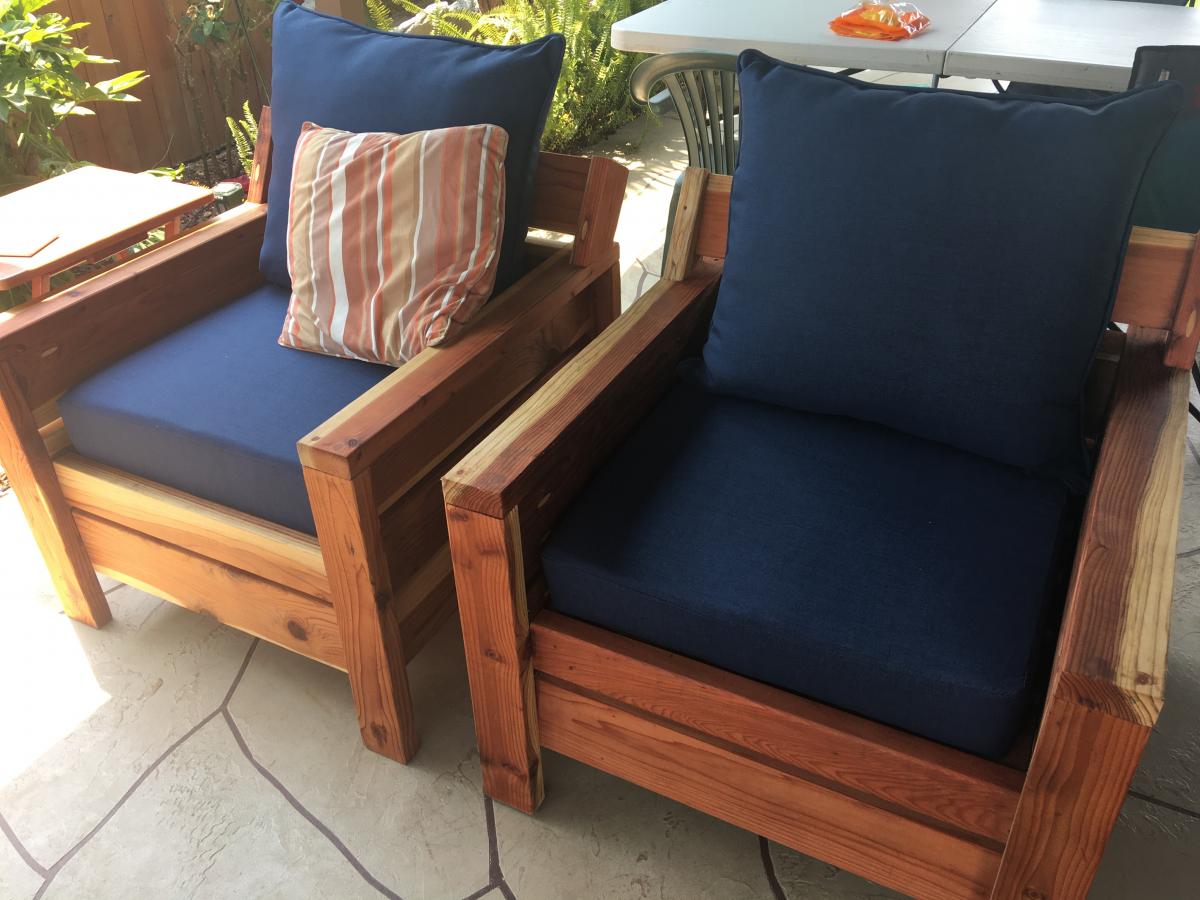
2x4 outdoor sofa sectional

Still needs stain and cushions. Will post finished product once complete.
Built from Plan(s)
Still needs stain and cushions. Will post finished product once complete.

Made another video of Ana Whit's X table!
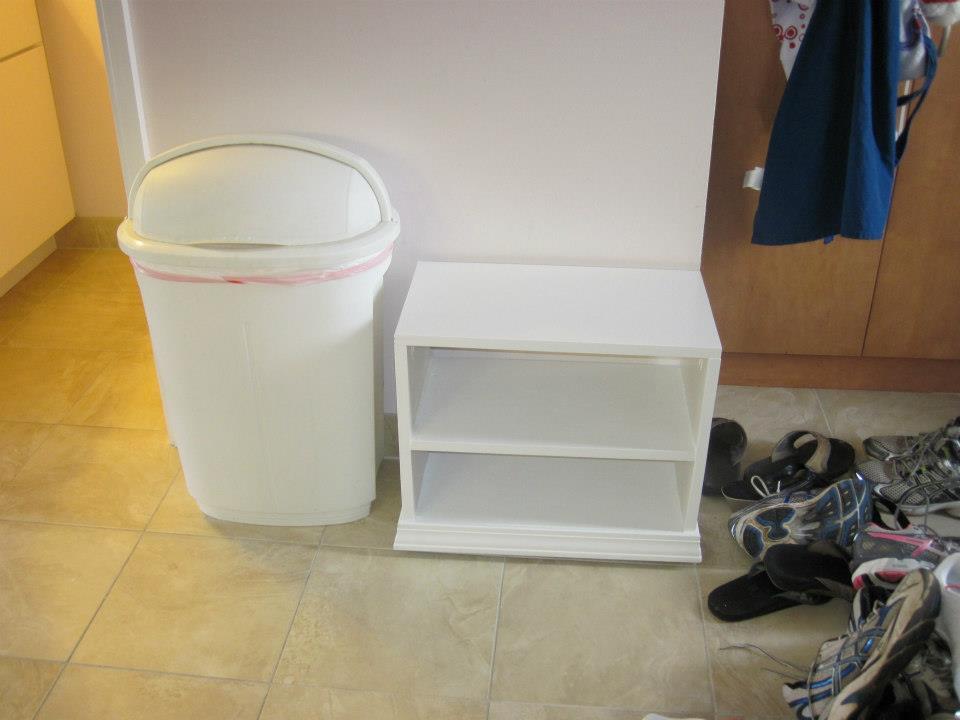
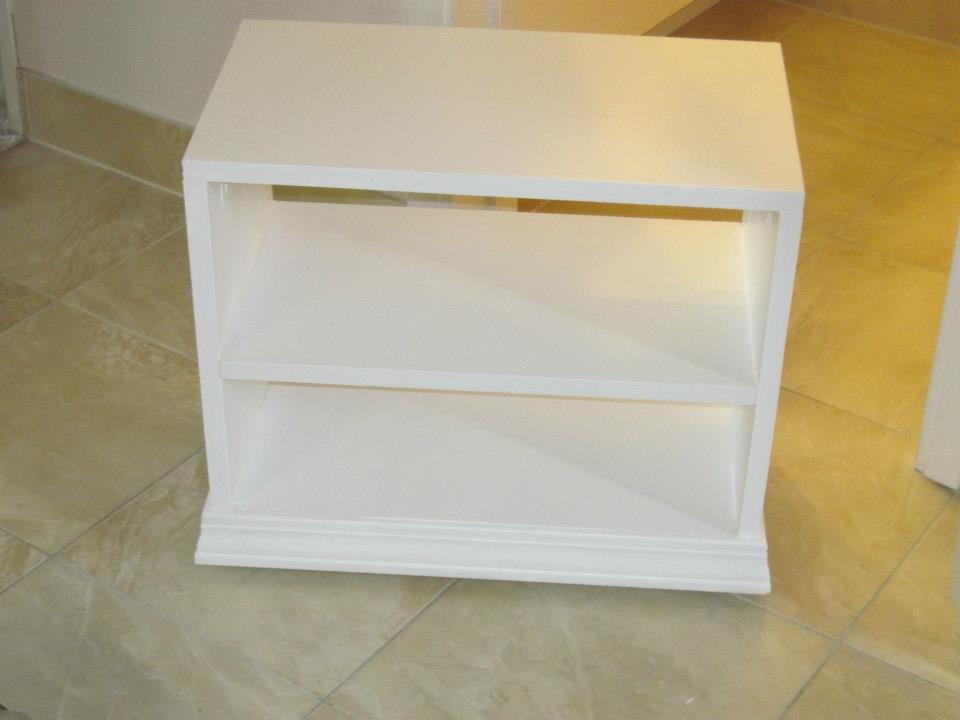
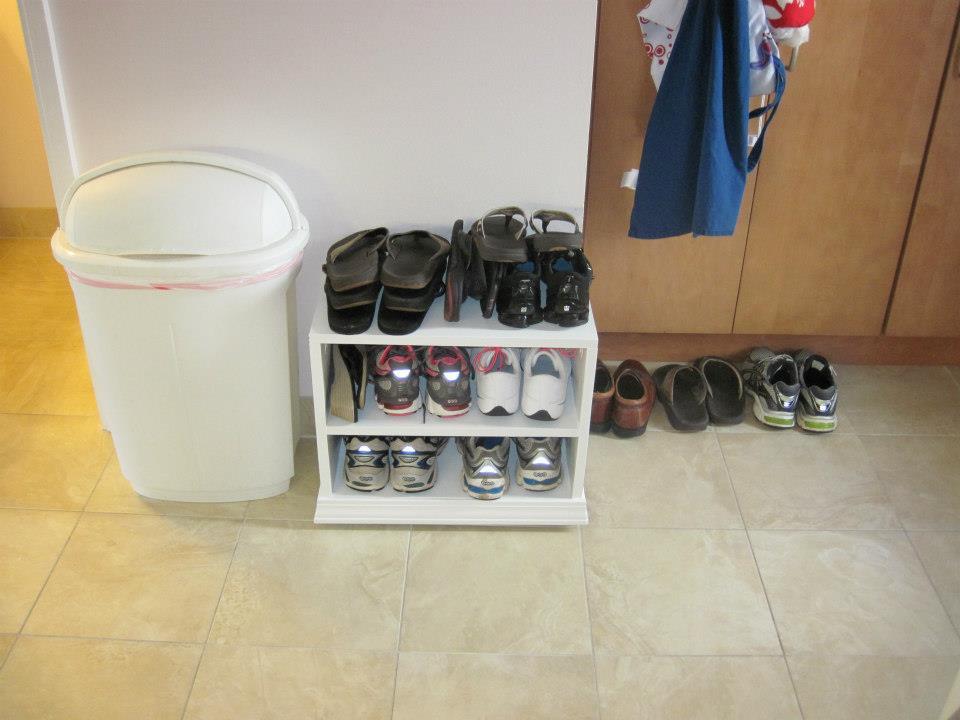
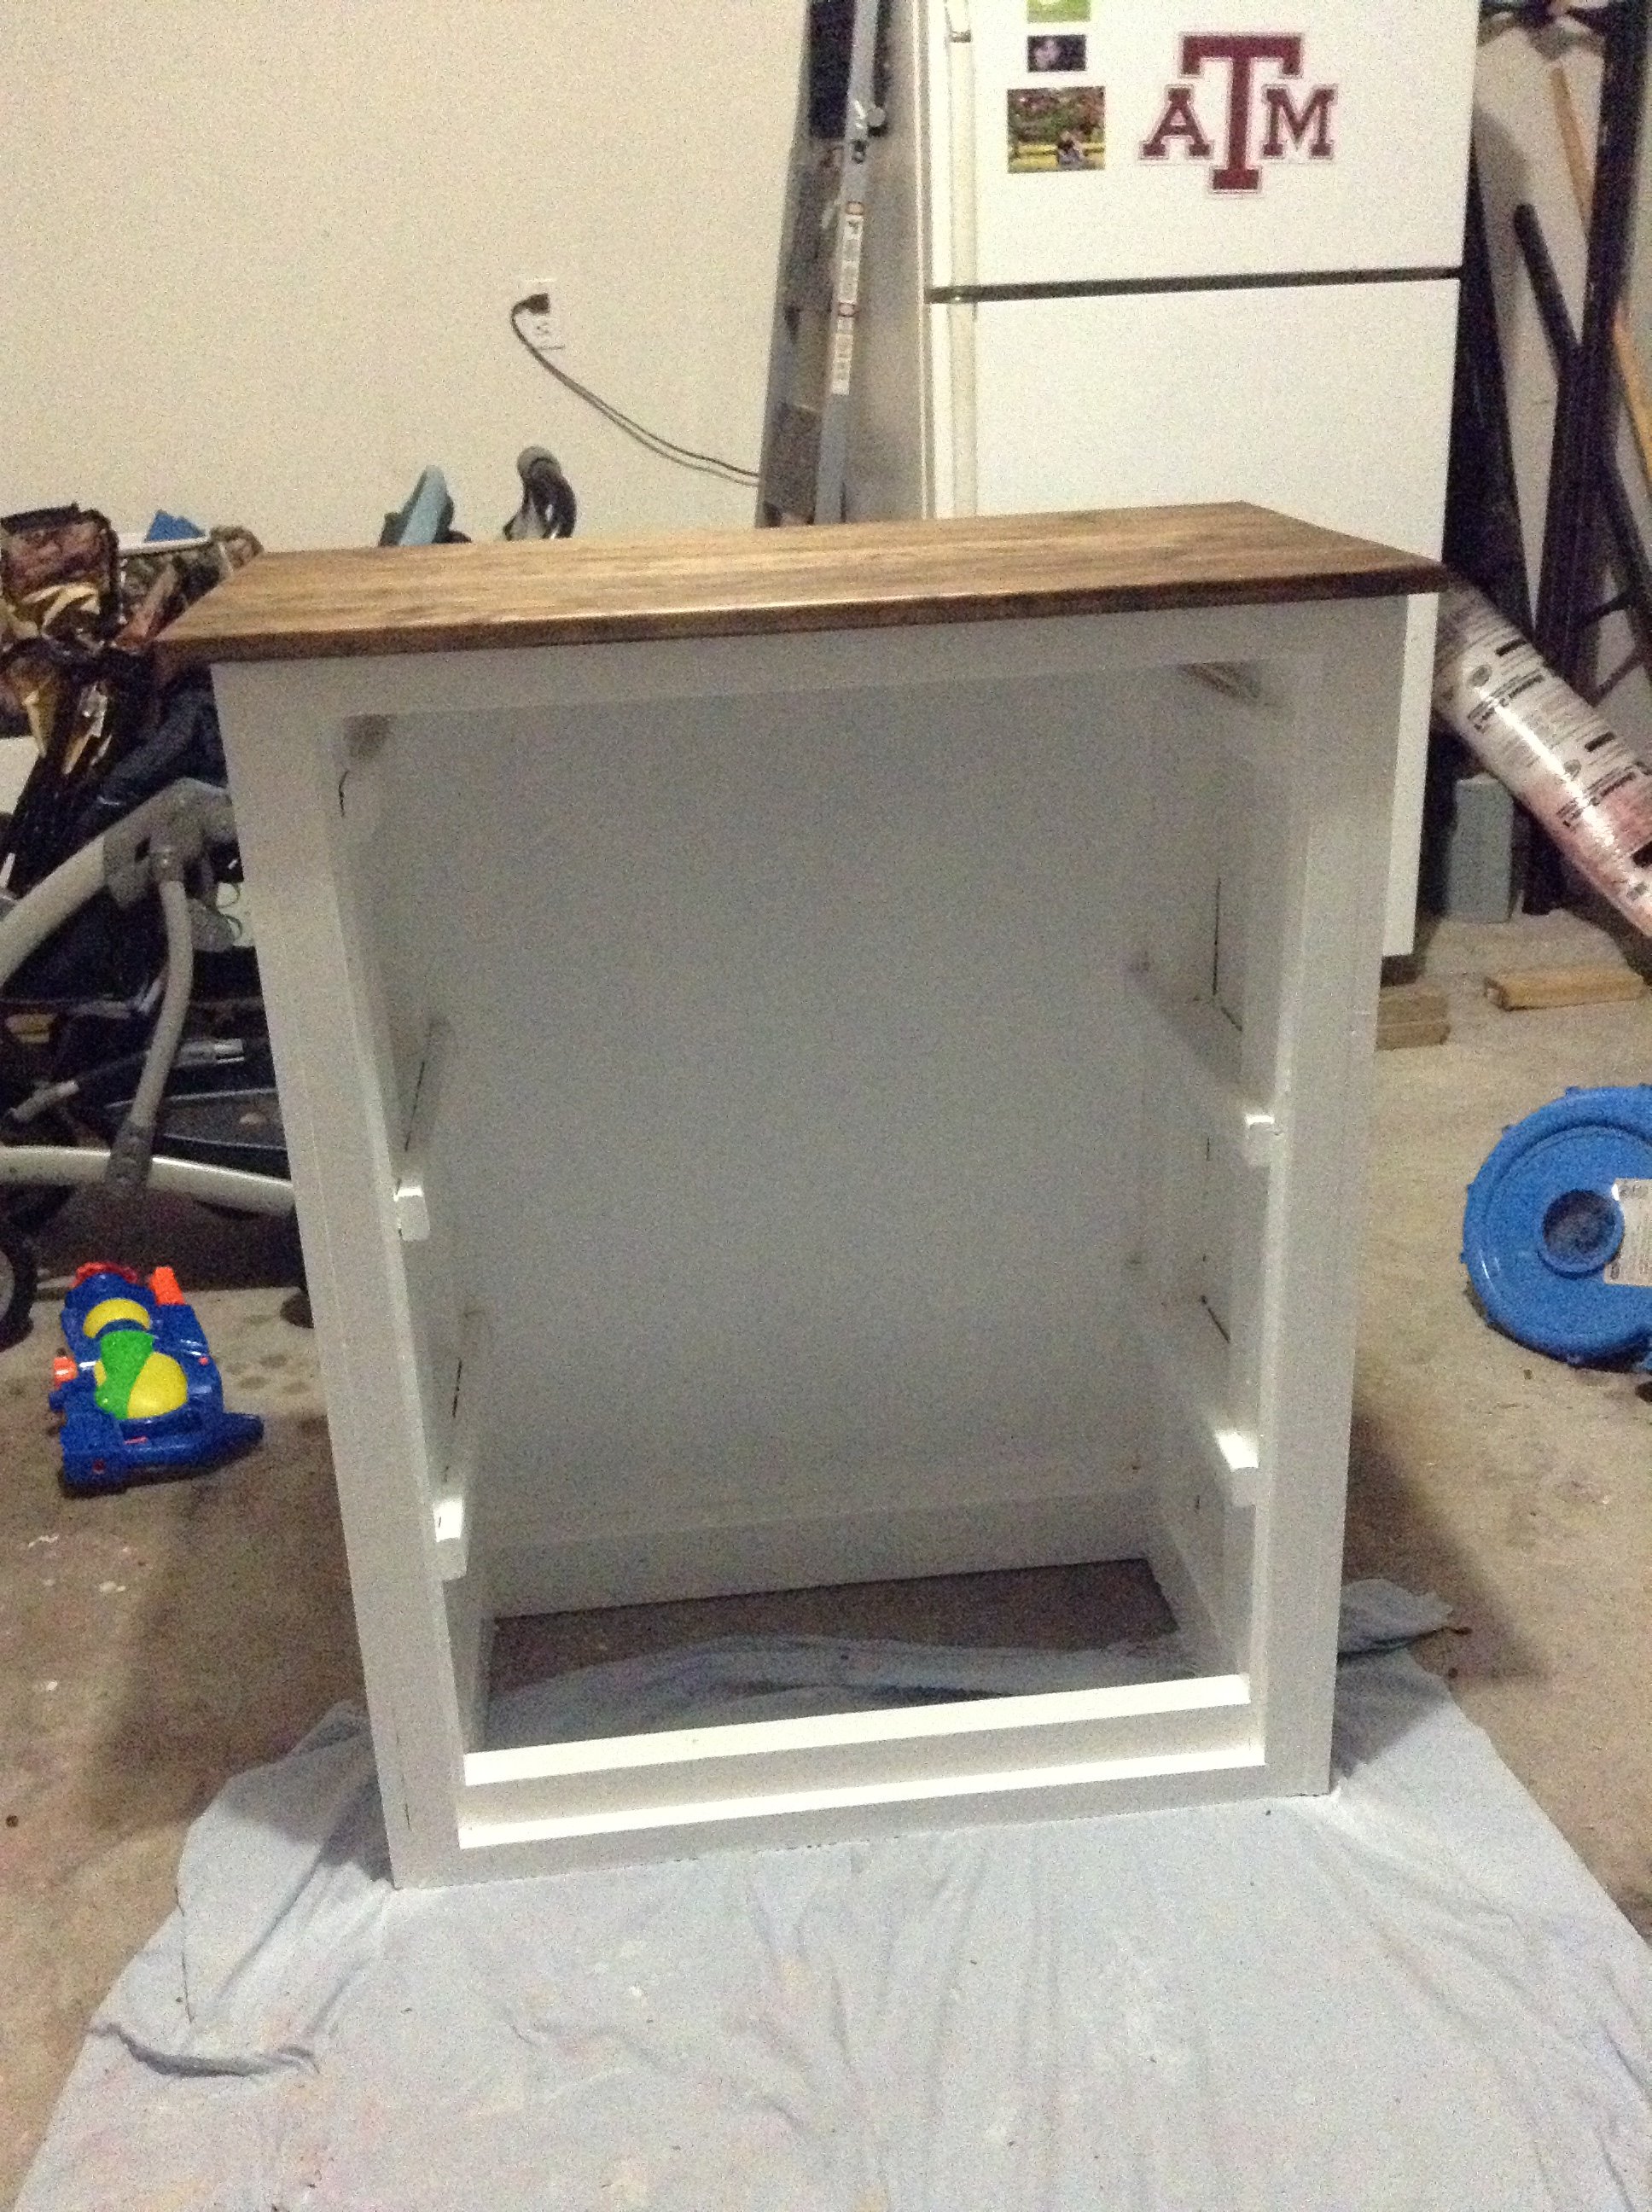
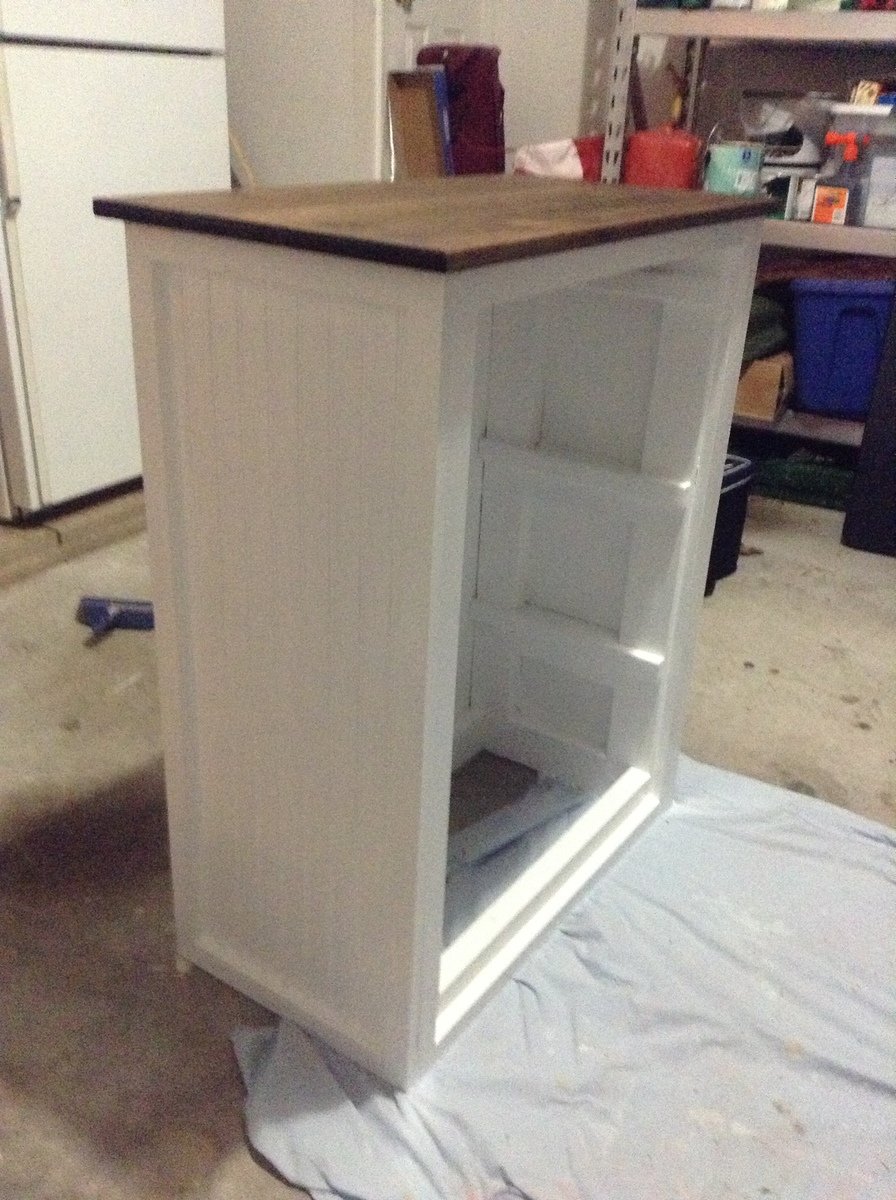
Between my husband and I, we routinely have 10 pair of footwear by the front door. In Hawaii, its tradition that you remove your shoes at the door. Unfortunately for us, our condo doesn't have much room by the door. As such, there would often be a pile of footwear as you entered the unit, which is the kitchen. I have tried various shoe organizers over the years, and none really fit the bill, or the space we had. So I built one myself.
Its a pretty basic box, with 1 fixed shelf. All joined with my Kreg jig (of course). I also attached some casters on the bottom to make it easier to move out of the way if needed. After assembling and painting, I picked up some moulding and added it to the bottom, which helped to hide the casters. Then I used some old liquid nail/caulk I had to fill in the holes.
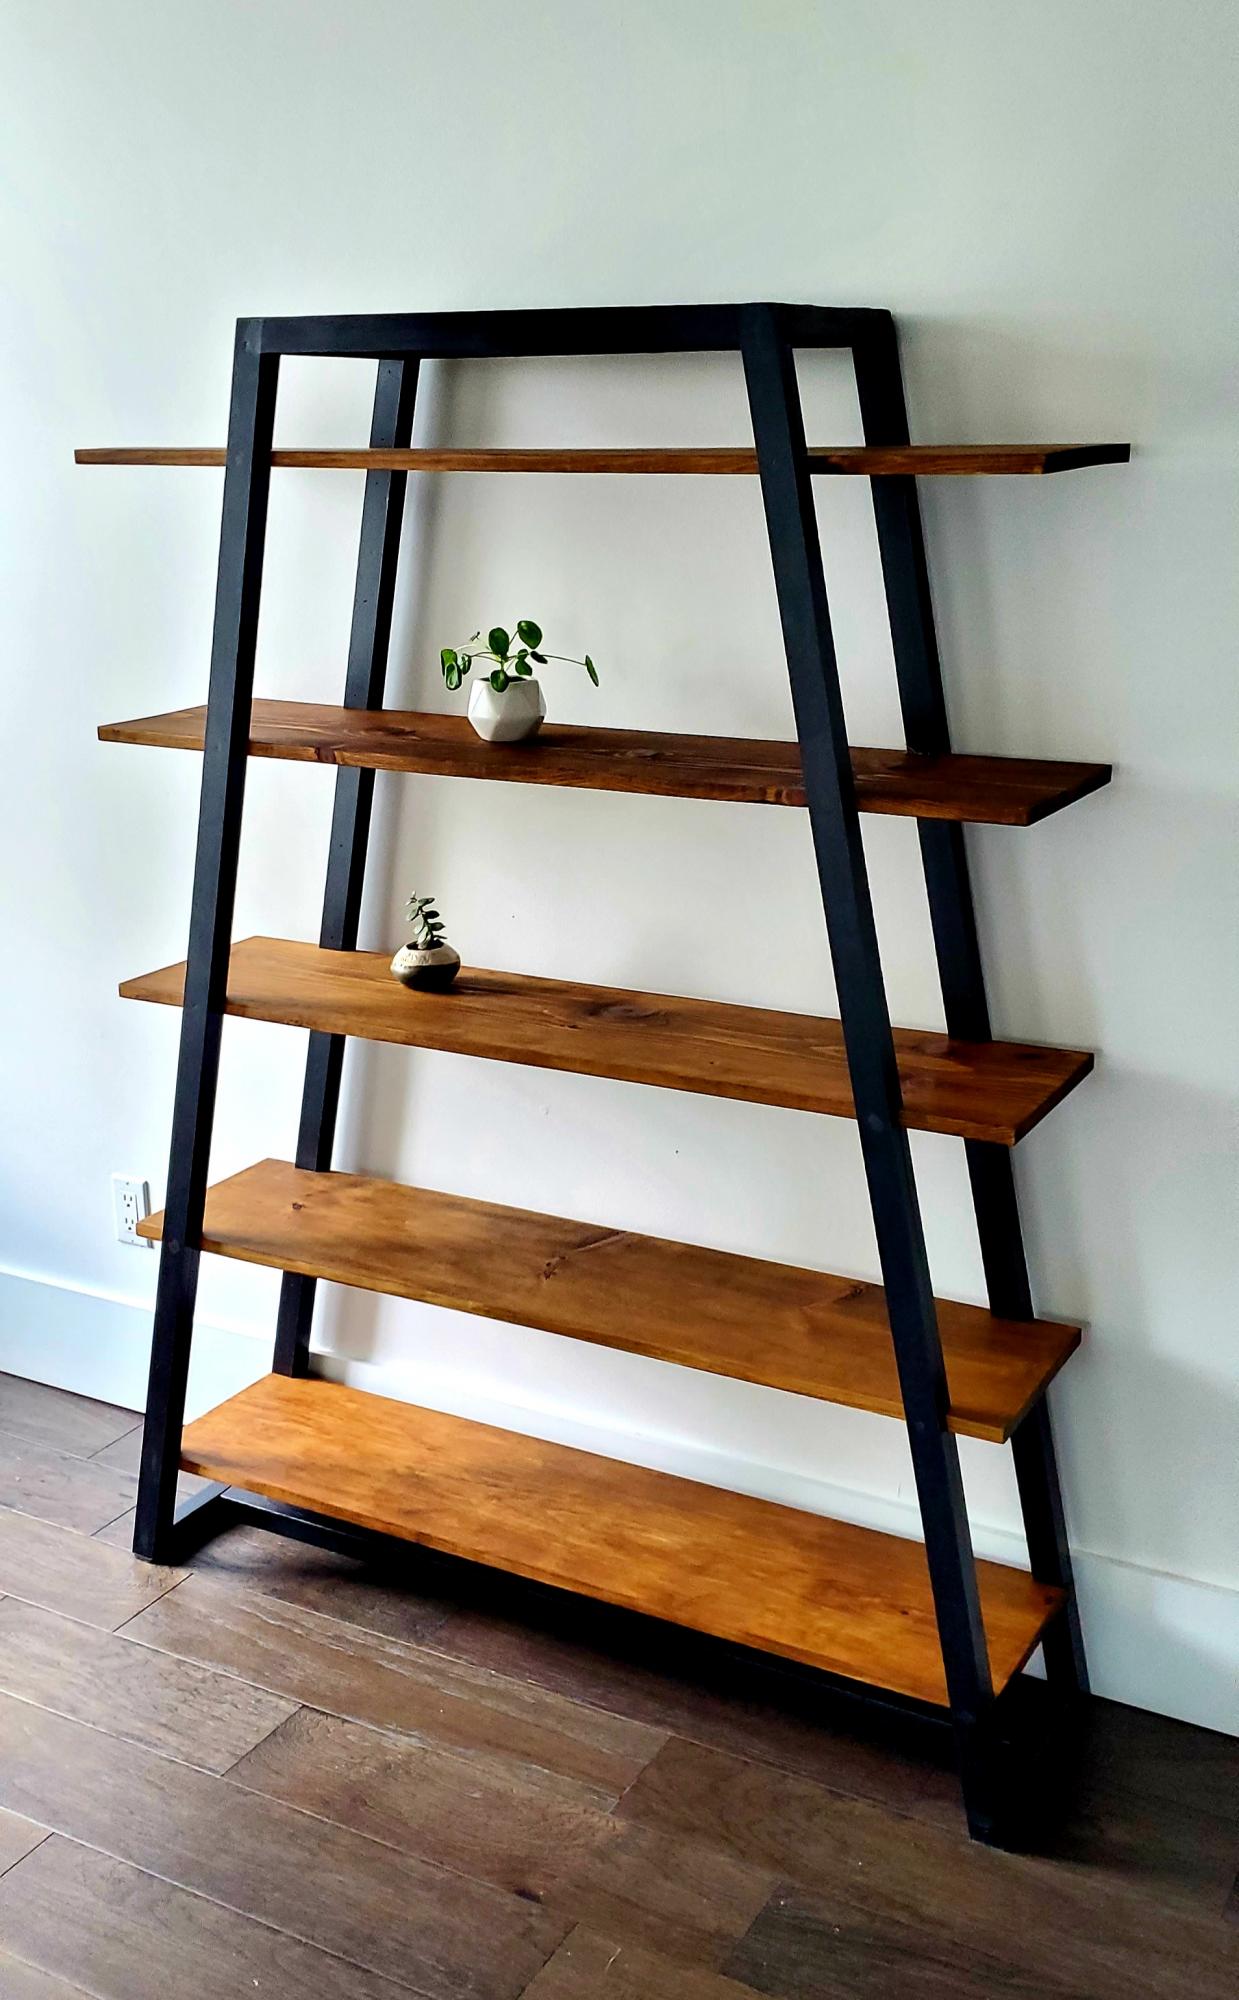
Painted the arms in a metallic onyx paint, shelves are Briwax dark brown.
I built this picnic table while I was pregnant with my youngest. It was an addition to our outdoor kitchen. Came out pretty good, thanks to Ana's plan.
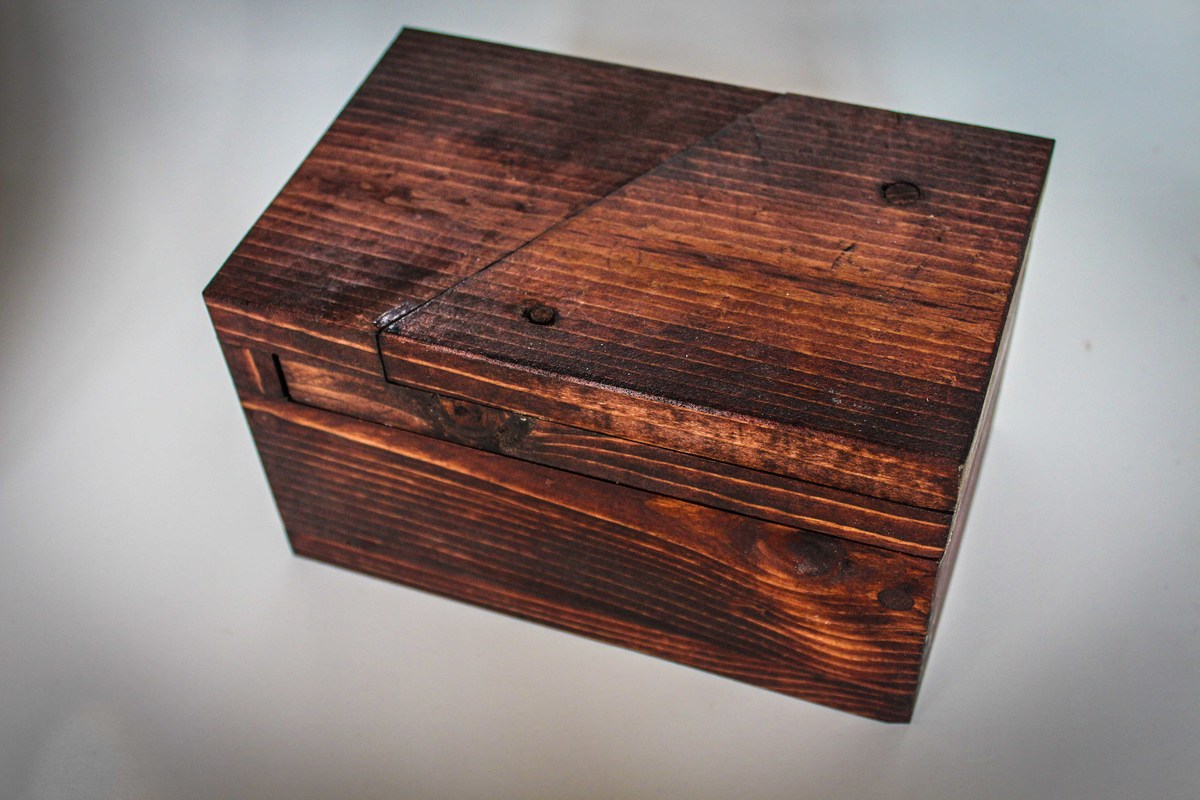
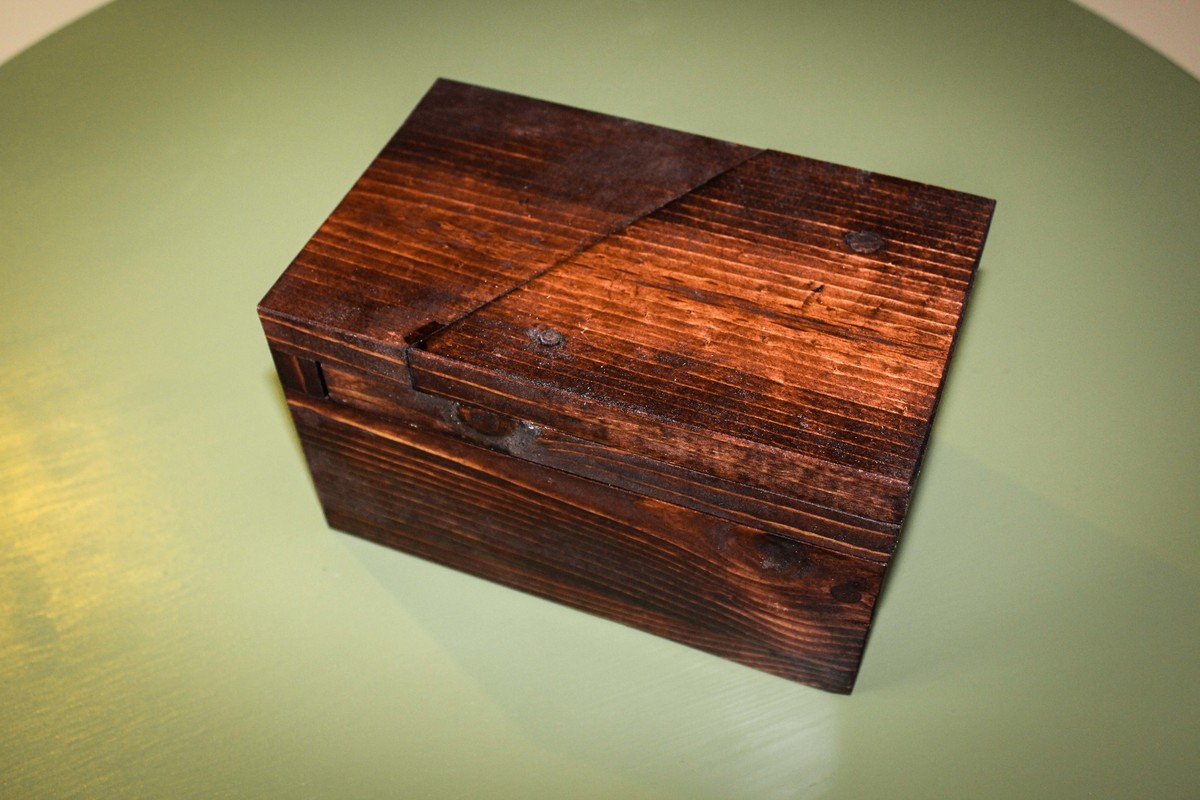
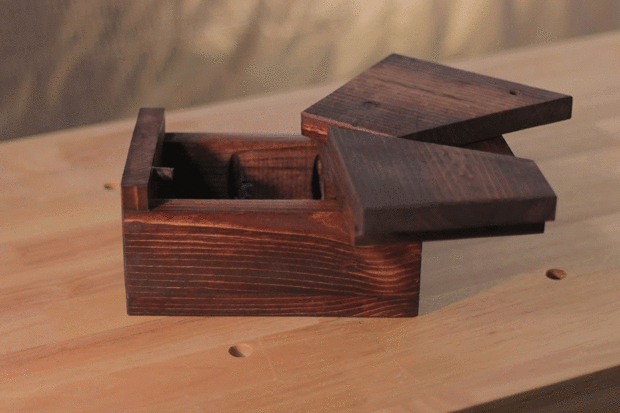
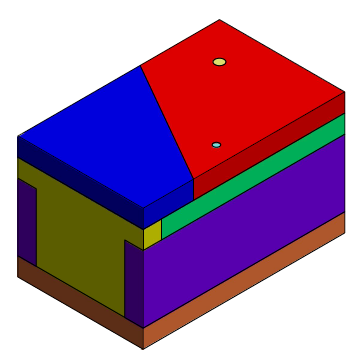
This is a simplified version of the Unabox from Make Magazine.
Build Instructions:
http://www.instructables.com/id/Puzzle-Box-Unabox/
Video:
http://youtu.be/VTaoUHsGau8
If you like this, please see my other puzzle box.
http://www.instructables.com/id/Puzzle-Box-4/

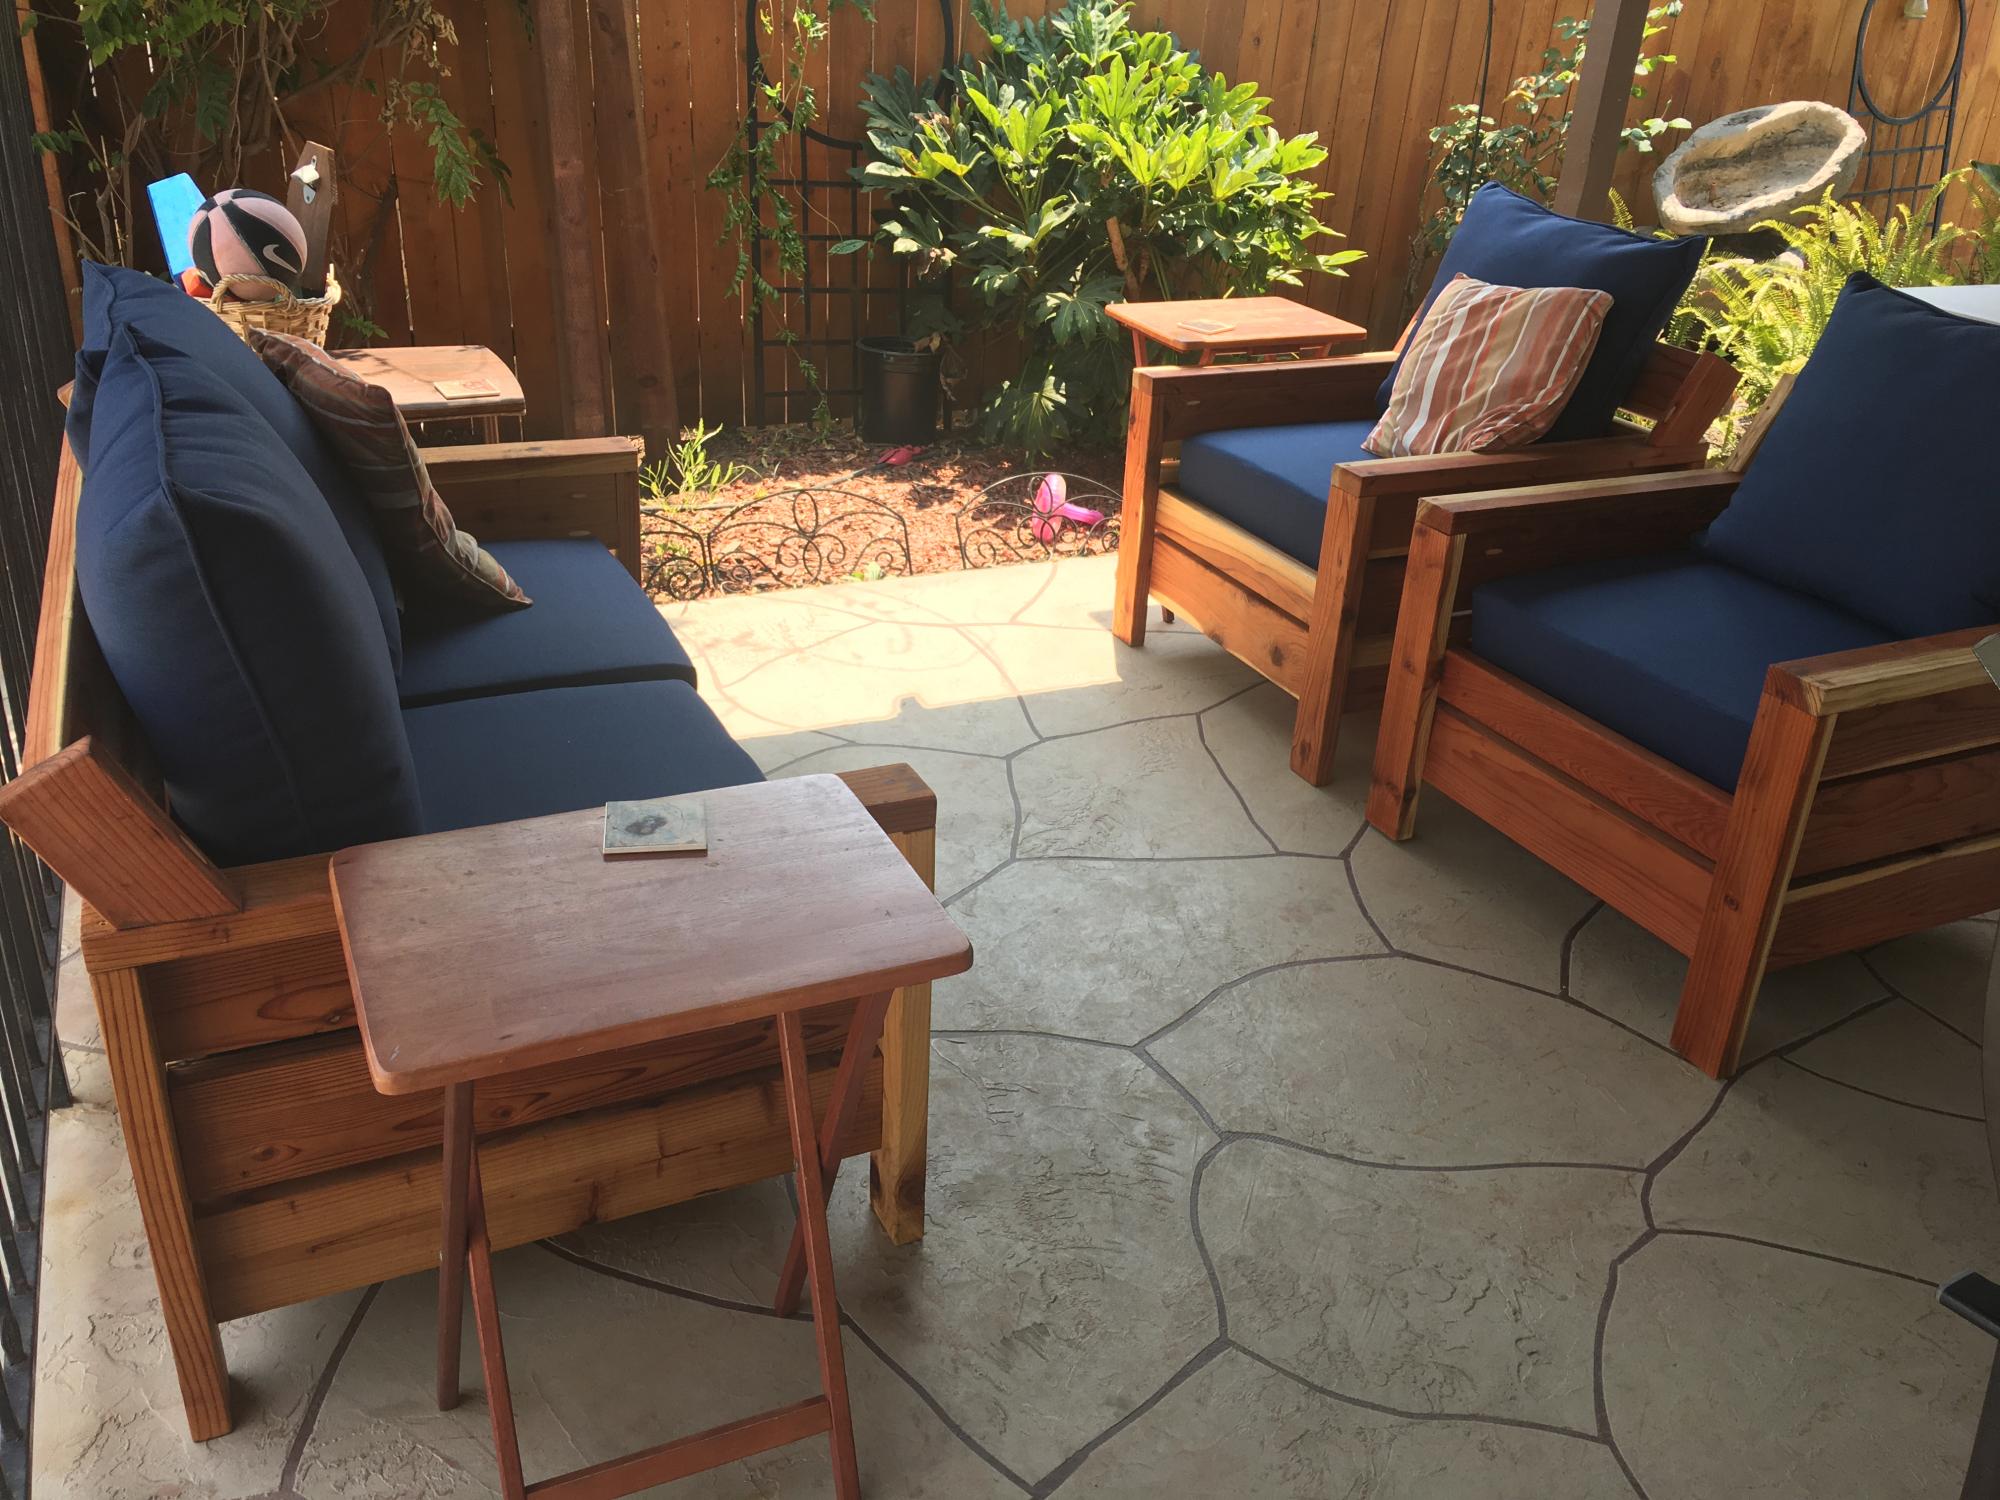
Saw some of the other brags which includes a raised backrest so I incorporated that into my build. There's a 30 degree angle on the backrest (two 2X4's and one 2X6)
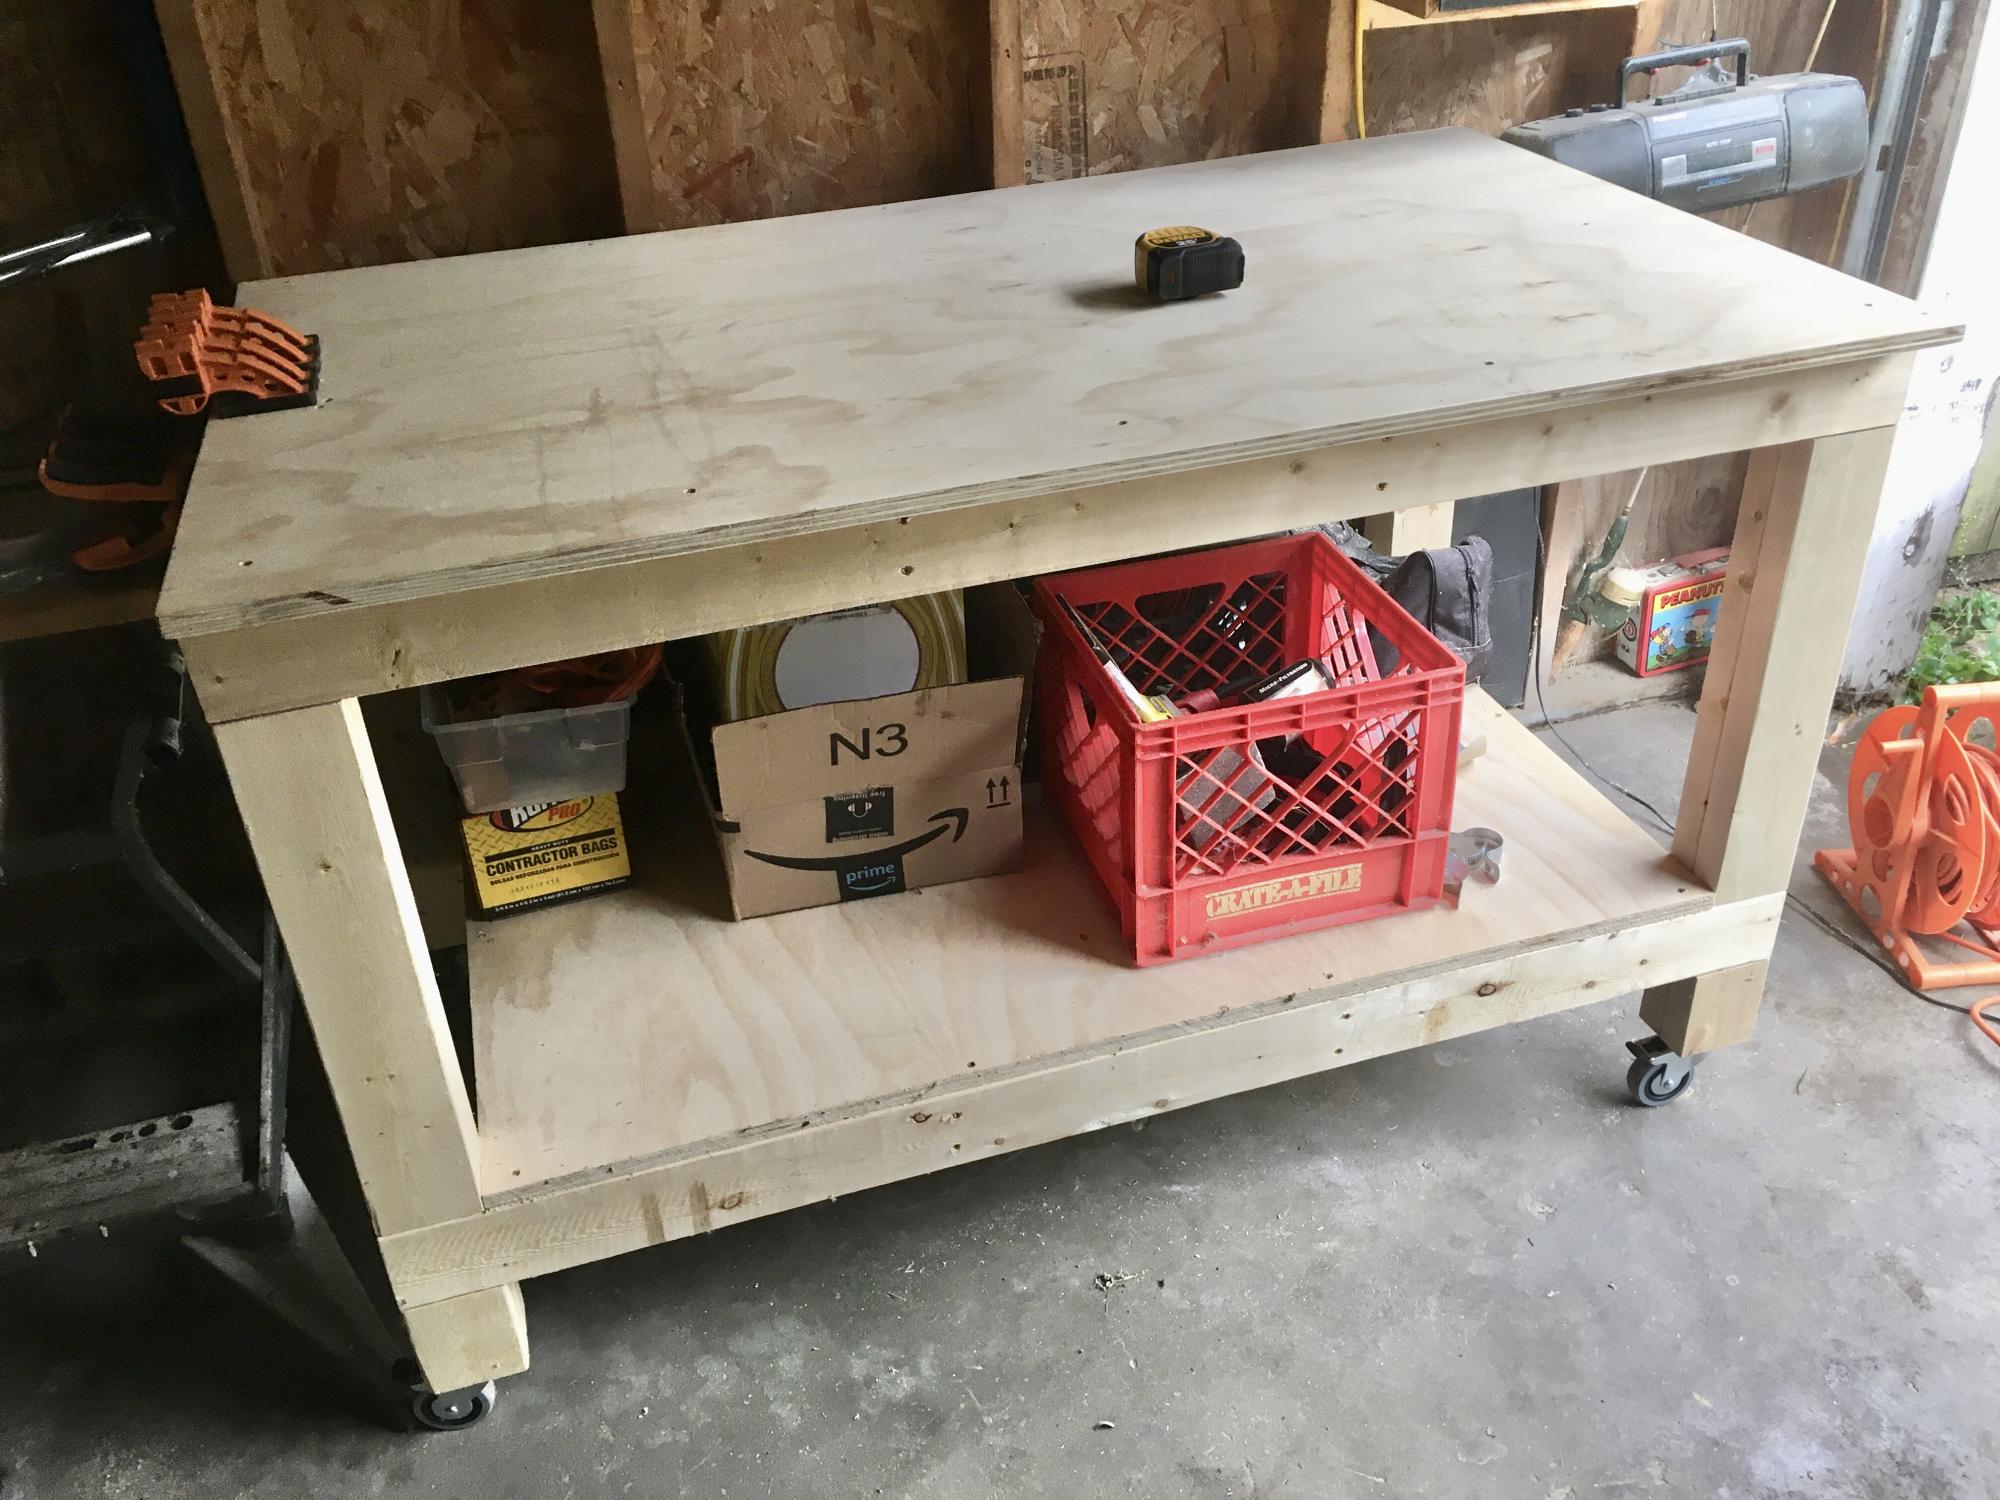
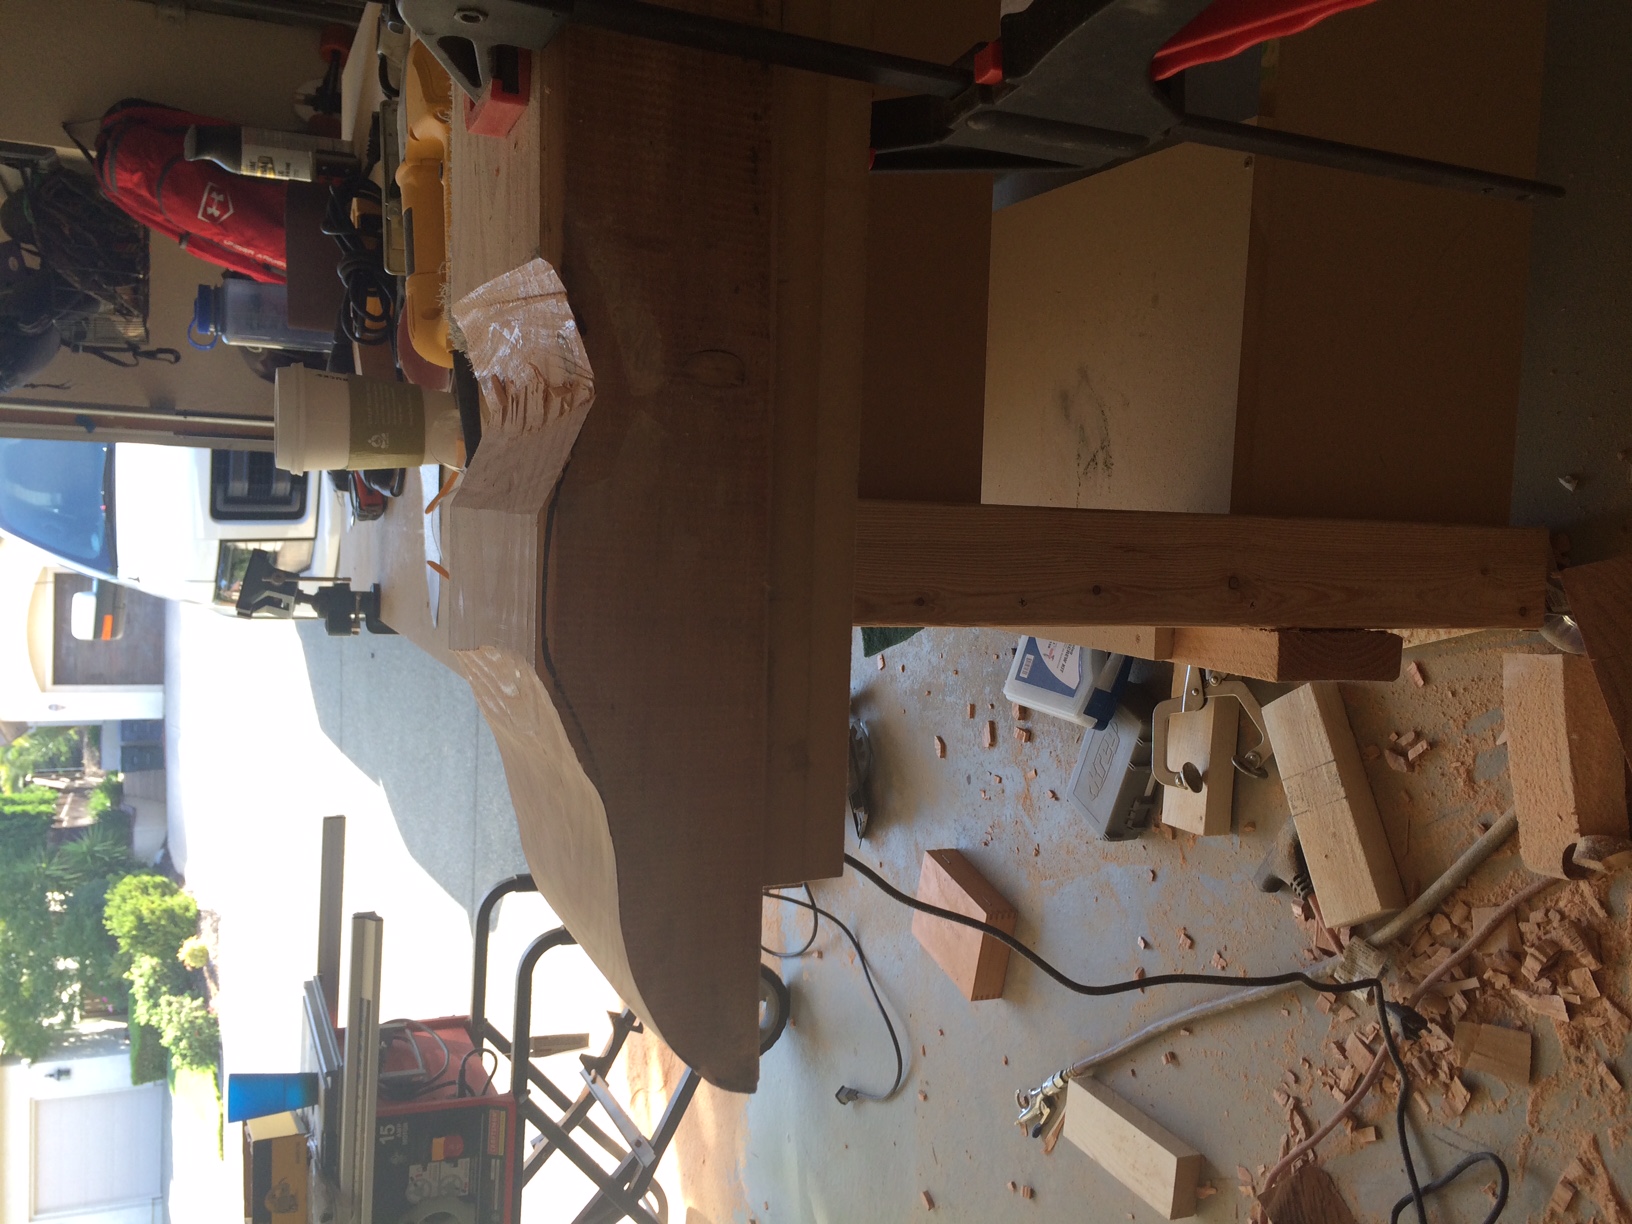
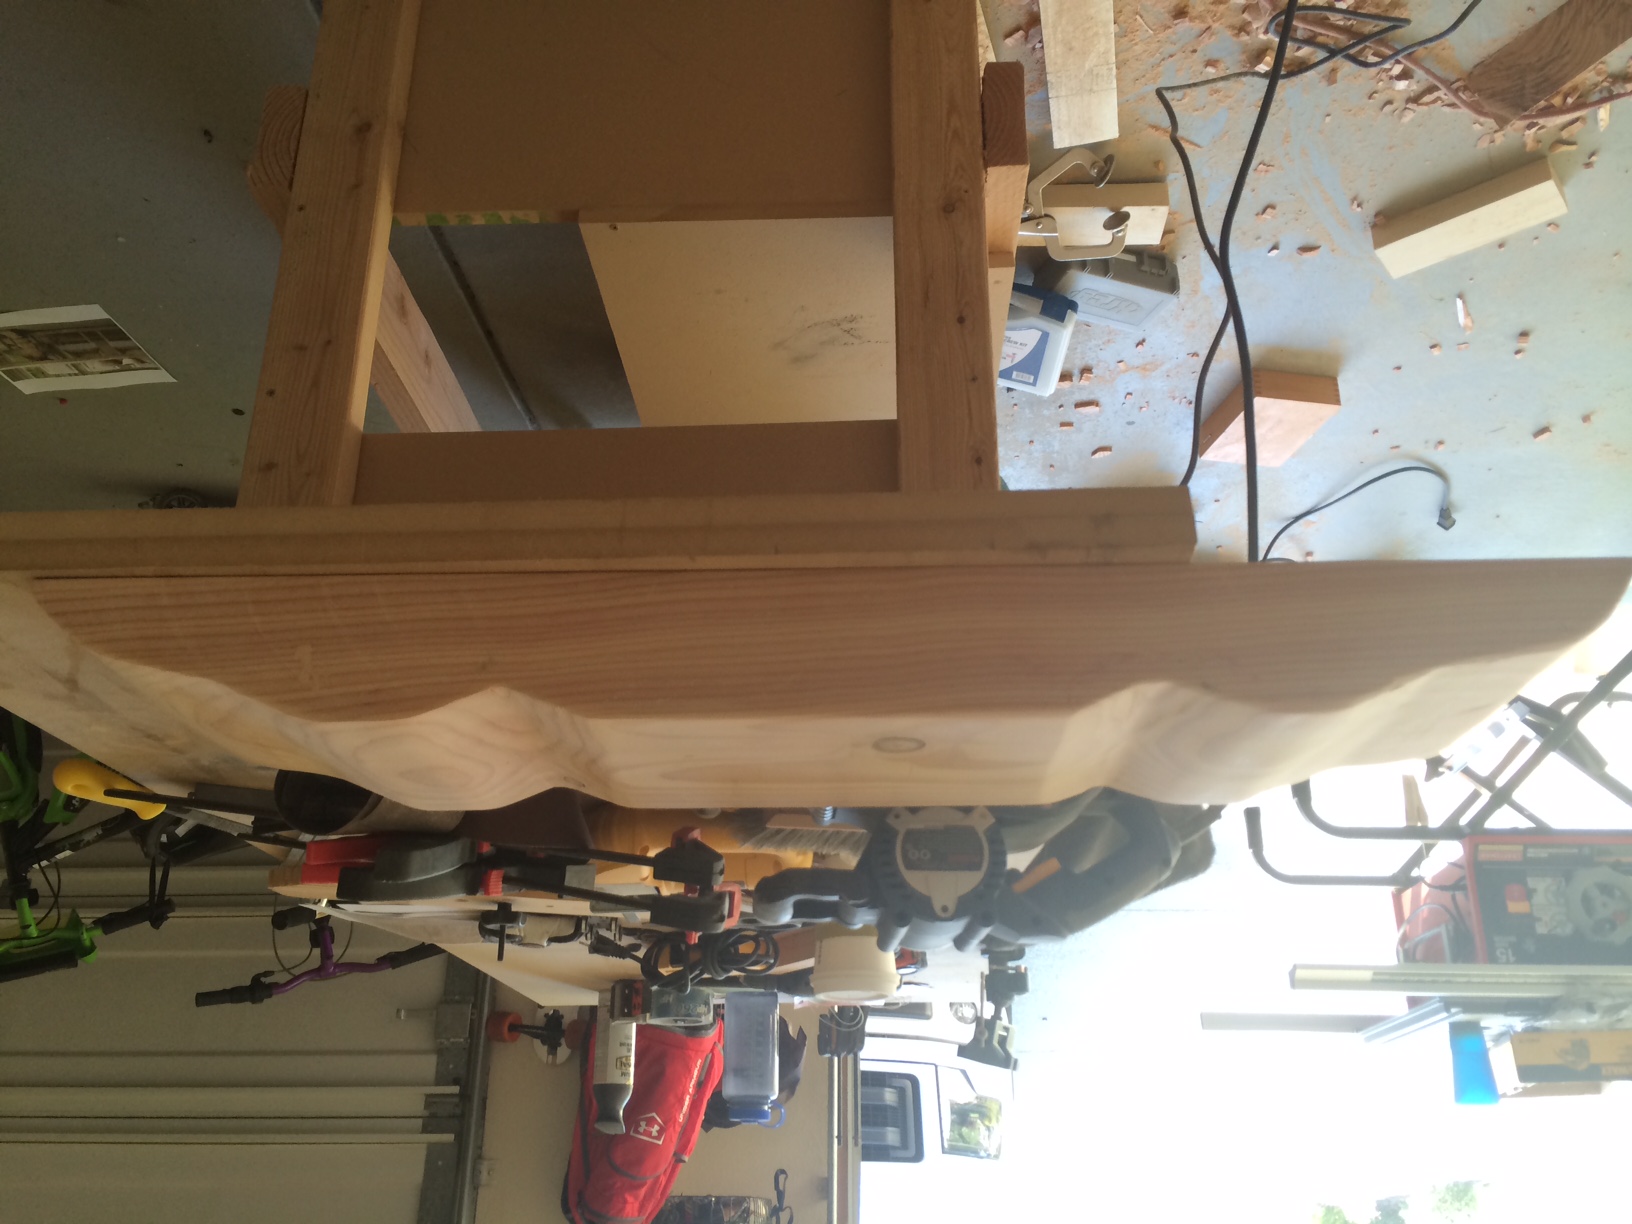
I needed a workbench and Ana's easy plans were perfect for what I needed. I have a small one-car garage that I do my projects out of. The garage also provides storage for bikes, kayaks, gardening tools, etc. I customized the dimensions a little, making the bench only 30" deep to better fit the space available, and to add wheels to be able to roll the bench out into the driveway if needed. The lower shelf provides some good storage for me as well.
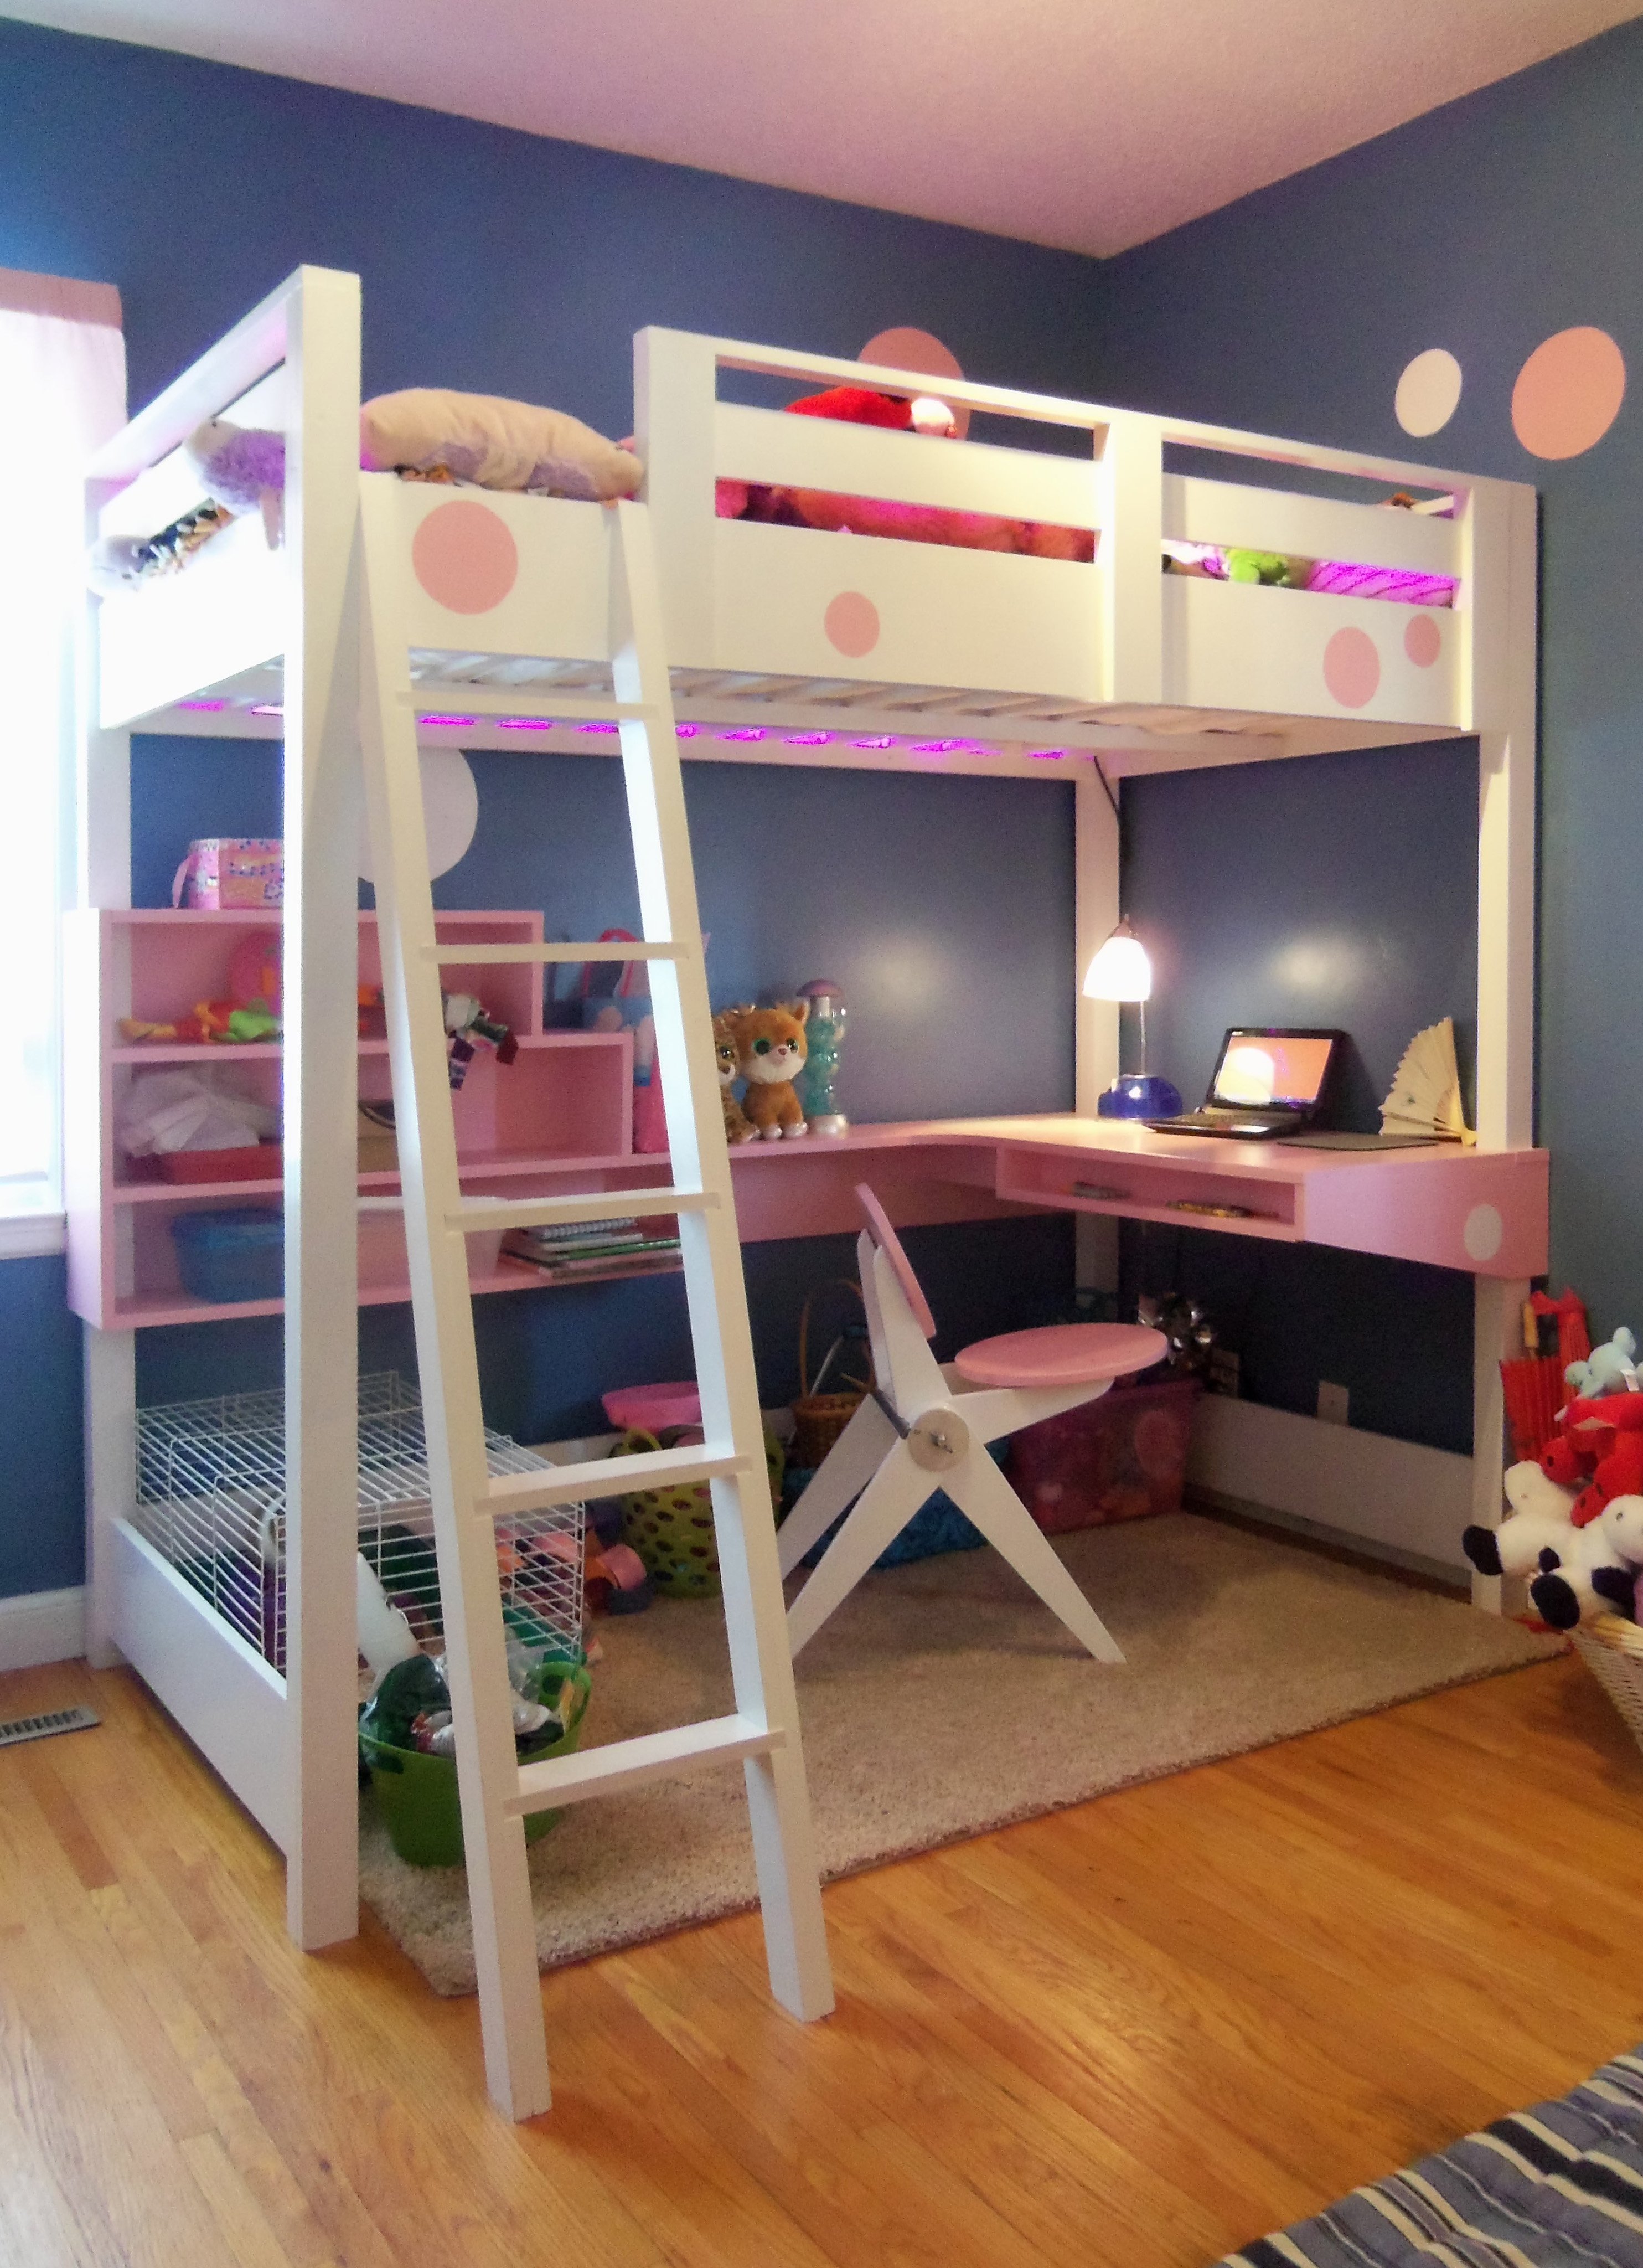
I just wanted to share the loft bed I built for my daughter based on the plans available here. I added a desk, painted an existing chair I had built to match and included pink LED lights around the inside of the bed. Thanks for everyone sharing their ideas, plans and pics..!
Fri, 08/14/2015 - 21:39
Awesome! Do you have plans up for the desk area? I would like to incorporate that similar style. Thank you.
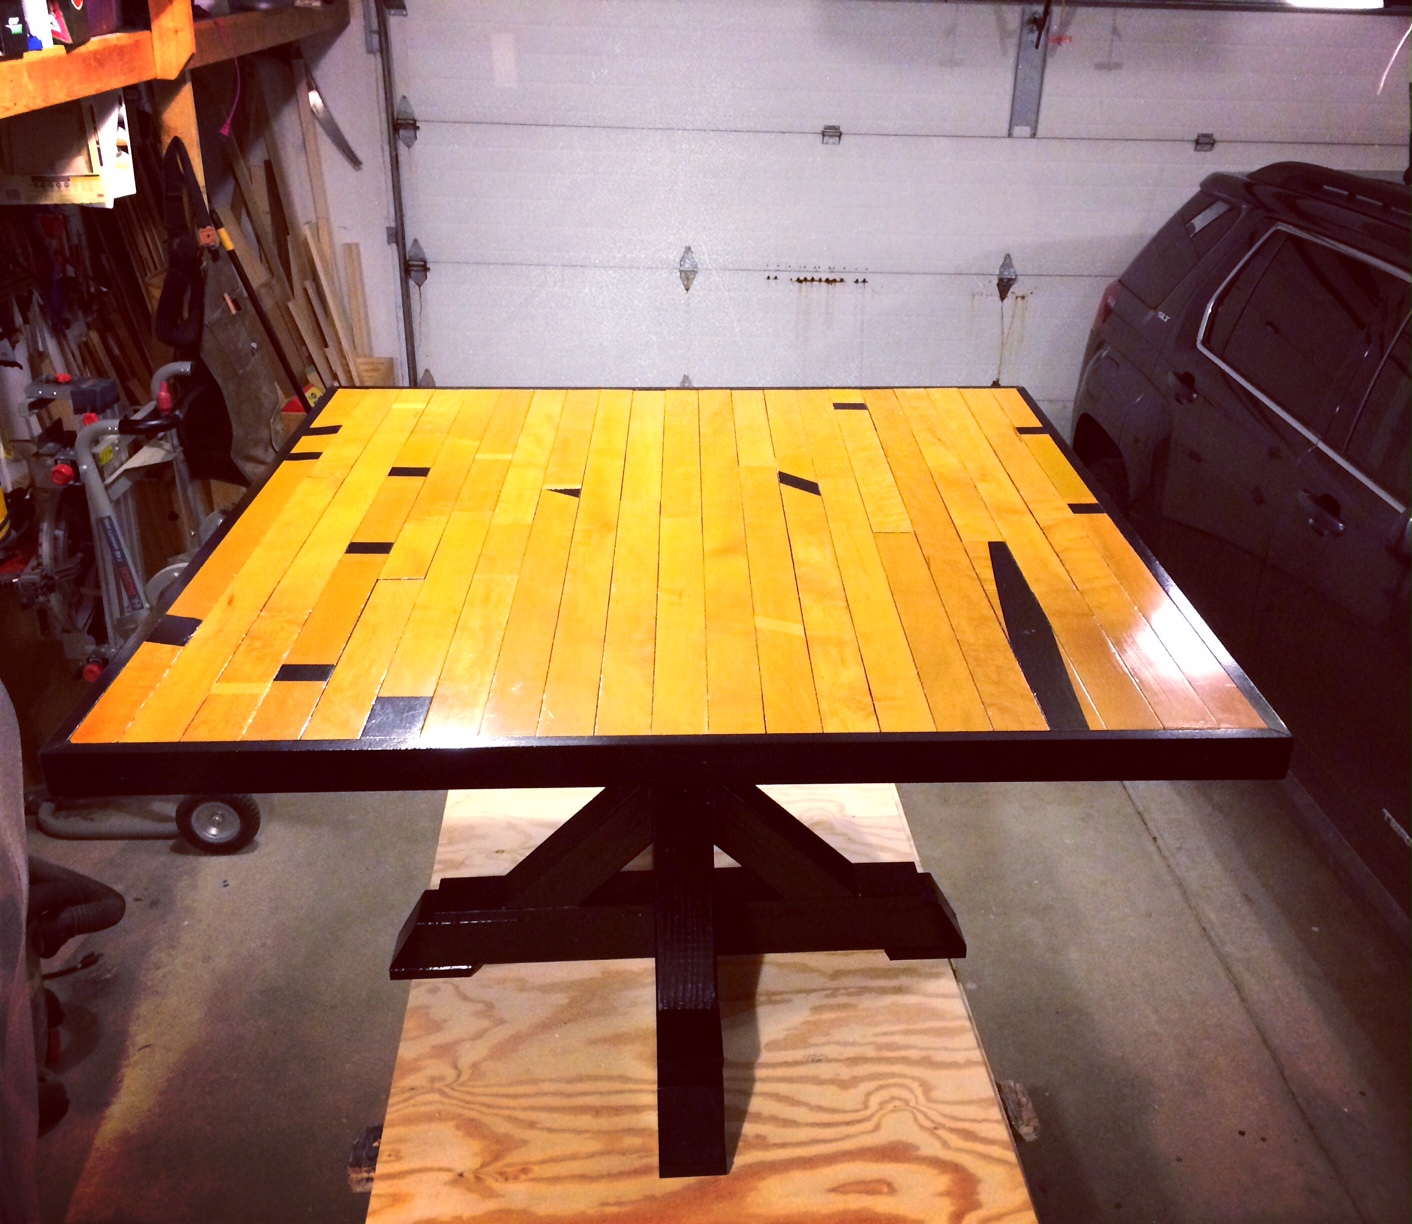
I used the "square x bass pedestal" plans to complete this 4' card table. The top is made from reclaimed gym flooring from the local high school. The "x base pedestal" provides a nice sturdy base for the large table. The project was completed over several weekends when I had time to work on it.

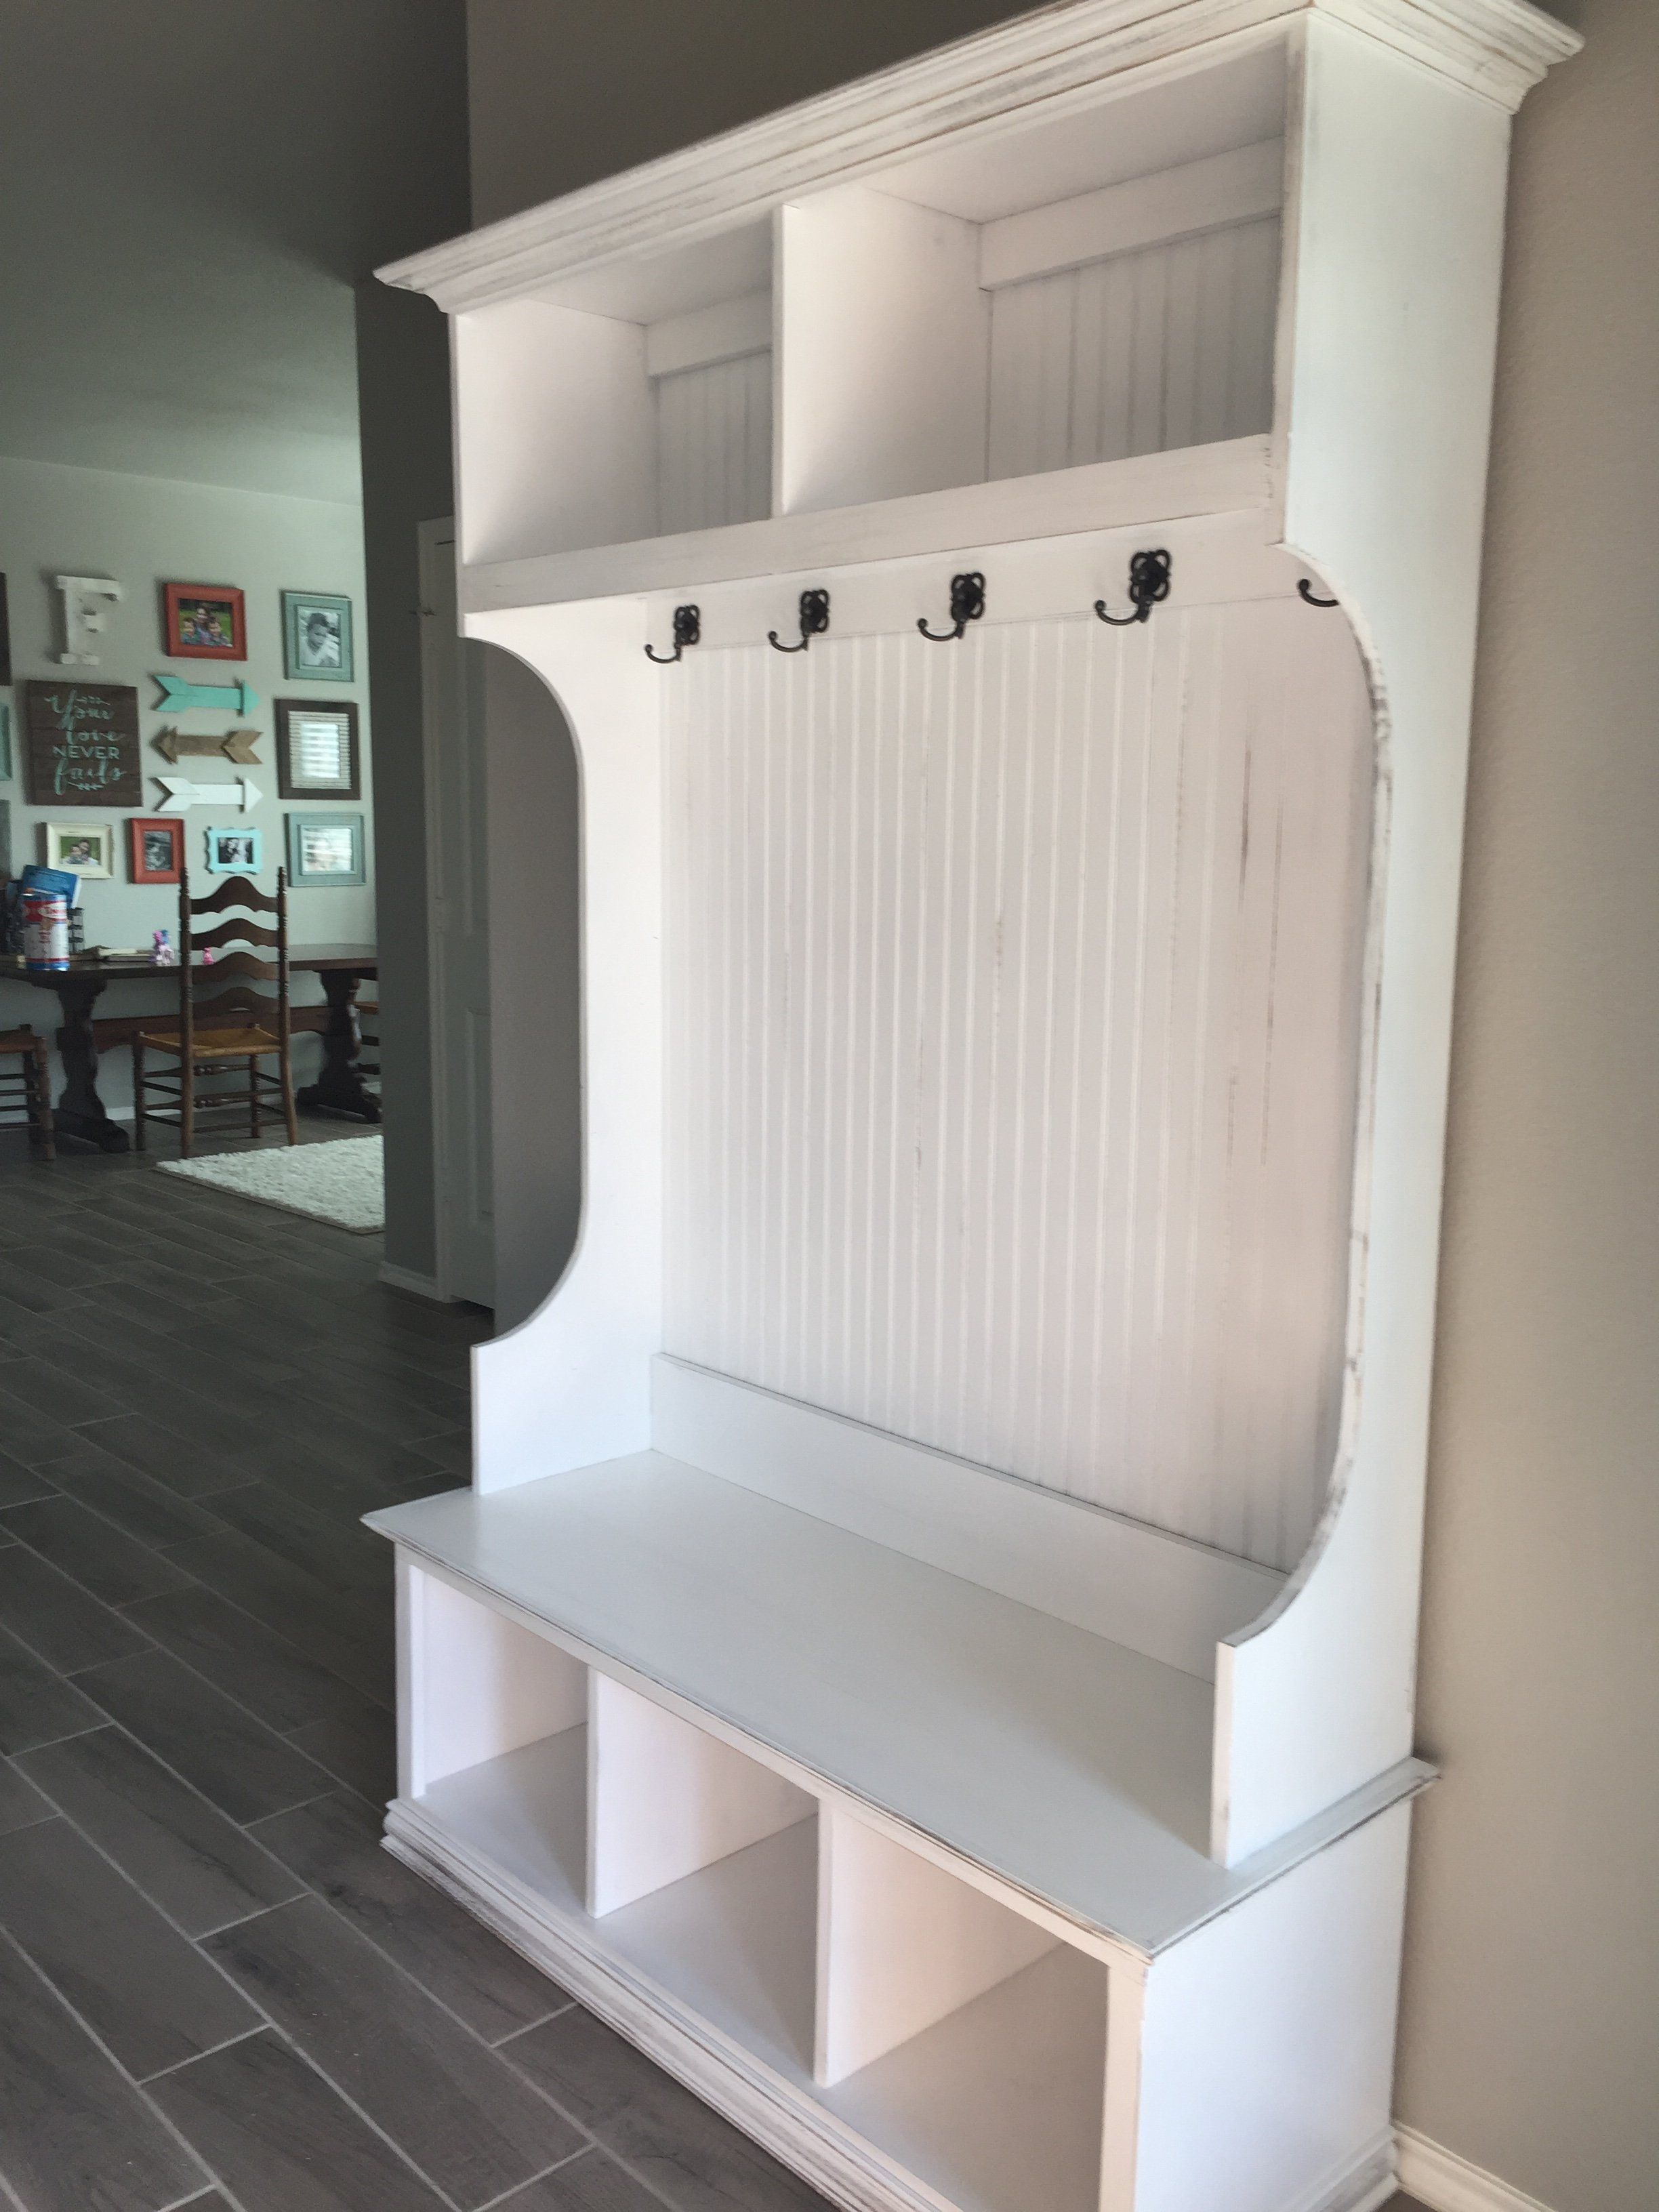
Took the fancy hall tree bottom and added Mimi's hutch to the top. Added a little bead board to the bench and top edges to cover up the plywood, and voila! My wife's Christmas gift.
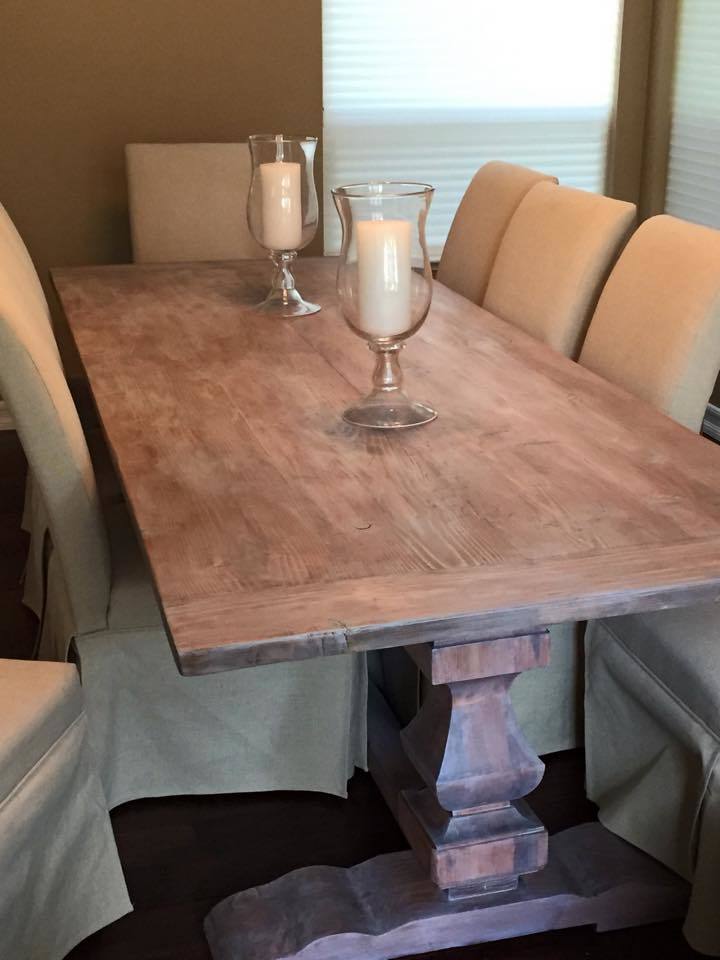
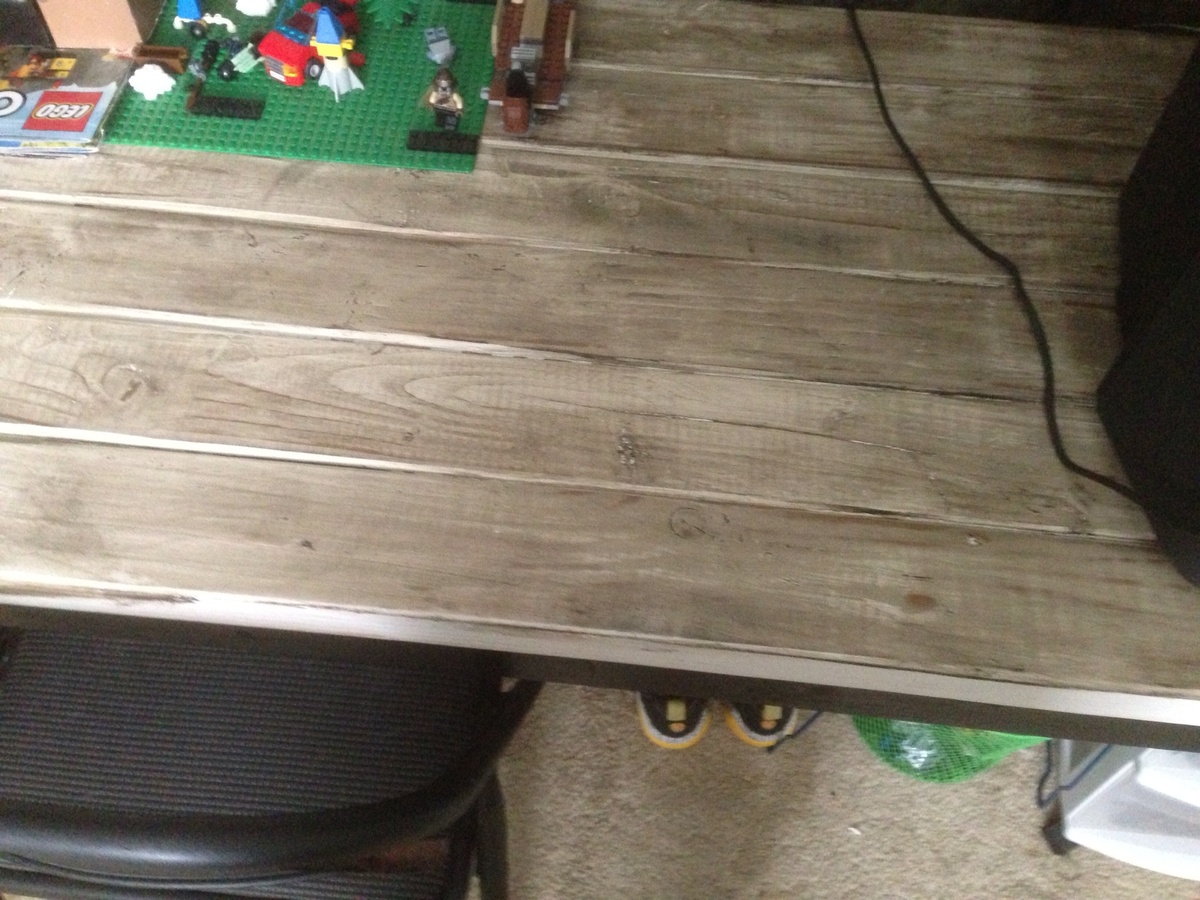
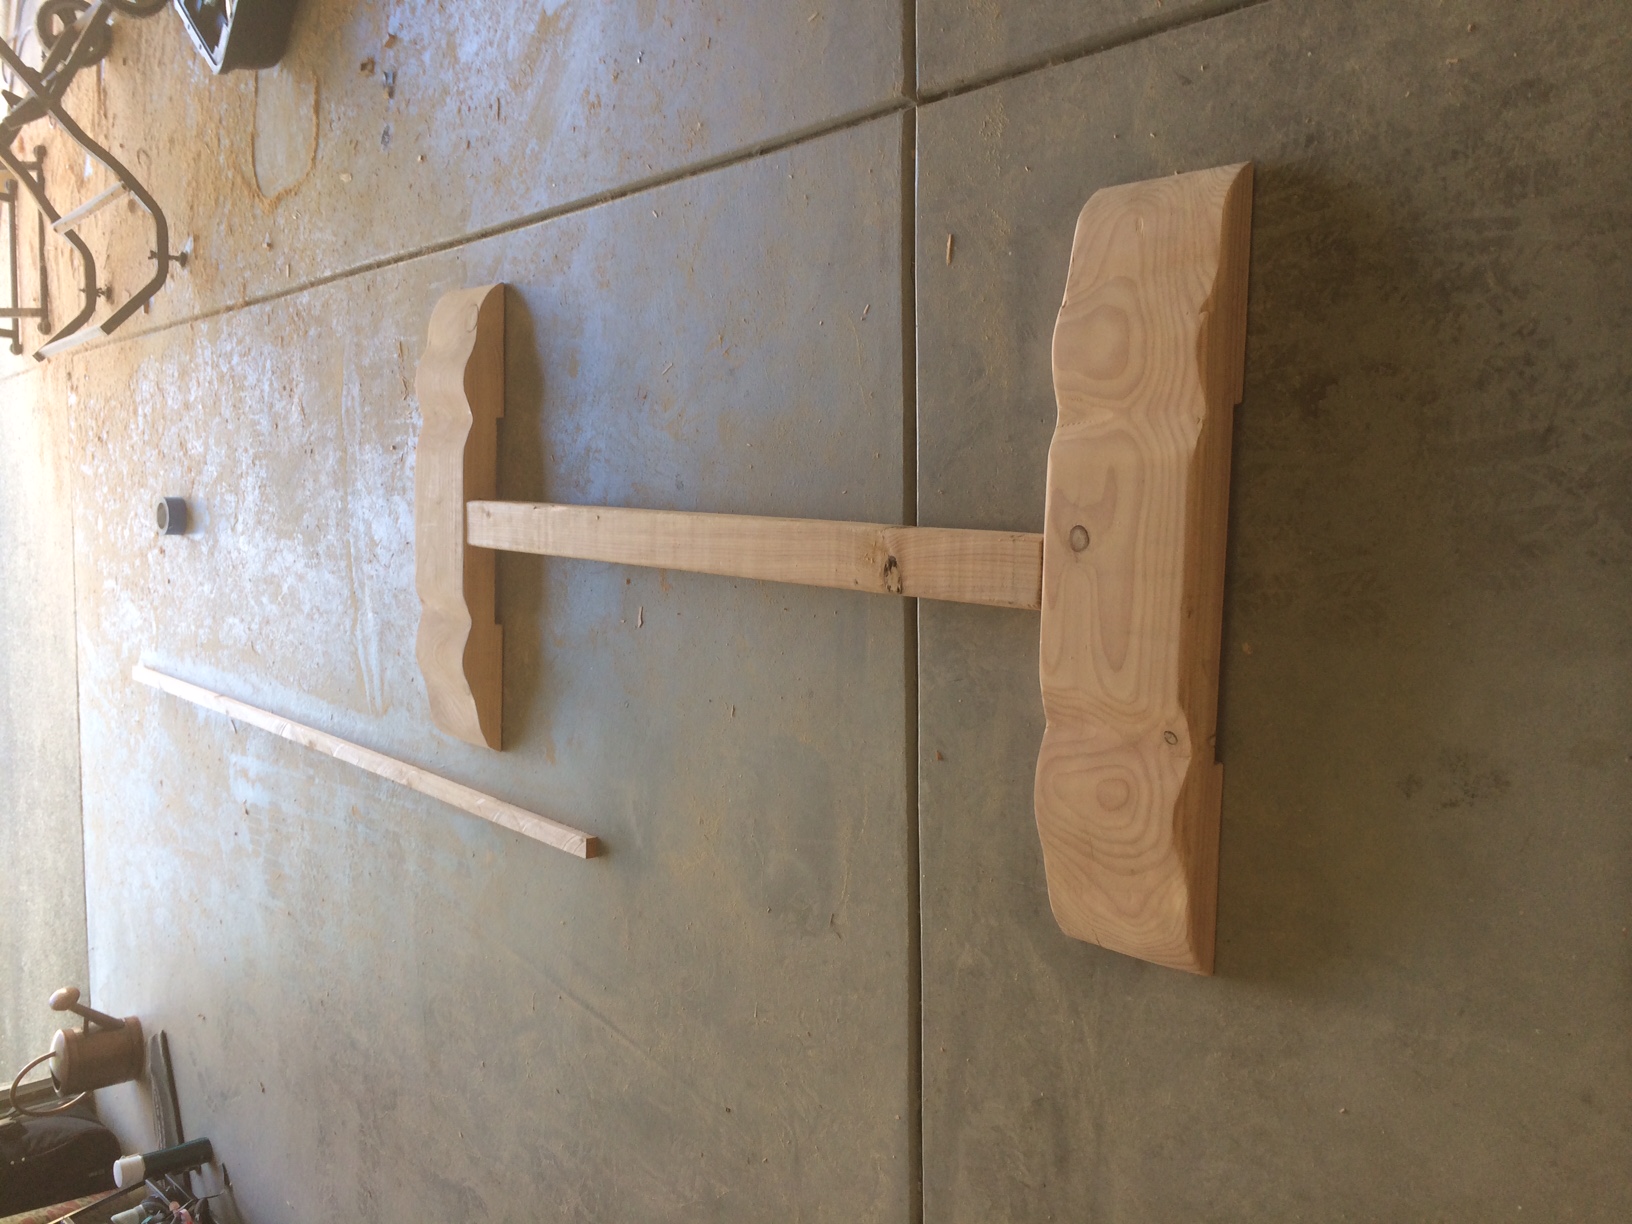
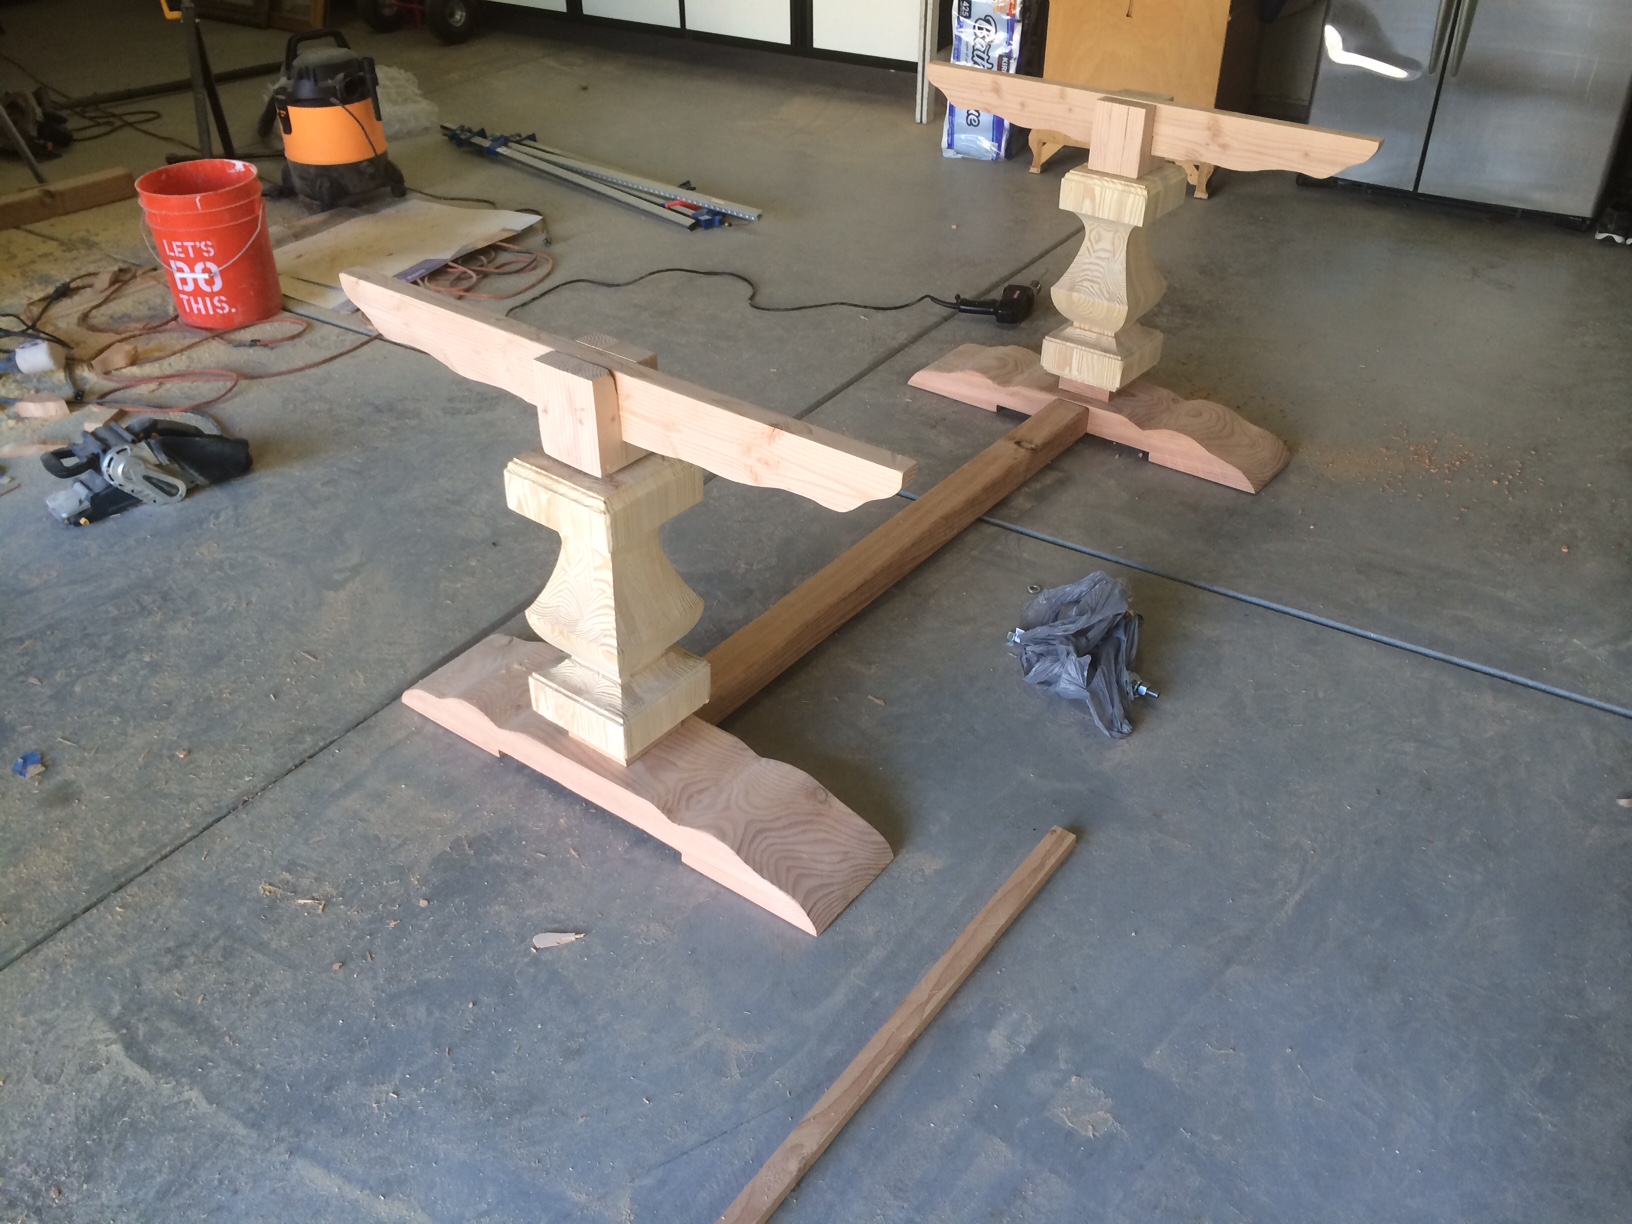
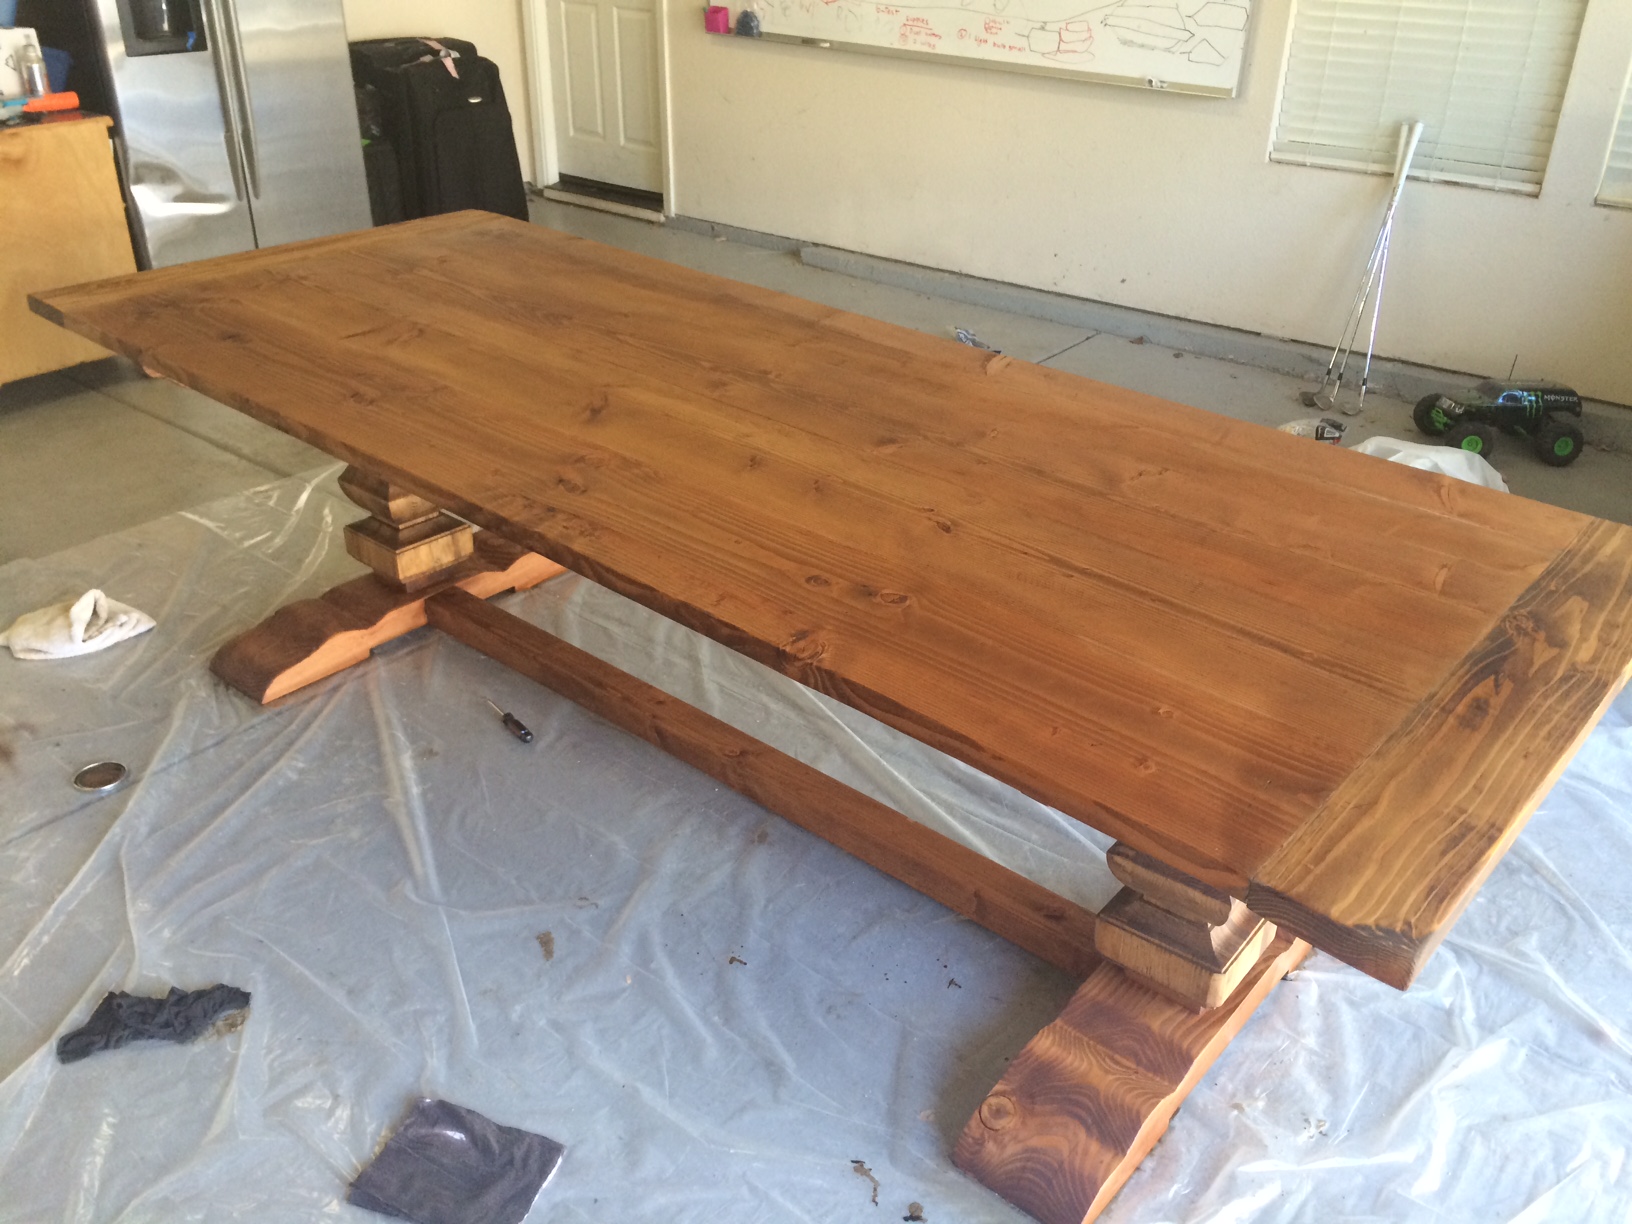
Was inspired to build this table after a visit to R.H. with my wife and realized a table this size and style would cost us about $3000.
So I decided to build myselft. With a little help from Ana's plans and my own modifications, I think I got pretty close to the Restoration Hardware Trestle Table.
I bought the pedestals at Osbornewood.com and asked them not to drill the leg holes and ordered it in pine. That was the most expensive part of the table, about $380 a piece. The rest of it is Douglas Fir.
I created a template and shaped the feet myself out of 4X8 beams. I was able to use my jig saw and a Bosch 10" blade. I made the rough cut with it and then sanded the rest of the shape using my belt sander.
The pedestals have a hollow center and were too tall so I cut them down and created plugs and glued them into the pedestal. The bottom plug has a large threaded rod and is glued and bolted to the feet, and the top plug was used to create the horizontal supports for the table top. I too created a template for this and used a jigsaw to cut the shape.
I then used Minwax American English, then weathered oak, (Like in one of Ana's stain posts). I then wanted to give it that weathered/reclaimed wood look so I add a fair amount of the White Pickling stain. I wanted a little less of the red tones and more brown...I may sand and refinish it someday, but it is in the house for now and can't wait for our first dinner party.
We have a laundry problem in our house. It piles up in un-organized piles and takes days to sort through and actually get in the washer. Honestly, we could do laundry every single day of the week and still fall behind. I guess that comes with the territory when you have 3 small boys in the house.
This organinzer is going to be great. We currently use it for whites, colors and "grown-up clothes". This keeps us from accidentally washing some of Mommy's more delicate items in the general colors wash which saves me money when we don't ruin her clothes.
The plans call for the 1 x 16's, but I had extra 2 x 4's laying around so I just built a frame using my kreg jig. The most expensive part was the beadboard for the sides and I used some S4S 1 x 4's for the top. Overall the project tooks me months, but that was more a product of my "shop" time coming after 8 pm and general apathy.
I definitely have the bug and have already starting a new project!
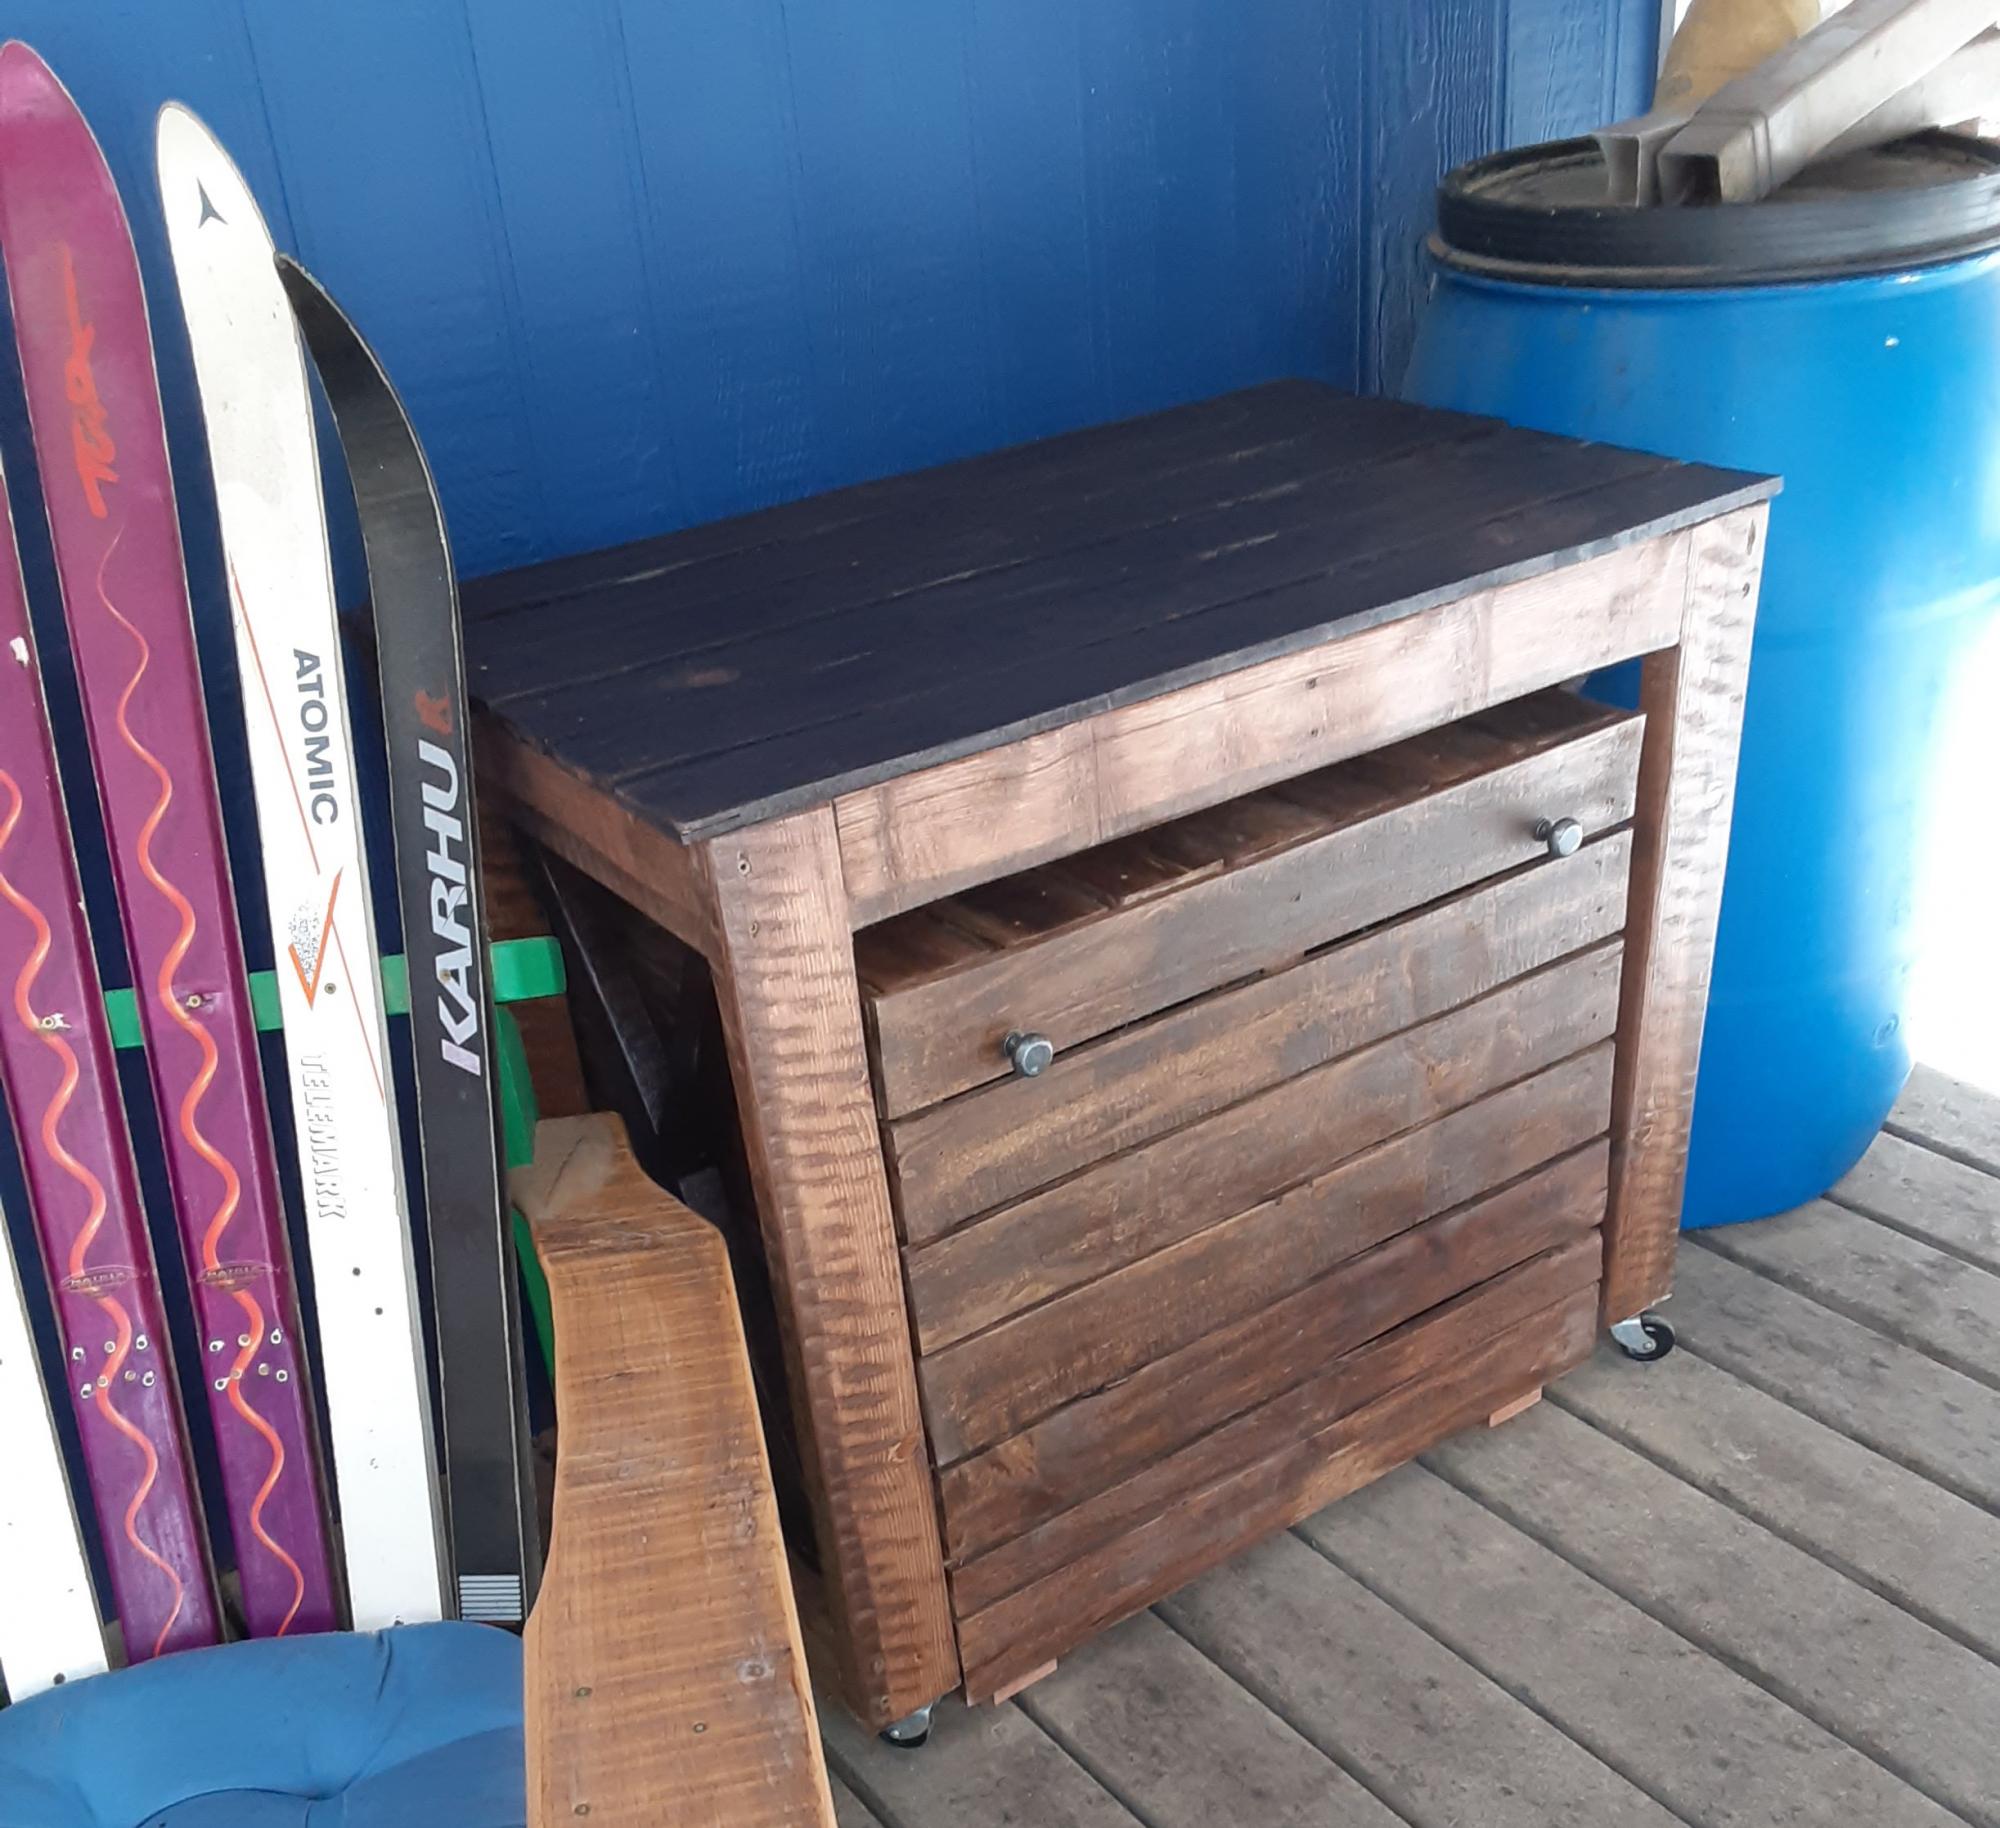
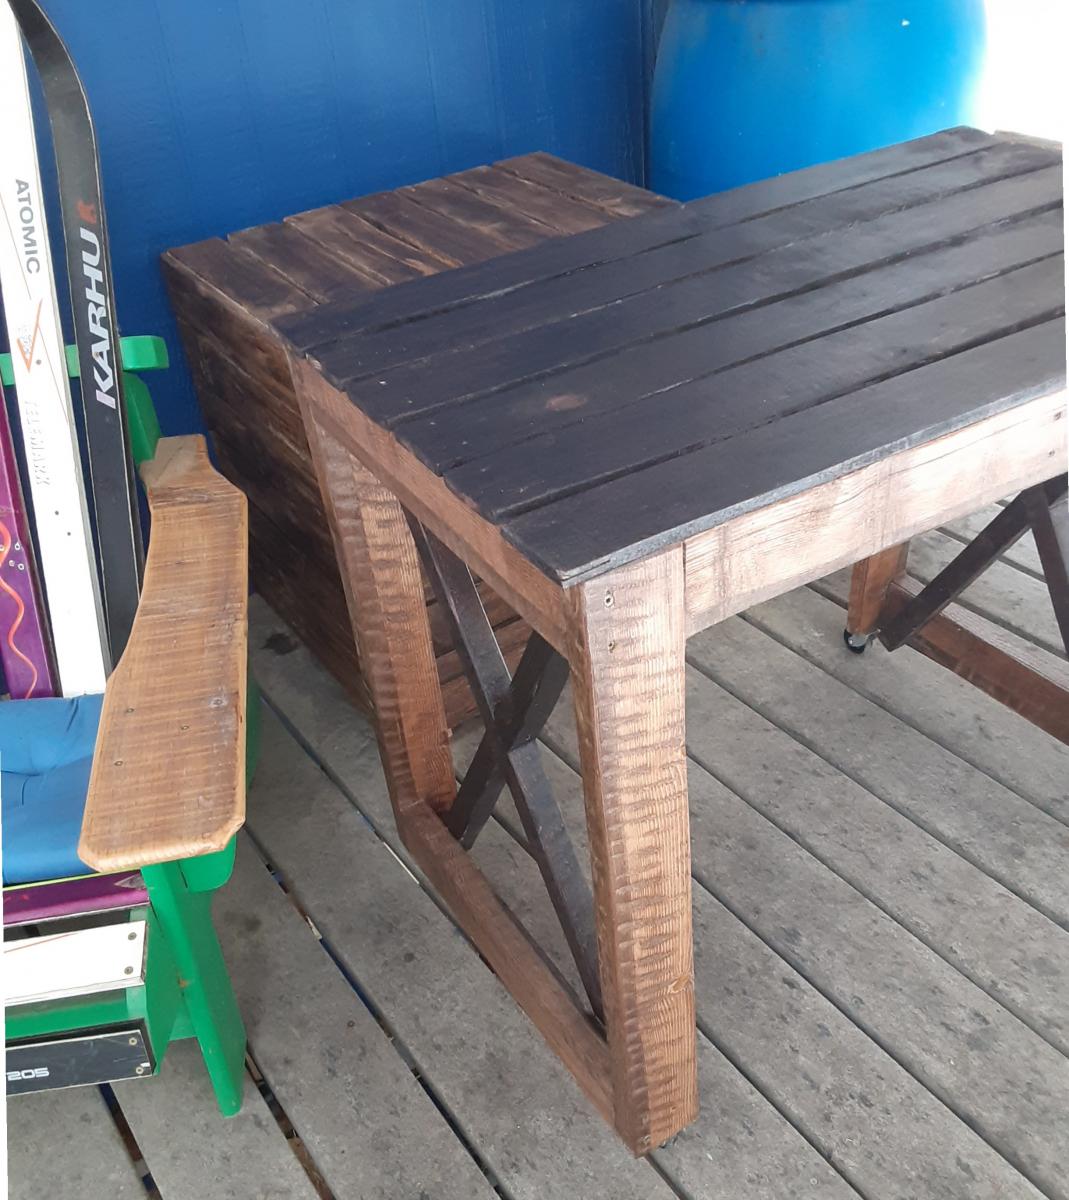
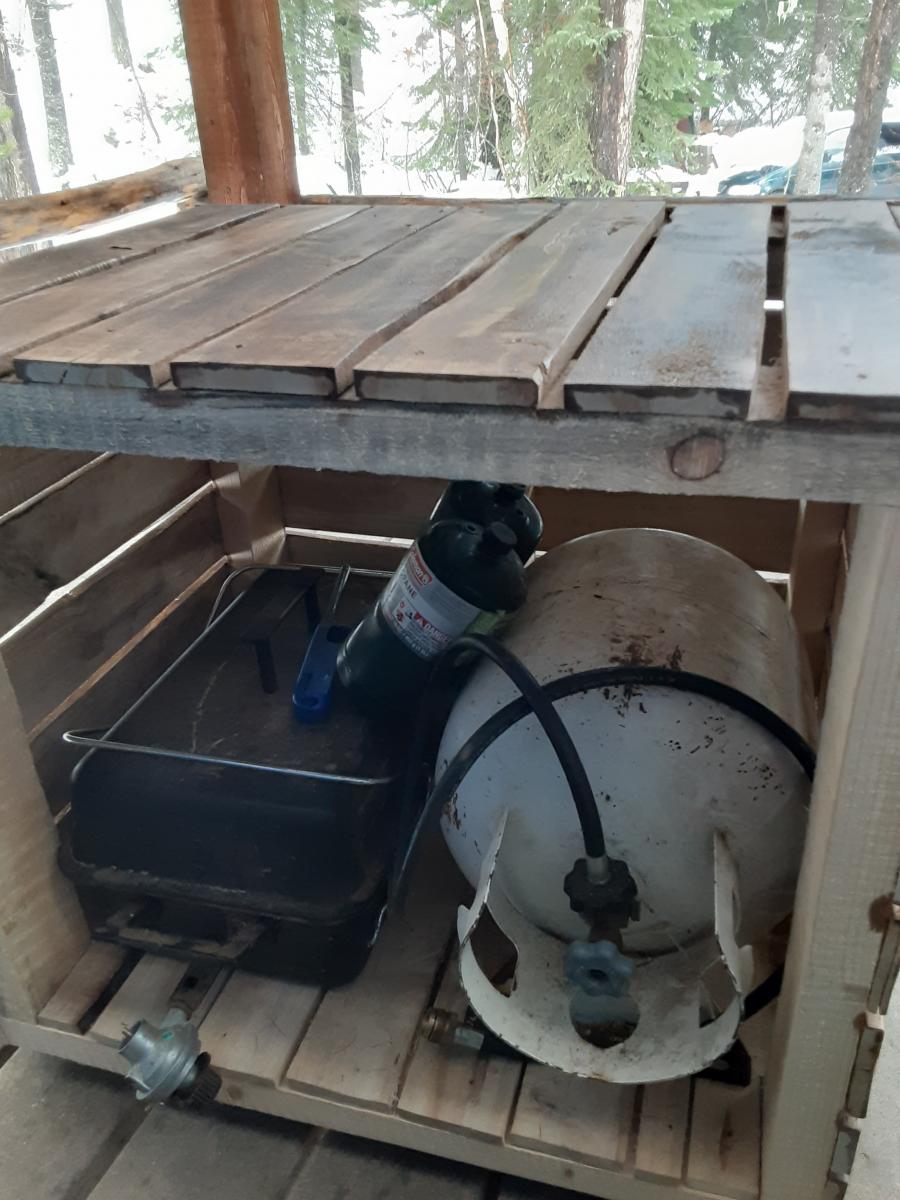
I was tired of seeing my propane bottle on the porch and this project was a perfect blending of camouflaged storage with lots of potential countertop workspace. My grill station is smaller and shorter than the original plans to better fit our family size and the porch space we have available. My husband has a bandsaw mill. When he was milling boards this fall, I asked for some 1/2" thick planks just for this project. I also had the knobs and wheels leftover from past salvaging work. I have been trying my best to use up "stock on hand" during this pandemic. Though I spent some time sanding the rough cut lumber, it still absorbed lots of stain. I wanted two tones of color, so that's good, but I still had to mix two stains together to have enough for the lighter parts.
Now we are looking forward to some cold weather BBQ meals!
Sun, 11/22/2020 - 13:05
Fire up the barbie! Thanks for sharing, it looks perfect:)
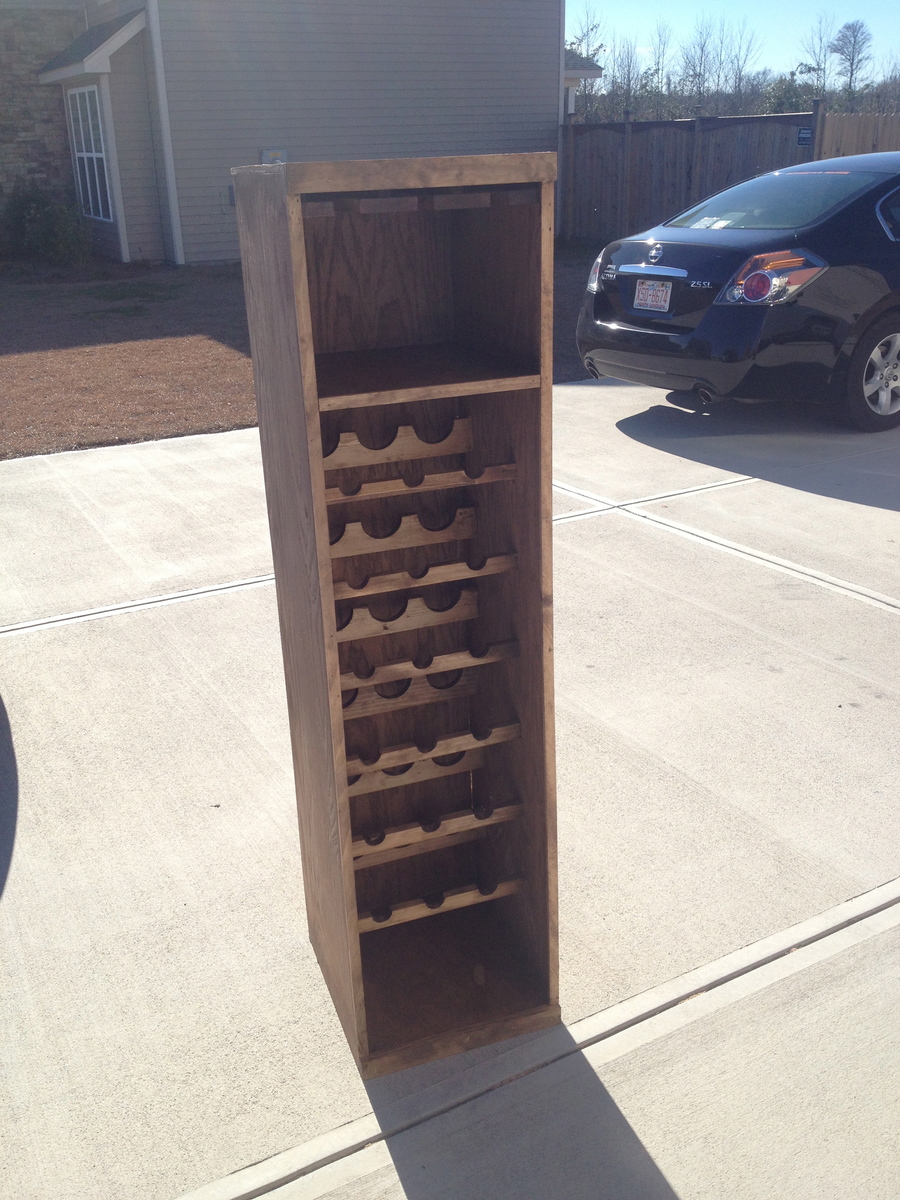
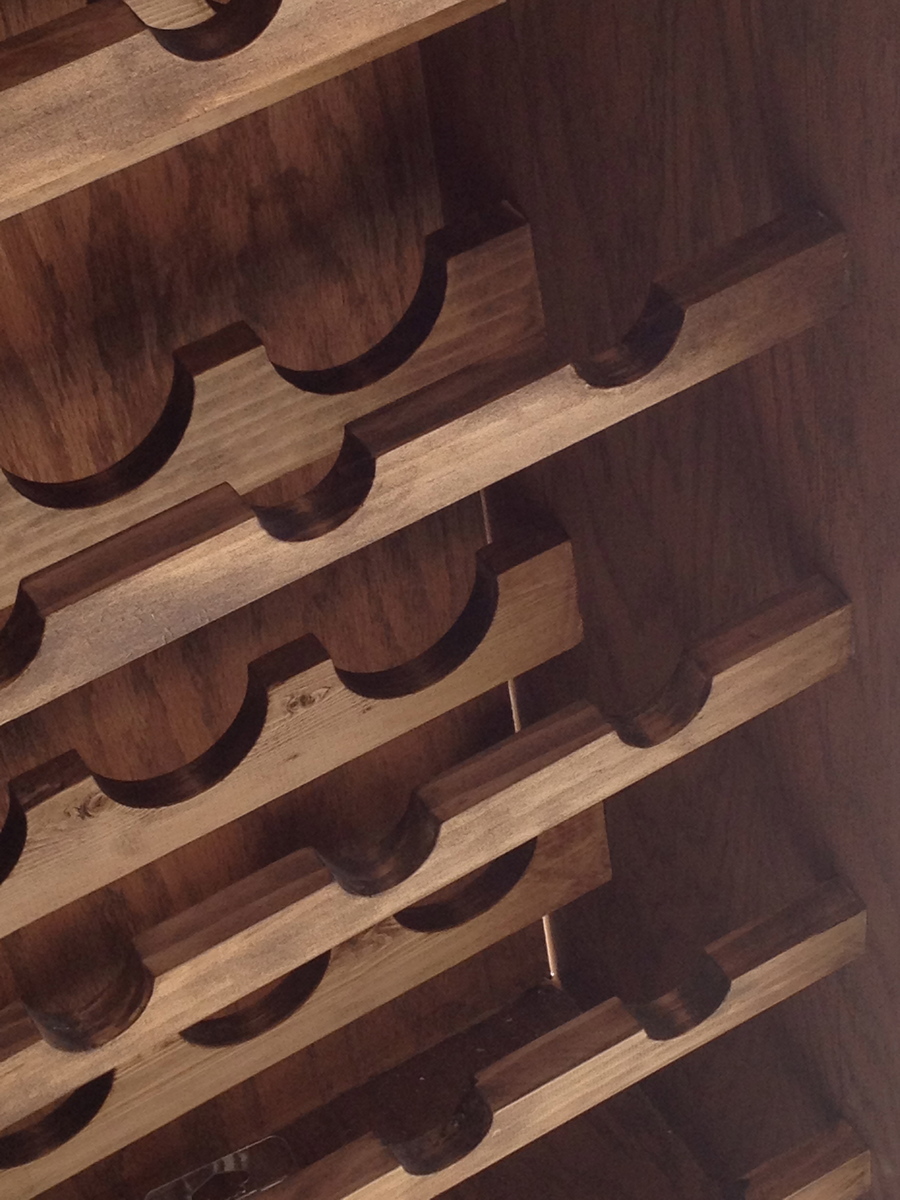
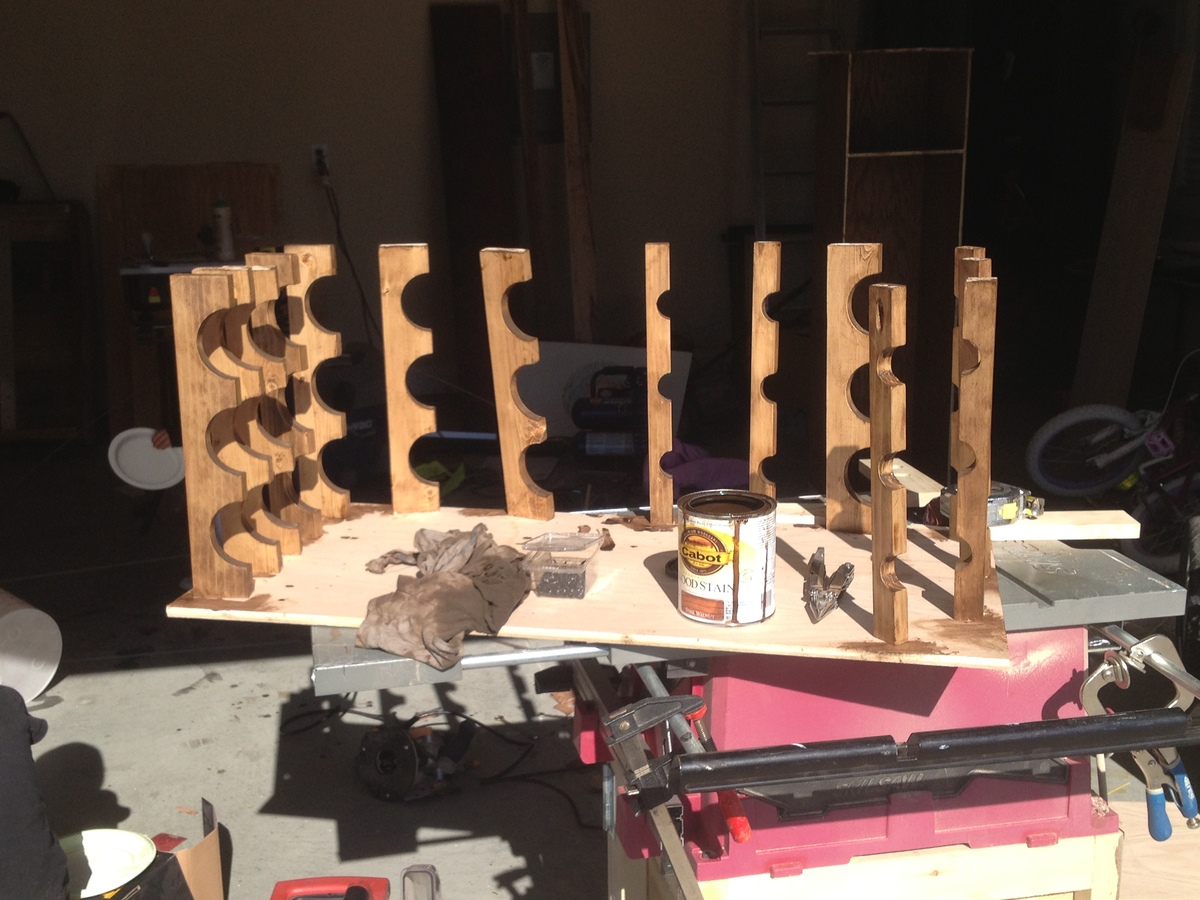
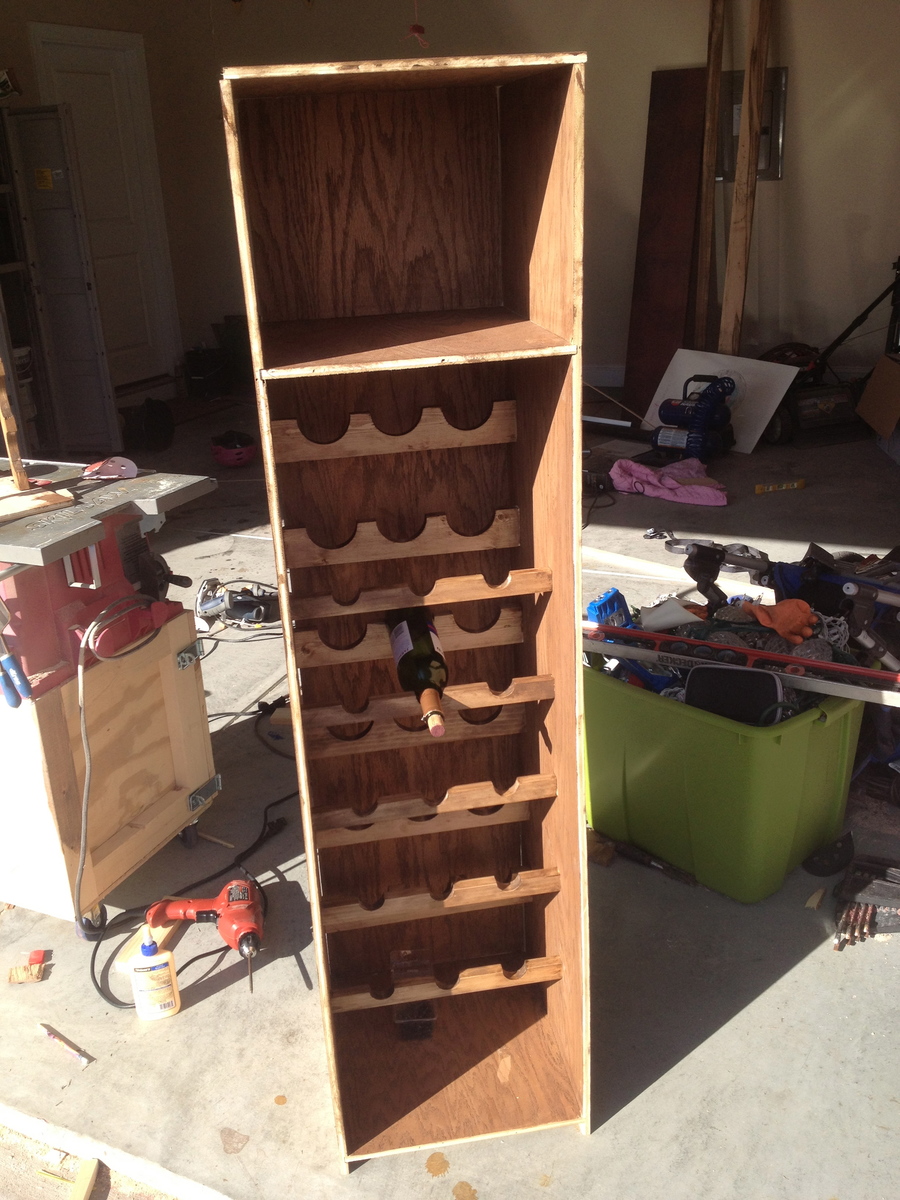
This is my first attempt at making a wine rack. It holds 18 bottles and 9-12 glasses. I made it from 1/2" red oak plywood and 1x3s. I used a drill press with a 3" hole bit and 1 1/2 bit for the neck supports. The one pic shows how I kreg jig the supports to a scrap piece of plywood so I could stain all sides of the pieces at once! Plus it allowed for a quicker drying time. I kreg jig all the supports from the back side with 1" PH screws and glue. I used my router and a straight edge to dado the top and bottom shelves to the side walls. This rack measures 5'Hx 15 1/4"w x 17" deep. The wine bottles do not stick out past the front at all. I stained it in a dark walnut to give it a country feel.

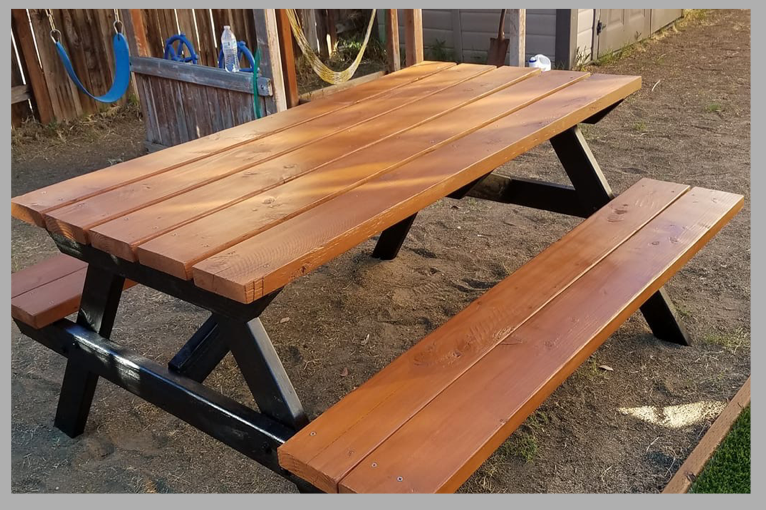
I wanted to make a black and brown picnic table, this one turned out really nice and it gets a lot of compliments.
I, also, reinforced the 2x6s used for the seats by boxing in 2x4s underneath. I just cut 4 53" (probably could have been 54" honestly) and mounted them to the bottom of the seats and screwed them into the seat cross members. This should keep them from flexing.
Tue, 01/14/2020 - 08:29
I love the look of this, it is great. I'm looking at your estimated cost wishing that was the case where I live .
This was a lot of fun to build and not very difficult with the right tools.
The only thing I changed was adding a 2x6 to the top cap instead of the 2x4. I like the look.
Honestly, the thing that took me the longest was picking out the straightest lumber off the shelf. lol
The painting was a different subject lol. I painted a dark gray and after not liking it I decided to give it a light gray wash for the weathered look I was going for. I love it! Thanks, Ana for the inspiration!
I would say anyone with a passion for making things, how to read a tape measure and attention to detail can make this bed fairly easily.
AJ in Texas
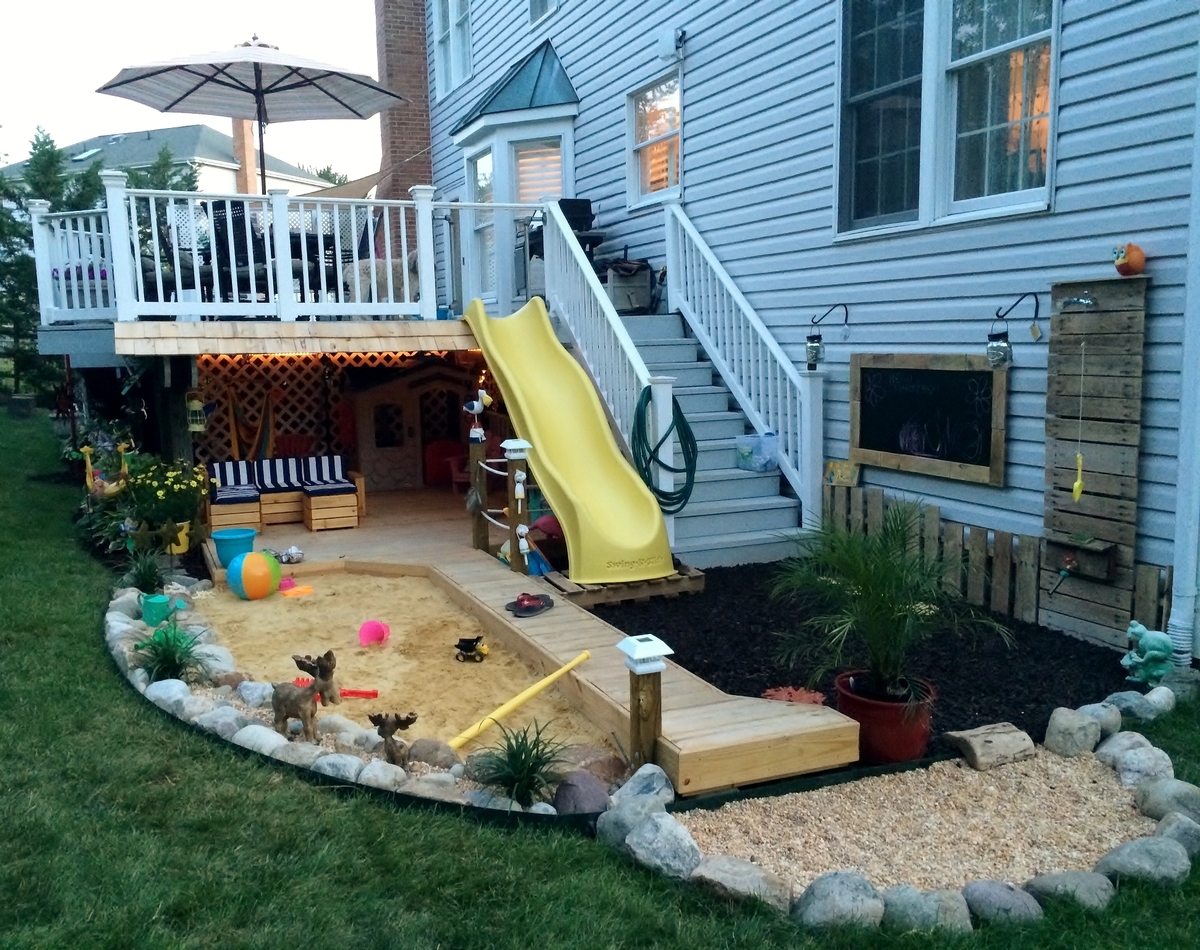
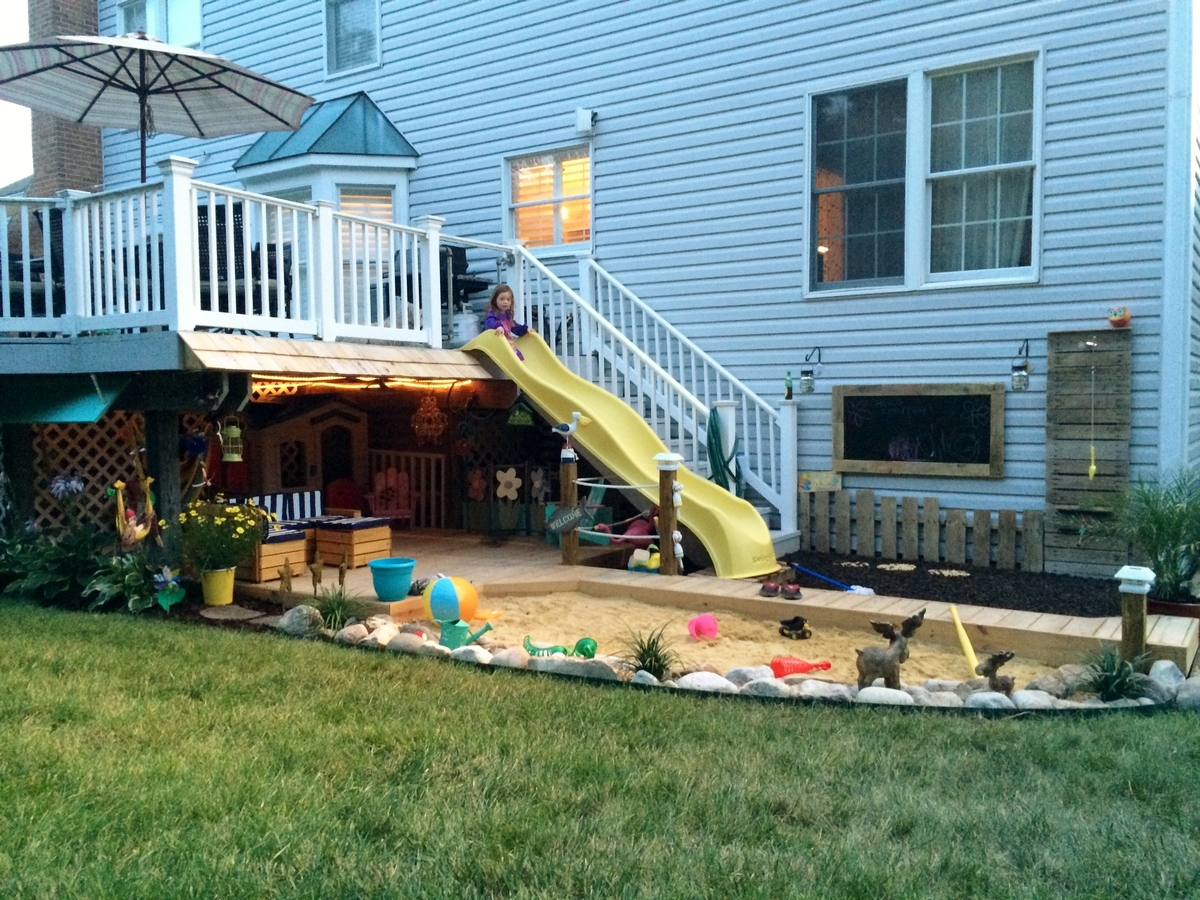
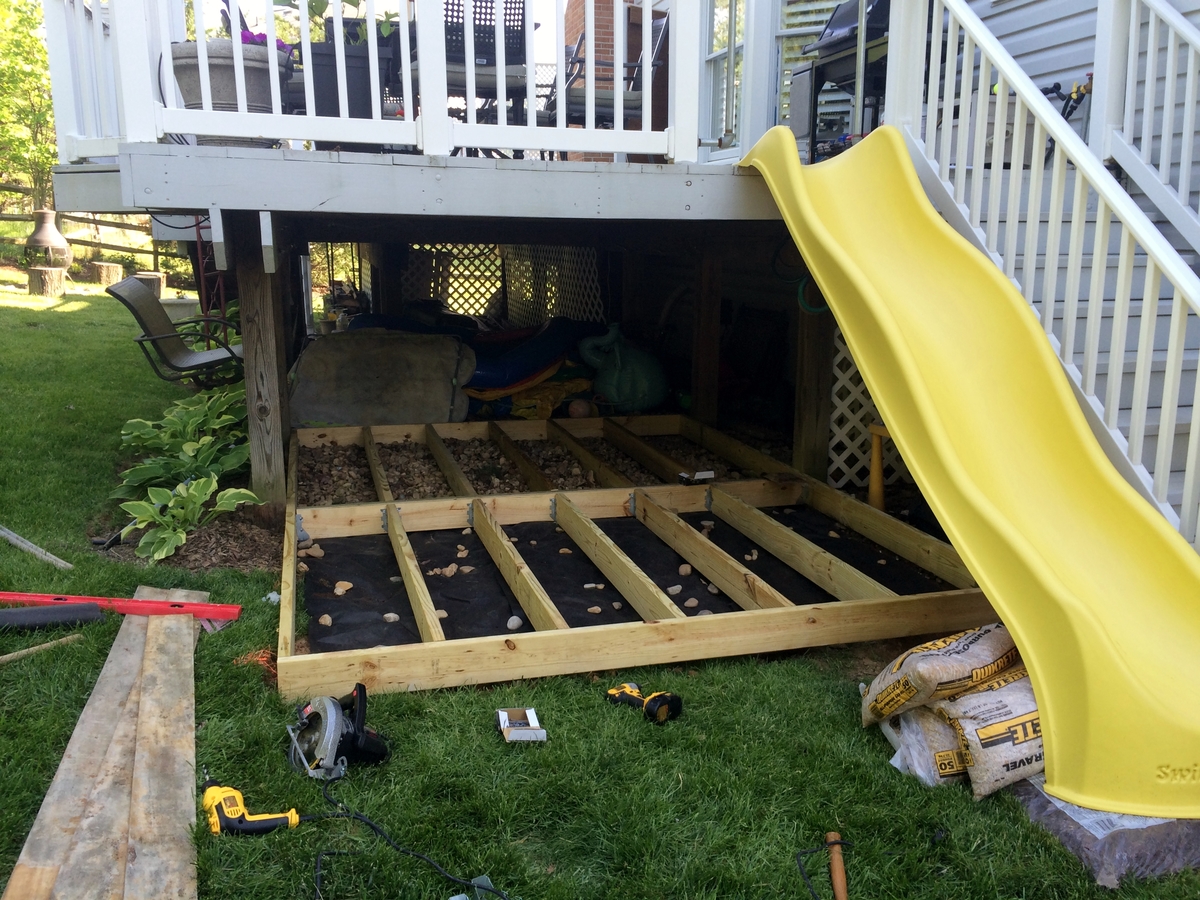
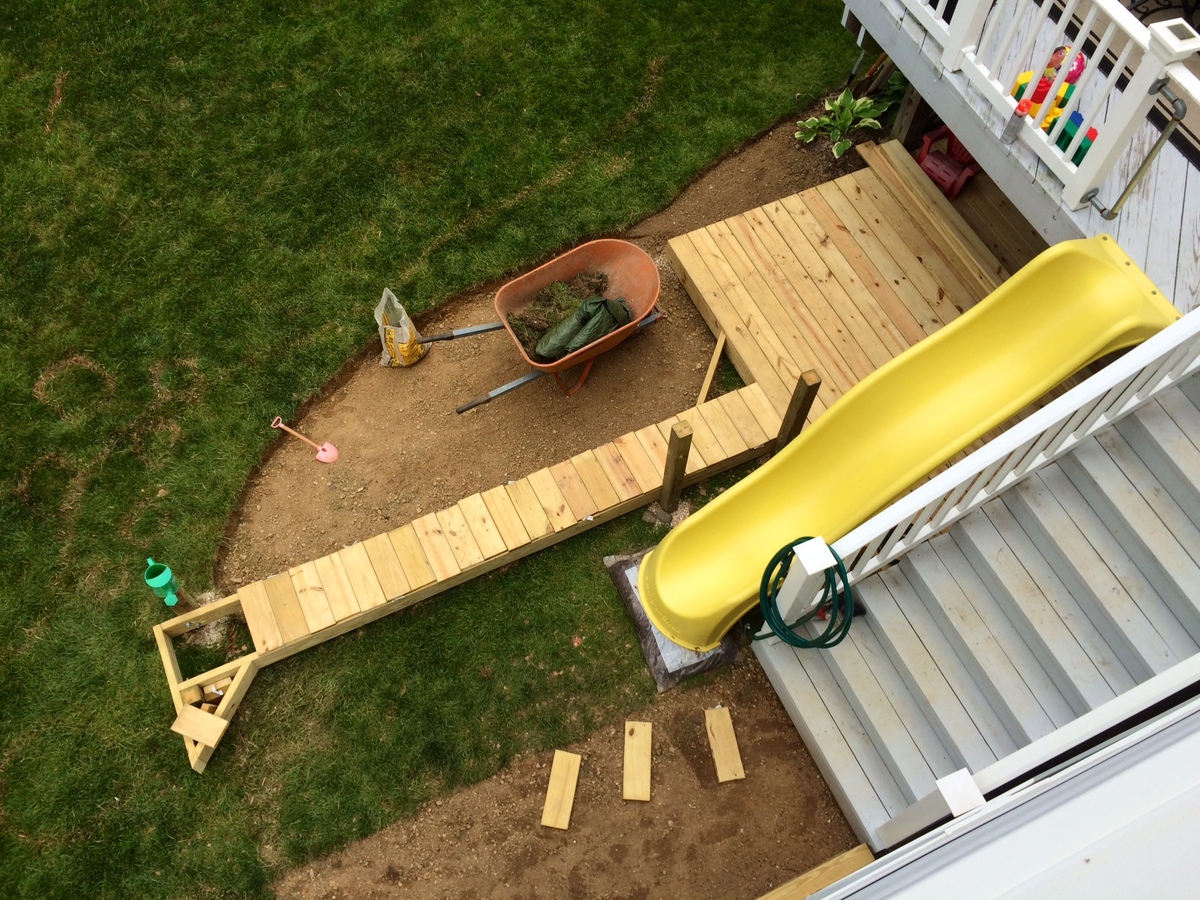
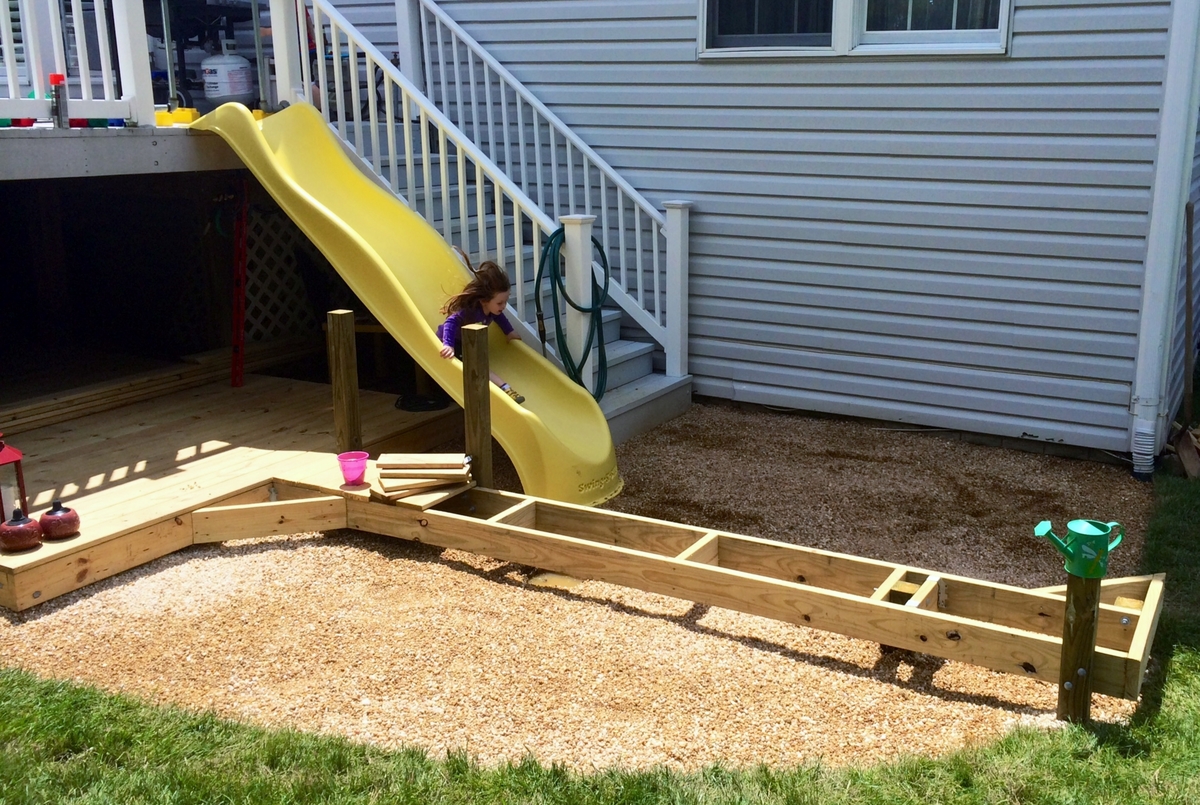
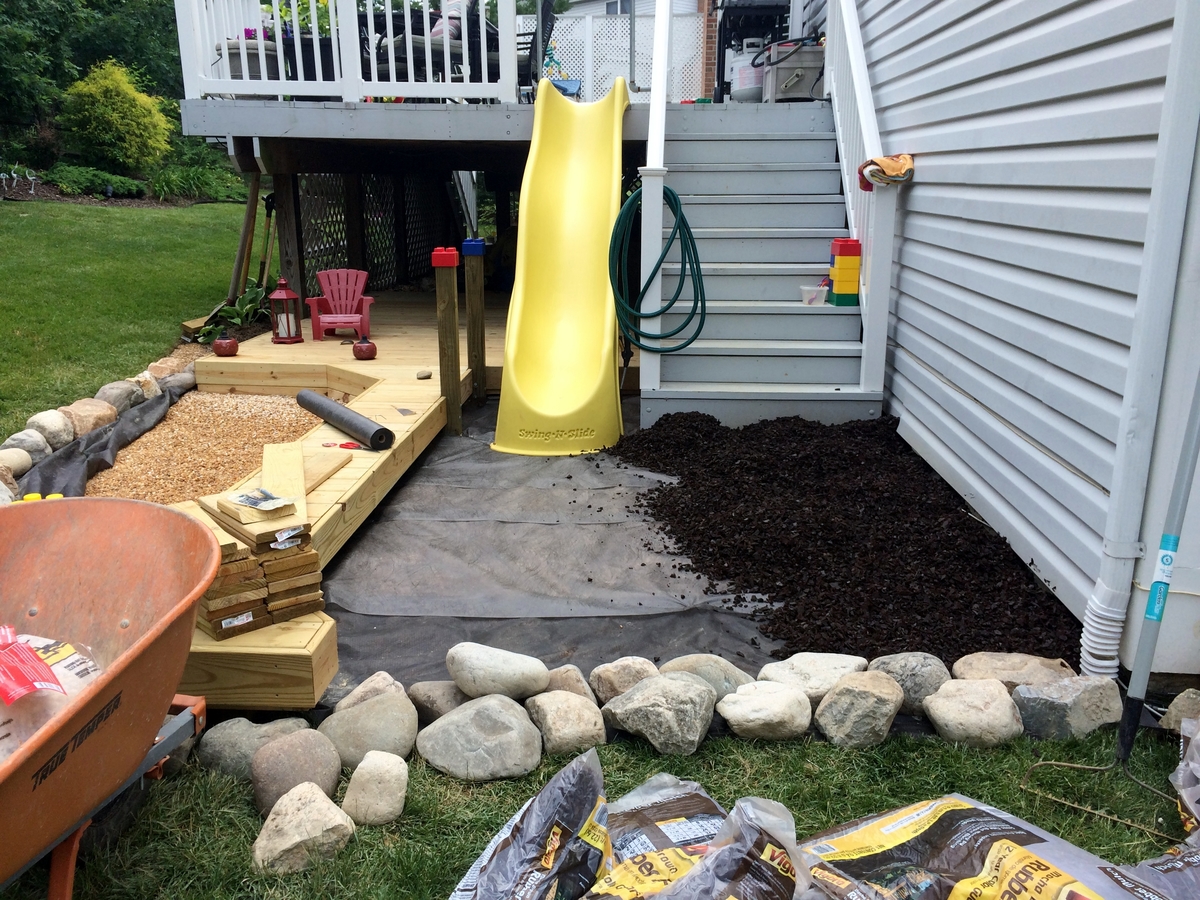
I built this outdoor play area for my kids this past summer. The area under that portion of the deck was always messy and muddy and so I wanted to make use of it. I built the deck and anchored it with lag bolts to the deck supports. On the one side I used rubber mulch and on the other there is play sand. I dug holes in various locations and filled with gravel to allow for drainage under the sand and mulch. For the awning I used plain cedar shingles. I added a shower that is just regular 1/2" metal pipe with a hose adaptor. The shower wall and fence are just old pallets that I had for a while, cut to size, which was pretty much random but they came out great. I added a misting system under the awning that works great, the kids love the cool mist on the hot days. Overall, a heavy job ripping up the grass, moving the wood, gravel, stones, sand and mulch, but a fun deck build and even better experience doing this with my kids by my side!
Tue, 01/13/2015 - 09:37
What an amazing use for a weird outdoor space ! You are genius !
Wed, 01/14/2015 - 06:21
I love it! I'm now trying to convince my husband to let me add a slide to the deck. Who wouldn't love that?!
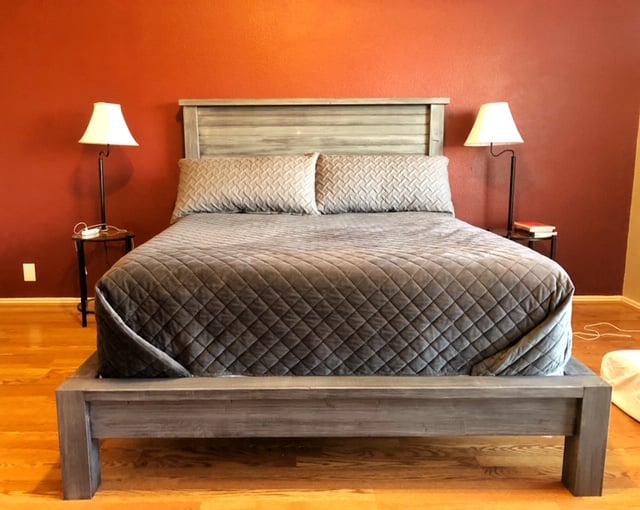
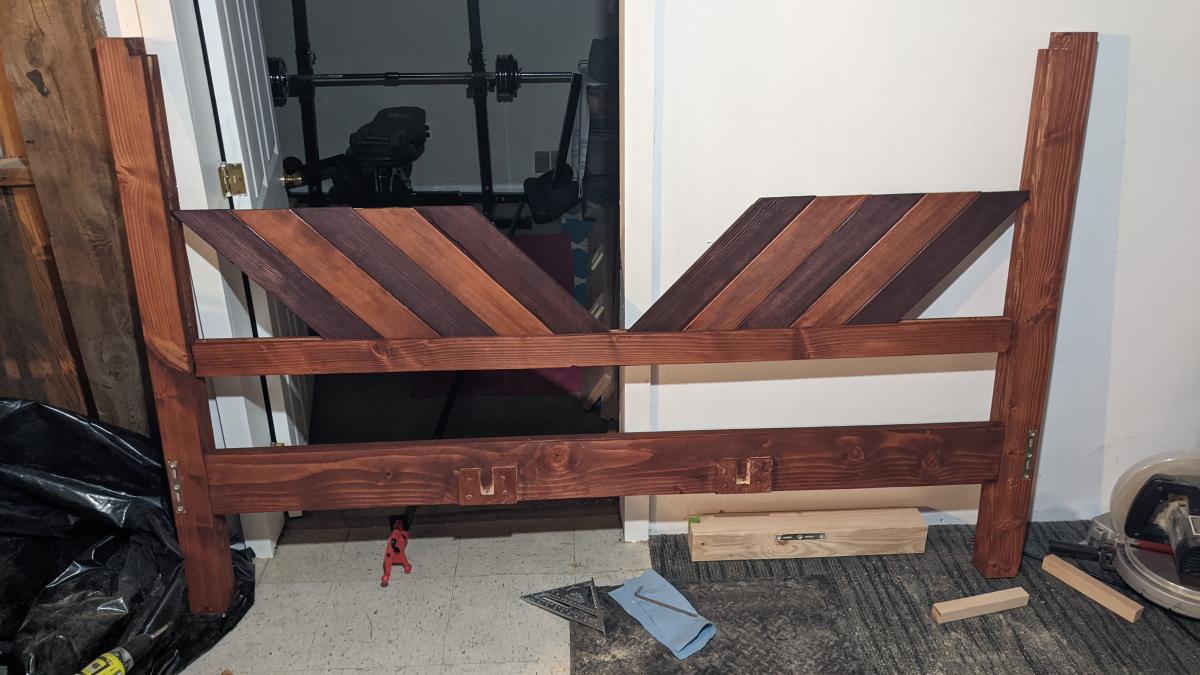
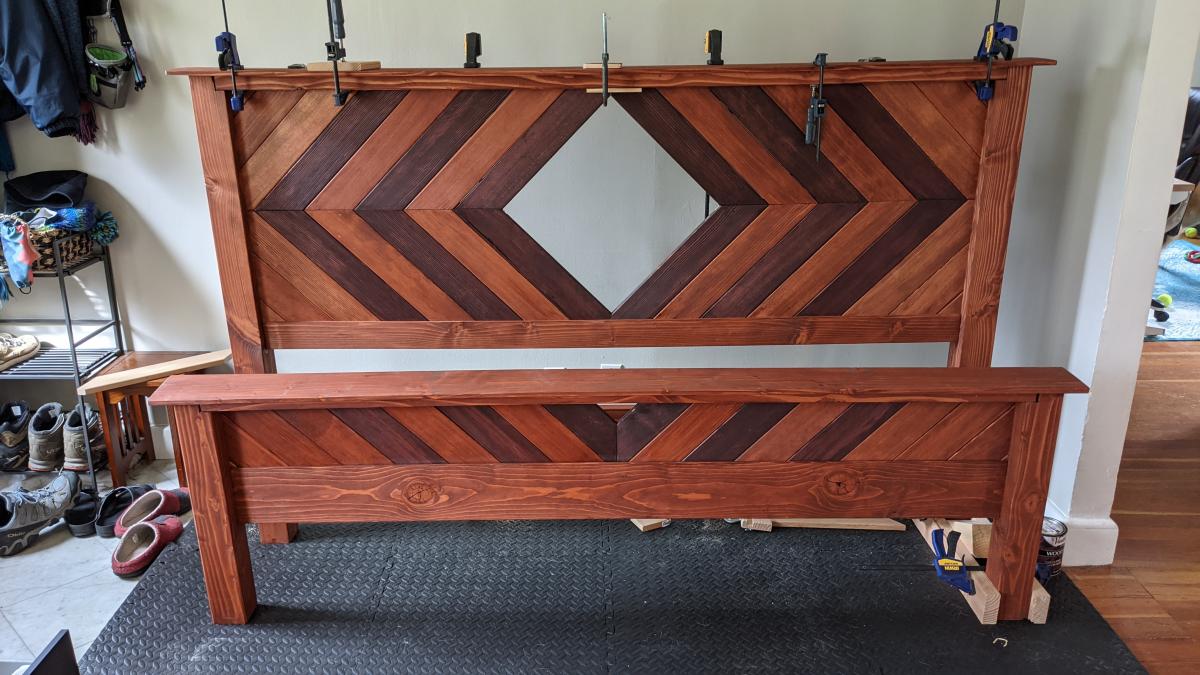
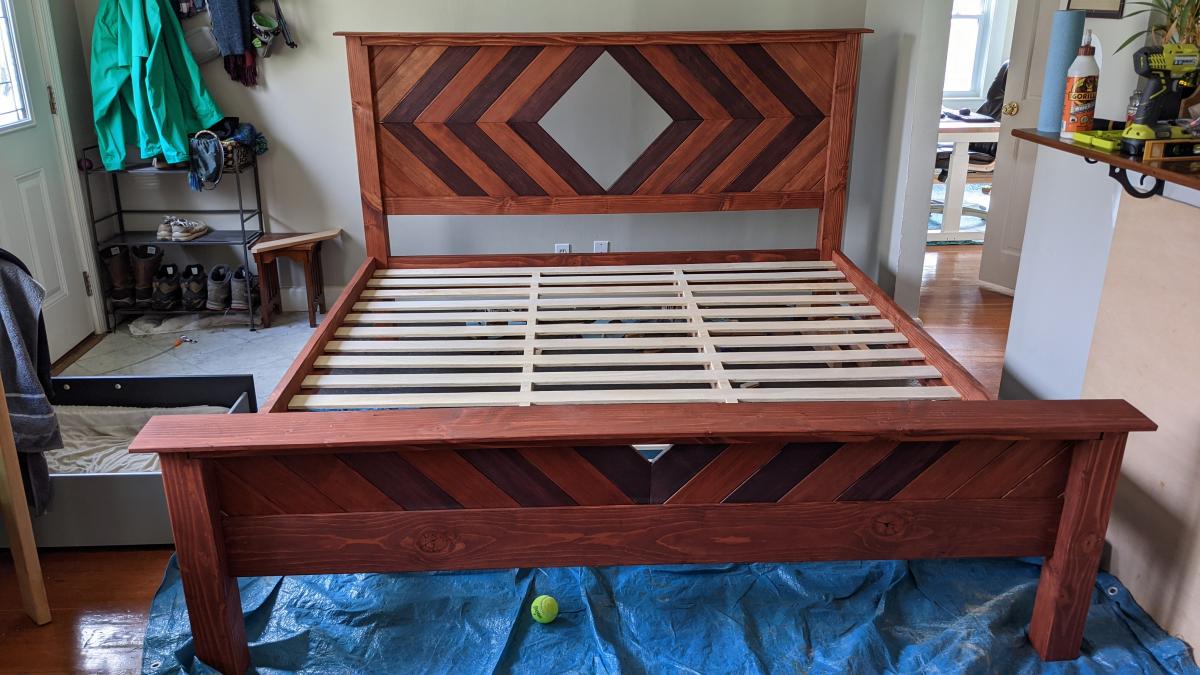
Took us 4 months cause we have kids so we have to work during naps and after bedtime and then we were hesitant to work on it for a while after a little stressful episode building the drawer. We had to lower our expectations for perfection when working with pine and no clamps. We're happy with how it turned out though! Reminds me of Van Gogh's "The Bedroom" for some reason.
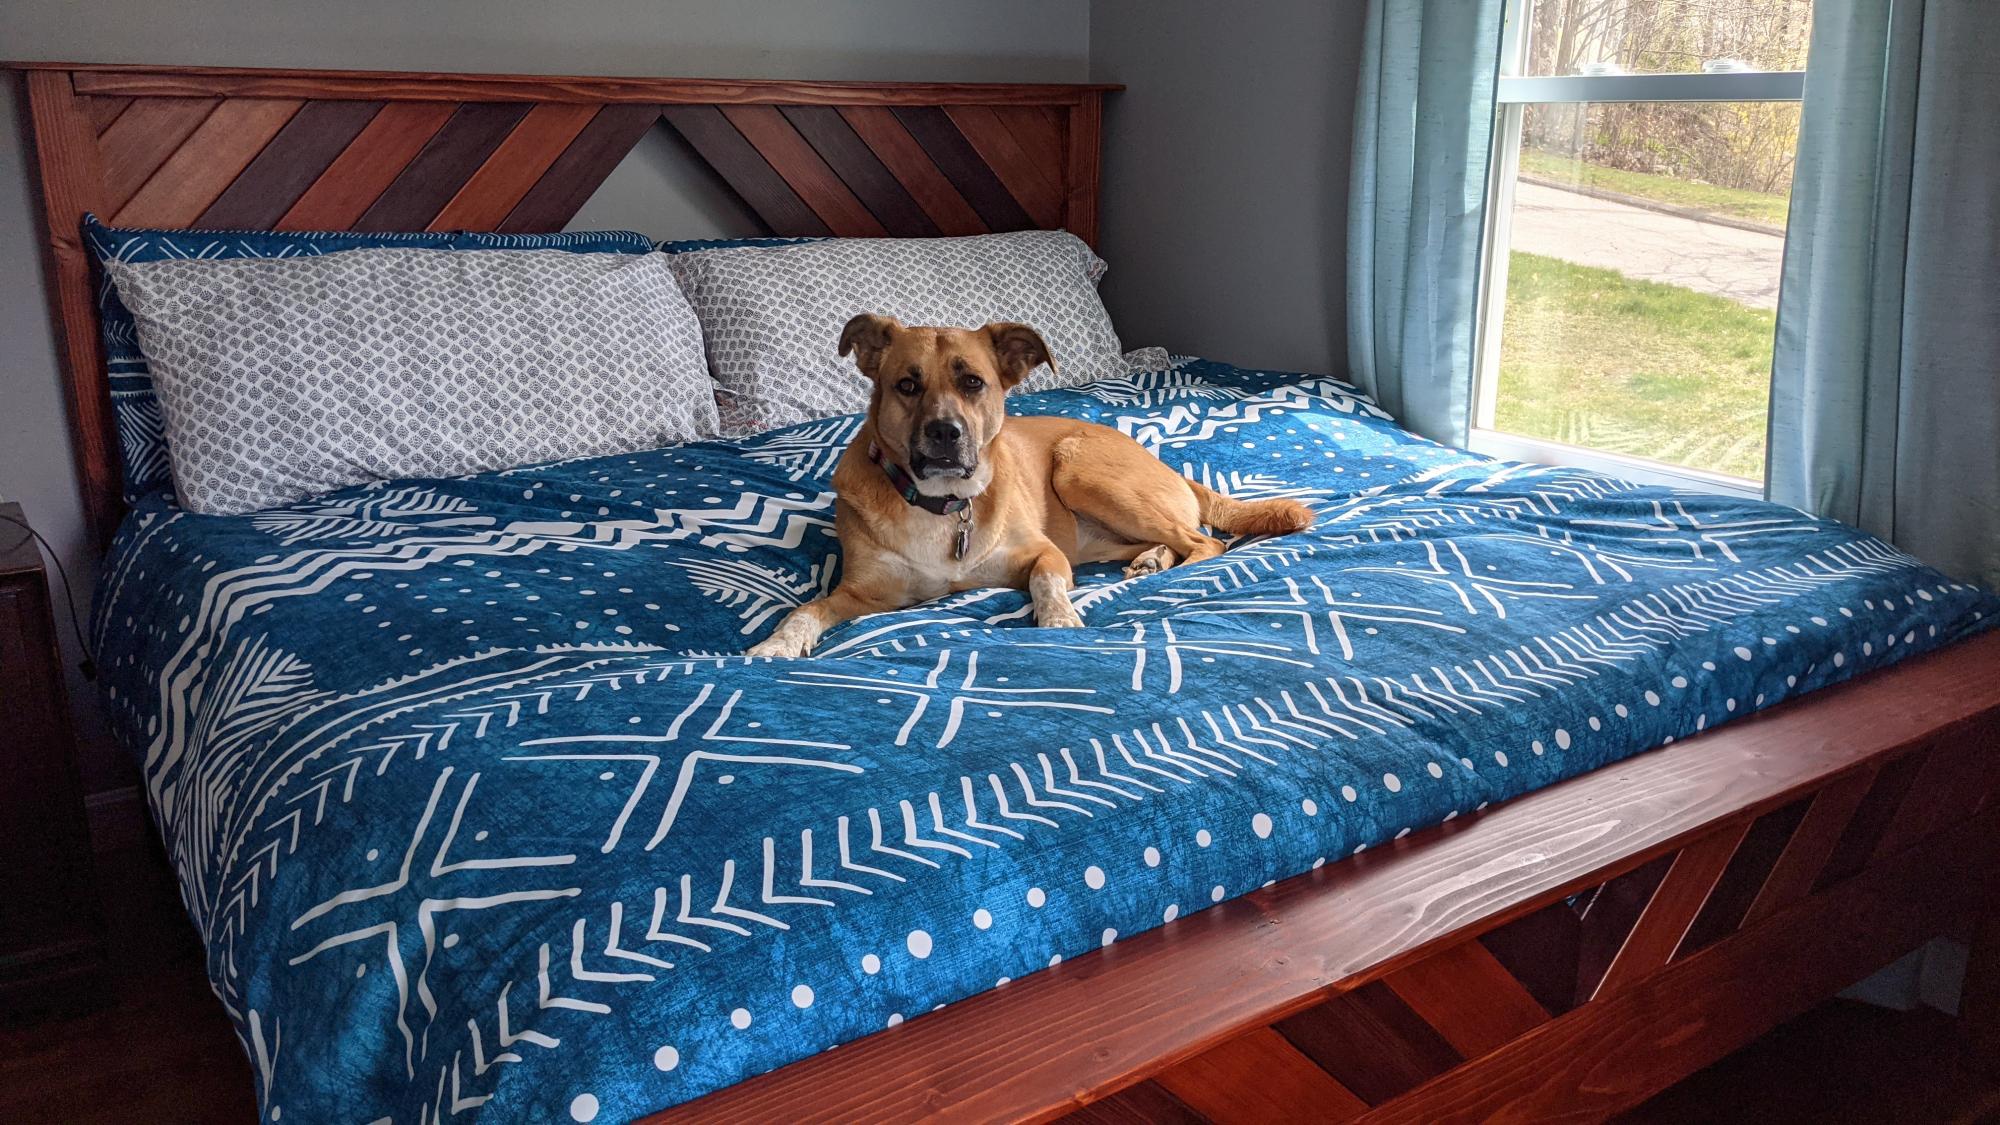
We ended up deviating more than we were originally intending from the Farmhouse Bed plans. We started off planning to modify so that it was able to be disassembled (used metal brackets and to fit storage drawers at the foot of the bed. The my finance got a router, so we ended up with a lot of mortise and tenon and tongue and groove joints, and a fancier headboard. I LOVE the end result but we were definitely in over our heads at times!


Sun, 07/30/2023 - 09:26
awesome modifications, looks wonderful. Enjoy.
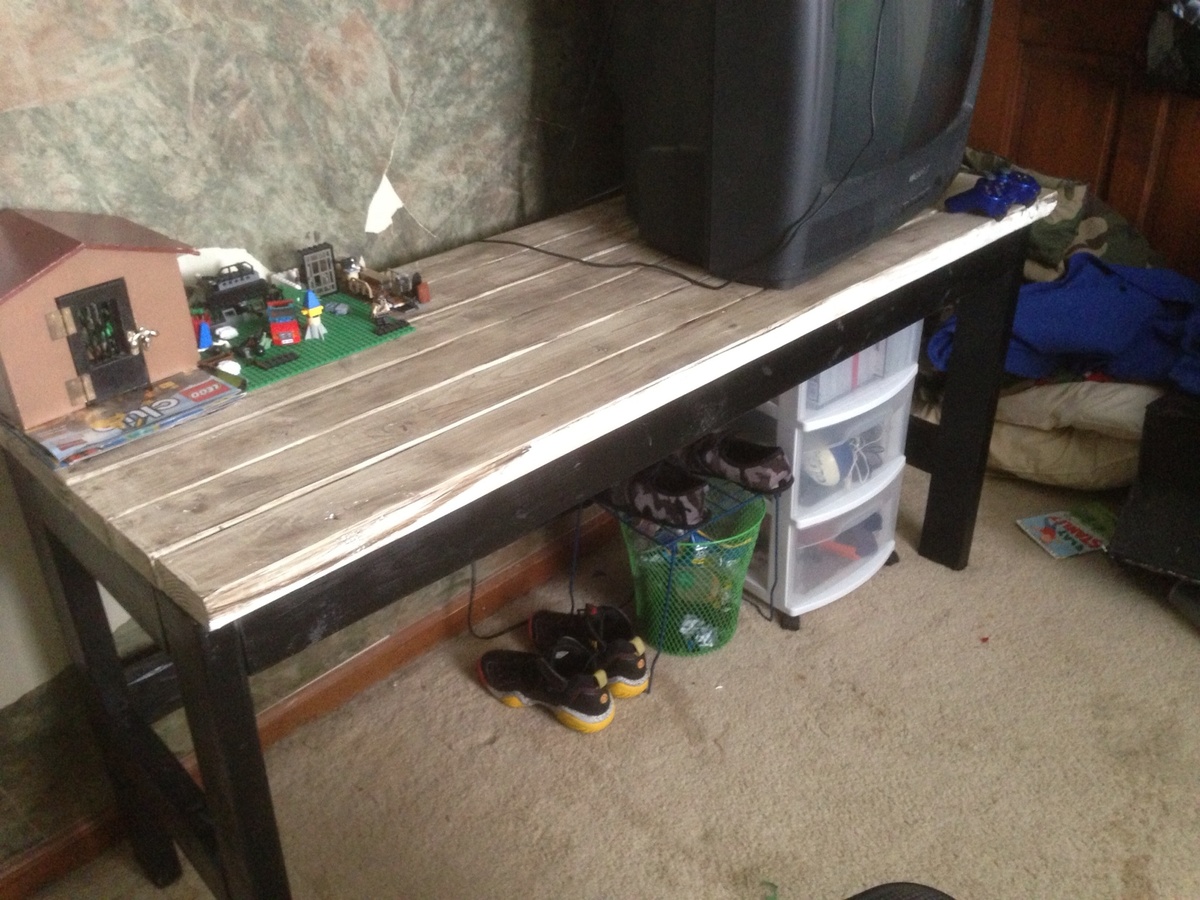
I built this desk so my son would have a place for his old school tv and to do his homework! It was super easy and I love how the finish came out! His room is a huge work in progress but this is the first step:)