Community Brag Posts

Modified Outdoor Storage Bench

Submitted by colbyka on Fri, 03/02/2012 - 10:41

My first project based on the Outdoor Storage Bench. We will use it indoors for firewood.

Estimated Time Investment
Weekend Project (10-20 Hours)
Recommended Skill Level
Beginner

Comments

Ray (not verified)

Sat, 03/24/2012 - 23:08

I am VERY impressed - Love it!!!

Play Kitchen

My husband and I worked on this and a dollhouse project simultaneously as our first builds. We did alter the dimensions to be taller and slightly wider than the plans. Being our first attempt, a lot of mistakes were made, especially given our limited tool resource. We learned a lot, though, and the end result is a hit with our little girl despite all the wonky bits.

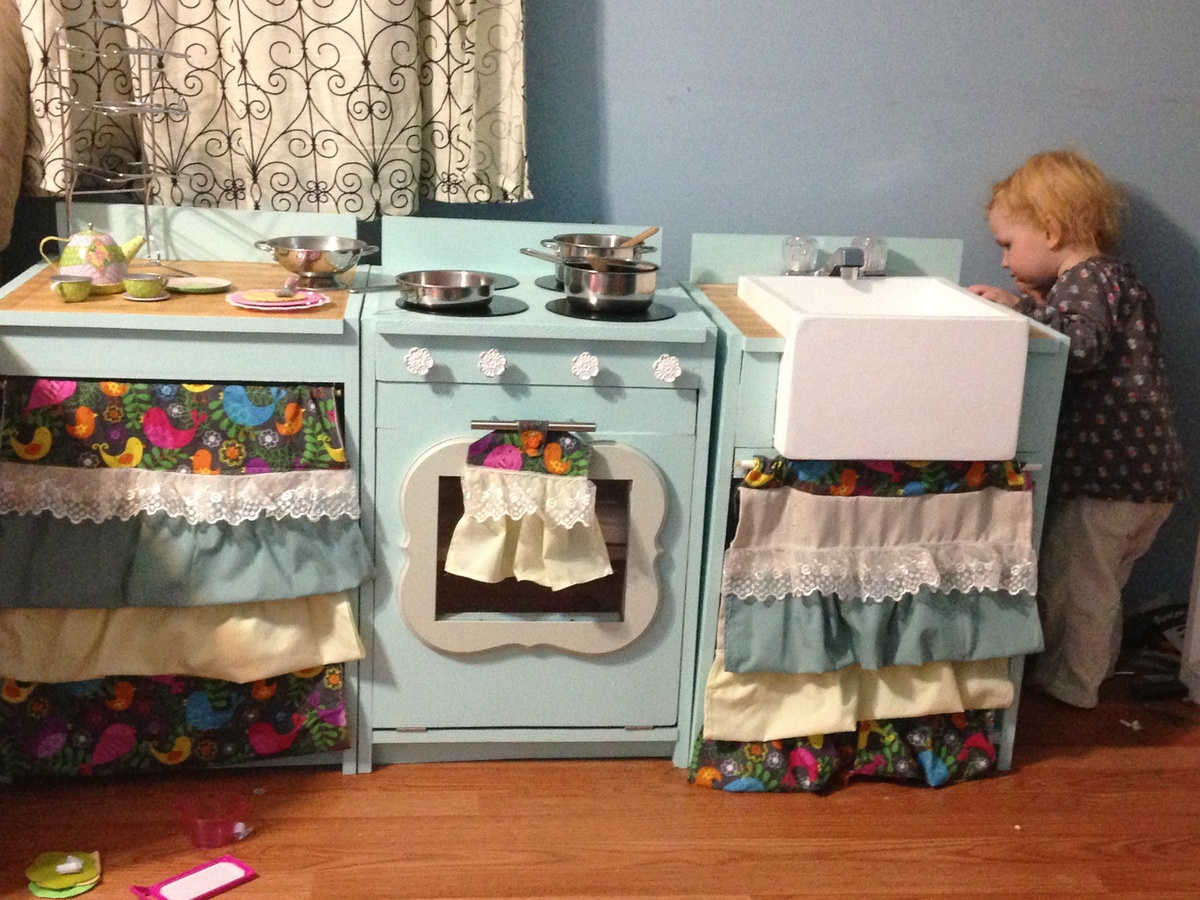
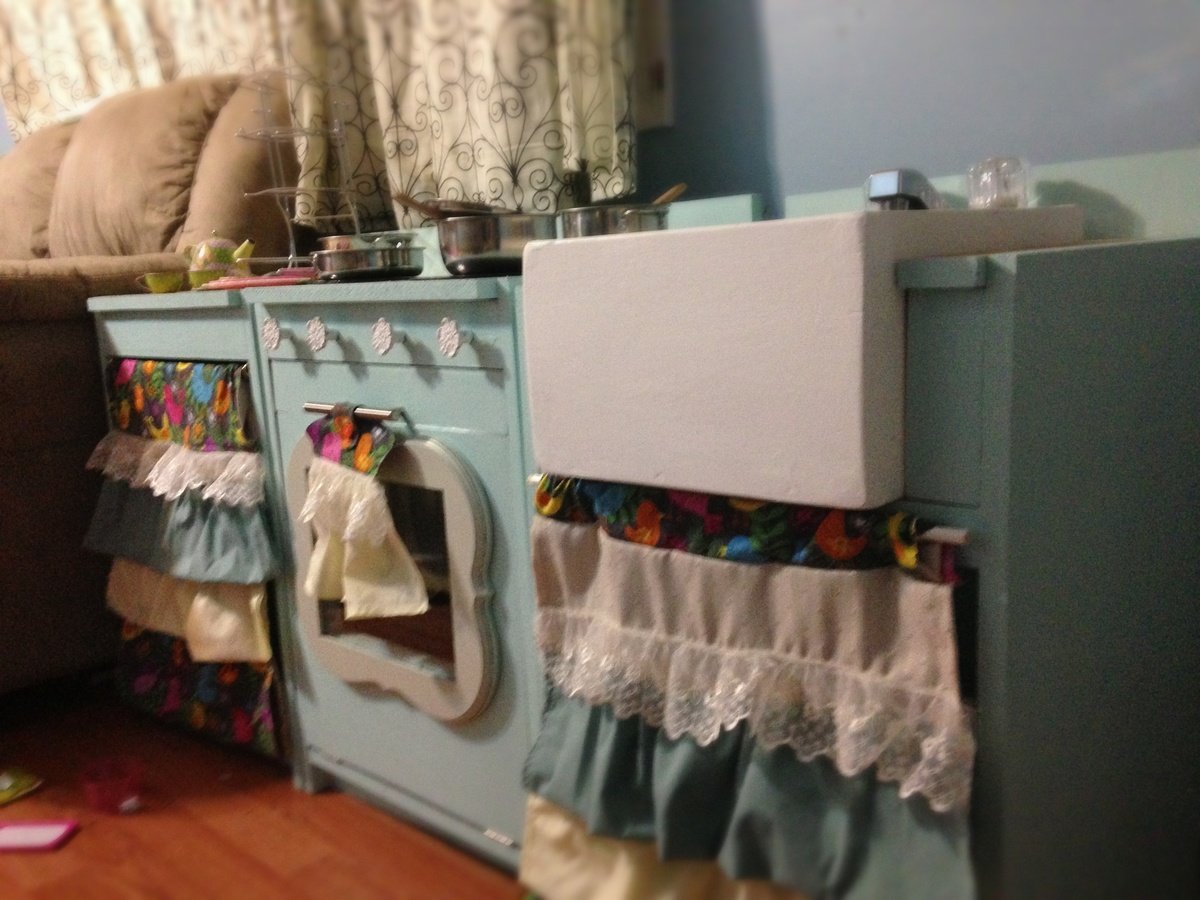
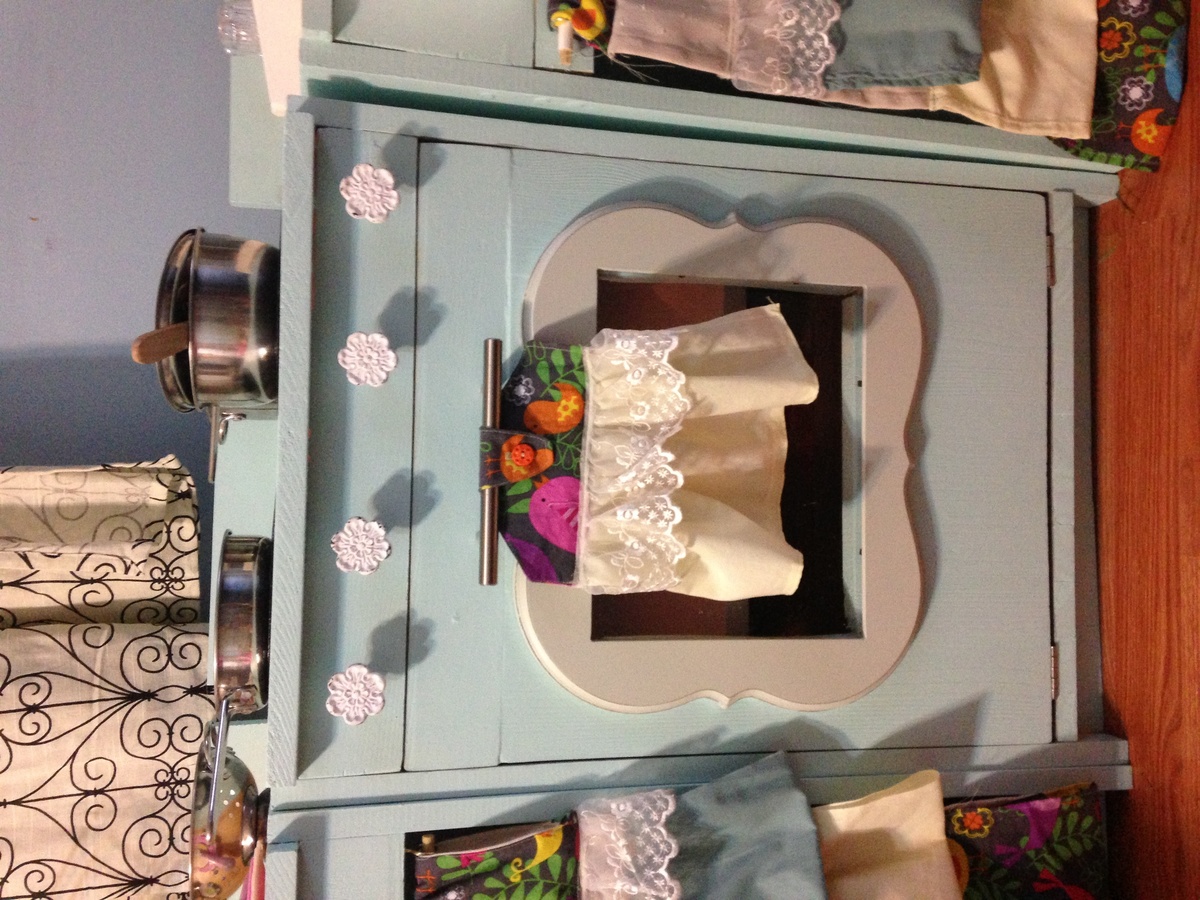
We opted for the farmhouse sink style, which was quite a bit of work for our newbie skills, but I think it was well worth it. I want a farmhouse sink my kitchen, so I'll just live vicariously! Plus, her toy pots and pans are stainless steel, so it's nice to not have a metal sink that would clang when her dishes are in there. We also opted for now to do an extra unit of "counter space" in lieu of a refrigerator. We do plan on making a fridge further down the road and even hope to alter these plans to make a washer and dryer set.

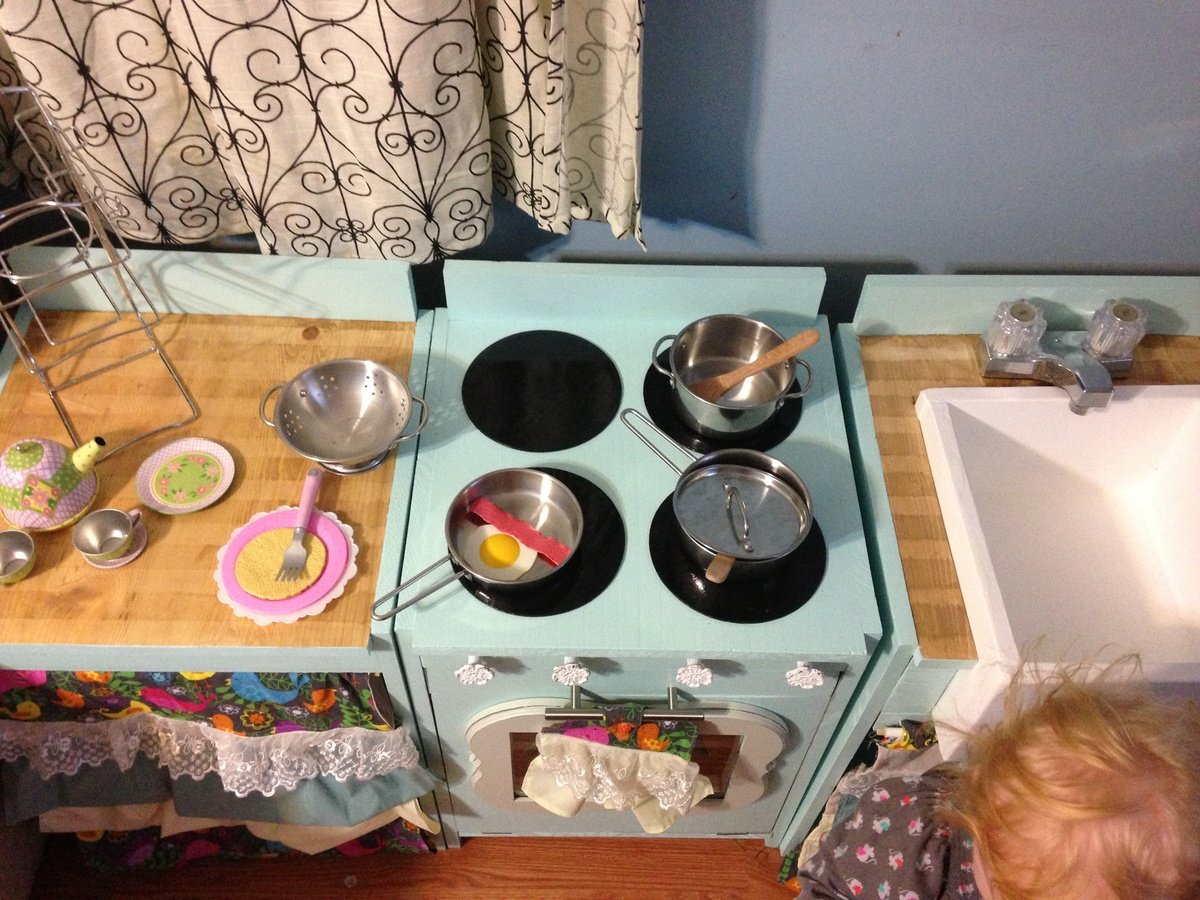
Regretfully, I can't recall the name of this color. I'm really pleased with it, though, and plan on using the remainder on a sewing table build. I already had all the supplies I used for the curtains (mostly remnant sales and an old curtain I recycled for the backing fabric). I do want to find a wood shape that I can attach to the burners to give it a gas stove look. That and varnish on the counter tops are still lacking here. We also added a tap light inside the oven and painted it a stony grey.

The construction went by pretty quickly, but I'd say the painting and decorating take it from a day project to a weekend project.

Estimated Cost
$150
Estimated Time Investment
Weekend Project (10-20 Hours)
Finish Used
Paint (around 3 coats for the units and closer to 10 for the sink), Stain (oil based, Golden oak; I taped off 1" strips and applied stain, letting it sit for 5 minutes, then I removed the tape and applied another layer all over, removing it immediately), Varnish
Recommended Skill Level
Beginner

Farmhouse King Bed

Submitted by Anonymous (not verified) on Thu, 03/17/2016 - 01:21

For this project we followed the plans pretty well. We added trim to the side rails to be more like the original bed which the plans were modeled after. We also extended the two by fours on the headboard and footboard to give s little more design to the headboard. Plans were easy to follow. We love our new bed with the natural wood combined with a light white wash on the panels.

Estimated Cost
$450
Estimated Time Investment
Weekend Project (10-20 Hours)
Finish Used
Minwax Whitewash
Recommended Skill Level
Intermediate

Barnhouse Door Cabinet

I began woodworking over the last year, having had no real previous experience, and fell in love. I work full time as a branch manager for the local Secretary of State, and have to fit my new hobby in where I can. Although I stumbled my way through the first few projects with my husband's help, I have grown both in knowledge, and confidence with each new creation. When I first started out I was nervous using cutting tools, relying solely on his assistance and focused on the nuts and bolts portion of the plans. However, I am now able to complete even more complicated plans with no assistance at all. Ana White plans are easy to follow and always end in a beautiful piece. The cabinet that I am submitting for this contest is by far my favorite of the pieces I have made so far. I think it turned out gorgeous, and I'm very proud of the work that I was able to do.

Built from Plan(s)
Estimated Cost
$450.00
Estimated Time Investment
Week Long Project (20 Hours or More)
Finish Used
I did a gray chalk paint with a chalk corresponding finish. The door was a satin polyurethane.
Recommended Skill Level
Intermediate

2 Person Picnic Table

Submitted by Anonymous (not verified) on Fri, 07/14/2023 - 12:45

Made 2 of these for my coffee shop in Puerto Rico. Easy instructions. Thank you!


Javiel Cardona

Comments

Seasonal And Holiday

My Storage Sofa!

Submitted by cr2 on Sun, 03/04/2012 - 18:35

This project was lots of fun. Made it for a college apartment- it is perfect.

Built from Plan(s)
Estimated Time Investment
Weekend Project (10-20 Hours)
Recommended Skill Level
Intermediate

Herb Garden Planter { $2 }

This was my first project, and Im pleased with the outcome. I made two different styles, and its hard to pick which one I like best. These are so versatile, thinking of making a silverware caddy and also one for the bathroom with handtowels, soap, etc. Candles would also be pretty.

Estimated Cost
$10 for both, the most expensive thing was handles for each
Estimated Time Investment
An Hour or Two (0-2 Hours)
Finish Used
Minwax walnut for the darker one, for the white one I painted dark gray, used vaseline for distressed look around edges, painted two coats over that in white..just a cheapy acrylic paint, and then sanded.
Recommended Skill Level
Starter Project

Comments

Dimensional Lumber Platform Bed

Submitted by Anonymous (not verified) on Sun, 03/20/2016 - 09:19

Modified to be able to be taken apart and easily reassembled into 4 frame pieces (each side plus the middle support beam) for transport at will, and made to fit a Queen bed instead of a double.

Built from Plan(s)
Estimated Time Investment
Weekend Project (10-20 Hours)
Finish Used
we added some cedar essential oil into linseed oil and gave it two coats with that!
Recommended Skill Level
Beginner

Cabin Bed Bunk Beds

Submitted by cpedraza on Wed, 10/30/2019 - 20:26

Fell in love with Cabin Bed by Jen Woodhouse but really needed bunk beds for my grand kids. So I modified the plans just a little. 

Built from Plan(s)
Estimated Cost
350
Estimated Time Investment
Week Long Project (20 Hours or More)
Finish Used
Varathane Weathered Gray Premium Fast Dry Interior Wood Stain
Recommended Skill Level
Intermediate

Dani & Brandon's Patio Set

Submitted by Laurie Mac on Thu, 03/08/2012 - 14:47

I gave my son's girlfriend a "gift certificate" for her birthday that said I would build her anything she'd like. There is a small patio outside my son's apartment that faces a lake. She decided to ask for some chairs so they could sit out on a warm night and watch the ducks swim by.

Estimated Cost
Not real sure... maybe $50...
Estimated Time Investment
Week Long Project (20 Hours or More)
Finish Used
Cabot Stains Australian Timber Oil
Recommended Skill Level
Beginner

My new TV X Console!

Submitted by chlag on Thu, 01/02/2014 - 21:53

I Modified the plans to add enough shelves for my audio video equipment and leave place for the woofer. I also shorten it to fit in the space I had available. Notice the 2x4 legs became 2x3 to keep a decent aspect ratio.

Love the oxidizing finish!

Built from Plan(s)
Estimated Cost
80$
Estimated Time Investment
Weekend Project (10-20 Hours)
Finish Used
Tea - Vinegar/steel whole - Wax
Recommended Skill Level
Starter Project

Comments

Grandy Sliding Door Console Table

Submitted by Anonymous (not verified) on Tue, 03/22/2016 - 08:29

this is modified slightly from the original plan to accomodate some basic electronics for the TV

Built from Plan(s)
Estimated Cost
200
Estimated Time Investment
Week Long Project (20 Hours or More)
Recommended Skill Level
Intermediate

Comments

deannaw08

Mon, 03/28/2016 - 06:58

i like the modifications that you made.  I plan on making this in a couple weeks (too many projects going on right now), how many inches did you add to the top for the electronics/pictures?  what you have seems like it'd be a good height for what i'm trying to do.  Thank you!

jstewart

Mon, 02/26/2018 - 08:15

I would like to build this and i am trying to find the plans for this console. please

Libbytiny

Tue, 02/27/2018 - 11:36

HELLO ANYBODY?  Love love love this.  I want to list my house and buy, build and live in this instead!!!  I want to know where everybody is going to be putting their new tiny house what kind of property and environment also does anybody know if you can park a tiny home in an RV resort that have the big dog class a types any information about how to build this and to purchase the plans. thank you!!!!

RoninsDad

Fri, 03/16/2018 - 18:30

I was wondering if you had the plans to the changes you made to this. I would love to you build this one.

20 sec tidy up coffee table with trundle toy box/storage

This is a project we built this weekend. My husband and I desperately needed some sophisticated storage space in the living room that is kid friendly, so we accepted the challenge. We together built a coffee table with trundle storage inspired by a plan on ana-white. We are truly inspired by her designs and plans help a LOT! Check out our work!

Estimated Cost
$100
Estimated Time Investment
Day Project (6-9 Hours)
Finish Used
We used one coat of red oak minwax stain with a layer of red mahogony stain over top. We finished with clear polyurethane.
Recommended Skill Level
Beginner

Comments

Bunnie1978

Tue, 03/13/2012 - 07:11

That looks very nice. This is the next project on my list I think.
It's really great to see the project with a different kind of finish also. How do feel about the functionality of it now that you have it "up and running" in your living room?
And... how do your kids feel about it?
Any drawbacks to this design for your needs, or tips that you can give me for building it over the next couple weeks?

In reply to by Bunnie1978

Windycrocodille

Tue, 03/13/2012 - 07:53

Thank you for the compliments! So far we absolutely LOVE the functionality! It really is made for easy clean up, slides back and forth nicely (we used wheels that only go one way, not swivels.) and our one year old seems to enjoy it. The table and storage compartment are just short and sturdy enough that she can pull herself up on them and because the storage compartment is not on swivels it doesn't move when she does. She is the first grand-baby on both sides of the family so she has approximately 175 toys that we have to find a place for and they all fit very nicely. With the large storage we have noticed that she is pulling out and playing with different toys that she could never get to or find before. As far as design is concerned we did have to modify it a little bit to work with the tools that were available to us. We wish the side legs were sturdier, even with 6 screws in each side they are still a bit wobbly. With the storage box underneath it helps to support it from swaying but we are still talking about ways to make it better. A possible support beam on the bottom of the back side? All in all we love the piece it fits perfectly into our space and offers a LOT of storage that we didn't have before. My husband and I had tossed around the idea, before we started, of making the piece smaller but we are glad that we didn't.

Suggestions: if you are going to buy based off of the shopping list provided make sure you also buy 2" screws. They forget to include that in the shopping list but include that in the directions. If you have any other questions feel free to ask. It was a really really fun project for us.

brookifer86

Tue, 03/13/2012 - 09:10

I just finished my Tidy Up Table too (brag post coming!) and I decided to add one L-bracket to each corner because of the wobble. I've also got a baby (7 months) and it's nice to have that added stability just in case. Now the sides are solid as a rock!

Bunnie1978

Tue, 03/13/2012 - 13:08

A little bit of medal support would probably be really good... I was actually thinking of modifying the design a little bit already, which will probably serve the end result to provide better stability. I think I'm going to make the storage trundle a little shallower, and put a row of small square drawers above it on each side. That is of course, much more complex, and then detail the trundle with the small squares so it looks like a cabinet of drawers all the way down...
What do you think of that idea? I mentioned that on the plan post too... still kicking it around a bit.

Farmhouse table

Farmhouse style table, 4 2x10 with 2X6 border. All Doweled and glued. Seems most plans are with square "breadboard" ends, i thought this style was a bit cleaner with no raw ends. 4X4 legs with 4X4 cross stretchers. Table ended up 4'X8' matching bench to follow.

You really need a dowel-jig, Kreg-jig, and bar clamps to do this project. You can also use a biscuit cutter instead of dowel jig, but I think it lines up better with dowels.

Close up shot shows swirl marks from 80 grit sandpaper used on an orbital sander... Even using 180 grit final sand it left them there, actually a nice distress look.

Estimated Cost
150.00
Estimated Time Investment
Week Long Project (20 Hours or More)
Finish Used
Min-wax dark walnut, min wax wood conditioner, 5 coats satin poly.
Recommended Skill Level
Intermediate

Farmhouse bed

Submitted by Anonymous (not verified) on Sat, 03/26/2016 - 07:33

Plans were perfect. This was my first build.

Estimated Cost
Under 400.00
Estimated Time Investment
Week Long Project (20 Hours or More)
Finish Used
Plans were the perfect size. Thanks Ana
Recommended Skill Level
Beginner

Wood shelving and hanging space for guest wardrobe

Submitted by Anonymous (not verified) on Wed, 11/13/2019 - 01:01

Ana's wood shelving plans are easily adaptable for whatever requirements you may have.
Apart from some of the cutting done on a table saw I was able to do this project on my own and assemble.
I'm a beginner and managed it OK. It's not perfect but my husband was over the moon to finally have hanging space and shelving in our new house.
Would look great painted or stained.

Built from Plan(s)
Estimated Time Investment
Afternoon Project (3-6 Hours)
Recommended Skill Level
Beginner

Porch Planters

Submitted by Anonymous (not verified) on Mon, 07/24/2023 - 13:40

This build was a lot of fun! Thanks ANA!

David Marks

Comments

First Project

Submitted by amy2789 on Fri, 03/16/2012 - 13:48

When I saw the plans for this bench I knew I had to make it. I had been looking for something to put on my porch, but hadn't found anything I liked.
I, or should I say, my husband had all the tools just sitting in the garage.

It was a great starter project. I definitely felt the learning curve. Thank goodness for wood filler and paint!

Estimated Cost
$30
Estimated Time Investment
Afternoon Project (3-6 Hours)
Finish Used
Cheap red spray paint from Wal-Mart. I had it on-hand from another project.
Recommended Skill Level
Beginner

Comments

Back