Community Brag Posts

Leaning Bookshelf - Narrow
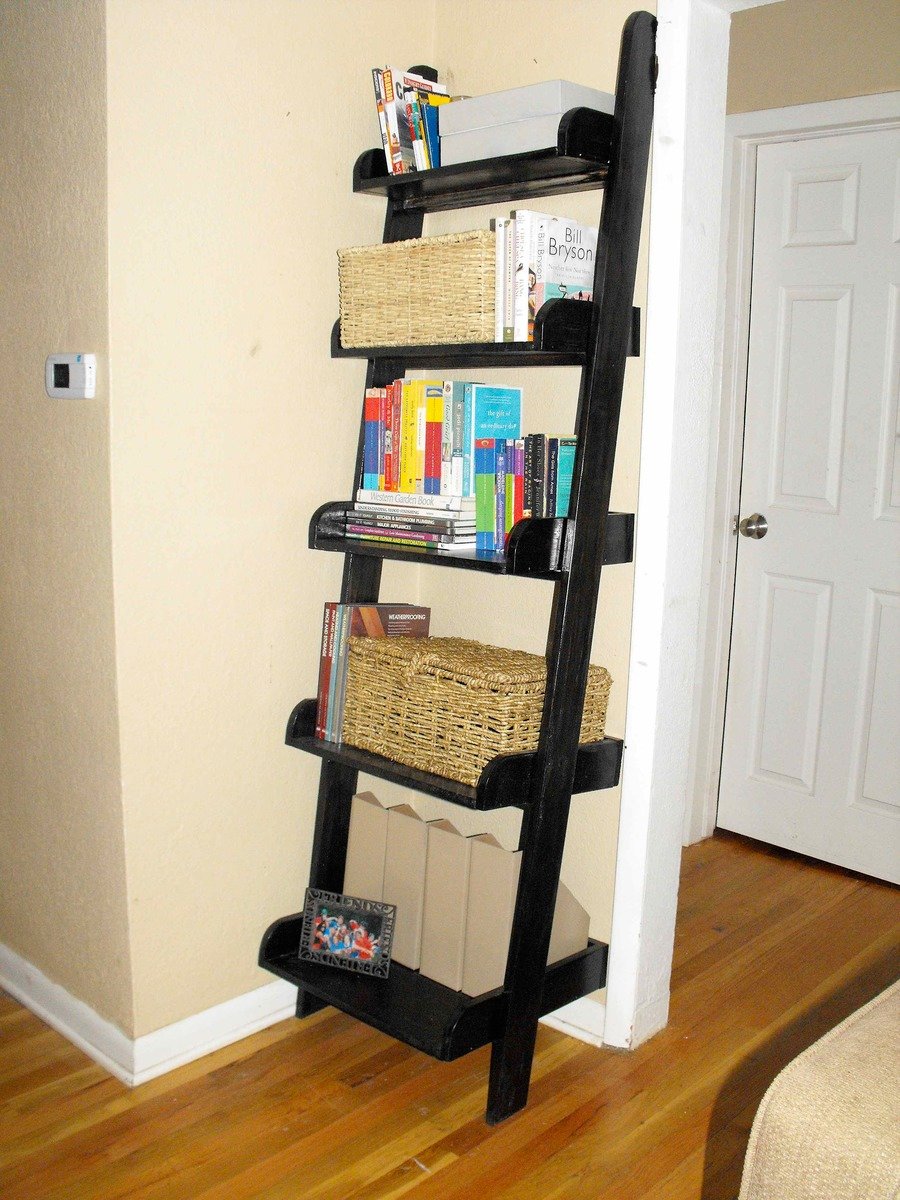
I was in Home Depot one day and found a large piece of MDF & straight 1x4 in the "scrap bin". Because my to-do list is longer than any christmas list, I knew I could find a use for it. I ended up buying a quality piece 1x4 for the legs. The remainder were scraps. My total cost of the wood for this project was approximately $20.
My living room space is narrow and awkward, so I subtracted 4 inches from every horizontal measurement. This plan was very easy to adapt for your space.
To round the edges, I traced with a circular piece of tupperware, cut with my jigsaw and sanded. To build, I used a nail gun and kreg jig on some parts. I also stained before putting it completely together.
I'm very happy with these plans and how the finished project fits right into my space. This project was easy to follow and easy to adapt. I would recommend it to anyone starting out
PS: I could use some help with my shelf styling. Recommendations welcome :)
Estimated Cost
20
Estimated Time Investment
An Hour or Two (0-2 Hours)
Finish Used
Miniwax early american (1st coat) and miniwax ebony (2nd coat)
Recommended Skill Level
Beginner
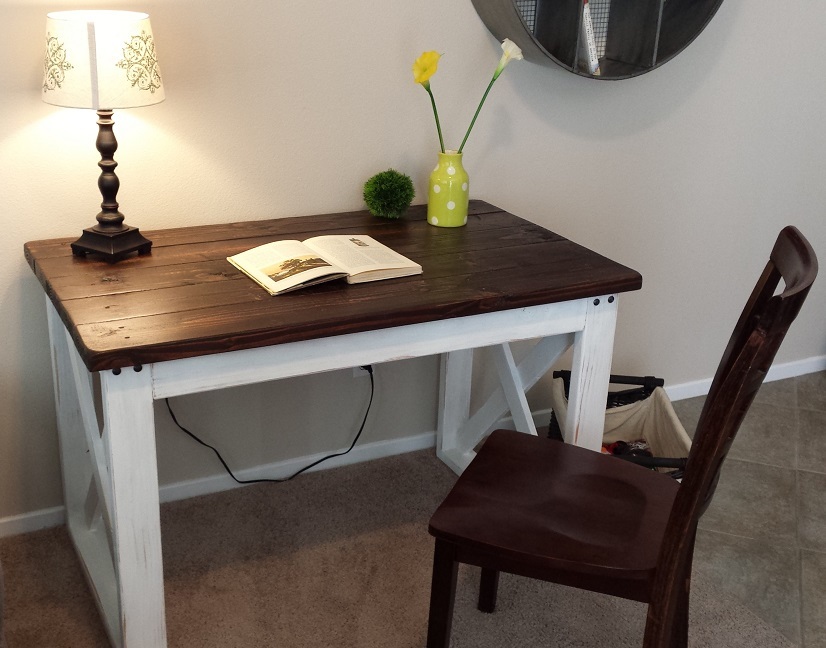
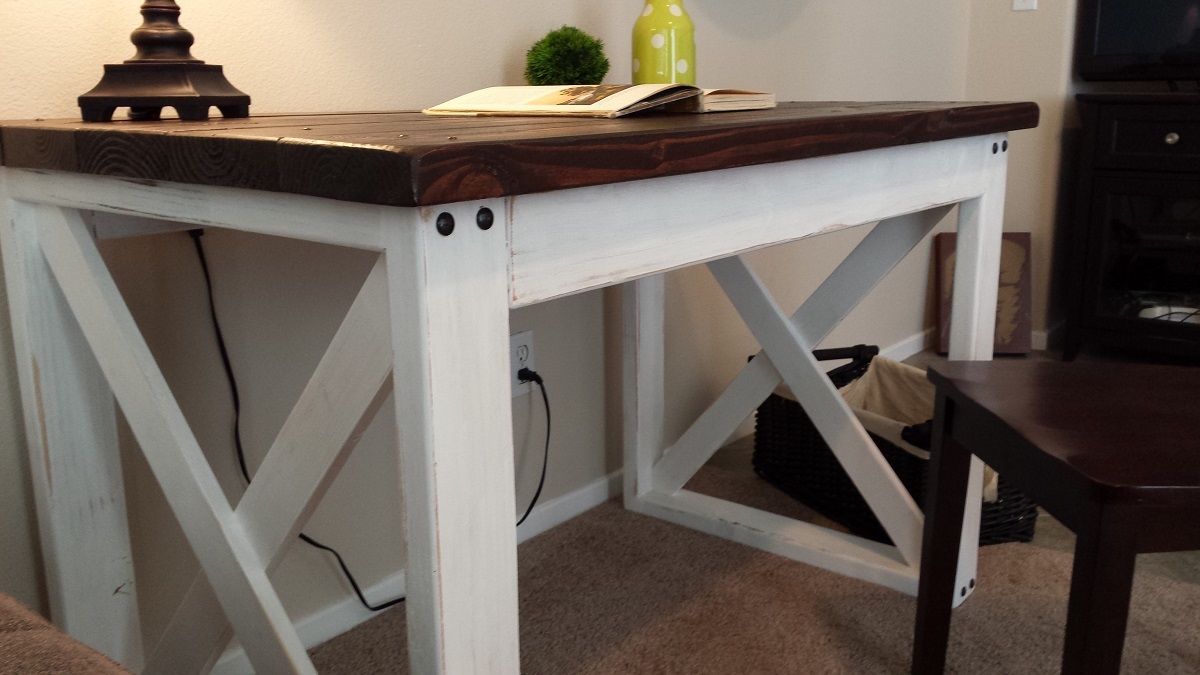
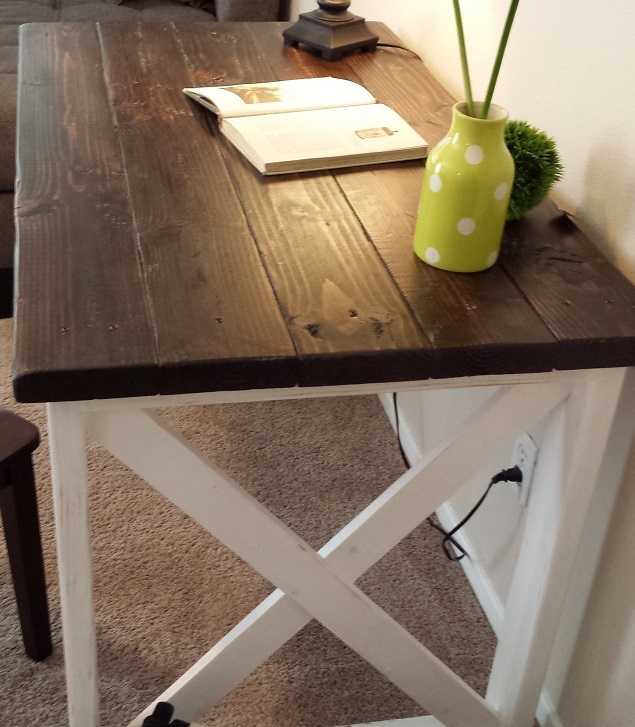
Fancy x farmhouse table... my version!
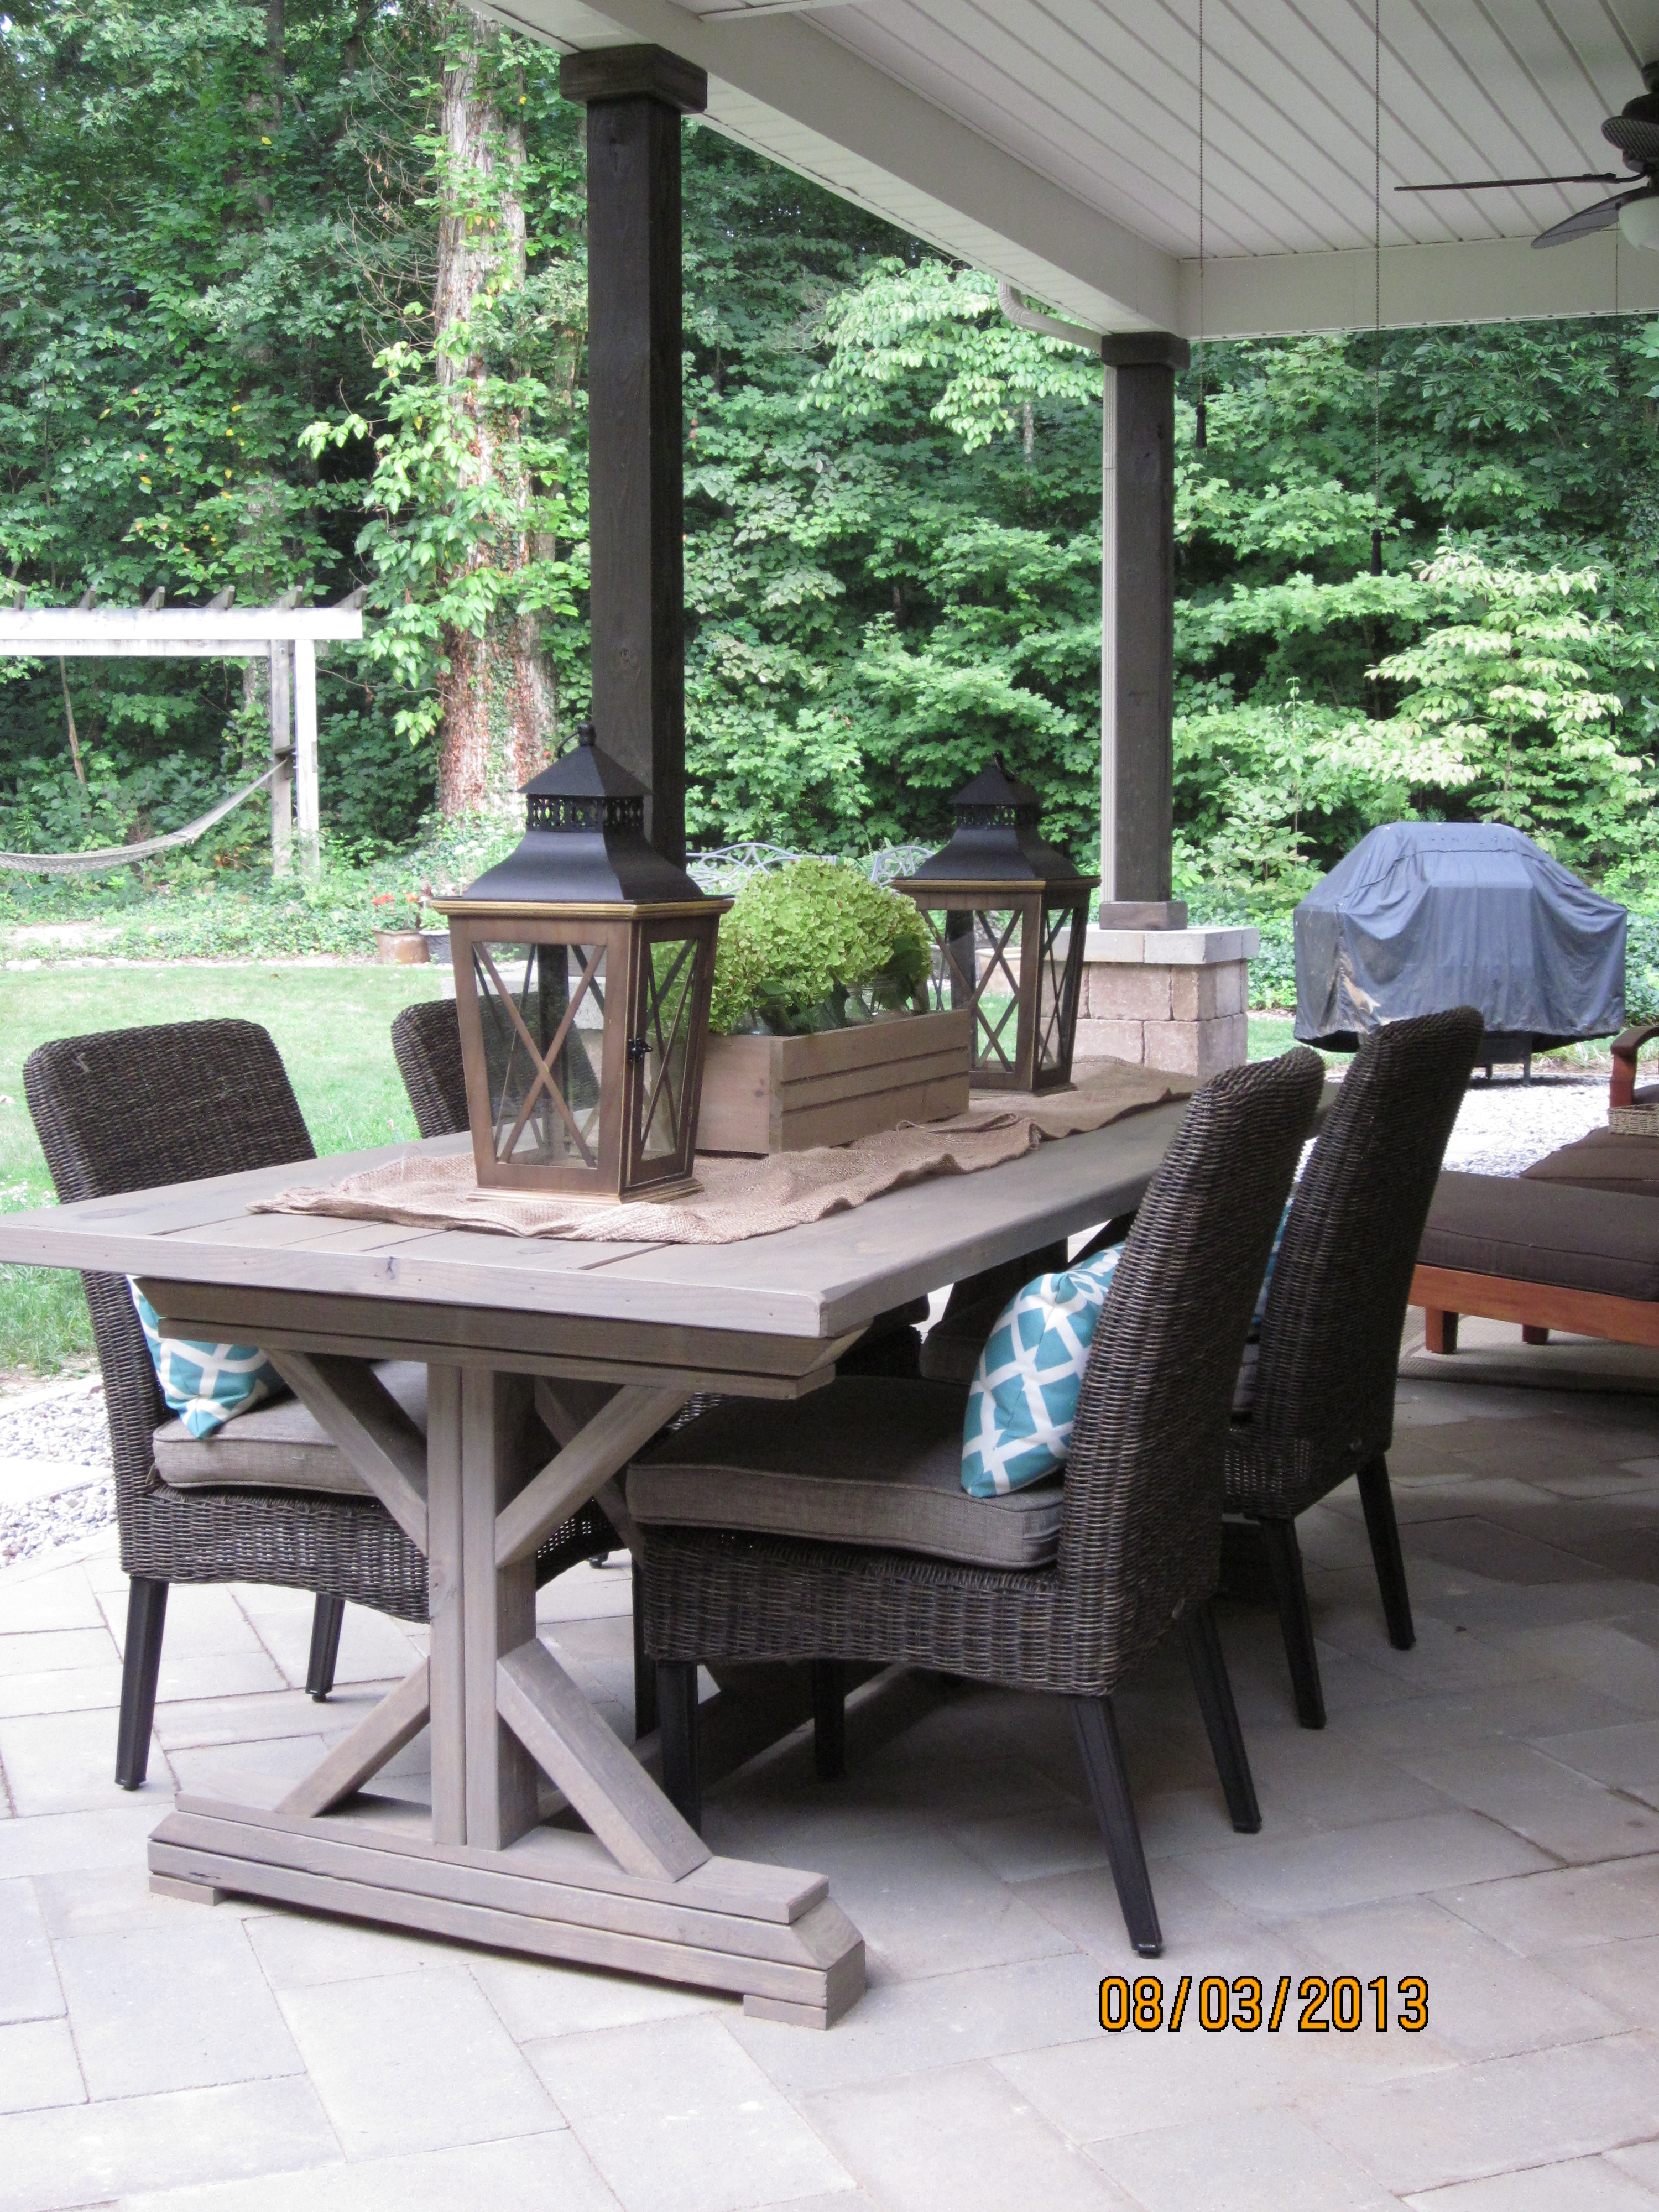
My version is a 7' table. I made the distance between legs 60" with a 8" overhang on each side. The stain is Olympic Driftwood. I also added 1 x 2 pcs on the ends for a more finished look & to secure the 2 x10's. One last thing, I used a router to round out all the outer edges of the table top and the legs.
Highly recommend....
I used some T braces/plates on the bottom of the table to connect legs with 60" pcs. Otherwise there is nothing to keep the legs square with the table.
Love the look...thanks so much for the plan!
Other notes: I used treated lumber so it's VERY heavy.
Built from Plan(s)
Estimated Cost
$130 ($100 lumber, $30 stain)
Estimated Time Investment
Day Project (6-9 Hours)
Finish Used
Olympic Driftwood
Recommended Skill Level
Intermediate
Comments
Sun, 08/04/2013 - 22:50
Very nice table
Your table turned out fantastic! Love the whole look on your patio too.
Sat, 08/30/2014 - 19:33
x farmhouse table
hi there..your table is great! can i ask if u think there is enough room at ends of table for a chair with the 8 inch overhangs that u did? i would like to do the same. thanks so much!!!
Tanya
Fancy X Farmhouse Bench

A lot of time and planning when into making this bench! Love how it turned out
Built from Plan(s)
Estimated Time Investment
Weekend Project (10-20 Hours)
Recommended Skill Level
Beginner
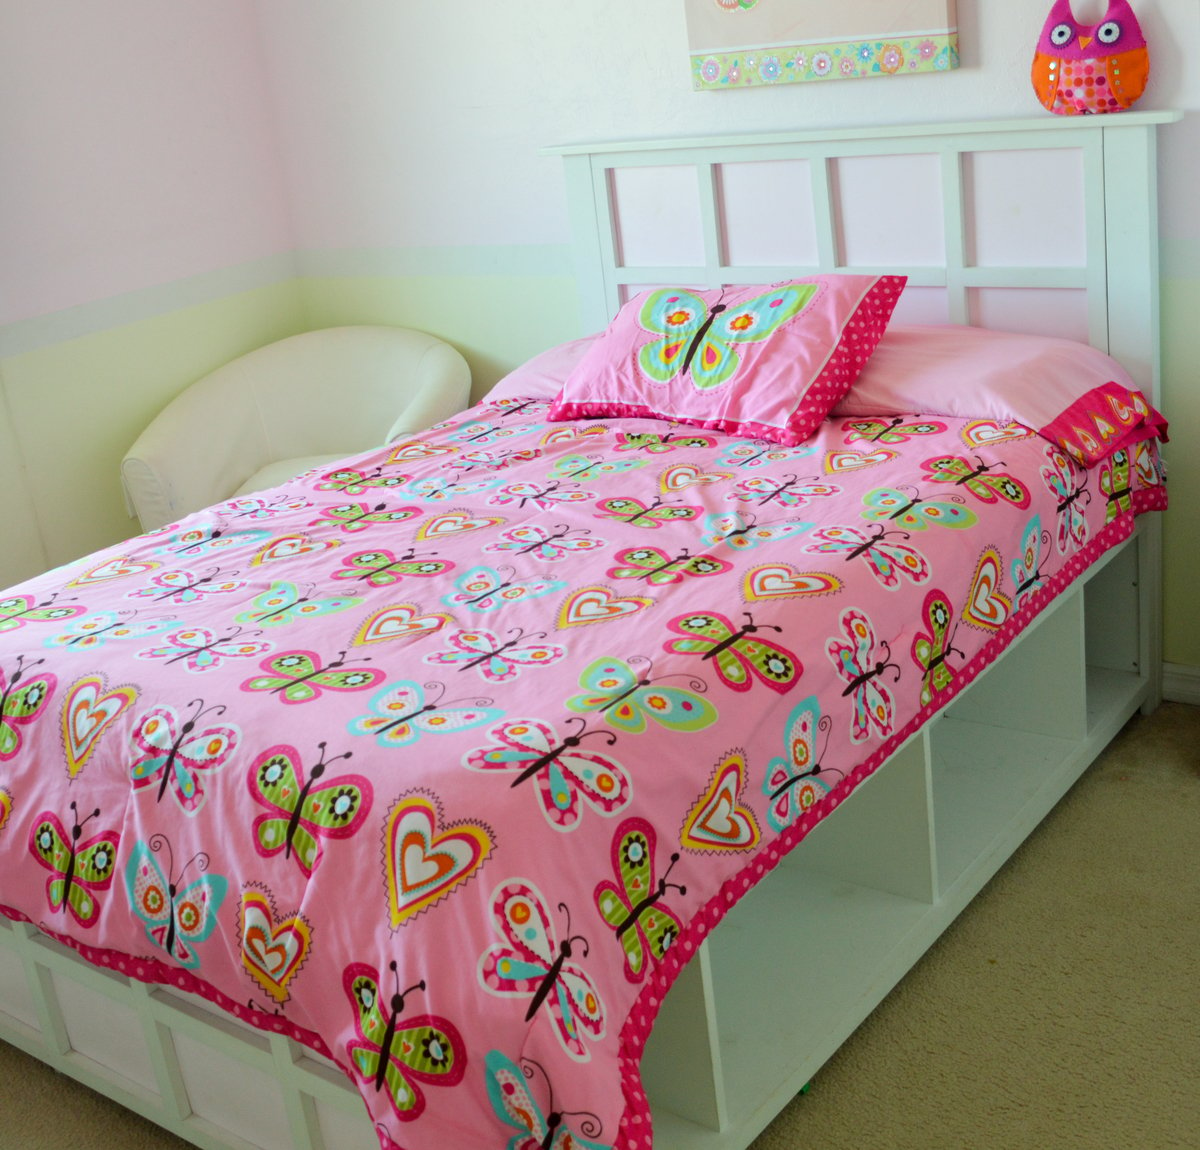
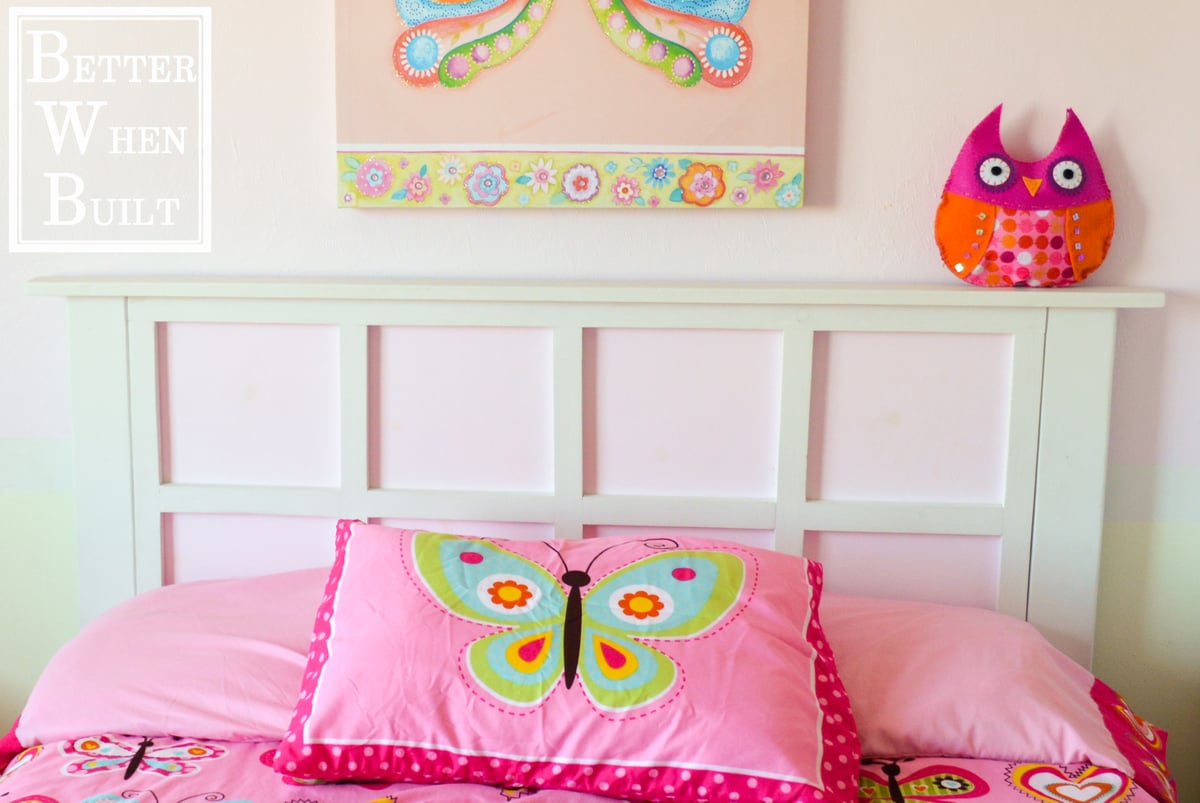
Modern Farmhouse Bed
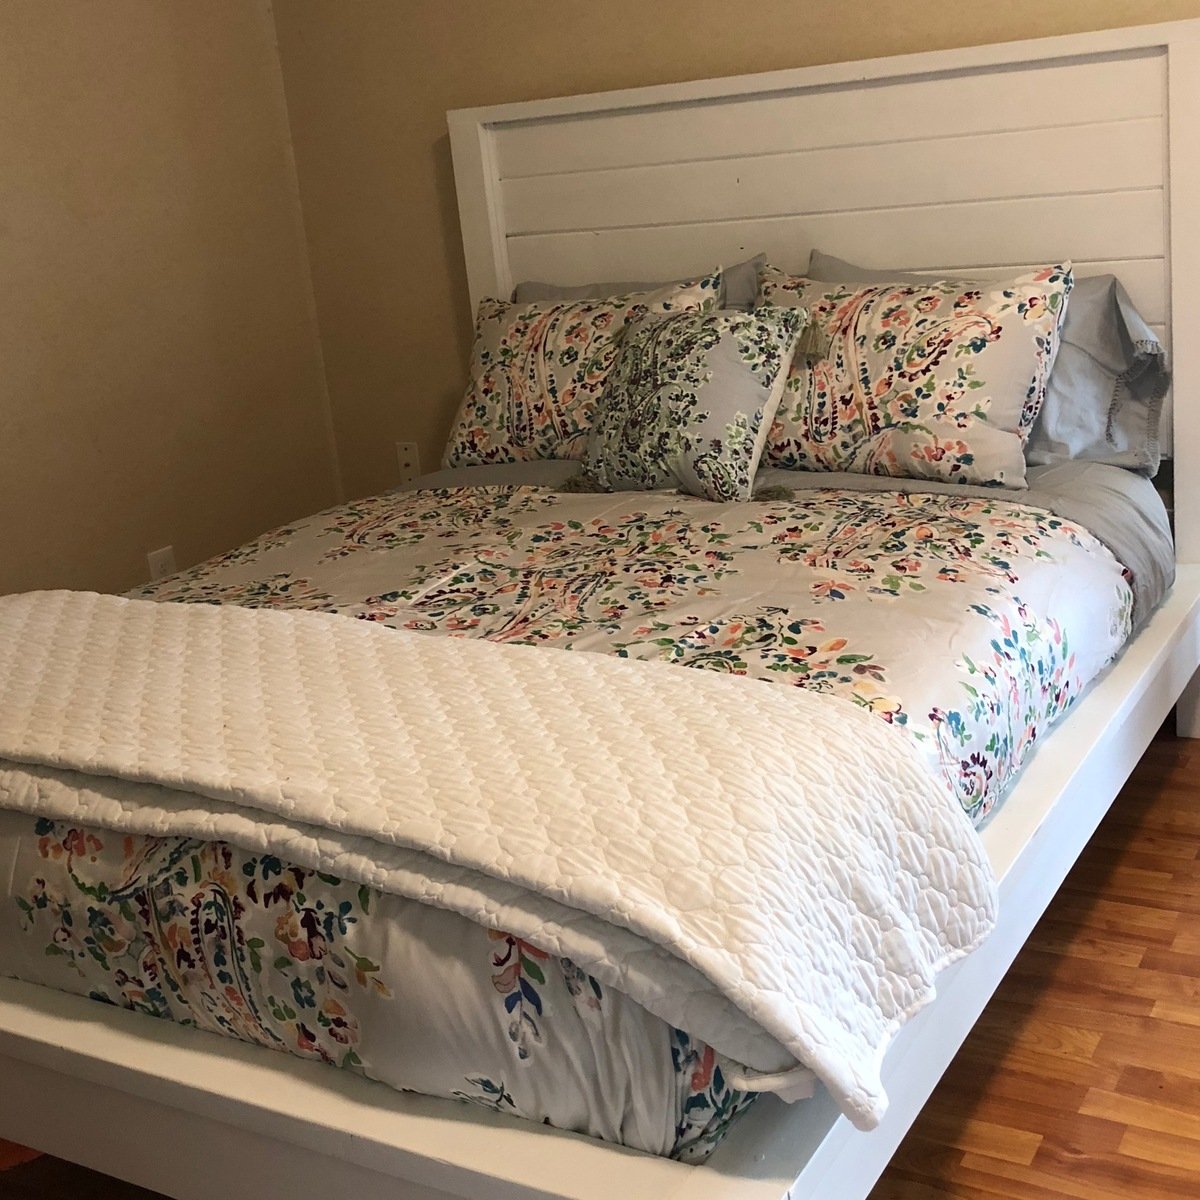
I wish I could get a better picture, but the bed is in an odd-shaped space and I can't back up enough to get a full picture. We used Fusion Mineral Paint to finish it. I love that paint, no need to prime OR add a protective finish! After it fully cured, this paint is so durable, and marks easily wash off.
This was our first build ever, and the plans were very easy to follow. We had it built in one day, and painted in the next. Definitely gave us confidence to continue on to other projects!
Built from Plan(s)
Estimated Cost
$100 in wood, $40 in paint
Estimated Time Investment
Weekend Project (10-20 Hours)
Finish Used
Fusion Mineral Paint in "Picket Fence"
Recommended Skill Level
Beginner
Outdoor Sofa
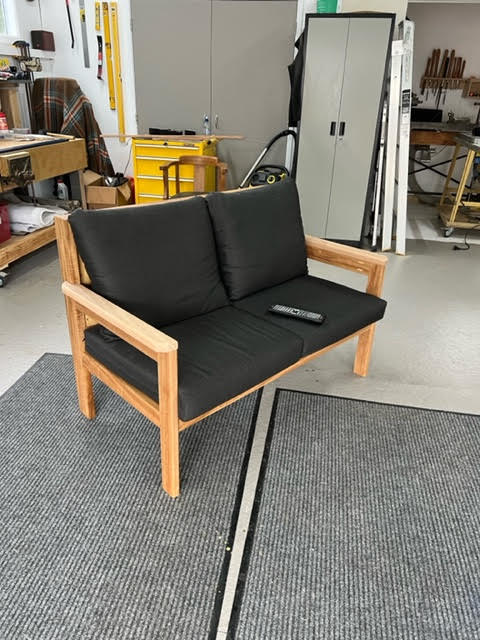
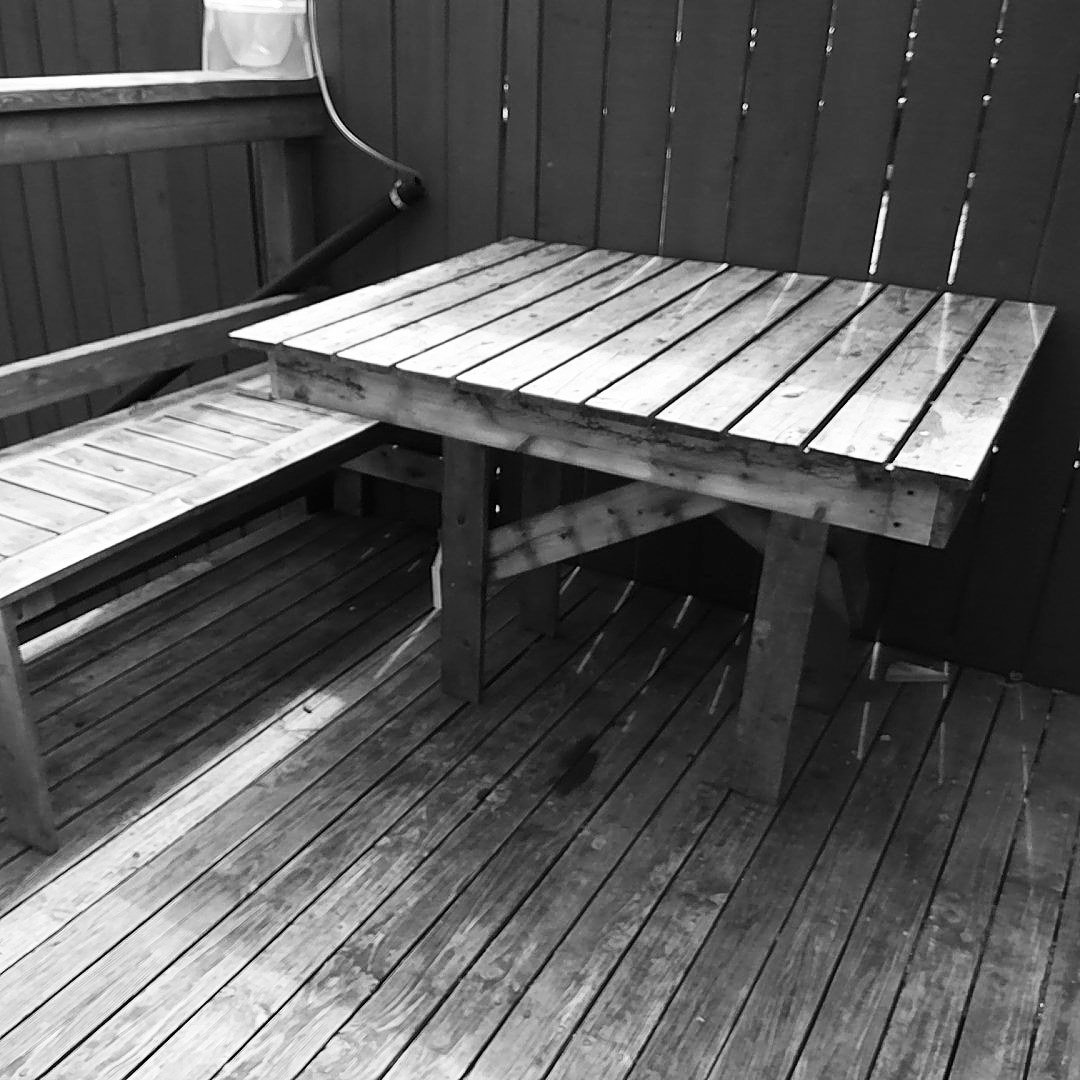
Two seater couch inspired by your web site . I have altered the design a little and added an ottoman . Built from Australian Eucalypt . Nicknamed Blackbutt Gum . It’s a hardwood but finishes very nice , sanded with 240 grit , varnished with marine grade diluted 10% with turps . Look forward to your weekly plans they inspire me to build projects and give me lots of ideas .
by Richard
Northland
New Zealand
Built from Plan(s)
Tryde Side Tables
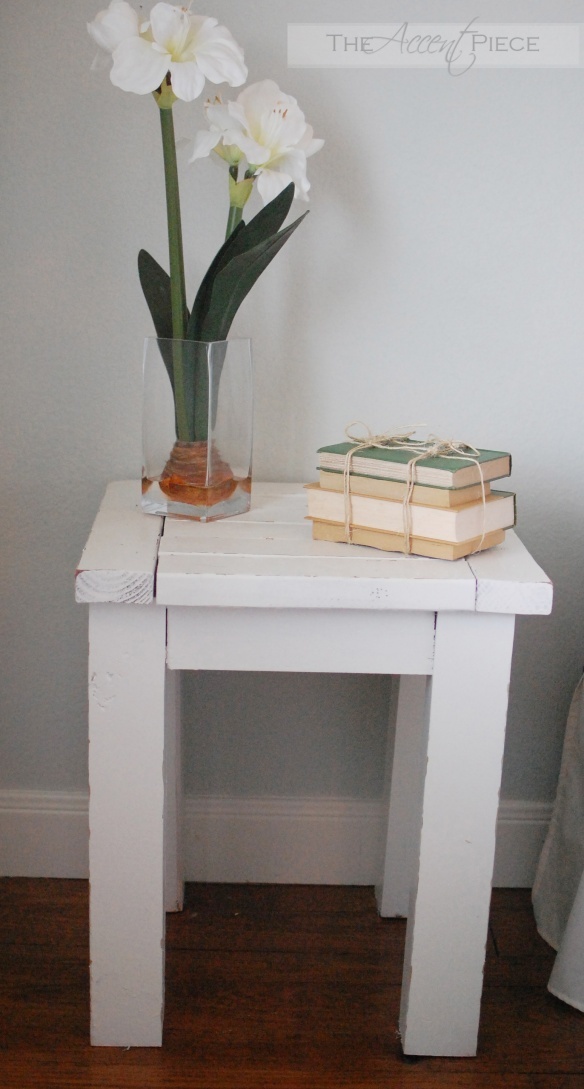
Made these for my guest bedroom!

Built from Plan(s)
Estimated Time Investment
Day Project (6-9 Hours)
Recommended Skill Level
Beginner
Comments
Thu, 06/30/2011 - 08:04
They came out great, and your
They came out great, and your guest room looks LOVELY!!
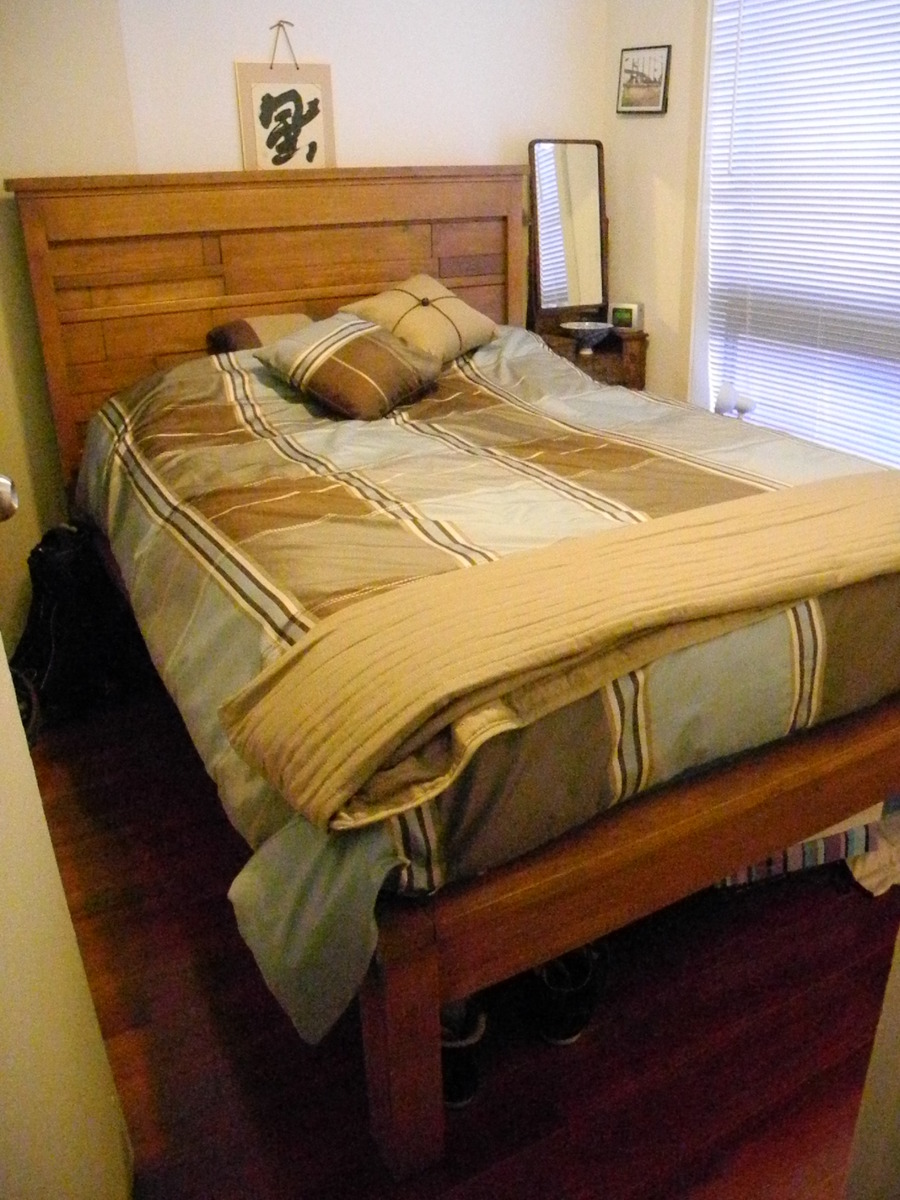
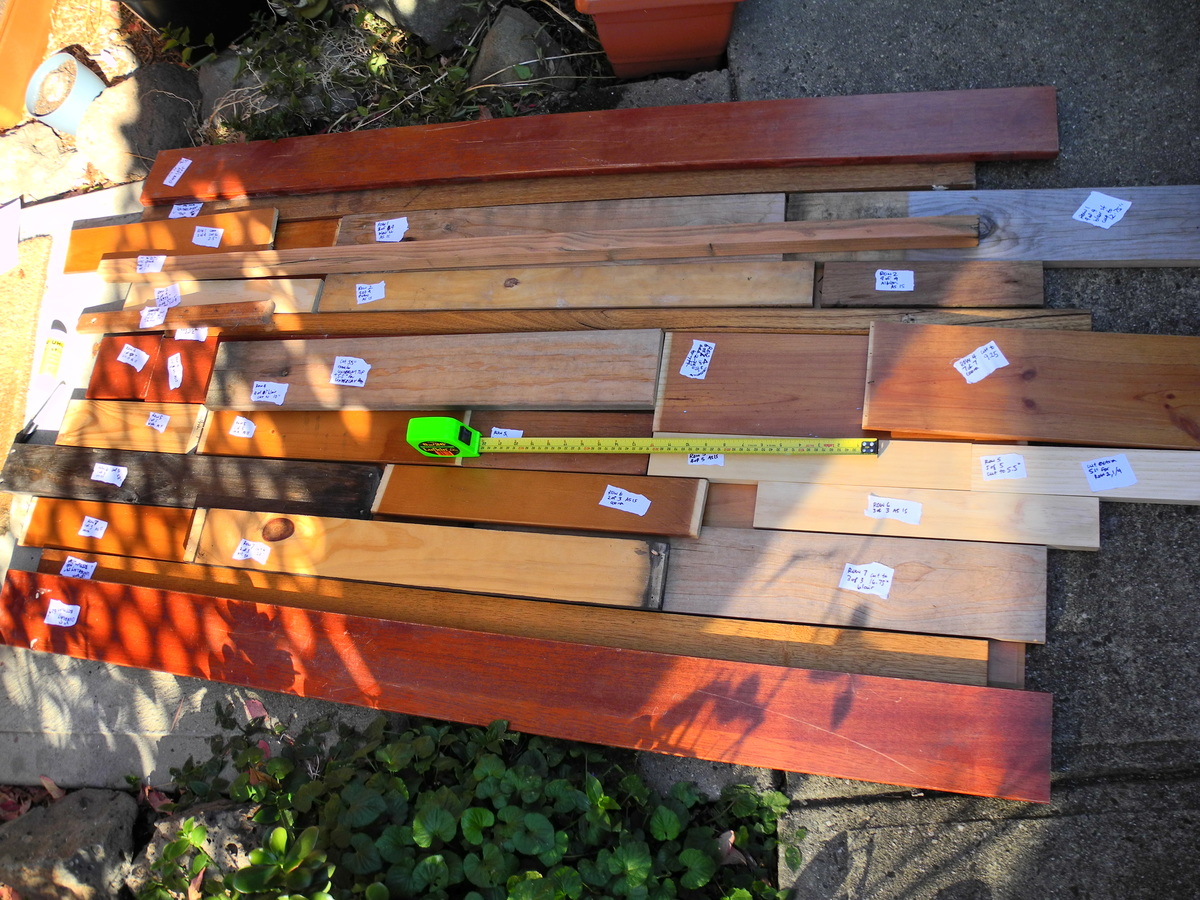
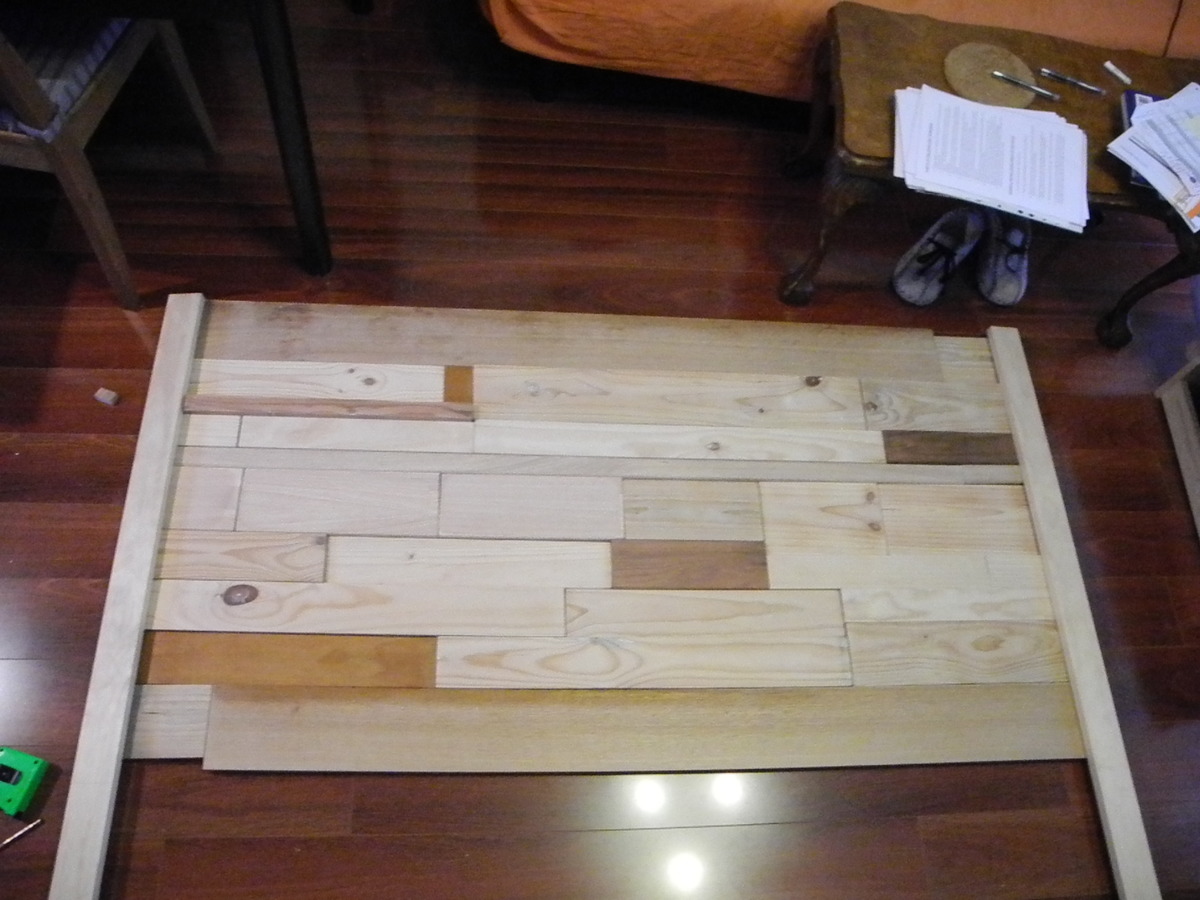
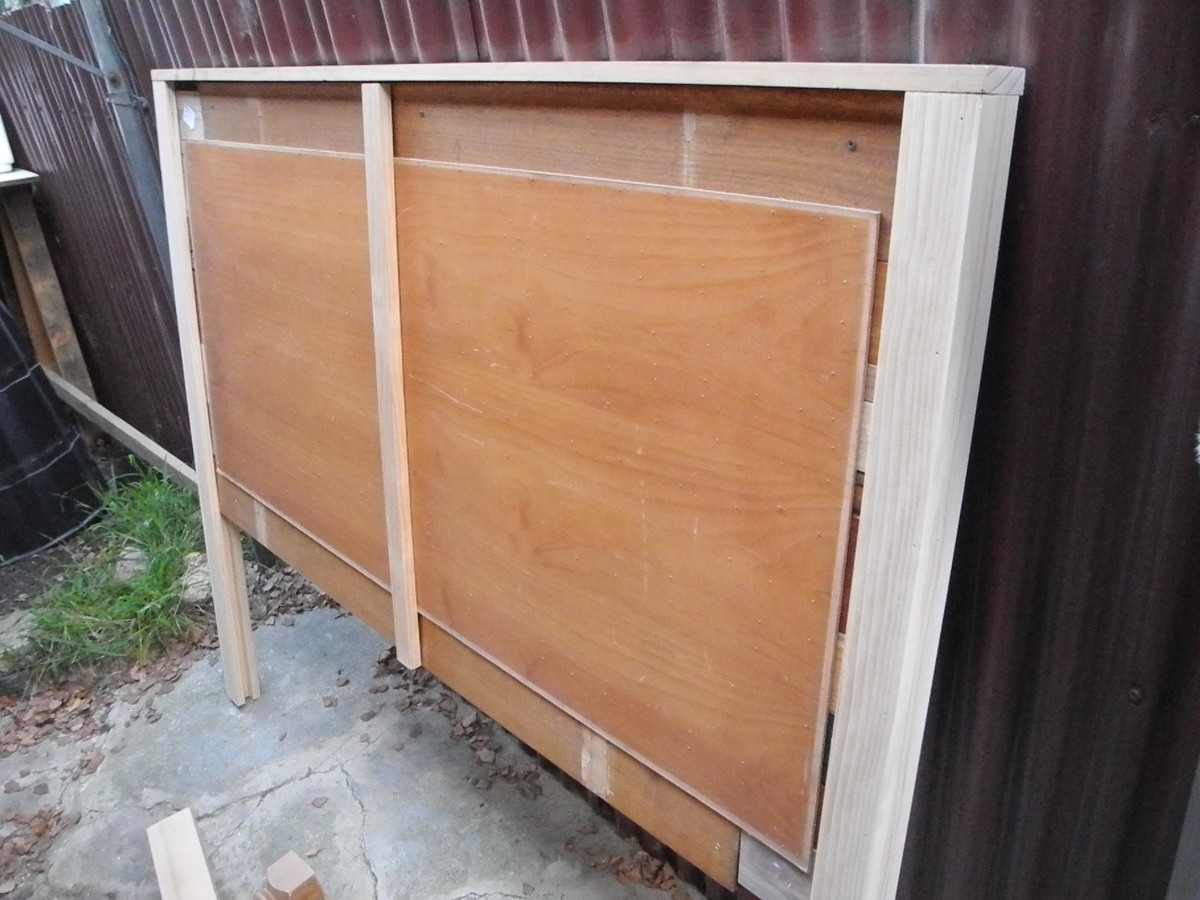
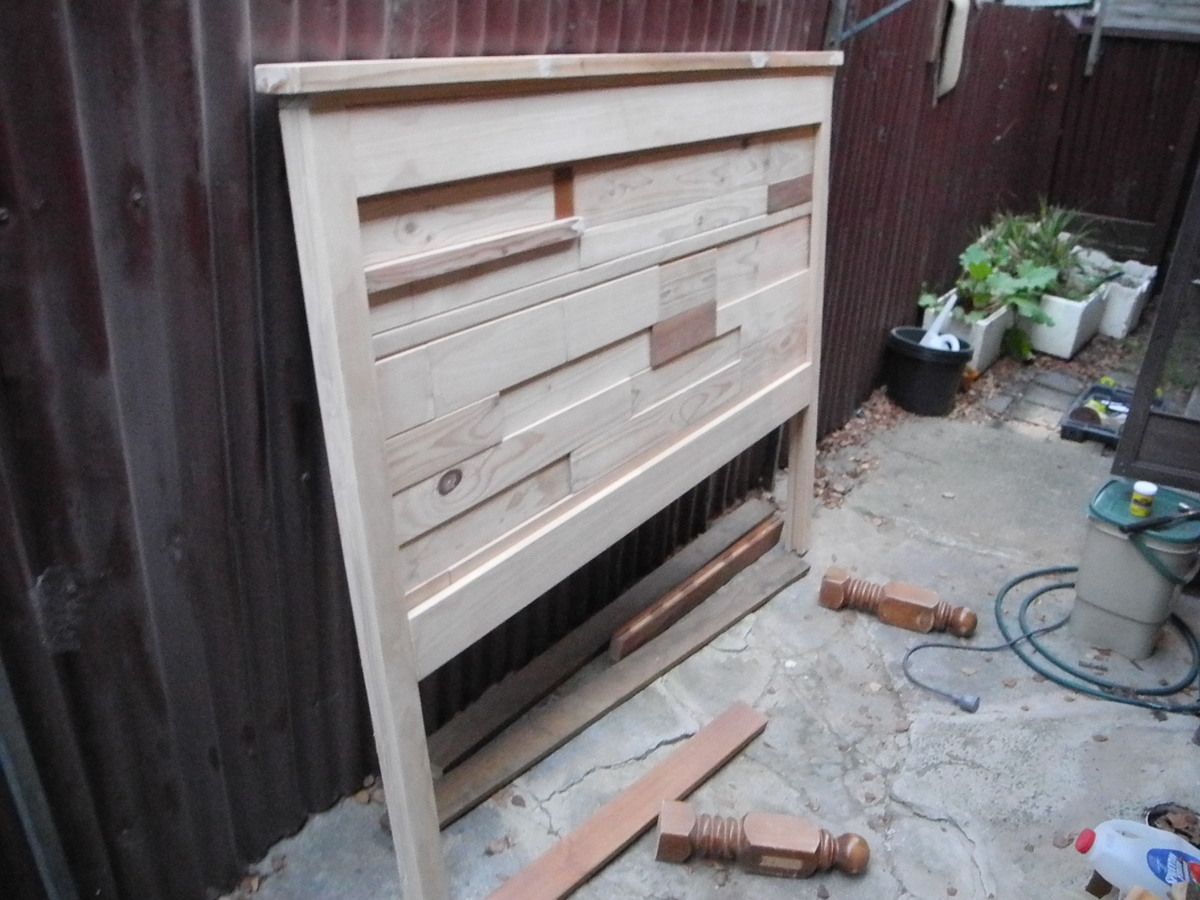
Patchwork Reclaimed Wood Headboard
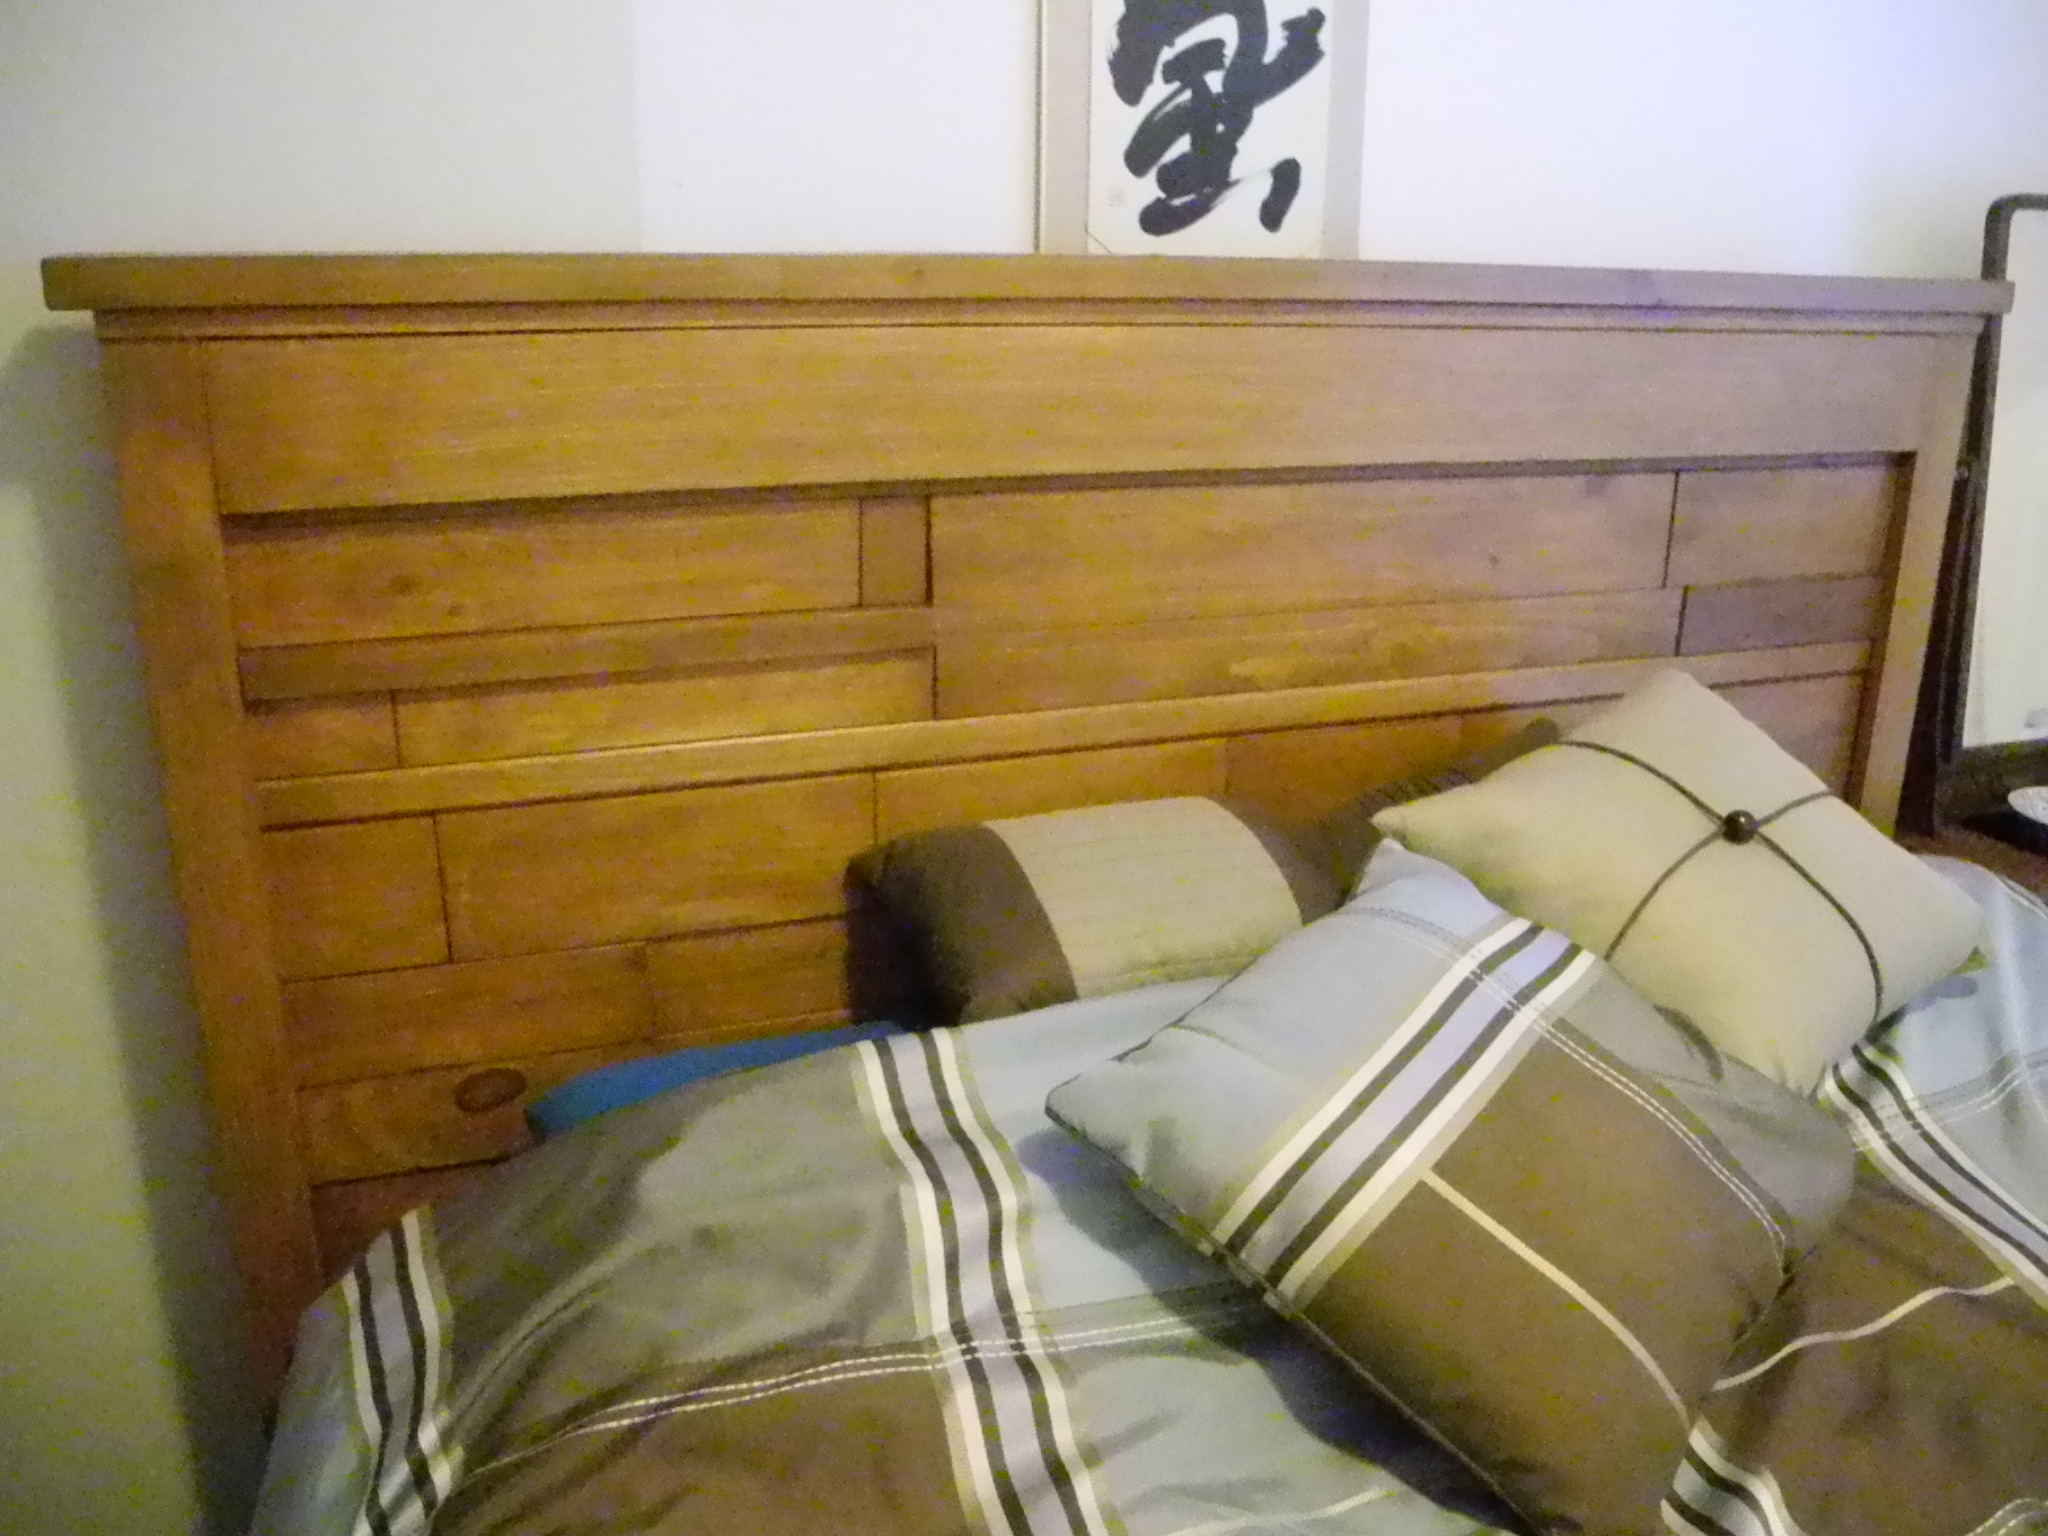
I used the Reclaimed Wood Look Headboard plans to make a headboard out of found, discarded wood. The only new wood is the vertical 1x3s and 1x2s that form the sides of the headboard. The bed is also made of reclaimed wood, using a modified version of the Hailey Platform Bed plans.
The plans are modified to create a patchwork look using scraps of wood in different sizes and thicknesses. The wood scraps were cut so that when put together they make up the total length and width of the horizontal planks in the plans. I glued and nailed all the patchwork pieces to a piece of MDF board I found, and added a vertical 1x2 for added support down the middle of the back.
The top 2x4 is made up of two pieces glued end-to-end with dowels in between, because I didn't find any long 2x4s I could reclaim. I didn't put the top and bottom trim on the back side, because it was already quite heavy and sturdy.
Built from Plan(s)
Estimated Cost
30
Estimated Time Investment
Weekend Project (10-20 Hours)
Finish Used
The original finishes have been sanded off and the wood sanded to 240 grit before assembly. The finish is two coats of Cabot's water-based stain and varnish in Sutherland Teak, applied with a varnish brush and then re-brushed with a dry brush to remove the excess.
The sanding took a long time - it would have been a shorter project if I left the original finishes.
The sanding took a long time - it would have been a shorter project if I left the original finishes.
Recommended Skill Level
Starter Project
Comments
Tue, 08/06/2013 - 06:44
It was worth the sanding
This piece is beautiful. I think it was worth the sanding.
Storage Bed
My daughter needed a new bed and I really liked Ana's Hailey Storage Bed plans. I adjusted Ana's plans to fit a full size bed and I also made a different headboard and footboard. To see how I made the headboard and footboard follow the links below:
Built from Plan(s)
Estimated Time Investment
Weekend Project (10-20 Hours)
Recommended Skill Level
Beginner
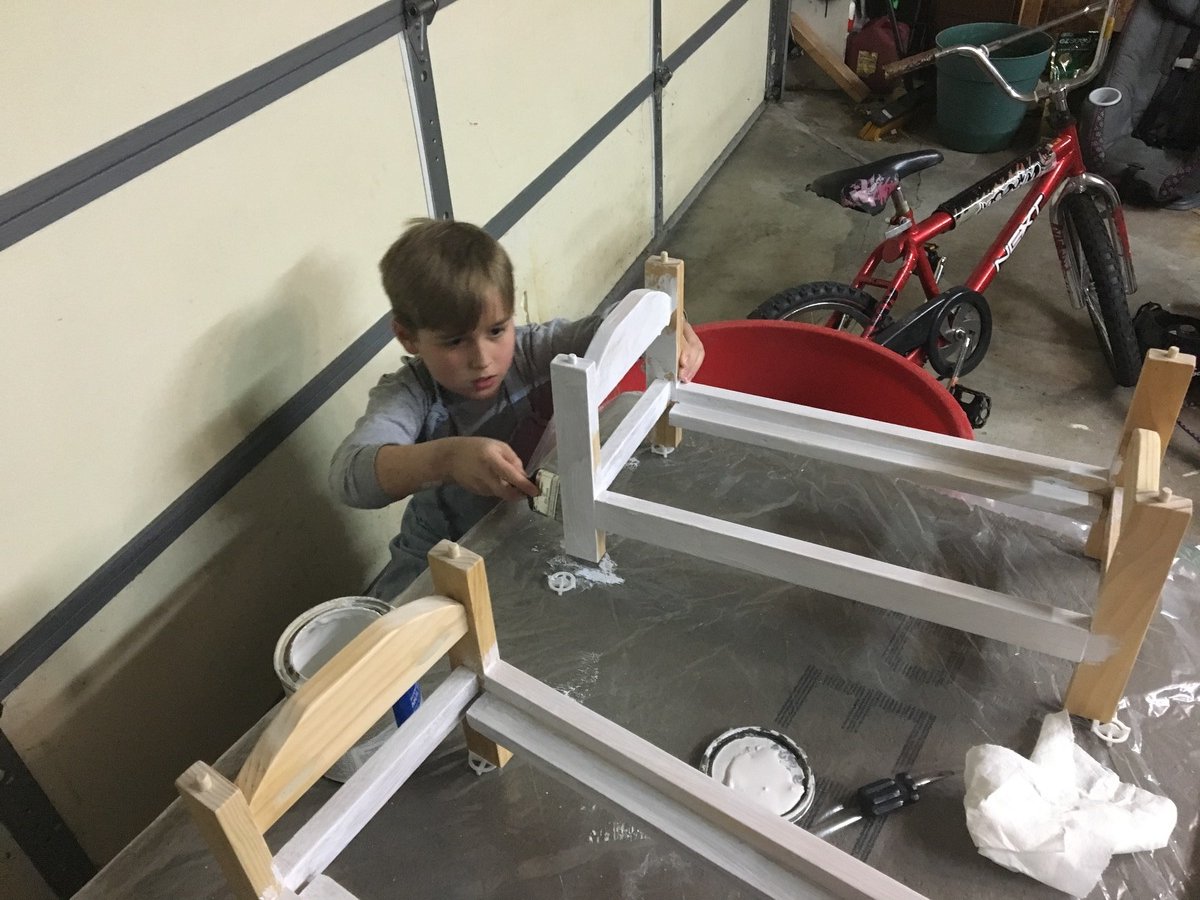
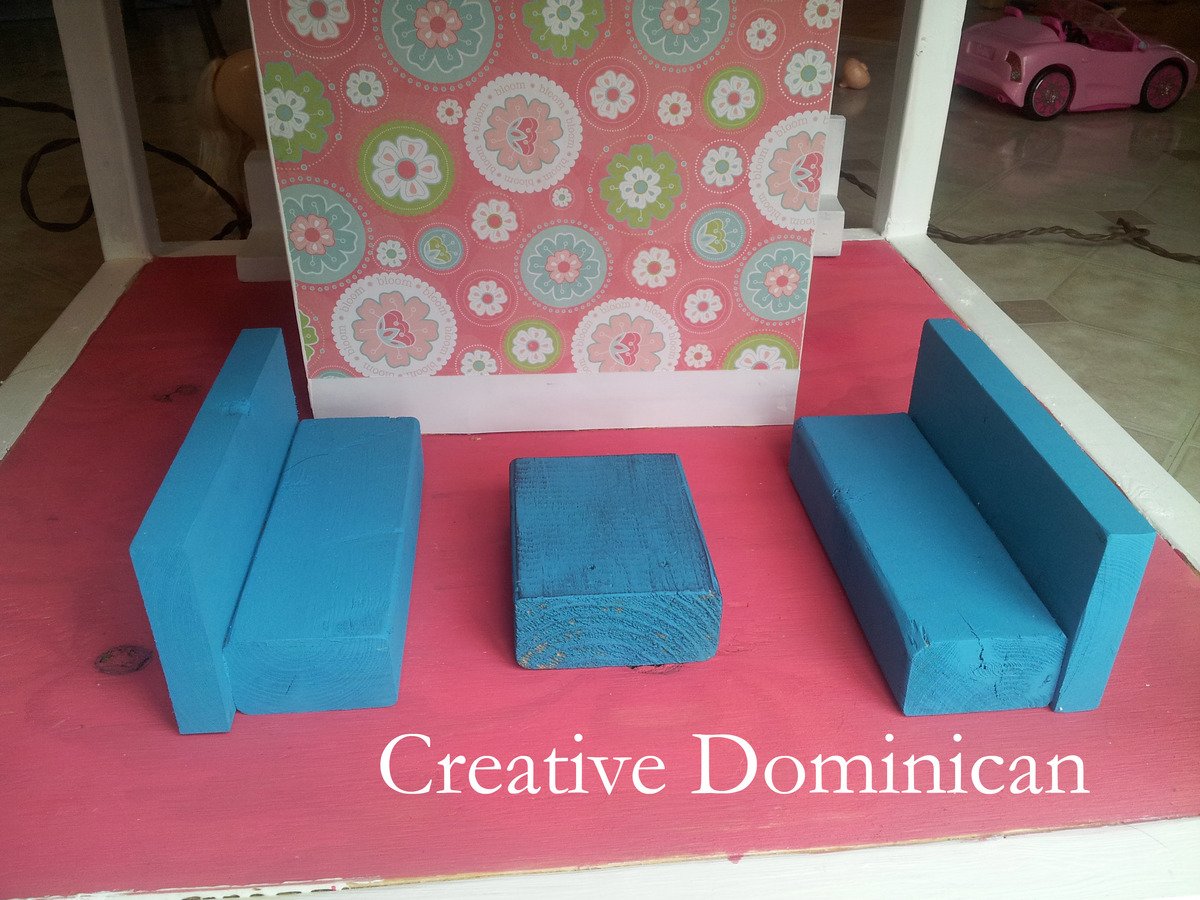
Bunkable Doll Beds
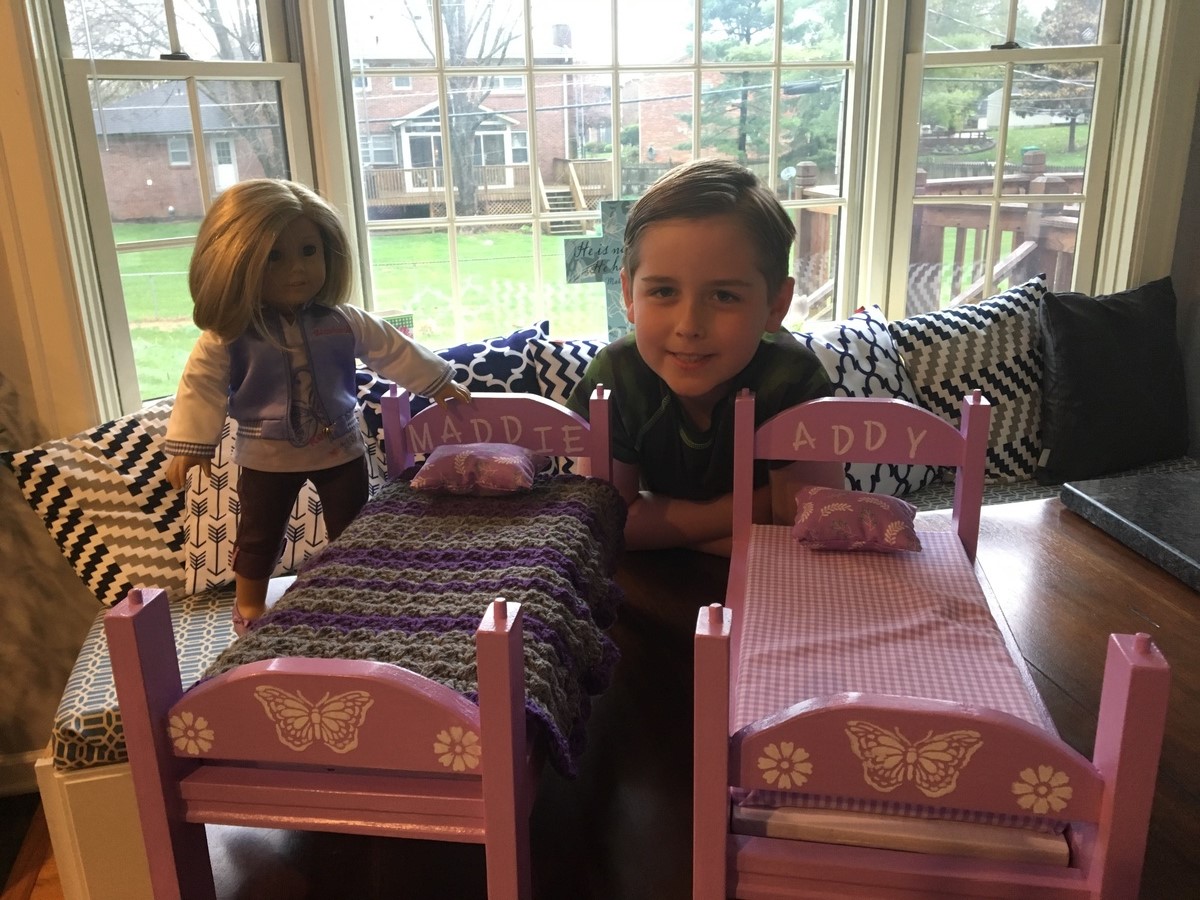
My son and I made these beds for a couple of his friends. We made them so that if they were ever together, they could bunk them up for their dolls. I had a great time working with him and incorporating his ideas into the project. He is very excited to give them the doll beds. http://www.ana-white.com/2012/12/plans/kid039s-kit-doll-bed
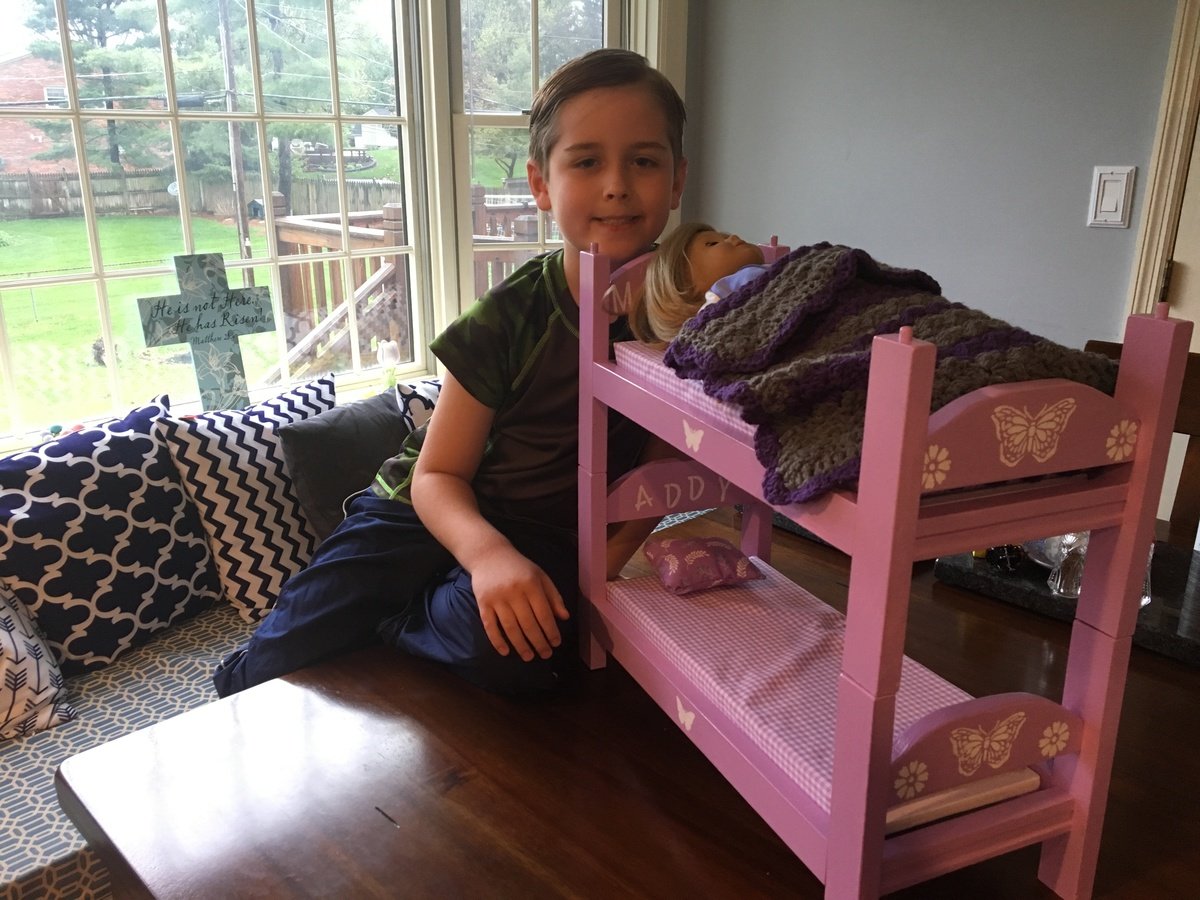
Built from Plan(s)
Estimated Cost
$10 each
Estimated Time Investment
Day Project (6-9 Hours)
Finish Used
Paint and Poly
Recommended Skill Level
Starter Project
Flat Wall Bookholders - Small Size

We really needed a place to organize my daughters books in the living room. These were fairly easy to make - my husband built them and I did the finishing.
I HIGHLY recommend the water-based poly. It is almost twice as expensive but it isn't near as smelly and it has a much lower VOC level.

Estimated Cost
approx $10 for both (not including paint & poly)
Estimated Time Investment
Afternoon Project (3-6 Hours)
Finish Used
Black flat paint (2 coats) and Water-based Poly (2 coats).
We used black paint because I found a $5 gallon at HD from the discount shelf. I couldn't resist saving a ton of money and not having to pick a color and then wait around for a can to be mixed.
We used black paint because I found a $5 gallon at HD from the discount shelf. I couldn't resist saving a ton of money and not having to pick a color and then wait around for a can to be mixed.
Recommended Skill Level
Starter Project
DIY Dollhouse
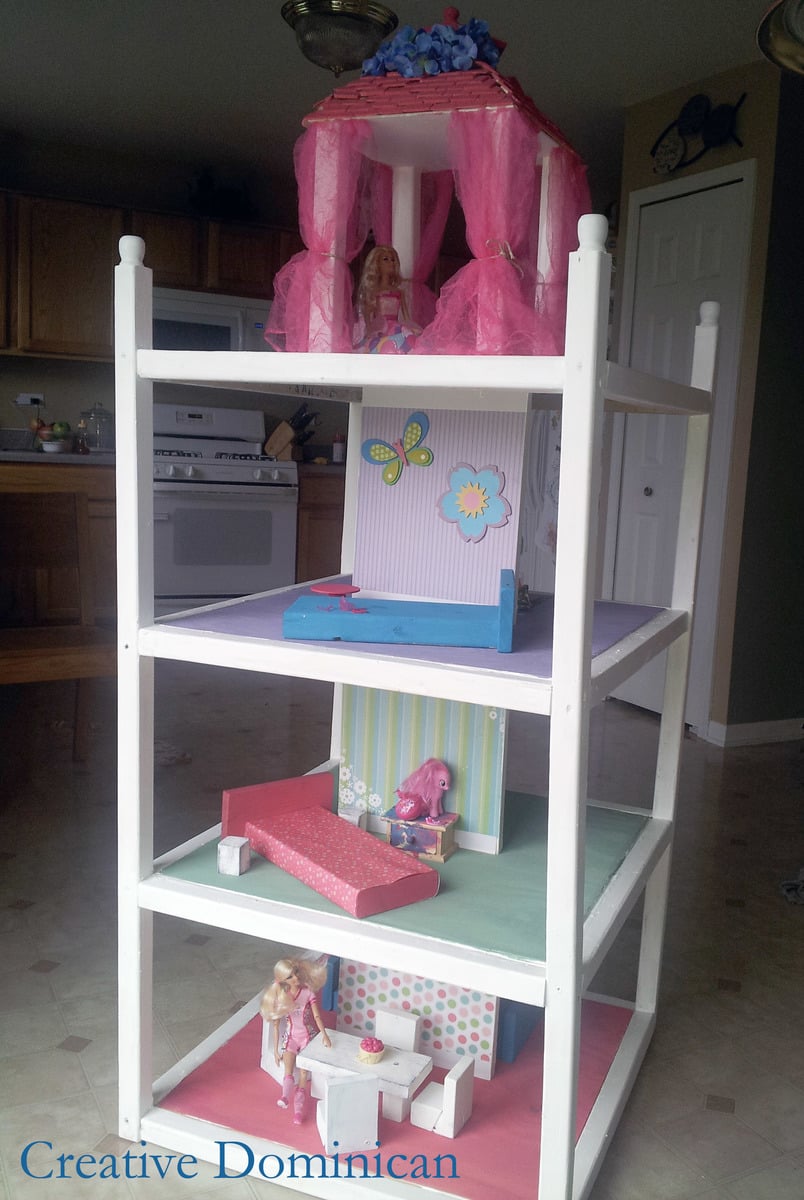
When my daughter asked for a dollhouse for her 3rd party I decided to just make her one and this Dream House plan was just perfect. I got a little carried away and added an extra floor. I also made some furniture out of scrap wood and I plan to add an elevator. This was a very fun project and my little one is already making requests for more furniture, pillows, blankets and a TV and video game room for the house.
I only spend about $50 total but that was using the cheapest wood I could find. The floors were made using plywood that was pre-cut at 24" x 24" . This project was a big hit with my little one. Thanks for the plans Ana.
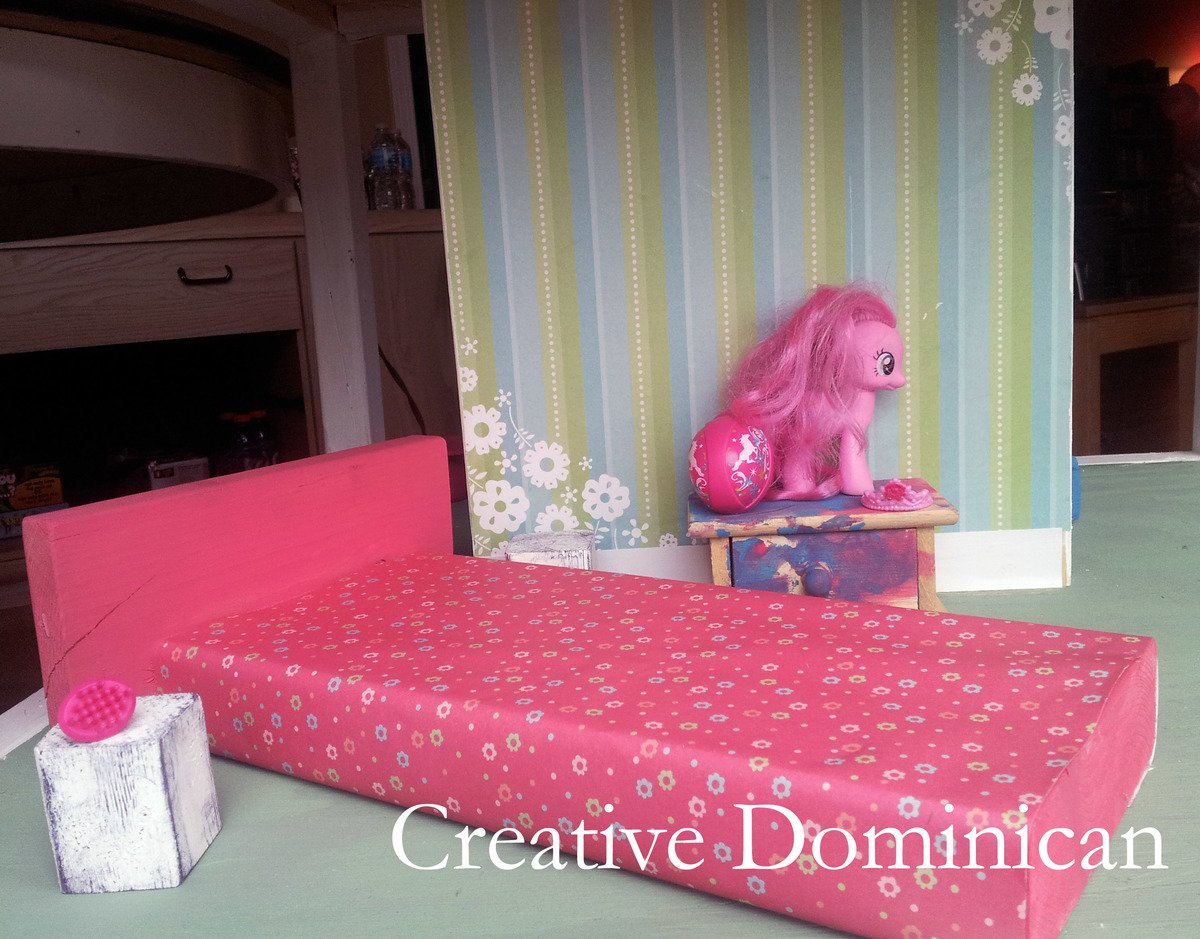
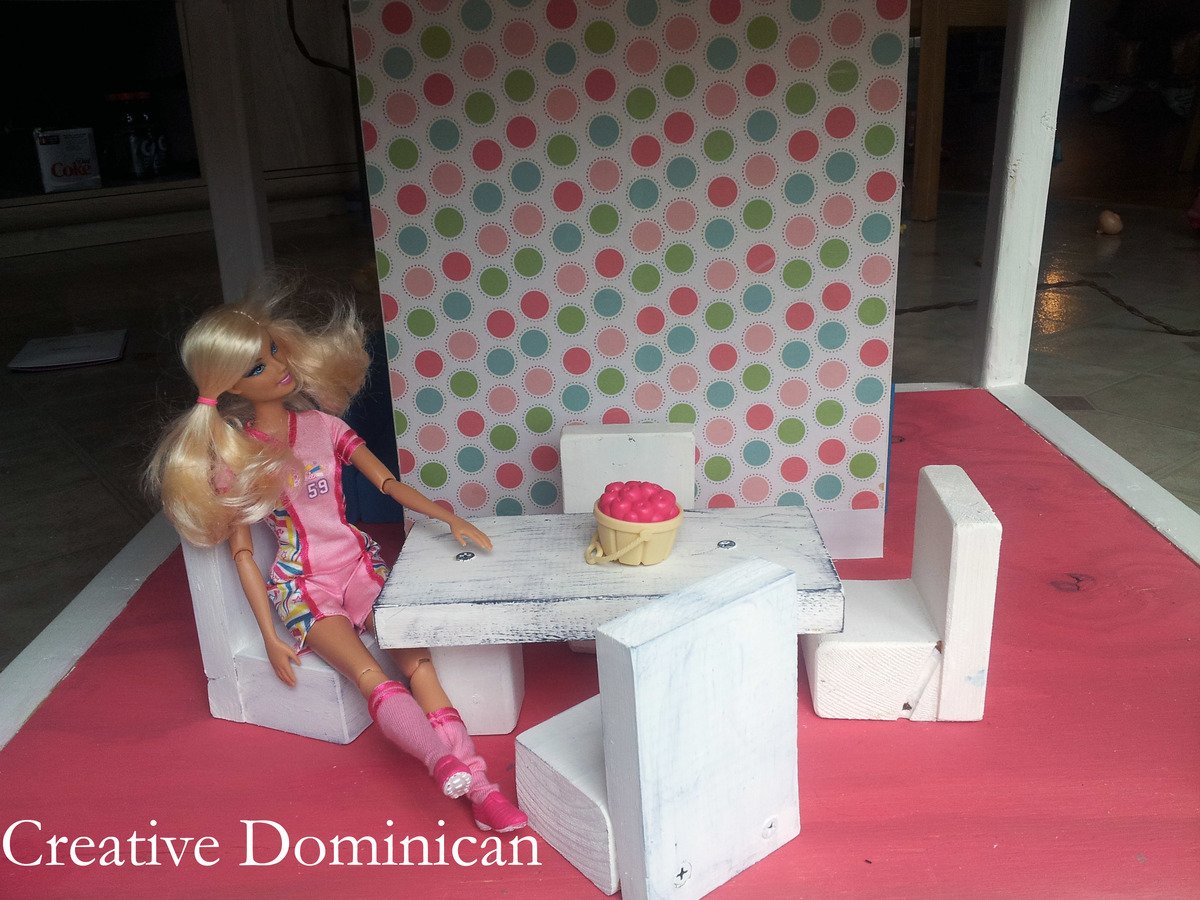
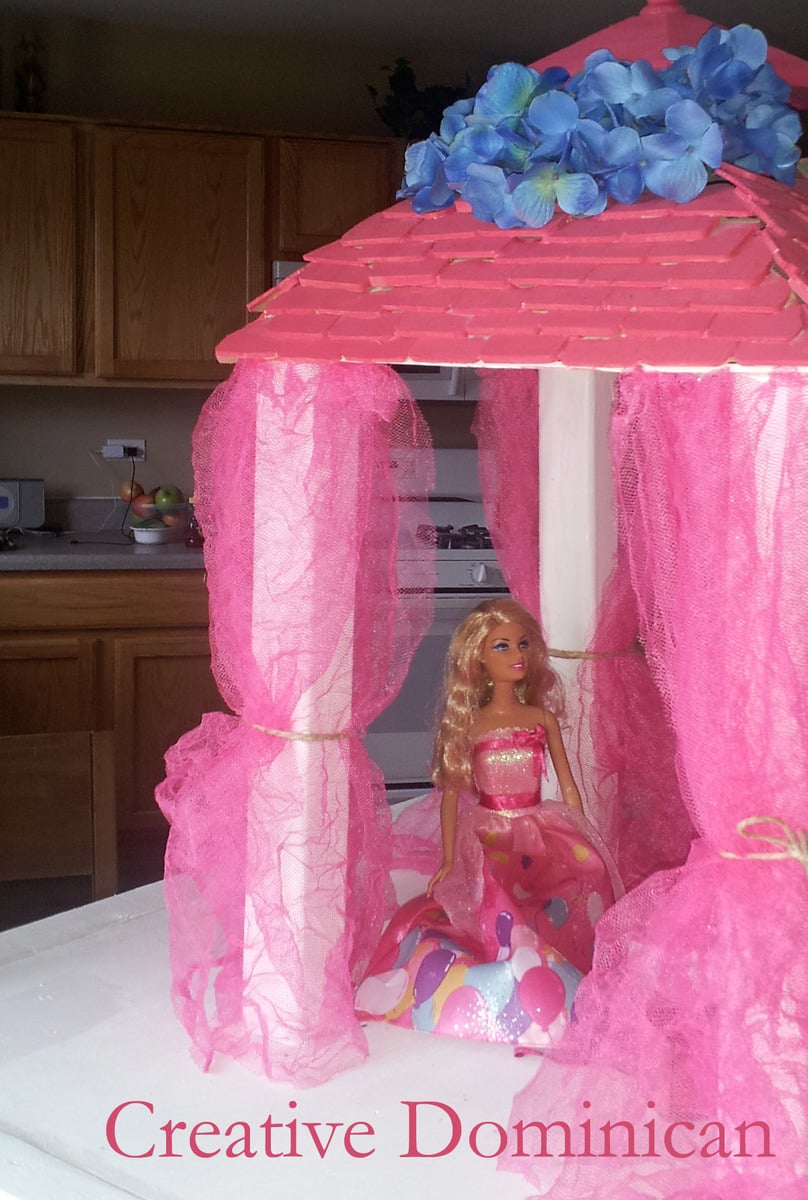
Built from Plan(s)
Estimated Time Investment
Weekend Project (10-20 Hours)
Recommended Skill Level
Beginner
My First Build - Thank you for the great plan!
My first build using plans through this blog. This project took me about four hours total and cost about 40$ with wood, paint, stain, and hardware.
Estimated Cost
$25 for the wood and an extra $15 dollars for paint, stain, and hardware.
Estimated Time Investment
Afternoon Project (3-6 Hours)
Finish Used
Kona finish from MinWax.
Recommended Skill Level
Beginner
Comments
Small table
I found the table to be pretty wobbly so I reinforced it with some triangulation and I moved all the legs into the centre so the triangulation wouldn't get in the way of people sitting on all sides.

Built from Plan(s)
Recommended Skill Level
Beginner
Banquette Style Bench
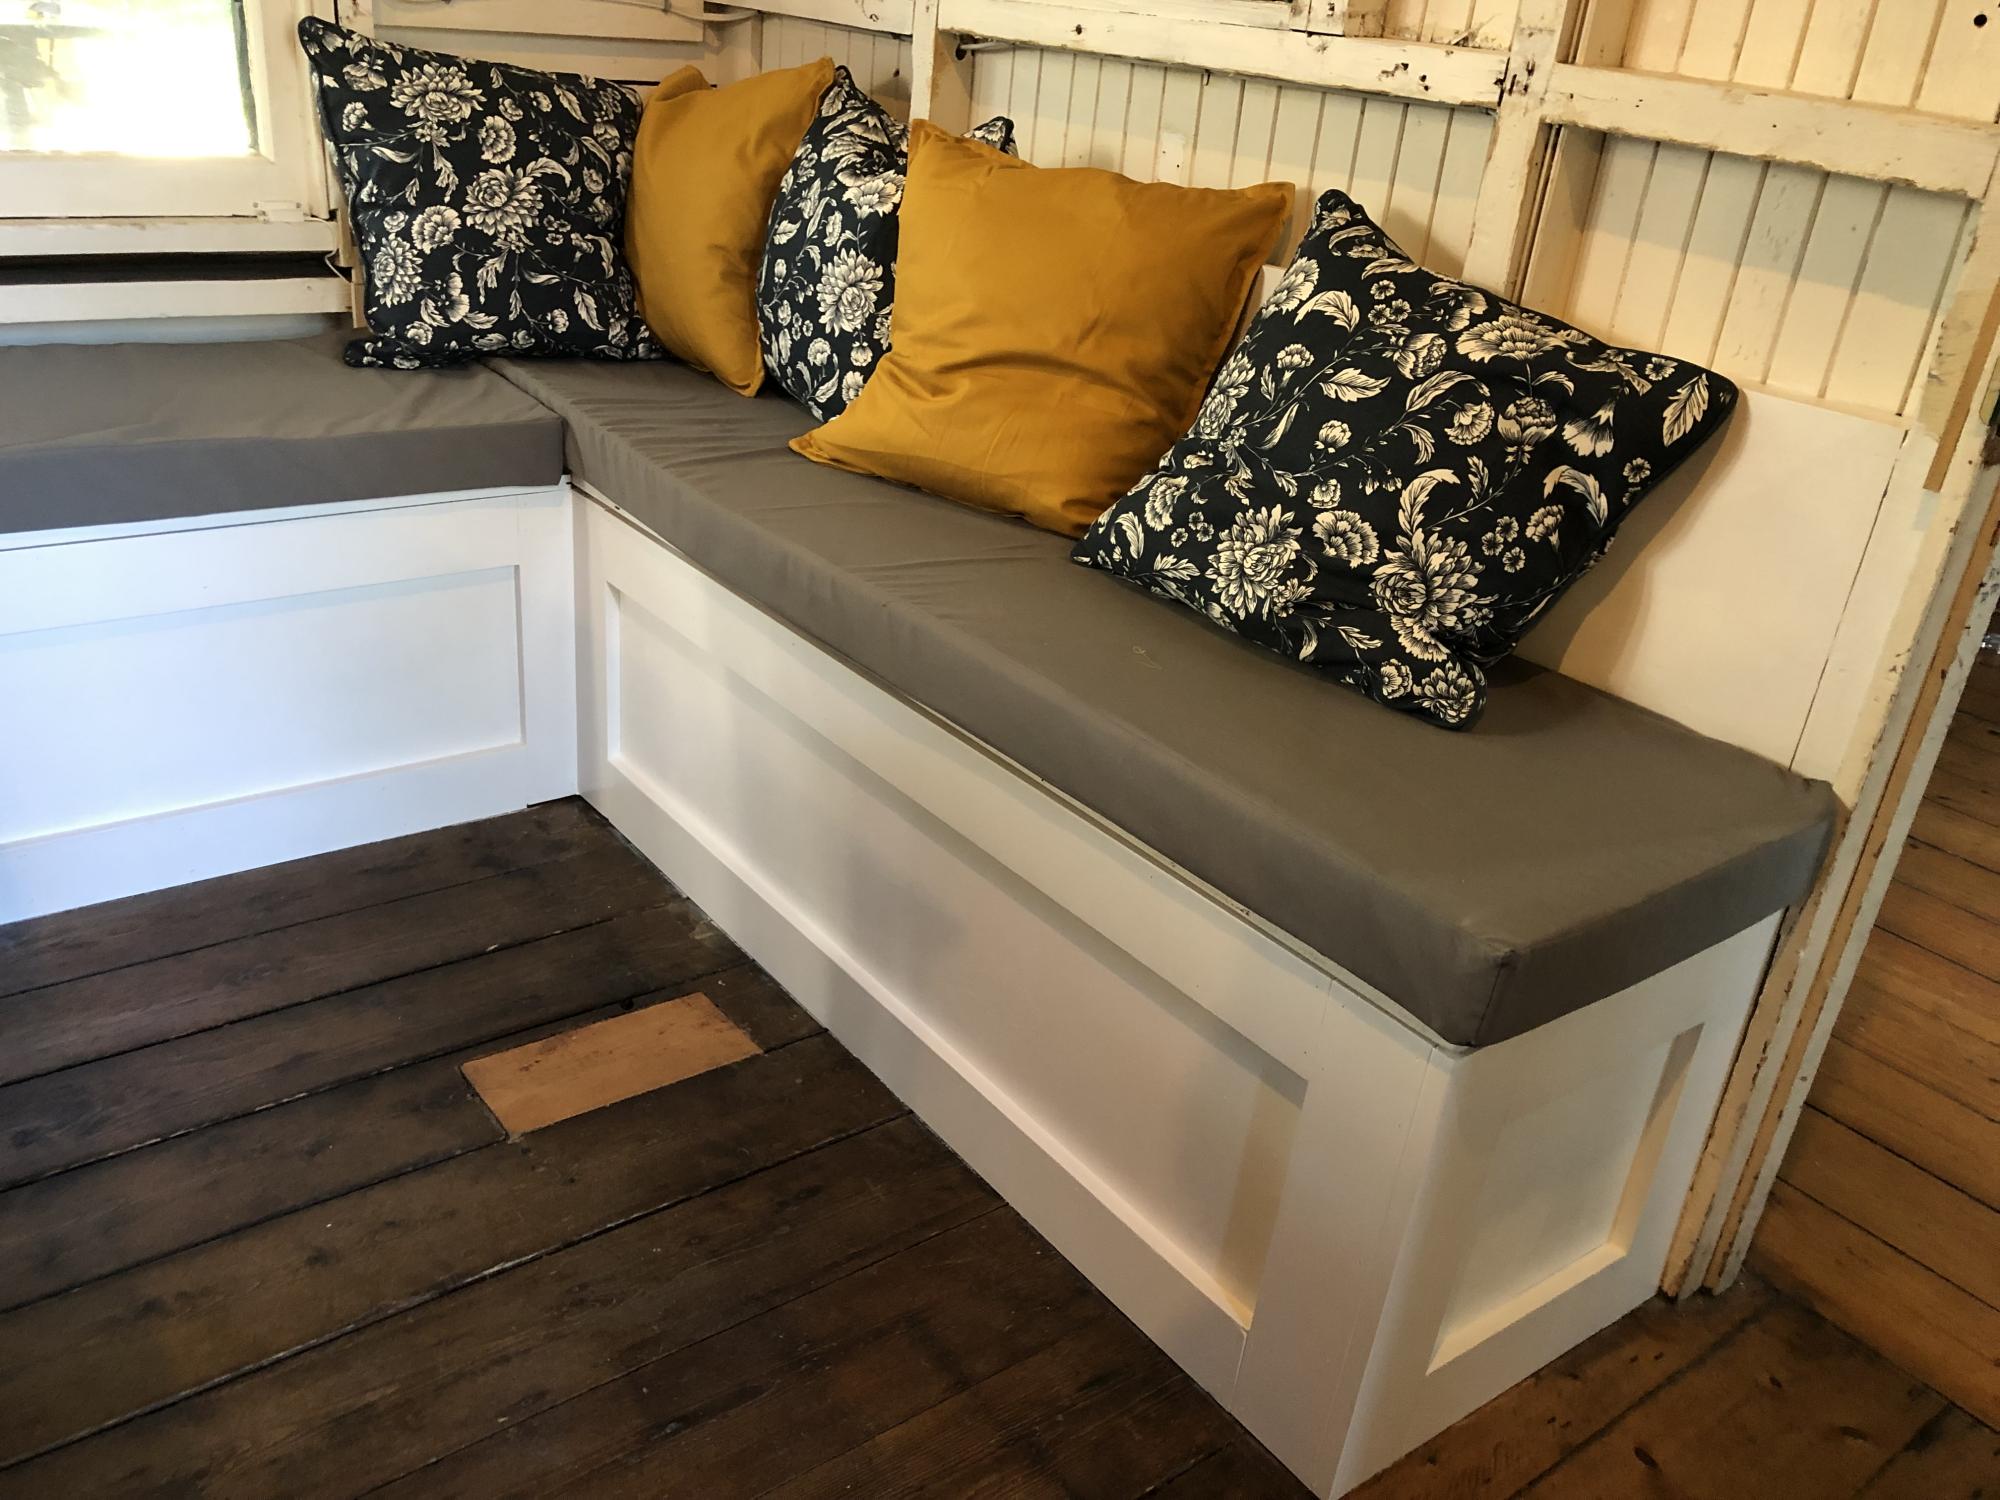
This is the first thing I built from your site. I used rainwear for the cushion so my grandkids can spill stuff and it won’t stain.
This is in my 134 year old cottage. Really spruced the place up.
Thanks for having your site - love the projects on it.
Built from Plan(s)
Just what my little readers needed!
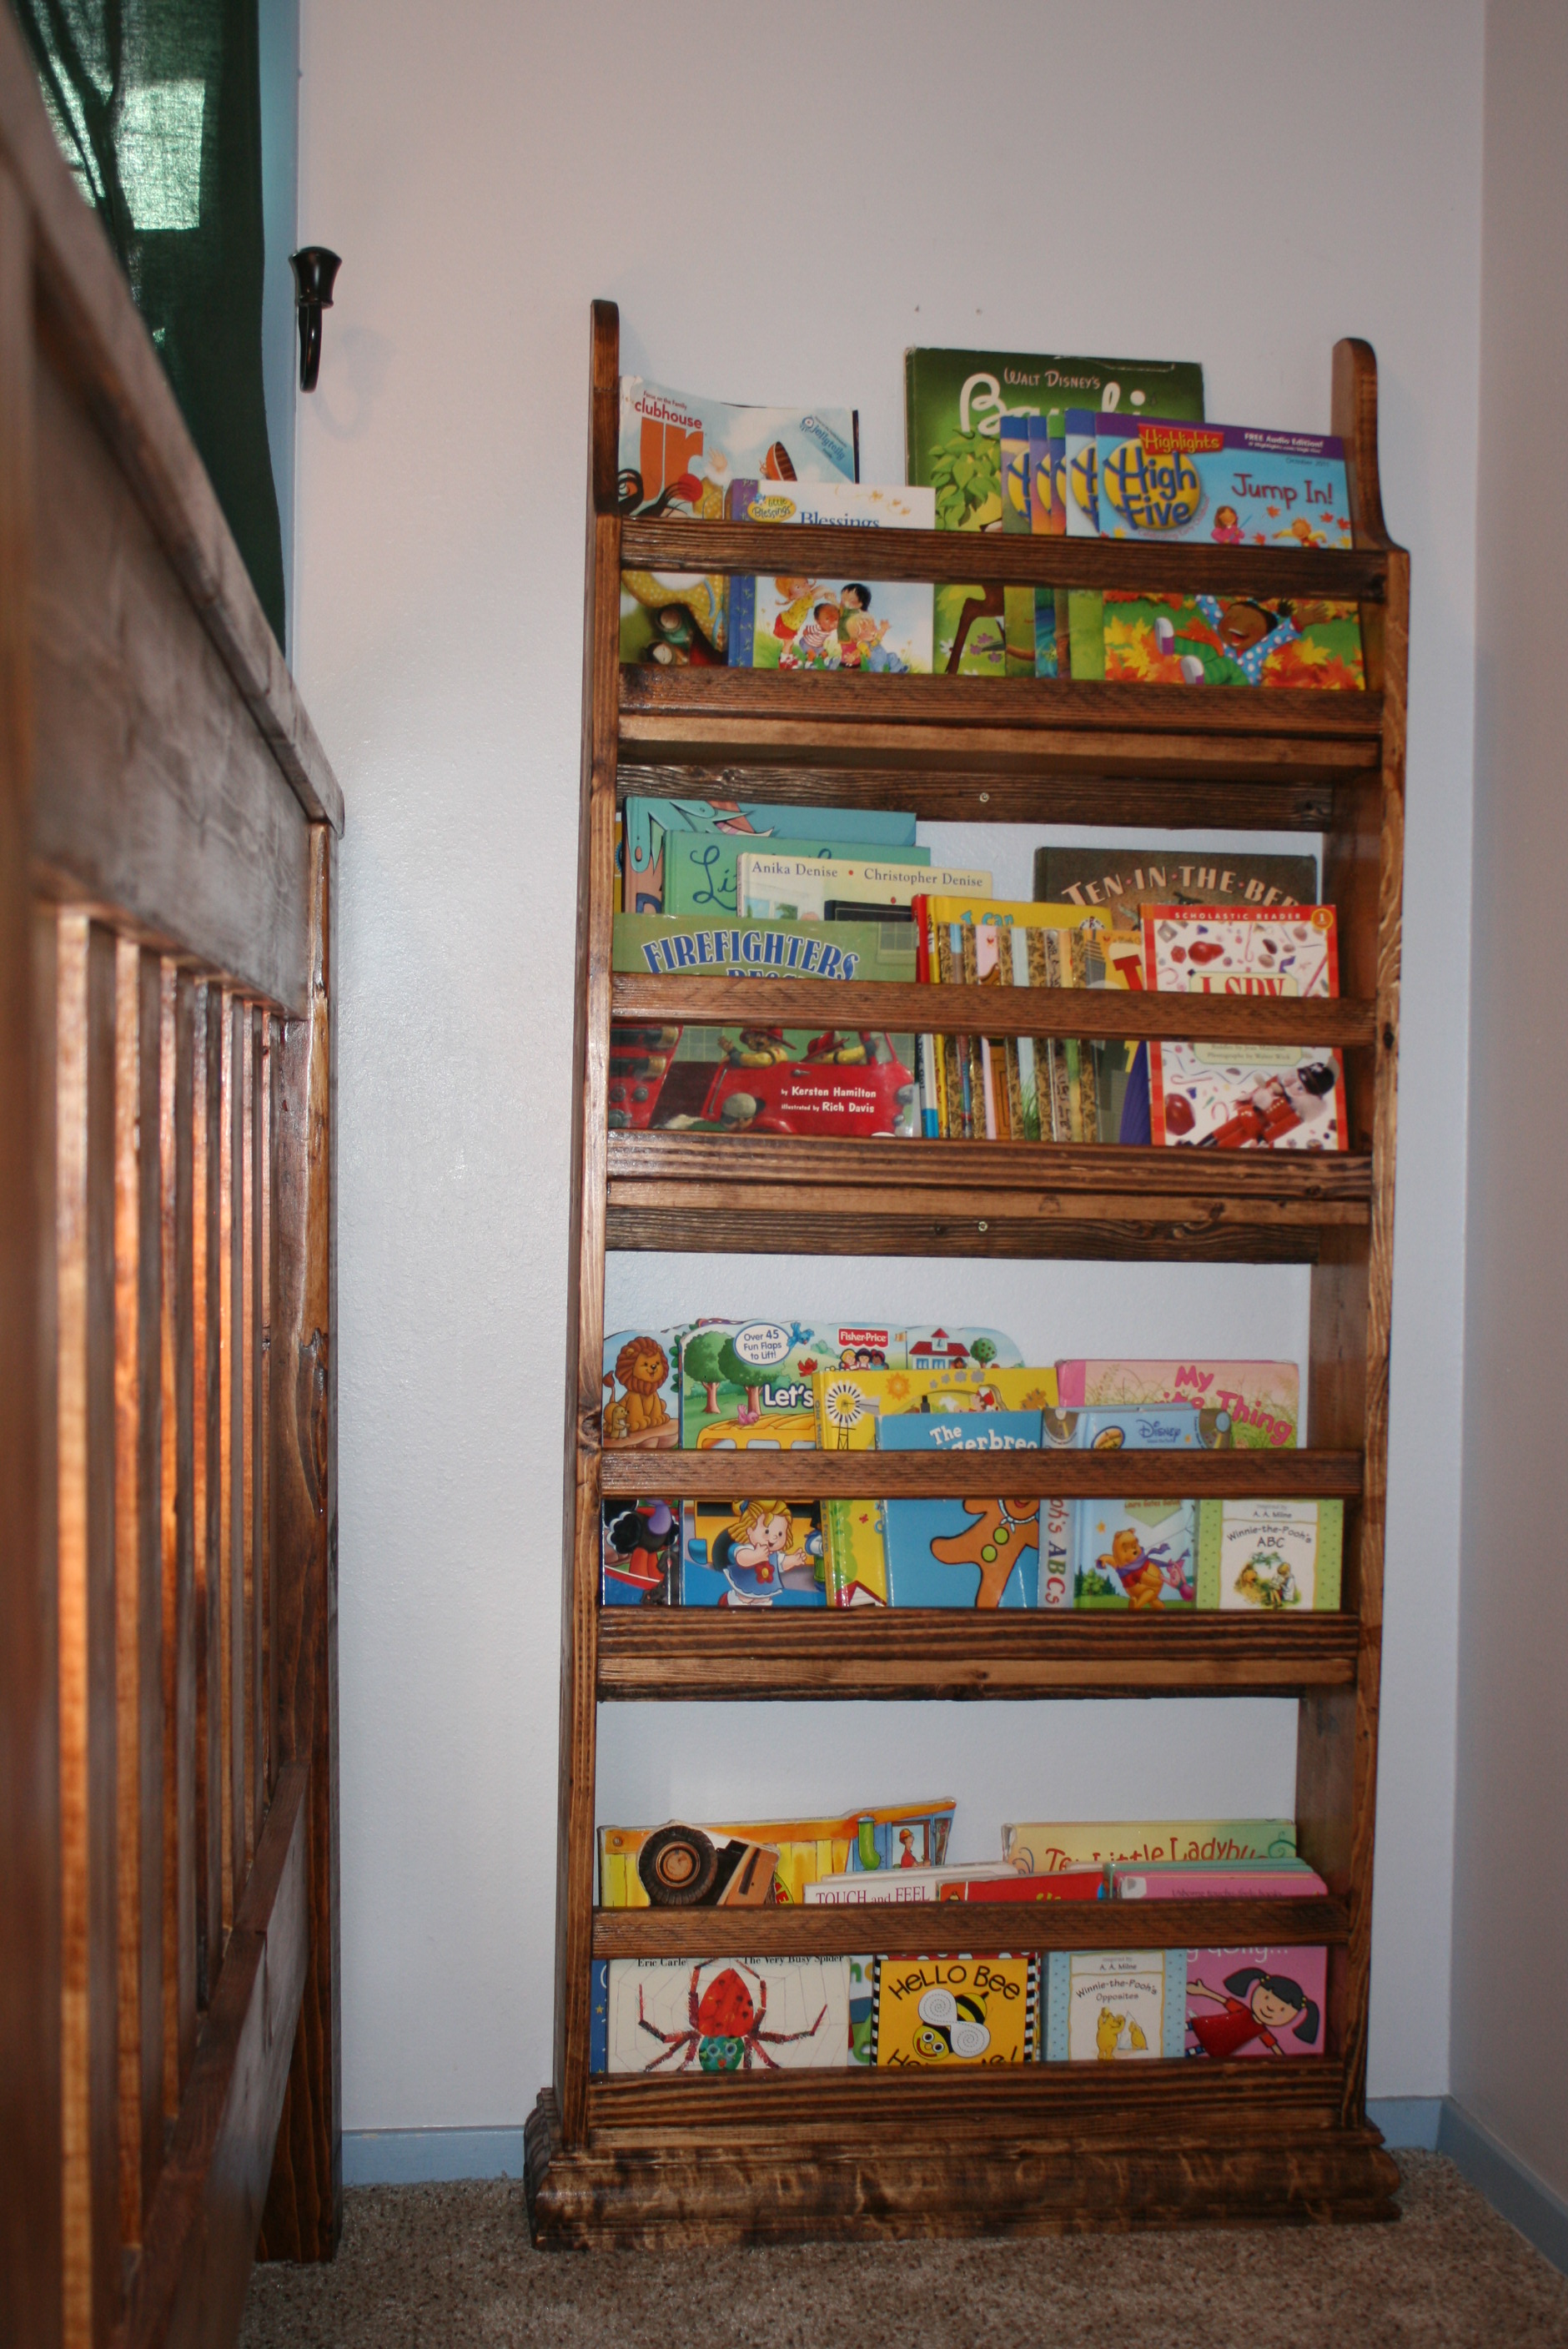
This was the first project in many years and I was pleasantly surprised how easy it was. I am so happy with the results. It was a great starter project to get me excited to do more projects.
This book shelf can be done even cheaper had I left the base trim off. It would have looked fine without it as well.
Thanks for the great plans!
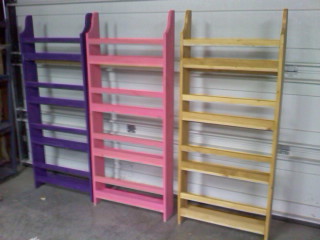
Built from Plan(s)
Estimated Cost
Less than $30.00
Estimated Time Investment
Afternoon Project (3-6 Hours)
Finish Used
Unfinished pine currently. I am hoping to use Minwax-Red Oak, Minwax-Polyurethane-Semi Gloss, to match the full size simple bed that I made for my son.
Recommended Skill Level
Beginner
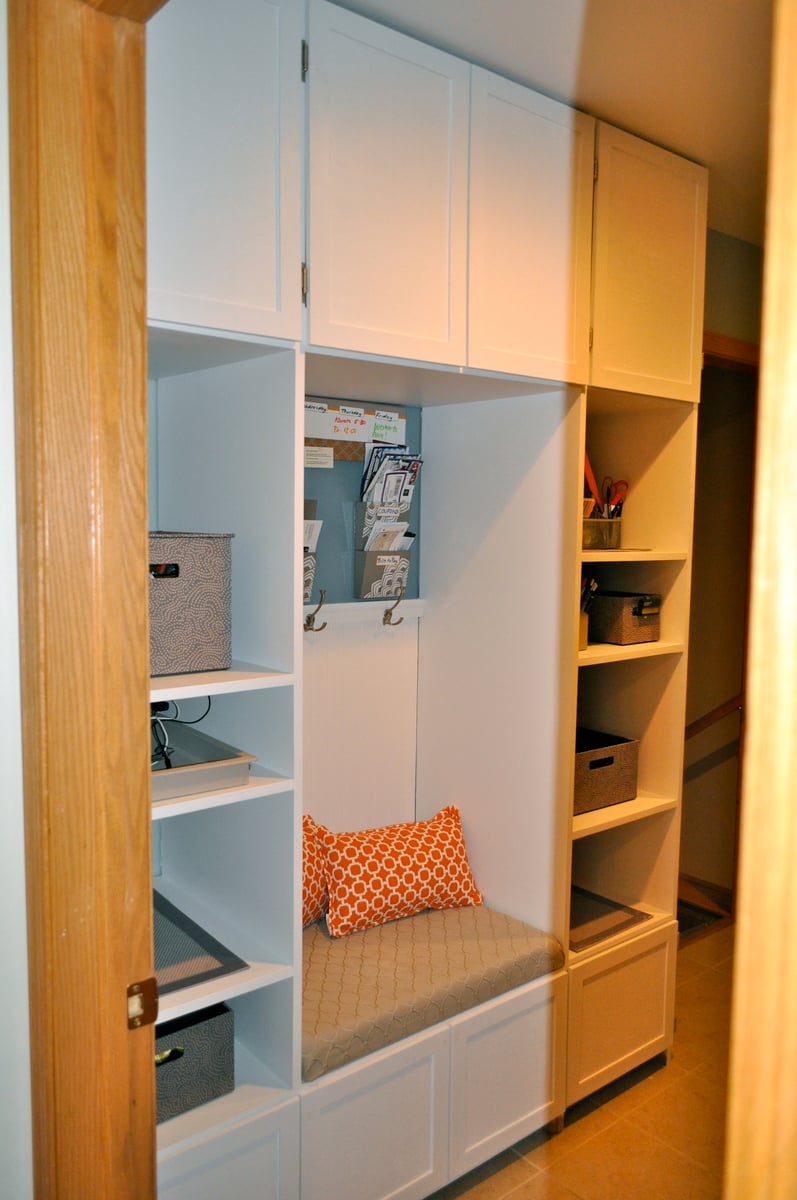
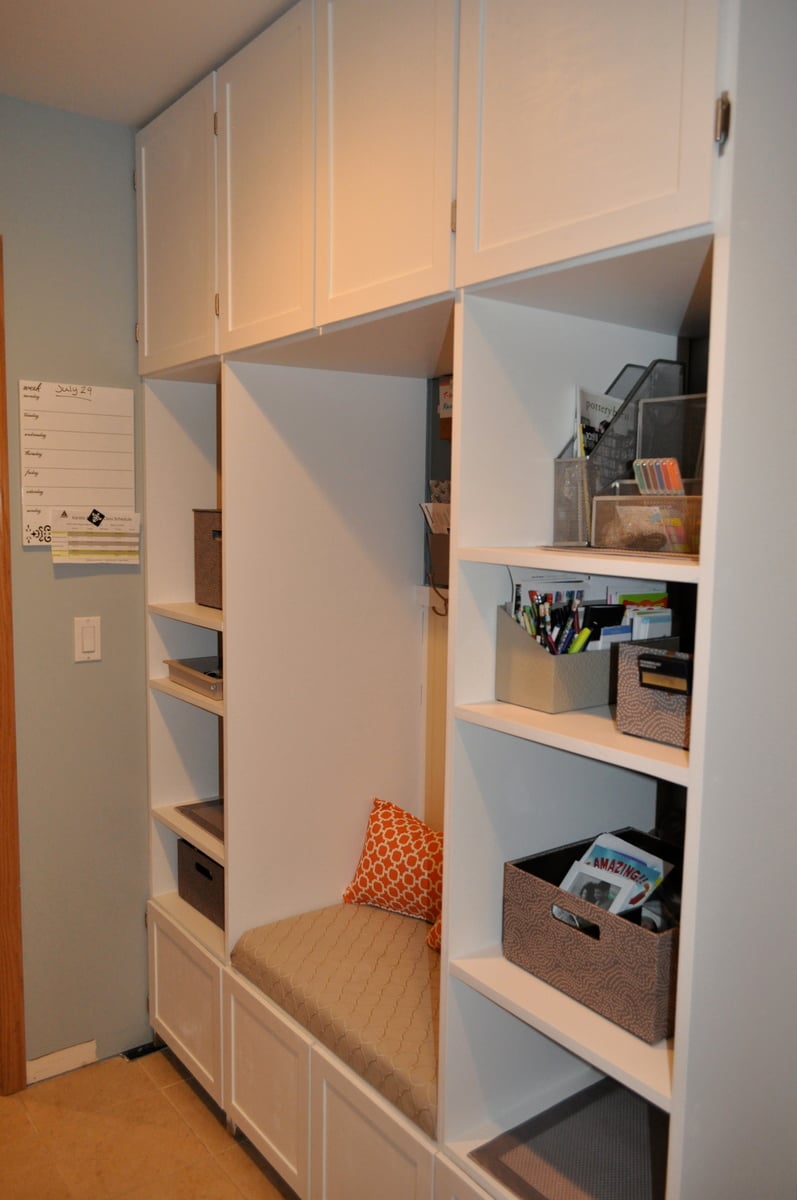
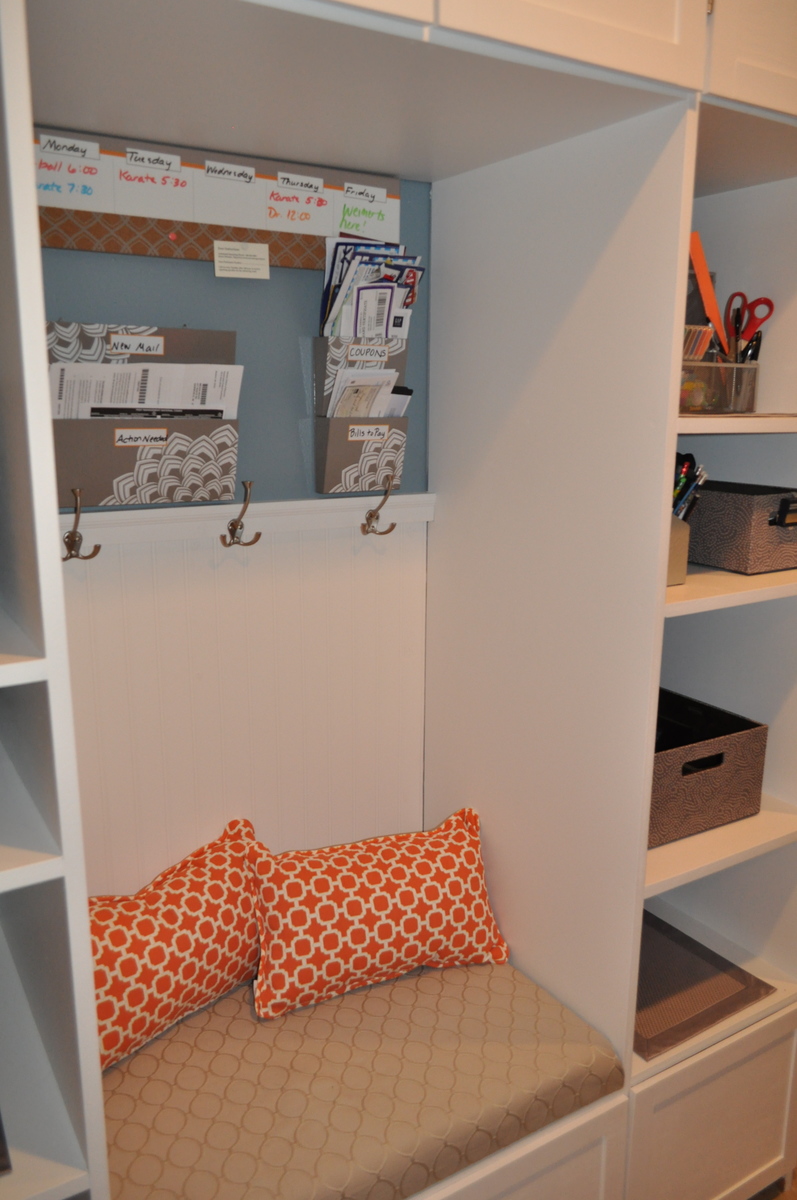
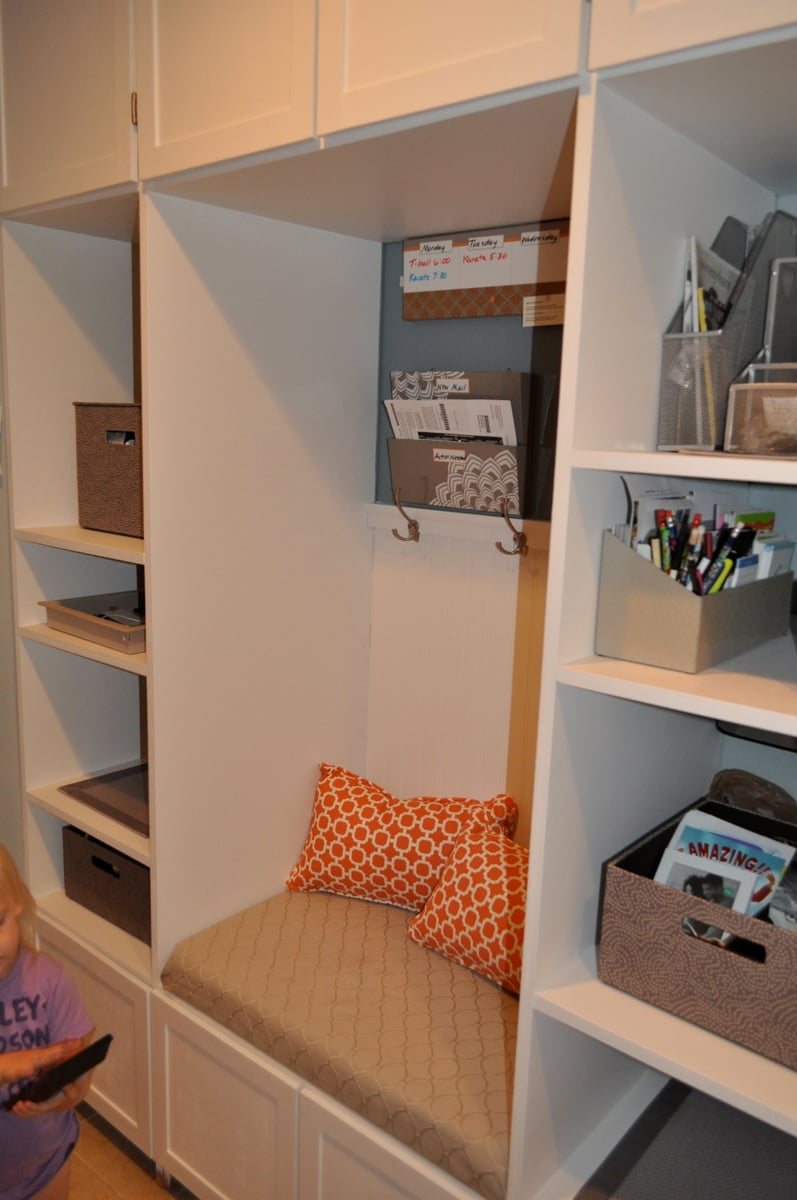
Functional Mudroom with Tons of Storage
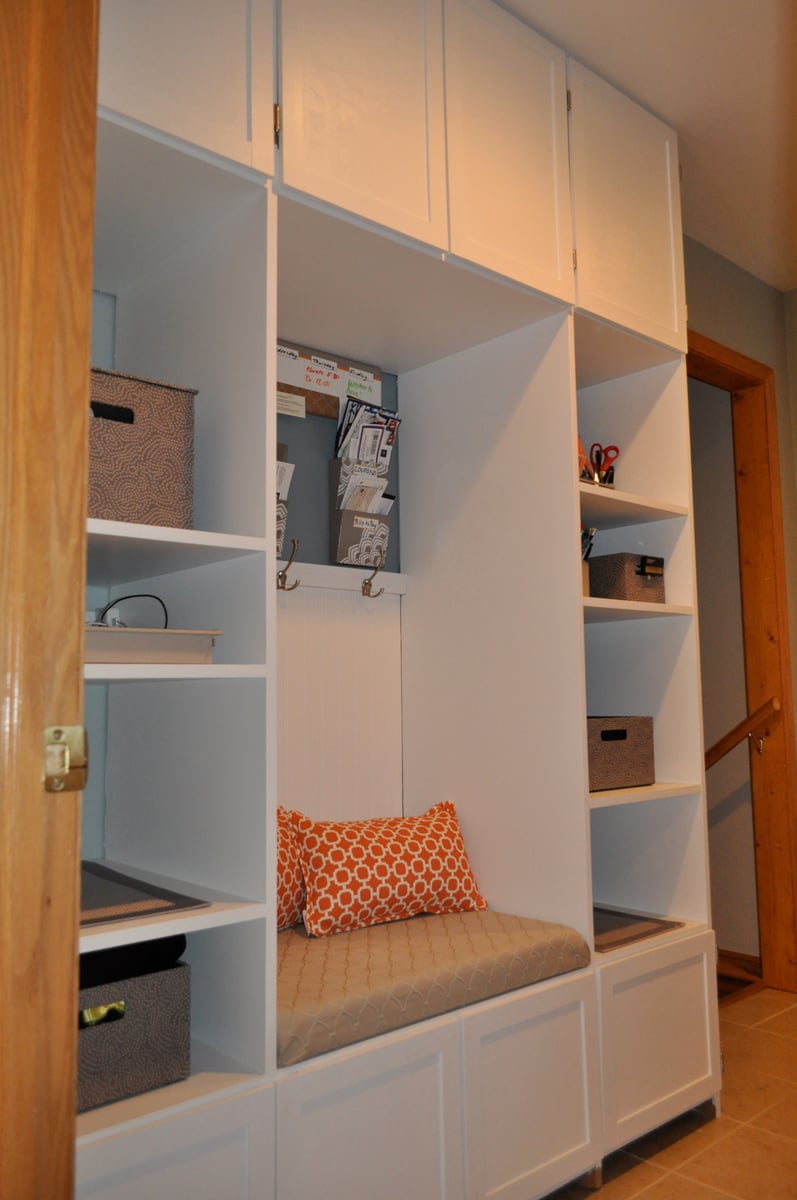
I was inspired by the Cutest Mudroom project. Our previous mudroom didn't work for us at all. There was wasted desk space and not enough storage. It was also a mis-match of cupboards, and without a window in the room, the wood and wall color made the room feel small and dark. We ripped out the previous shelving and desk and repainted a light blue color. I drew up plans based of the plans here to maximize our storage space. My husband and brother-in-law built the custom bookshelf towers on each side. We went all the way to the ceiling to maximize storage. I also decided to add cupboards across the top. We painted the entire thing white to keep things bright. We made the bench into a lift-top for storage of winter hats and mittens inside the bench. I upholstered the bench with fabric from Jo-Anns and found bright orange pillows at Linens and Things to give the room a pop of color. We put doors on the top and bottom cabinets and left the rest of the cubbies open and used fabric storage bins to keep everything organized. I love the touch of wainscoting in the middle and the hooks in the middle are for the kid's coats and backpacks. In the center of the whole unit is our family messaging and mail system.
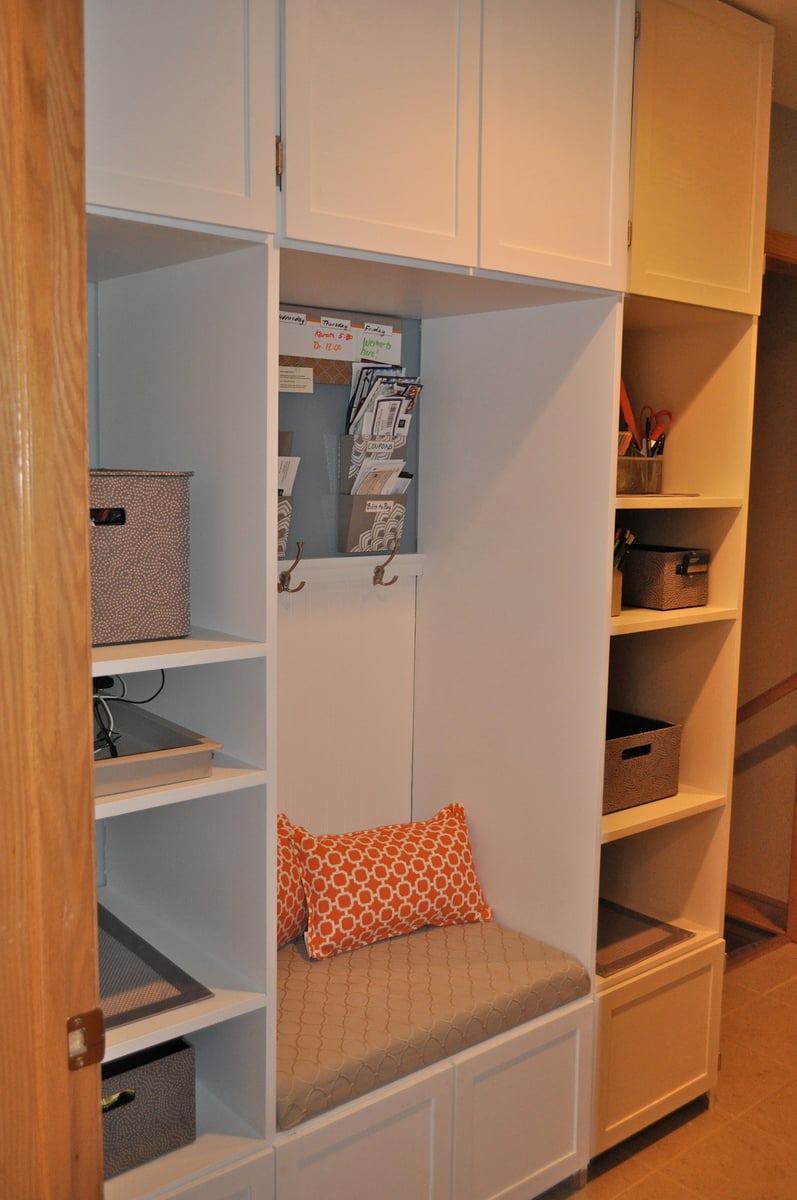
Built from Plan(s)
Estimated Cost
500
Estimated Time Investment
Week Long Project (20 Hours or More)
Finish Used
Behr paint and primer in one from Home Depot, color: Frost
Recommended Skill Level
Intermediate
Wainscot Nursery
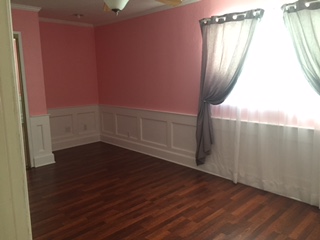
Check out our new nursery! I used MDF sheets ripped to 5 1/2" and 3 1/4" to make the frame of the paneling. I attached the rails and the stiles with 1 1/4" PH screws and mounted them to the wall with liquid nails and 16 guage brads. I framed all of the panels with quarter round and finished off the top with 1x2" poplar rounded over with a router. Check out my link to my instrucables page for a complete step by step layout!
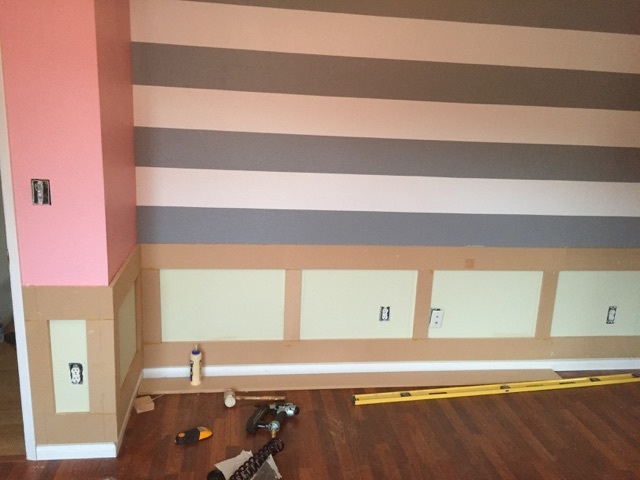
Estimated Cost
$500
Estimated Time Investment
Week Long Project (20 Hours or More)
Finish Used
Semi-Gloss white paint and white caulk
Recommended Skill Level
Intermediate
RyobiNation workshop carts

The plans were easy enough to follow. I made the miter and table saw carts not as long because of the space I had to work with. These were perfect to provide a stand for my saws while at the same time giving me the additional storage I need. This was the last part of the garage that needed to be organized so I'm extremely pleased.
Built from Plan(s)
Estimated Time Investment
Weekend Project (10-20 Hours)
Recommended Skill Level
Beginner
Comments

Sun, 07/08/2018 - 20:56
Glad the plans worked for you
Glad the plans worked for you! So much extra storage now!
Potting bench
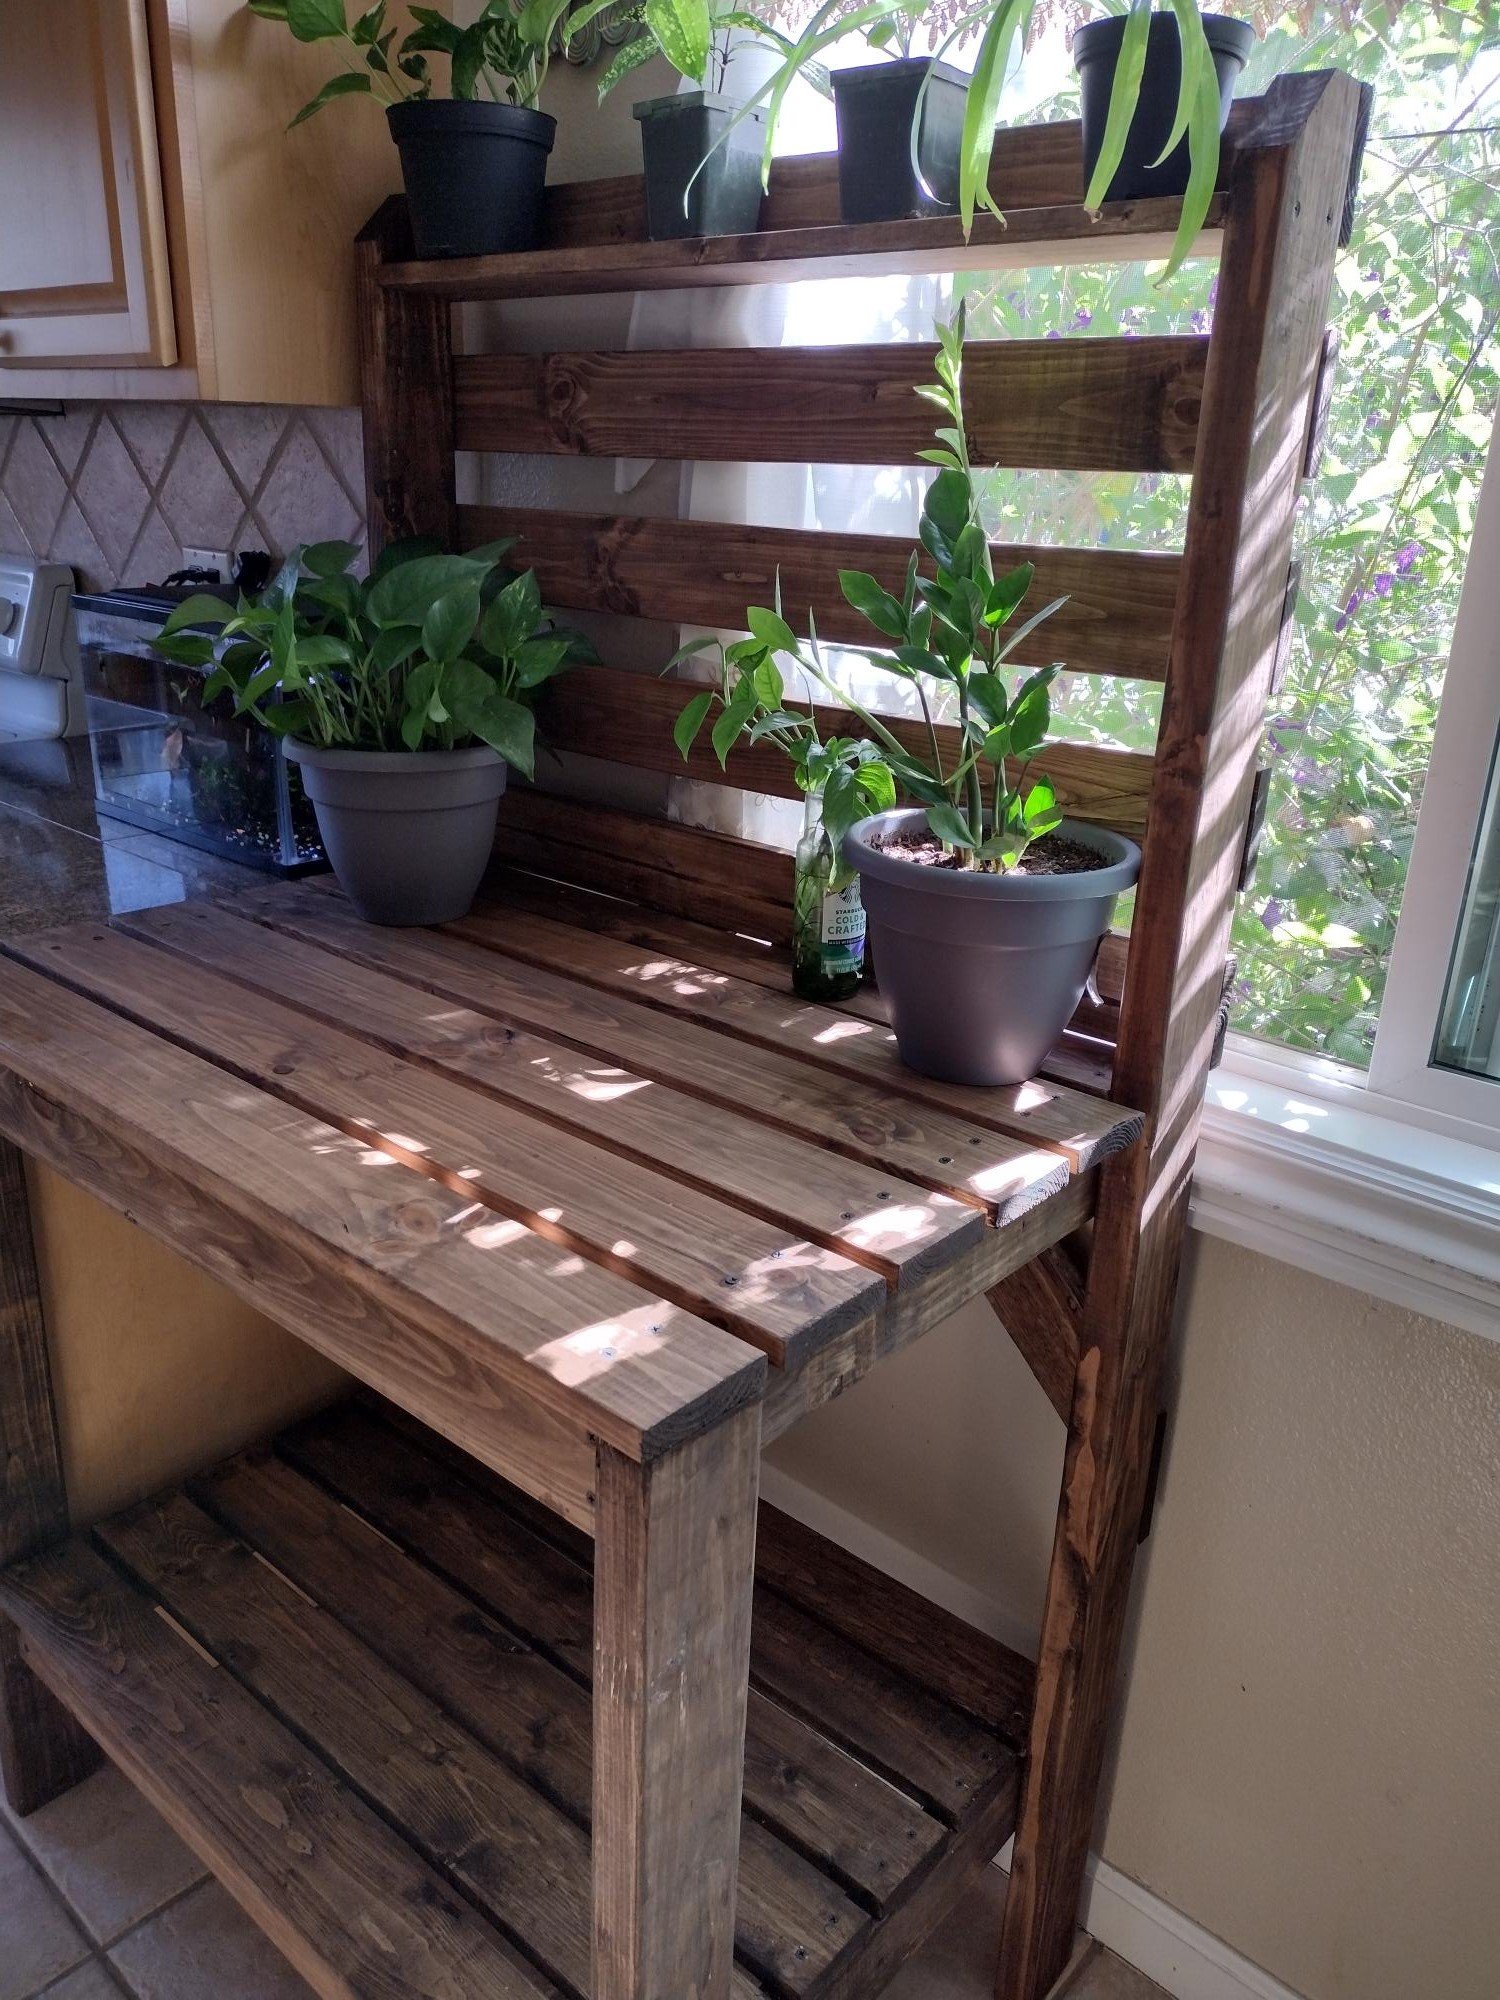
Simple potting bench in dark walnut
Built from Plan(s)