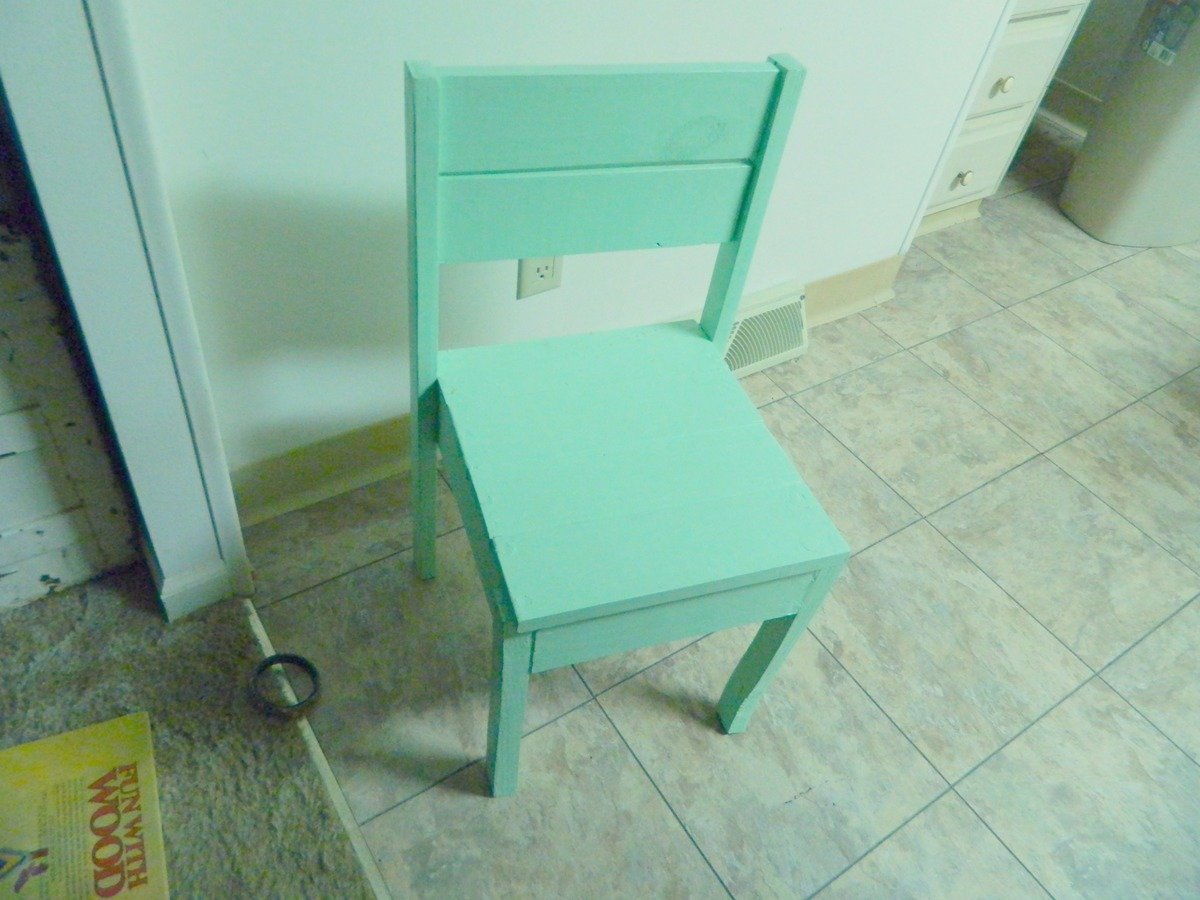
Community Brag Posts

Rolling Side Table

Submitted by Bradnag on Sat, 02/03/2018 - 13:04

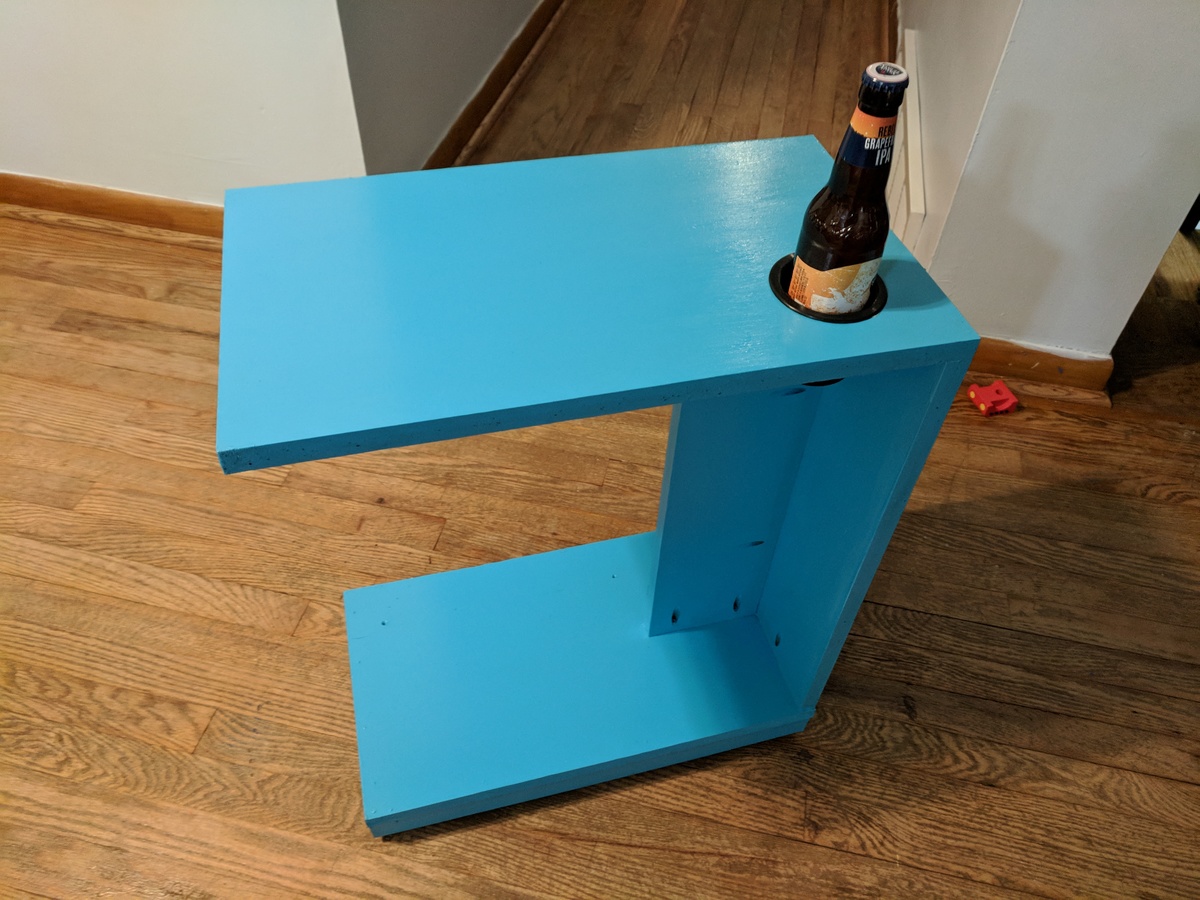
I had a bunch of scrap 3/4" MDF, so I used that instead of wood. The result is still as sturdy but a bit heavier than if I'd have used pine, which has added to the table's stability. I added a cup holder, but otherwise kept to the base instructions with no extra mods. I put an extra thick layer of polycrylic on the top surface, to protect the MDF from absorbing any spills. This was just a test run, so I didn't bother filling any of the visable pocket holes. Given how cheap and easy this was to build, I imagine I'll end up making 2-3 more.

Estimated Cost
$10
Estimated Time Investment
An Hour or Two (0-2 Hours)
Finish Used
Dutch Boy primer+paint, Minwax Polycrylic
Recommended Skill Level
Beginner

Bunk Beds

Submitted by hook Fam on Thu, 05/26/2011 - 12:24

I had so much fun building these beds! Thanks Ana for providing the plans for these. My boys absolutely love them. This was my first furniture build and now I can't wait to tackle some more. The bottom bunk is using an odd-sized mattress, so I had to change the plans a little, and the ladder has since been attached as well.

Estimated Cost
$250-$350
Estimated Time Investment
Week Long Project (20 Hours or More)
Finish Used
Varathane Dark Walnut and Clear Finish. The finish is what took the bulk of the time building this. The bed itself went together incredibly fast.
Recommended Skill Level
Beginner

Farmhouse X Table

Submitted by LoriWing on Wed, 07/17/2013 - 07:01

My first project! Used the plans on the website, but tweaked the top a bit. Made the top from maple plywood with maple 1x2 edge, so I would have a smooth top. Also changed the length to 86" to fit my kitchen. Assembled the base with glue and screws, sanded and filled the holes, then painted it. Attached the top with pocket hole screws. Worked on the project for around 10 hours, but took me 10 days to finish because the kids are home on summer vacation!

Built from Plan(s)
Estimated Cost
$100 for wood, finish supplies, and screws.
Estimated Time Investment
Weekend Project (10-20 Hours)
Finish Used
Base is painted with 2 coats white high-gloss paint for easy cleaning. Top is stained with 2 coats Bartley Chestnut Gel Stain and 3 coats Zar Satin Polyurethane.
Recommended Skill Level
Beginner

Modified Farmhouse King Bed Plans

Submitted by lampertg on Sun, 07/19/2015 - 04:26

I'm from Israel, and i love your site.
i've already built several projects from your plans, but this one was the most challenging one.
I wanted the bed to support a mattress (without a base), so i had to modify the plans. I've added 2X4 to the siderailes, between the headboard legs, and to the footboard, and also one in the middle (see attached photos) to support the thin 1X3's that are the base for the mattress.
I painted it using a water based yellowish cream collor (I know that water based color in not the best choice, but it's just so easy to clean ).
I used a Wagner electric spray painter/gun to paint the bed, and the result was very satisfying.

the wood i used was pine.

Estimated Cost
300$
Estimated Time Investment
Weekend Project (10-20 Hours)
Finish Used
Water based
Recommended Skill Level
Intermediate

Kentwood Bookshelf

I had a few days a week to work on this project.  I needed to modify them by the following:

Size was 92" H x 47" W x 14" D.  I had two football helmet cases to place on these shelves and they had big cases above the standards shelf size.  The top of the case did not overlap the project.  I cut it to size.  I used Cherry Stain and did not varnish it.  I am not a fan.  One thing I would change is the wood.  I would have paid double for the premium select wood so that I know it is cut straight. 

This was my first project and it didn't turn out bad.  I never used the Kreg, but I think I became a pro after this one.  I would recommend going out and buying all the size pocket screws and have them on hand.  Also, buy the vises that you will need.  Trust me, they will come in handy.  I hate having to drive back to the store for things I should have had. 

Overall, I paid about 240 for the wood.  Since I only had the Kreg and no screws, I ended up shelling out a lot of money for the big buckets of screws and vises.  Total for the both came out to about 350, from wood stack to finish.  I would have paid more for one smaller piece at a store. 

Estimated Cost
350
Estimated Time Investment
Weekend Project (10-20 Hours)
Finish Used
Cherry Stain. Did not use any finish.
Recommended Skill Level
Intermediate

Bar

Submitted by Anonymous (not verified) on Mon, 03/14/2022 - 10:09

Built this exactly from your plans. Used aged barrel for stain. I love it!!!!

Comments

Stackable kid's chairs

My daughter needed chairs to use at her art/play-dough table. I used pallet wood for everything except the legs of the chairs. The legs were from some scrap wood that I had. I made two chairs and plan to make two more. They are each a different color.

Estimated Cost
free
Estimated Time Investment
An Hour or Two (0-2 Hours)
Finish Used
Can of oops Mint green Behr eggshell finish water-based paint and some leftover light blue spray paint.
Recommended Skill Level
Beginner

Quad Bunkbeds

Submitted by Newfey on Thu, 07/18/2013 - 19:29

This is a set of bunk beds that I made for my daughter Alicia for their getaway home at Canadian Lakes, MI. Now their children can invite their friends and have a fun place to sleep.

Recommended Skill Level
Intermediate

Comments

JoanneS

Fri, 07/19/2013 - 02:37

Wow! This looks absolutely amazing! I like the light and shelf in each bunk too. Spectacular!

spiceylg

Fri, 07/19/2013 - 04:45

Newfey, these are awesome! I've seen pics of this type of bunk over the years, but never anybody attempting them as a DIY from a non-professional, unless you are one? Either way, they certainly look professionally done. Love, love, love!

In reply to by spiceylg

Newfey

Fri, 07/19/2013 - 07:56

I am not a professional by any means and have a limited tool supply. My daughter sent me a picture and asked if I could make them for her. It was a big project as their getaway home is 165 miles from where I live. It took quite a few weekends to complete.

kelleer

Fri, 07/19/2013 - 08:12

This is totally awesome. were there plans that you might have used as a base to go from or were you able to design it on your own?

In reply to by kelleer

Newfey

Fri, 07/19/2013 - 09:24

That was one of the problems, I had no plans, only the picture as a reference. It was a design as I went along and needless to say I gave a sigh of relief once that I saw the mattresses fit into their places.

Lasso the Moon

Fri, 07/19/2013 - 11:49

This is a dream room. They look so beautiful! How fun to have extra places for friends to stay the weekend.
Anna

momofour09

Fri, 08/30/2013 - 06:48

I've been viewing pictures of these style bunkbeds for a while. I'm almost certain I could come up with something but most definitely lose my sanity along the way. This would be great in my girls room and you did an awesome job!

meganhammon29

Sat, 07/25/2015 - 20:25

Ana I am looking to see if you have actual plans for a quad bunk bed? Also what about a quad corner bunk bed? We are trying to put our 4 girls in one large room and this would really help make it work!

Man Crate for Grandson

My Grandson Brax is staying with me for a few days this summer and I thought I'd get him invloved with a wood project. We decided on building him a "man crate" to keep toys & other boy stuff in. He was a great help, and got to have a lot of fun while learning to build a DIY project.

Maybe one day Brax will love to build things out of wood like his Paw-Paw.

Estimated Time Investment
Afternoon Project (3-6 Hours)
Finish Used
Minwax Polyshield "Espresso"
Recommended Skill Level
Beginner

Comments

Entryway bench

Entirely made of reclaimed wood.  Sanded with 220 on a random orbital and applied two coats of polycrylic finish

Built from Plan(s)
Estimated Cost
$20
Estimated Time Investment
Weekend Project (10-20 Hours)
Finish Used
Polycrylic clear matte
Recommended Skill Level
Starter Project

Toy Storage Bin Box

Tried to find a toy box for my Granddaughters 1st birthday. Ana White has the best plans so far. My Grandaughter’s room is wildlife themed, so I customized it for her room. Used semi-transparent white Minwax and added stenciling with acrylic paint before I added 2 topcoats of clear coat. In less than 10 minutes they filled it up, and so far, she seems to love it.

Comments

I built a table O_o

Submitted by kiki on Wed, 06/01/2011 - 06:34

I haven’t done woodworking since jr. high and that was only making a plant stand and a turtlebank, so it’s been a while since I last used wood tools and came out with a useable product at the end.

Estimated Cost
Including taxes it ended up being around $51dollars. See my blog for breakdown.
Estimated Time Investment
Week Long Project (20 Hours or More)
Finish Used
Tinted outdoor stain applied with a brush; two coats.
Recommended Skill Level
Beginner

Entertainment Center

Submitted by Dadx6 on Sat, 07/20/2013 - 08:53

This fun project was only my third piece of furniture I've done. I took my time and worked on it a couple hours during the work week and got a most of it done on a Saturday.

I appreciate the projects here on ana-white.com. They are easy to follow, clear, and use basic tooling and cuts.

Estimated Cost
~$250
Estimated Time Investment
Weekend Project (10-20 Hours)
Finish Used
Rustoleum Kona Wood Stain
Rustoleum Spar Finish
Recommended Skill Level
Intermediate

Trash Bin based on Ana's Plan

Submitted by Scottcs42 on Sun, 07/26/2015 - 20:39

Trash bin based on Ana's plan

Estimated Time Investment
Weekend Project (10-20 Hours)
Finish Used
Wheat stain, poly
Recommended Skill Level
Intermediate

Dining Table SC

Submitted by bhoward7 on Fri, 02/23/2018 - 08:28

It took me a good 6 months to finish this since I started before summer, but it got too hot here in SC very fast. So I just finished it in January this year. It turned out great! Longest part was the finish work since many days it was too cold to put Poly on it. The actual building of the table went quick.

Estimated Cost
$200
Estimated Time Investment
Weekend Project (10-20 Hours)
Finish Used
Minwax Provincial
Minwax Polyurethane
Recommended Skill Level
Beginner

Bed+ entertainment center

Submitted by Anonymous (not verified) on Thu, 04/07/2022 - 13:02

This is your storage bed and entertainment o r media center flipped upside down. I am self taught thanks to you. Thank you for making it easy to do and follow!

Comments

Closet Door and DVD Storage

Since we moved into our house over a year ago, we had no closet doors for our TV room. Just a giant gaping hole in the wall. Filled with 2 boxes of DVDs. Needless to say, it was really unattractive. I saw someone on the Knock-Off Wood facebook page building her own closet doors, and I was inspired. I drew out a quick sketch and got to work. They were really simple to make, but because they were so bulky they were a bit hard to manage. (The husband never helps out with my "buildy" projects, but I definitely needed an extra hand getting these into place!) I also built the behind the door storage to go on the larger door for all of our DVDs. What turned this project into a "Weekend" project rather than a "day" project was really the bulk and the finishing. While I am normally the self-proclaimed queen of spray paint, I took the time to do a really nice hand painted and glazed finish on the doors. (The DVD storage, though, went back to my area of expertise with the spray paint.) We LOVE all of this extra storage! We definitely have room to grow our DVD collection now!

Built from Plan(s)
Estimated Cost
$100
Estimated Time Investment
Weekend Project (10-20 Hours)
Finish Used
For the doors, I used General Finishes Milk Paint in "Snow White" with a coat of "Van Dyke Brown" glaze. For the DVD storage, I used 4 cans of Rustoleum spray paint in "Dark Grey" gloss.
Recommended Skill Level
Intermediate

Comments

teembee

Tue, 06/21/2011 - 17:00

hi I was wondering you had plans created for these doors...I "need" these doors!!

Debi_G (not verified)

Sat, 07/07/2012 - 19:37

Bypass doors drive me nuts, so I'd love love love to see a how-to about the doors you built. They look great!

Eco office work space

Submitted by solomonson on Mon, 07/22/2013 - 13:35

We (my husband and I) were in desperate need of a better work space, and this was perfect.

Estimated Cost
$150 (for the whole desk)
Estimated Time Investment
Week Long Project (20 Hours or More)
Finish Used
Bases - Valspar's paint+primer in one in Antique White from the oops bin. Desktop - General Finishes water based stain in Espresso. Top coat - I used Minwax's spray-on polycrylic for the bases and GF's water-based polycrylic in Gloss for the top. Contact paper from Blue for the insides. Paint was rolled and brushed, stain was applied with a rag. Polycrylic was rolled and brushed. Use good brushes (I used Purdy) and you'll never see a brush mark.
Recommended Skill Level
Intermediate

Das Tisch

Submitted by Ahlspiess on Thu, 07/30/2015 - 21:35

Well saw a project here and inspired me to get my sons elbows away from me, so i built this oversized table, Inspired by a Simple outdoor dining table design.

anna-white.com/print/247

hmm its a bit to high also lol time to build some chairs and or a long tall bench :-)

Thanks Anna 

Estimated Cost
175.00
Estimated Time Investment
Day Project (6-9 Hours)
Recommended Skill Level
Starter Project

Bookcase

Submitted by paul42 on Mon, 02/26/2018 - 21:30

Took about a week working an hour or 2 a day, but for my first woodworking project I think it turned out pretty well!

Estimated Cost
$100
Estimated Time Investment
Day Project (6-9 Hours)
Finish Used
Minwood gunstock
Recommended Skill Level
Starter Project