Planter step
![](/sites/default/files/plant%20steppin.jpeg)
I only needed one step up, but replacing the old, cracked, weird, faux concrete step with the new planter box worked great!
Fun build for my wife. Added back boards to the shelves. They were routed and set flush to the cabinet
learning woodworking. this is only my 2nd project. We.are going.to use to place our 6 bottle wine chiller.on. Going to stain dark to match living room. I added some decorative molding as you.can. I.still can't believe I am actually making real furniture. Thanks Ana, I finally.found a hobby I enjoy after 30 years since wood shop in 7th.grade.
We followed the plan and were able to successfully create a picnic table for our own "big kids". It's a great size for school-aged children and allows us to have a space for them and their friends to eat and do messy artwork.
It was fun to create this smaller version of the table
This was a really fun build. The bottom side boards were put on the outside instead of the inside (this was an accident) but it still seems very sturdy. Perfect for 2-5 years old.
Fri, 07/19/2019 - 16:01
Super cute! I don't think it matters if it's on the inside or out, looks awesome to me!
Built this from Ana White plans. Love how it looks in our four season room.
Fri, 04/21/2023 - 10:20
Gorgeous build and finish, well done! Thank you so much for sharing.
Yea! I made this for my second boy for Christmas. He wanted yet another art set. When I saw the plans I knew I had to make it! Ana I love you and your site and your amazing ideas! Thank you, thank you, thank you!
After reading all the comments I decided to make the desk part a little wider on each side to make room for the hinges. It worked great. The hinges did rub so I just got out a pocket knife and put some notches where they were rubbing...problem solved! My son loves it and I love that he has somewhere to hide his stuff!
Tue, 03/13/2012 - 20:16
I have been flipping back and forth trying to figure out how to install the hinges. I just realized you made the desk top larger to allow the hinge installation on the outside. Now I can get back to work!
In reply to Hinge issue by Guest (not verified)
Wed, 03/14/2012 - 08:27
Yes that was the big concern with this desk. Making the desk top larger and putting the hinges on the outside seemed the easiest way for me. I did have to cut little notches in the wood for the hinges to slide freely but it works. My son uses it all the time and I am so glad that I made it! Good luck!
I built this nightstand for a 7 year old girls birthday.
This was our first ana white build. Bed build took one Saturday - to finish up took another week or so working nights - most of our time spent on getting the color we wanted and sanding and finishing. Building the 2x4 frame took more time than anticipated as well. We are super happy with how it turned out.
This project was fun to build with hubby said the shopping list and the cut list was perfect! Love all your designs! King bed is next!
Fri, 04/28/2023 - 09:15
Very well done, thank you for sharing your beautiful space and build!
These storage step stools are super easy to build. I've built several over the couple of years. The first was for my daughter and then several more since, including one for the Make Two Challenge.
The functionality of these little stools is what really makes them great. My daughter is able to carry it from room to room with her toys stowed away in the little hidden storage area.
I modified the length to fit my dining room. Very easy to build and finished in a weekend. Total cost for wood was about $105. Best project I've built yet! Working on the matching bench this weekend.
Custom sized bed for our son's room.
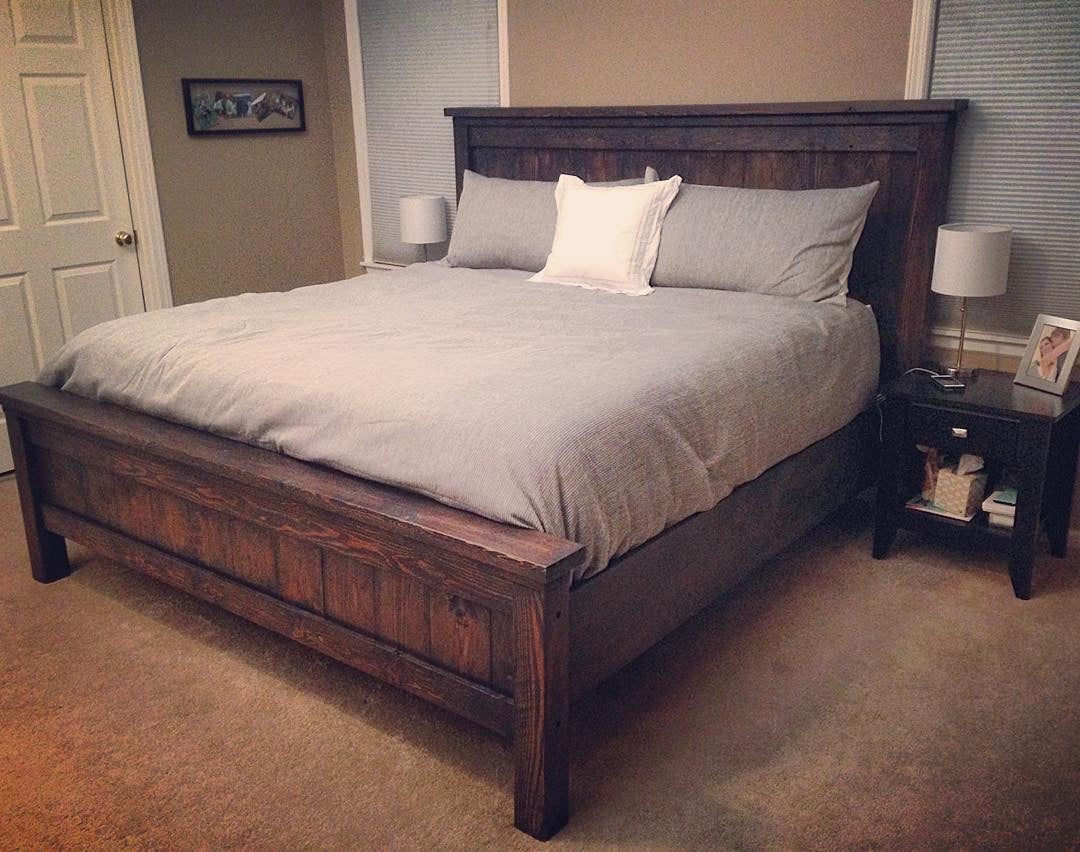
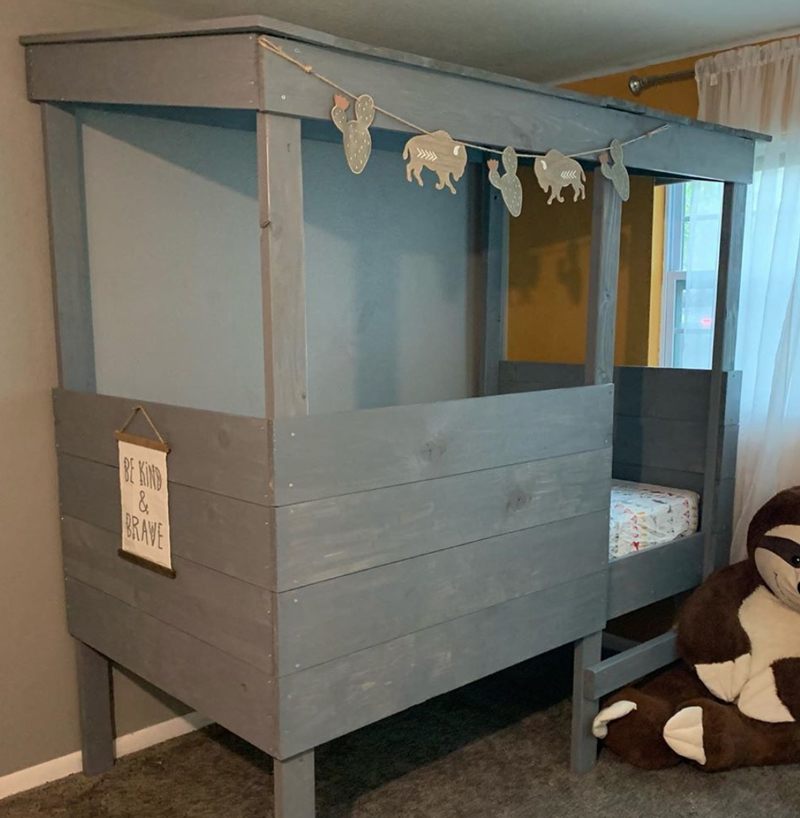
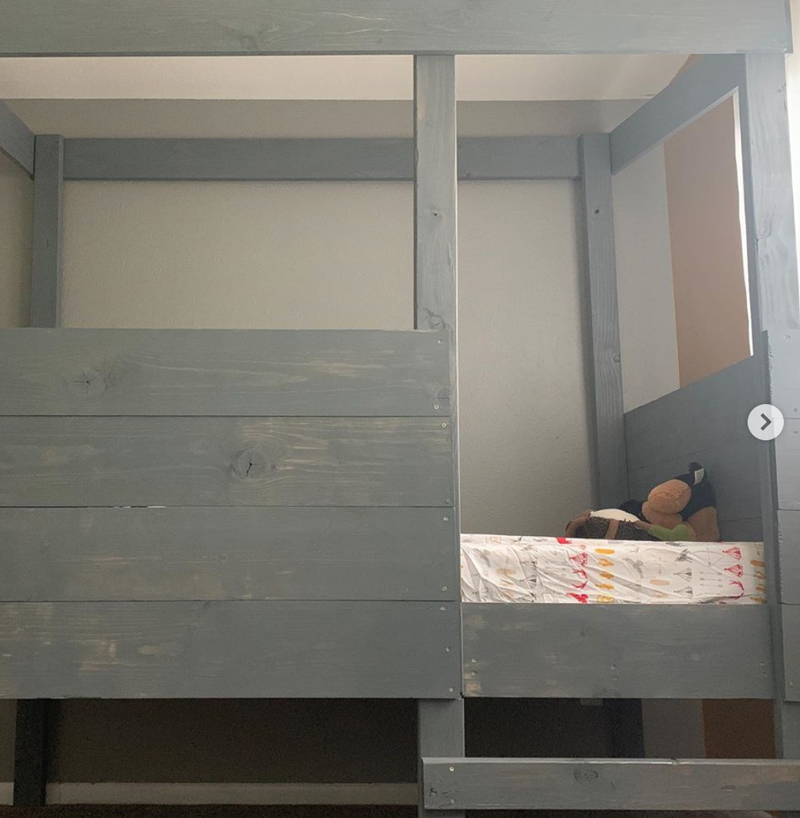
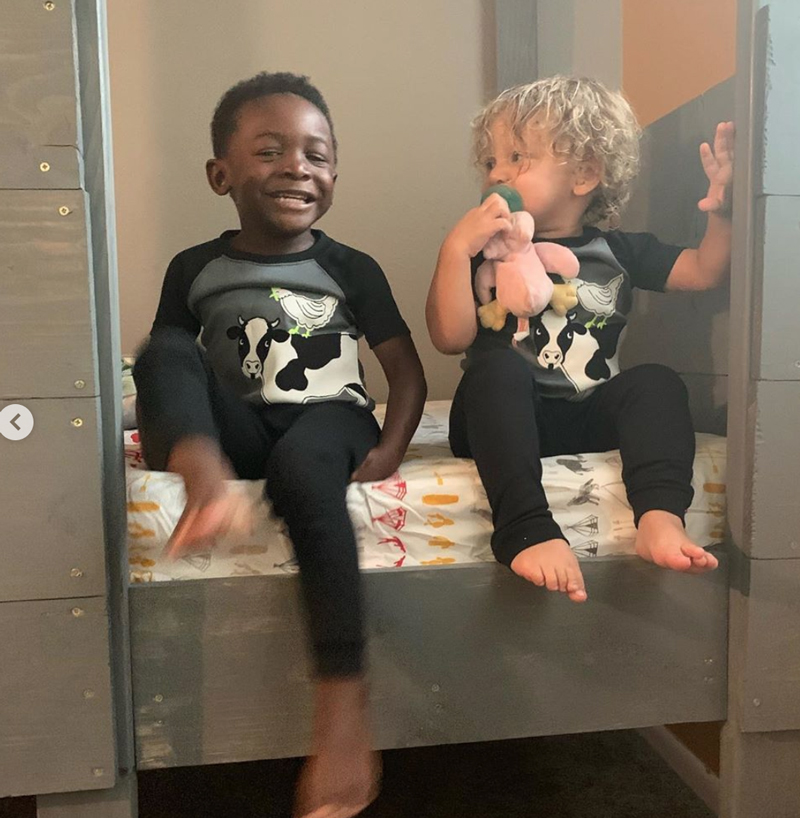
My boys LOVE this bed. I am making one for my other son who shares the room next so there will be two matching. They take up almost the whole room but they look so cute and double as play space in and under the bed so it works!
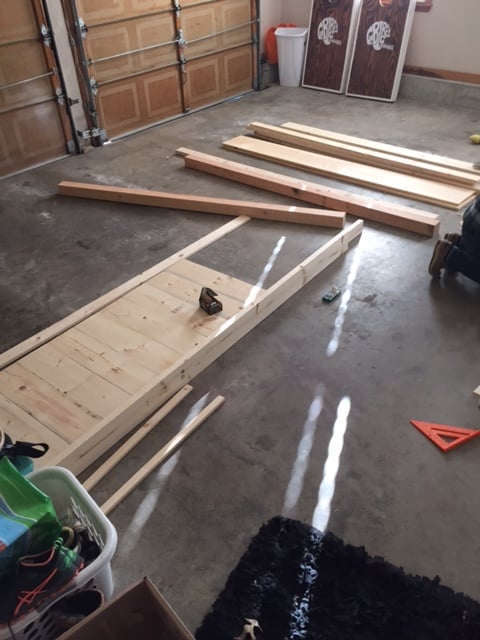
It took about 2 days to build and I had help from my husband and friend to make construction easier and cuts and staining more efficient.
One problem I had at the end was screwing in the roof boards. I hadn't thought about the fact that my ceilings are low on my old ranch house and could barely get the screwdriver in the space above the bed, so I had to tip the bed over to make it easier. Next time I may predrill the screws til just before breakthrough so I can fit the drill above.
Also those boards around the bed are probably the most expensive piece - if I didn't want the second bed to match exactly I would wonder if 1x6s wouldn't have been more economical.
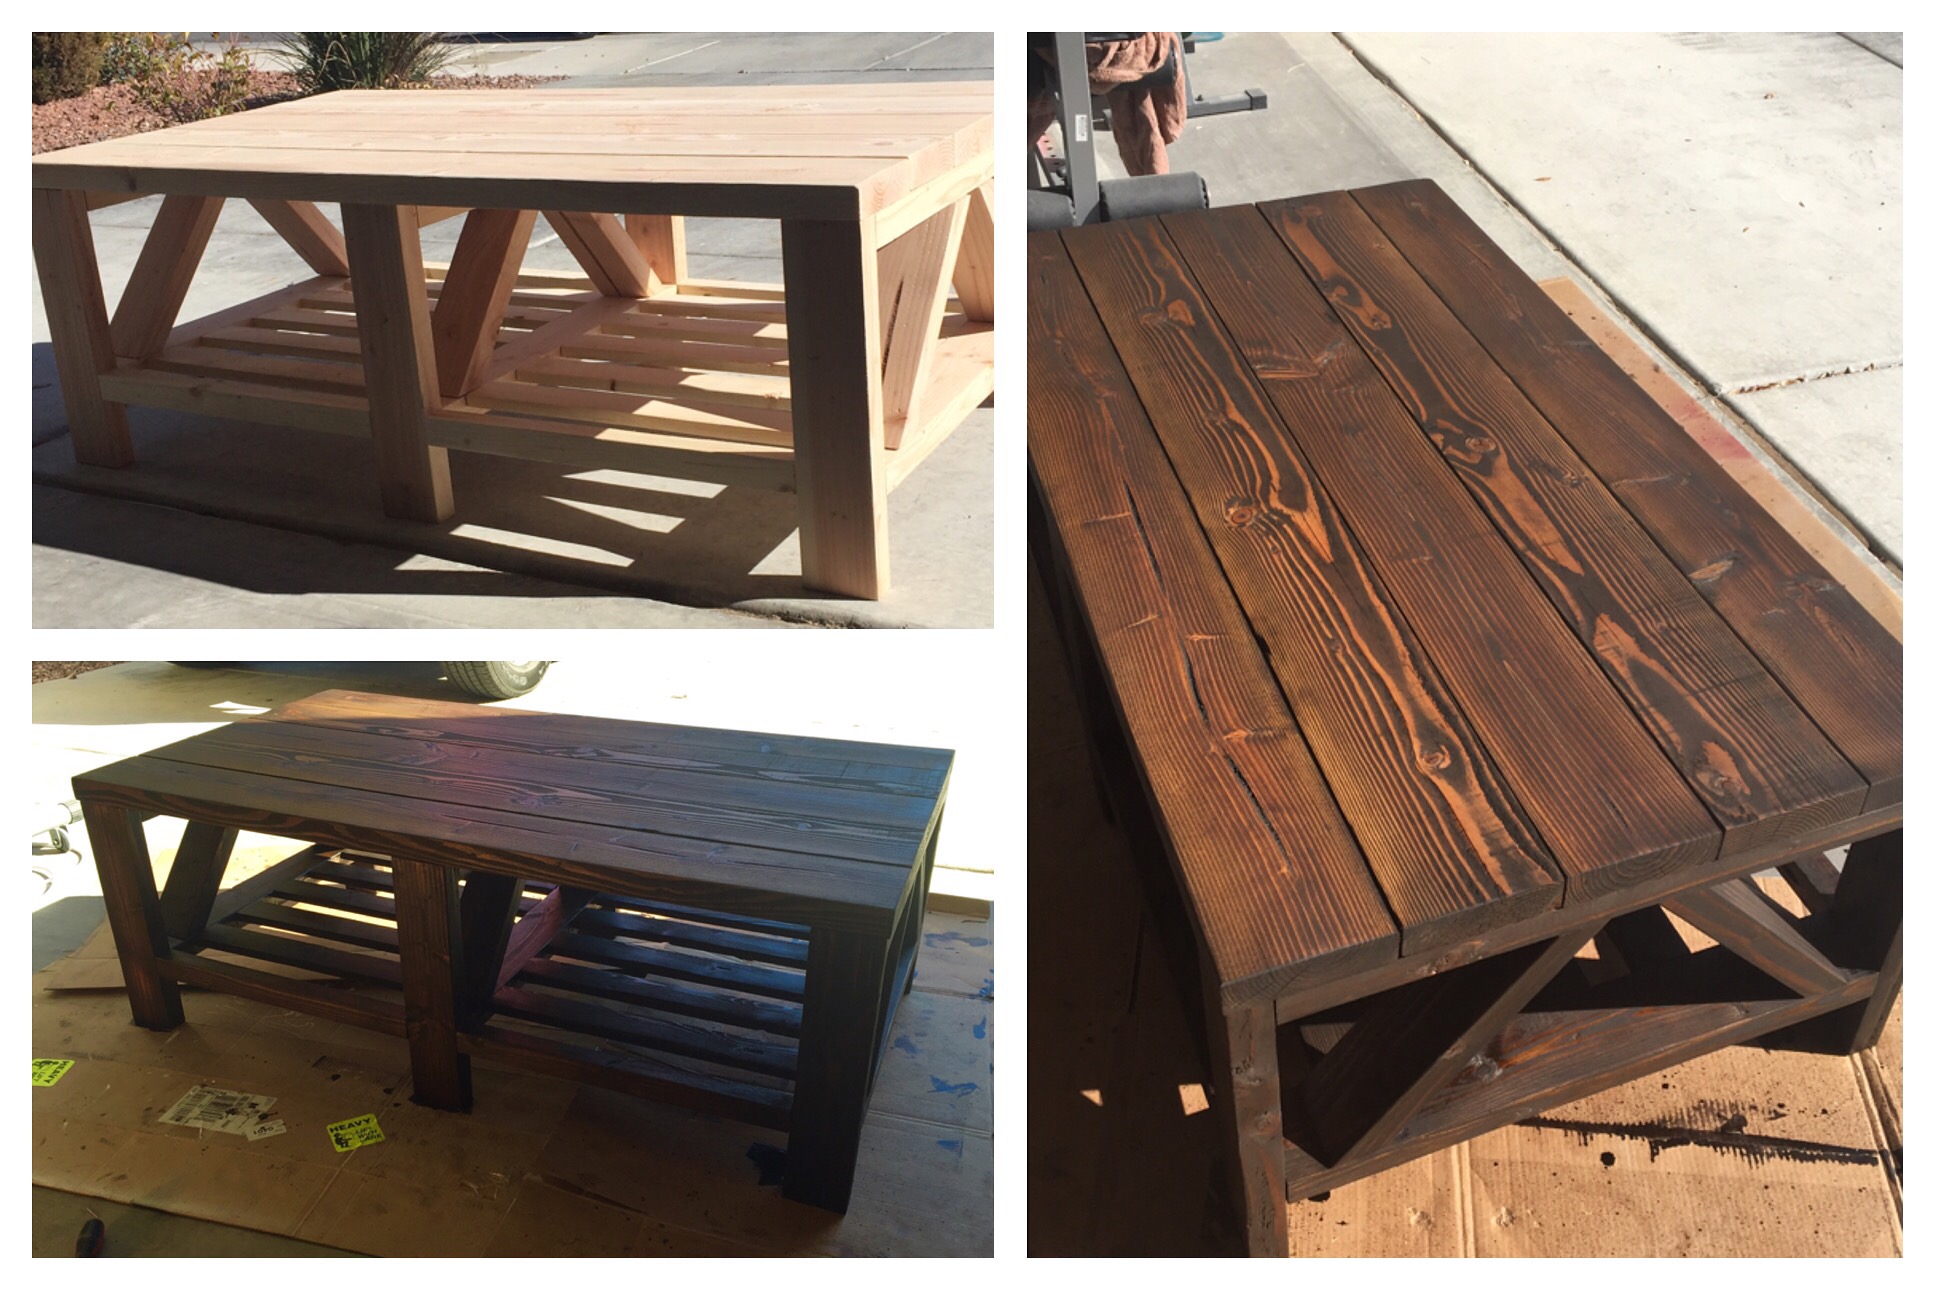
I did sand and stain before assembly which made things much easier. I used my standard weathered grey stain.
The sheets are Pillowfort : Rustler's Ranch twin set. The sign and banner hung on the bed I got from Hobby Lobby.
Sun, 08/04/2019 - 21:54
Thank you for submitting! This is awesome!
That is a smart suggestion to swap 1X6S for the siding that could save a lot of money.
very much appreciate all the photos and the details!
My husband whipped this up in one day using Ana’s plan. This is my new favorite spot to relax.
My husband and I modified the lovely Miss Ana White's dollhouse bookshelf plans to create this awesome Barbie Dollhouse for our 2 and 4 year old daughters to Christmas. They love it, and I love that it will last for years! Thank you Ana, for your amazing talents and your giving heart...your sharing your talents means the world to me and my family!!
Tue, 01/03/2012 - 20:50
I want one of those for my Barbie dolls, and I'm 52 years old!!! It's probably a good thing I don't have the room for this or I would make one just for me.
I needed a desk for in the finished basement. It's not the nicest of spaces but I am trying to class it up a bit while saving money. This desk was pretty easy to build and is one SOLID piece of furniture. This is something that will last a lifetime (or two, or three). Couldn't be happier with how this turned out. I followed the plans to the letter. The shopping list on the plans was one 2x4 short but other than that it was spot on. Love your site Ana! Thanks for all you share!
This coffee table was a weekend project that turned out quite well.
Our son was moving into his first college apartment. The dining area is small and he thought a breakfast bar would be perfect in this spot. We built the base using Ana’s Counter Height Farmhouse Table for Four plans. We modified the plans to to fit the table top - which was originally the top of a desk. We purchased the desk at our local Habitat Restore. We planed to use the base of the desk for another project- so using the top for this breakfast bar was perfect! The breakfast bar was a perfect fit!
Comments
Ana White
Fri, 07/12/2019 - 19:36
This is perfect for your…
This is perfect for your front door ! Love how you tied it in with your house colors.