Community Brag Posts

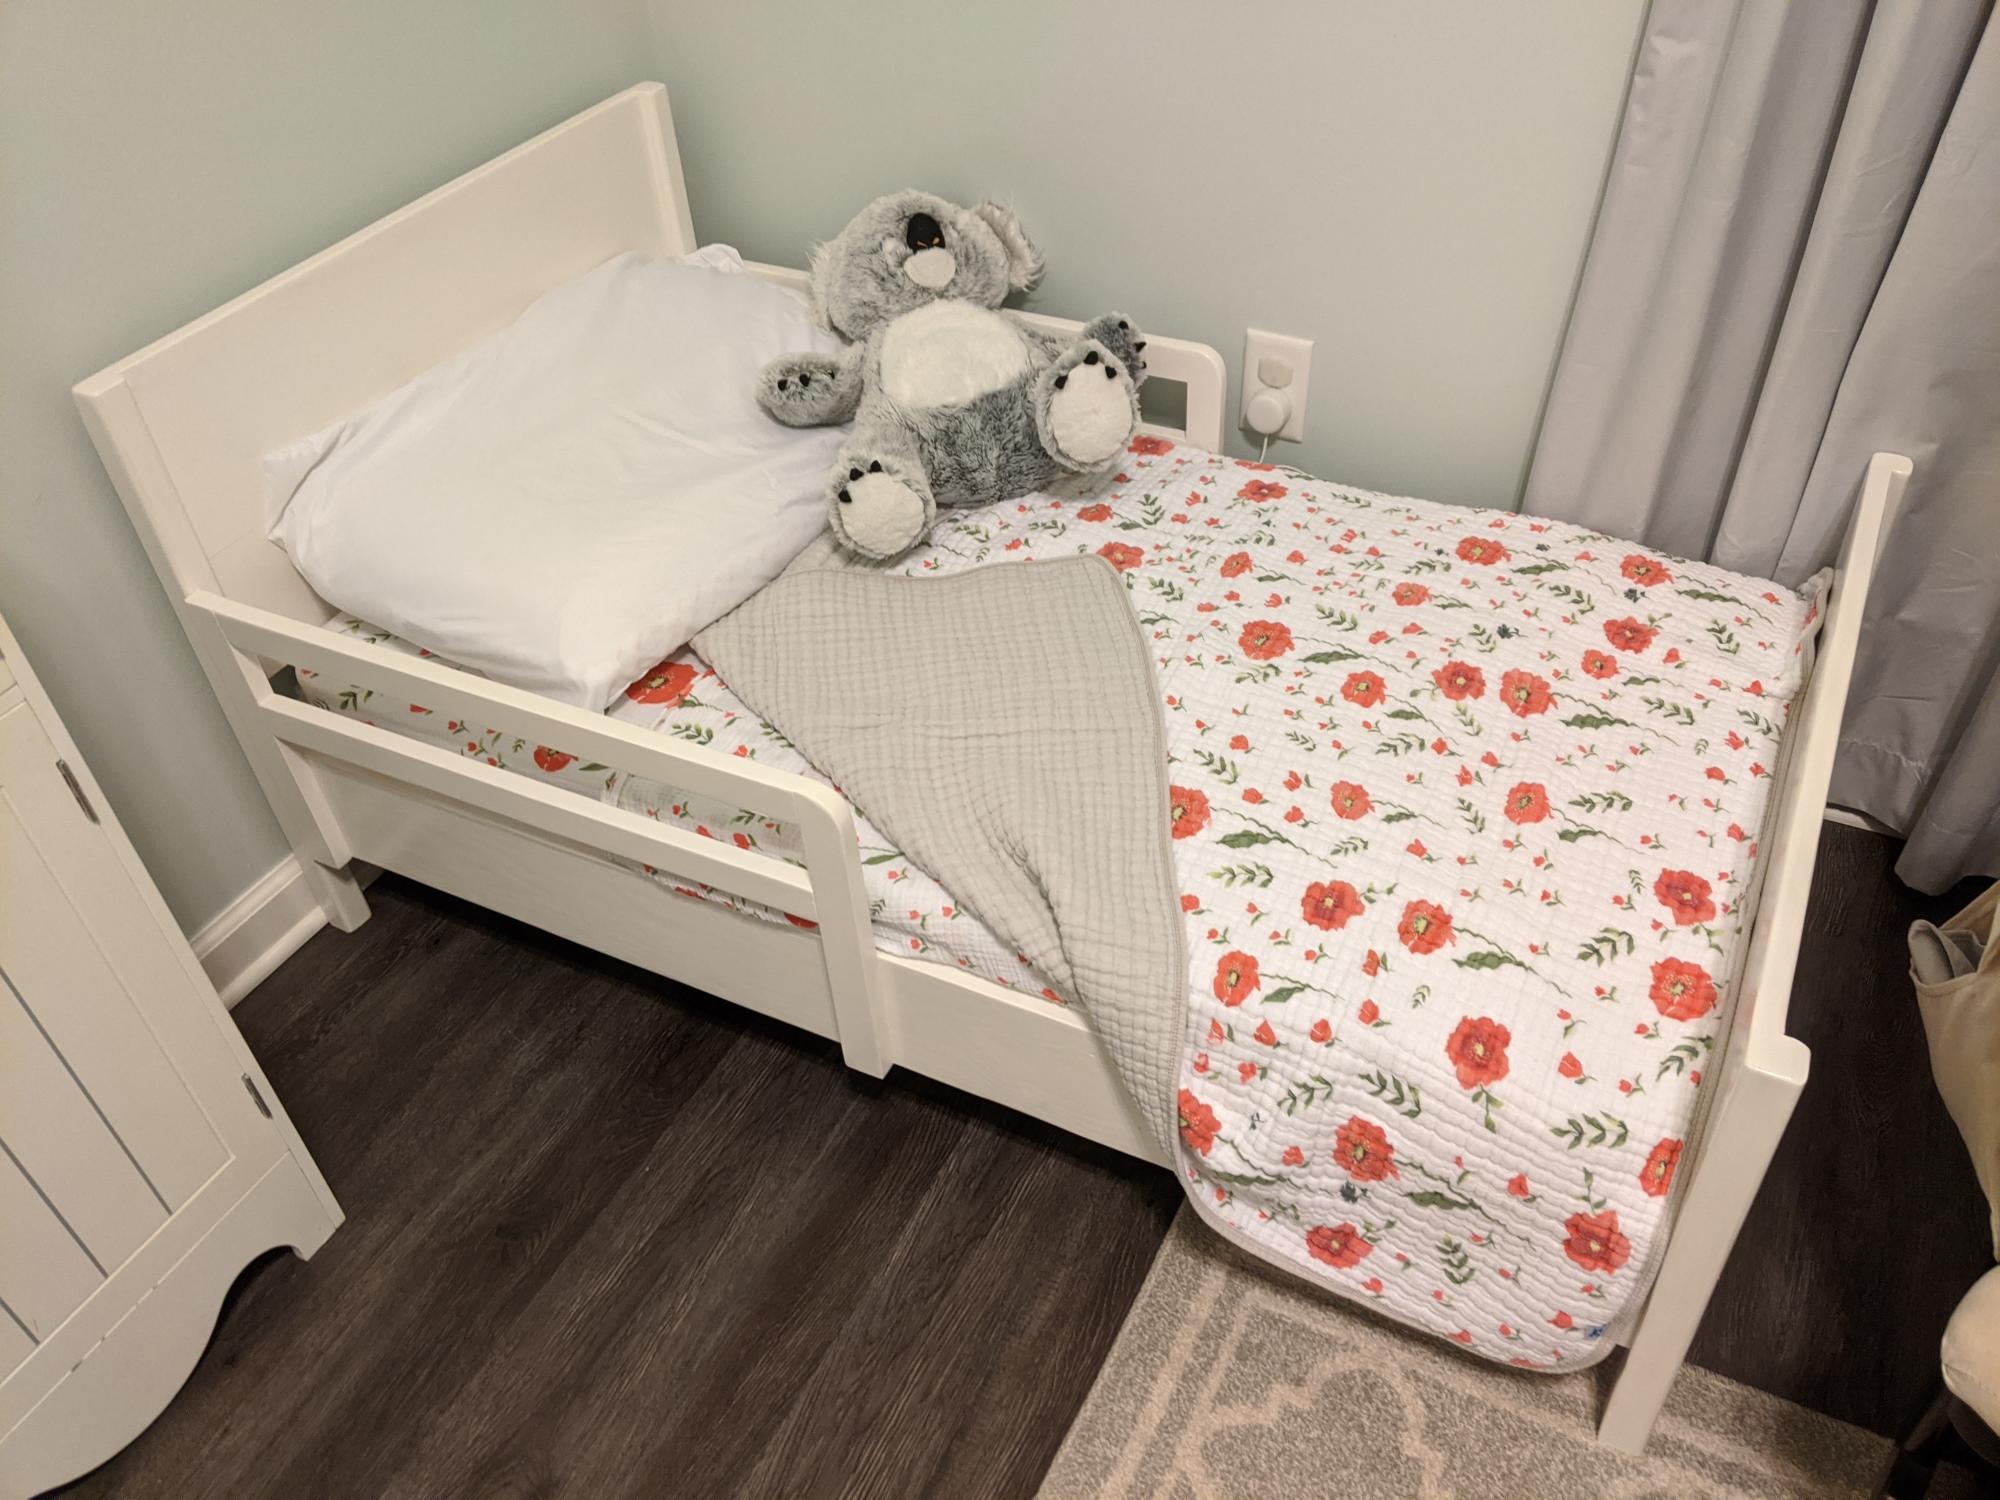
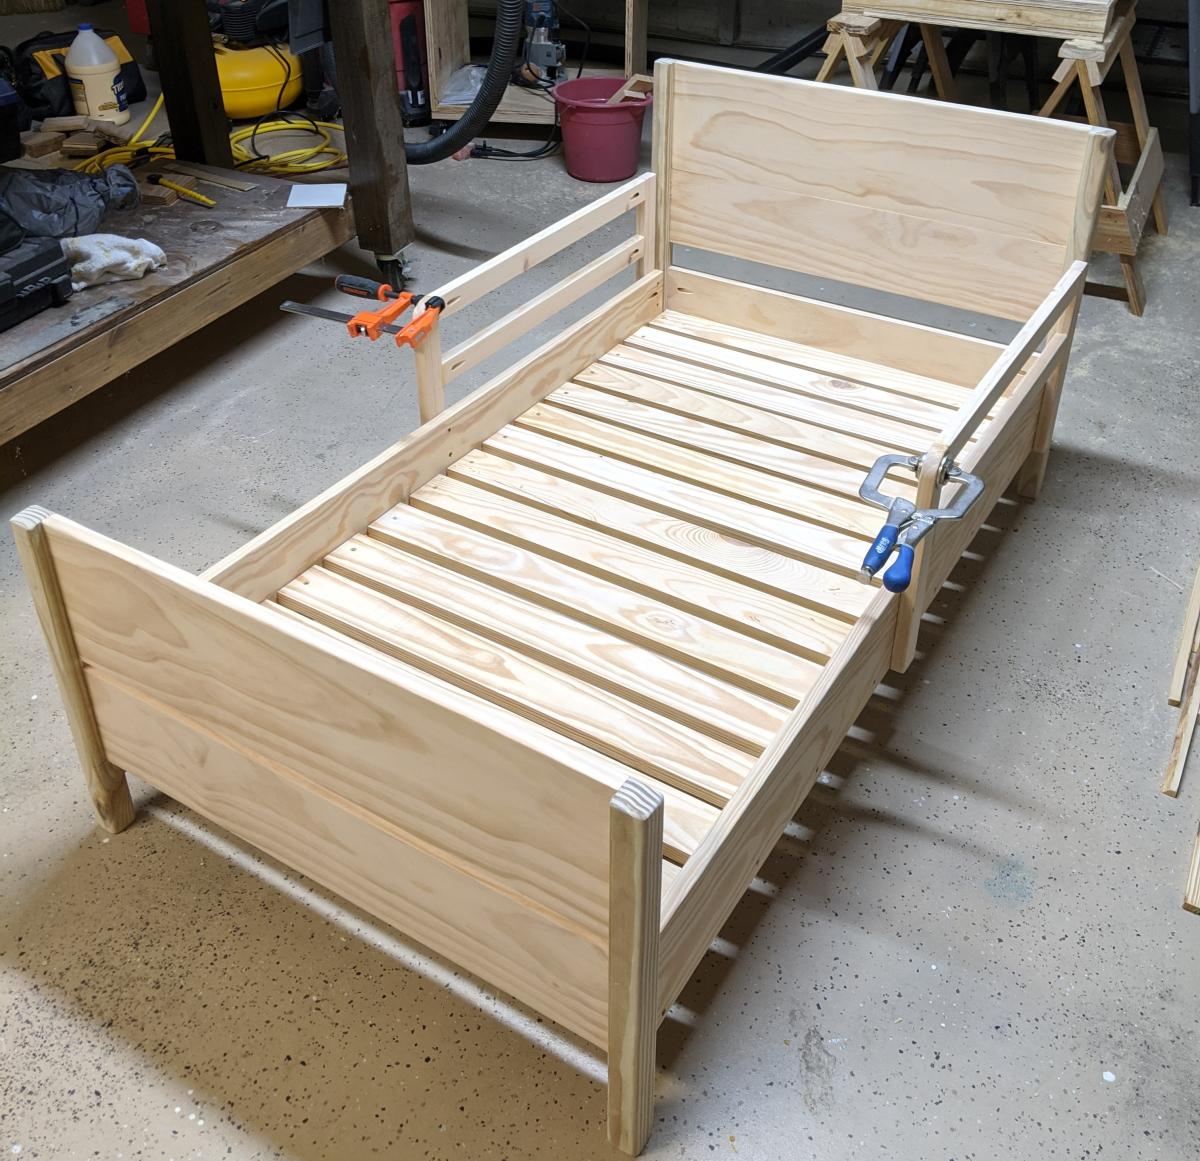
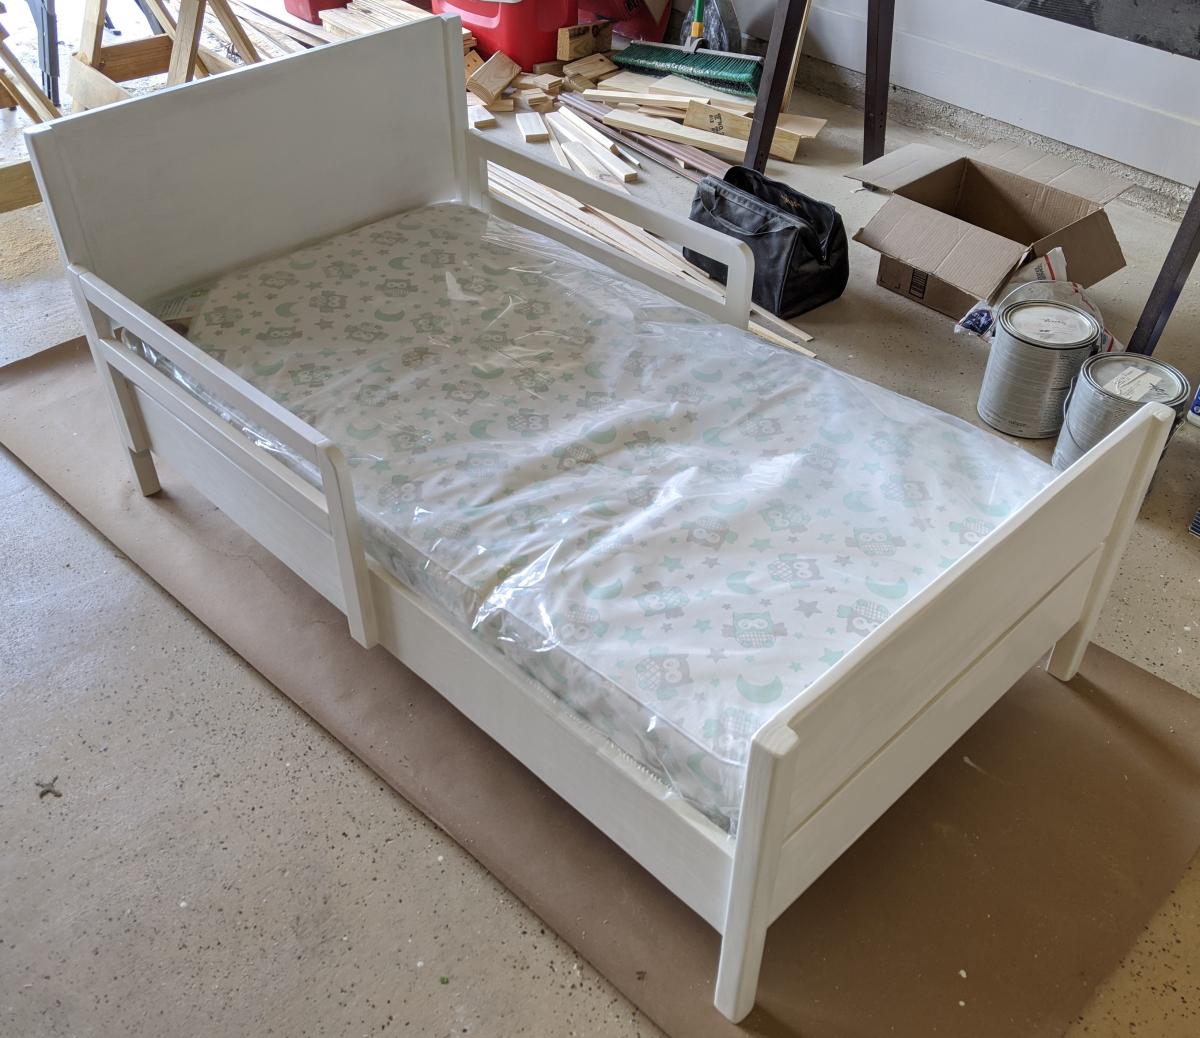
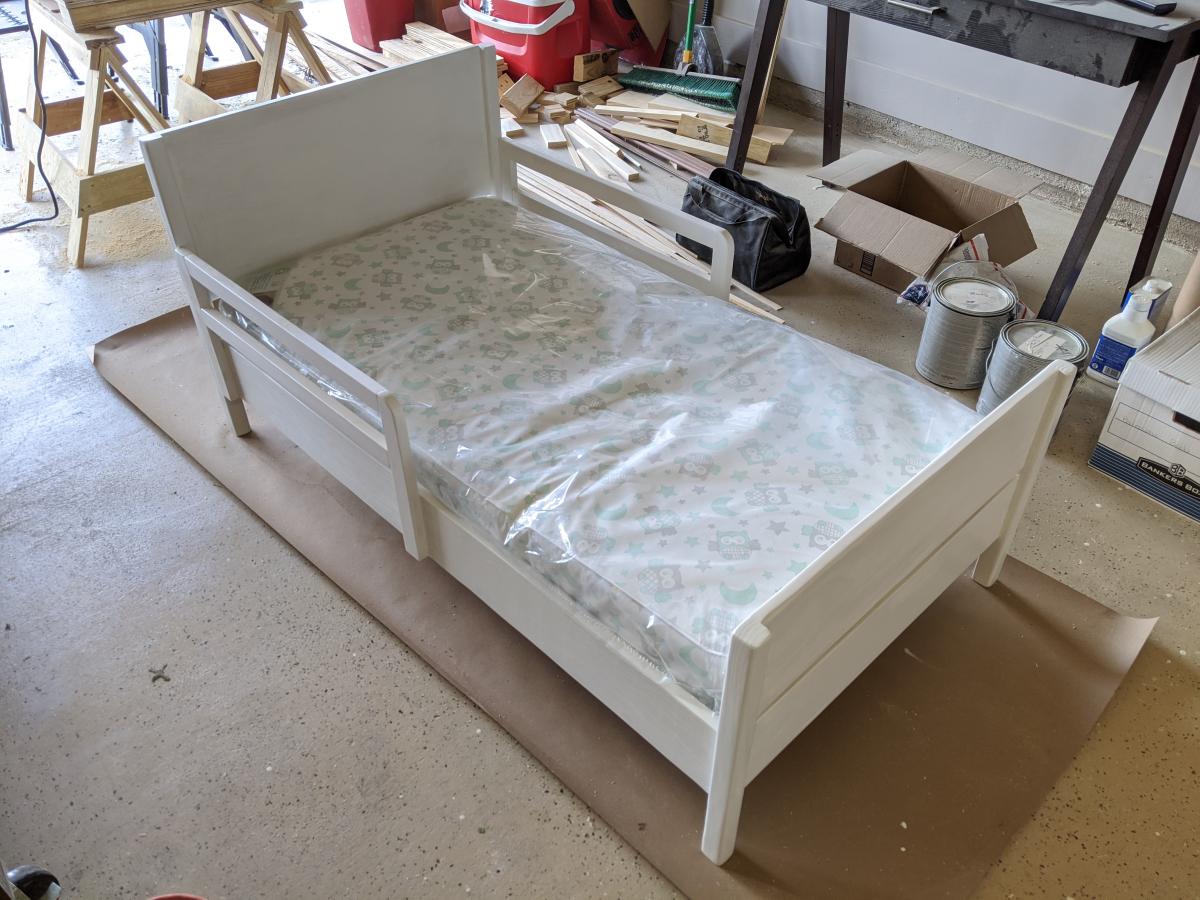
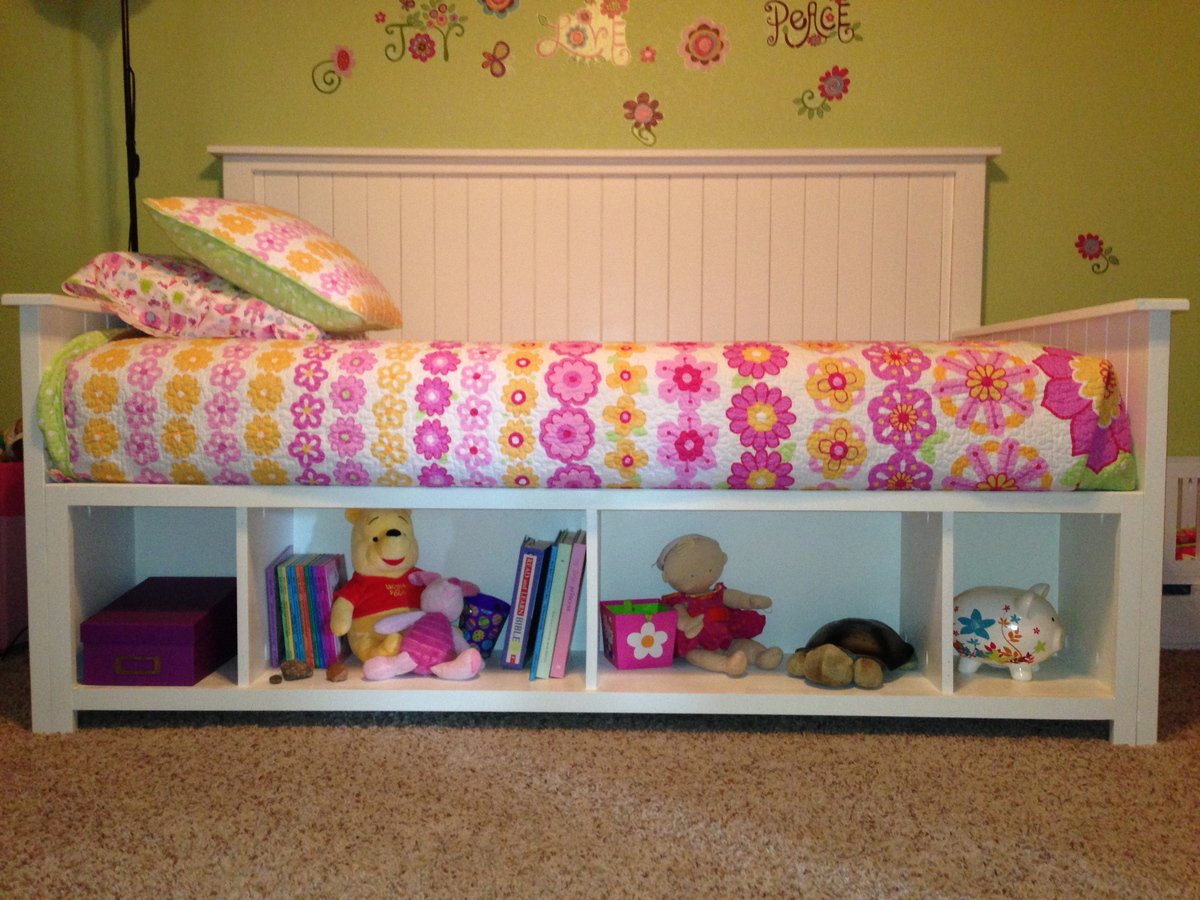
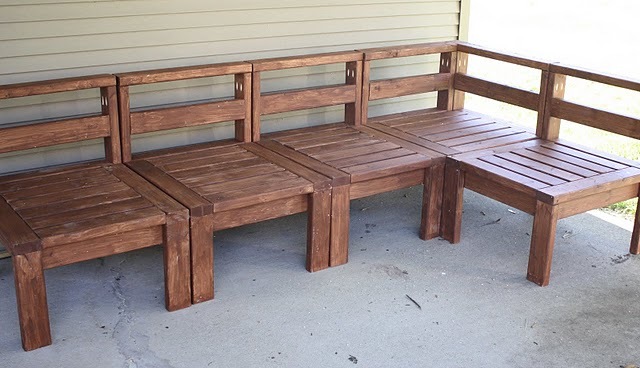
Stratton Daybed Knock Off Project

We followed Ana's detailed plans for the Stratton Daybed from her book and her blog. We appreciate the help!

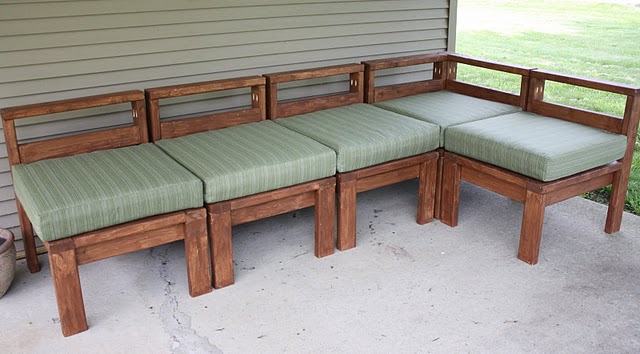
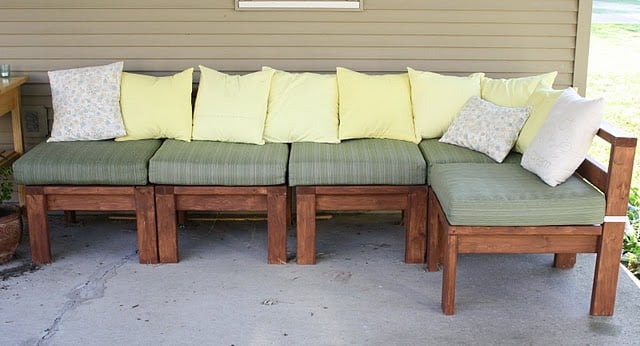
We made this for our twin nursery, so that I could have a place to feed, sleep and read to the babies. It is much more comfortable than having to squeeze myself and two babies into a single chair.

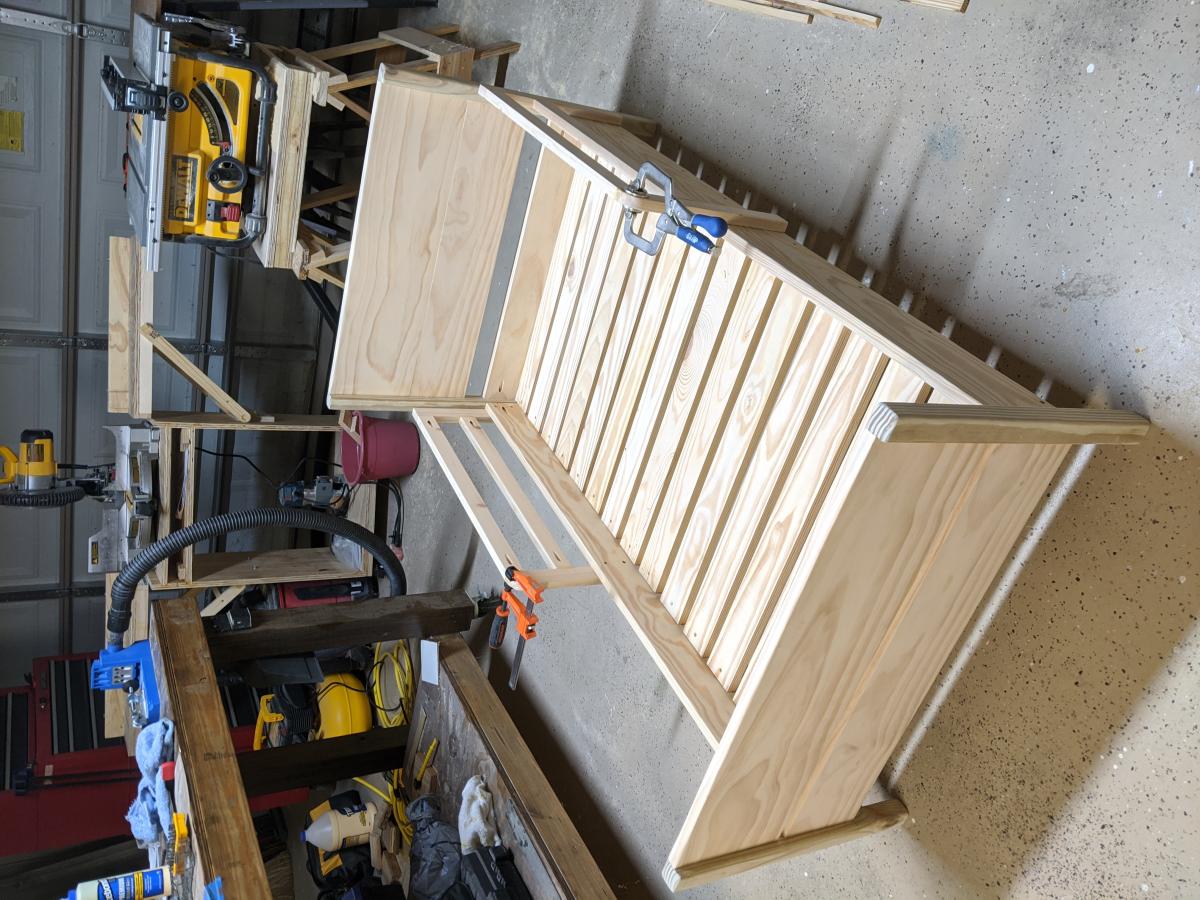
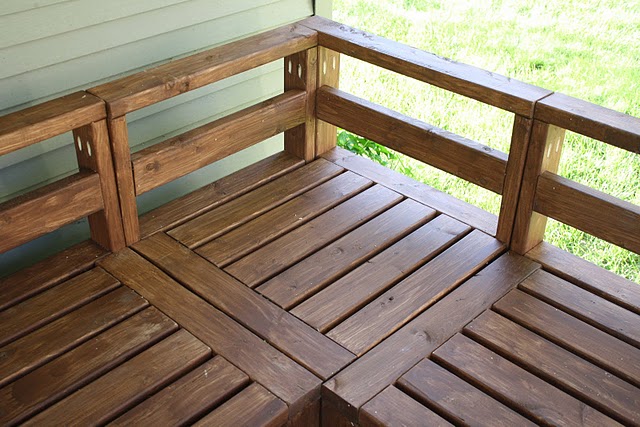
It took us a few days because we work and have a three year old. We decided to paint the inside of the storage spaces underneath to go along with the rest of the room.

Estimated Cost
$380
Estimated Time Investment
Day Project (6-9 Hours)
Recommended Skill Level
Intermediate

Garage shelves

Submitted by Joy on Sat, 09/08/2018 - 18:12

Designed to store 56 qt clear sterilite totes. Spaced 17” apart and used 5 2x4s so 23” deep. We have a lip of our foundation that sticks out so we had to adjust for the difference in leg heights. 

Estimated Cost
Lumber was $8.25 per board (2x4x16) and we used 32. 3 boxes of screws. 2 1/2 for the frame, 2” for screwing down the shelves and 3 1/2 to screw into the wall studs.
Estimated Time Investment
Afternoon Project (3-6 Hours)
Finish Used
None
Recommended Skill Level
Beginner

Pool Noodle Holder from DIY Planter Box

Submitted by Anonymous (not verified) on Sat, 06/04/2022 - 06:58

I modified the plans for the planter box to make a holder for Pool Noodles. I made it 40" tall and used 4-4" fence pickets and 1-5.5" fence pickets. I used a 4" spacer and the openings worked out perfect. I stained inside and out since it would show with 2 coats of the solid stain. It is perfect! Thank you so much for the inspiration and plans!

Comments

Farm House Table

Submitted by MzAnderson on Sat, 07/16/2011 - 14:39

With only a few changes from the original plan this farm table is my first furniture build. The legs are removable on the table and custom sized for our breakfast nook. I very much enjoyed building this all thanks to Ana!

Estimated Time Investment
Weekend Project (10-20 Hours)
Recommended Skill Level
Beginner

Comments

T-Town DIYer

Thu, 12/08/2011 - 06:34

No one has commented on this table, yet? It looks great. I'm loving the white bottom with the stained top. Im probably going to steal the idea for a project in the near future.

Guest (not verified)

Tue, 01/24/2012 - 07:34

Can you share the specifics on your mods? This is just what I want for the breakfast nook i'm going to build!

Simple Kitchen Bench

Submitted by bludevil35 on Tue, 08/20/2013 - 07:44

Another bench for another wedding gift.

We've made another already to keep in our kitchen. Looks great, thanks again for the plans.

We opted not to incorporate the storage/ flip top. Just a simple sturdy, great looking bench.

Estimated Cost
Just our time, all materials were reclaimed
Estimated Time Investment
Afternoon Project (3-6 Hours)
Finish Used
Minwax Dark Walnut
Recommended Skill Level
Beginner

Rustic X End Table

Modified to be slightly more modern by removing had the X and having a solid bottom shelf. Also, narrowed it up to be rectangular shape to save space. 

Built from Plan(s)
Estimated Time Investment
Day Project (6-9 Hours)
Recommended Skill Level
Beginner

Comments

Traditional Wood Toddler Bed w/ Straight Headboard and Footboard

Submitted by tducote on Tue, 06/14/2022 - 13:01

I completed this project back in February of 2020. I'm just realizing that I never posted about it here. The bed had held up phenomenally for the past 2+ years.

This was an excellent little project. It was just a little challenging and very fun. I changed the headboard and added a footboard to the bed by using extra 1x6 boards and elongating the feet about 6 inches to make it work. The construction part of this project (including cutting and assembly) took just one evening. I stayed up pretty late working on it, but I was able to complete it in one night. Painting took a few more days.

One note about the guardrails: the pocket screws split the vertical rails that were rounded off at the end. I glued and clamped the splits back together (note the clamps in one of the pictures), so no big deal. But I would recommend maybe not rounding them as much as I did. If I were to build it again, I'd probably just use my little disk sander to take the corners off, instead of taking off as much as I did using a jig saw.

Built from Plan(s)

Comments

Simple Modern Outdoor Sectional and Ottomans

Submitted by dwcampb on Fri, 07/22/2011 - 12:04

This was my second project and is the simple outdoor sectional. Took me about 8 hours to build all the sections and another 8 hours to stain everything. We ended up buying the cushions and pillows from Garden Ridge in Texas. Total cost for the cushions was about $500. Wood and materials was about $300. I used 1 x 4 cedar to insure it was rot and insect resistant. Then I stained it with Behr Premium Outdoor Natural #500. Looks great out on our covered patio. I will be building more as we are in the process of installing a pool of which I need lots of furniture to go around the decking!

Estimated Cost
$850 with cushions
Estimated Time Investment
Weekend Project (10-20 Hours)
Finish Used
Behr Premium Outdoor Natual #500. I sprayed all stain with a cup gun and gently spread the stain with a pad applicator. I did 2 coats on all sides.
Recommended Skill Level
Beginner

Comments

Guest (not verified)

Fri, 07/22/2011 - 13:55

This is gorgeous and it goes really nicely with your brick house too! I'd love to see more pics if you have. Great job :)

spiceylg

Mon, 07/25/2011 - 08:09

I want to build this so bad but have to be patient and wait because of the cost of the cushions - it's crazy! You did an amazing job!

Guest (not verified)

Sun, 02/26/2012 - 12:41

Cushions are expensive because you want to buy a mold/mildew resistant foam on the inside. Secondly, you want the fabric to be an outdoor fabric that has resistance to fading from the sun, but again that will resist mold/mildew and withstand rain, etc...with that said it makes them expensive.

Seasonal And Holiday

Daybed for our "big girl!"

We pulled ideas from a couple of plans for this daybed. We utilized the farm house headboard for both the back and the sides. And, the daybed dimensions and framework from the Hailey Storage Daybed.

We have cabinet doors to put on the two center cubbies, but the first set warped when painted. So, the second set are currently drying. We're planning to use magnetic spring-push closures on them to eliminate the need for cabinet knobs (we're afraid they could be used as a step by little feet!).

We did not secure the slats that lay behind the cubbies and the headboard, this way we can utilize space under the bed for additional storage--there's a ton of room under there!

This was the first project that we used a Wagner HVLP paint sprayer on. I will NEVER go back to brushed and rollers. The learning curve was minimal and the time savings phenomenal!

Estimated Cost
$300.00
Estimated Time Investment
Week Long Project (20 Hours or More)
Finish Used
2 coats of primer and 3 coats of high-gloss latex paint applied with HVLP paint sprayer.
Recommended Skill Level
Intermediate

Comments

BuiltByMangus

Mon, 10/28/2013 - 11:04

We built this bed over the weekend! Just need to finish painting. I was wondering if you had trouble with the mattress fitting, because the dimensions seem to be a very tight fit. Also, did you put a sealer on the bed or just paint?

DIY Kids Art Table

I'm so excited Ana created plans for this table!  When I first came across it on Pottery Barn Kids it was love at first sight. :D  I built it over the weekend for my little toddler.  Unfortunately, he's too short for it, but he'll grow into soon enough. :)  (I secretly wished it was an art table appropriate for my height!)

It cost me about $75 to build.  I splurged and bought select pine boards for the project.  The art table was also my submission for September's Fab Furniture Flippin' Contest.  September's sponsor is General Finishes and the theme was geometry!

Now, I just need to build matching seats! I love the little stools Ana built; maybe I'll do something sorta like that. :)  


Thank you Ana for inspiring me to build!


Built from Plan(s)
Estimated Cost
$75
Estimated Time Investment
Weekend Project (10-20 Hours)
Finish Used
General Finishes Milk Paint (Snow White), Acrylic craft paints for the geometric pattern, ECOS Paints Woodshield in Pine Needles for the cubby stain, and ECOS Paints Gloss Varnish
Recommended Skill Level
Beginner

Comments

Mike’s Cedar Shed

Submitted by Anonymous (not verified) on Sun, 10/14/2018 - 19:29

My husband Mike built Ana’s cedar shed over the course of a few weekends. He wanted it to be 3-ft deeper than the original, so he made those modifications, and it turned out great! We added some vintage/historical knobs and brackets to really make it pop! It is ready to be filled with lawn mowers and tools! 

Built from Plan(s)
Estimated Cost
$600
Estimated Time Investment
Week Long Project (20 Hours or More)
Recommended Skill Level
Intermediate

Blanket ladder

Submitted by JMG on Fri, 06/24/2022 - 21:04

I built a ton of these as Christmas gifts and they were a huge hit! I used 2x3's and made them in different heights. Thanks, Ana!

Comments

Parson Tower Desk

Submitted by a2joy on Tue, 07/26/2011 - 11:58

I've been wanting a new desk for YEARS, as I've been using my childhood desk as a computer desk for about 12 years, but I never wanted to shell out the kind of money a desk I'd want would cost. So, this Parson Tower Desk was my very first build! First time using a table saw & I kept all of my fingers (go me). I'm very proud of how it turned out. It's not perfect, but it is exactly what I was hoping for! I love using it & can't wait to move onto my next project!

Built from Plan(s)
Estimated Cost
$75
Estimated Time Investment
Weekend Project (10-20 Hours)
Finish Used
2 coats of white semi-gloss Behr paint & primer in one.
Recommended Skill Level
Beginner

Comments

emmarosemc

Thu, 07/28/2011 - 18:11

Screw the power station thingy to the bottom of the desk and fill in the pocket holes and youre perfect!
Im still in the process of building two supersized versions of the parsons desk

Pam's Bench

Submitted by CSaintD on Tue, 10/06/2015 - 10:41

#formeremortals   #anawhite  
A bench I built for my sister as a birthday present.  I used whitewood for the painted parts and some left over knotty alder for the top and cross supports.  The alder was from a kitchen rehab and I have been holding on to that wood for ages. :)  The hardest part was the cross supports - figuring out the angle was a bear!   Thanks for the plans Ana!

Built from Plan(s)
Estimated Cost
I had the top wood saved from a kitchen rehab and the white wood was left over from other projects so no cost to me. But I estimate if you had to buy everything it would be around $25.
Estimated Time Investment
Day Project (6-9 Hours)
Finish Used
The Alder was pre-finished from kitchen cabinets and I painted the whitewood with a sample I had from lowes.
Recommended Skill Level
Intermediate

Garden Bench

Submitted by JMG on Wed, 07/06/2022 - 19:32

Combined several different plans from several different sites, but my mother in law is a master gardener who loves birds and wanted a new bench for her garden. I used 1x4's on the seat slats (instead of 2x4's- added an extra support in frame), made the seat a bit deeper, and I modified the arms to allow somewhere to rest a glass of her southern sweet tea. :) All made from box store non PT lumber and sealed for outdoors. The ideas for the "pickets" on the back and birdhouse came from "MyOutdoorPlans.com"- want to give credit where credit is due.

Built from Plan(s)

Comments

Outdoor Sectional with 2x4s

Submitted by Georgia M on Sat, 07/30/2011 - 19:04

We LOVE Ana's plans for the outdoor sectional! We just bought a house with a first patio and we knew this is what we wanted out there! We used one corner unit and four armless units to fill our space. I'm also planning to add a couple ottomans as a coffee table. Let the cookouts begin!
I don't know if it's true everywhere, but here 2x4s are about 1/2 the price of 1x4s so we made a couple modifications to the plans so we could use the much cheaper 2x4s instead. It saved us tons of money and gave the sectional a really chunky, sturdy look - a nice bonus!
When we finished it, the blue store employees suggested we use a deck sealer to make the cheaper wood last a long time. We were able to use a waterproofing stain to color and seal the wood at the same time which made the finishing go a lot faster than other projects I've done with stain and polyurethane.
This is the first time I got to use my new Kreg Jig, which was super fun, and made the furniture nice and sturdy!

If anyone is interested in using 2x4s I have the modifications here: http://morelikehome.blogspot.com/2011/06/our-new-outdoor-sectional.html
And info about my finished project here: http://morelikehome.blogspot.com/2011/07/patio-perfection.html

Estimated Cost
Building supplies - $130, Cushions - $140
Estimated Time Investment
Weekend Project (10-20 Hours)
Finish Used
We used Thompson's Deck & House Waterproofing Stain, applied before assembly
Recommended Skill Level
Beginner

Comments

spiceylg

Sun, 07/31/2011 - 04:33

Love the chunkier look as well. Beautiful job and thanx for posting the mods which I will be sure to use in the future when we build ours! If you don't mind me asking, where did you get the cushions and how much for each? Also, love, love, love your profile pic! Absolutely precious!

In reply to by spiceylg

Georgia M

Wed, 08/03/2011 - 20:06

I'm glad you like it! Thanks for the nice comments!
The seat cushions were from walmart for $25 each (marked down from $30). We spent almost as much on those as on the furniture! Crazy! The back pillows are just regular throw pillows to save some $$$. :)

Barn door closet doors

Submitted by JCJINAZ on Mon, 08/26/2013 - 12:29

Made these barn door style doors for our master bath remodel. Using some of the same techniques found here. The finish is a 5 step Minwax process: pre-soak, American oak stain, grey, whitewash and finally wax finish.

Estimated Cost
200
Estimated Time Investment
Weekend Project (10-20 Hours)
Recommended Skill Level
Intermediate

Comments