Vanity
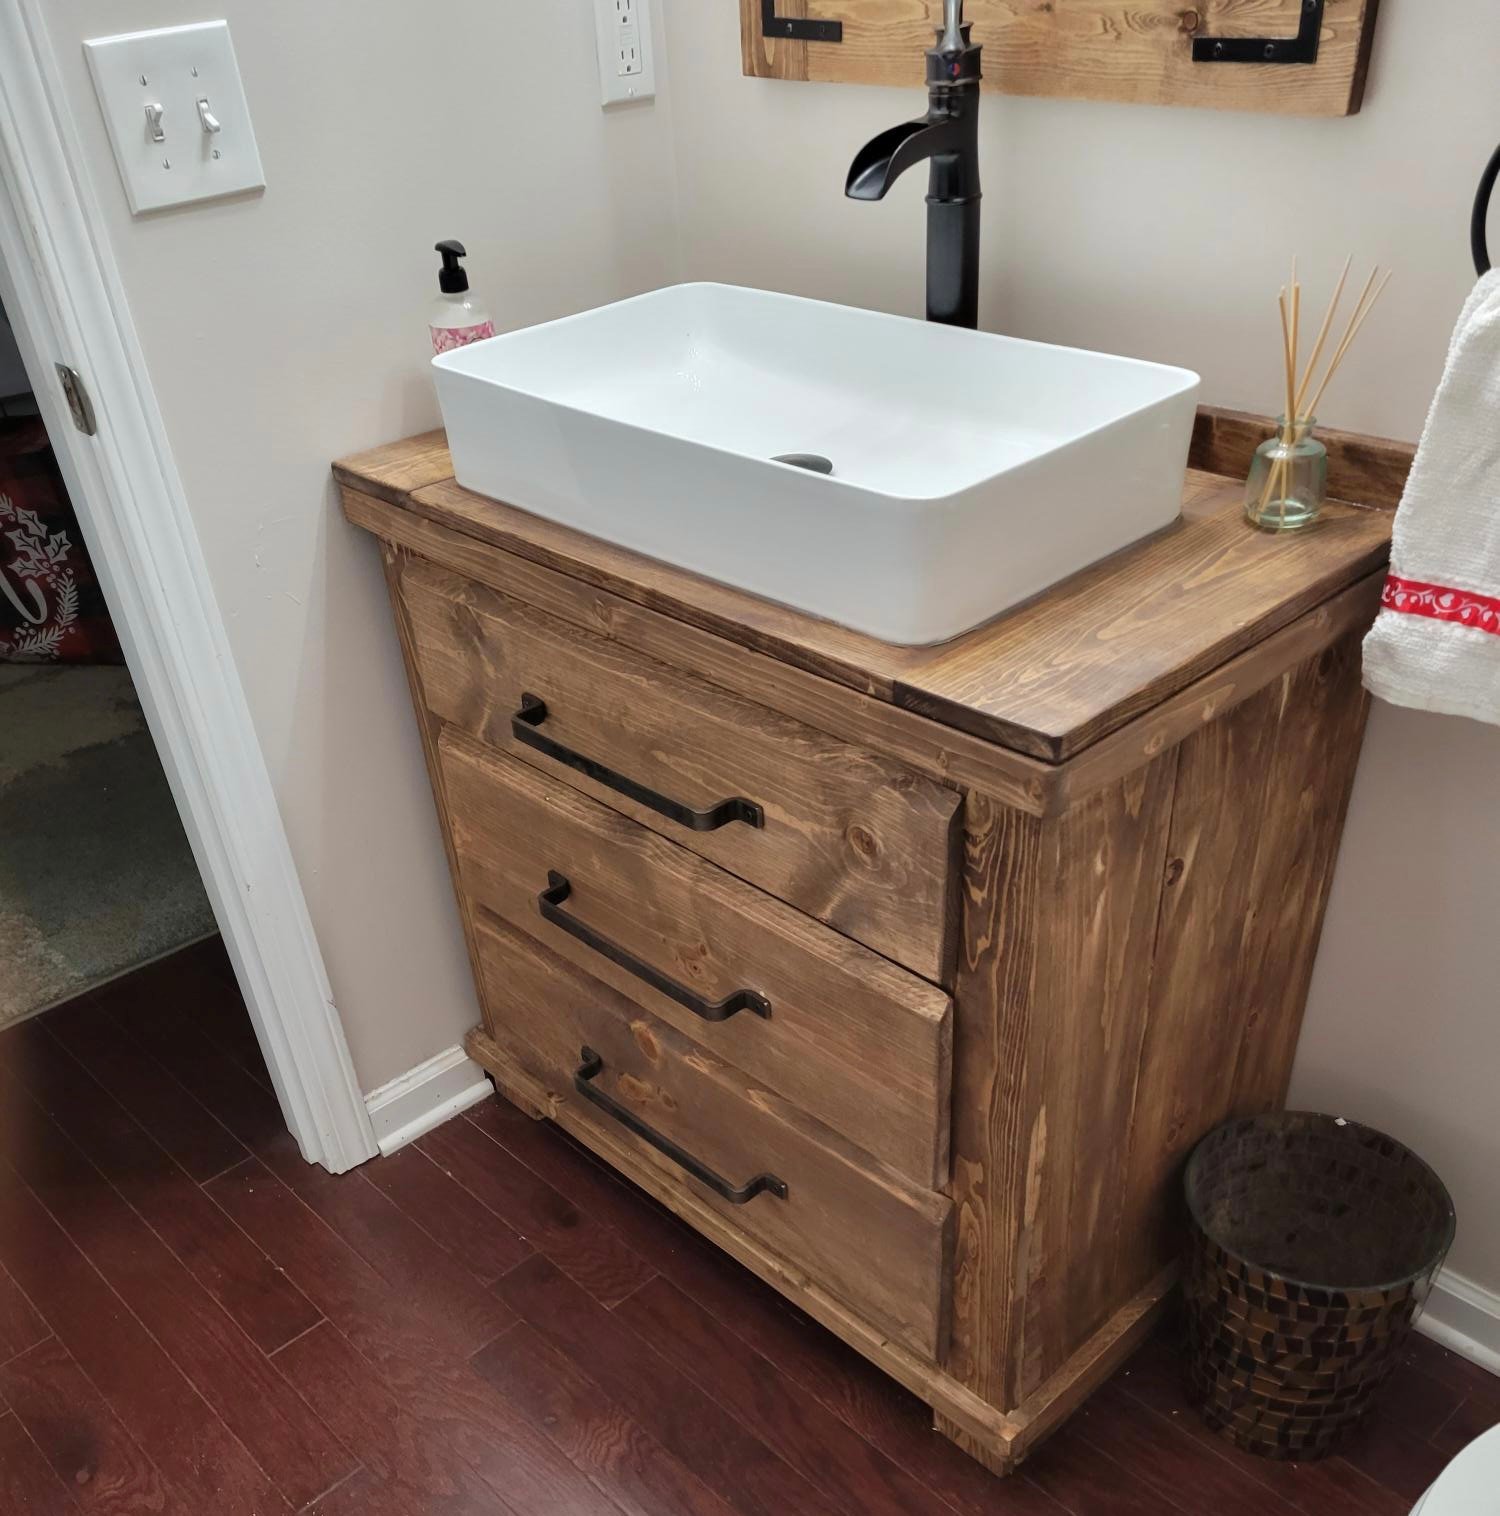
Wanted something different, thought it came out ok..
Built from Plan(s)
Wanted something different, thought it came out ok..
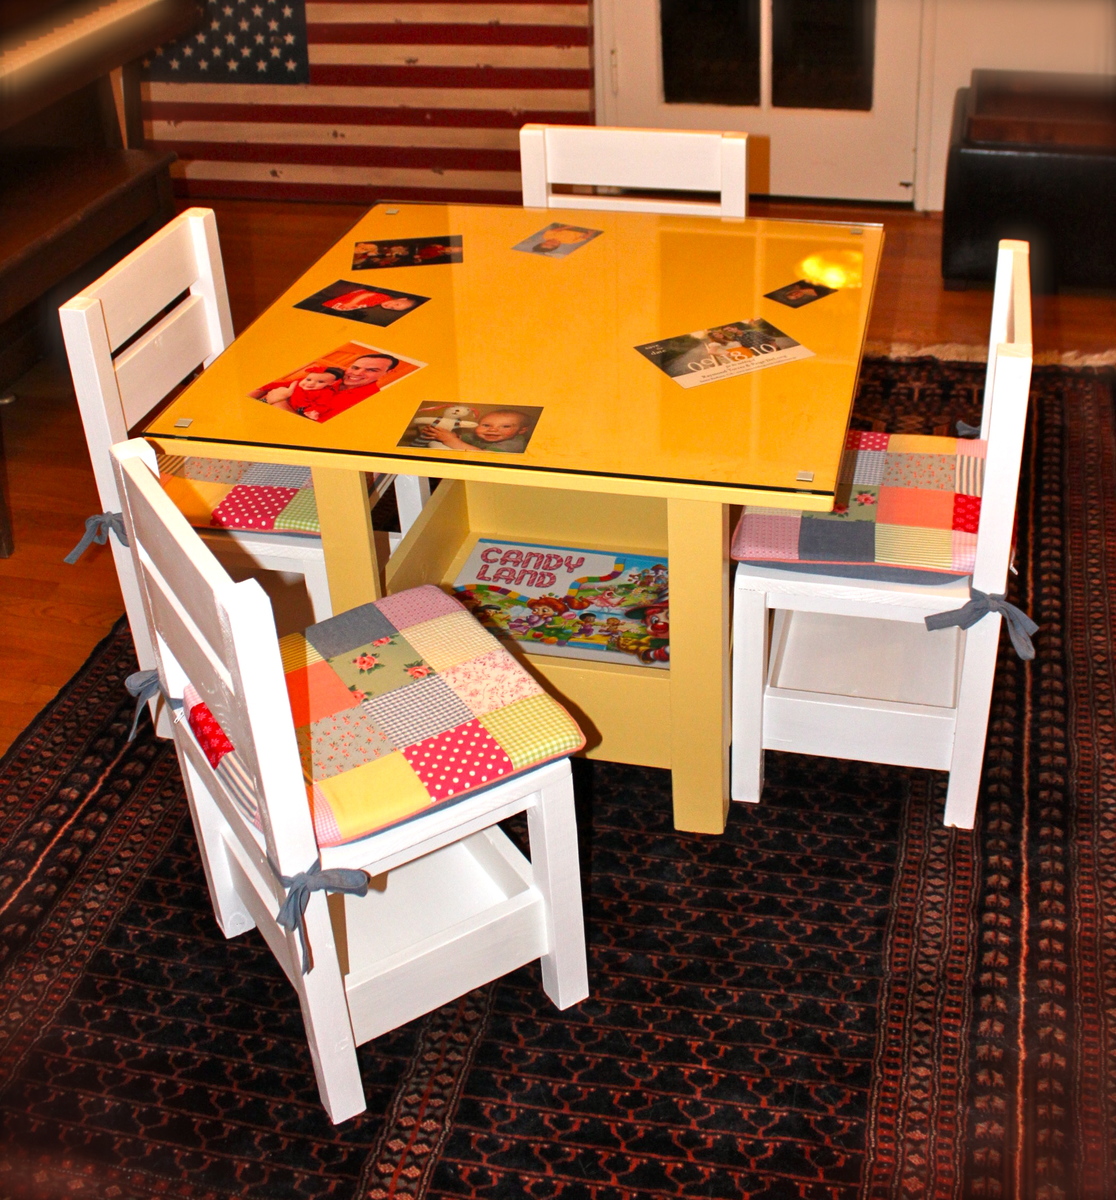
I wanted to build something for my Daughter's 1st Birthday that would last a long time. This was perfect!
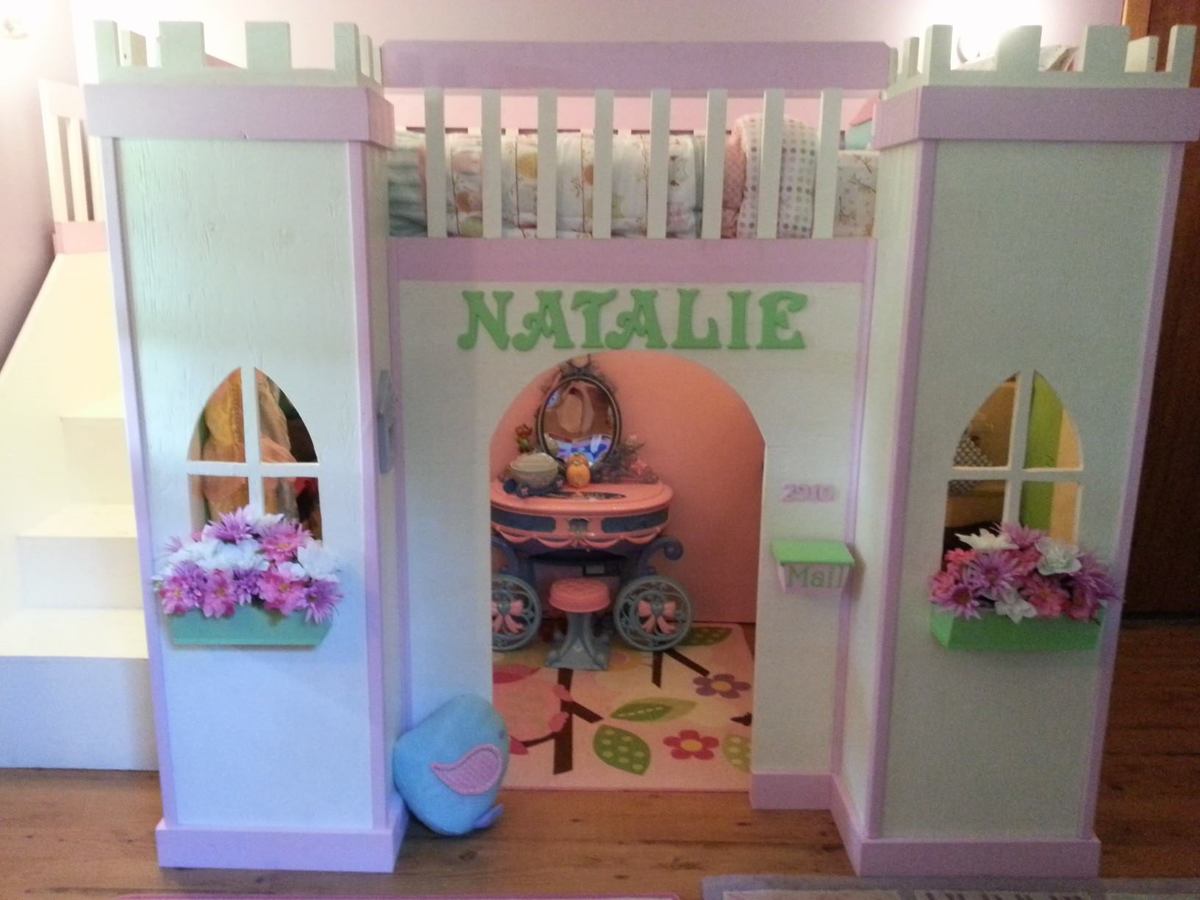
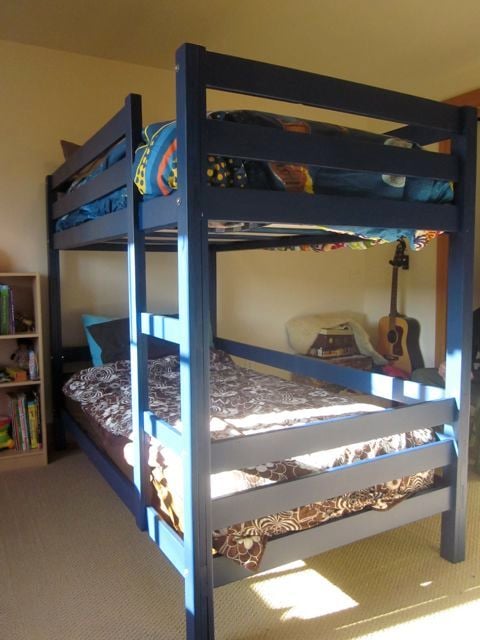
My Husband built this bed in about two weeks time (in addition to working 70+ hours at his real job). This past week I have helped with all the painting and decorating. As you can see he modified the plans to omit the slide. We hung soft white rope lights under the bed to illuminate the inside of the castle. My husband paired the rope lights with a remote control light switch so our daughter can turn them on and off safely. We are incredibly pleased with the results of our hard work as well as our sweet Natalie! Thank you Ana White for this amazing site of yours!!! My husband has also built from your site the clubhouse loft bed (PBK version) for our son, a computer desk, as well as the rustic X console table for me!!! We LOVE your site!!!! Thank you again!!!
This was my first project from Ana's website and I'm hooked! I'm a beginner, but thank goodness for my Dad's help because I have a lot of learning to do!
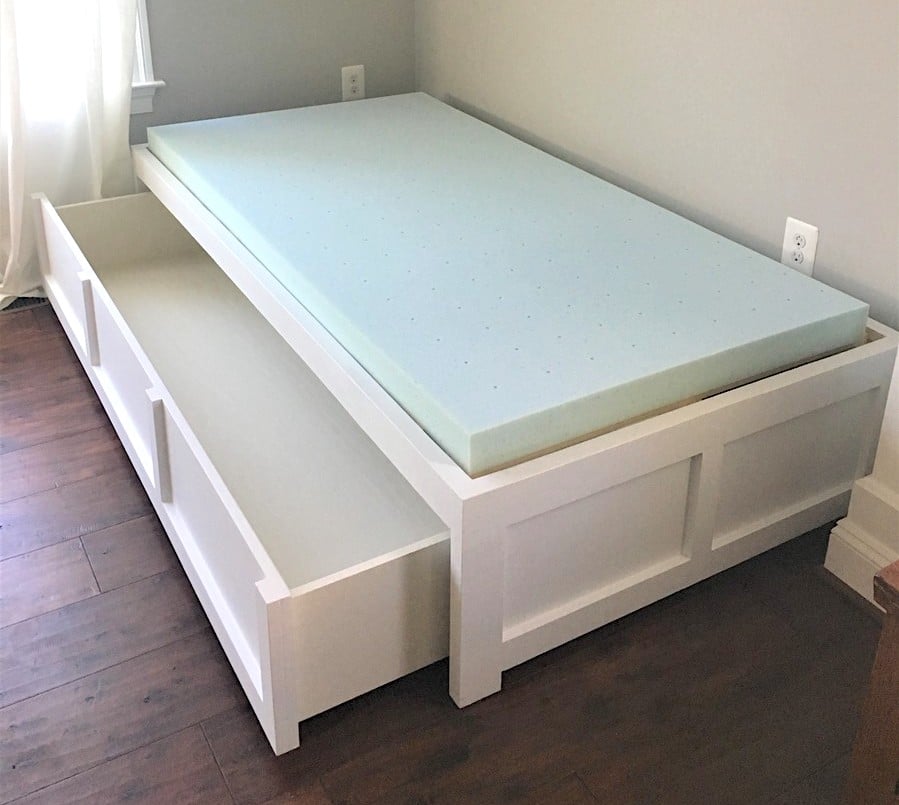
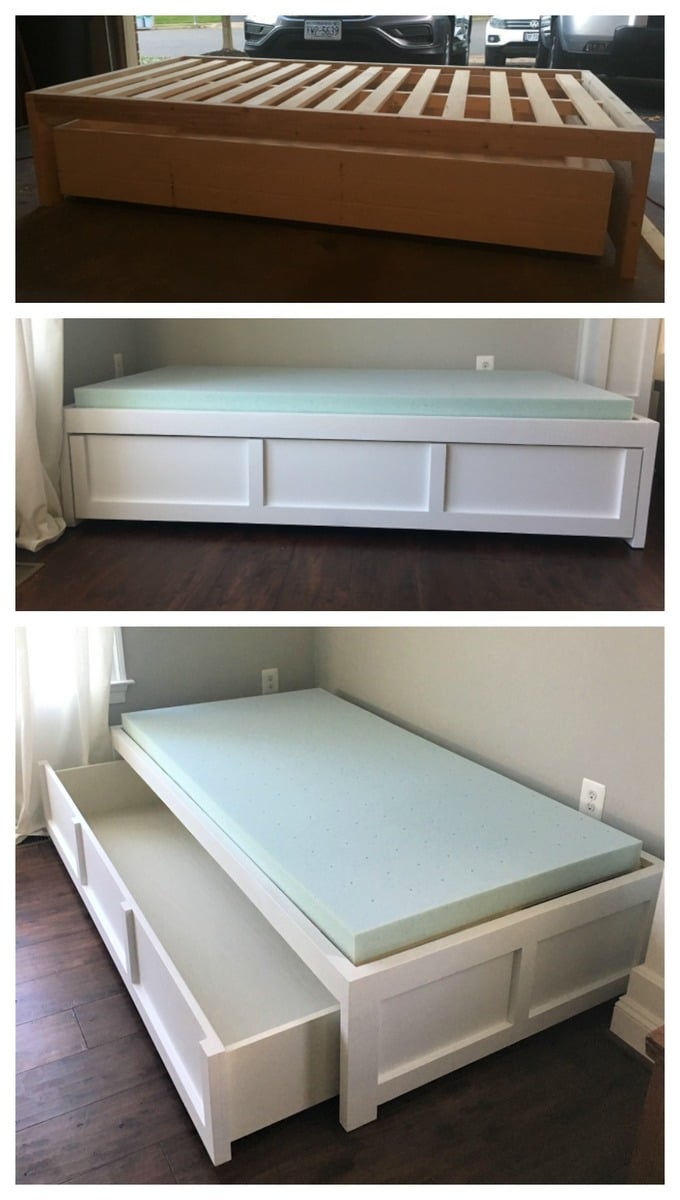
I wanted the drawer to be 1 drawer instead of 3. I feel like it looks cleaner (without having to adjust 3 drawers constantly to make it look good when you push them in). I was thinking the bed could actually be used as a trundle bed in the future too! I use this to store toys right now and it is Awesome!
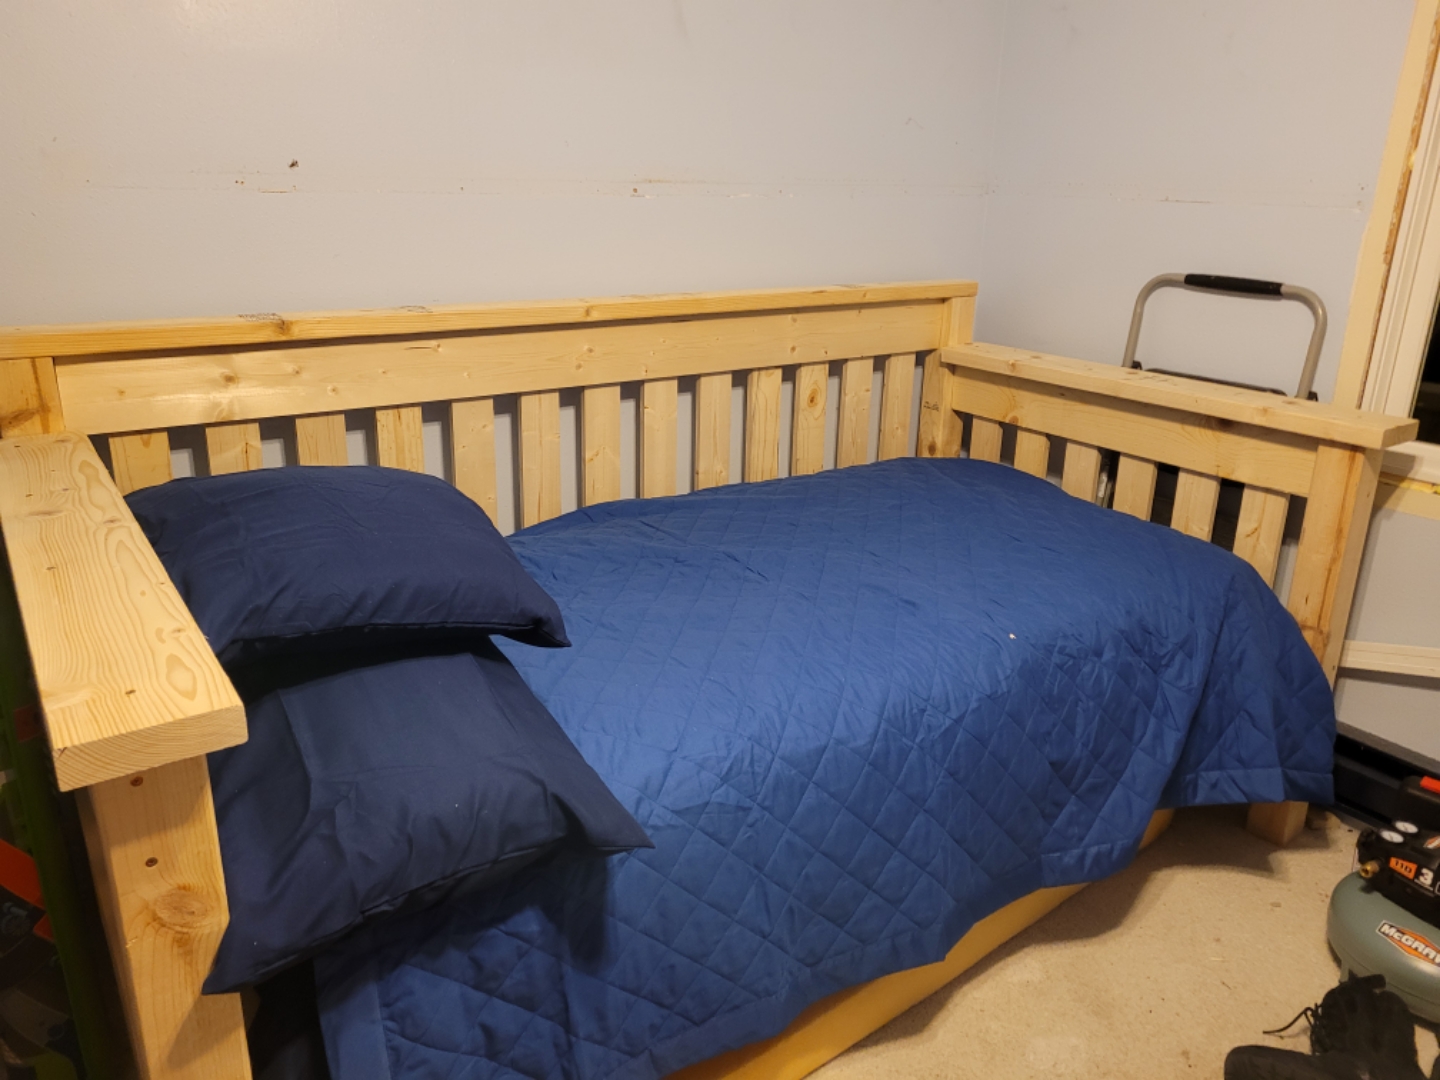
I increased the bed size to fit a twin mattress and increased the height of the bed slightly so that the drawer would be a little bit deeper. We also added a back to the bed and carried around the trim to make all sides look the same. We added a bumper to the back and sides of the inside of the bed so the drawer is easy to push in and fits in snug. Finally we reinforced the bottom of the drawer with more 1x4 boards so that if a child does sleep in it, it would be more sturdy. I now have kids come over and jump into the drawer (literally) and I'm glad we reinforced it.
The changes we made did add to the cost and our time (as well as being newbies), but I think it's worth it and the bed turned out beautiful!


Sat, 01/15/2022 - 08:02
Any chance you have your cut list for this? Will the trundle storage drawer fit a twin mattress in it? Also, you say you increased the bed size to a twin, was the original not a twin too?
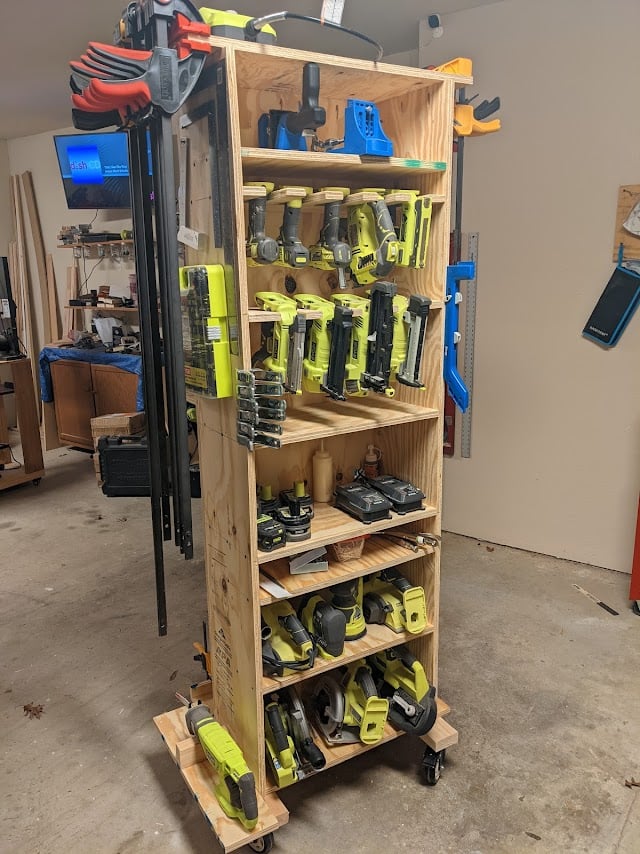
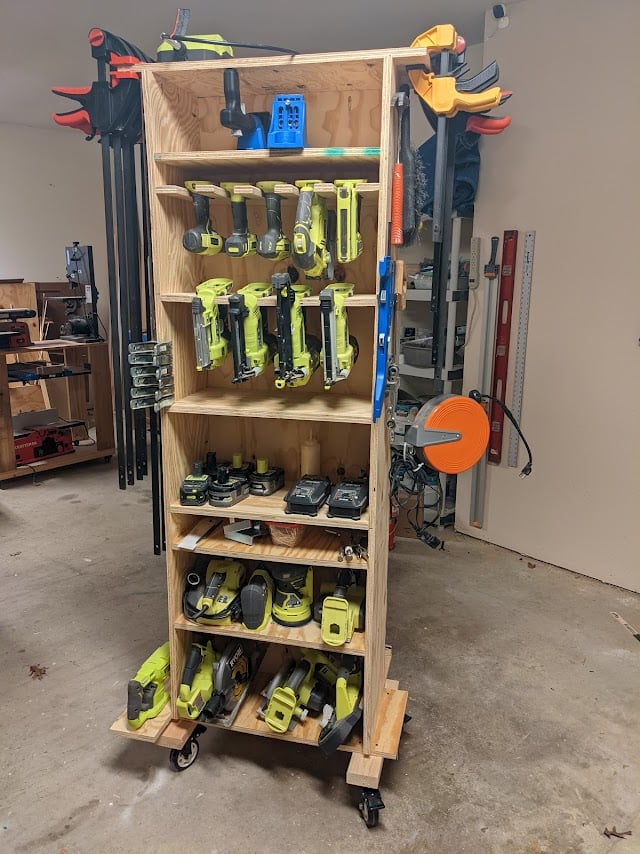
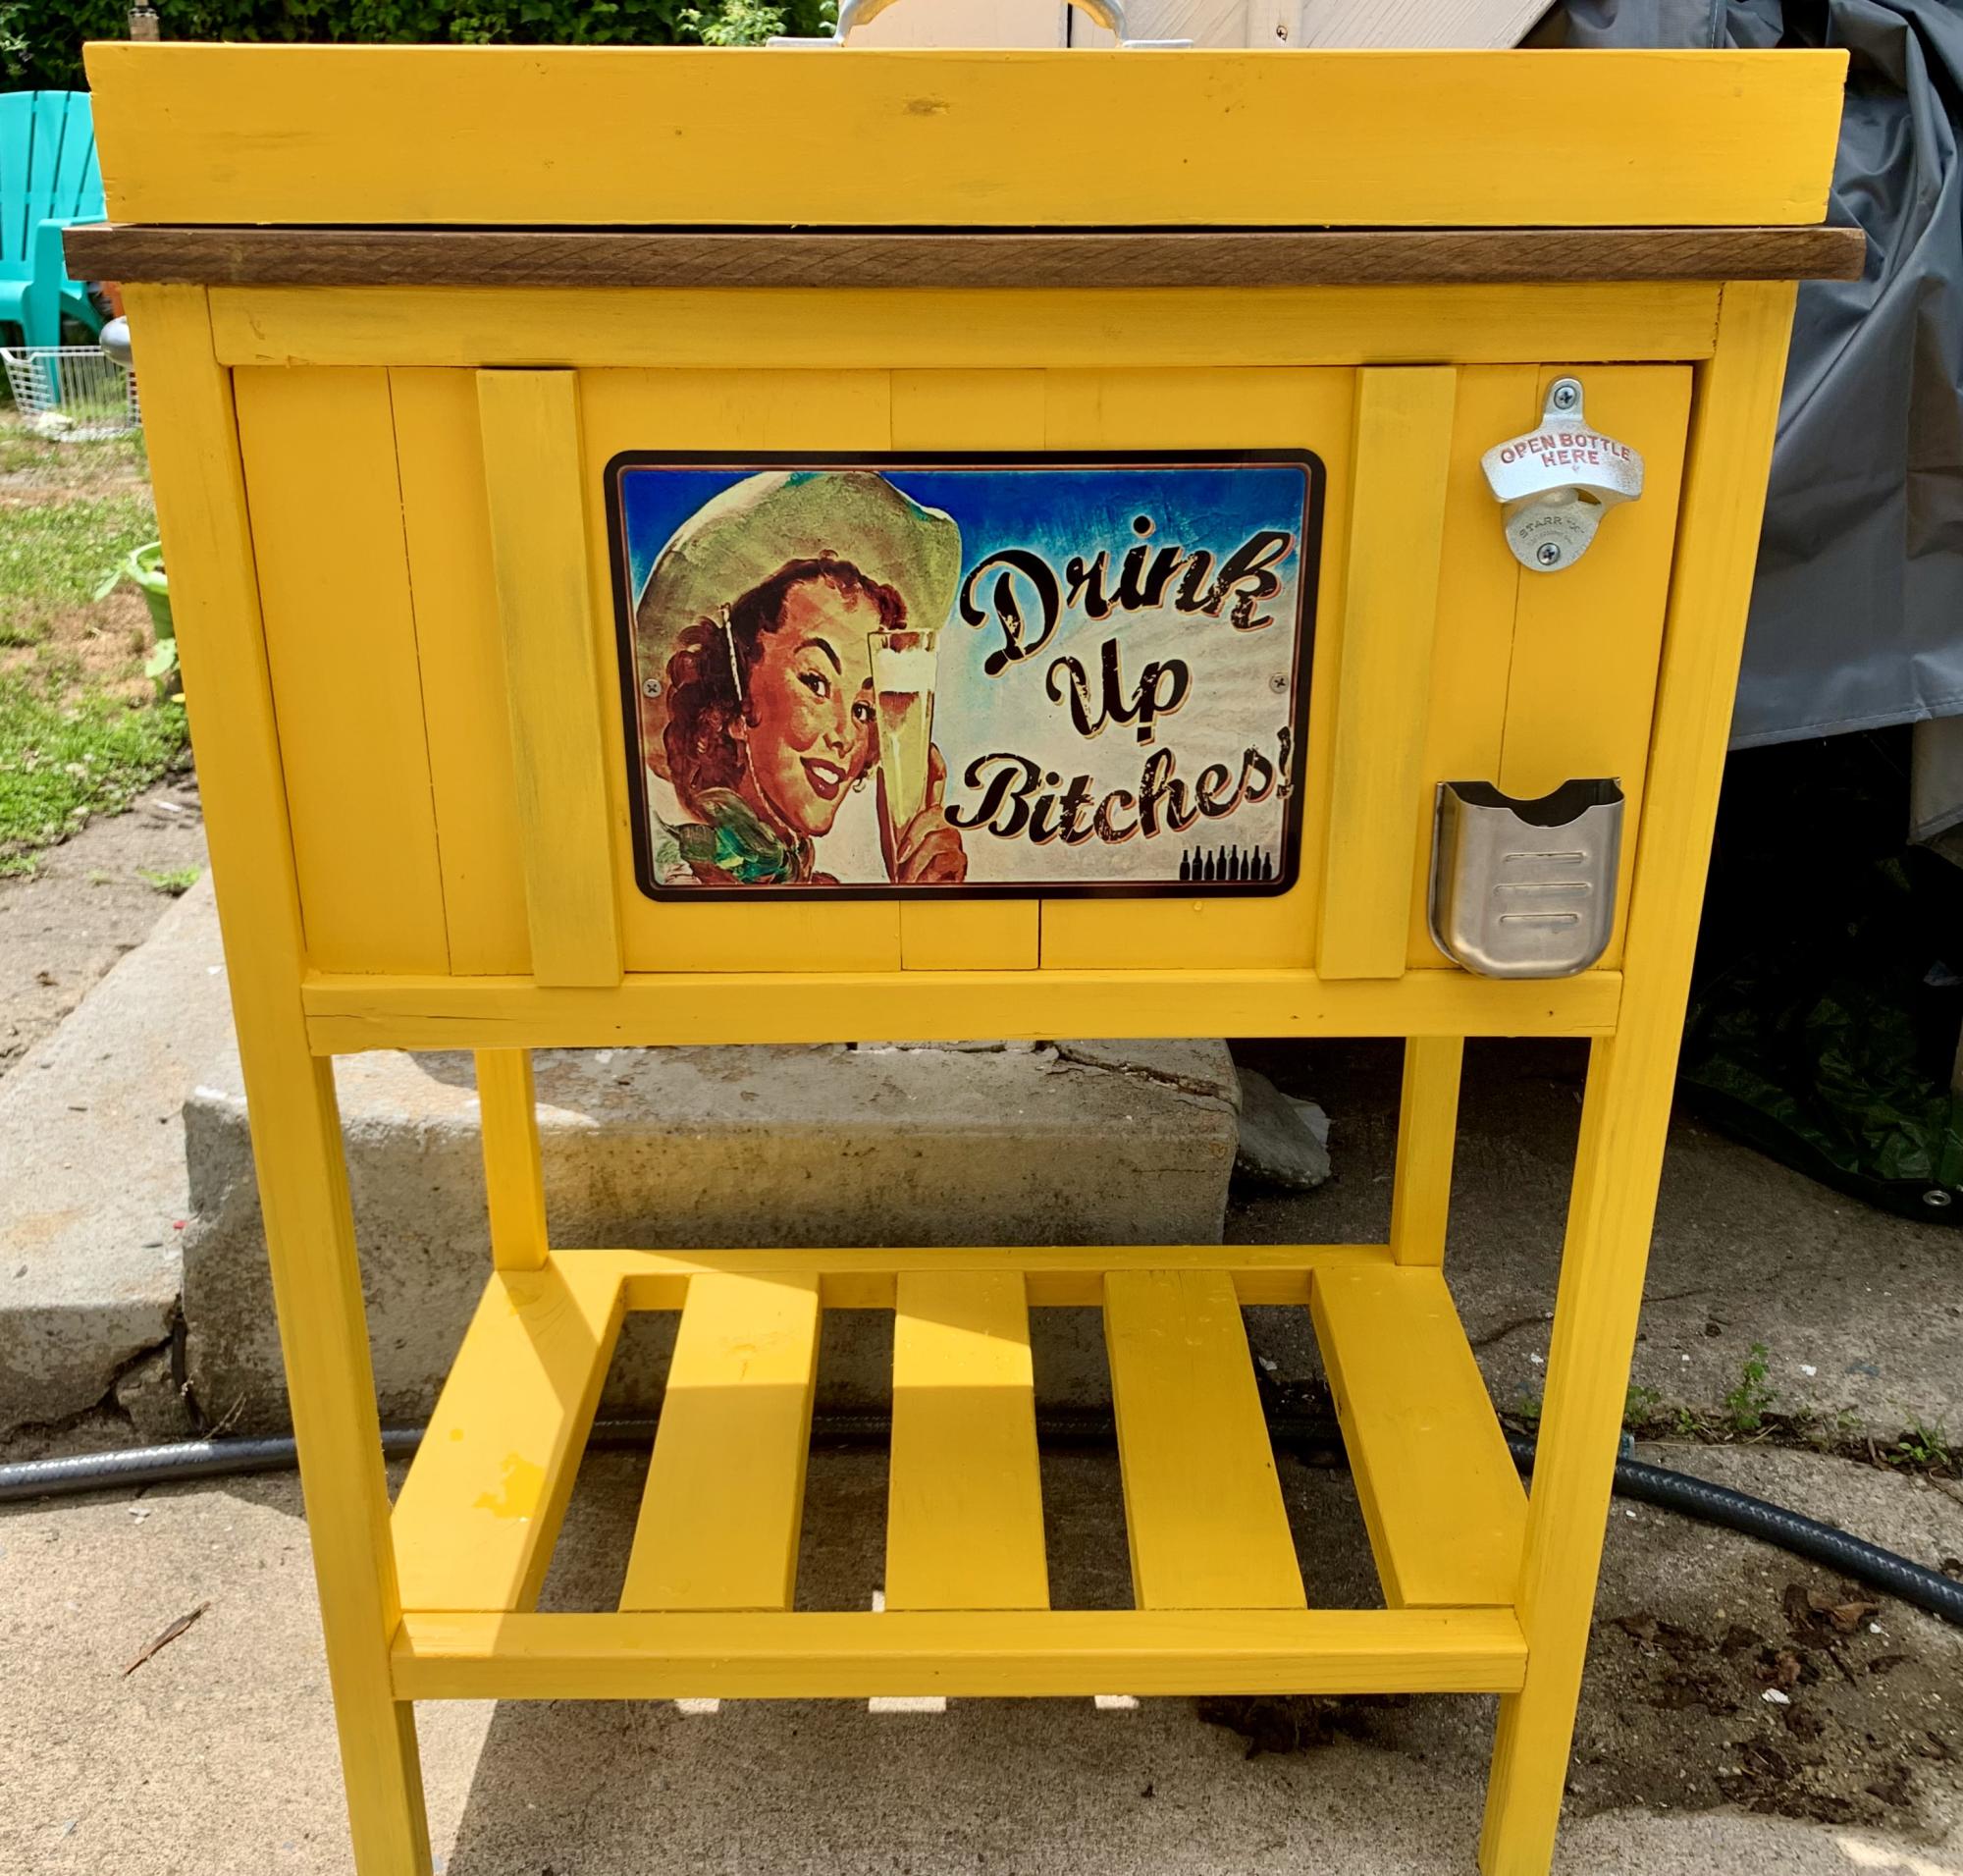
I repurpose furniture as a hobby and I got tired of having my tools hanging on a wall on the other side of the garage so I bult this rolling tool caddy. It is made out of 3/4" plywood, a couple of 2x4's and some heavy-duty casters. I built one about 3 years ago and realized that there were some things I wanted to do differently so I sold it and bult this one. My wife gave me a subscription to SketchUp and I had fun drawing it up and tweaking it. I left an over hang of 3" on both sides so I could store my clamps. I also attached an electrical cord reel on the right side and reversed the ends so the male end can plug into the wall and I can roll the unit across the room allowing me to be able to charge my batteries. The back side has a 44 drawer storage organizer and also a few shelves for additional tools like a router and a multi-tool. I'm not nearly the craftsman many of you are and I'm sure you could do a much better job. I didn't build it to look pretty but to be functional and it works for me.
Fri, 01/21/2022 - 08:28
This is EXACTLY what my husband needs!! Are you willing to share your plans so I can build it for him?
Fri, 01/21/2022 - 09:16
I really like this idea. I have my tools hung up neat all around the garage, but I keep walking back and forth for tools and batteries. It would be great to roll this over to a project and have everything you need right there. Nice work. I will modify one for my needs.

Fri, 01/21/2022 - 10:06
there are some very thoughtful features on this, notably the wings at the top and the bottom for clamps and extra tools and the different shelf heights. Well done! I'm going to build one just like it and a power strip for battery storage.
Fri, 01/21/2022 - 11:25
This is awesome - great job.
please post plans!
Fri, 01/21/2022 - 14:21
Very cool!!! I would appreciate it if you would share your plans…so that I could attempt to make me one.

Couldn't wait to show it off, I'll post another picture when I have it in the room! This goes with the Michael Collection twin platform bed. The open area you see will be covered by the bed. Its a bit dusty still and the top isn't completely finished but I'm so excited how it has turned out!
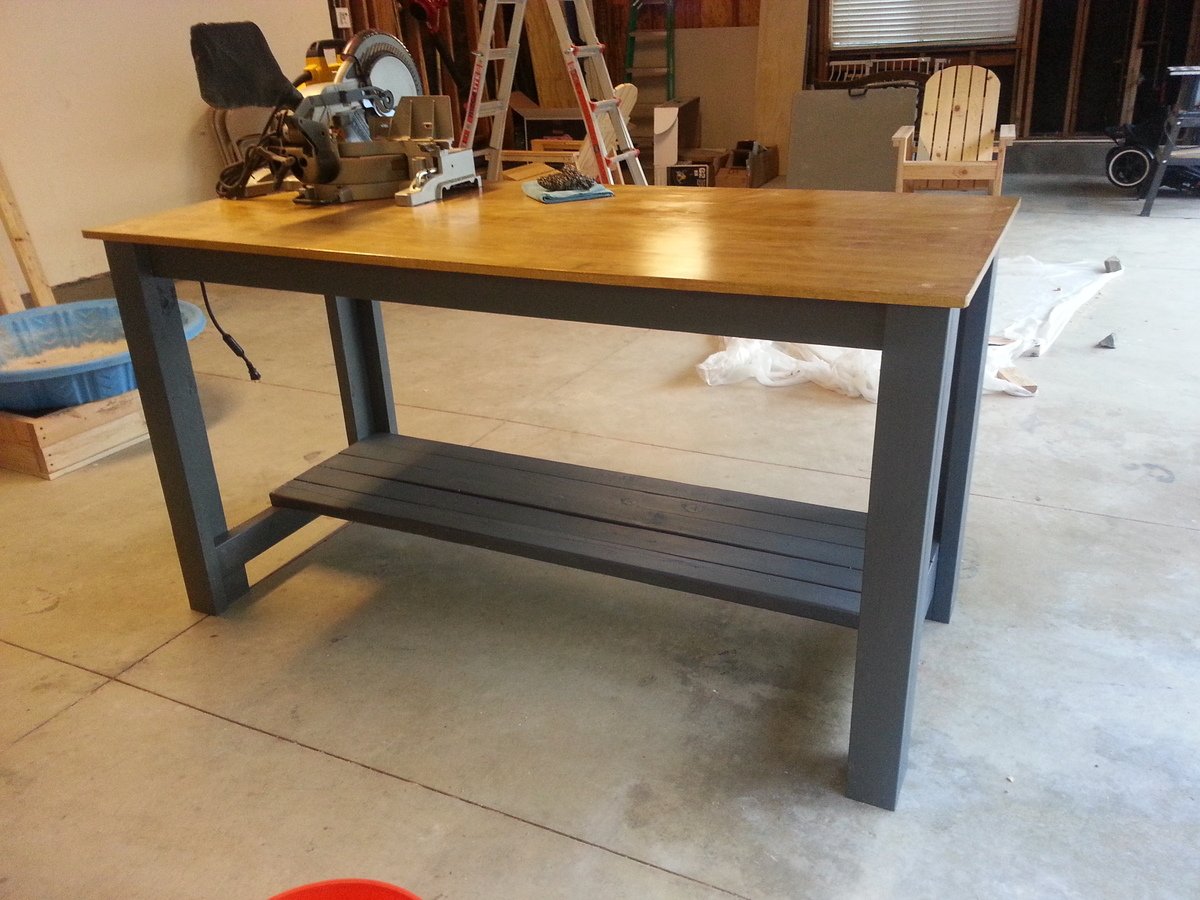
This is a modified version of the sturdy workbench. I made it six feet long, about three feet wide (I can't remember exactly), and 36'' high. Since I'm 6'2'', I needed a bench that didn't keep me constantly bending over.
I used Douglas Fir framing lumber and 3/4'' plywood for the surface. The plywood was a cheap replaceable option since hardwood is extremely expensive in my area. The wood warped a bit after I built it, so its clearly not perfect. But who cares, its a workbench after all...
I used left over paint / stain I had laying around in the garage. The gray is a custom mix interior paint, and the stain is Minwax Golden Oak. I used 1 coat of stain, and three coats of Poly.

Sun, 07/14/2013 - 20:31
Looks great. :) I like the gray and golden oak together; two neutrals I would not have thought to pair.
In reply to Gray and Golden Oak by yurra-bazain
Mon, 07/29/2013 - 21:11
Thanks! It definitely stands out in the garage...

First, if you don't have one, the pocket hole jig is the only way to go. I spent years cutting dado slots for shelves. What a game changer. I stayed with the over-all dimensions of the Dawson Media Console. Like so many, I made the inside areas fit our current and future needs. I could not be more pleased. Oh, I invested in an HVLP fan sprayer for this. Again...how did I not already own this? The project turned out perfectly. From fit to finish it's excellent.
Coffee table to match
I made two foot boards for the ends and stretched the headboard for back. I also made the corner posts longer to accommodate a trundle bed underneath.
My neighbor needed bunk beds and was fustrated that she couldn't find what she wanted for under $500. She knew that I built my entertainment center and asked for my help.
We picked out the classic bunk beds because they came apart in to small pieces that would be easier to handle since we live in three floor townhouses. She also really liked the ladder that didn't take up more floor space.
Building was fairly straight forward. It was a little hard to read the direction at times, so we had to depend on the photos at times.
The best part is that we spent under $150 for supplies not including the bedding and mattresses. That is a screaming deal.
Thanks for posting this plan. It turned out great.


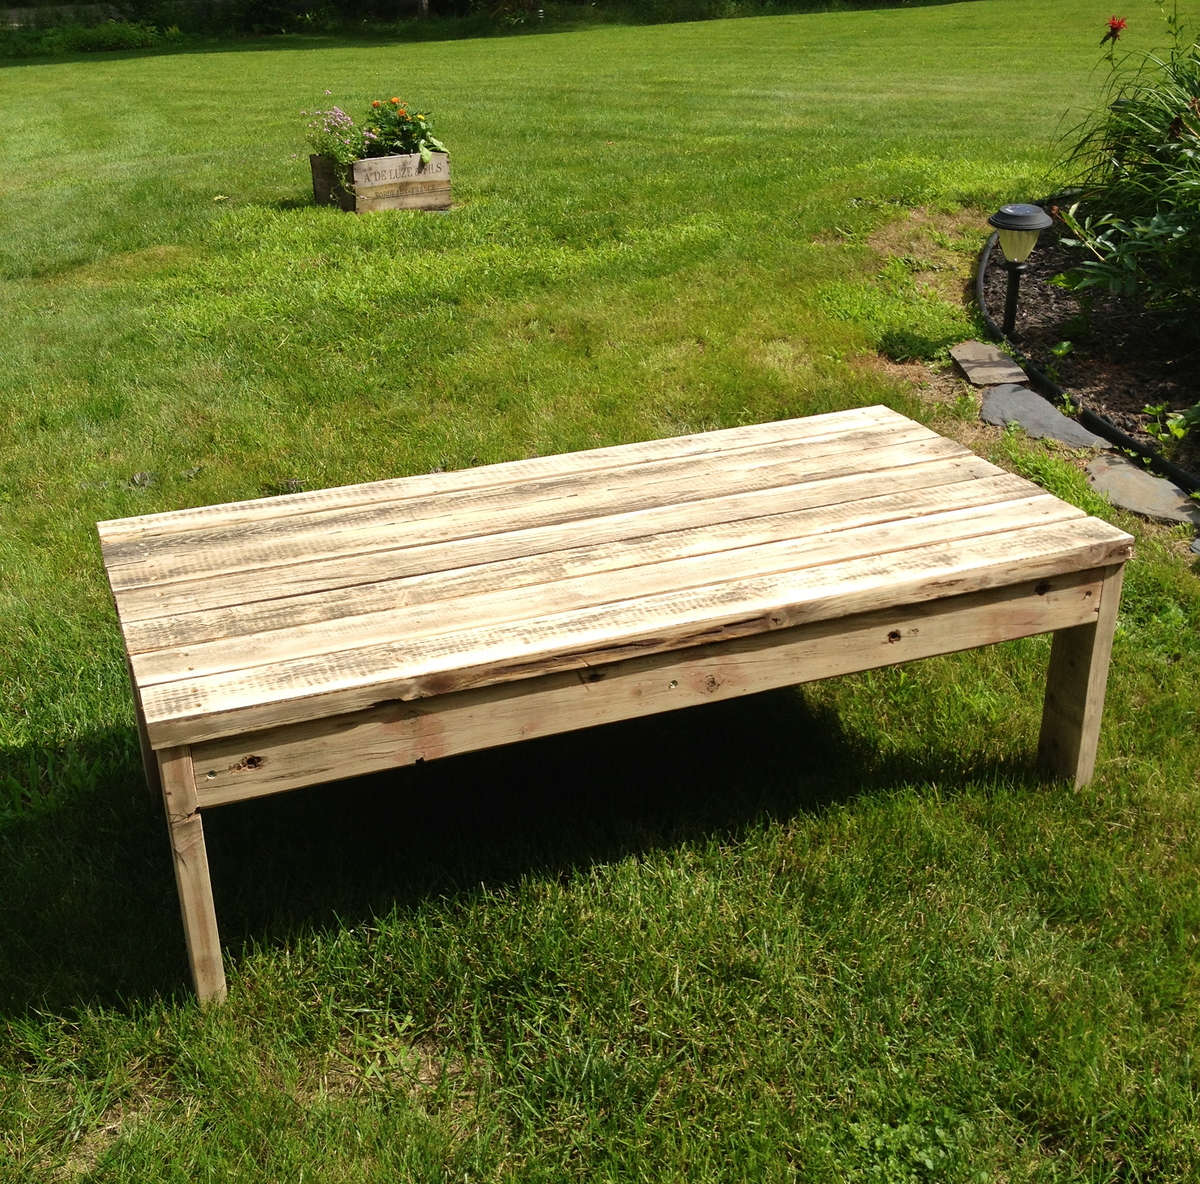
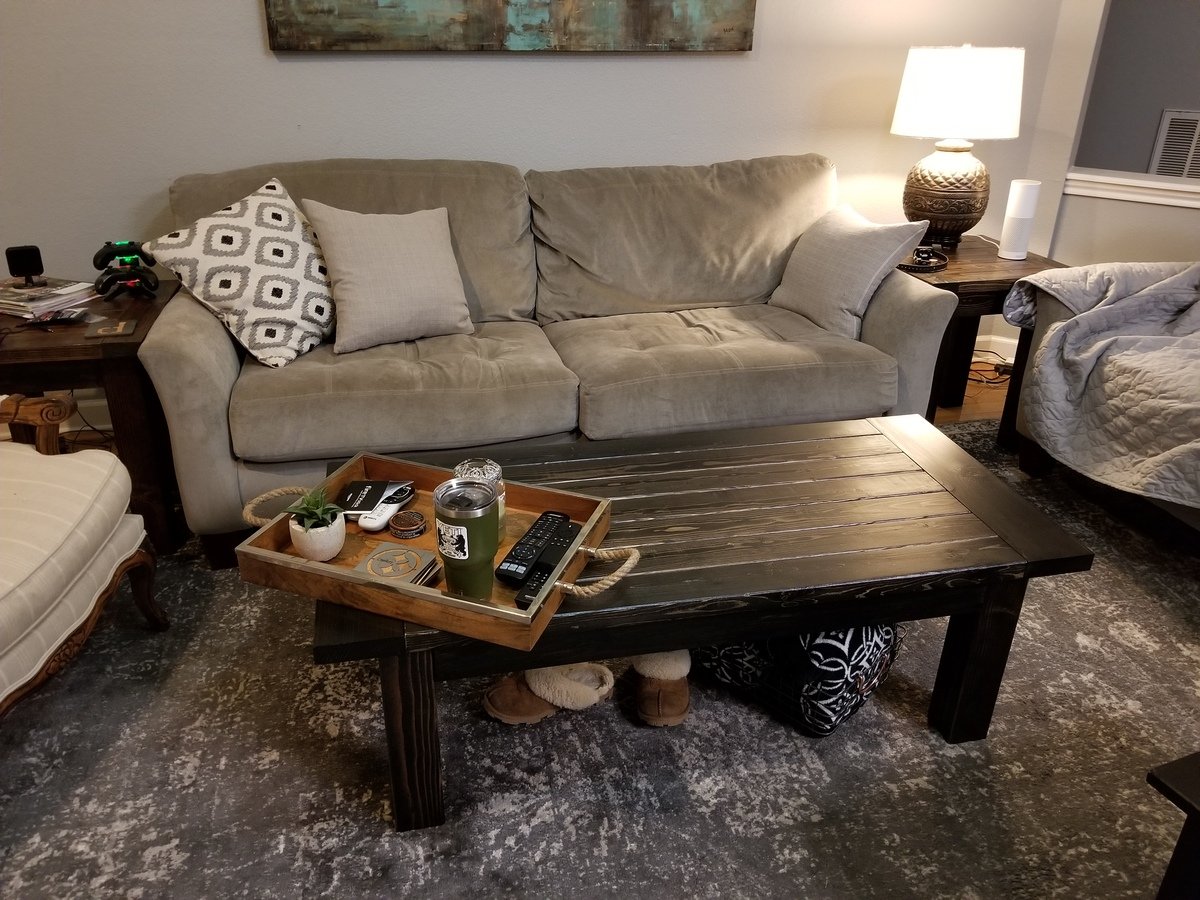
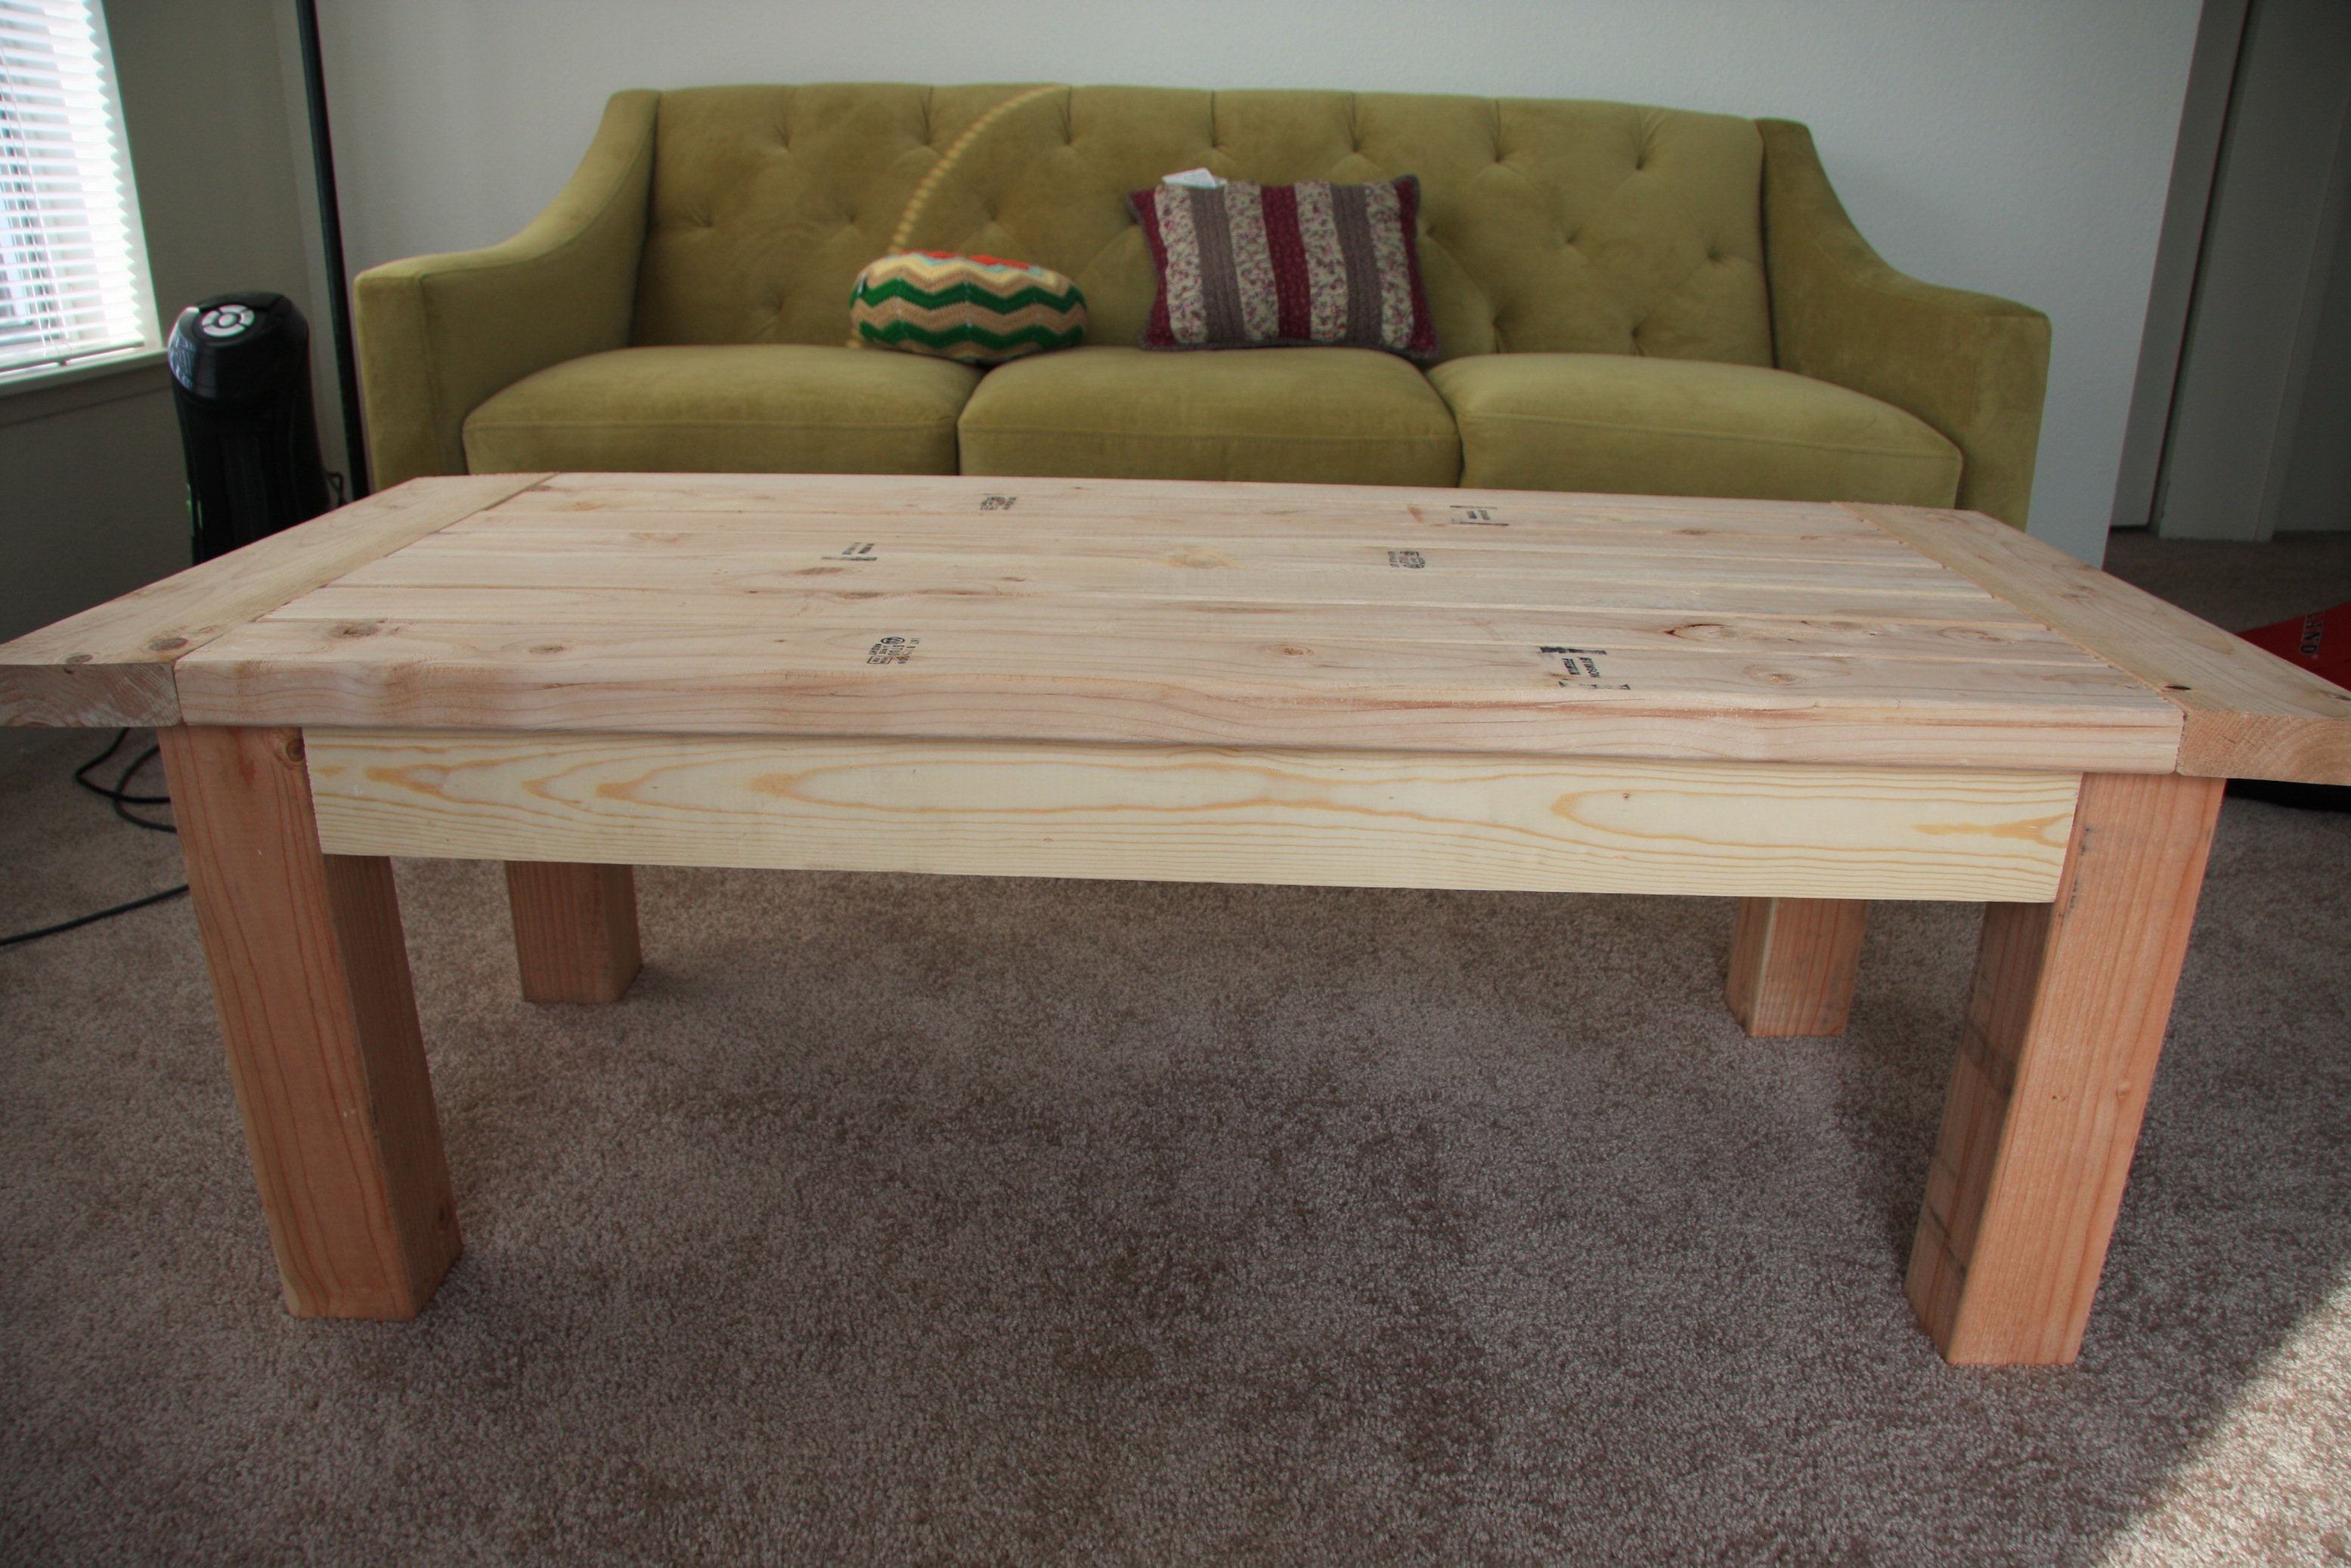
We took apart our old rotting picnic table, saved what wood we could salvage, sanded it all down and had enough wood to build this table. We added an extra board for the tabletop to make the slats sit closer together. It was easy to put together and would have taken less than two hours had it not been for all the sanding we had to do. Now we have a sturdy outdoor coffee table for our patio.

Loosely based on a few different plans found on internet and books, made this bookshelf out of oak plywood and oak boards.


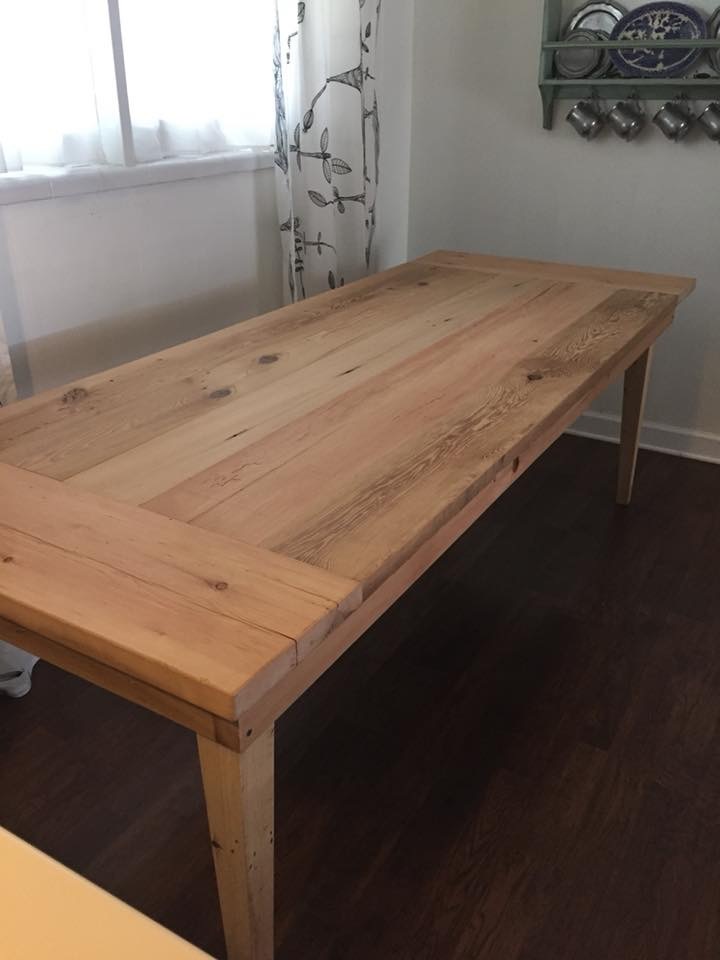
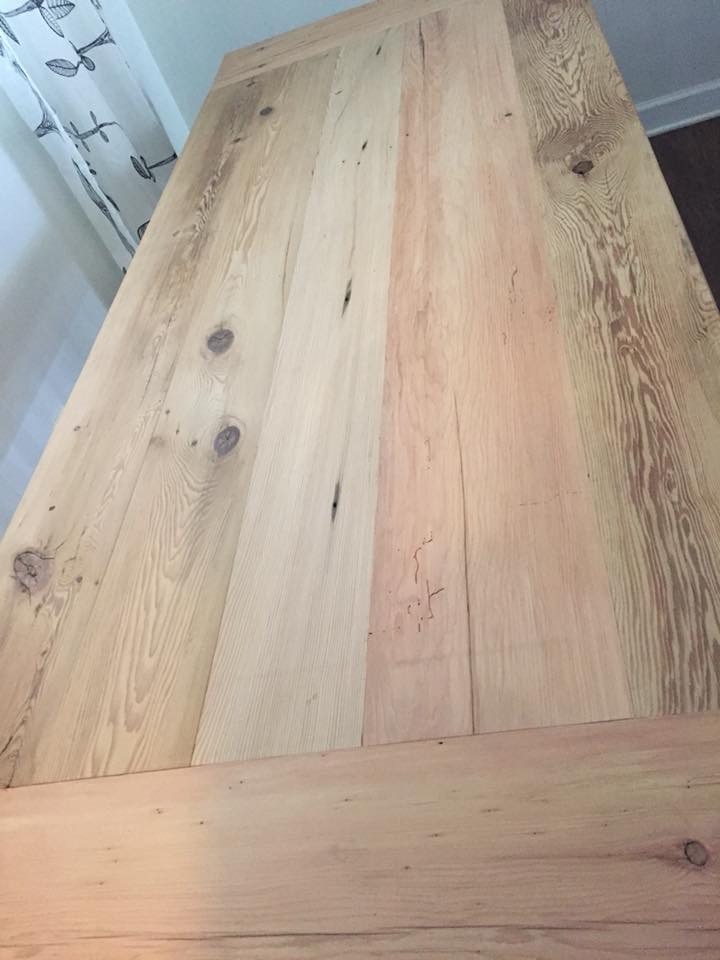
This is my (late) Christmas present from my boyfriend, based on the farmhouse table plans. He had no idea how to build a table, so I directed him to this site! The wood is 80+ years old, all reclaimed. The table top is white pine, and the legs are cypress. I hand picked the pieces I wanted from his old wood “collection”. I plan to put a light stain on it, and use a satin, water-impervious finish. I wanted it to look old, hence the reclaimed wood. I love tapered legs, so that was a must. He still has to countersink the screws he used on the apron (!) and plug them with white pine plugs. The table is 91” long, and 36” wide.
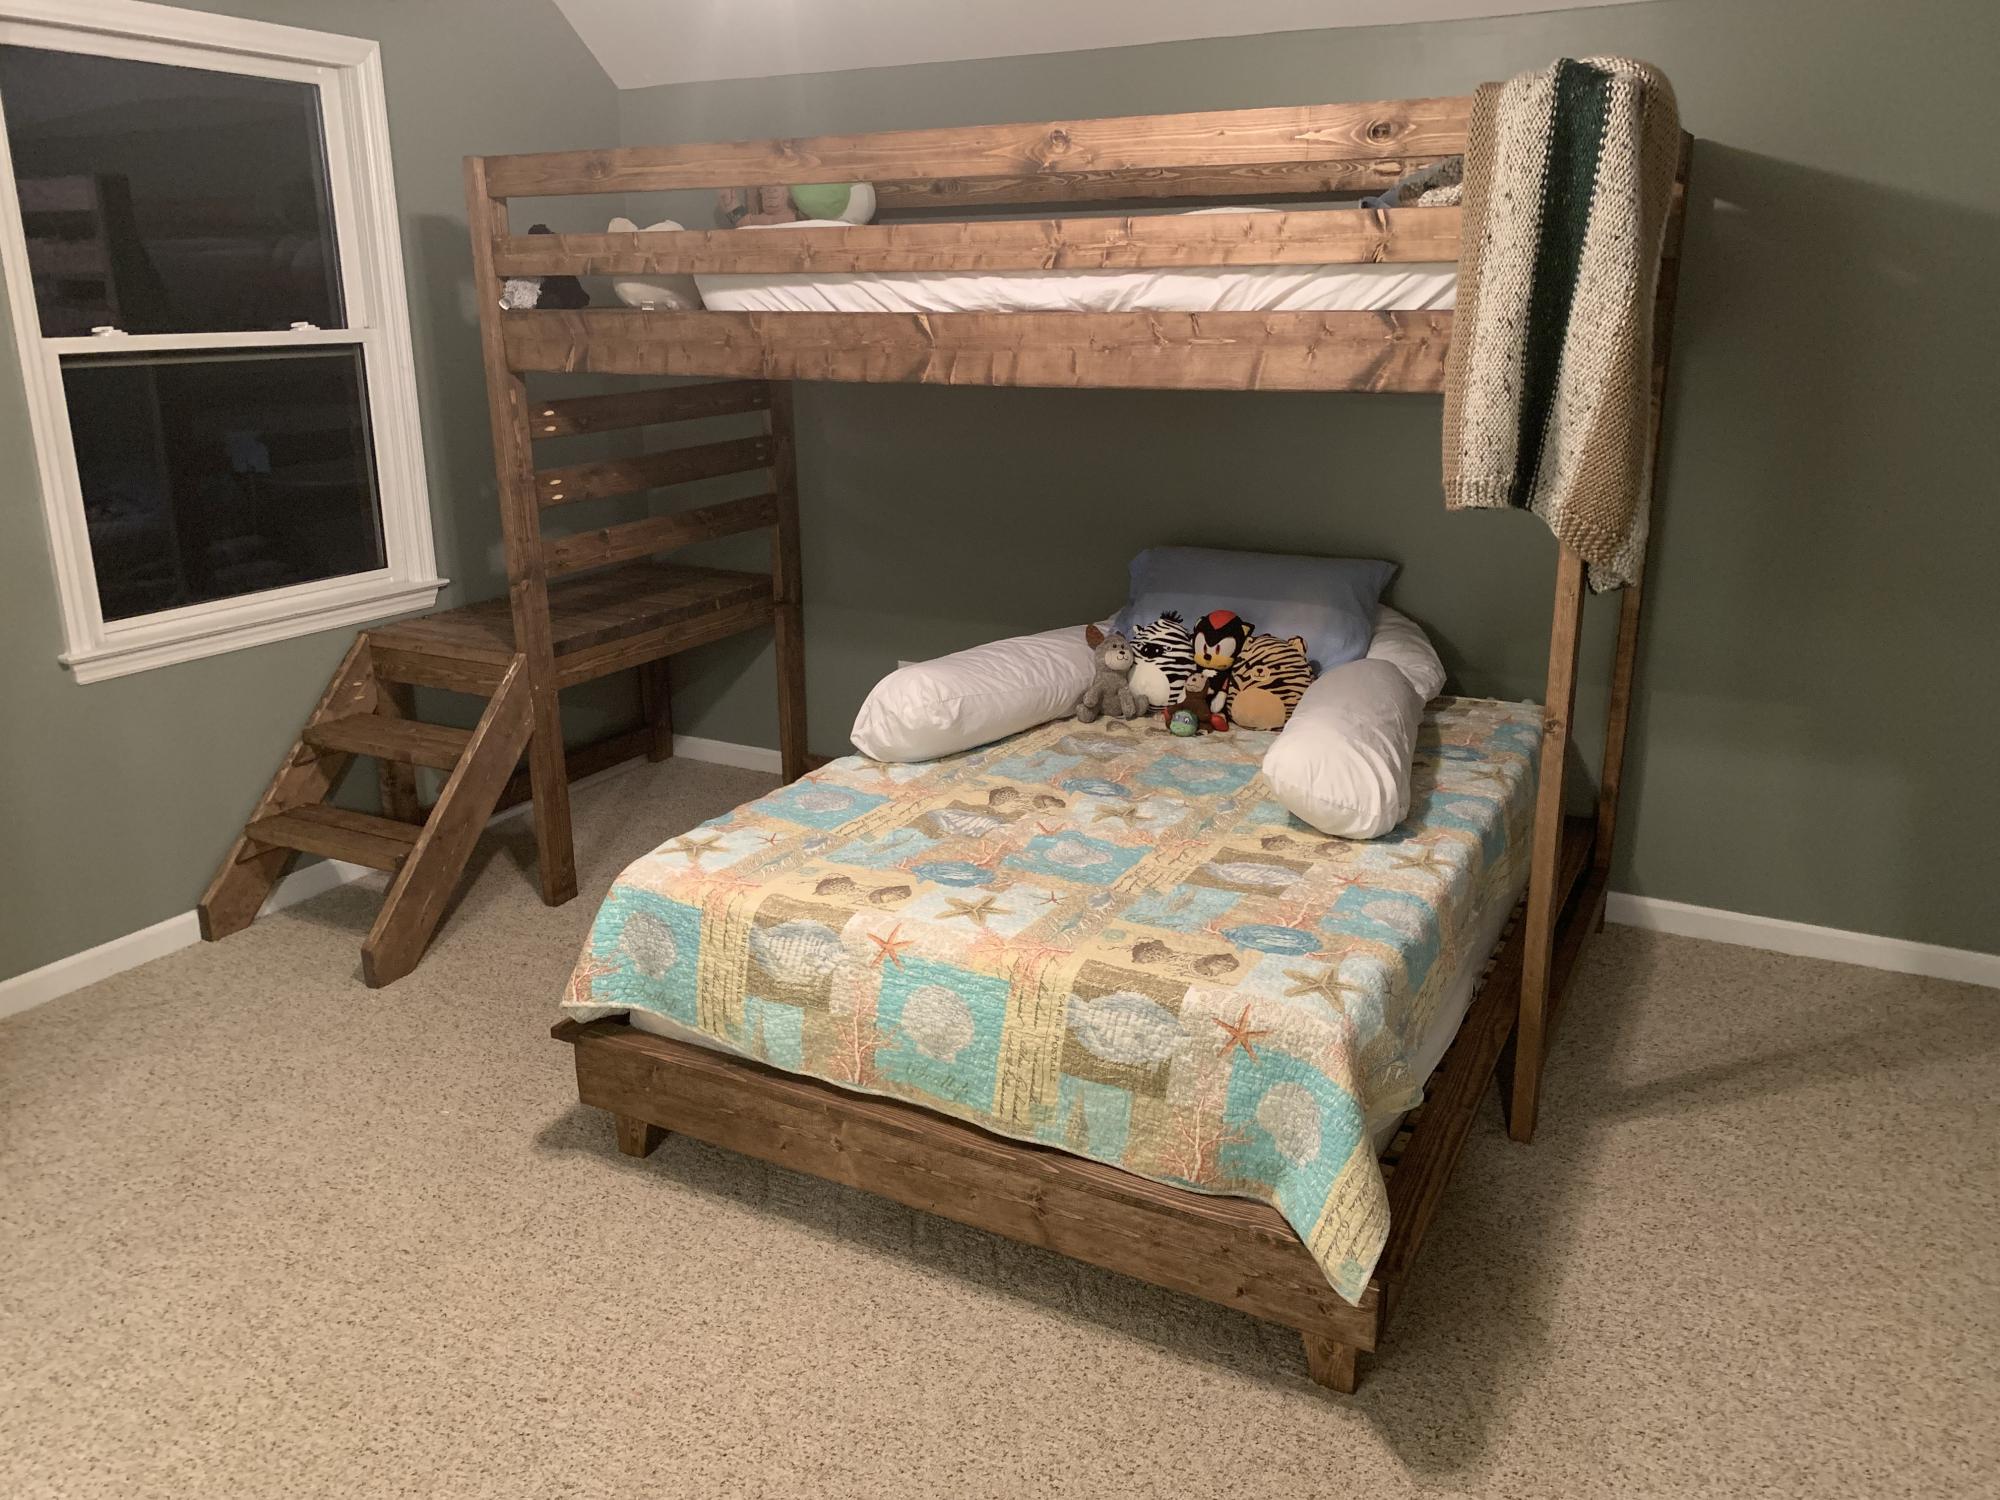
My young boys had been sharing a full bed and it was awful. We had an extra twin mattress so it was time to make them a bed. Loved the camp loft bed plan with stairs so that's what I went with. I did the Hailey bed frame plan for the full bed underneath and made some small adjustments on the loft bed - made it 6" higher, 18" longer (wanted room for a bedside table next to the full bed underneath - I just added extra decking on the top bunk part to fill in the space), and had to adjust the stair height because I wanted it to fit under the window - so only needed two steps instead of 3. The boys absolutely love it and their sisters did too - now I'm building 2 loft beds for their room, with a platform in-between the two beds. Will post that when finished! Still need to make a headboard for the full bed as well, but it works for now!
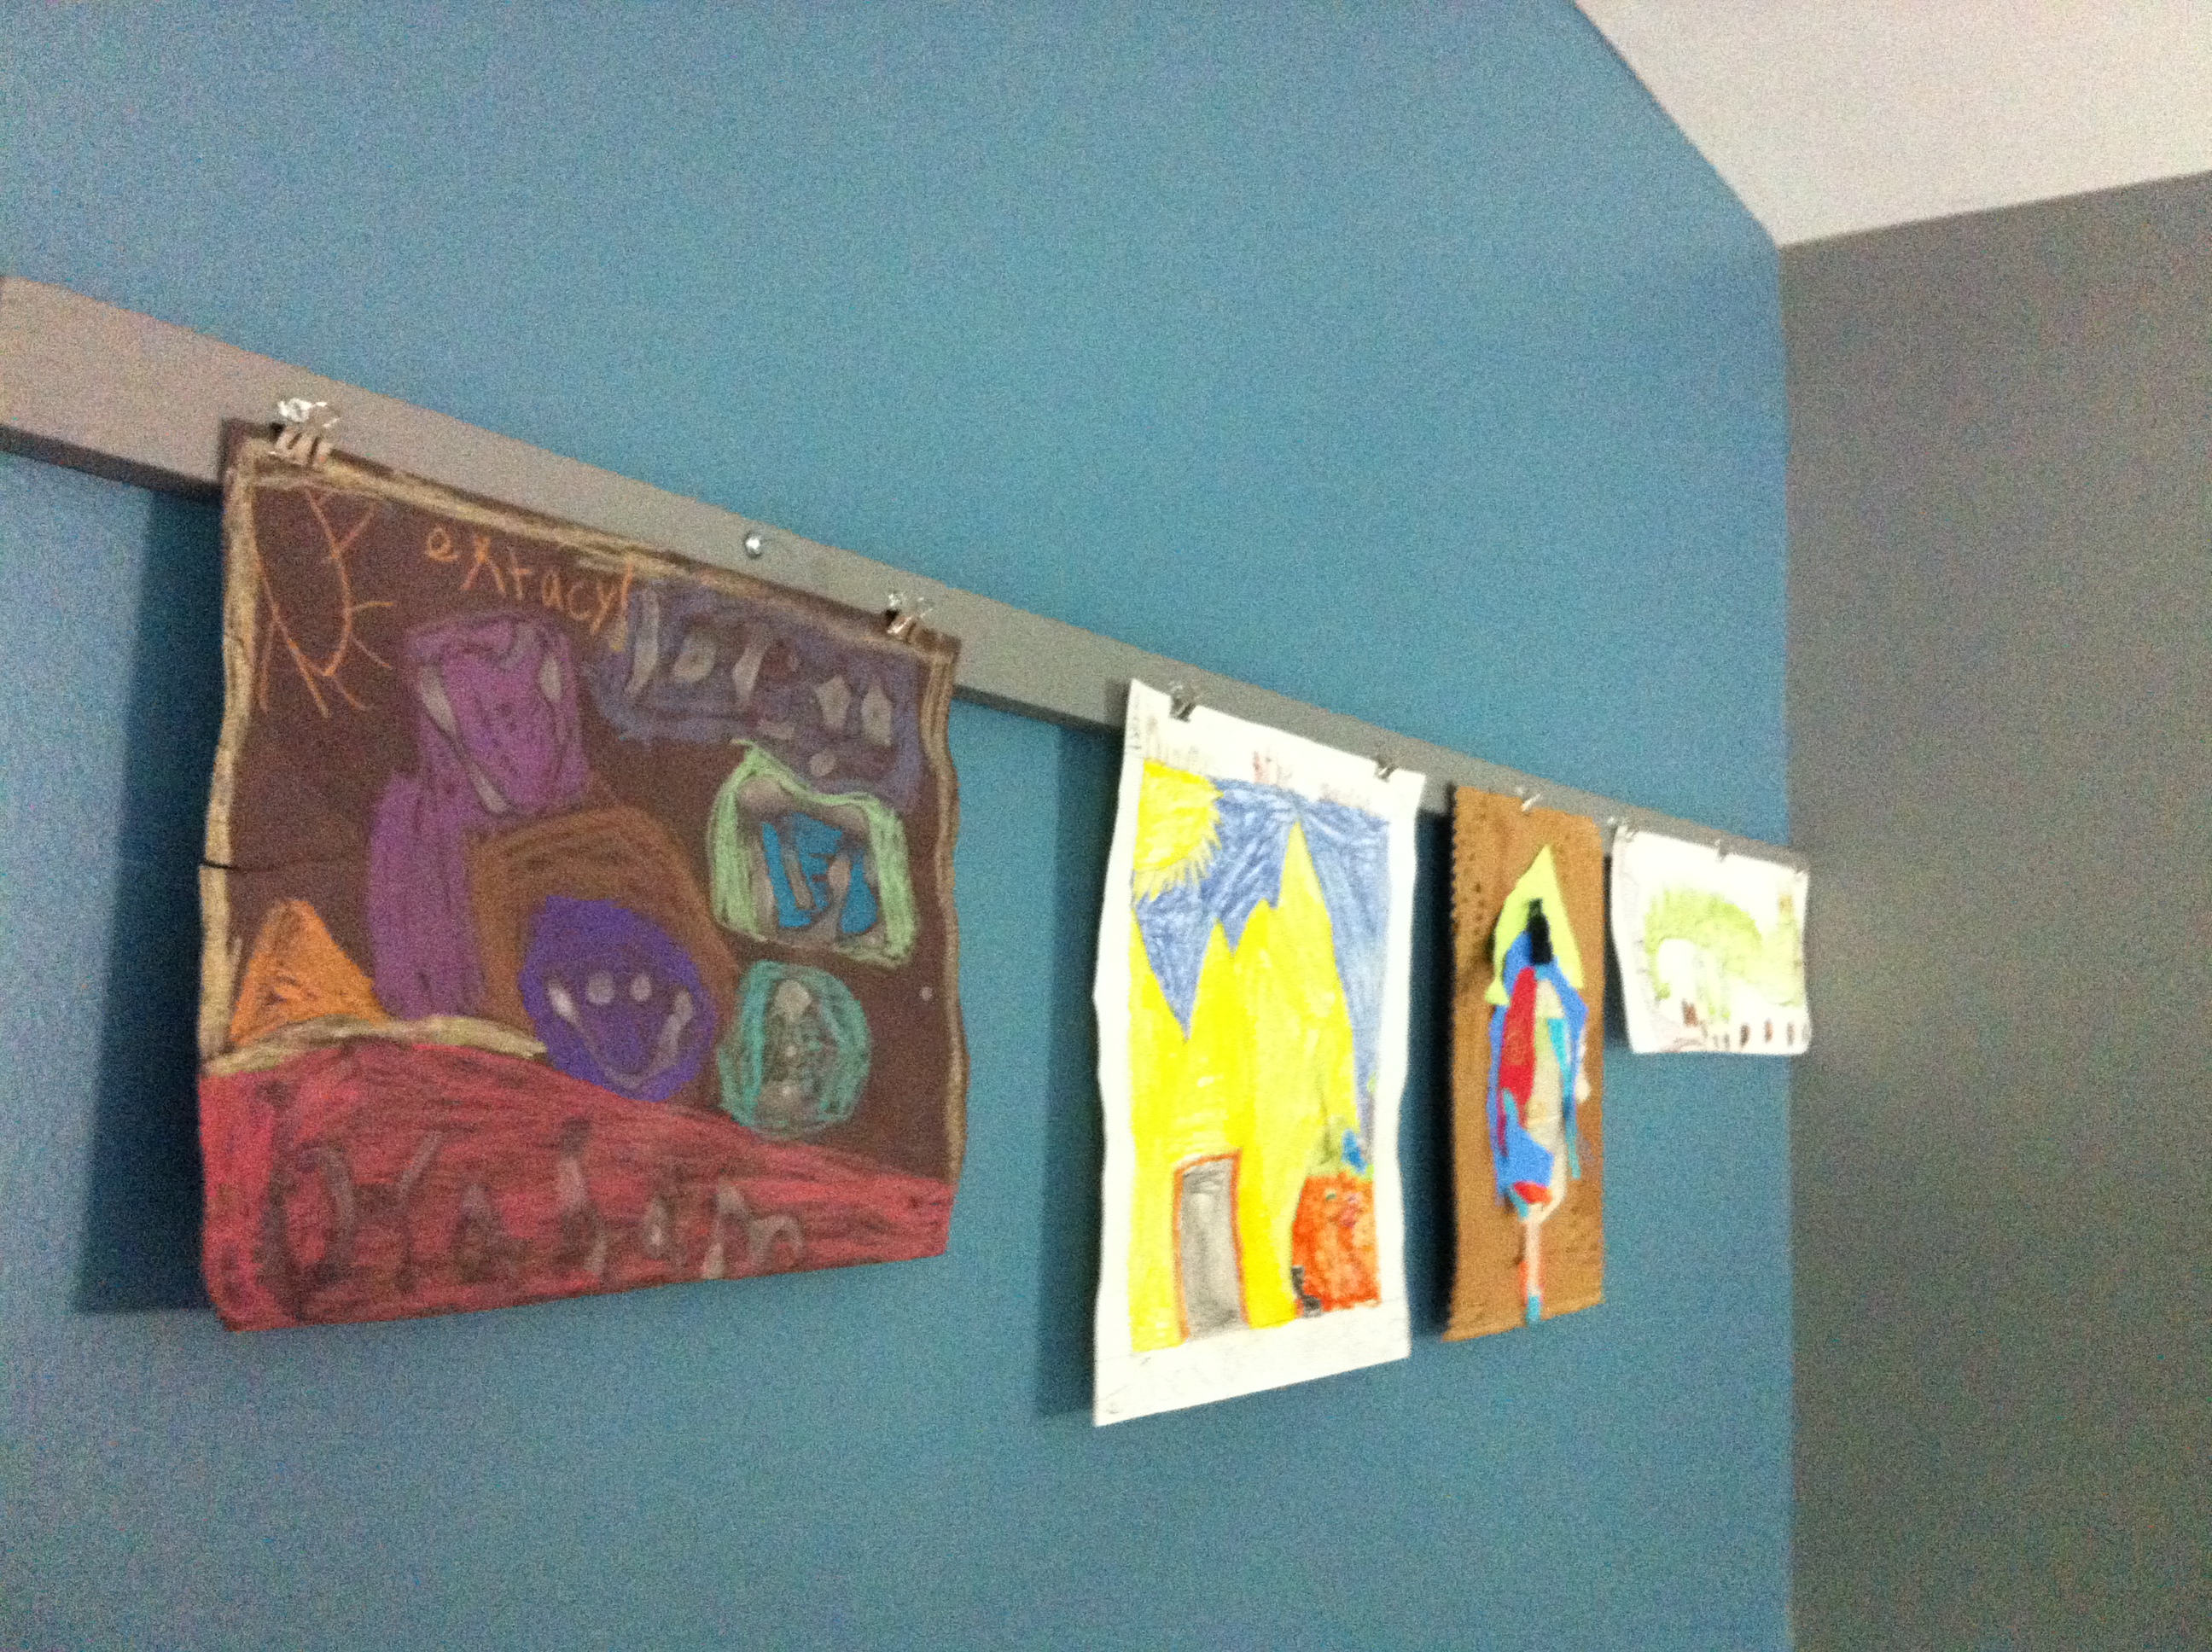
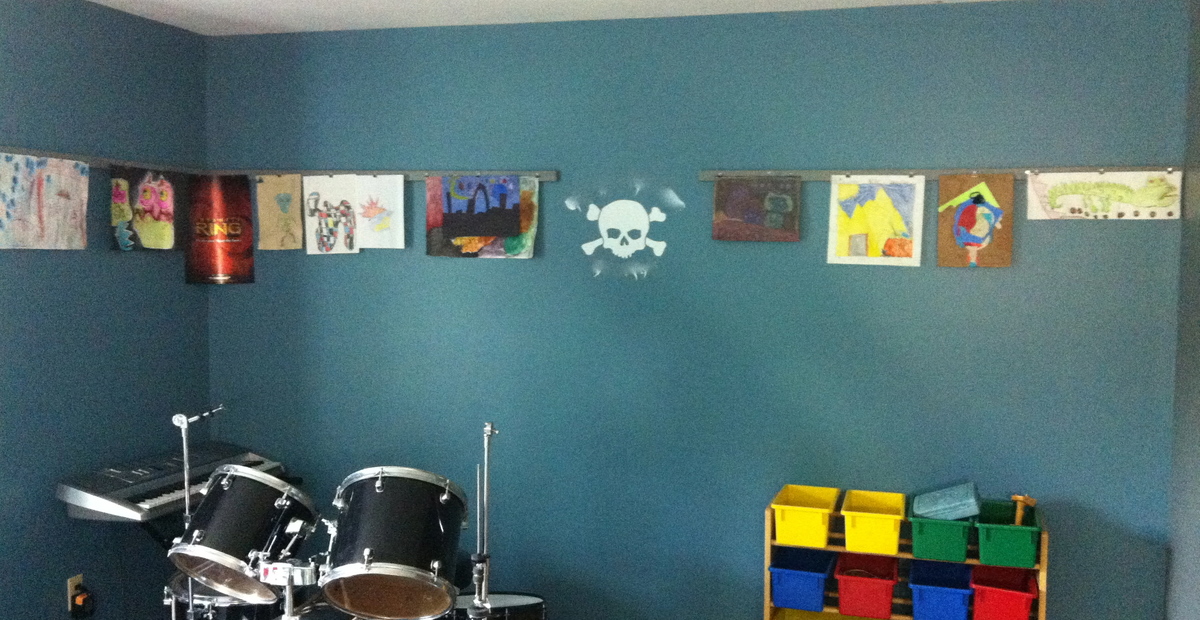
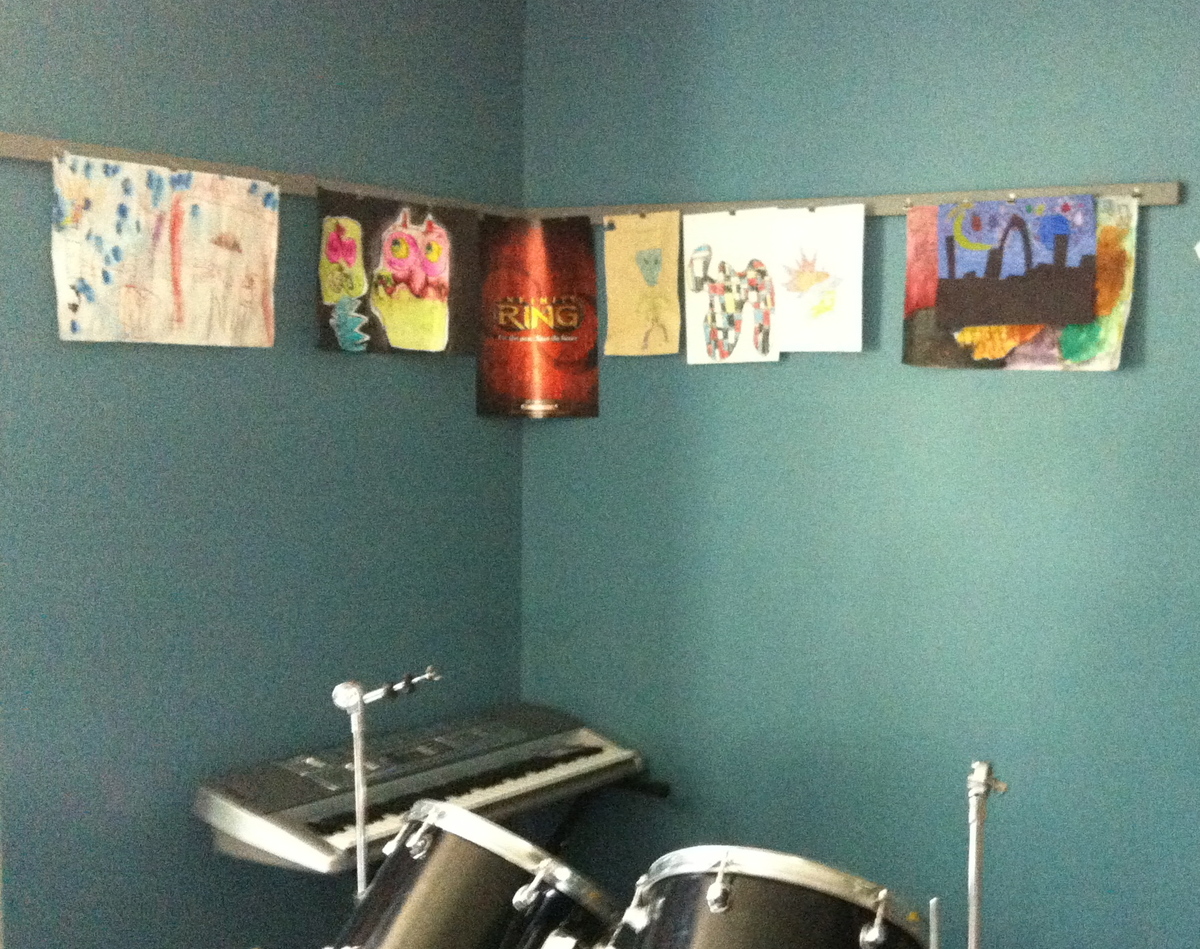
My son and I both enjoy changing out the artwork he chooses to display in his bedroom. We will be making another clip rail for the kitchen, right above the row of coat hooks. Waiting for the paint to dry is the most time consuming part of this project. Cheap & easy!

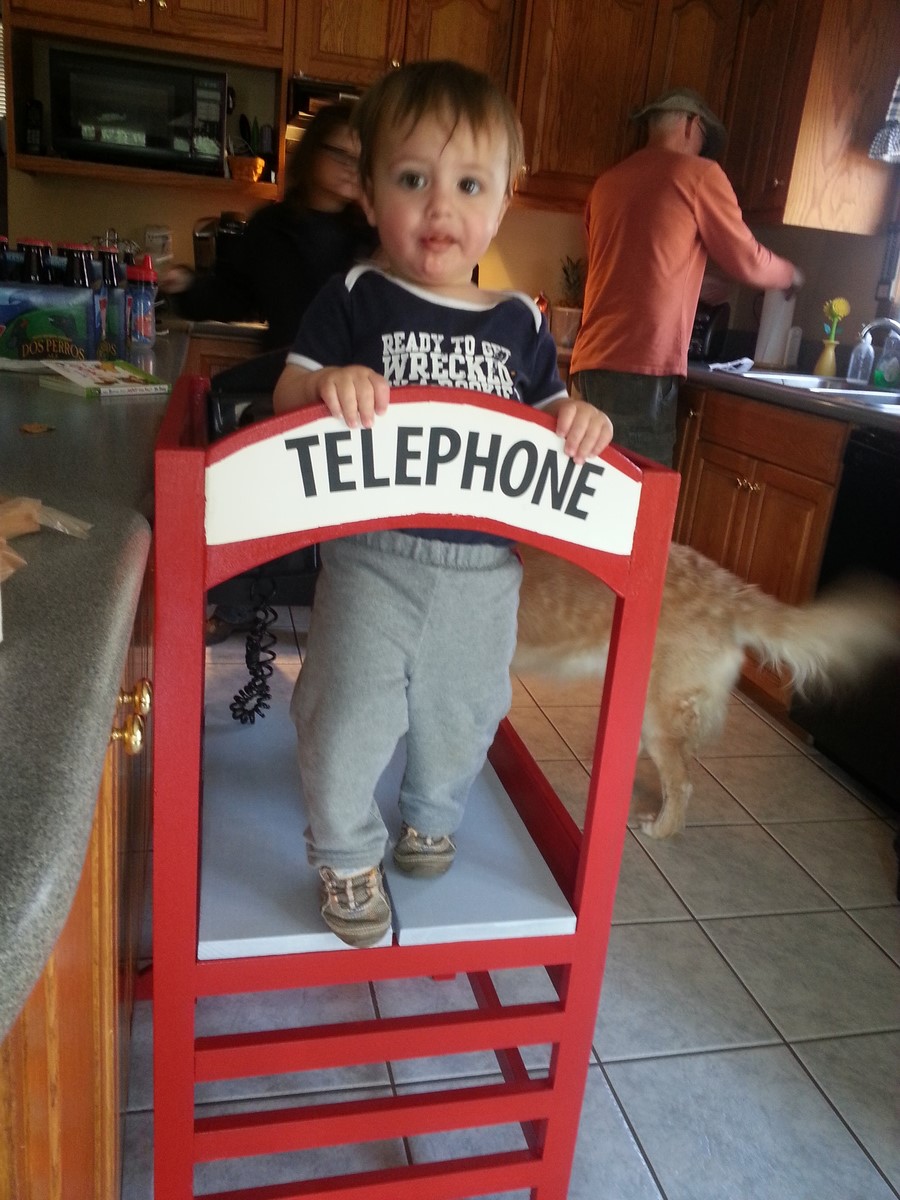
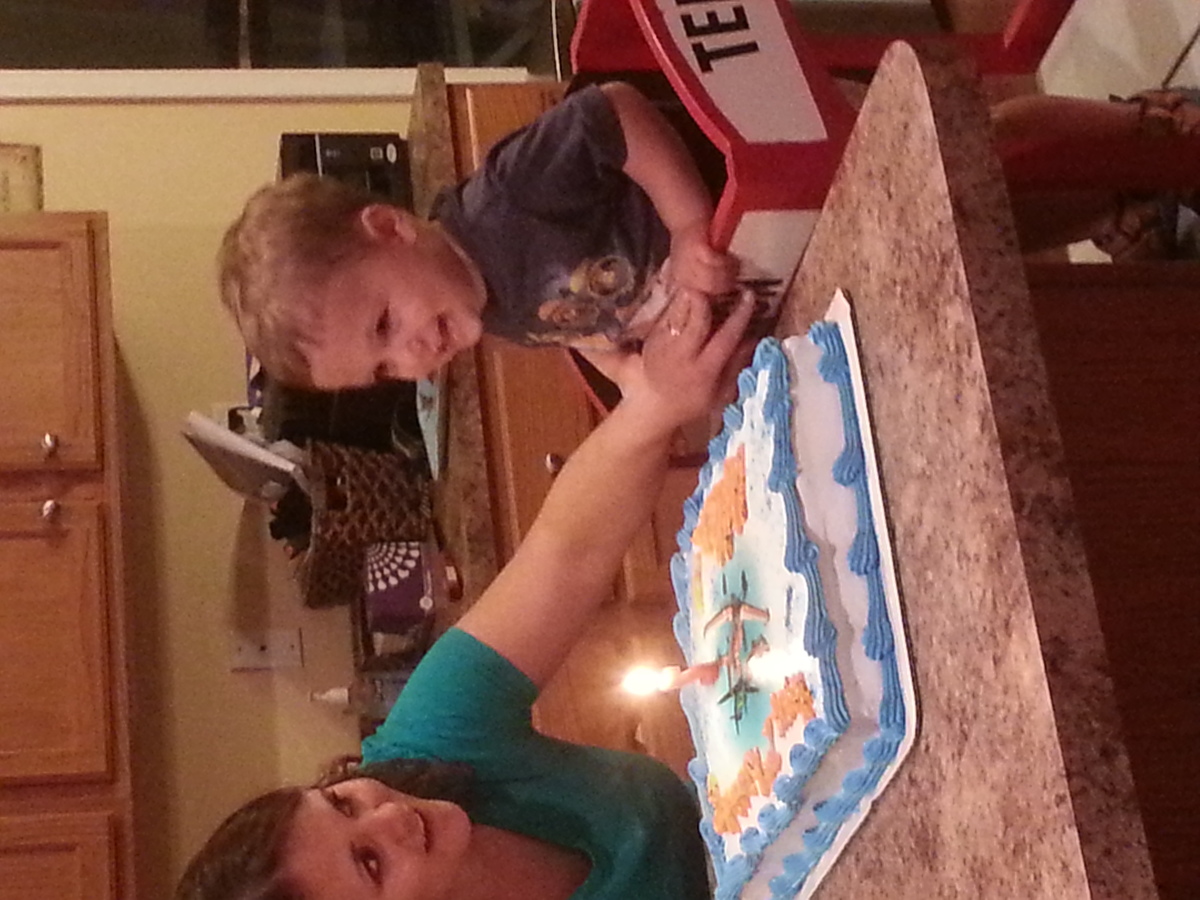
Made this awhile ago for my nephew. I thought an English phone booth would be neat. He is probably the only kid his age who knows what a rotary phone is. He loves using it and has never had a problem climbing in.
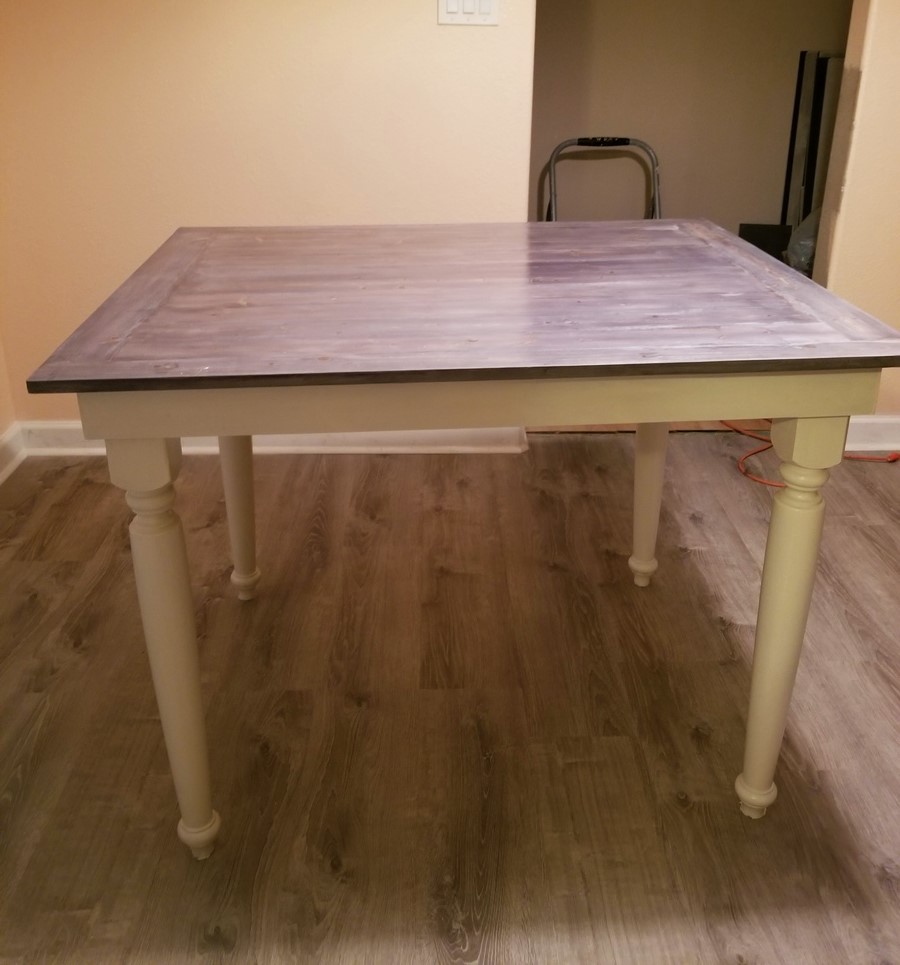
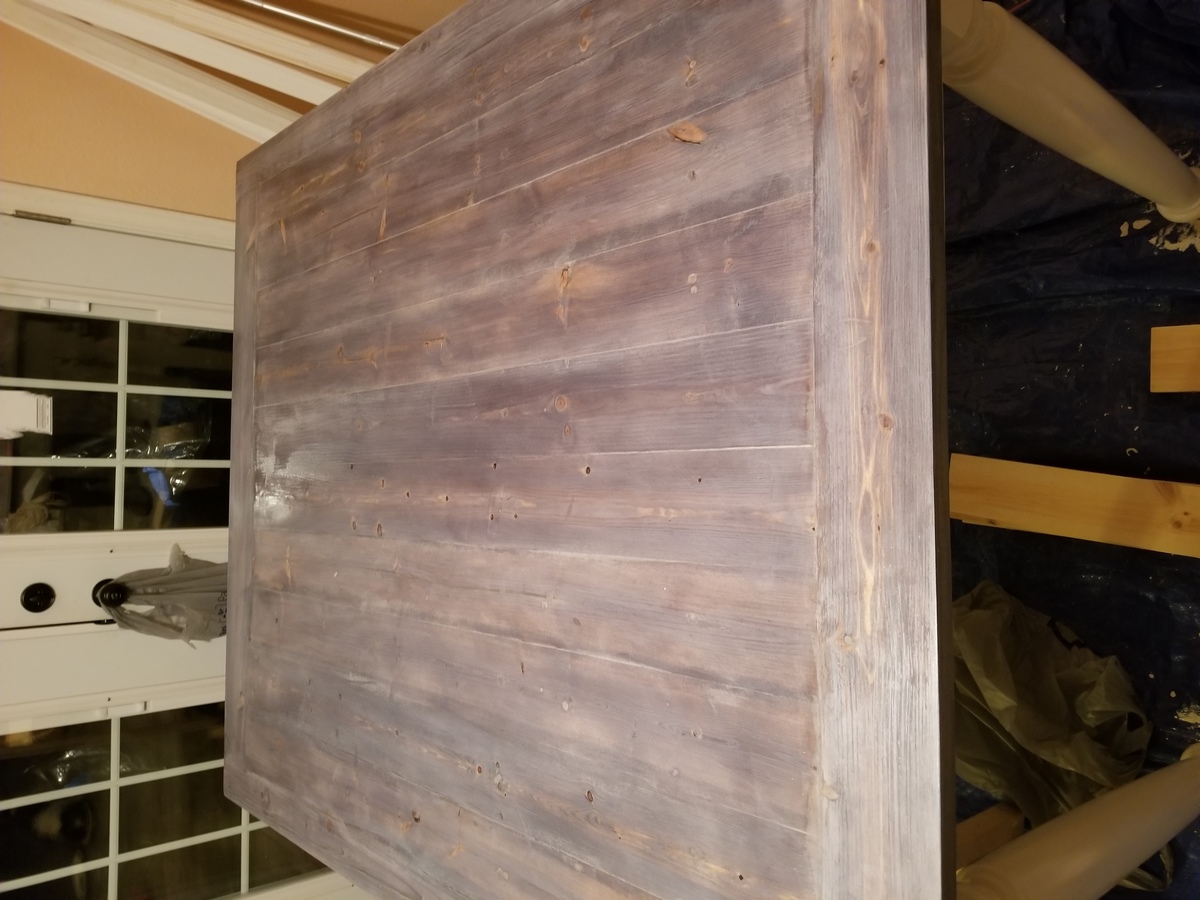
I used the Pub table/farmhouse table plans modified to 48x36 with framed edge over hang 2 inch all around ..I also used the turned legs from Lowes ..


Made a Tryde Coffee Table with my sister in a tiny porch of her tiny city apartment. We had all the lumber cut at HD, and even though the cuts were not precise, we made it work! It was easy to build, and was also the first time using a kreg jig, and I don't know how I made everything so far without it. Love the kreg jig!!


Comments
Ana White Admin
Mon, 01/17/2022 - 09:00
Heck yes!
It looks fantastic, way to go!