Community Brag Posts

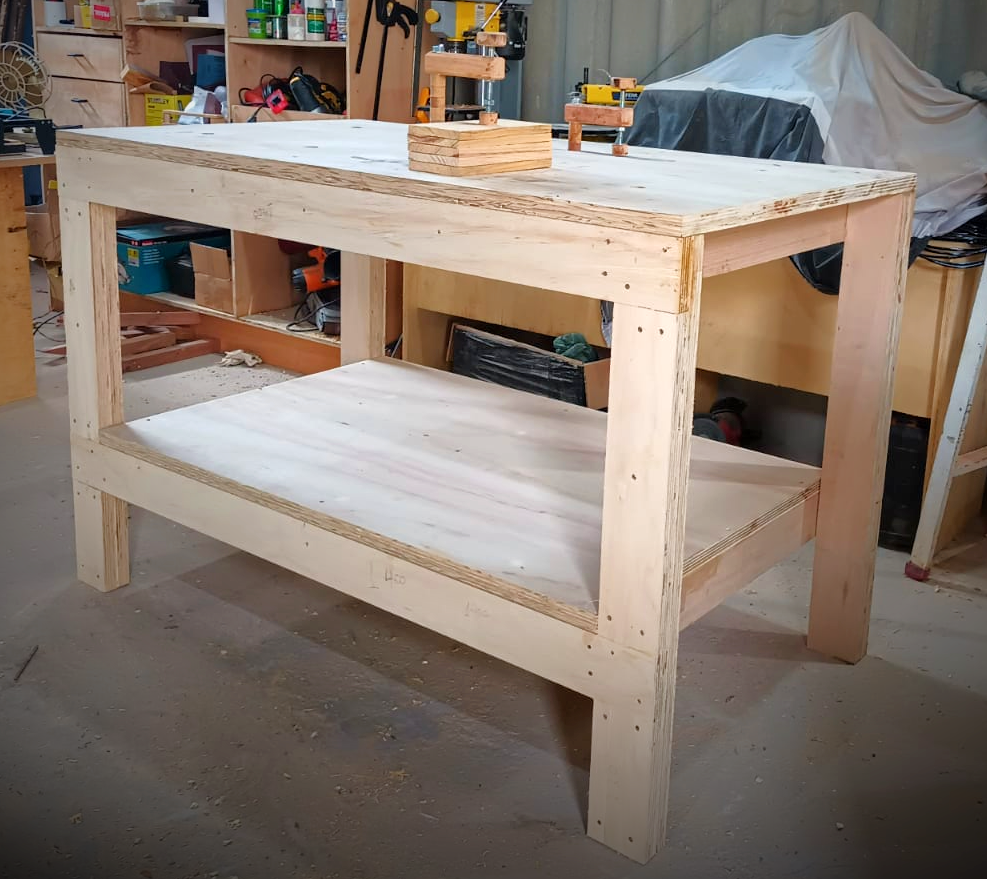
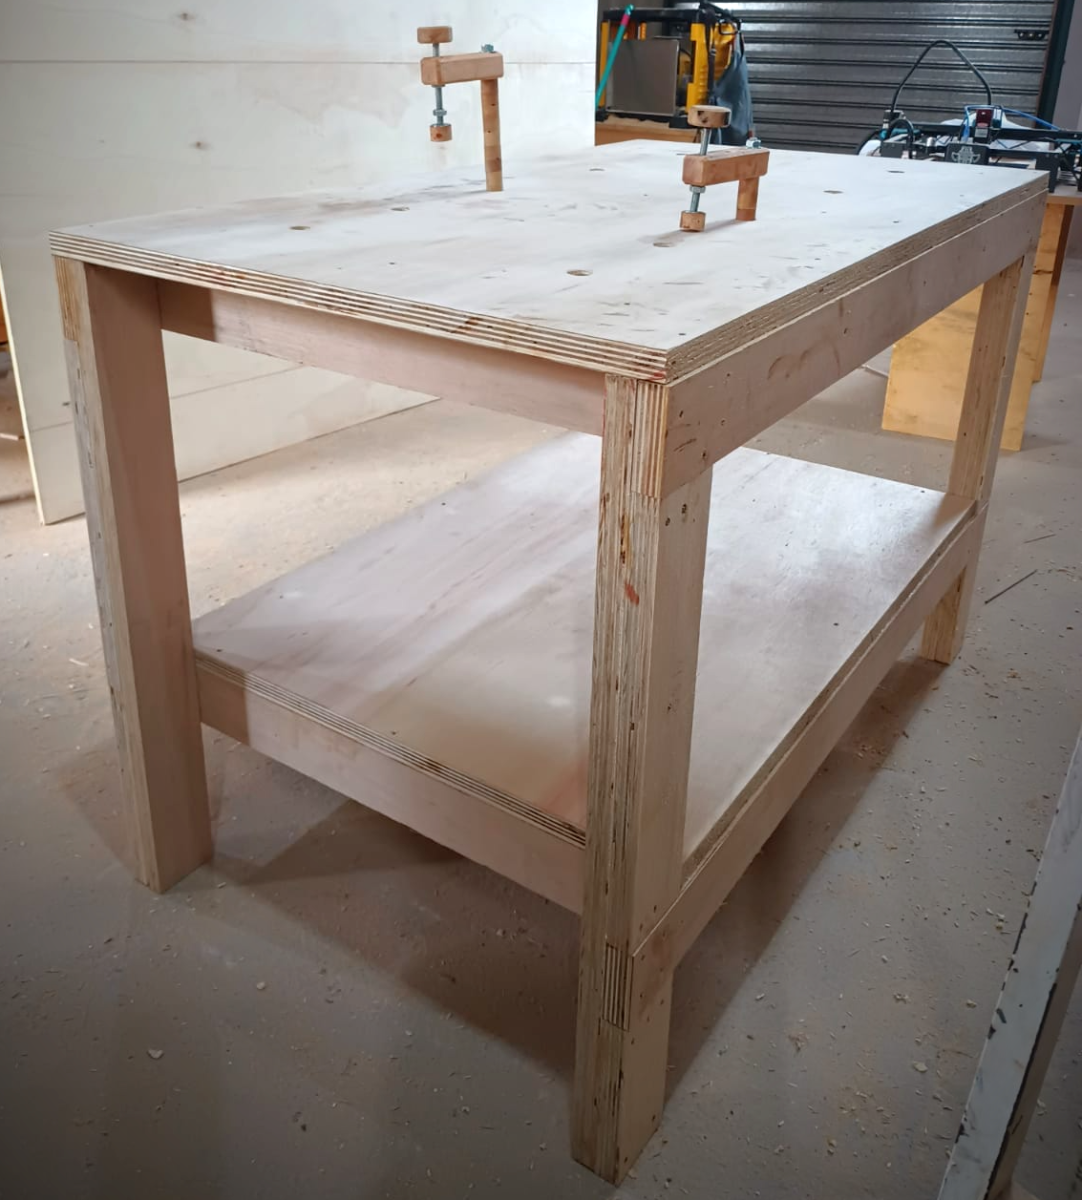
Roll Away Workbench with Miter Saw Stand

Submitted by advanlente on Sat, 03/28/2020 - 11:03

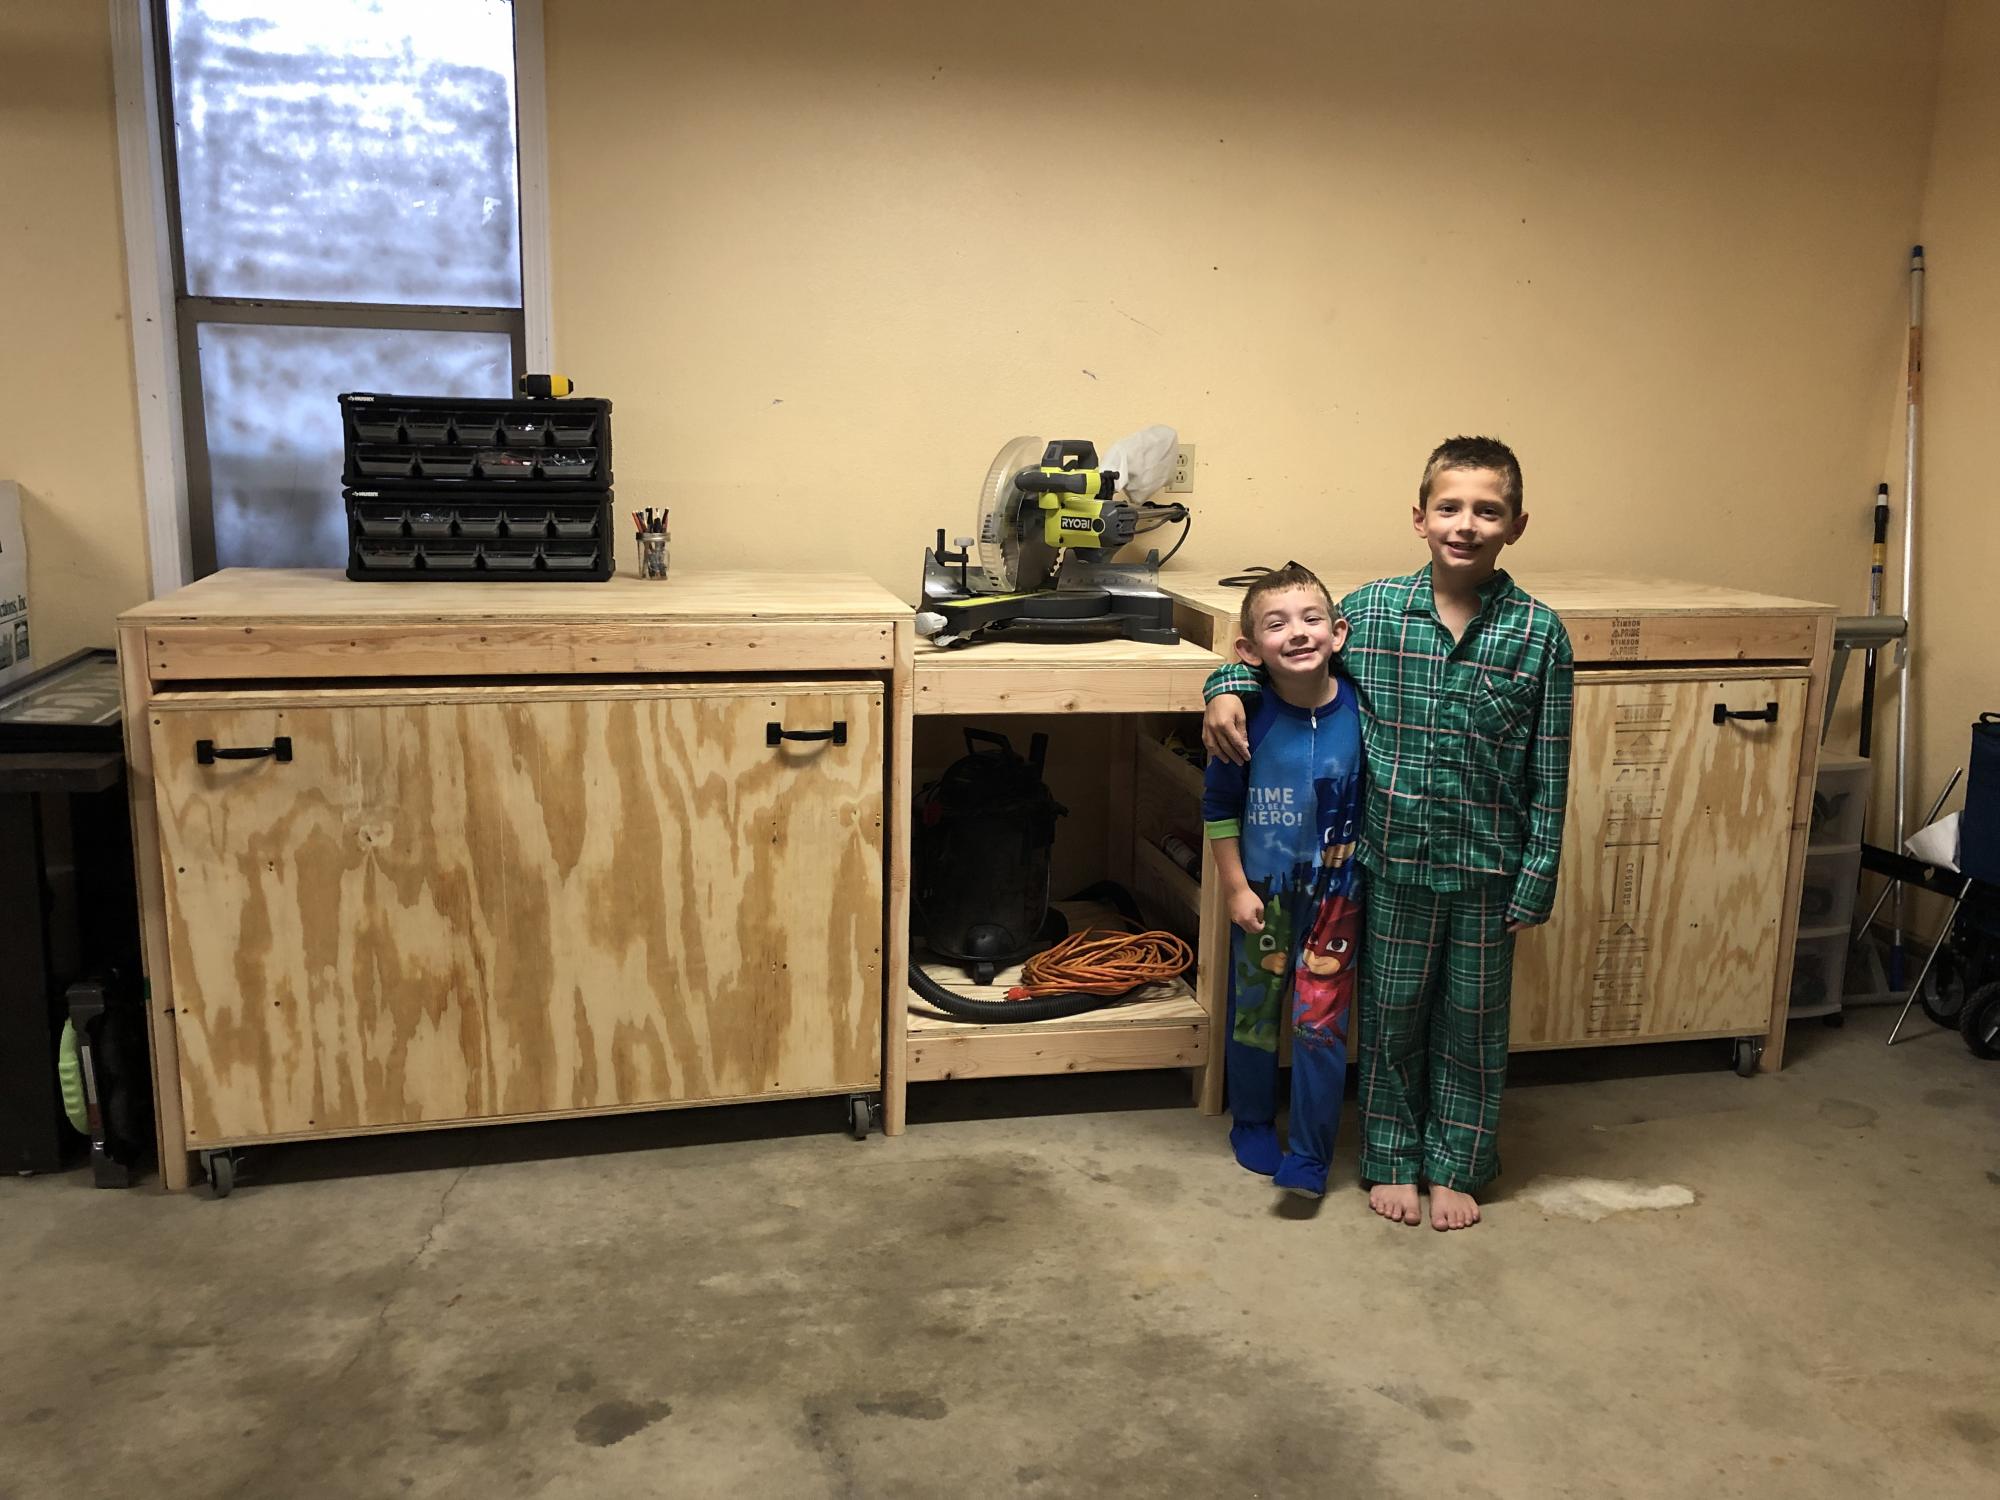
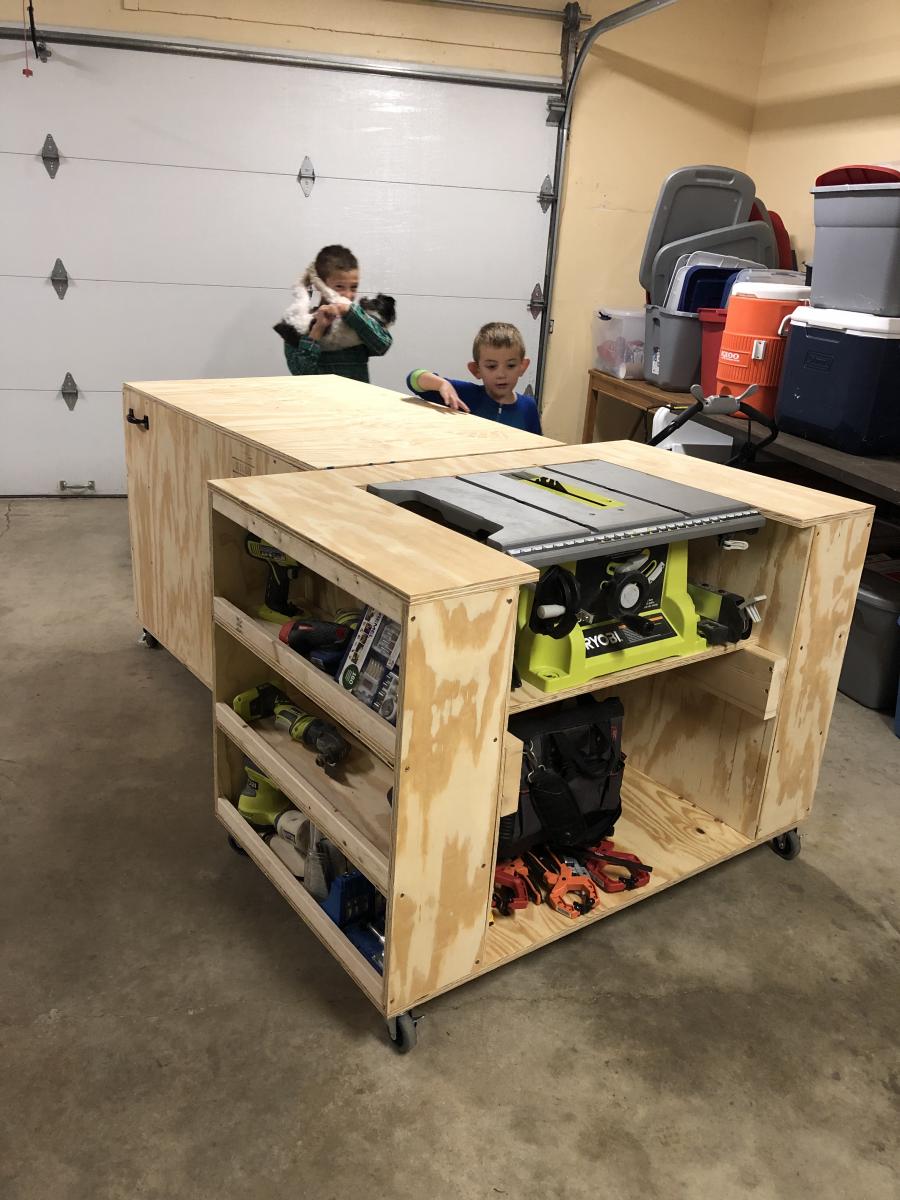
After collecting my tools, I needed a place to store them that would protect them. I had already had two jigsaws break because I was storing them in a rubbermaid tote. When I saw this plan I knew it was going to be perfect for my shop. My husband was supper happy because I would finally have a central spot for my workshop. My boys were happy to help when they could. 

Estimated Time Investment
Week Long Project (20 Hours or More)

Craft Table

Submitted by Anonymous (not verified) on Mon, 11/13/2023 - 09:02

Maple top plywood wrapped with walnut trim. Stain is minwax aged barrel. Warm satin polyurethane finish.

Built from Plan(s)

Easy Kitchen Island Plans

Submitted by Tammy MT on Sat, 05/26/2012 - 09:28

We made the top a solid piece, so we wouldn't have to deal with food getting in the cracks.

We modified the measurements to fit our space, it measures 48" w x 16" d x 36" h. I absolutely love this island!

Built from Plan(s)
Estimated Time Investment
An Hour or Two (0-2 Hours)
Finish Used
legs painted black, top stained mahogany
Recommended Skill Level
Beginner

Comments

Corner hutch and twin storage beds

Submitted by Chriss45 on Wed, 03/12/2014 - 01:47

This was my first build and it took me about a week to finish. My son has an L shaped room due his closet being the laundry room. This plan was perfect for his room and provided tons of storage. I could not find baskets that I liked so I just made bins using 1x2 for front and backs, left over scraps for sides and 1/4 plywood for bottoms then stained them. The approx cost for each bin was 5 dollars. I made my own chalk paint and painted them the same as the antique dresser i found on craigslist that I refinished.

Estimated Cost
450.
Estimated Time Investment
Week Long Project (20 Hours or More)
Finish Used
Chalk paint recipe using Behr flat primer/paint= 4 parts paint-1 part water-1 part plaster of paris. Finished with a coat of wax.
Recommended Skill Level
Beginner

Comments

bellcynt

Wed, 03/12/2014 - 13:23

I love this room! The paint job is amazing and the beds look great!

Heather03

Thu, 02/05/2015 - 18:09

Do u still have the blue print to make this. I've been looking and it's hard to find. If so can u send me a link

Rustic X coffee table

My first project and I love how it turned out

Built from Plan(s)
Estimated Time Investment
Weekend Project (10-20 Hours)
Finish Used
Drift wood stain on top, cotton white chalk paint on base
Recommended Skill Level
Beginner

Bunbed

Submitted by RosalyG on Thu, 04/16/2020 - 07:31

This was my second Ana White project and I LOVE IT. In the picture you only see the first coat of paint. This bunk bed is so heavy duty, even I can sleep with my girls in there in case they need me - we love it

When I built it I did not have a Kreg Jig yet so I bought a teeny tiny little one hole pocket hole thing- so it took me propably an hour longer than it should have... now with the real deal Kreg bam I'm laughing!!!

I already have three friends wanting me to build them one too (there is no store here to buy bunkbeds... everything is with shipping and we live remote in Dawson City so there is A LOT of shipping cost...

I buy the way could not find this awesome plan online but I have Ana White's "The Handbuilt Home" Book where it is in!

Estimated Cost
I paid for wood (it's expensive up north - 200 CAD)
Estimated Time Investment
An Hour or Two (0-2 Hours)
Finish Used
whatever our hardware store offered haha, we do not have a choice up here
Recommended Skill Level
Beginner

2 Person Adirondack

Submitted by Tony H on Sat, 11/18/2023 - 11:36

 A customer asked me to make them two singles and a double. Unfortunately, not as comfortable as the single chair.  There’s nowhere to put one of your arms.  If I do another double, I’ll add an arm rest in the center.  The middle is supported by a double 30 degree leg. 

Seasonal And Holiday

Farmhouse Table - My first project!

Submitted by ksuehr on Wed, 05/30/2012 - 13:02

I followed Ana's plans for the farmhouse table and bench. This was my first project and it turned out really well! The flash makes some of the table top look discolored but it does not look like that in person - just a weird flash thing I think :)
The project took me about a week - table and bench and I only worked on it during nap times and when the kiddos went to sleep! The original plan was for a 96 inch table - I shortened mine to 75 inches to fit our dining room.
A great dining room table for us and it cost around $200 for both table and bench.
I am so proud that I actually built something that my family can use and I get so many compliments on!
Thanks, Ana!!!

Estimated Cost
$200
Estimated Time Investment
Weekend Project (10-20 Hours)
Finish Used
minwax in jacobean plus a polycrylic finish (3 coats)
Recommended Skill Level
Beginner

Wooden Illusion

Submitted by mtairymd on Sun, 03/16/2014 - 07:39

I found a picture of this online but couldn't find the instructions on how it was built. With some trial and error, I recreated the illusion.

Watching the video is the easiest way to see how it works. I've included a drawing which is linked in the video description.

https://www.youtube.com/watch?v=b3vbaZP2cL8

Build Instructions:
http://www.instructables.com/id/Wooden-Illusion/

Estimated Time Investment
An Hour or Two (0-2 Hours)
Finish Used
None
Recommended Skill Level
Starter Project

Comments

Mini farmhouse bedside table

Submitted by hummbaby on Fri, 04/17/2020 - 17:03

After years of hand me down nights stands and using everything from milk crates to tv trays, it was definitely time to build something to be proud of. My wife decided mustard was her color of choice. I think when she chose this design, we planned on modifying the Farmhouse Bedside table to make it smaller and then Ana came out with the mini version. Pretty easy all around. I added a stopper block to back inside end of the drawer to keep the drawer from falling out when opened too far. It can be twisted to allow the drawer to come all the way out.

Estimated Cost
$75?
Estimated Time Investment
Day Project (6-9 Hours)
Finish Used
Mustard yellow paint
Recommended Skill Level
Beginner

DIY Custom Workench

Submitted by Anonymous (not verified) on Tue, 11/21/2023 - 16:31

I had been looking for a carpentry bench project for some time that was easy to make and had the ideal dimensions for my space.

Here's what I did.
I added holes in the table to work with wooden clamps I made.
The end result was better than I expected. It's been very useful.
My sincere thanks to Miss White for this project.

Gidenilson A Santiago

Dresser to Buffet

Submitted by tazO on Fri, 06/01/2012 - 06:07

I have been looking for a dresser to transform into a buffet. I posted on a facebook yard sale group and a wonderful woman offered me one she had been keeping in her garage for free.
Step one stripping a lot of old paint and sanding, sanding, and sanding some more. I found a stencil i like on etsy. Stenciled that design onto the top of my "buffet" with white paint and then when it was dry lightly sanded it. I then stained the entire top the color i wanted. 3 coats of varnish finish that off.
The next step was the bottom. The hardest part about that was getting all the old paint out of all the ins and outs of this piece. Once that was done, with the help of the husband, we removed all the rails and braces holding the bottom 2 sets of drawers. It was put together with interlocking pieces so taking it apart left some hold in the side and middle brace. My husband cut pieces to fit in there and were put in place with wood glue. Once dried they were sanded completely smooth. We used a 1/4" piece of luan for the back and 3/4 piece of pine for the bottom of the now open area. A little trim, 2 coats of white enamel and some new hardware for the drawers and tada a new buffet..lol.
Just got it in yesterday so I'm still decorating, but i love the way it turned out!

Estimated Cost
$40
Estimated Time Investment
Weekend Project (10-20 Hours)
Recommended Skill Level
Beginner

Comments

spiceylg

Fri, 06/01/2012 - 06:29

That came out really nice. Love the stencil touch, too! I am looking for a dresser to turn into a media console. Never thought about posting on FB. Great idea!

Rustic X Coffee Table

Submitted by ajdostie on Tue, 03/18/2014 - 22:33

This was my husbands first time using a plan from the Ana White website. For finish we used Danish oil in "dark walnut" and we also put a coat of beeswax on it as well. We are so happy with the end project!

Built from Plan(s)
Estimated Cost
$40
Estimated Time Investment
Weekend Project (10-20 Hours)
Finish Used
Danish Oil "dark walnut"
Beeswax wood finish
Recommended Skill Level
Beginner

Barn Door hardware console

Submitted by Anonymous (not verified) on Tue, 06/21/2016 - 12:44

Changed the Grandy design just a little to bring it up off the floor and add legs to it. I notched 2x4 to line up with the 1x4 face pieces. Then I found barndoor hardware on Amazon for $47 a set. Needed two sets for this console since I wanted two doors. Only needed the one rail piece though. 

Built from Plan(s)
Estimated Cost
$275
Estimated Time Investment
Weekend Project (10-20 Hours)
Recommended Skill Level
Intermediate

Comments

Decross

Tue, 06/21/2016 - 14:50

This is my build. I guess I wasn't signed in when I posted this on the board. If you have any questions about it then I'll be glad to answer any. Let me know. 

blangenfelder

Thu, 03/02/2017 - 07:25

love the changes you did to the entertainment center...do you have the changes you did? care to share what you did different?

Awesome Garage Shelves

Submitted by scrapngurl on Sun, 04/19/2020 - 14:24

Thank God for these garage shelf plans! :D We have a one car garage that was disorganized and full of stuff. We tried to organize with some metal shelves, but they were very disappointing. They could not hold a lot of items because they were unstable and their measurements did not maximize the space we have. This was my first build and my husband thought I was crazy to attempt it. Neither of us knew what we were doing. However, the plans are simple, clear, and straight-forward and we had no difficulties. I can fit so much on these shelves because they are so sturdy. Love them!

Perfect for lego table

Submitted by vic b on Mon, 06/04/2012 - 18:49

This table took six hours to build plus finish and is perfect for Lego.

Estimated Cost
$100
Estimated Time Investment
Day Project (6-9 Hours)
Finish Used
maple stain and varnish
Recommended Skill Level
Intermediate

Cottage End Table

Submitted by JamieLynn on Tue, 04/01/2014 - 13:25

This was my 4th woodworking project and boy did I learn a lot! I was dead set on building something with a drawer and also with staining it. My first for both. For one of my first wood projects, I think it turned out cute =) It's a definite improvement on my first 3 projects!!

The plan was great, I changed up the top a little but not by much. Otherwise followed it pretty step-by-step. I did not do pocket holes (a Kreg Jig is my next purchased).

Estimated Cost
25.00
Estimated Time Investment
Afternoon Project (3-6 Hours)
Finish Used
Polyurethane and English Chestnut Stain
Recommended Skill Level
Starter Project

Kitchen Console Table

Submitted by DentDiva on Thu, 06/23/2016 - 13:53

I needed a skinny table for the kitchen.  I build this with dog dishes built in to make life easier.  It's an all purpose table that looks nice too. Custom plans made from ideas from other plans.

Built from Plan(s)
Estimated Cost
$75
Estimated Time Investment
Afternoon Project (3-6 Hours)
Finish Used
White paint for bottom, stain for top
Recommended Skill Level
Beginner

Chunky farmhouse trestle table

Submitted by FStrat68 on Mon, 04/20/2020 - 17:47

Built this for my daughter and son-in-law! It is 72"L x 42"W x 31"T per her request! I'm making 2 benches to accompany it! In part, I used ana's plans with some tweaking and adjusting for the 4x4's in the bases! I'm doing the same for the benches!

Estimated Cost
$165
Estimated Time Investment
Weekend Project (10-20 Hours)
Finish Used
I used "Dead flat white" on the base and varathane red oak stain distressed then covered over with carbon gray stain (wipe on and right off) and matte polyurethane for the top!
Recommended Skill Level
Intermediate
Back