Community Brag Posts

Modified jr. camp loft bed TRANSFORMED my daughter's small room!

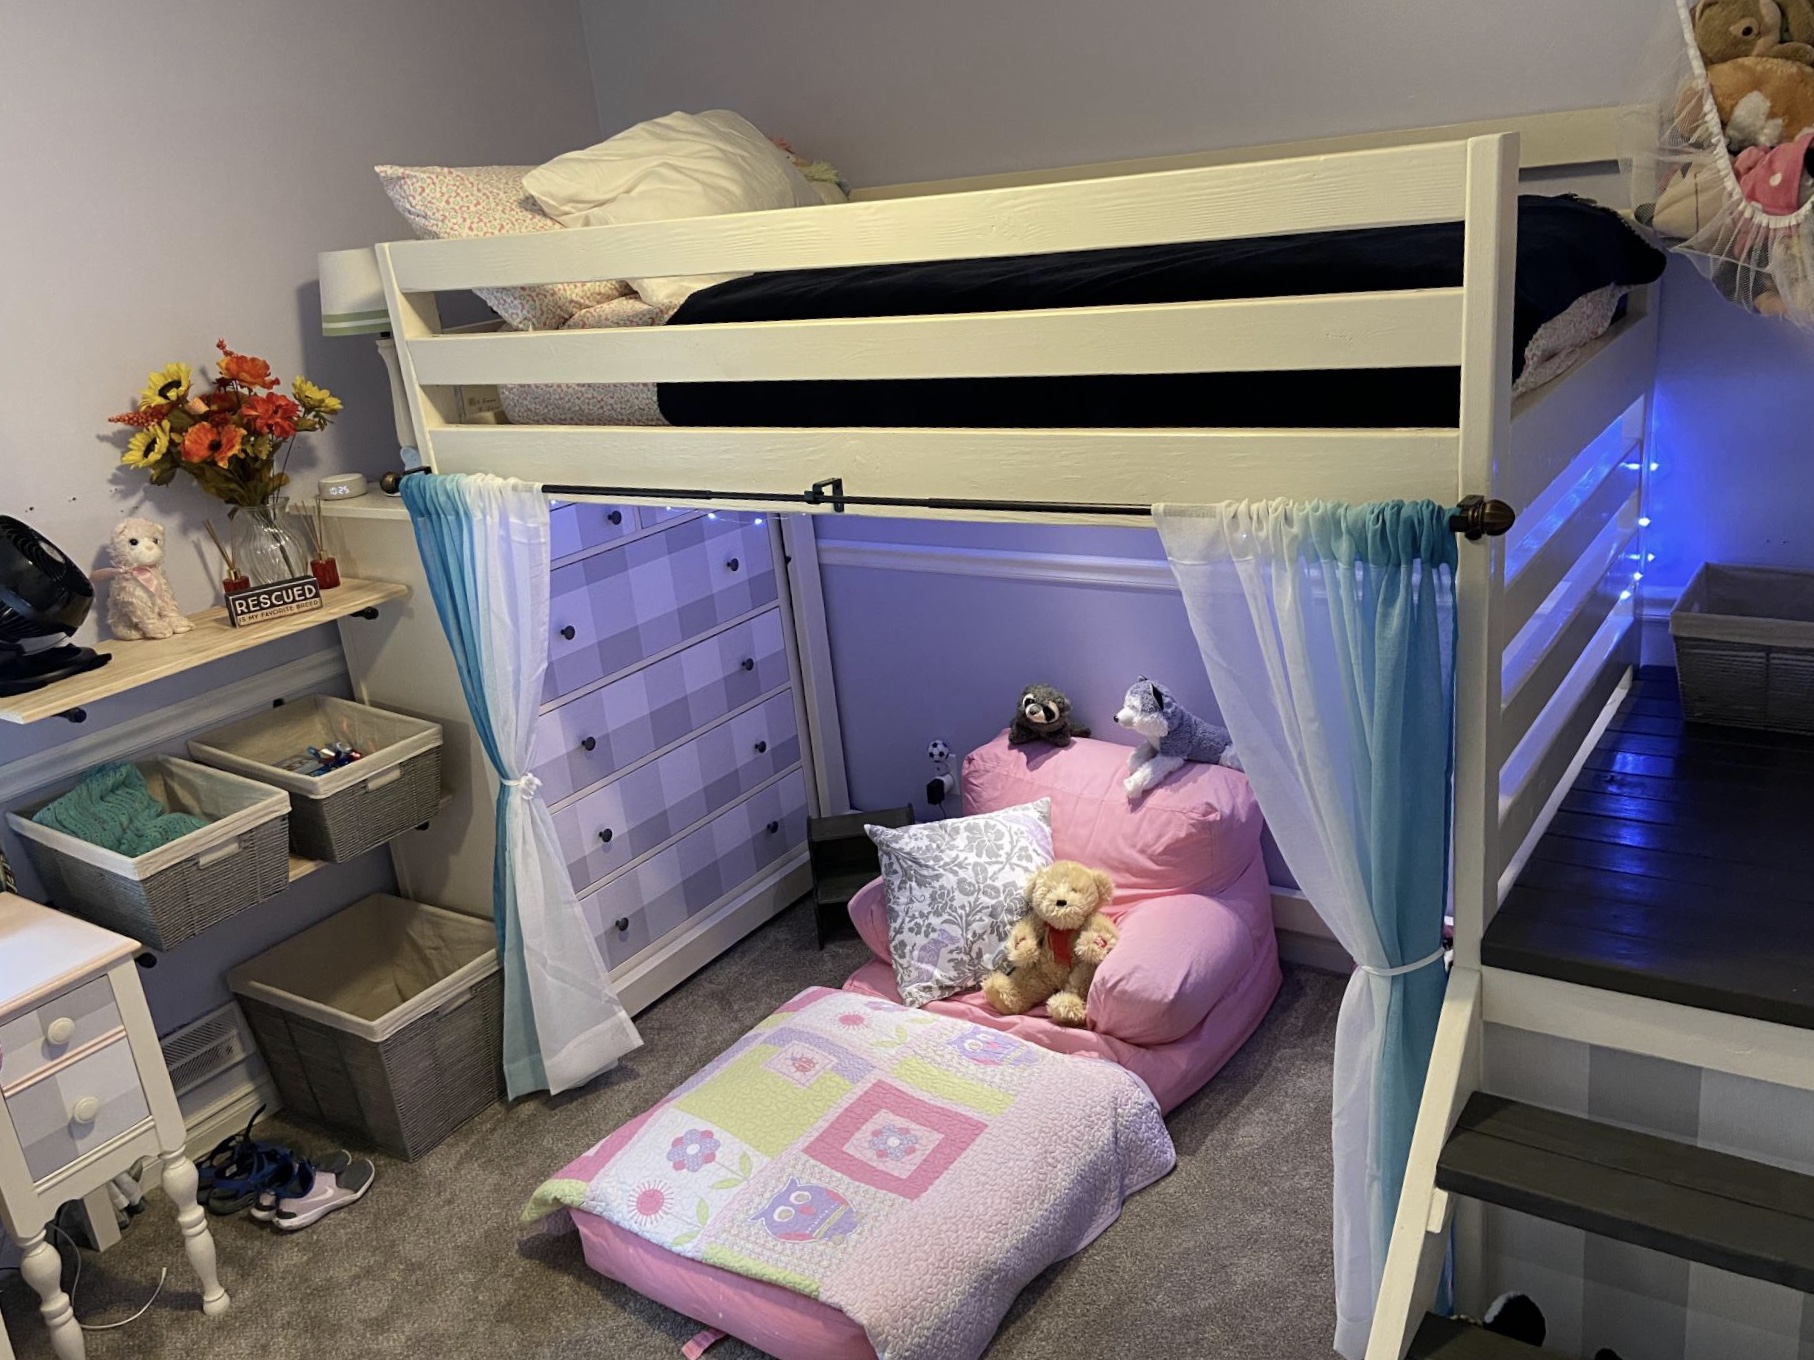
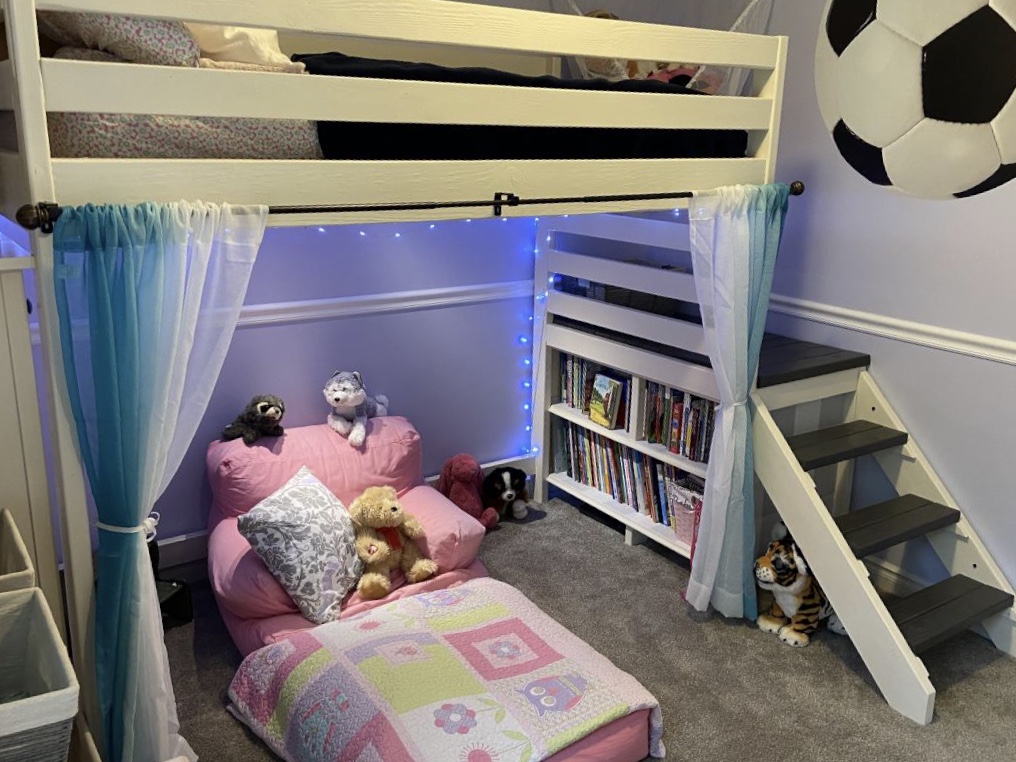
This was a labor of love for my 7 year-old daughter. I LOVE the plans, and modified them a bit to make it work in her small room. Modifications include:

-- Made it six inches higher than the plan calls for. My daughter can stand up underneath (probably for another year), and there's still plenty of height for her to sit up on the bed, even with 8-foot ceilings.

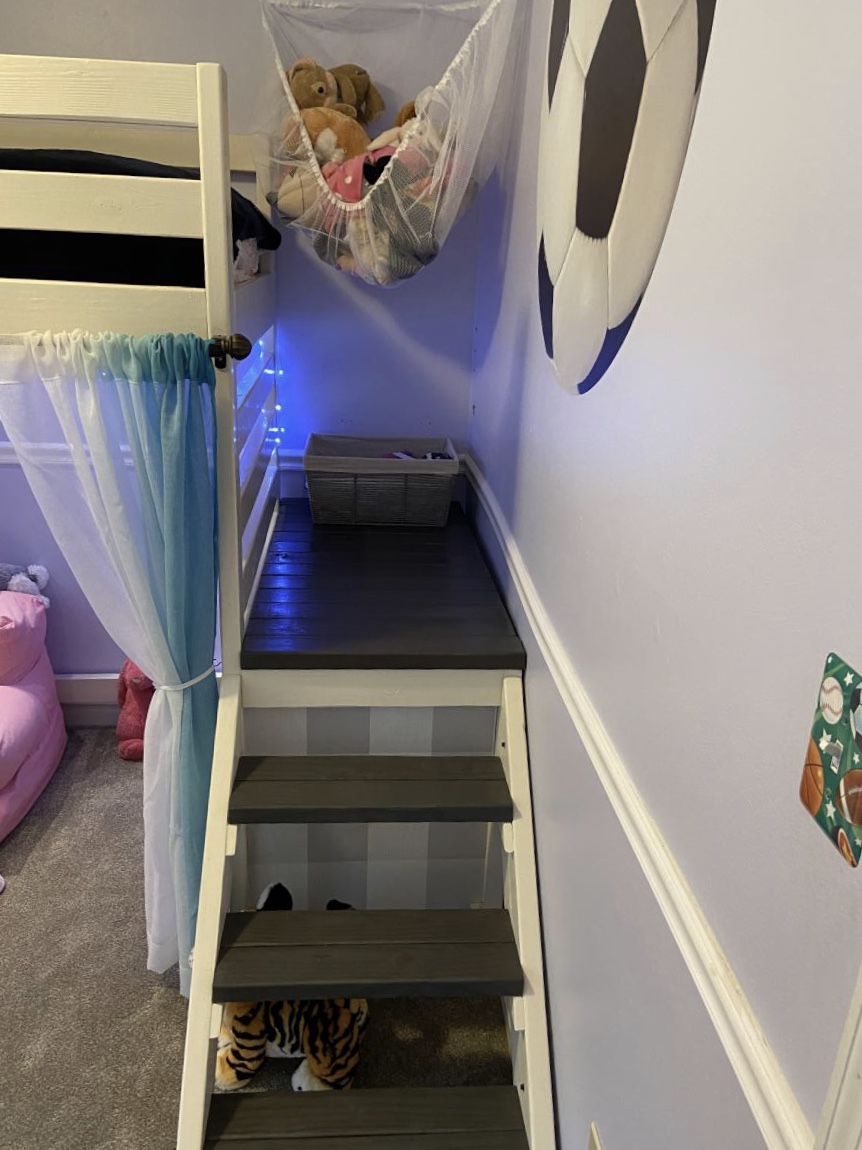
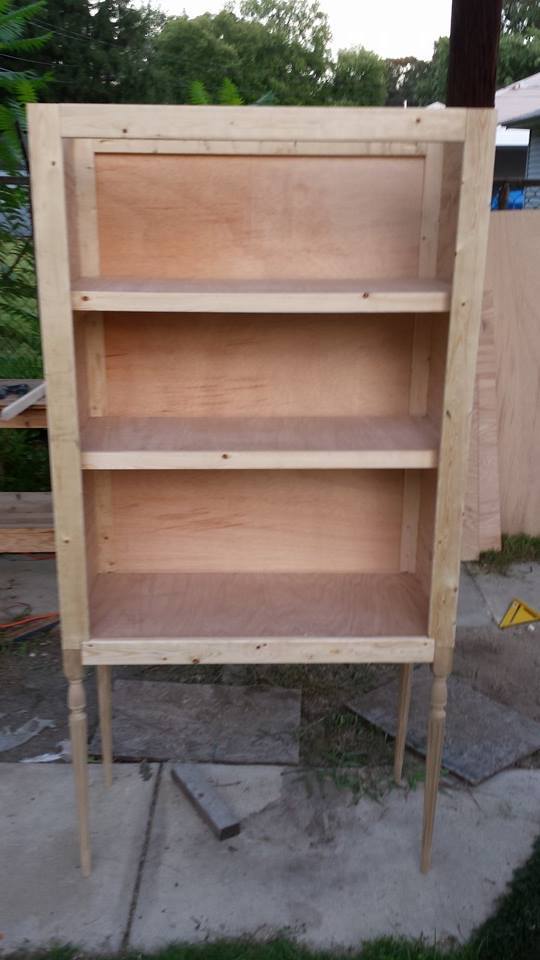
-- I added a book case under the stair landing. Again, her room is small, and the goal was to take advantage of every available nook with the room redo. I love how they came out. I used adhesive wallpaper as a shelf liner and on the outside portion under the steps, and reinforced the shelves with a piece of wood that I screwed into the top of the frame (using my beloved Kreg jig).

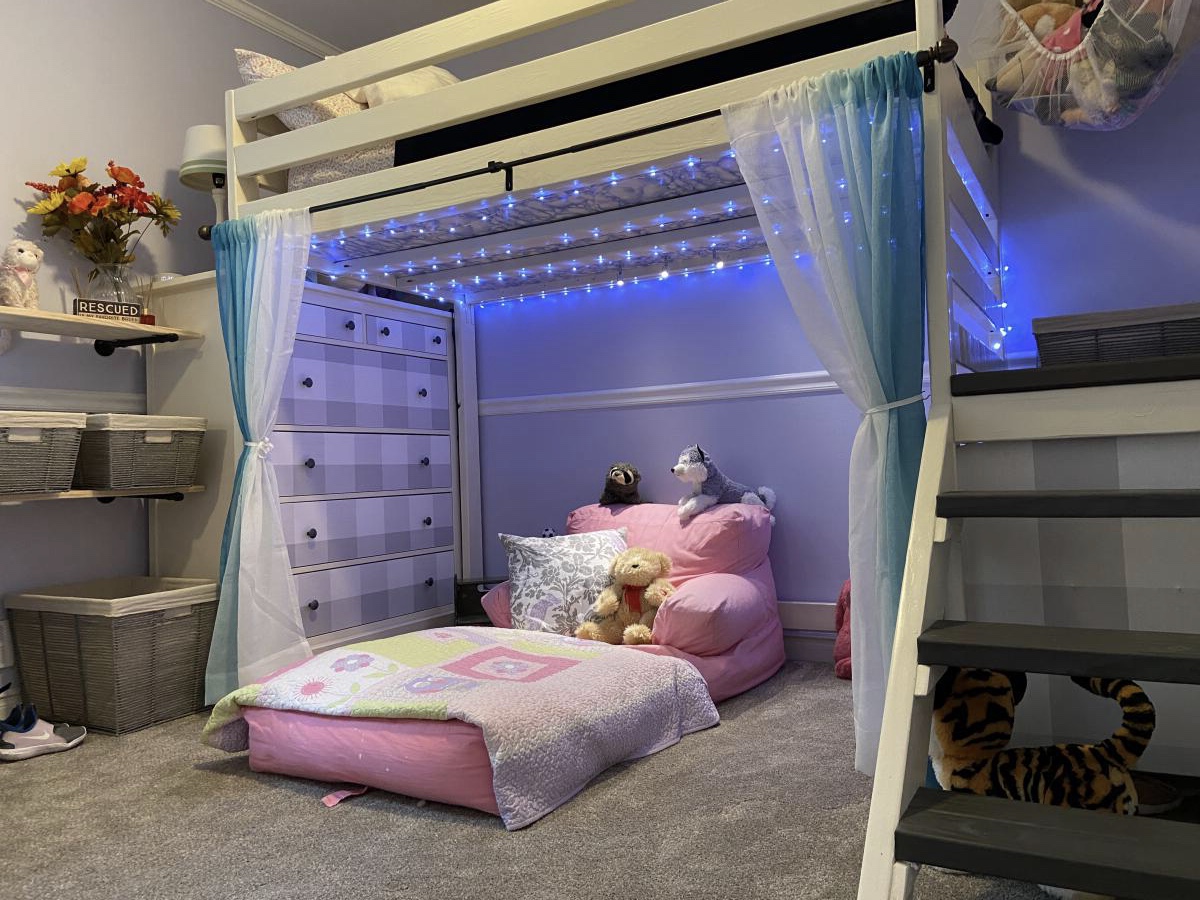
-- I got really lucky with the dresser on the left side of the bed. It fit *perfectly*. It's a Hemnes dresser from Ikea, in case anyone wants to do the same. My six-inch height addition allowed the six drawer version of that dresser to fit; otherwise the three drawer would have worked. I added the same adhesive wallpaper to the drawer faces to dress it up a bit more... really pleased with how that turned out, too. So much so that I did the same thing to her desk.

-- To give me peace of mind, I added MANY L-brackets on the underside of the bed, and also used two additional 2x4's from head to foot. Every joint was made using my Kreg (did I mention that I love that thing?).

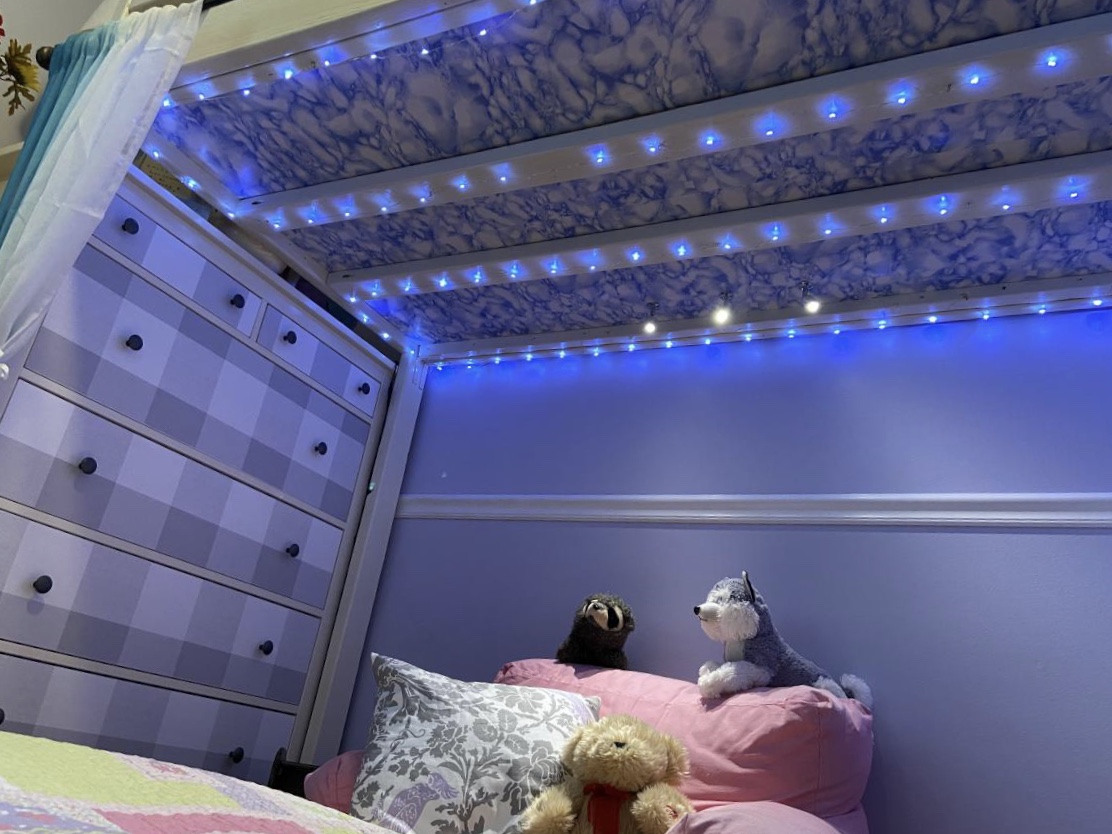
-- Cloud'esque adhesive wallpaper was added under the bed. I like the look, but that particular wallpaper was tough to apply smoothly. If anyone is considering doing the same, I suggest only using thick paper... it won't crease and will save you many four letter words.

-- I strung "fairy lights" under the bed, possibly excessively. :-) My daughter loves them, and enjoys telling Alexa to turn them on/off (by use of a smart plug... they're really cheap these days).

-- I also installed what we call "reading lights" (as they're known to Alexa... separate smart plug) underneath, as that space is now the go-to reading area at bedtime.

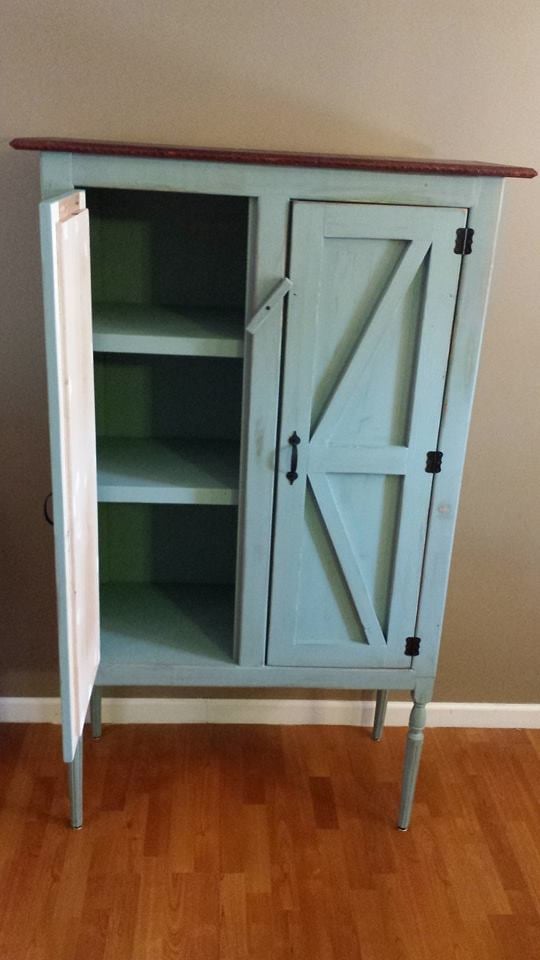
-- I painted it white and made the stair landing a grayish brown stain.

I can't say enough about how much I love this site. The plans -- including the ones for this loft bed -- are all easy to follow from both instruction and materials perspectives alike. And the finished products are all great. I also made a desk from plans on this site, and am going to get working on some outdoor furniture soon. This plan in particular COMPLETELY TRANSFORMED my daughter’s small room into a space where the whole family loves to hang out before tuck-in.

The day my daughter inevitably outgrows her loft bed (hopefully several years from now) will be a sad day indeed.

Estimated Time Investment
Week Long Project (20 Hours or More)
Finish Used
Behr Antique White paint in semi-gloss.
Custom mix of gray and brown stain for stair landing.
Adhesive wallpaper bought at HD and Amazon (for the cloud paper)
Recommended Skill Level
Intermediate

Richard's Work Bench

Submitted by nveelover on Thu, 11/15/2012 - 15:52

We have been doing some work in our garage and the old workbench had to be dismantled. My husband asked for a new workbench for father's day, but I didn't like any of the ones we saw at the stores. I told my husband that I could build a better one for cheaper and he said ok (although I don't think he really had much faith in it turning out). We bought the wood and then, after putting the baby down for a nap, knocked this thing out in 2 or 3 hours. It was very easy, just straight cuts and screwing the pieces together. I did the whole thing myself with a little help from my brother at the end. My husband loved it and showed off pictures of his Father's Day present to his boss and co-workers. We probably spent about $60 in materials and it really did just take a few hours. I changed the dimensions to fit our space and needs. We had some extra wood left over so we added a back-stop to the top to keep things from rolling off the back and I made the bottom shelf deeper. It was a fun and easy project to do.

Built from Plan(s)
Estimated Cost
$60
Estimated Time Investment
An Hour or Two (0-2 Hours)
Finish Used
Unfinished
Recommended Skill Level
Beginner

Country Pie Safe

We recently moved from Washington state to Maryland and the house we rented didn't have a pantry. I decided after searching pintrest that this would be the perfect addition to the house and it could add to our kitchen storage. I am completely happy with the finished project.

Estimated Cost
$115.00 for paint and wood
Estimated Time Investment
Weekend Project (10-20 Hours)
Finish Used
Paint and stain
Recommended Skill Level
Intermediate

Comments

Helper tower!

Submitted by Anonymous (not verified) on Wed, 12/21/2016 - 12:50

My husband made this for our son! He uses it everyday and sometimes our 5 year old does too! Best idea ever!!

Estimated Time Investment
Afternoon Project (3-6 Hours)
Finish Used
Painted it white!
Recommended Skill Level
Intermediate

Herb Window Plan

Made an herb planter out cedar fence planks. Cost about $12 without stain.

Estimated Cost
12
Estimated Time Investment
An Hour or Two (0-2 Hours)
Finish Used
Minwax Gunstock 231, Halcyon rugged Amber gloss
Recommended Skill Level
Starter Project

Pergola

Built this Pergola next to my house. Worked by myself, took several days. a Very relaxing spot !!

Estimated Time Investment
Weekend Project (10-20 Hours)
Finish Used
White paint.
Recommended Skill Level
Intermediate

Farmhouse Queen Headboard

Submitted by Anonymous (not verified) on Sun, 12/25/2016 - 09:00

I built this on the floor of my apartment with just a drill for power tools.  (Lowes cut the wood for me.)  After two years of having the headboard up without stain or paint, I painted it white and moved it into my guest room of my new house.  I also made the two little bedside shelves.

Built from Plan(s)
Estimated Cost
$50 + $10 for shelves
Estimated Time Investment
Weekend Project (10-20 Hours)
Finish Used
White paint
Recommended Skill Level
Beginner

Outdoor sofa

Submitted by Anonymous (not verified) on Sat, 09/05/2020 - 12:30

Created using the outdoor sofa plans. The cushions were created from 3" foam on the bottom and 2" foam on the back. The color us denim blue stain that was leftover from a previous job.

Estimated Cost
~50
Estimated Time Investment
Day Project (6-9 Hours)
Finish Used
denim blue stain
Recommended Skill Level
Beginner

5 Board Bench

My nephew and I made this bench for his mom and dad's 24th Anniversary

Estimated Time Investment
An Hour or Two (0-2 Hours)
Finish Used
stain
Recommended Skill Level
Beginner

Comments

Double Decker kitchen island

Submitted by sr on Sun, 09/07/2014 - 13:53

We took the basic plan but made it a smidge higher (36" high) and added a second shelf. The island is longer that the plans, at 60". Provides us space for all our pantry items.

Built from Plan(s)
Estimated Time Investment
Weekend Project (10-20 Hours)
Recommended Skill Level
Intermediate

Hall Tree

Submitted by Anonymous (not verified) on Tue, 12/27/2016 - 11:37

For the top I followed the plans for the most part.  I made this for my mother for Christmas and she wanted shelves under the bench instead of a storage bin so I modified the original bench plans.  I purchased the baskets for $12.99 each from "At Home" and the medium size fits pretty good.

Estimated Time Investment
Week Long Project (20 Hours or More)
Finish Used
I used Minwax "Early American" stain and finished with gloss polyurethane. The rustic looking wood on the back is actually paneling that had been printed that way.
Recommended Skill Level
Intermediate

Office space - ladder desk and shelves

Submitted by RobRN4 on Mon, 09/07/2020 - 07:17

My wife needed an office space and the ladder desk and bookshelves was the perfect plan for it. In fact when I was looking at the pictures and plans online she thought I was looking at an online furniture store! She said "I like that,we should buy that" I made the desk part first and surprised her with it one evening.
Unfortunately I don't have a garage and not a lot of tools, so the desk is mostly hand cut and some of the bookshelf as well. I finally borrowed a mitre to finished off the cuts and (redo the ones I screwed up) It is a little rough but I love this space! And so does my wife!. My next project I hope to improve my staining skills! Lol. I admit I'm kinda proud of it. On to more projects!

Modified Queen Farmhouse Bed

Submitted by KORR92 on Mon, 11/26/2012 - 18:09

I used Ana's Queen size Farmhouse bed with the modifications for the box spring. I also changed the plans slightly, instead of the 1" x4" on the footboard and head board I used 2" x 6" at the bottom. I don't have a nail gun or finishing nails so this provided the stability and saved me a few dollars. I also made the corner posts longer than the plans to make the bed taller.

I love this bed, I made it extra tall, so you have to jump into it. And there is plenty of storage underneath!

It took me and my dad about 4 hours of actual cutting and assembling, but an additional 10-20 hours of sanding and painting. It took me a few months to actually finish it after work.

THANK YOU ANA for the plans!!!

Built from Plan(s)
Estimated Time Investment
Week Long Project (20 Hours or More)
Finish Used
Off white paint, sanded to antique, then a clear varnish.
Recommended Skill Level
Starter Project

coffee table

My version of benchright coffee table. Made this for my daughter. It's made of solid cherry.

Estimated Time Investment
Week Long Project (20 Hours or More)
Finish Used
Poly 3 coats
Recommended Skill Level
Intermediate

Comments

Patchwork Dresser

Submitted by bRick on Thu, 12/29/2016 - 05:47

This was an anniversary gift, so I wanted it to lean more "chic" than "shabby" and as a result I spent a little extra money. Instead of using different colors of stains, I used different kinds of hardwoods to provide the color contrast. I changed the dimensions to fit our space and my wife's requests. In the end I believe the dresser was 50" wide, 31" tall (not including legs) and 20" deep. 

Carcase - The carase is made of 3/4" plywood and the the divider is held in place by a dado groove. I used a roundover bit to soften the edges. I then applied a vinyl spackle to the edges of the plywood so the paint would go on uniformly.   

Drawers - The drawers were made with 1/2" plywood for the sides and 1/4" for the bottoms. Isntead of nailing the bottoms to the drawer sides, I routed a dado groove into the sides that holds the bottoms in place. I used full-extension ball-bearing drawer slides, which in hindsight may have been a mistake. Combining the the full-extension with weight of the hardwoods created a decent tipping hazard. As a result, I've needed to add wieght to the backside of the dresser for stability. 

Feet - In lieu of casters, I bought some premade 6" legs from a local big box store for about $10-$15. I don't regret this purchase as they worked out very well. 

Finish - The paint I used was super thick and covered great but was difficult to brush on with any consistency or finesse. It was like painting with pancake batter. I had impossible visions of being able to sand the finish down to an incredible flat surface but after redoing it twice, I settled for a brushed look. 

Built from Plan(s)
Estimated Cost
~$600 but with a slight design change and not screwing up the finish, it could've easily been ~$400
Estimated Time Investment
Week Long Project (20 Hours or More)
Finish Used
Tung Oil on hardwoods and Black Dog Salvage Paint with Rustoleum Chalked Matte Clear topcoat.
Recommended Skill Level
Intermediate

Cutting Table for Sewing room

Submitted by tjbr100 on Mon, 09/07/2020 - 22:06

Jennifer wanted a cutting table for her sewing room and so I took Ana-White's Sewing Table plans and made them taller into a cutting table. We aimed for 36" (Standard Counter-Top Height), but ended up at 36 19/64" due to the casters not being exactly two inches. Jennifer's a little short so I was really worried about the extra 19/64" (but don't tell her I said that :)

We decided to use MDF instead of plywood to avoid the risk of snags on finer fabrics.

Instead of simple hinges for the legs, I chose locking hinges available from Lee Valley https://www.leevalley.com/en-ca/shop/hardware/table-hardware/legs/leg-b… ($38 for all four).

We purchased 2" Casters from Amazon.ca https://www.amazon.ca/gp/product/B07G84R9Q9/ref=ppx_yo_dt_b_asin_title_… ($22.99 for all four).

The base was cut from one sheet of 3/4" MDF

We used 2 1/2" screws and glue to build the base. We pre-drilled and counter sunk the screws, ensuring squarness all around.

We attached the casters with the screws provided.

Then we cut the leaves from some scrap 3/4" MDF and attached them with some old door hinges we had.

Once the leaves were attached, we attached the locking hinges for the legs.

We cut and planed the legs a little, and then routered the corners to give them a bit of a nicer look.

Once assembly was finished we applied a coat of primer and two coats of white, satin, interior paint.

The whole thing came out really well and is a nice addition to the sewing room. Once again, I found the plans on this site to be really helpful and easy to understand. Thank you!

Estimated Cost
$150
Estimated Time Investment
Weekend Project (10-20 Hours)
Finish Used
Interior Primer and White, satin, interior paint.
Recommended Skill Level
Intermediate

Queen Farmhouse Bed (Rough-cut lumber)

Submitted by jacktipper on Thu, 11/29/2012 - 05:25

We constructed our farmhouse bed from rough-cut lumber (mostly pine with a few eastern red cedar panels). However, the top rails of the headboard and footboard were reclaimed from an old railraod depot and maintain their faded red color. I will admit, using rough-cut lumber practically tripled our efforts because nothing was square or even, but all in all, I think it was worth it!

Built from Plan(s)
Estimated Cost
$200
Estimated Time Investment
Week Long Project (20 Hours or More)
Finish Used
Clear Satin Lacquer
Recommended Skill Level
Advanced

Comments

Outdoor concrete/wood coffee table w/ browning emblem

My first project using countertop concrete mix.  This specific concrete calls for very low water mix ratios, and I was hesitant to over water the mix. I should have used more because it came out very pourous. Not bad over all though. I used a urethane Matte finish on the concrete and a semigloss poly for the wood base that is made from 4x4's and 2x4's. I used a special walnut color stain from minwax for the base and used a browning triler hitch cover for the emblem.

Estimated Time Investment
Weekend Project (10-20 Hours)
Finish Used
Minwax Special walnut for base color
Urethane Matte on concrete
Semigloss polyurethane for the base
Recommended Skill Level
Beginner

First project

Submitted by Anonymous (not verified) on Sat, 12/31/2016 - 21:34

First project since high school woodworking class. I was pleased with the outcome but, I had a few bumps along the way. I learned from my mistakes so the next one will be better!

Built from Plan(s)
Estimated Cost
About $30
Estimated Time Investment
Weekend Project (10-20 Hours)
Finish Used
Light Walnut, Gloss white, Poly
Recommended Skill Level
Beginner