Community Brag Posts

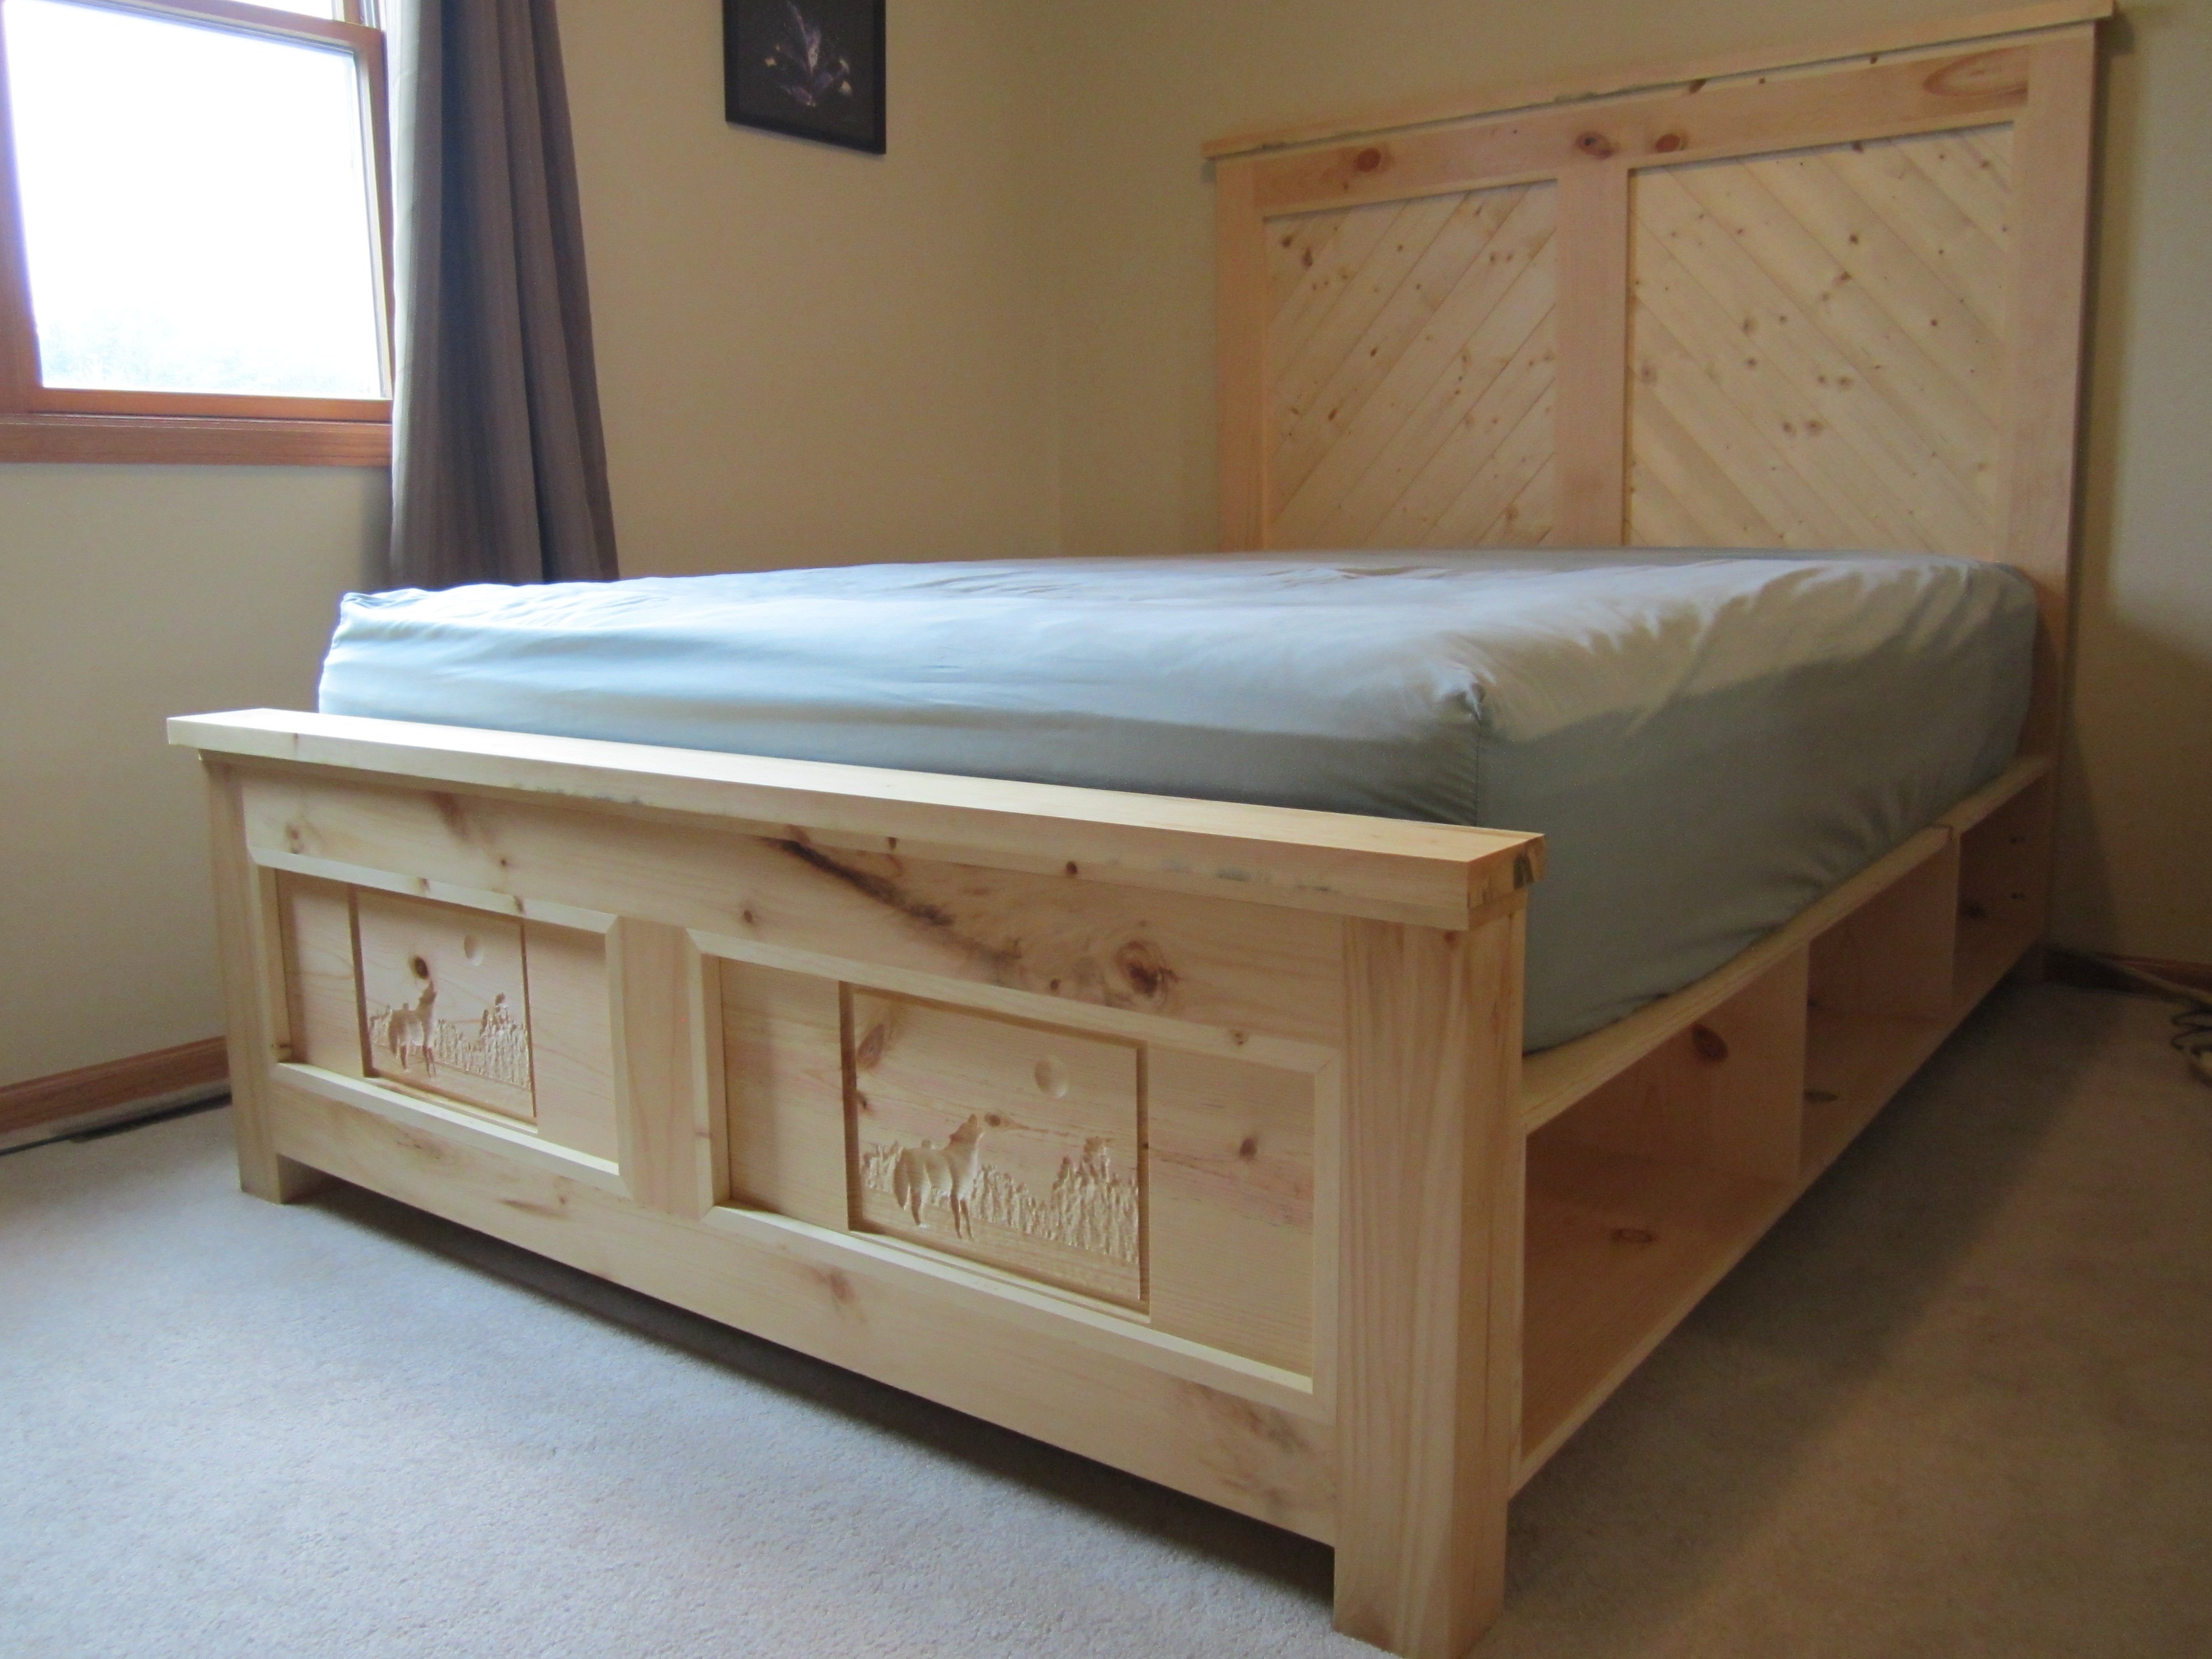
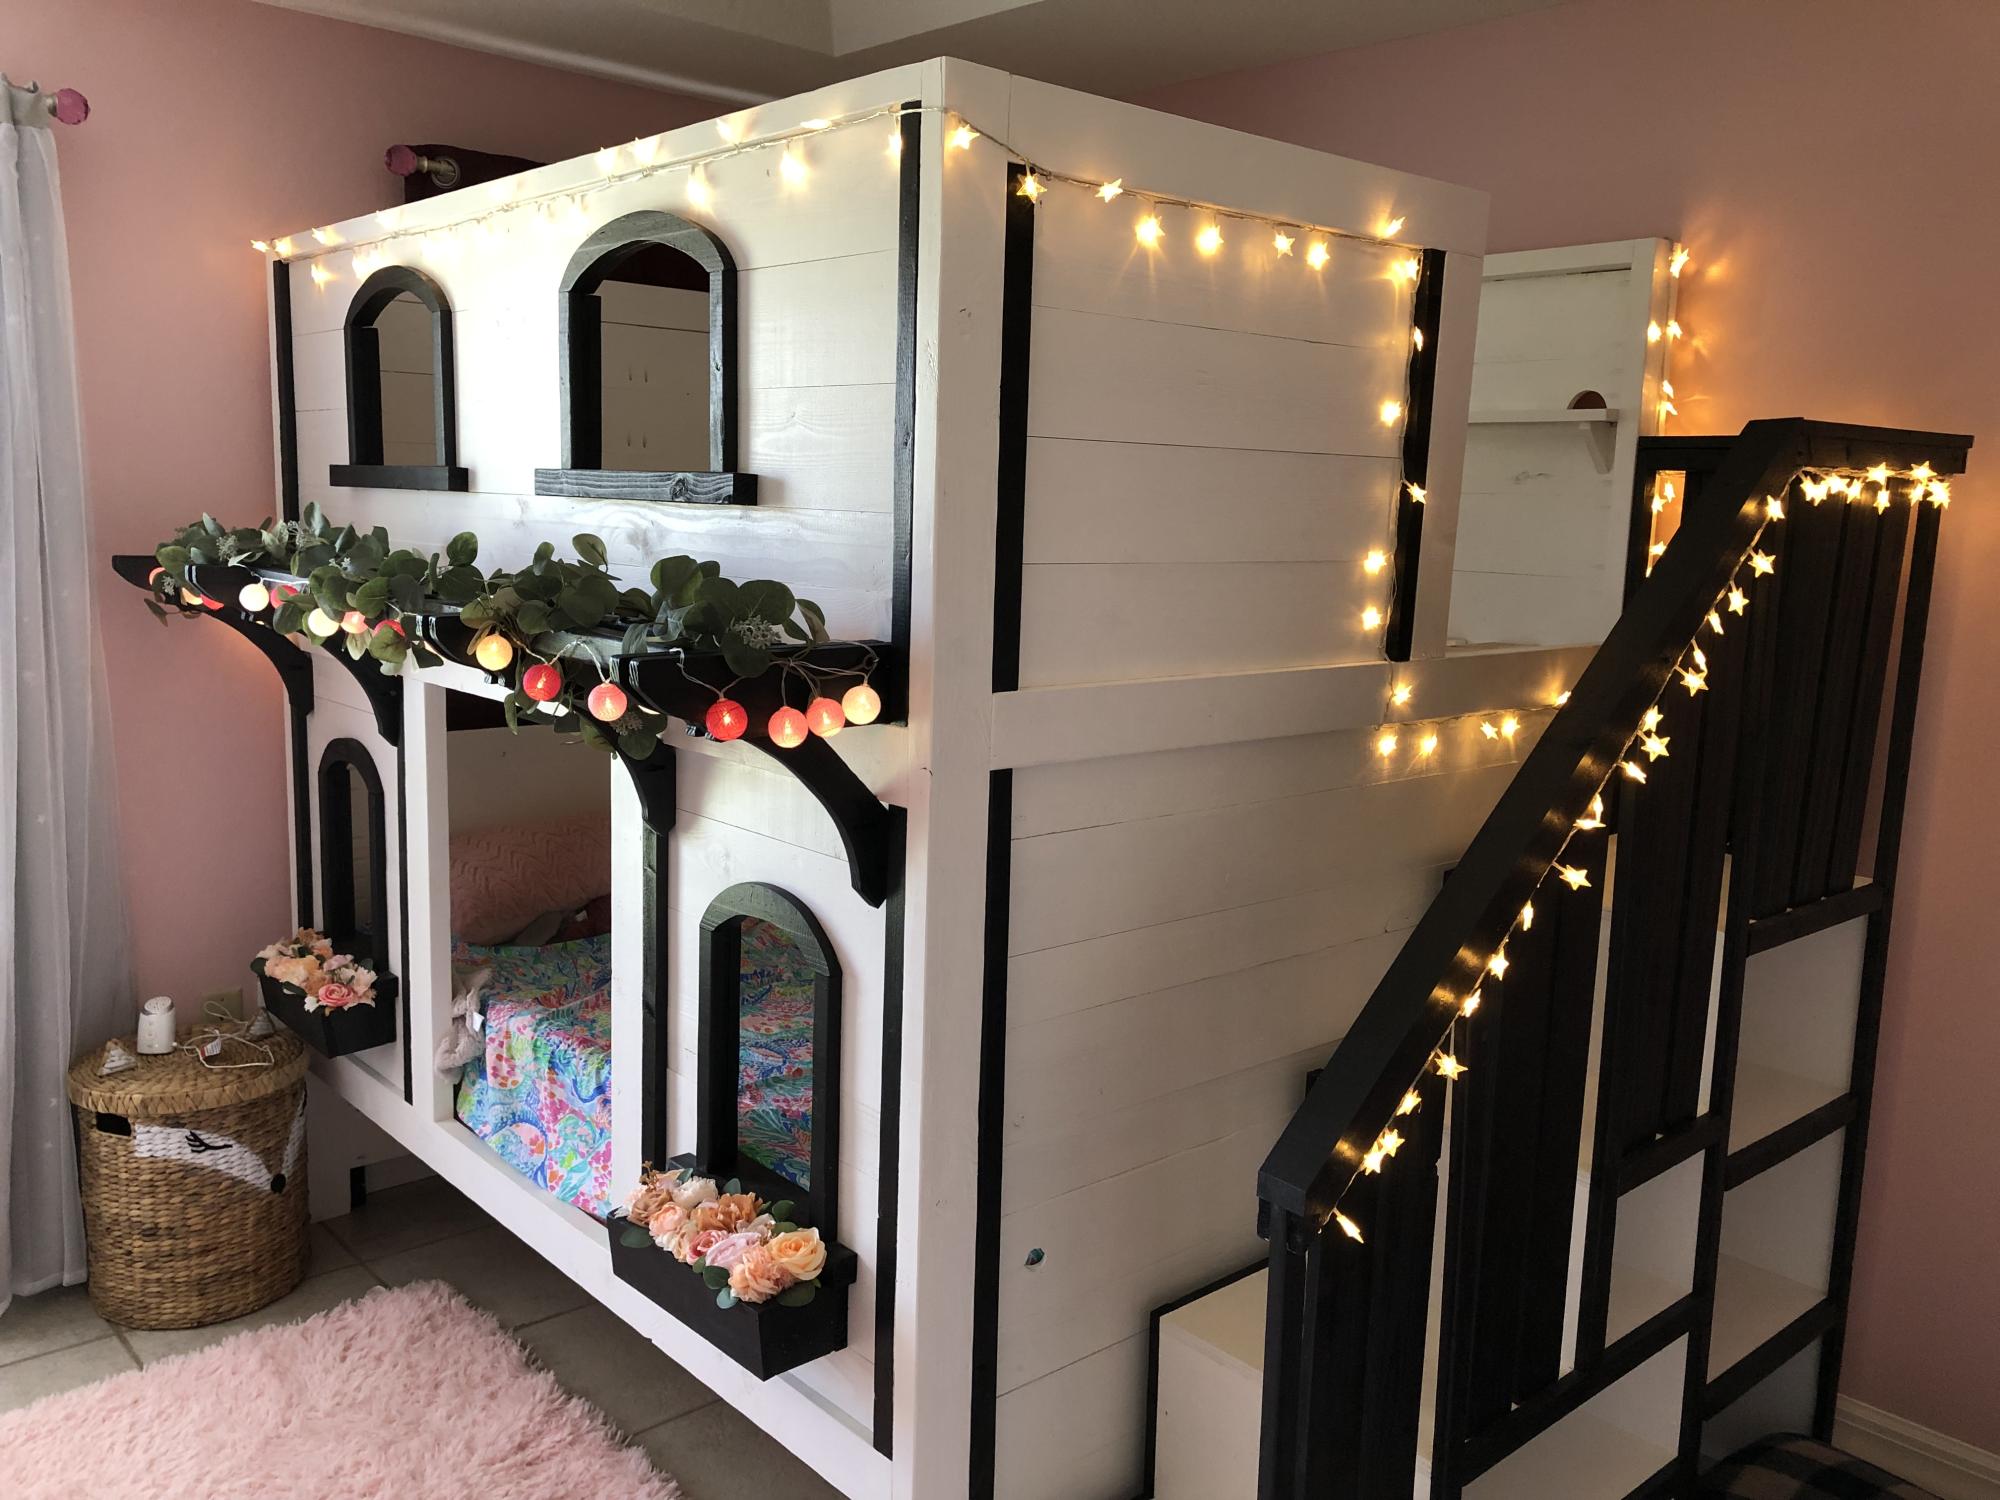
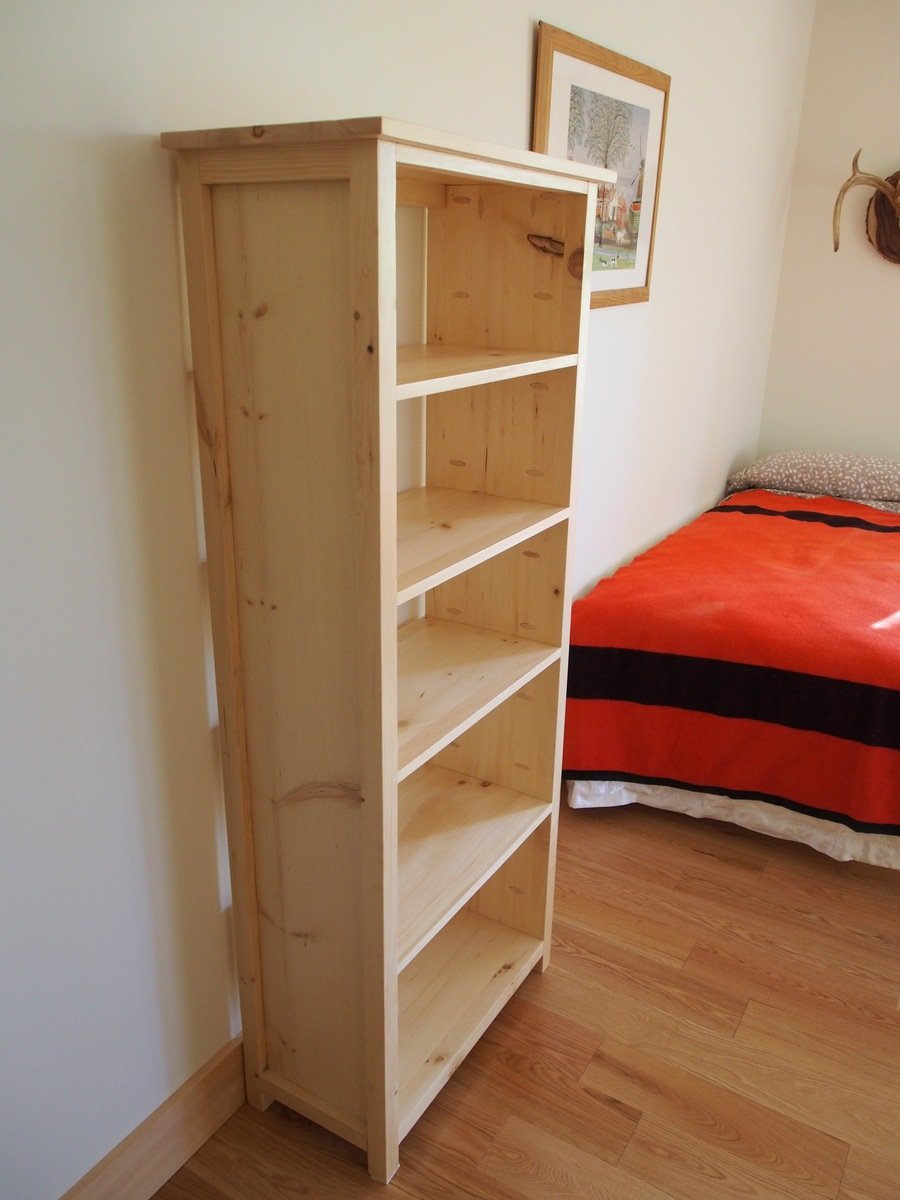
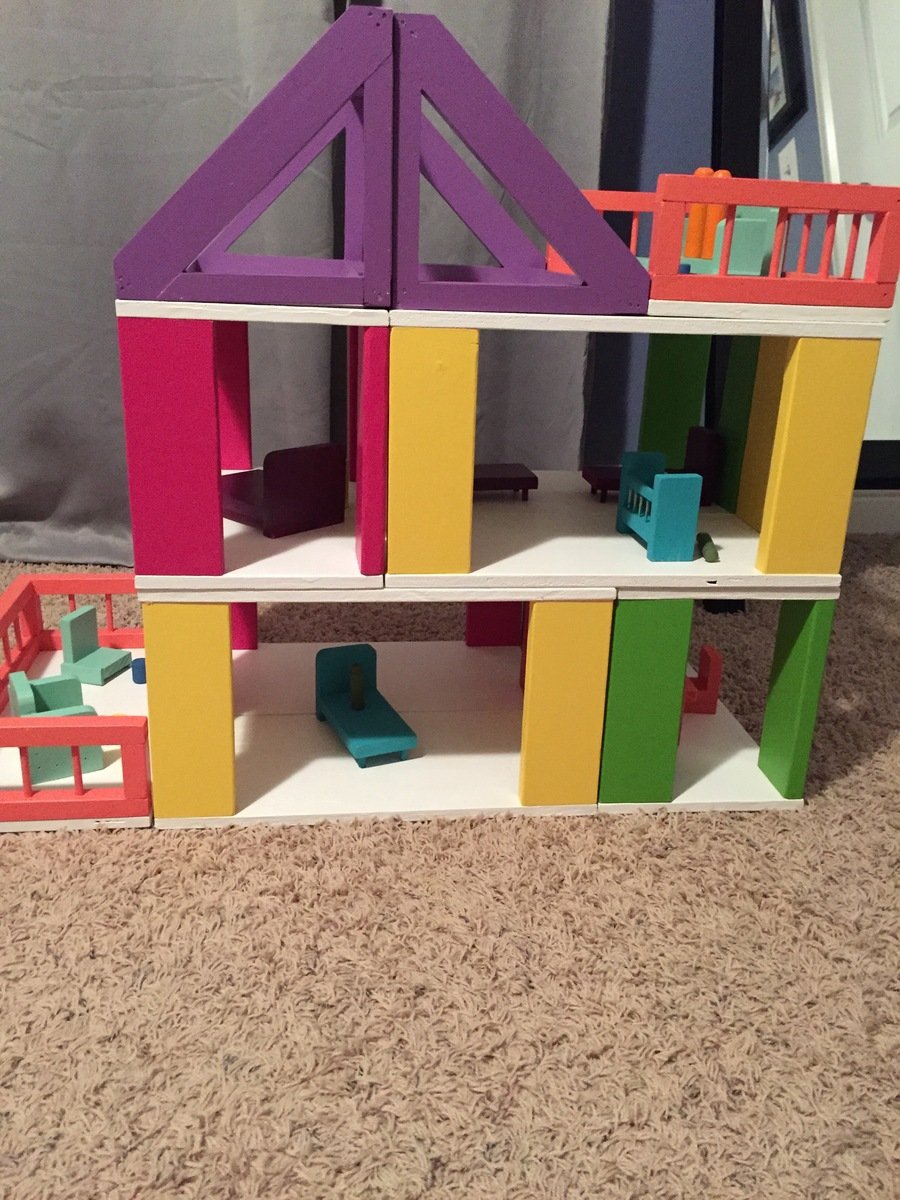
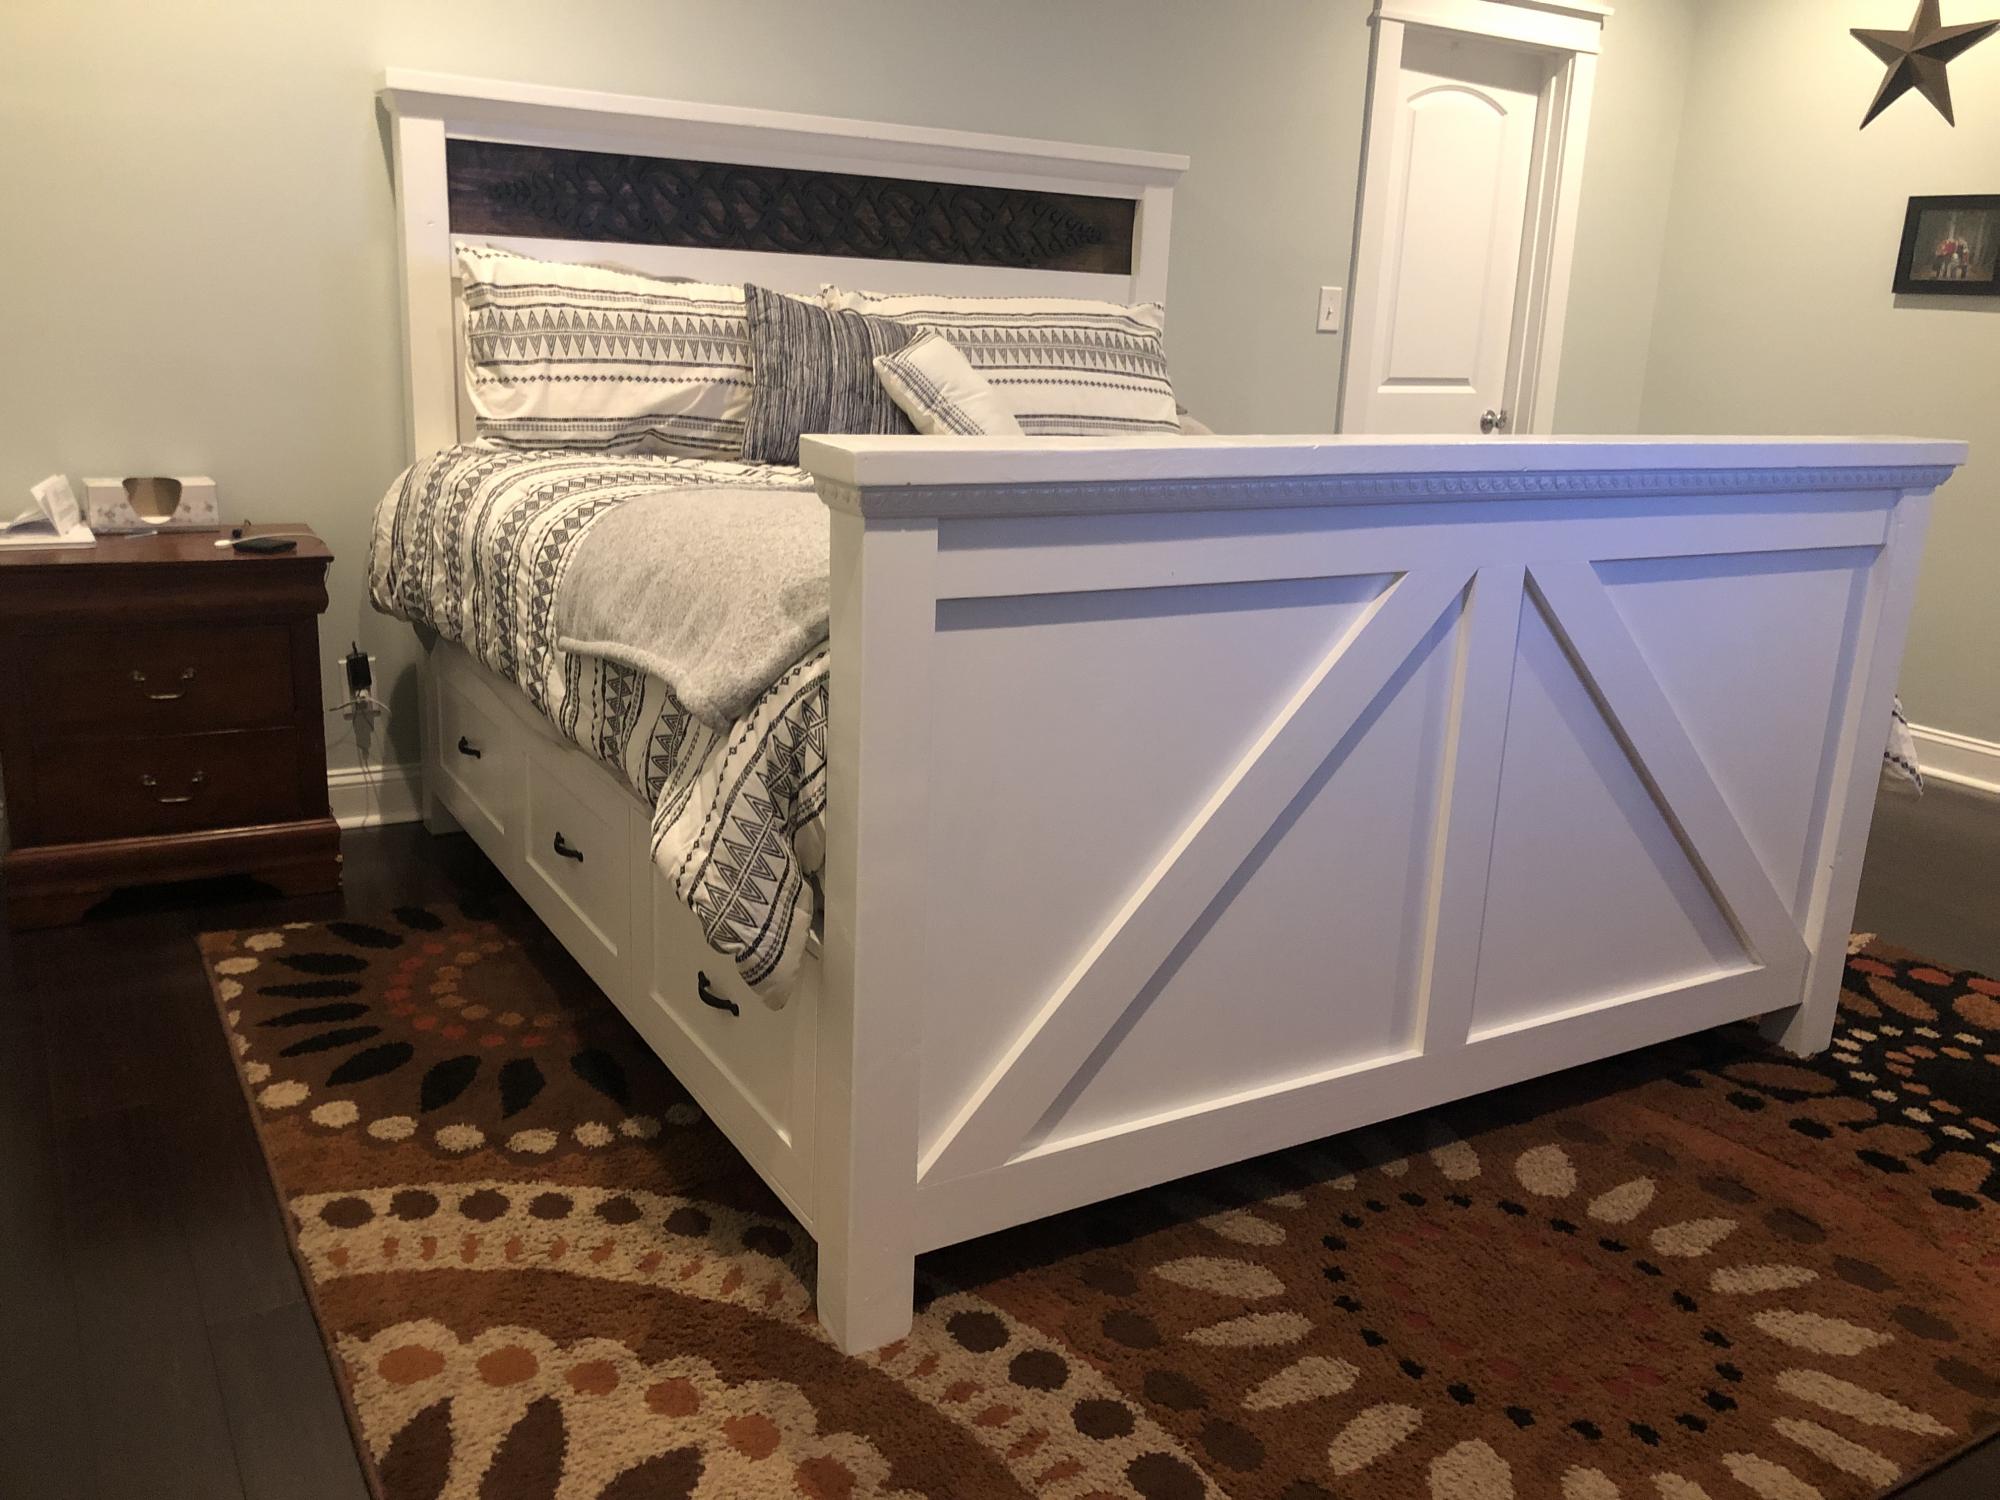
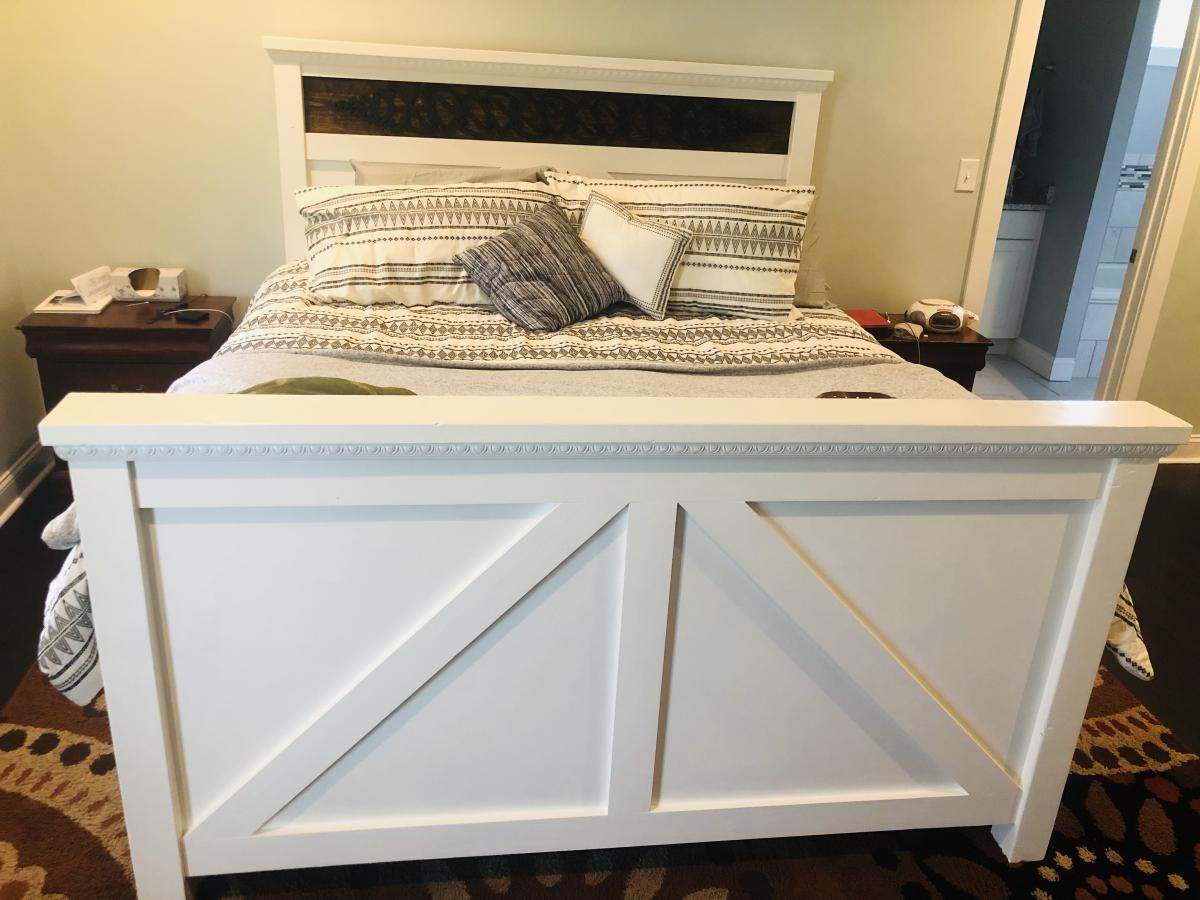
Loft Bed for Renee's Room

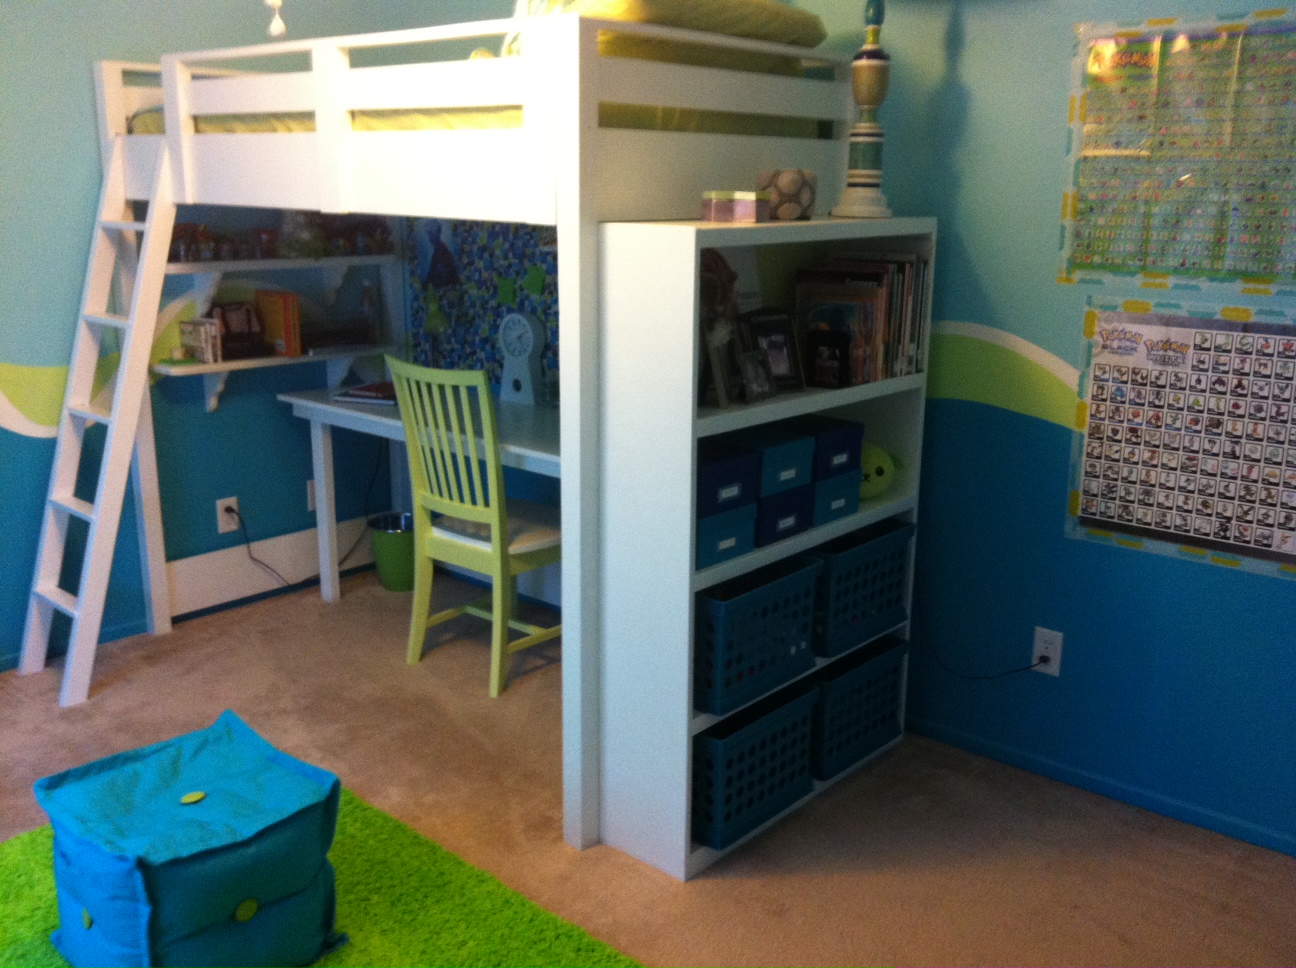
This is the 2nd of two loft beds I have built using Ana's plans - they came out great and my girls love them! I did make some modifications to each, as the girls have different needs. It was a great project and I would like to thank Ana for the concise plans, cut lists, ideas, etc. You made it so easy!

If you are interested in seeing more about this project feel free to visit my blog at www.mothersmusings.net. See you there!

Estimated Cost
$150.00
Estimated Time Investment
Week Long Project (20 Hours or More)
Finish Used
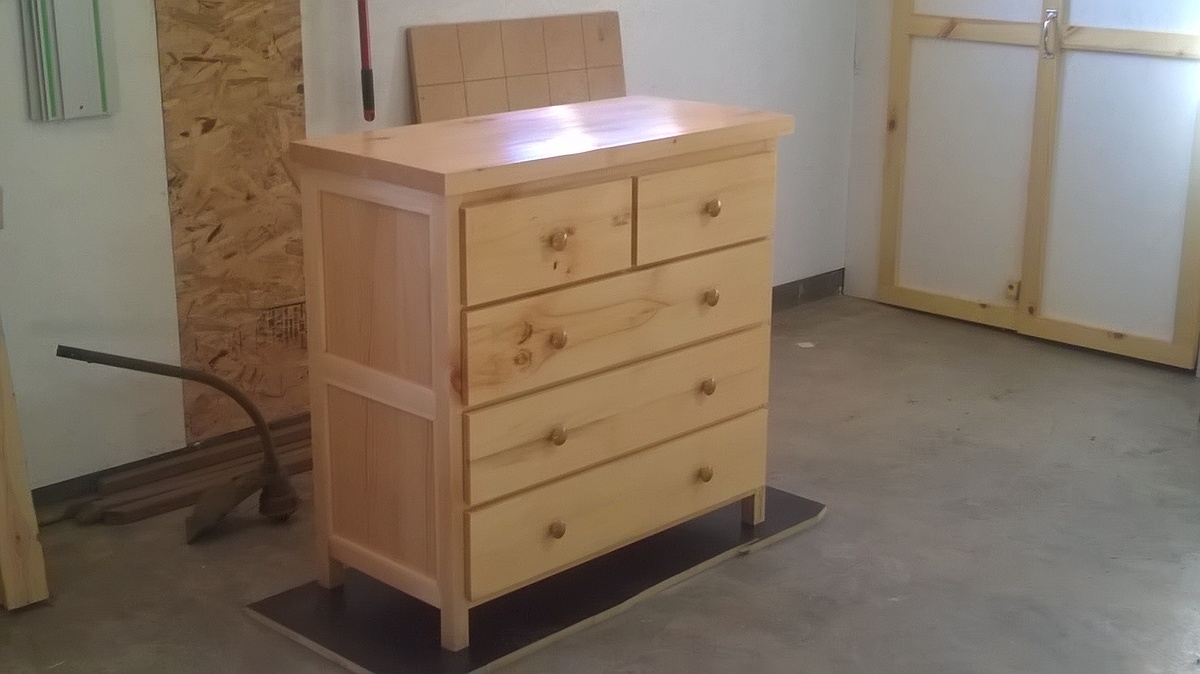
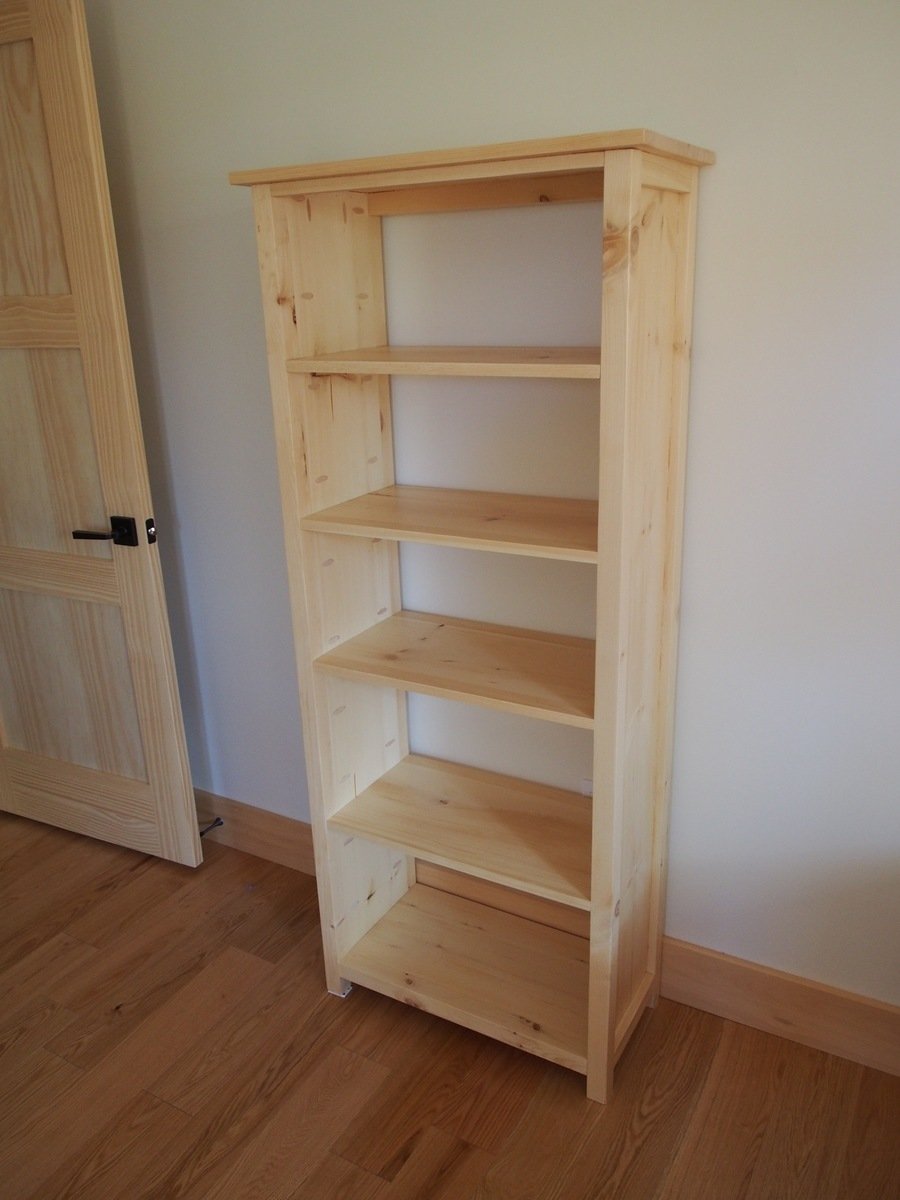
I must say, if I had it to do again I might have upgraded on the wood, but I got the cheapest pine I could find. This led to using A LOT of wood filler and sand paper - and probably took me about twice the time it would have taken had I used prime wood. I used an oil based primer to make sure the knots stayed covered, and 2 coats of Behr high gloss white paint for the finish. Extra work...yes - but ultimately I think I cut my cost in half.
Recommended Skill Level
Beginner

Northern Wisconsin White Pine Bed and Dresser

In need of outfitting the spare bedroom for overnight guests I came upon this site and found the storage bed plan we liked.  After building the bed of course a dresser was in order.  My sawyer has some northern white pine that came from the Wisconsin Northern State Fair grounds in Chippewa Falls.  Having never worked with white pine before I found it rewarng and was happy with the finished product.  Hope our guest enjoy it as much I had building it

Estimated Time Investment
Week Long Project (20 Hours or More)
Finish Used
A self leveling poly finish by General Finish.
Recommended Skill Level
Intermediate

Flip top table

Submitted by Anonymous (not verified) on Sat, 10/27/2018 - 07:58

Great project!

Estimated Time Investment
Afternoon Project (3-6 Hours)
Recommended Skill Level
Beginner

Sweet pea full over full bunk bed

Submitted by Anonymous (not verified) on Wed, 07/27/2022 - 17:24

Modified the original plans to make the bed a full over full. Planning on adding a trundle underneath later in the summer. Thank you so much for the plans! It was a lot of work, I can’t imagine having to design it too.

Comments

Designer Shoe Shelves on a Budget

When we first bought our house, one of the things that appealed to me was the walk in closet off the upstairs foyer. A walk in closet in a house from the 20′s? That’s unheard of! I know I could have designed this in a way that fit more, but I switch out my shoes seasonally, and I personally wanted slanted shelves. Come on, they’re so much prettier! Shopping List 1 – sheet of 1/2″ plywood (4 x 8′ sheet) 2- Primed 1×2′s @ 8′ 1 – 1/2″ Square Wood Dowel (like this) 2- Chair Rail @ 8′ (like this) Kilz Paint Primer Behr Semi Gloss White Paint Indoor Caulk Wood Putty 2″ Screws 2″ Nails Cuts Plywood- 5 pieces at 23″ wide and 12″ deep. Cut either of the 23″ end at a 45 degree angle. Plywood- 1 piece at 23″ wide and 12″ deep 1×2′s- 10 pieces at 12″ with ends cut at 45 degree angle. Then measure 1″ down from the top of the front piece, and cut it straight across. 1×2′s- 2 pieces at 12″ 1×2′s- 1 piece at 21.5″ Wooden Square Dowel- 3pcs at 23″ Chair Rail- 6 pieces at 23″ How To Build 1. I first figured out how far apart I wanted my shelves to be. I don’t have particularly tall shoes, so I had the first shelf 17″ off the ground in the front, and then they were set approximately 12″ apart after that. I located the studs, and screwed in the 1×2′s on the walls directly into the studs. 2. I then added the wooden dowels to the tops of 3 of the shelves. I didn’t even nail these down, just used wood glue and caulk. I set the wooden dowel 2.5″ from the back of the shelf. 3. After that I dry fit the actual shelf on top of the 1×2′s. This was probably the hardest part because of course this house doesn’t have even walls. Why would anyone ever need even walls? What a silly concept. I ended up having to sand a lot of the edges to make them fit. Caulking will help fill in those gaps! I then nailed in the shelves to the 1×2′s from above. 4. I slowly worked my way up the wall. When I got to the top shelf, I knew that I wanted a flat shelf to store boxes of shoes. I also added an extra 1×2″ to the back wall just in case I really decided to stack those shoes high. I followed the same process as I did for other 1×2′s, and screwed this into the stud. Closet 1x2 All Shelves 5. Then I used the chair rail and aligned it at the bottom of the 1×2″ and nailed it to the front of the shelf. It sticks up higher than the front of the shelf, which is great for catching shoes that tend to slip down. 6. After this I, I ended up using wood putty and caulk to fill any gaps. They work miracles on wood. 7. Finally I just painted everything and viola! Budget 1 – sheet of 1/2″ plywood (4 x 8′ sheet) – $28.97 2- Primed 1×2′s @ 8′- $5.98 1 – 1/2″ Square Wood Dowel - $1.75 Chair Rail - $16.00 Kilz Paint Primer- already owned Behr Semi Gloss White Paint- already owned Indoor Caulk- already owned Wood Putty- already owned Screws- already owned Nails- already owned TOTAL: $52.70

Estimated Cost
$50.00
Estimated Time Investment
Weekend Project (10-20 Hours)
Finish Used
White Semi Gloss Behr Paint
Recommended Skill Level
Beginner

Cottage bedroom bookcase

Submitted by yhaas on Thu, 10/29/2015 - 20:42

I used 1 x 10s to make the bookcase a little shallower, and left the back open. Thanks for the great plan.

Built from Plan(s)
Estimated Cost
$100
Estimated Time Investment
Weekend Project (10-20 Hours)
Finish Used
Varathane diamond finish water-based polyurethane, satin.
Recommended Skill Level
Beginner

Modified Shed - Door on short side

Submitted by aalim on Tue, 09/10/2013 - 07:00

I had very little clearance on the long side of the shed, so I opted to put the door on the short side. Thanks for the plan, it was a great starting point for my project.

Built from Plan(s)
Estimated Time Investment
Week Long Project (20 Hours or More)
Recommended Skill Level
Beginner

Comments

Distressed finish fireplace

Submitted by Anonymous (not verified) on Tue, 01/22/2019 - 04:41

This was a great plan to use!  We changed some of the measurements to fit our space and added a simple base to the bottom.  My inspiration was a picture of an old chippy mantle from a flea market.

Estimated Cost
$100
Estimated Time Investment
Weekend Project (10-20 Hours)
Finish Used
I stained everything first then lightly rubbed vasoline over some areas. Used a white paint (rustoleum white linen chalk paint)and dry brushed on until distressed look was achieved.
Recommended Skill Level
Beginner

Shoe Dresser

Submitted by Anonymous (not verified) on Tue, 11/29/2022 - 13:04

Modified the shoe dresser dimensions to fit the space.

Built by Janae

Built from Plan(s)

Modular Doll House Painted

A joint effort between my dad, my husband and I!  I love the way it turned out!  The painting was a little time consuming but totally worth it.  Cannot wait for my daughter to see this on Christmas morning.  My dad even made a little crib and highchair, which are just adorable!

Estimated Time Investment
Week Long Project (20 Hours or More)
Recommended Skill Level
Starter Project

X style work bench

Submitted by Anonymous (not verified) on Sat, 01/02/2016 - 10:50

I made this work bench for my garage. Over a few weekends. It is 11' 6' long and is made of pine lumber. I used 2x10x12's on the top, mostly 2x4's are used for the farm with the exception of the center part of the legs. Those are rough cut 4x4's I had laying around. 1x6's for the bottom shelf. Getting the top seams to line up took a lot of sanding with 40 grit. They were to big for me to run through the table saw myself so I sanded and sanded. I did run skews threw the top and then filled with wood filler. I wanted strength. Plus the top boards are not glued so I can replace as needed (It's a work bench right?). This thing is big, heavy, and solid!

Built from Plan(s)
Estimated Cost
$120.00
Estimated Time Investment
Week Long Project (20 Hours or More)
Finish Used
Thompson’s WaterSeal Stain – Transparent ACORN BROWN on frame and Minwax Fast-Drying Polyurethane for the top and bottom shelf
Recommended Skill Level
Intermediate

Comments

Roller Vertical Pantry

Submitted by MikeW on Mon, 05/06/2019 - 08:49

Made my wife happy!

Estimated Time Investment
Day Project (6-9 Hours)
Finish Used
Paint
Recommended Skill Level
Intermediate

Comments

Modern Craft Table *tweaked*

Completed Modern Craft Table! We tweaked the plans a bit because I was looking for a larger table top. The top now measures 48" x 76". We simply did this by adding an extra set of cubbies to the other side of the shelves. Absolutely LOVE how this turned out! All I need now is 4 counter height stools built and lots of shelves to complete my craft room! Will be sure to post those once they are completed!

Built from Plan(s)
Estimated Time Investment
Weekend Project (10-20 Hours)
Finish Used
Ultra White Latex Paint
Recommended Skill Level
Beginner

Comments

Ana White

Thu, 11/17/2011 - 01:10

Darn I was so excited to see you craft table! I apologize that your brag post did not show images. If you can send me images at knockoffwood(at)gmail.com I'd be happy to post. Thanks so much for submitting a brag post. Ana

Guest (not verified)

Sun, 03/04/2012 - 07:31

I LOVE LOVE LOVE your craft table. I want one! Looks like my husband wil have to get busy! Thanks for sharing!
Kristina
Houston, TX

Kimmy (not verified)

Tue, 03/20/2012 - 17:51

Is this the pic of the one you did ?? I am wanting a bigger table top too. I have waited years for just the right table and this is it.

Kimmy (not verified)

Tue, 03/20/2012 - 17:51

Is this the pic of the one you did ?? I am wanting a bigger table top too. I have waited years for just the right table and this is it.

Kimmy (not verified)

Tue, 03/20/2012 - 17:54

Is this the one you made ? I want a bigger table top as well. But I don't see the extra cubbies.

Kimmy (not verified)

Tue, 03/20/2012 - 17:54

Is this the one you made ? I want a bigger table top as well. But I don't see the extra cubbies.

naildoctors

Tue, 05/29/2012 - 00:05

This is great!! I am planning something similar, but what is your idea or the plan you used for the middle support to keep it from sagging over time? My idea is to run another cubby in the middle from side to side. What do you think?

Laura Mulholland (not verified)

Mon, 01/21/2013 - 09:54

I love the modern craft table, just what I have been looking for, do you share instructions, dimensions, etc.? thanks, Laura

HapETexanGal

Thu, 05/12/2016 - 15:14

I'm loving this and would love to have FIL build it for me but the plans look like its for the regular modern craft table but not the tweaked?  Also is there support for the middle?  Can you send me a link for the tweaked supply list please, can't seem to find it.  Love what you do!

Ariel's Coffee Table

I built that table for a friend using primarily hand tools. The only power tools were a table saw to rip the legs from a scrap 2x12 from another project, and a drill for draw-bore holes.

The table is made from pine, so that it is light enough for a woman of small stature to carry it up to a third-floor apartment. The frame is made with mortise and tenon joinery for strength, and the joints are draw-bored to make sure it doesn't fall apart in our lifetime.

The top is a glued-up panel from five other boards. This was my first panel glue up, so it was a little bit exciting in the same way that a kitchen fire is exciting. The surface has a rustic texture, made by planing it smooth with a cambered jack plane. The texture isn't visible under normal lighting, but with a raking light you can see it. It's very interesting to run your fingers over this table because of the texture from the plane, and the strong grain of the white pine.

Estimated Time Investment
Week Long Project (20 Hours or More)
Finish Used
The finish is amber shellac, with four coats of gloss polyurethane, thinned 1:1 with mineral spirits to improve the flow and help the finish self-level.
Recommended Skill Level
Intermediate

King Farmhouse Storage Bed

Submitted by Anonymous (not verified) on Sun, 08/18/2019 - 15:41

After a successful attempt at Ana’s farmhouse desk I decided to make a bed for my wife... needless to say I think she likes it! Thanks to Ana and Pretty Handy Girl’s plans! (This is my 3rd woodworking project)

Estimated Cost
700
Estimated Time Investment
Week Long Project (20 Hours or More)
Finish Used
Valspar Cabinet Enamel
Minwax Dark Walnut stain
minwax Polycrylic satin polyurethane

I used acetone to transfer the graphic I designed for my inlay. I carved out the inlay with a router. I stained the wood and then painted the surface black.
Recommended Skill Level
Beginner

Comments

My Adirondack build

This build was so simple and fun to make. Just like Ana stated in her video, it really only took me an hour to build. I plan to do many more projects that I find on Ana's website. This project still has a little bit more work to do like staining and sealing but will finish that on another day real soon.

Comments

HouseHomemade.us

Submitted by Anonymous (not verified) on Tue, 02/16/2016 - 04:09

We had a great time making this desk! I was so thankful for the inspiration and now I have a new favorite spot in our home.

Built from Plan(s)
Estimated Time Investment
Day Project (6-9 Hours)
Finish Used
paint
Recommended Skill Level
Intermediate

Comments

Rustic 7 Drawer Dresser

This was our second dresser build, but the hardest. I don't know why we had so much trouble with the tracks but we did. We cheaped out and bought the cheapets option and then decided to wrap them out and by the more expensive option - which would of saved us so much time in the first place.

Built from Plan(s)
Estimated Cost
300.00 CA
Estimated Time Investment
Weekend Project (10-20 Hours)
Finish Used
This dresser was stained in Early American ( one coat ) and then varnished with Matte Varnish.
Recommended Skill Level
Intermediate

Comments

TCossins1

Submitted by Anonymous (not verified) on Sat, 10/19/2019 - 07:52

I used the 4x4 X Base Pedestal Dining Table with Planked Wood Top plans for the base but I decided to go with a round tabletop because it fits better in our kitchen. The tabletop is 16 2x4’s attached together using pocket holes and wood glue.

Estimated Cost
$150.00
Estimated Time Investment
Weekend Project (10-20 Hours)
Finish Used
Varathane “sun bleached” brushed on with a cheap paintbrush and wiped off with a towel after about 1-2 minutes after application.
Recommended Skill Level
Intermediate