Outdoor DIY Grill Station
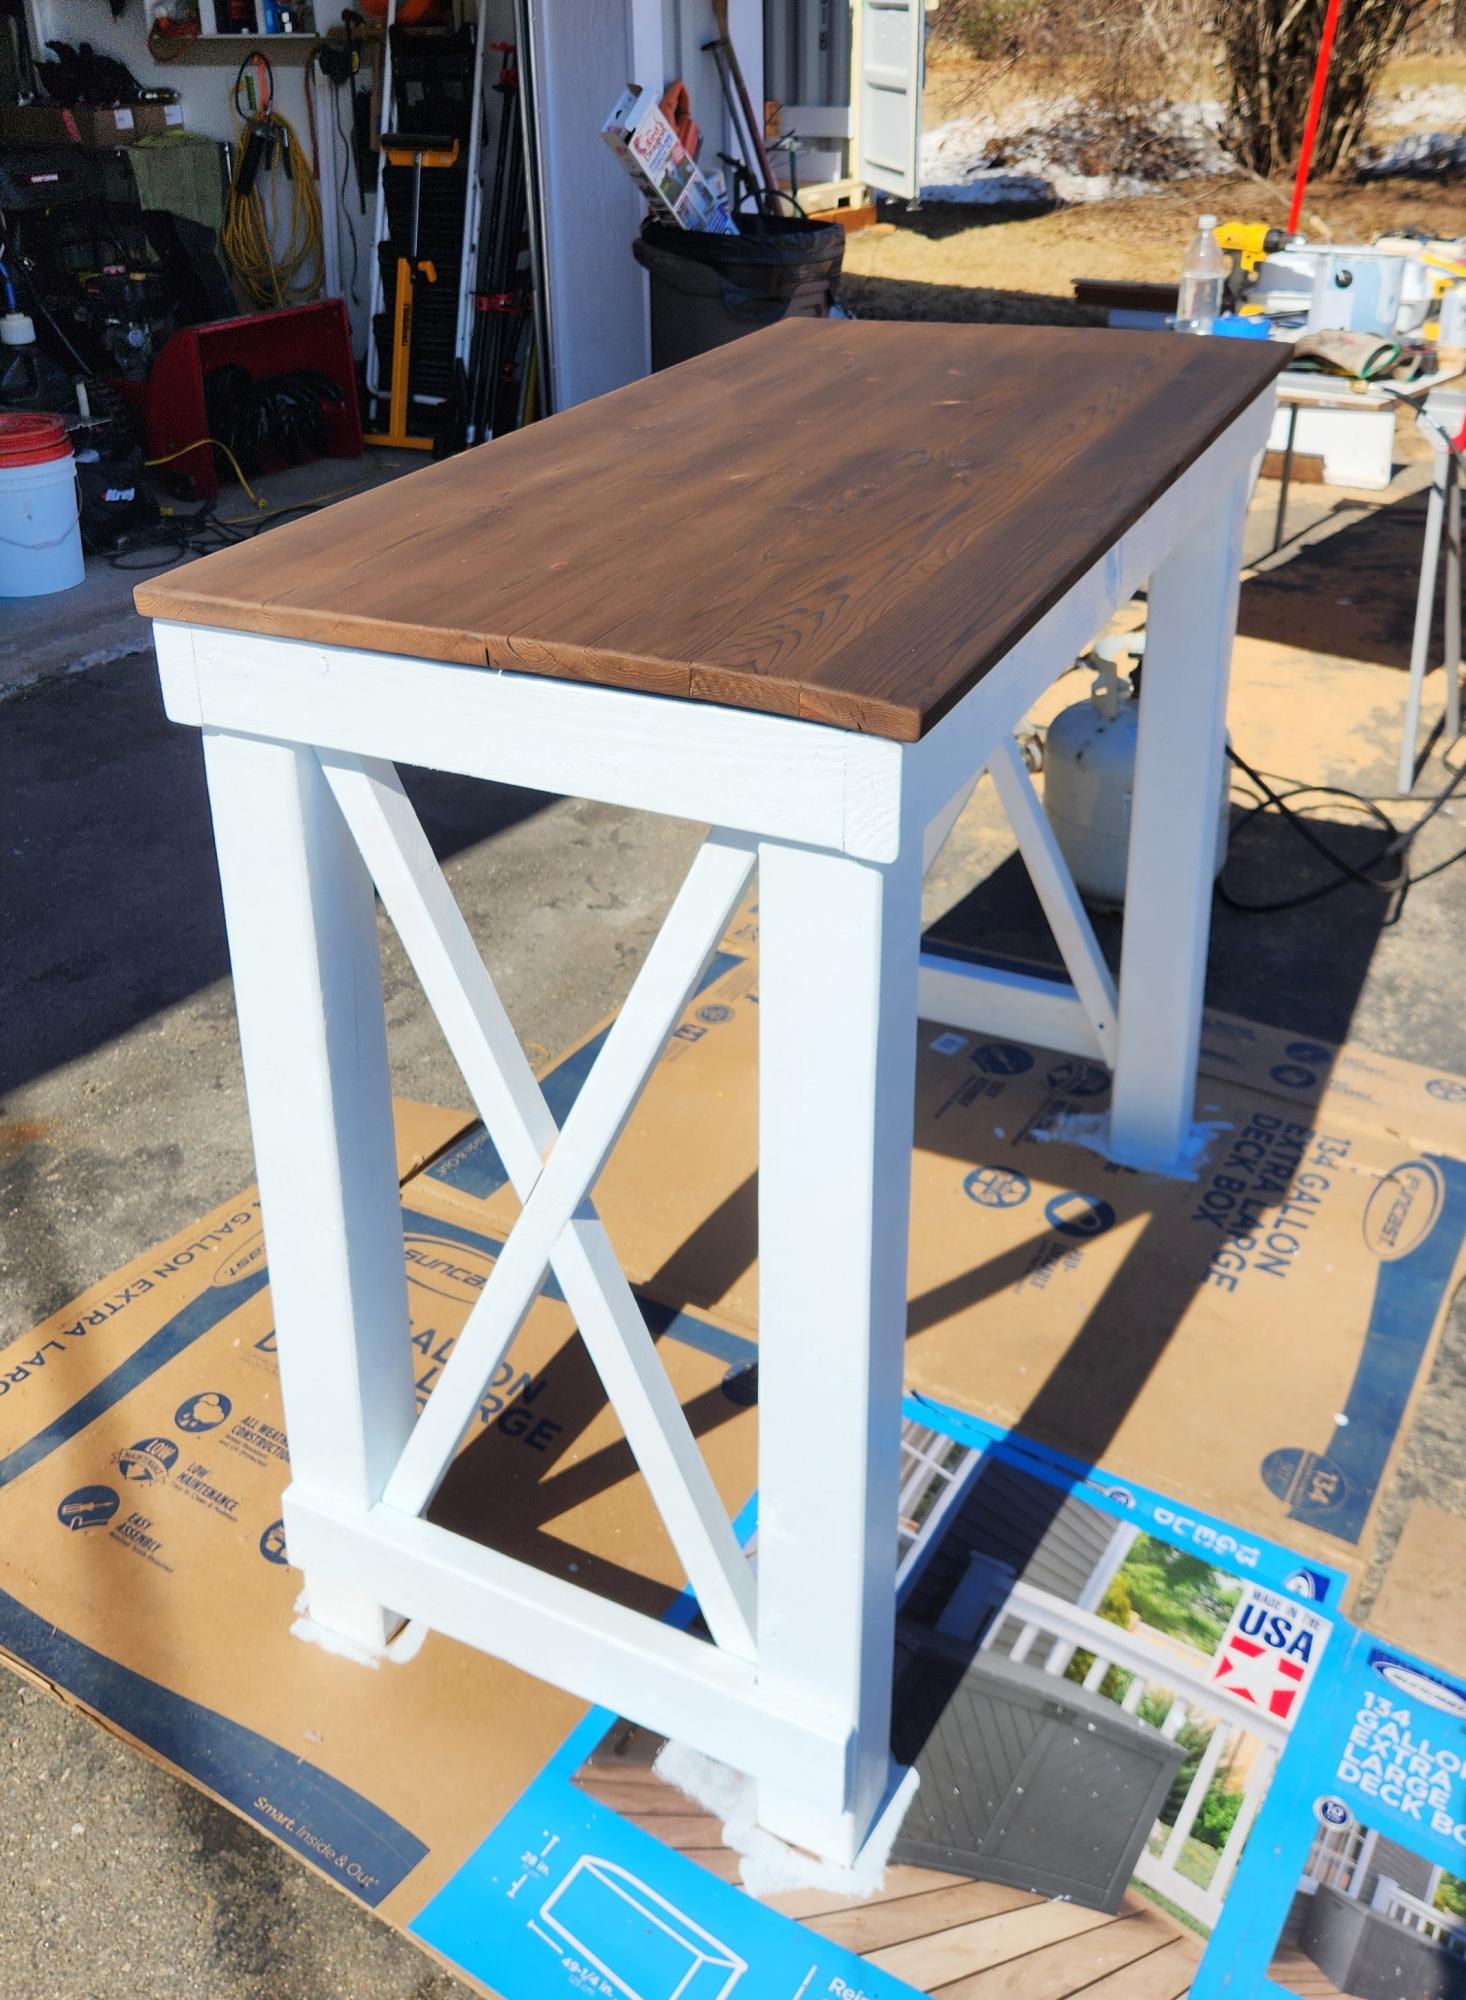
I saw this table and nesting grill station on your FB page. I changes it up a little bit, but the concept is perfect for my back yard deck.
Dharris
Built from Plan(s)
I saw this table and nesting grill station on your FB page. I changes it up a little bit, but the concept is perfect for my back yard deck.
Dharris
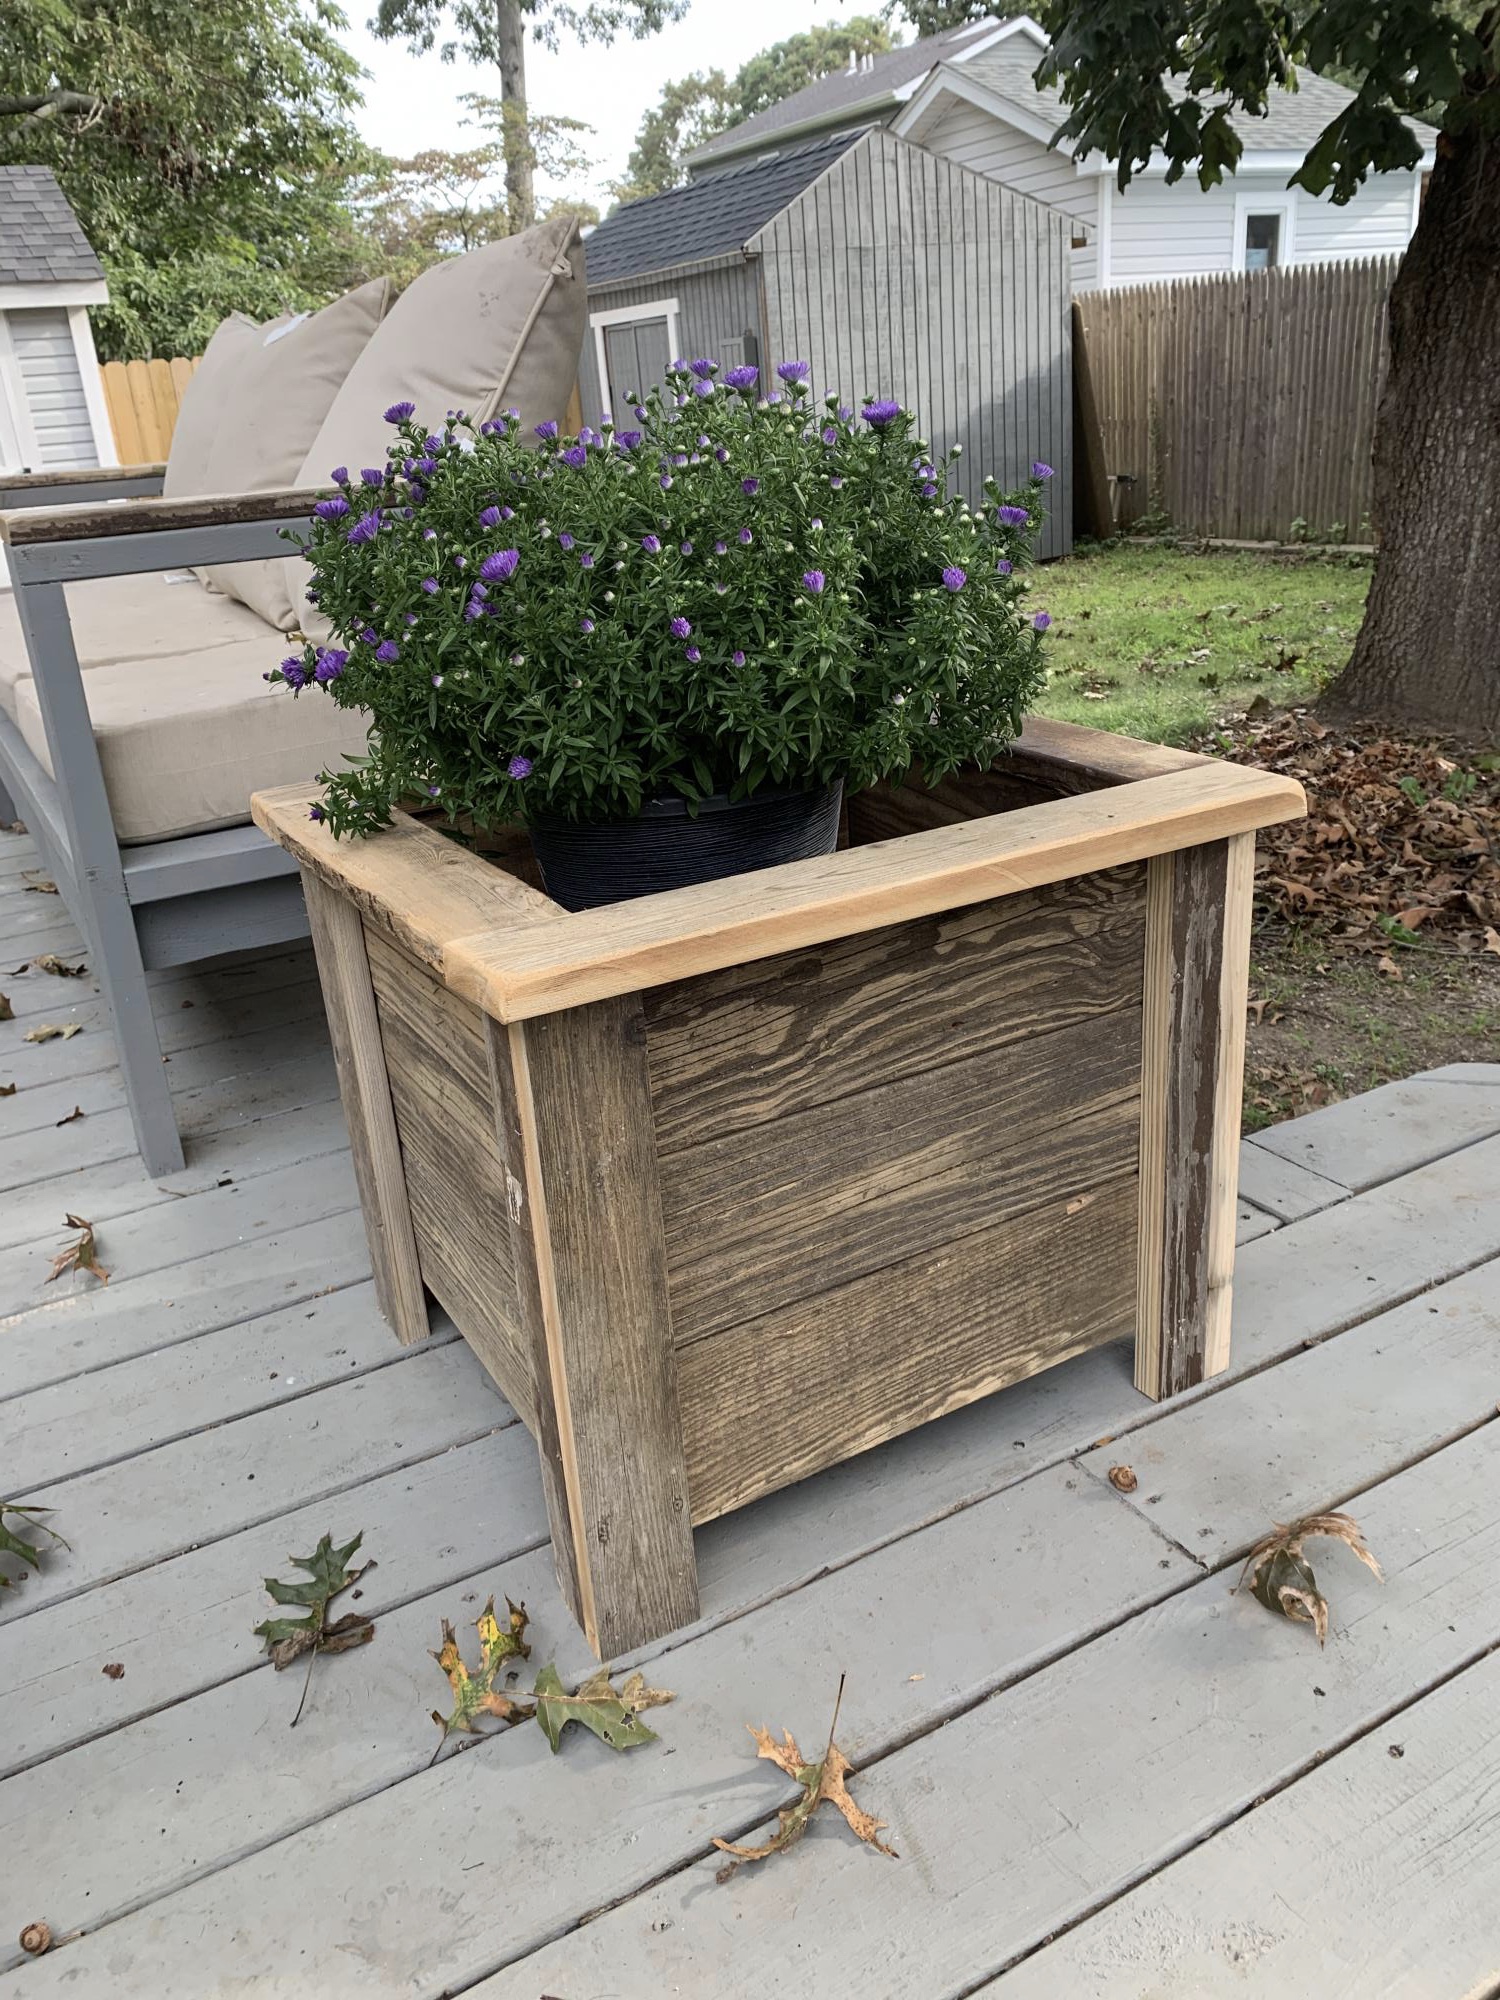
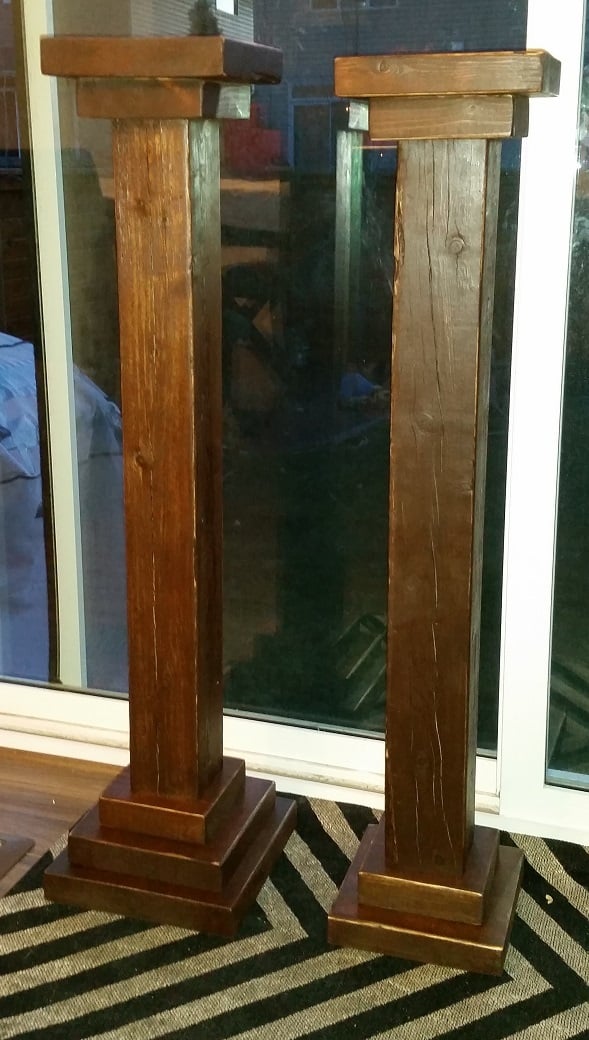
Like Anna's white planter she made with cedar, these repurposed from my old deck
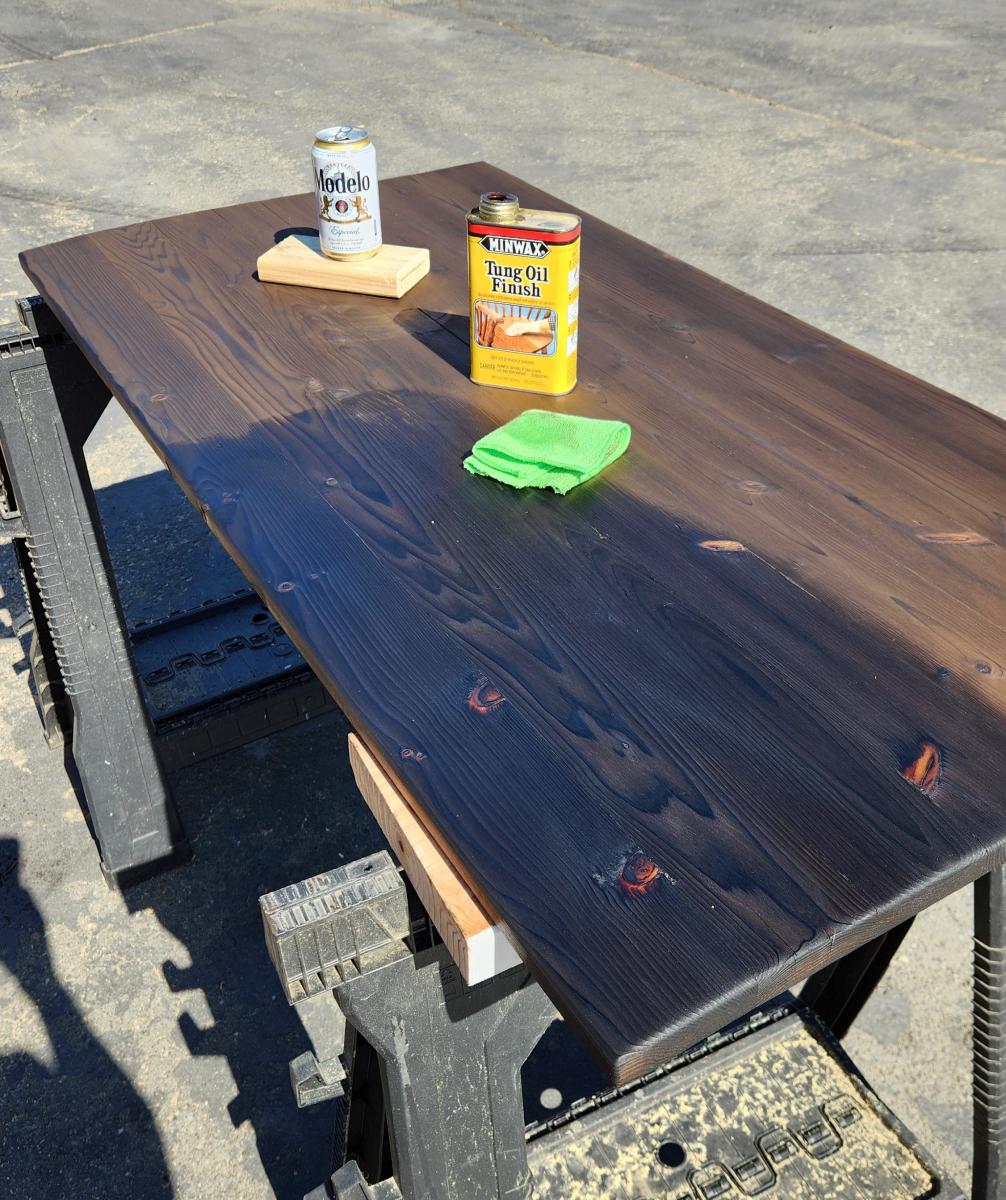
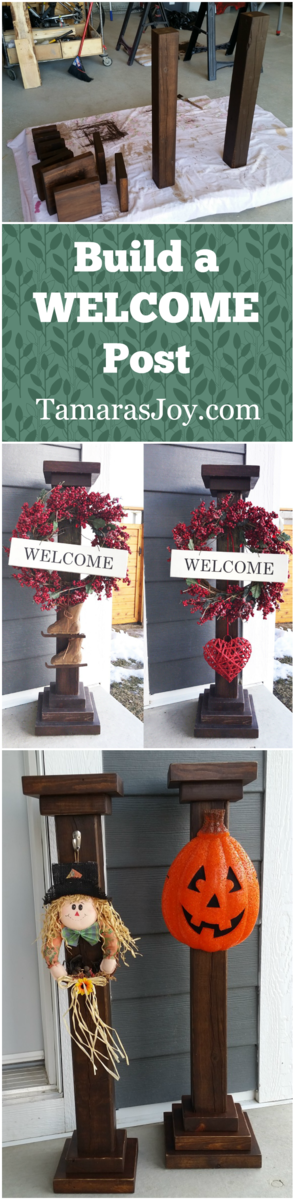
Full instructions on how I put this together on my blog.


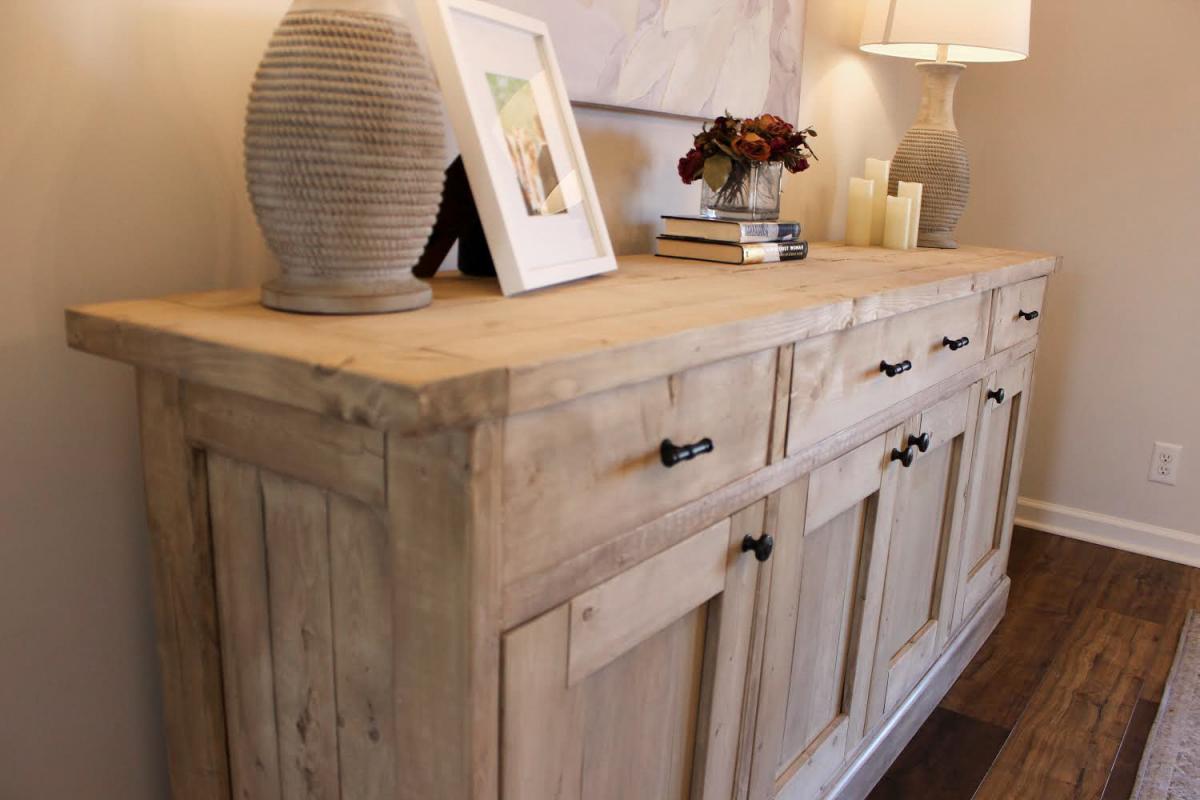
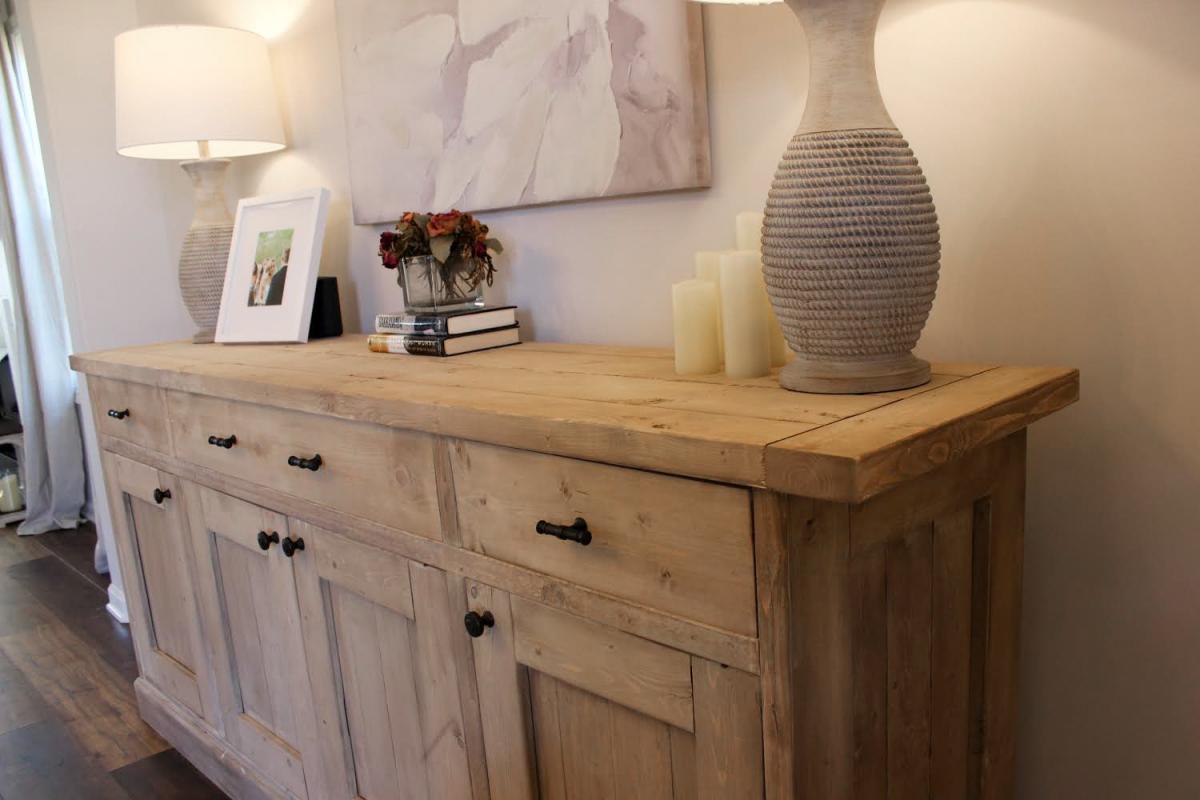
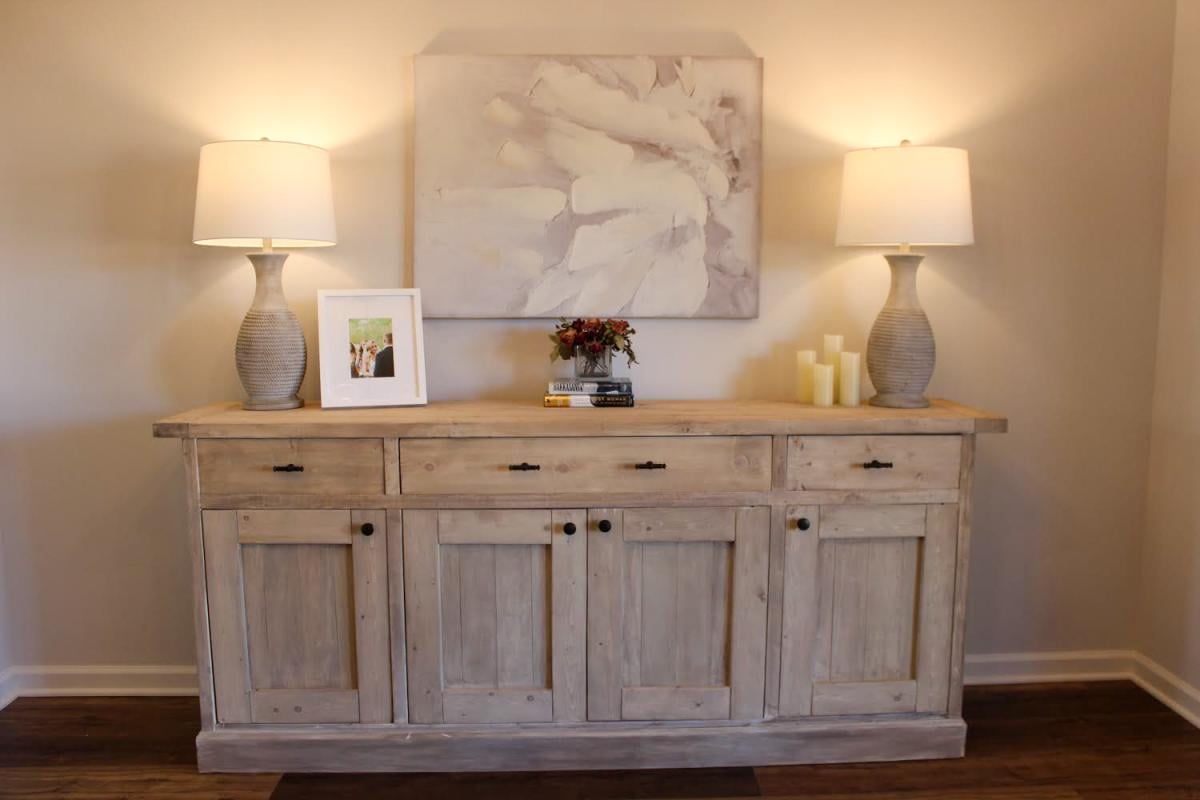
Inspired by the RH Salvaged Wood Panel Sideboard. No measurement adjustments to deviate from the Planked Wood Sideboard plan.
Sun, 11/01/2020 - 12:42
Great choice of finish! Thanks for sharing your beautiful build:)
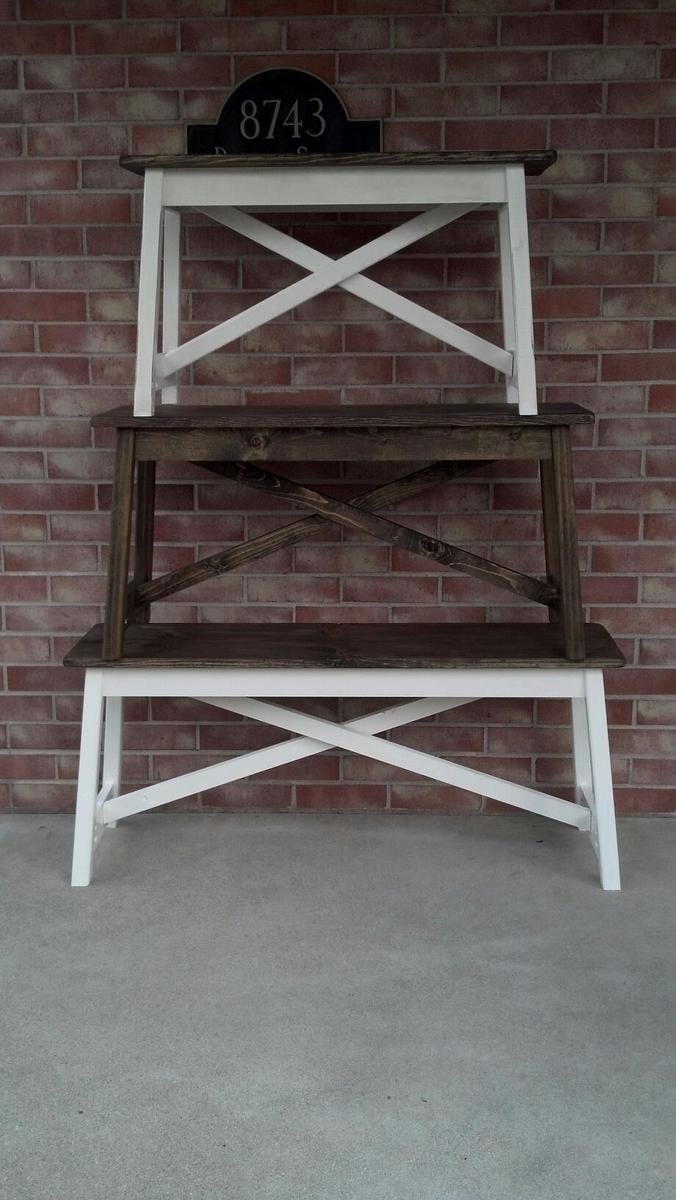
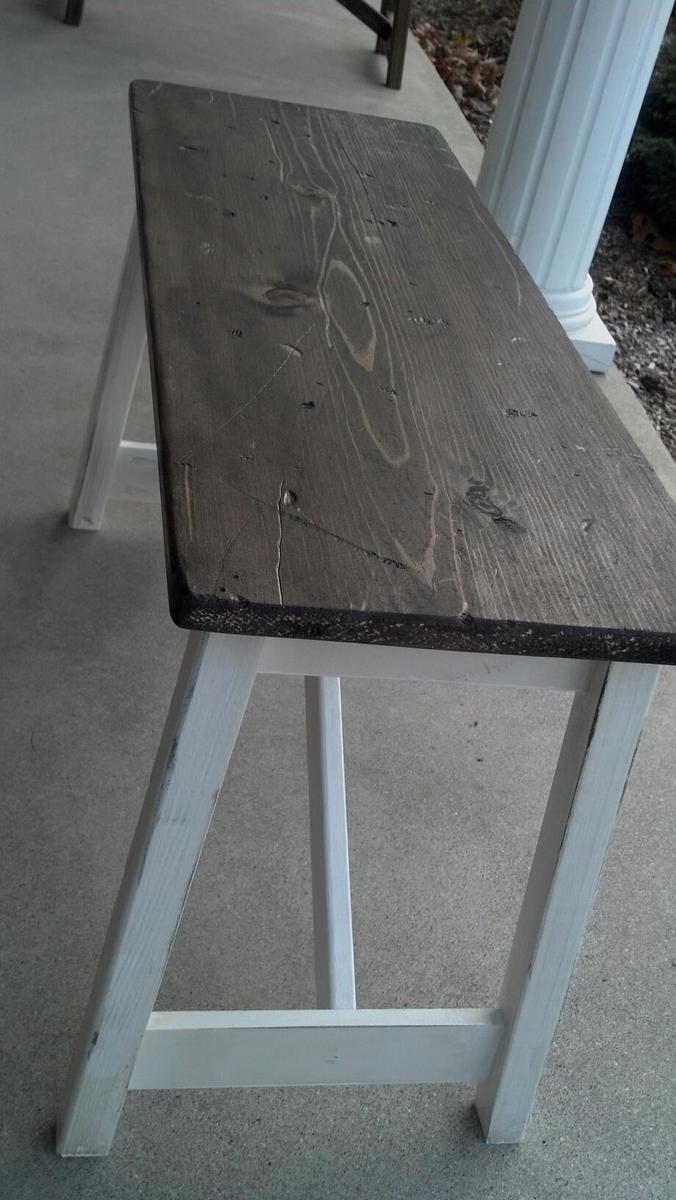
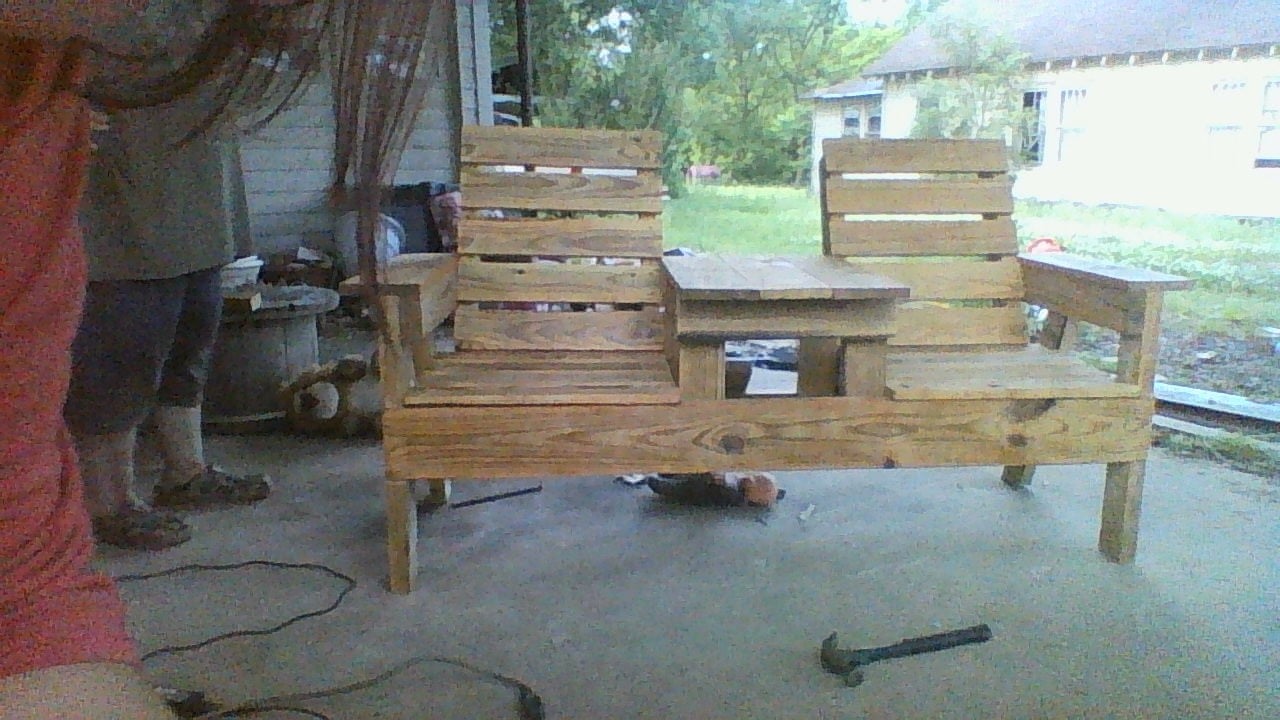
We made eight of these benches for Christmas gifts this year. It was a lot of fun and we learned so much along the way. We made 5 benches in the standard 30" length, 2 in 36" and 1 42" bench on request.
Suggestion for building: Make jigs so that the legs and side boards are the same size. It doesn't exactly matter if the measurements are a little off from the plan, as long as they are consistent in each bench.
We chose to paint the bottoms off-white and stain the tops for an elegant rustic look. However, we fully stained a couple of the benches as well because we thought they would look best for a few of our family members.
It was hard to tell exactly how long each bench took because we worked on all eight at once when we had free time, but one bench shouldn't take more than an afternoon if you are new.
I also added a picture of the one bench we chose to distress.

Mon, 01/14/2013 - 11:10
Love!Love!Love! these!!!!! I so badly want to make some of these benches, but have too many more important projects to complete first. You did a great job on them. How do I get on your Christmas gift list ;-)
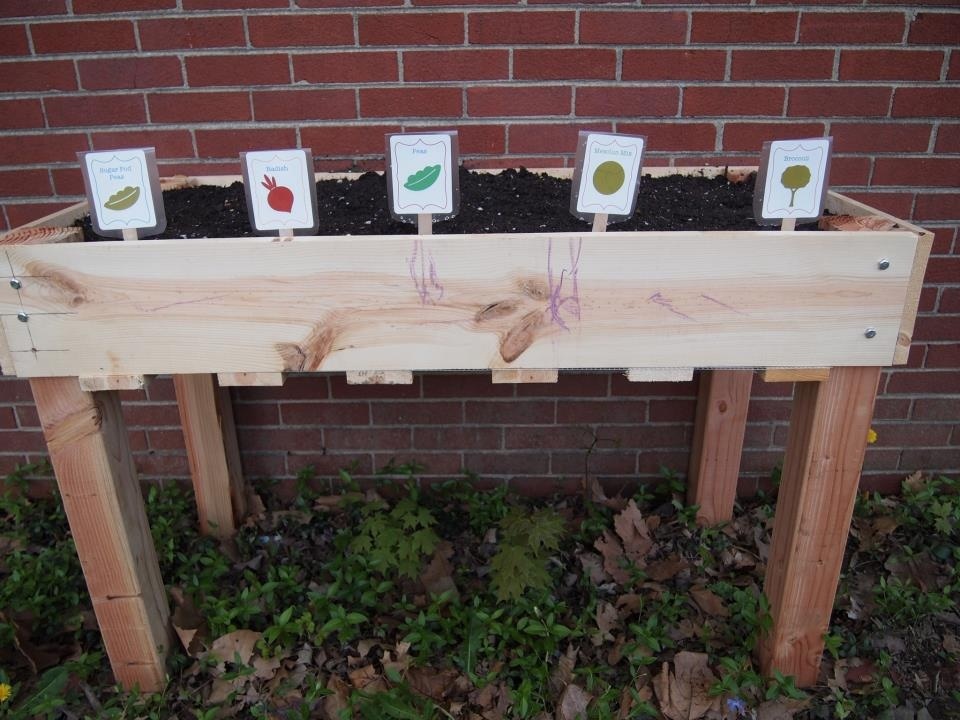
We needed extra garden space this year and I thought adding one of these planters would be a great addition. So far it has. It allows me to easily weed, which is my most despised gardening job. Added bonus that the dog can't dig it up, and bunnies can't nibble on my plants. It also makes a great art canvas for my son's chalk drawings.
Wed, 04/20/2016 - 12:55
Hi I live in north Dakota we get about 10 ft of snow every January, I am planning on making the counter height garden boxes, but how do I keep the snow in winter from crushing them. Patty
Wed, 04/20/2016 - 12:55
Hi I live in north Dakota we get about 10 ft of snow every January, I am planning on making the counter height garden boxes, but how do I keep the snow in winter from crushing them. Patty
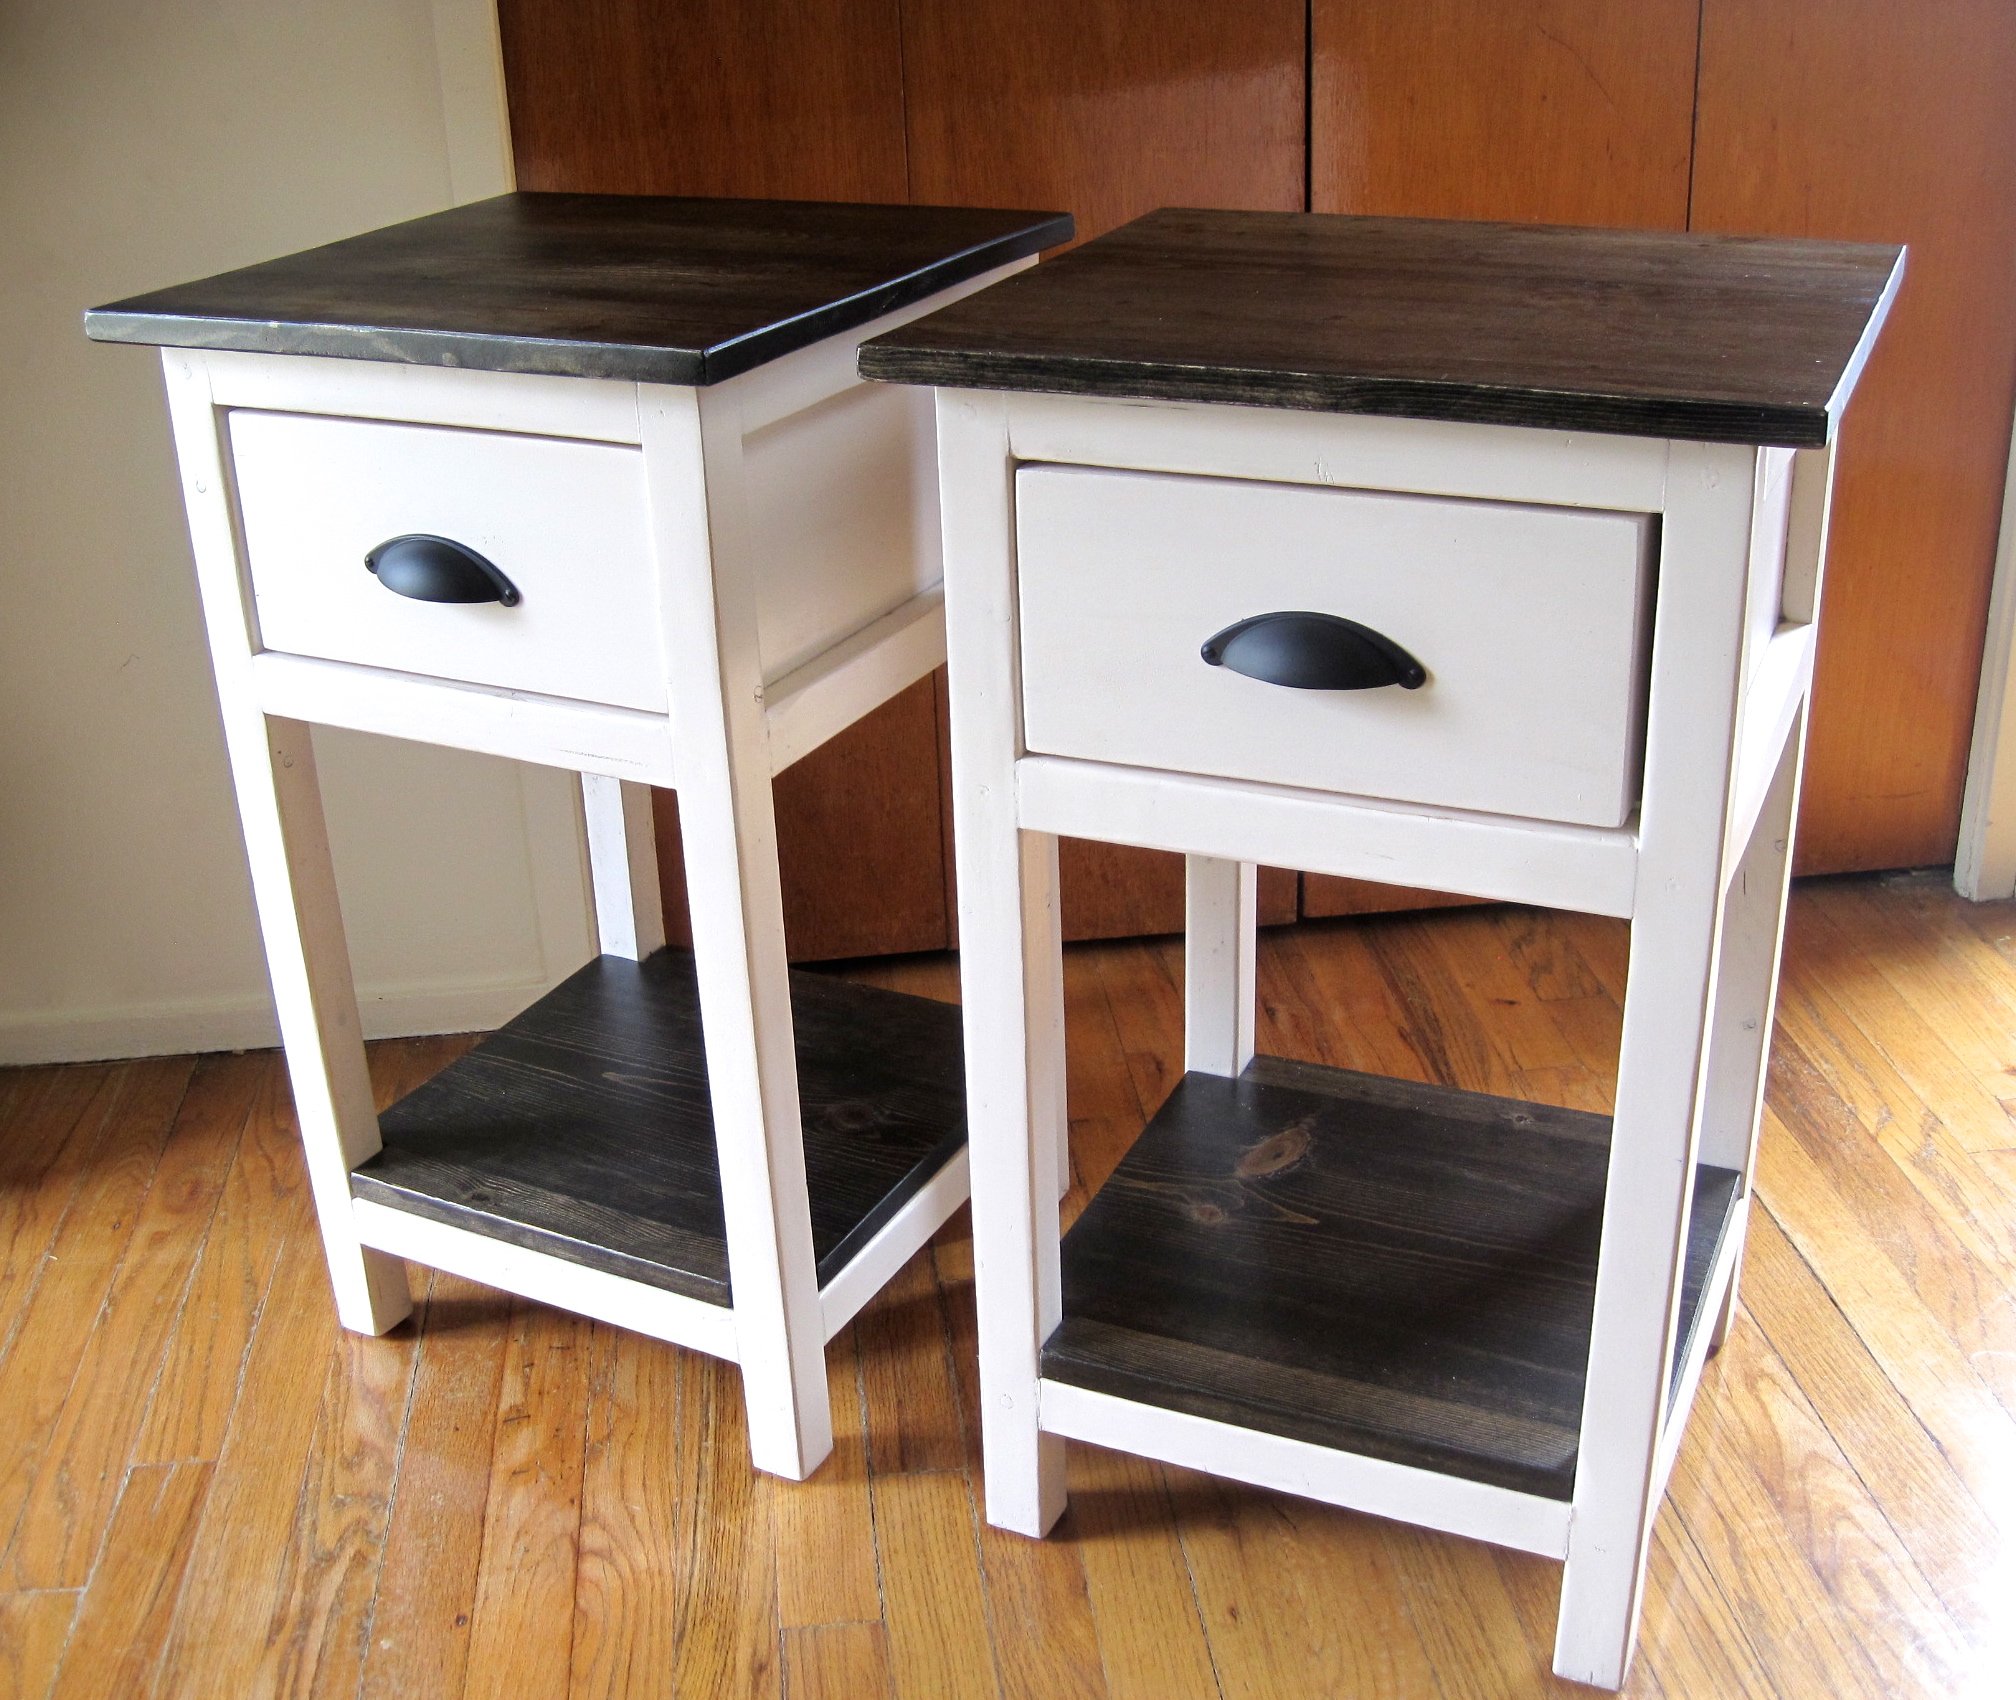
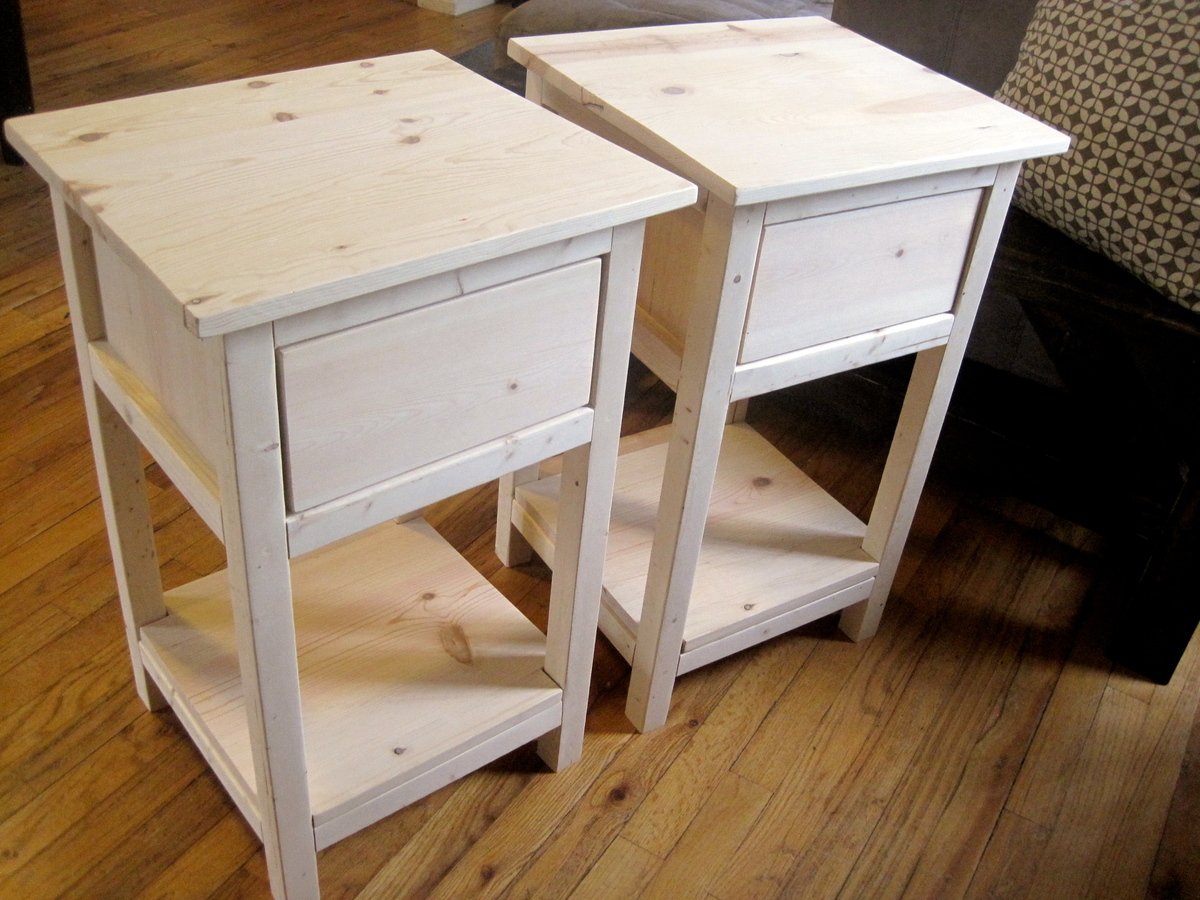
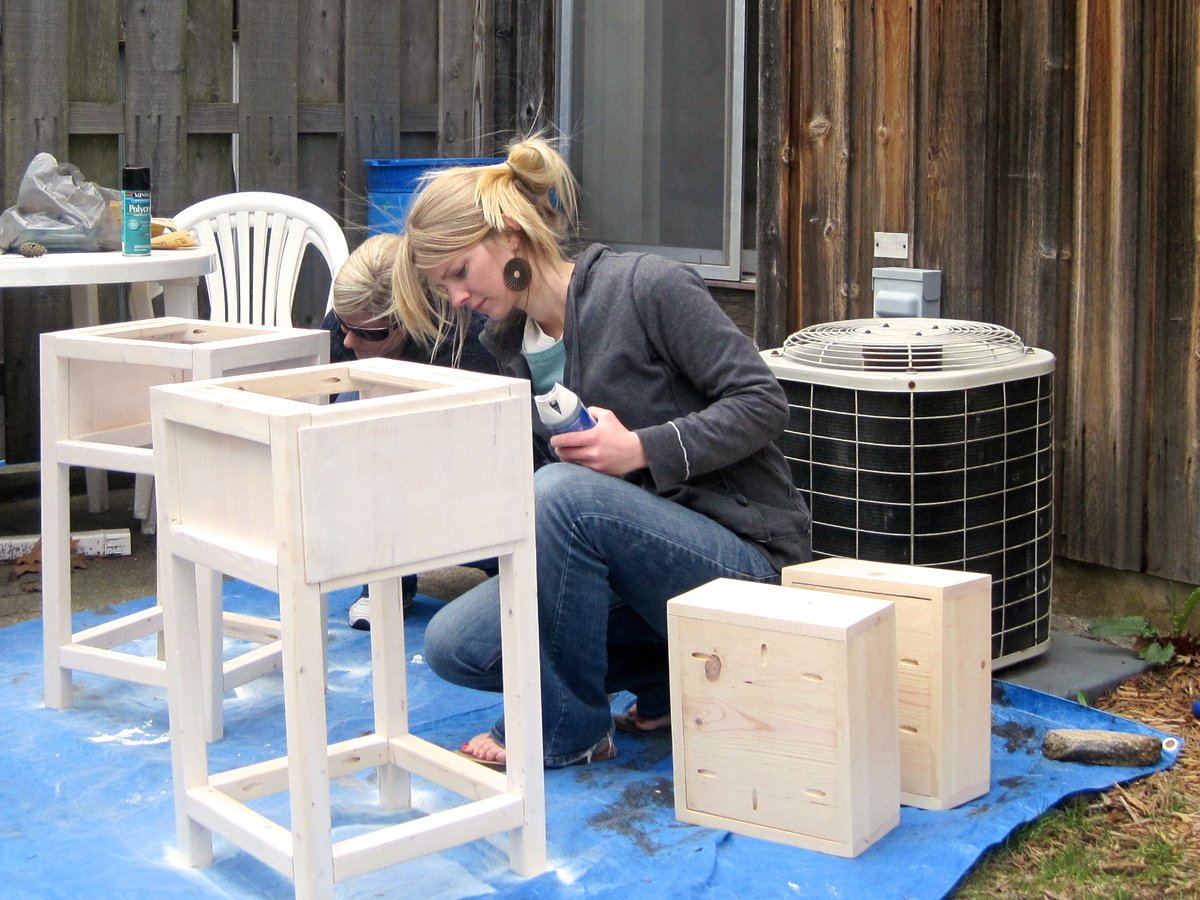
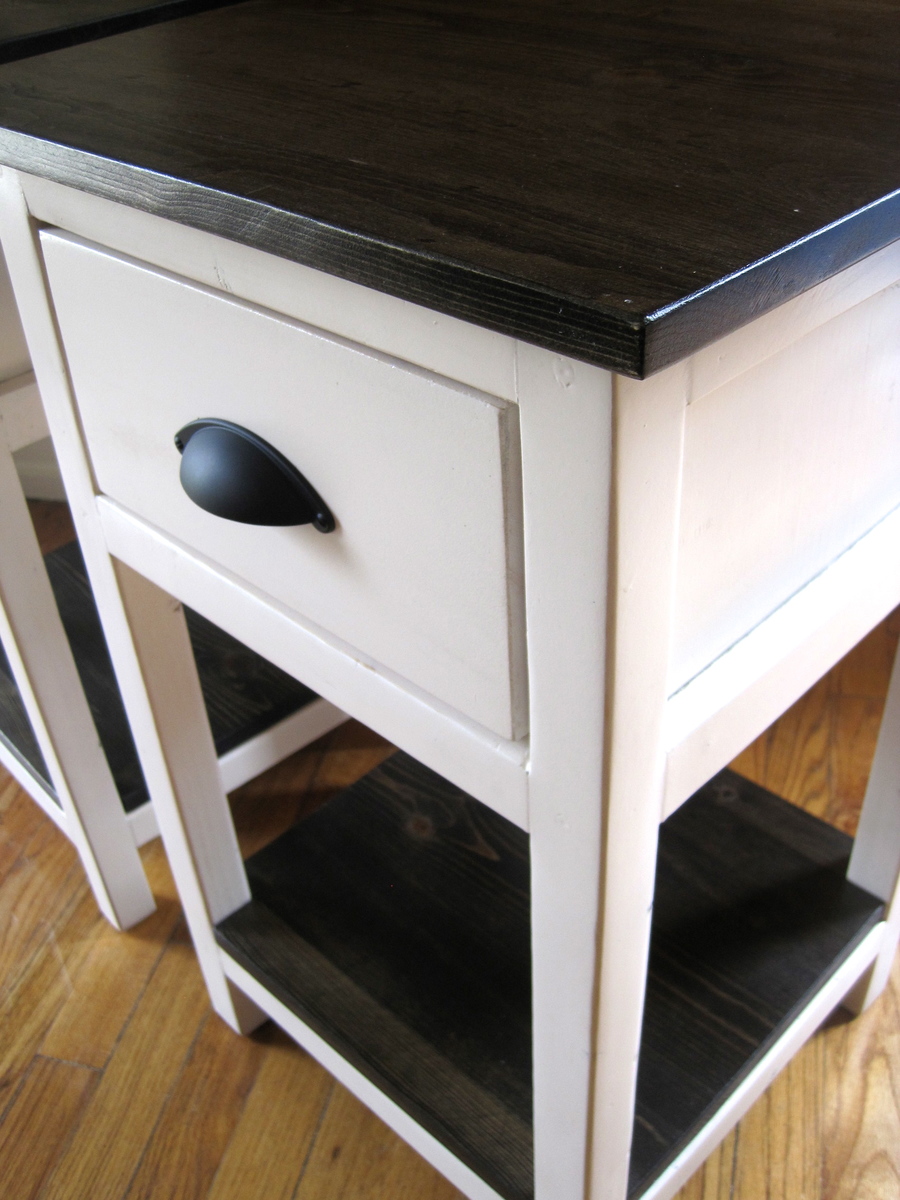
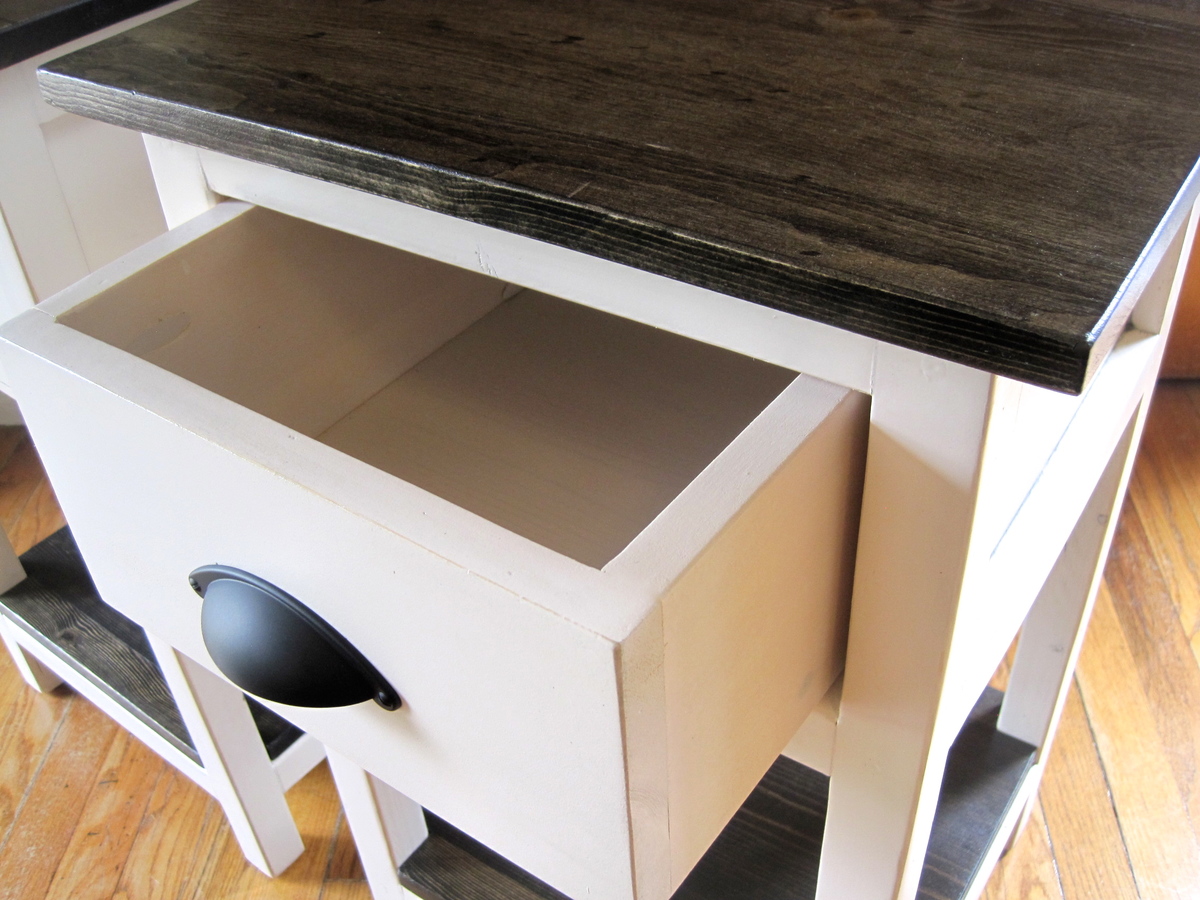
I built these side tables with a friend. We under estimated the time it would take by a long shot! We estimated that with the both of us it took 15+ hours to complete. We spent $120 on all the wood, paint and hardware for both. It was a lot of work and the most time consuming part was the finish (sanding, painting, sanding, painting, clear coat, sanding, clear coat, sanding, clear coat). In the end, it was worth it! They turned out so cute!
Tue, 05/14/2013 - 08:31
The Ebony finish really sets these tables off. Great job! This plan will go on my to do list≥
this was a fun build had to tweak the plans a little but turned out great!

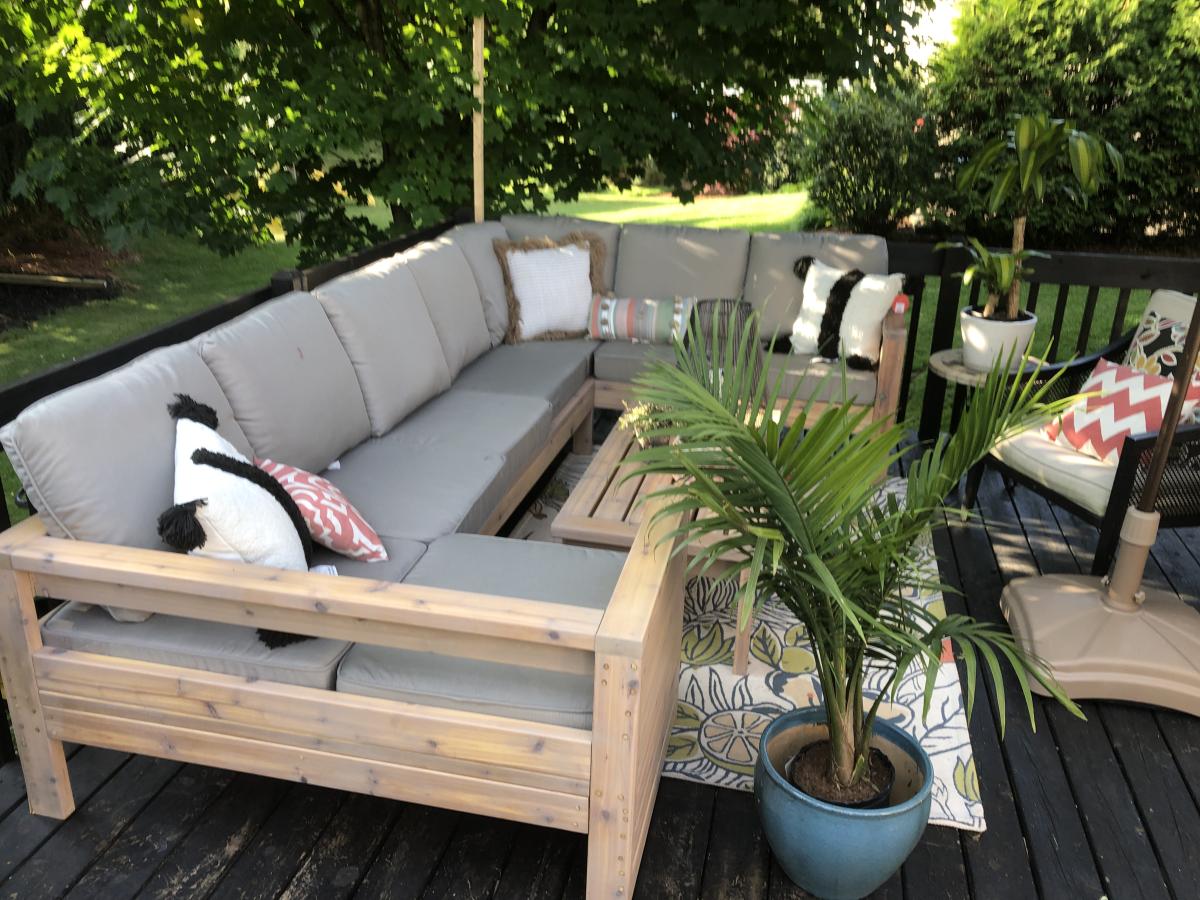
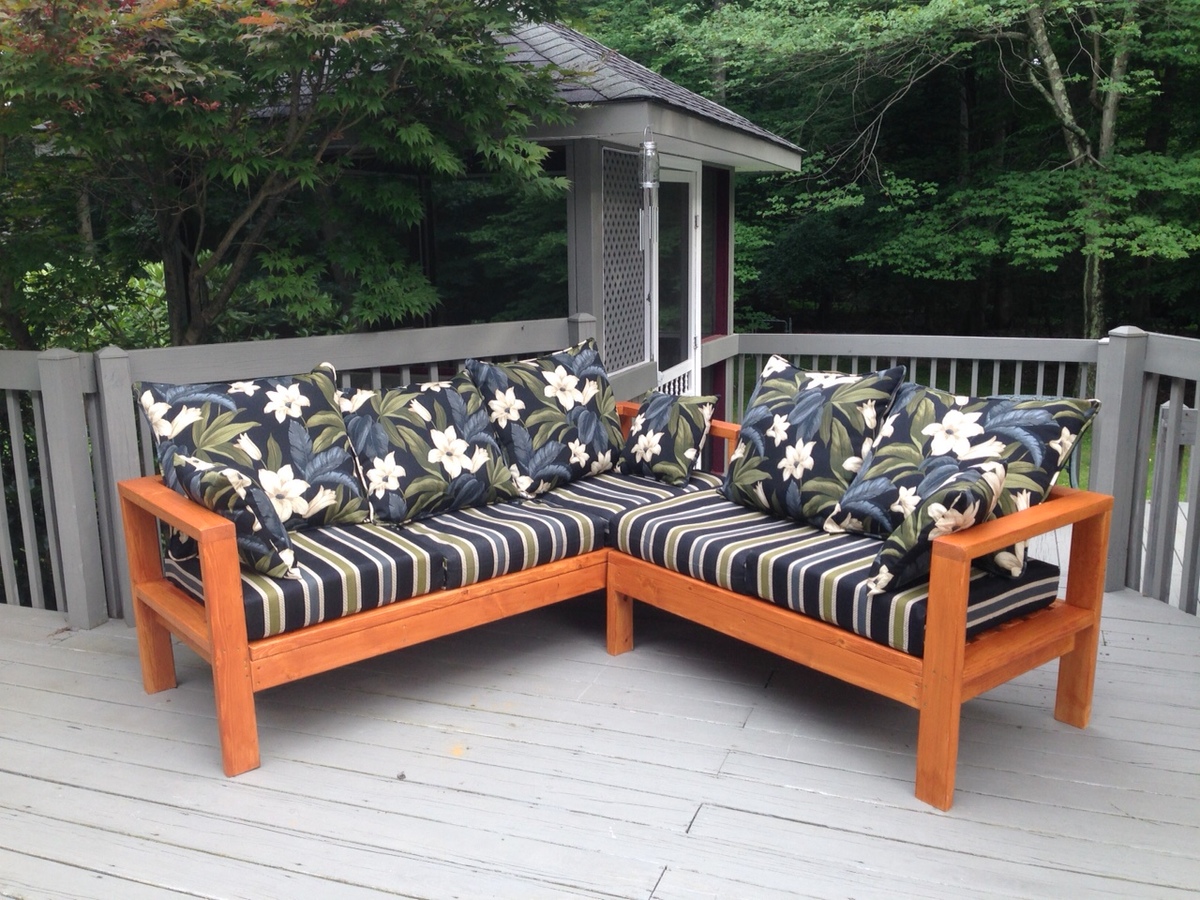
We have wanted nice deck furniture since we moved into our house 22 years ago but just couldn’t justify the cost. I have made several projects from Ana’s website and I love her easy to follow and FREE plans! But this project was my favorite as you can see by the pics. I used cedar and my wife finished the furniture with stain. Thanks to Ana for providing these plans and helping a DIYer to feel proud!
Sat, 01/01/2022 - 12:57
WOW, that is stunning and so inviting, love the outcome! Thank you so much for sharing!
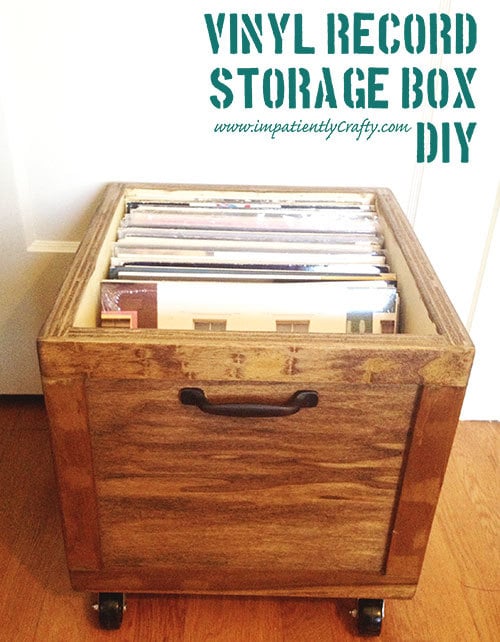
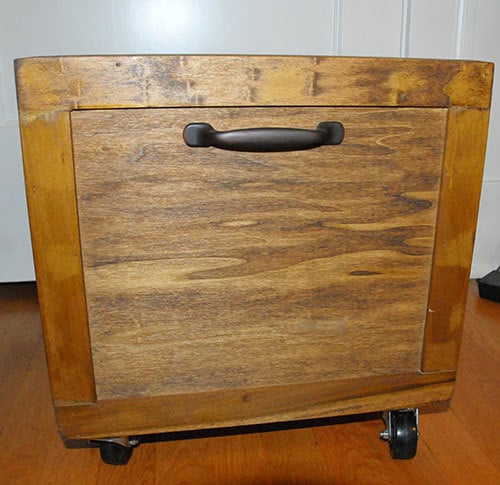
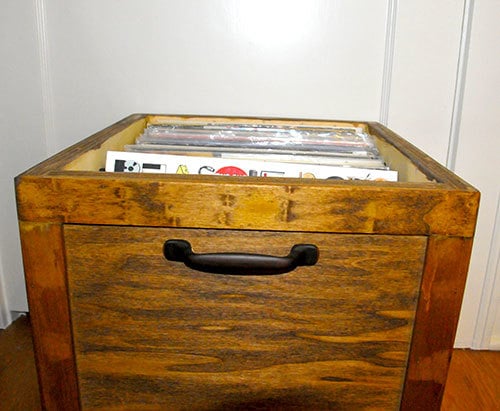
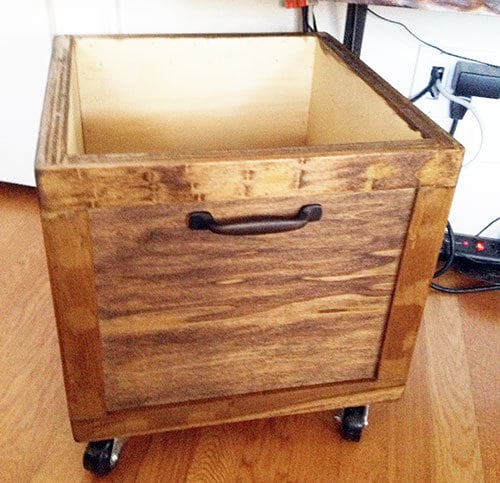
I have to say, there is something about listening to music on vinyl that just gives me the warm fuzzies! A little bit of crackle, fuzz and hum.. physically having to flip over the record to get to the next side, & listening to an album start to finish just has a nostalgic feel to me and I love it.
We’ve started quite the collection of LP’s and quickly found we needed some good storage for them. Since vinyl isn’t exactly the most popular form for listening to music, I just had to make my own.
I knew it had to have 3 things.. size to fit, wheels and easy of searching through records.
I had some scrap poplar plywood lying around, and just had to purchase some casters and furring strips to frame out the box. I even had an extra cabinet handle laying around to use.
I made it 12 inches wide by 16 inches deep, framed it out shaker style with furring strips and then stained it.. added casters and a handle ;)

Tue, 07/09/2013 - 10:59
I love how you appreciate vinyls and gives things you have on hand new purpose. This storage box is nicely done.
I looked at your blog and went straight to the Upcycle tab, since that's where my interest lies too. I love seeing a "pile of useless" restored to use. =D
This was my first attempt at making anything. Thank you to Ana for providing such easy plans and the encouragement to try something. I think I'm hooked!
Sun, 05/31/2020 - 13:21
Beautiful! where did you get the cushions from?
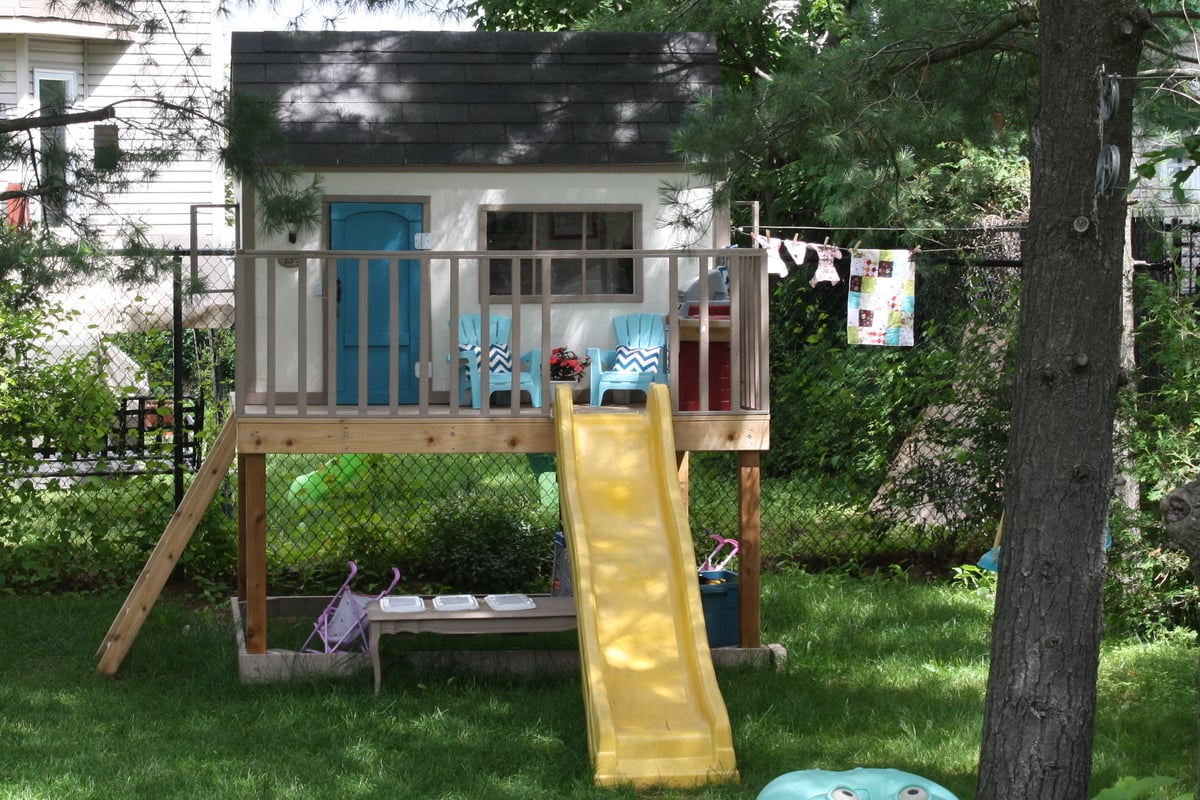
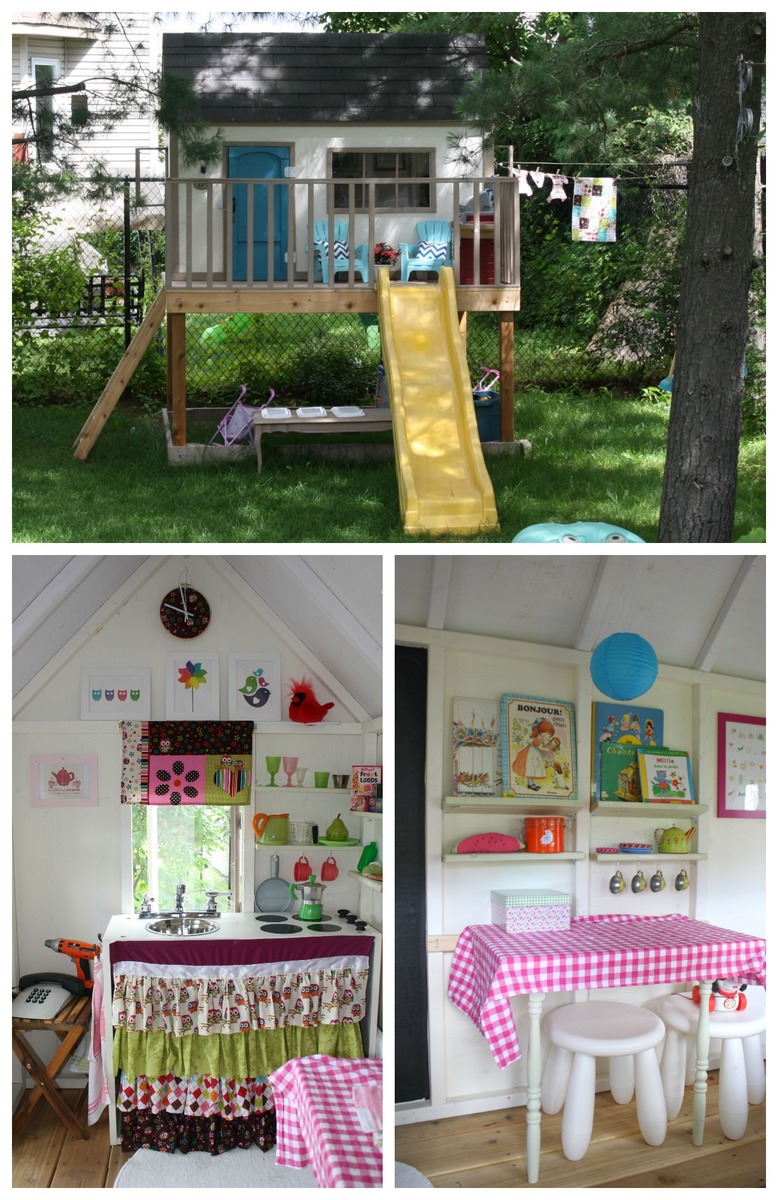
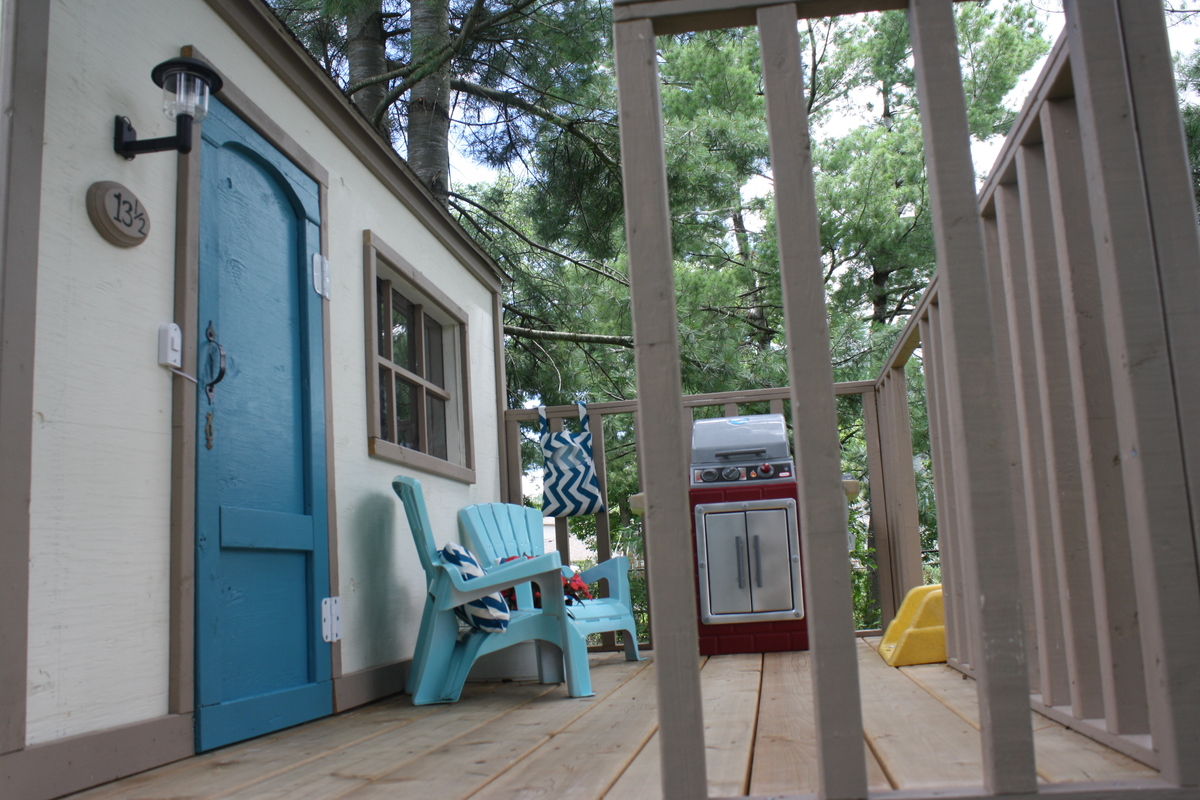
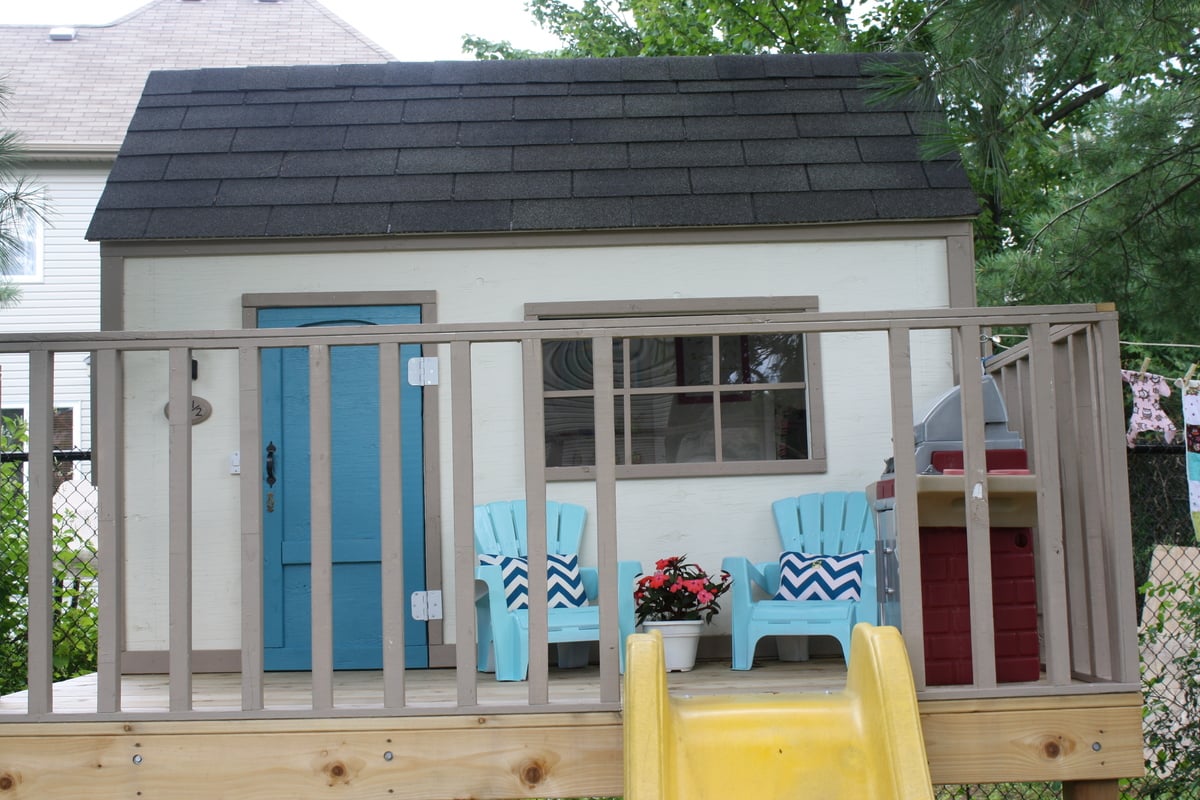
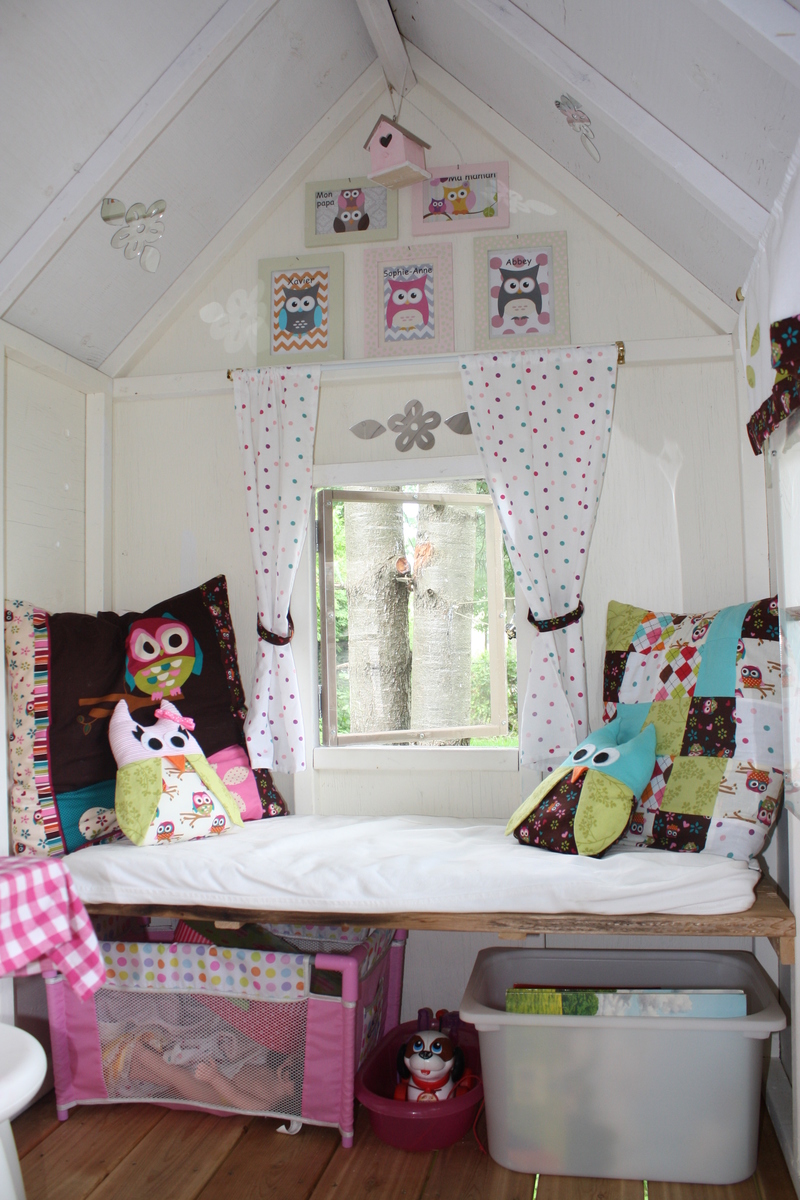
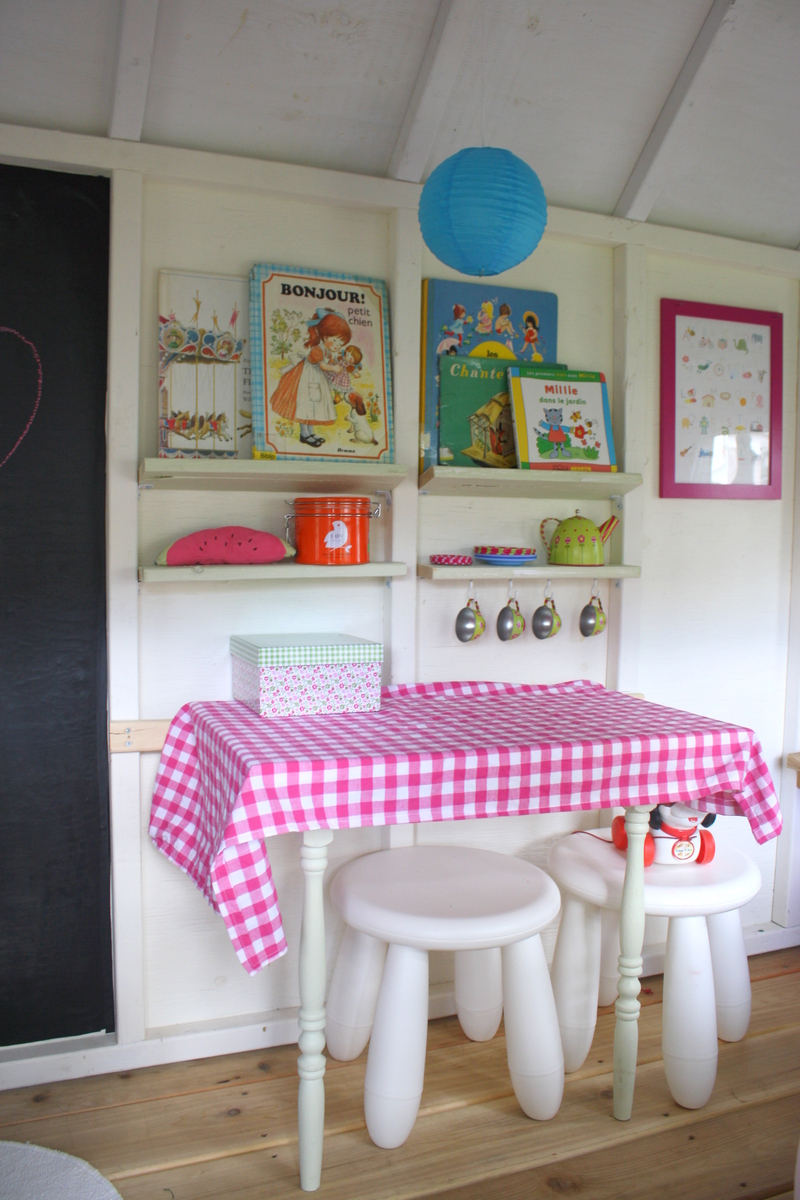
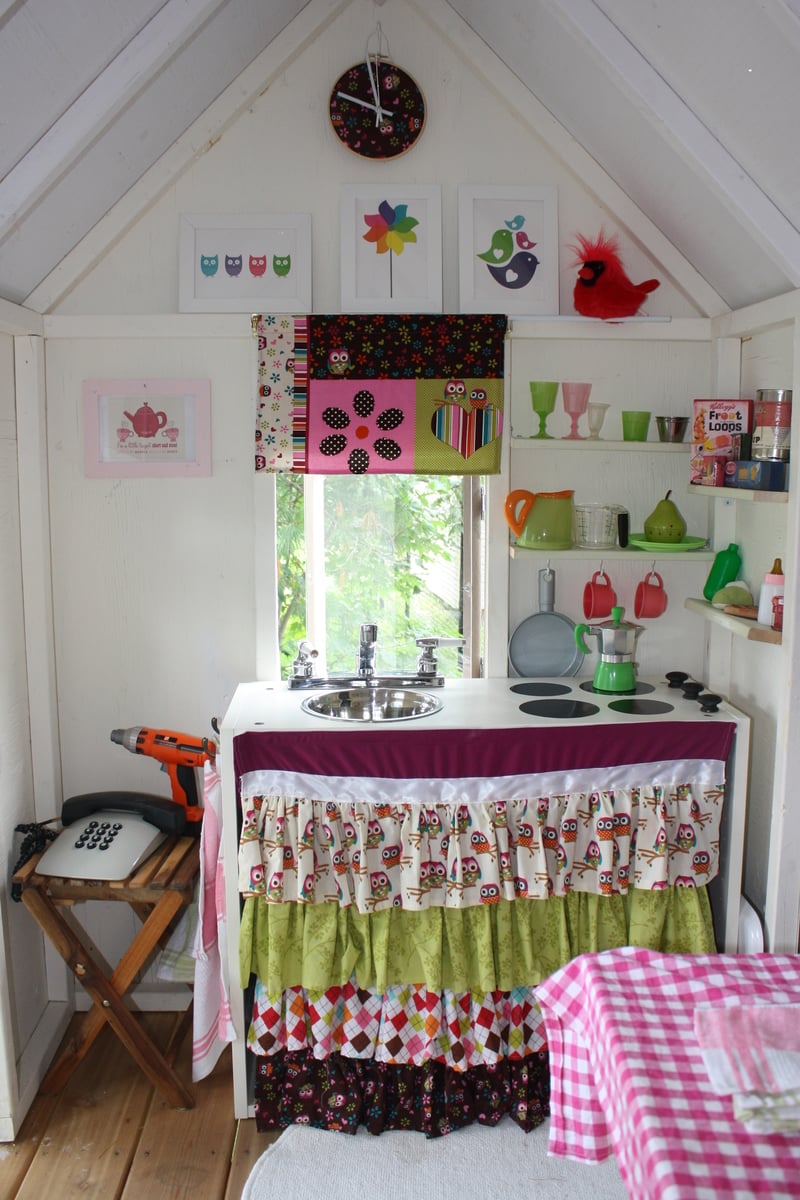
We started this project a few months ago. My husband made most of the construction, and I decorated the inside. We added many little details, including a clothesline, windows with plexiglass, a BBQ, a little kitchen, a doorbell, a solar light, a slide, shelves, a table, a bench, etc. The kids loooooove their new house. The whole project took many many hours, but I am really happy with the results. Thank you so much Ana for the plans!!
Sun, 07/14/2013 - 21:10
Looks like your child has everything they need. Including a phone! I love the bench seat and the pillows with the window. So cool. You put a lot of work into this. Well done.
Thu, 04/03/2014 - 08:23
Love, love it! Couple of questions... how did you attach the walls to the decking and how far apart? How tall is the railing? I'm curious to know the sturdiness of the project overall and my SIL has concerns about the 3/4 roof sheeting over 1/4 walls. Comments please. My son-in-law and I have just started this project.
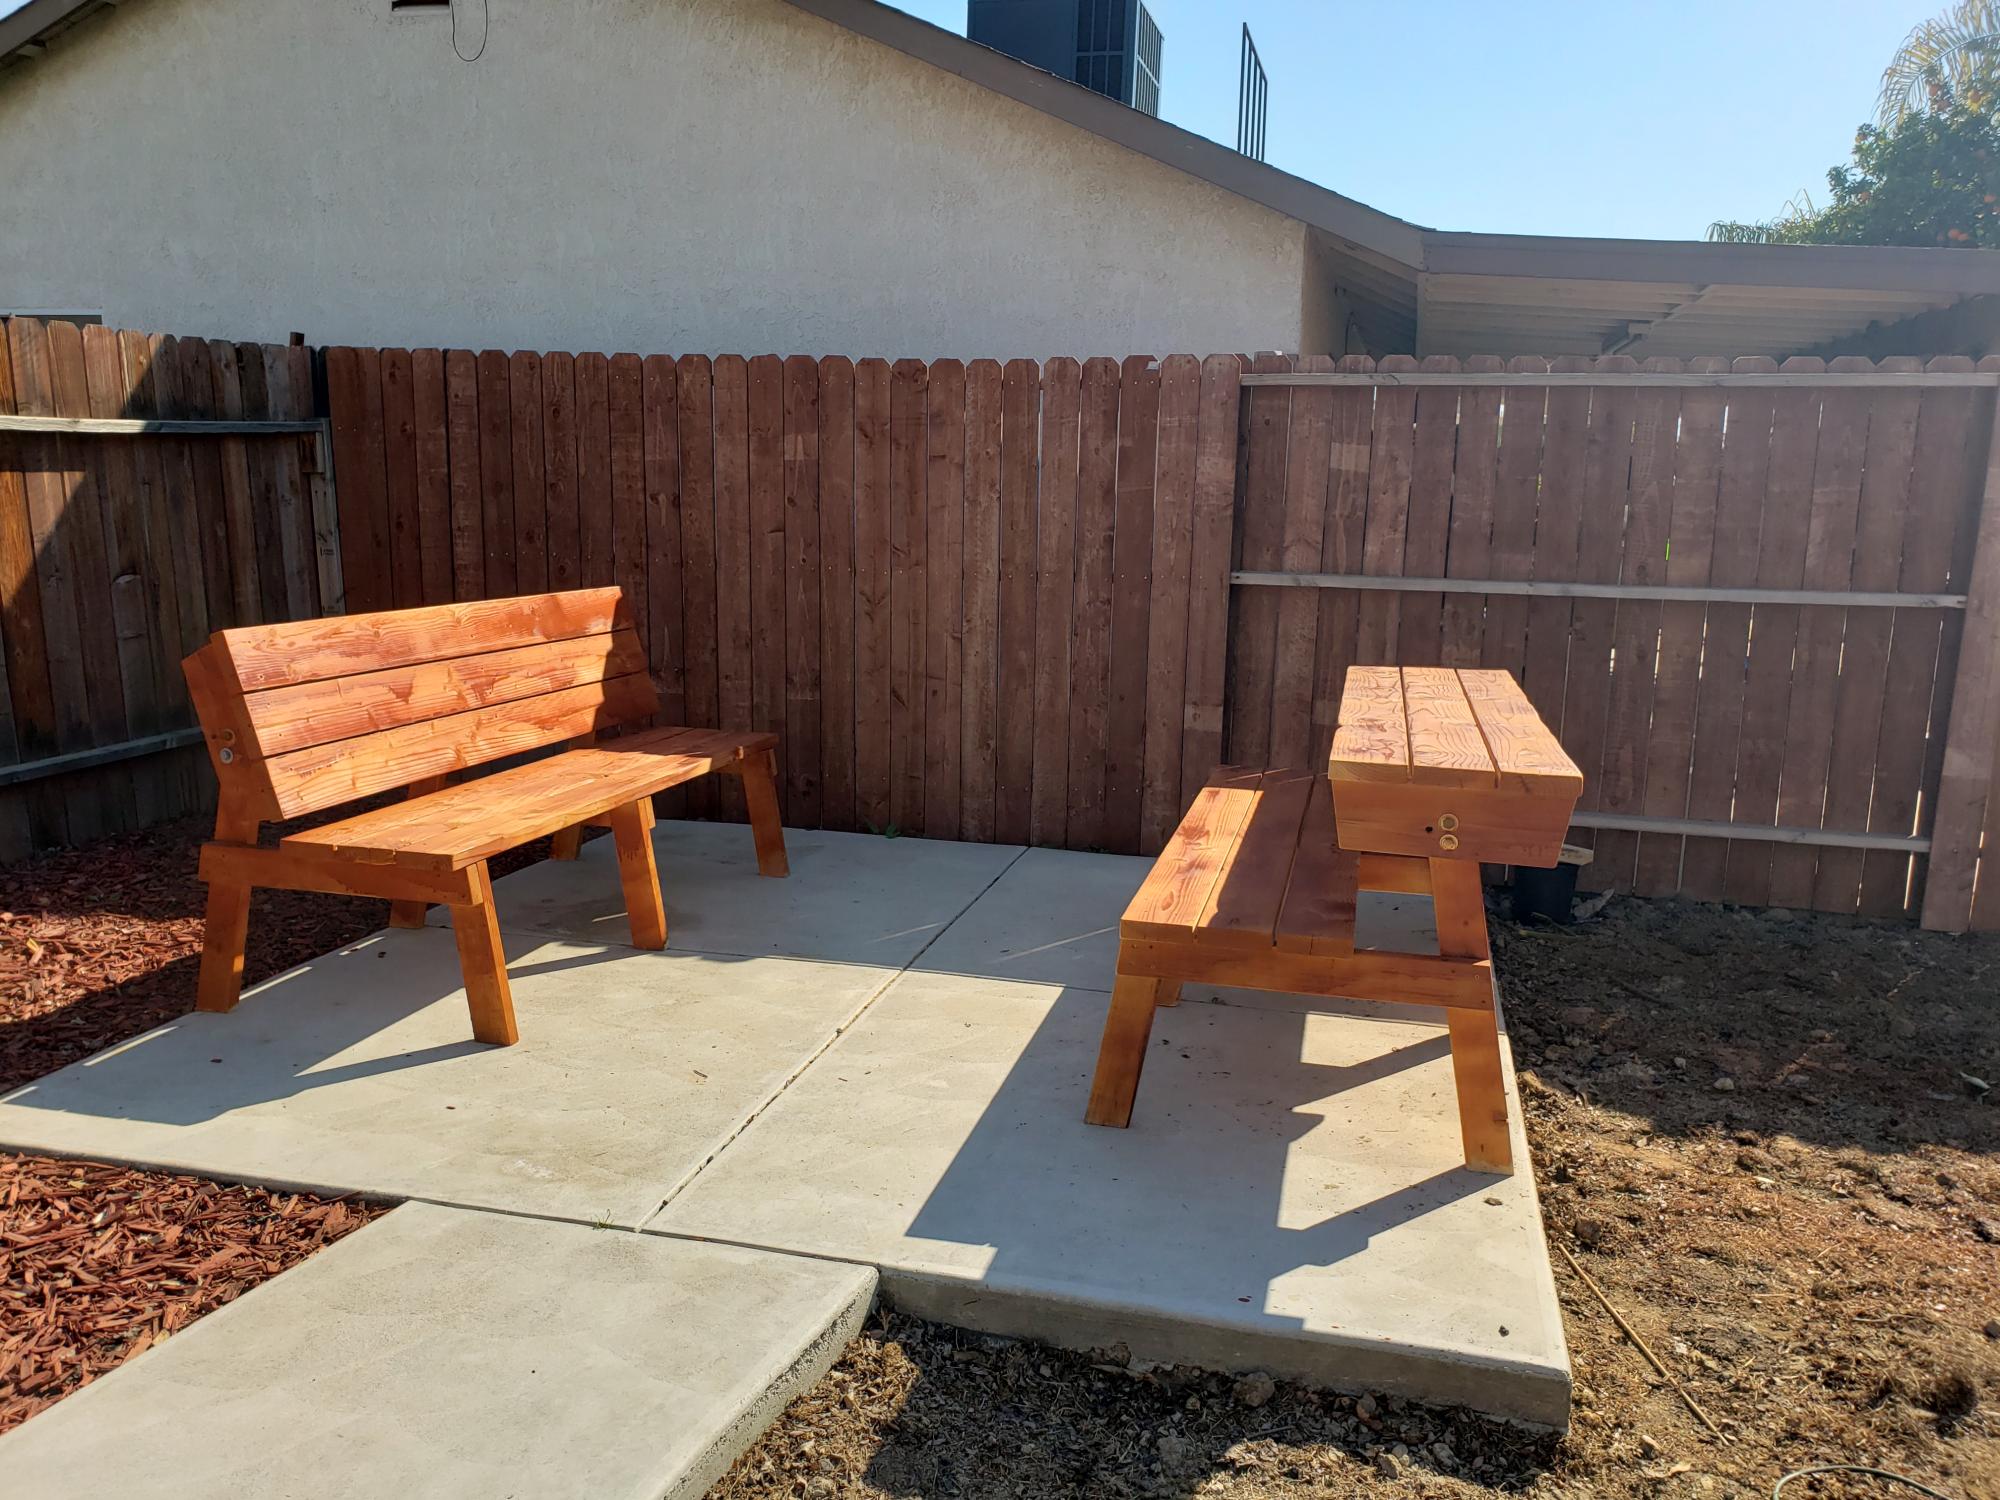
We love these benches! We actually just leave one of them in bench form and the other in table form for everyday use.
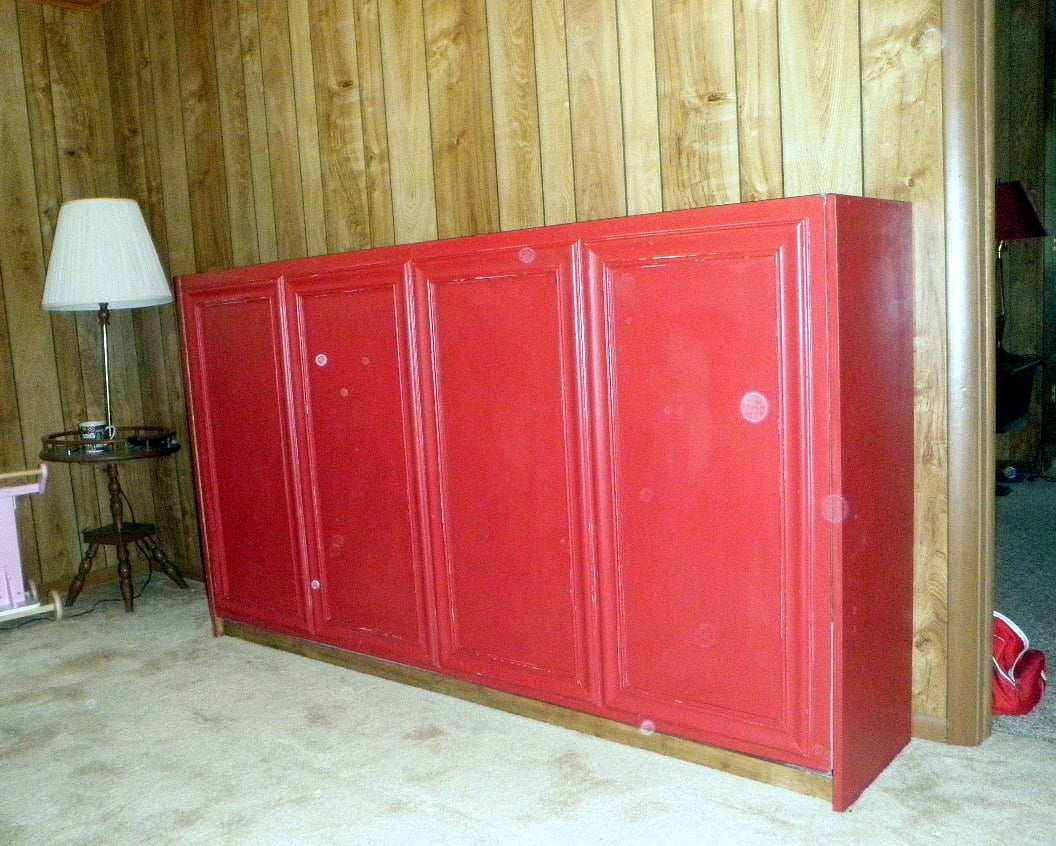
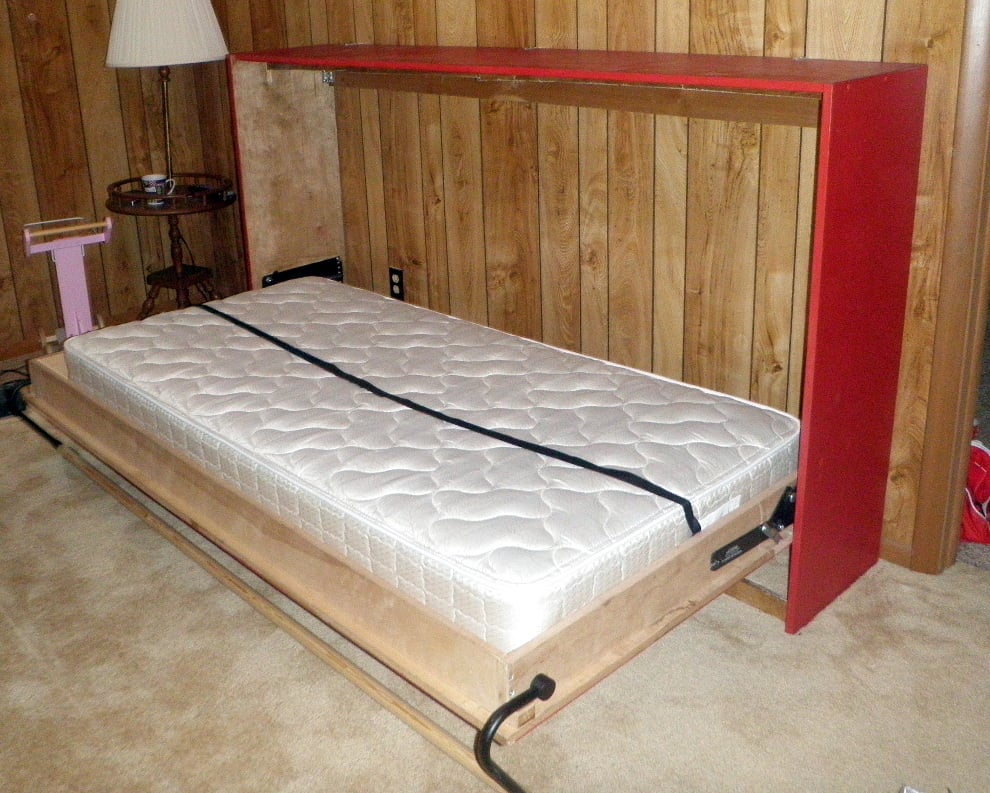
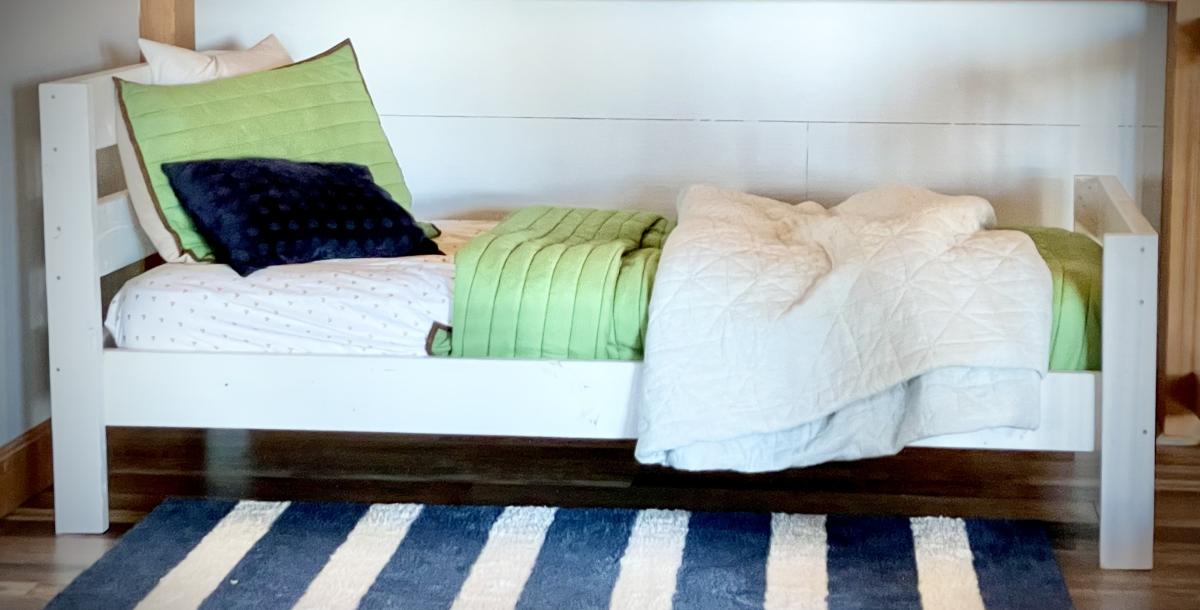
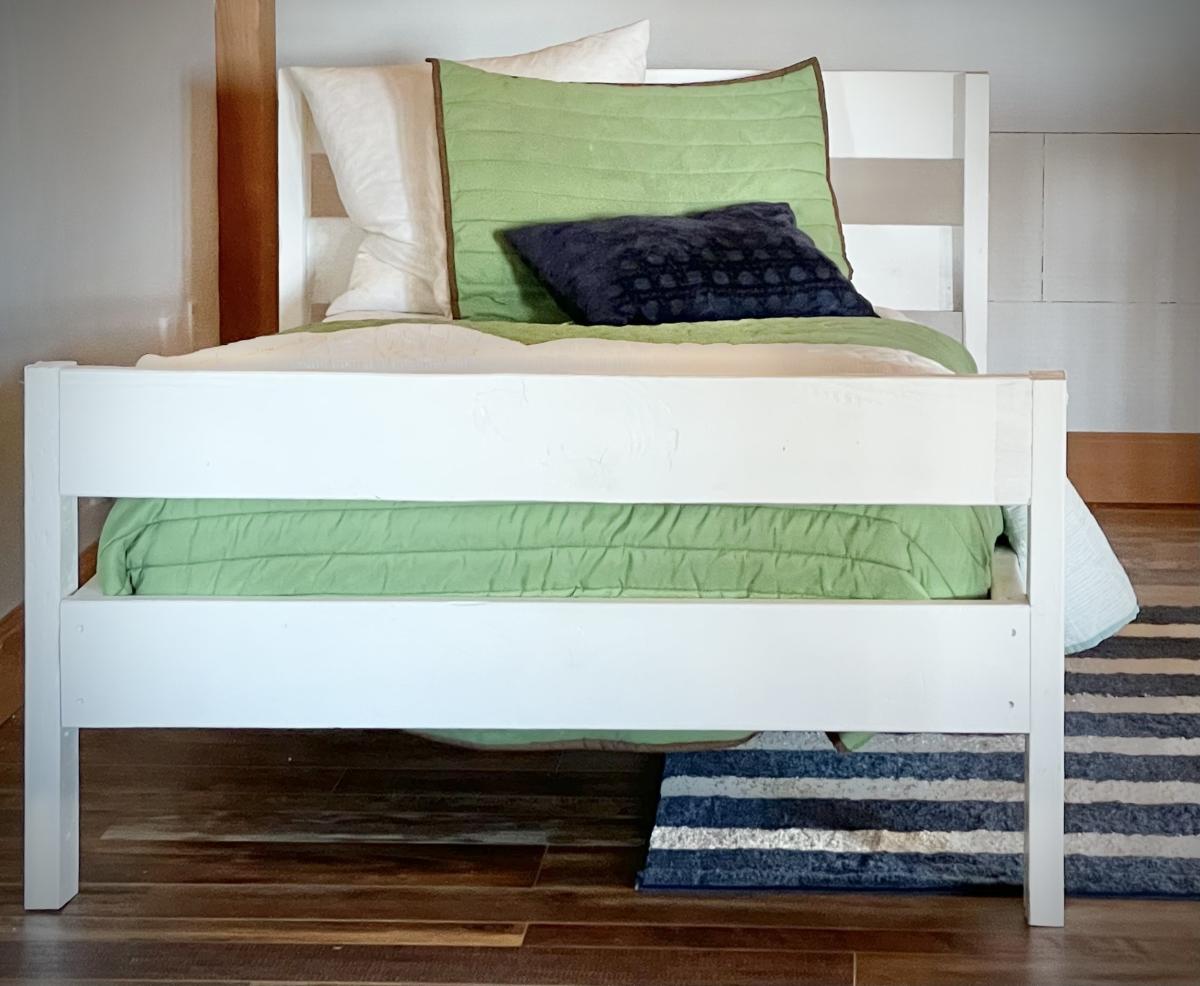
This is a Murphy Bed that I made for my daughter Alicia for their getaway home at Canadian Lakes, MI. Due to limited space i had to make it horizontal instead of the normal way of being vertical. It really comes in handy and takes up very little space.

Fri, 07/19/2013 - 15:17
Looks great! Love the color and the trims you used. Where did you find your hinge hardware? PS- How did you like the baking soda paint? I've tried ASCP which was good but very pricey, and last time made my own with some plaster of paris. Your finish is lovely.
Sat, 07/20/2013 - 18:47
I bought the spring hardware on line. I can't take the credit for the paint as my daughter did that part. She loves the way that the baking soda and paint covers everything and it is a whole lot less expensive than buying the commercial stuff.
Sun, 09/28/2014 - 01:02
I found some cool designed Murphy Bed Collection. Also bought one. Its so cool. Just happy to get that. You also can check this place <a href="http://murphybedikea.com/">murphy beds</a>
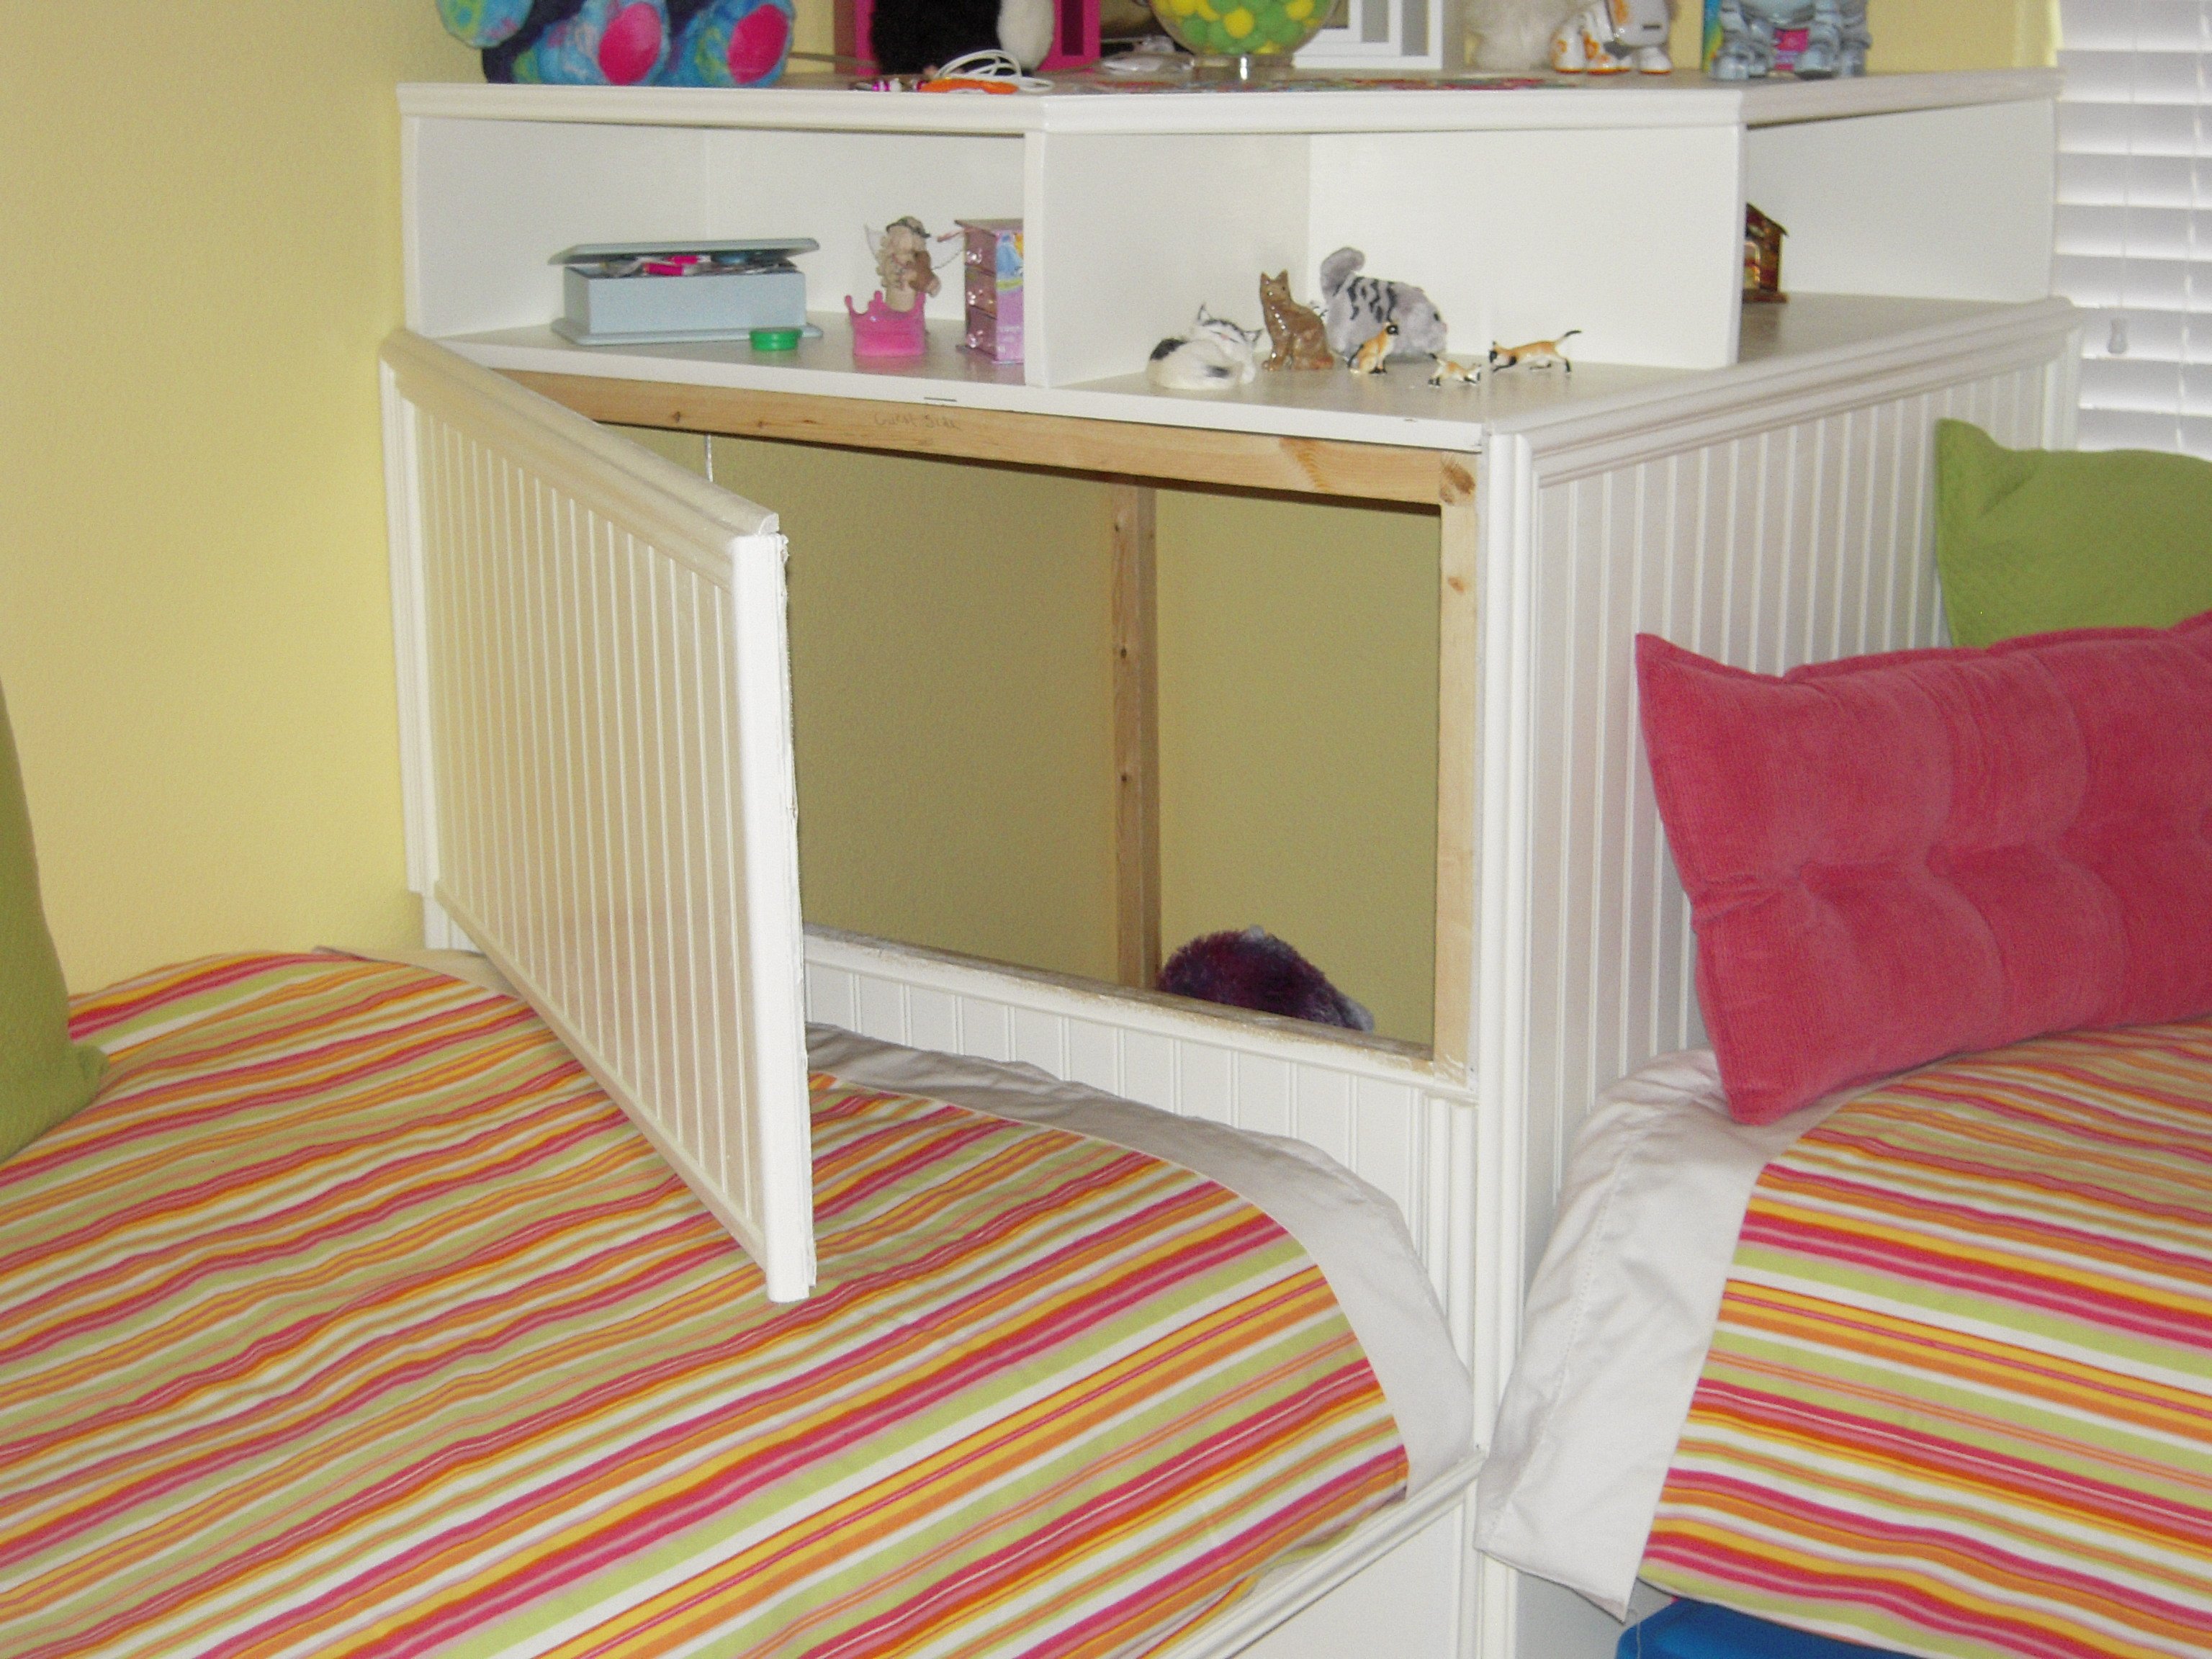
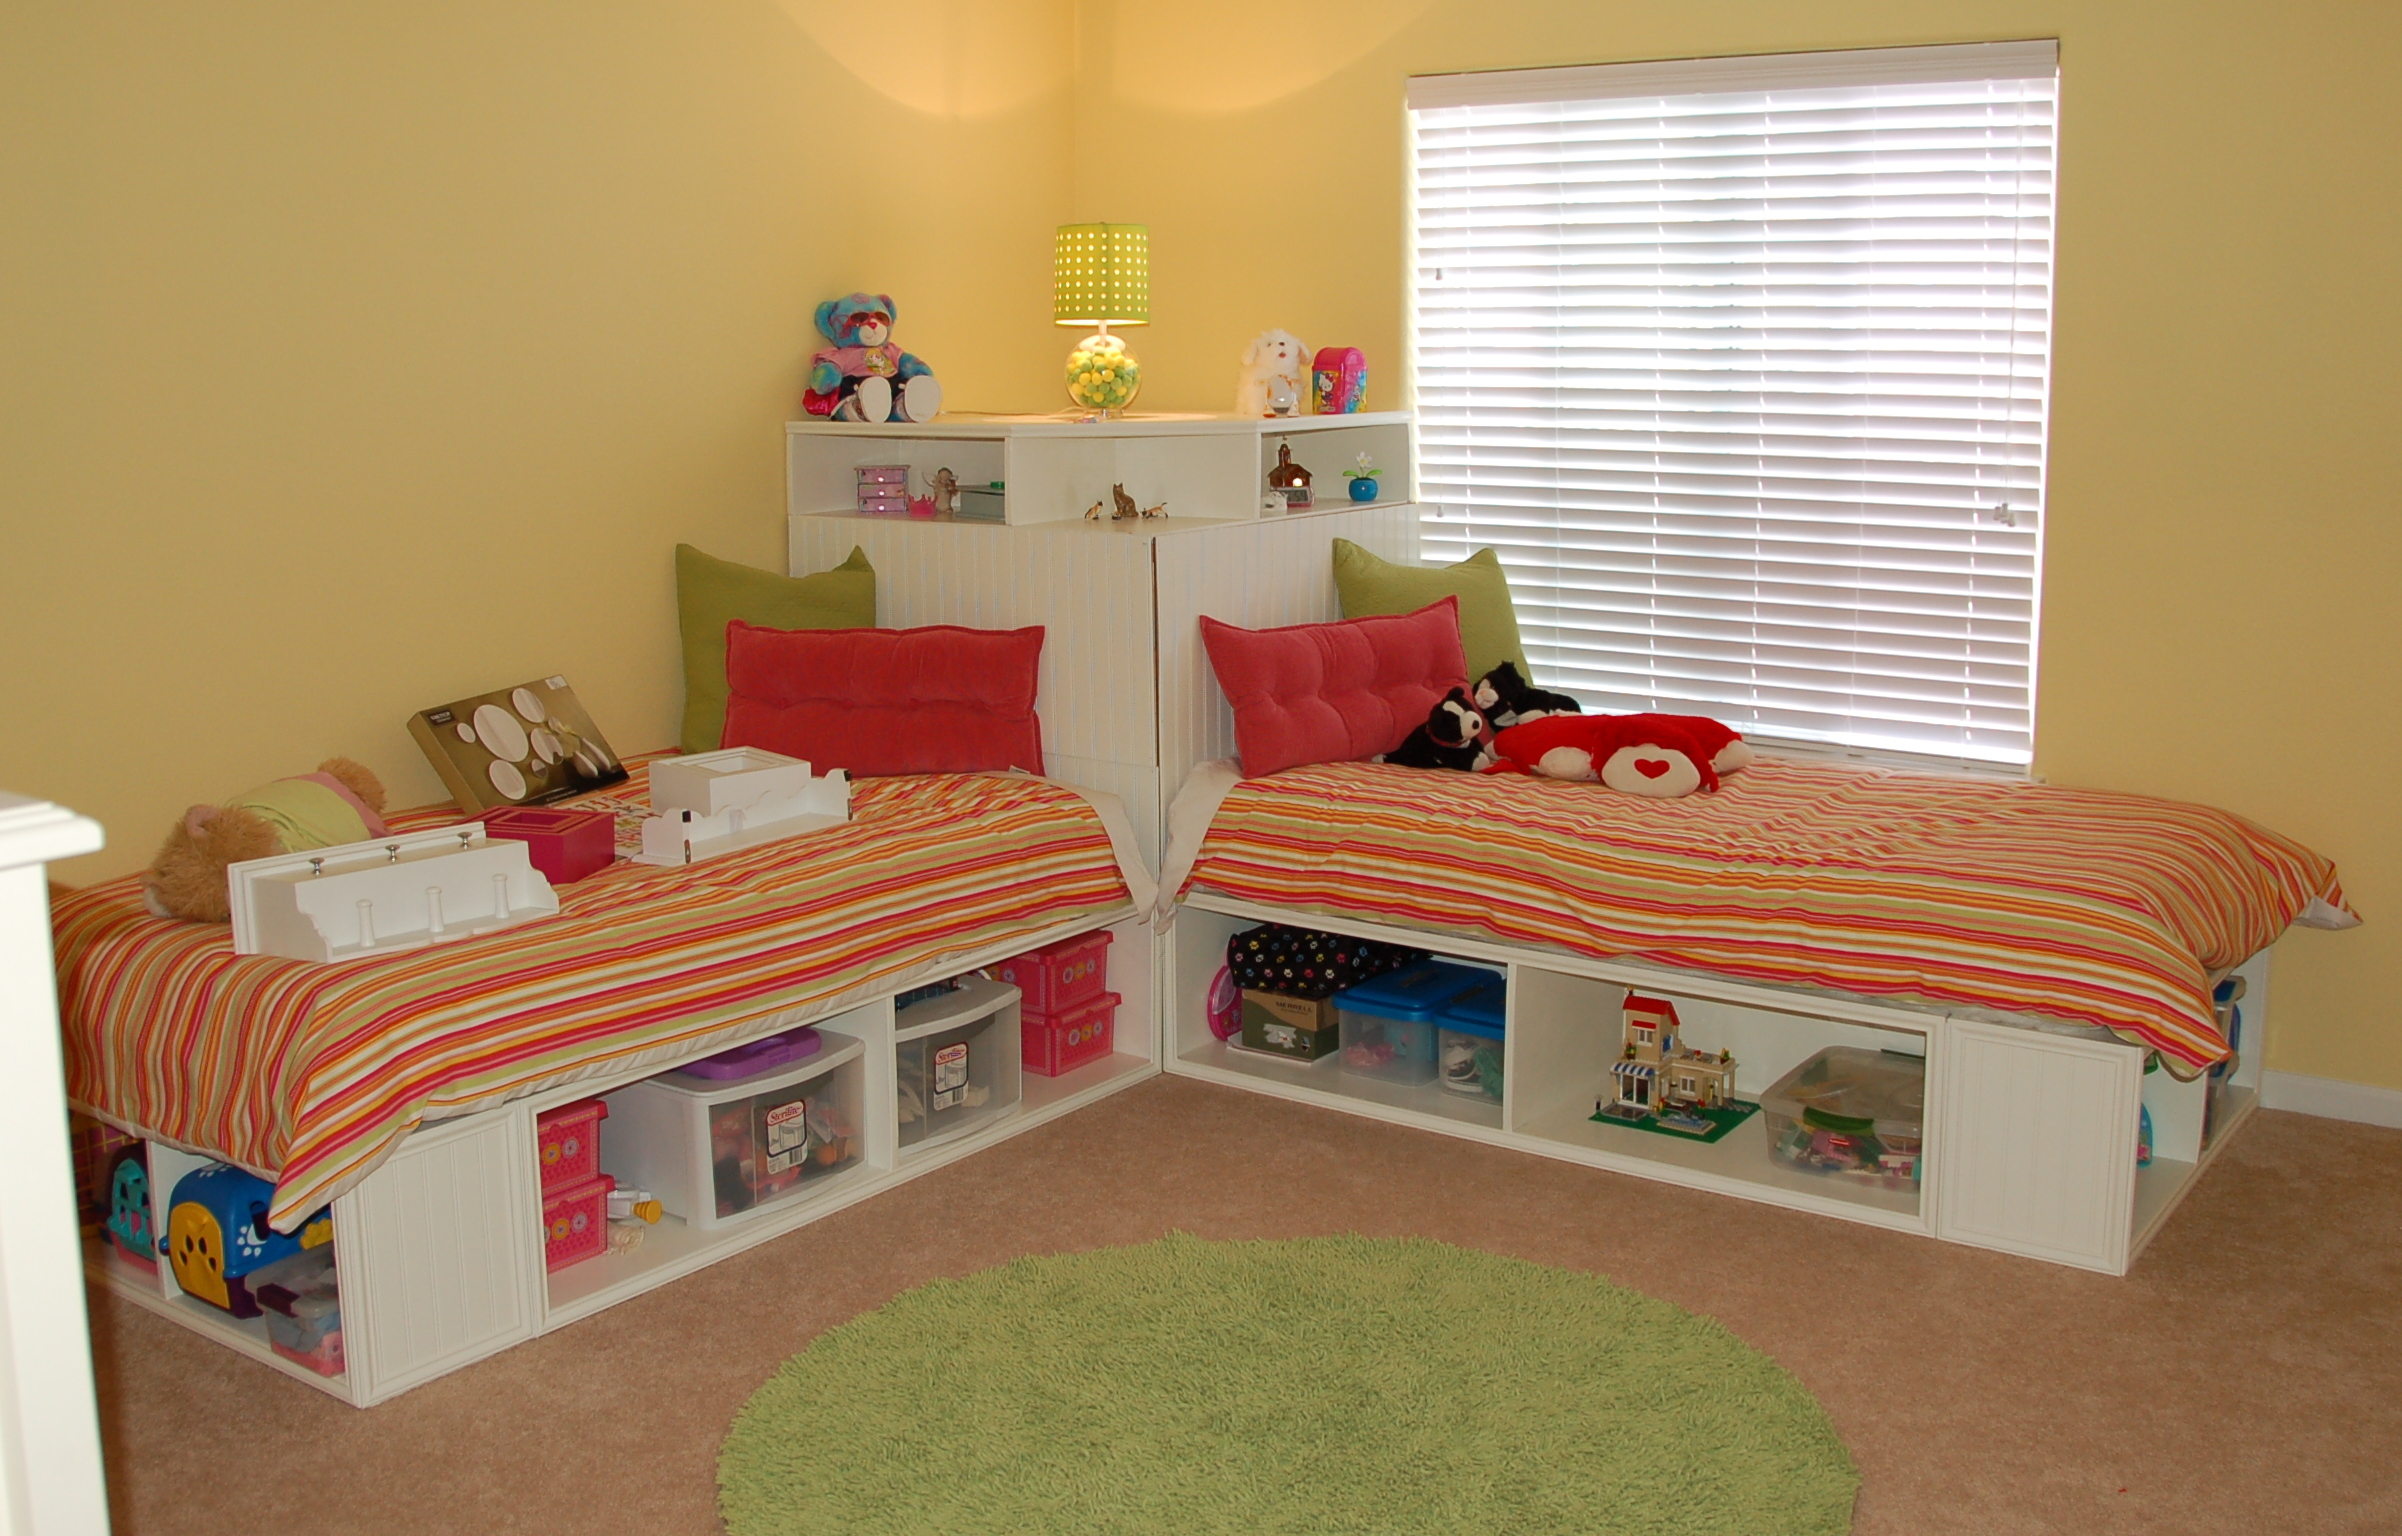
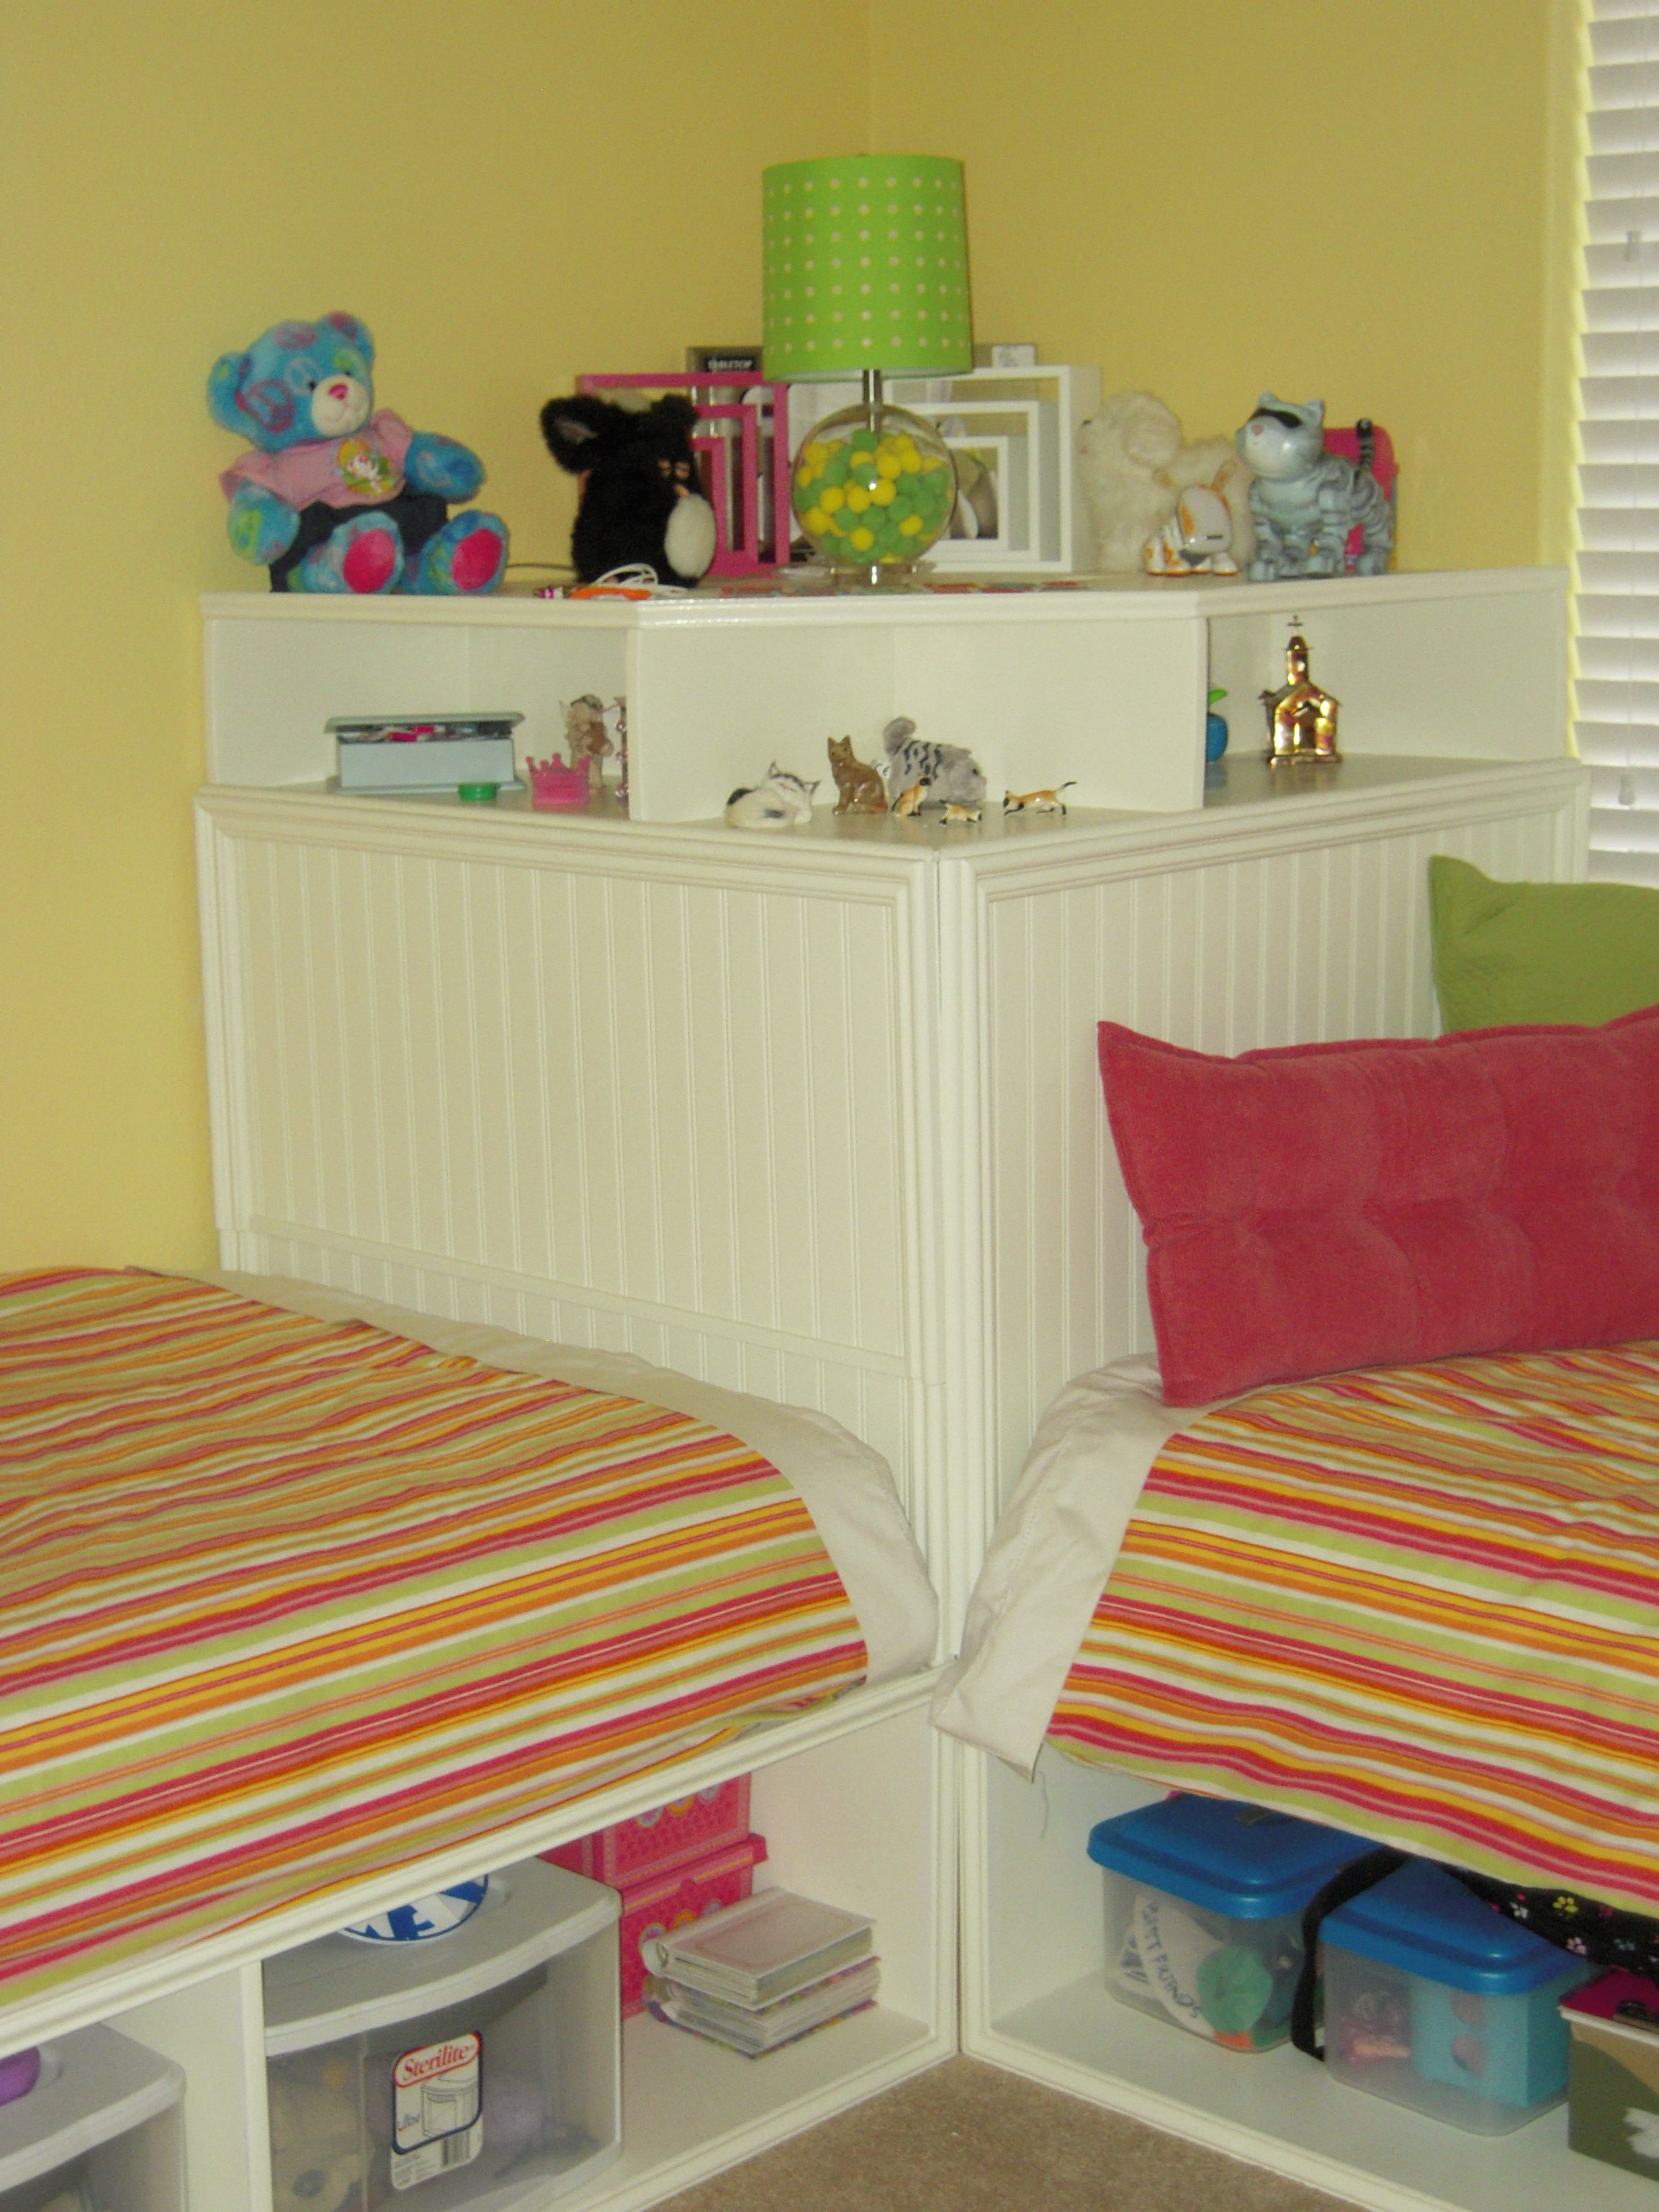
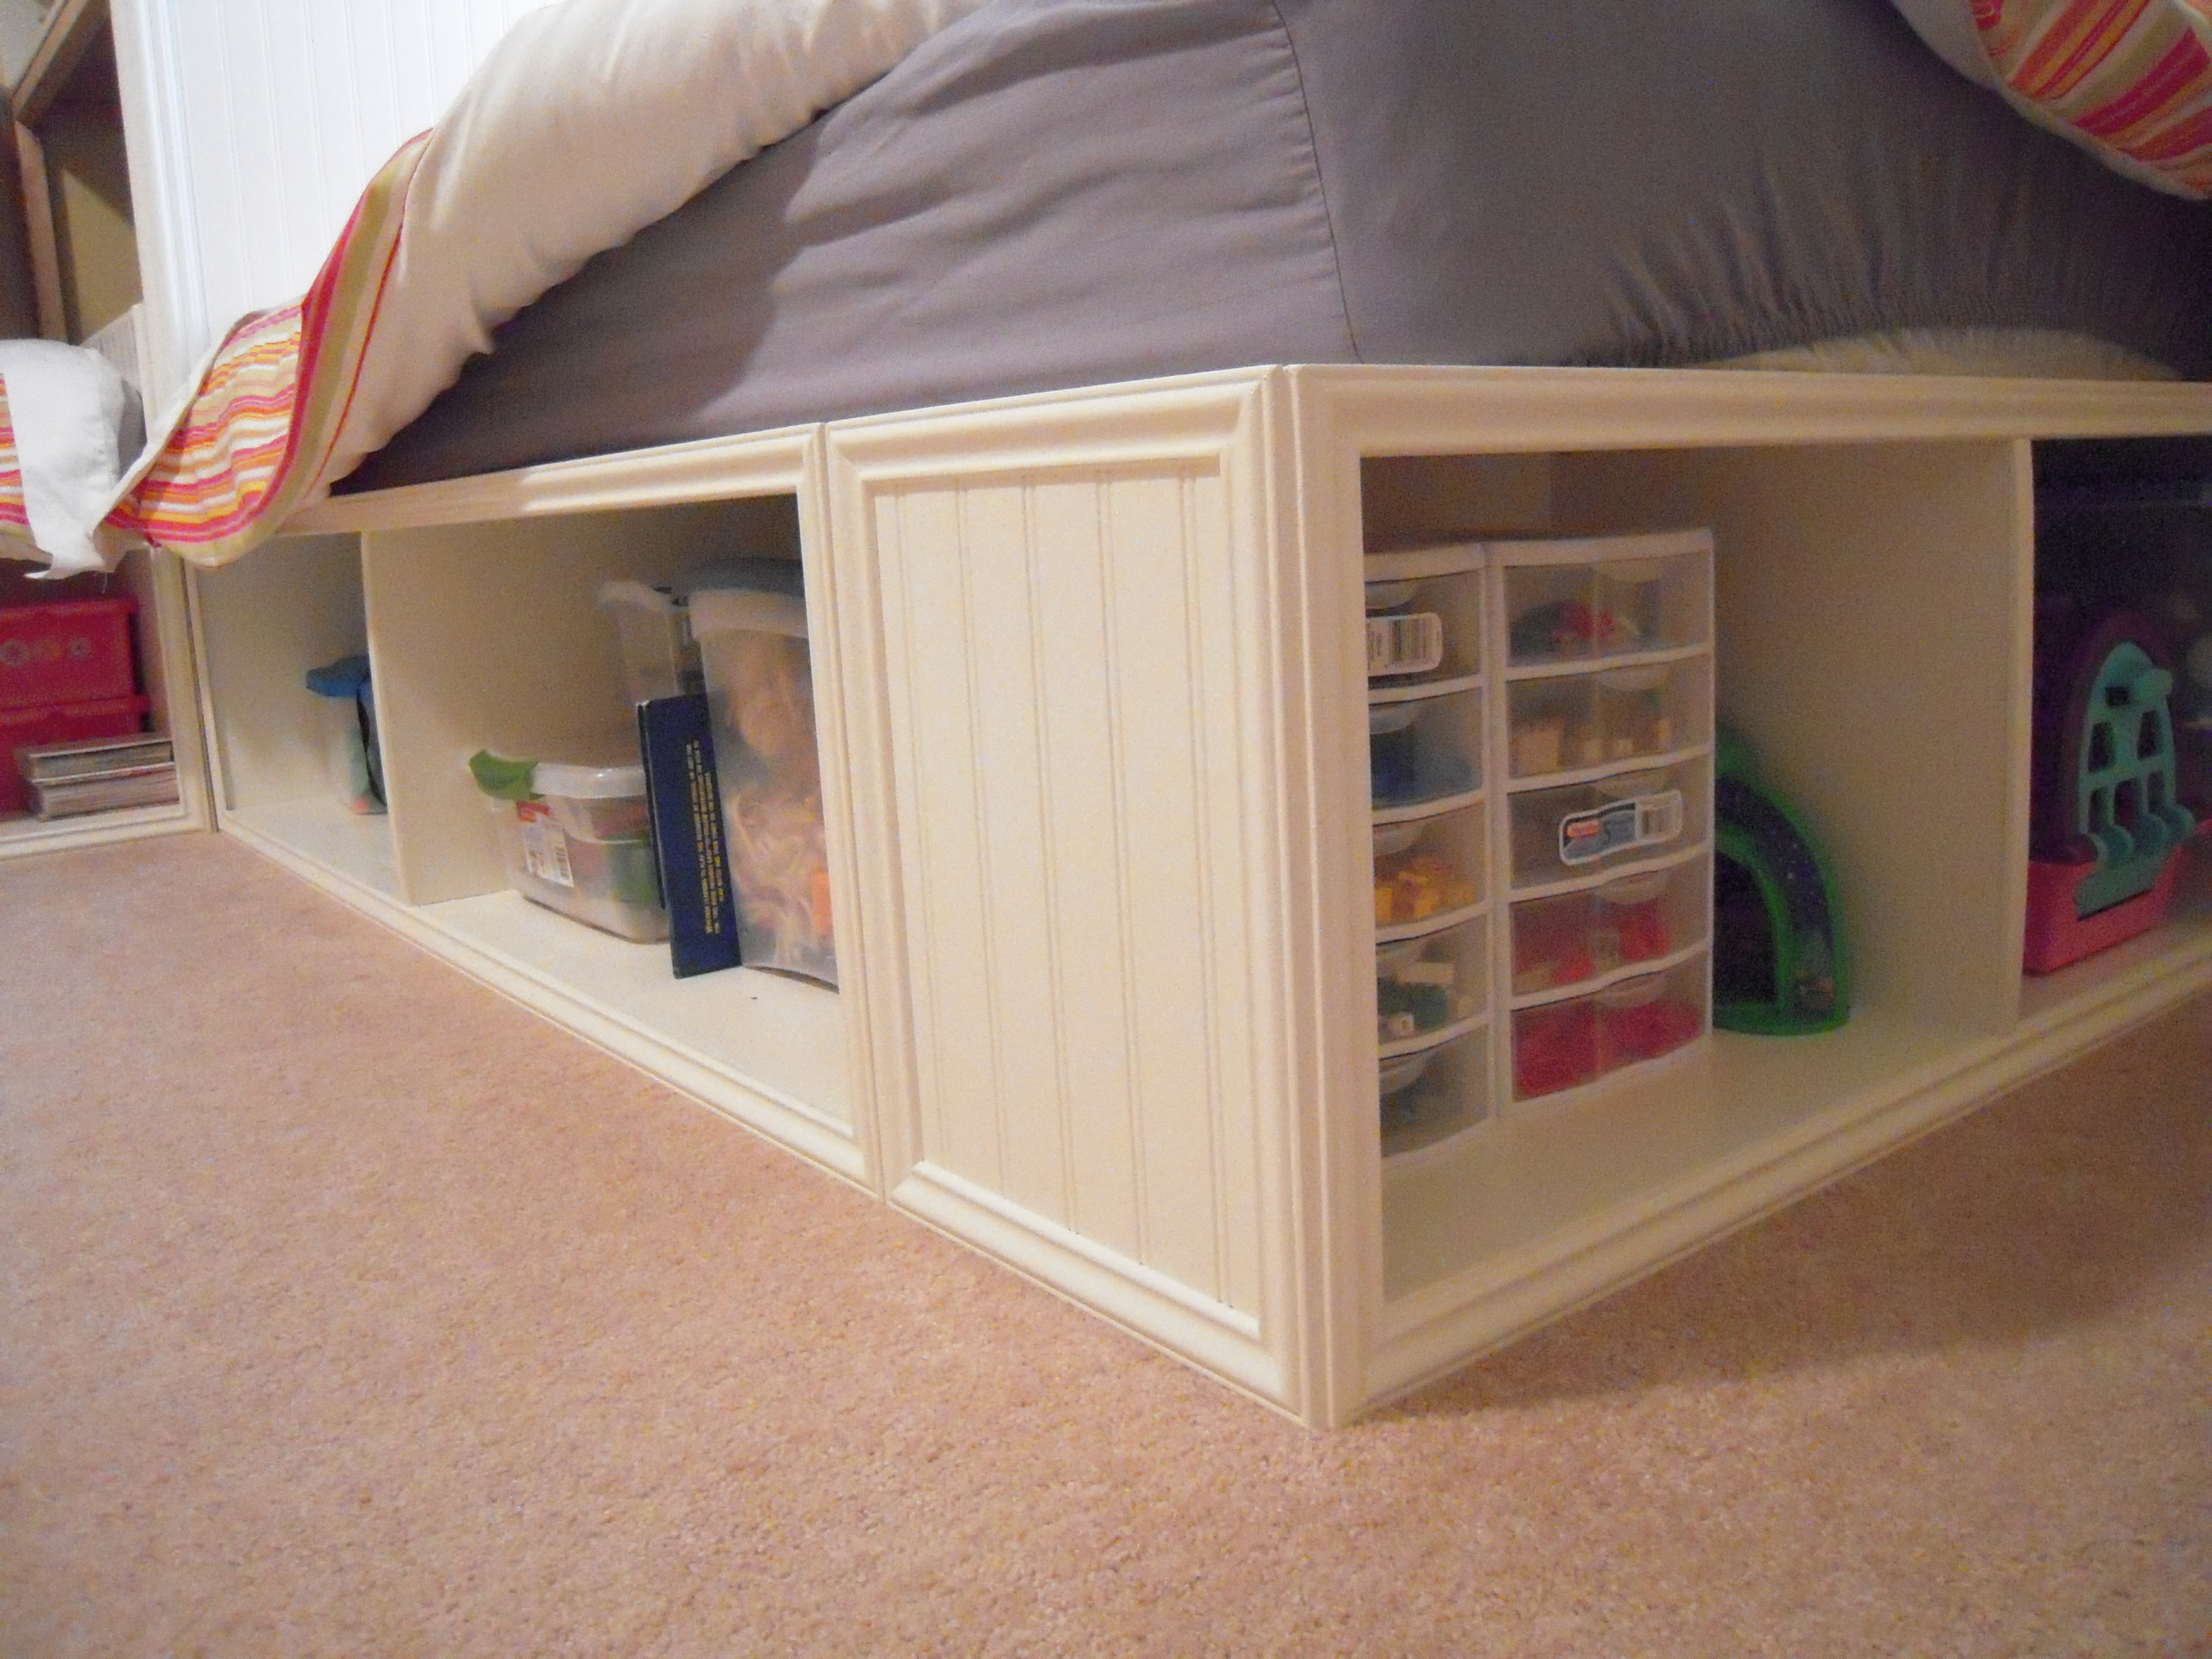
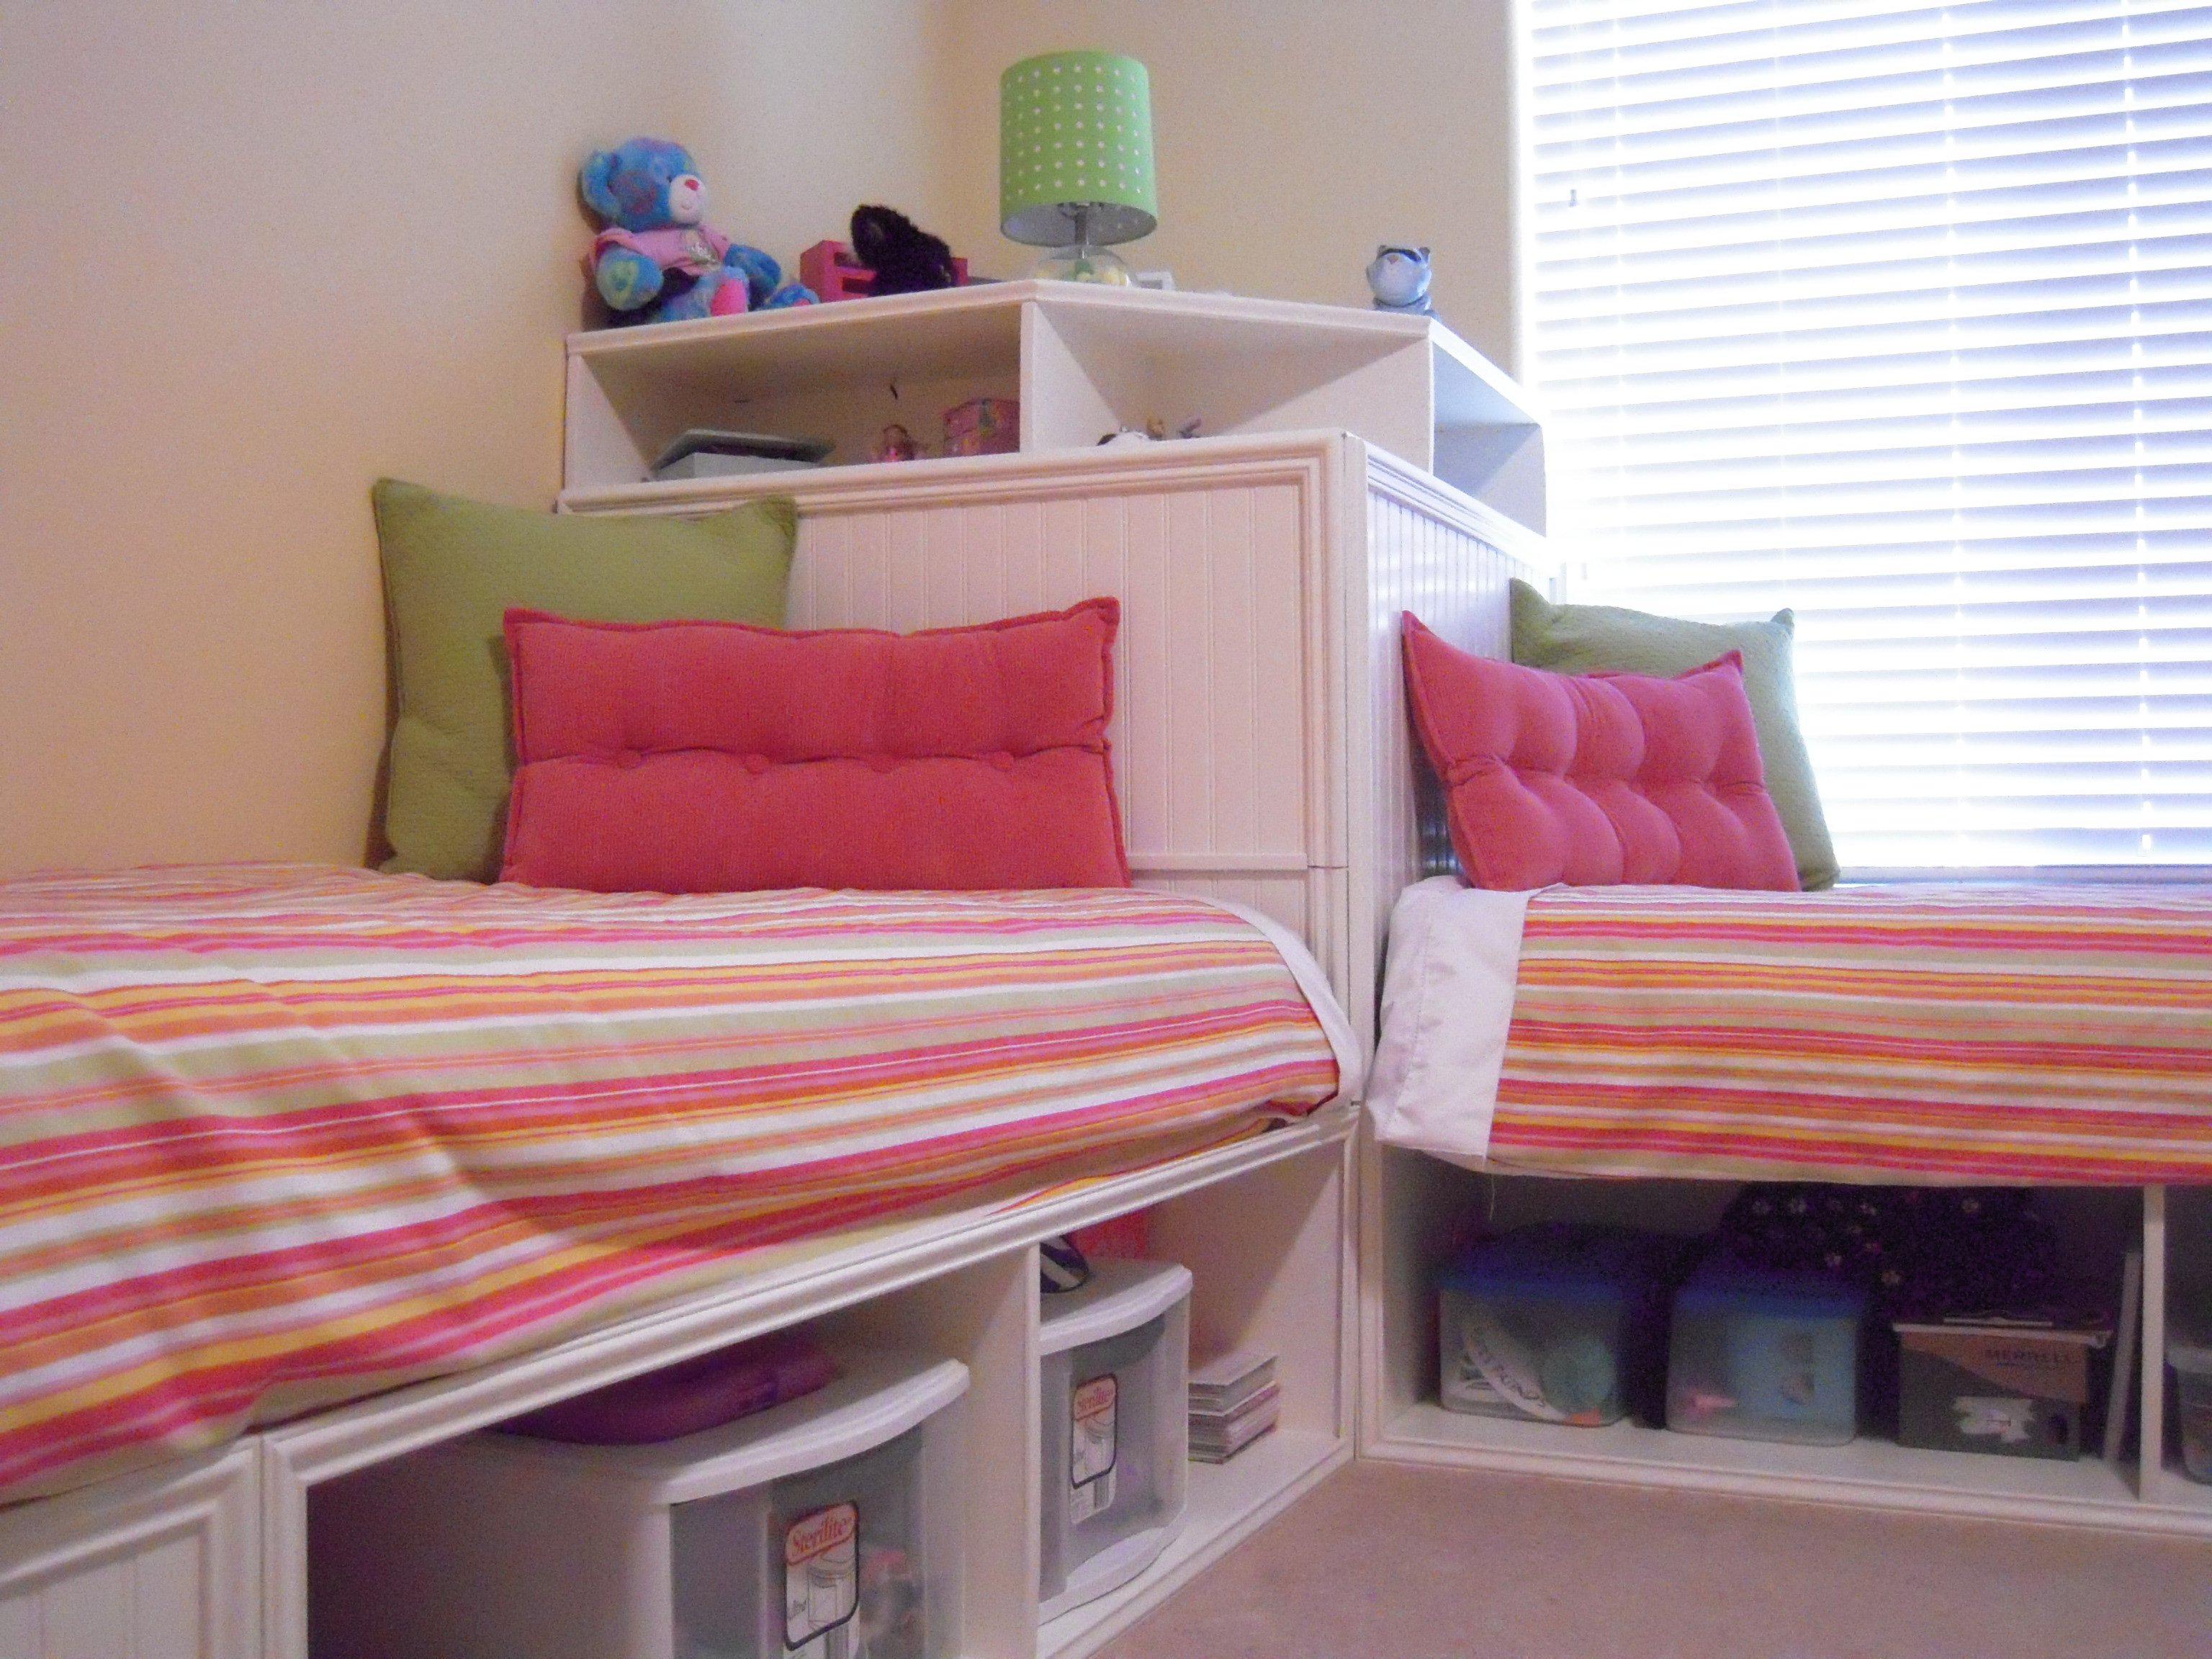
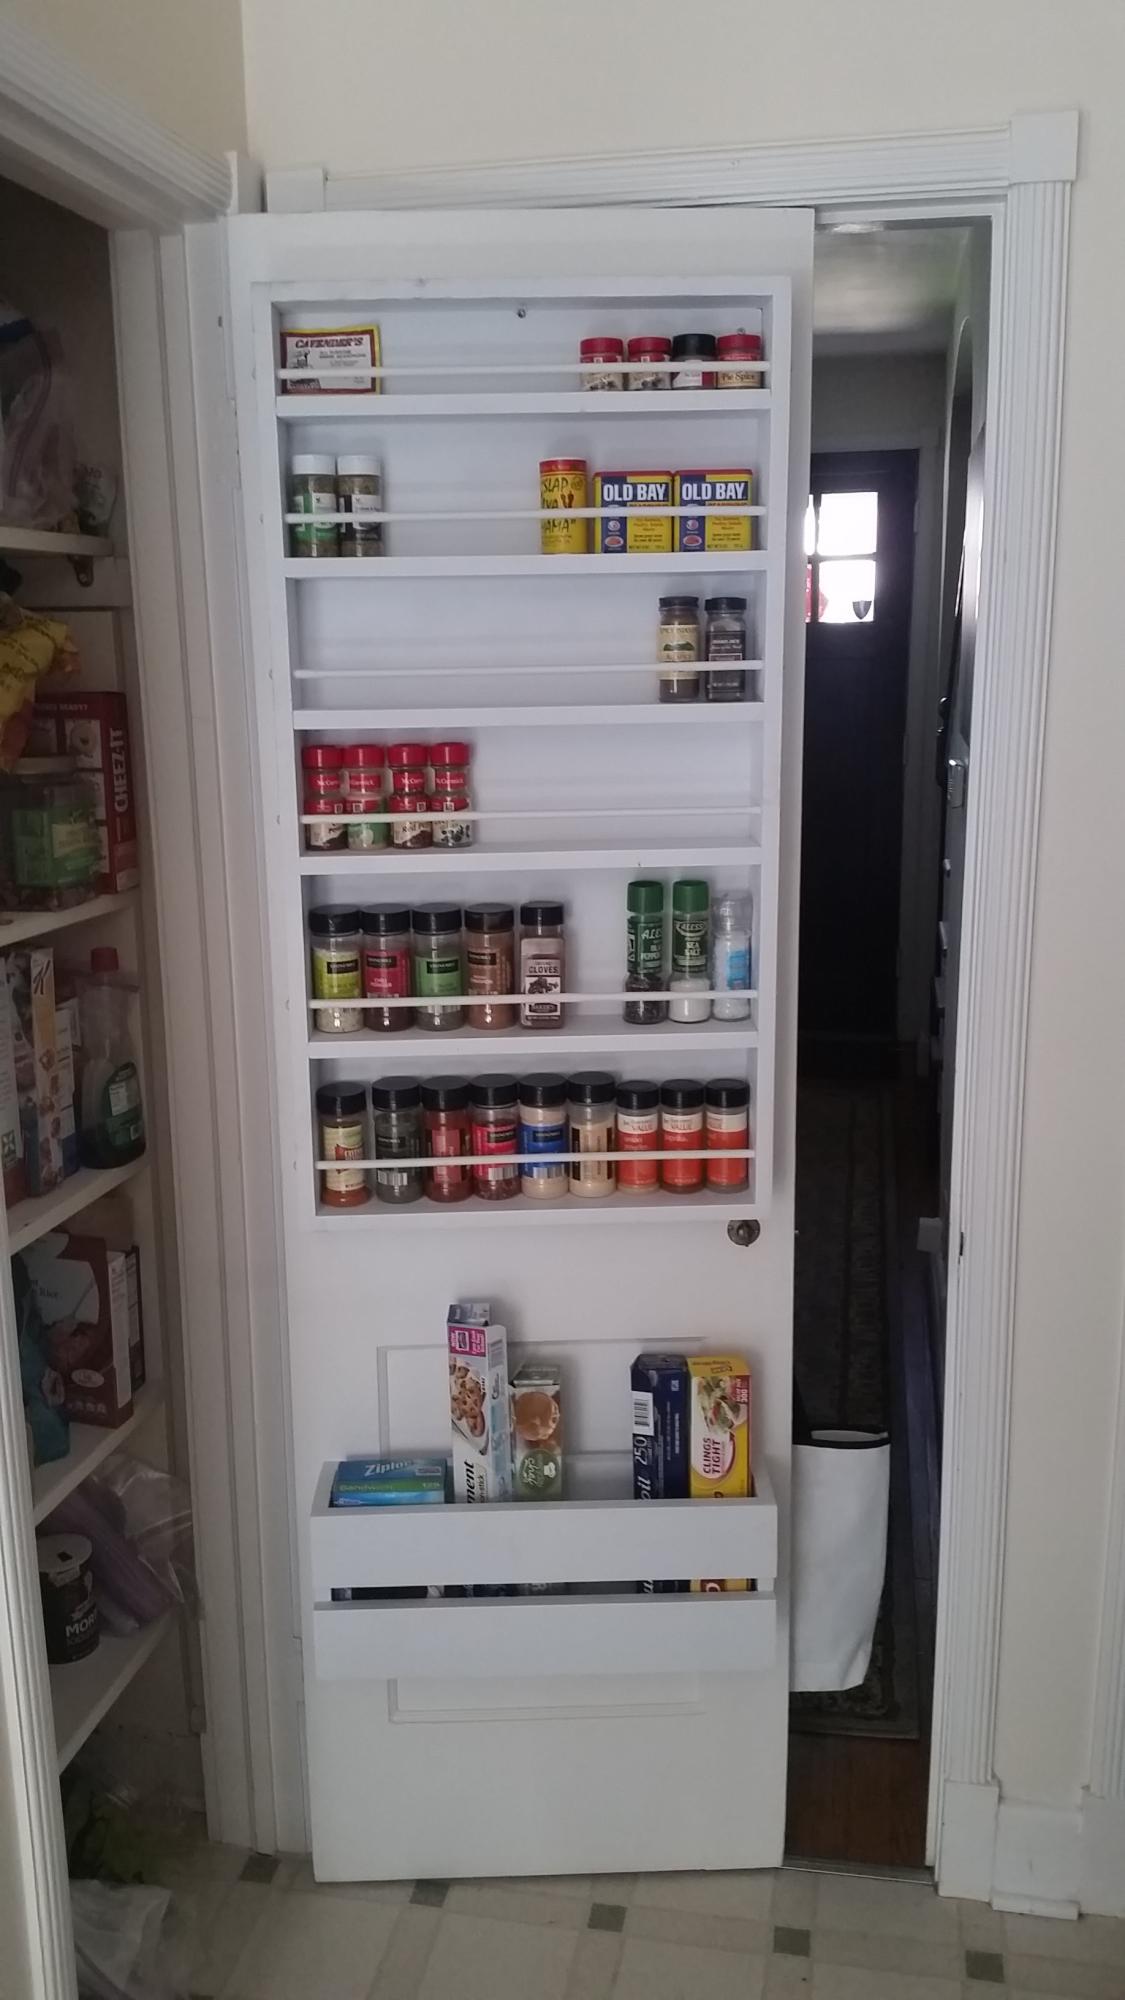
I loved doing this project. I used Anna's plans but modified them just enough to help be with my biggest problem, stuffed animals! :) I increased the height by eight inches and cut one of the bead board panels just above the mattress. Next I attached the top panel using a piano hinge. Finally, I reinforced the bottom panel with an extra piece of 1x1 (horizontally) so that my daughter can climb in to and out of the corner unit and not crack the bottom bead board panel. She now has a place to put all her stuffed animals and as a bonus a new "secret hiding place.
To spruce up the storage beds and corner unit I added moulding to the front of everything and then painted everything cream colored to match her dresser. The molding took extra time, but it was well worth it! Because I increased the height of the corner unit I also added a thin piece of plywood behind each piece of bead board (heard boards) to help reinforce it and would support the weight of someone leaning back on the "head board". All in all it was a great project to work on, Anna's design plans were easy to read and allowed me to make adjustments when necessary without any trouble.

Thu, 07/07/2011 - 12:36
This is so perfect! The trim makes it all look very professional. I love the idea of the door and utilizing the extra storage...something we all need more of! I also built the storage beds, but my girl's room isn't big enough for the corner unit, but if we ever move and they have a bigger room I will be back to look at you design for the corner unit! Good job!
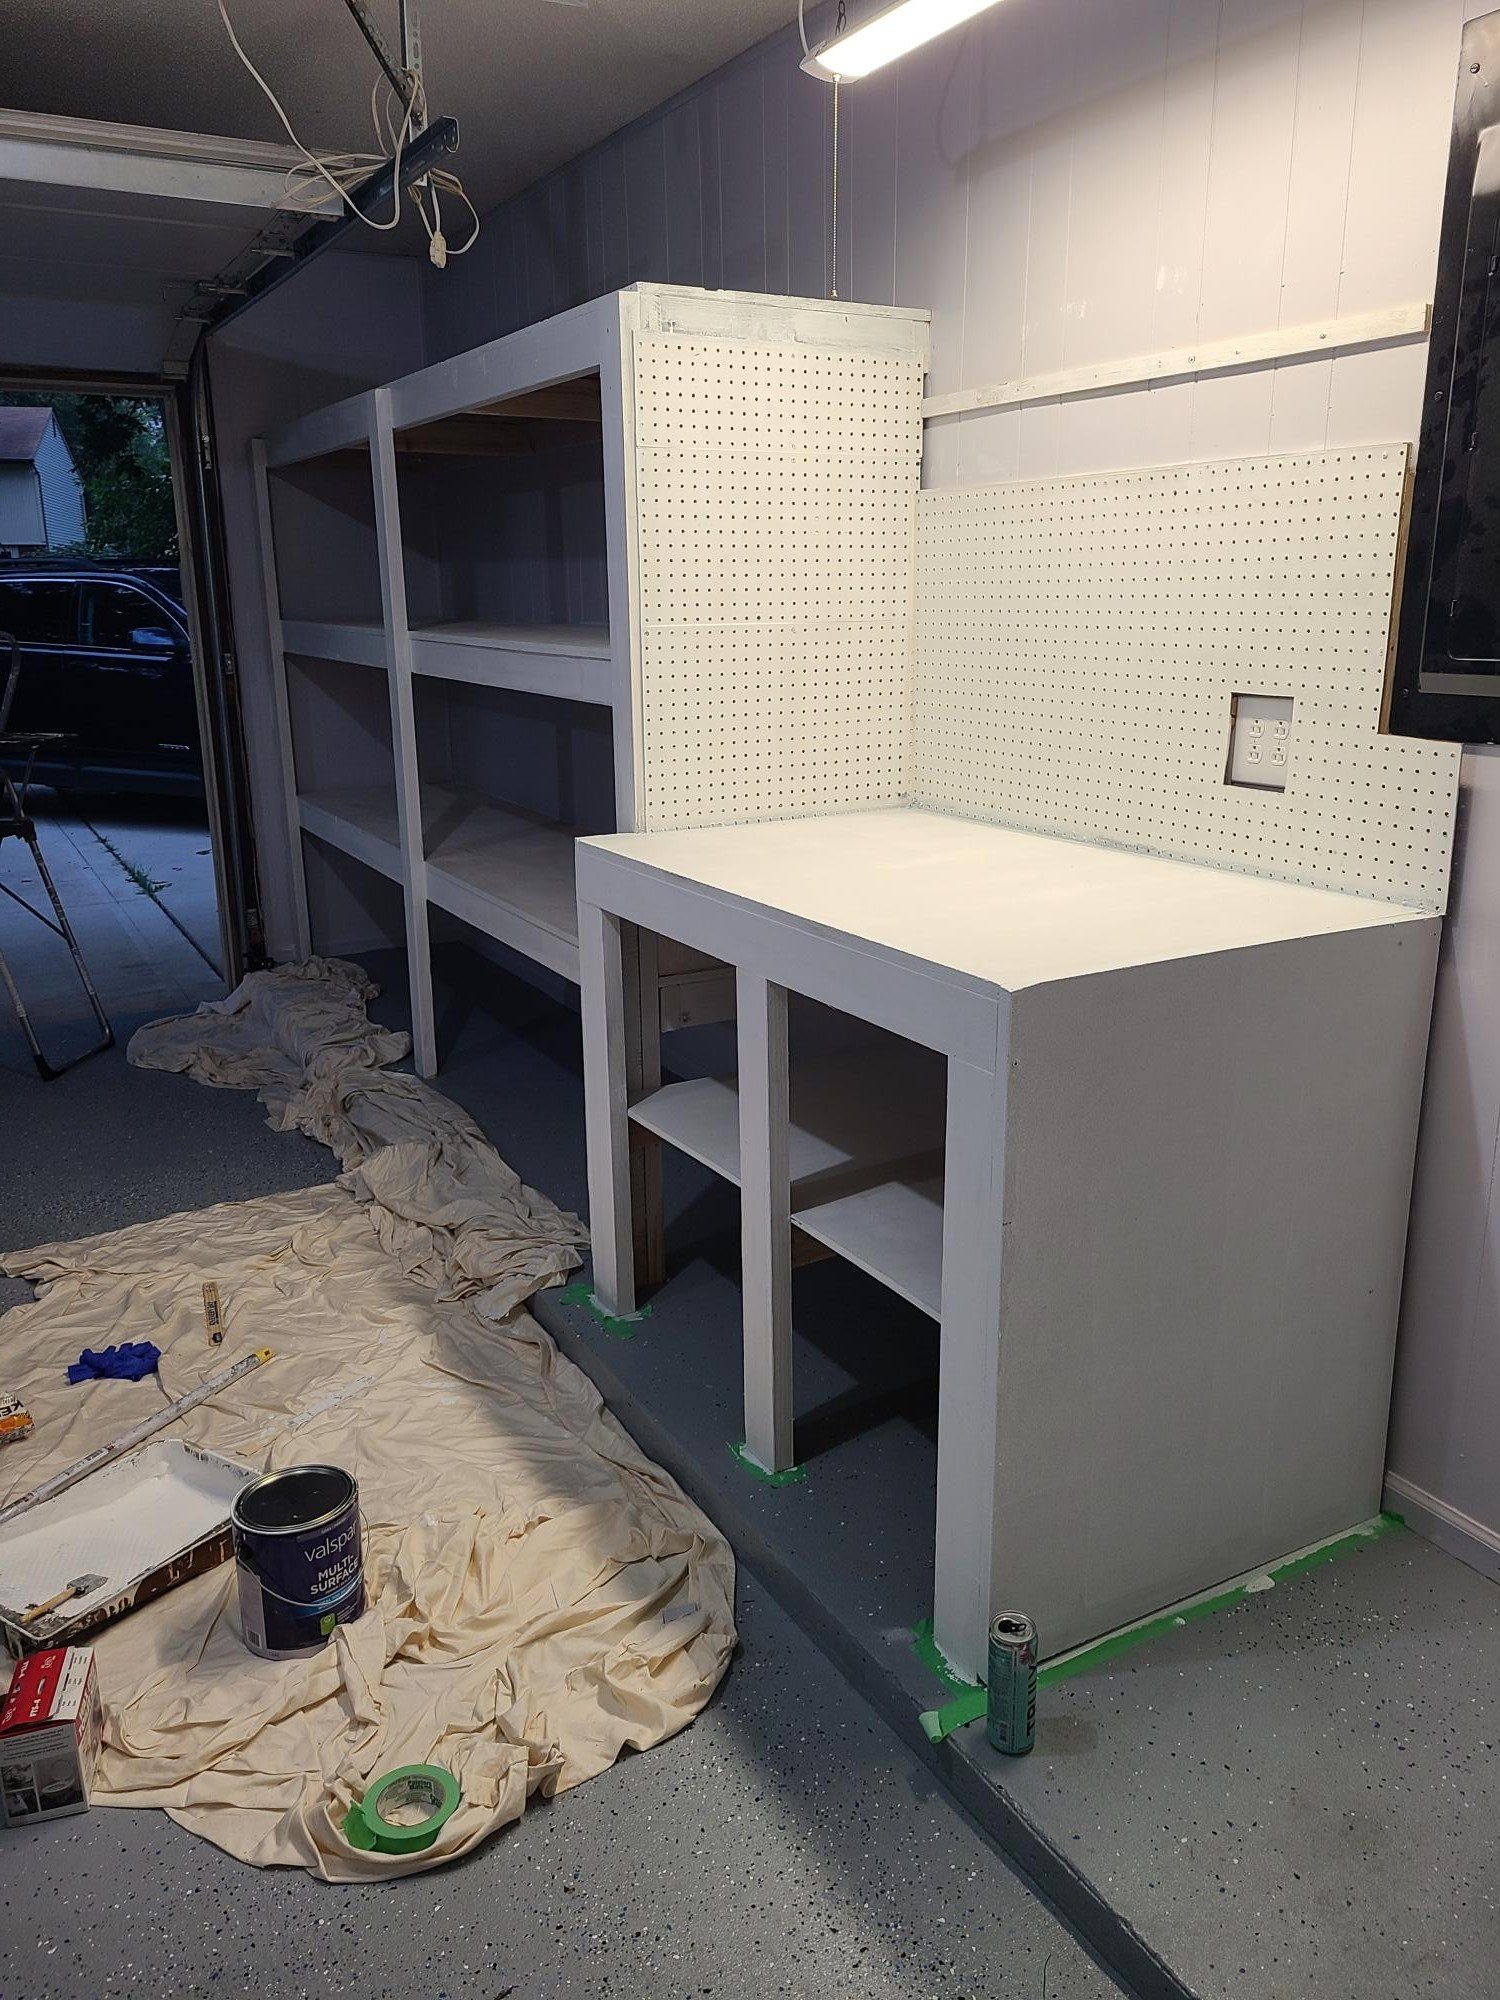
Used the plans from attached garage shelving to make a 10 ft, 24 inch wide shelf then used similar idea for workbench which I still need to put doors on. I love it! Such an easy plan!

Easy build
Thanks for the plans!
Wed, 10/19/2022 - 08:32
Looks great and perfect space saver and organizer!
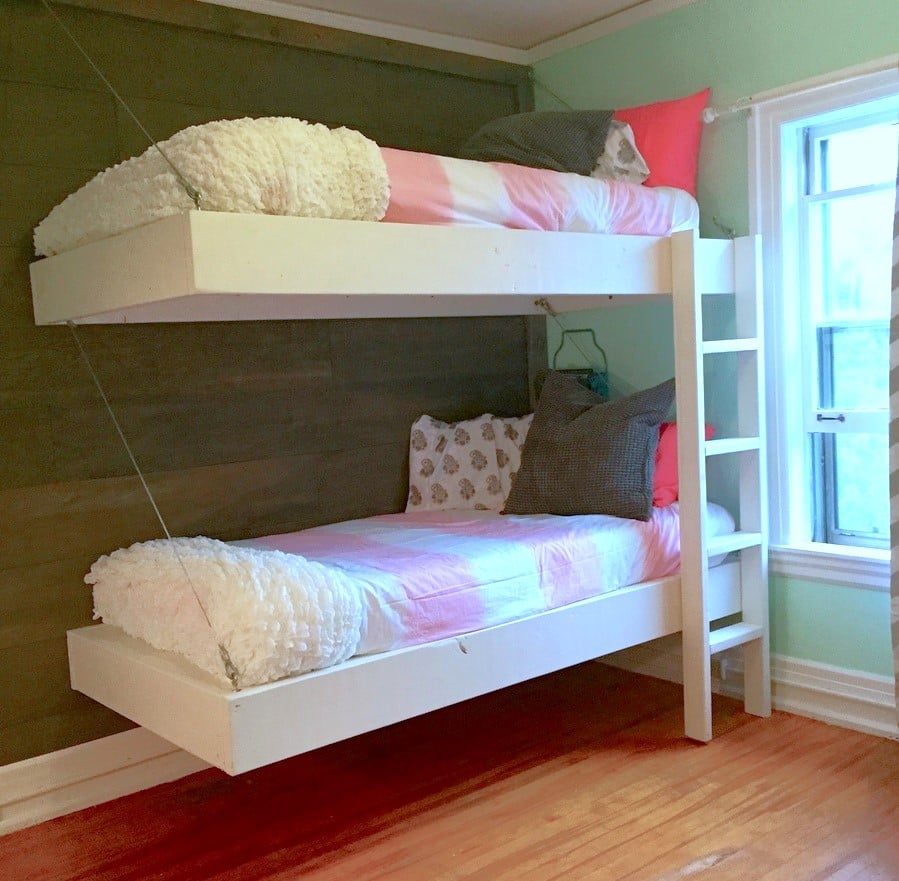
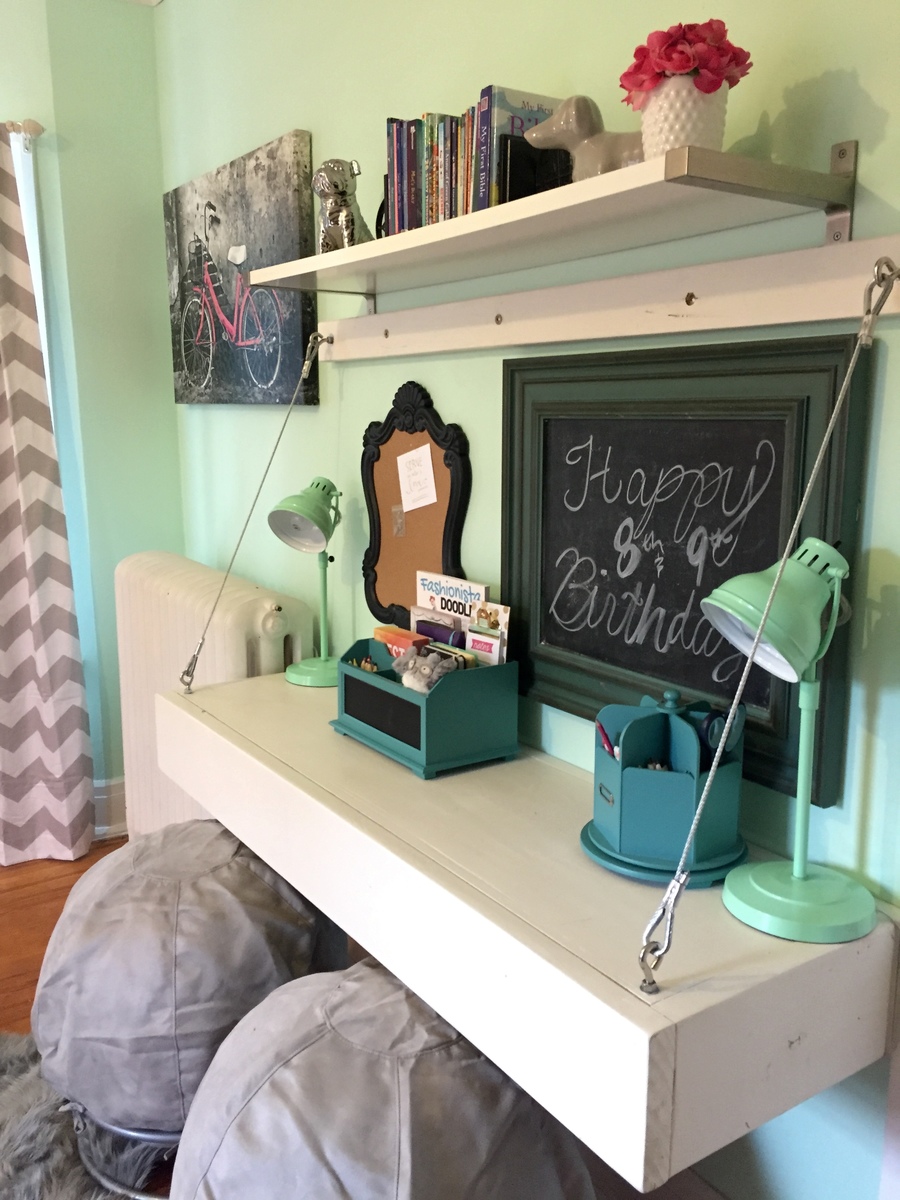
This little girls room needed a little happy birthday! I planked the wall with birch veneer, made simple box frames for the beds and desk, and attached them to walls with heavy duty cable. Then my friend added her designer touch, and made it cozy and girl CHIC!

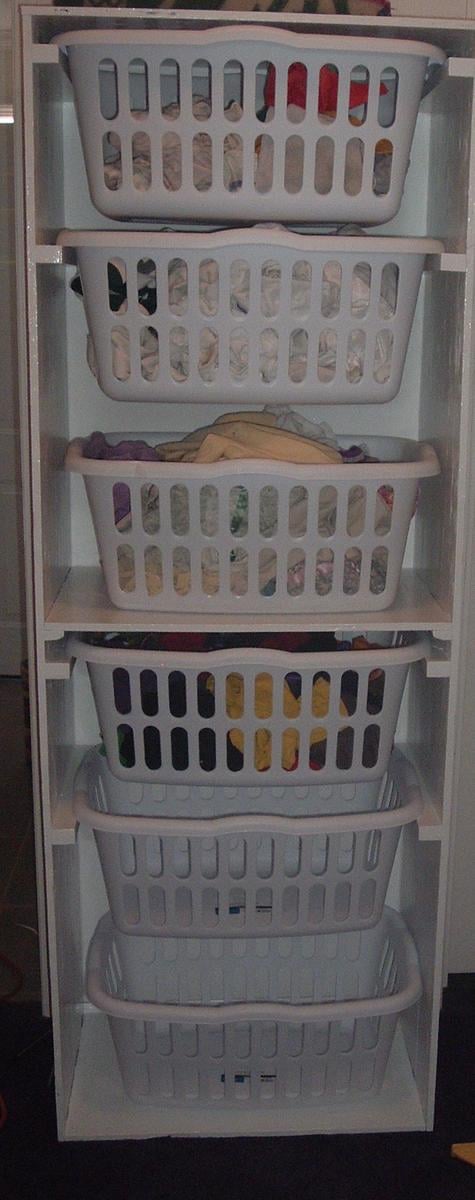
My laundry room is really small and laundry baskets were always in the way. I needed a way to organize it better. I thought it would be really cool to have a way have the baskets more accessable and take up as little space as possible. I started thinking up a plan when I decide to check and see what might be here and found the perfect project. My husband and I modified it just a little. Instead of building 2 smaller units and stacking them we decided to build it all in one unit. We added a shelf in the middle to help stablize it more. We also made wood side supports and only used them for the top 2 baskets in each section leaving the other two baskets to sit on the shelf and the bottom peice. We built it in just a few hours but because I used oil based paint to finish it, it too a while longer for it to dry.
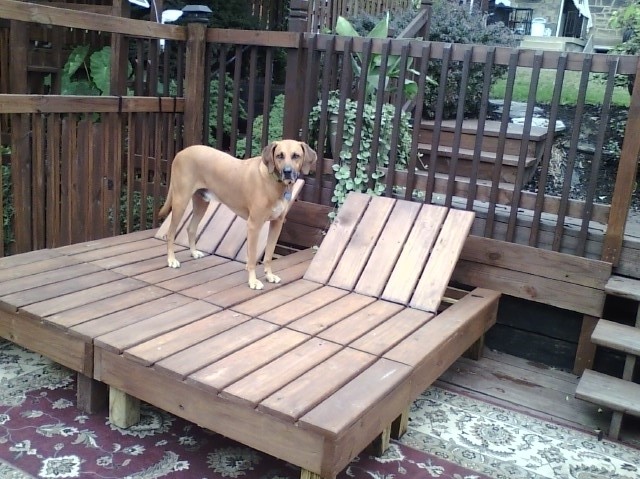
I had an idea in my head of what I wanted for deck seating/lounging in my mind but just couldn't seem to get to the "nitty gritty" of creating workable plans. Then, while googling through images of double loungers I stumbled onto Ana's site. Wow! I felt like a fish that had just found the water! With the detailed plans generously provided for a double lounger I was able to create my "vision" with just slight modifications. The loungers are actually two chairs and two ottomans that fit together or come apart depending on how much "togetherness" the situation calls for. And best of all - almost all the materials were left overs and cut pieces from another deck and fencing project. For cushions (not in this photo) I used two inexpensive "Hide A Mats" folding beds from Costco that I covered with waterproof duck fabric. I can't thank you enough, Ana, for taking the time to share your talent so freely. I'm truly grateful. As is Jake, the Redbone Coonhound, who insisted on being in the photo!
Tue, 10/04/2011 - 22:46
Beautiful job! I really need to create these for our backyard too, and Buck, our treeing walker coonhound :) lol. Jake is a cutie!
Tue, 10/04/2011 - 22:46
Beautiful job! I really need to create these for our backyard too, and Buck, our treeing walker coonhound :) lol. Jake is a cutie!
Thu, 10/06/2011 - 06:18
I would have never thought to break it up into a chair and ottoman. Brillant! I love that idea!