Hotel Room Bed and Wall Project
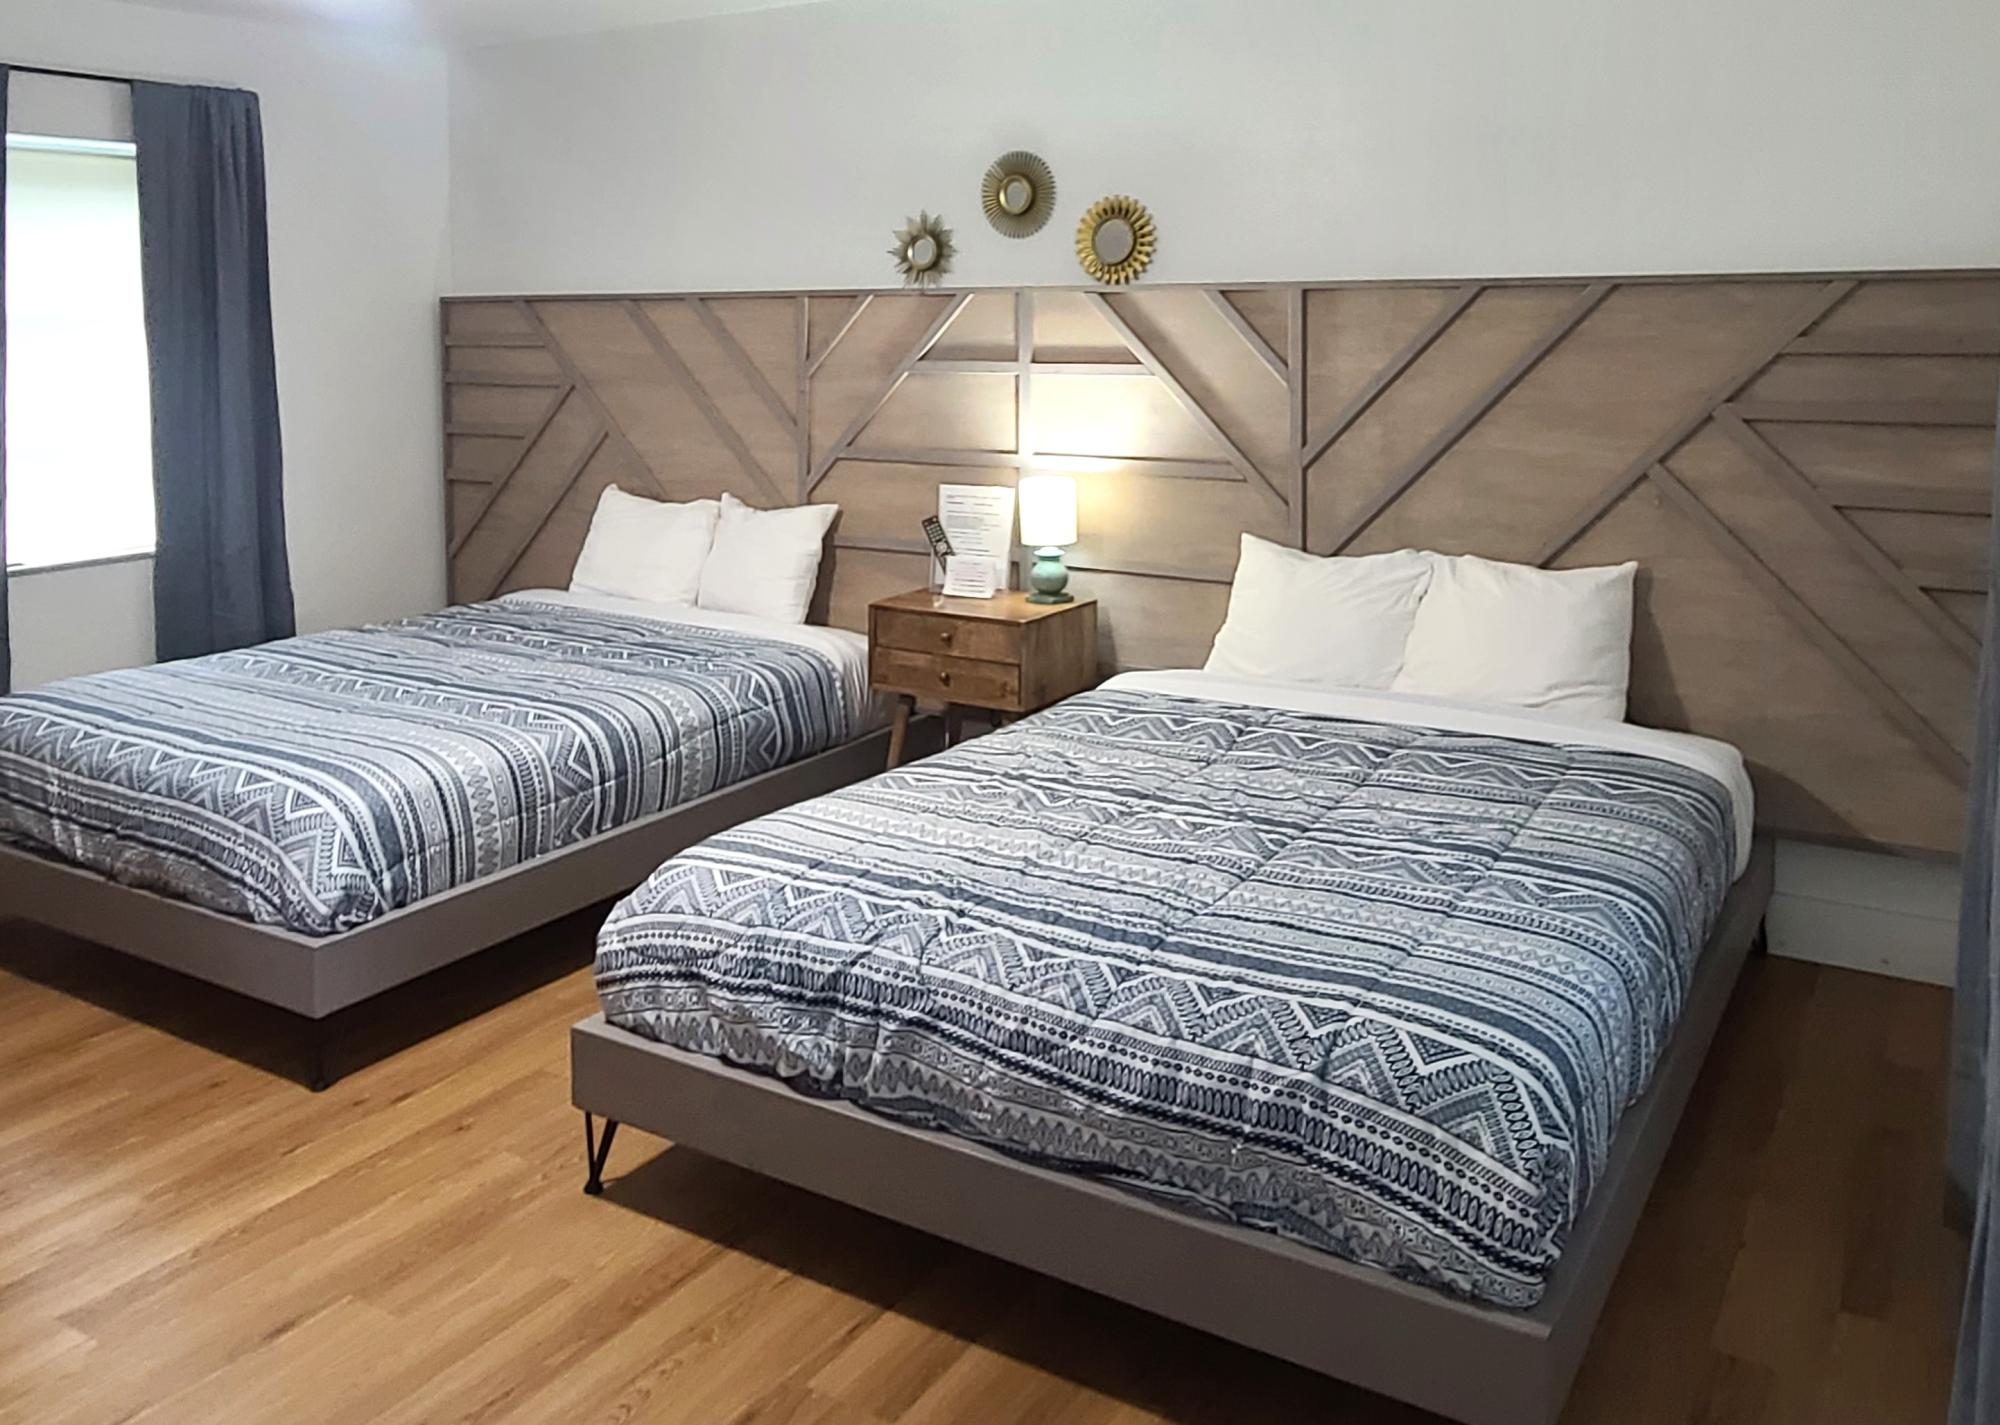
Built these bedframes and headboards for a local motel
Built from Plan(s)
Built these bedframes and headboards for a local motel
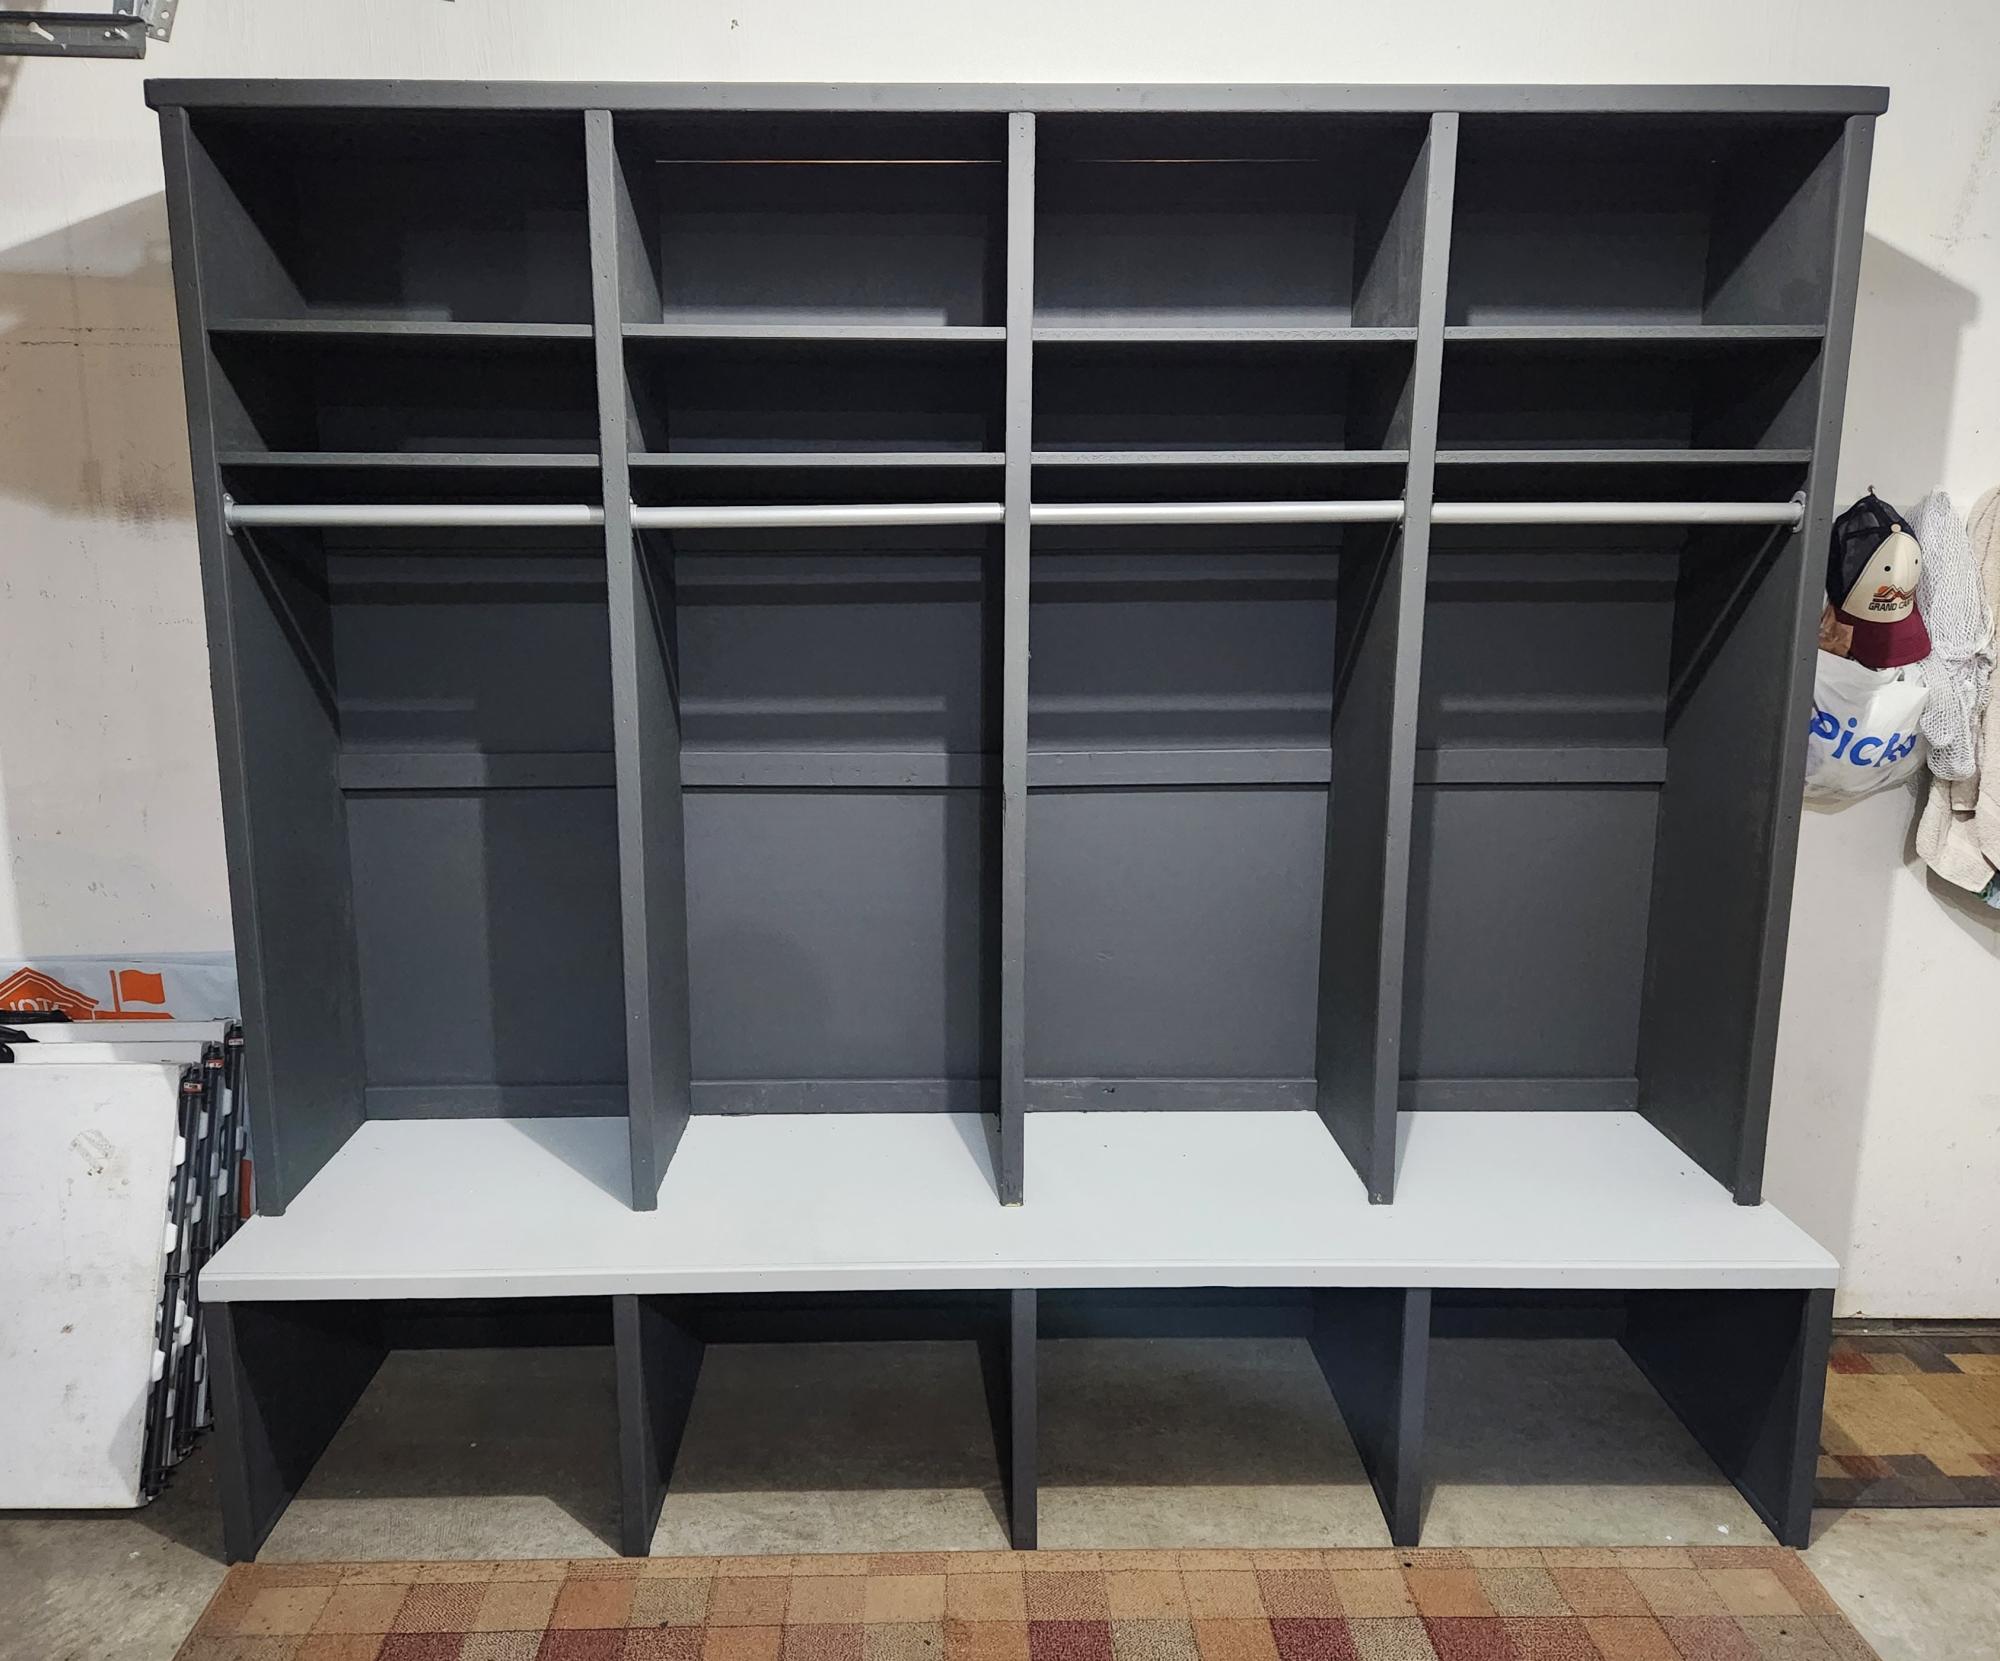
Garage bench with lockers. Plans and videos provided great inspiration and proves most anyone can do it.
Steve L. in Ohio
Fri, 09/08/2023 - 08:42
You did a fantastic job, love the added hanging option! Thanks for sharing.
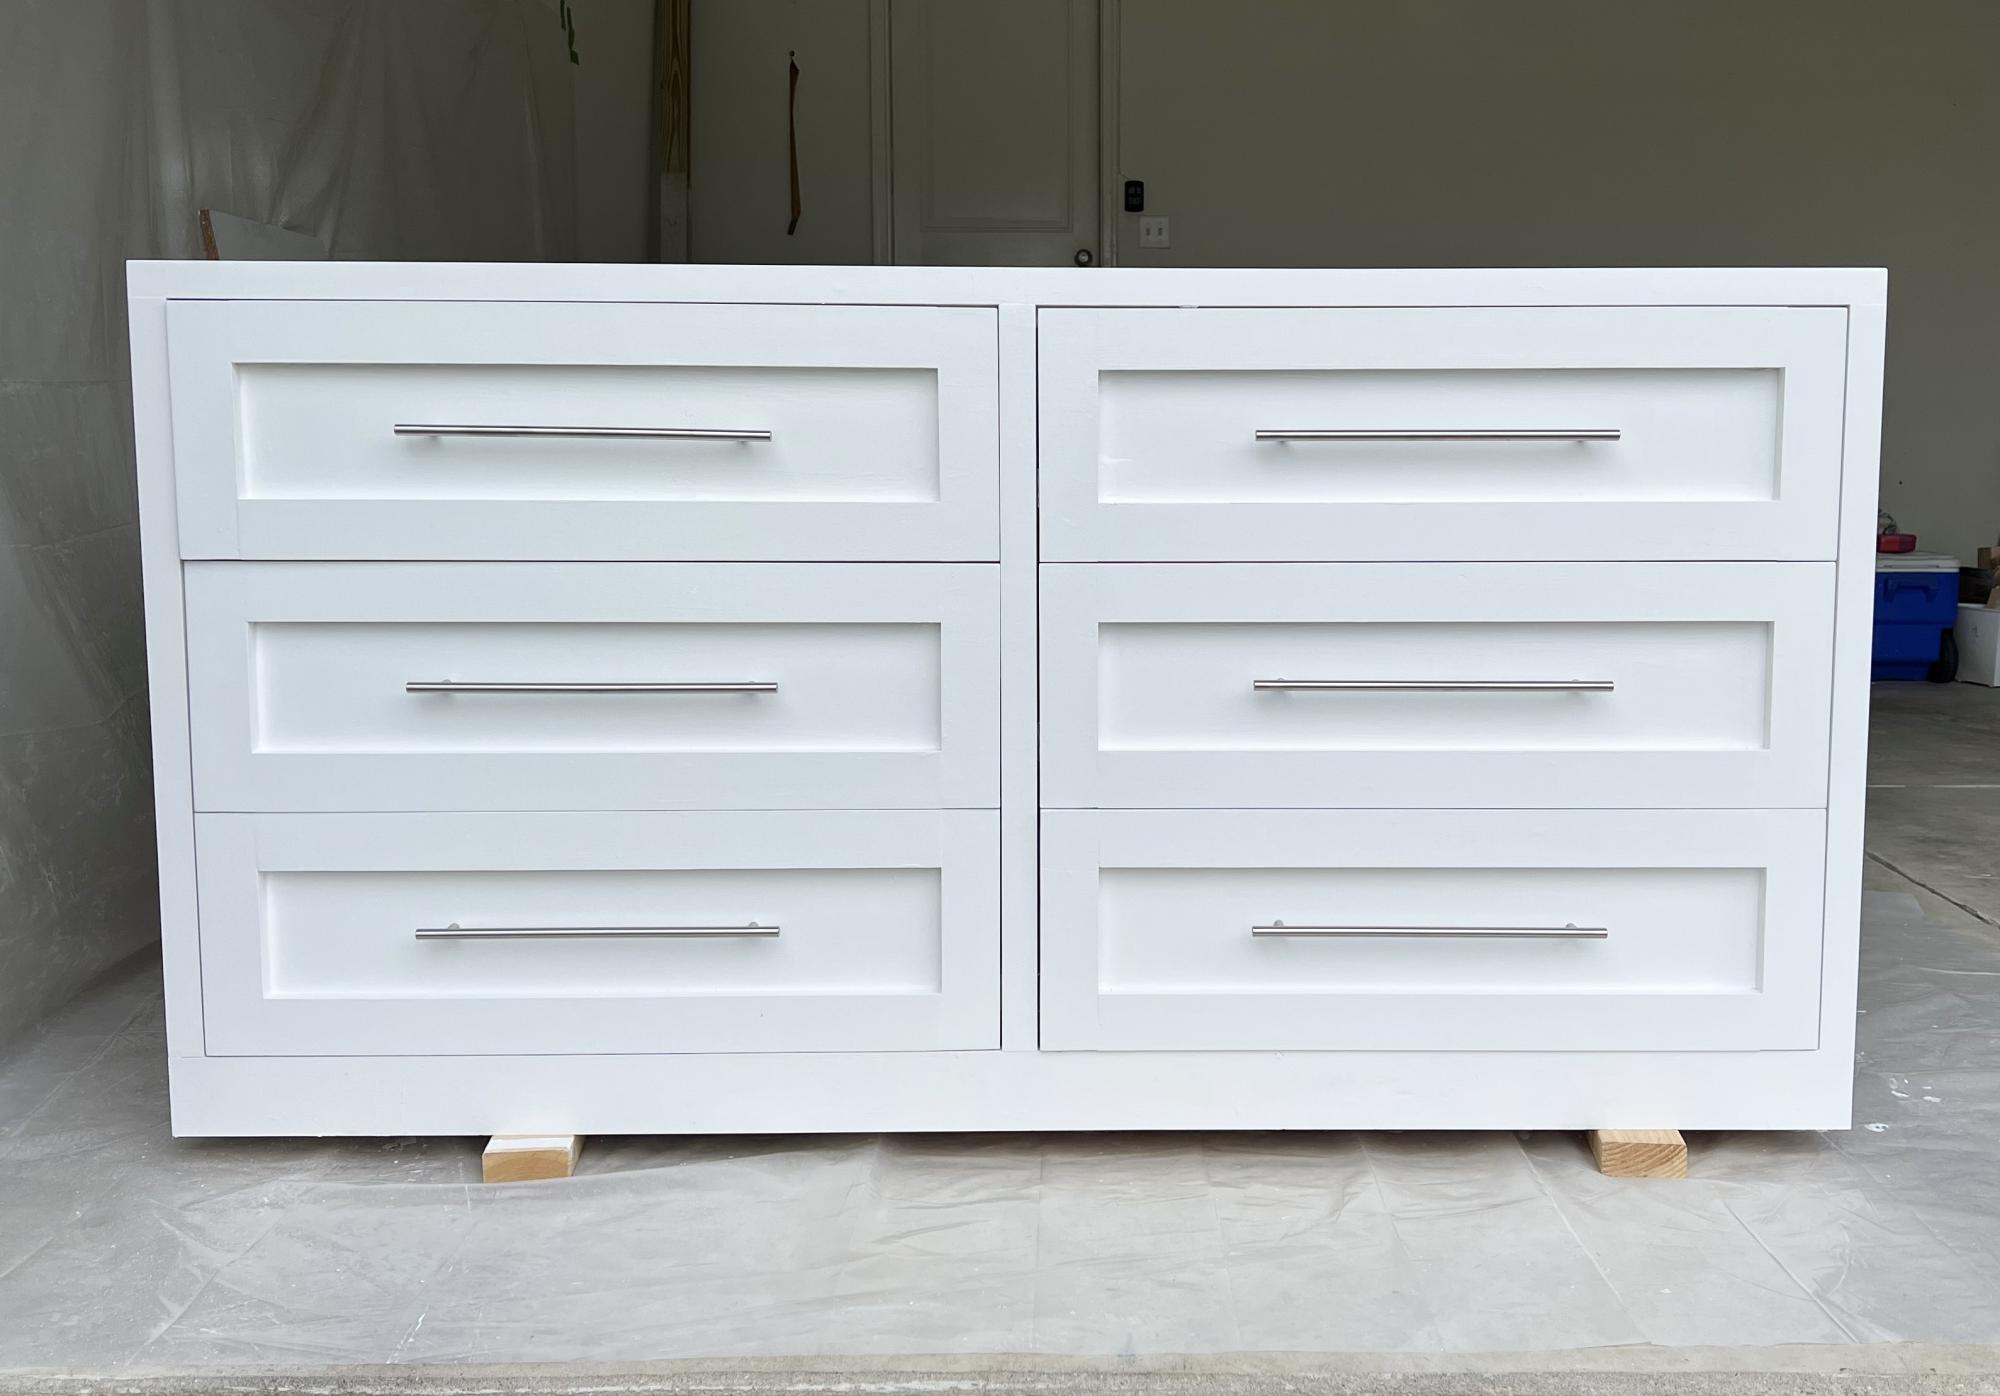
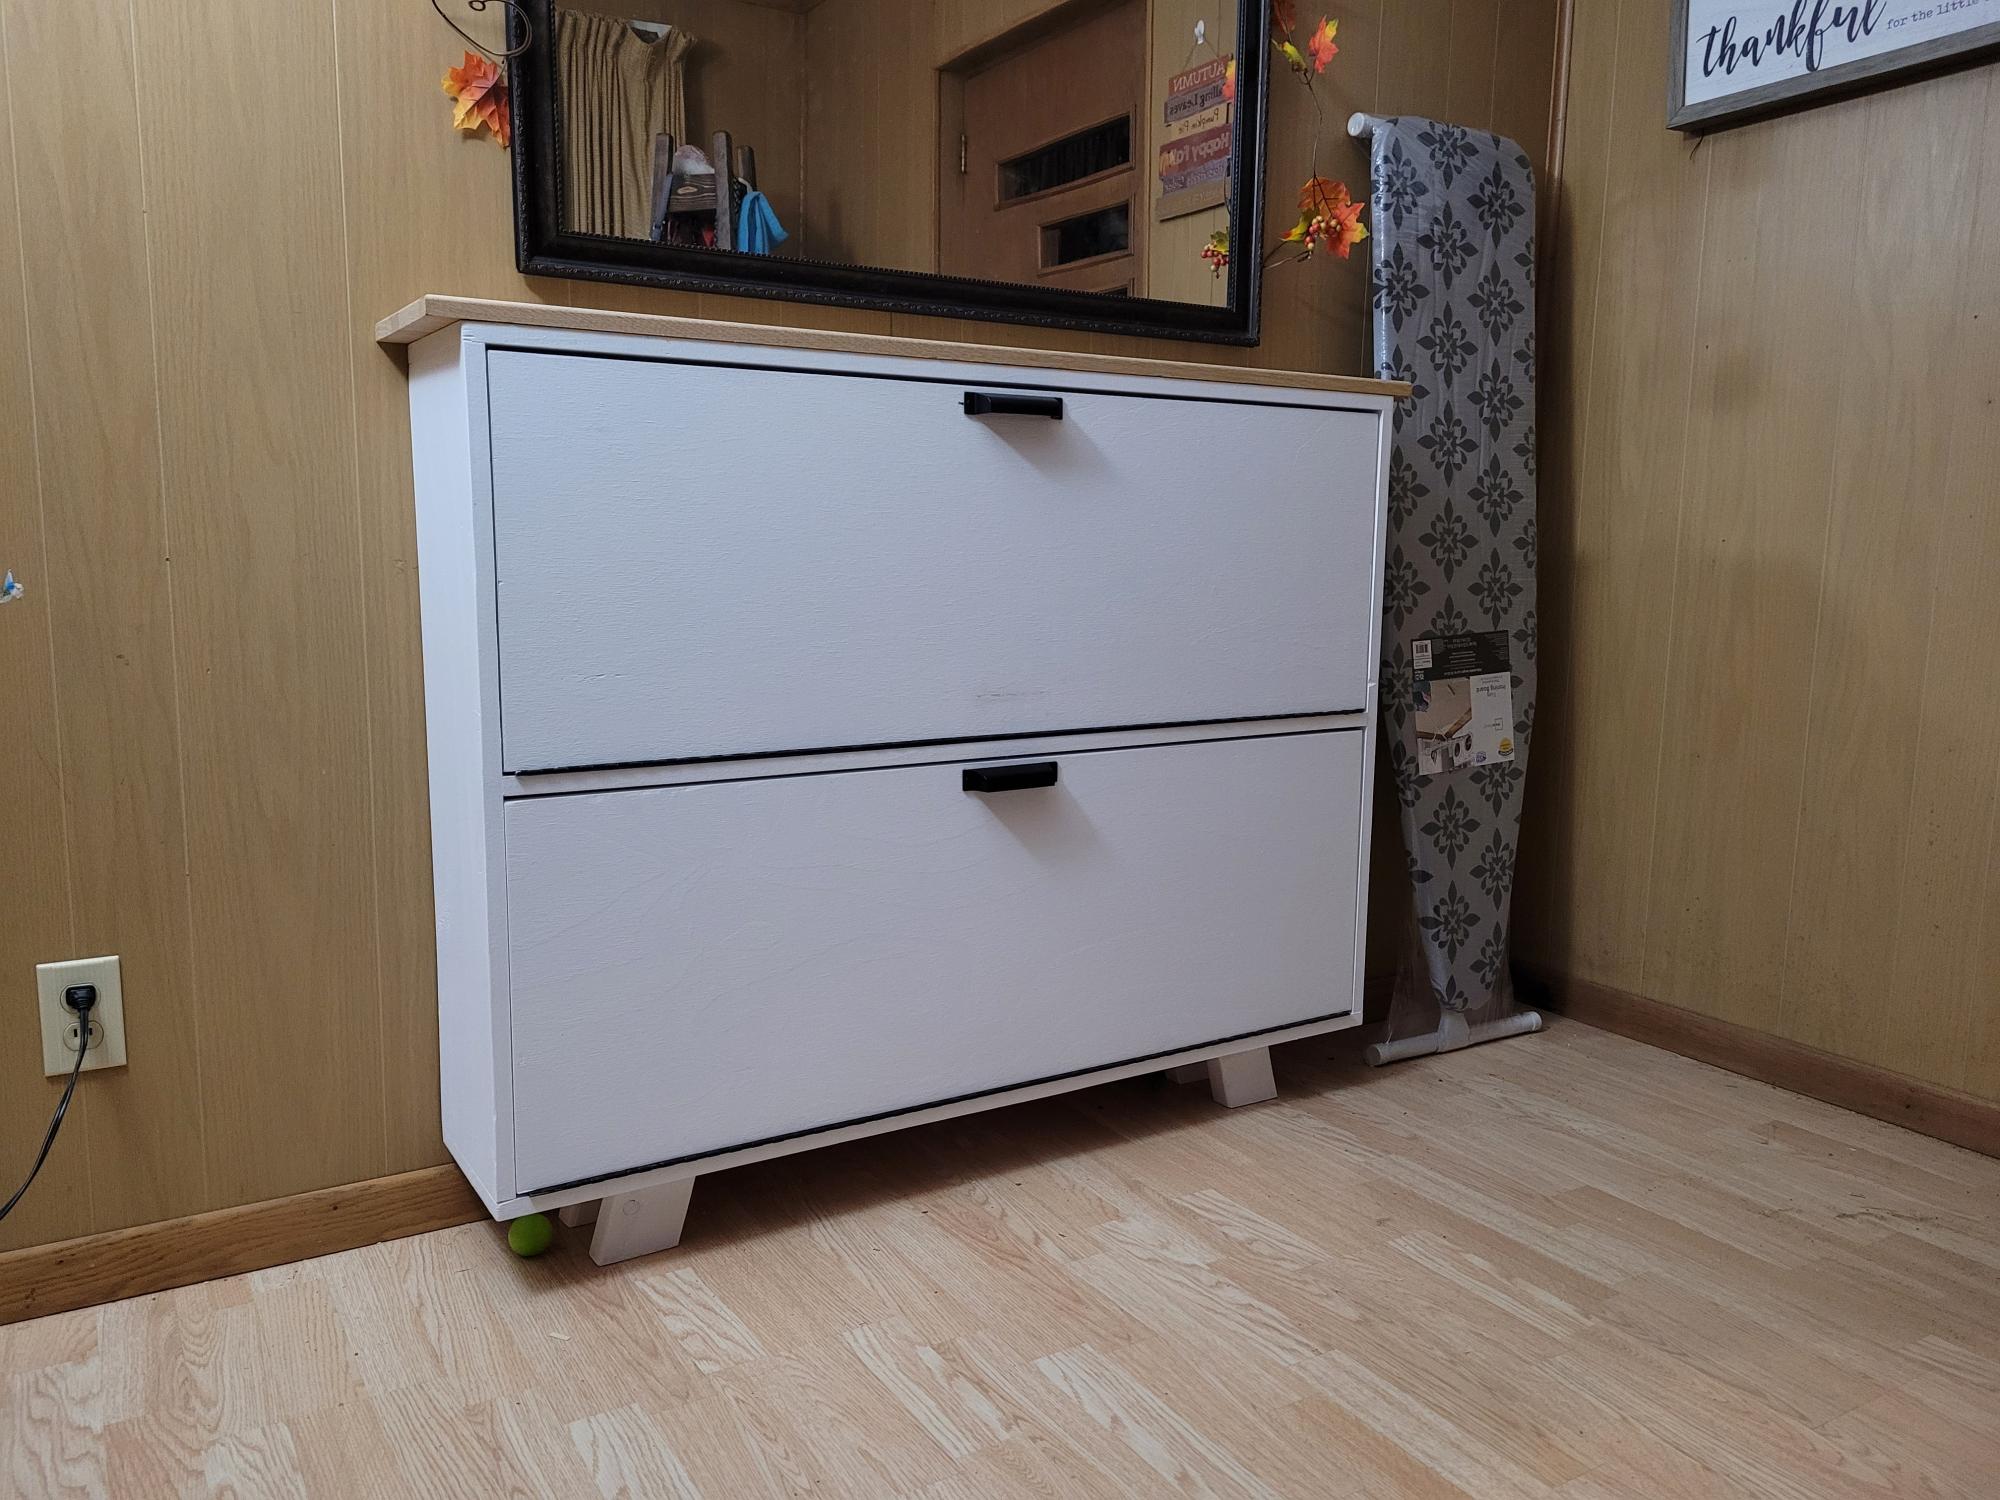
72 by 36 by 24 dresser with 6 heavy duty drawers.
Rasik
Fri, 09/22/2023 - 07:54
Love the build and finish, just gorgeous! Thank you for sharing:)
Fri, 09/22/2023 - 07:54
Love the build and finish, just gorgeous! Thank you for sharing:)
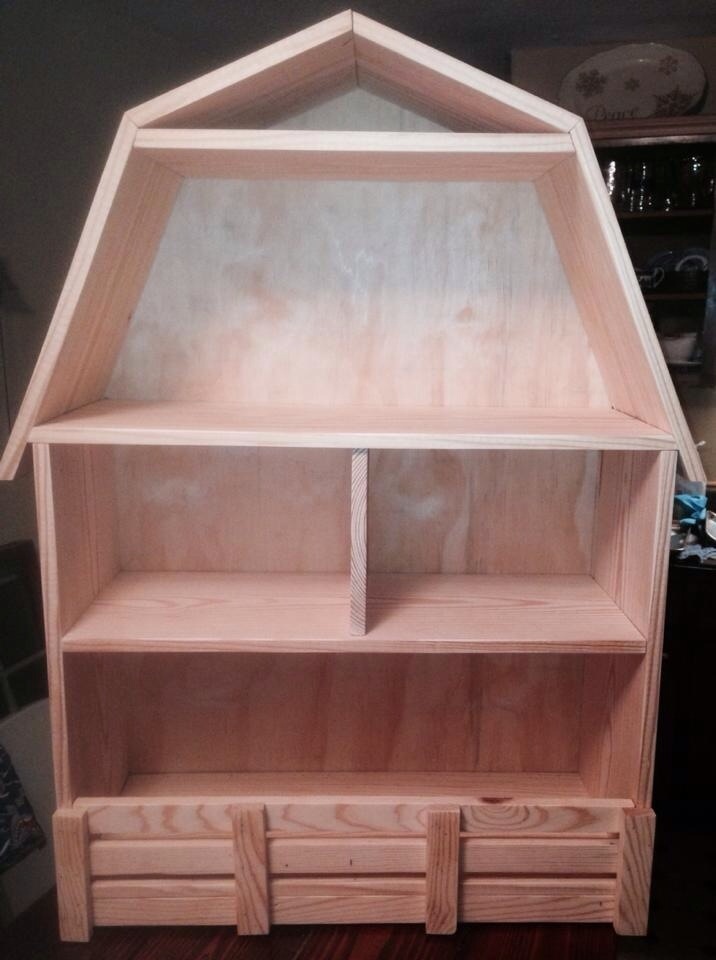
I built this for a friend's daughter who collects the Tractor Supply farm animals. This is the first time I have cut on angles to make the roof. The directions say built it from bottom to top but I found it easier to start for the top and work down. Then attach the whole roof where it marched on the barn... Hope this helps. I did not finish it cause the friend wanted to stain it herself...

This was my first build and experience with power tools. The size of the workbench table is absolutely the perfect length and height. I ended up adding wheels that lock in place. I’m hooked! Thank you Ana White for providing the plans for a workbench.

Thu, 02/20/2020 - 11:04
This project is perfect for the beginner. The plans are very simple to follow especially for one that’s never picked up a power tool. I am absolutely hooked.

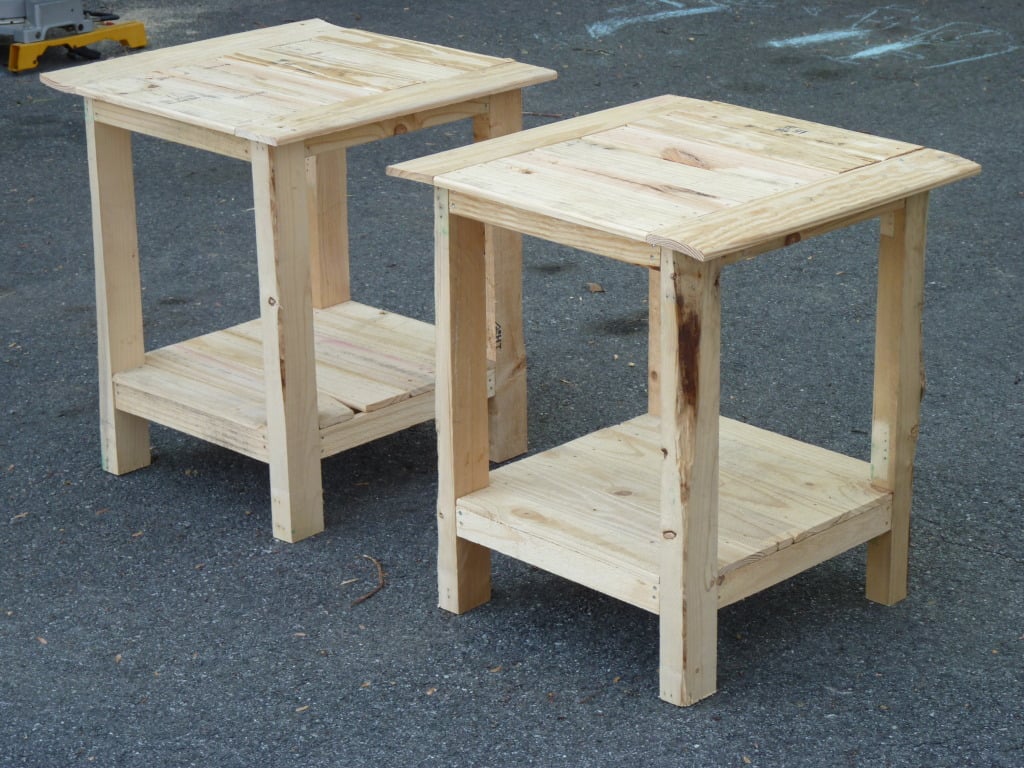
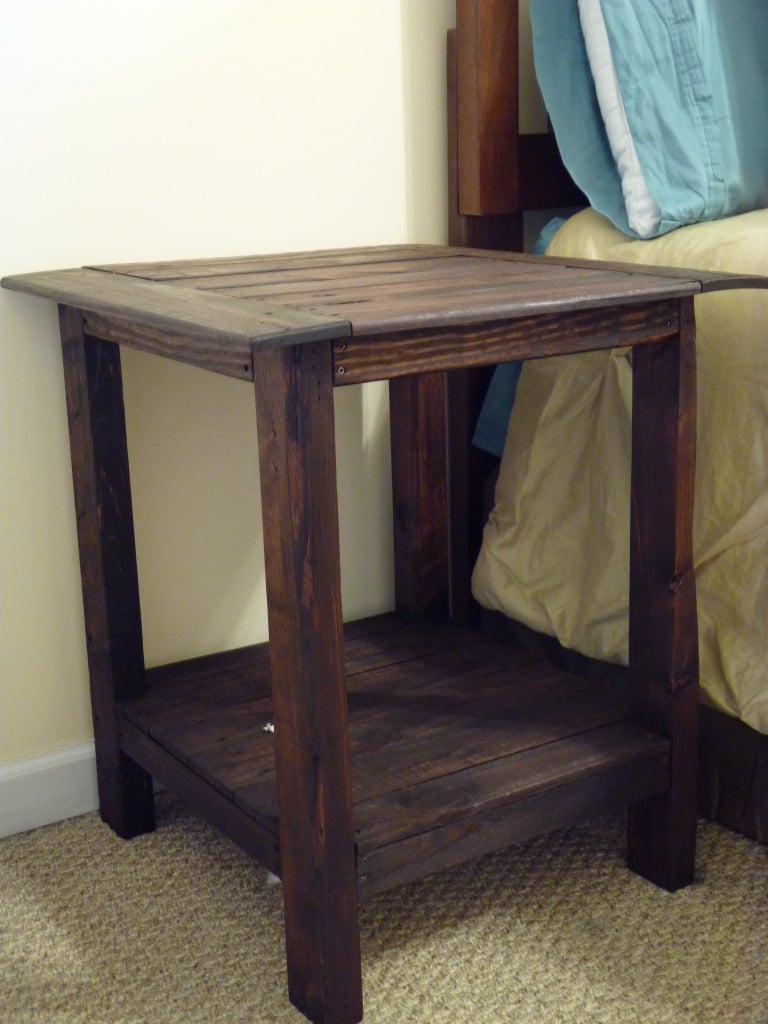
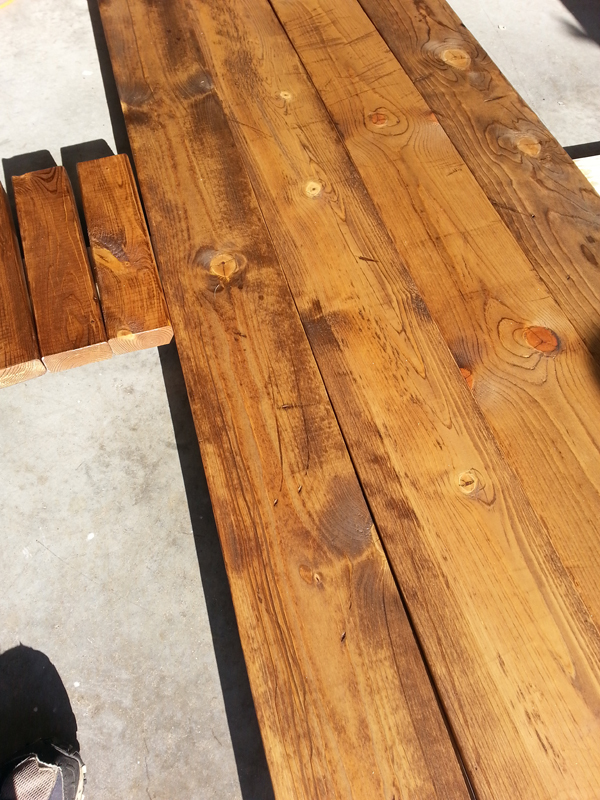
All the wood is from pallets, which you can find for free at local big box stores.
I added the shelf with the same support system used for the table top.
Made with as little cost as possible so materials are not too much.
Material:
A few pallets
Wood screws
Tools:
Table Saw
Miter Saw
Drill
Sander
Measuring Tape
Square
Pencil and Paper
Stain
Brush
Shop Cloth
This is my first Project :)

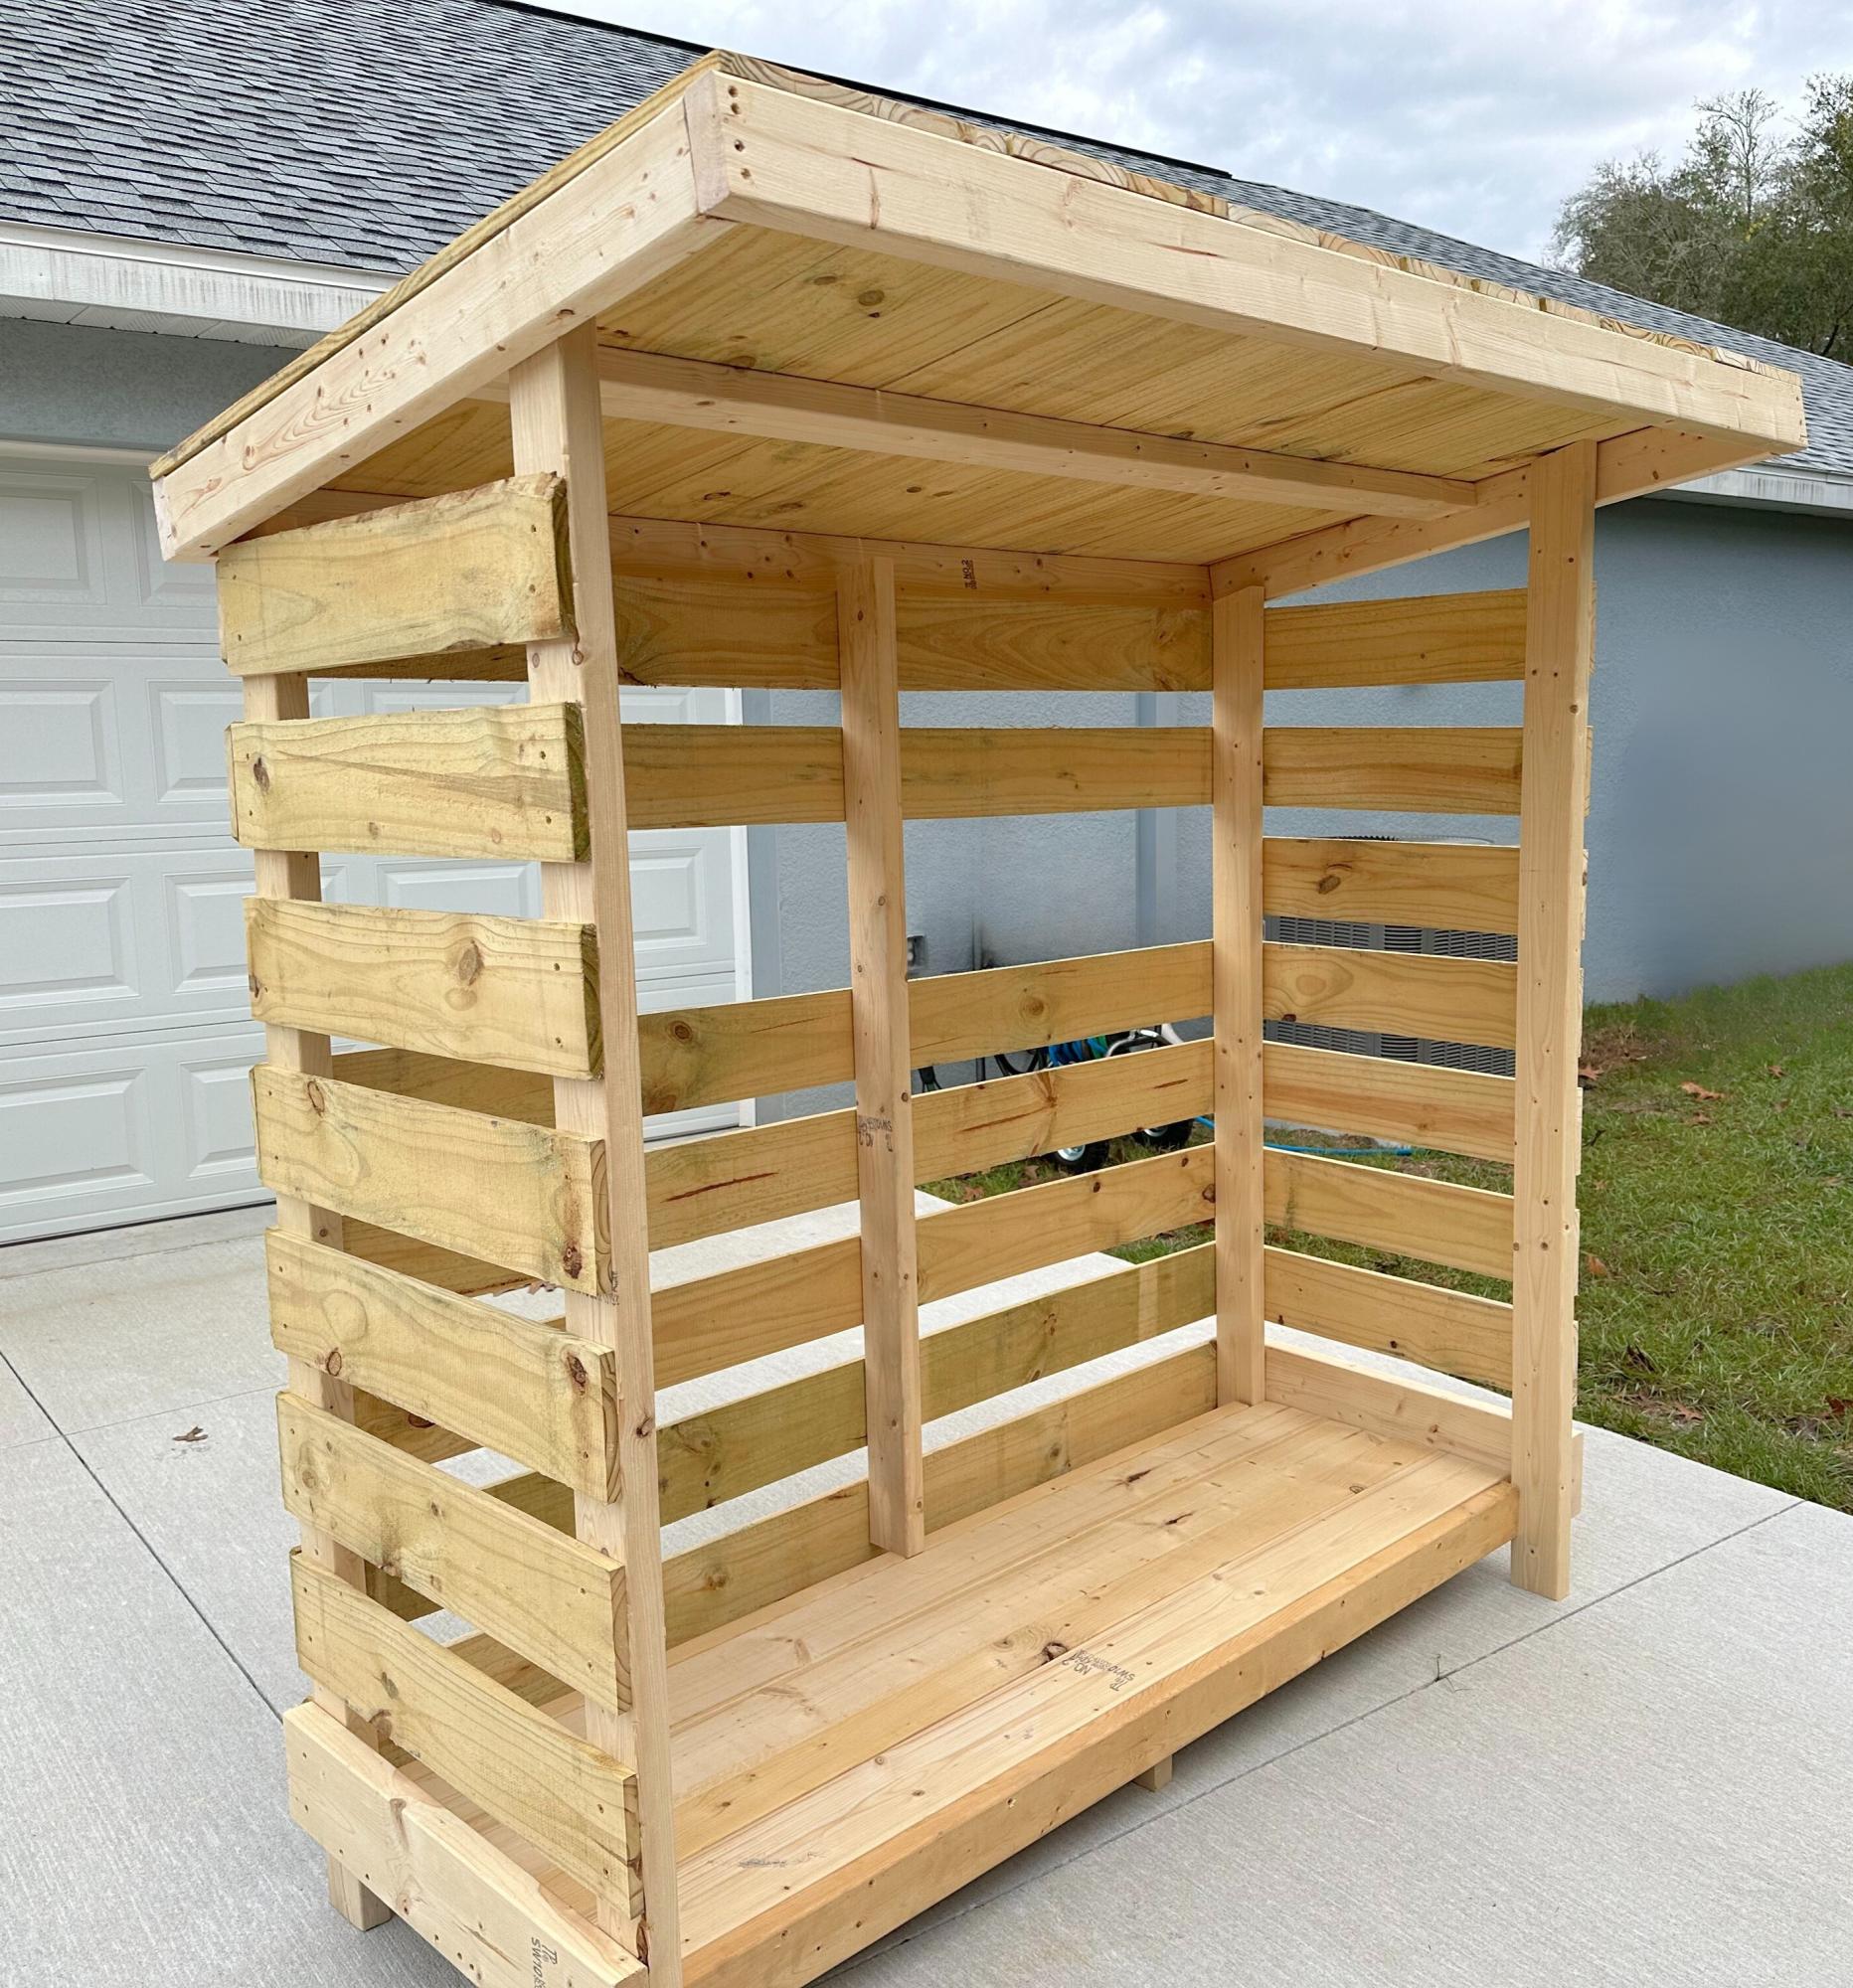
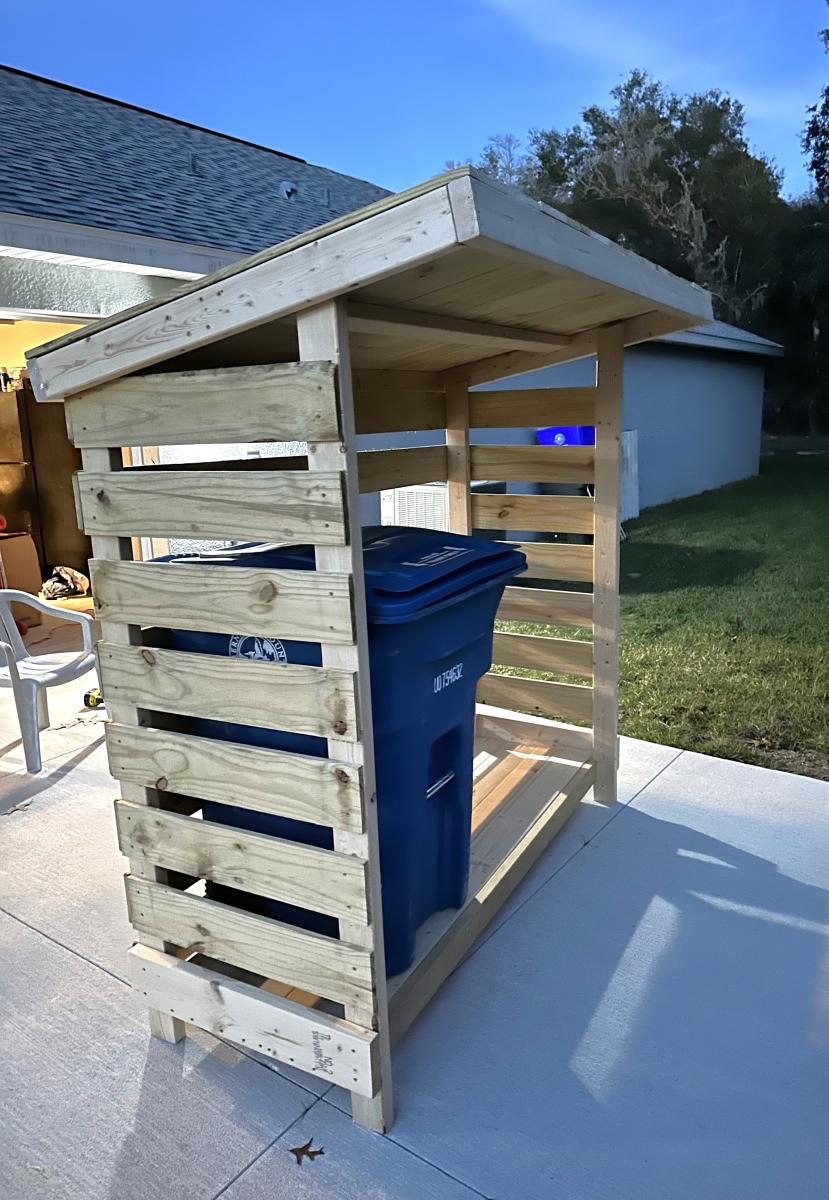
Chose the small firewood shed project as a "template" if you will .. built this to house our garbage cans and eventually put a gate on it to "help deter" the Florida black bears (we do multiple things to keep them at bay) but this will also just be a nicer looking way to keep the cans outside.
I modified the floor since the firewood shed had a floor that was suitable for, well, firewood but not so much for rolling garbage cans. Had to leave the one slat off the back for the depth of the can which I didn't completely account for in the beginning. Overall, still need to paint it and water seal it but happy with how it turned out.
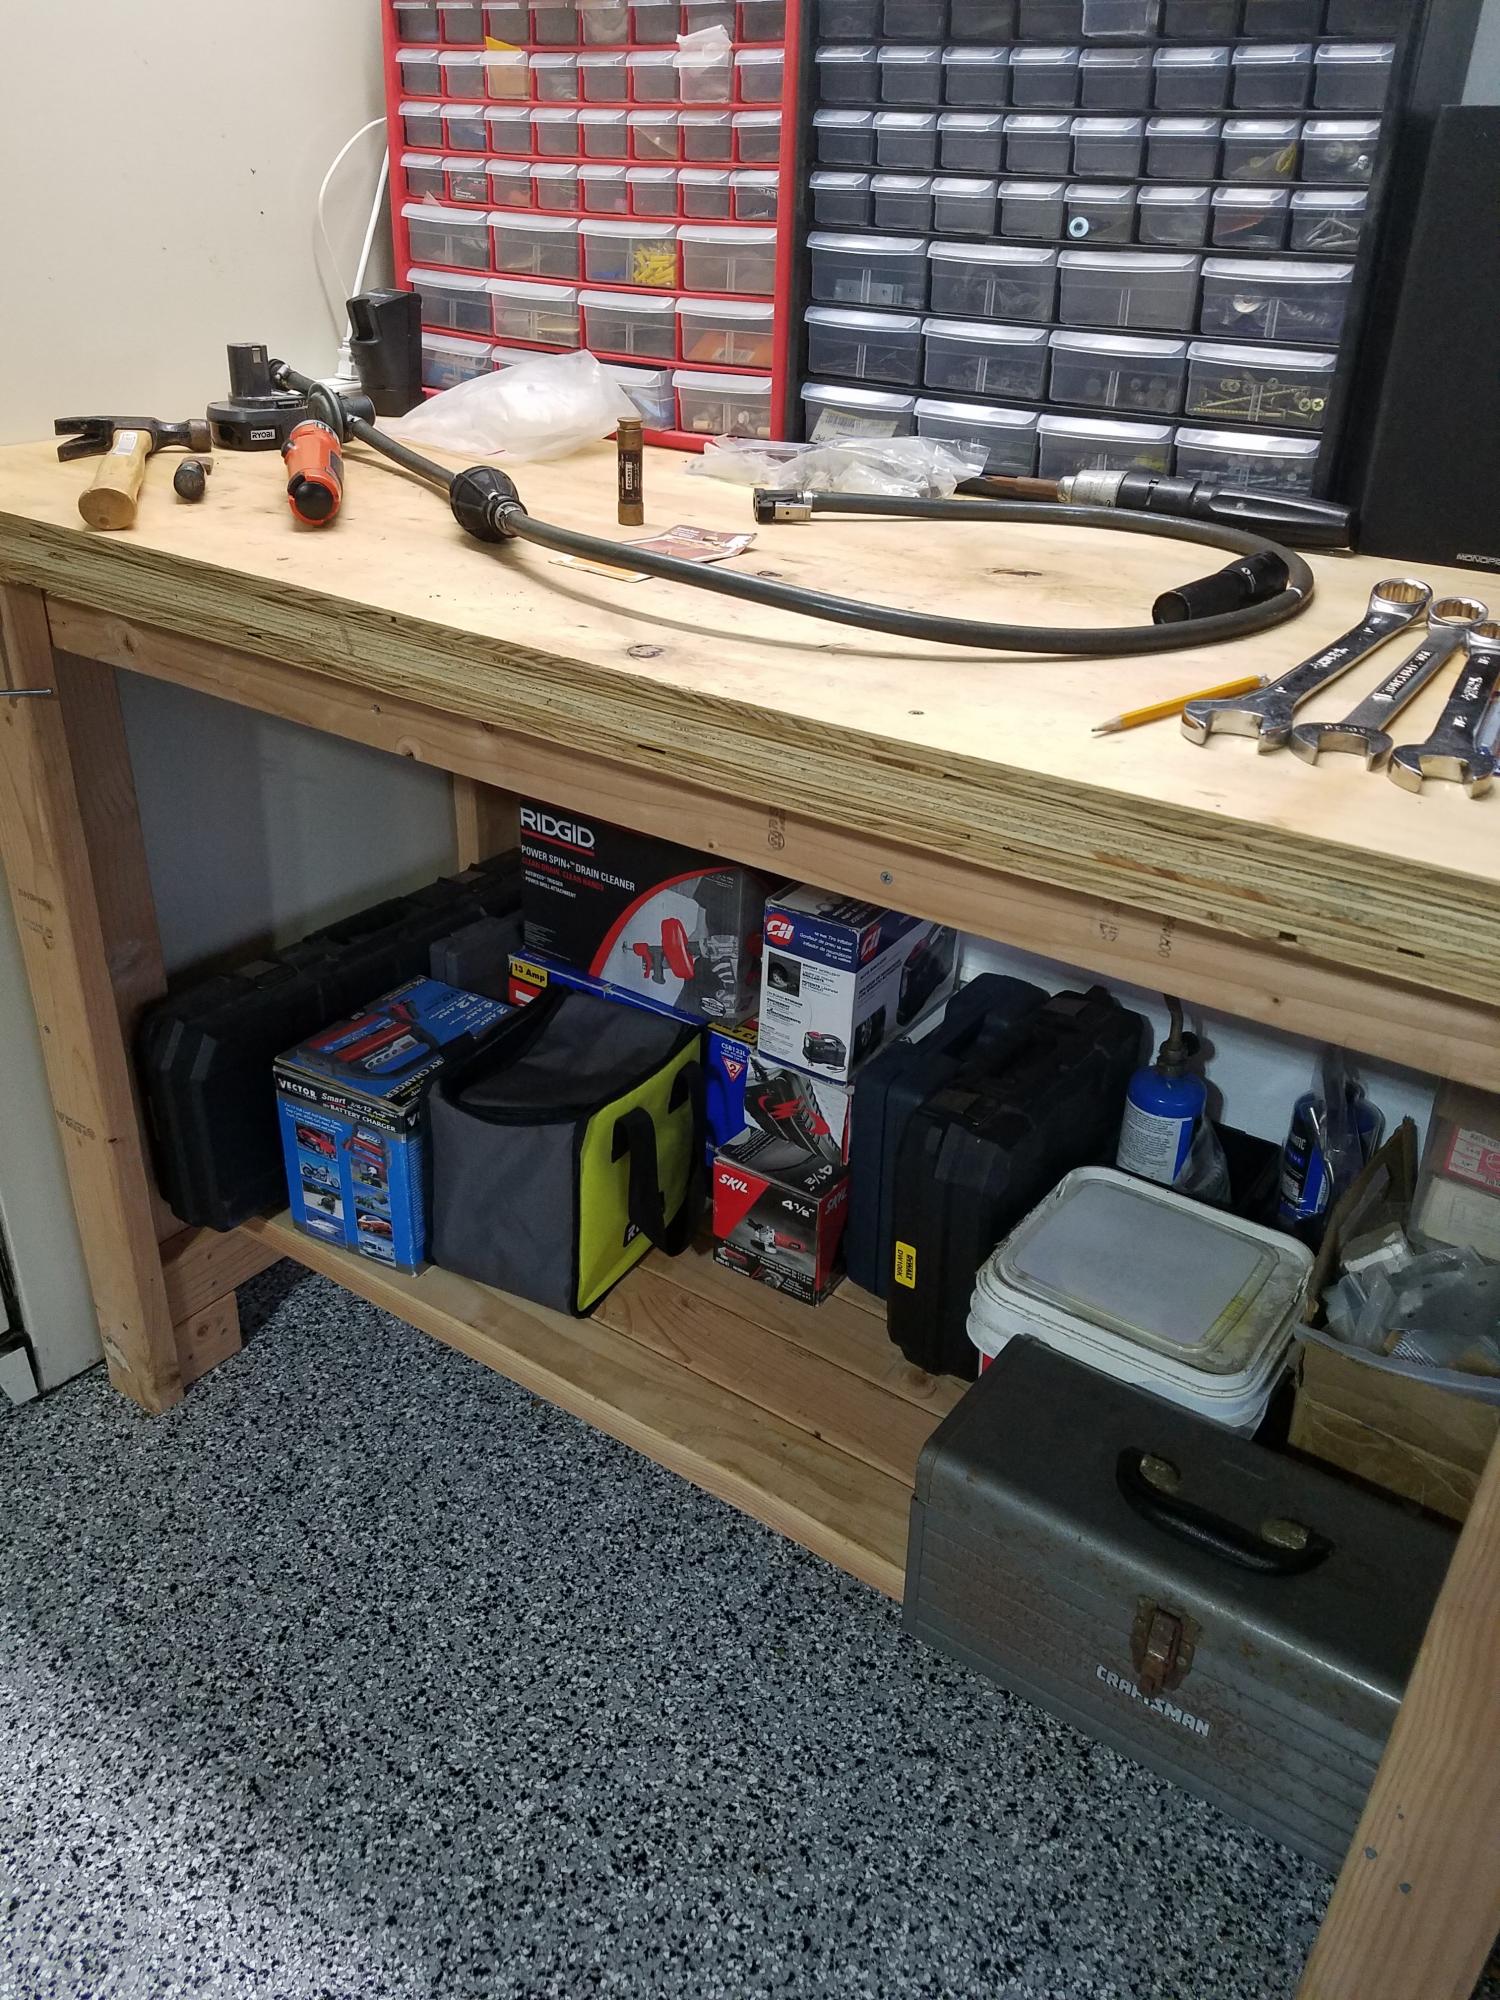
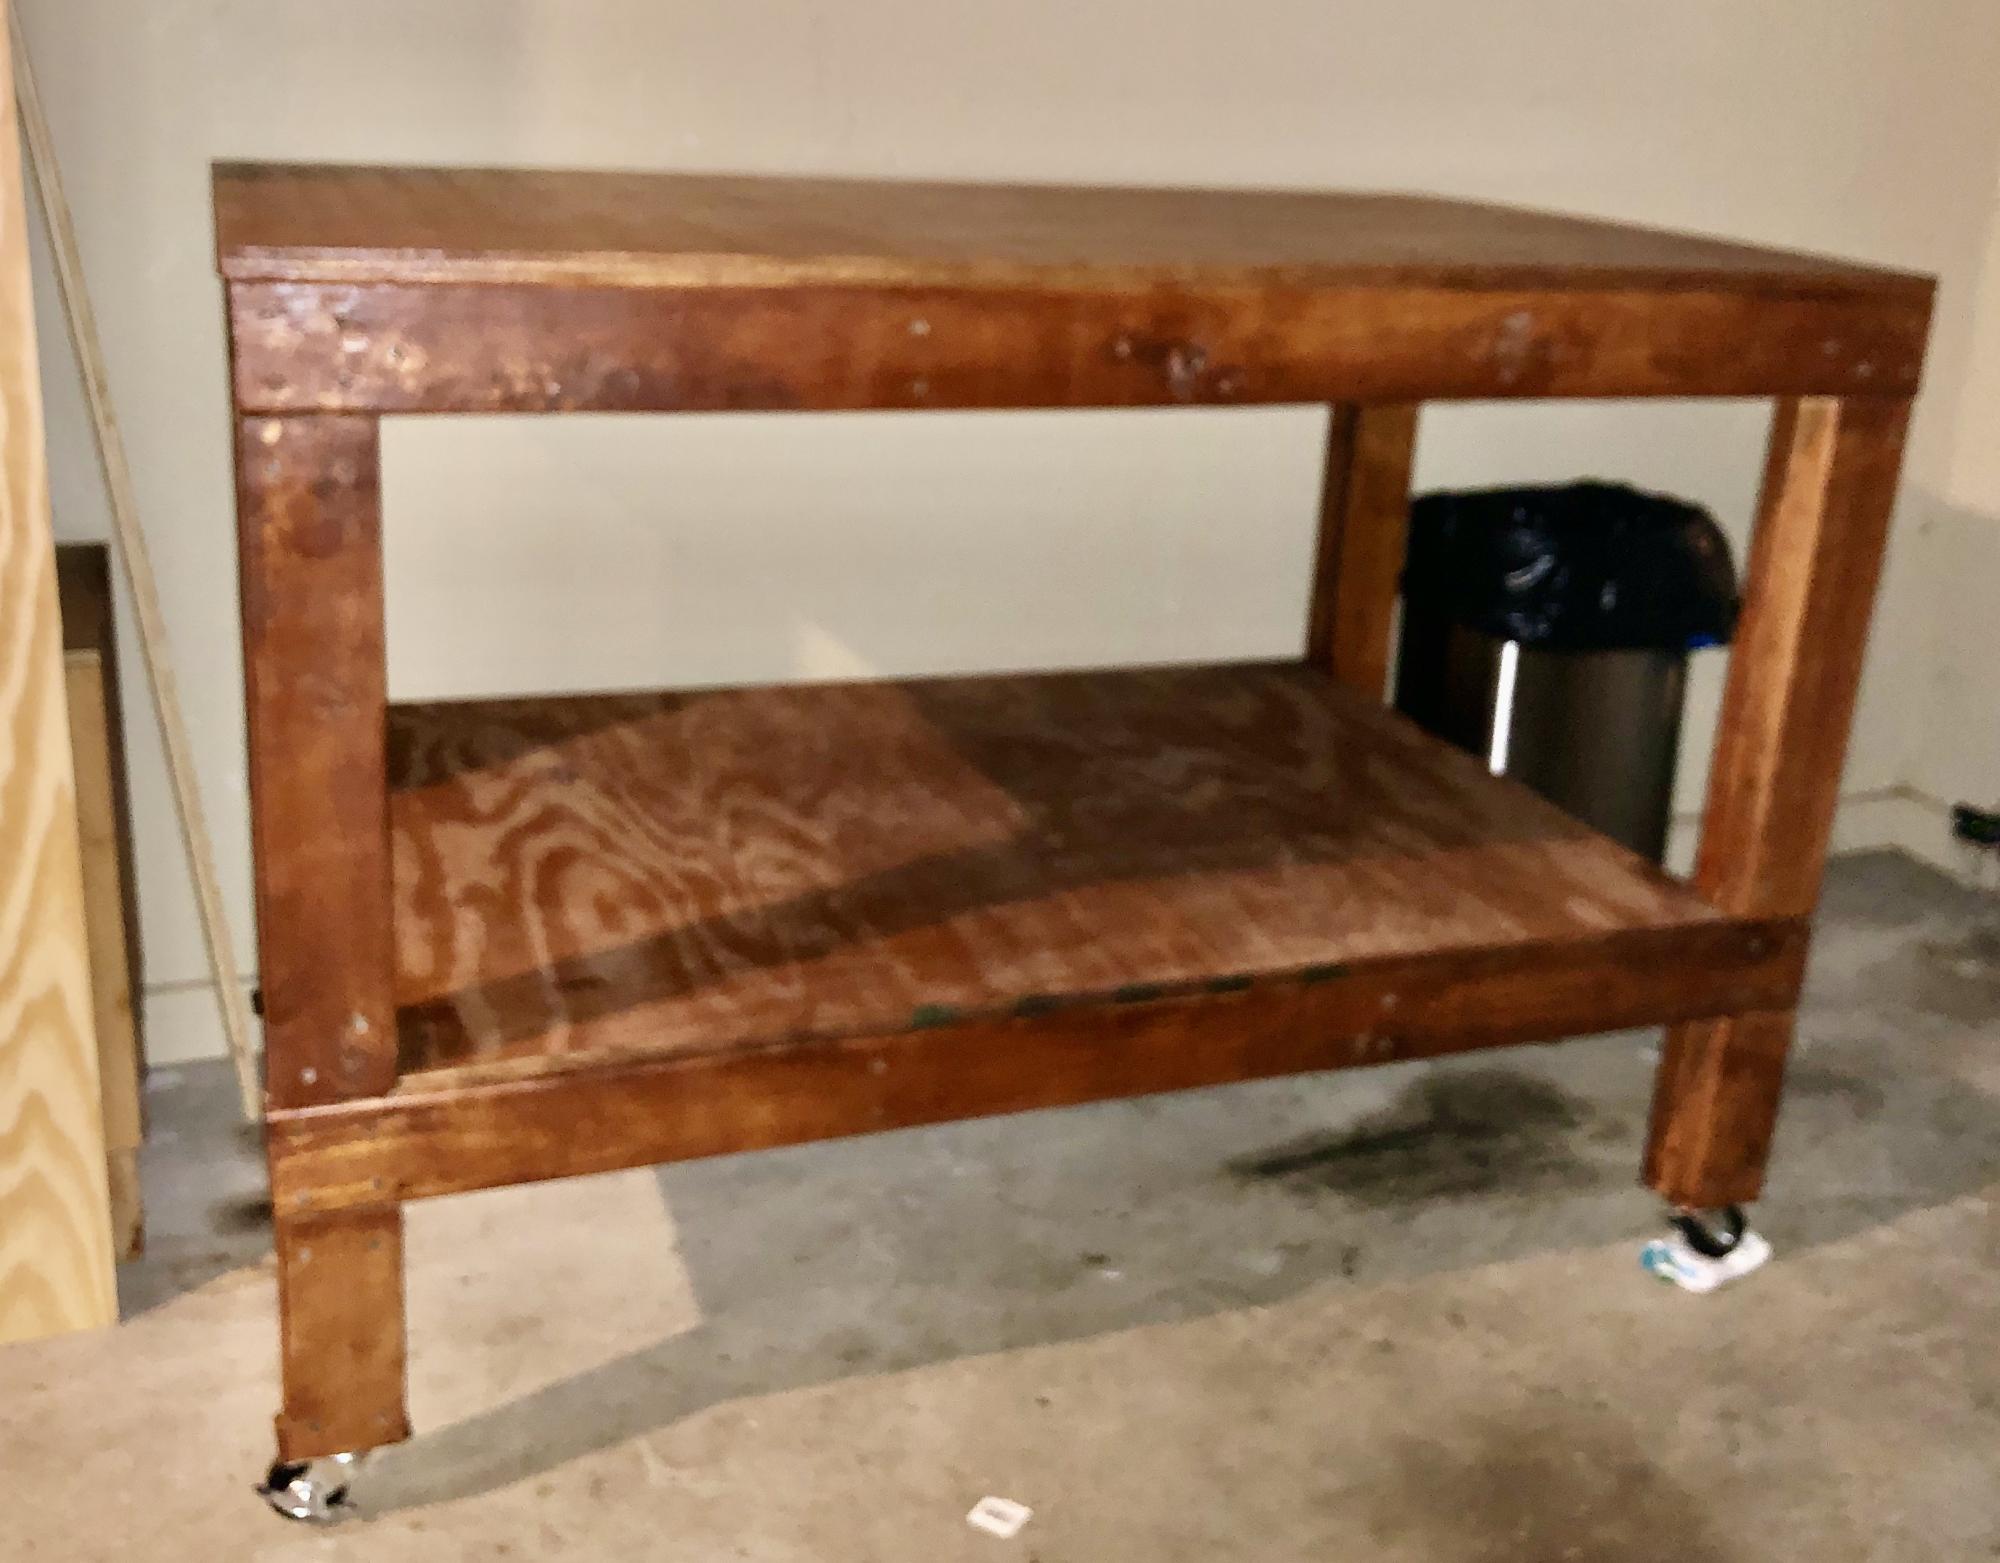
This is the perfect workbench for my garage here in South Florida. I modified the plans using 2x4 actual dimensions so that the outside dimensions were 60" wide x 40" height x 30" deep. I designed it for my husband and he is 6'4" so I wanted it to be taller for him. I used 3 sheets of plywood (3/4" thick each layer) for the top and it is super sturdy. For the bottom shelf, I left one 2x4 off so that it wouldn't hit our shins while standing at the front. I was concerned at first that the wider bench (60") may need an additional bottom shelf support in the middle. It did not need this extra support. The shelf can hold a lot of weight with no concern. See all the tools that are on that shelf in my pic. Thank you Ana White for these great plans - it was my first workbench that I have built. I am looking forward to more woodworking projects.

I wanted to make something for my mom so she could have a place to grow her herbs this year on the balcony for easier access instead of planting in the backyard. The project was stretched over a few days. Cutting on day one, sanding on day two, painting on day three and drilling and putting it together on day four.
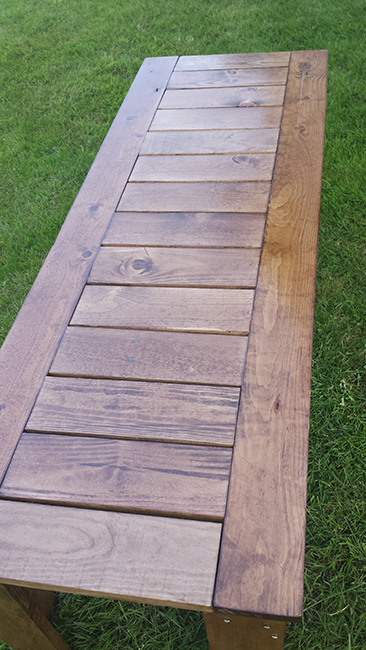
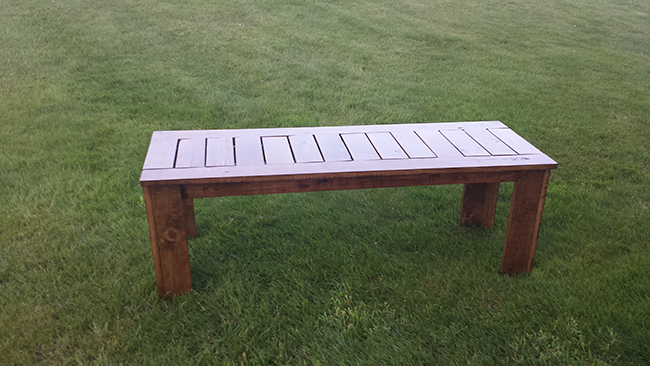
With the exception of the legs, the entire bench was put together using the Kreg Jig mini. I added extra 1x4s to the legs. Though, next time I will change to either 2x4s or 4x4s for extra stability when sitting. I really love how it turned out. I almost don't want to put it outside.
Wed, 11/25/2015 - 16:28
I love how your bench came out! I am looking at doing something similar - two in sectional arrangement to use as project/work space seating and convert to spillover sleeping area (the table will lower to bench height). I have a question about stability.Even with the additioanl 1x4 are you finding this bench not very stable?
thanks!
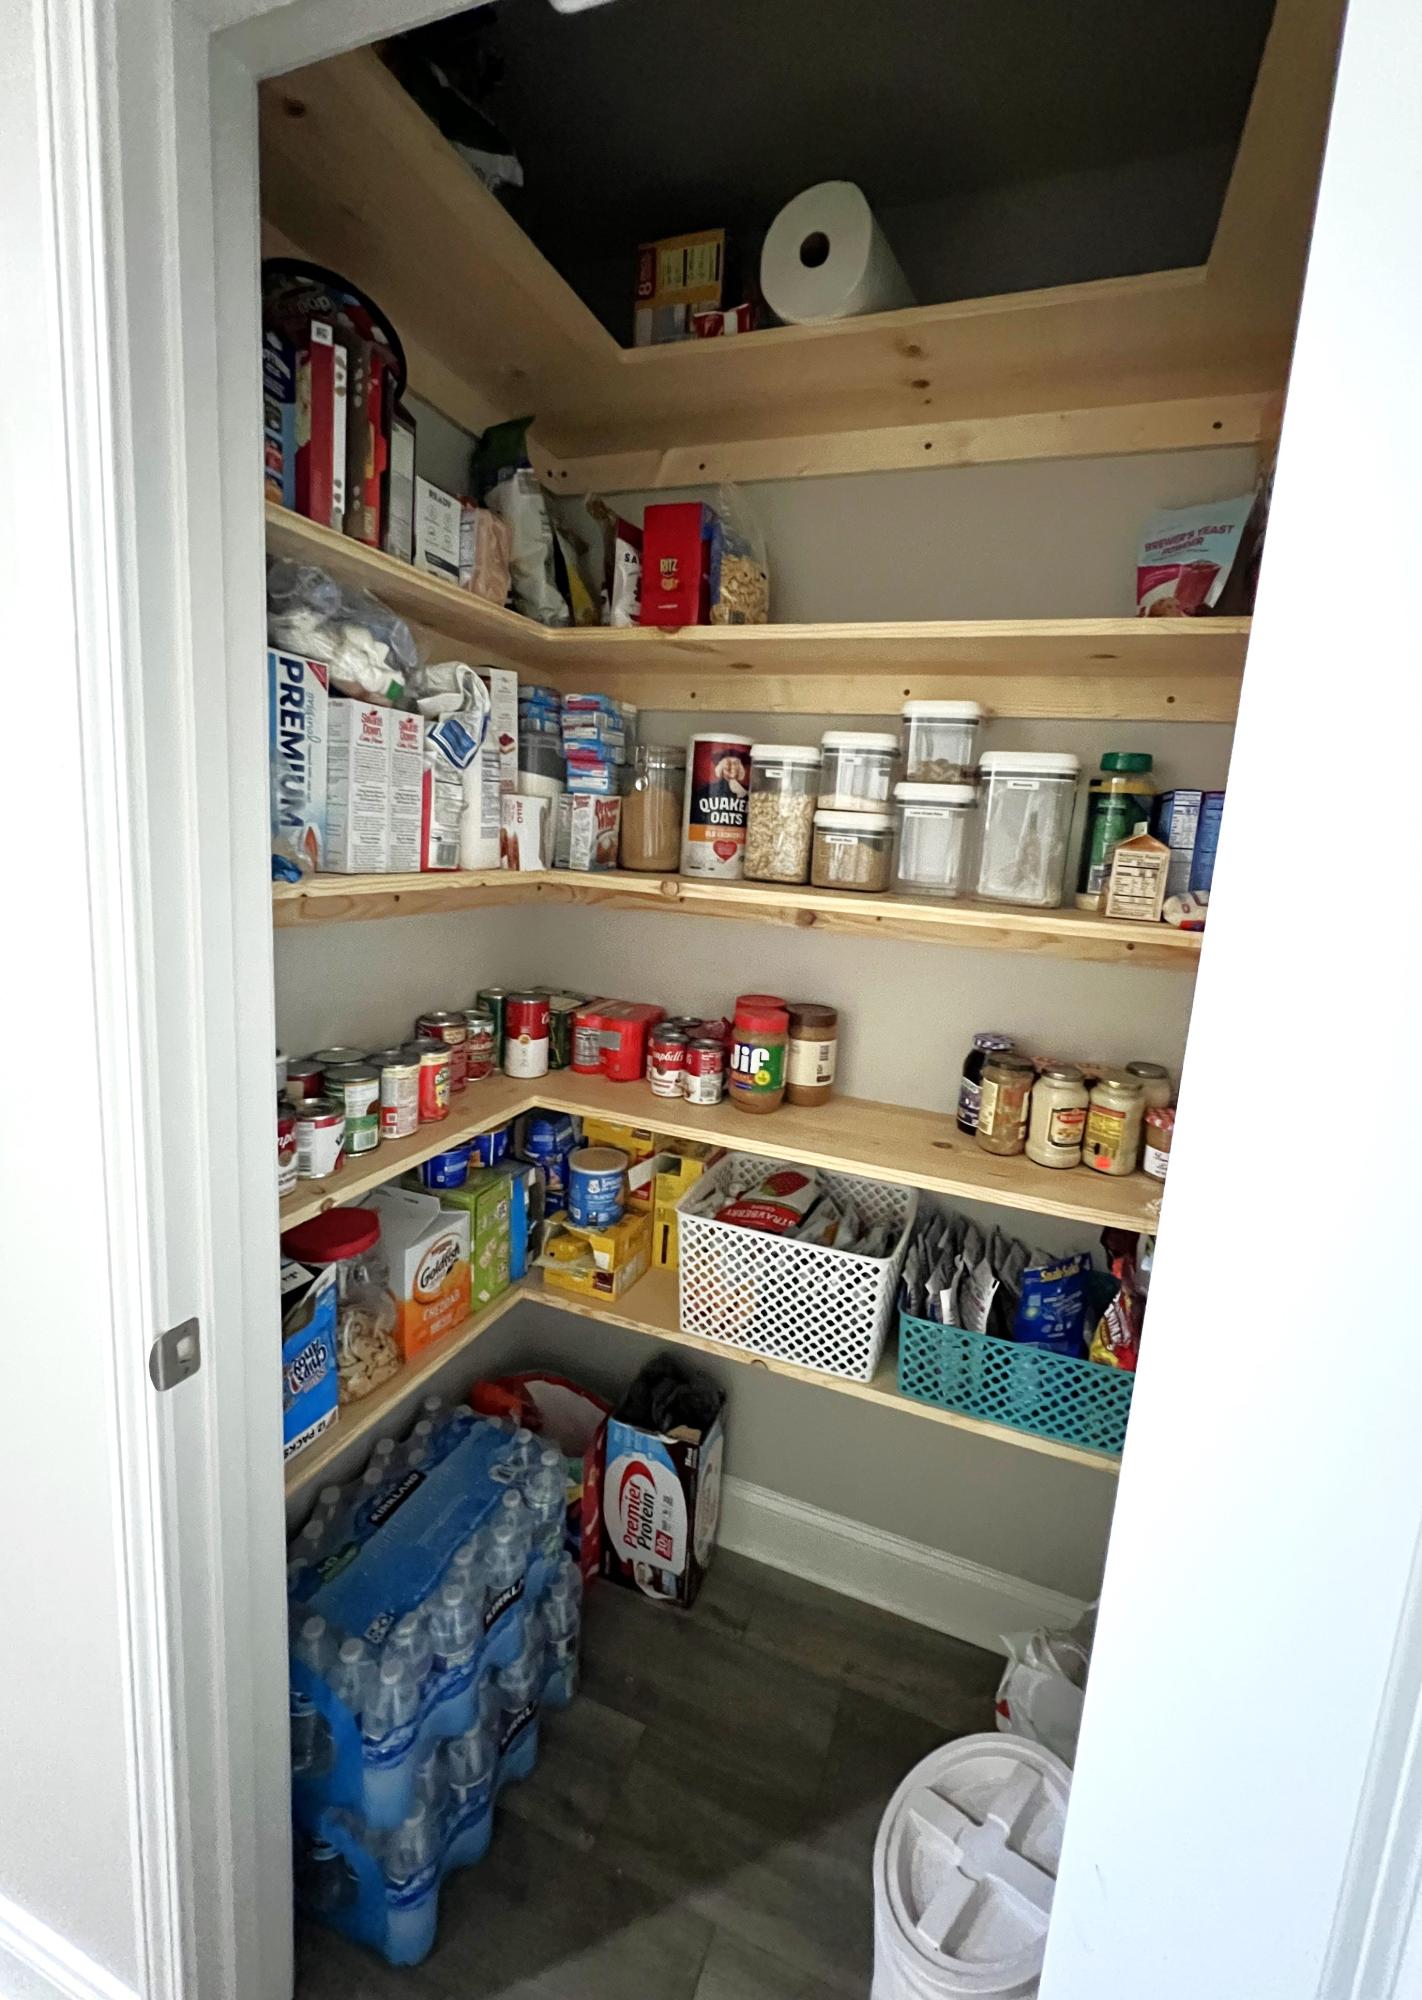
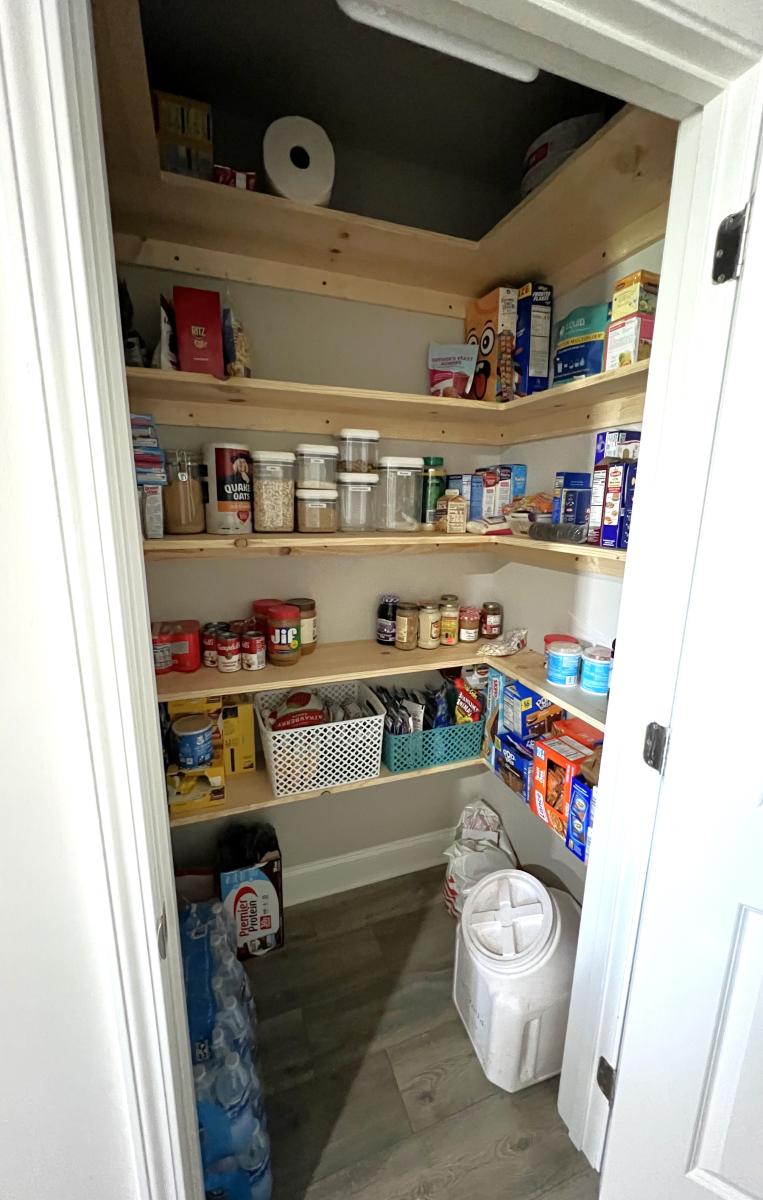
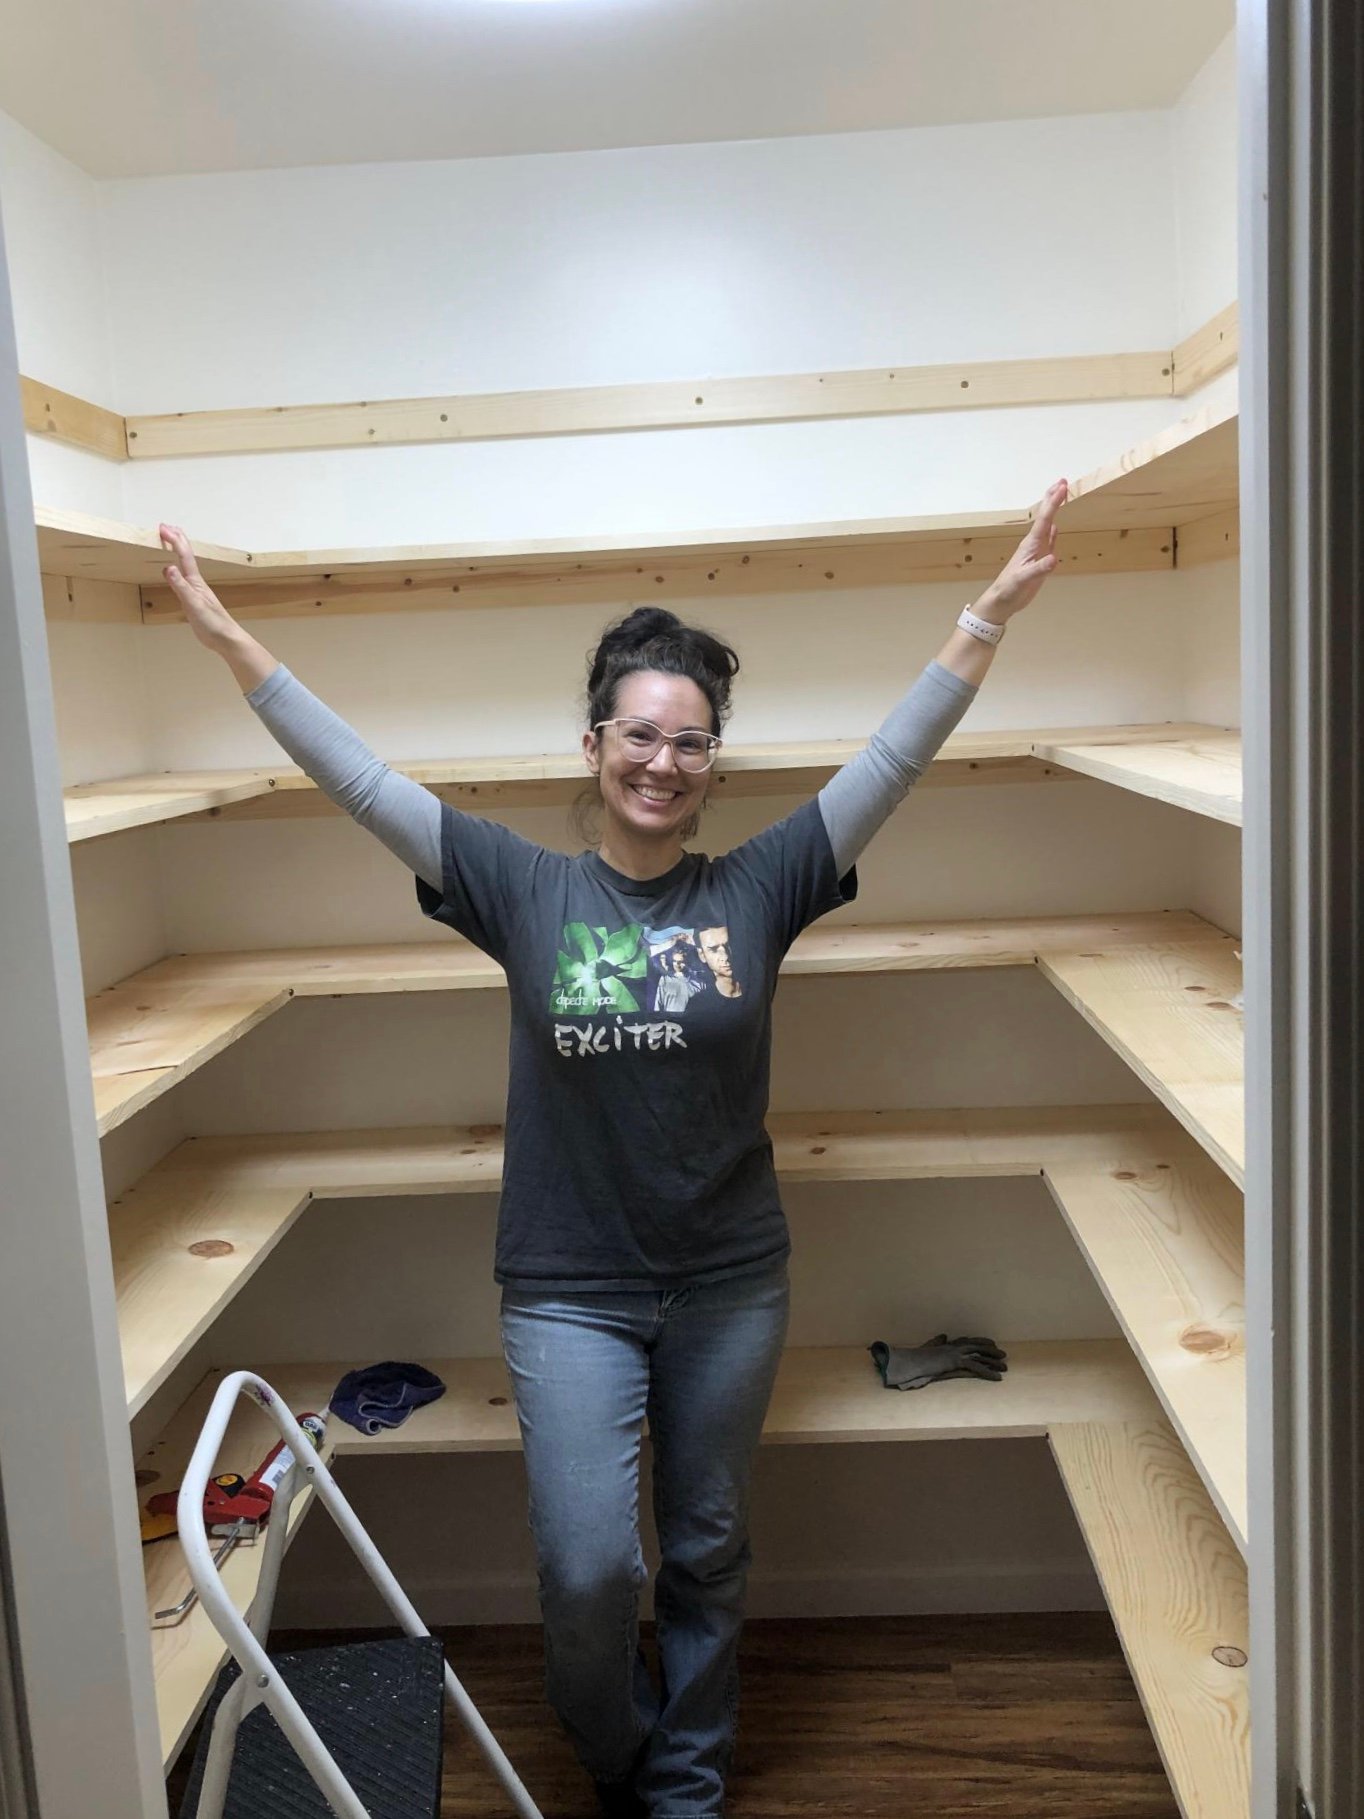
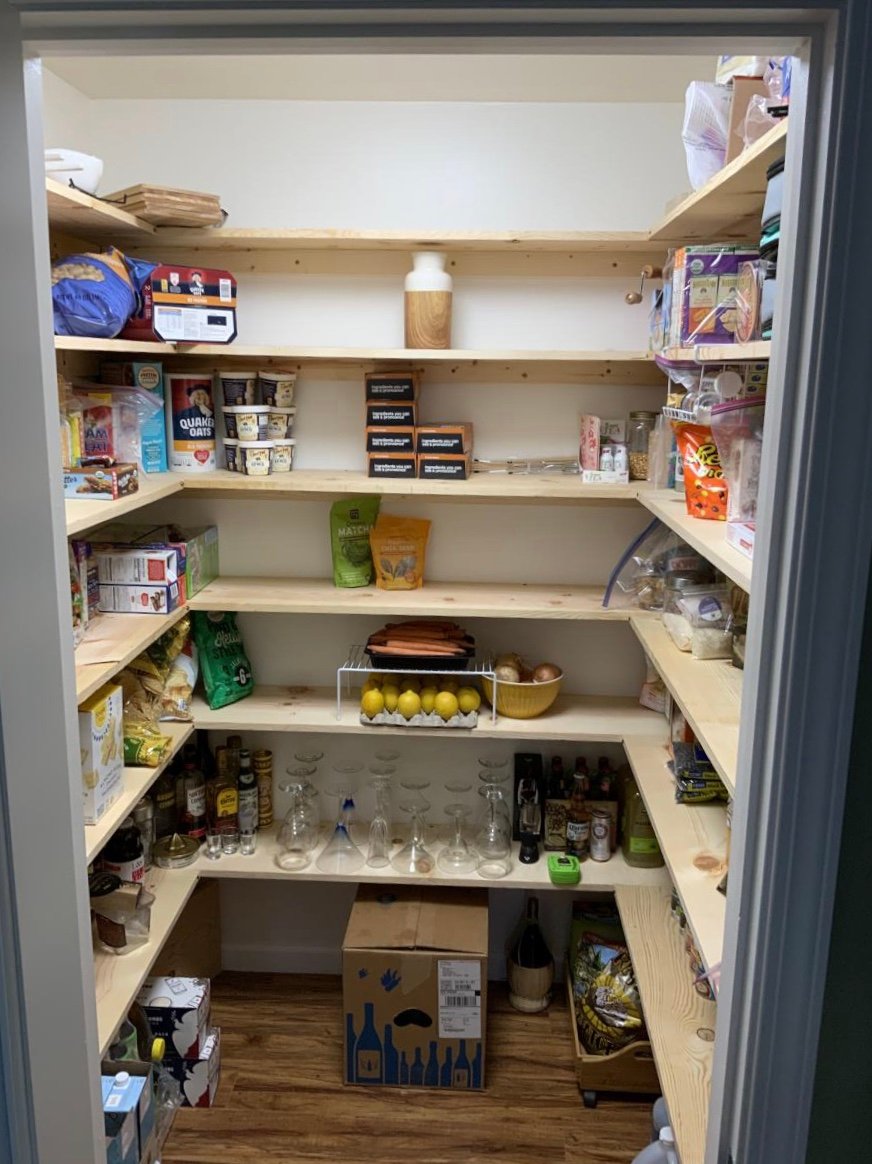
The wire shelves that the builder placed were not cutting it for storage. This setup from your plan helped garner so much more space for organizing. The pantry is roughly 54”x 35” and we were able to place five shelves instead of the four. Thank you so much for your assistance!
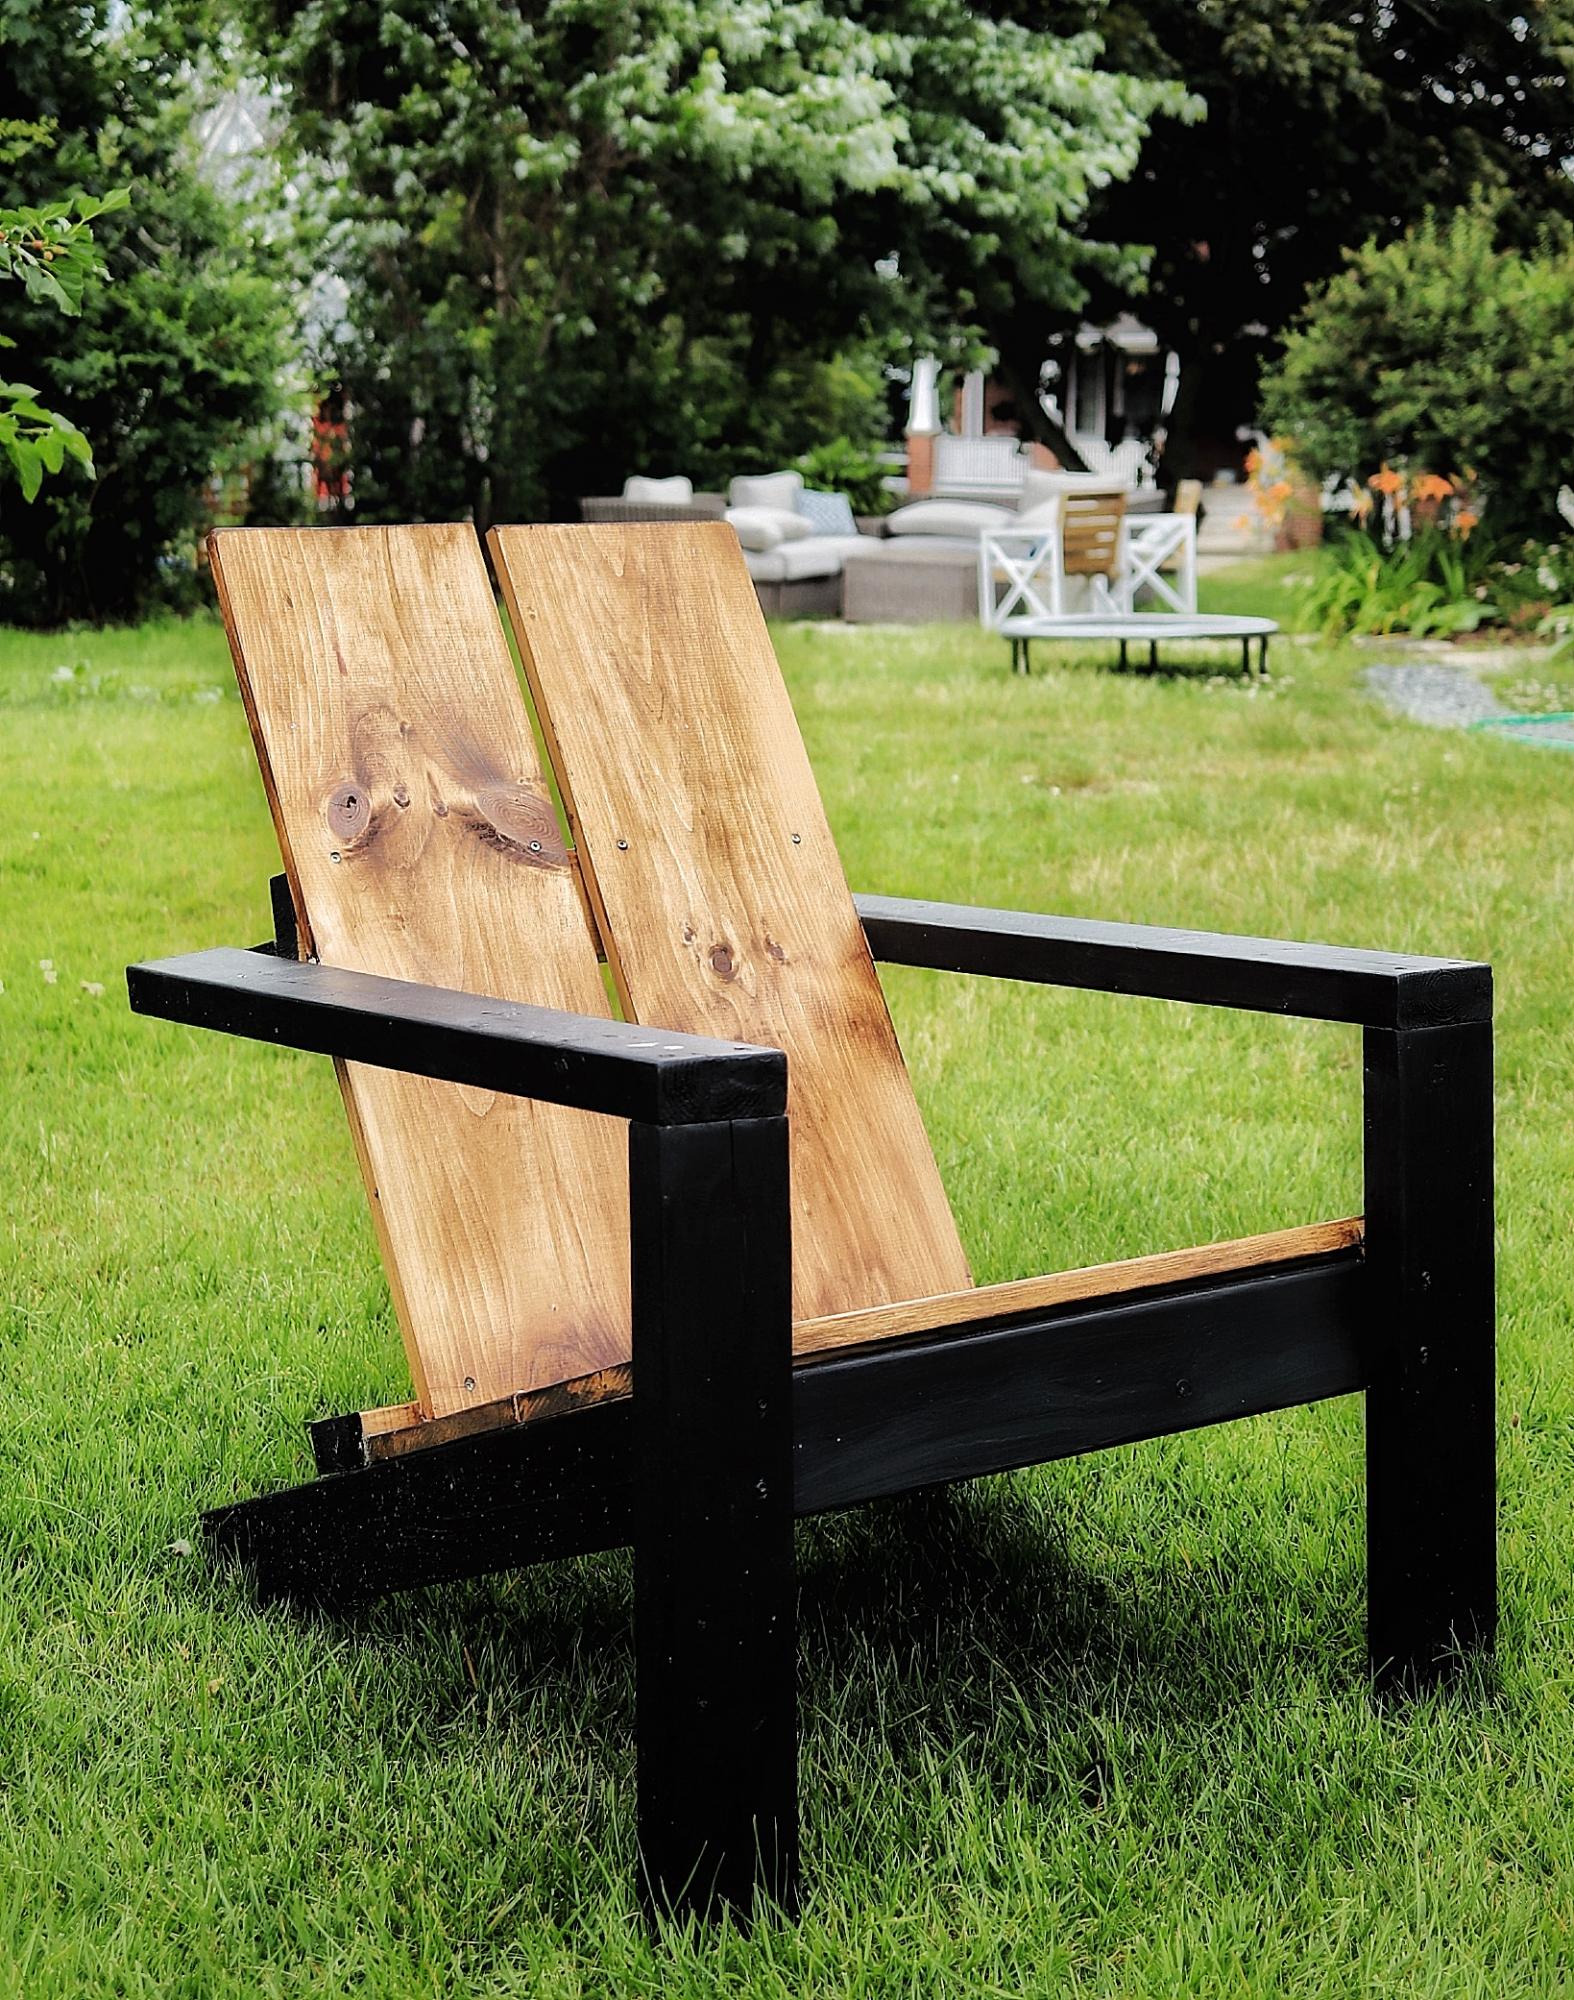
I was so excited to find the plans for these awesome chairs, I’ve built 7 this season already—the modification happened as an accident, but I loved the result !

Thu, 03/04/2021 - 10:59
This is absolutely gorgeous! I love the modification!
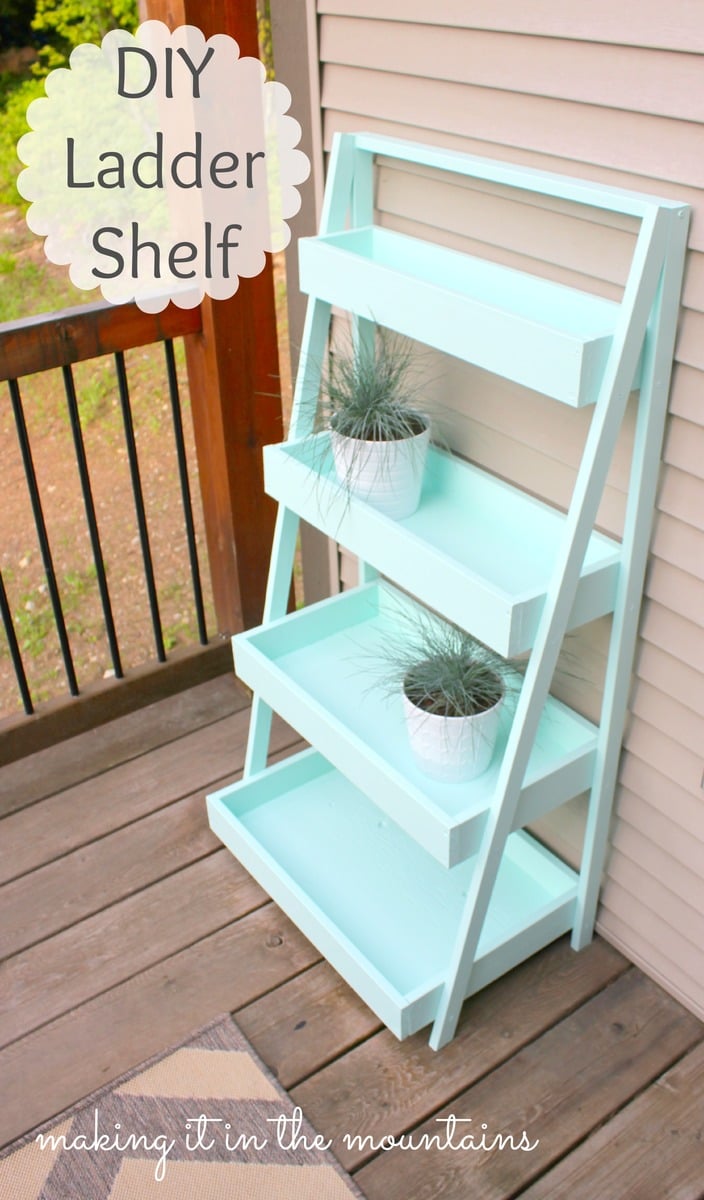
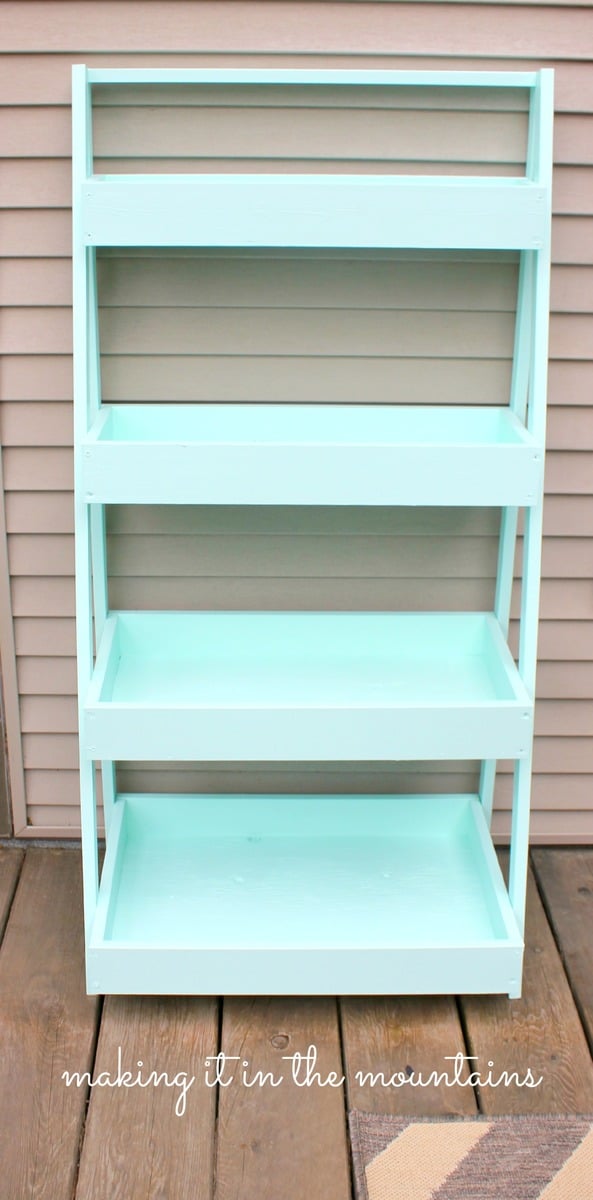
DIY Ladder Shelf to use as a plant stand on our courtyard deck.
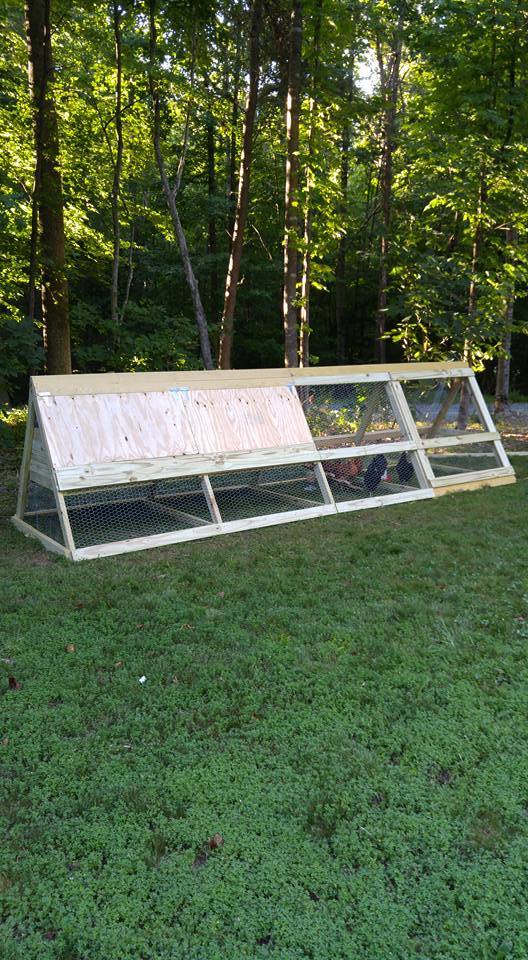
We wanted our chickens to have plenty of room for when we ere not home and could not let them free range in the yard. One of the six was a rooster-- and long story-- but we don't have him any more-- so 5 chickens now enjoy this coop/run. It cost about $300 in supplies. It is 16 feet long.

My friend and I bought all of the materials for about $350. We started Friday afternoon and he worked most of Saturday on it. The plans were super helpful! My four little silkies are enjoying their new home.
Mon, 10/03/2016 - 10:01
You and your friend did an amazing job! I love the cedar roof and white paint - so farmhouse chic! Thank you so much for bragging, love seeing your project! Ana
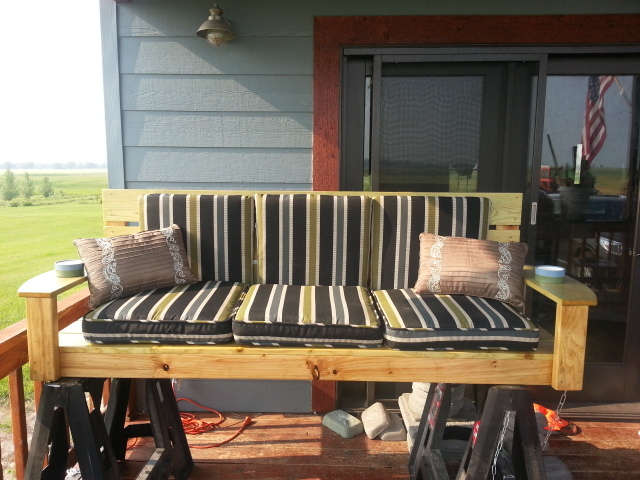
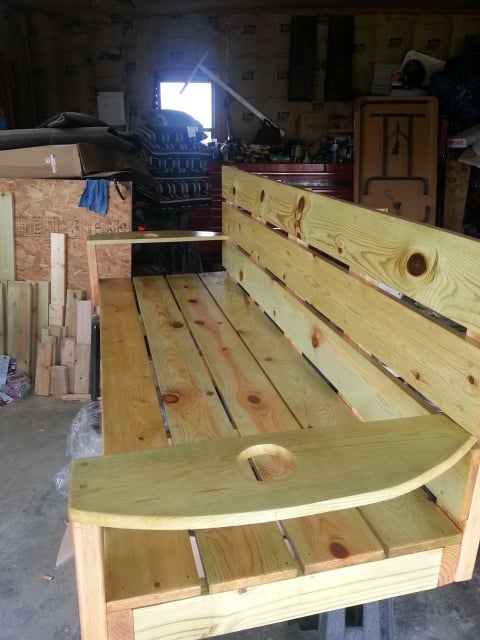
This is the second project I attempted and it was a huge undertaking for me, but it was fun and went well! I had planned to sew a cushion for it, but by the time I completed the project, I was DONE! So I bought some for now.
The only modifications I made were larger arm rests so I could put cup holders in them. The cup holders I made out of PVC 3" Male end and a 3" drain, which I glued together. I then scuffed the entire thing and painted them with acrylic paint (trying to get them to match the blue and green in the cushions) before spraying them with gloss sealant.
My family LOVES the new "swing bed". It weighs ALOT so I had to make sure to get proper hanging gear. It's obviously not hung yet when I took the pics tho.
Thank you for another beautiful project!

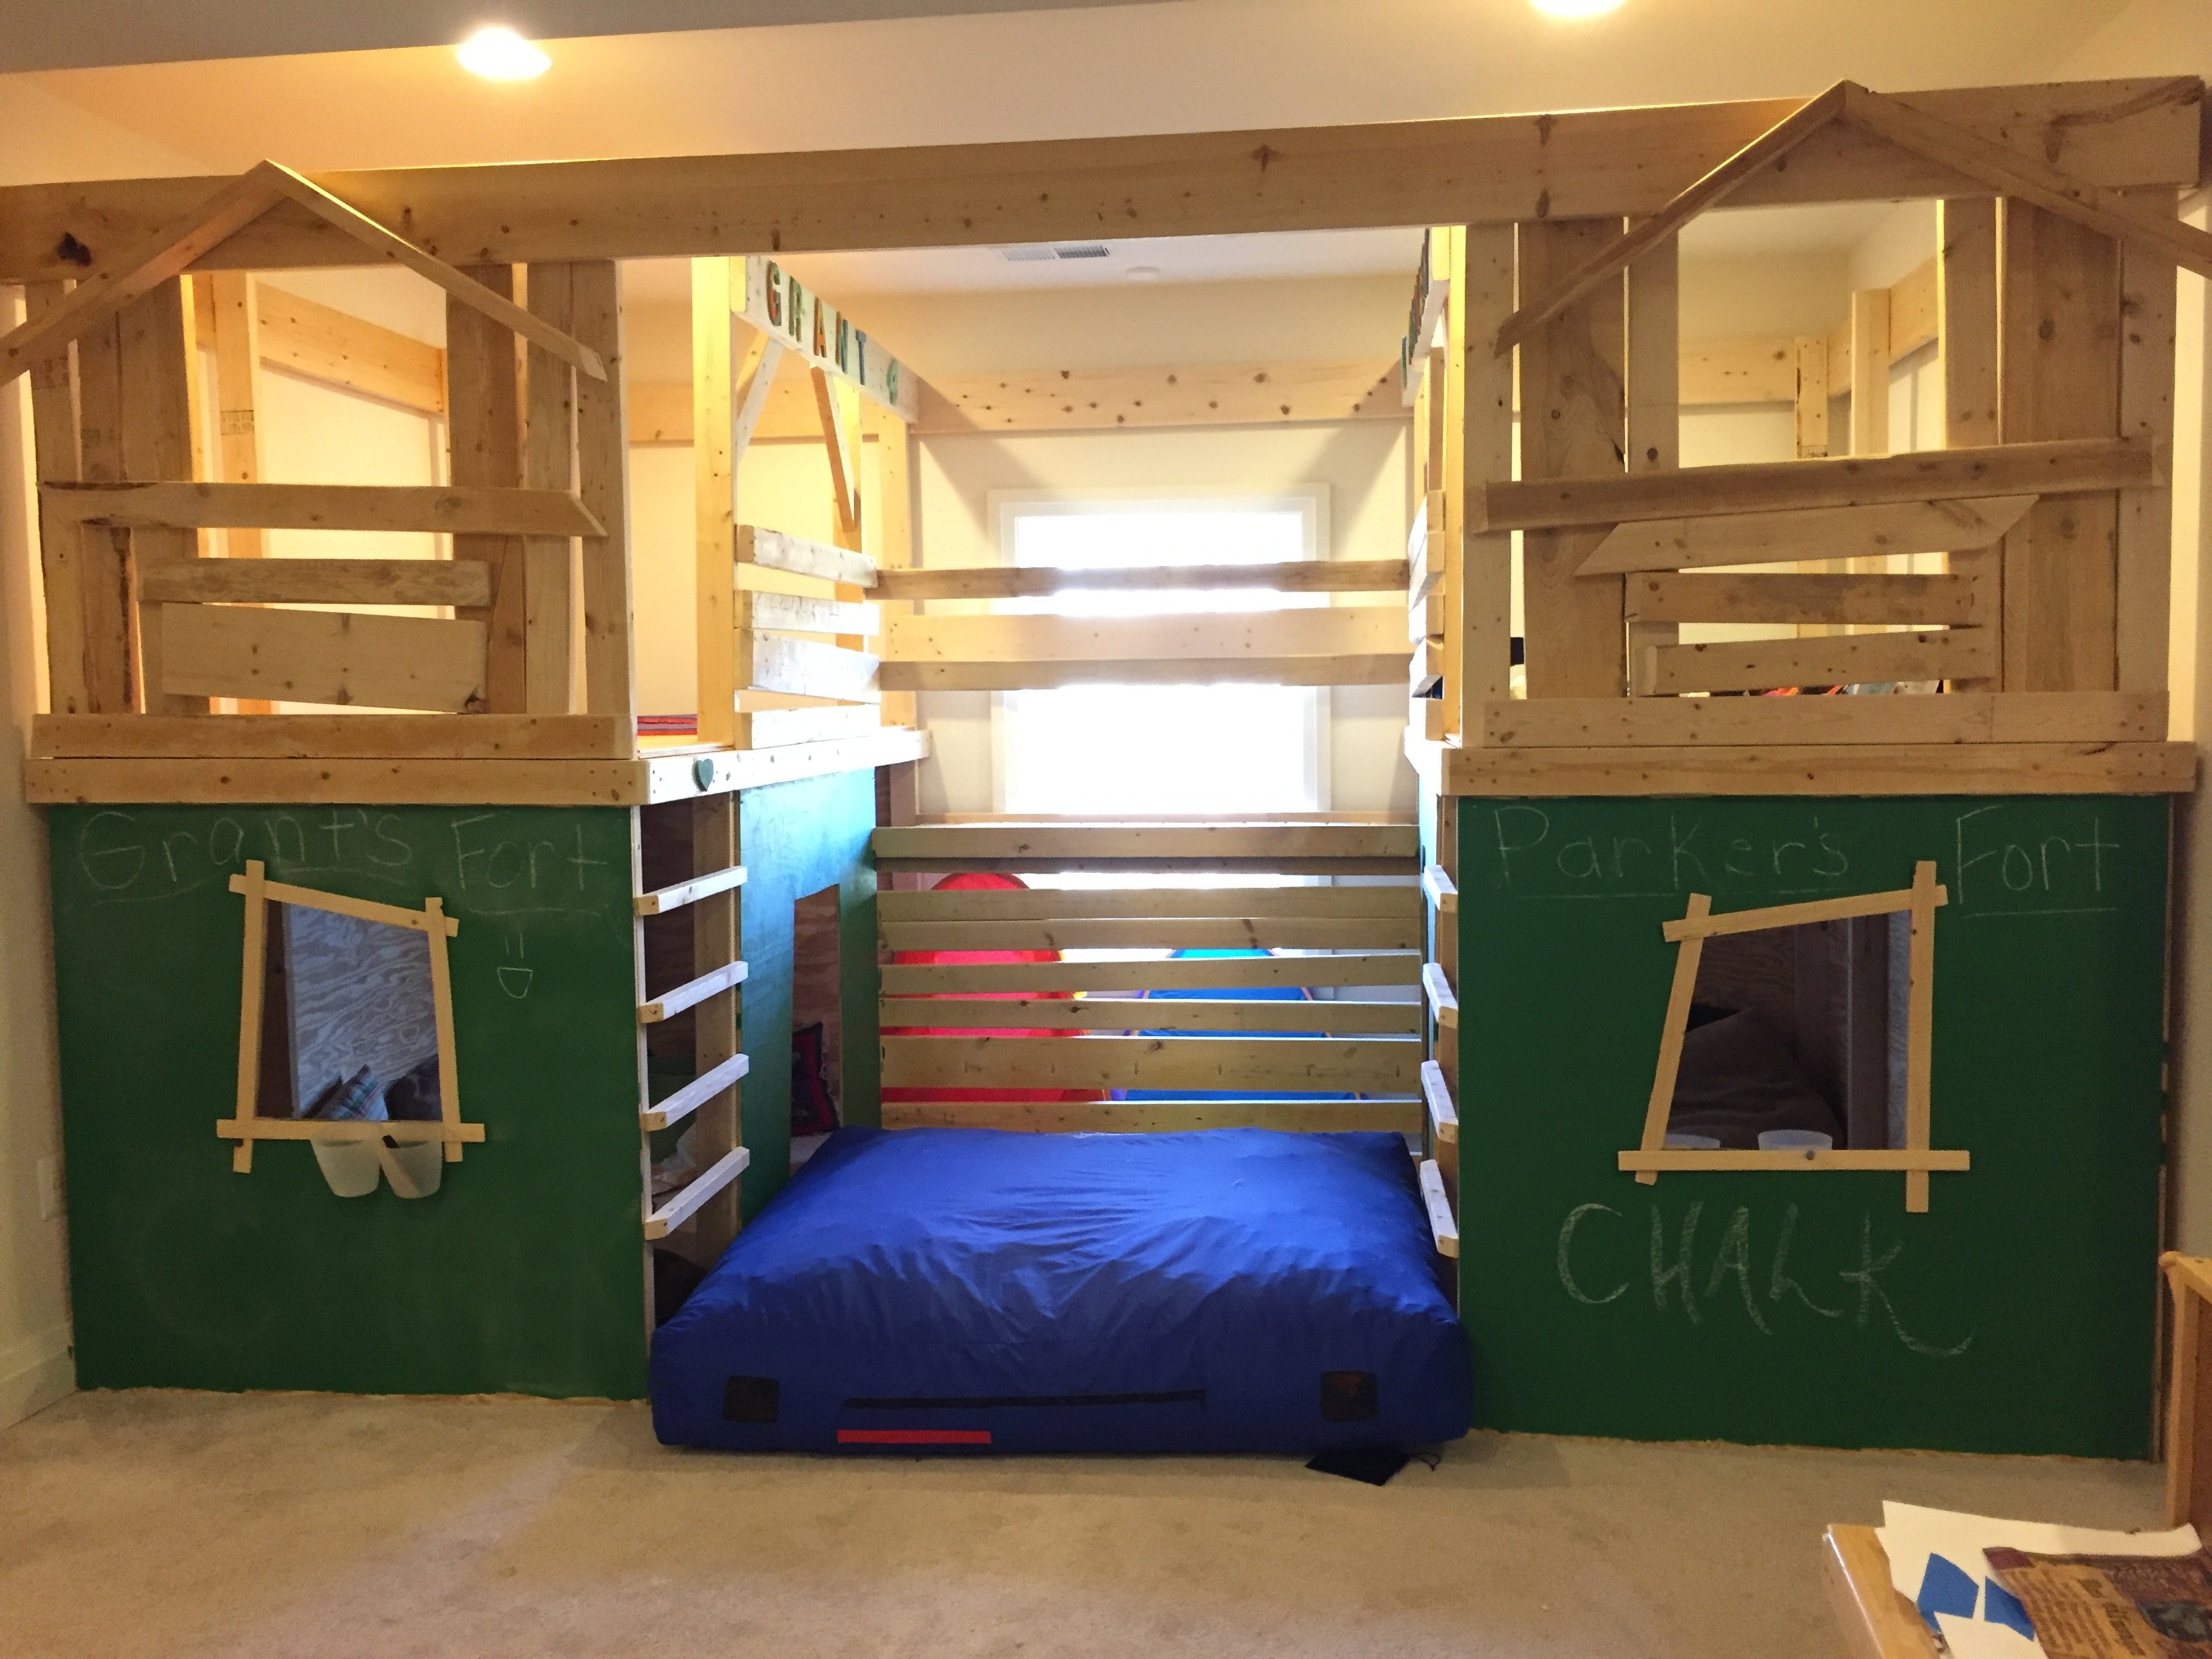
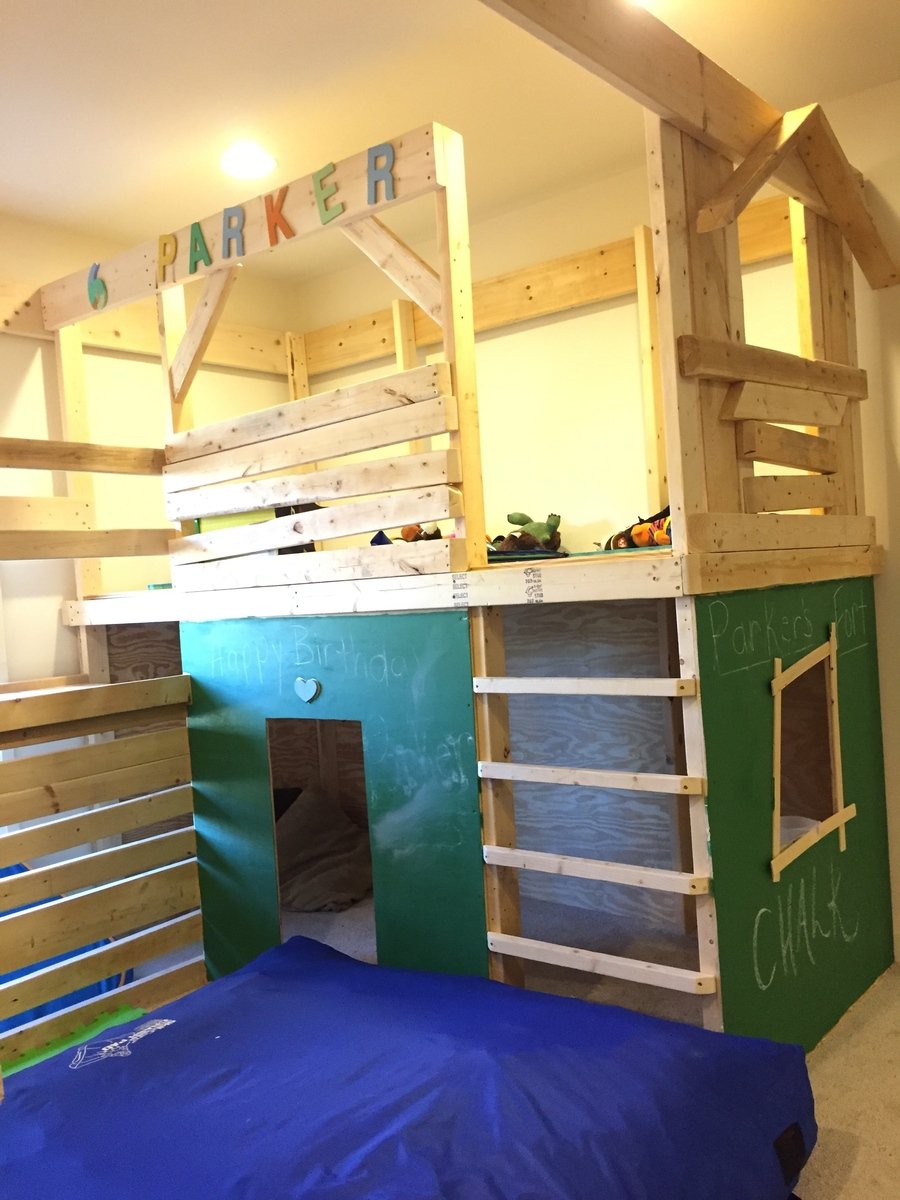
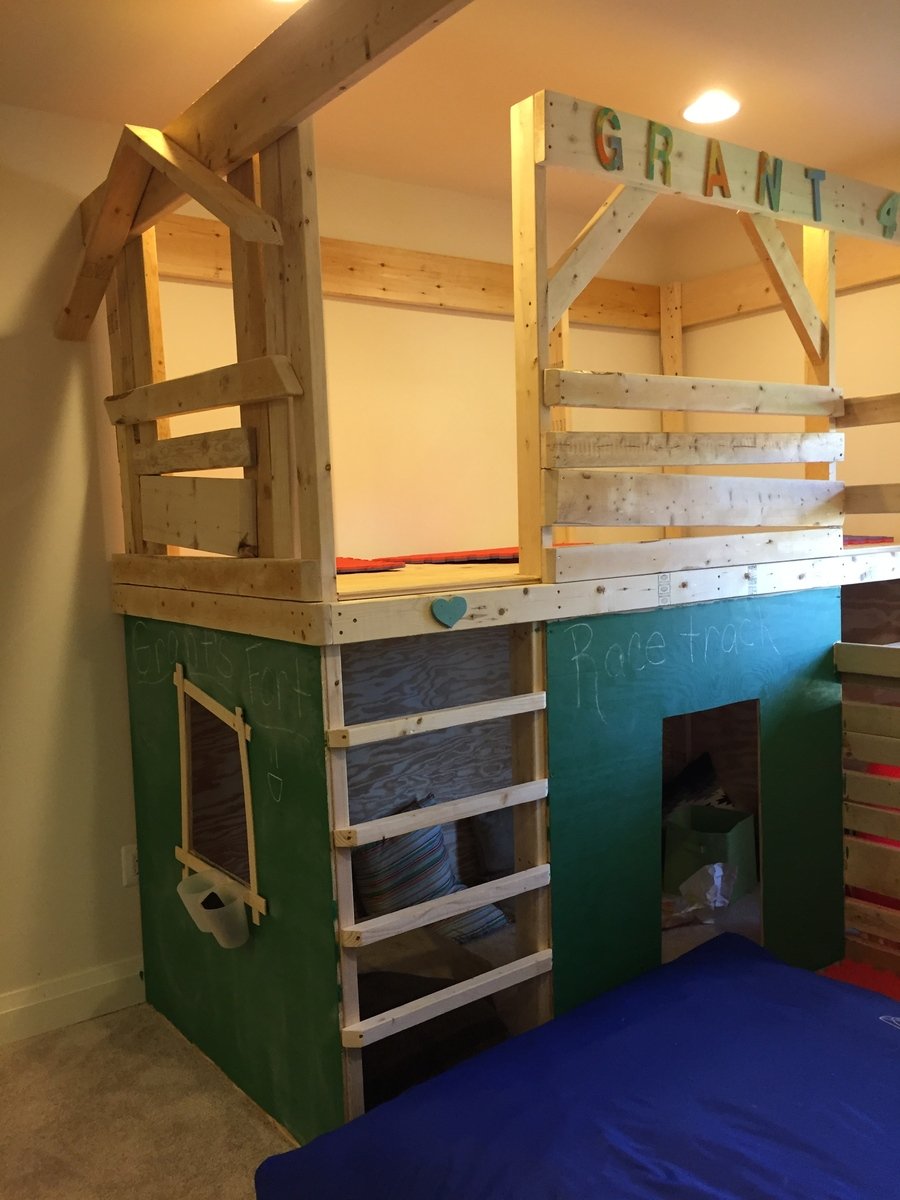
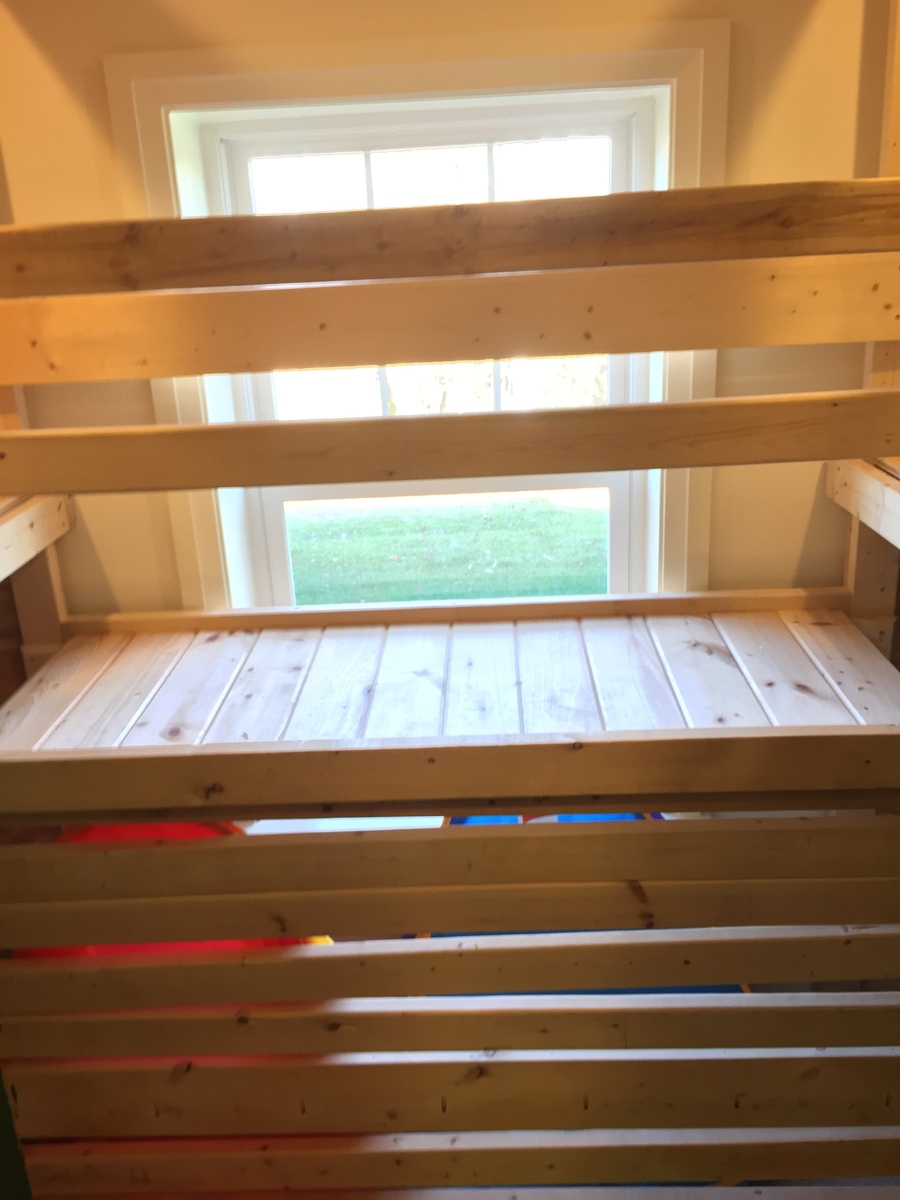
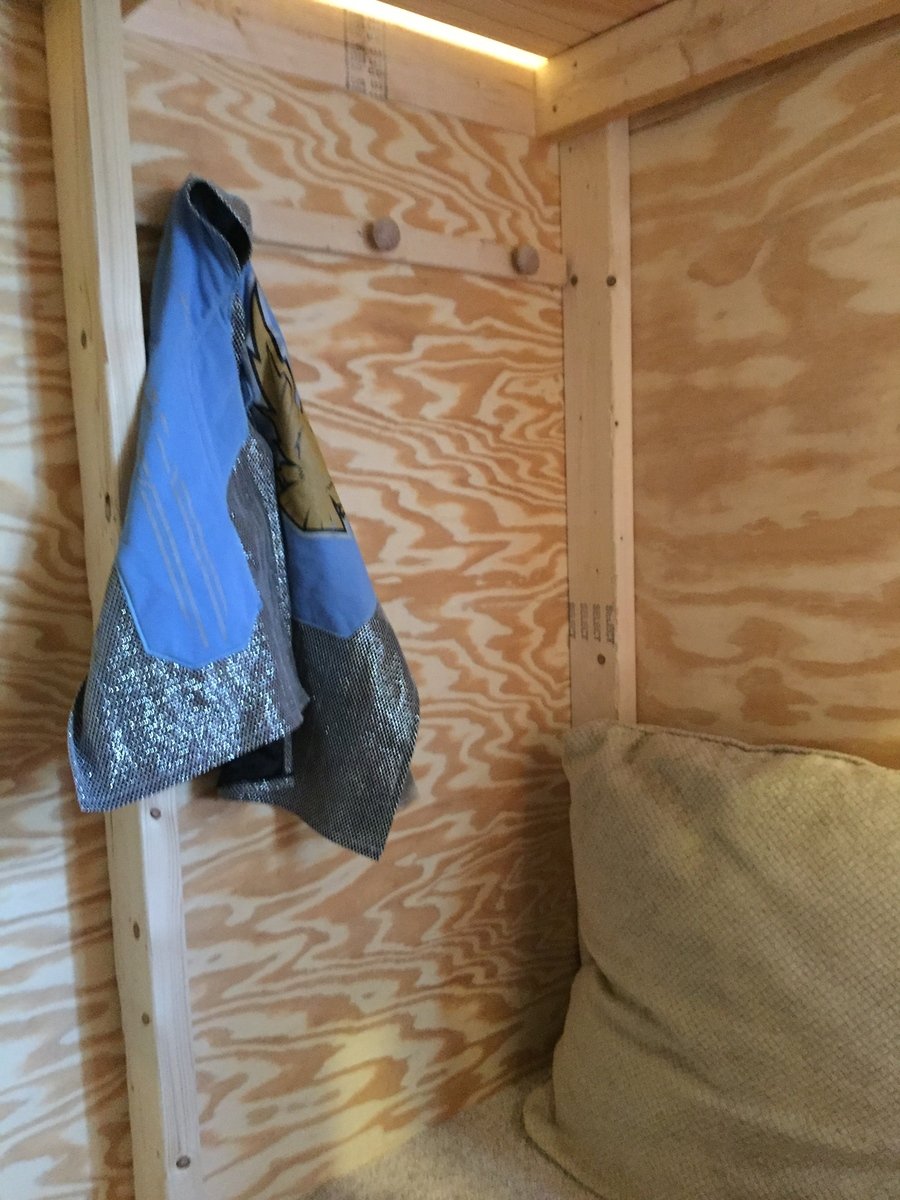
I built this project by myself. My husband helped move the large pieces when I connected them, so one person really can tackle this project! I had a combination of scrap wood from new home construction on hand and store bought lumber. Most of my time was spent sanding, sanding, and more sanding, especially with the construciton grade lumber. Yes, it was worth it! I used tongue and groove wood for upper level flooring and bridge. It really made it easier to put the floors together. I connected all the tongue and groove pieces with a snug fit and used my brad nailer to secure it down on the perimeter of the floor. Therefore, not every peice had to be screwed down.
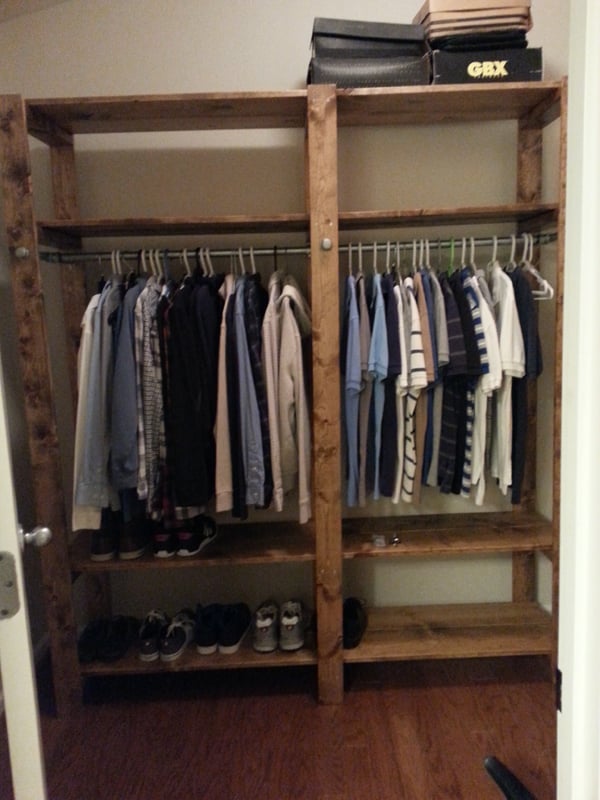
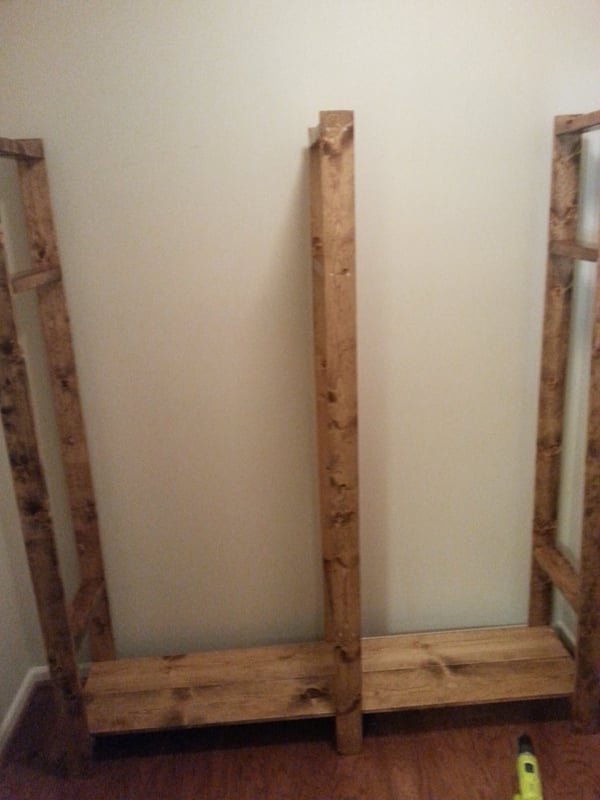
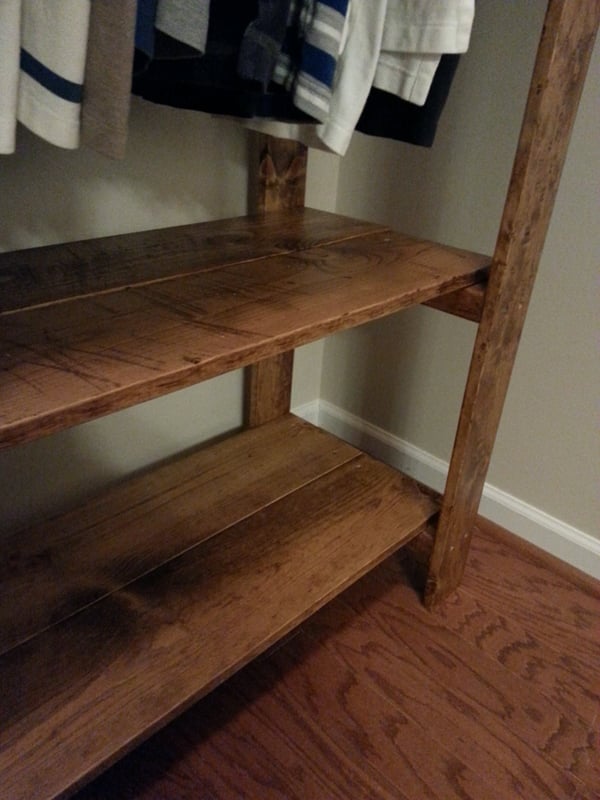
This is my first carpentry project. Bought my house recently and it had the white wire organizers on the wall but I wanted to do something different. Only had 6' width to work with so had to shorten it a bit and lose the middle shelves. Lowes didn't have enough 1x4's for the shelves so I used 1x8's and just left a gap in the front which in my opinion looks good.
5 1/2W x 5 1/2L x 8H.
Ana made this project very easy for me. I did the main building while hubby cut the wood & helped drill in hard to reach areas. Thank you Ana for boosting my confidence. I’ve never done anything trike this.
I've been wanting to make this for so long! I still have a couple blemishes to touch up but I'm super pleased with how this turned out. Easy construction and tons of customization options! THANK YOU ANA!!!

This is a wishing well I made for my sister for her wedding. It will be used during the wedding for people to drop "wish you well" cards into and afterward she can use it as a planter in her yard.
I followed ideas from multiple plans here on Ana-White.com, but I didn't follow any specific plan. Mostly I followed tips and instructions for cutting angles, drilling pocket holes and some finishing tips. This is the first "big" project I've done and I"m quite proud of it.
With everything, it measures 44.5 inches high. The well measures 21 inches across and 15 inches high. The roof measures 22.75 inches by 23.75 inches.
I hope y'all like it. I worked hard on this! :)
Thank you, Ana and everyone who contributes to this site. It's been so much fun and I've got lots of ideas for more stuff. If I was any good at all at Google Sketchup I'd put up the plans but I'm not. If anyone could help me with that, that would great. :)
Have a great day!


Mon, 07/21/2014 - 20:04
Anyway you can please tell me the angle for the boards ont the walls. I reallly like your well, and would like to build this for my wife but im not sure on what angles to use thank you

In reply to wishing well by bellows86
Sun, 07/10/2016 - 17:10
The 8 sided wishing well is going to be 22.5 degrees all the way around. hopes this helps
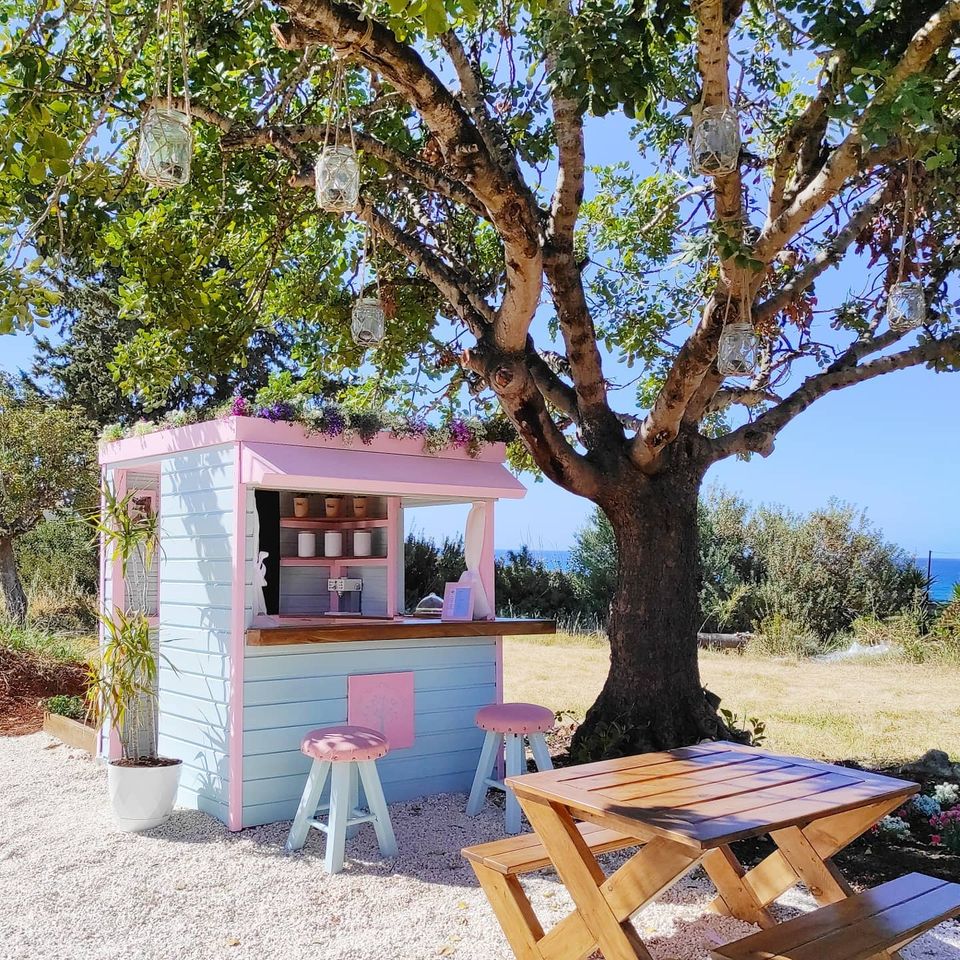
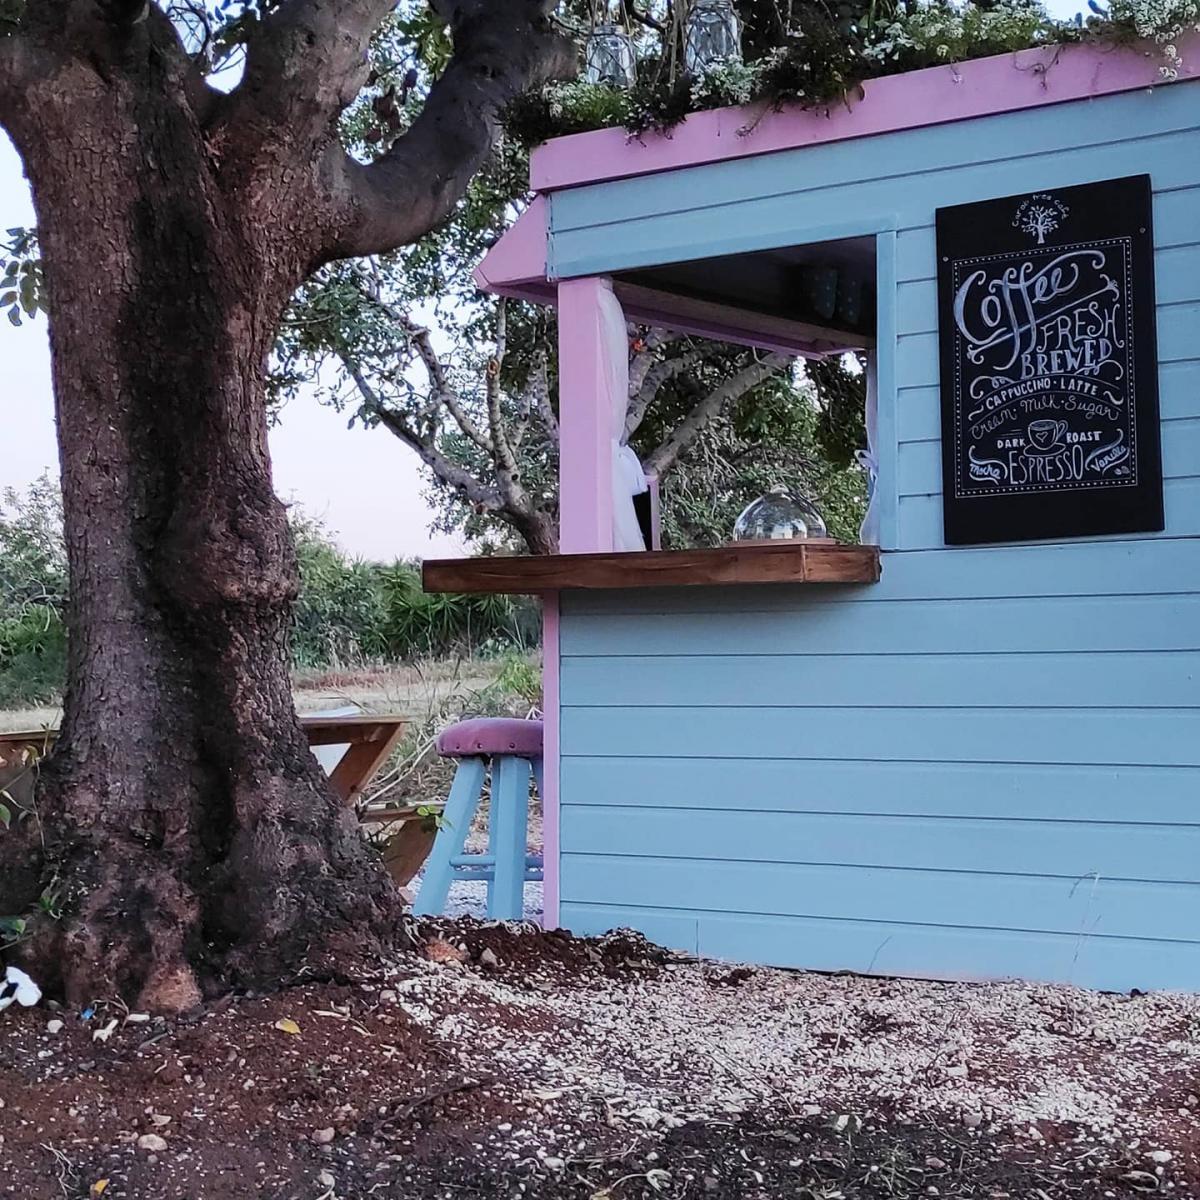
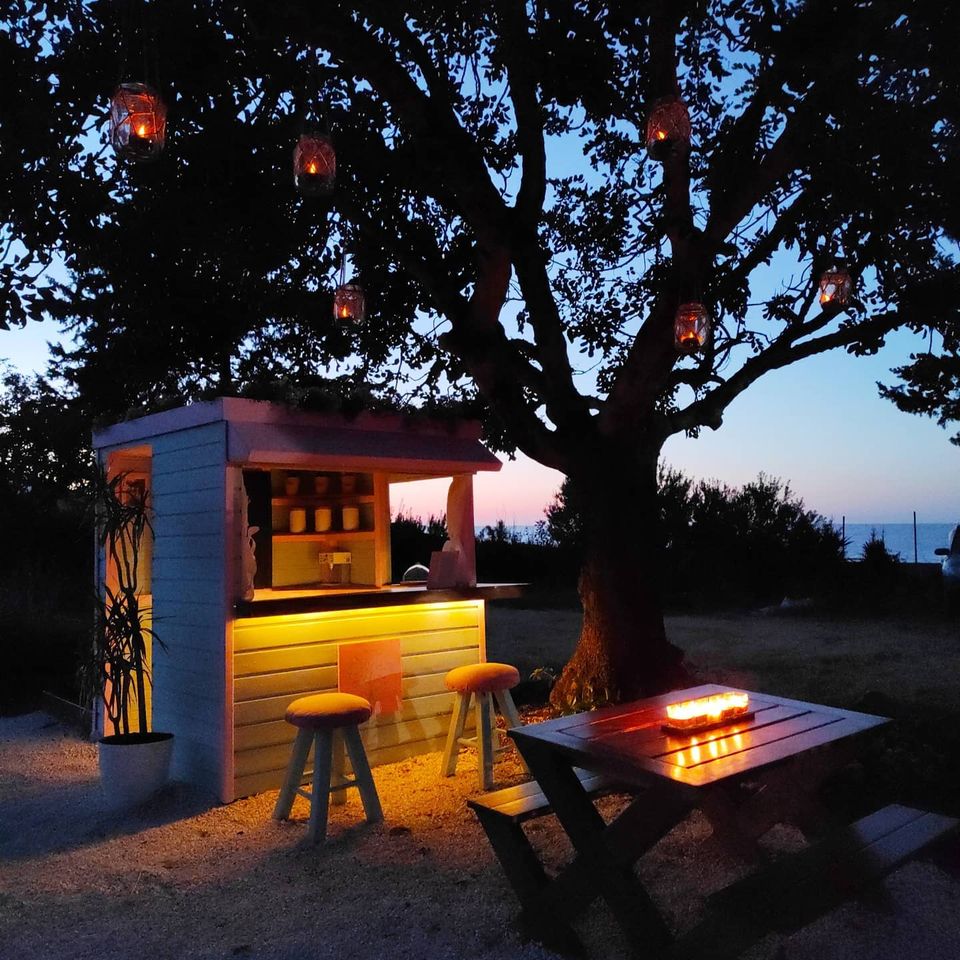
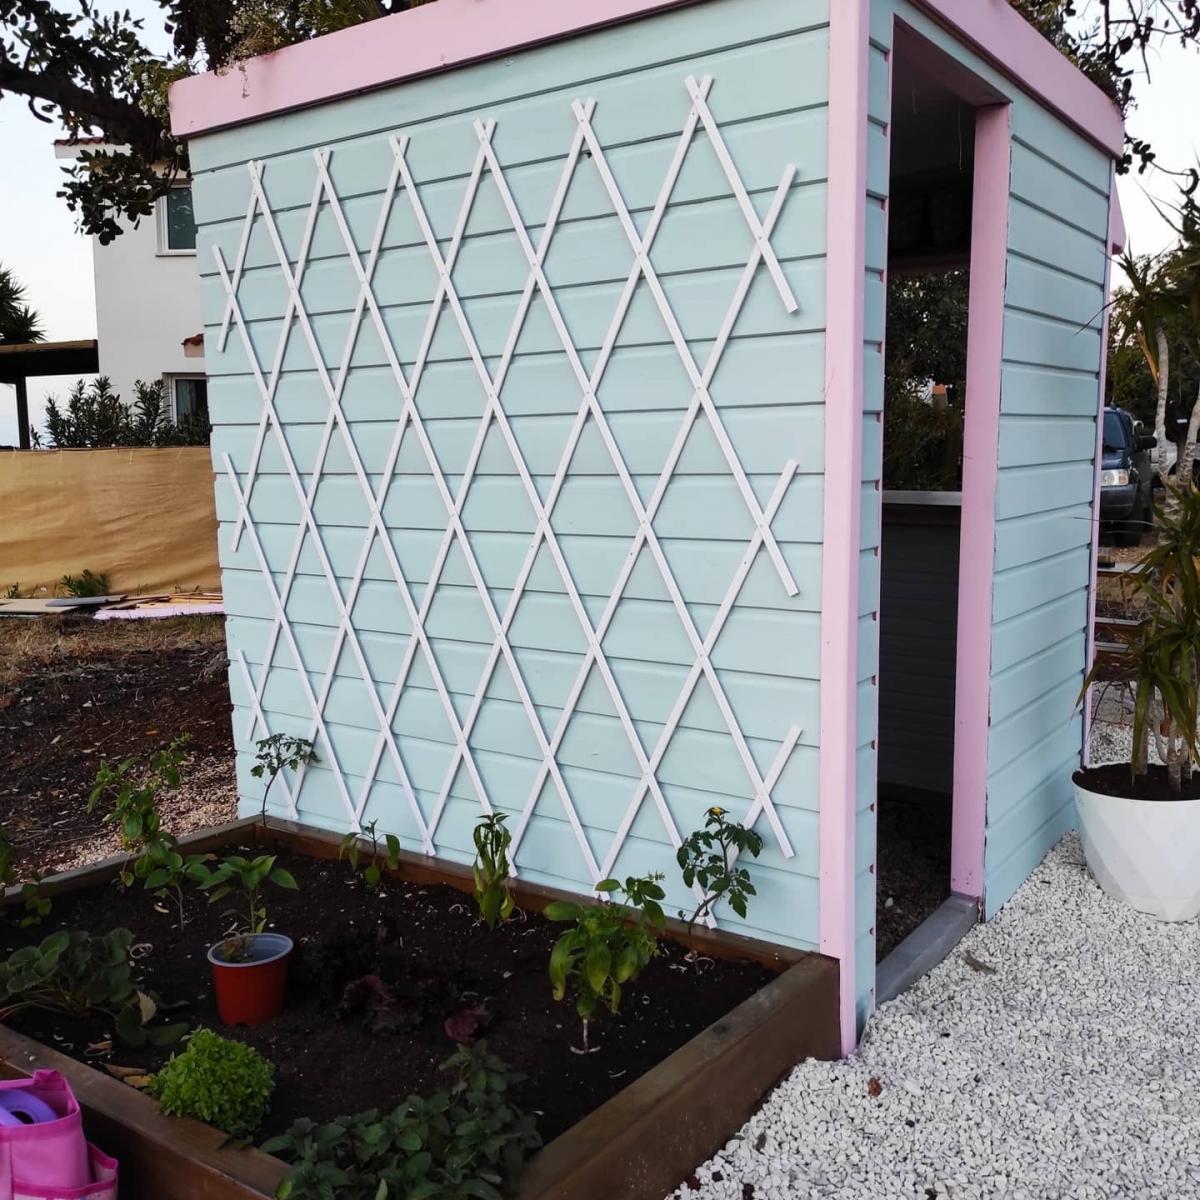
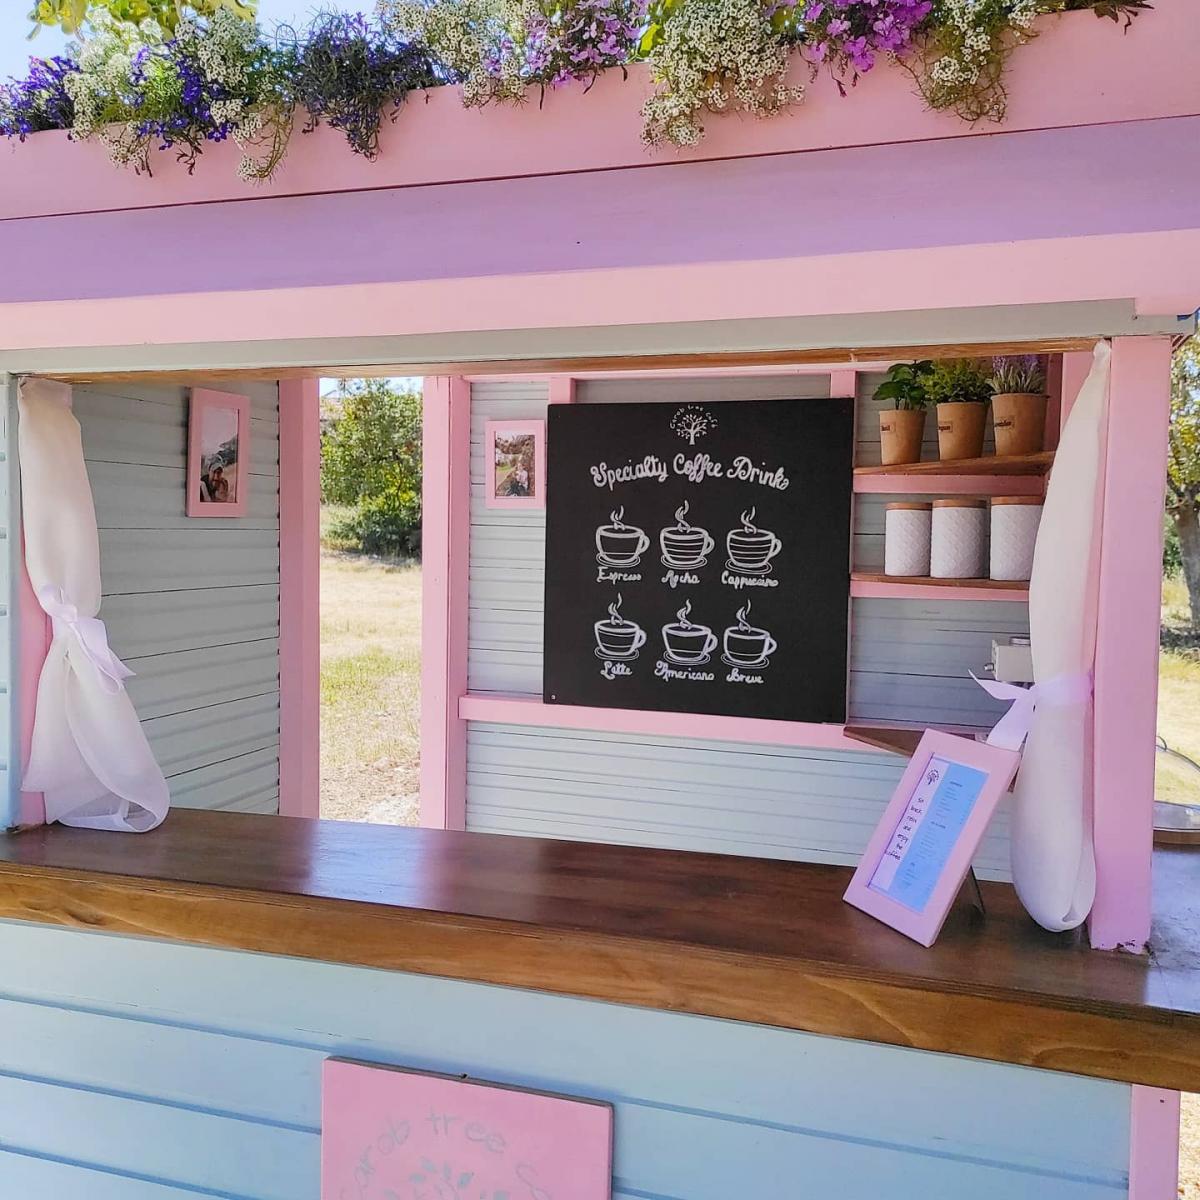
With another total lockdown happening here in Cyrpus, right at the same time as my Daughter will be on Easter holidays, I'm trying to knock up as much outdoor play kit as I can to keep her entertained and off the iPad.
The design of this was very simple, a 2x2 frame clad with T&G; the countertop, shelves, and roof are from marine grade baltic birch (the roof also has additional levels of water prof membranes, root barriers, etc to support the living roof).
Finish-wise, for the pinks and blues, I've used wood aqua by Kraft paints, and for the counter, shelves, and picnic bench, high protection wood stain in walnut by V33.