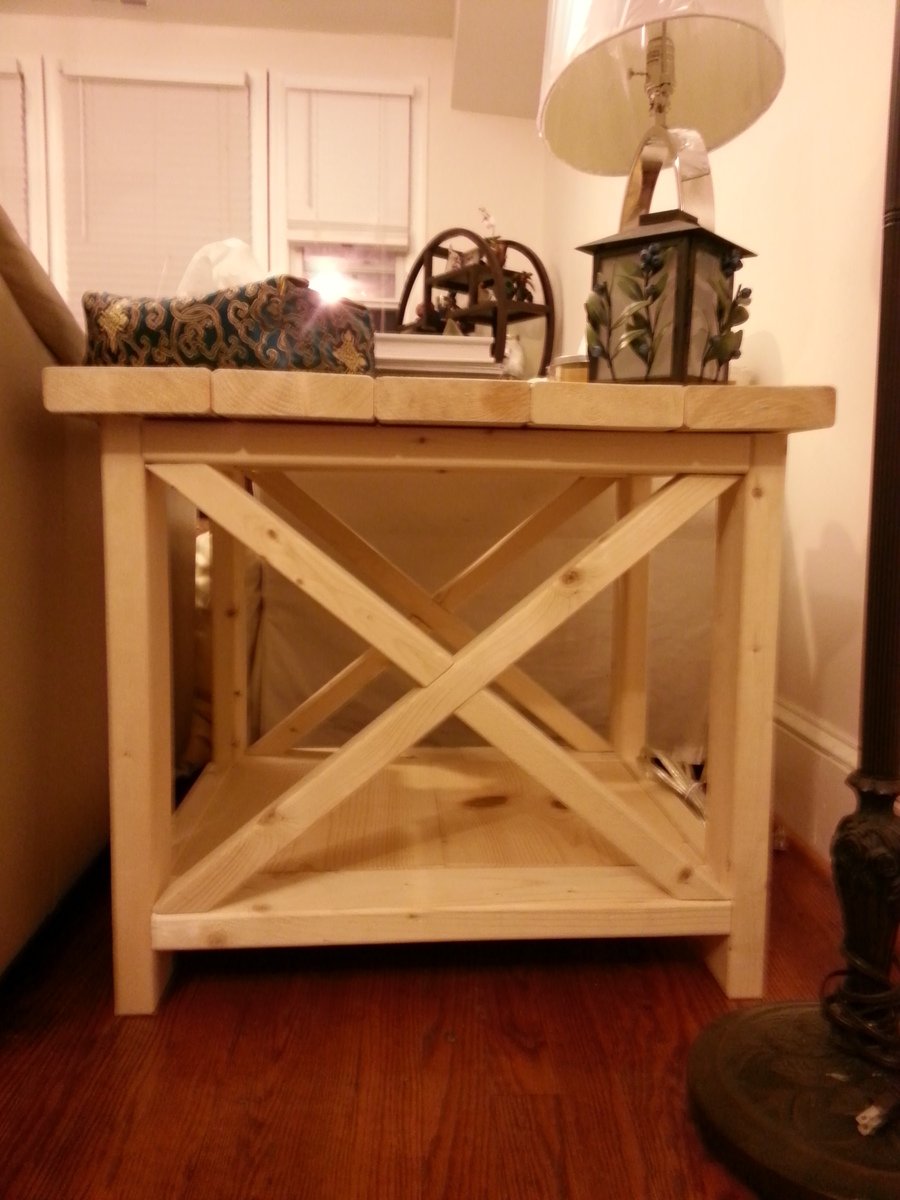
2x4 Wood Side Table
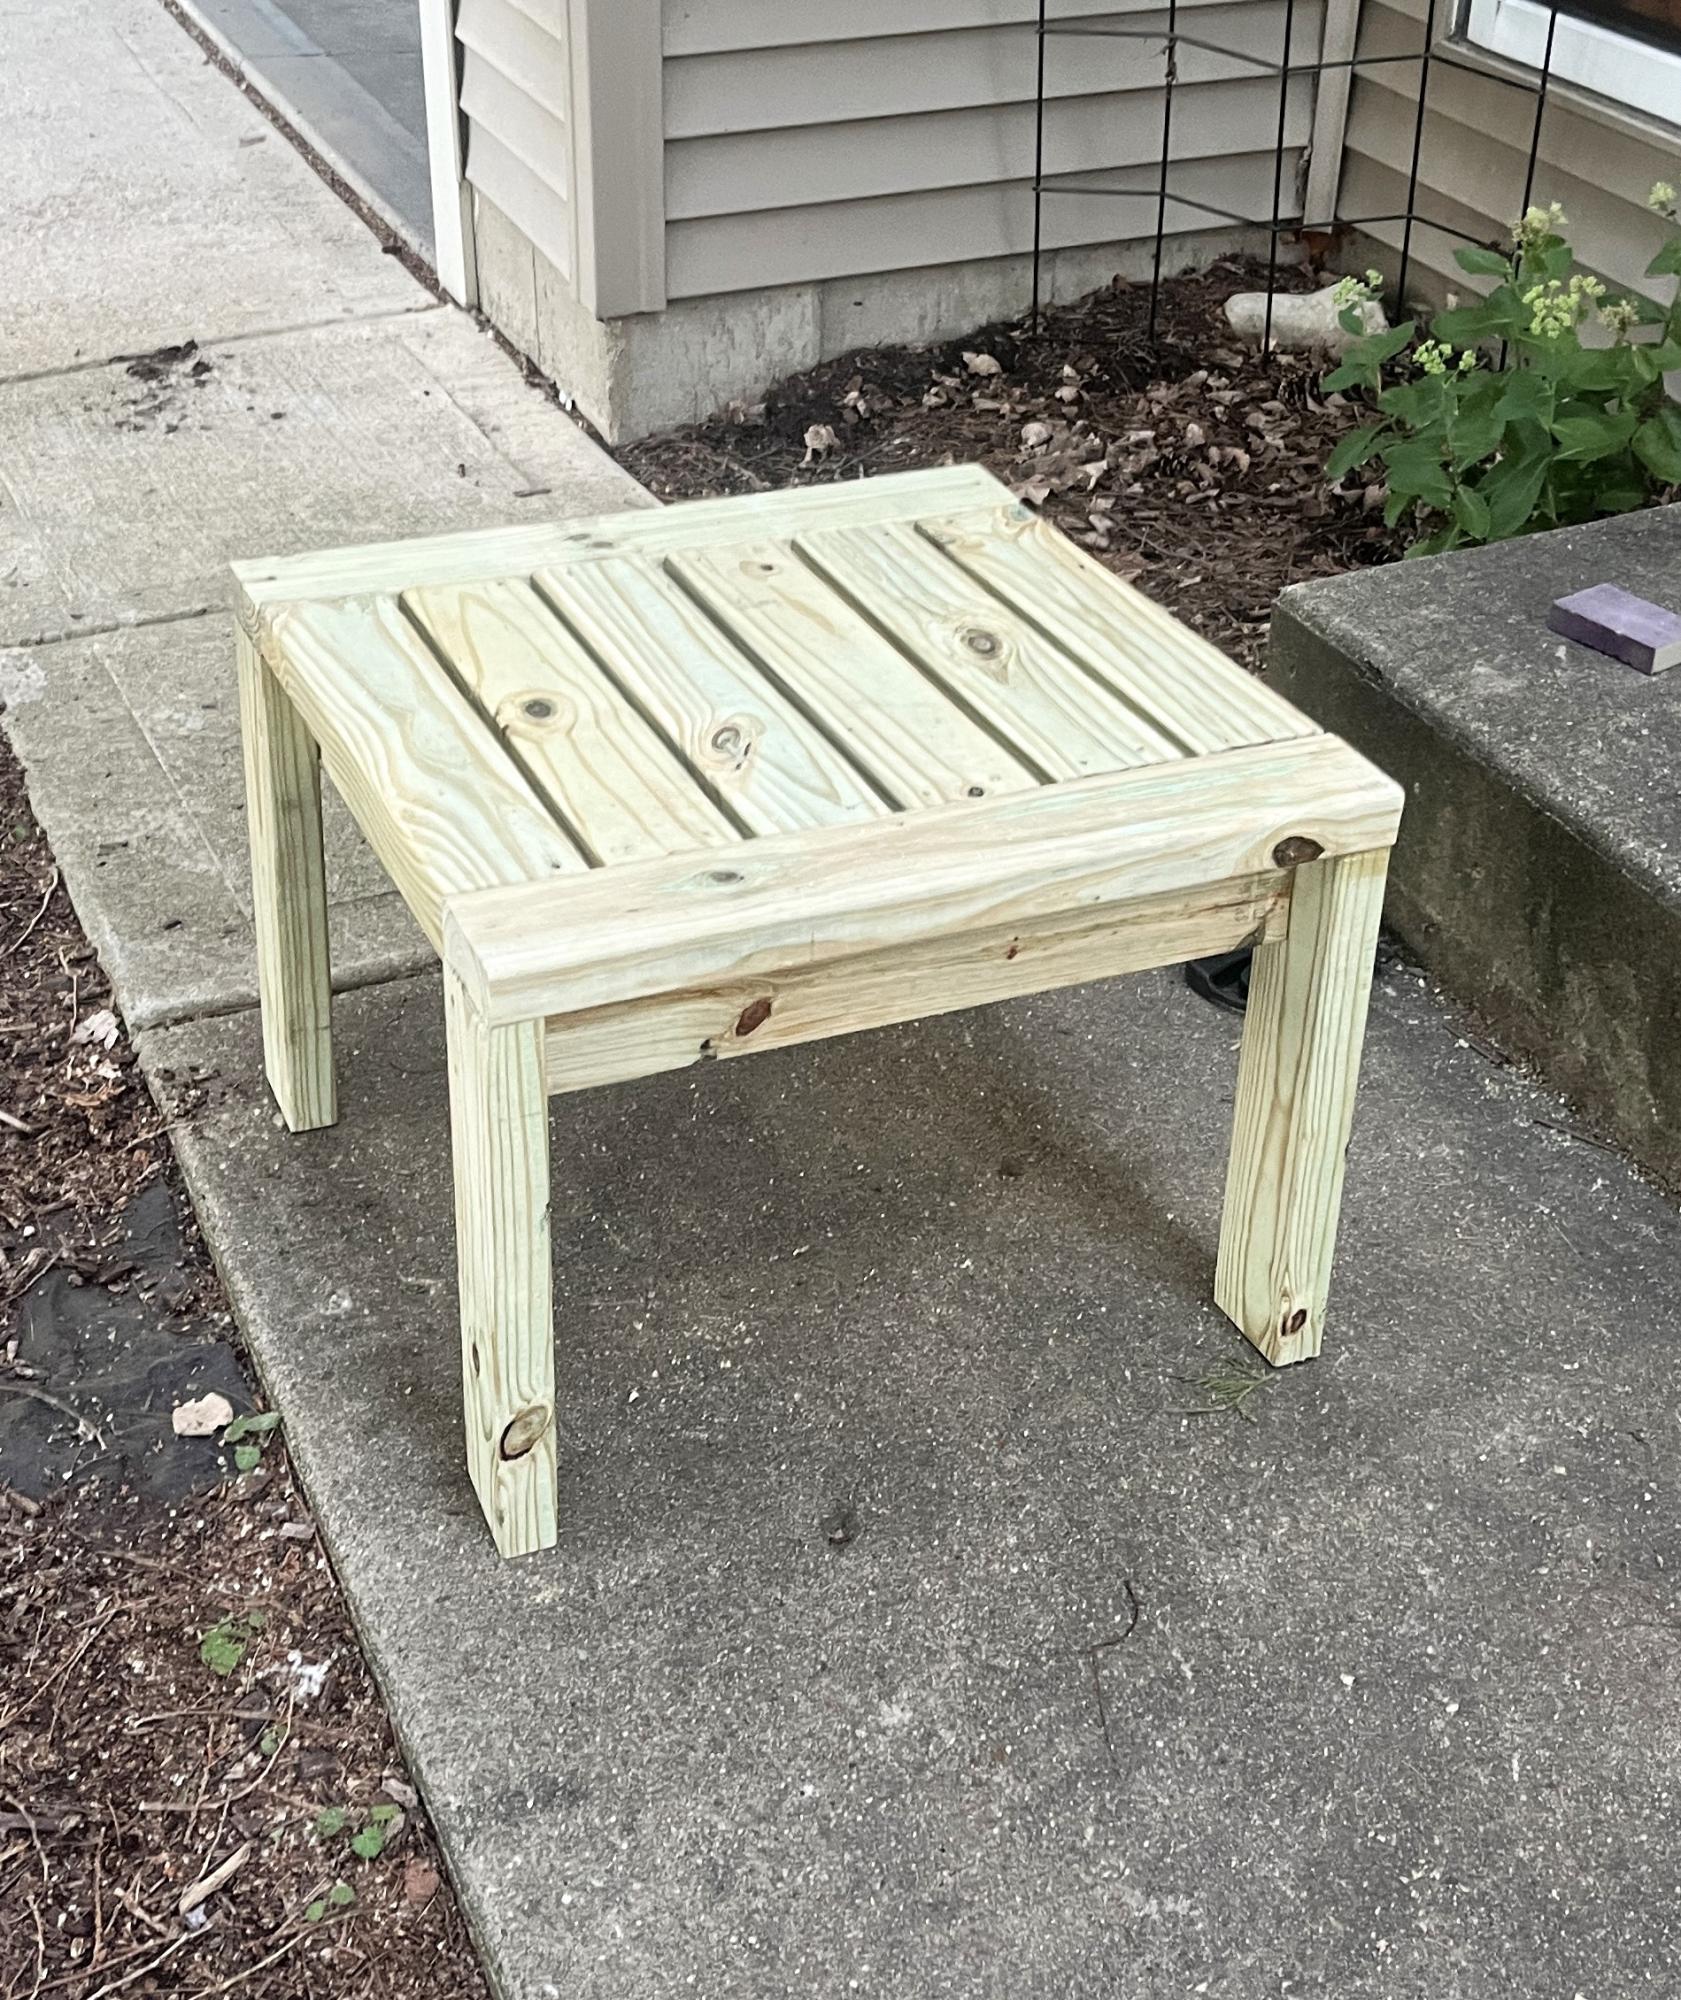
Outdoor Wood Side Table by gianahannant
Built from Plan(s)
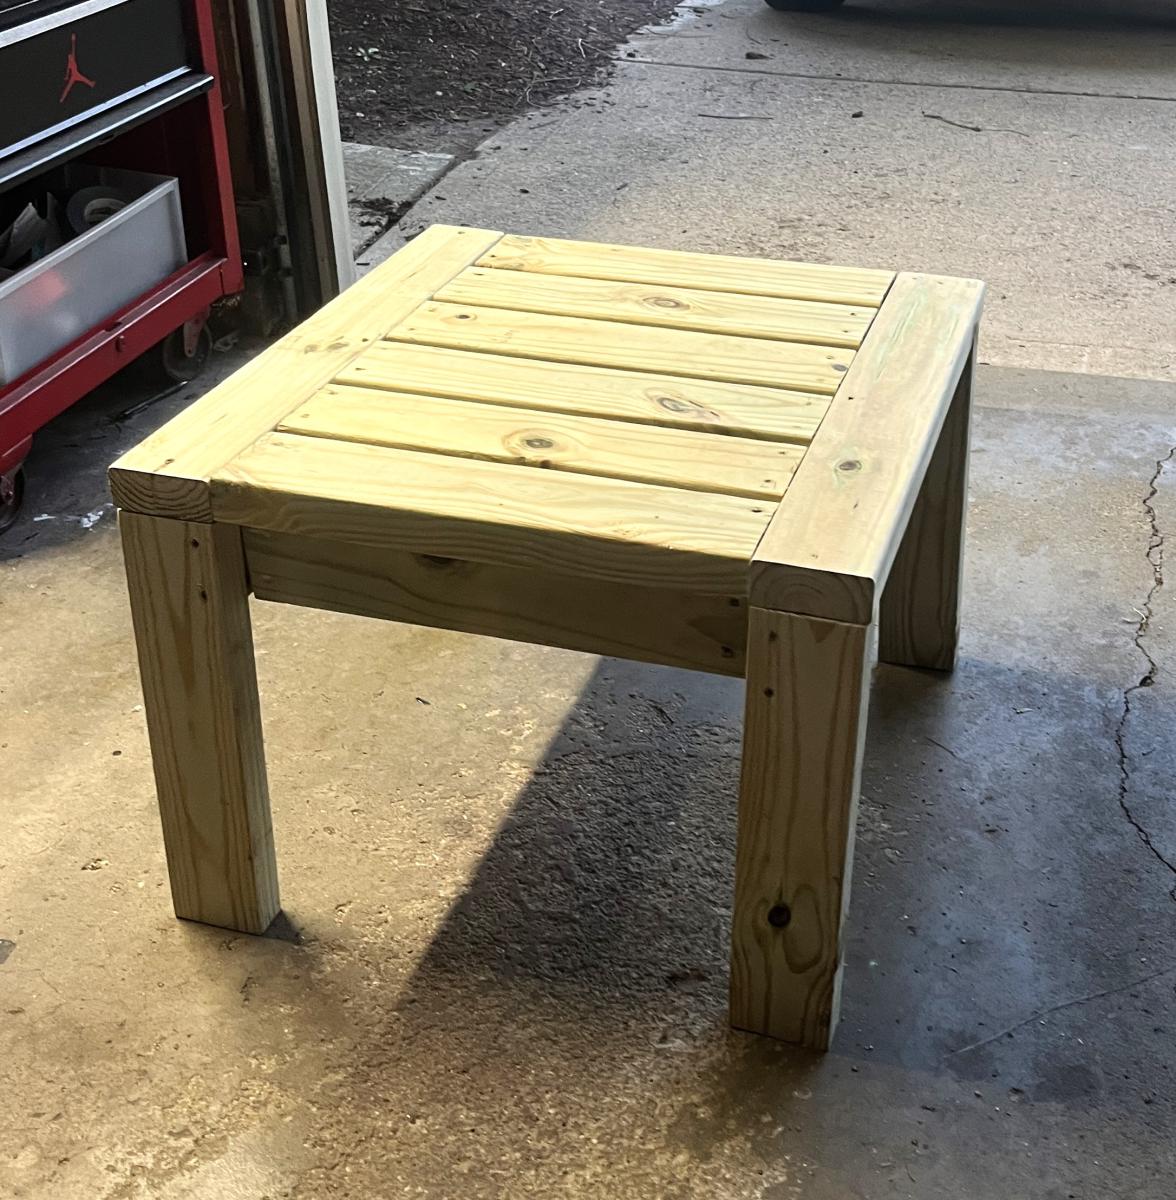
Outdoor Wood Side Table by gianahannant
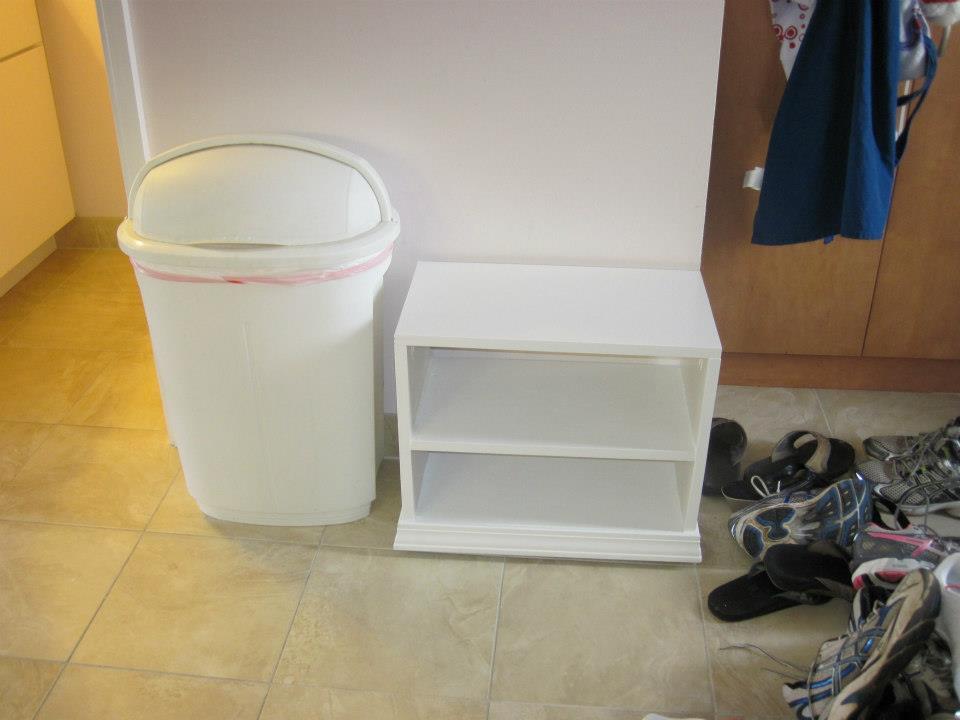
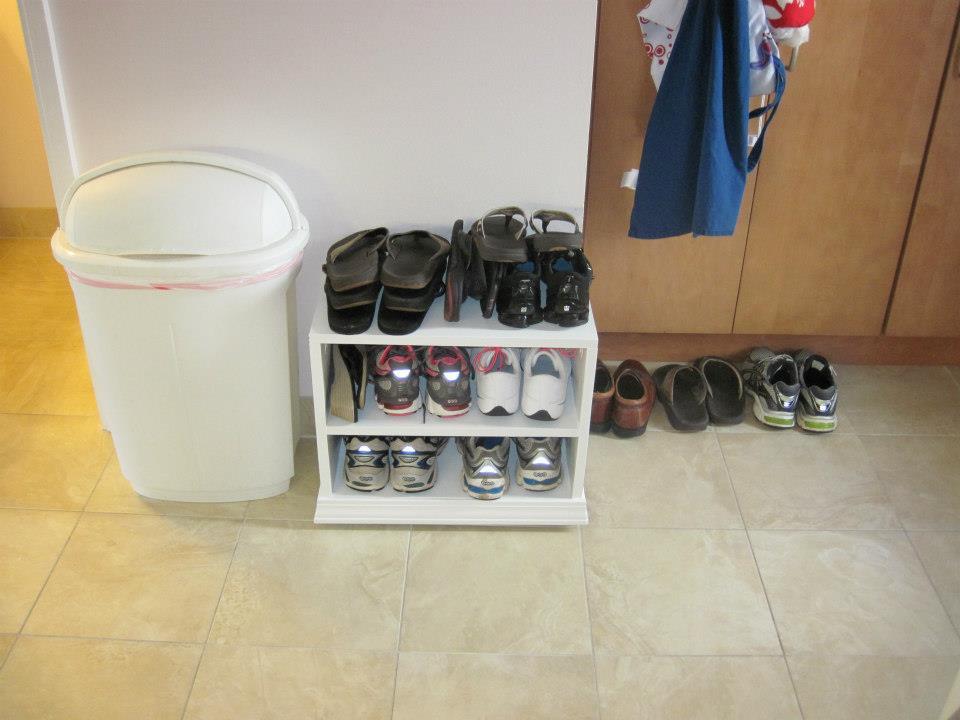
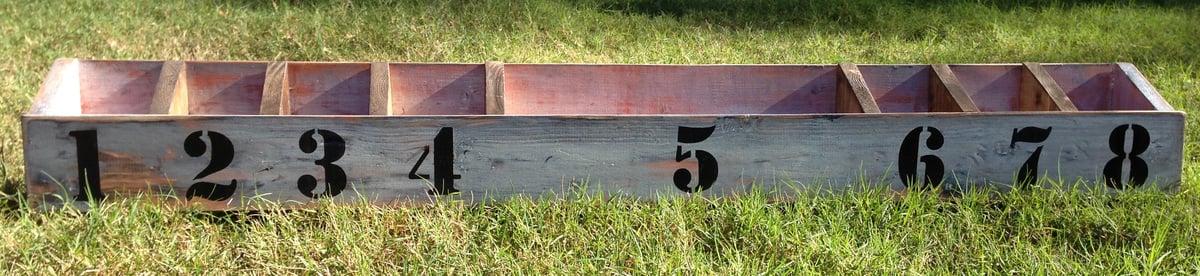
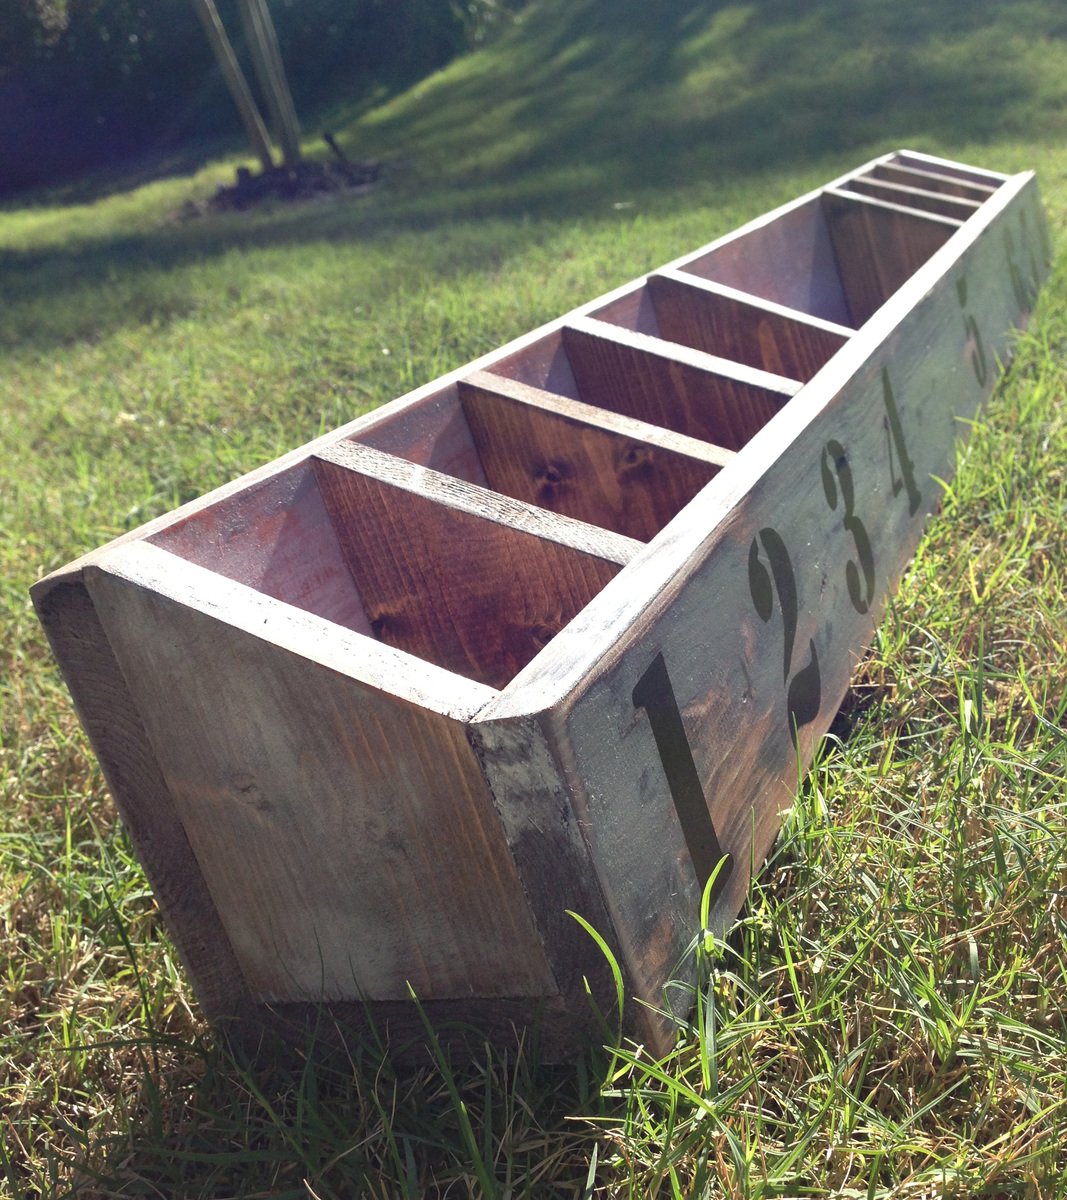
Between my husband and I, we routinely have 10 pair of footwear by the front door. In Hawaii, its tradition that you remove your shoes at the door. Unfortunately for us, our condo doesn't have much room by the door. As such, there would often be a pile of footwear as you entered the unit, which is the kitchen. I have tried various shoe organizers over the years, and none really fit the bill, or the space we had. So I built one myself.
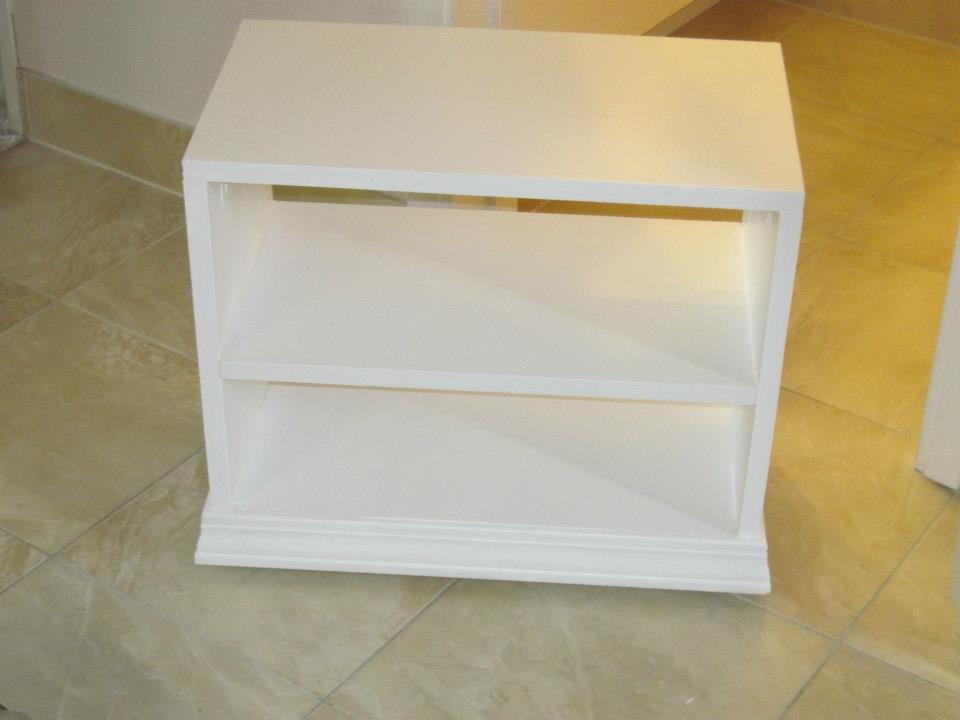
Its a pretty basic box, with 1 fixed shelf. All joined with my Kreg jig (of course). I also attached some casters on the bottom to make it easier to move out of the way if needed. After assembling and painting, I picked up some moulding and added it to the bottom, which helped to hide the casters. Then I used some old liquid nail/caulk I had to fill in the holes.
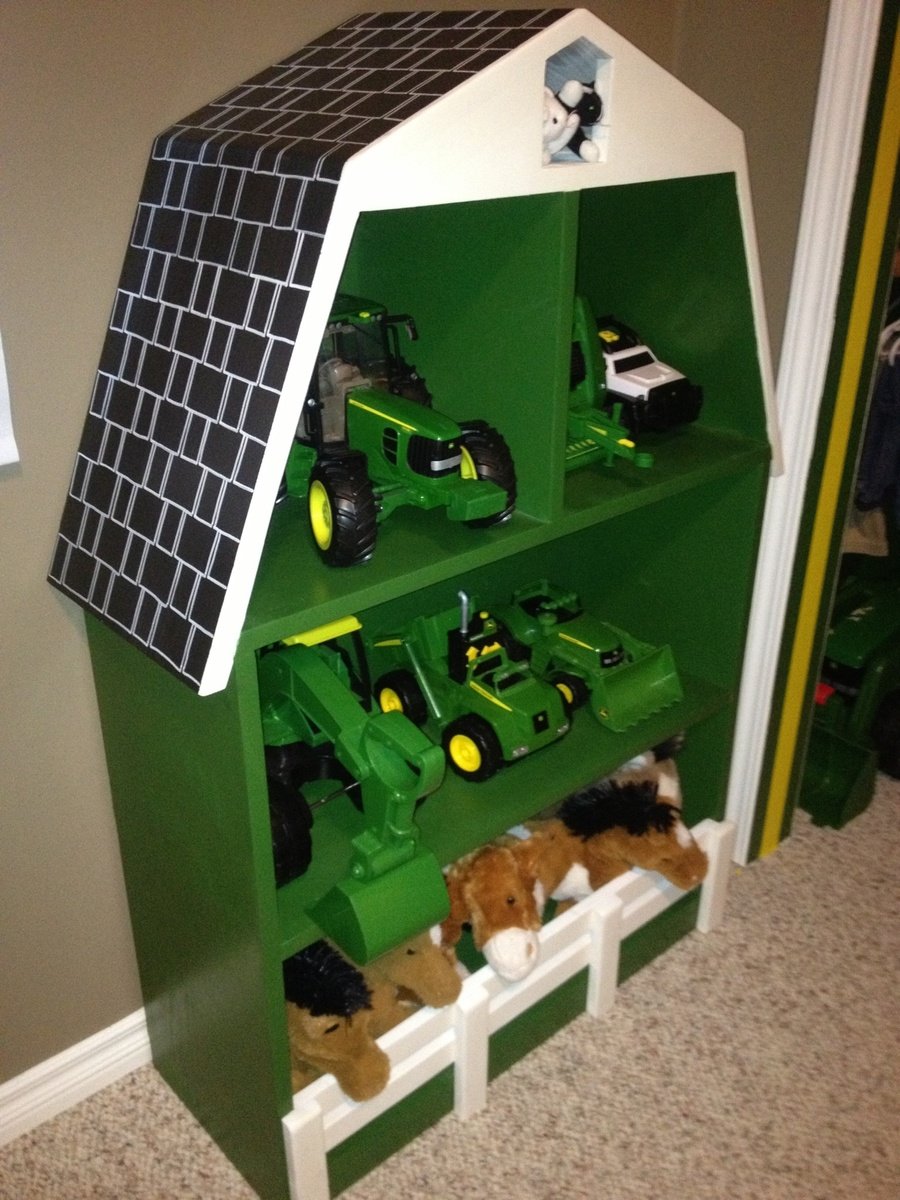
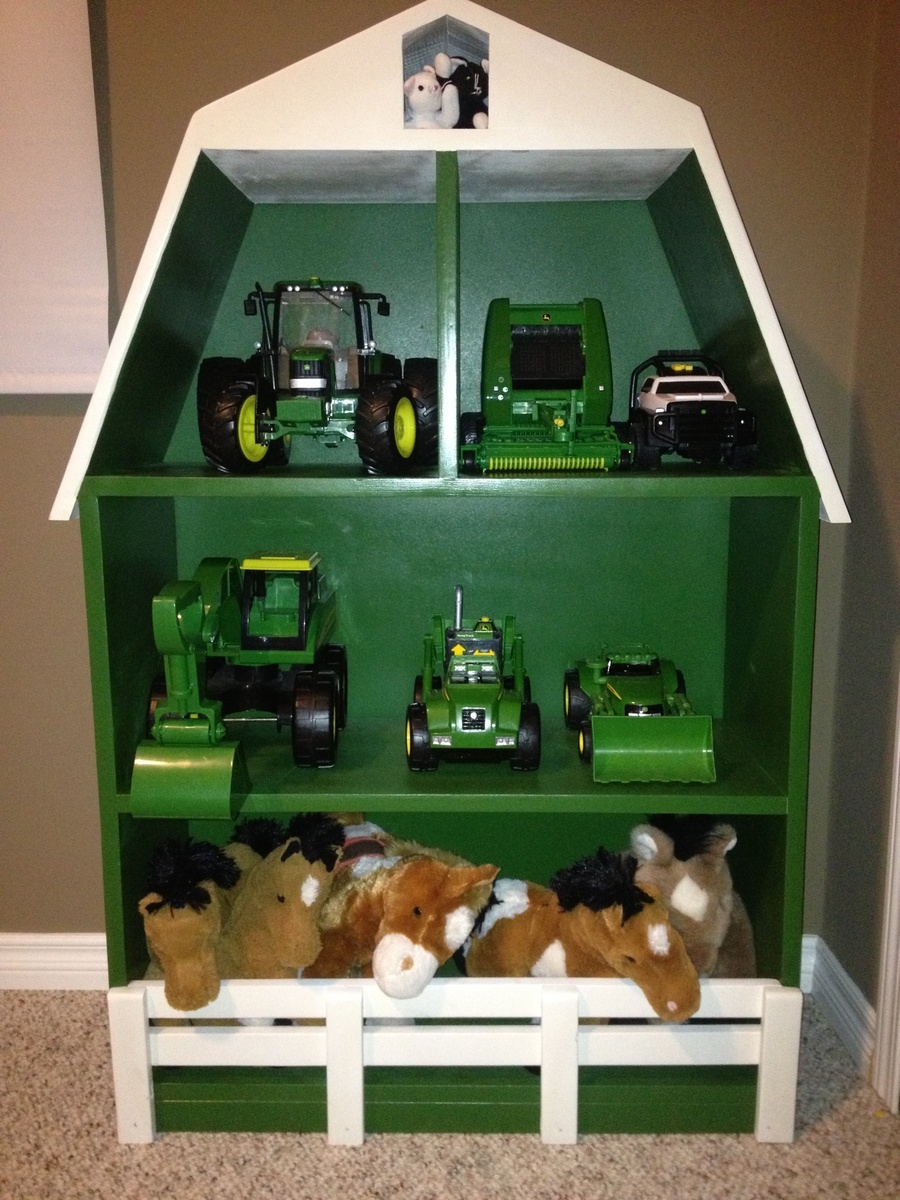
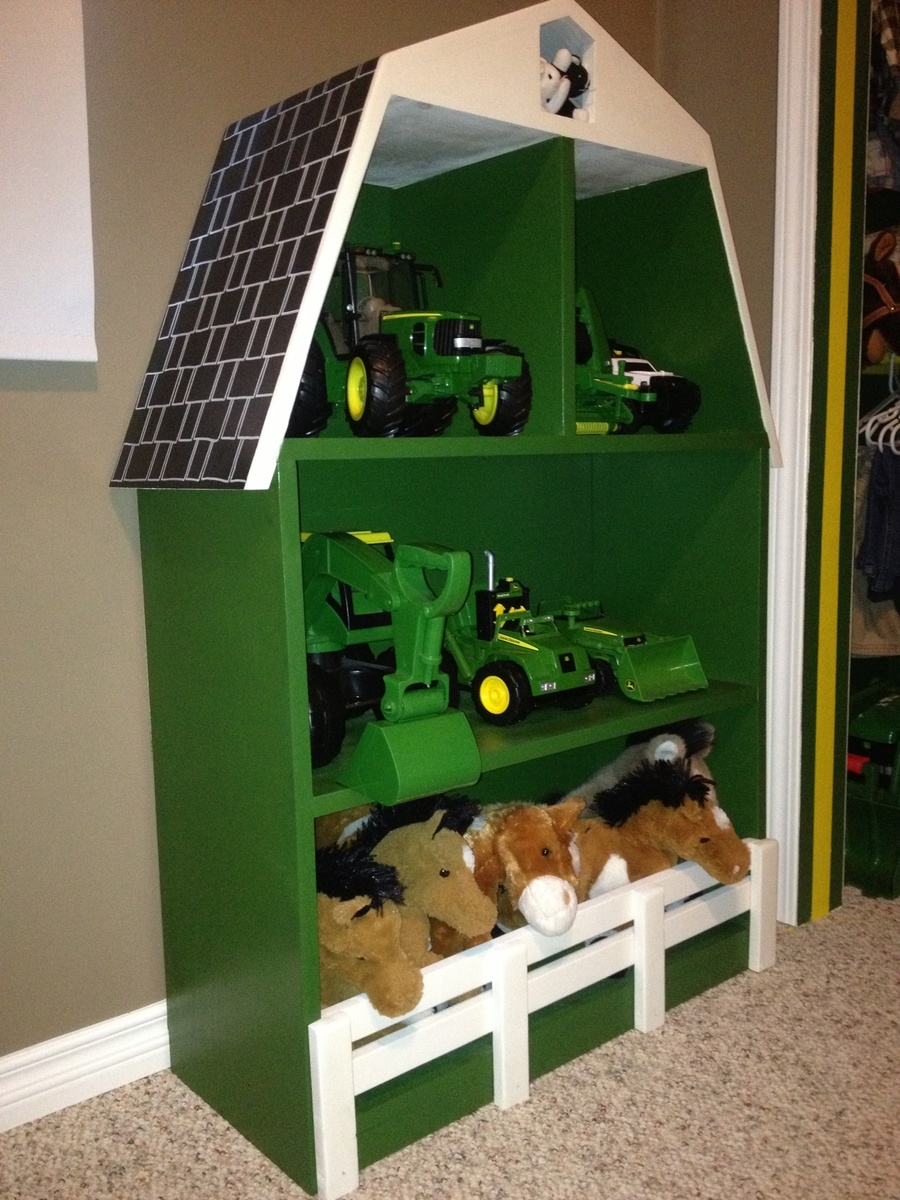
After finishing my boys' new John Deere room and tractor bunk bed (also posted), I saw this plan and thought it would be the perfect thing for some extra toy storage.
Yes, I know, barns are supposed to be red. Everything else in the room is John Deere green and I had paint leftover, which is not cheap. So green it is! I used my new paint sprayer for the first time on this project and am thrilled with it. I would recommend it to anyone who dislikes painting as much as I do. I bought the Wagner Flexio 590 which comes with a detail sprayer as well as the full size and I'm very happy with both.
Thanks to Ana for the well laid out, easy to follow plan and also for helping me create a big boy room that my boys love!
Thu, 07/31/2014 - 07:24
I love this. :) I especially love the spacing of your horses and cats... very realistic. lol. I also saw the bed when you posted it. VERY impressive little details!
Thu, 07/31/2014 - 09:38
Thanks so much for your comments. It's so nice to hear positive feedback since I'm very new to this! My 3yr old is quite particular about everything being in its place, I'll pass along that you liked his animal placement. Lol :)
Sun, 09/27/2015 - 18:26
Could u please send me the plans for this? My email addy is [email protected]
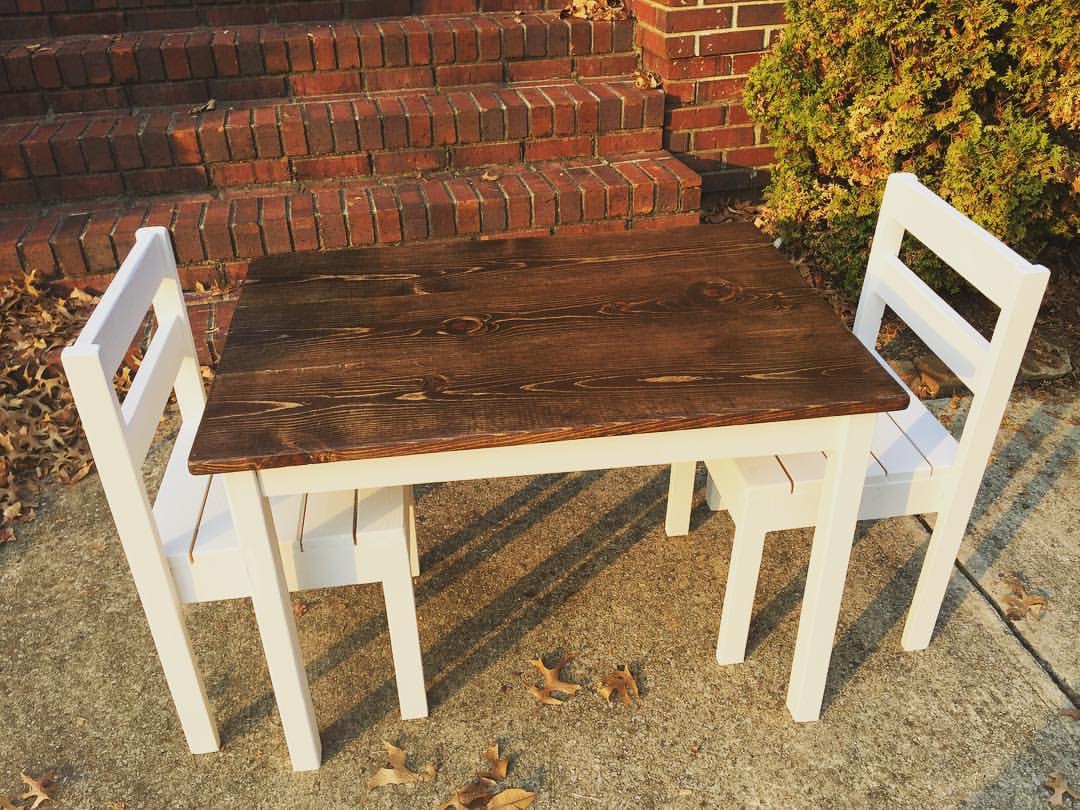
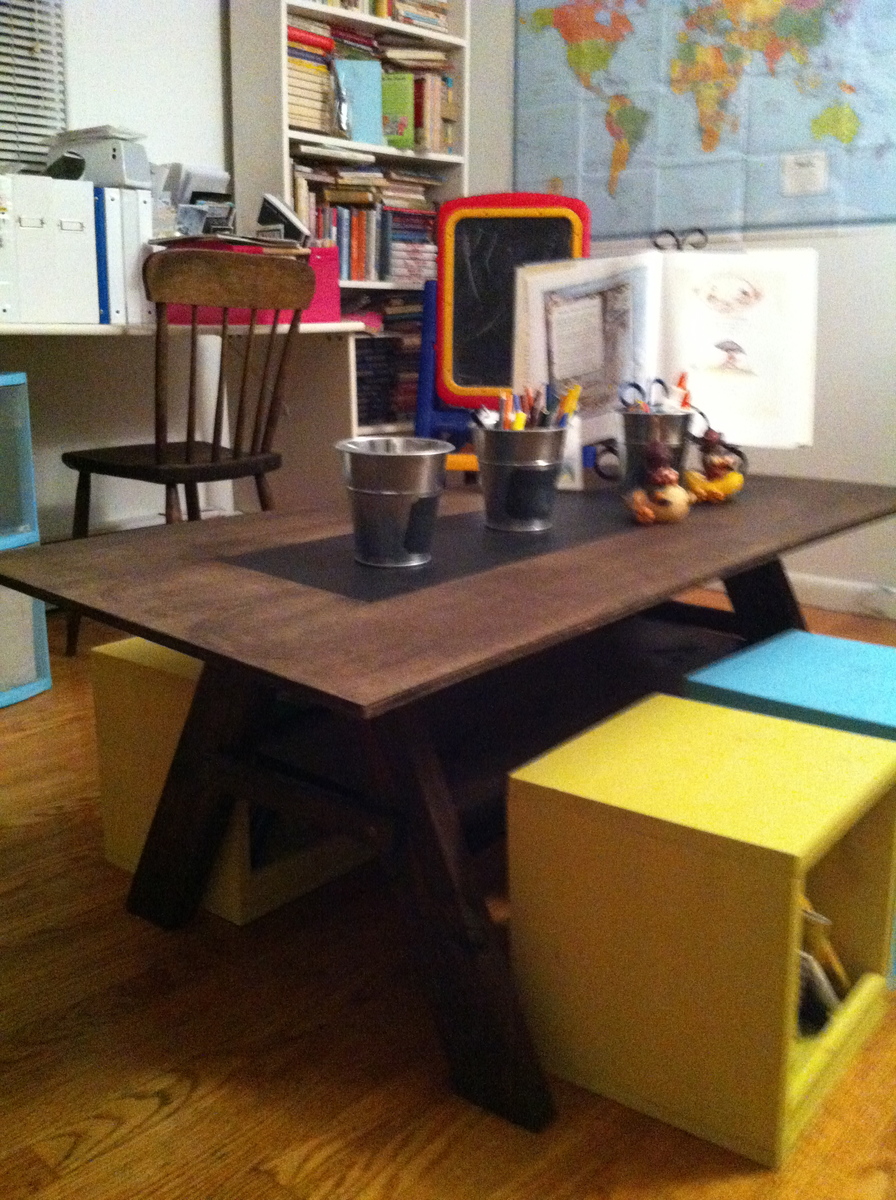
Needed a small "homework" table for my 6 year old. Looks more appealing in the living room than the Disney Princess table she's has since she was 2. Super simple build and very affordable!! This is my 3rd project from Ana White and definitely not my last.
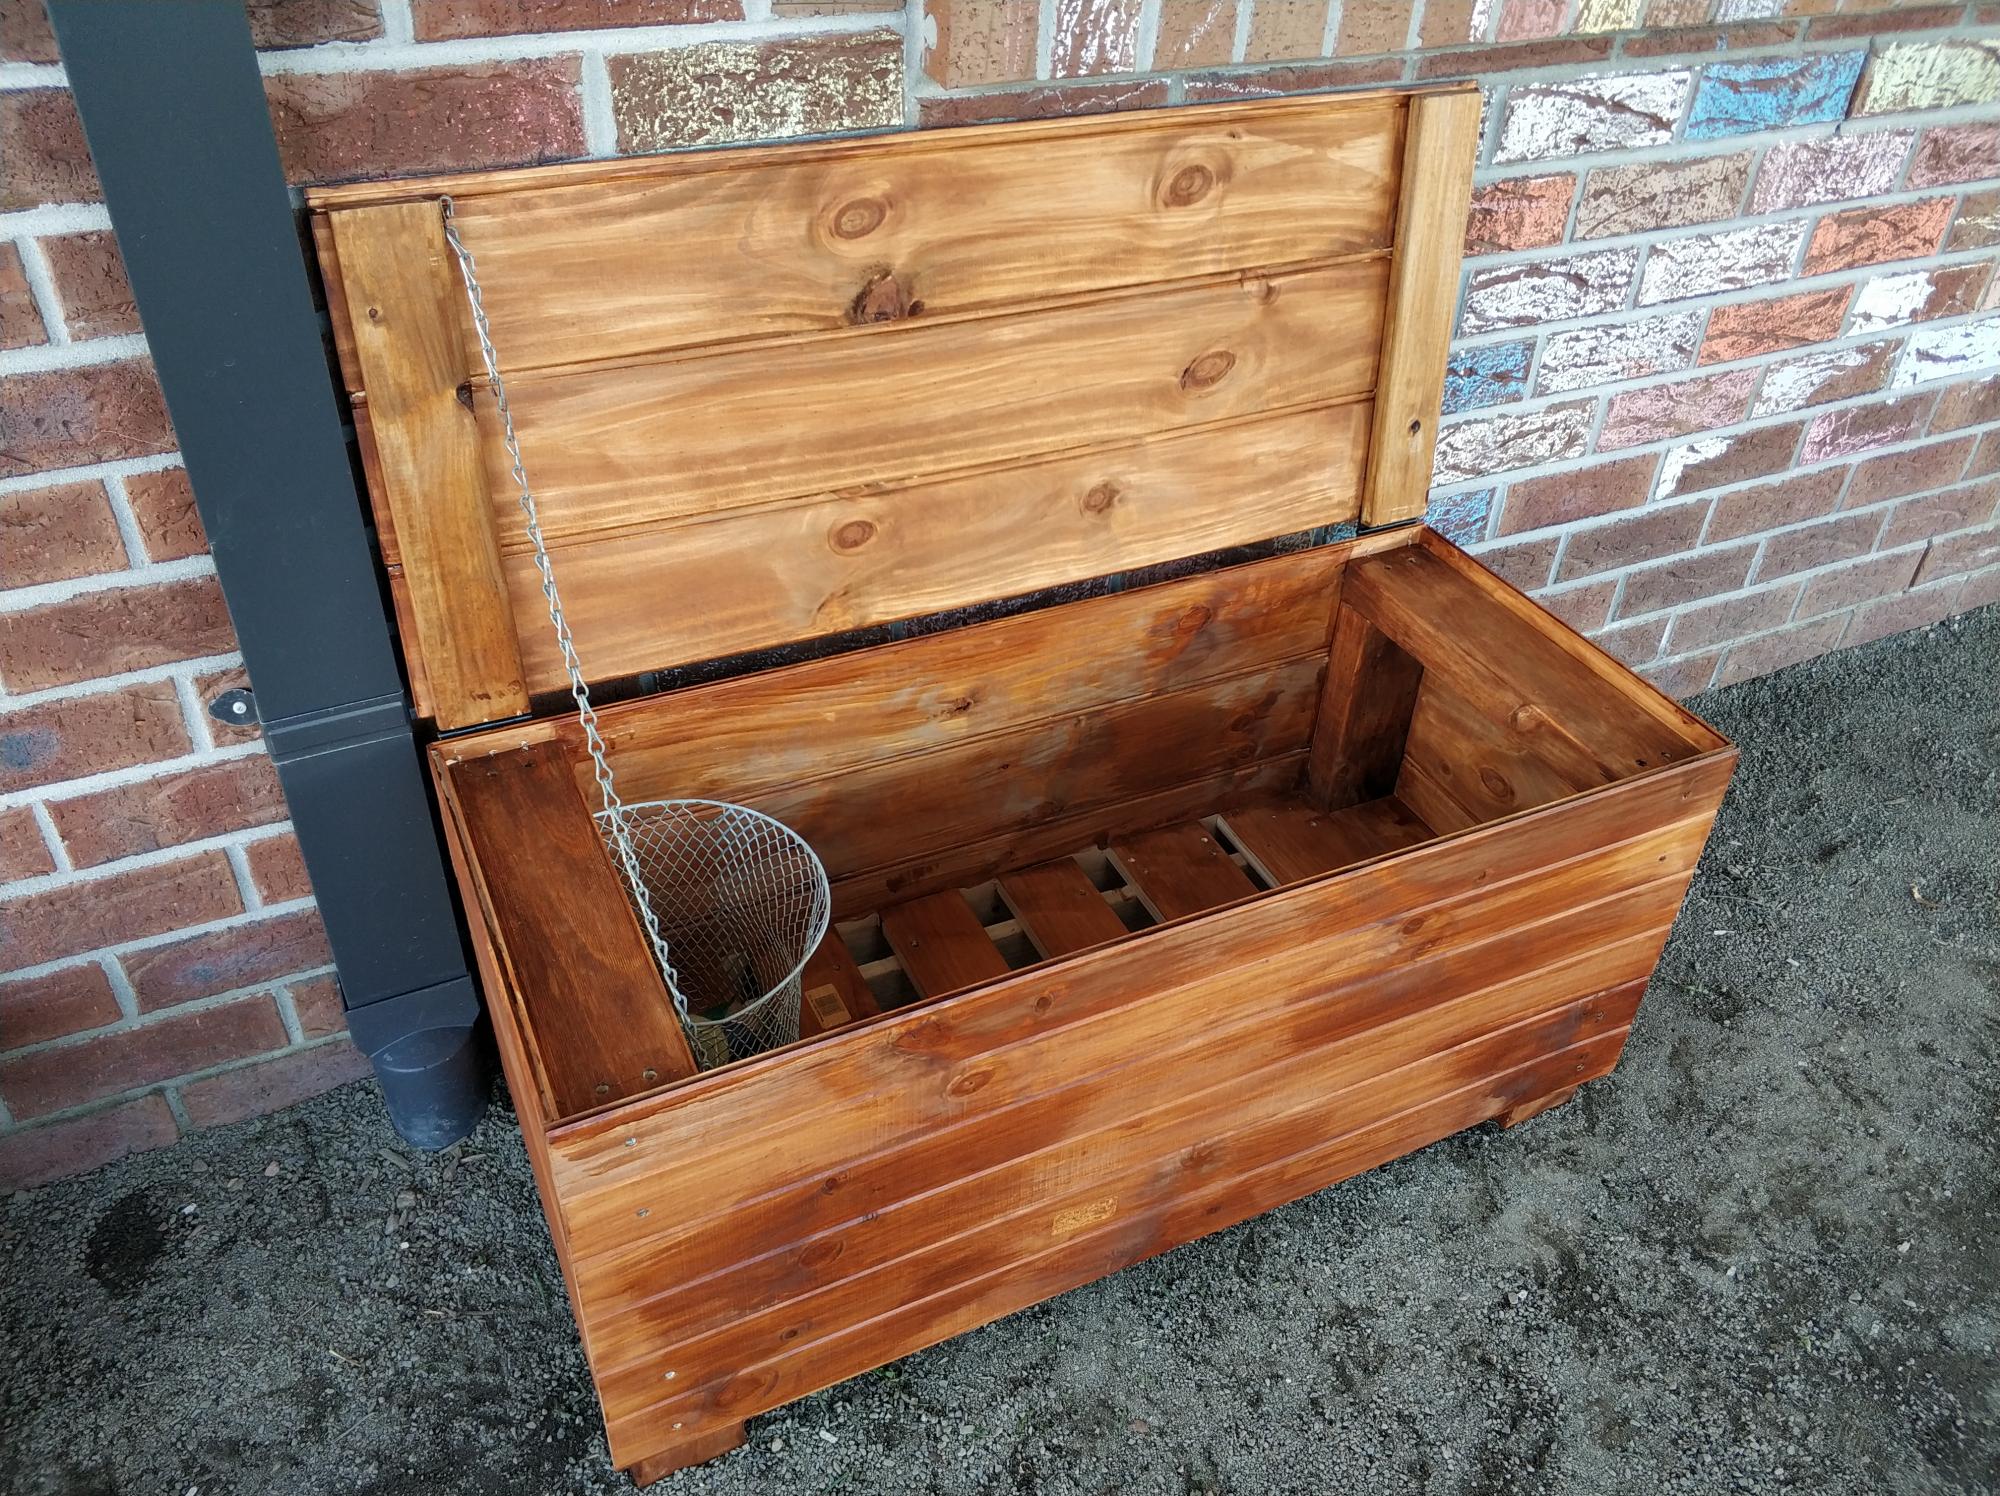
First time making anything half decent and it turned out ok. Followed the Cedar Box plans with a few adaptations. I live in regional Australia so used different materials, also extended the length. Used an app on the phone to convert the measurements to as close as I could. Worked out well, a few teething issues but does the job.
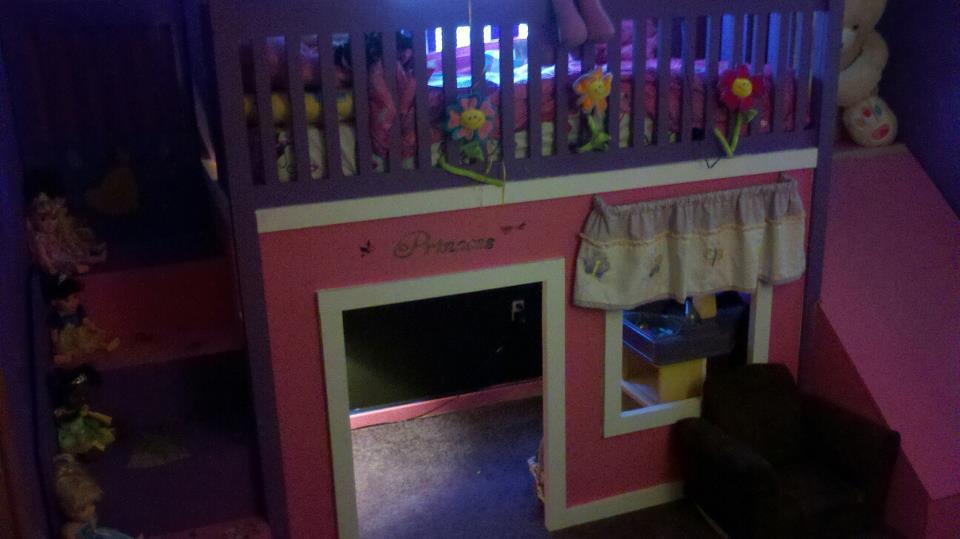
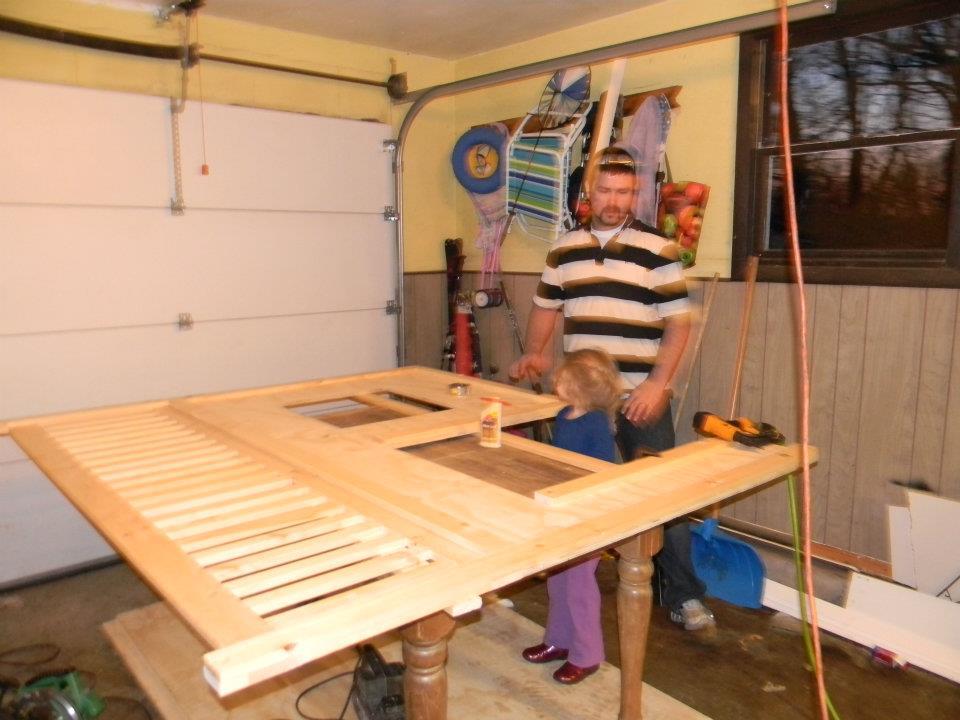
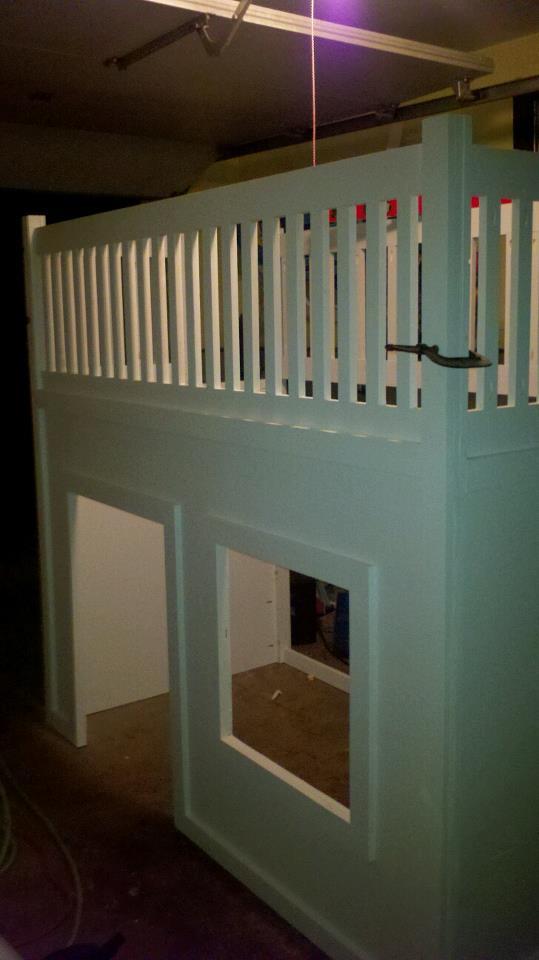
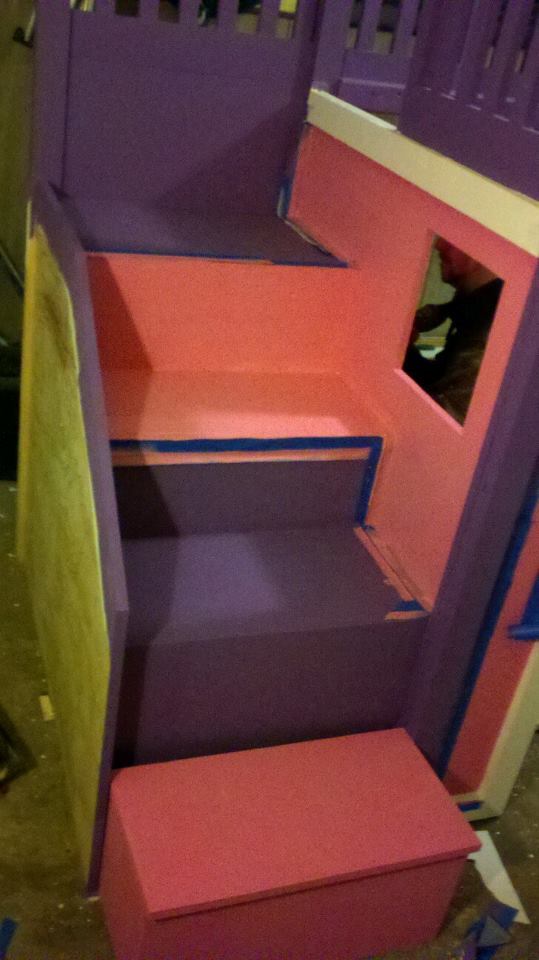
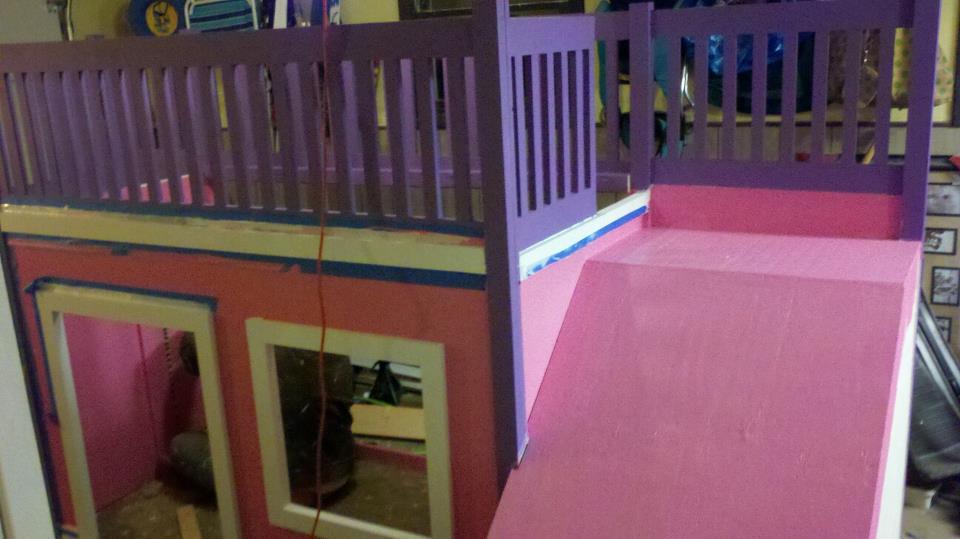
This is my first attempt at building furniture. My wife found the plans and after some research of how much it would be to purchase a bed that would be similiar, my wife decided I was building one. I must admit at the time I was not very thrilled about this idea, but I have experience with building so I thought I could handle the challange. My background knowledge is in framing and deck building, not so much furniture building and finish carpentry. I printed out the step by step plans for the bed from Ann's website and went to work. I added the stairs and the slide and build them to fit perfectly on one wall of her room. I built a small door so she has a hide out under the slide which she loves to go in and read. Under the stairs I built in some storage. After this was done, I was really happy with it. My wife, my daughter and my brother also helped during the process.My daughter loves this bed. For a week she was running around the house saying "I have the best dad ever!" and to this day the first thing my daughter says to people who come to our house is, "Do you want to see my bed?" Looking foward to building more.

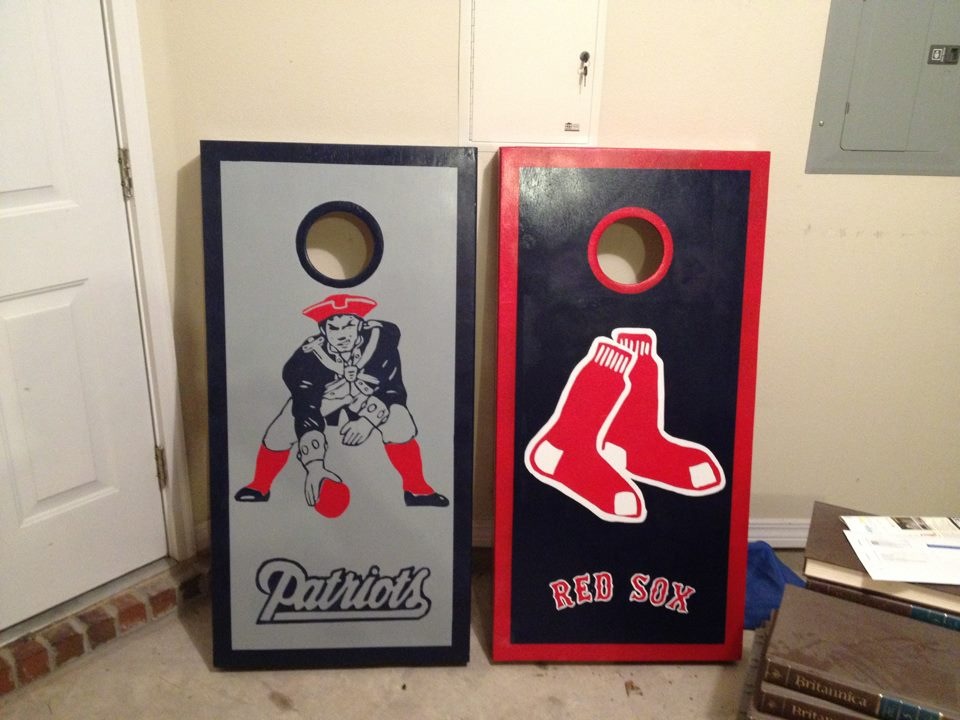
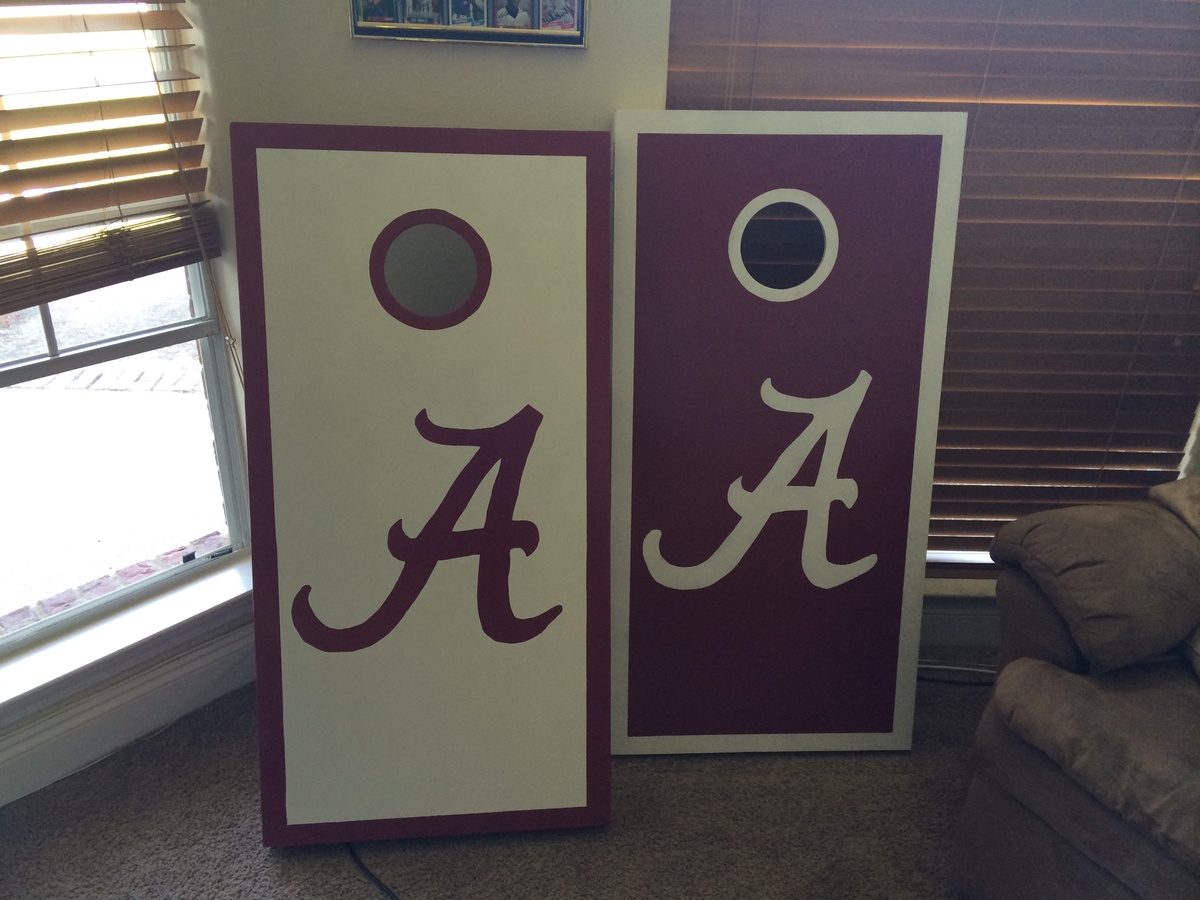
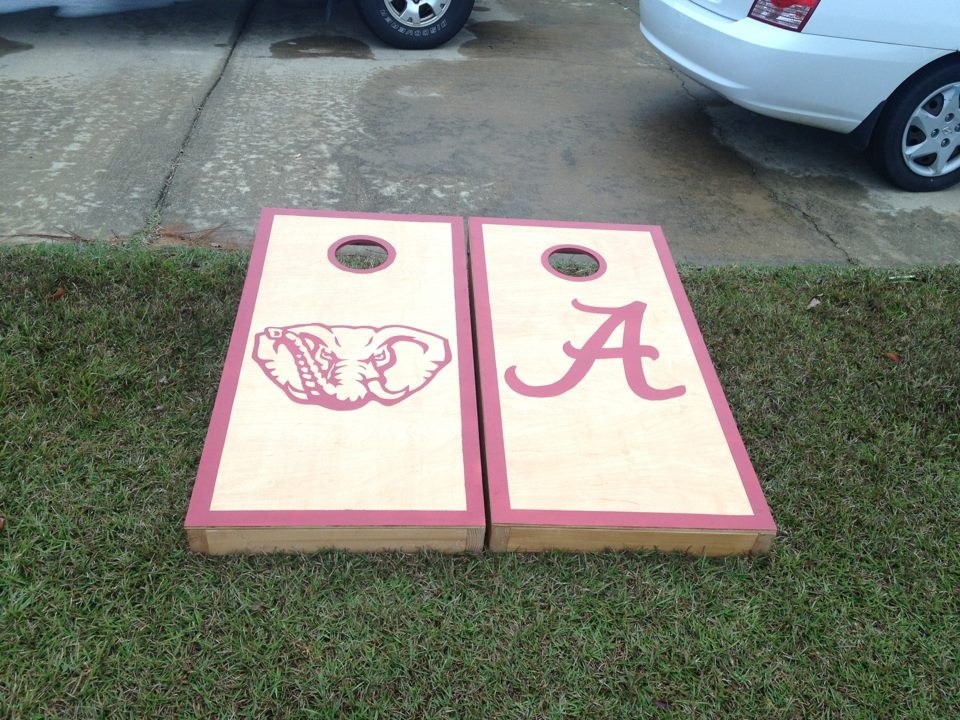
Custom cornhole boards, made with pocket joinery
Childrens chair
Using the Small Cedar Shed plans as inspiration, I created this 3'x6' shed using pressure treated fence pickets as the siding. I also made the shed one foot taller than the original plans to have a taller single door instead of the double door in the plans. Used 2x4 framing to strengthen the shed. Overall, I am pleased with the results. This was my first time constructing any type of building.
With two small boys it took me several days to make. I had some problems in the beginning because I cut the legs using a carpenter square and not a miter saw. But it worked out in the end. I love the way it came out!
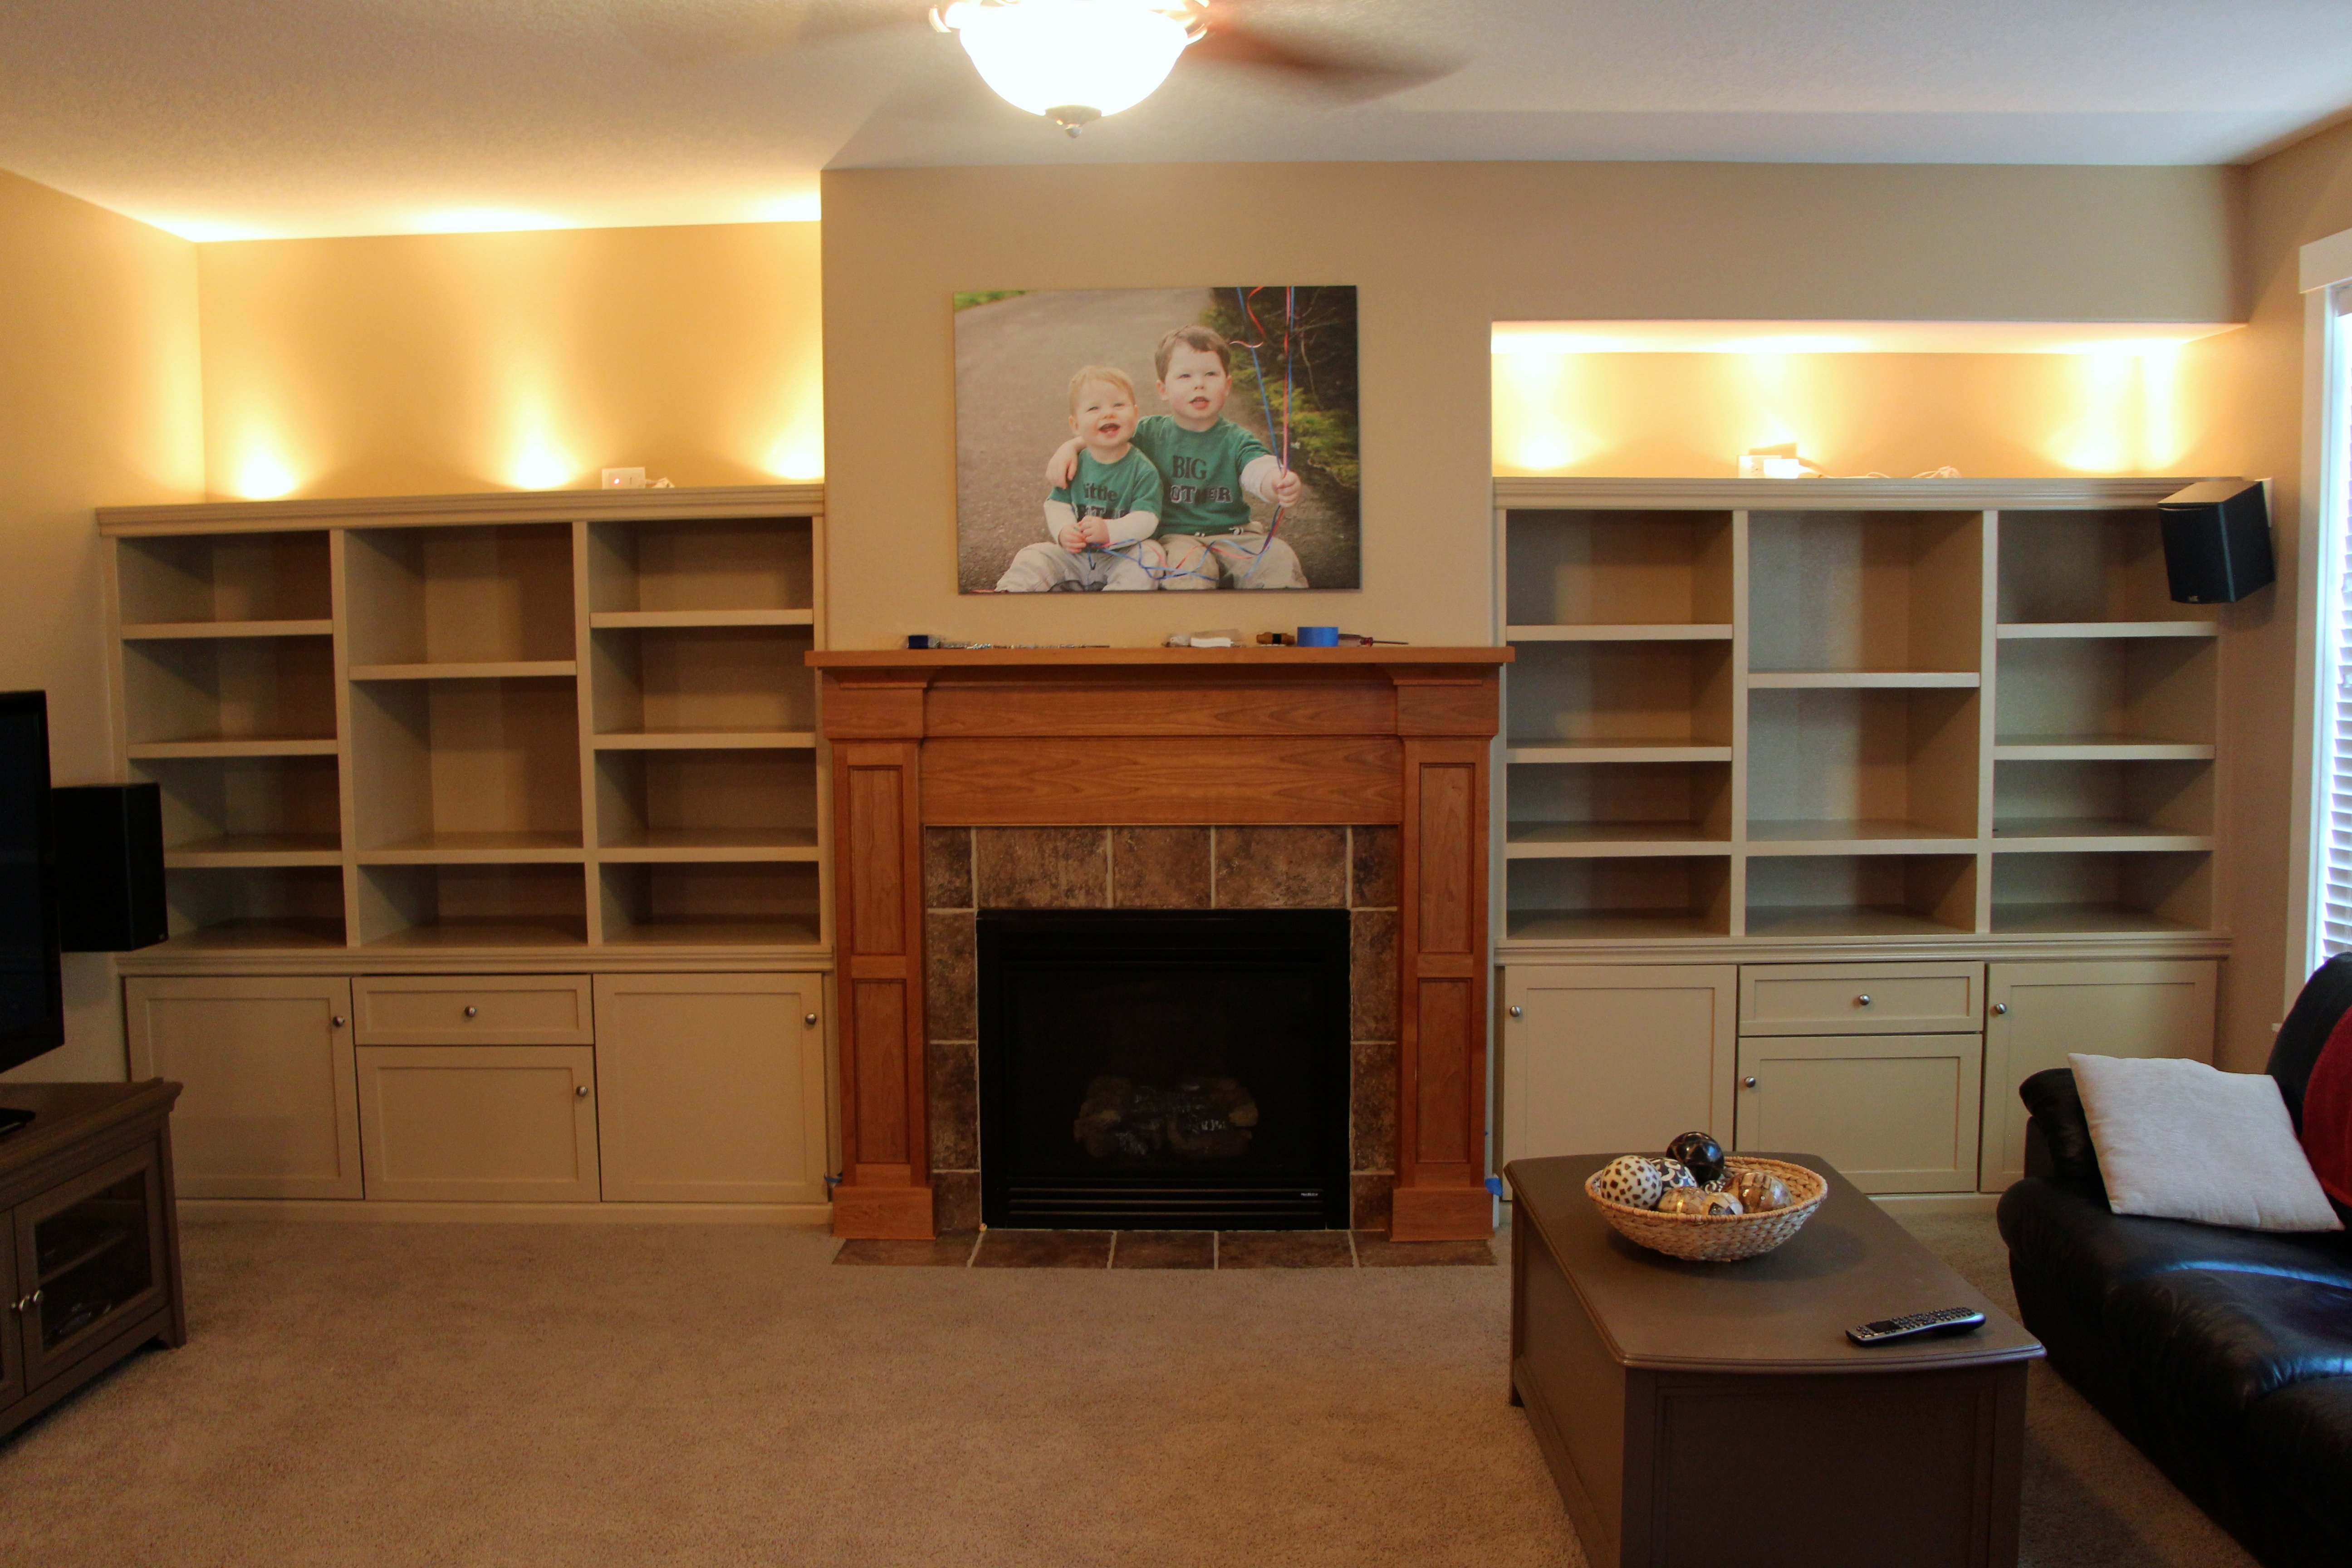
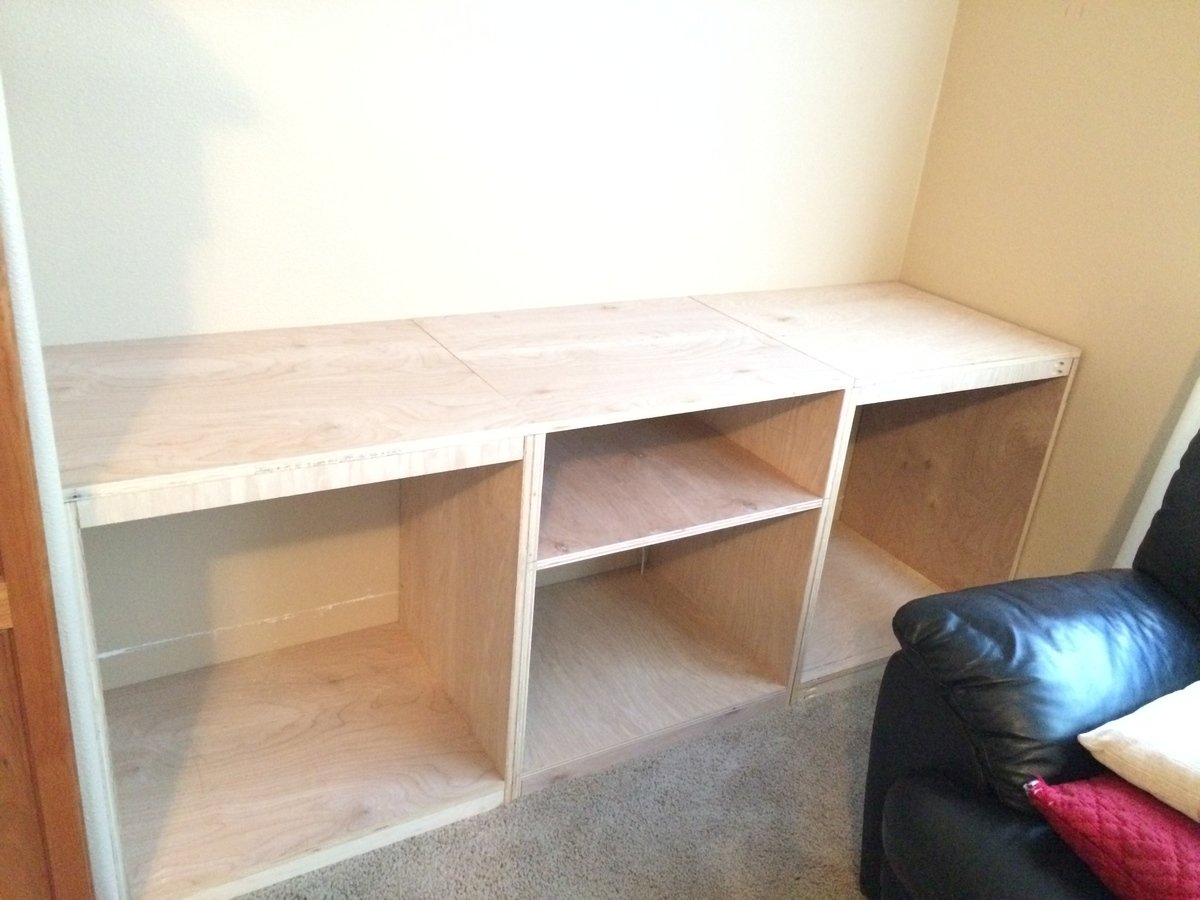
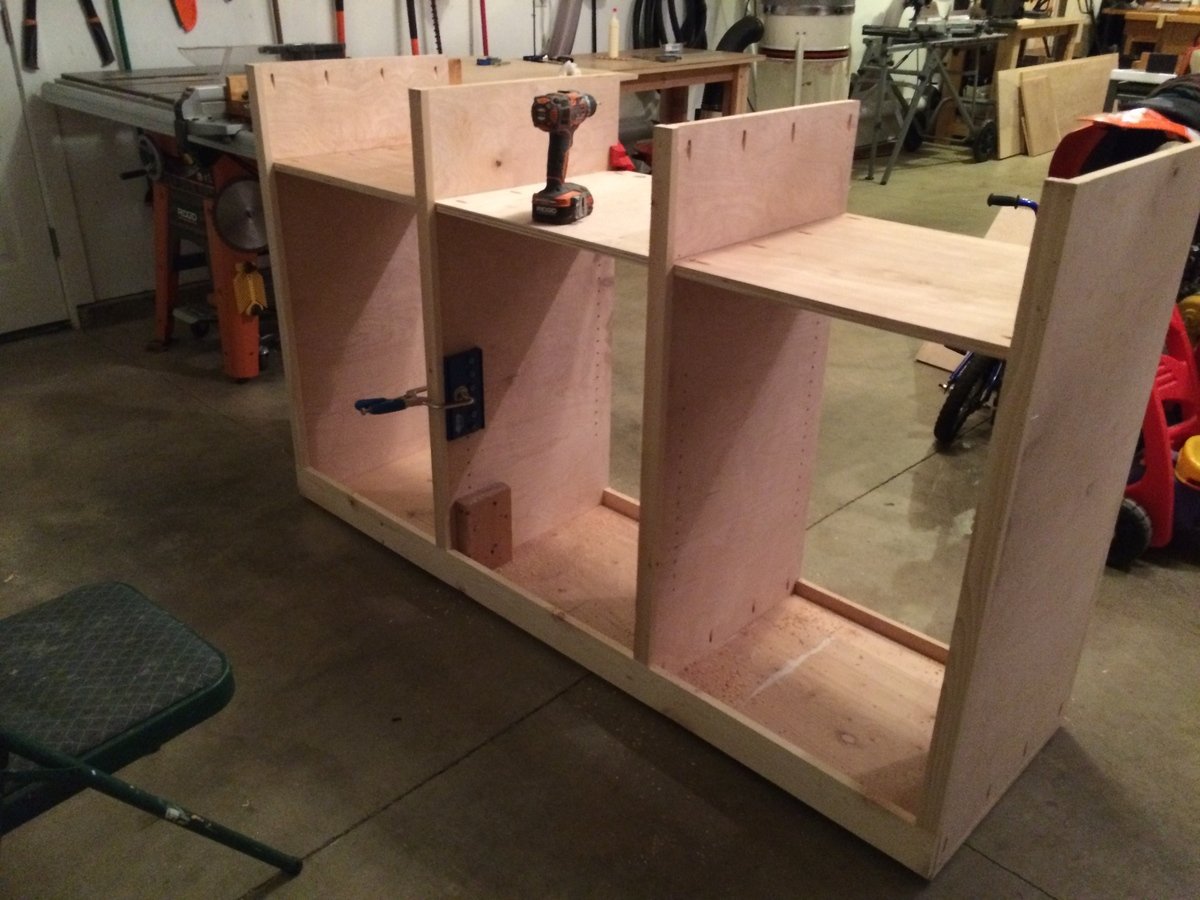
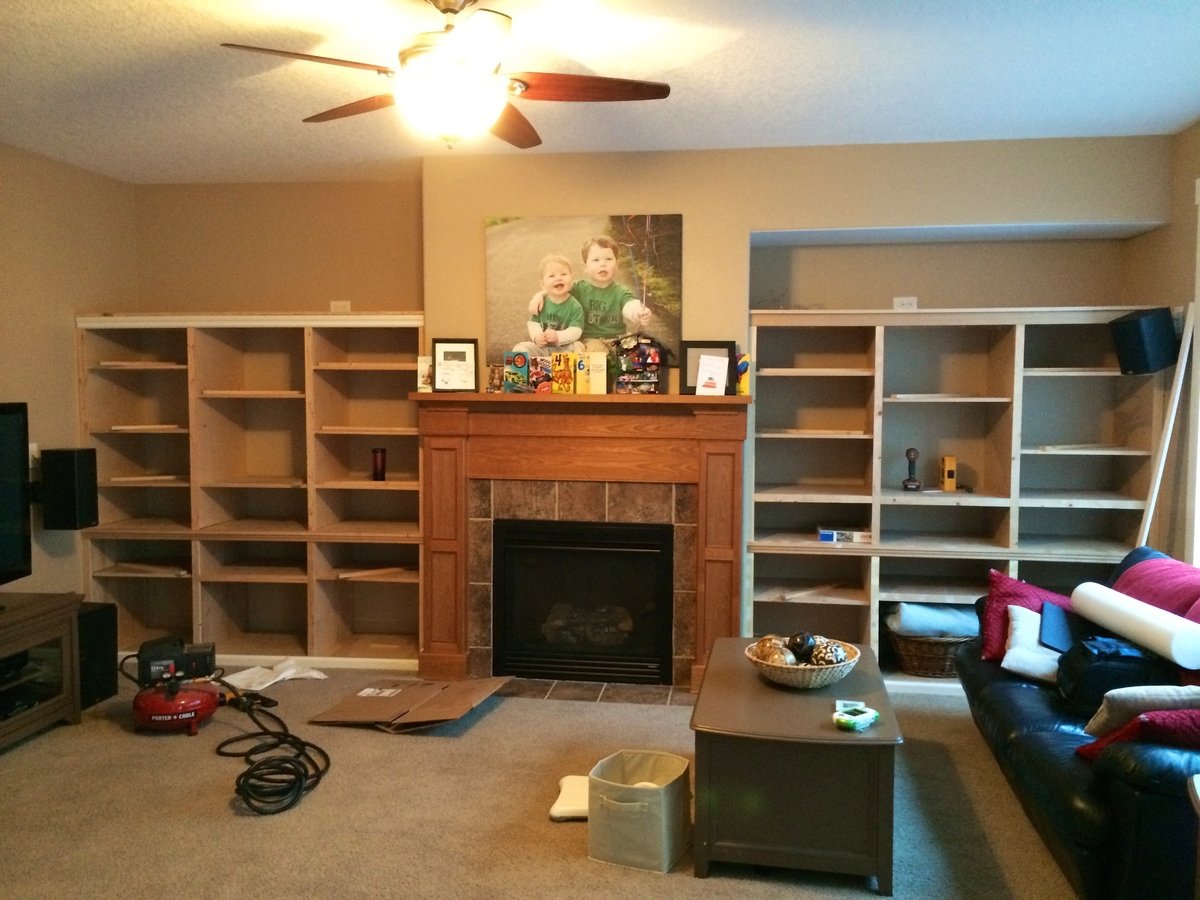
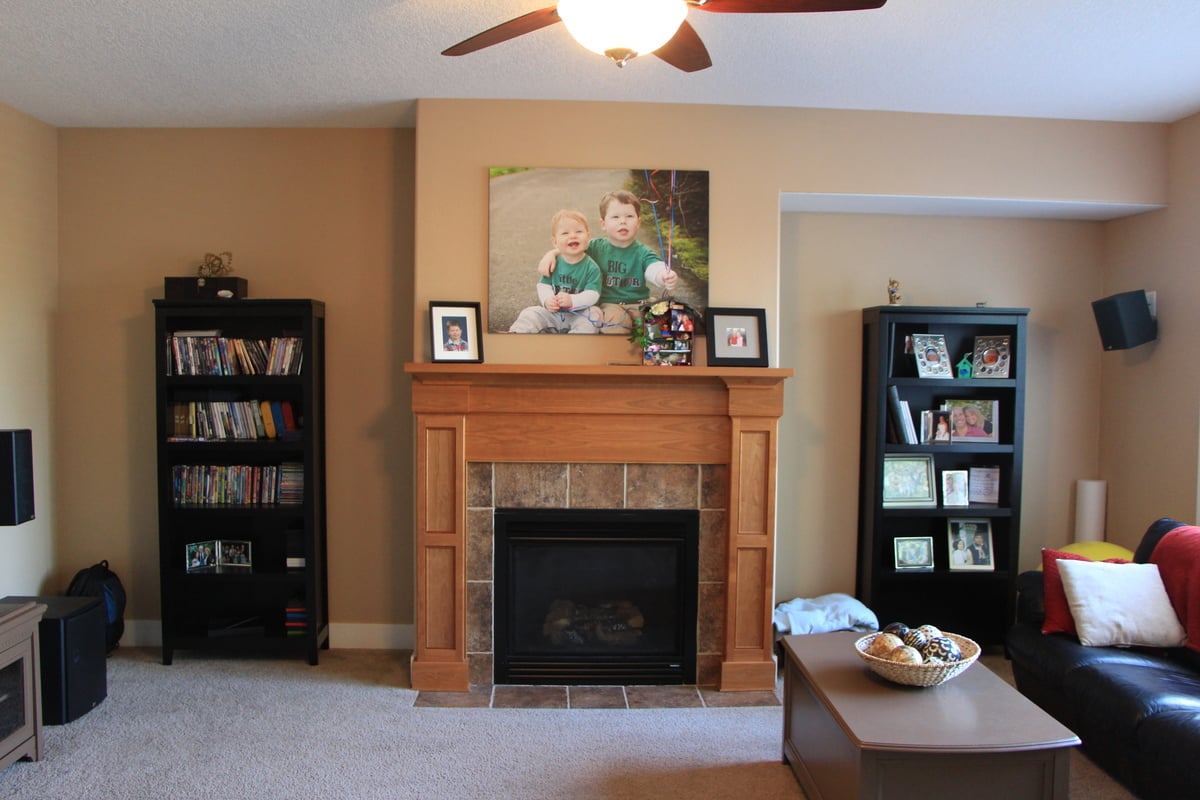
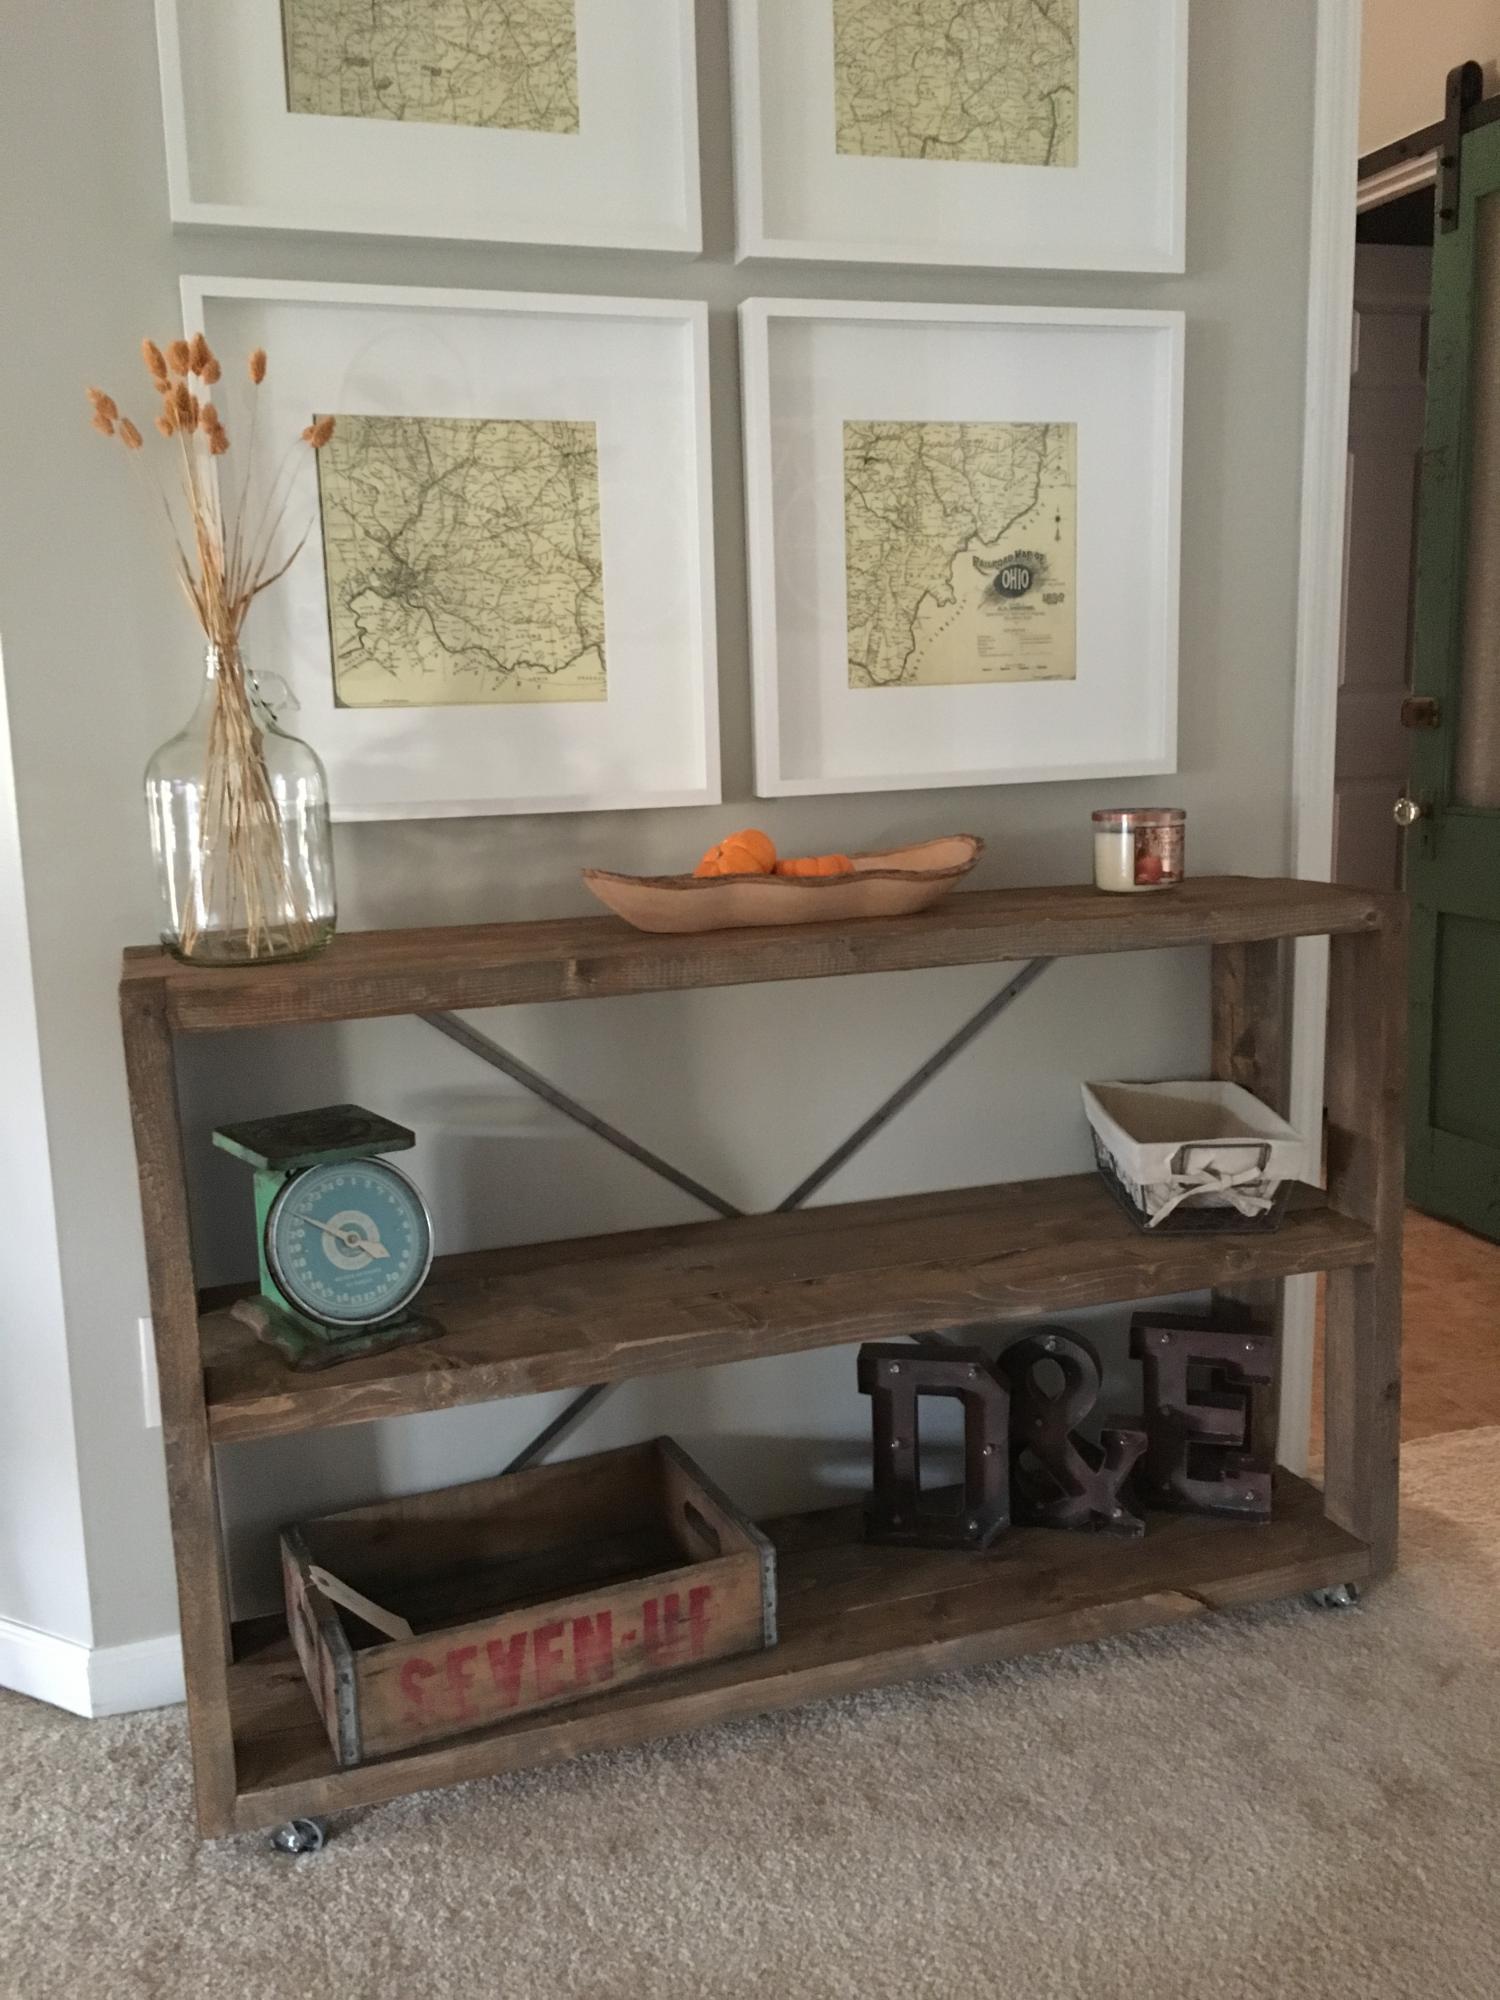
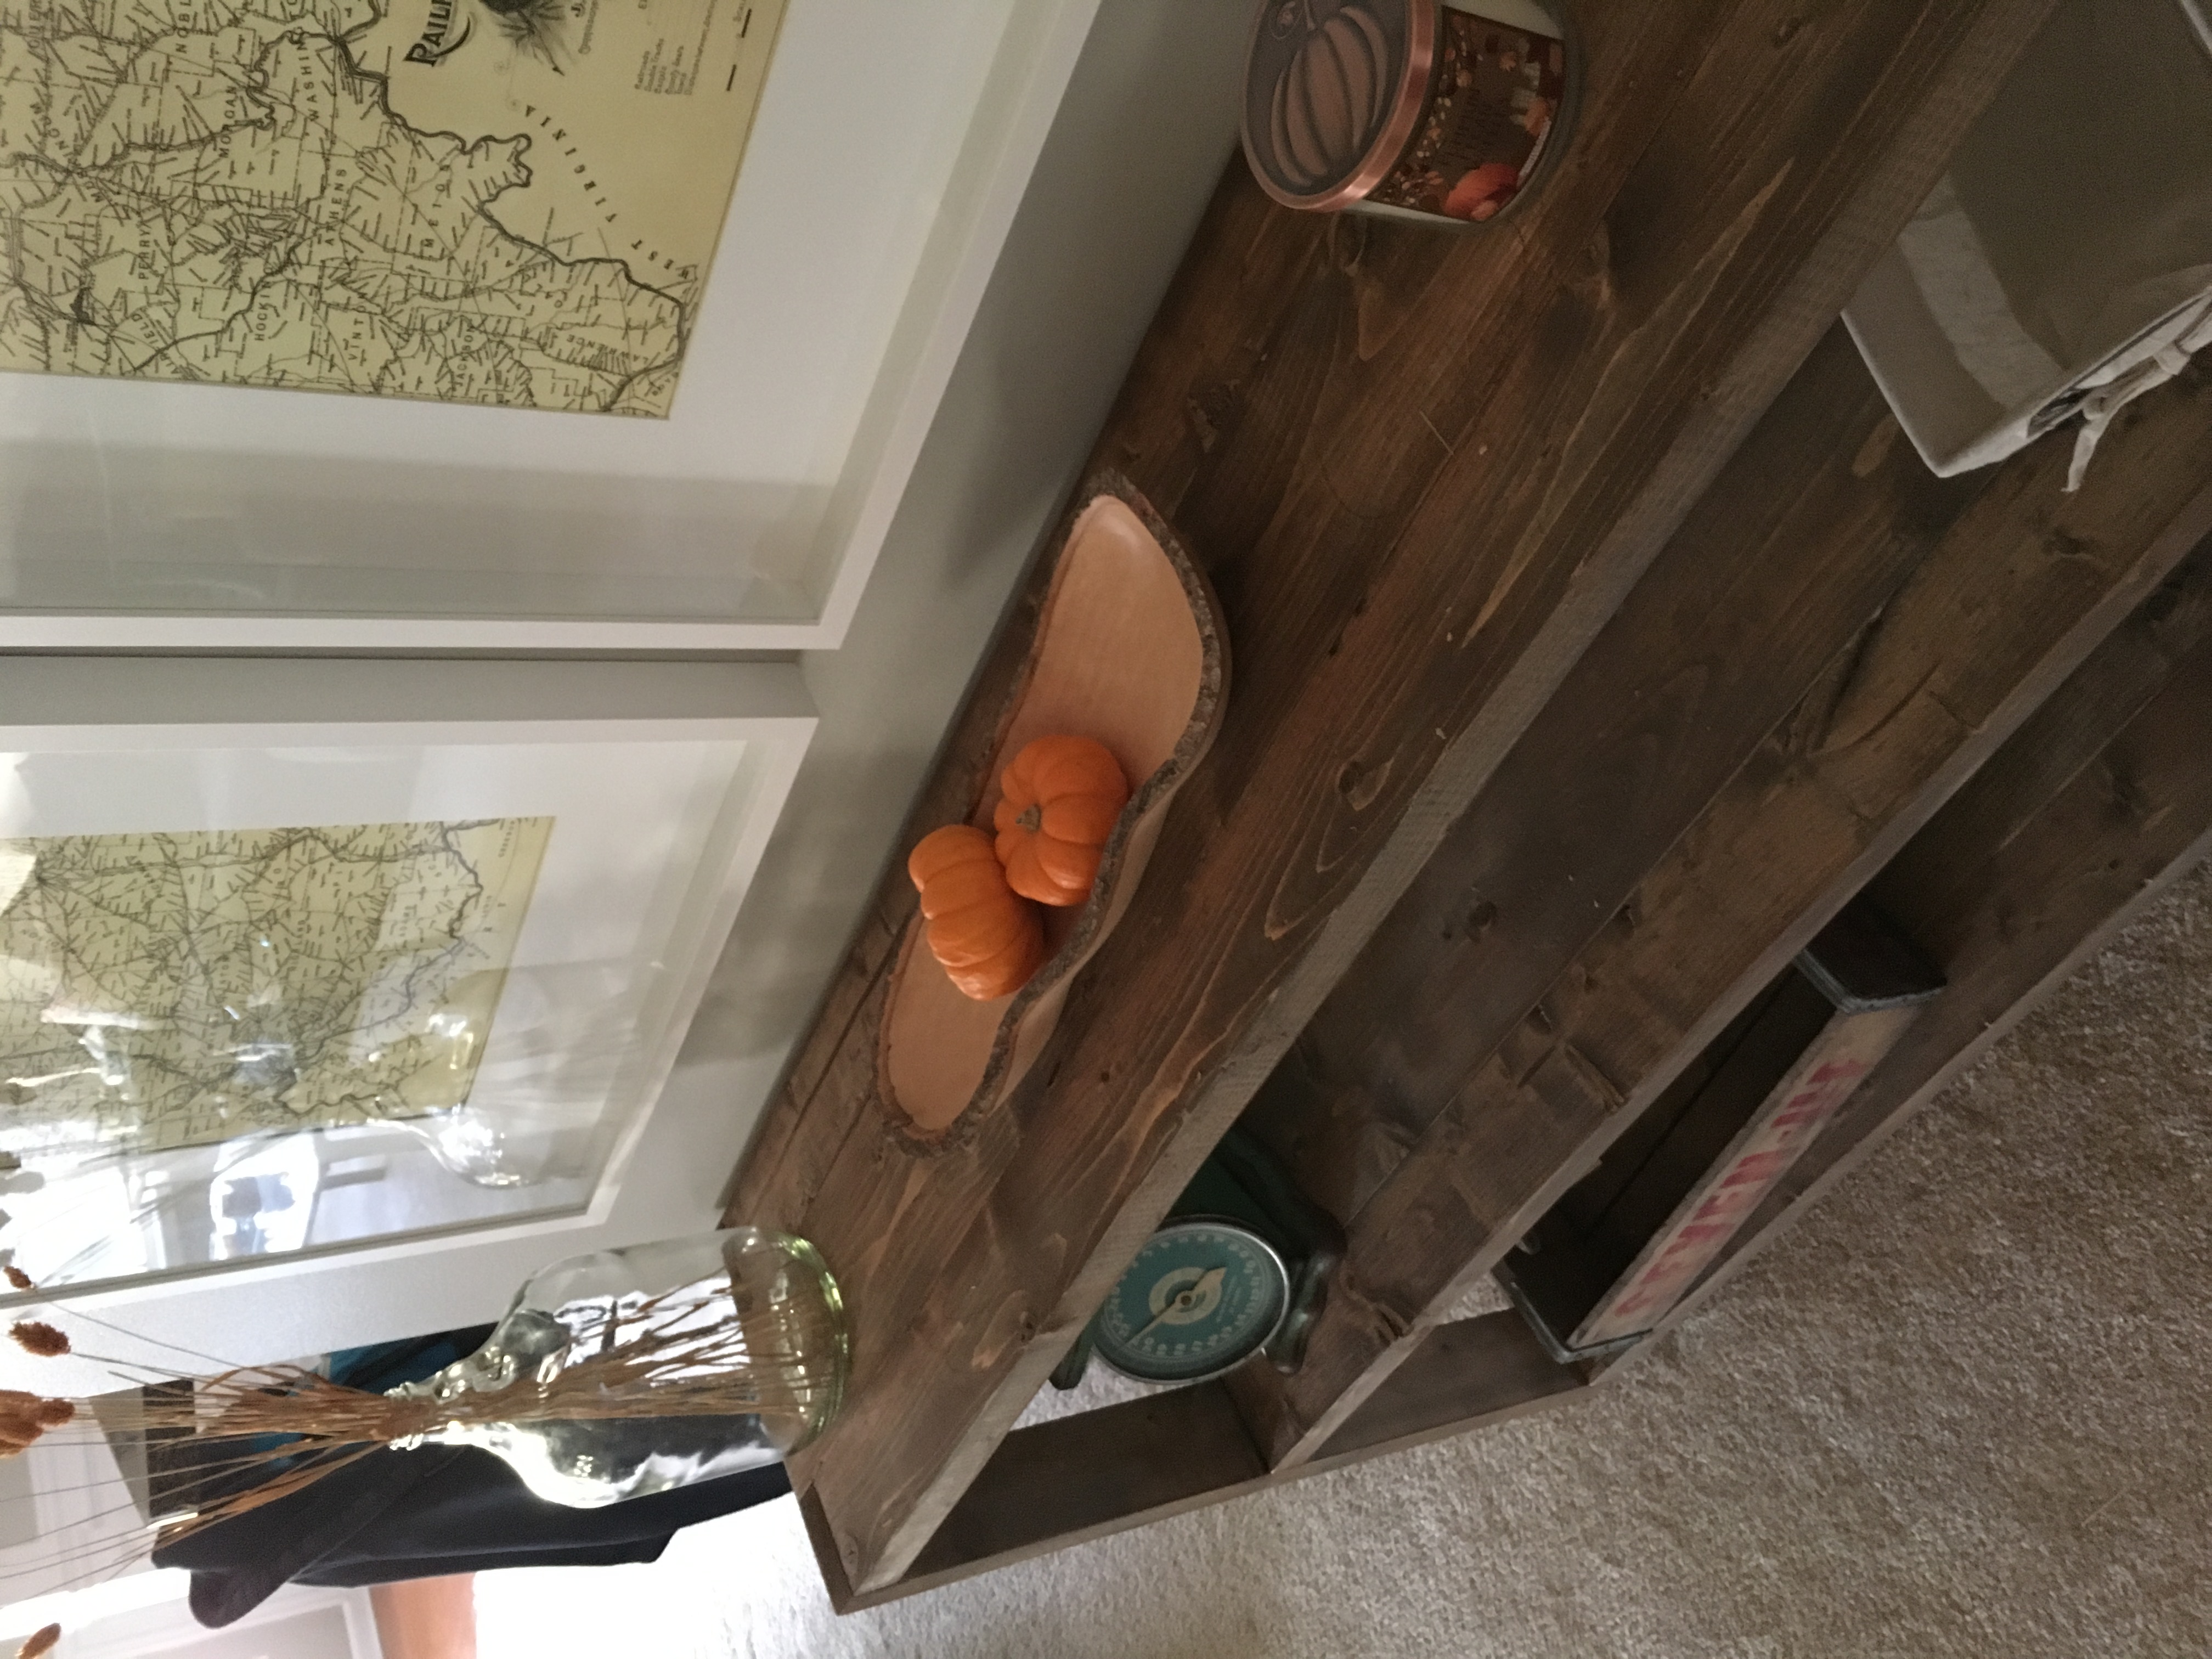
I've been wanting to build some built ins in the recessed area surrounding our fireplace for awhile now. I wasn't really sure how I wanted to tackle this and at first it was just going to be shelves from the floor up. After browsing around, I stumbled onto Rebecca's media center and could see how I could turn this into my built ins!
The whole thing is mostly boxes placed next to one another with trim that covers all of the seems. The bottom left and right cabinets were inspired by her media center side base and the middle of the bottom row is a modified version of the center console piece. For the top I combined the console side and hutch piece to get something that would work for me.
I learned a lot on this project and tried to take my time. Using trim across the entire project help make it look like one big piece of furniture. One thing I would do differently if I was to do this again is to use higher quality trim, such as hemlock as the pine required lots of wood filler, sanding and time, all which exceeded the cost difference between the two types of lumber. I used the Kreg drawer jig for the first time, which was nice and also used the Kreg shelving jig after I decided to make all of the shelves adjustable. It to was a nice and easy to use tool. A must for anyone who makes adjustable shelves.
I sanded, sanded and sanded some more and than put two coats of high quality primer (57$/gallon) from Rhodda, which was a God send. It hid all of the imperfections and created a nice smooth area to paint, which I used foam rollers and the Renaissance paint also from Rhodda. They said it went on and dried like a oil paint, which I love, but cleaned up with water. It was awesome paint to work with, but we'll see if it gets that hard eggshell layer that oil paint gets. It's already pretty hard the night I painted it!
The hardest part for me was going to the local Woodcraft store and deciding what hinges I need and how to adjust them perfectly! This was so hard as the tolerances were minimal and I wanted everything to be uniform. I could probably adjust them a little more!!
I included a picture of what the area looked like before!
The idea I had, which was the best, was when it came time to decide on a color, I had my friend who is handing in Photoshop, show me several colors on a picture I took. This changed the planned several times and save a lot of money in paint. In the end, we decided to paint them the color of the walls to make them look like they were always there. It also worked with the stained mantle next to them!
Wed, 08/06/2014 - 07:23
This is so impressive. I have an area in my office I want to built some similar built-ins, but I fear it won't come out nearly as nice as this. :)
Wed, 08/06/2014 - 10:15
The build was much easier than the finish work, which surprised me a lot! I learned a lot on this project including having good corner clamps!
Booksnotbomb-
You can totally do this, which is why I included some of the earlier photos showing it was just a bunch of boxes! PM if you need help getting started!

Finished it with two coats of shallac and used black iron hardware.
I built it for a cabin I am building. Thank you for the palns, they were great!

The wife wanted this desk for her computer. Thank you for the plans
Wood Organizer for Desk by Linda G
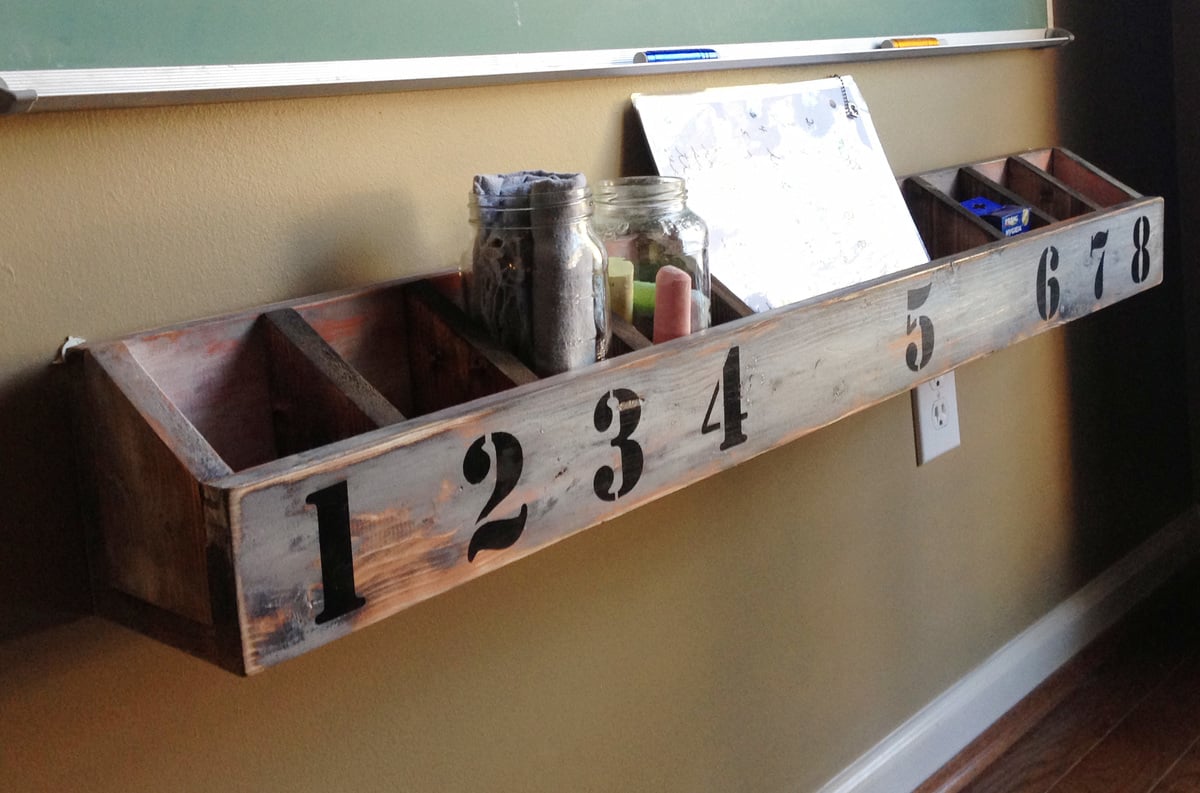
I loved Ana's cubbies the first time I saw them. :) I used different measurements and set mine for one large cubby to hold class papers and the others each fit a mason jar that holds chalk/ eraser cloth/ misc. Measurements/Wood Used: back: 4" x 1" x 44" bottom: 3" x 1" x 44" front: 3" x 1" x 44" I miter cut the insert separators to go edge to edge. Setting was 31 degrees and sanding to finish top point to back I added the inserts last after distressing the front/back/bottom assembled. I stained the inserts with no distressing and slid them in and used finishing nails to hold them to place front and back as my last step.
Tue, 01/22/2013 - 10:54
I love this project! You did an amazing job. I also love that you put the inserts in at the end, that would have been so much easier!
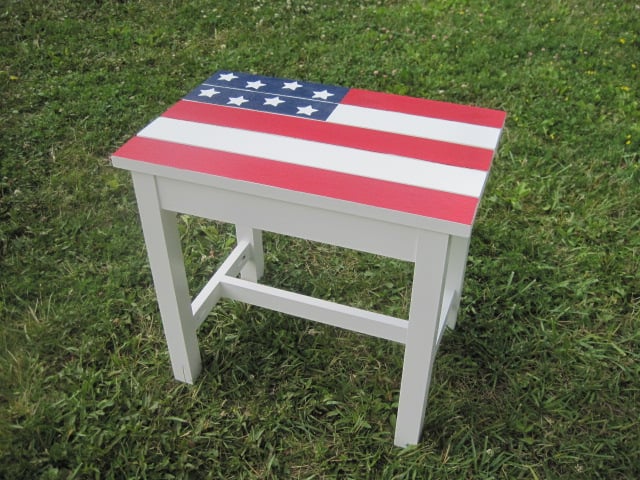
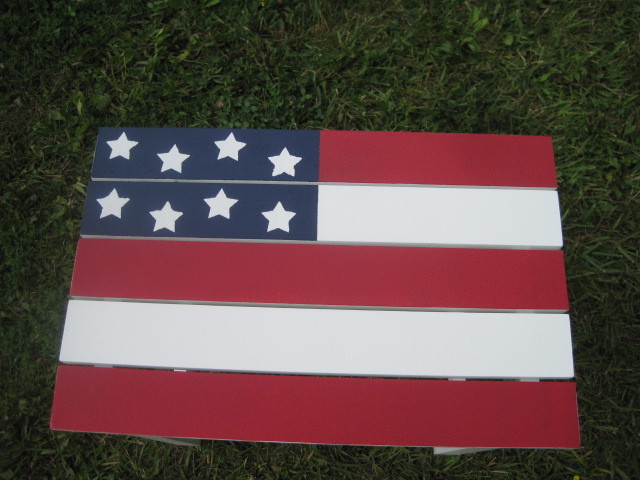
I built this in small spurts over a week. The most time consuming part was waiting for paint to dry. I painted all of my wood before I assembled since it would be too hard to get in the crevices after putting together. I painted the table top at the very end after it was assembled. I used painters tape to make sure I didn't goof and the stars are stenciled on. I extended the table to 20 inches wide so it would look more like a flag and just adjusted my other cuts to make it work. I built one for my Step-Mom and had to build another for my Mom after she saw how cute it was.
I modified the plans to fit my space. I needed a shorter wide shelf. This project was easy and fun. Turned out great
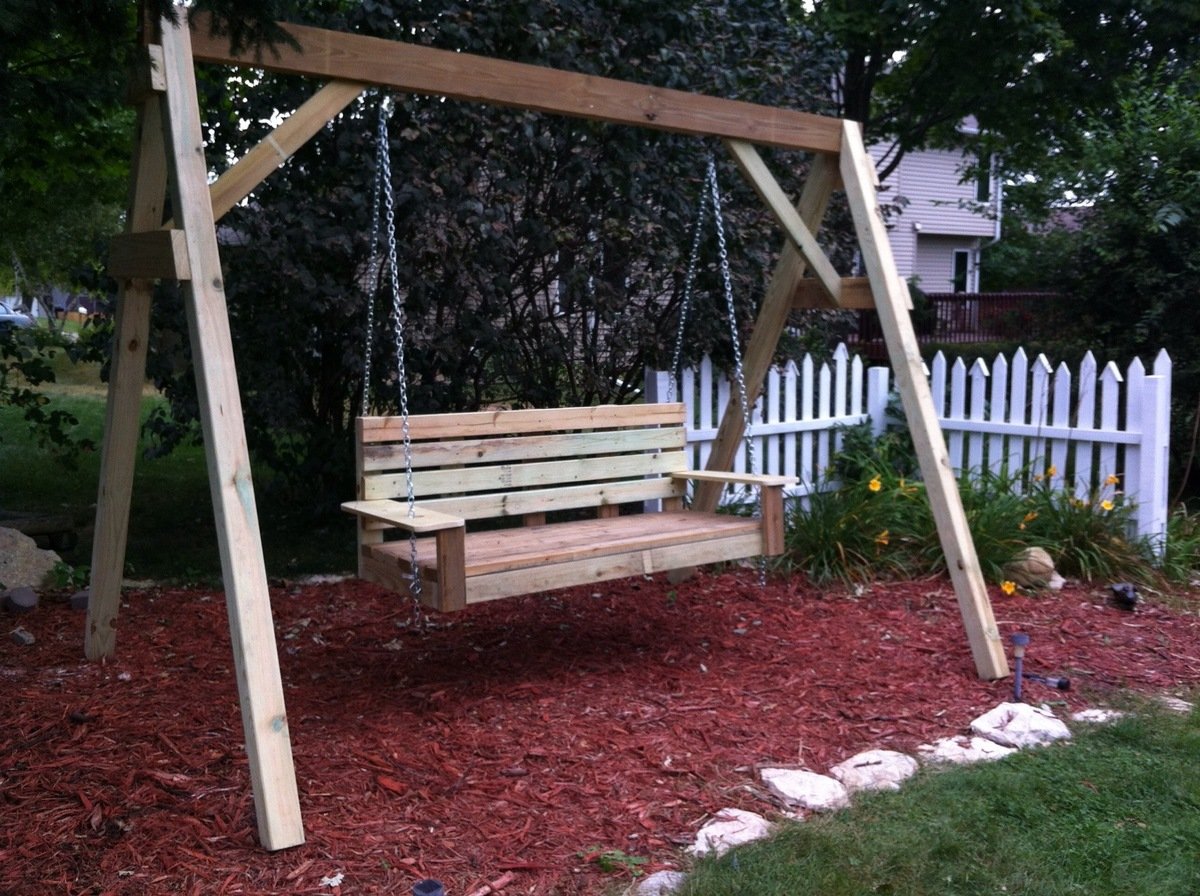
I wanted to make this porch swing ever since seeing it in the plan catalog (Large Modern Porch Swing). Just a matter of setting aside a weekend to get it done and then to find A frame to support it. I made the A-frame from a combination of this post:
http://www.buildeazy.com/newserve/swing_seat_support_dec07_1.html
and this one:
http://www.hgtv.com/home-improvement/custom-a-frame-childrens-swing-set…
I made the back a bit higher on our swing... and not quite as wide.
Reading several other blogs on this- I chose to attach the chains to the top back of the swing to keep it from tipping backwards...
Now just get to enjoy it!!
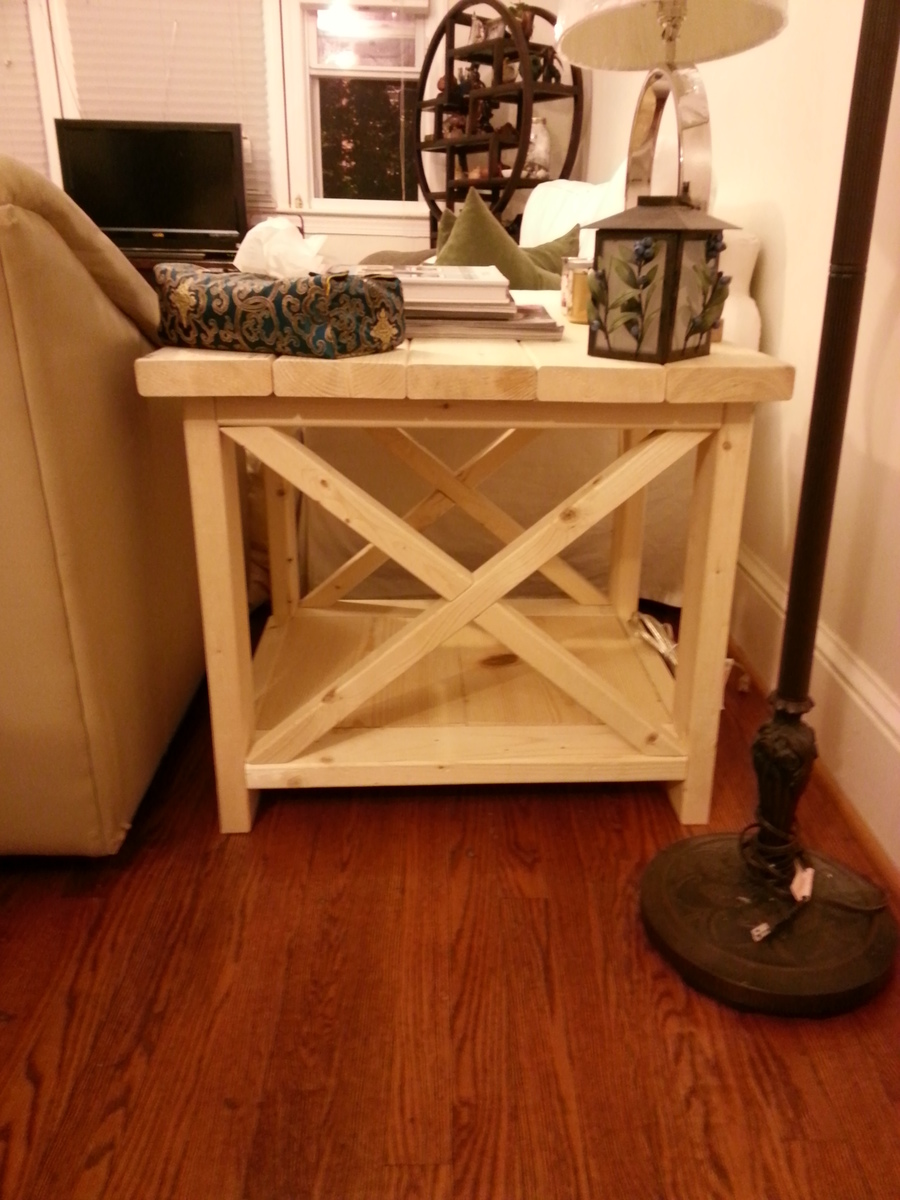
Built two of these over the weekend. The first one took 7 hrs to build and the second one only took 3 hrs. Things I learned:
1) Do step 3 before you do step 2. It was a nightmare trying to fit the 1x12s into the rectangular opening. Once you get the 1x12s in there, you can sandwich the 2x2s neatly onto the sides without having to shave down the 1x12s trying to get them to fit.
2) Check for square as you go. This will be important when you get to step 4 and 5.
3) I don't know about other folks but the 2-1/2 PH screws were always screwing all the way through to the other side so I used 1-1/4 PH screws for most places.
And that's it folks! A gorgeous and easy side table. =)
First table my husband and I have ever made, and it turned out beautifully!

I built the one bench using the original plan with the storage and table top unit but needed two additional seating benches to go around the firepit without the bulk of the backside of the bench.
I modified the original plan as follows:
Shopping List:
(2) 2X6X8
(3) 2X4X8
(2) 1X6X8
Cutting List:
(2) 2X4X17" front legs, 15 degree cuts, parallel long to short
(2) 2X4X23" back support, 15 degree cuts, parallel long to short
(2) 2X4X20.75" back legs, 15 and 60 degree cuts, not parallel long to long
(2) 2X4X24.75" under seat, 15 degree cuts, not parallel long to long
(2) 2X4X30" bottom support, 15 degree cuts, not parallel long to long
(1) 2X4X42" bottom cross brace between leg sets, 90 degree cuts
(2) 2X6 cut equally in half, 3 for the seat and 1 for the top plate
(2) 1X6 cut equally in half, 3 for the back rest and 1 to be tucked under the seat overhang
Thu, 09/08/2022 - 11:23
Great work! Have you had any tipping issues with the benches without the table back? If you kneel on the bench backwards and lean on the back do you think it would tip? Ha I clearly have kids around to be asking such strangely specific questions... TIA!
Thu, 09/08/2022 - 14:26
Also, what size platform did you pour for reference?
Sat, 02/25/2023 - 08:57
The concrete pad they are sitting on is 14 foot diameter.
Sat, 02/25/2023 - 08:56
I built these for my daughter/son-in-law and their young family. I have grandkids that use them and have never tipped them. However a strong wind gust 100km/hr did flip one over but not the other. I would suggest adding a horizontal ground level ‘foot’ extension on one or both back legs to alleviate any concerns of tipping.
