Wall Frame from page 70 of The Handbuilt Home
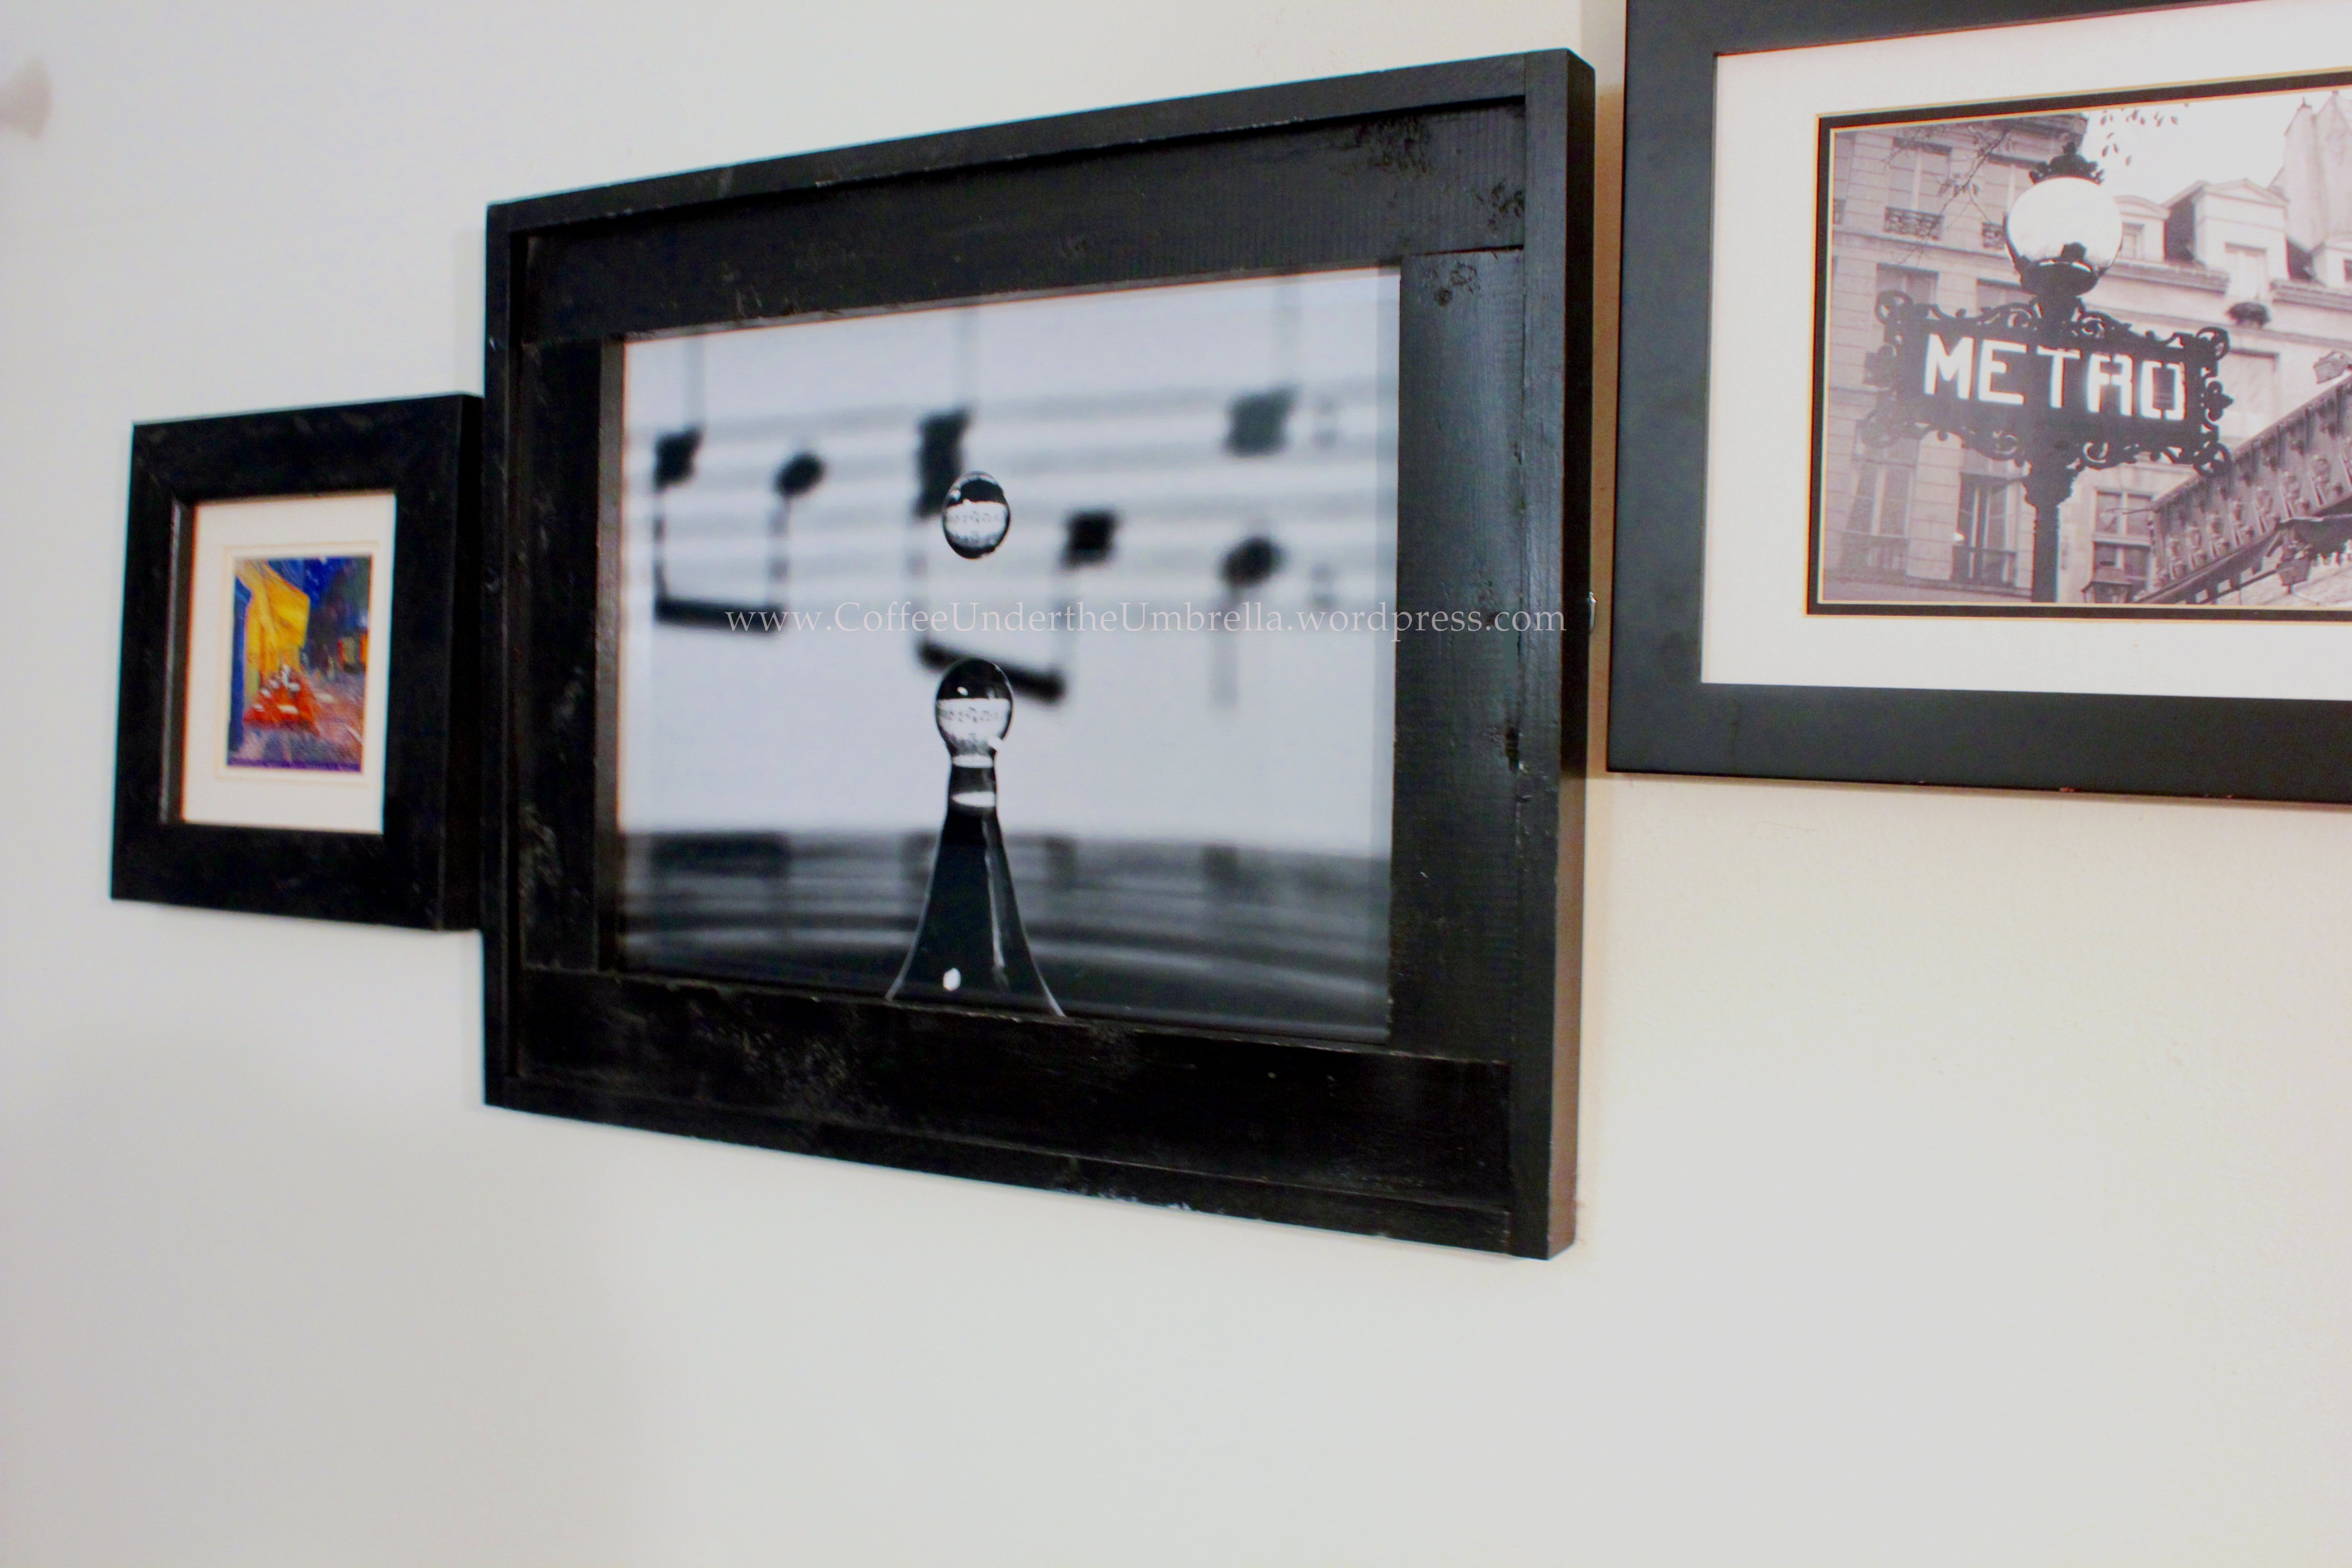
So I bought this print, sized 16" x 20", from an independent photographer. My husband said I could get it only if I built the frame, so I was on the hook.
I used pine boards and glued and clamped the outside part since I don't have a nail gun. I sanded the really rought parts, but probably could've sanded more. Finished with Valspar's black spray paint and used mirror clips and 1" wood screws. Blue had glass pieces in 16" x 20" for less than $6. Hung with D rings and picture hanging wire.
Time estimate includes time for paint to dry and rigging up all the hanging hardware.
Estimated Cost
$15-$20
Estimated Time Investment
Weekend Project (10-20 Hours)
Finish Used
Valspar spray paint in black semi-gloss
Recommended Skill Level
Beginner