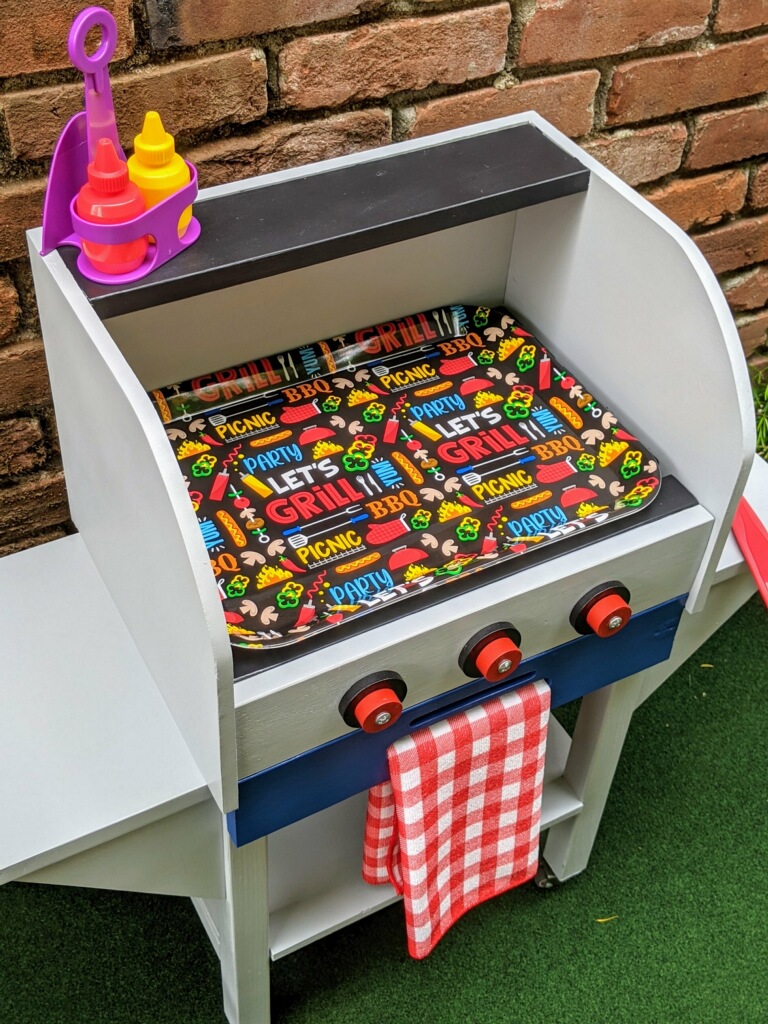
BBQ for the Grands
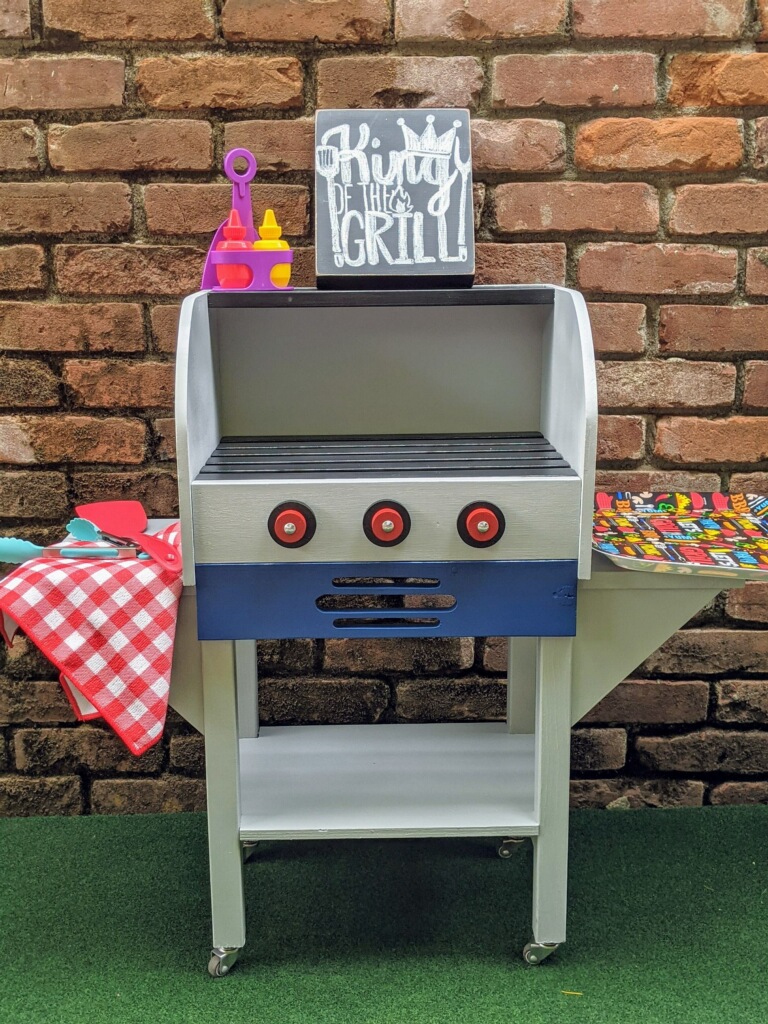
My husband and I actually made four of these little bbq’s for our grandchildren and also for our own backyard. They were super fun to do. Pattern was easy to follow. Thank you Anna!
Built from Plan(s)
My husband and I actually made four of these little bbq’s for our grandchildren and also for our own backyard. They were super fun to do. Pattern was easy to follow. Thank you Anna!
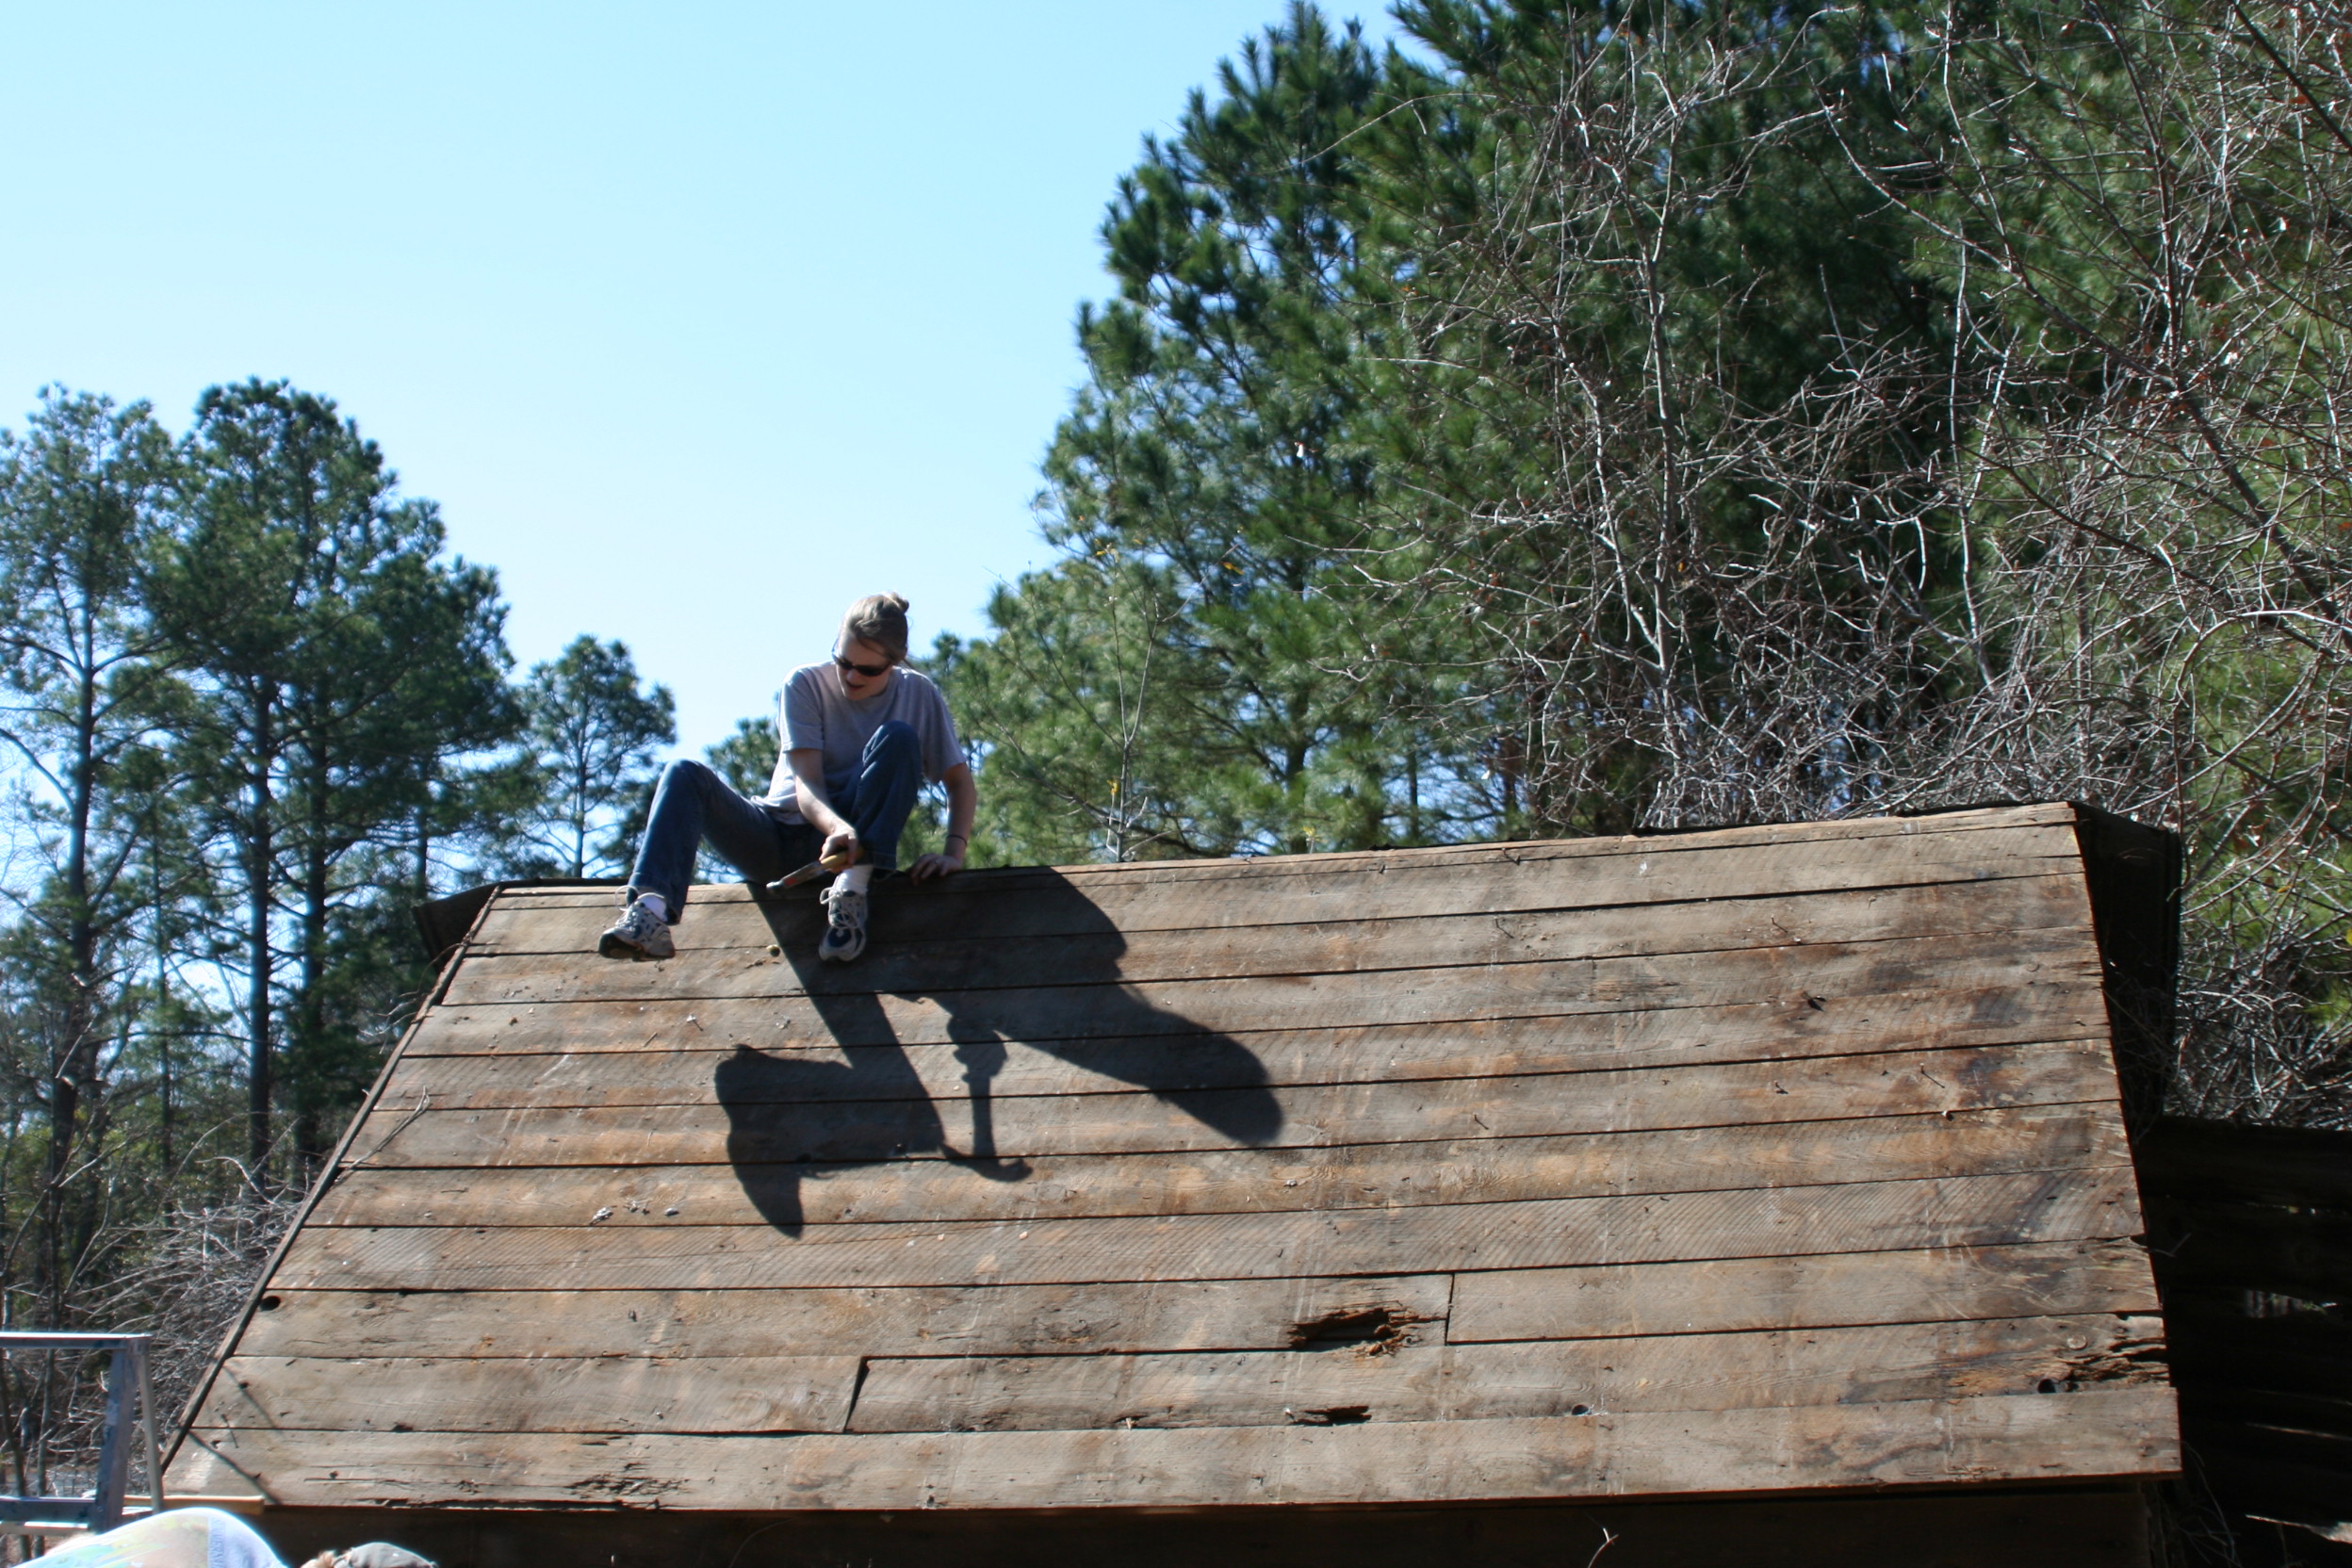
We removed the roof off an old chicken house in the heart of South Carolina. 100+ year old heart pine was the treasure we were able to use! Had to buy the 4x4's but we were able to use the old pine for the rest. Use natural oil stain on the heart pine and had Sherwin Williams do a custom stain to match the new 4x4 posts. Plus 2 coats of polyacrylic and sanded with extremely fine paper after stain and both coats for a wonderfully smooth finish.
And then attached our son's sidecar cosleeper back to the bed) that's what is over to the side.

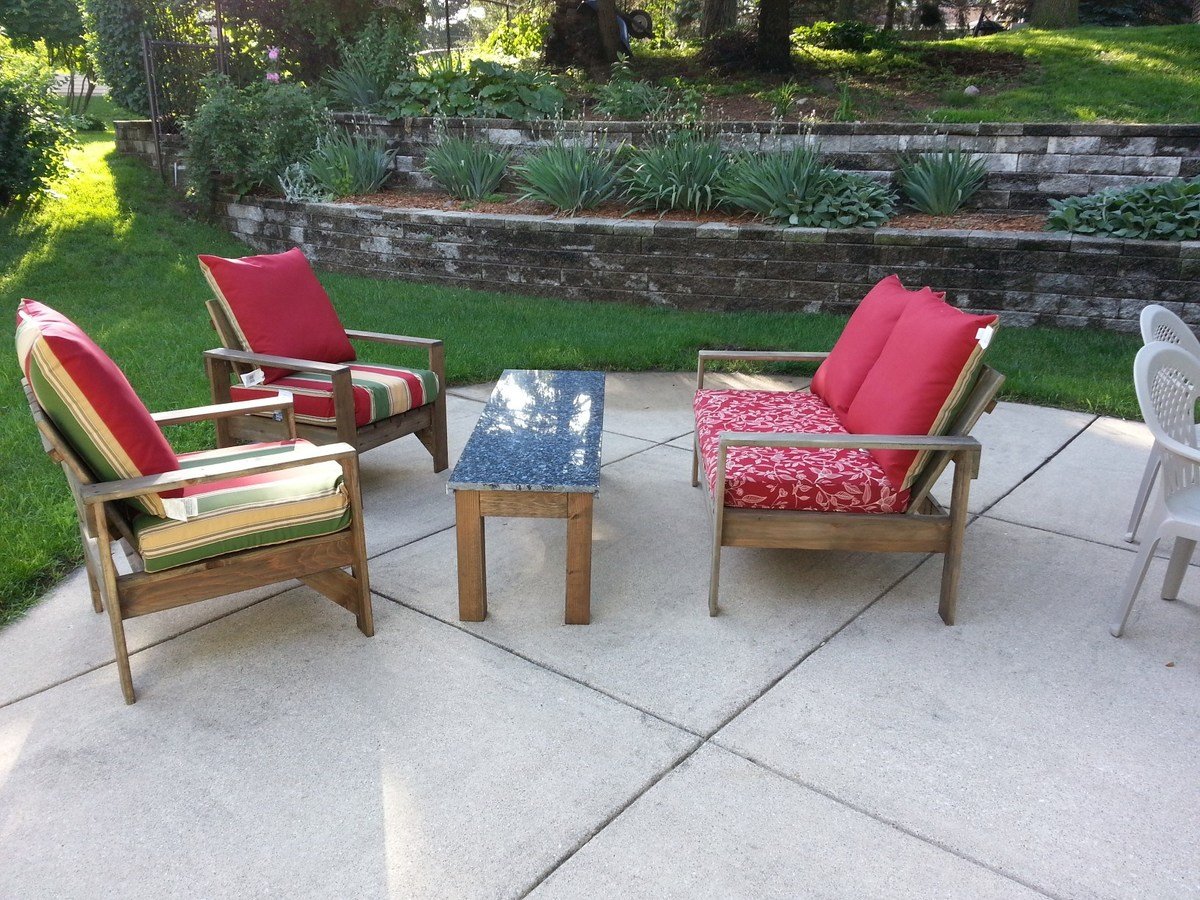
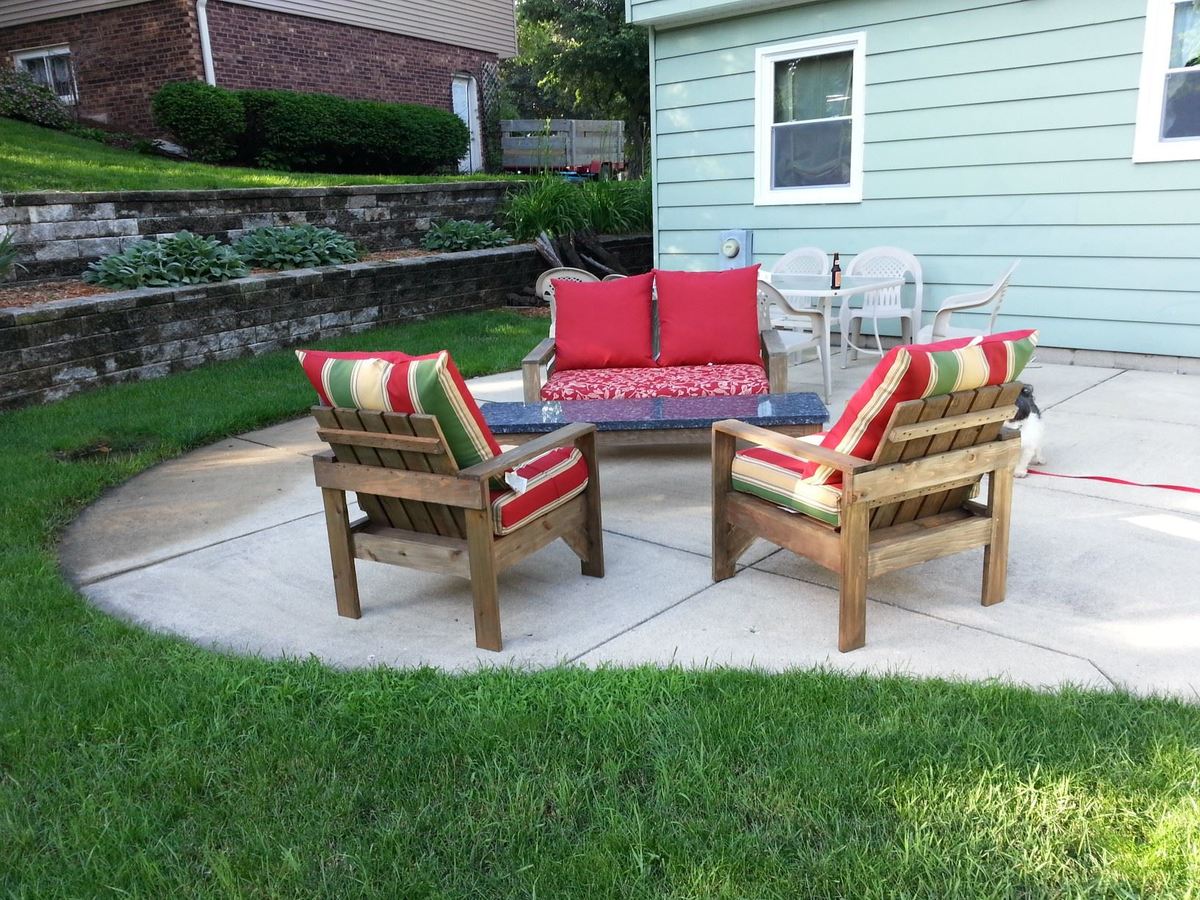
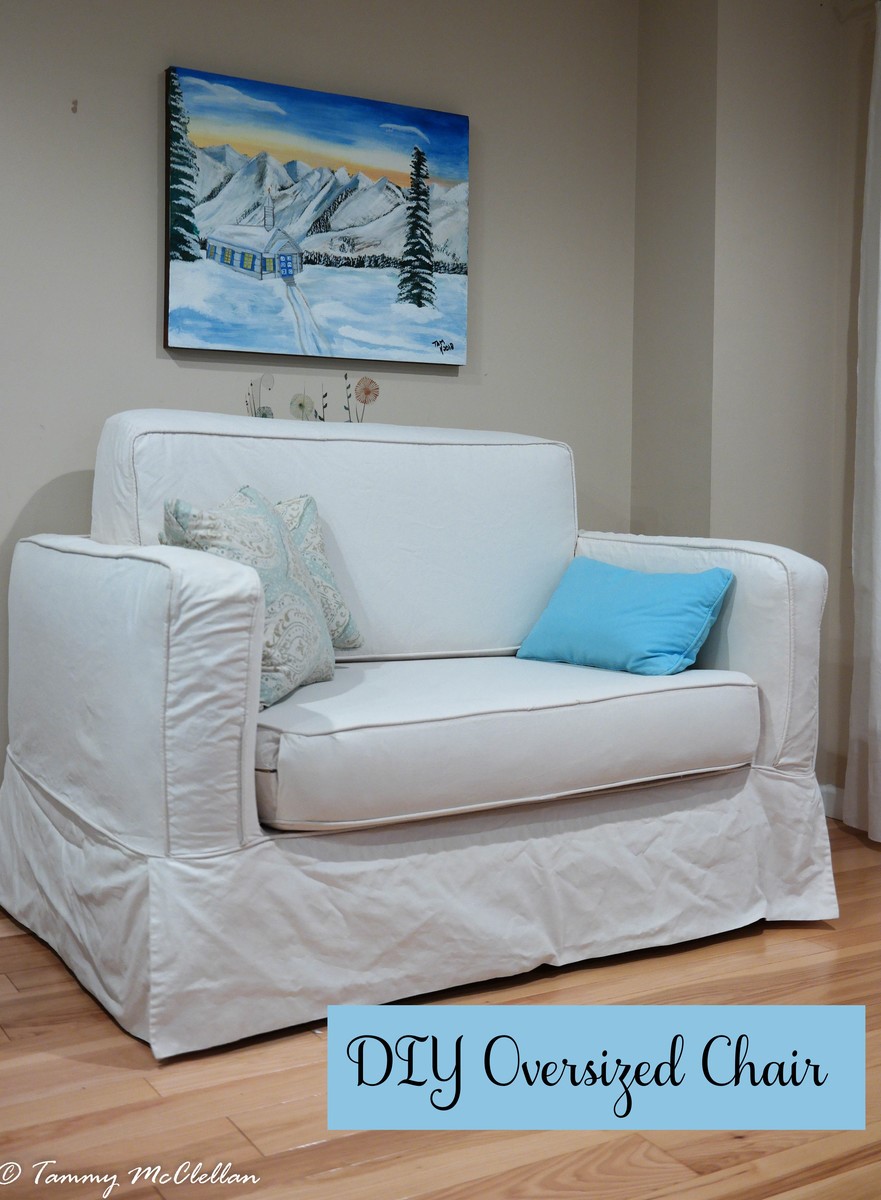
I made this set using the plans from the simple outdoor lounge chair. I used cedar wood, and adjusted the dimensions of the love seat to fit the cushions. Total cost (including cushions from walmart, not including granite slab for table) was about $250, and it took me about 20 hours to complete from start to finish.
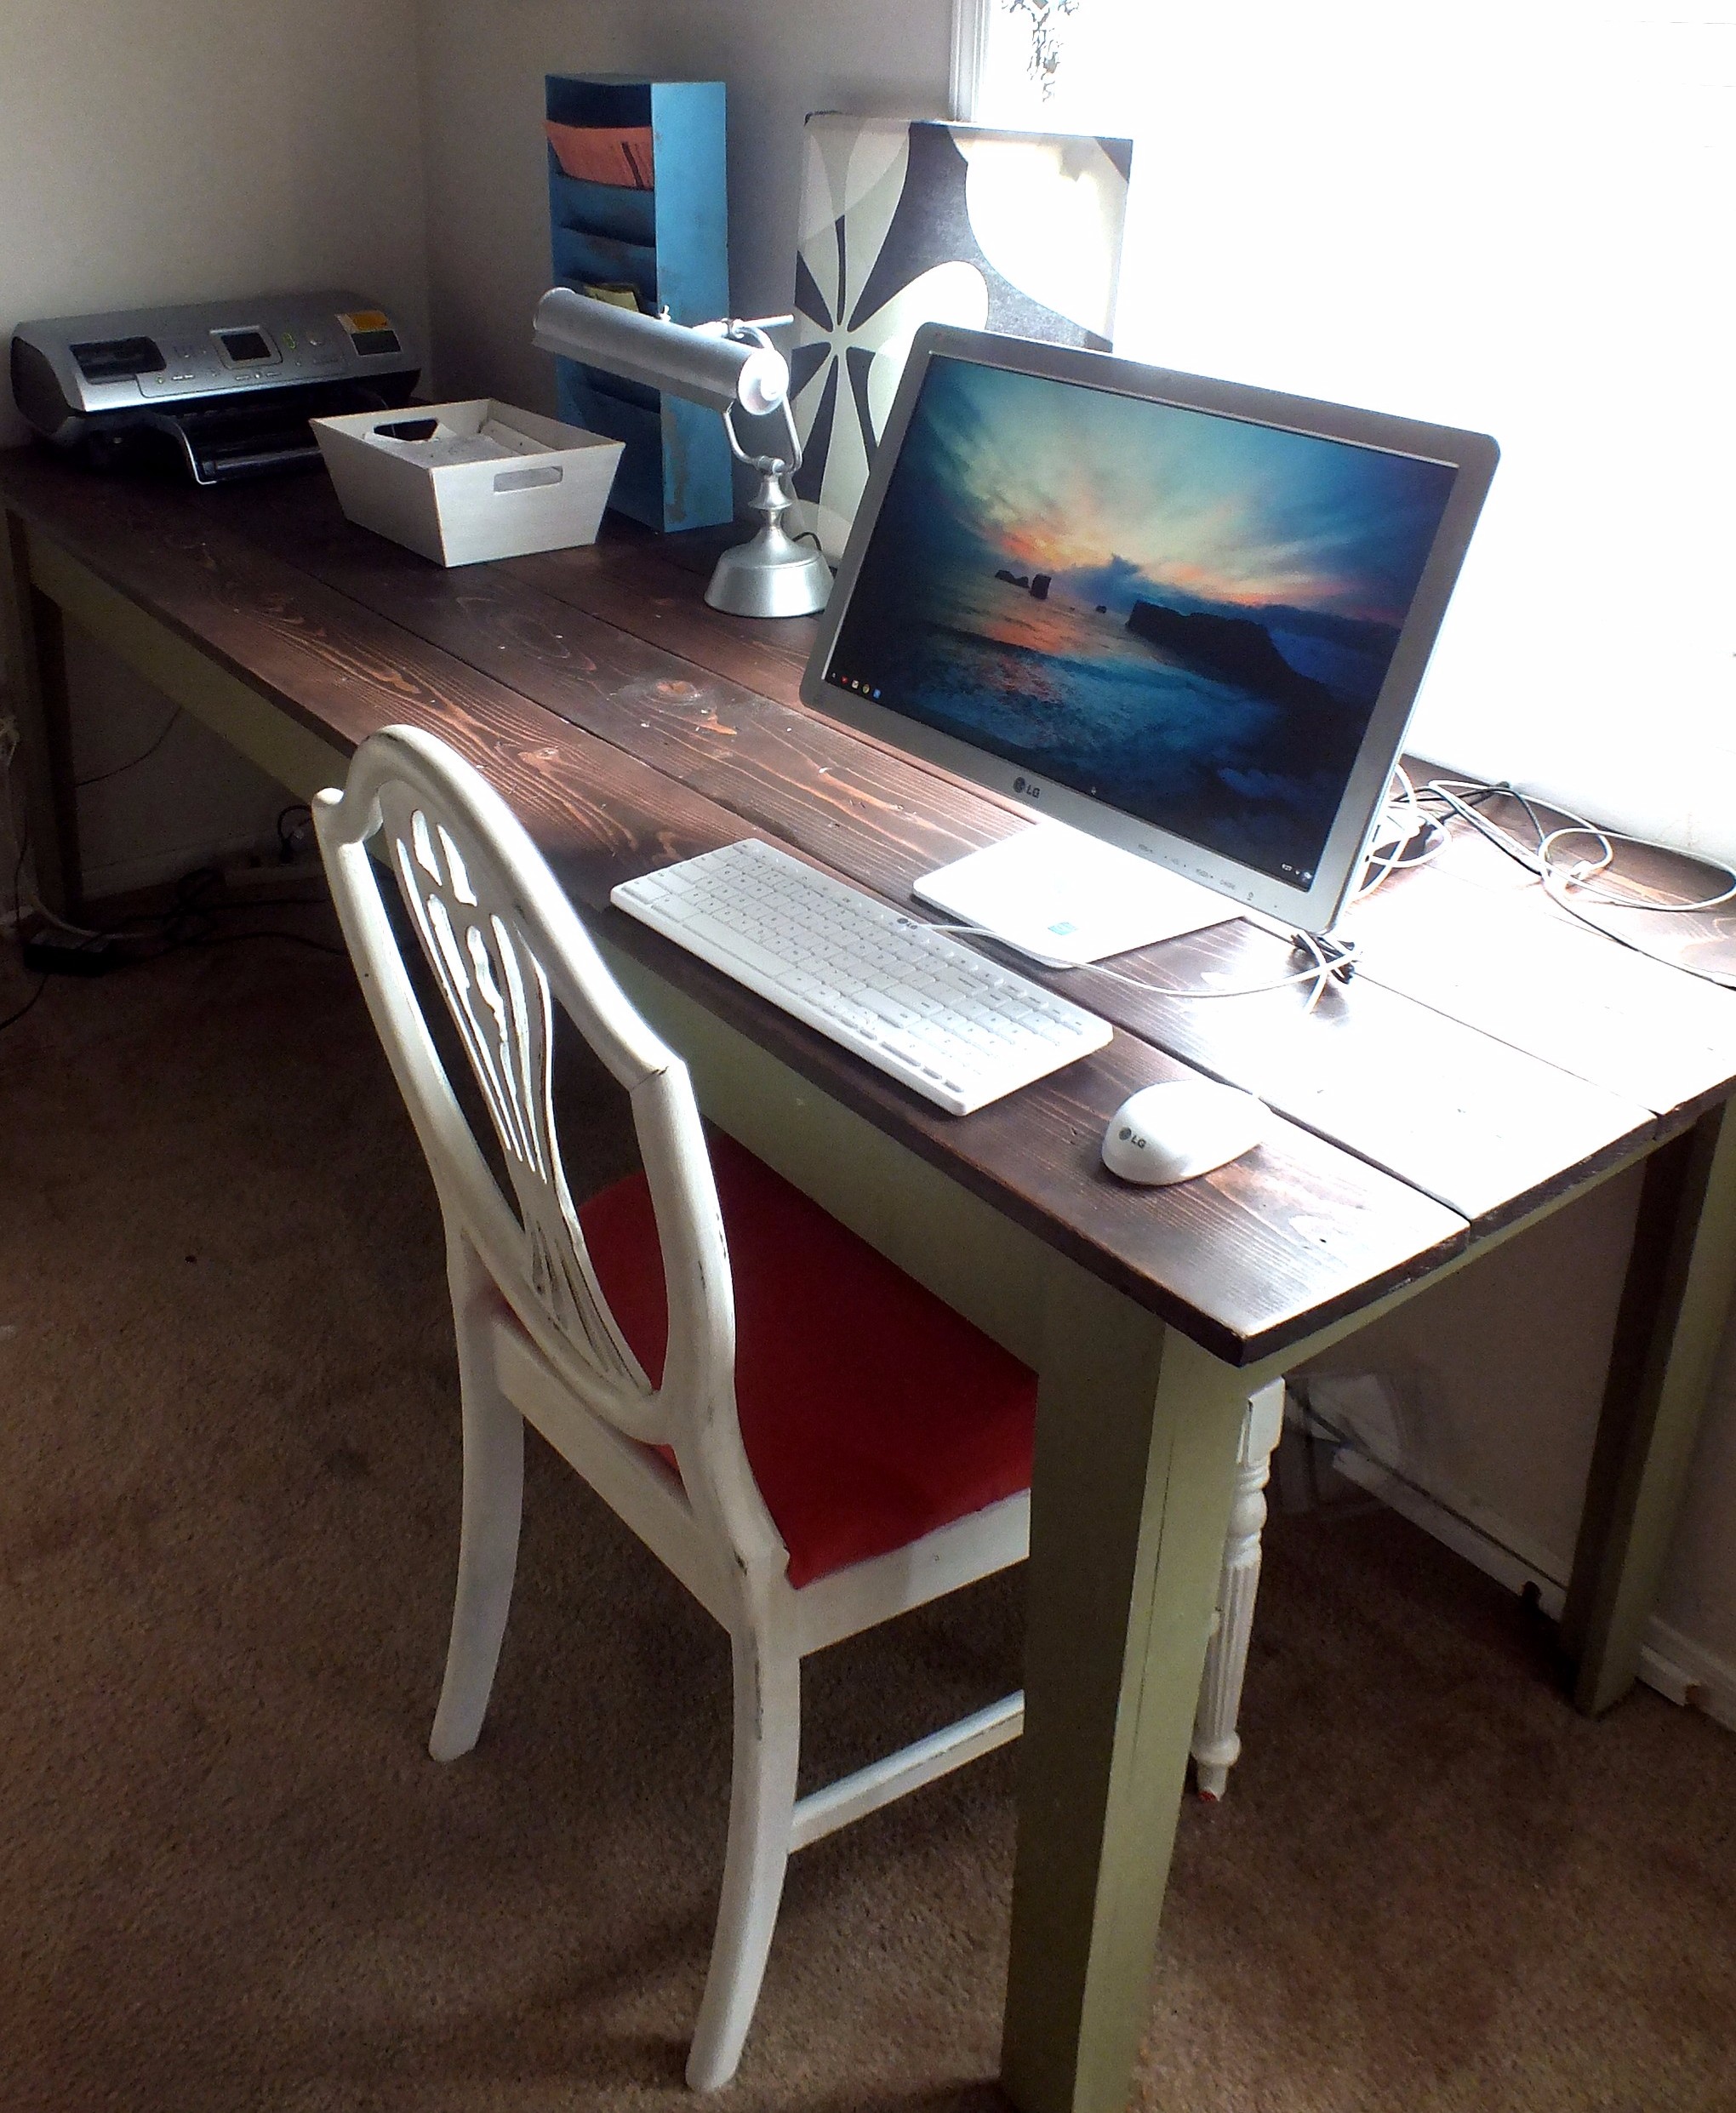
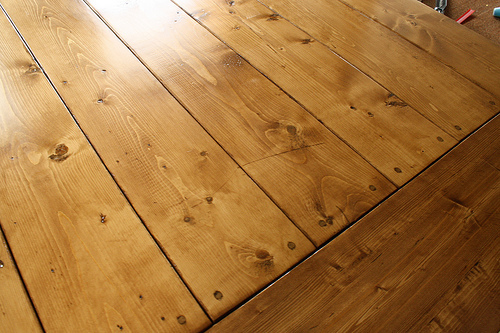
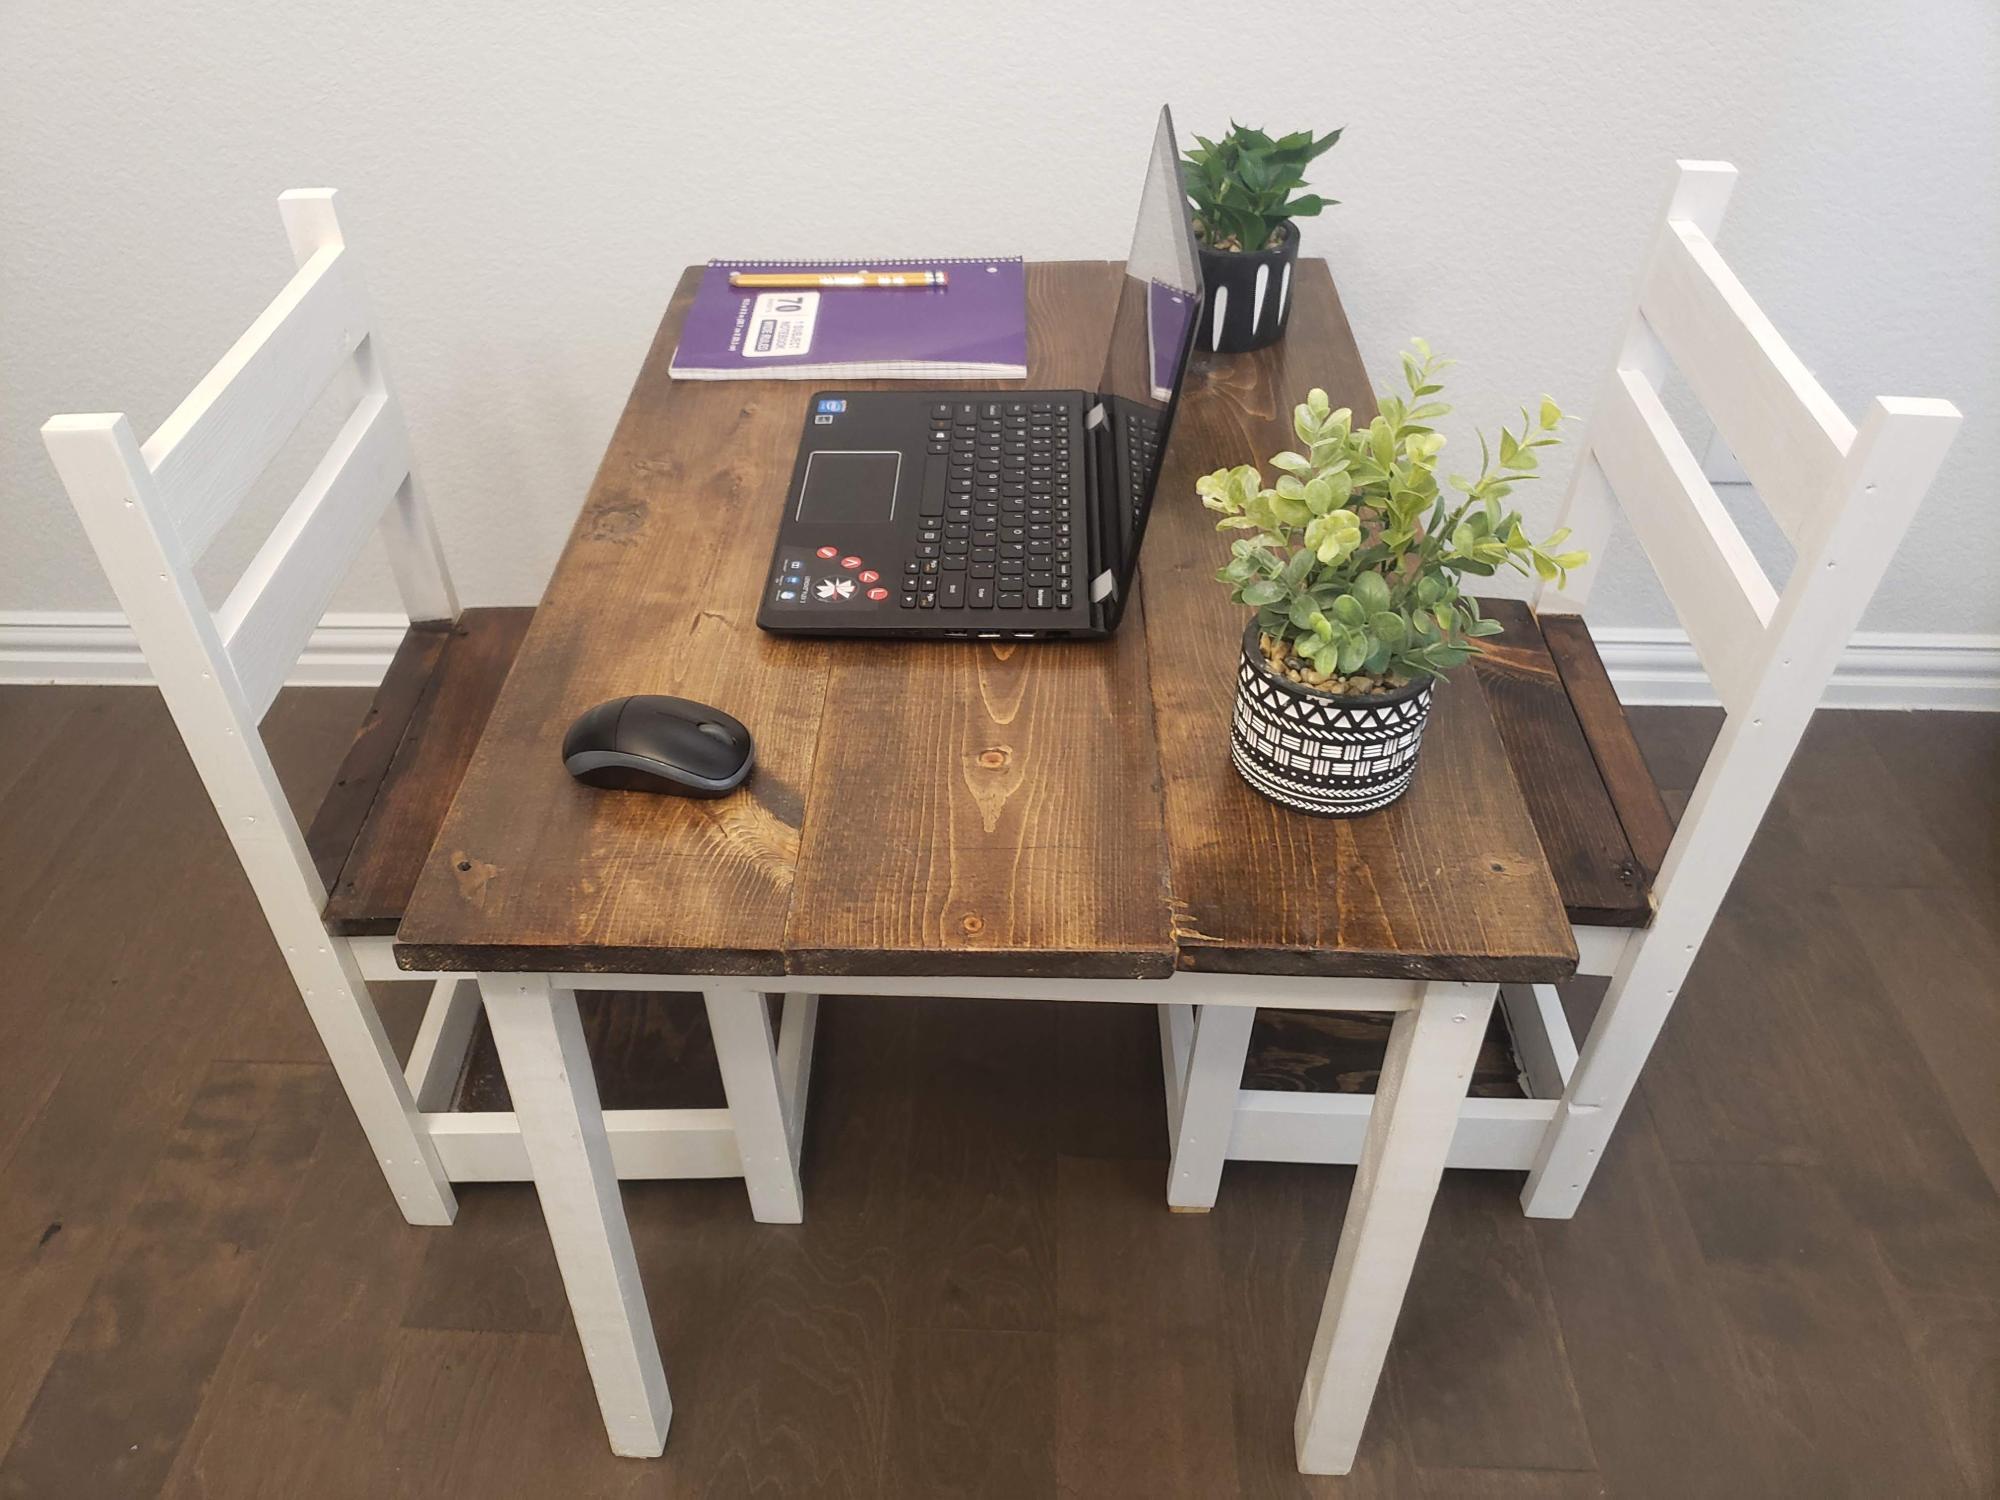
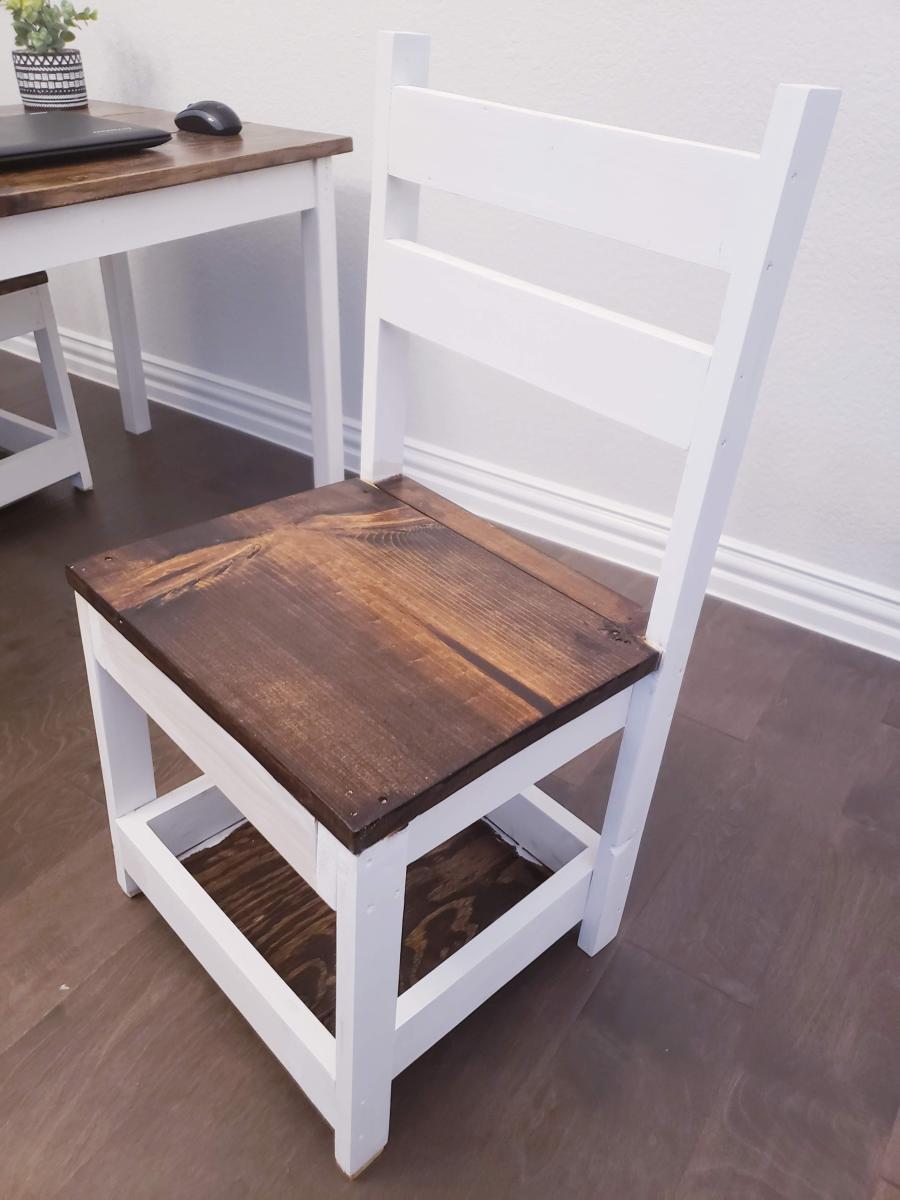
I recently started a refinishing business and needed a work surface where I could use the computer, print, and write down inventory and have some storage for receipts, etc. I couldn't find anything affordable and big enough for my home office so I decided on building something myself. With help from my wonderful husband, I built the Narrow Farmhouse Table. I beat up the top with any tool I could find, then sanded, gel stained the top (java) 2x, and I painted the legs a sagey green with homemade chalk paint. Its big and beautiful and perfect for my home-based business.
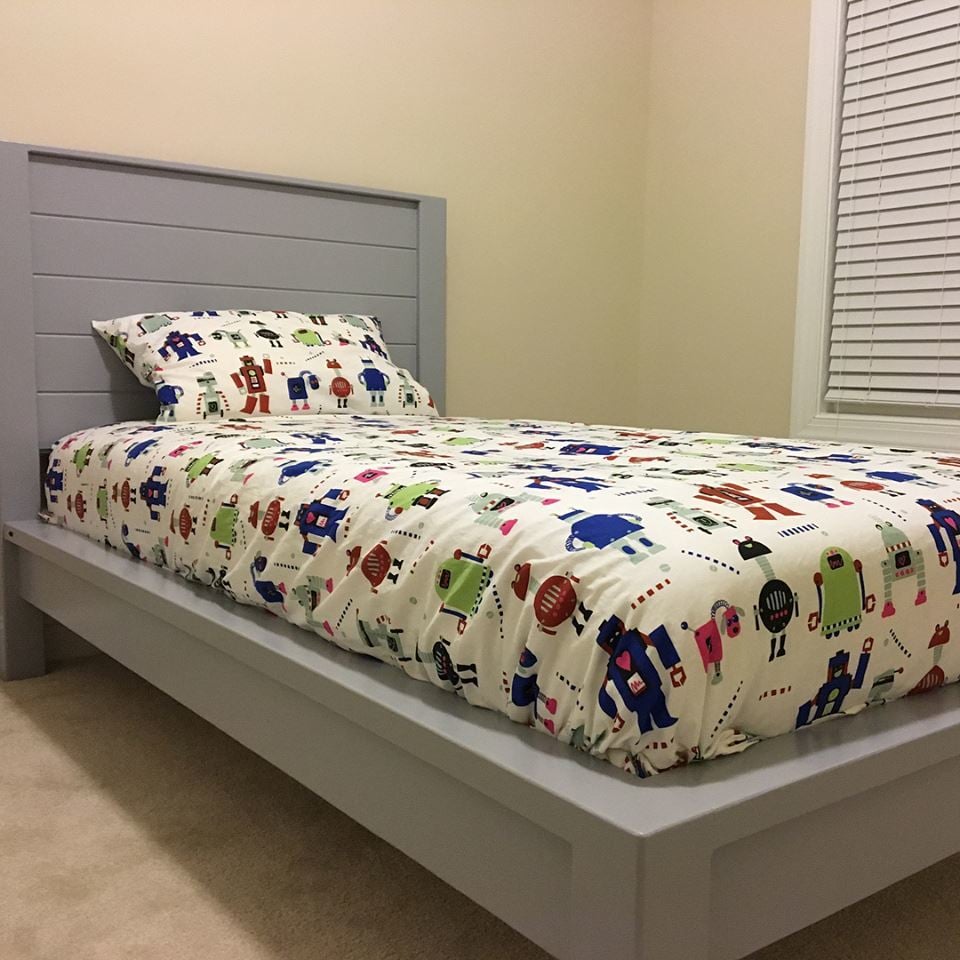
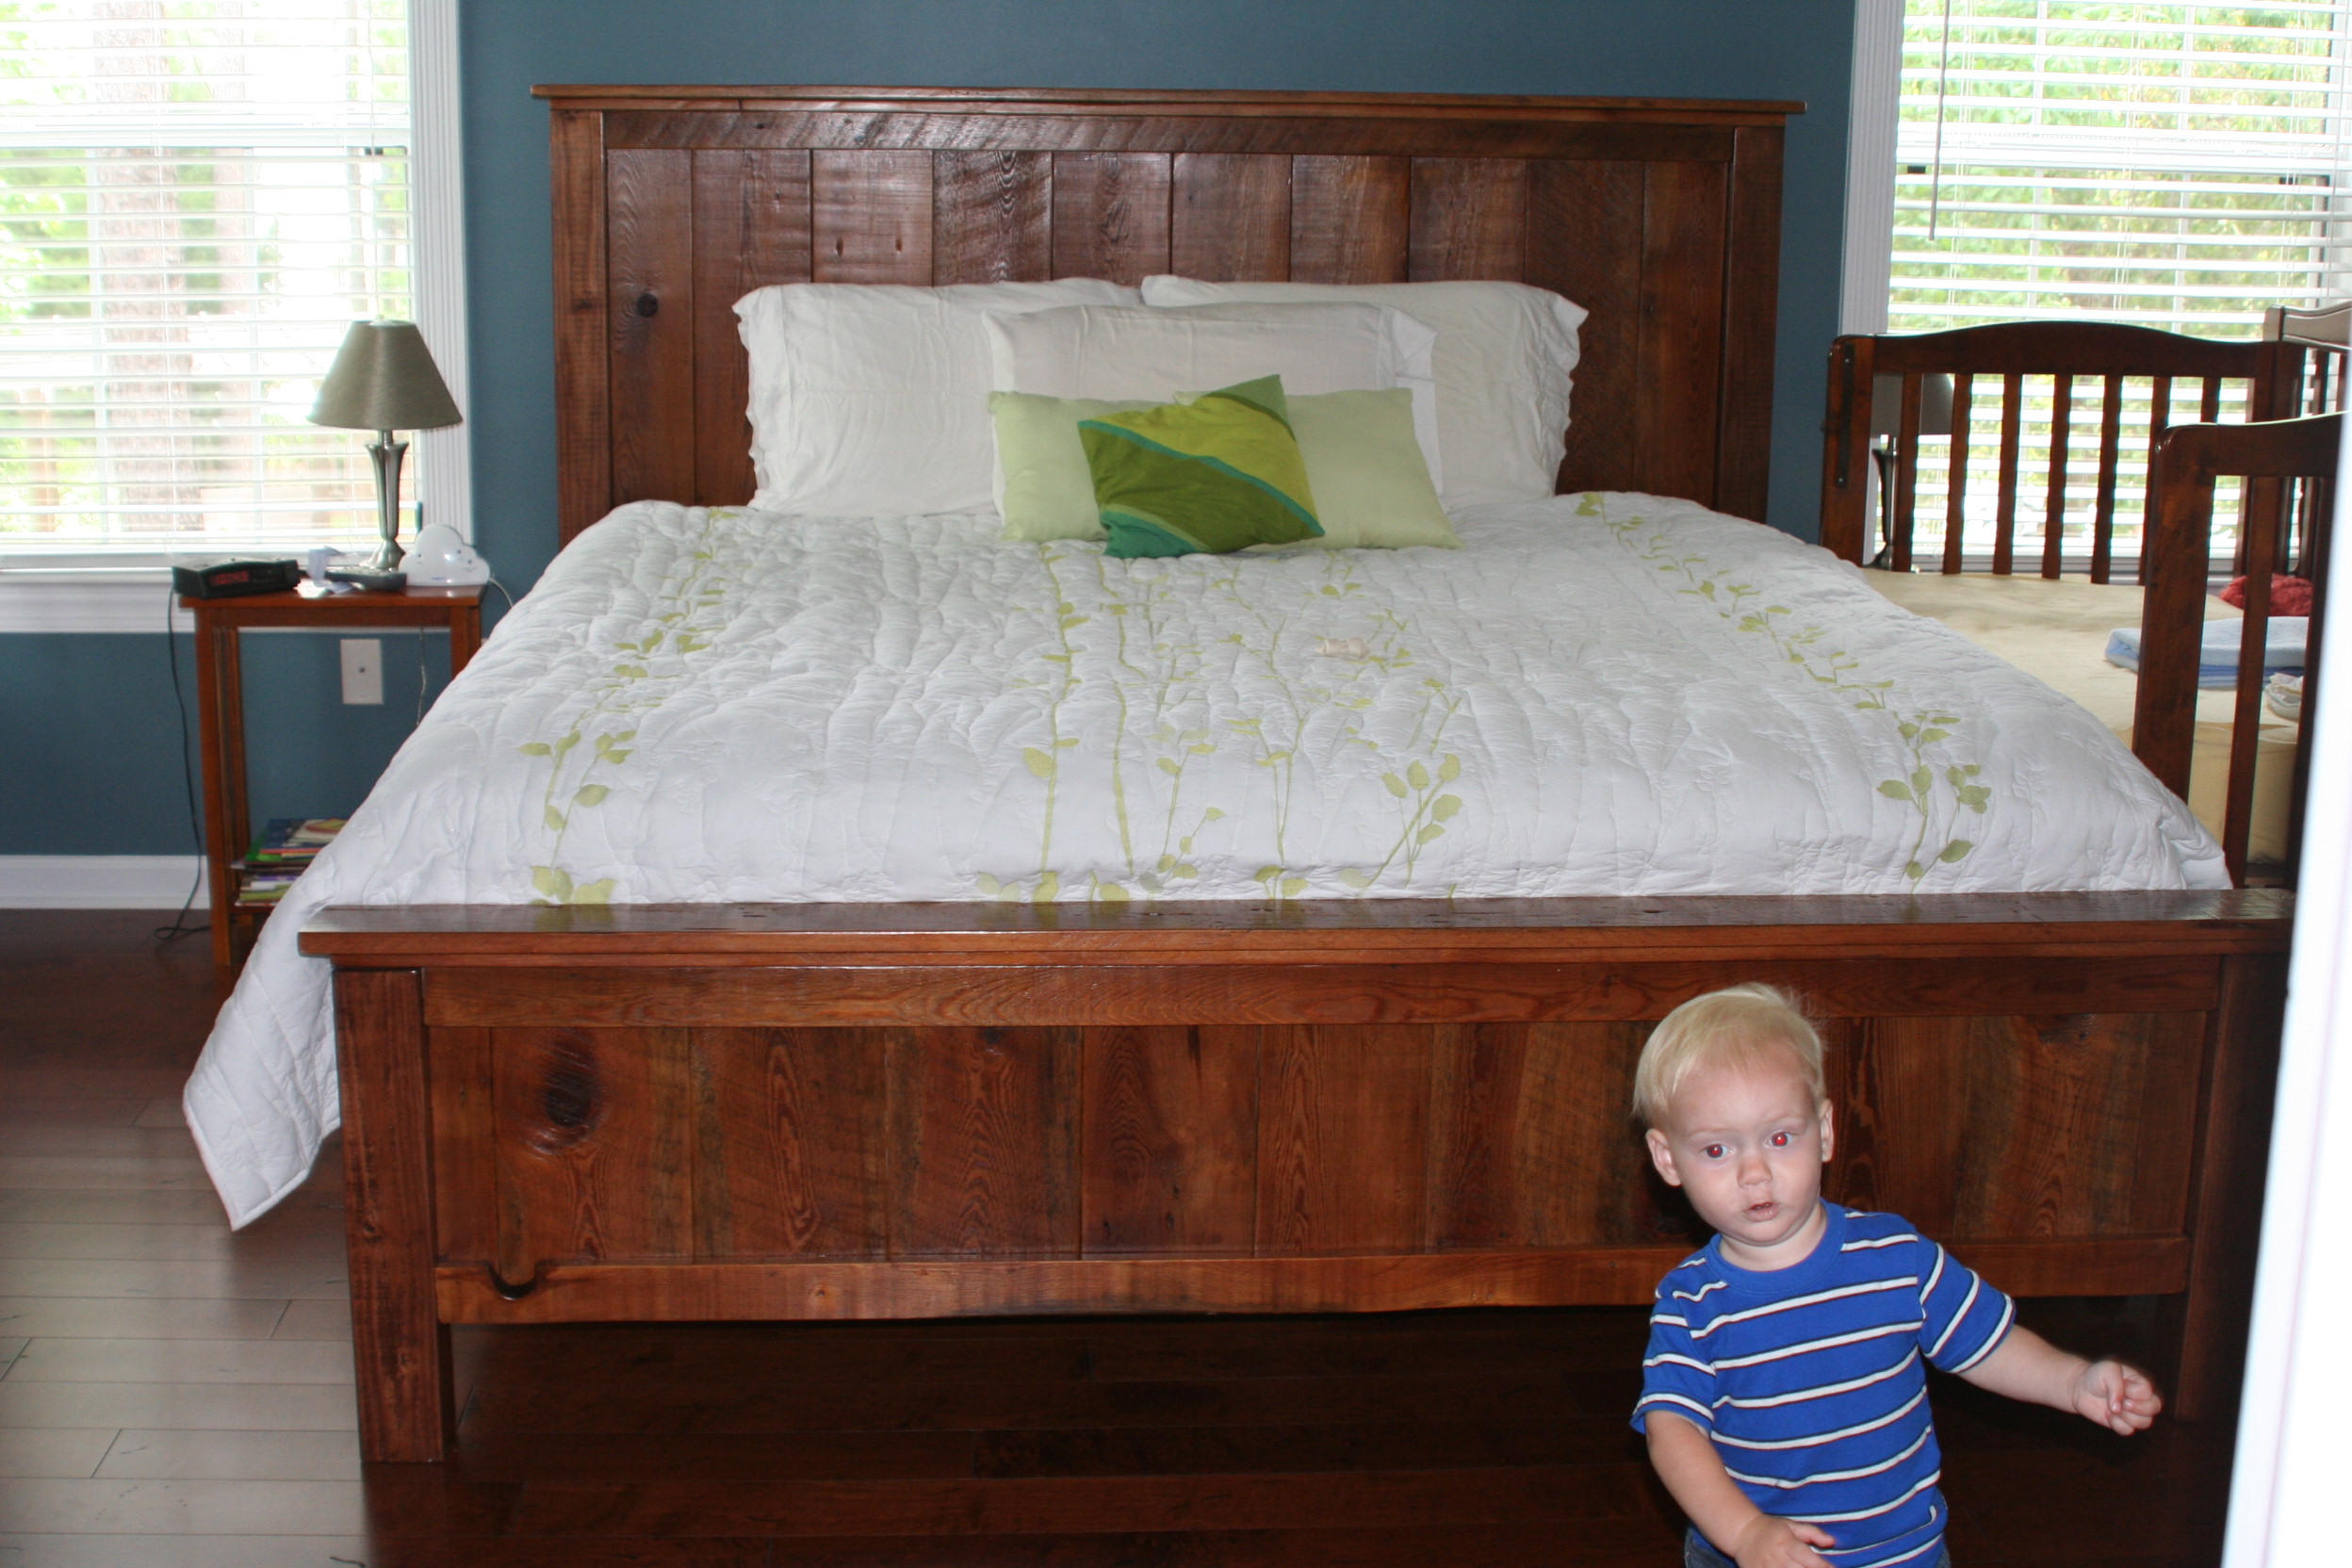
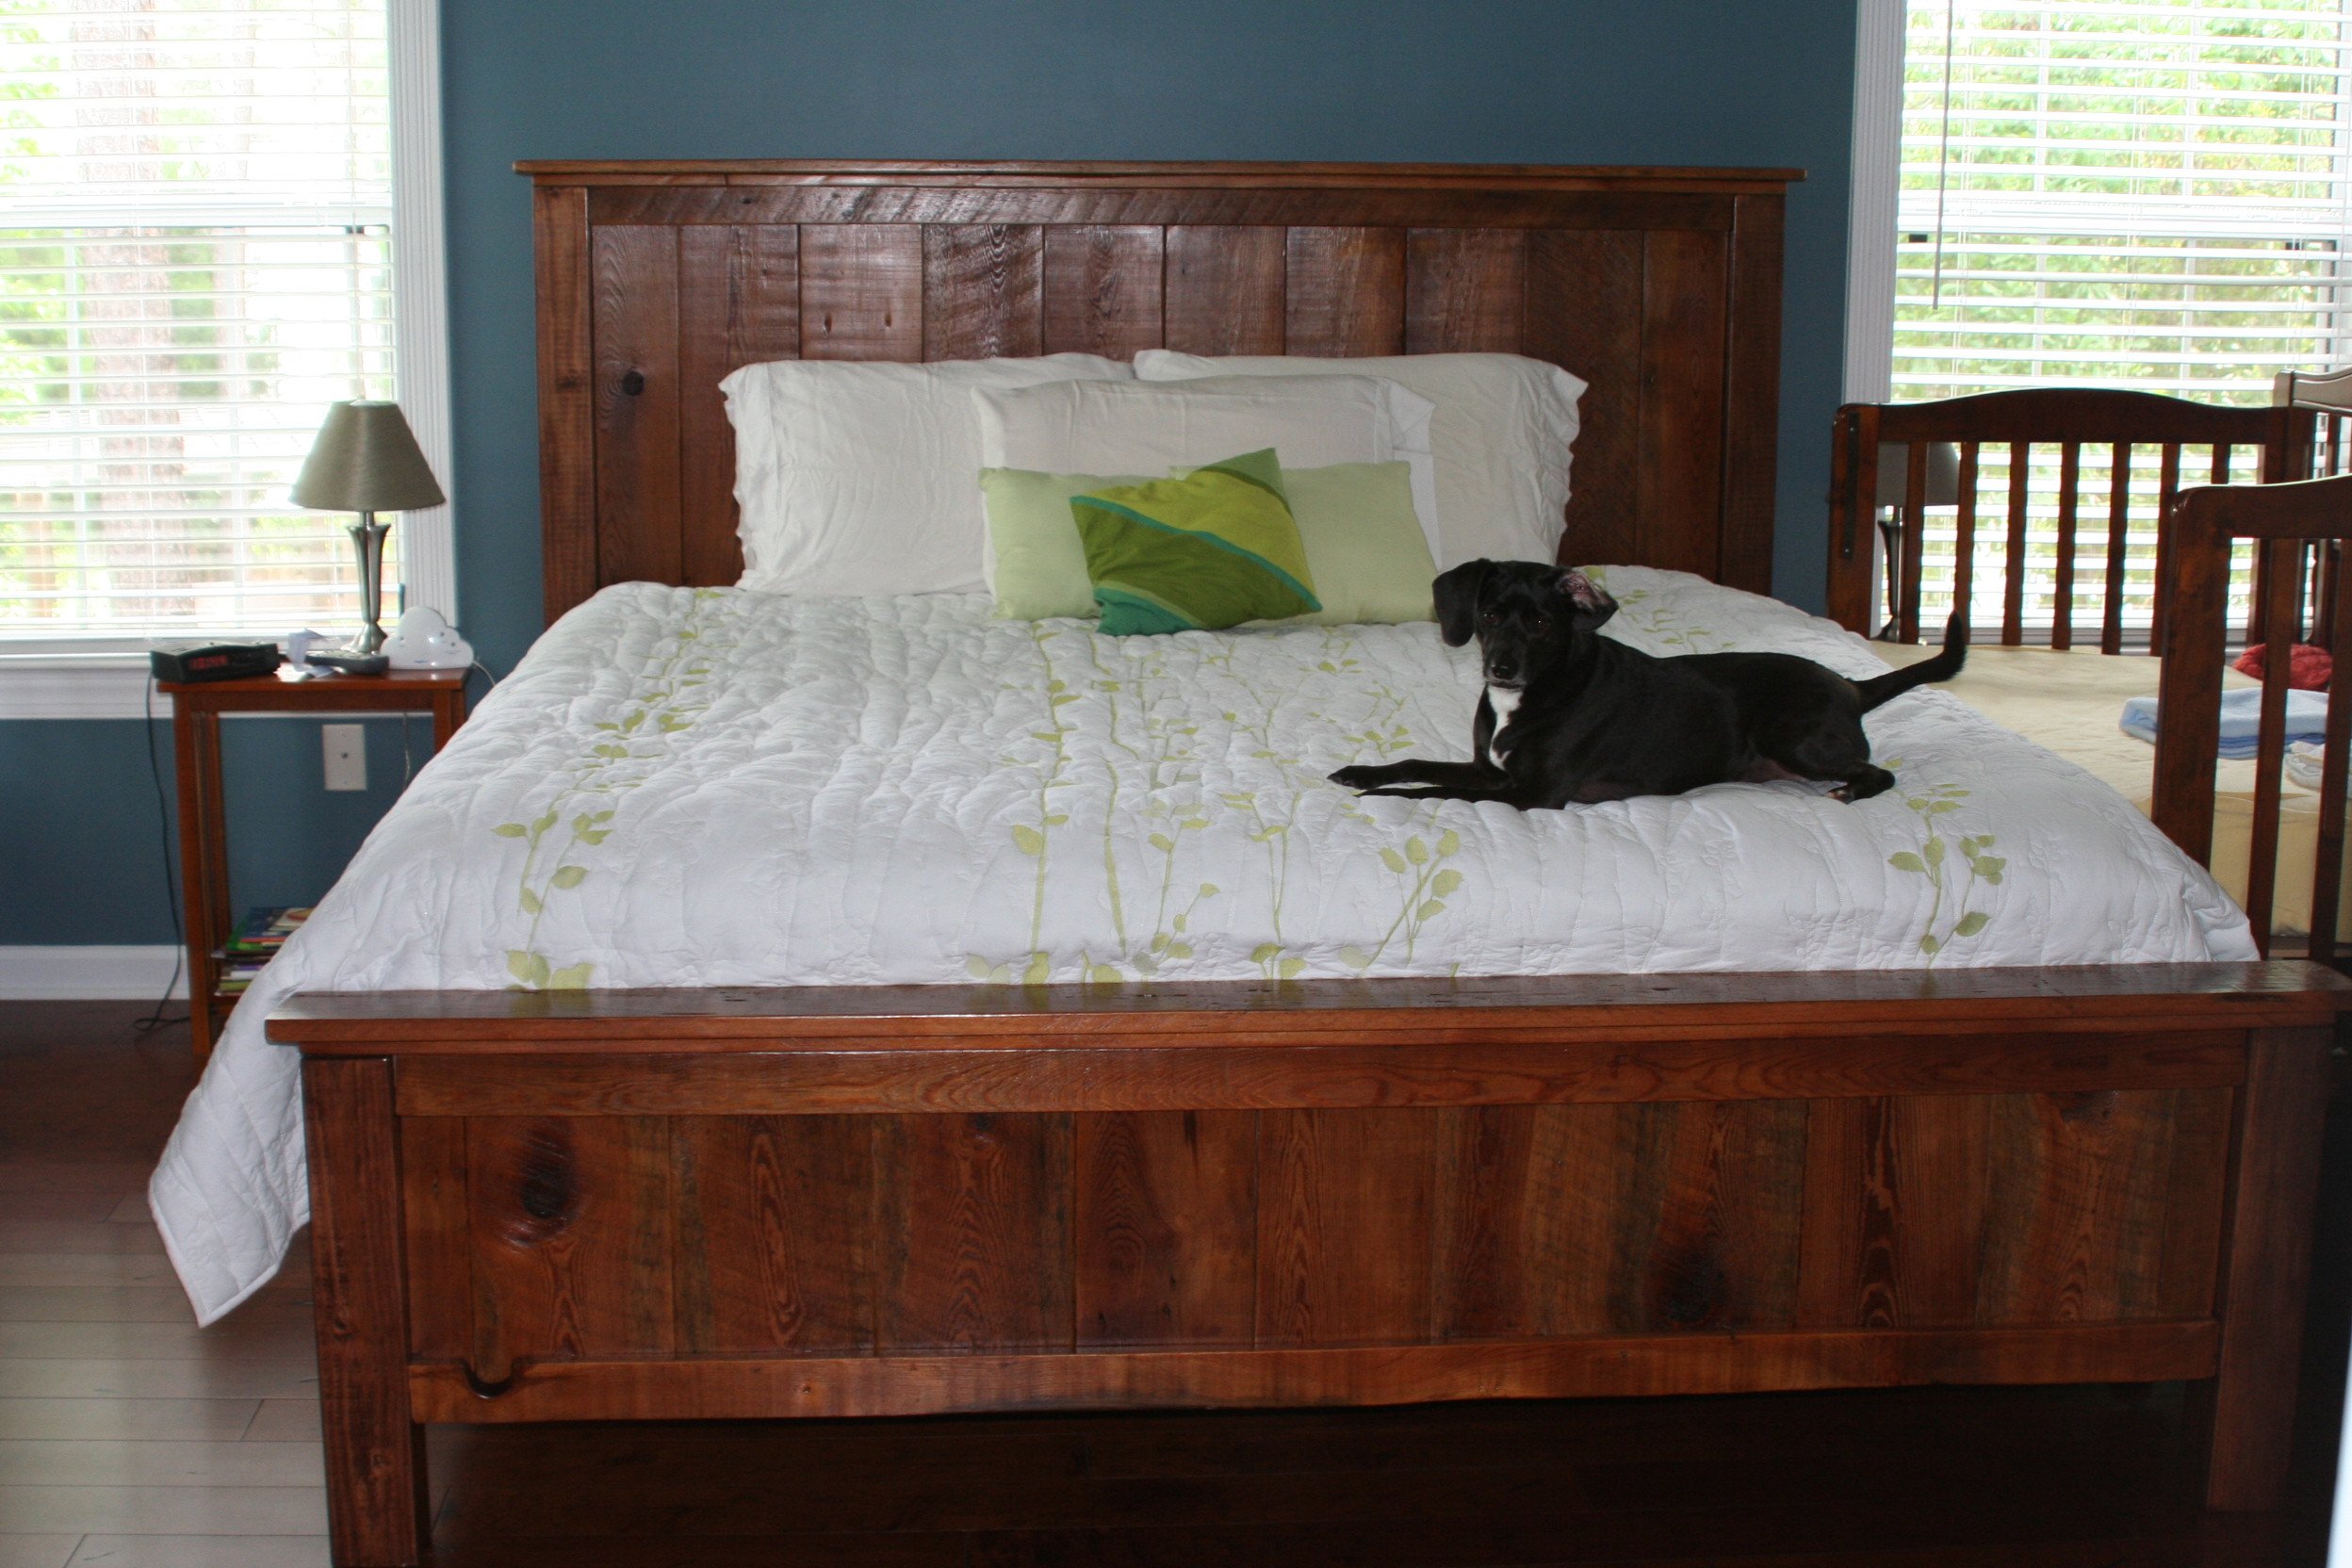
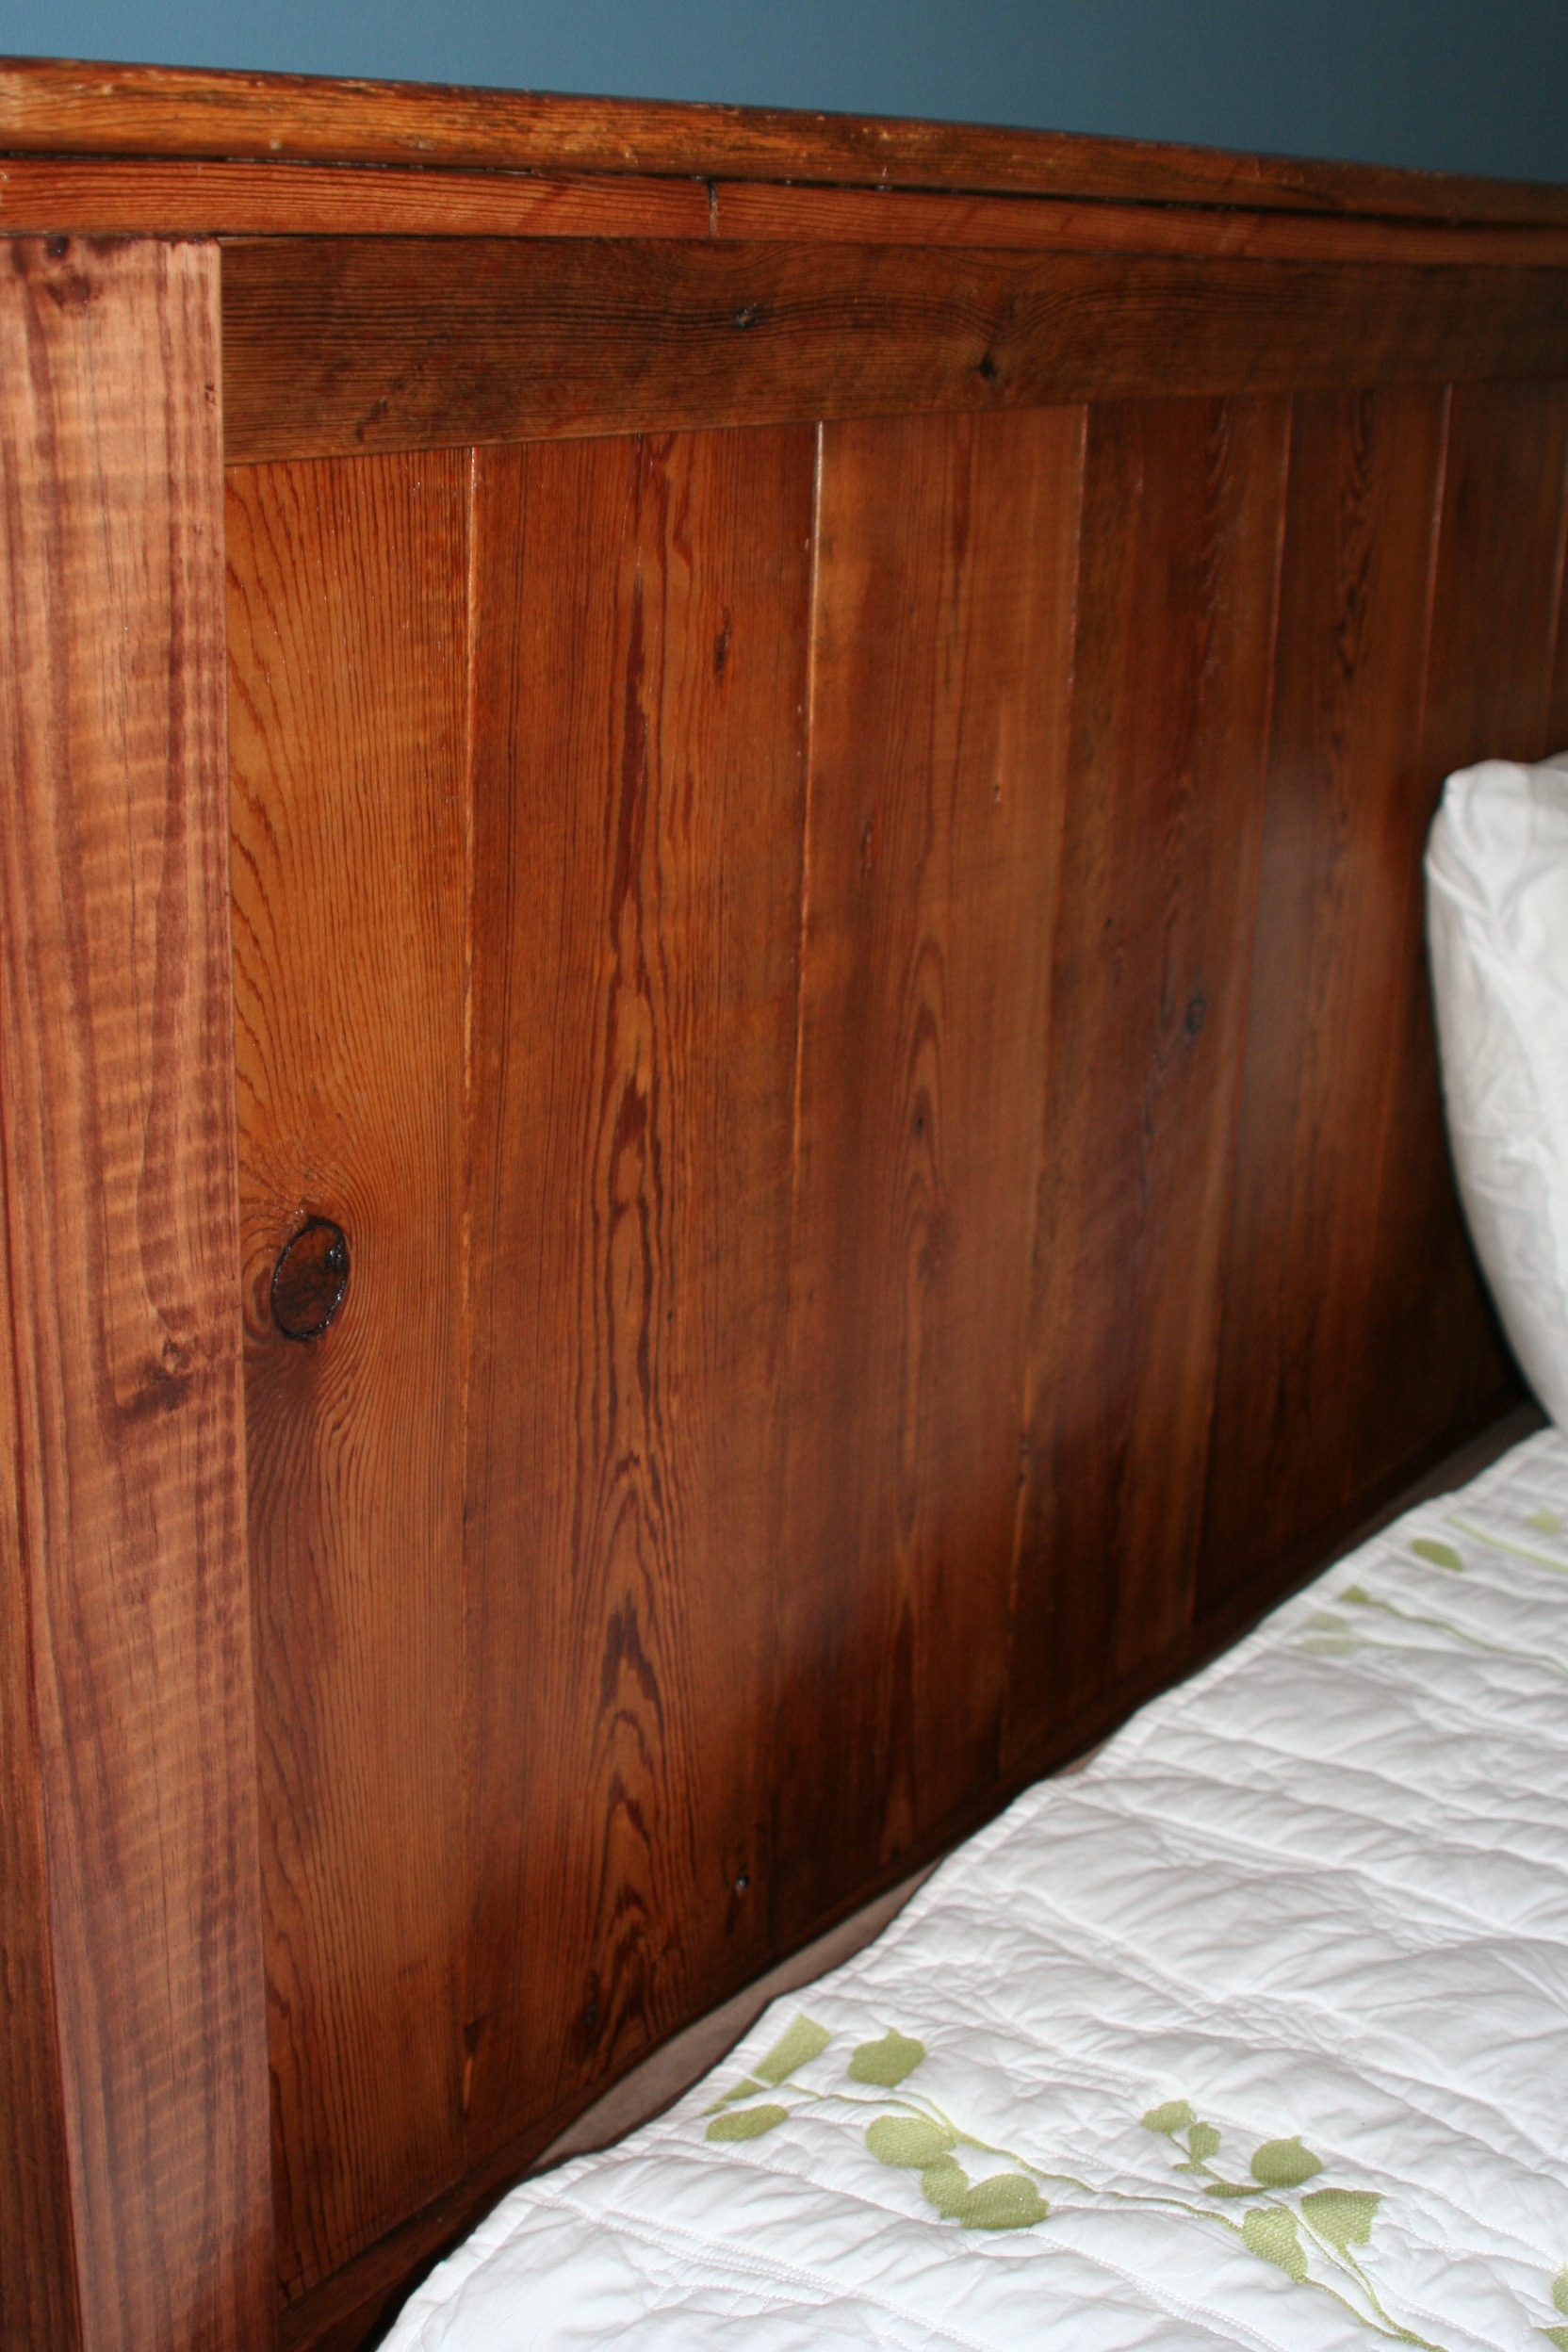
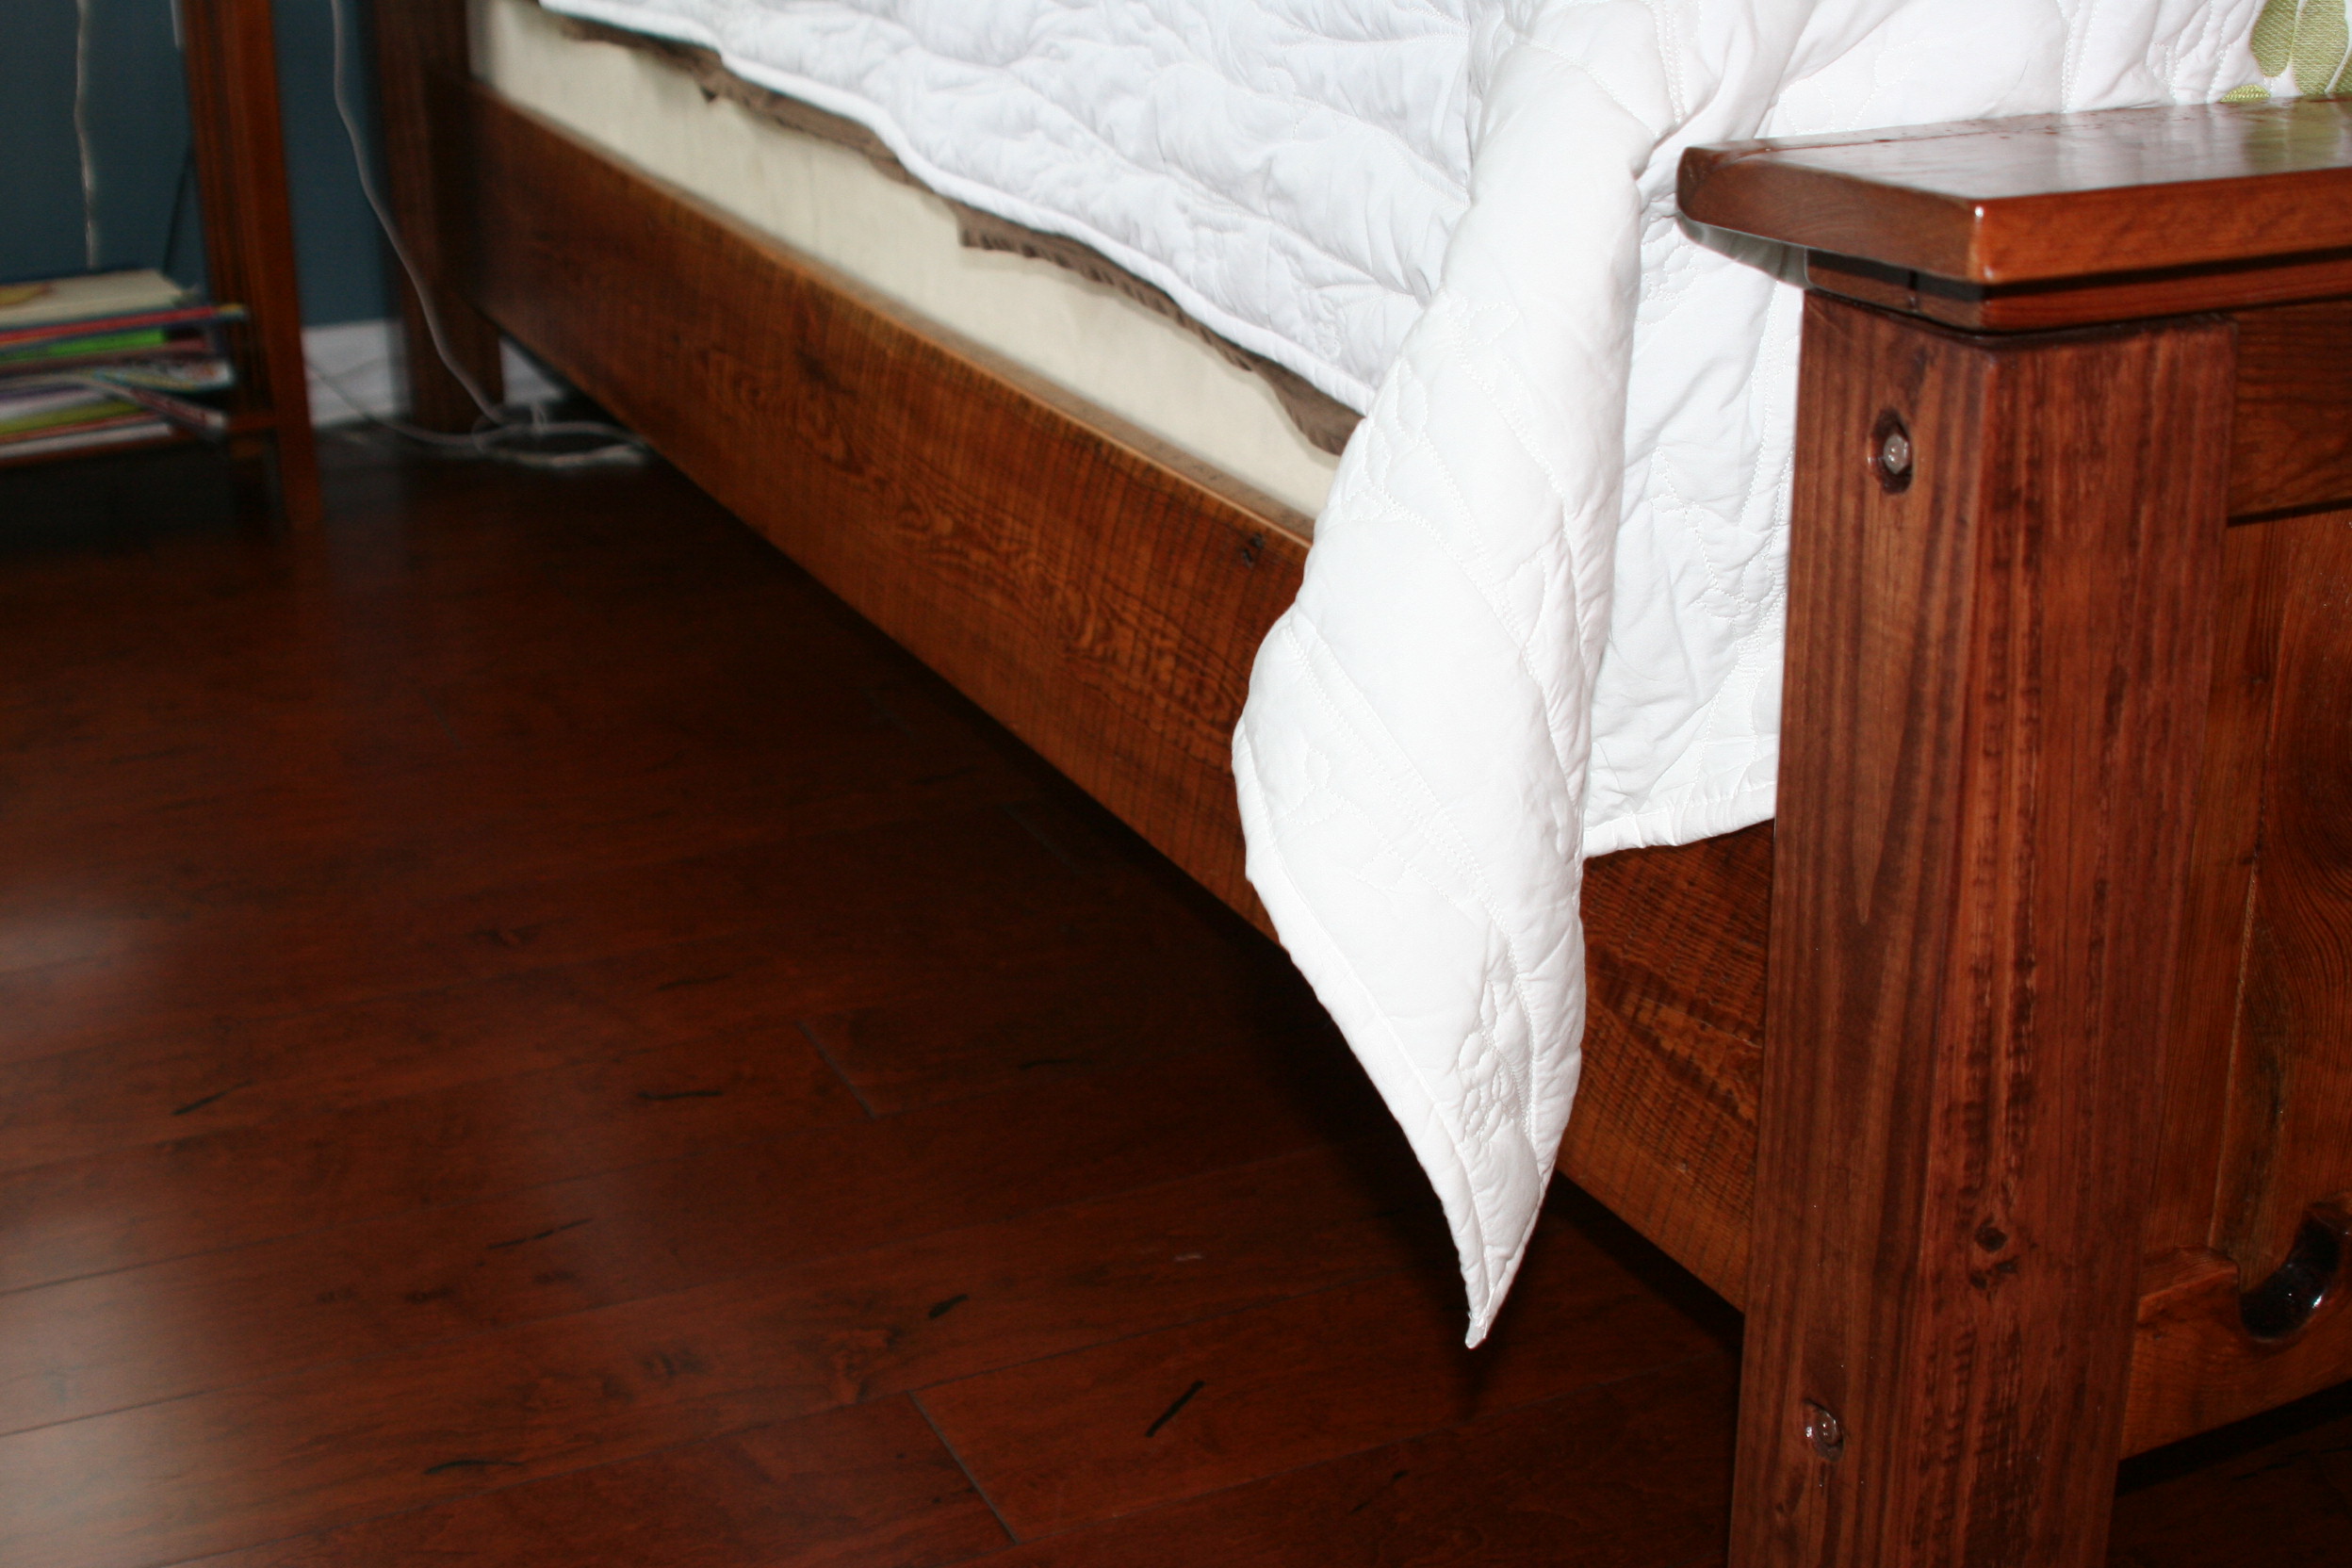
My version of Modern Farmhouse Bed. Let me know if you have any questions.
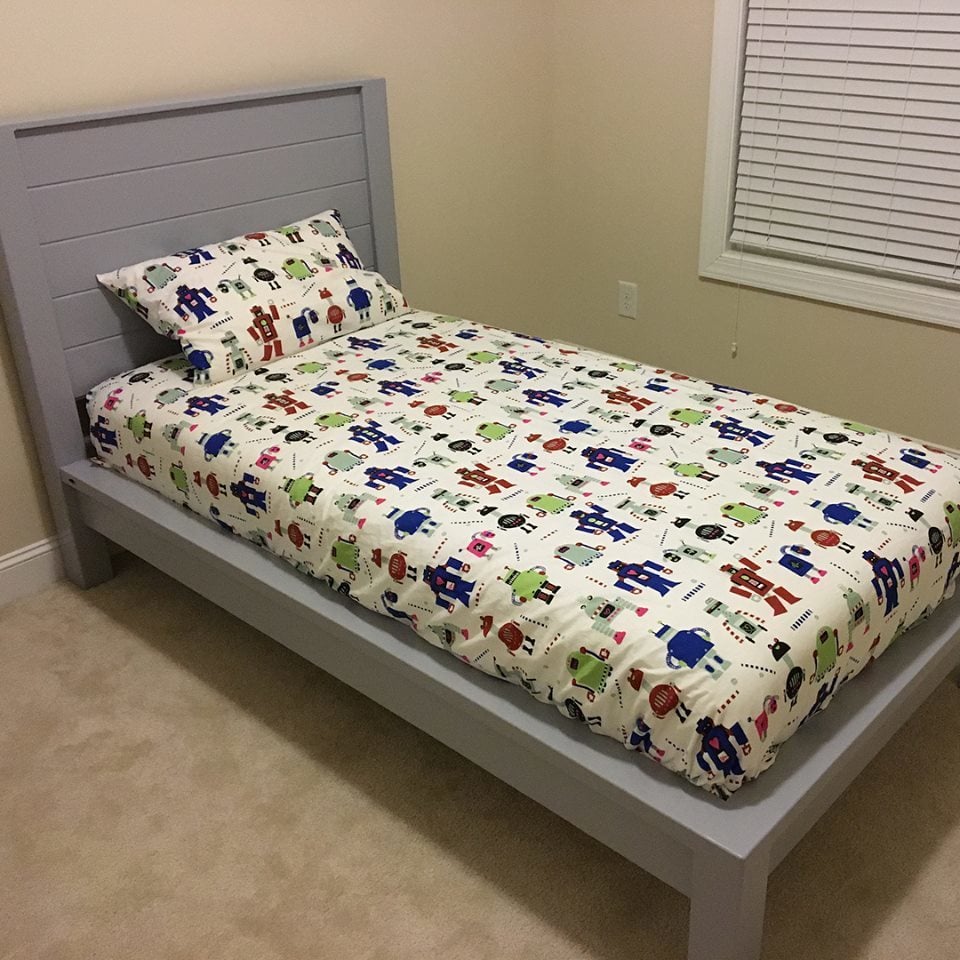
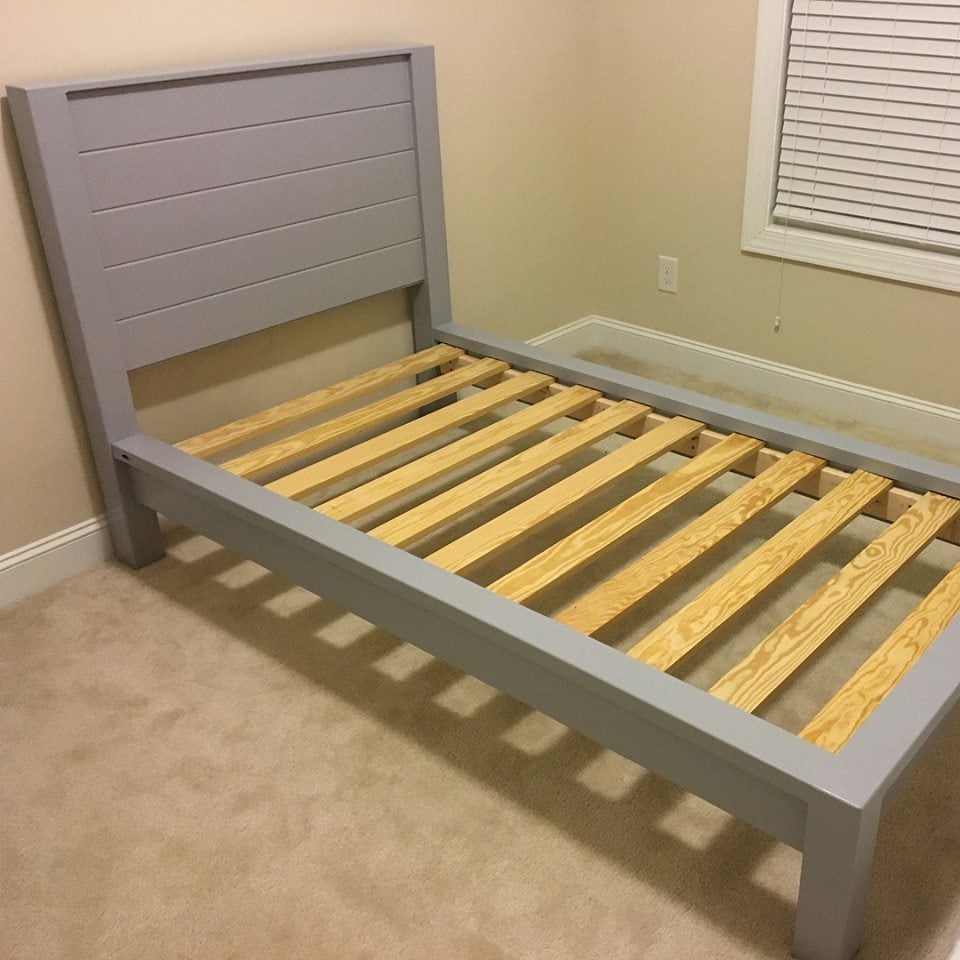
I made this farnhouse bed from the plans I found on Ana’s site.
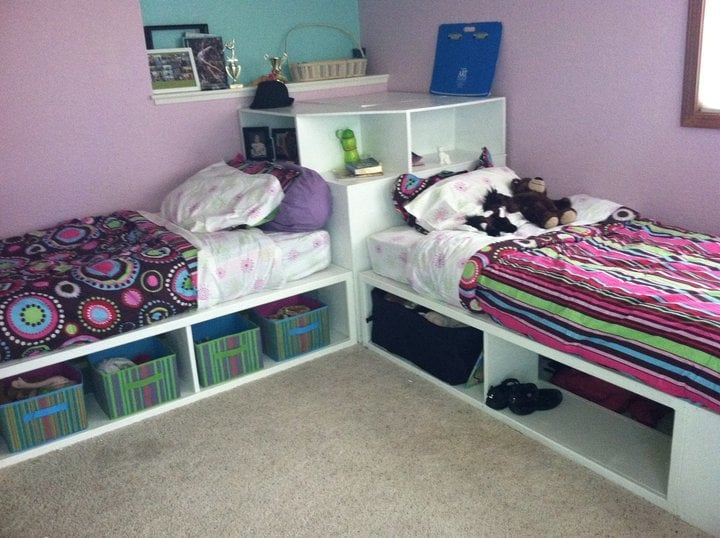
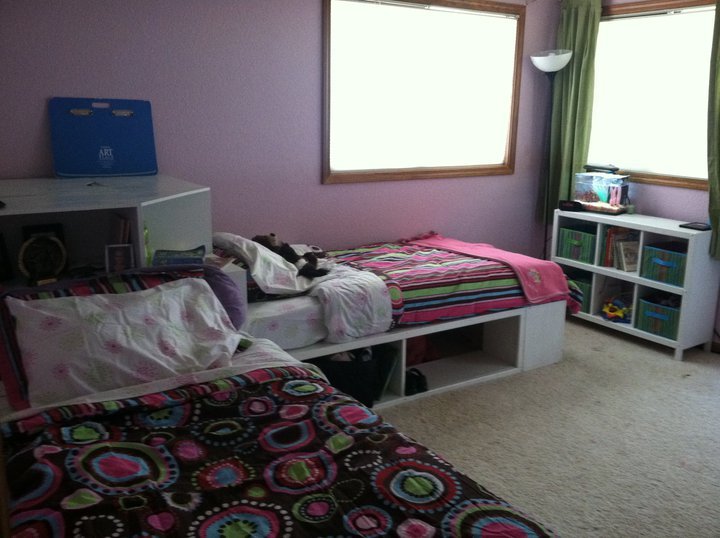
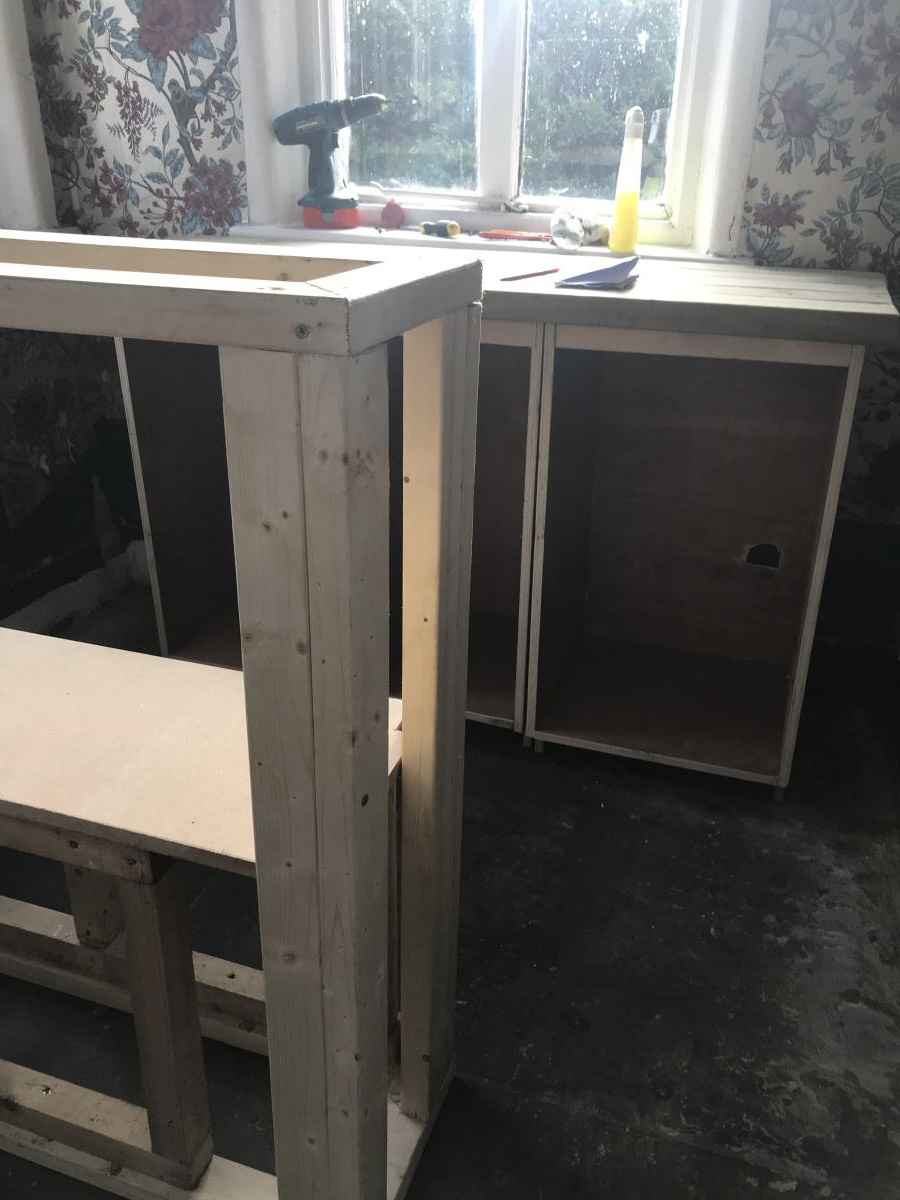
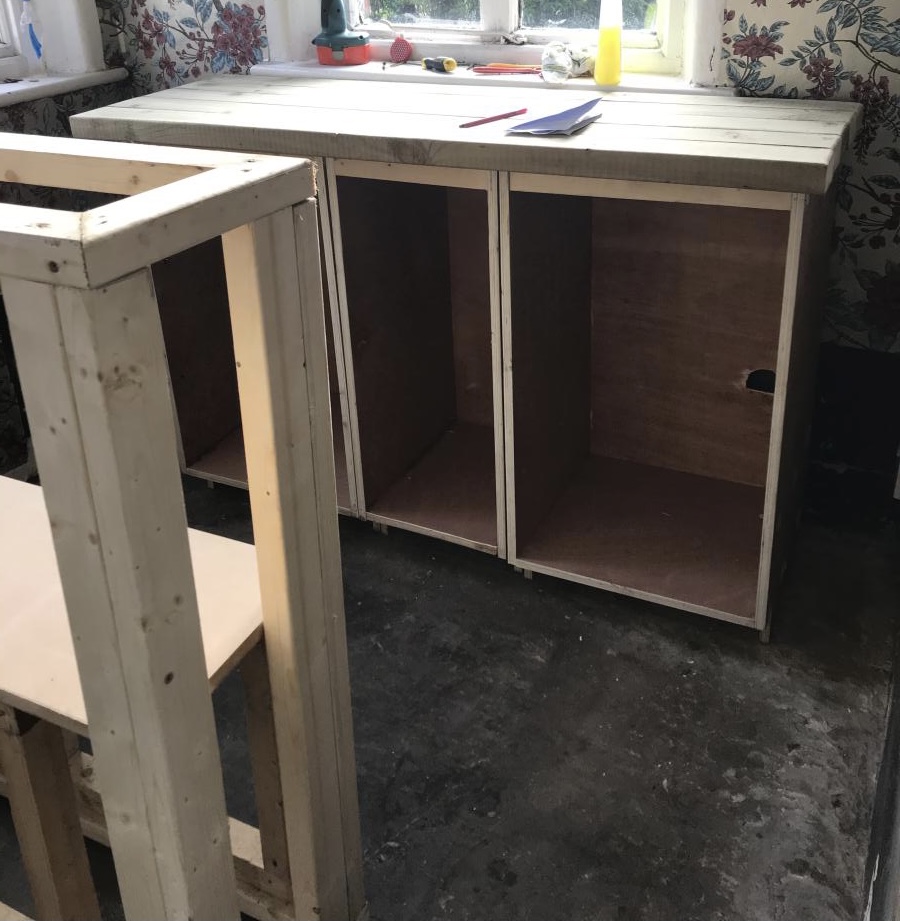
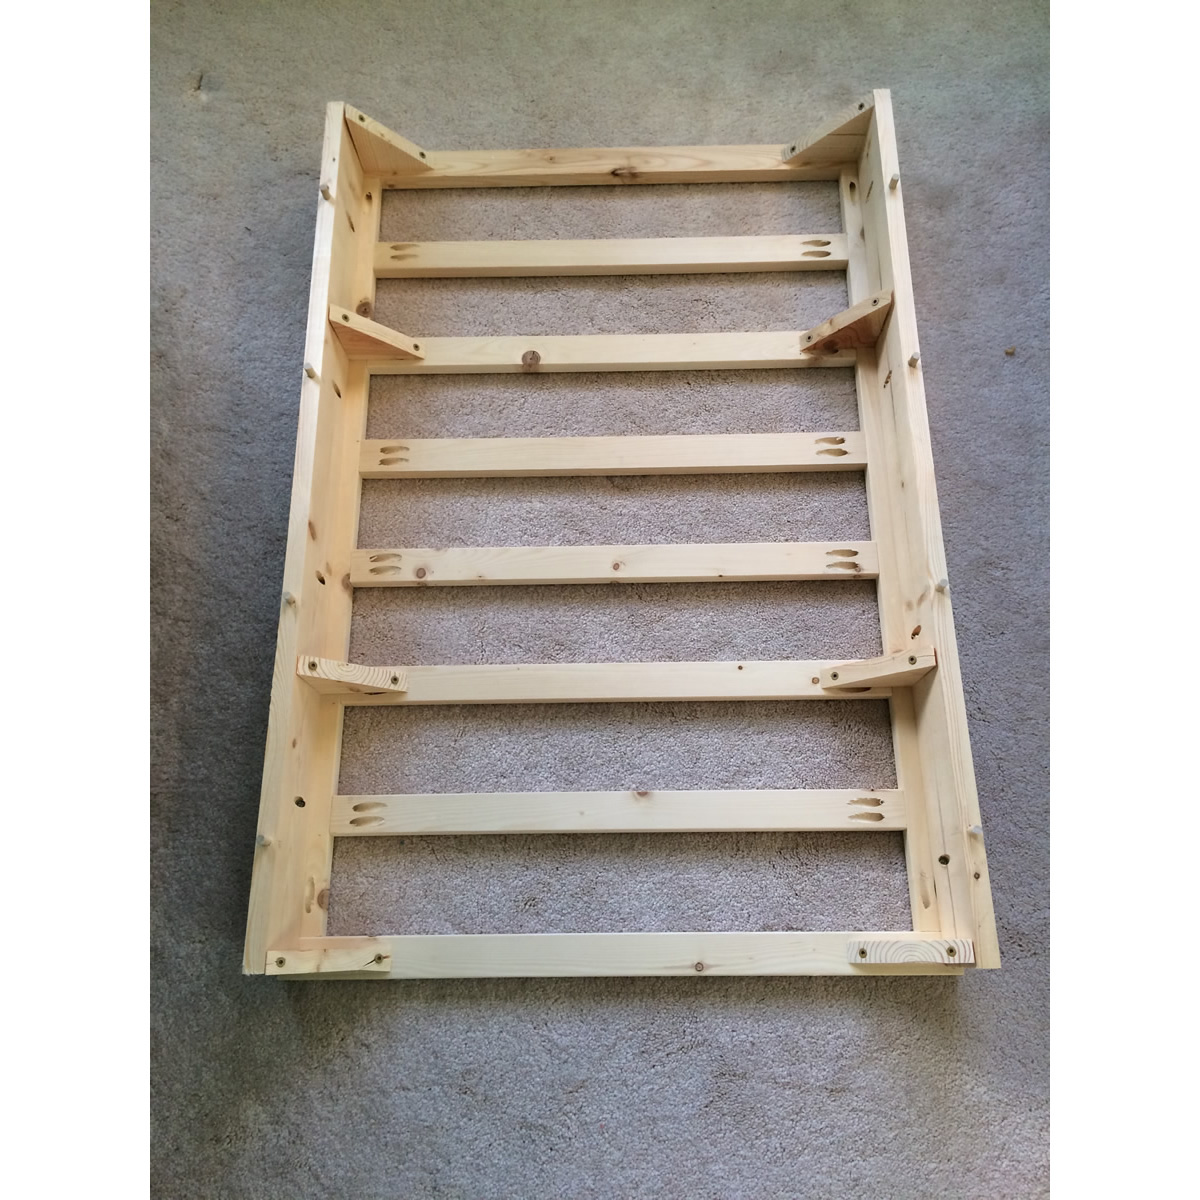
We made these beds for my daughters, who were ready to pass on the bunkbeds to their little sisters. We have 4 girls in one room, so use of space is crucial! I originally wanted the hutch as well, but as you can see in the picture, we had to work around a wall cut out, so we modified the corner unit to have a larger shelf area to fit the space. We also left the sides open to be able to slide containers in to store out of season clothes and blankets, though the ends have a backing.
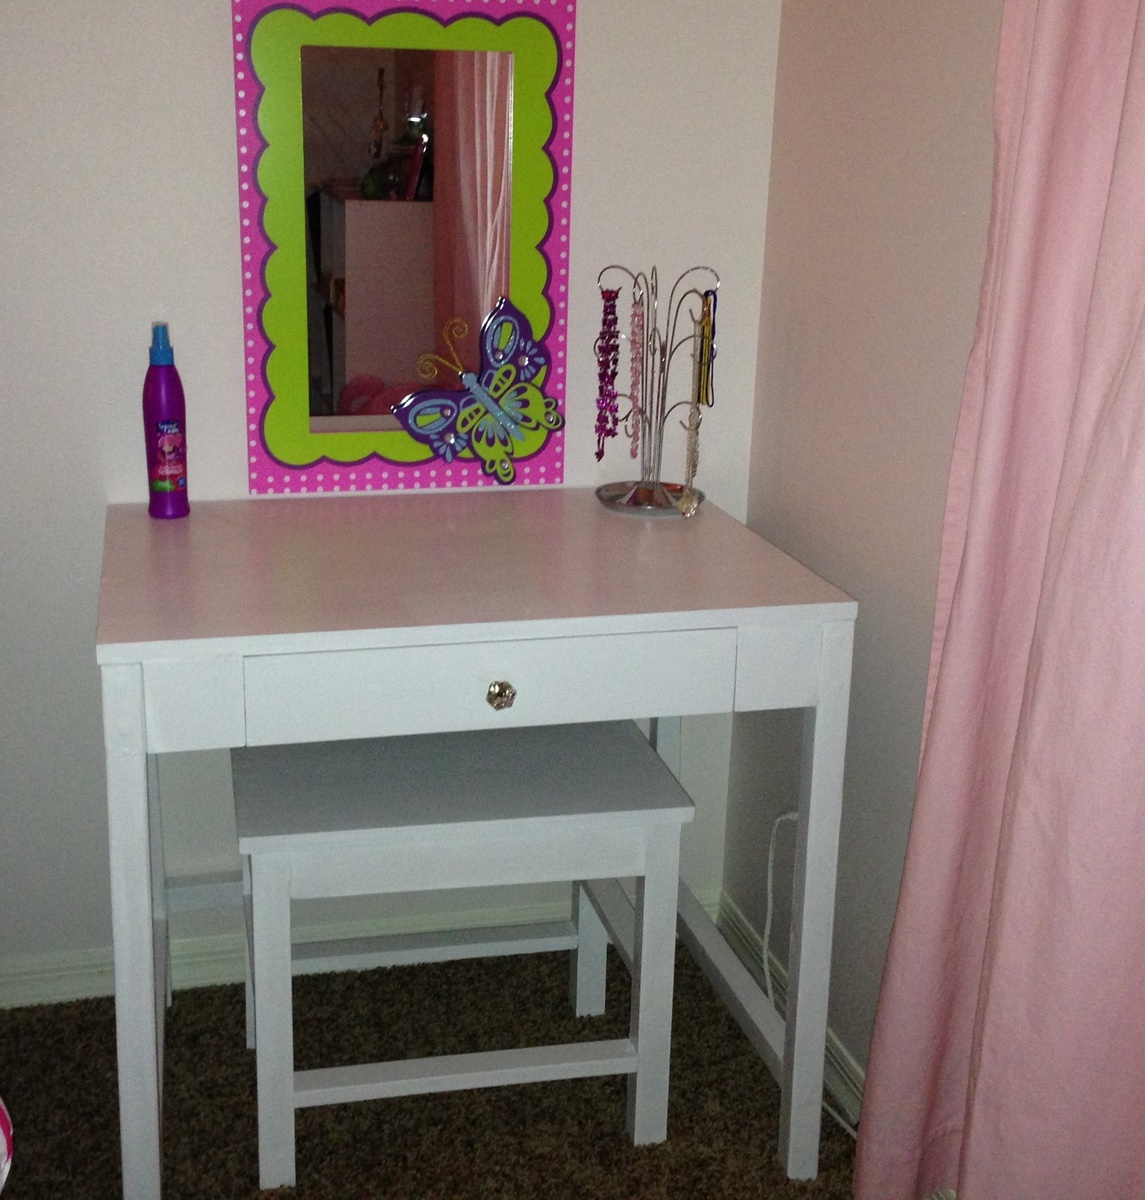
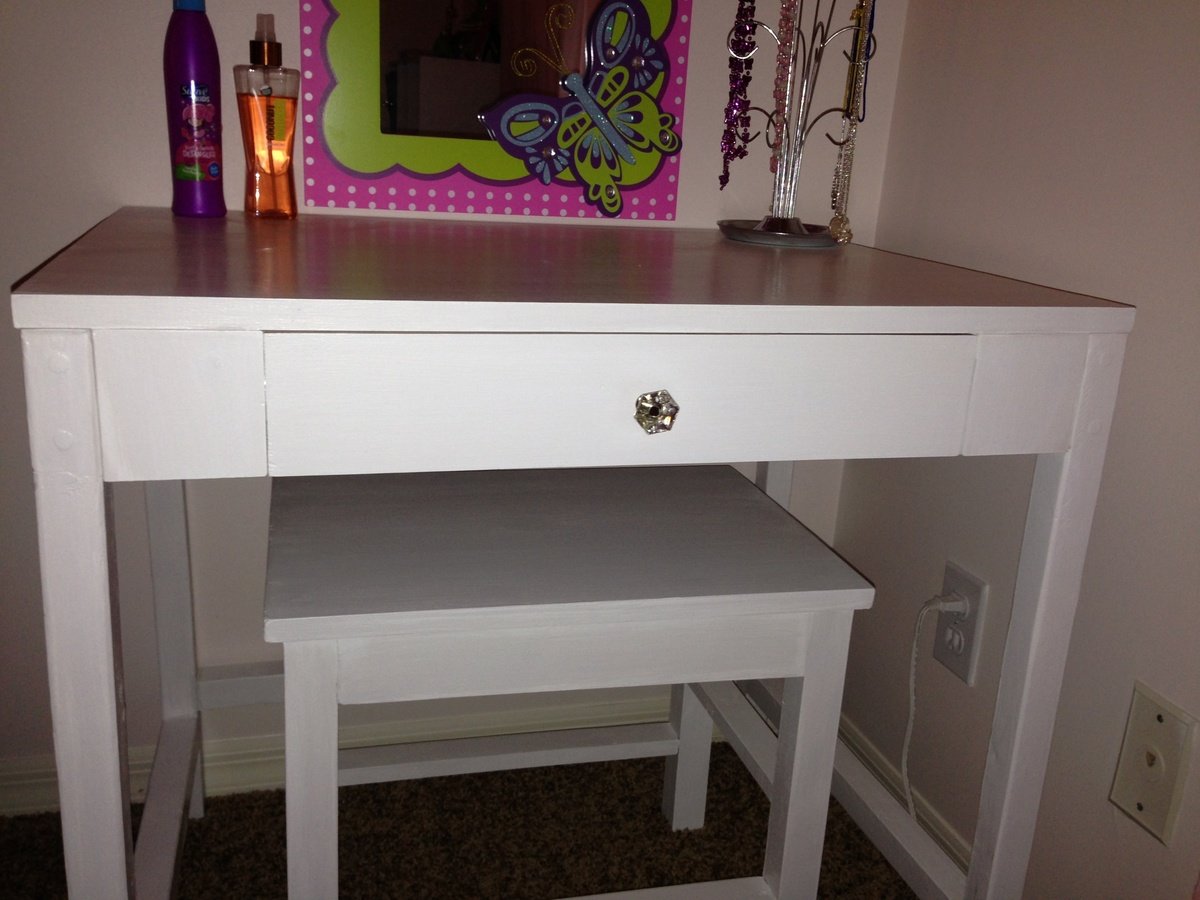
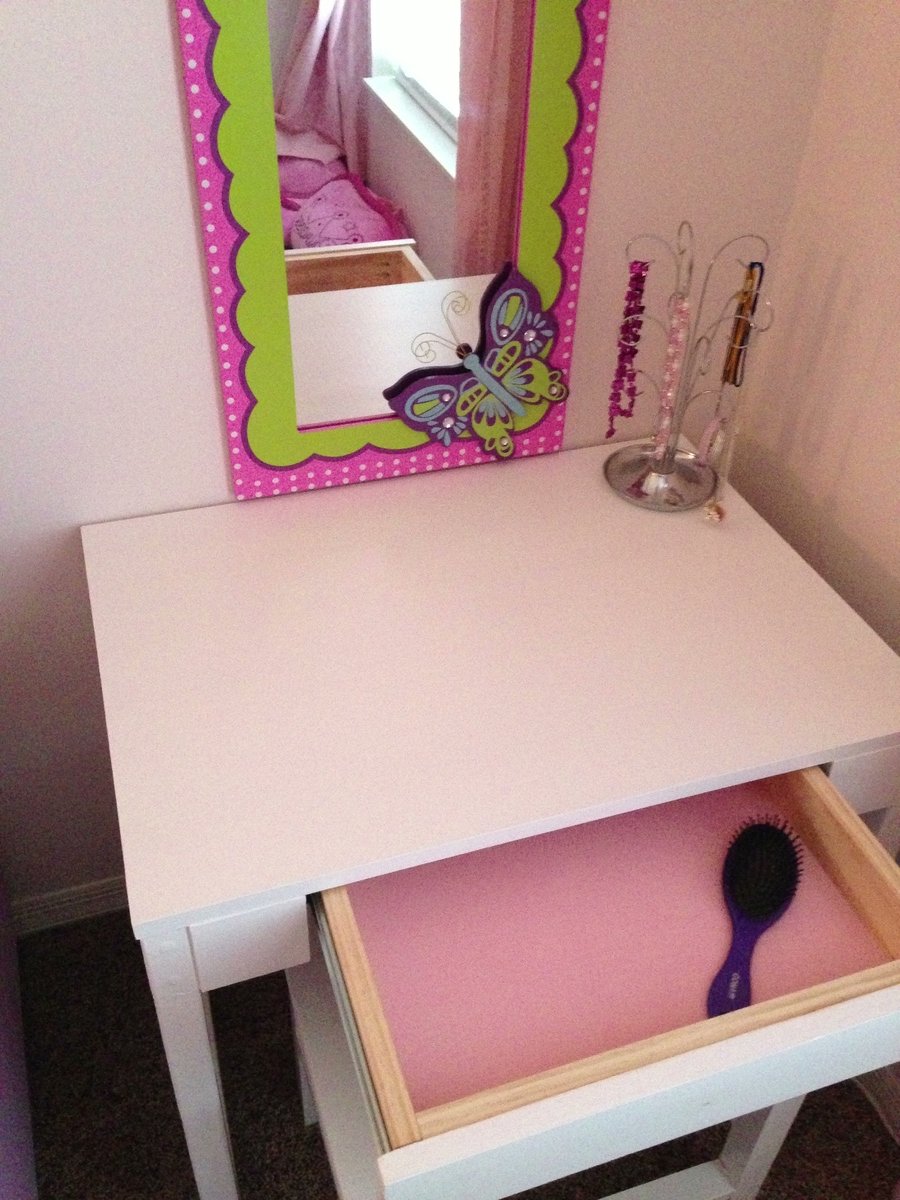
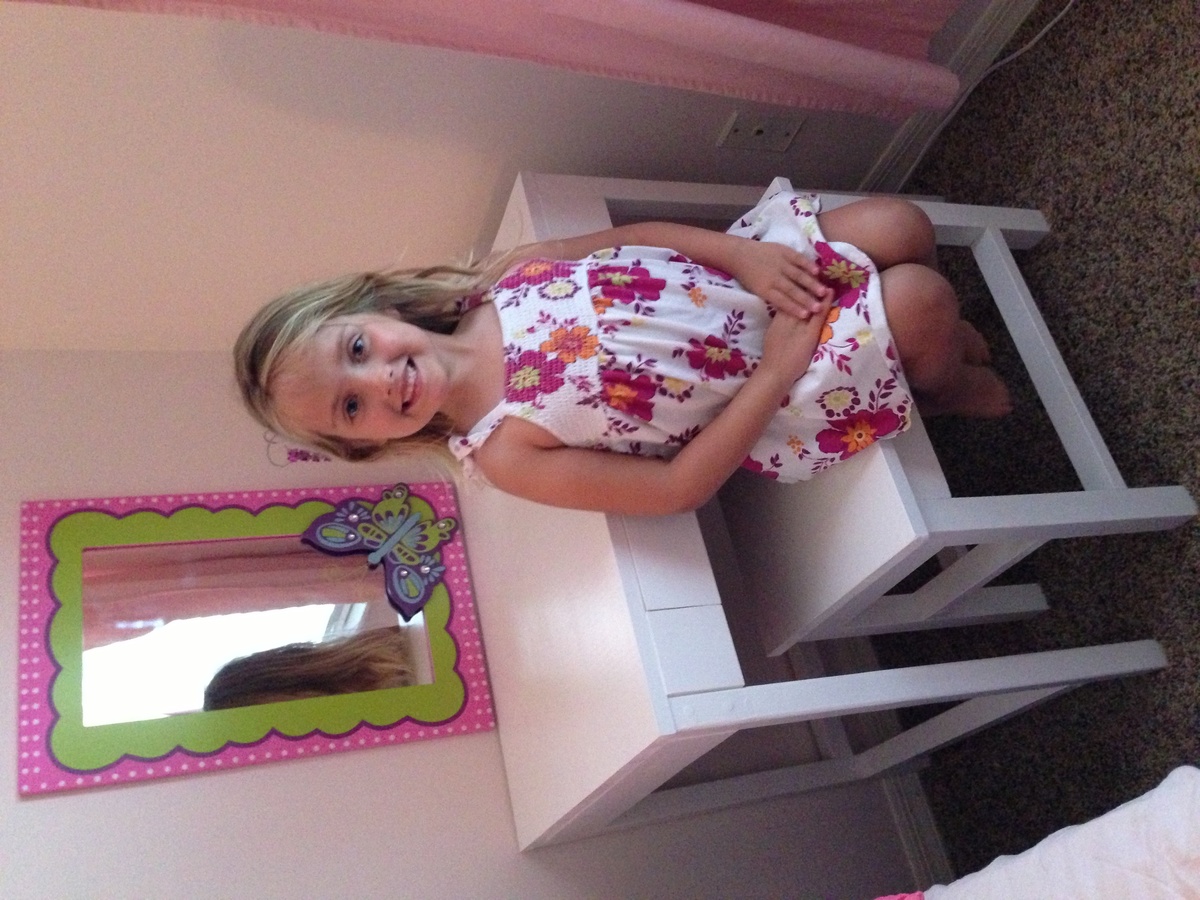
This was my first "by myself" build! I decided to make my daughter a pre-K graduation gift. She helped me fill the screw holes and painted the inside of the drawer with me. We called it "peek-a-boo pink" because she pulled it out and said it's a surprise. My only complaint was a lot of the pieces in the plans said they were 1x4's when they were in fact 2x4's, so I ended up building the desk top twice before I got it right. Live and learn right? I love, love, love this site and am so excited looking through plans deciding what to build next. Thank you Ana!!
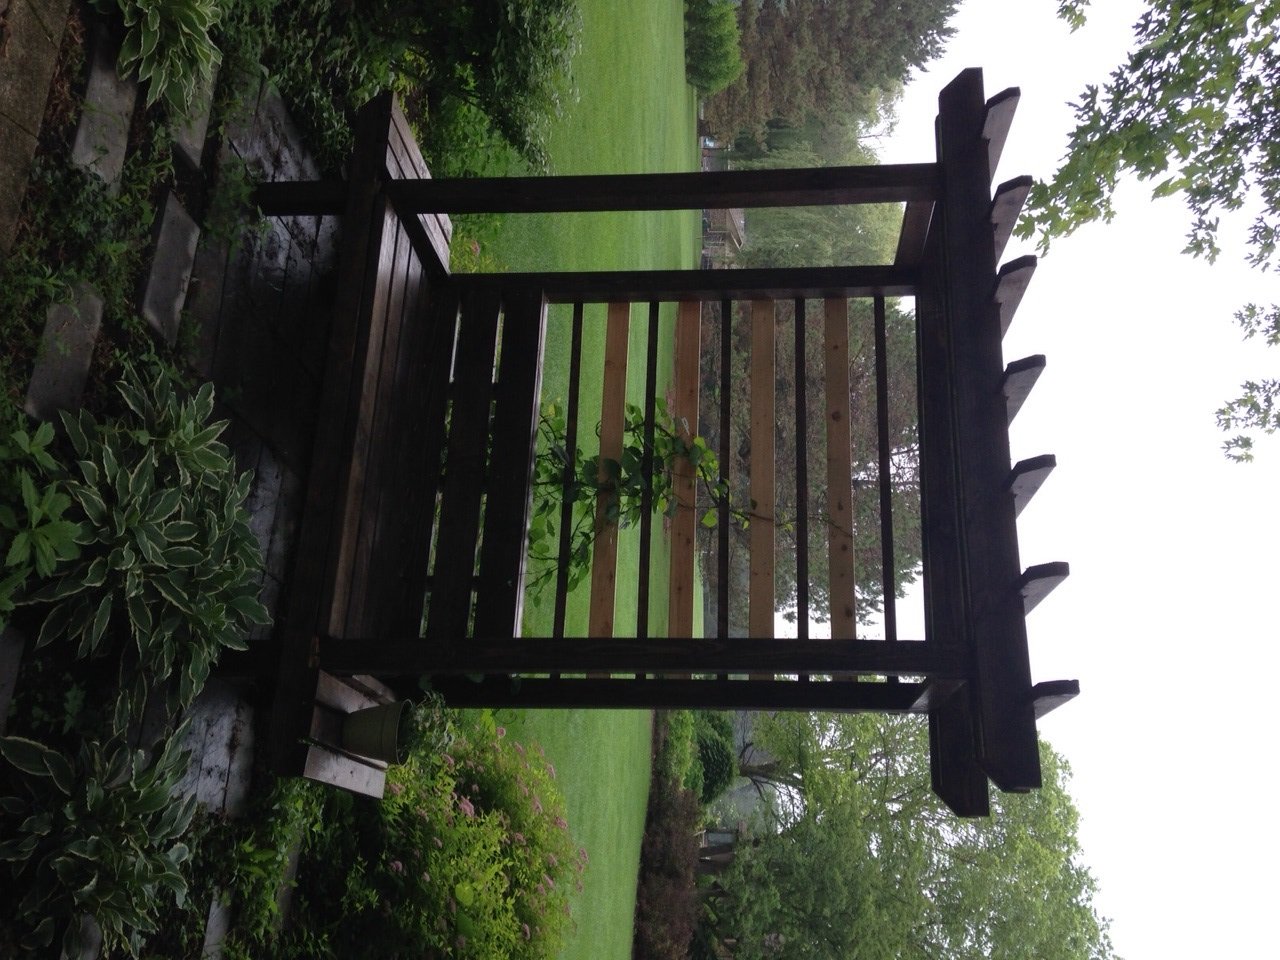
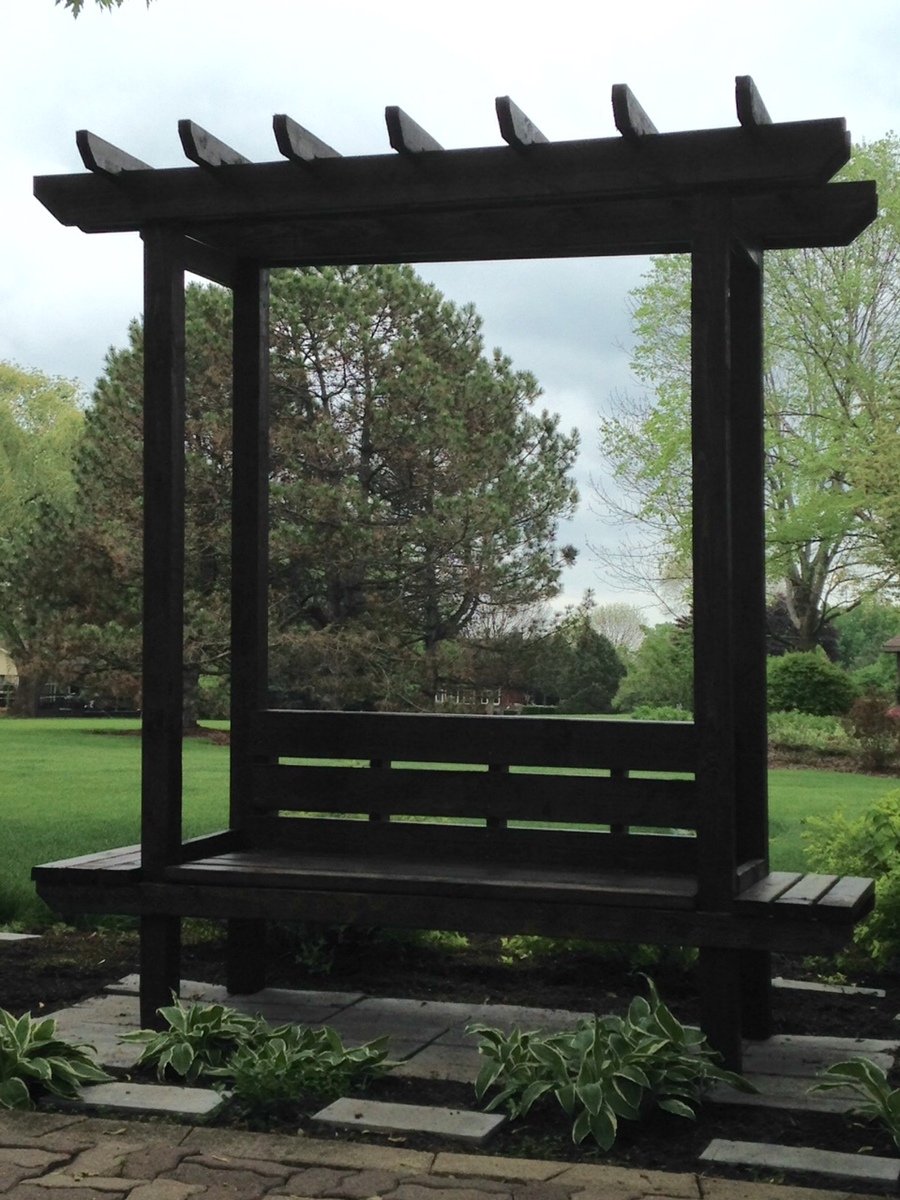
This plan was pretty easy to follow. Apart from having to make some minor adjustments to the notches for the rafters across the top, and needing a couple more seat support boards than the cut list called for, everything went as planned.
I used green treated lumber and stained it with Minwax Walnut. I also sealed the entire piece with Spar Urethane.
I didn't use lattice work on the sides, but went with some horizontal lattice work on the back (a mix of stained and unstained 2x1 and 3x1 boards). I may install a couple of 2x4 for arm rests on each side.
The morning glory vine I planted behind the bench has almost reached the top of the lattice work. All in all, I'm very pleased with how this project turned out.
Thanks Ana!
Sun, 06/21/2015 - 11:11
This is awesome. I really like the horizontal slates on the back.

Wed, 06/24/2015 - 10:27
Thank-you. It was a fun project to work on. Lots of opportunities to tweak the design to suit your own preferences.
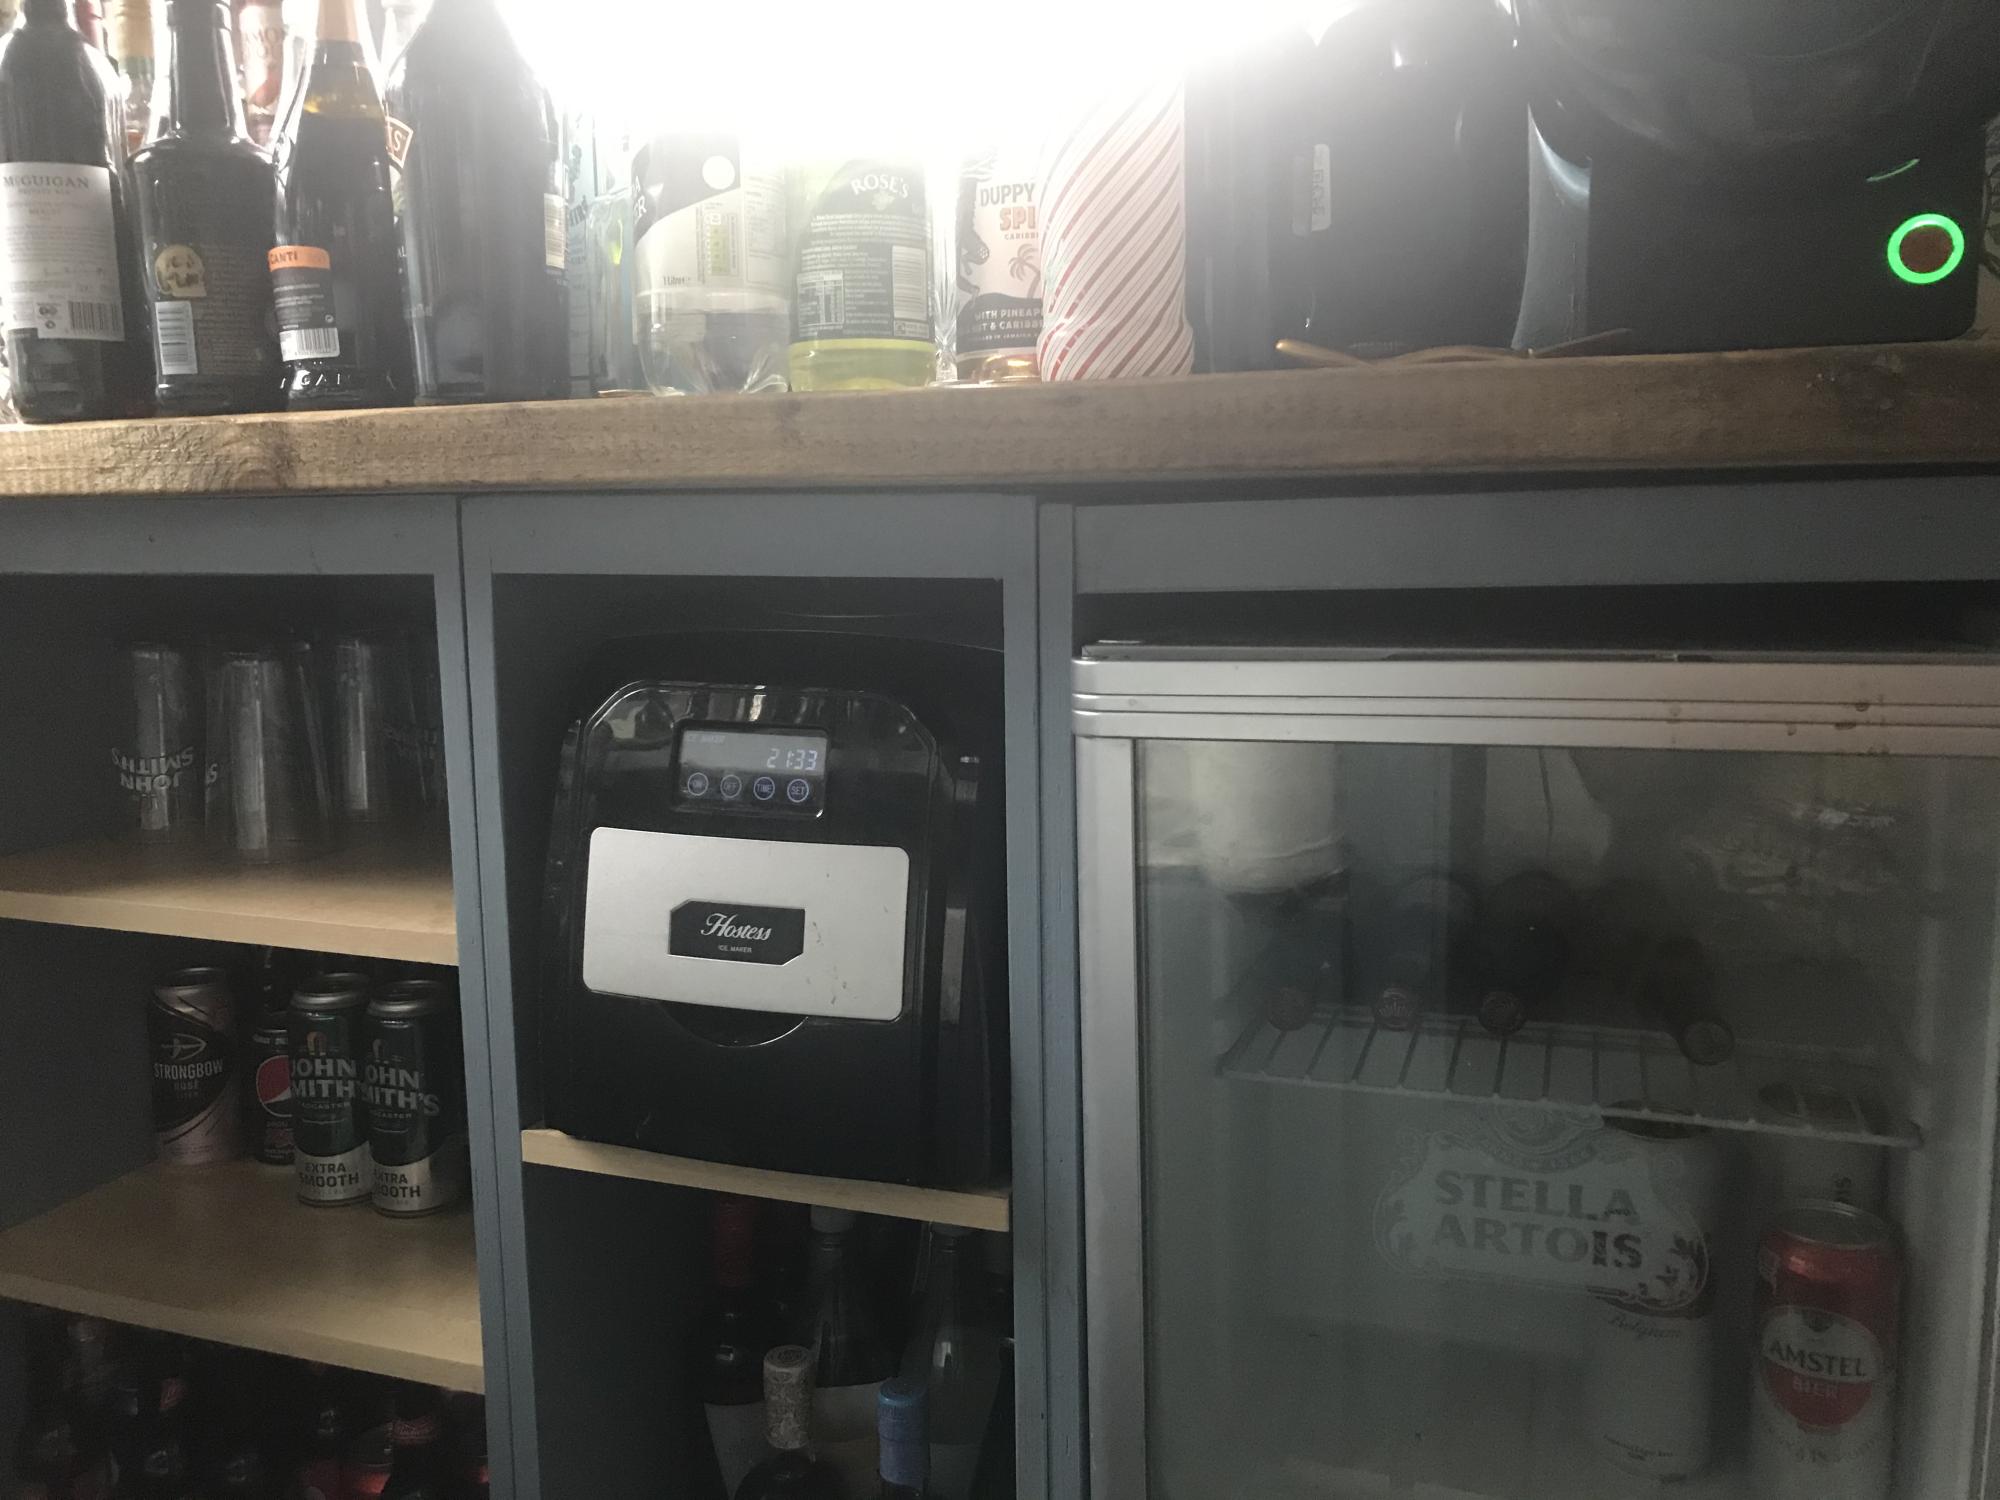
Based bar cupboard on kitchen carcass plans and then made the bar front as I went . The kitchen cupboard plans were easy to follow and I was really pleased with the results. This was a real hit at Christmas a really good base for mixing and even better folks brought bottles with them !!

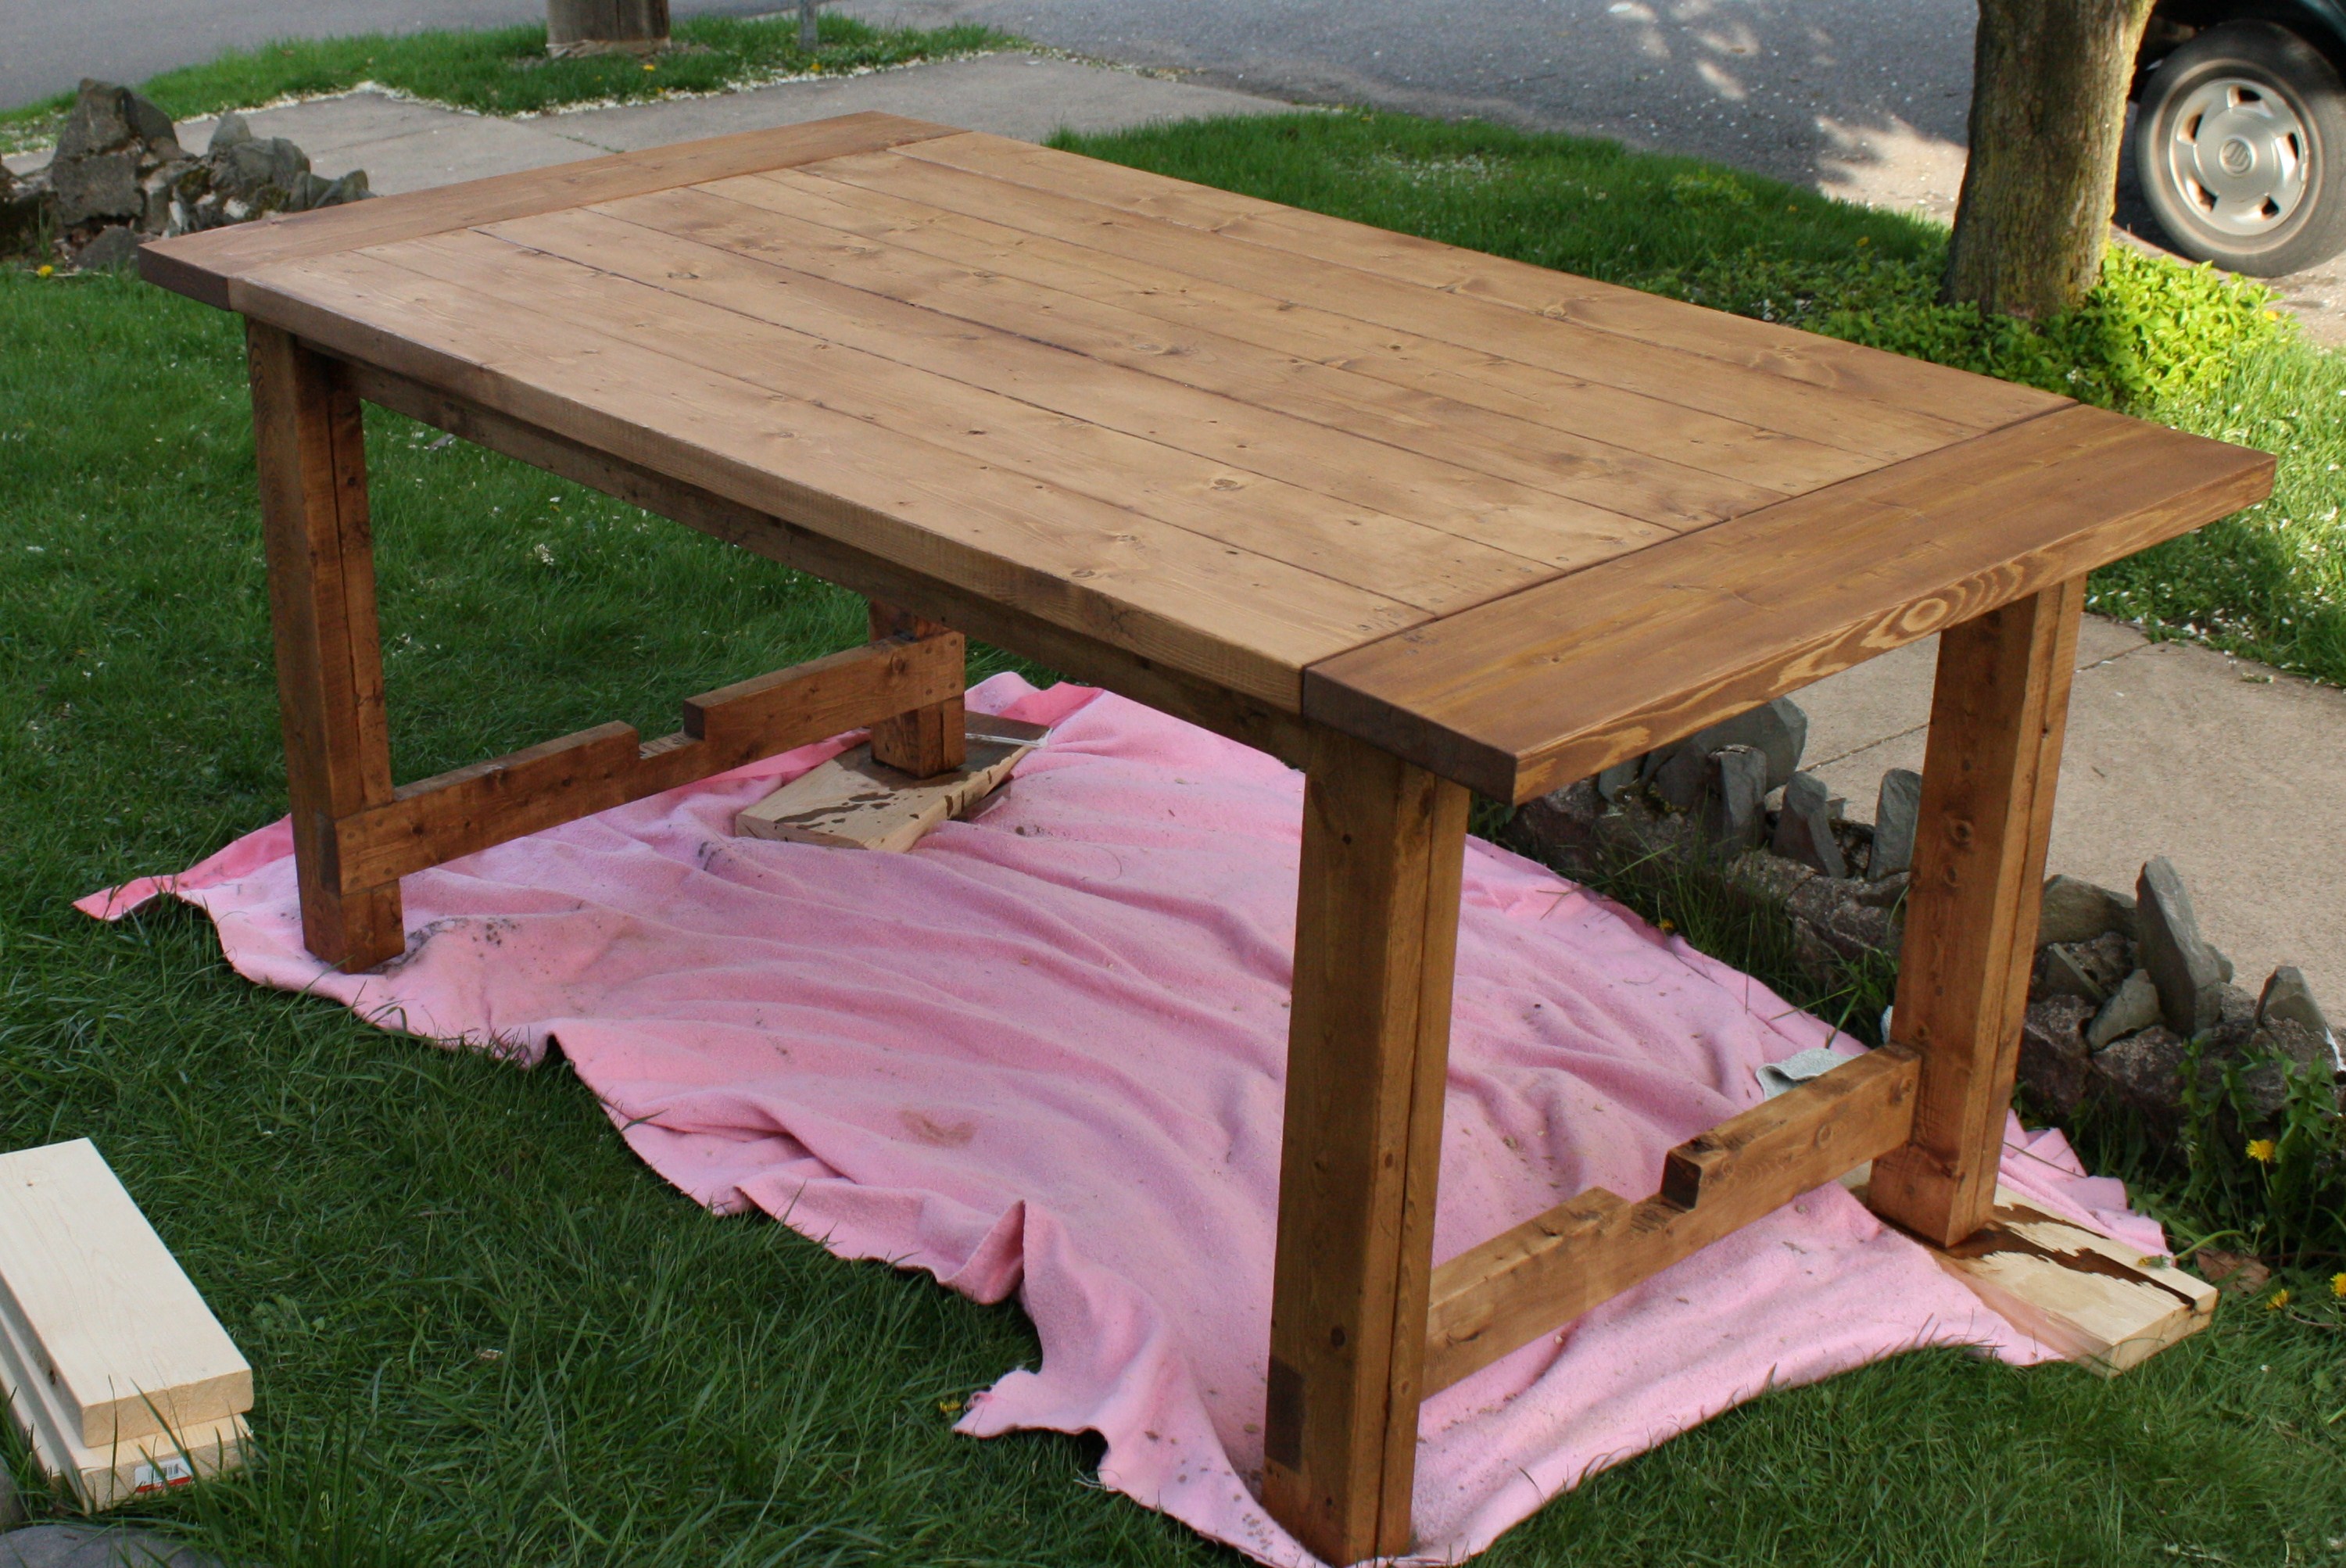
We shortened the length of the table to 5 1/2 feet. Took me bits and pieces of 3 weeks to build working around rain days and napping children.
Around $80 in materials, not counting the new orbital sander (which I wanted for a while).
Looking forward to building 2 benches next month. A sturdy table for my family of 7. (Including 3 boys!!!)
This was my first project. I see the flaws, but overall, I'm very happy. I built mostly myself, but hubby had to help with the hauling indoors/outdoors, kids held wood while I used the saw, stood on boards while I attached. It was fun for all of us and we are thrilled with the results. Even the scratch in the tabletop photo below was done by my 2 yr old and I call that his little touch!

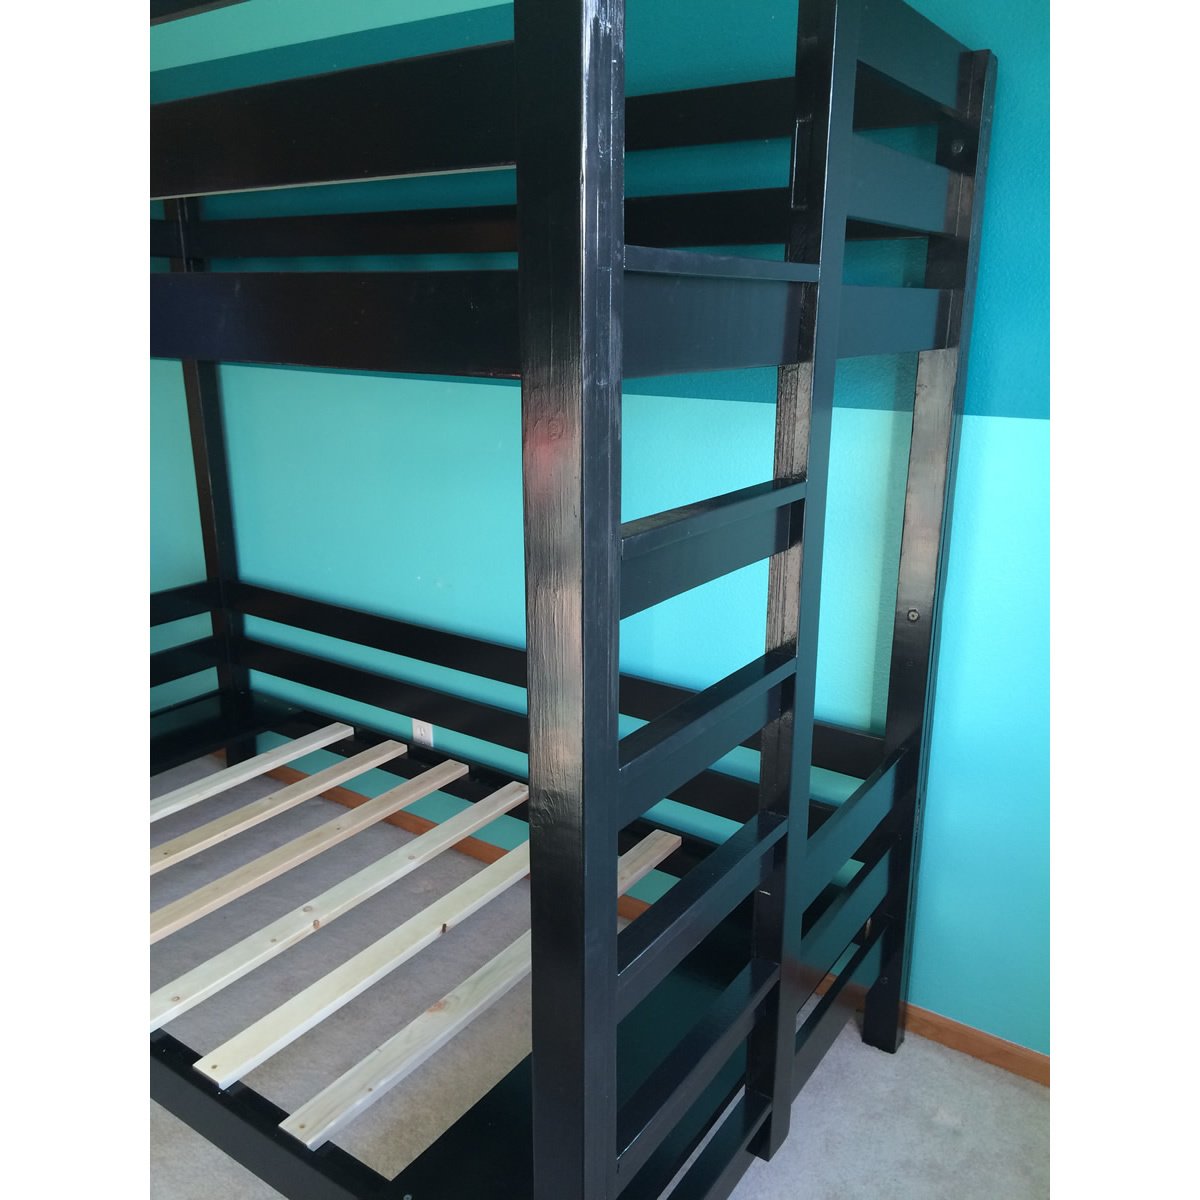
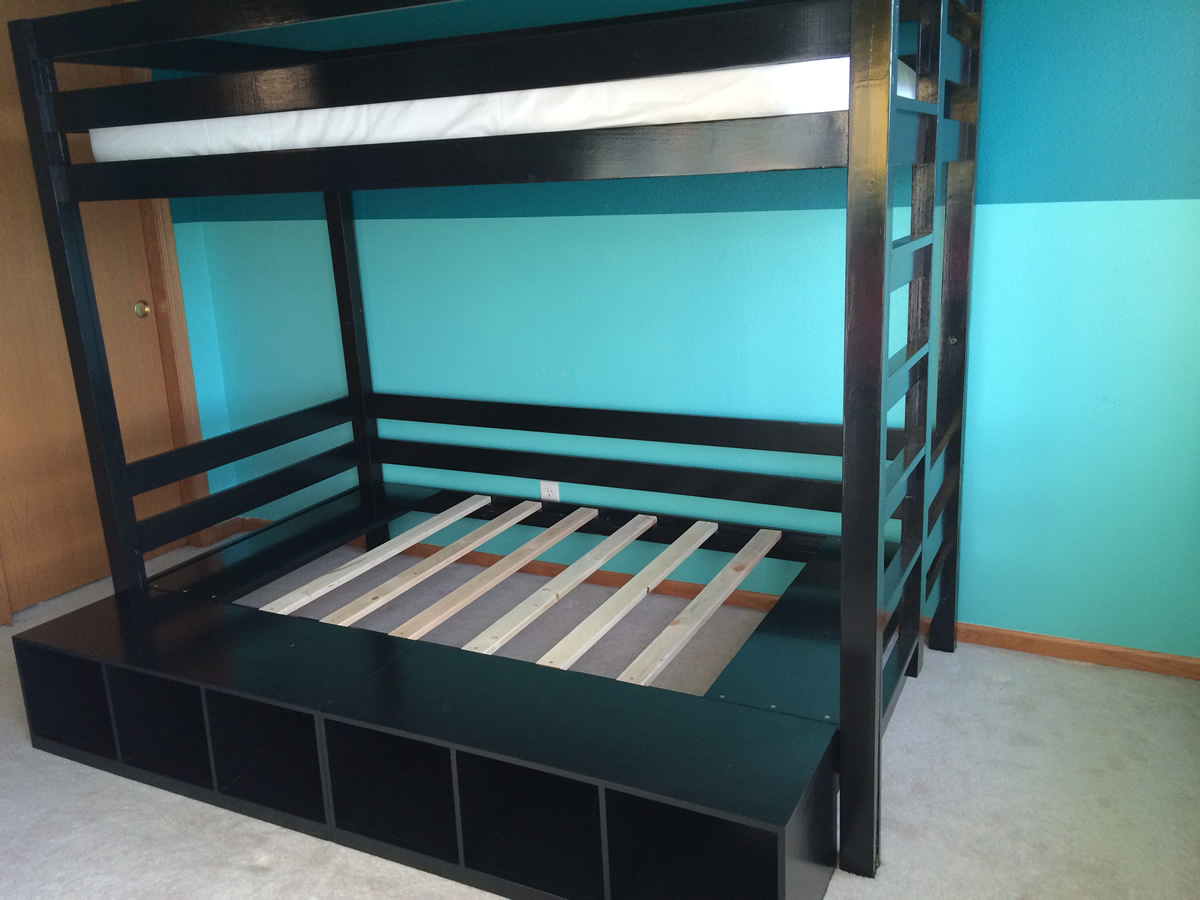
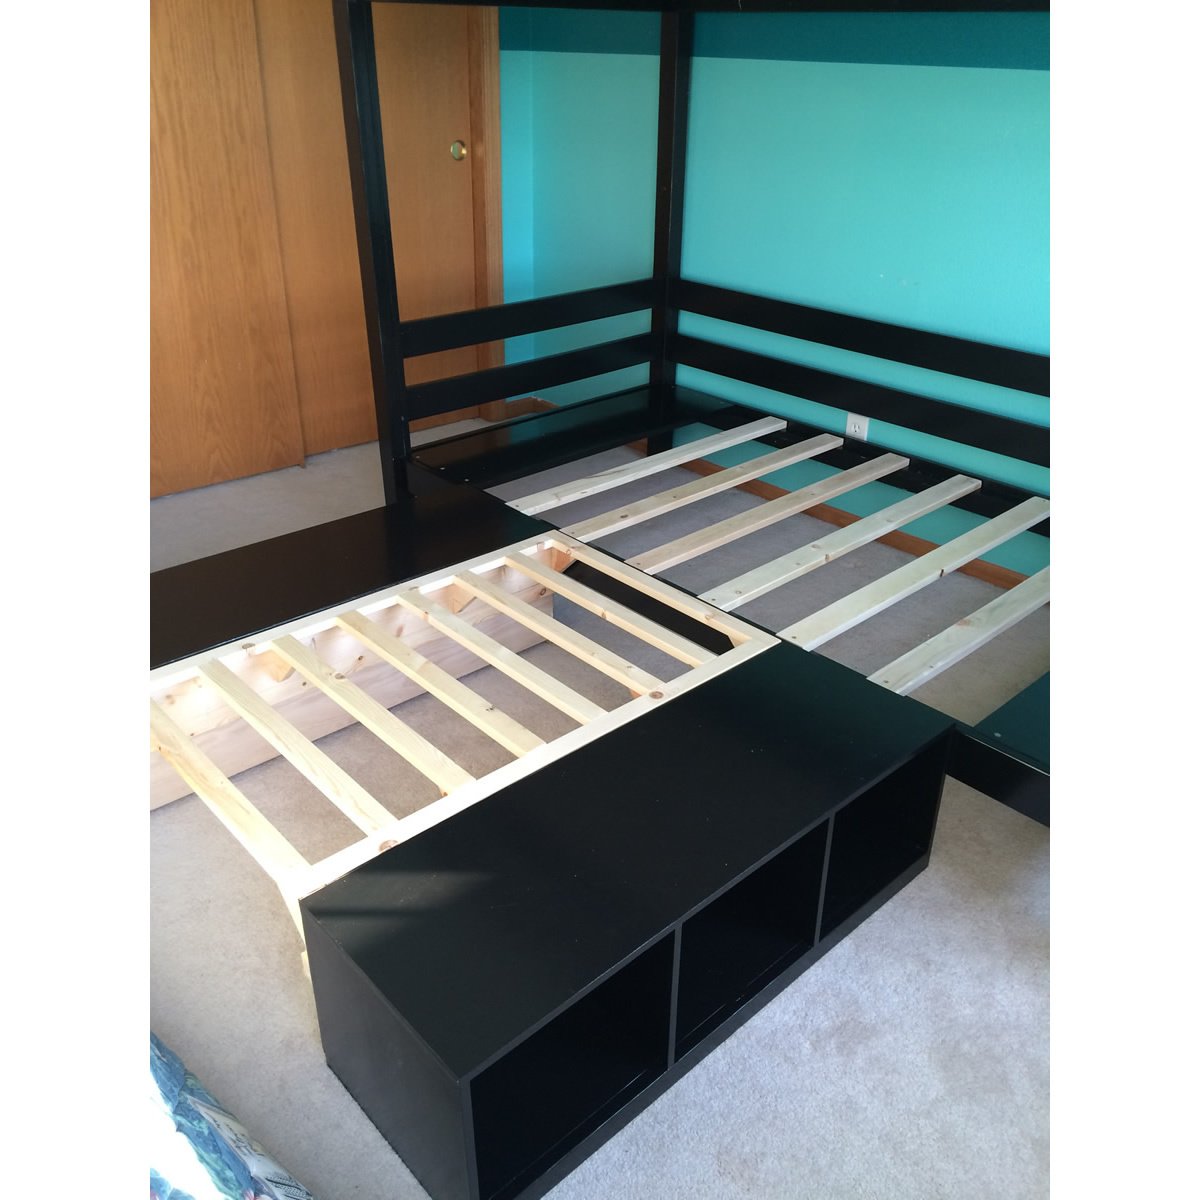
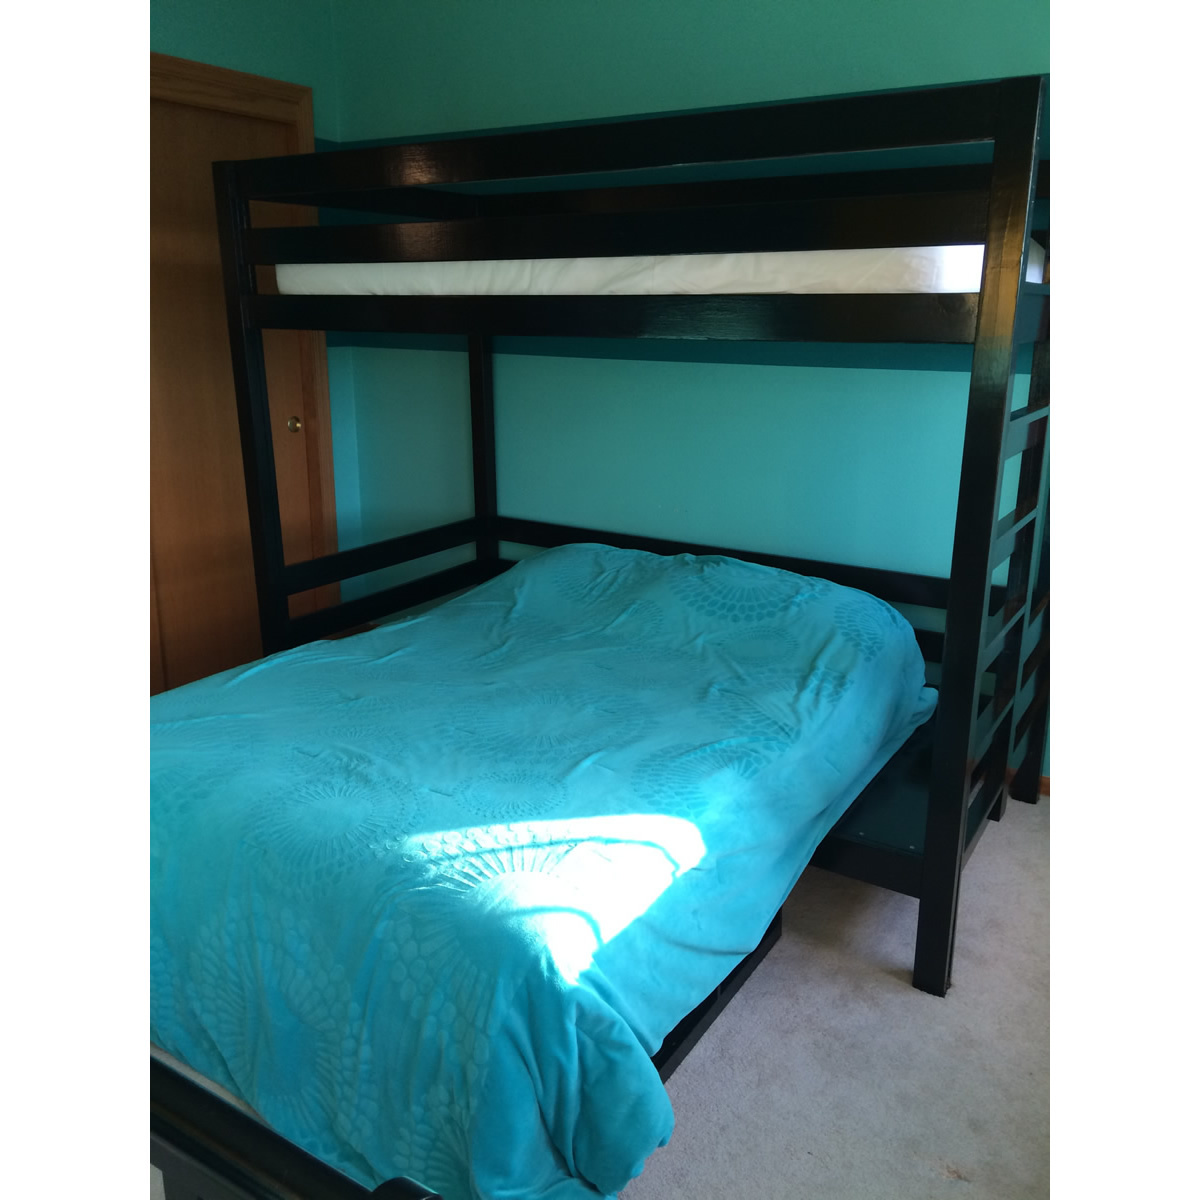
I modifed the Classic Bunk Bed and Cubby designs to create a convertible twin over full bunk bed. The bottom full-sized bunk can be rotated to be parallel to the wall (when my son sleeps there) or perpendicular to the wall (for when we have guests so they don't have to climb over one another). Changes I made were:
- I moved the ladder to the end of the bed to make room for the full-sized mattress.
- I added 1x2 treads to the ladder to make it easier on the feet.
- I raised the height of the top bunk. Finished height of the bed is 68" to add head room on the bottom bunk for taller people.
- I built 2 custom cubbies (full dimensions of each 37.5" x ~13.5" x 11.5") to support the added width of the full-sized bottom bunk. These cubbies can also be rotated to support the mattress in the perpendicular position for use as a guest bed (see pictures).
- I built an additional support that fits onto the back of each of the cubbies when they are turned to support the perpendicular guest bed (see pictures).
- I changed the end support rails for the bottom bunk to 1x12s that I painted to match the bed to be used as night stands when the bed is rotated to be a guest bed (see pictures).
- I used wood thread inserts and 1/4"-20 connector bolts (from Fastenal) to assemble the bed, so it would be easy to disassemble and reassemble.
Funny story - When we went to move it to the second story bedroom from the garage where I had finished it, the long sides wouldn't fit up our stairs!!! Our stairs have a tight 90 degree turn partway up. After all the hours I put in building and finishing it, I almost cried! Fortunately after using a straight edge blade to carefully cut through the paint, we unscrewed the upper most rail and were able to just barely get it up our stairs. I was so thankful I hadn't glued those boards on!
I love woodworking and trying different techniques...Thank you Ana for the detailed plans!..My niece loves it
Mon, 12/27/2021 - 22:21
Awe, love this, it looks great! Thank you for sharing:)

I loved the idea of the magnet wall, but I knew that something smaller would be perfect for this 12 year old girl's room redo- so we just framed it out in painted 1x2's.

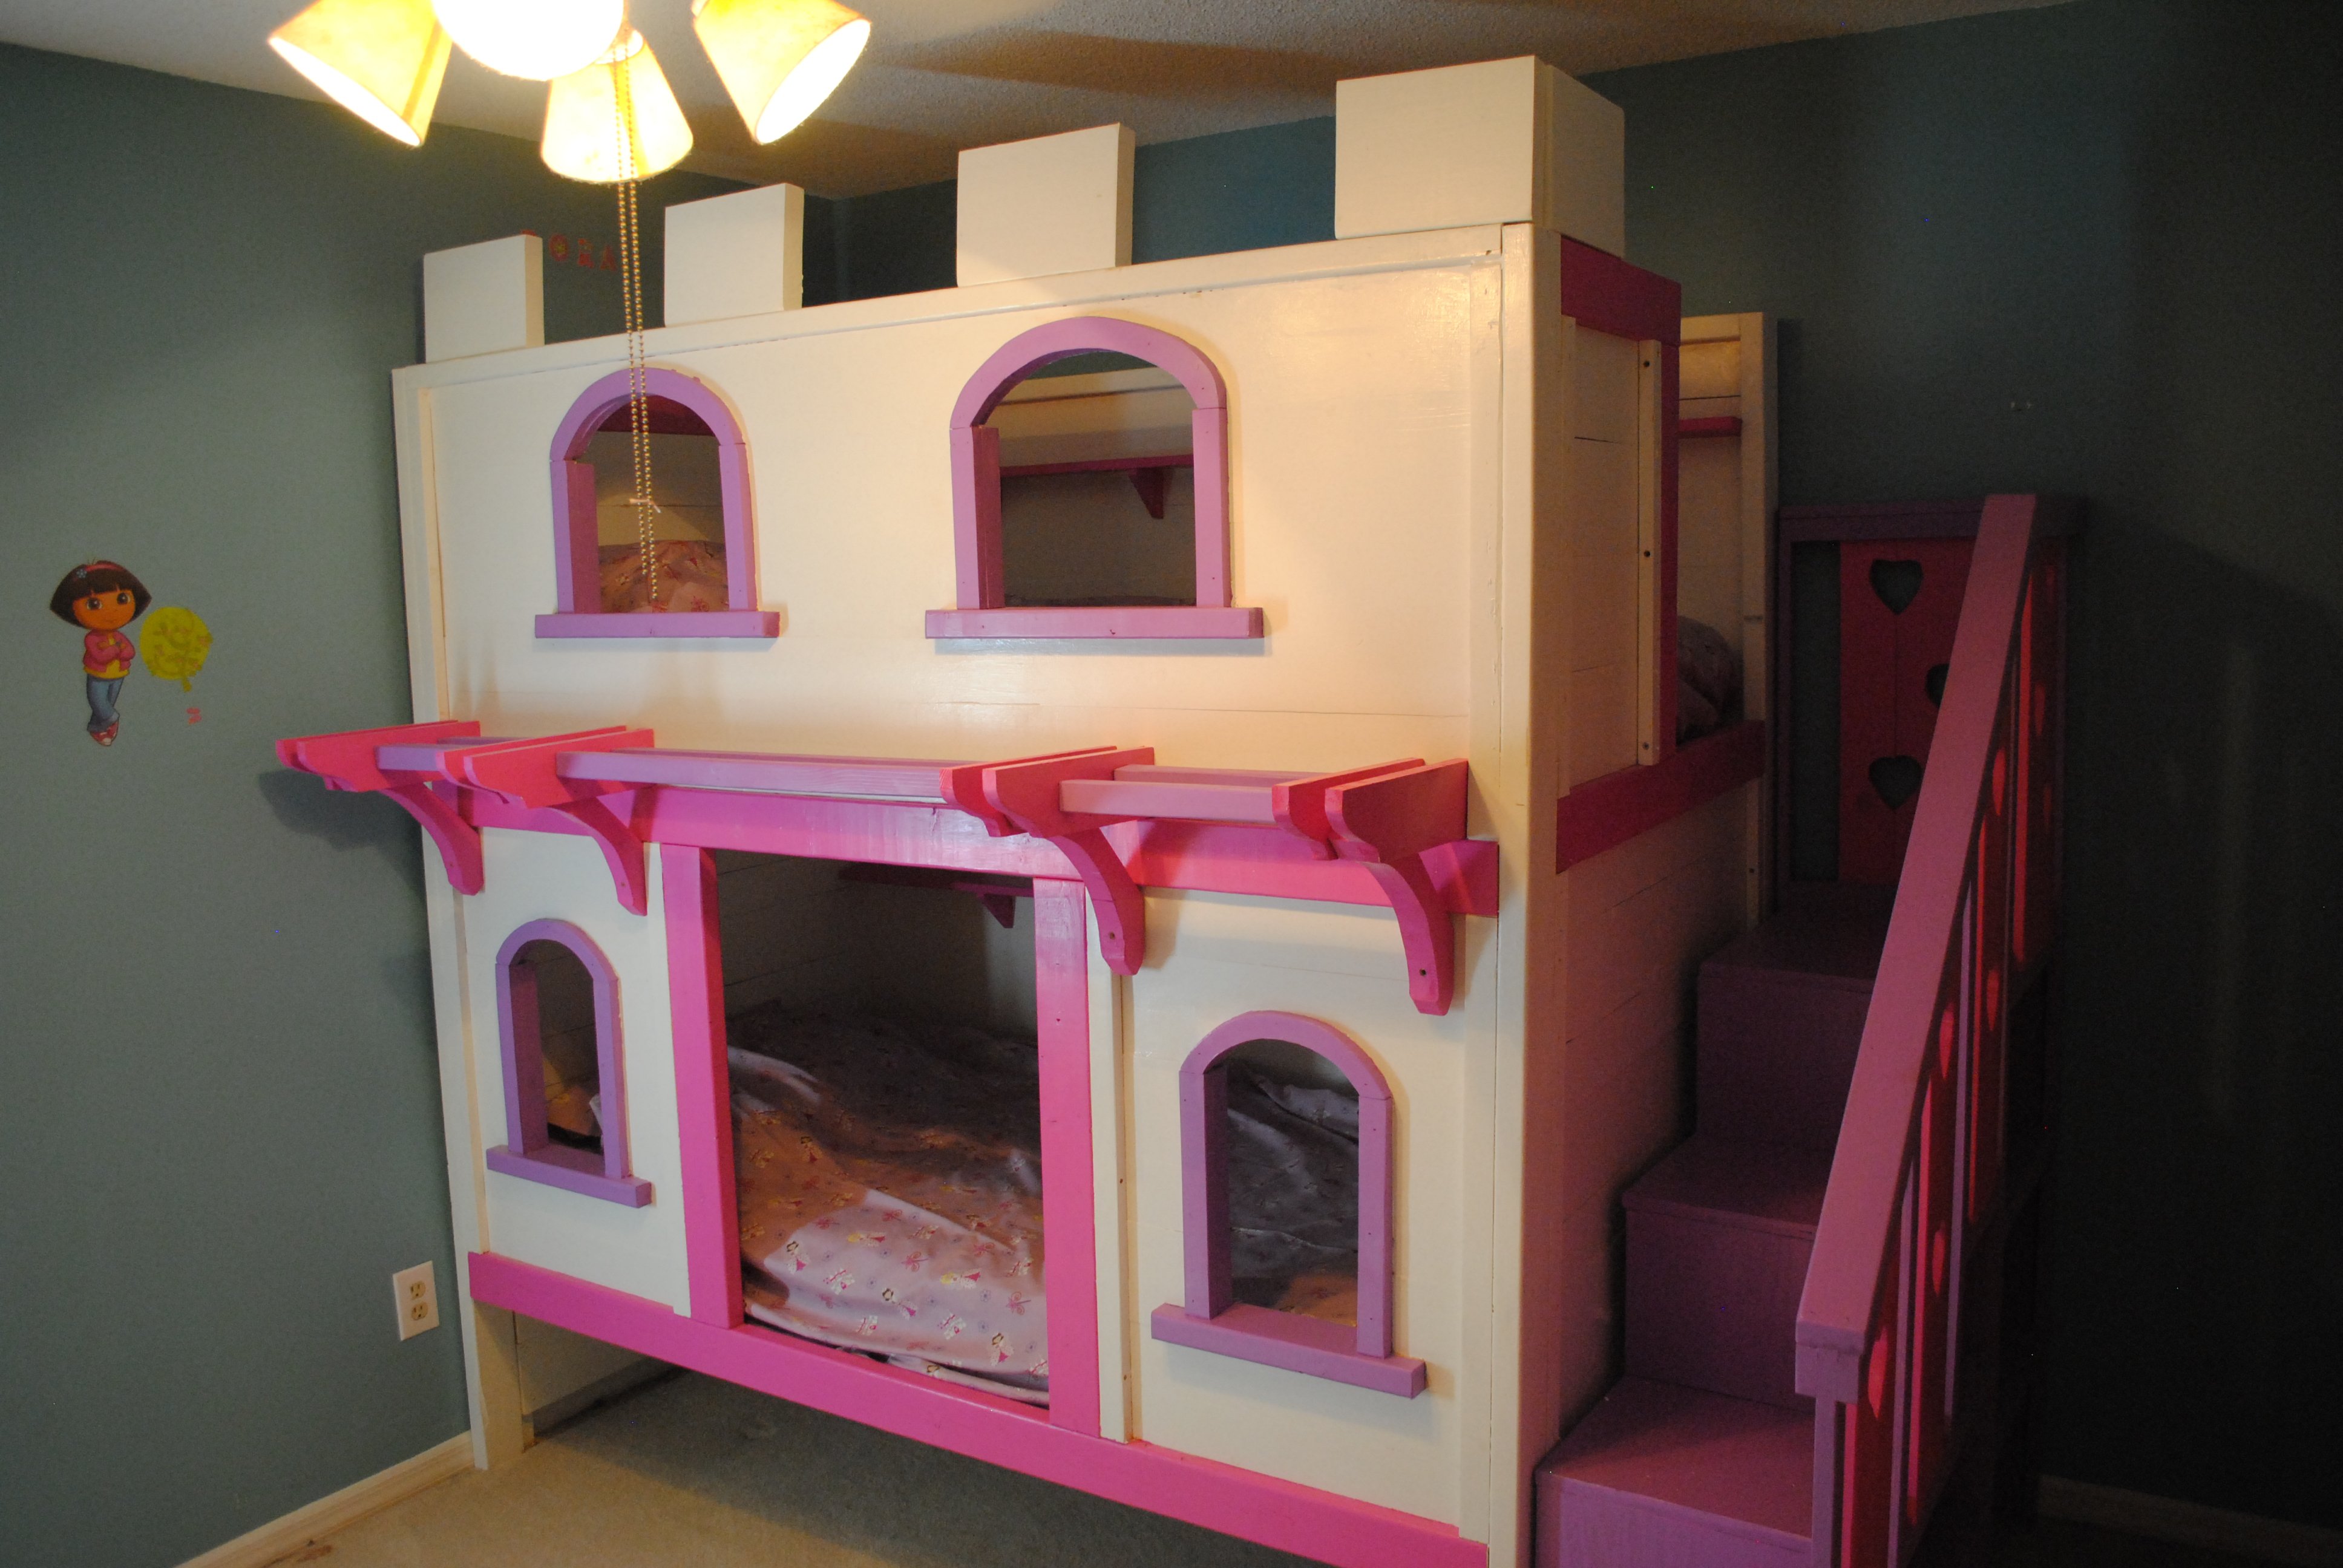
I was searching online for plans for Bunk Beds and came across Ana-White.com. I found the Sweet Pea Bunk Bed and my wife and I both fell in love. My daughters are very "into" princesses right now, so I took the elements of the Sweet Pea Bunk Bed and modified it slightly to create a castle look, so that my oldest could "climb to the highest tower of the castle". They both love playing with their beds!

Sat, 07/06/2013 - 09:32
I love the castle twist! When the neighbor kids come over, they say the same thing about the top bunk- it is amazing what stairs can do! Your little castle is truly fit for a princess!
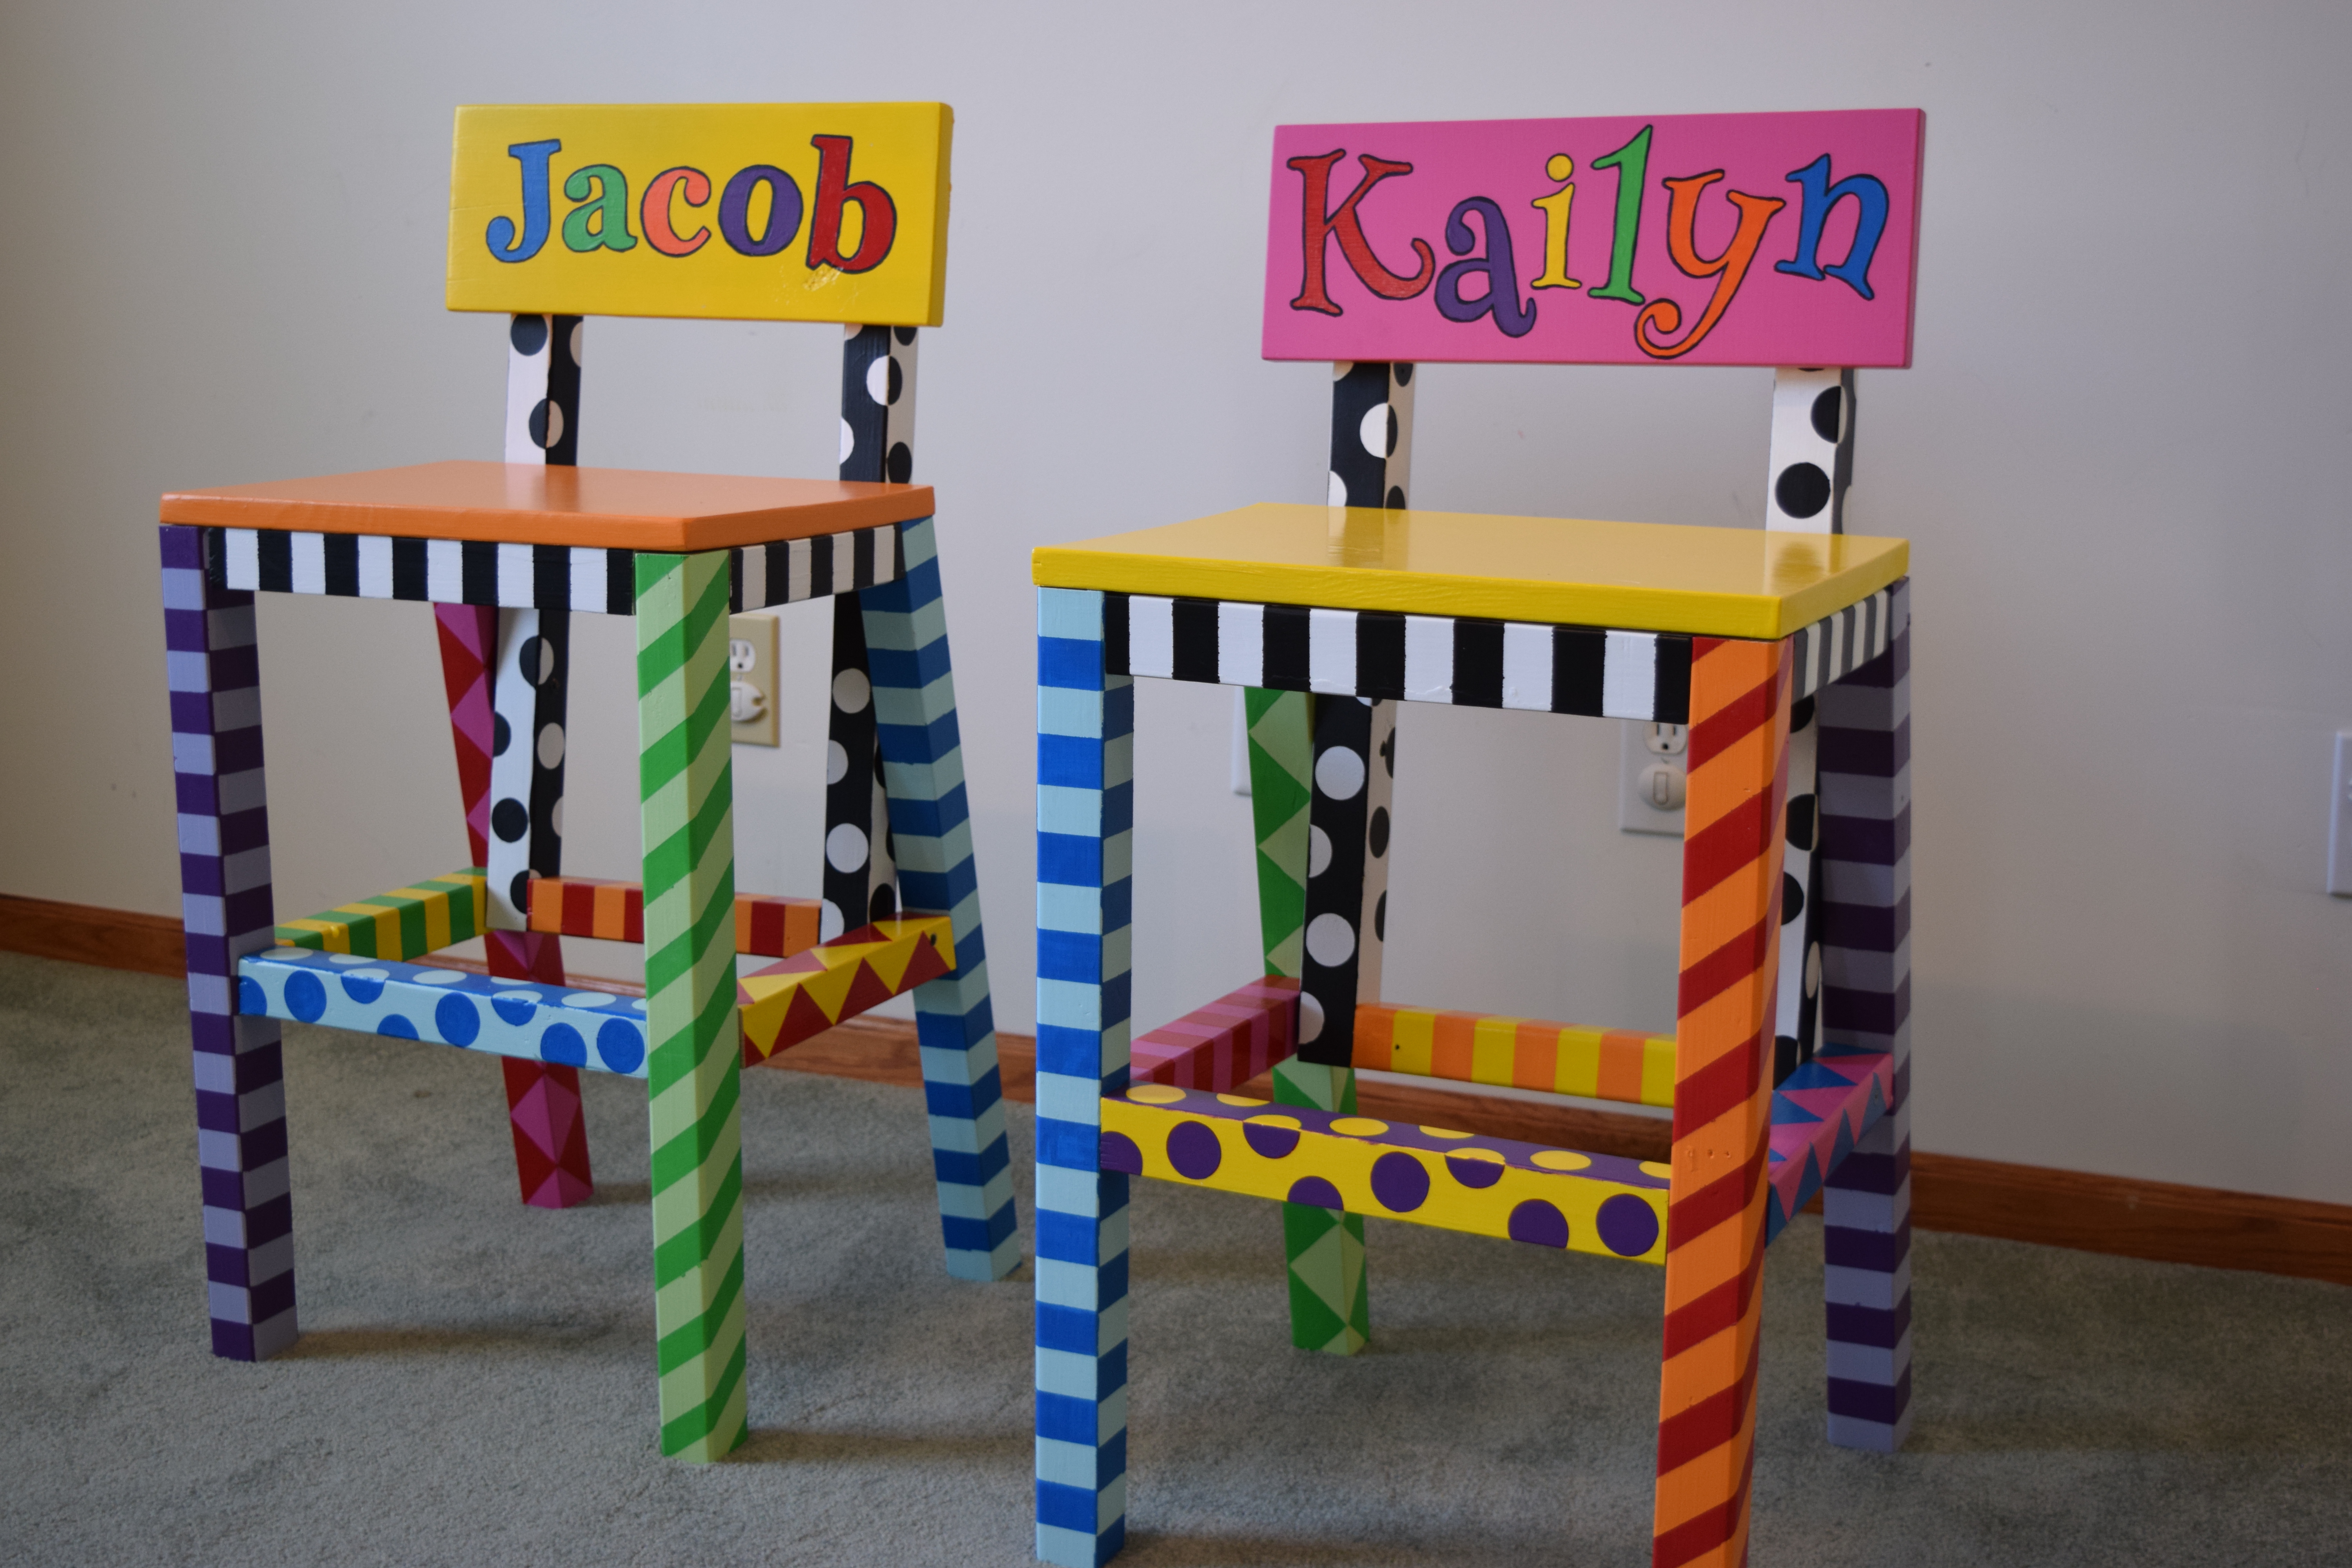
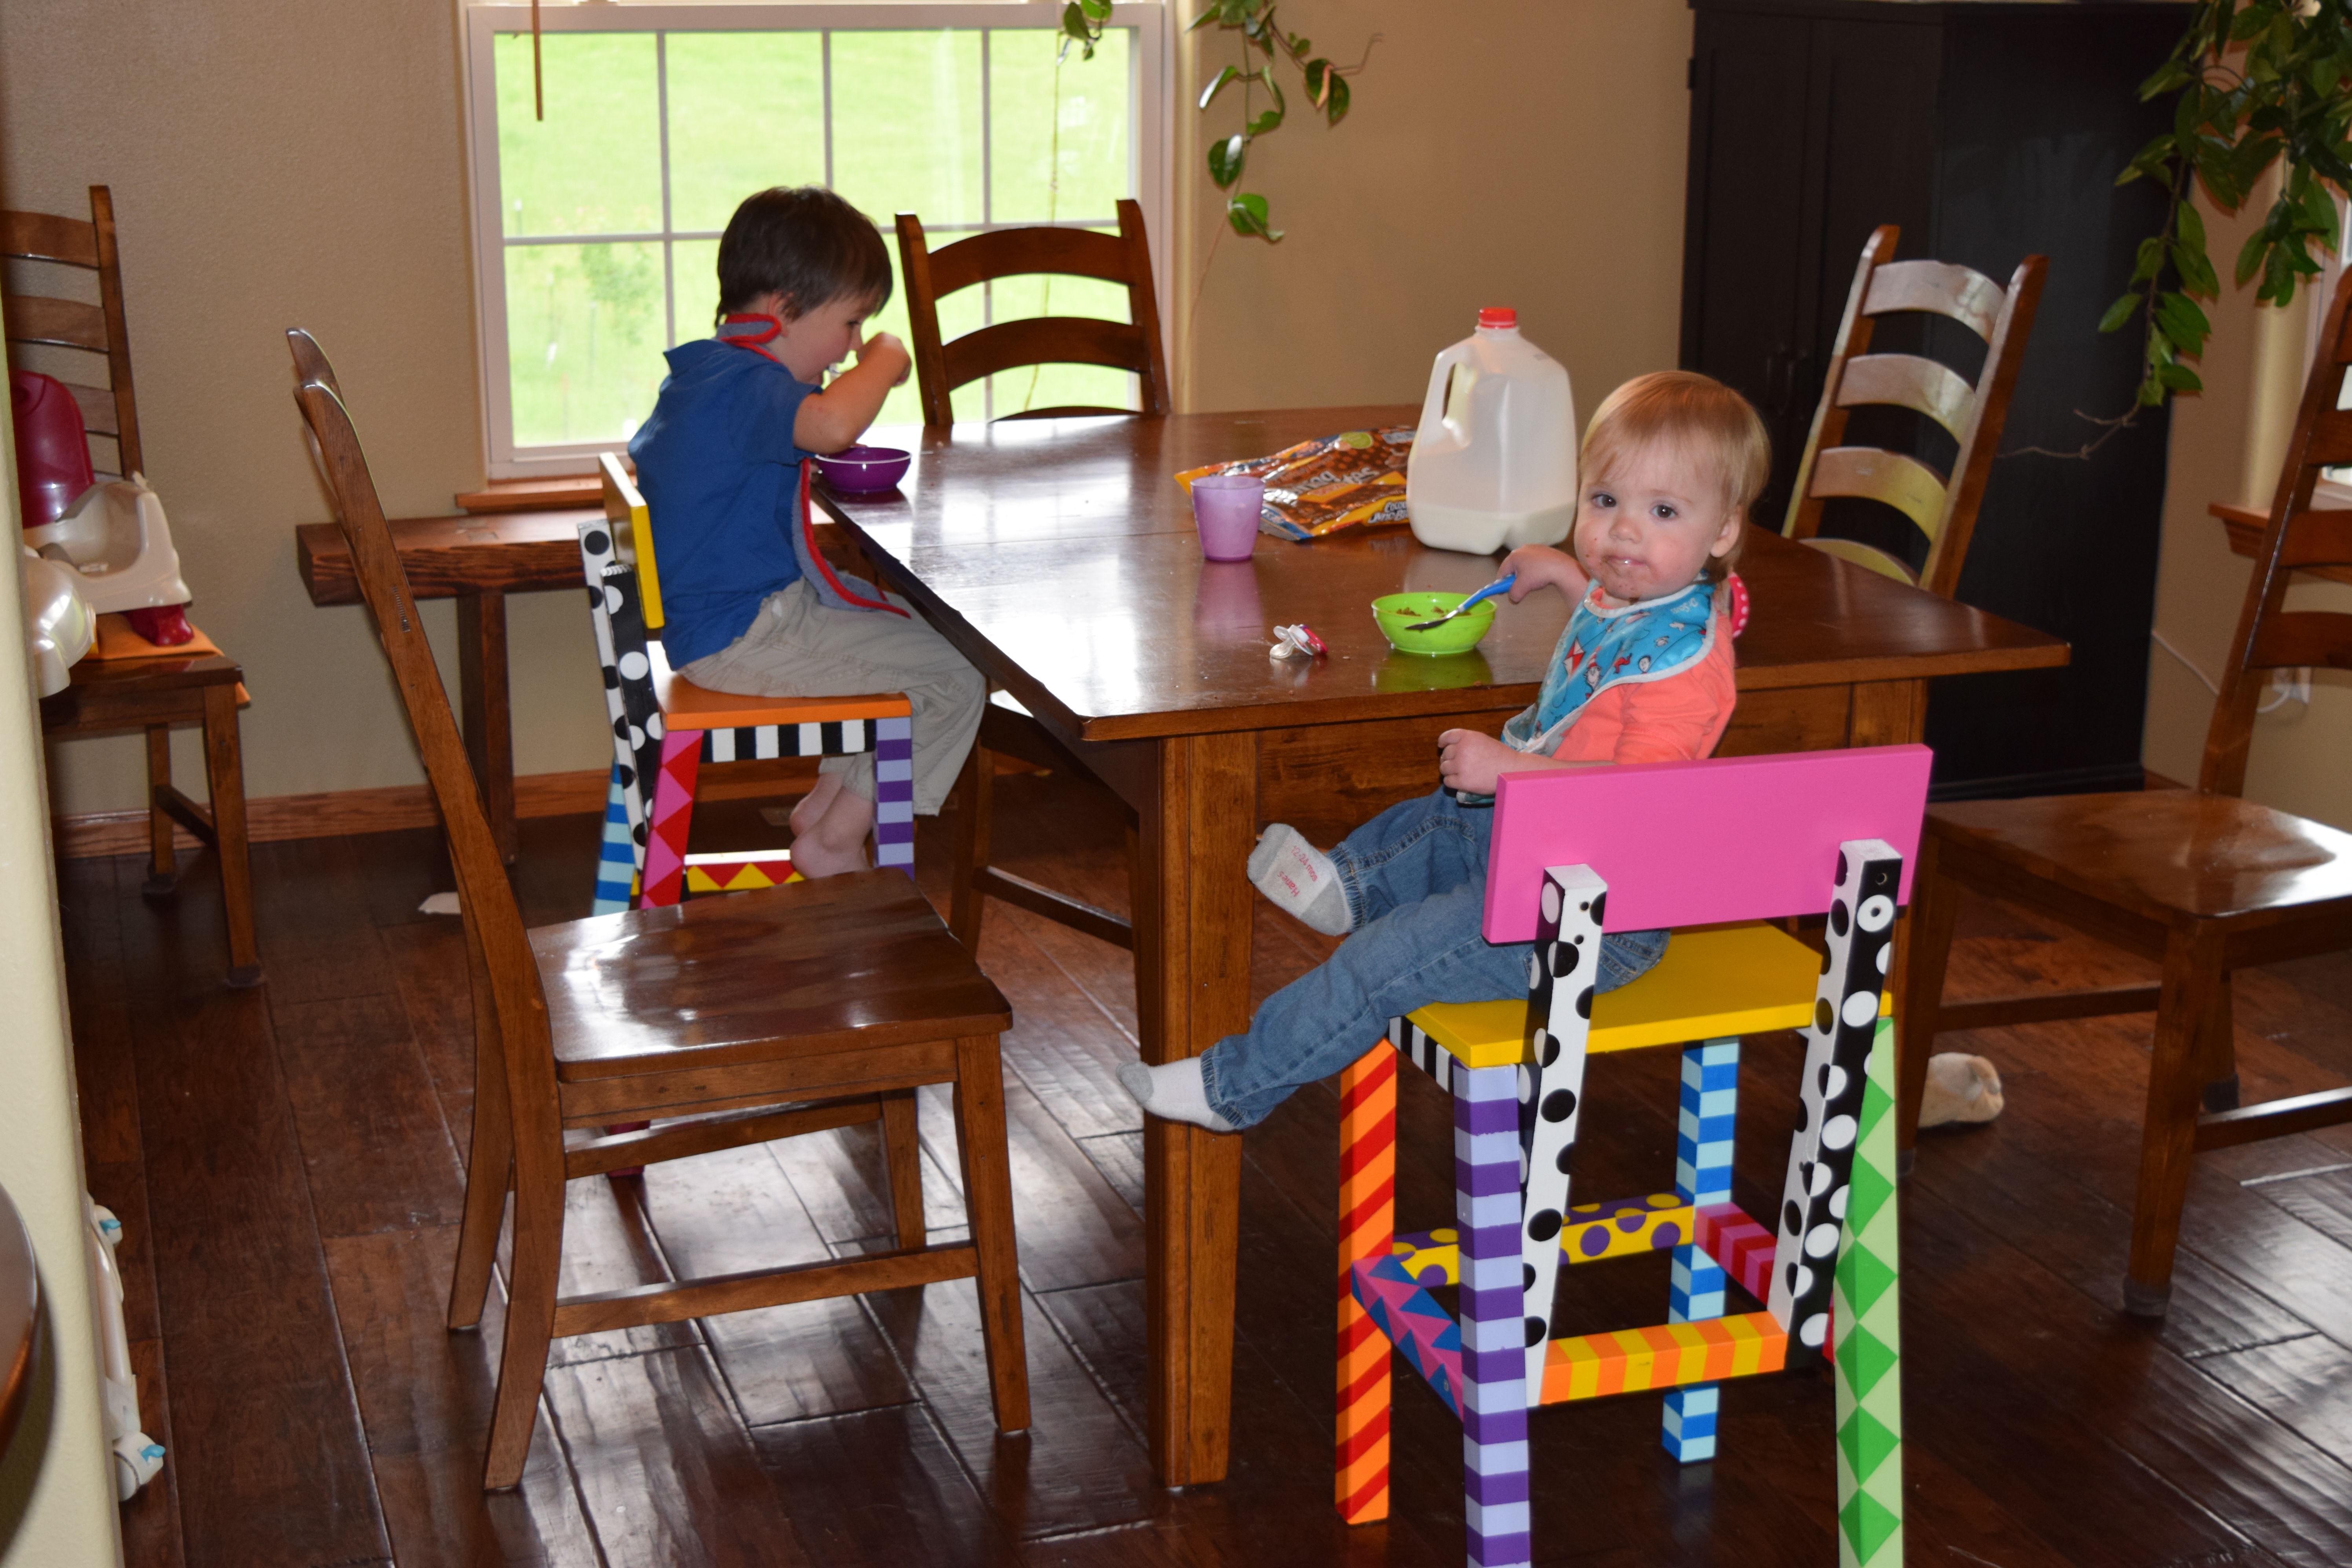
These chairs are easy to build and the kids love them. I wanted them to be colorful, fun, and personal. My son has been using his chair before it was finished for two years now. It was supposed to be used temporarily for a dinner party one night and we didn't want to part with it long enough to finish it. I built a second chair for my one and a half year old and decided to finish both chairs at the same time. With a little bit of planning and some painters tape this is how they turned out.
Sat, 06/27/2015 - 22:14
Love the finish here, so cute! For the circles, did you use those circle stickers? I may need to do something like this for a very special little girl :)
In reply to love the paint! by ladybug'13
Sun, 08/02/2015 - 18:40
I used a stencil to draw the circles then just painted them in.

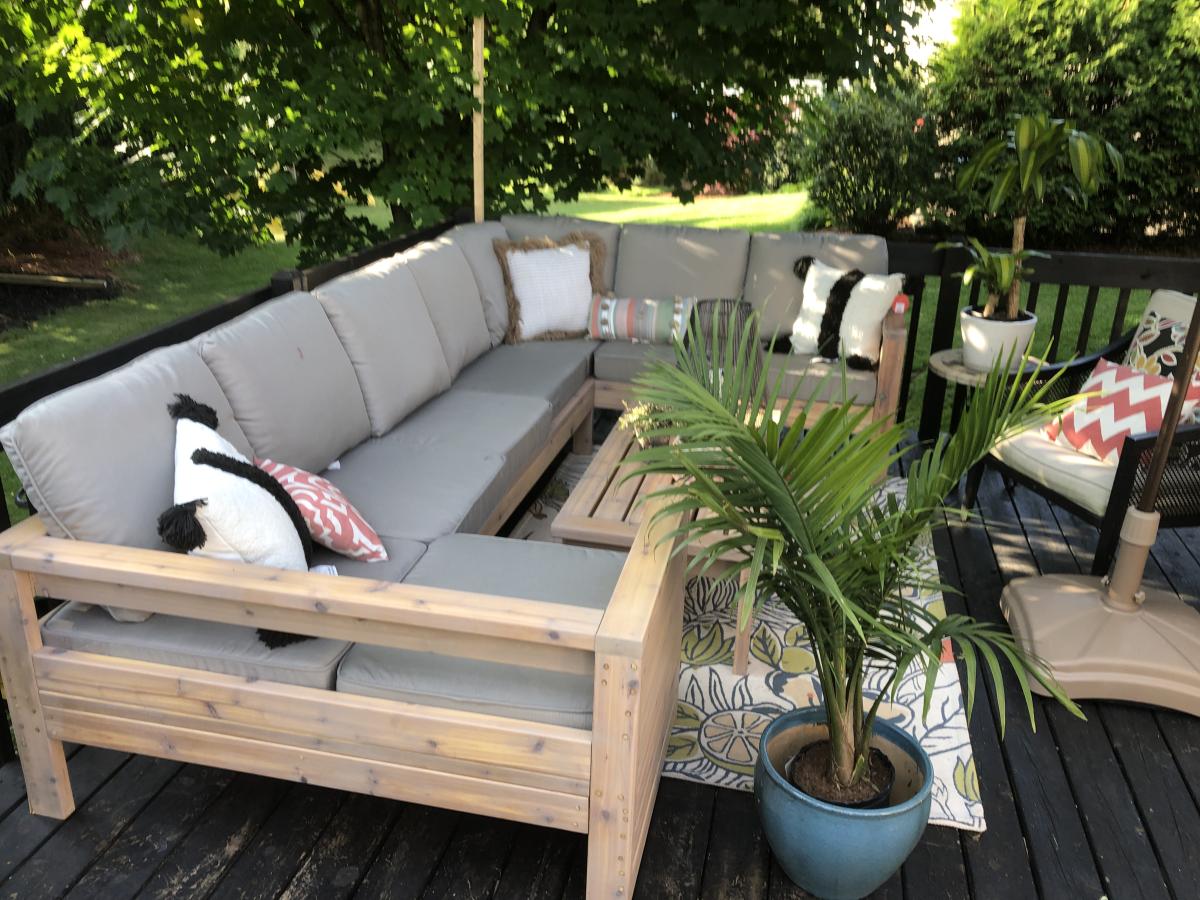
We have wanted nice deck furniture since we moved into our house 22 years ago but just couldn’t justify the cost. I have made several projects from Ana’s website and I love her easy to follow and FREE plans! But this project was my favorite as you can see by the pics. I used cedar and my wife finished the furniture with stain. Thanks to Ana for providing these plans and helping a DIYer to feel proud!
Sat, 01/01/2022 - 12:57
WOW, that is stunning and so inviting, love the outcome! Thank you so much for sharing!

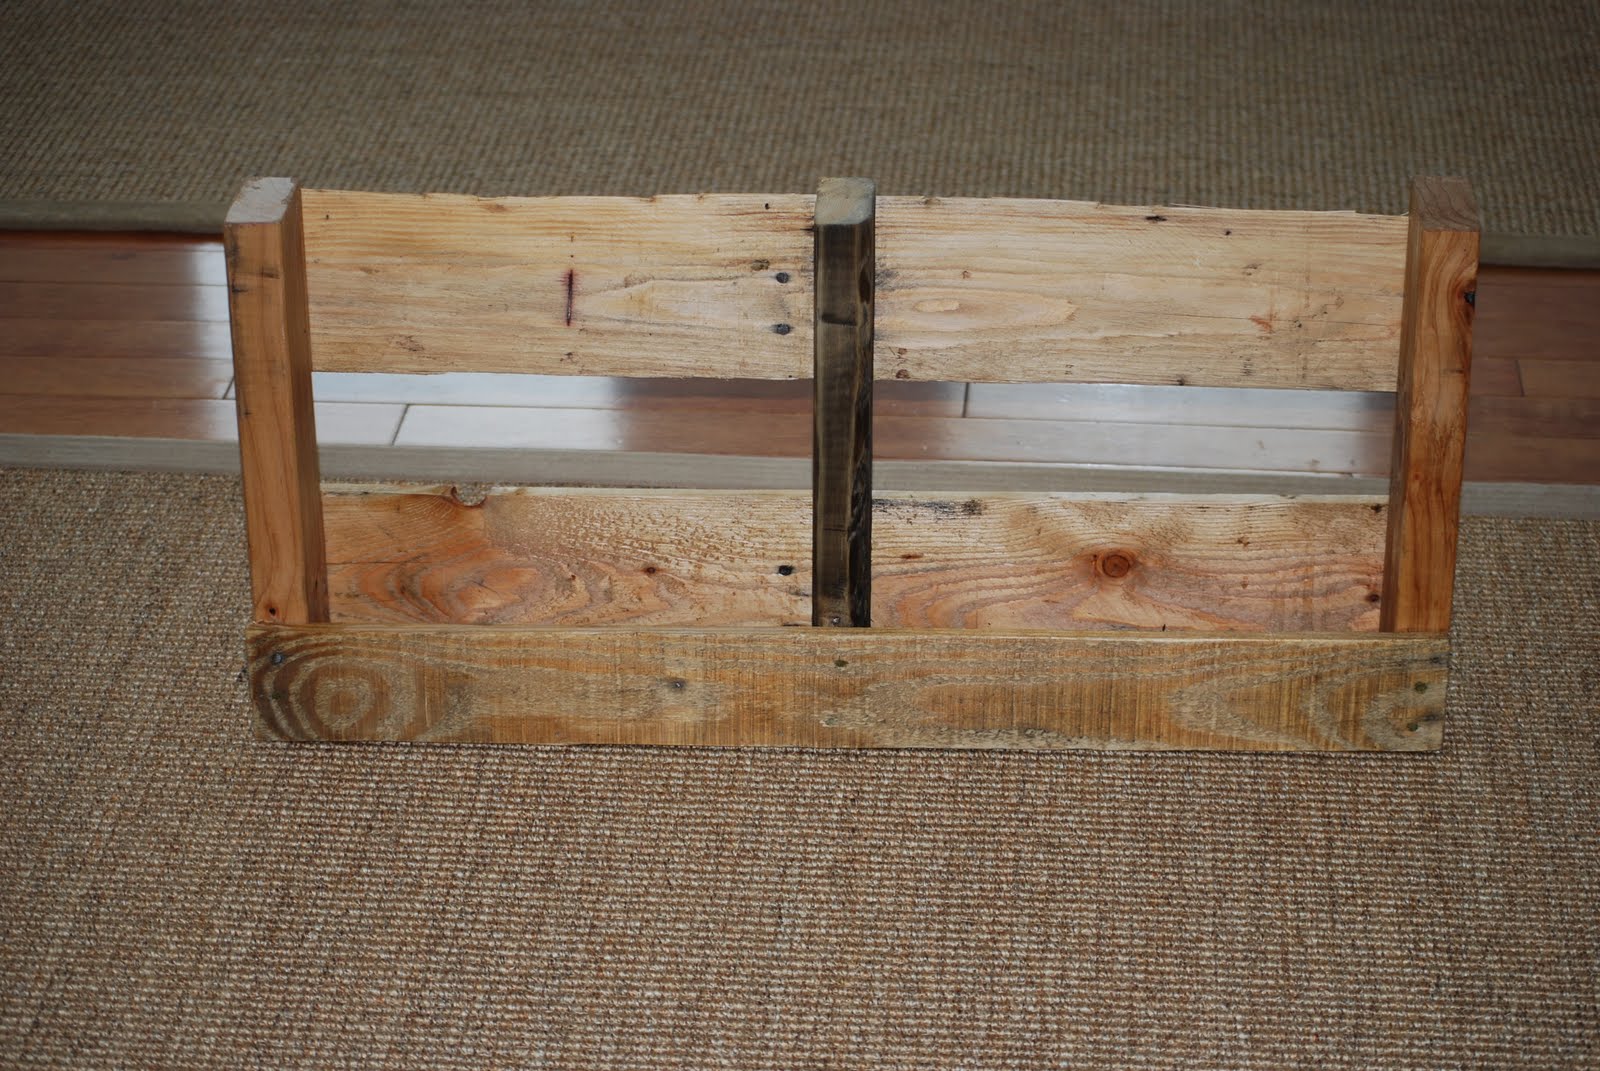
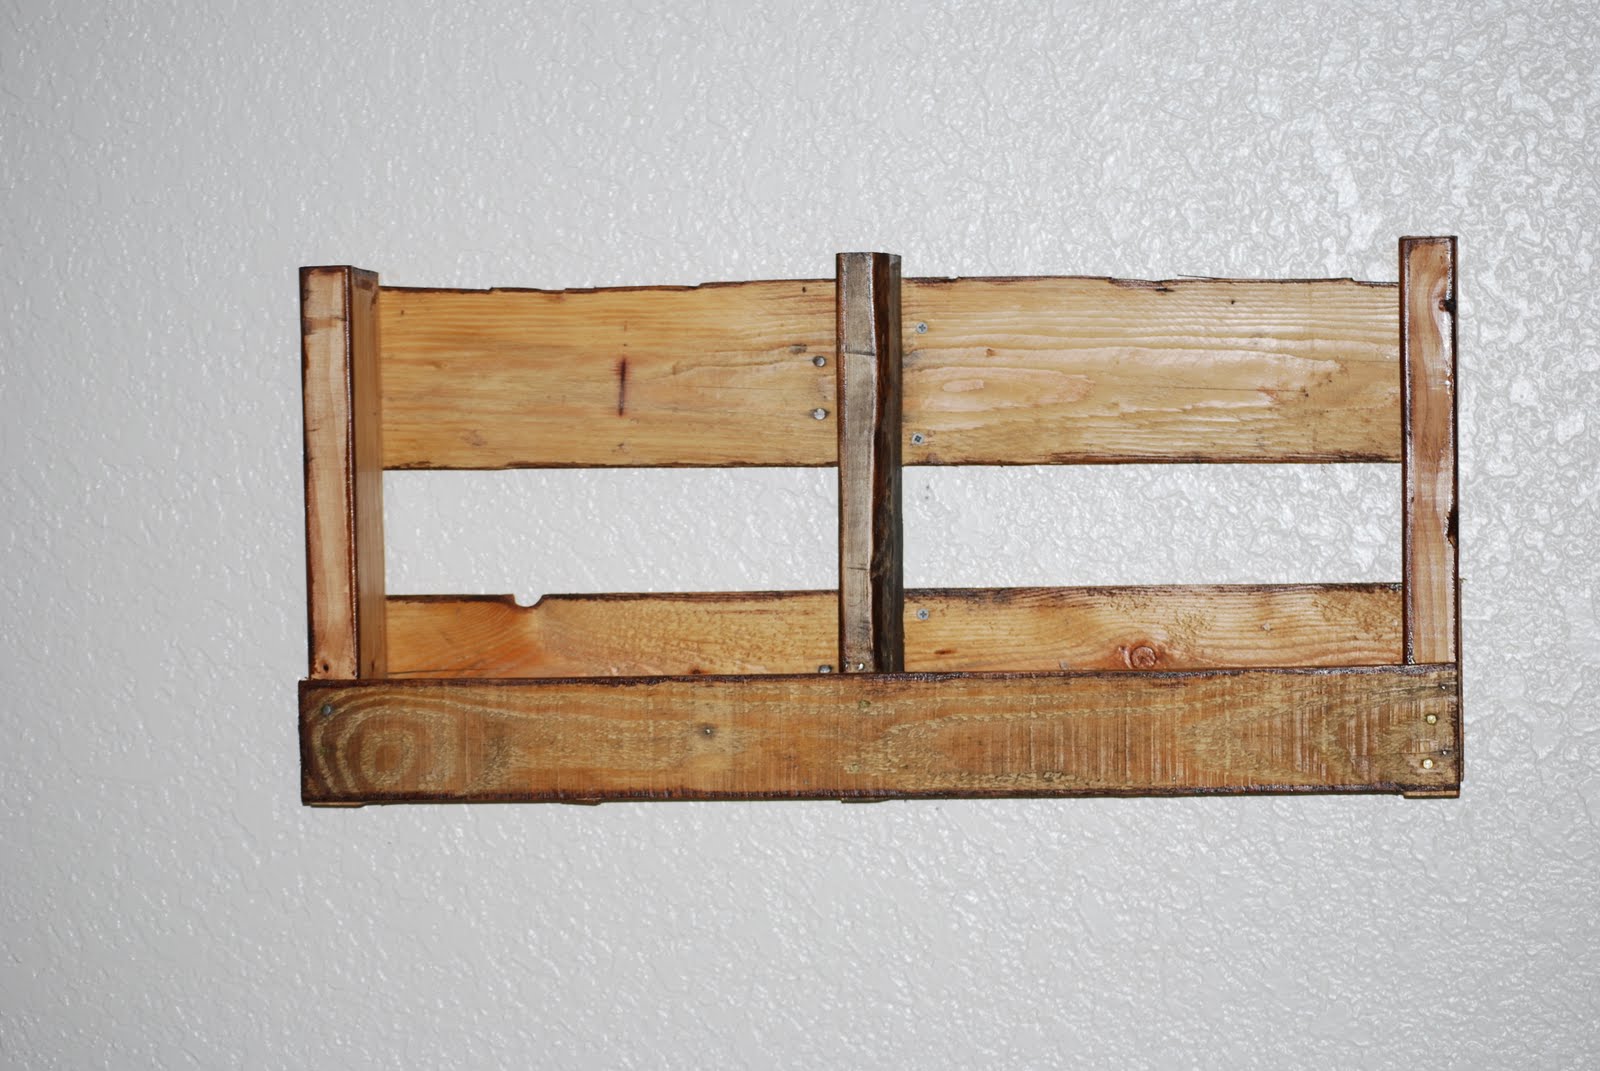
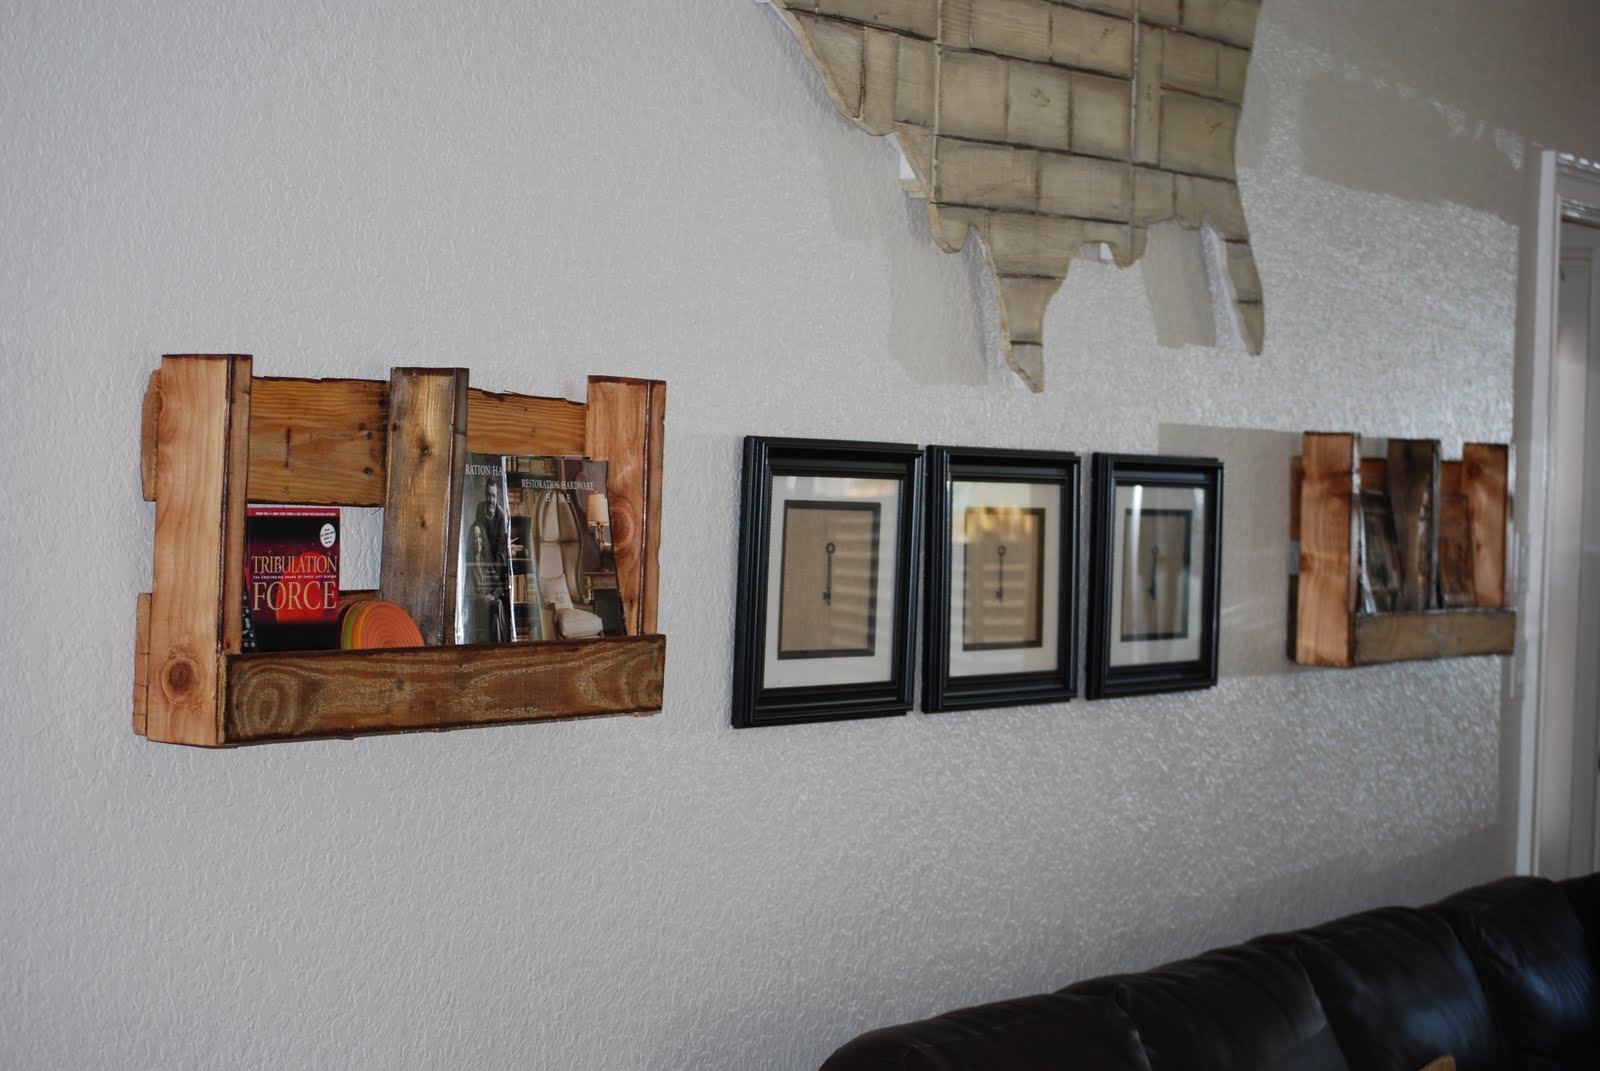
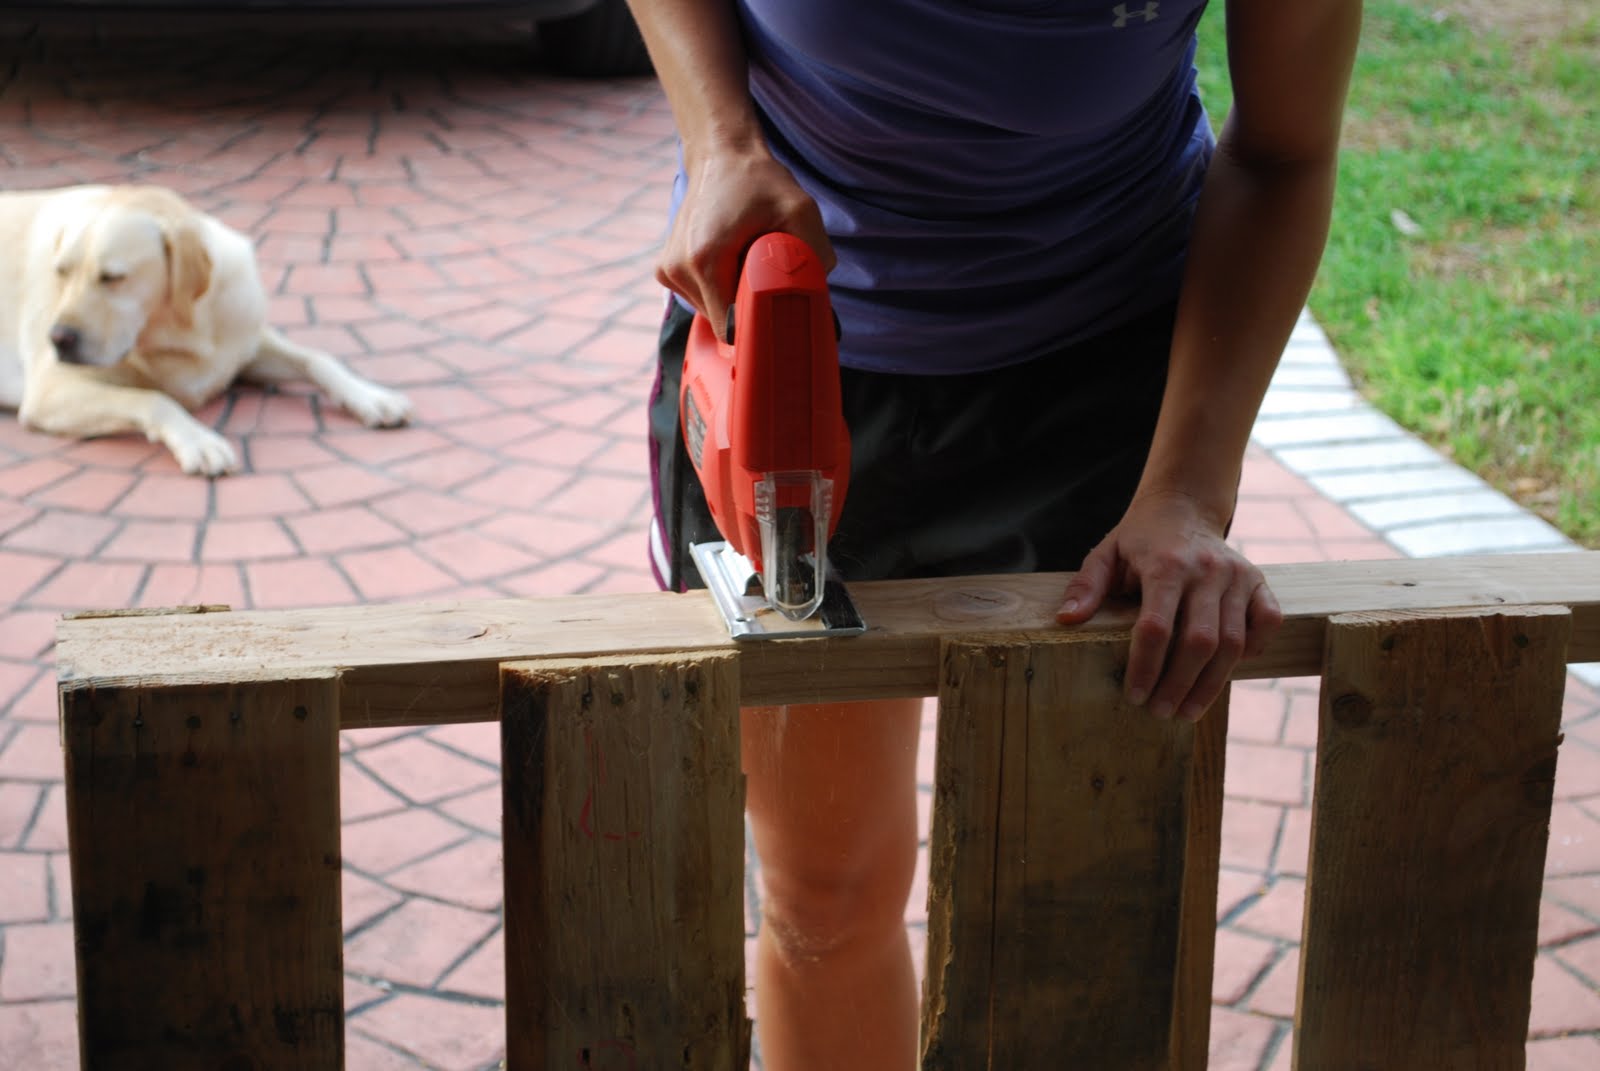
I made these two pallet shelves to go in my living room to hold all of our magazines, coasters, and remote controls that were constantly getting left all over the place. They've been there for almost a year now, and they work so well!


Comments
Ana White Admin
Sun, 12/26/2021 - 17:33
Hours of fun!
You get the number one grandparents award, that is awesome!
Thank you for sharing:)