Clubhouse Bunkbed w/Climbing Wall
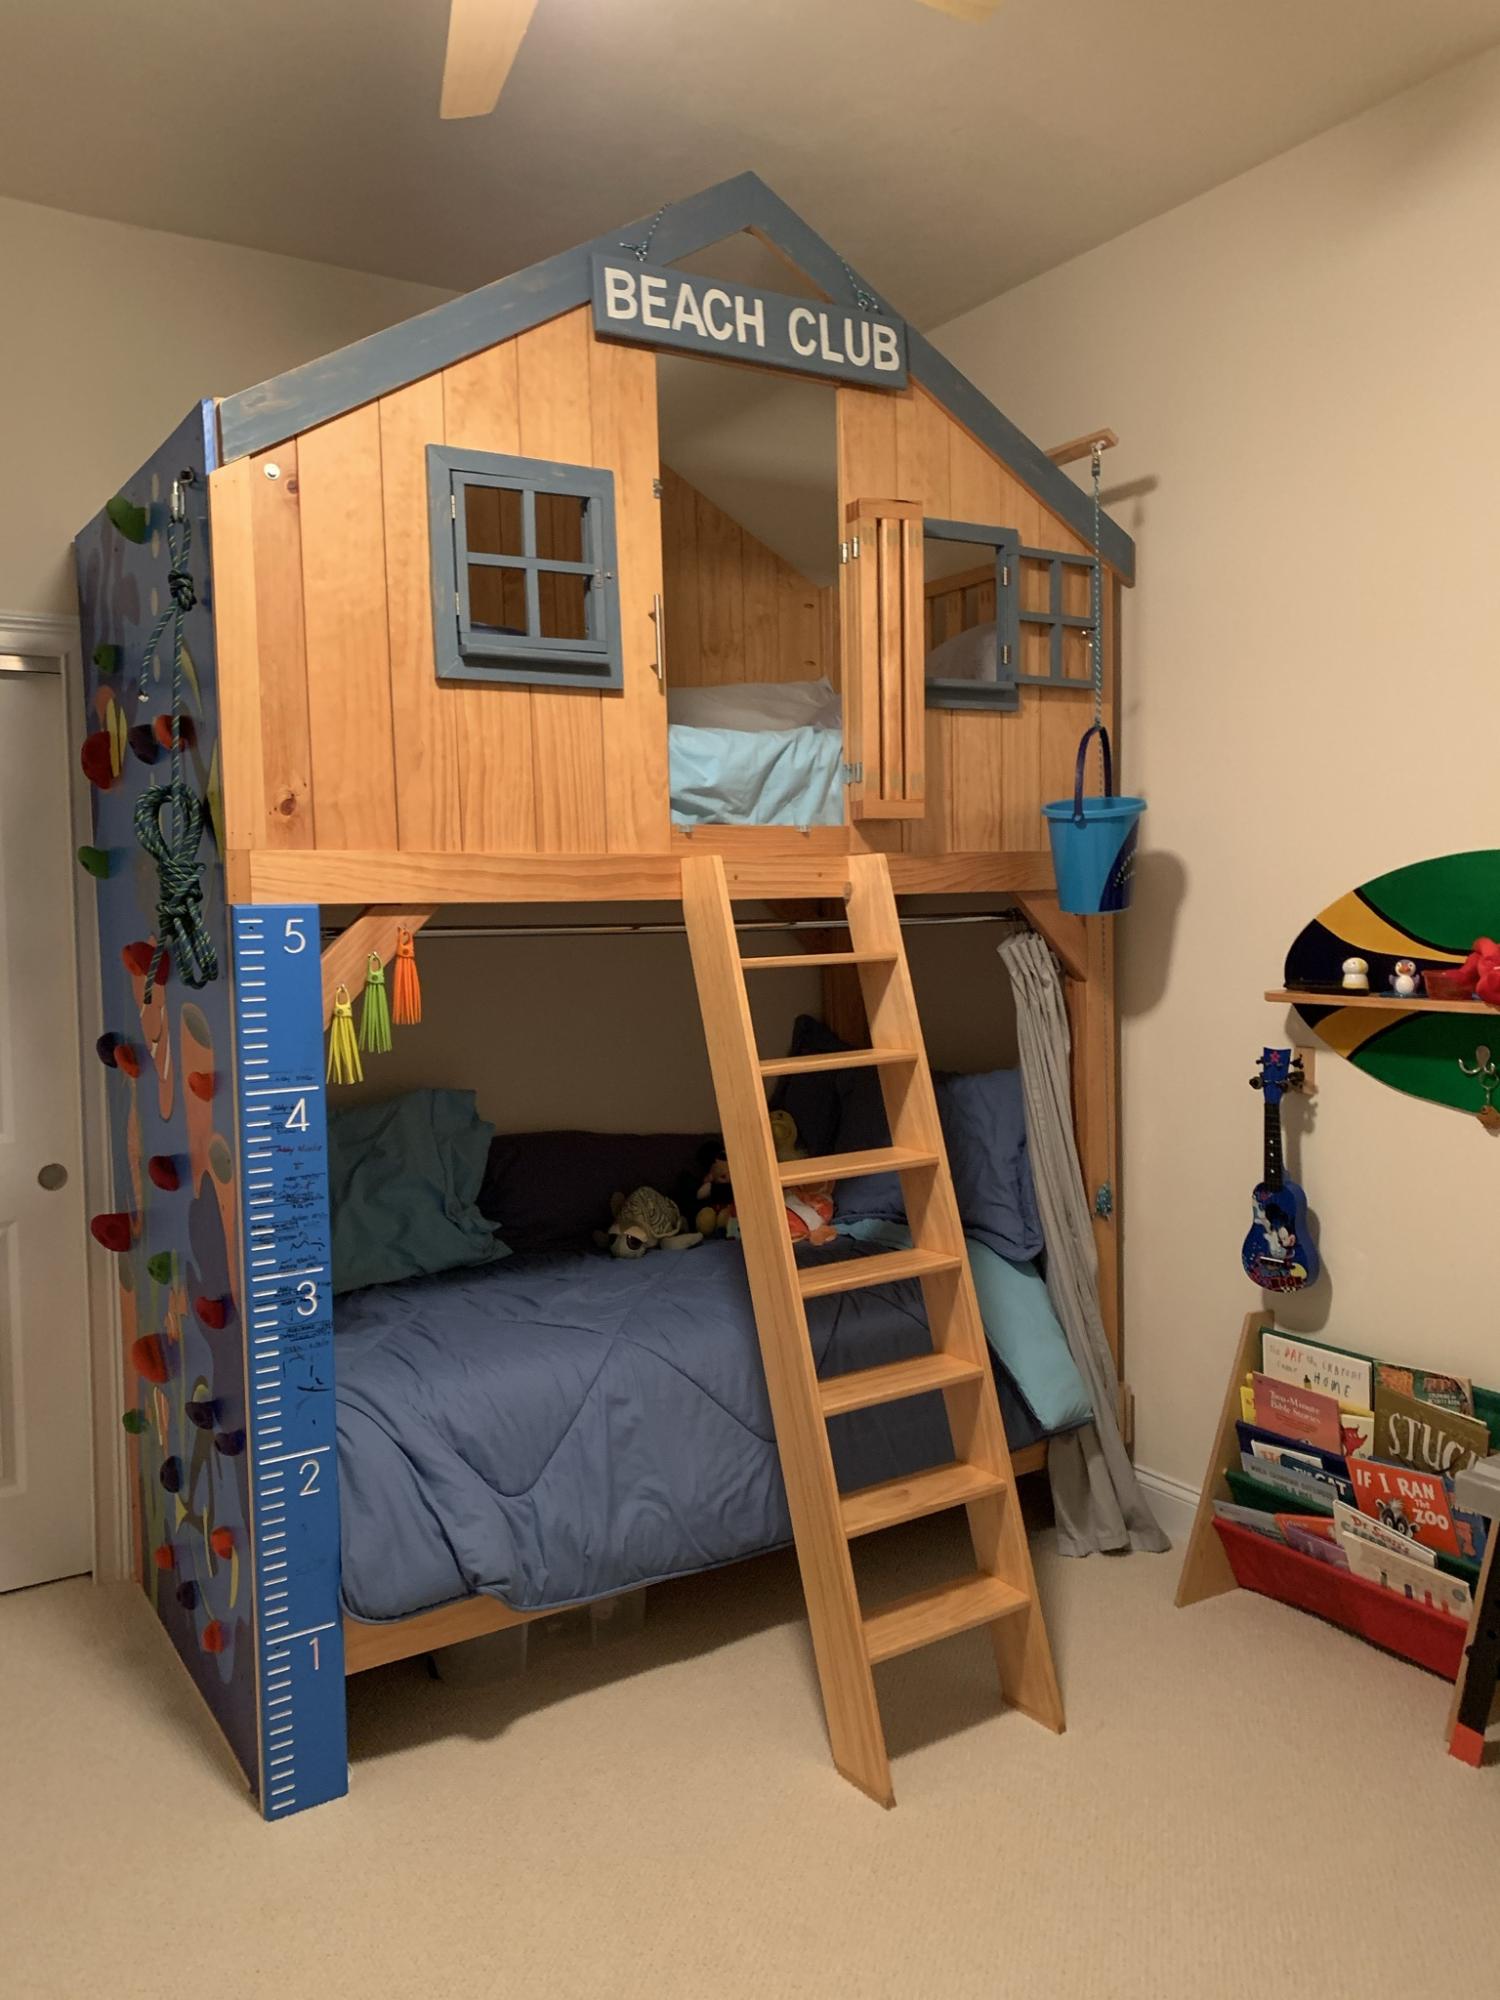
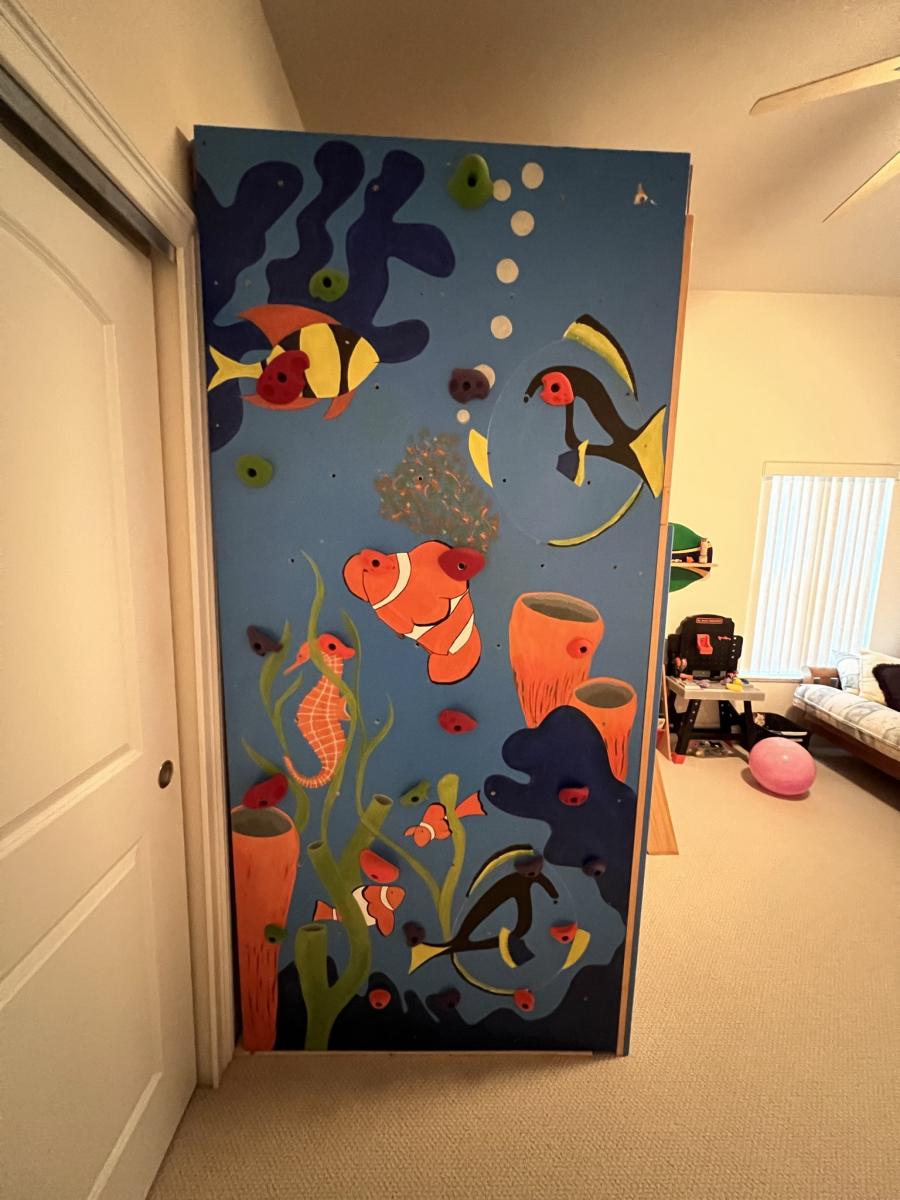
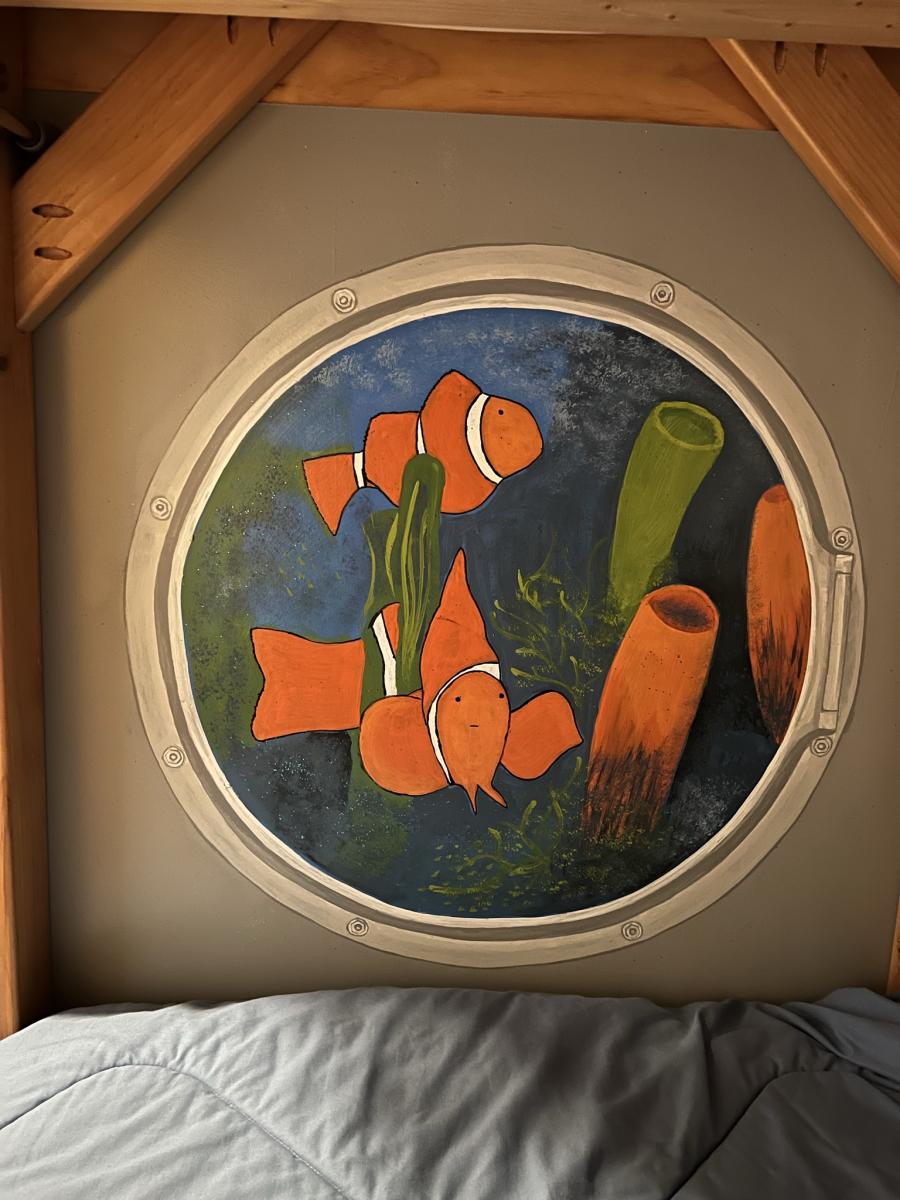
This is my first Anna White project that I built almost 10 years ago when I was a new grandma. Much to my surprise, it has endured and is still a fun place for 4 grandkids. I revised the Clubhouse bed plans by raising the loft and building it into a bunk bed (I have 10 foot ceilings making this possible), with one end covered by a 4x8' 3/4" plywood climbing wall (with toddler climbing set hardware) painted in seascape that allows them to climb up and over rather than using the removable ladder. I also added a tri-fold latching "baby gate" to the loft for safety if I was called out of the room while the littlest ones were up in the clubhouse. I also added a bucket on a pulley system to let the kids "deliver" items to the clubhouse window from the ground and a "flood level" measuring stick to let them measure their growth progress. To cover the backside of the plywood climbing wall and the hold screws and make sure all was nice and smooth, I added a 1/4 MDF sheet on the inside and painted with a porthole to simulate a submarine when the curtain is closed.


Comments
Ana White Admin
Wed, 11/09/2022 - 10:11
Amazing project!
You have to be the sweetest grandma around, this is so awesome! Love all the added details and growth chart, thank you for sharing.