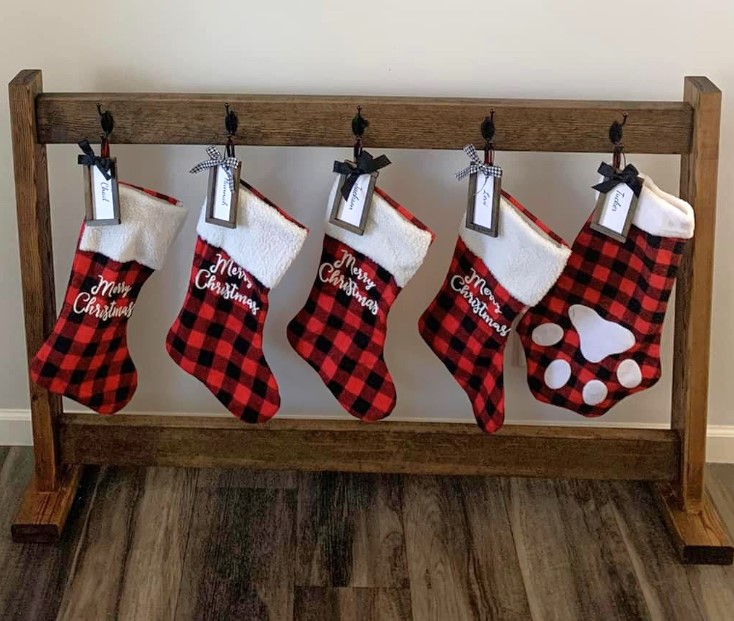
Christmas Stocking Stand
Love this project!
Rlynhack
Built from Plan(s)
Seasonal And Holiday
Love this project!
Rlynhack
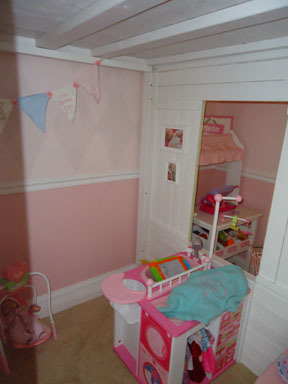
Loved making this for our girls...Selah & Annaleah. We have 9 ft walls so I made it extra tall. Love it so much!!! Used 4 in boards for the walls b/c they were so much cheaper. The shutters ended up my favorite part.

Mon, 08/06/2012 - 14:26
I really like the paint colors that you used on the bed and the ones on the walls. What paint brand(s) and colors did you use? I really love your room. Additionally, where is your fabric from? Your room is amazing. I know a little girl in TX who would like one just like it :)
Mon, 05/23/2016 - 18:52
Hi! I really like the taller version for my daughter's room, would you be able to share the new measurements, or what you did differently? Thank you! !!
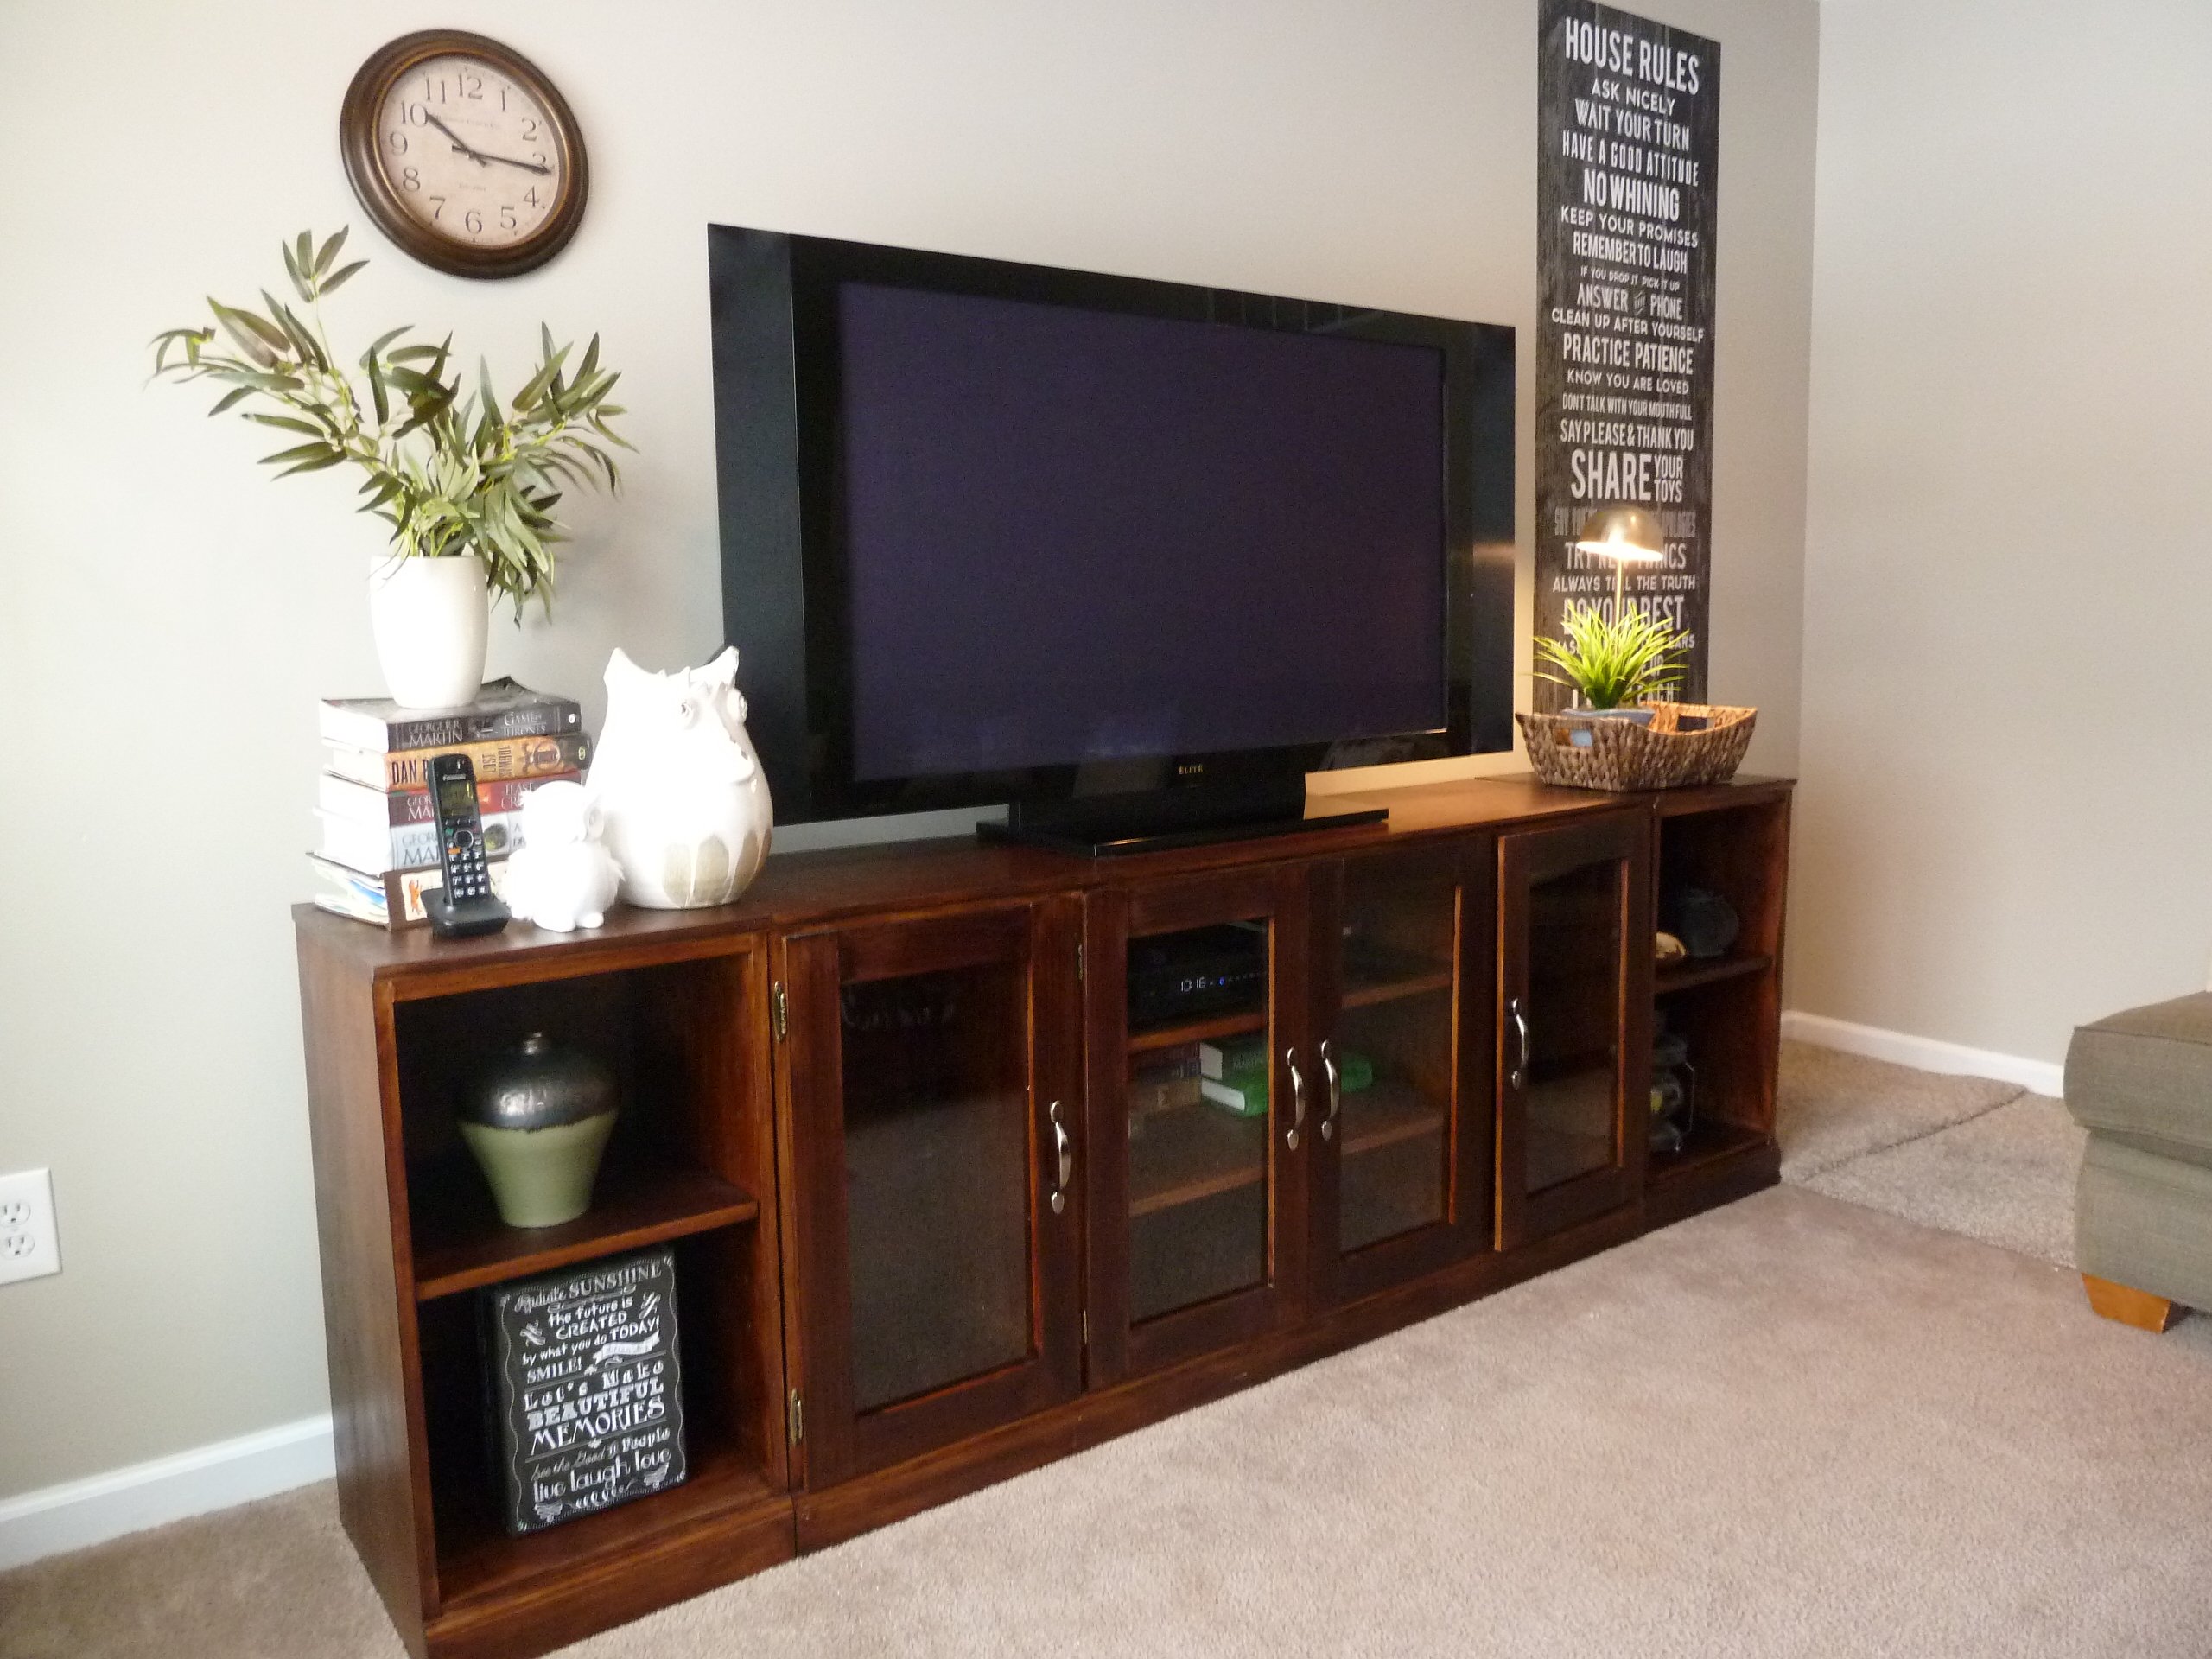
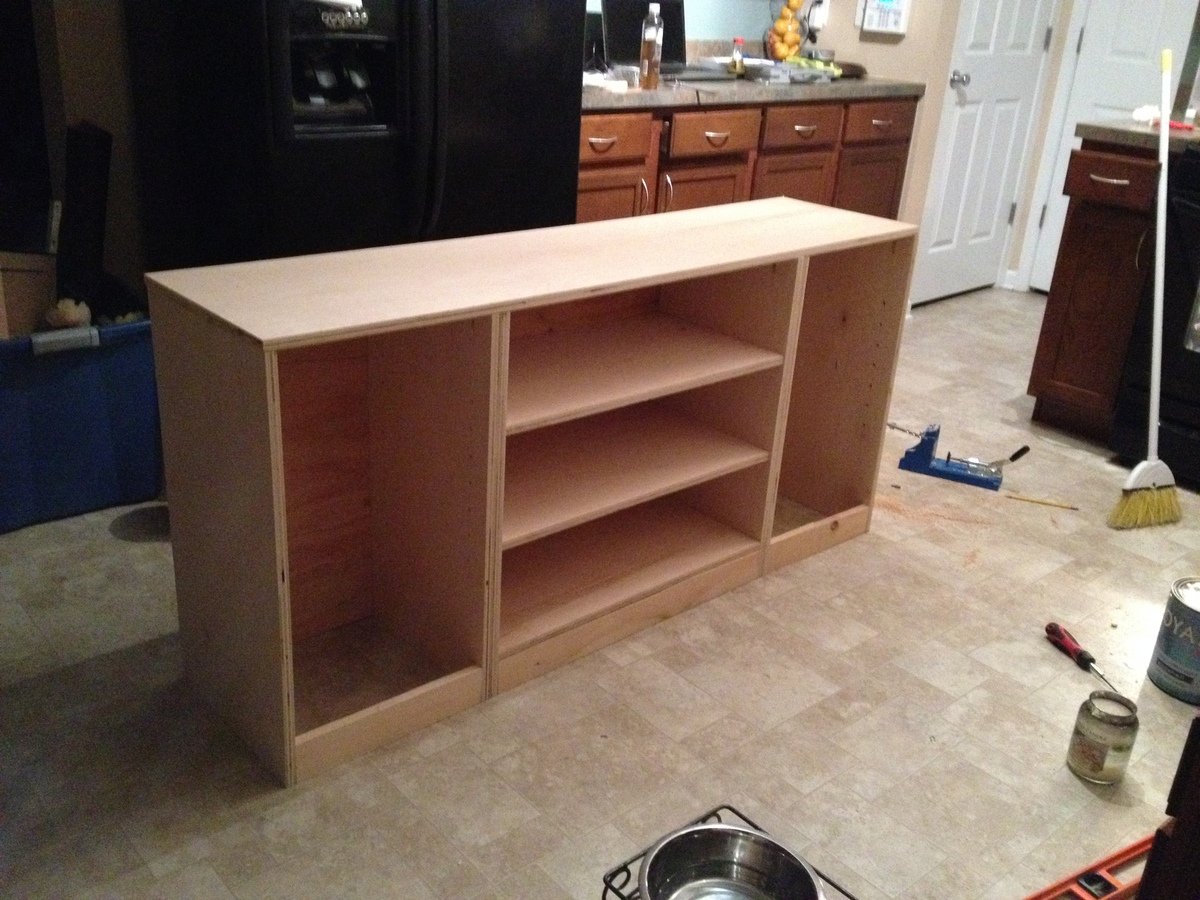
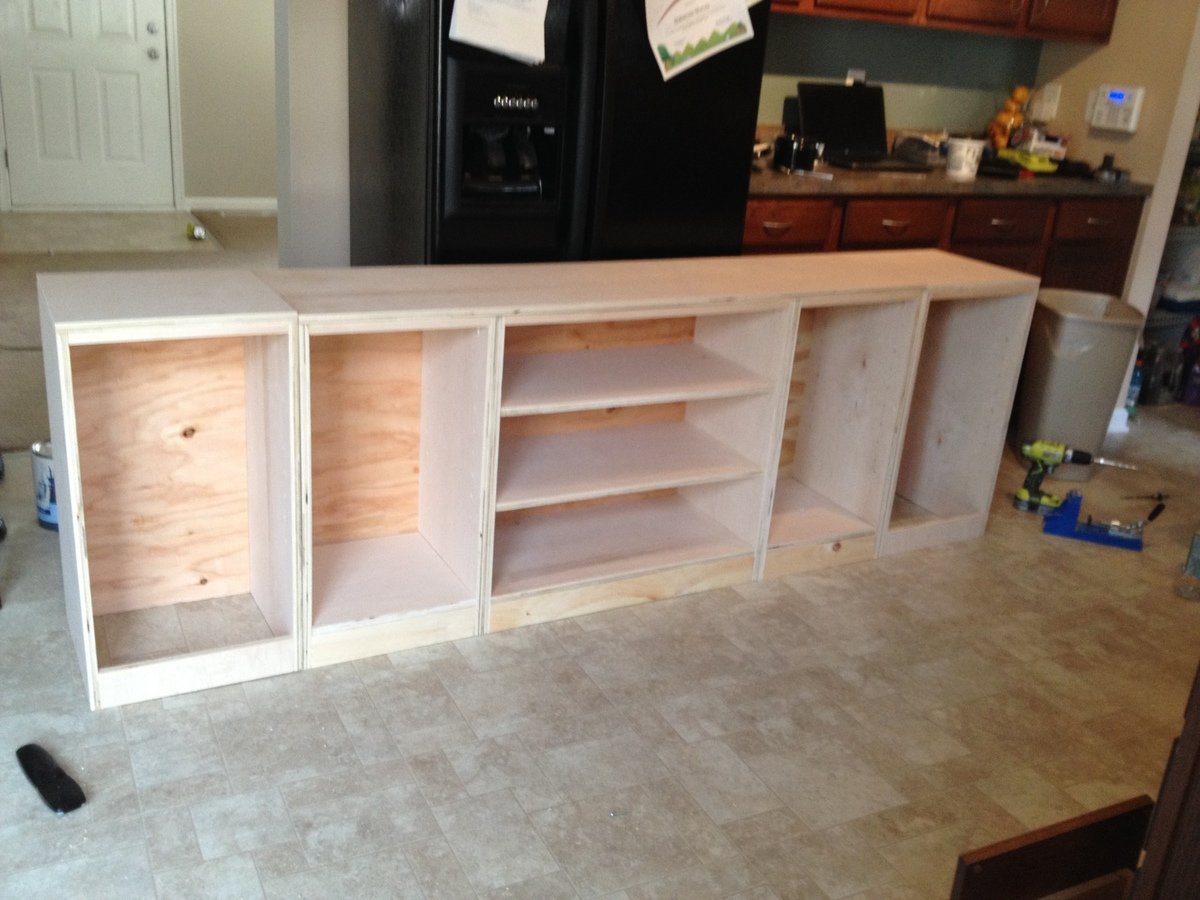
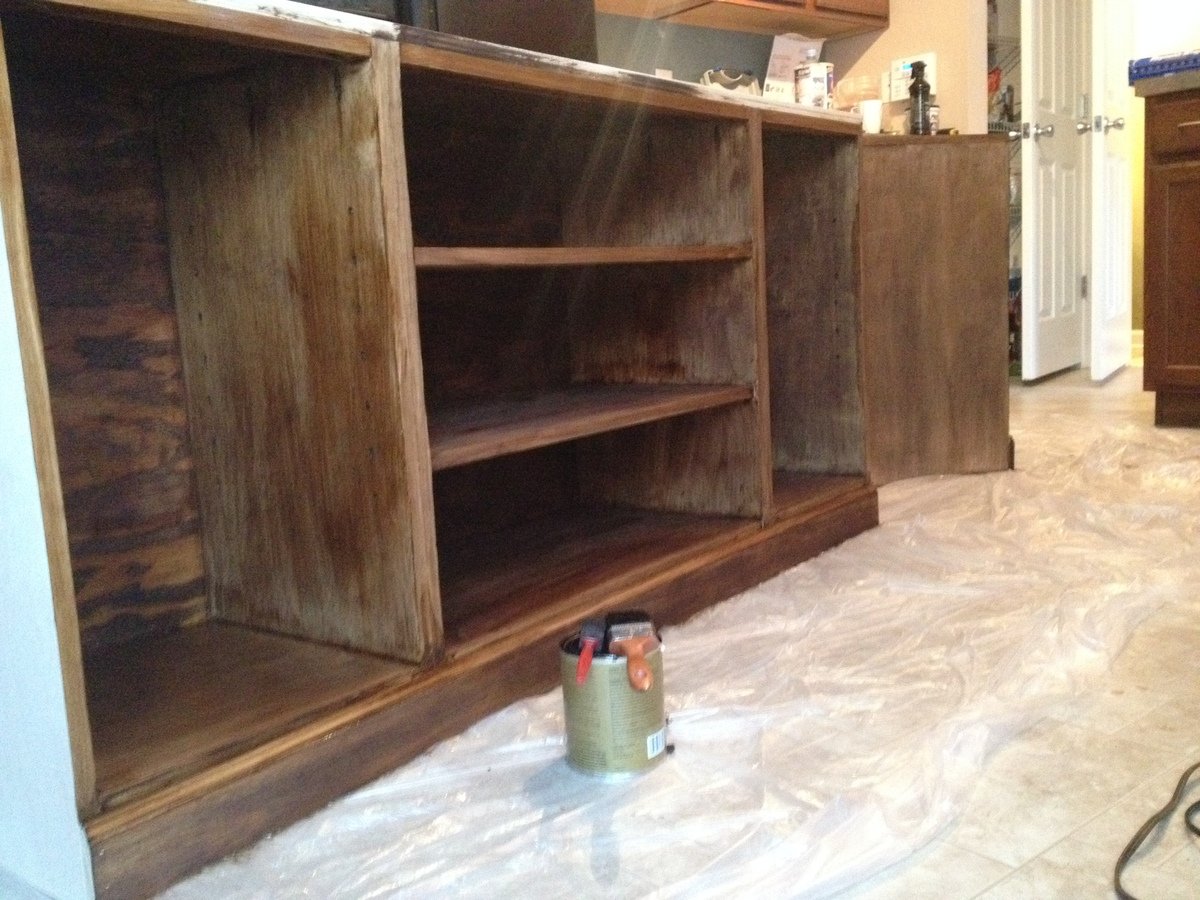
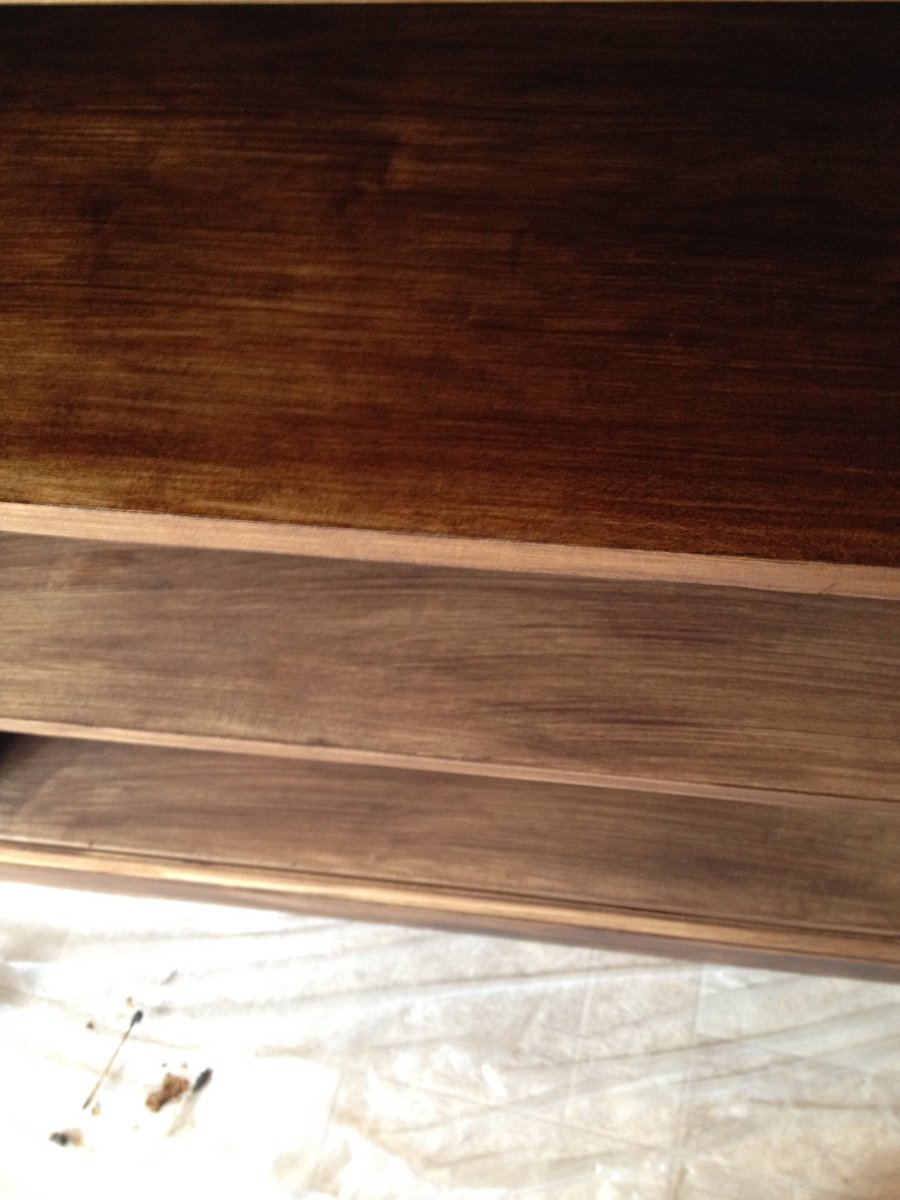
I feel in love with the Pottery Barn Media Suite and new immediately I wanted to build it. I couldn't justify paying close to $2,000 on an entertainment center. I knew Ana would have the plans to help me out. I modified the plans a little bit and instead of building 6 cabinets, I decided to make the inner 4 cabinets one piece, and the 2 outer cabinets removable. This will give me options for when I have to place the Christmas Tree or if we move and cannot fit this huge piece. I also wanted to have as much strength in the middle for our plasma TV. It's about 4 years old and isn't as light at the new TV's are. I loved every minute of building this project and couldn't be more happier! Feel free to search PB website to compare their media suite to my version (savings of $1,700). Feel free to ask any questions!
Wed, 07/08/2015 - 08:35
Love how you did yours Christina
I too would like to make one larger unit rather than say 6 of the individual cabinets. Looking at your pictures, it looks like you still made them individually but I'm assuming you attached them (screwed) together? Is that the case? Did you have any issues with the main piece and two ends being different heights when finished?
Am wanting to make a total length of around 104". Means I'll have to tweak some measurements.. In addition, I would like to have one side be a lift top so we can put in a record player and simply lift the top face to access. That wont be too big of a deal.
How did you find the doors were to make? No big deal? i've been curious how the dimensions all play out with the hinges and doors opening etc.
Sat, 01/30/2016 - 13:58
I cannot find these instructions anywhere! The PDF does not include the instructions :(

In reply to Instructions by LBlakesley87
Sat, 01/30/2016 - 14:42
This is a brag post (a beautiful one, might I add!!). The links to the instructions are included above. Here's to the main base http://www.ana-white.com/2010/08/plans/open-base-basic-collection

Saw the basic 'c' looking shape end table on Pinterest, but it didn't have any plans. So I drew up my own plans, used different types and dimensions of lumber, and added the black iron pipe to our design to truly make it our own. These took my quite a while, and were a lot more expensive then I wanted them to be. So these will probably be staying in my home. Lol
I made this for a cousin, but now I think I am going to need to make one for myself too! I used shiplap for the back instead of plywood. It cost a little more but was less effort than cutting the lines into the plywood. Plus it was already finished.

A twin version of "Mom's Fancy Farmhouse Bed" that includes a matching footboard. Kreg jig used all around. The bed takes about 6-7 hours to cut everything and put it together. Staining takes quite a bit more because of the dry times needed.

Sun, 05/27/2012 - 15:09
What a lucky little girl to have such a beautiful bed!
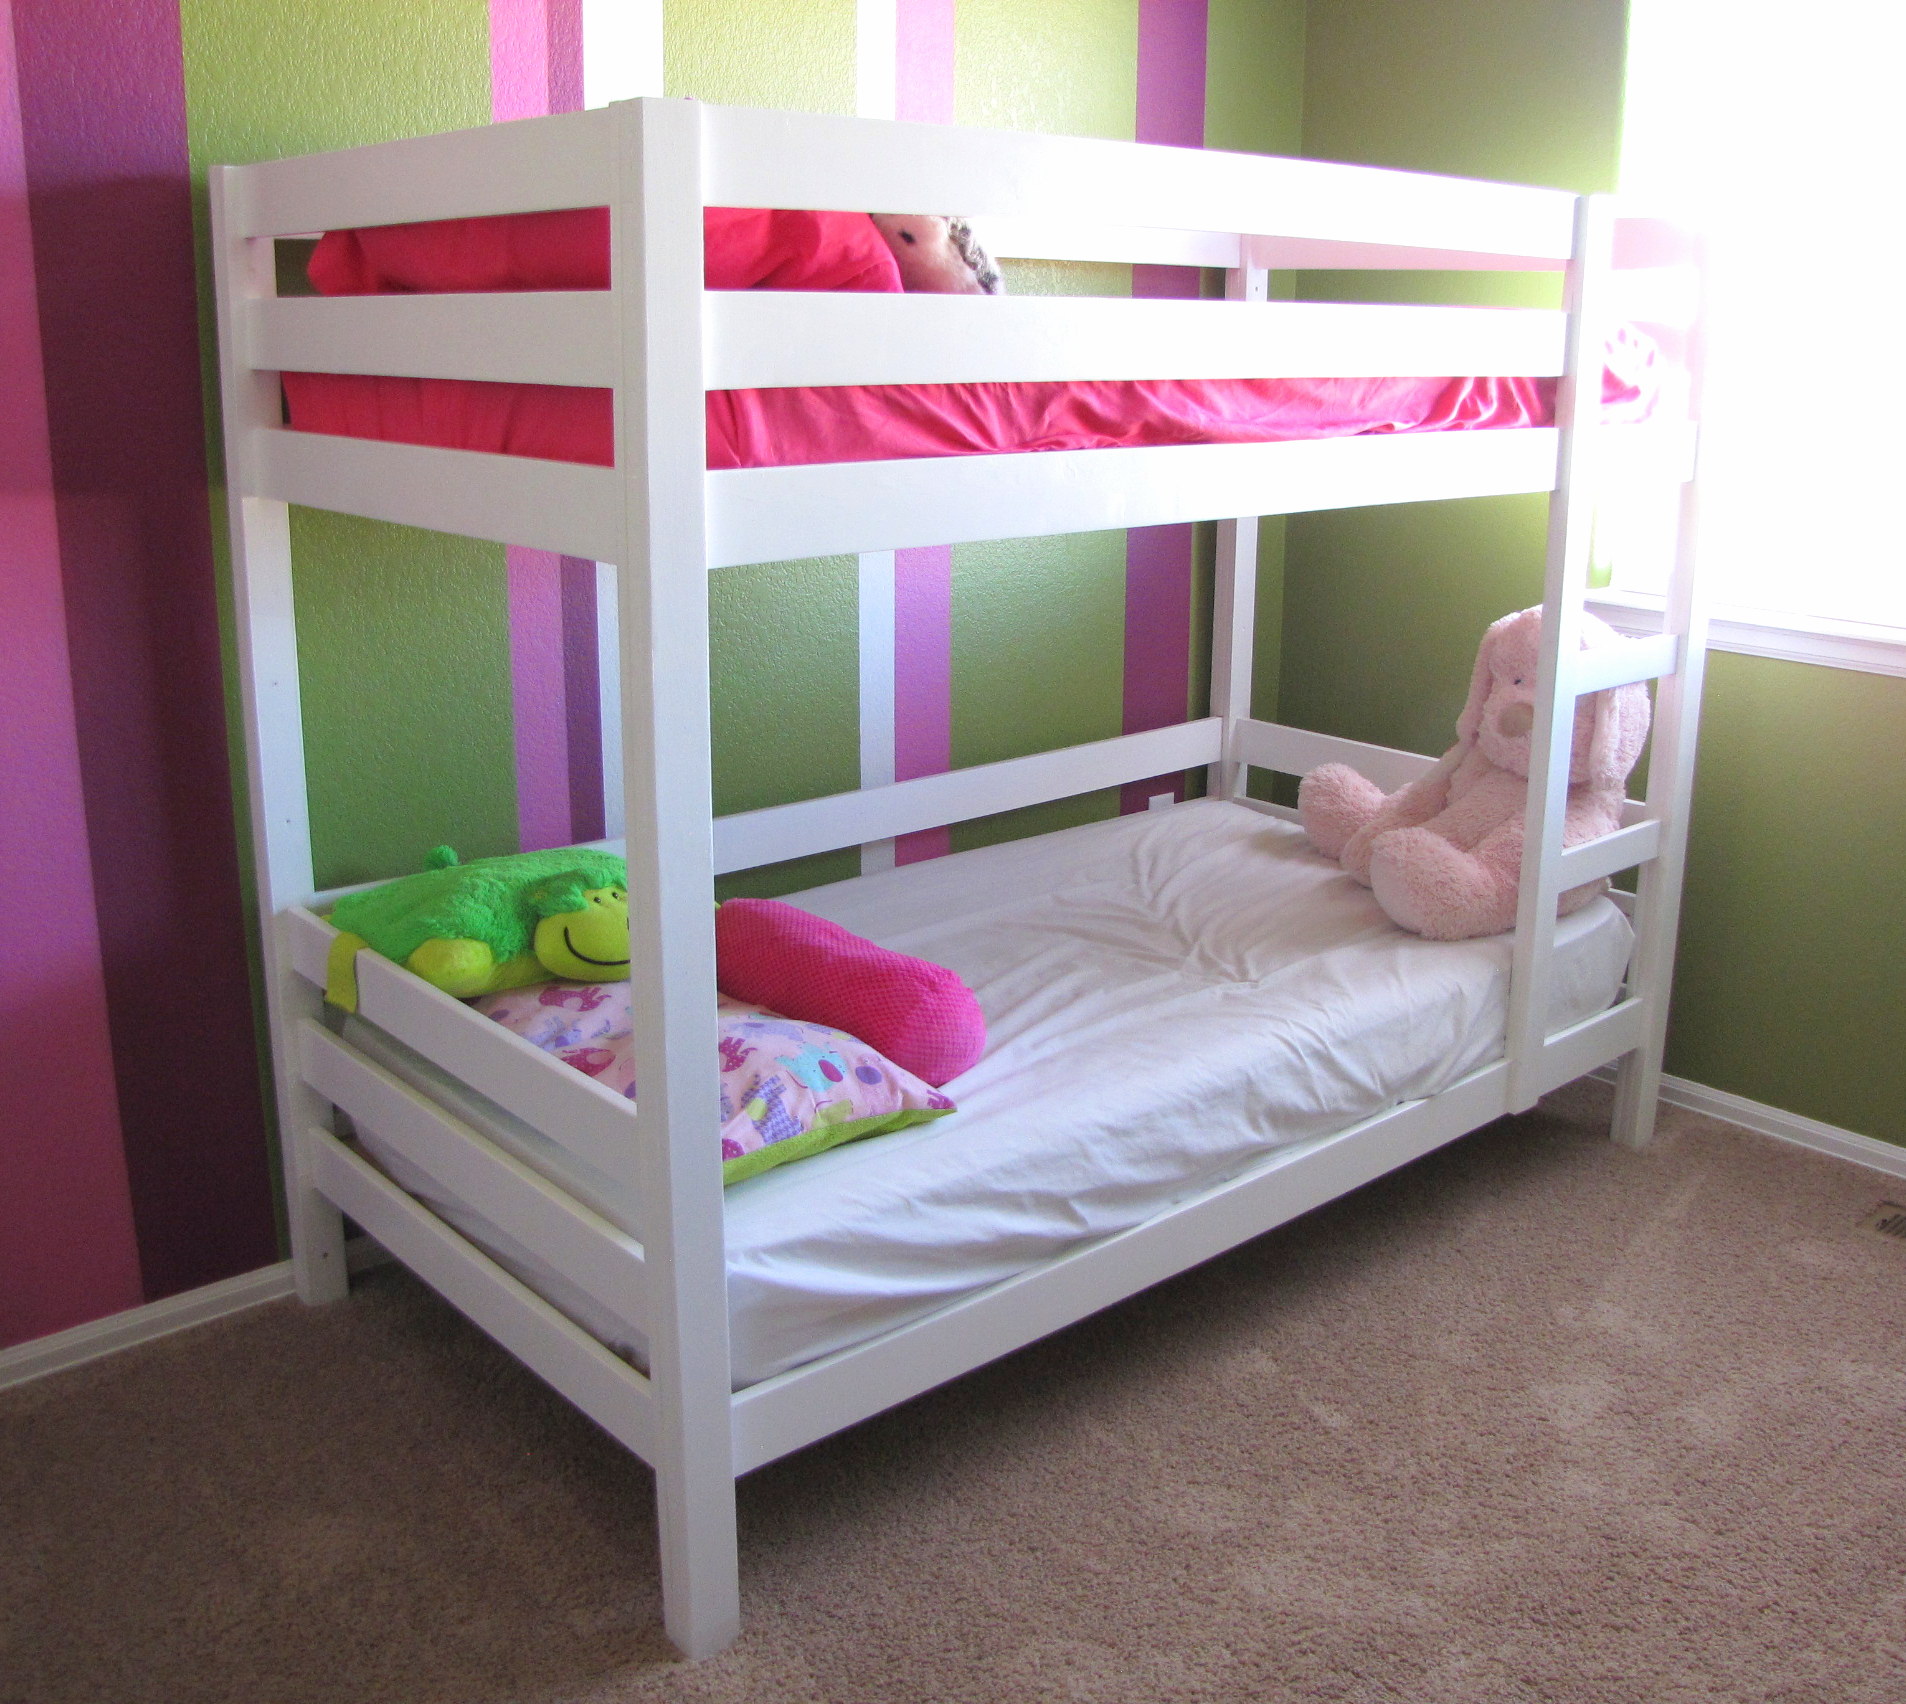
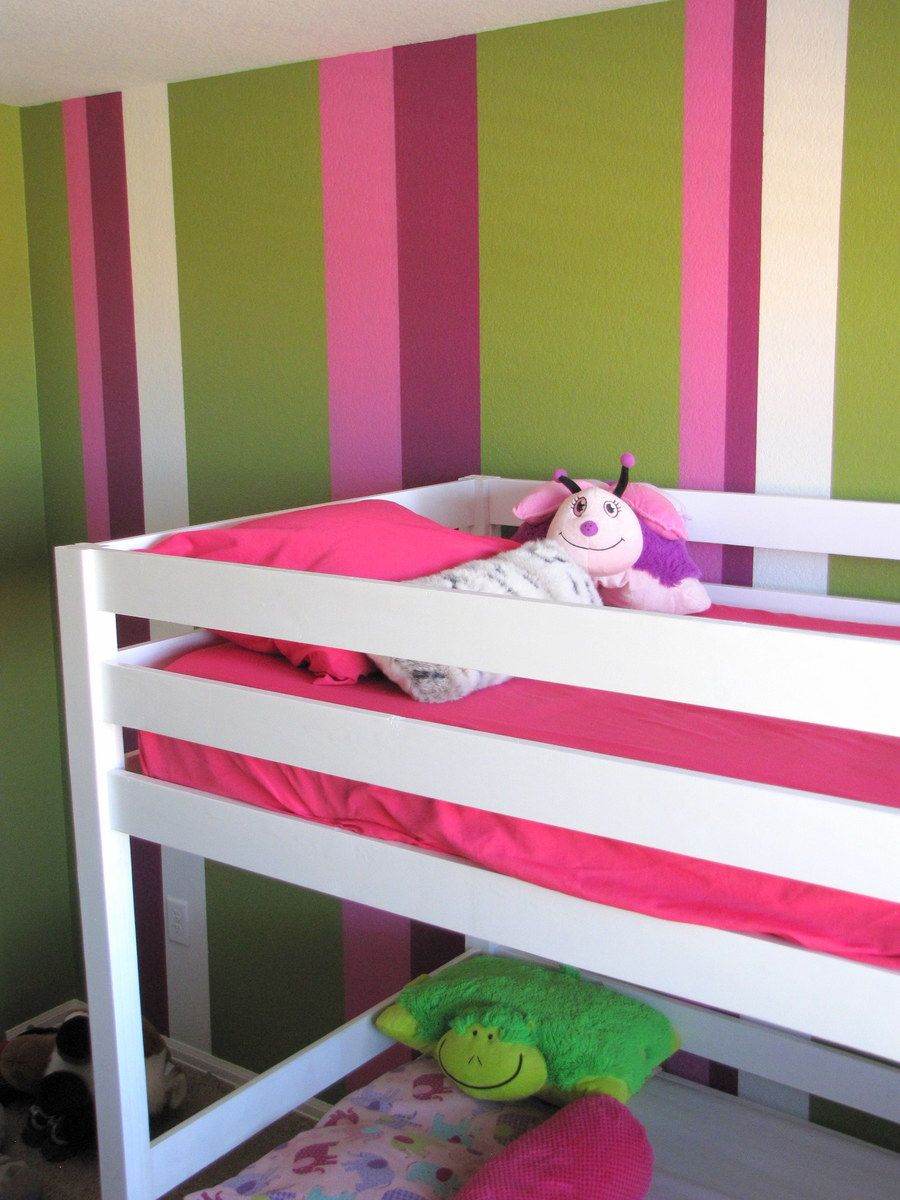
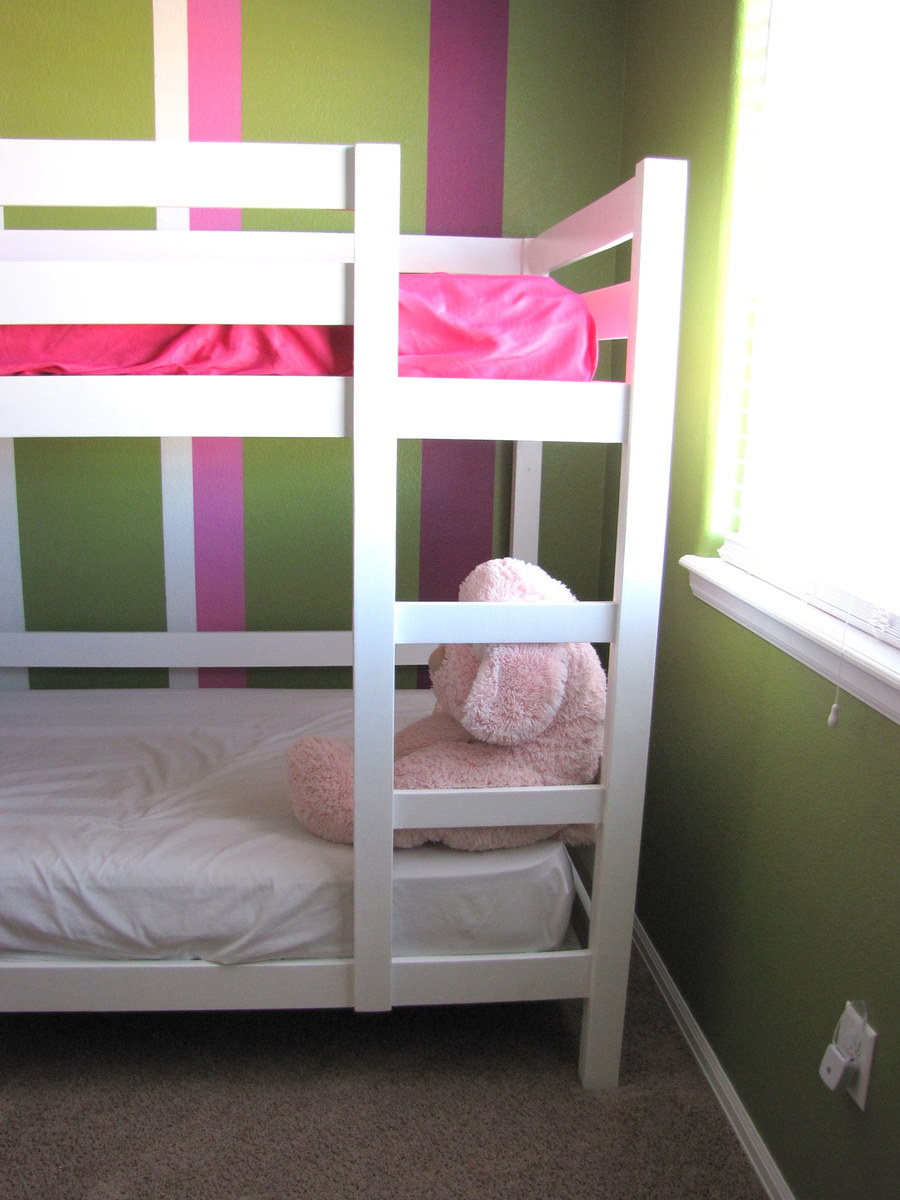
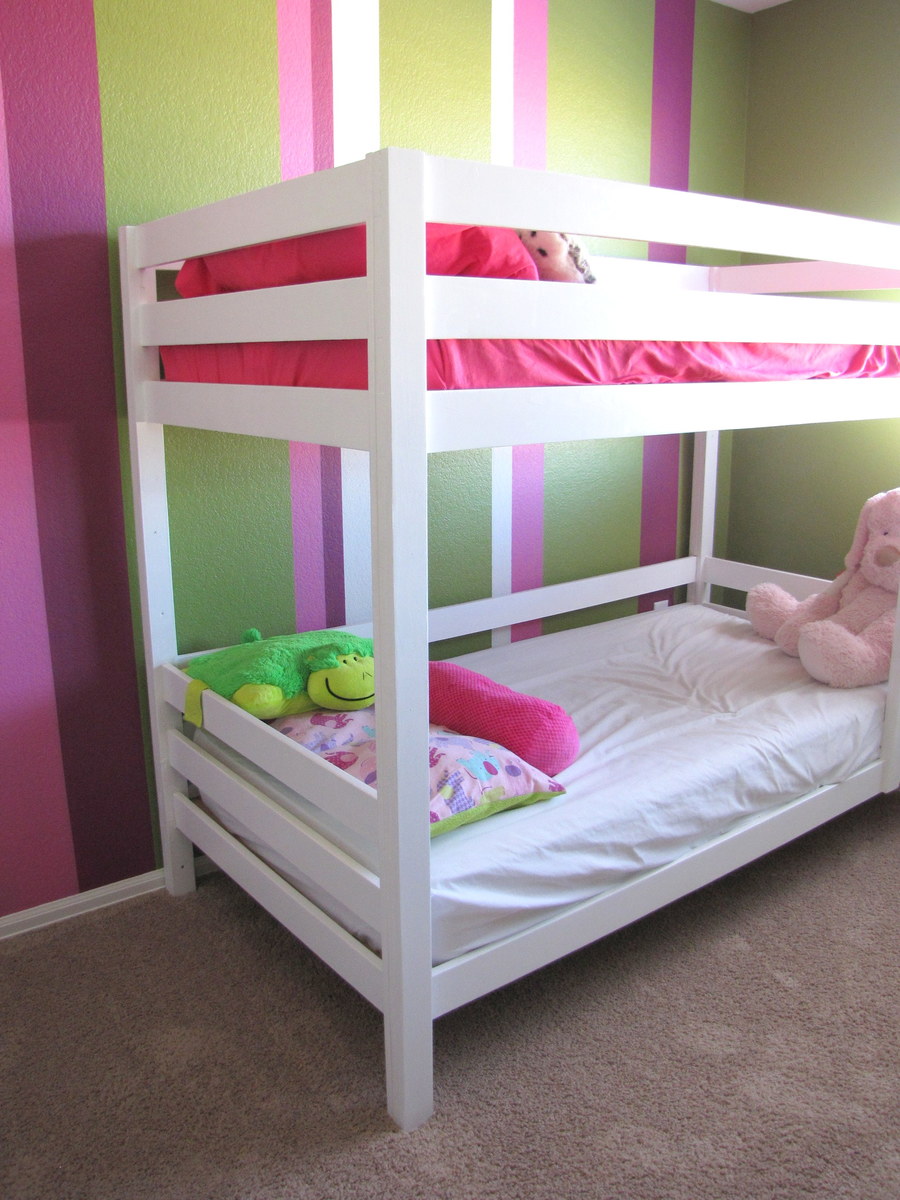
Simple, easy to build and oh-so functional. Loved these plans because of the ease of building and the budget friendly supply list.
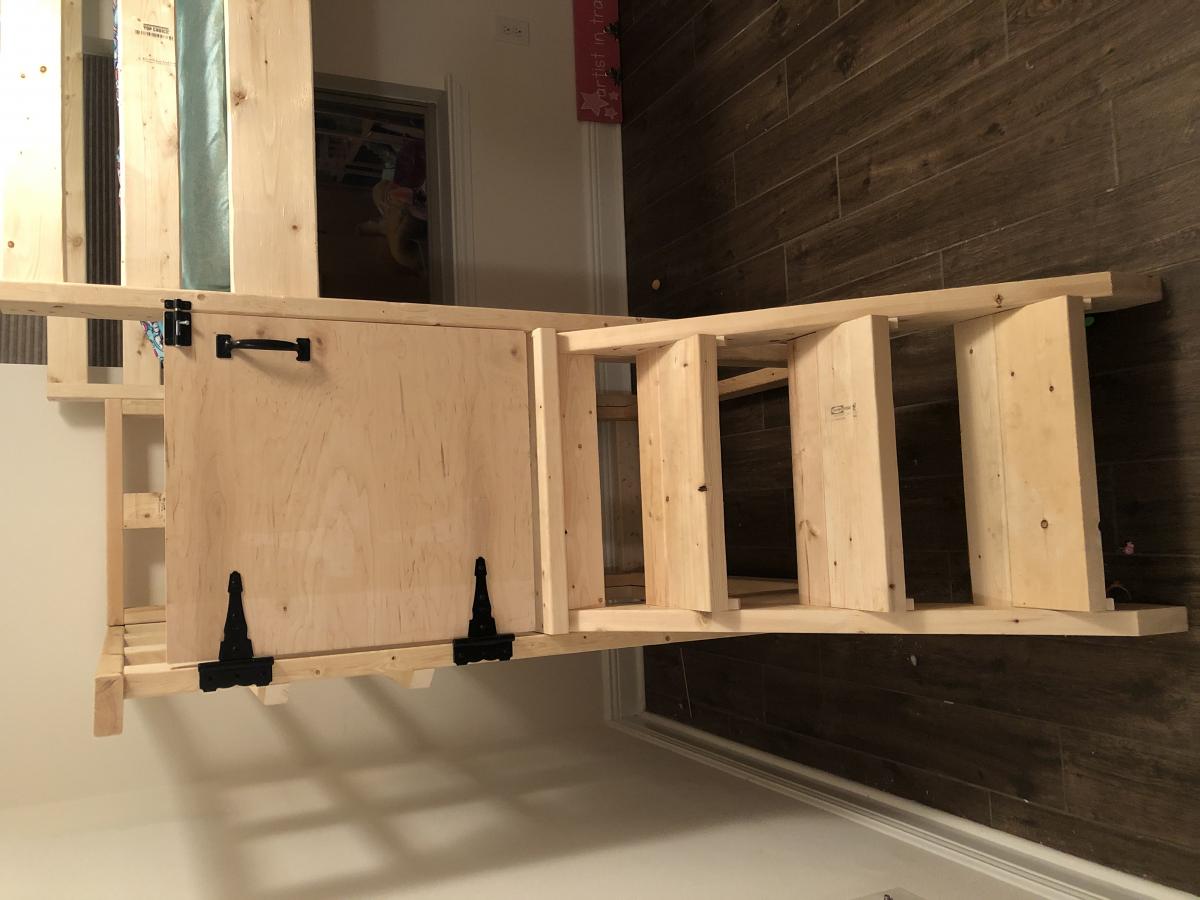
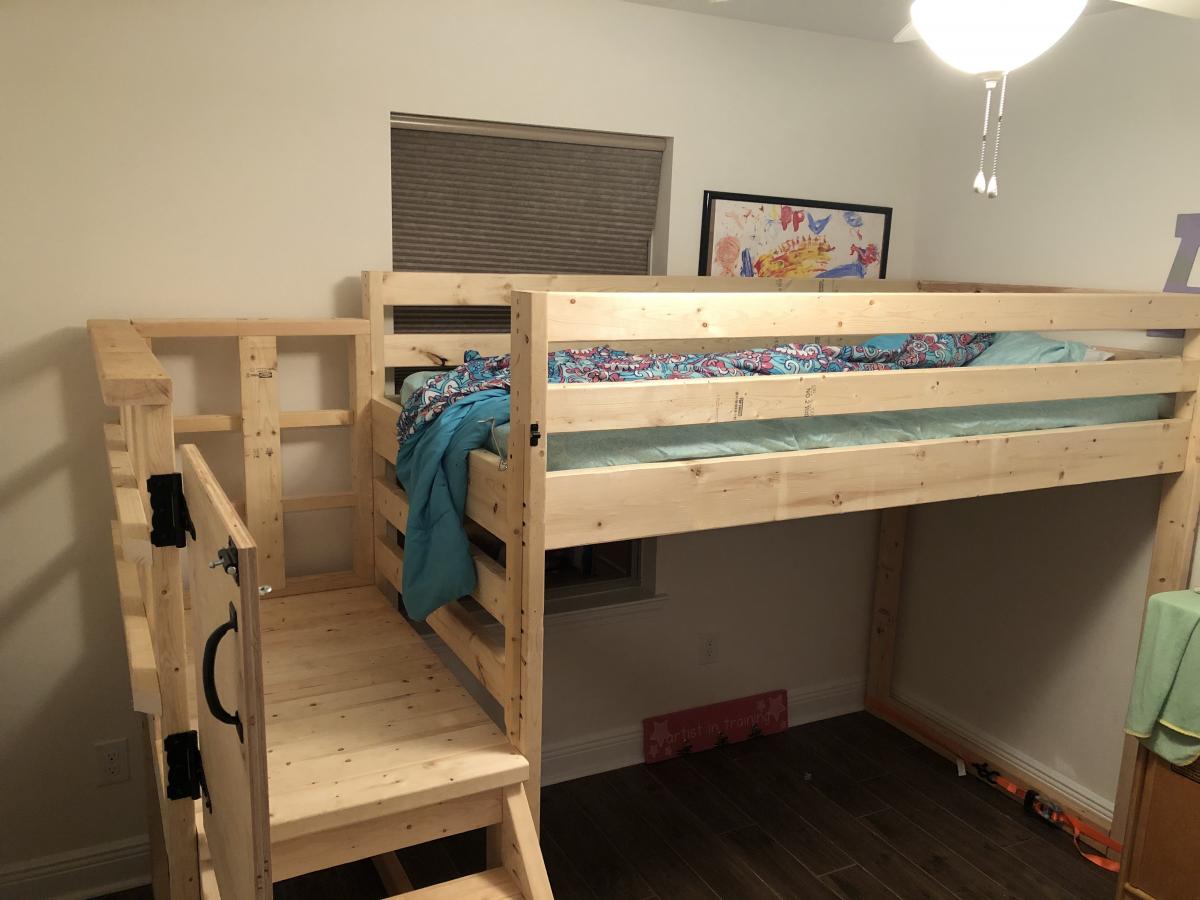
The frame for the bunk beds were completed over the course of a weekend and the next week was spent sanding and painting.
The plan allows you to build a strong, sturdy bed that can be easily disassembled/reassembled as necessary. It worked great being able to carry the 4 separate panels into my daughter's small room and then screw everything together. I also liked that feature along with the ladder integrated into the bed.
An Important Tip (one Ana recommends all the time) - Be sure to read the comments section on the original plan. Lots of important information there, especially if you need to buy 8' boards instead of the 10' listed in the plan (like I had to) and a few of the missing cuts are noted in the comments.
You can read more about my build experience here... http://radcrafter.com/2014/03/adding-the-bunk-bed-bedroom-makeover-pt-2/
Built from this plan: Classic Bunk Beds: http://ana-white.com/2010/09/classic-bunk-beds-cleverly-designed.html
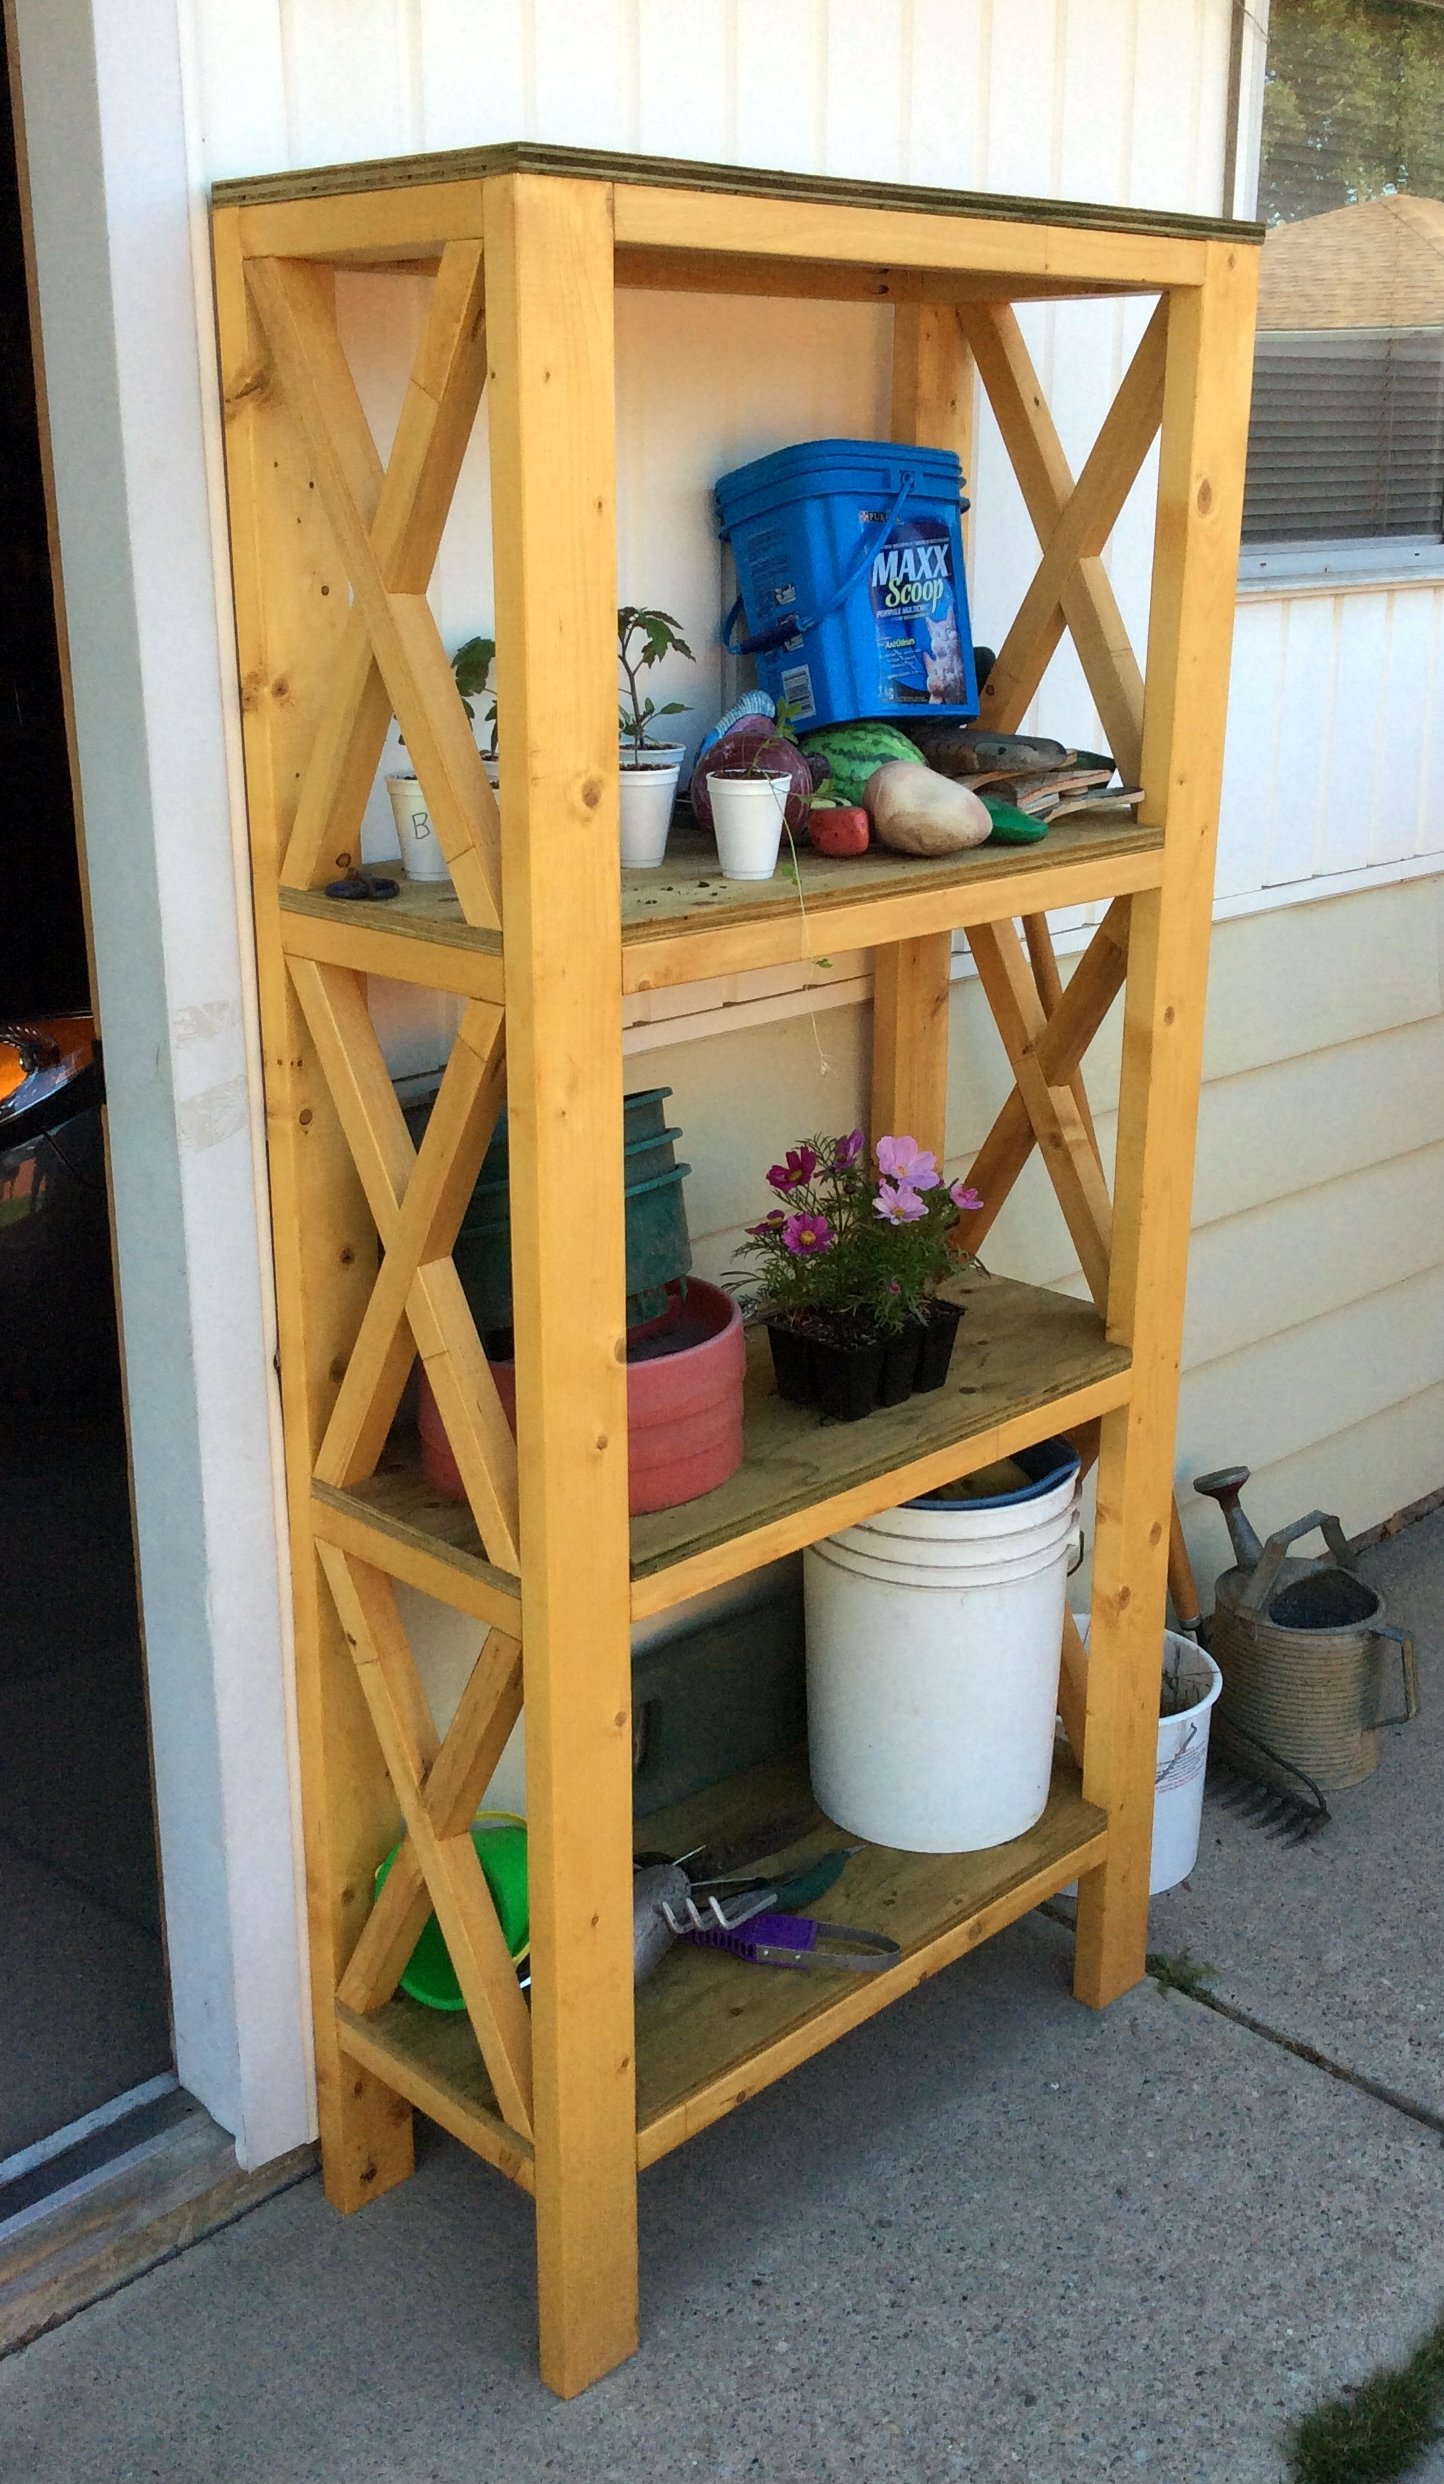
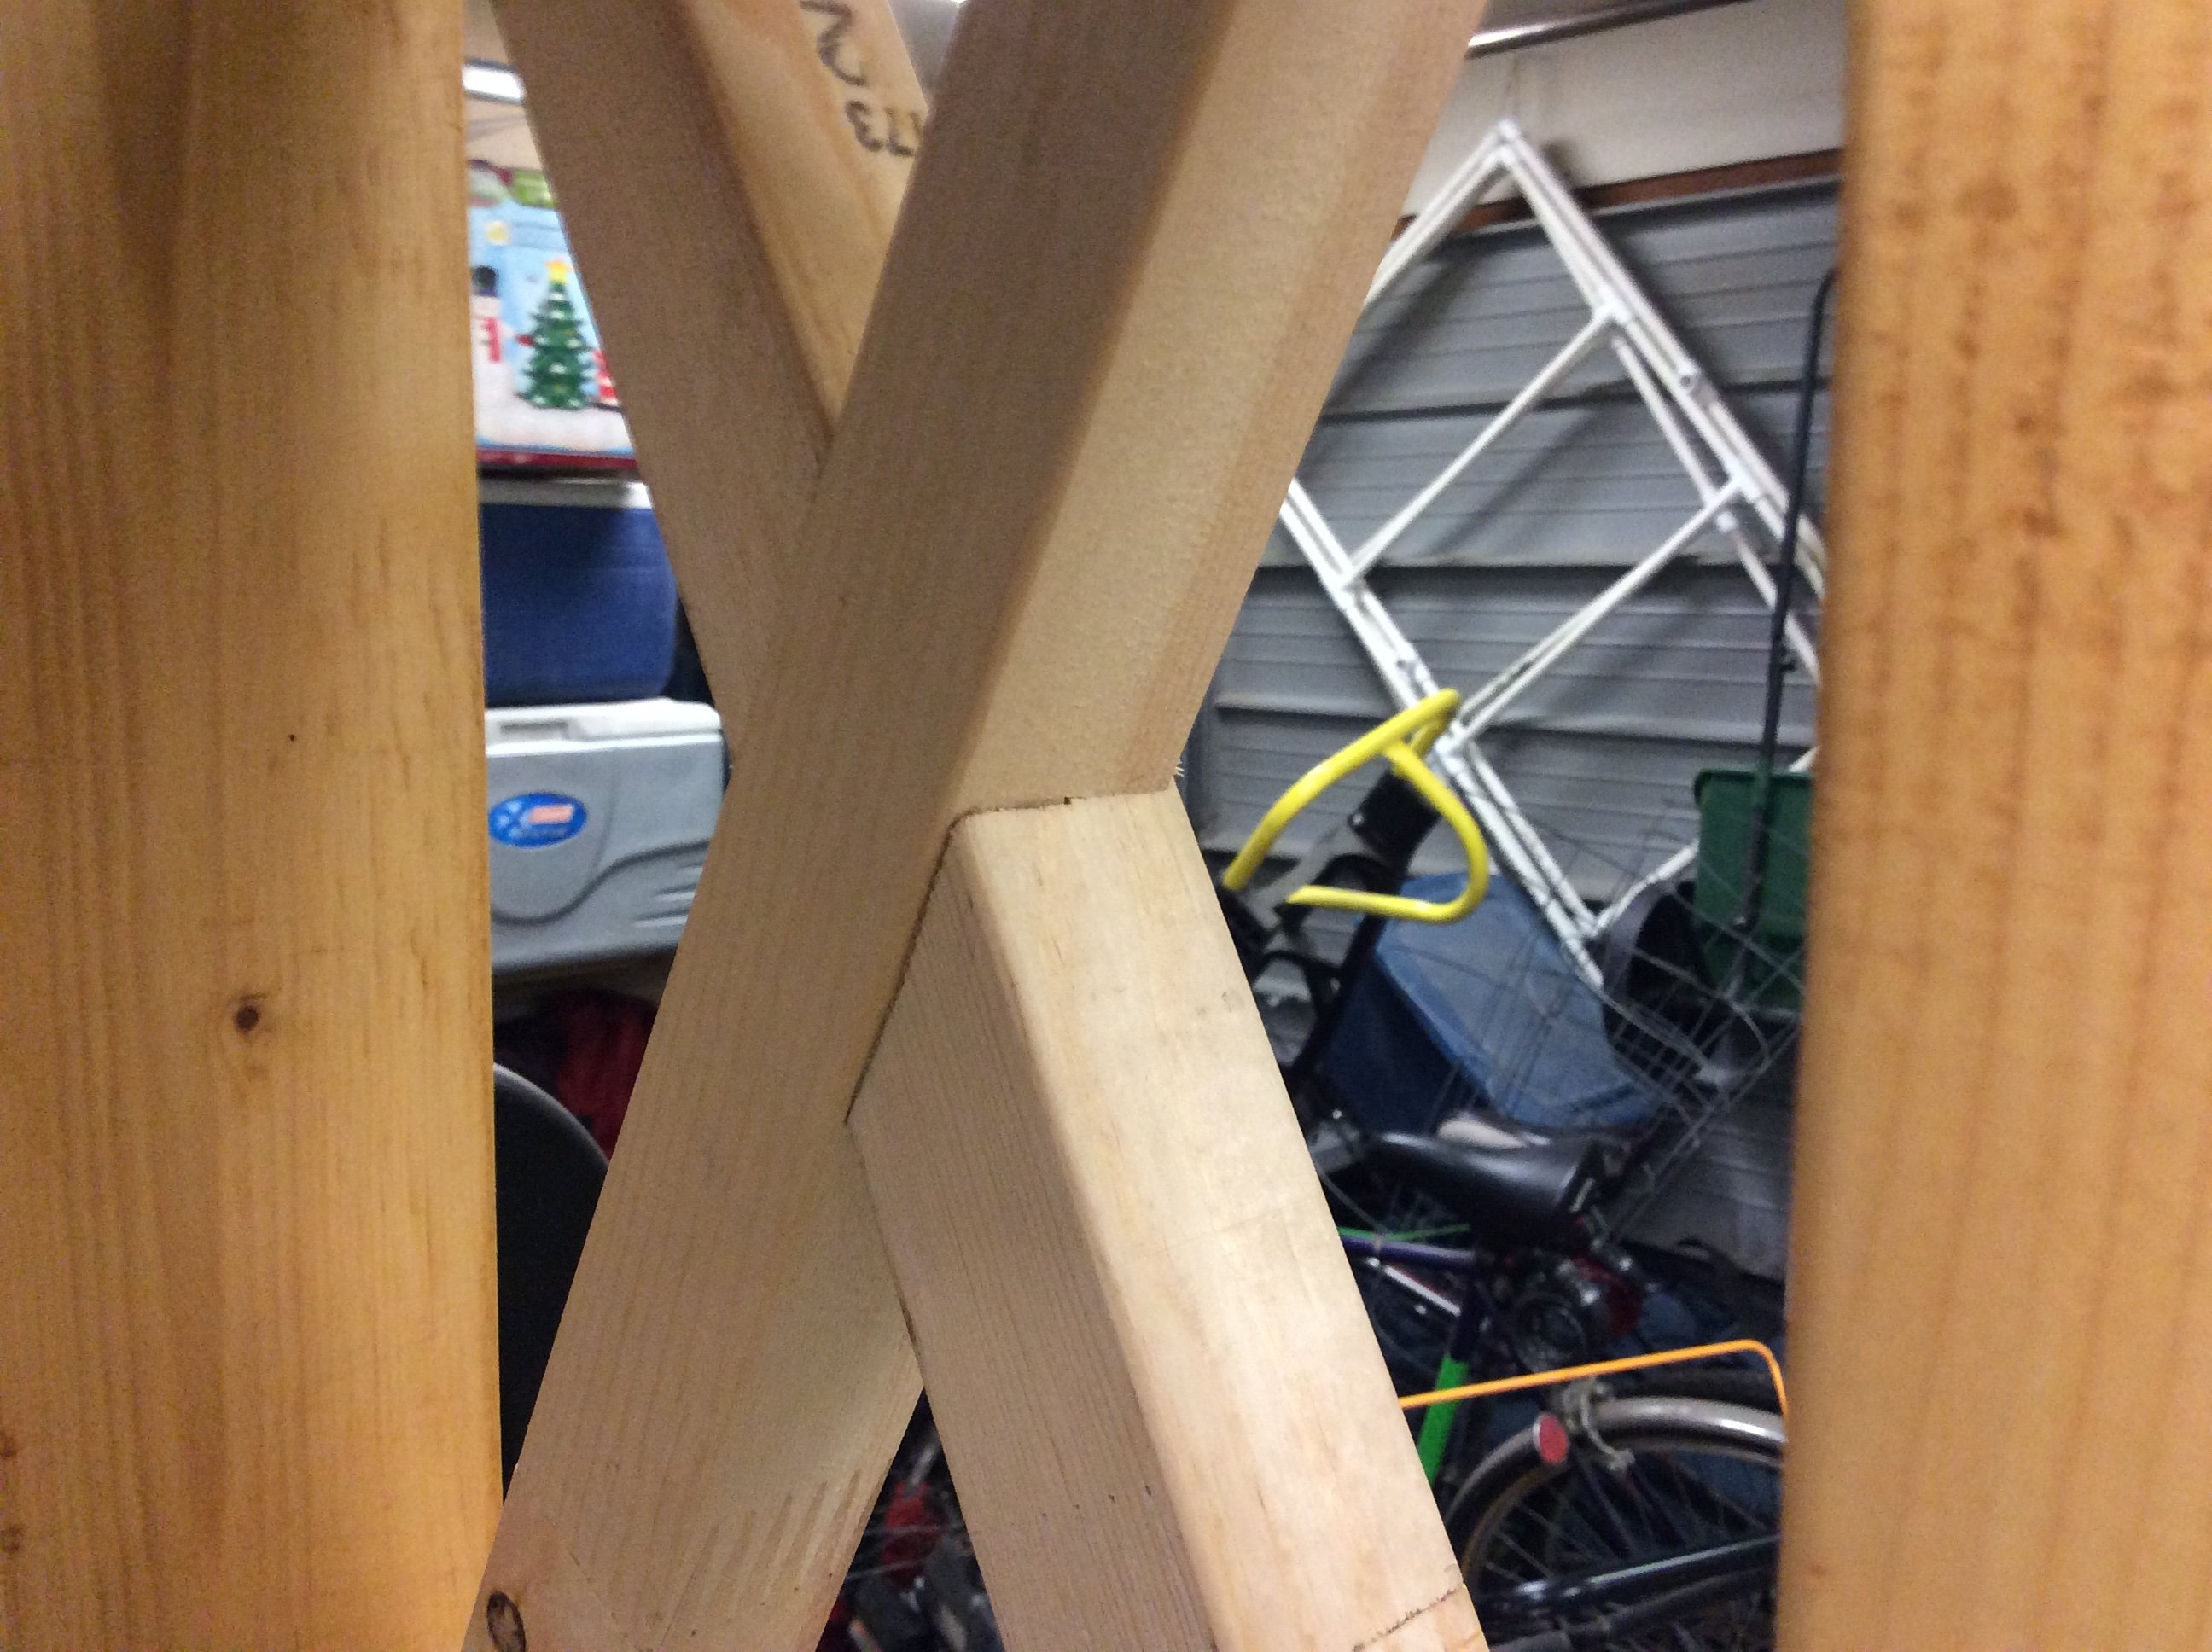
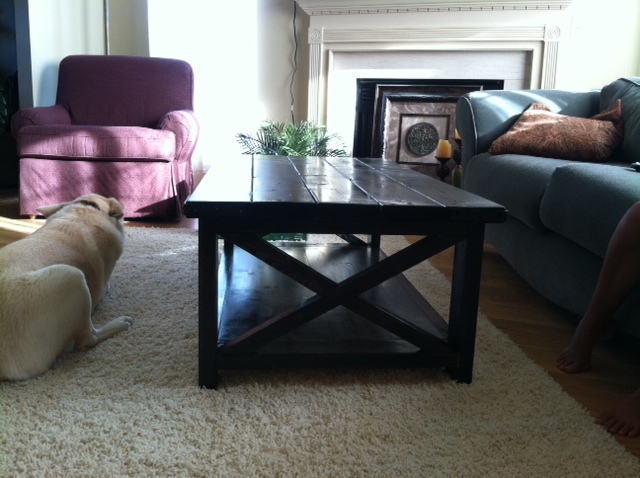
My wife wanted a Garden Shelf to replace the one that just gave up the ghost, so I browsed my favorite site for plans similar to what I was thinking. Thats when I found the Rustic X Book Case. Perfect.
I need to stuff larger objects then books in there, so I changed it to 3 shelves and I put those on top of the cross members. That was easier and it gives it that work bench look.
For the X's, I had the wood to risk so I tried recessing them. I dry fitted (chop saw highly recommended) and marked them and when I flipped them over, they aligned perfectly. With a circular saw set to just slightly less then 1/2 depth, and some very careful cutting, they fit together quite well.
Sturdy with a bit of class. I'm pleased. Thanks.
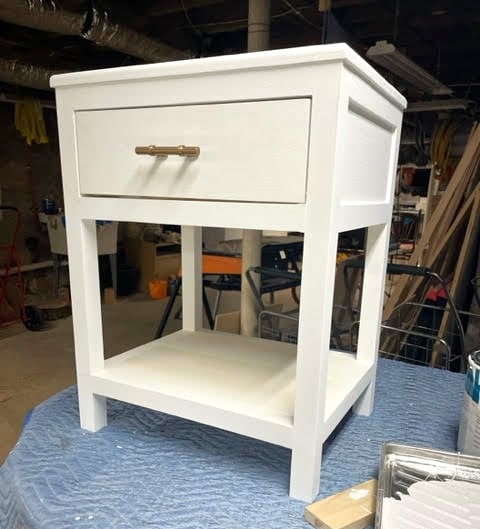
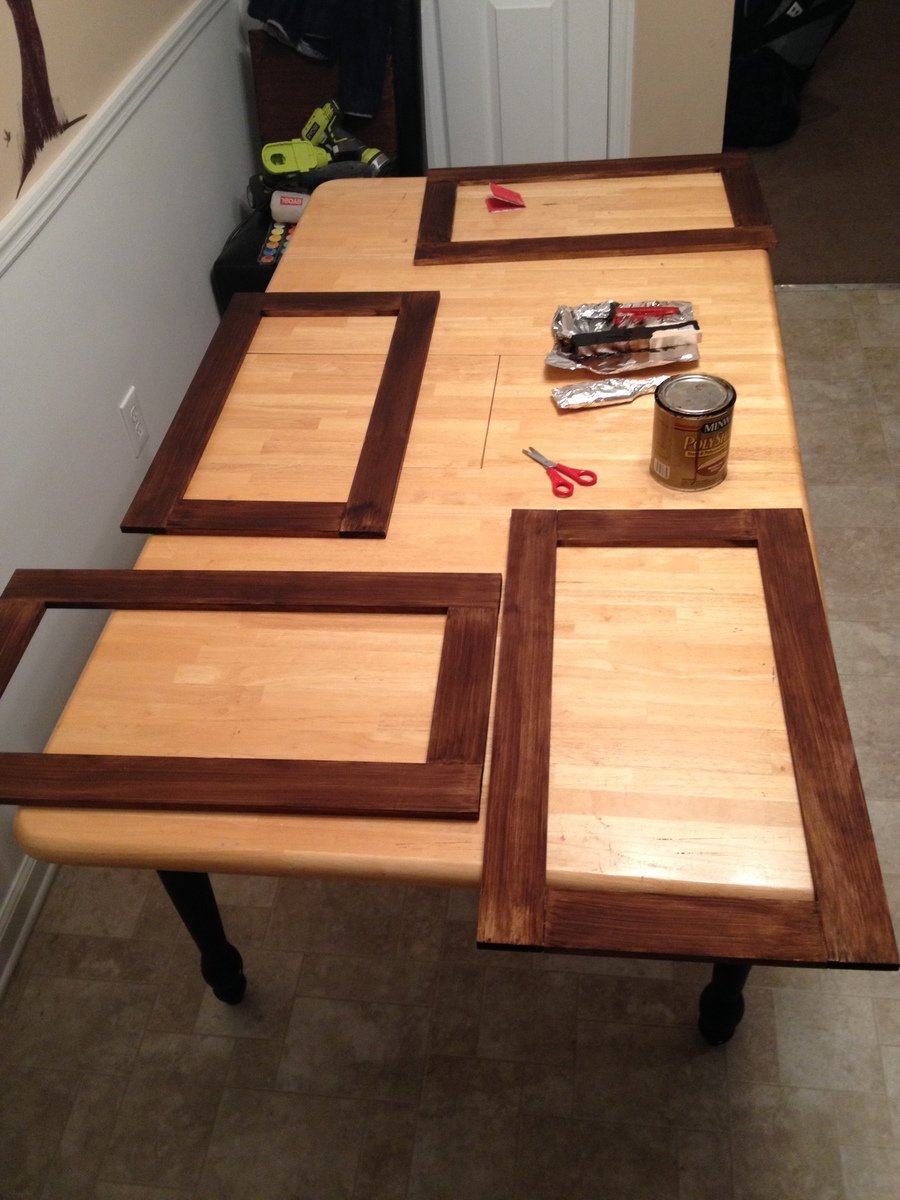
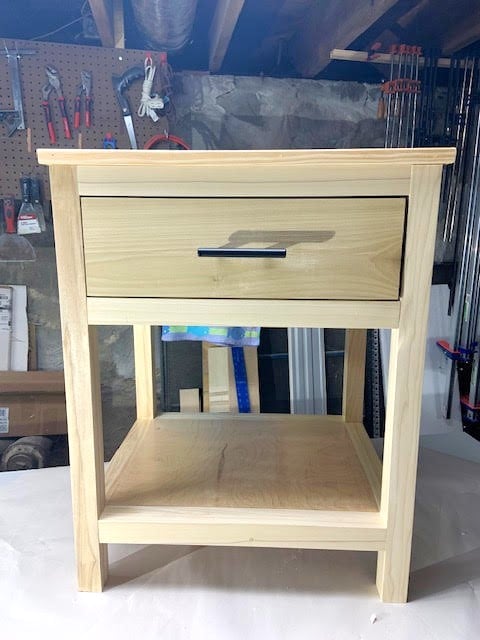
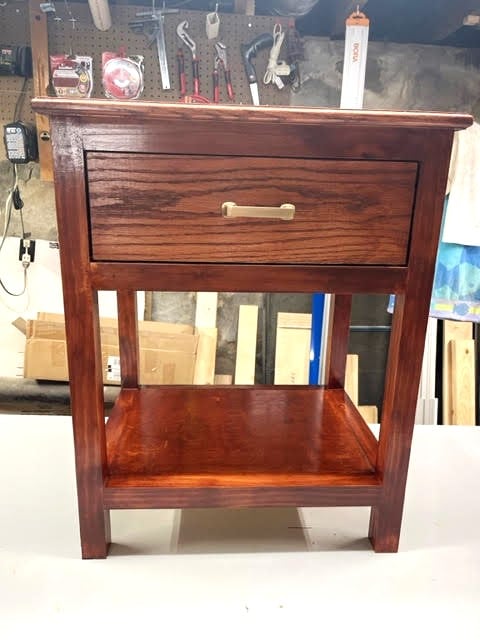
Each nightstand features different hardware and finish.

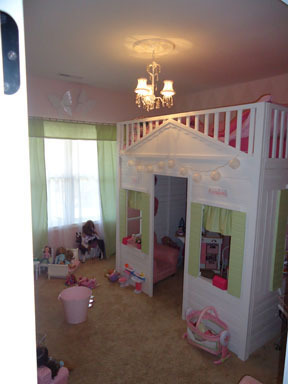
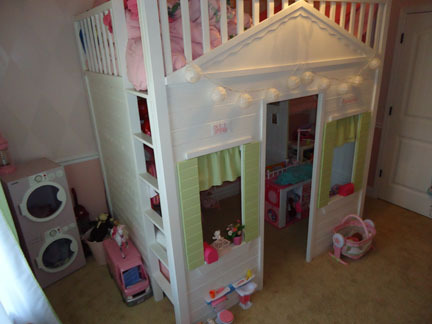
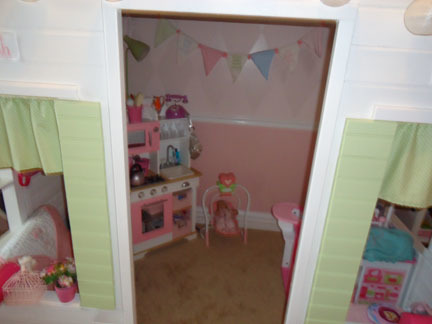
I made this for my 4-year old granddaughter and added it to the play area I built for her last summer.
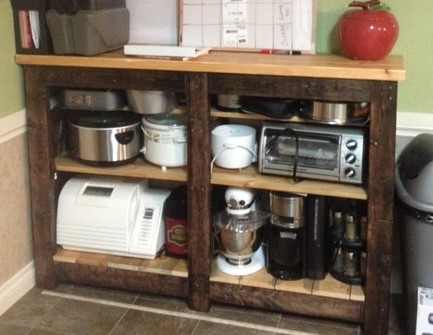
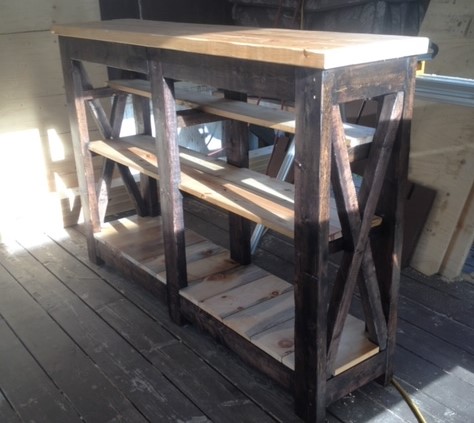
I built this X console for my kitchen, to replace an ugly cheap wardrobe that previously held my kitchen appliances. This made space for a kitchen organization space too- with calendars above, and bins for the kids' schoolwork etc.
The plan was easy to customize, and a great afternoon build.

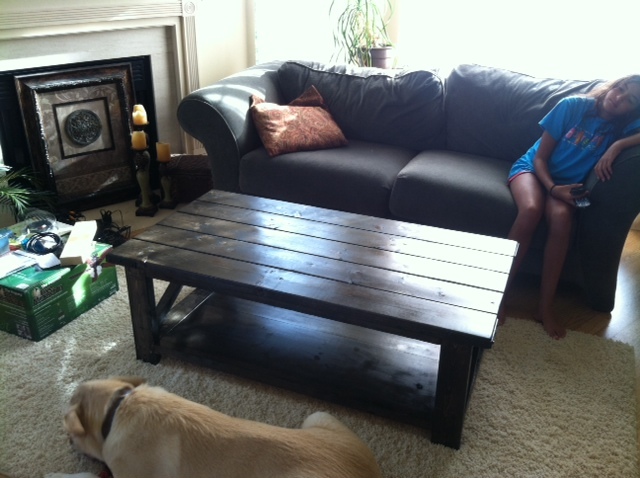
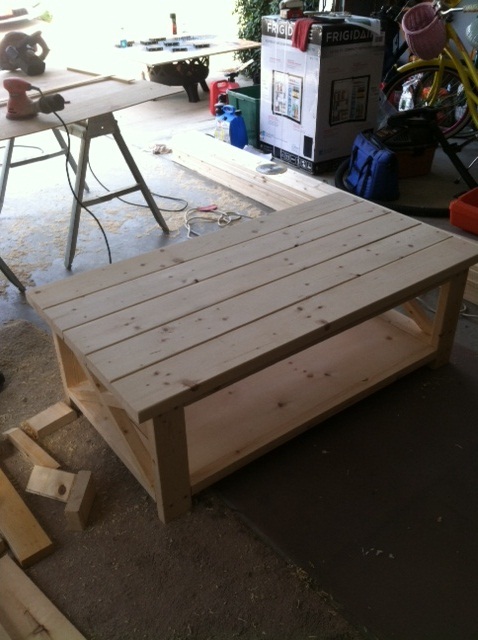
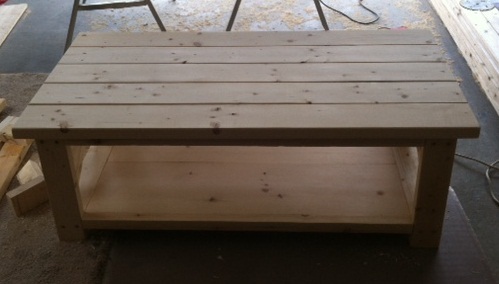
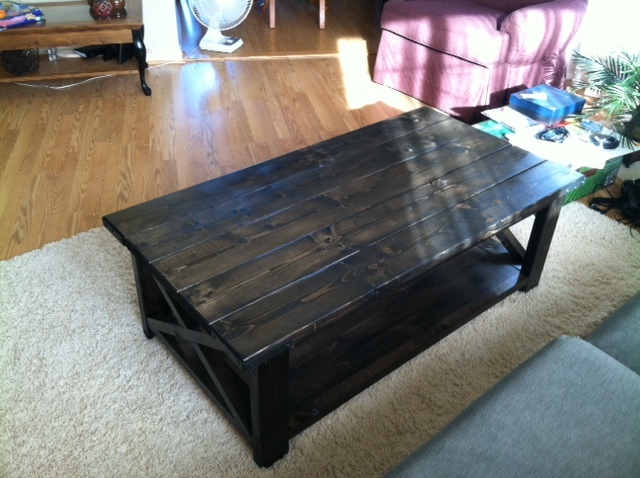
This was my second project......it came out of necessity. We had a dining room with no furniture. I wanted a table that would stand the test of time. A place where we could eat, do homework and enjoy making memories. We have 4 little ones so a sturdy table was a must! All the tables I looked at were cheaply made or WAY over our budget. I found a wonderful couple in Ann Arbor where I purchased my wood. I had them assemble the top, (8 1x6's) since I do not have the equipment to plane and sand a top that large. The rest I did a little at a time.
I am very pleased with the result!
I modified the plans to fit our needs.......the changes are as follows: I did not make bread board ends, and my width is 44.5 in.
My next phase of this dining room is to build a buffet and hutch......I always juggle about three projects at a time so my realistic goal will be Thanksgiving!

Coffe table to match the console and end table
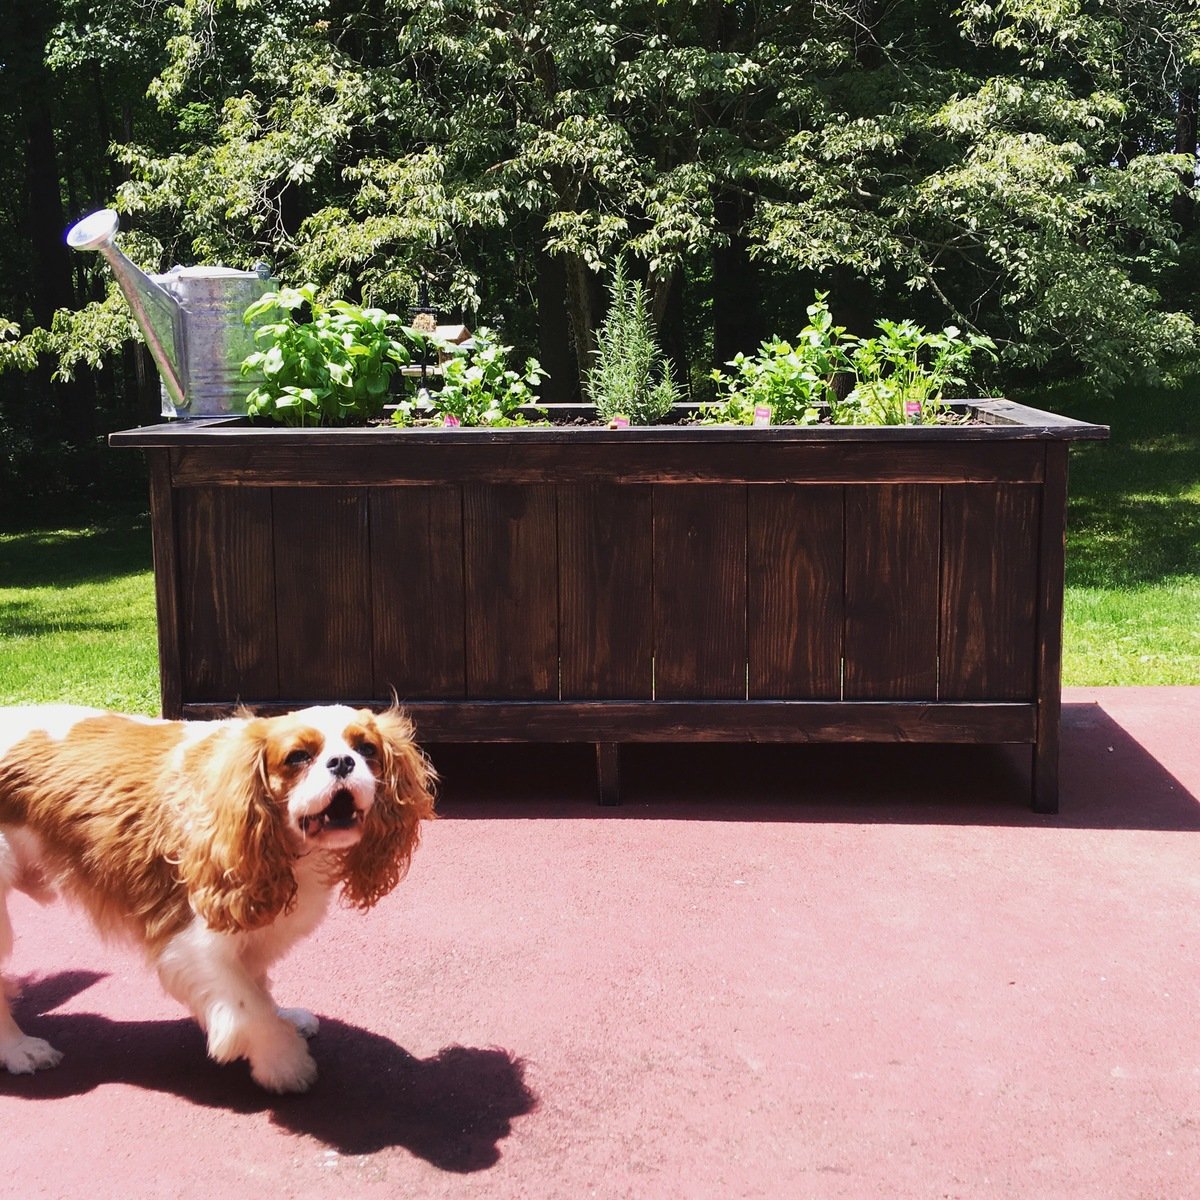
Modified the dimensions to make a good sized planter for patio herb garden :)
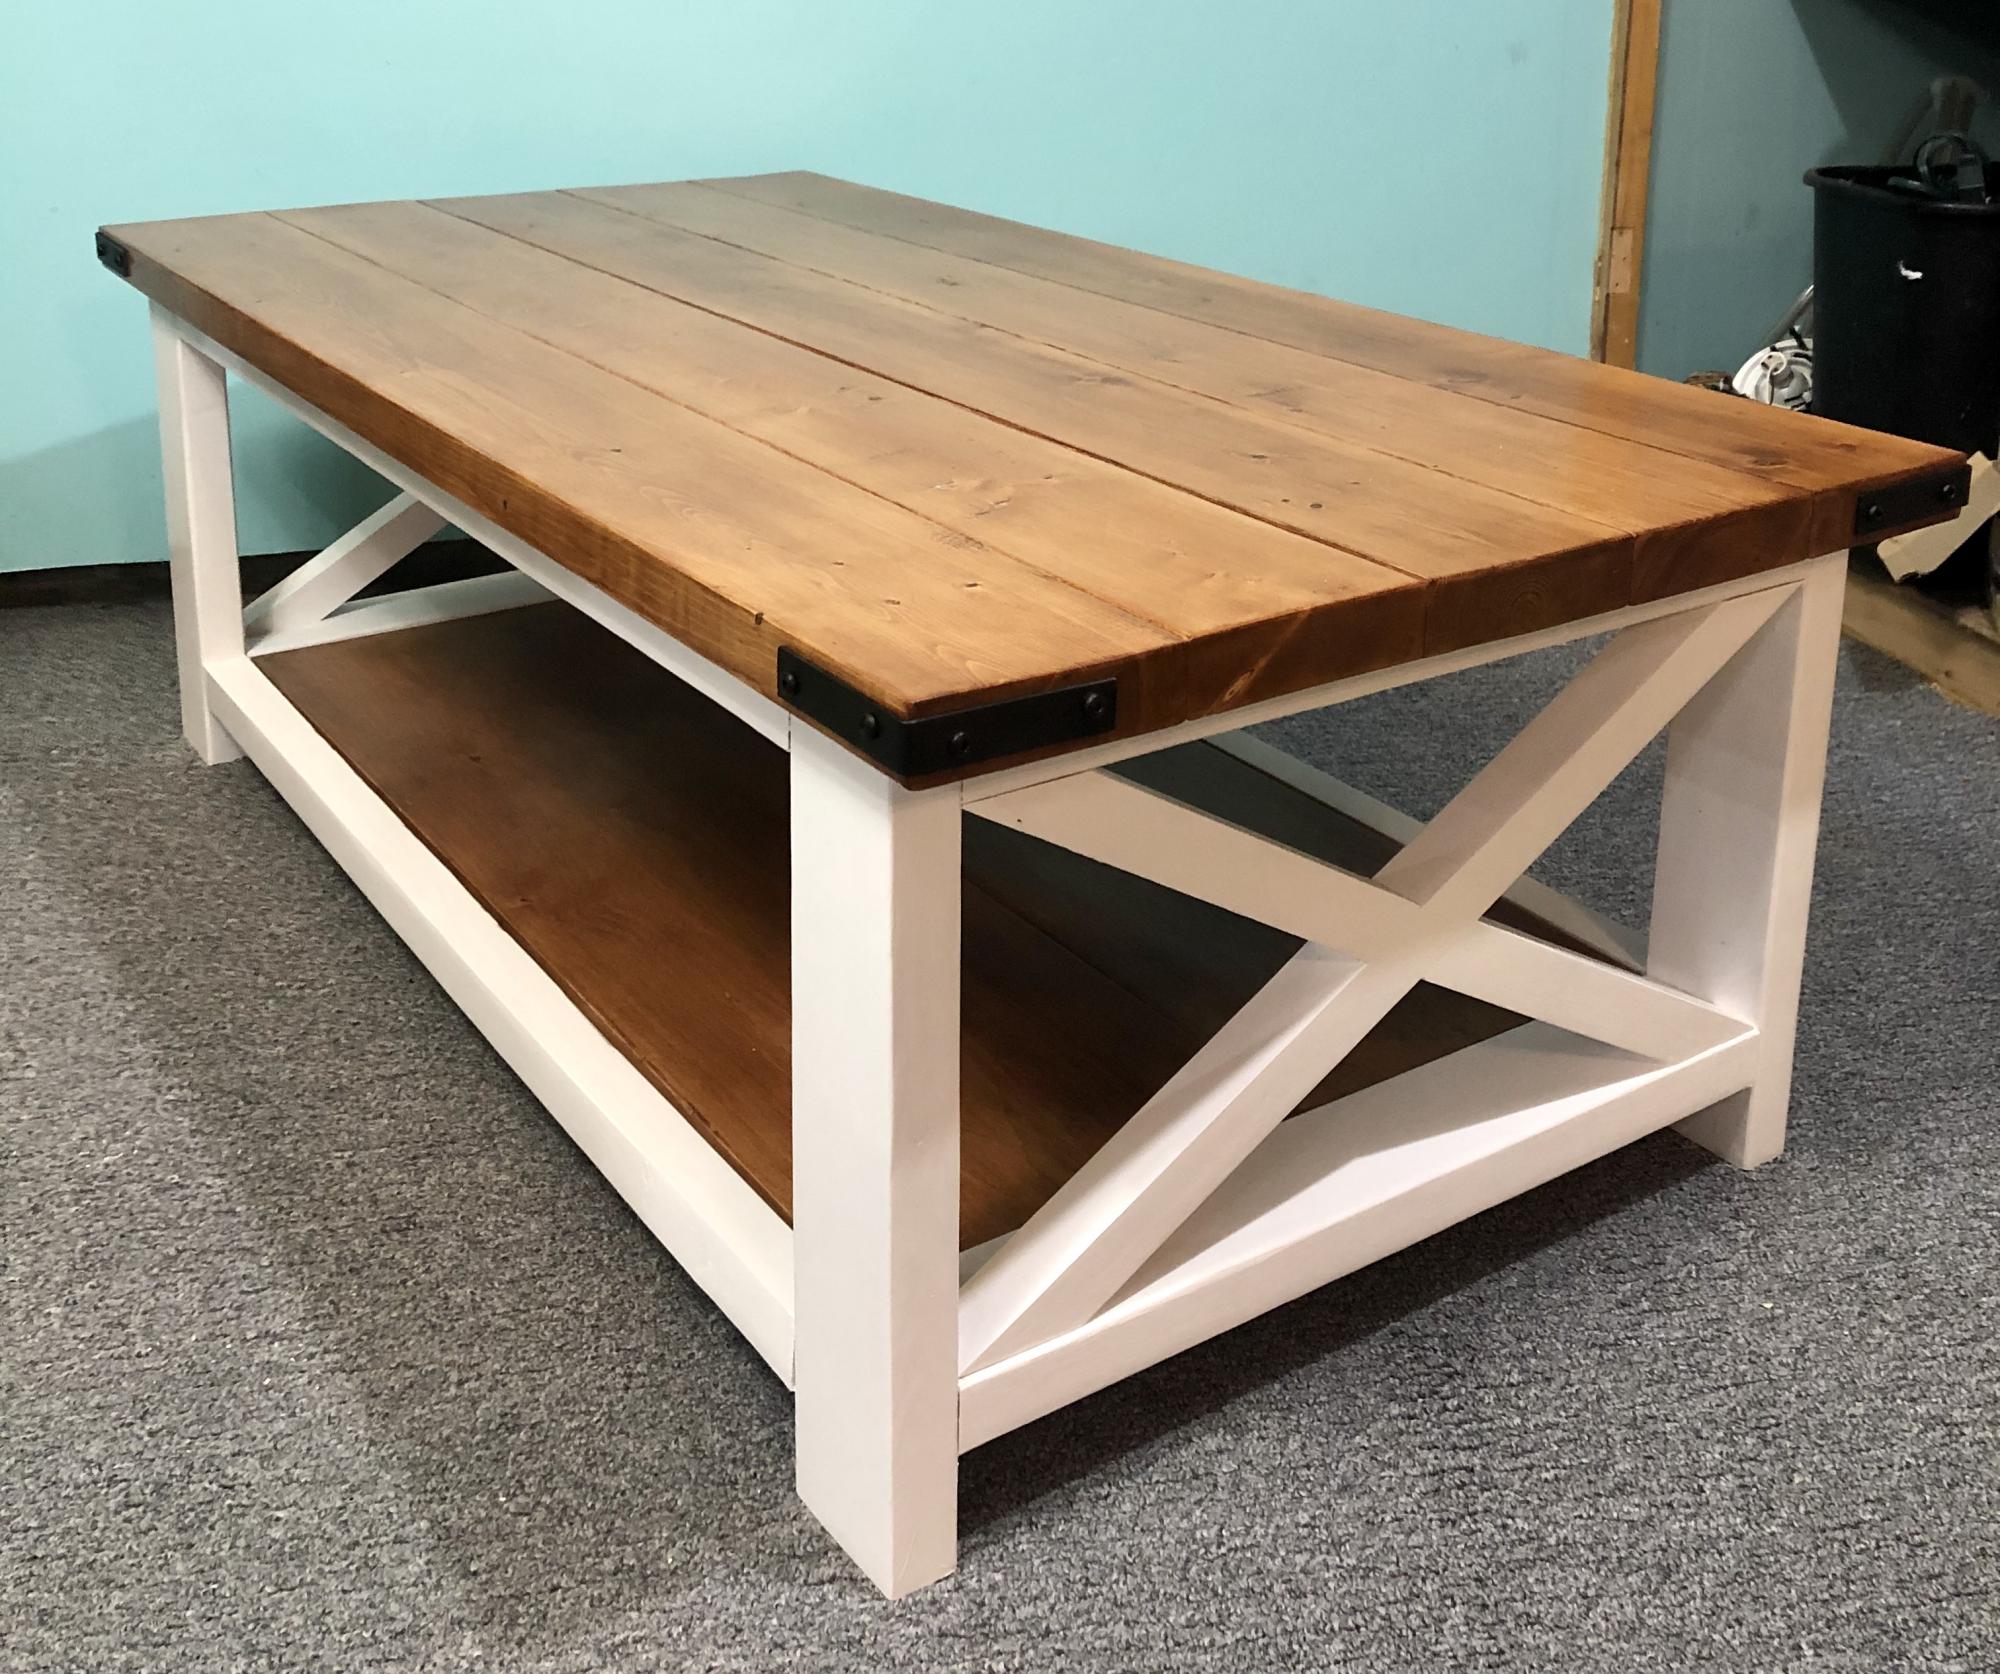
The current Covid-19 Pandemic has allowed me to re-explore hobbies that I have not had the time or resources to enjoy in the past several years. This coffee table is the first woodworking project I have made in nearly 15 years and it felt great to be back! Frame is painted white and finished with polycrilic. The top and shelf are finished with antique walnut and a polyurethane top coat for extra durability. Can't wait for the next challenge!
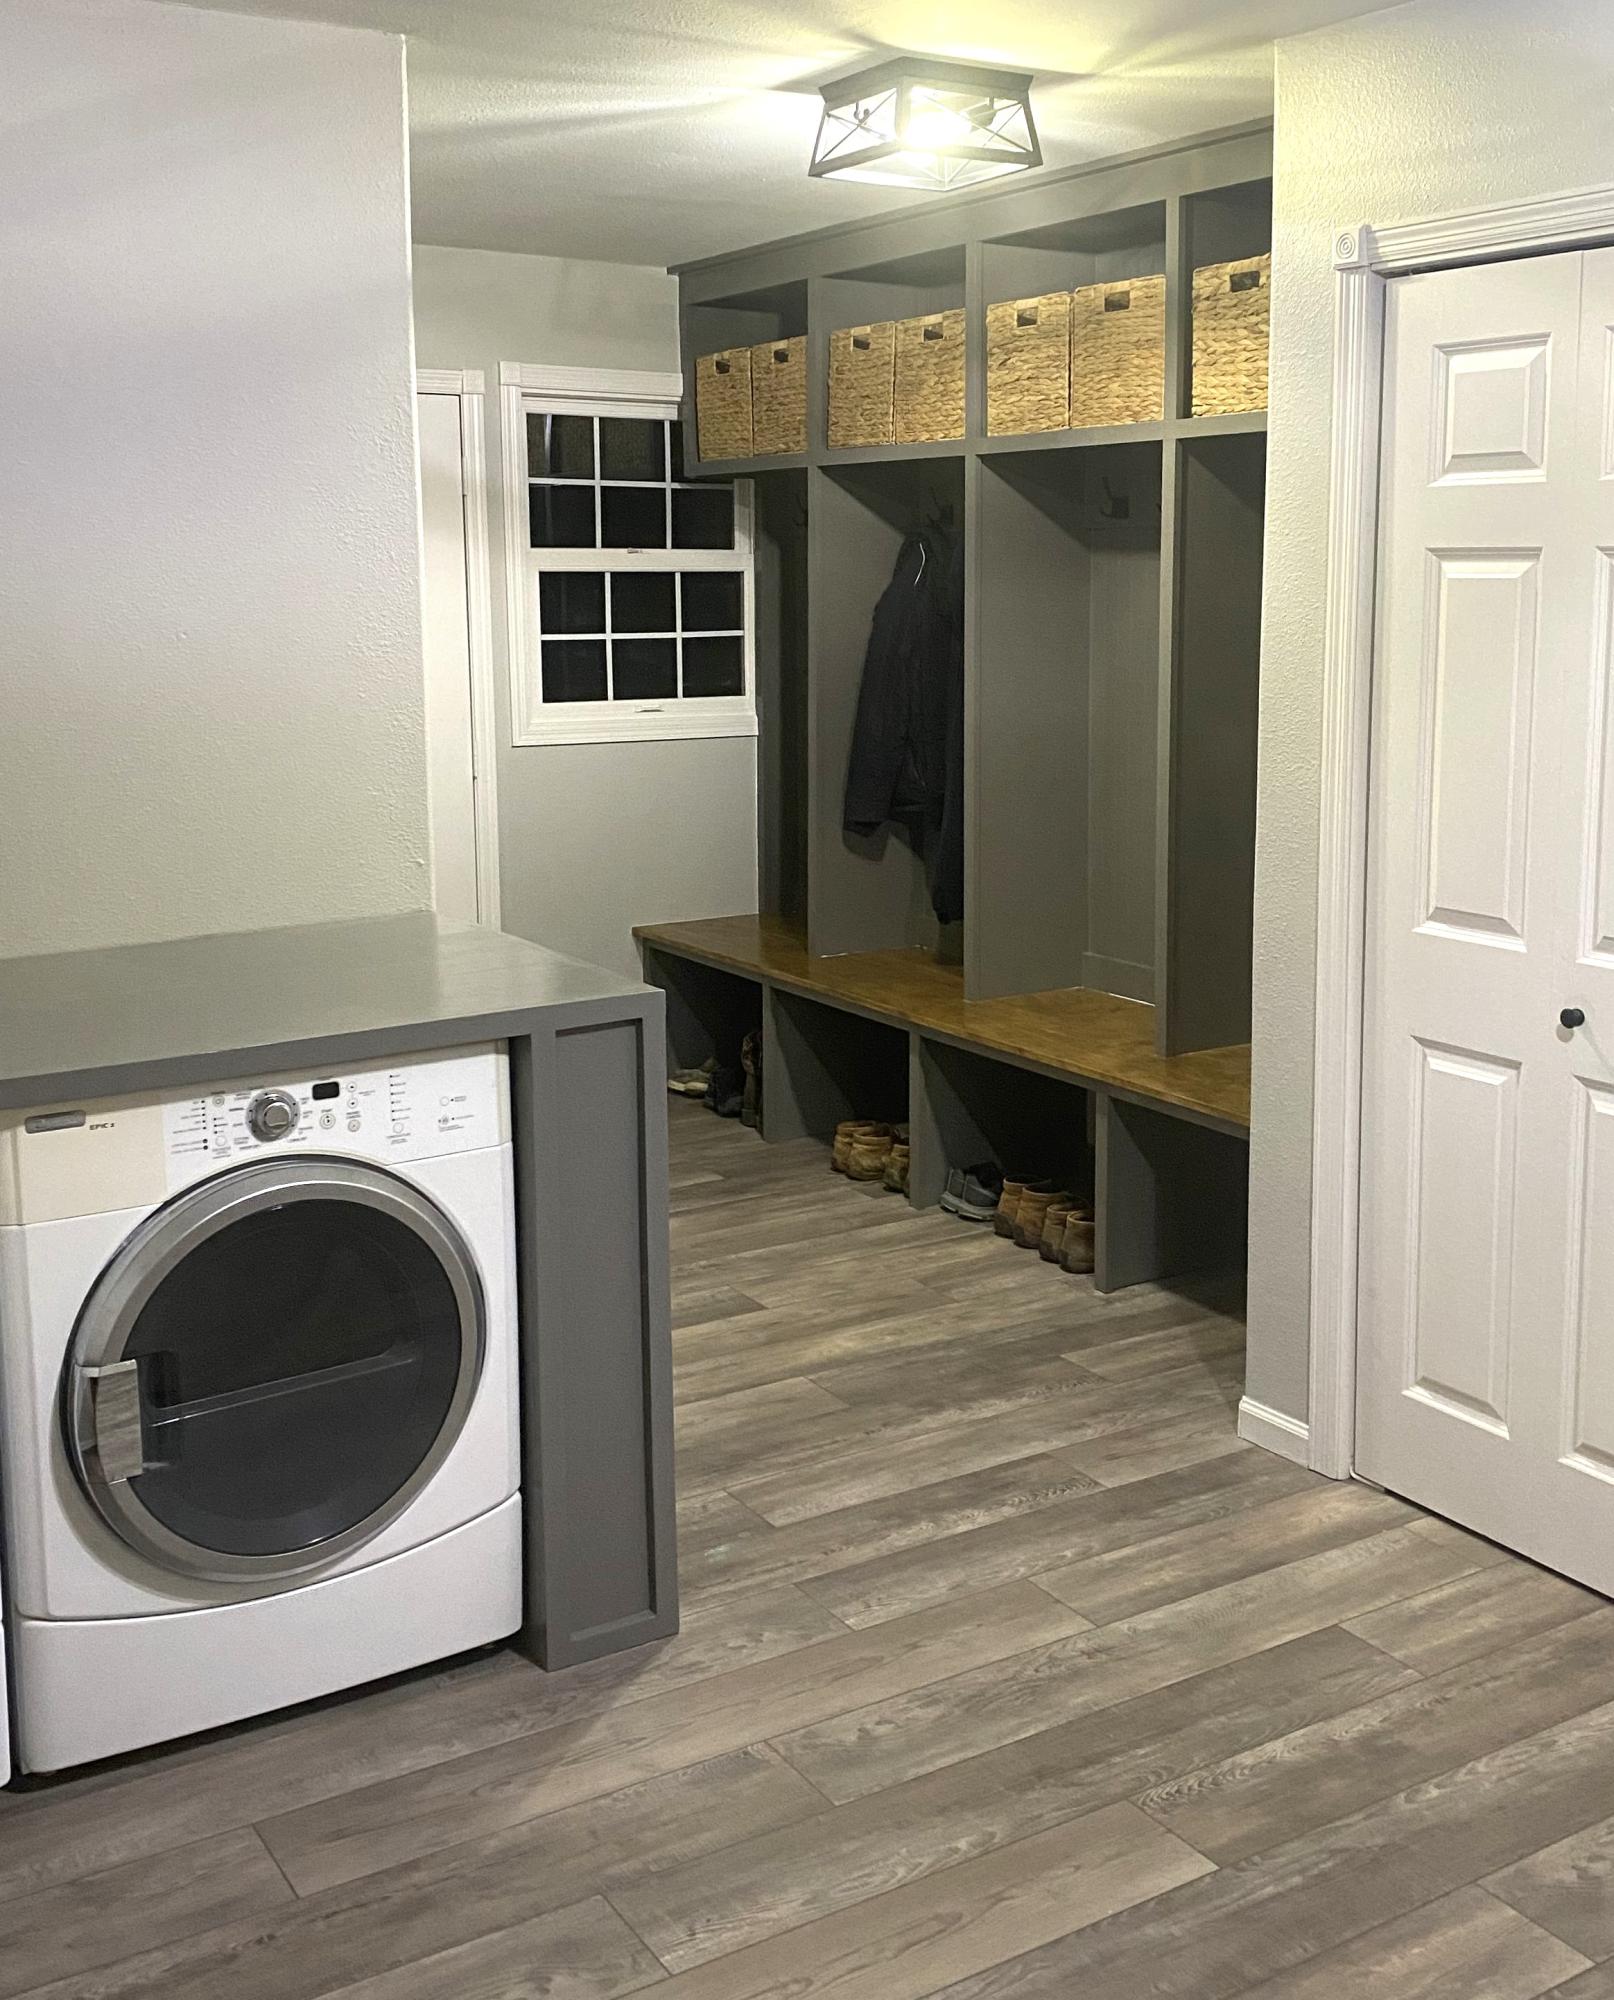
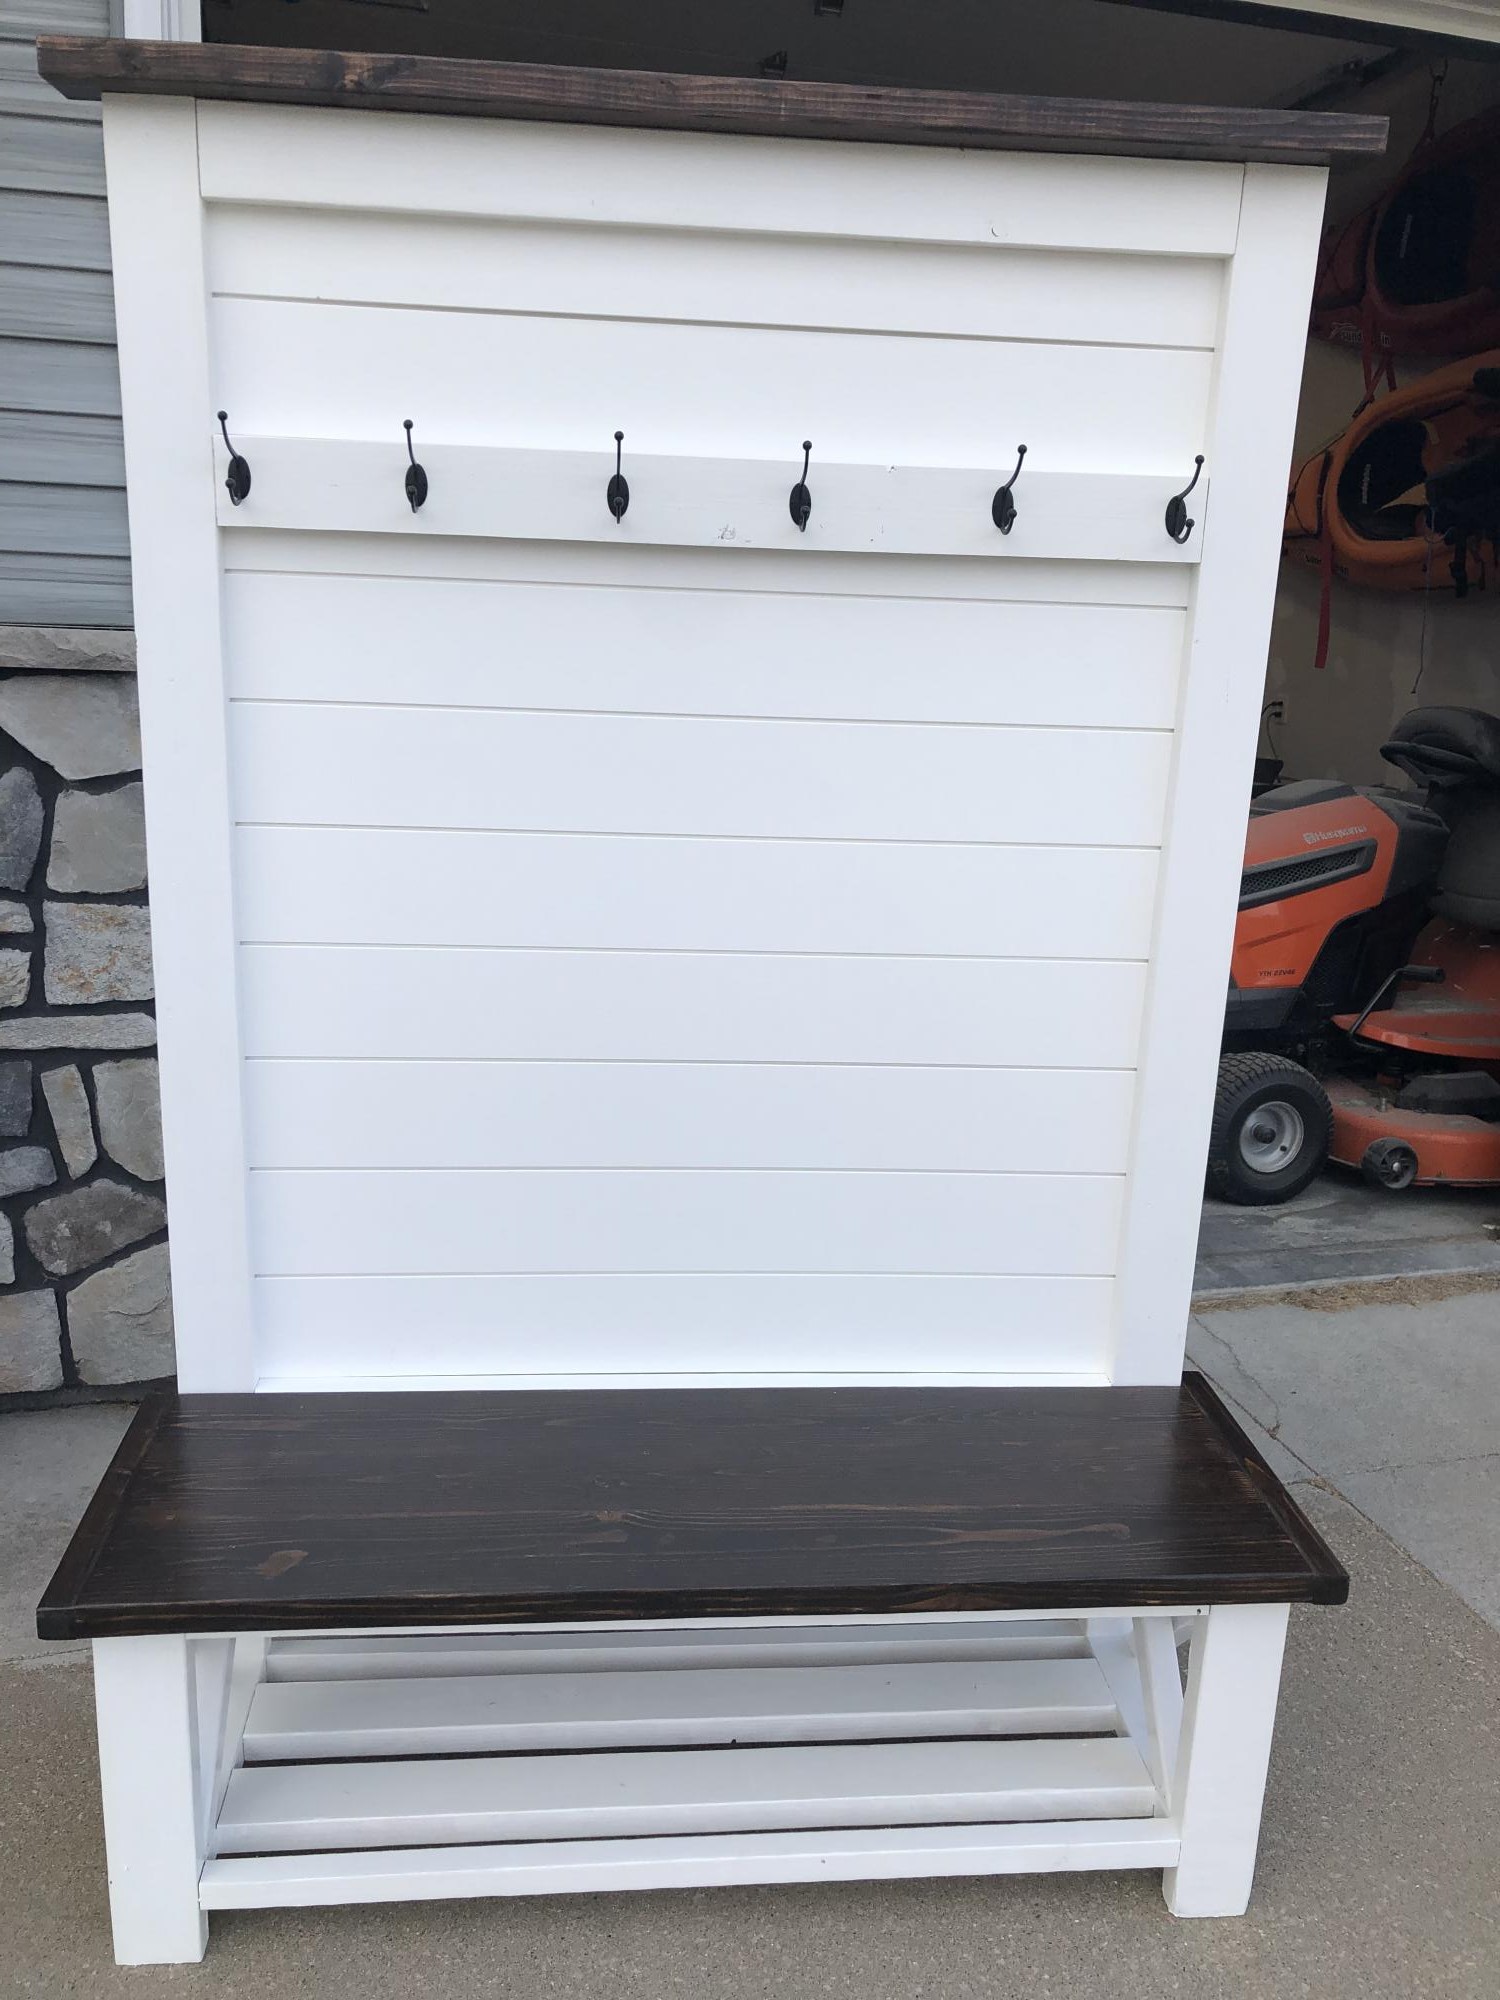
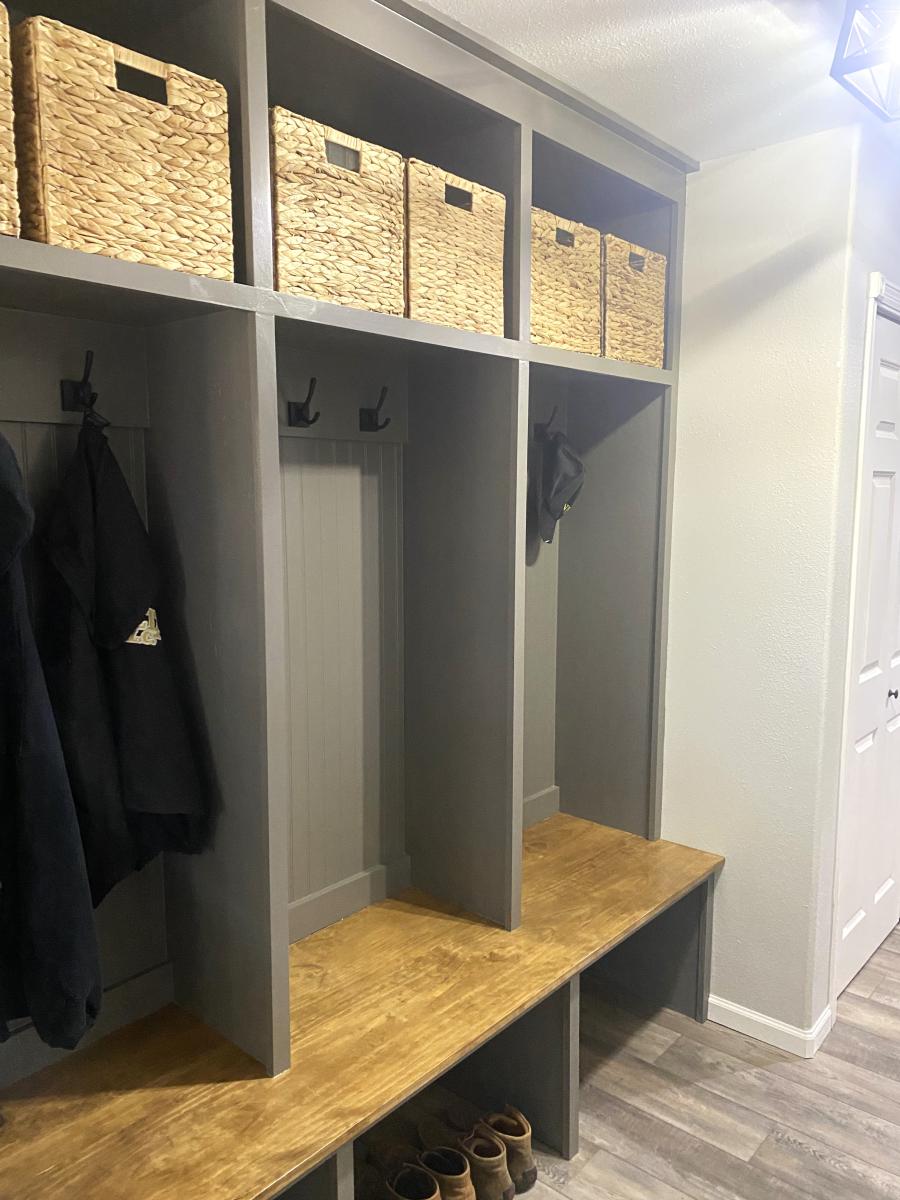
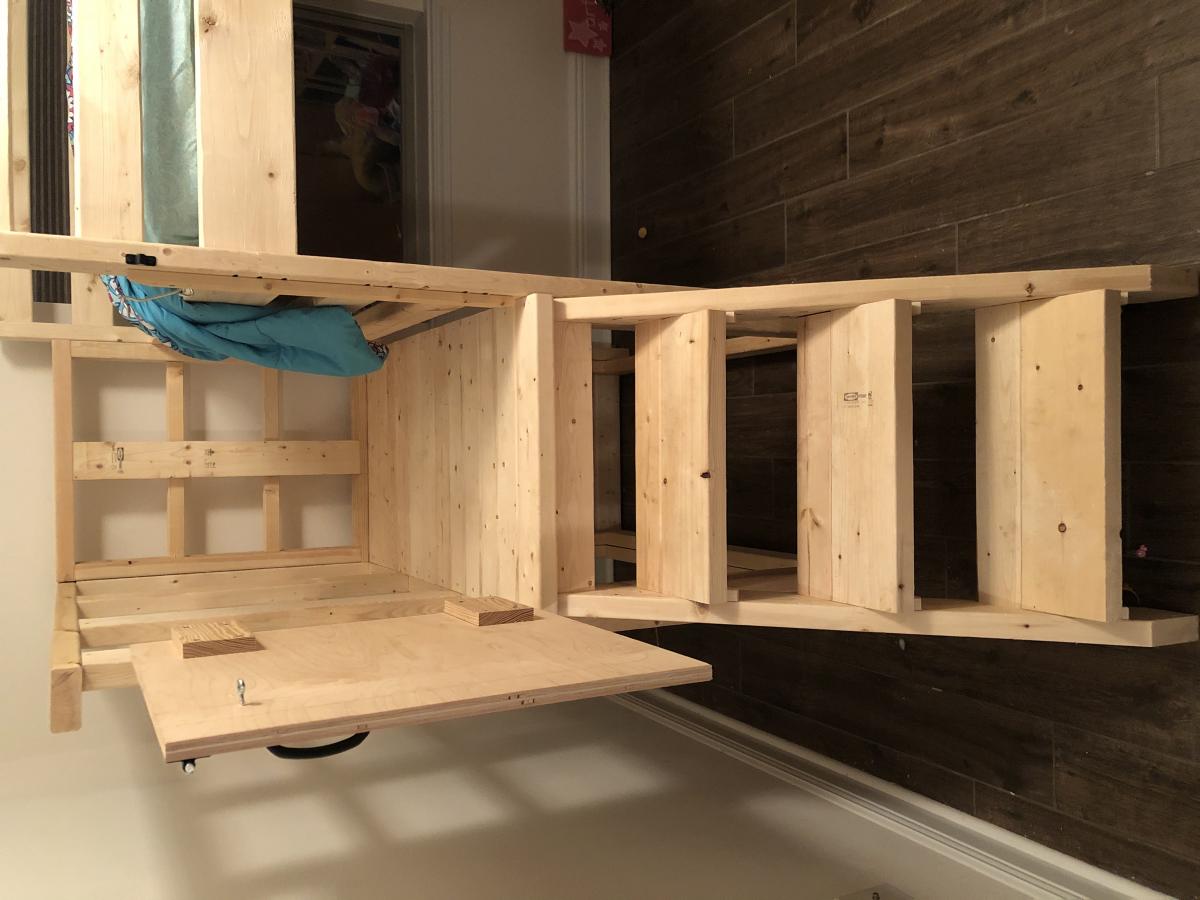
Laundry Mudroom Storage

Very quick and came together nicely! The only change I would make would be to raise the large bars on two of the sides because our daughter likes to stand on it and balance there (I see in some of the brags that some people did exactly that), but that wouldn't be an issue if she were bigger and the platform were lower (and I imagine that will happen soon enough!). You can see her just starting to try to stand on it in this photo. She is only 18 months old, so I'm looking forward to many years of use!
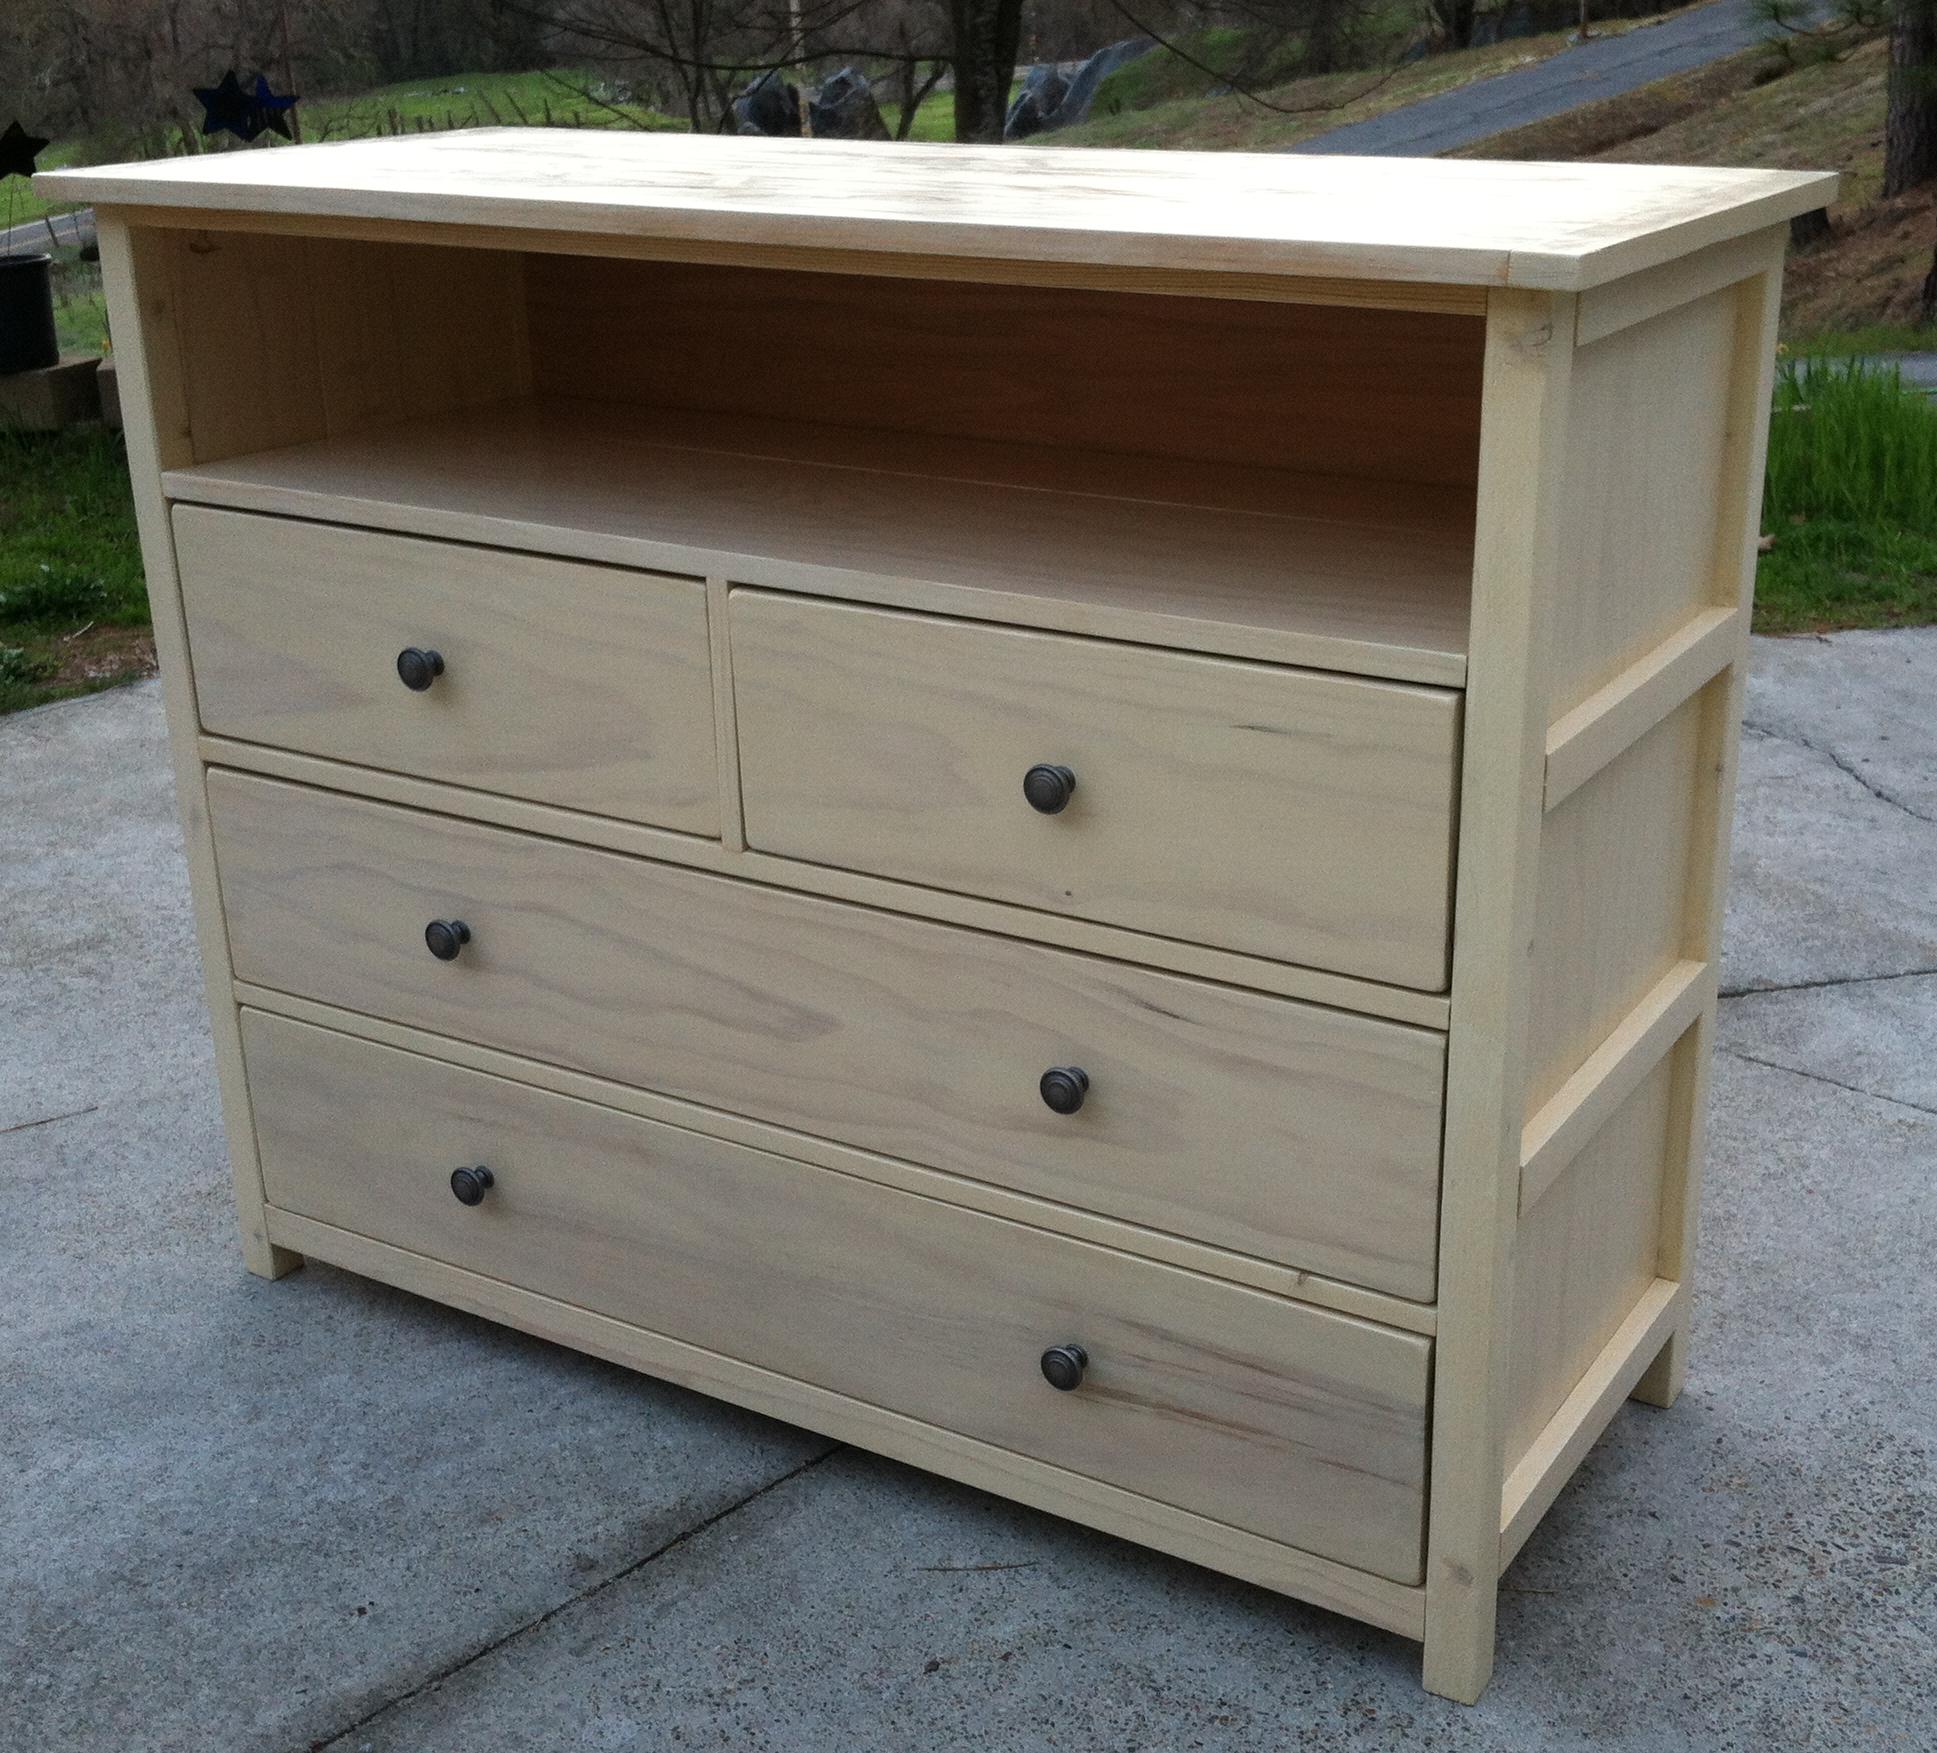
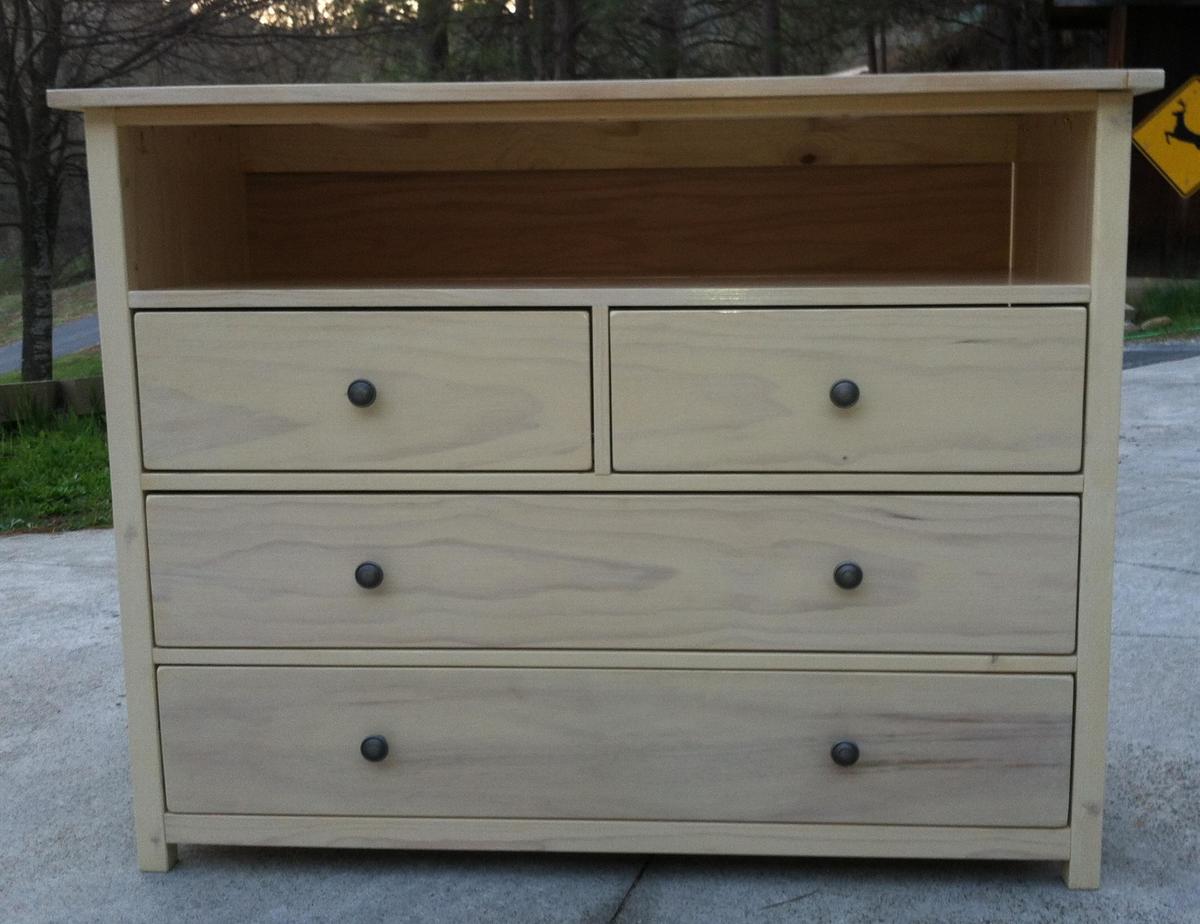
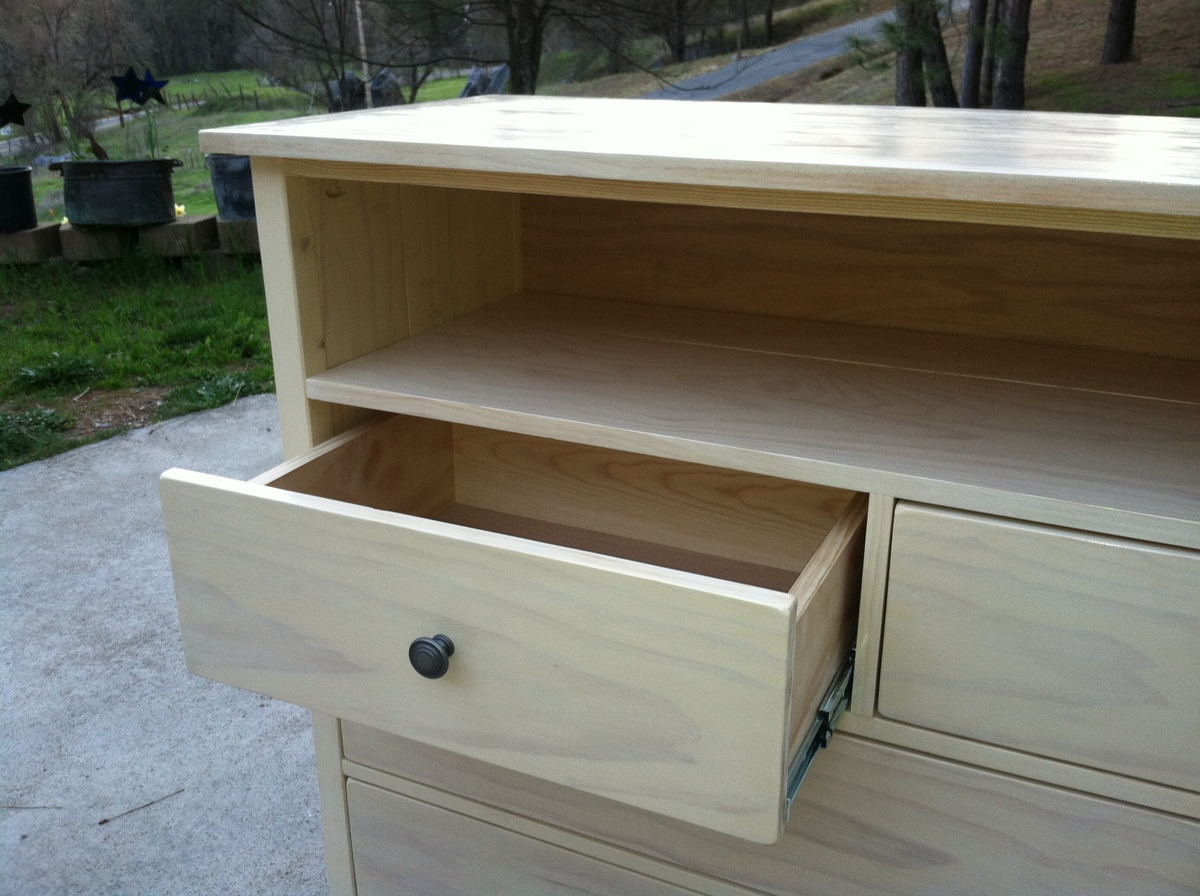
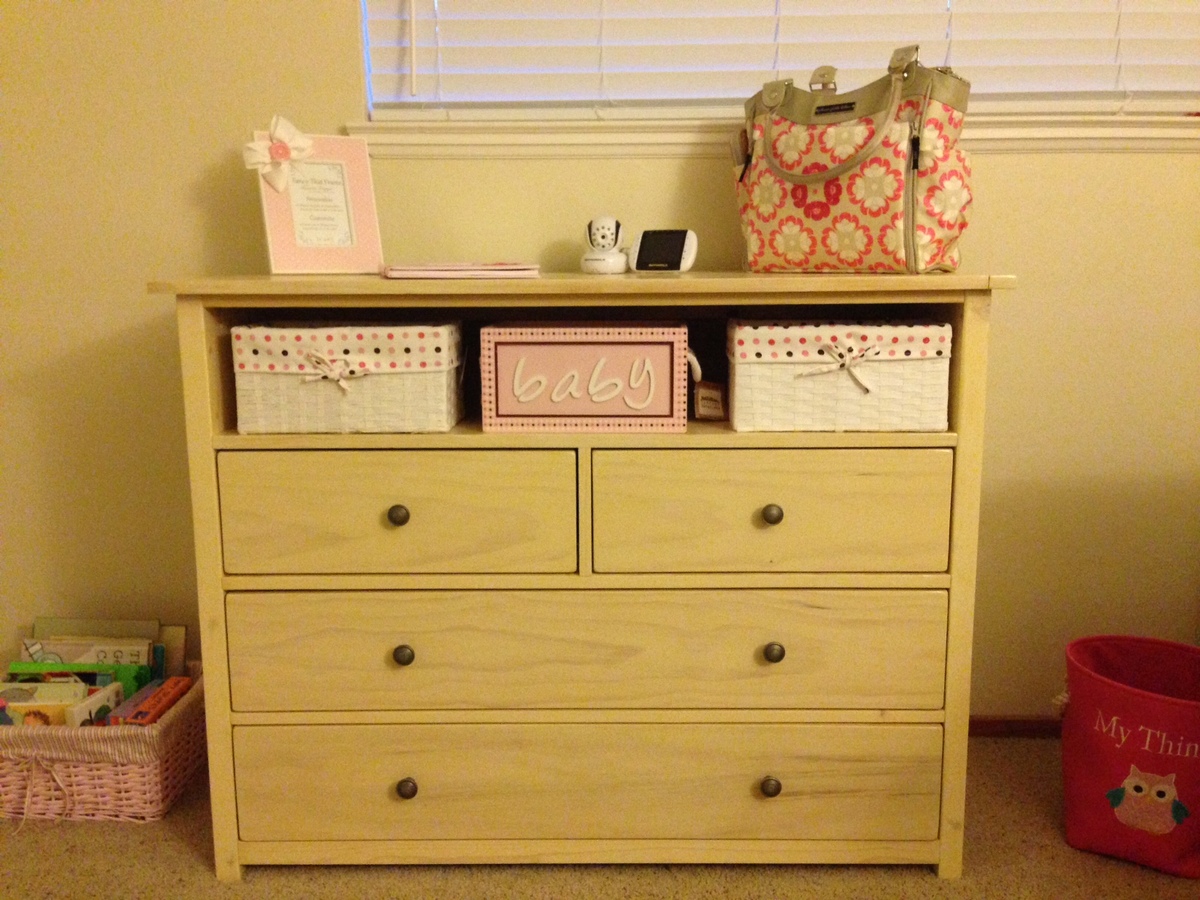
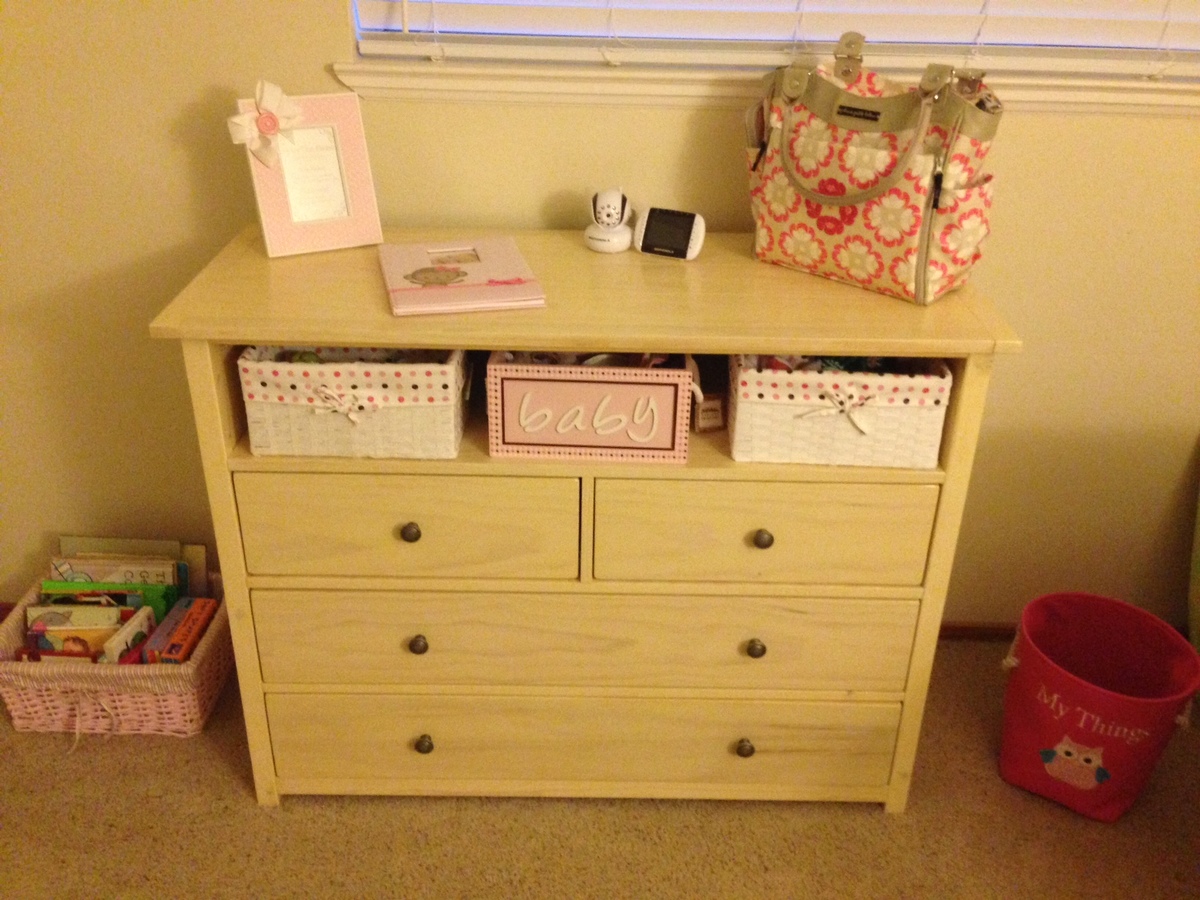
My friend, who is expecting a baby, asked me to build a changing table for her. She provided me with a couple of things on her wish-list. 1. to have a big enough top to change a baby (of course) 2. a cubby or cubbies for easy access to baby stuff 3. big enough drawers to house all those cute baby clothes. Well, she was given a couple of changing tables and the project just turned into a dresser. In any case, the Patrick Beach Cottage Dresser was a great design to work off of. This was my first build that I made for someone other than myself or my family. Every build becomes my favorite and this one is my newest favorite.
Wed, 03/26/2014 - 23:39
Wow! You did a gorgeous job & you're friend is very lucky to have received such a beautiful gift. Initially, when I saw you're photo, I thought it was a media dresser. The cubbies could also be used for TV components (DVD player, cable box, ect.) I can only hope to make such a great piece someday.
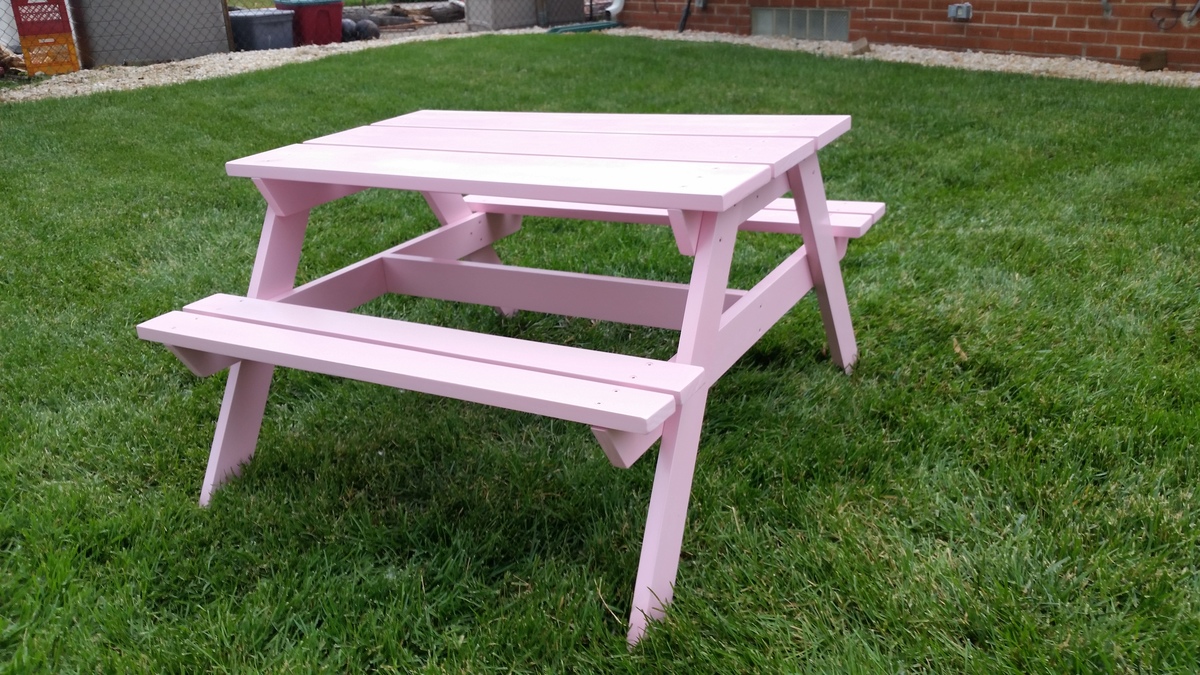
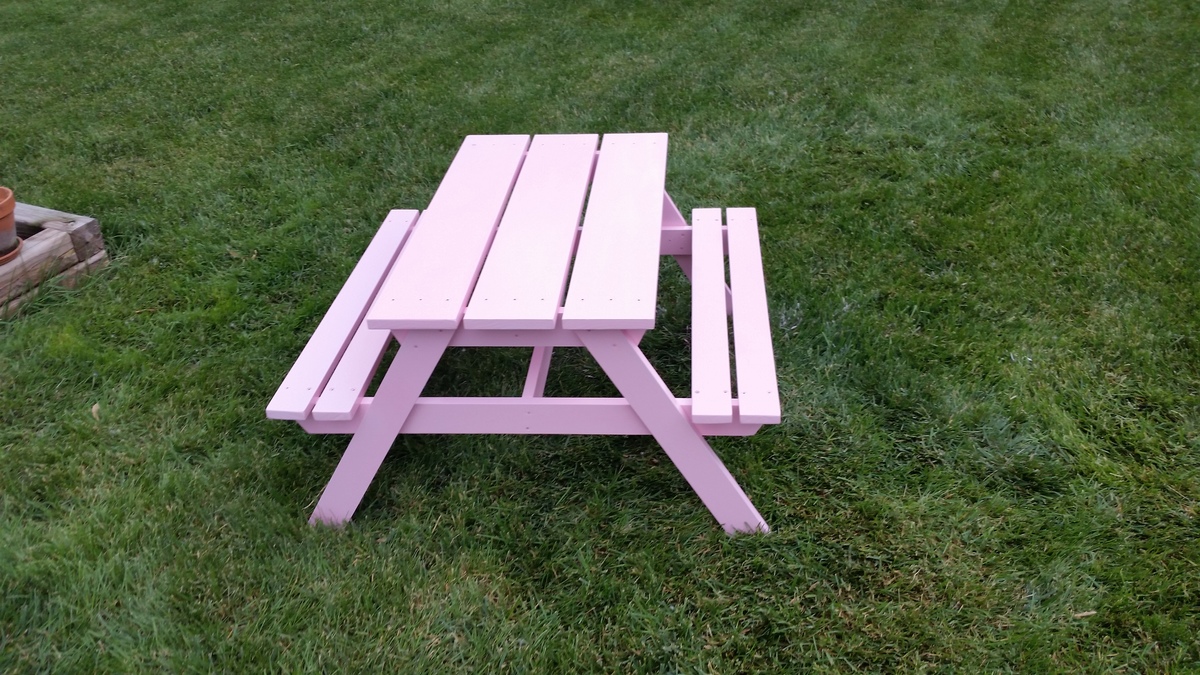
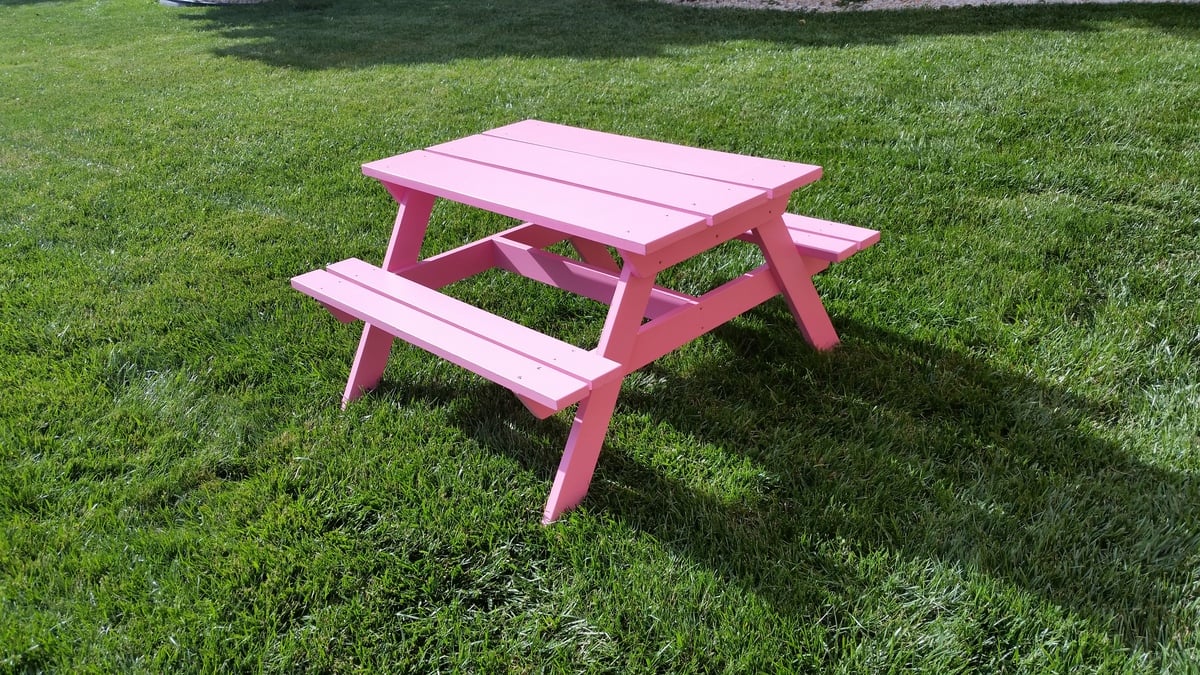
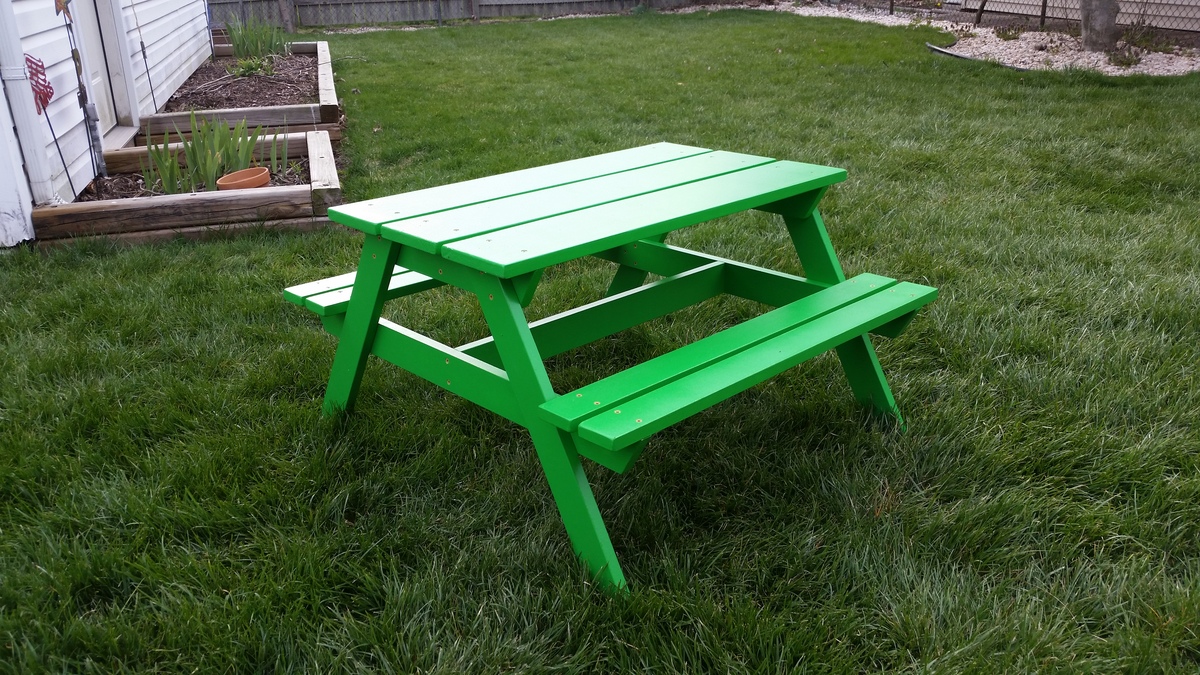
After discovering these plans, I was excited to build one of these tables. But my little one was not big enough yet, so I've been building them for friends. When their kids hit 2, I give them a table for their birthday. All the kids (and parents) have loved them. Photos showing tables #1, #2, and #4. Built #5 and #6 this week. If I can go back and add in a photo afterwards, I'll post table #6 in blue. Next up, table #7 for my little one. I might tweak it a little so I can add an umbrella, too. Thanks for the great plans Ana!
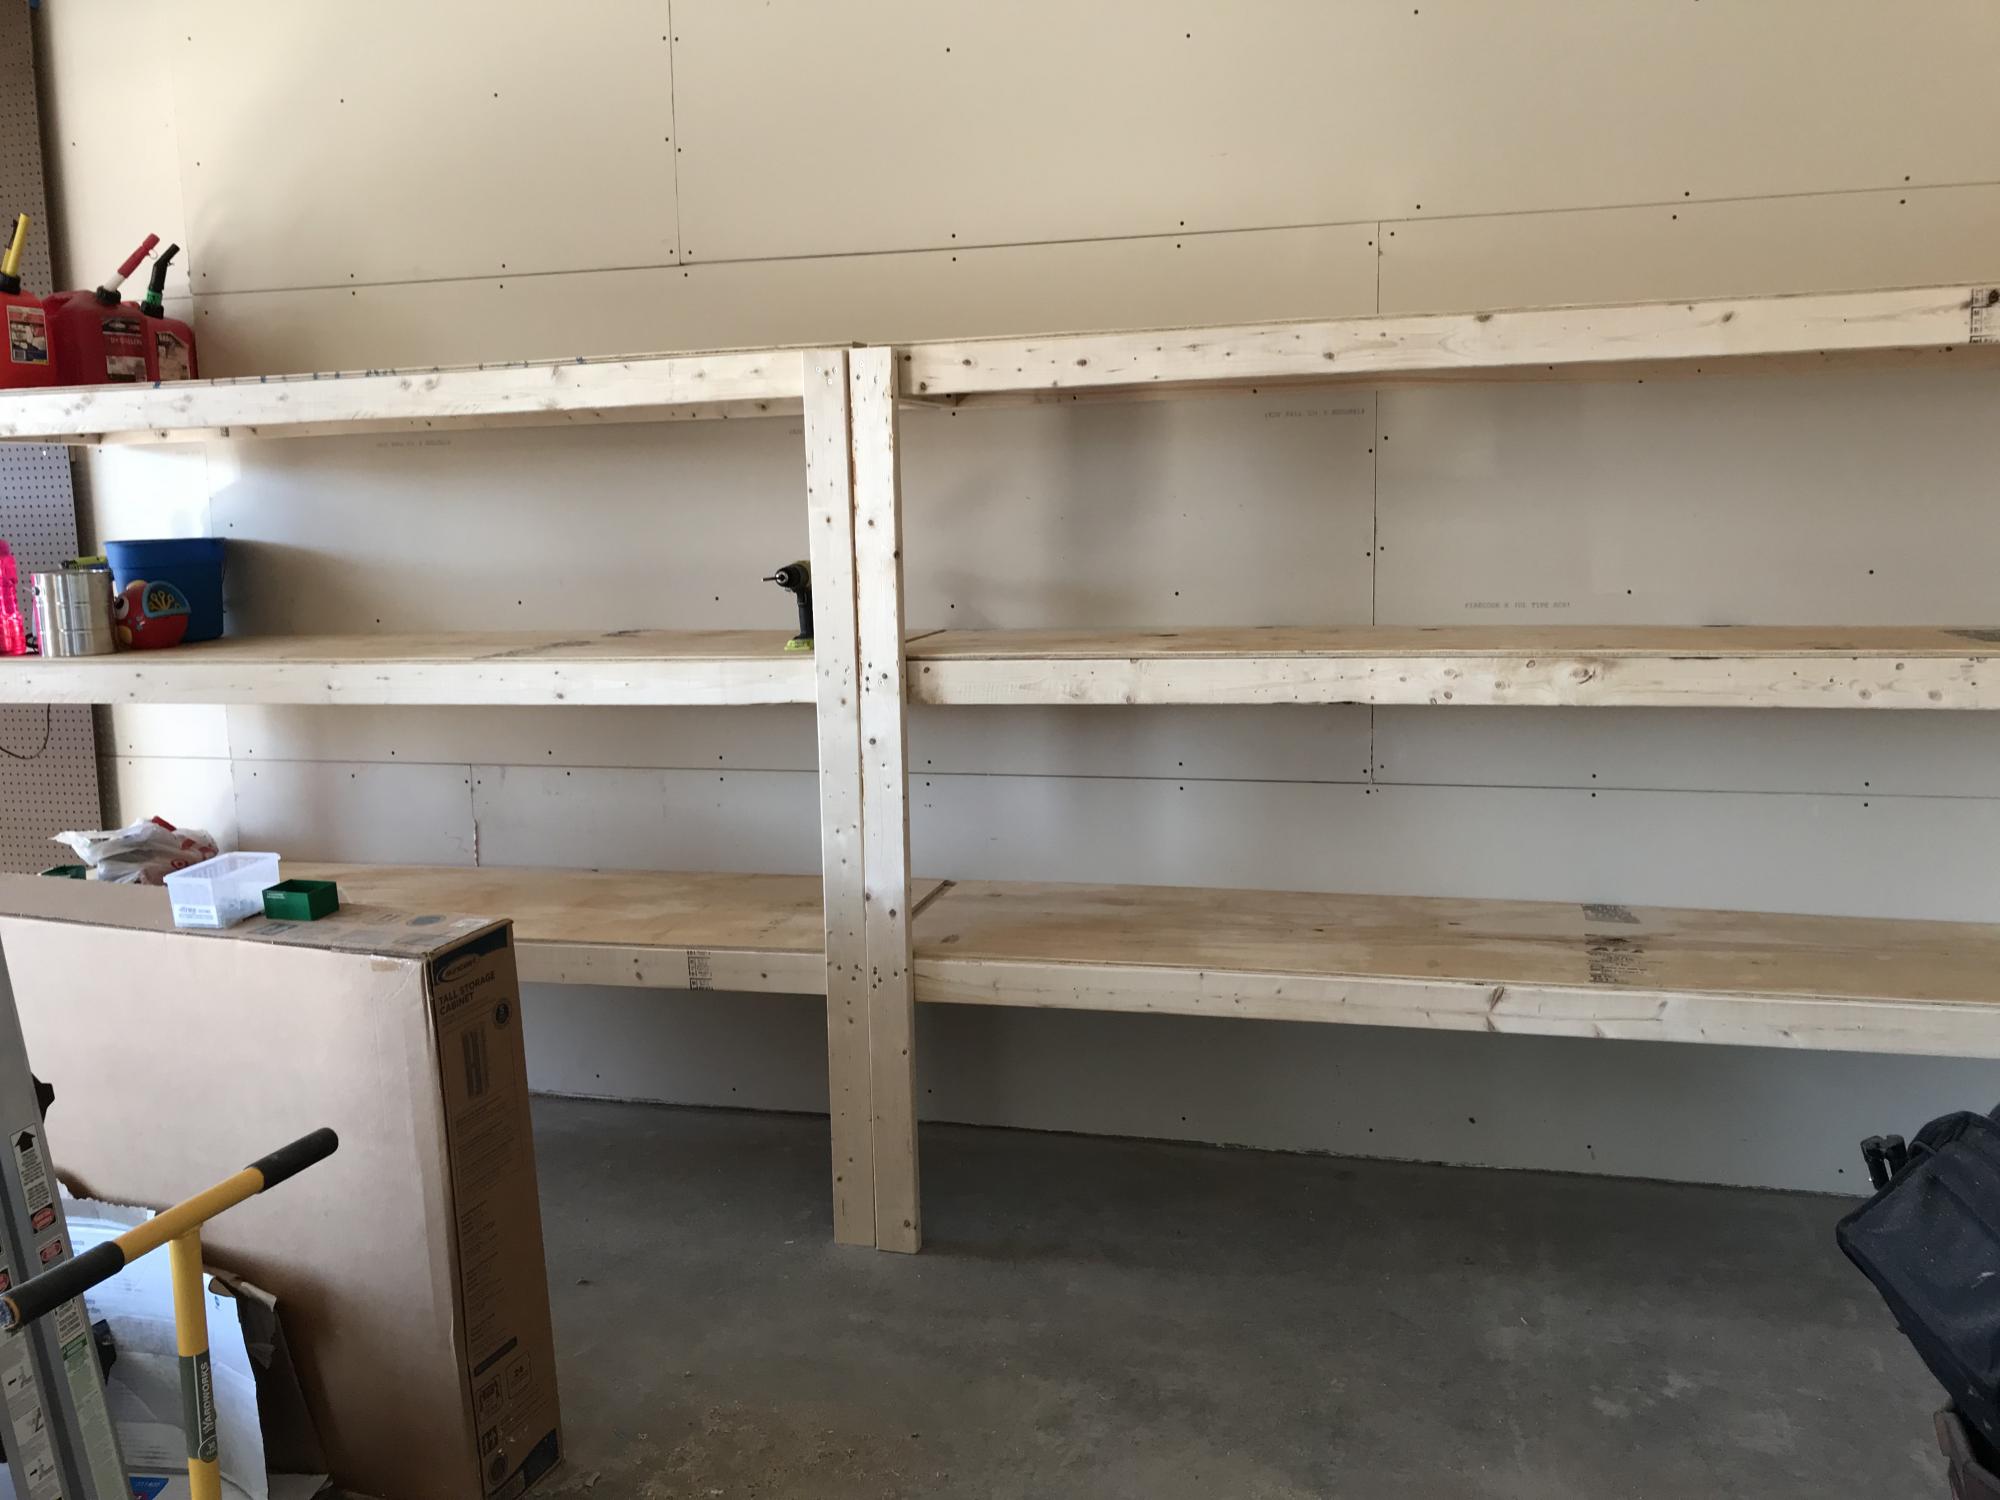
Easy, quick garage shelves!


Comments
dswanson1972
Wed, 11/20/2024 - 19:49
Keeps the kid safe
Keeps the kid safe