Outdoor Wood Chair

New Deck Chair
Built from Plan(s)
New Deck Chair
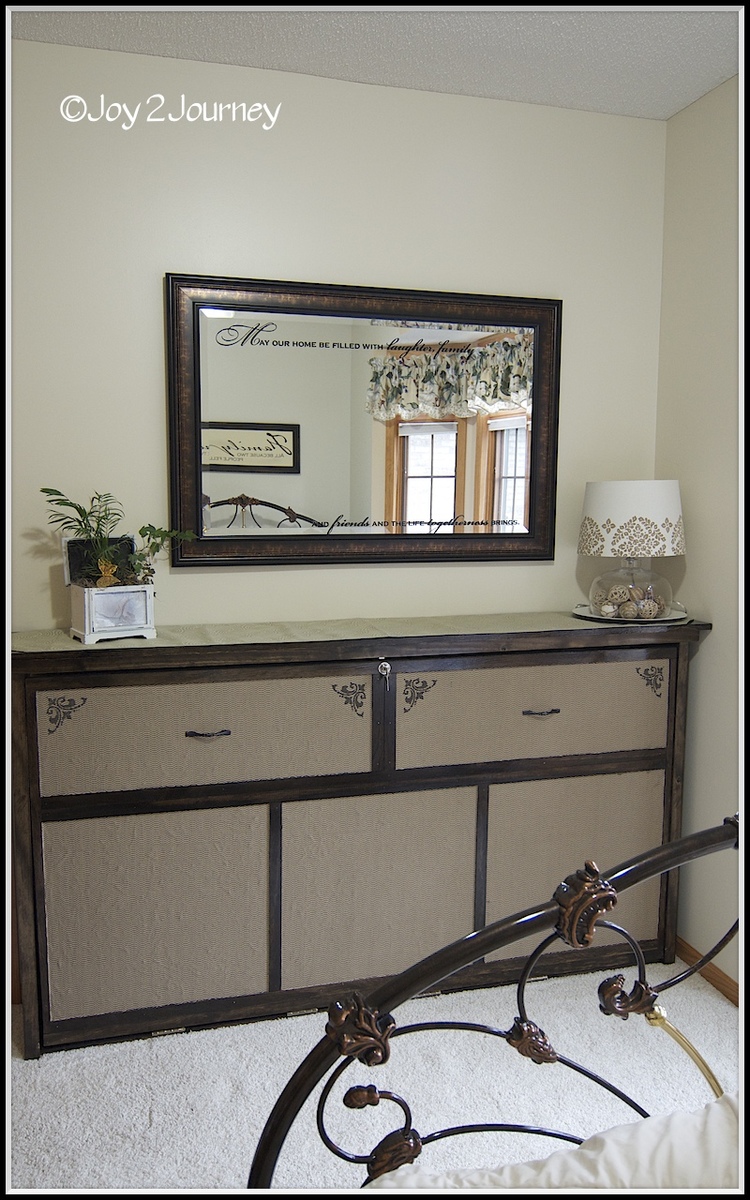
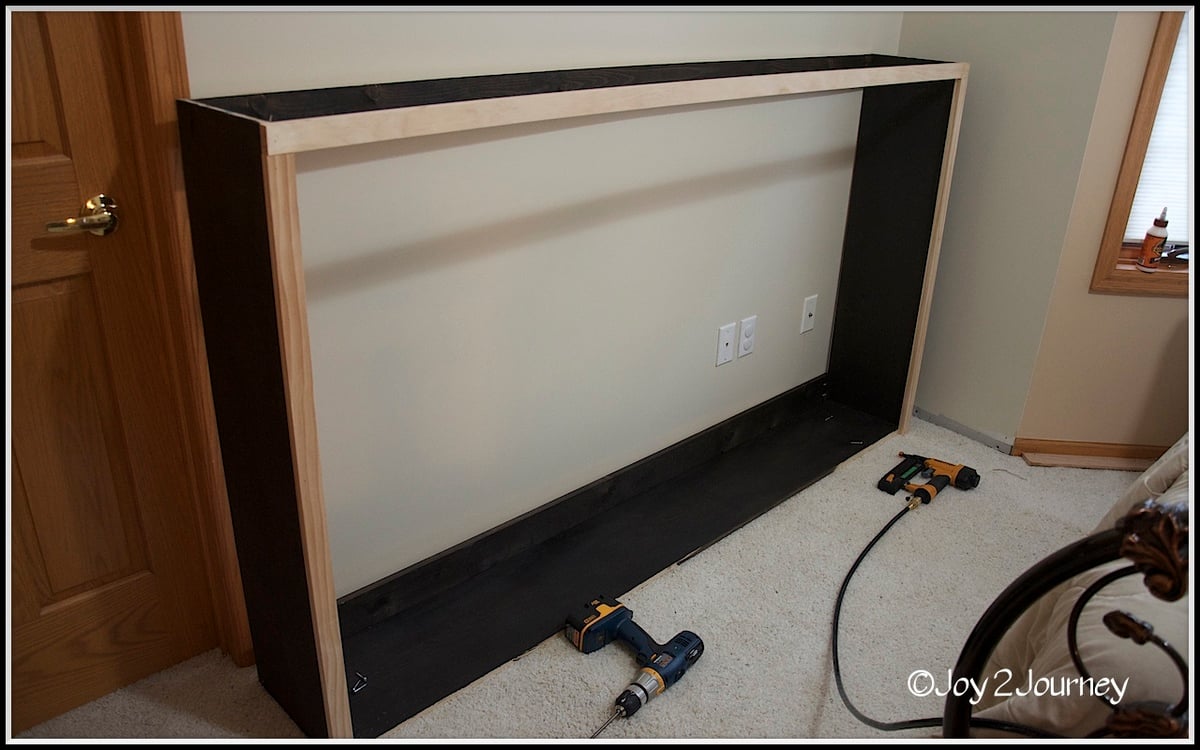
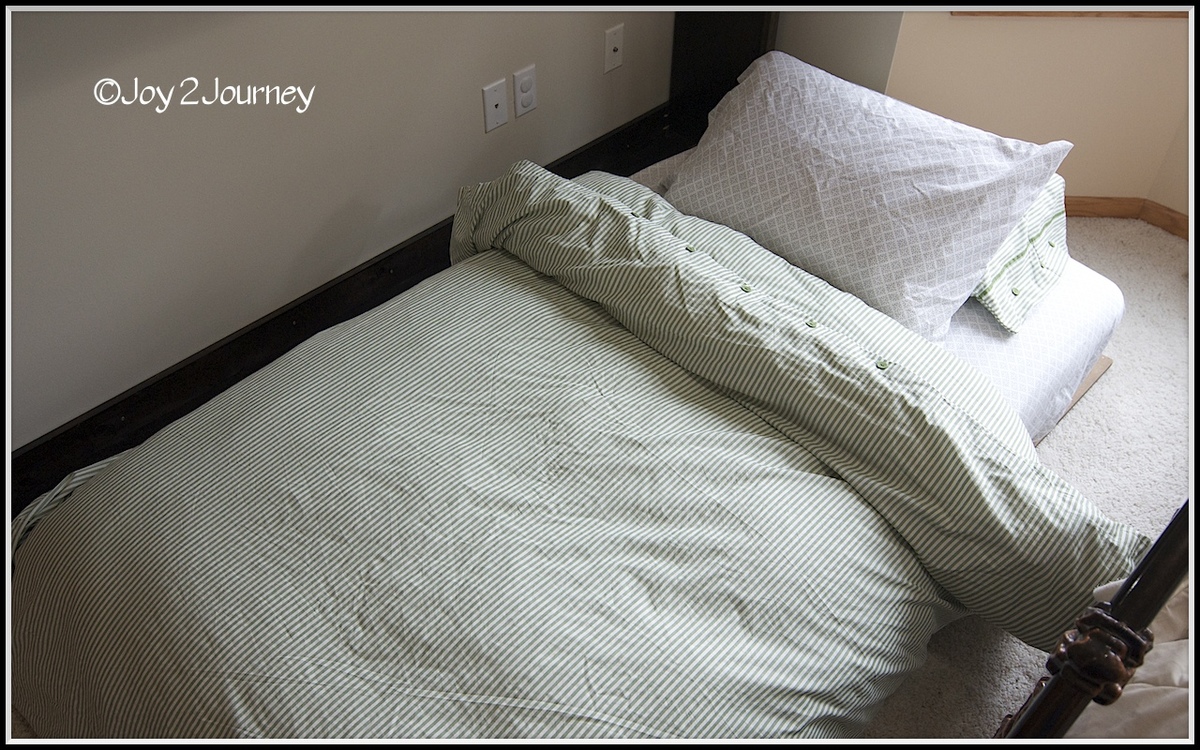
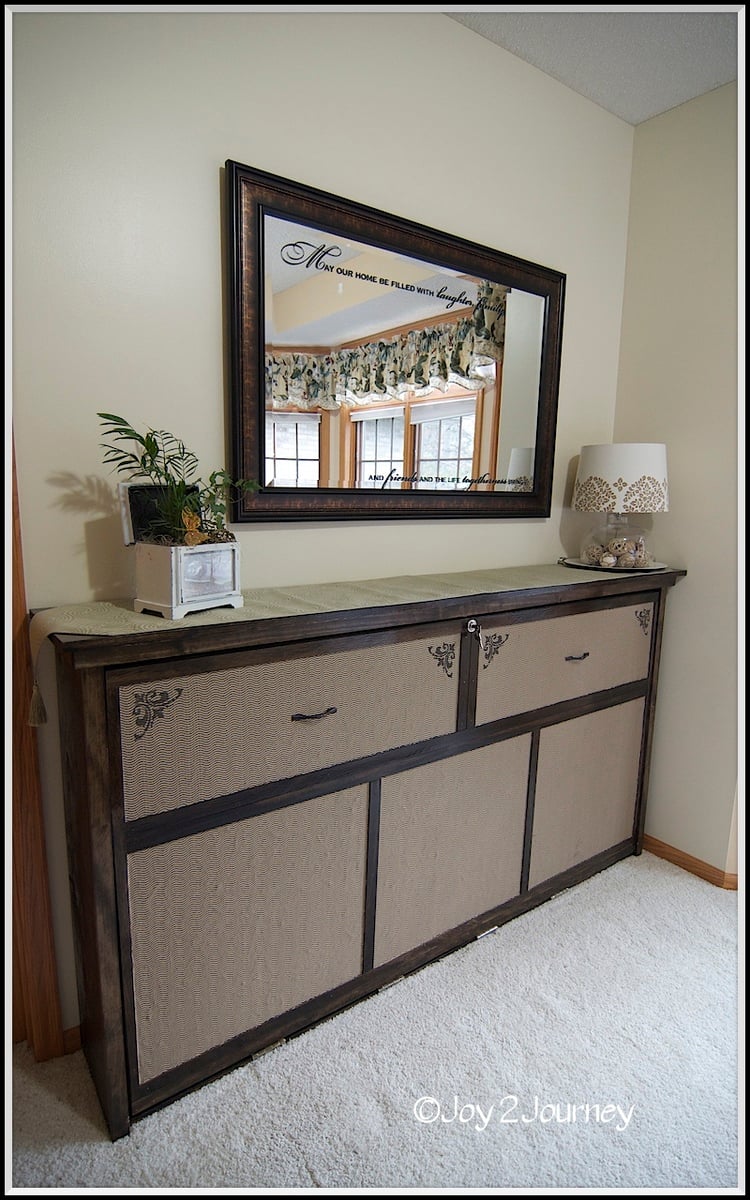
I used the Murphy Bed Plan that Ana had on her website. I modified it so that it would look more like a dresser and would fit into the space that I have. It is perfect and I have used it myself just to see if it was comfy. It was!!! :)
This project took me longer to do as I had a creativity issue that you can read about here .. http://joy2journey.blogspot.com/2012/04/m-is-for-murphy-bed-its-finishe…


Sun, 04/15/2012 - 11:37
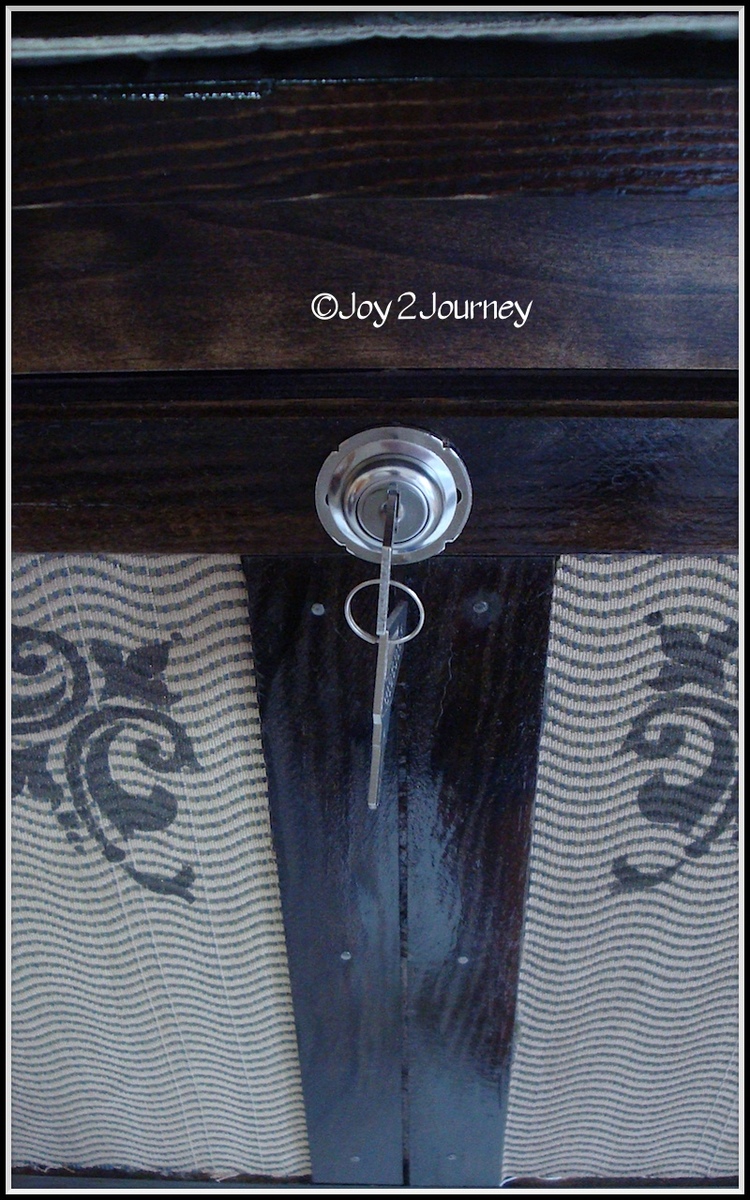
What an amazing job! Really looks just like a dresser. The lock closure is a great idea for keeping it securely closed. Beautiful finish, and the fabric and stencils are so creative!

In reply to Amazing job! by JoanneS
Sun, 04/15/2012 - 11:54
I was afraid little hands would pull it open ... hence the idea of a lock. Now I just have to spray paint it to have it blend in :)
bj
Fri, 12/14/2012 - 03:36
Things derived in this material will surely have some impact on the process of making of a classical overview. You should bookmark this page and http://allfreepapers.blogspot.com for the future. The question about it is a very important for the contemporary society. They have become proclaimed national standards recently.
Wed, 02/13/2013 - 11:42
Just curious did you buy the jig called for? If not what did you use instead? Camille
Wed, 01/08/2014 - 12:28
You did a fabulous job on your murphy bed. Good to know it can be made horizontally too. Thanks for the inspiration! =]

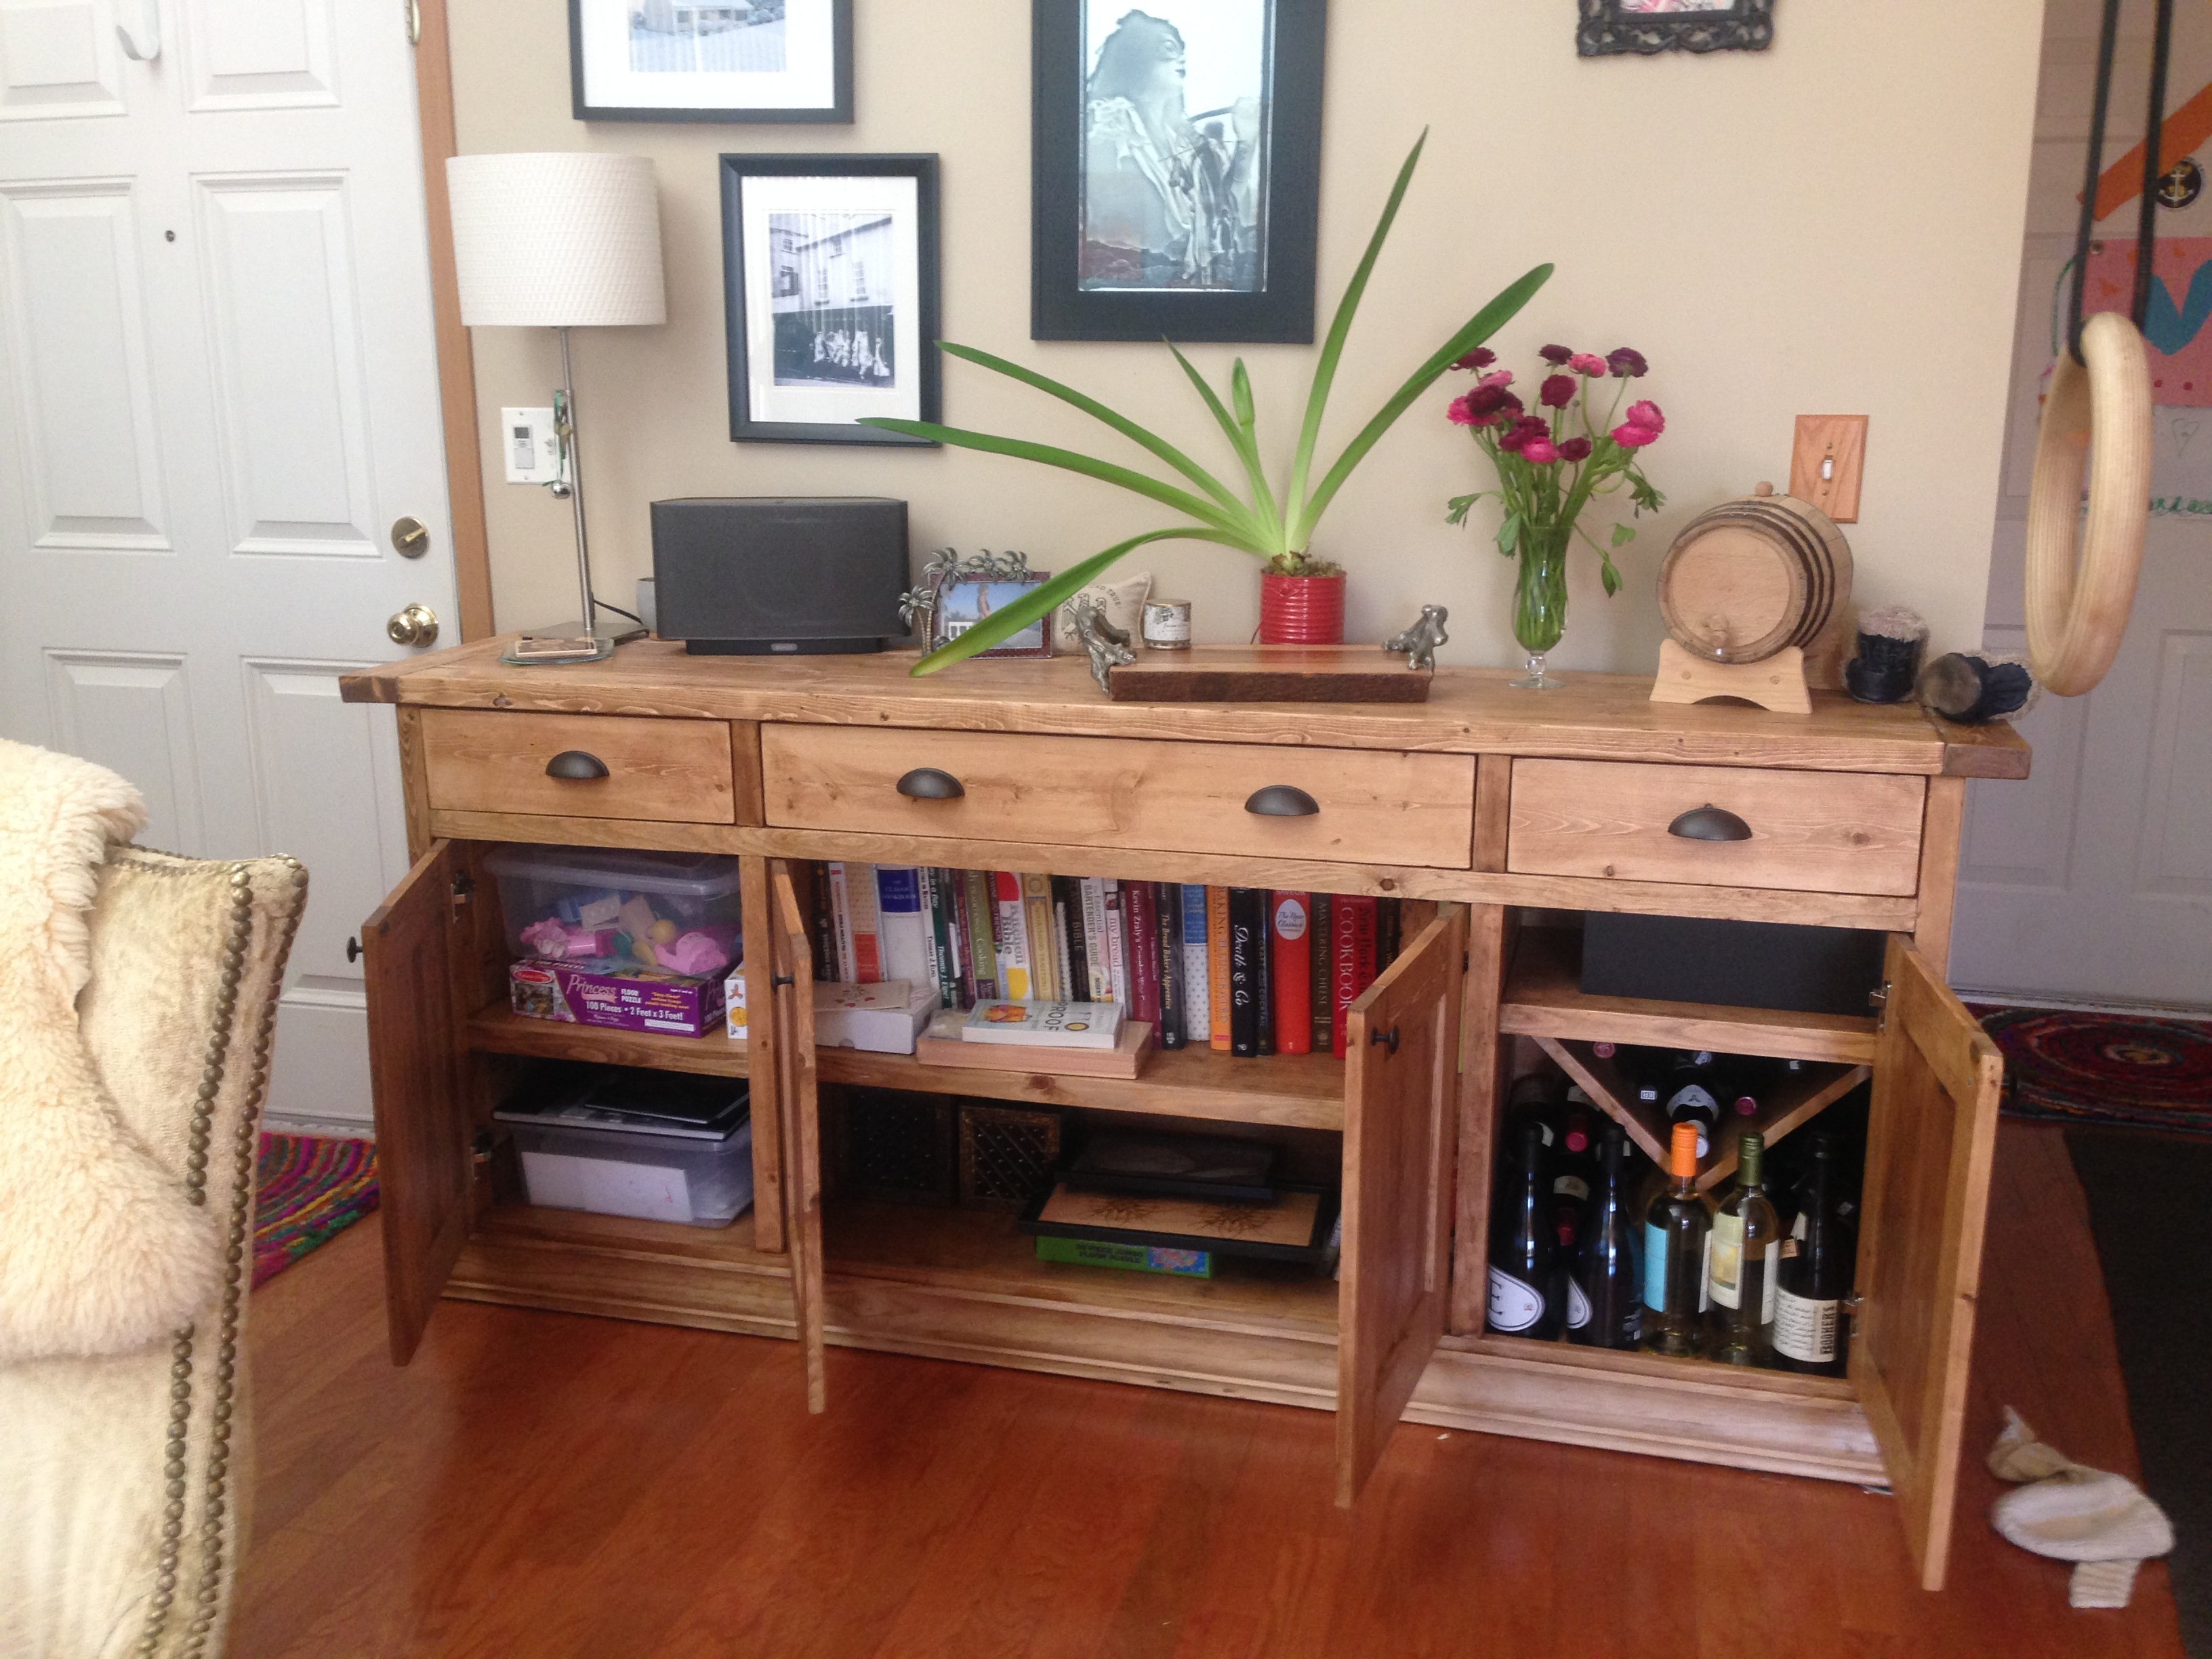
Inspired by both Ana's Industrial Closet design and the Sliding Mirror Cabinet.
Making maximum use out of a small space, bought a mirror from Ikea and removed it from the existing frame, everything made in virgin wood from DIY store. Two tier clothes rail to separate big coats from other clothes, two height shelf system to accomodate sloped ceiling. A lot of fun to make!
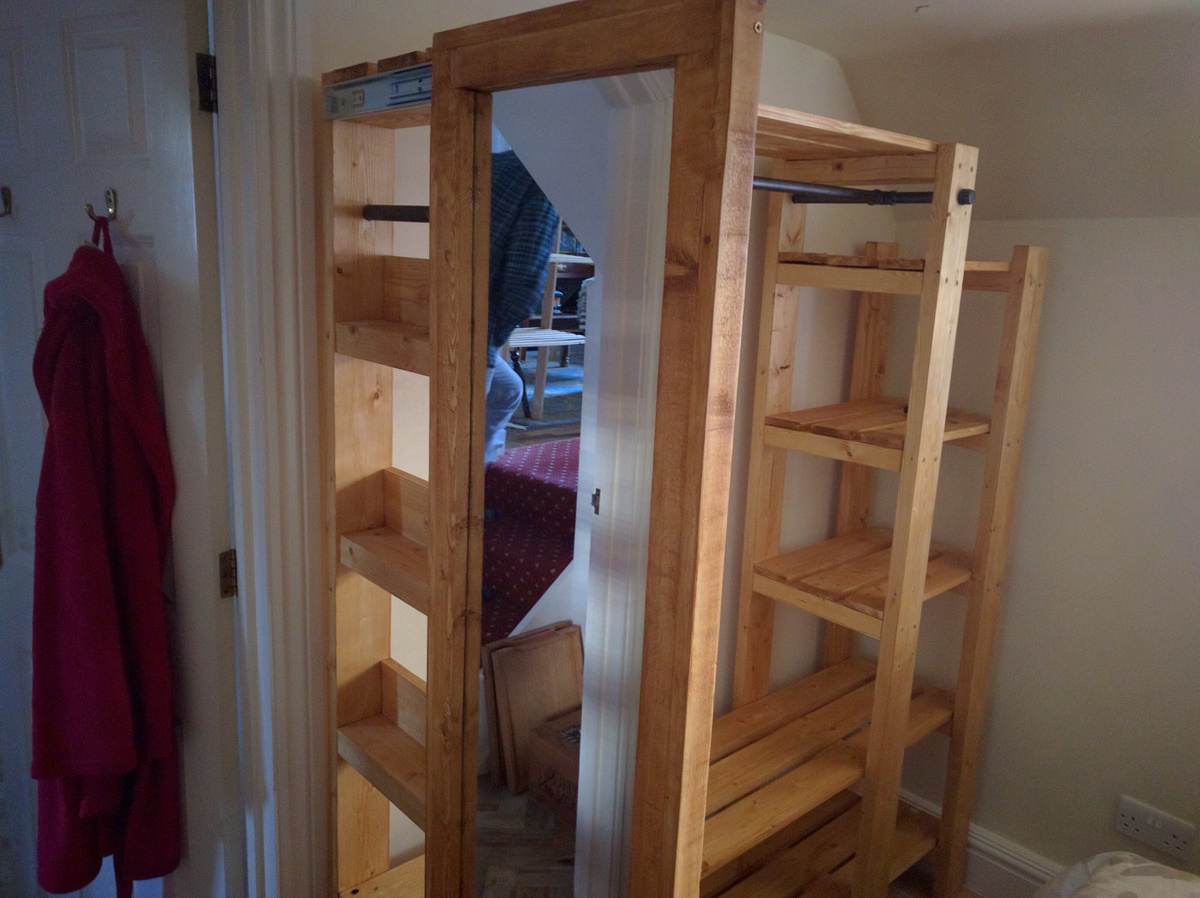

Just finished this tonight. Decided to make it a little wider than the plans. Added bead board on the back. I also made the top shelf a little larger so I can come back later and add some LED lights on it. Because I made the top shelf bigger I wanted to add the angled supports. That’s why I didn’t do an “x” on the bottom so the shelf support would mimick the slanted piece in the bottom.
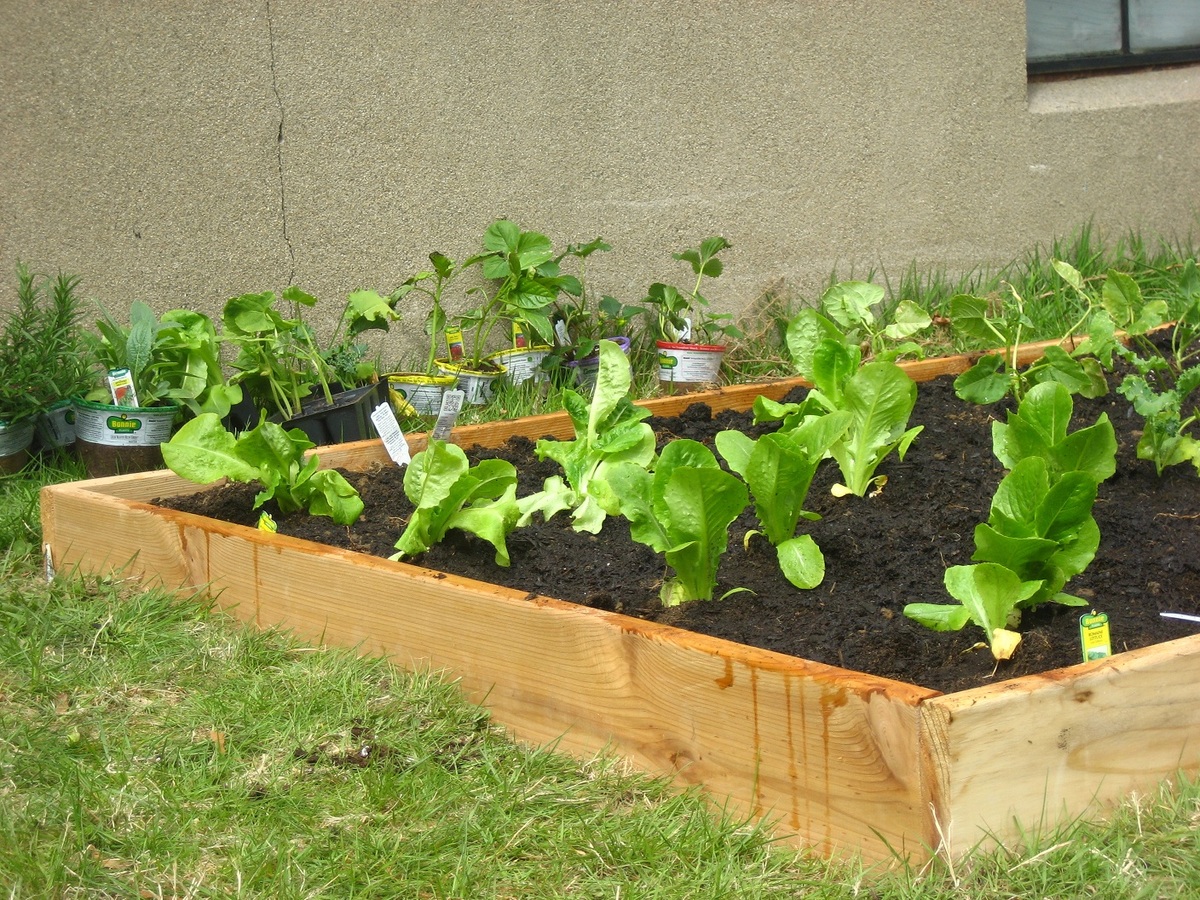
We made a very simple raised cedar bed for fairly cheap considering the size and inspired by Ana's plans although it's a much larger and simpler design. The box is 8x4 feet, made of cedar kregged together and the wood only cost $12. My simple tip to save money on wood, specifically for a project where the wood quality is not super important, is to ask the store to mark down the "meh" pieces. Lots more pictures and info on my blog.
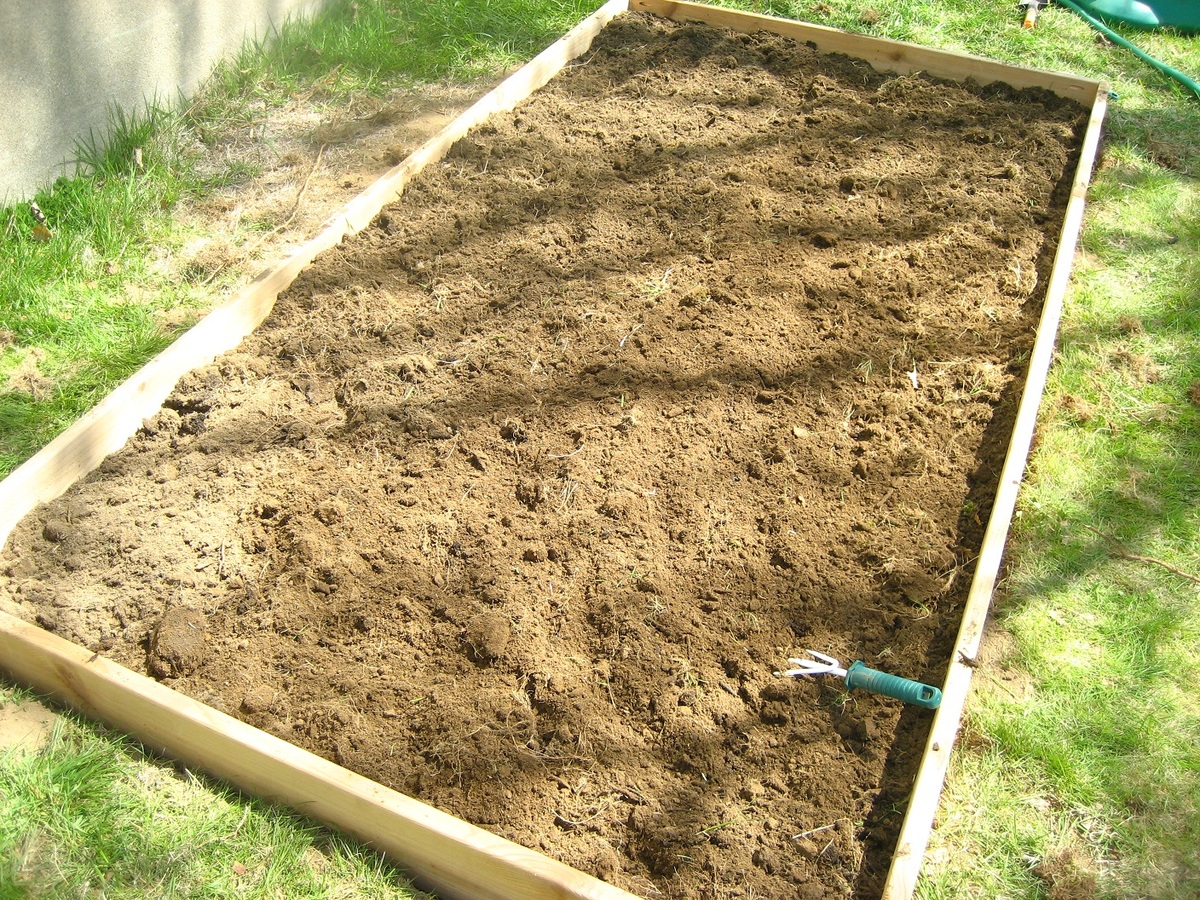
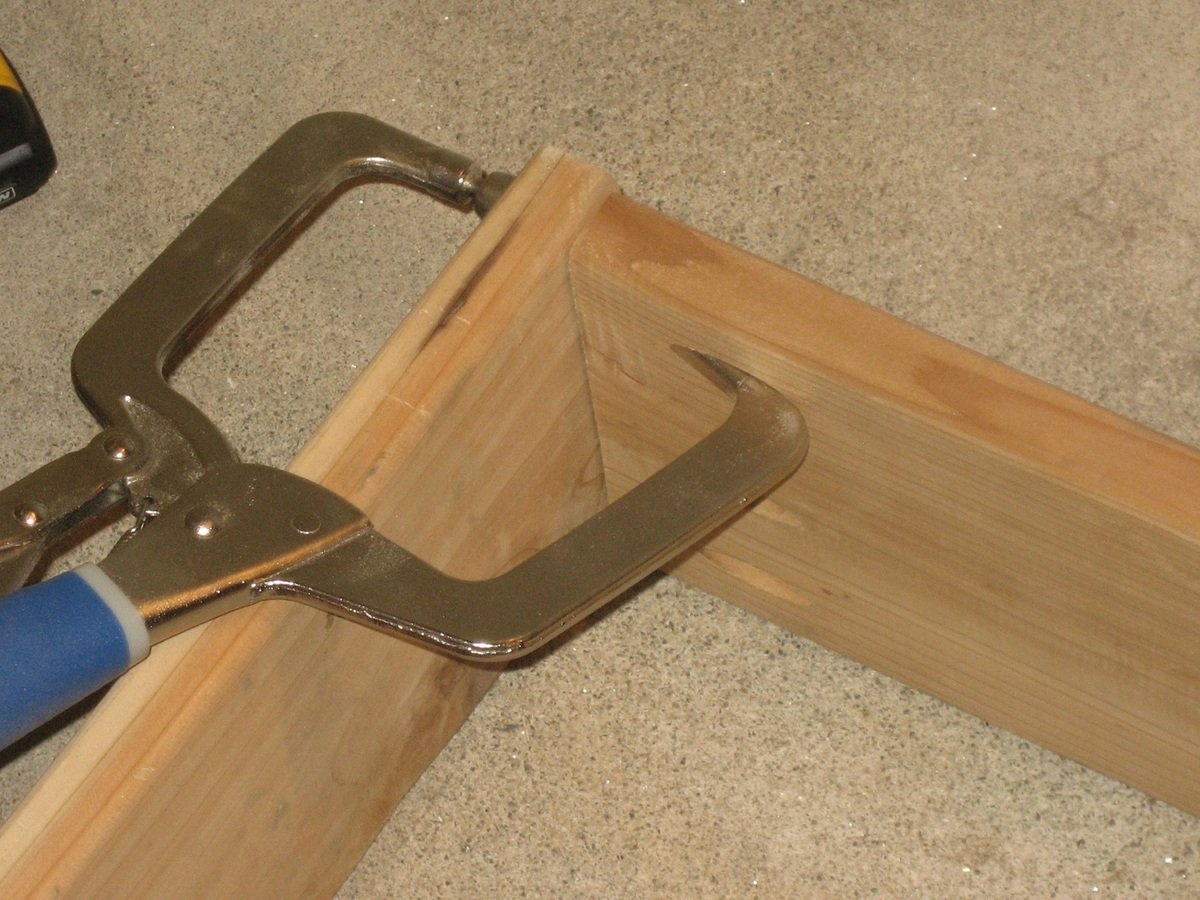
The plans were pretty simple to follow, I did change the way I set the bottom shelf in because it wasn't very stable and I was worried it would eventually dip in the middle. I screwed some pieces of scrap wood onto the back to hold it together better and then built a ledge for it to sit on around the bottom. After that I screwed it into the and BAM.. much more stable..
Sat, 09/06/2014 - 05:41
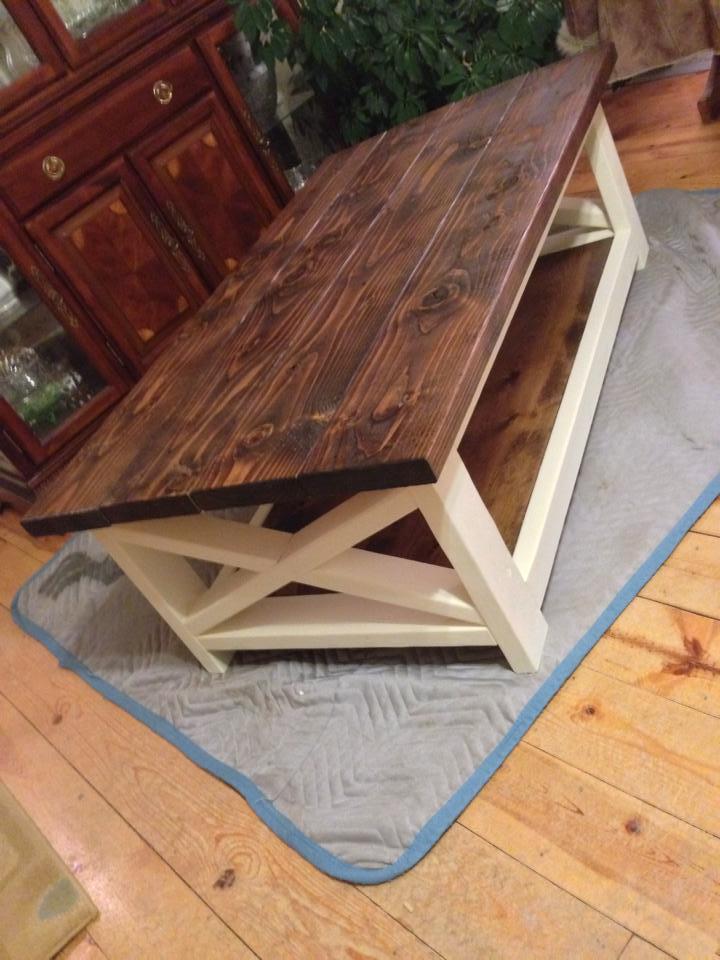
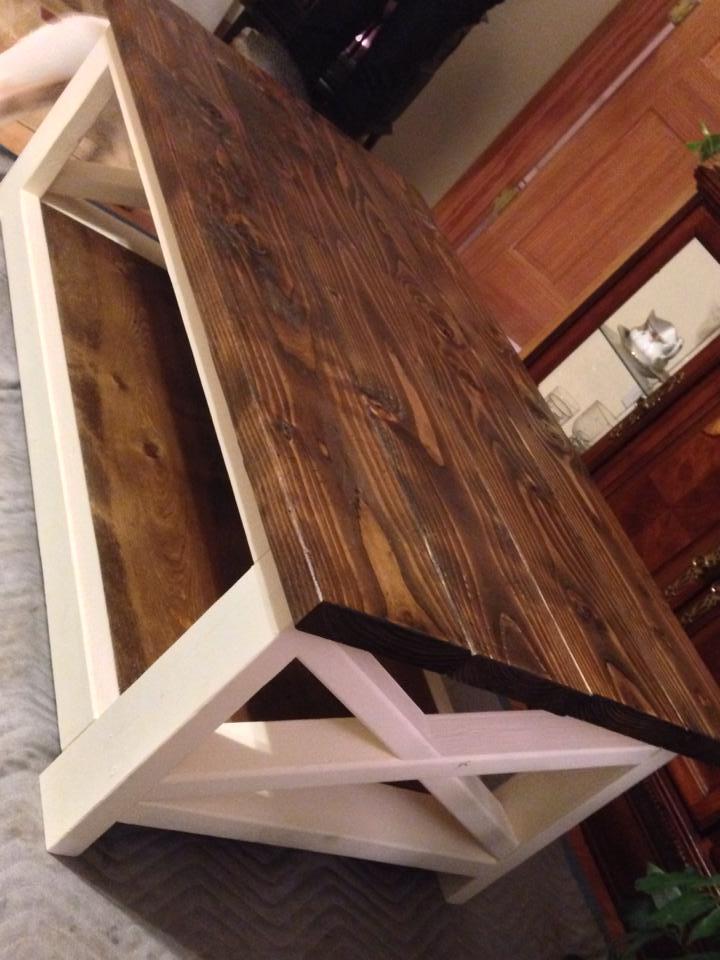
I would like to have the detailed plans for this too!! I have looked everywhere for the perfect coffee table for my screened in porch and here it is.... I'm so excited!!!
Sat, 09/06/2014 - 08:28
This looks like the plan you want:
http://ana-white.com/2012/07/plans/rustic-x-coffee-table
To find this, Under Plans, I did a search with Rustic X as the search term, and under Plans by Project type selected Coffee Table and clicked "Apply".
Ana has a lot of Rustic X plans, so you can even make lovely matching pieces if you like. Happy building!
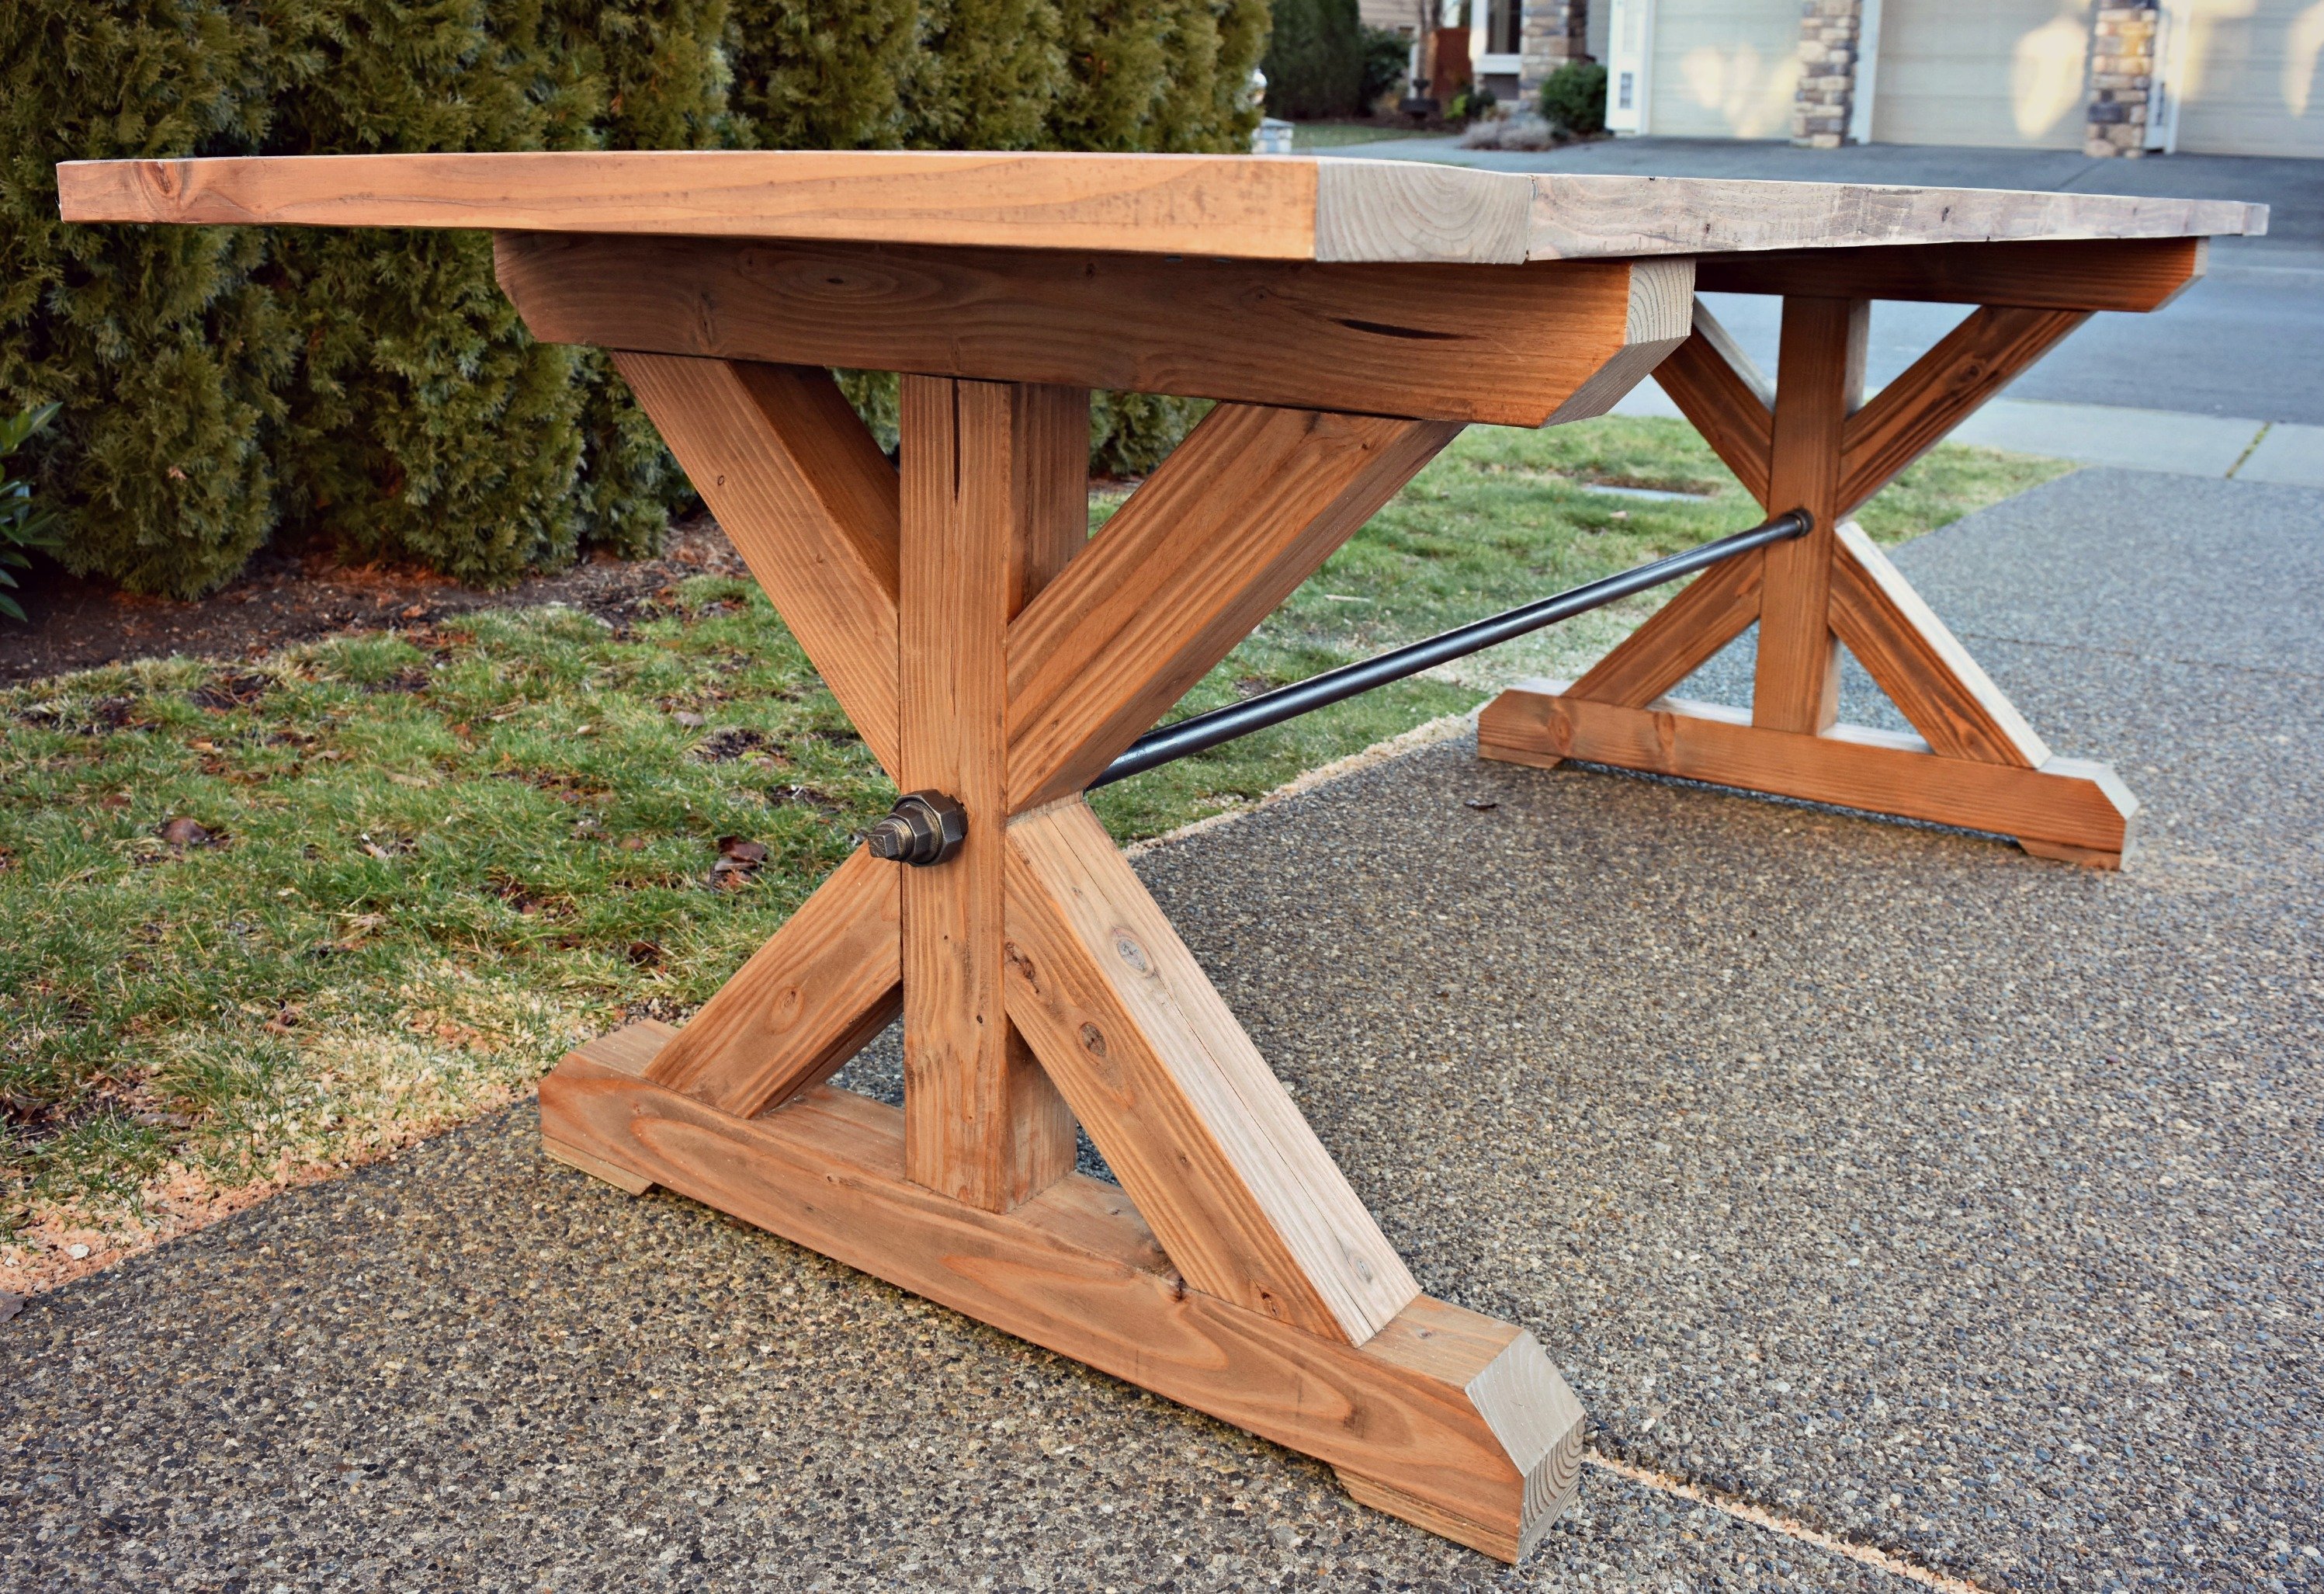
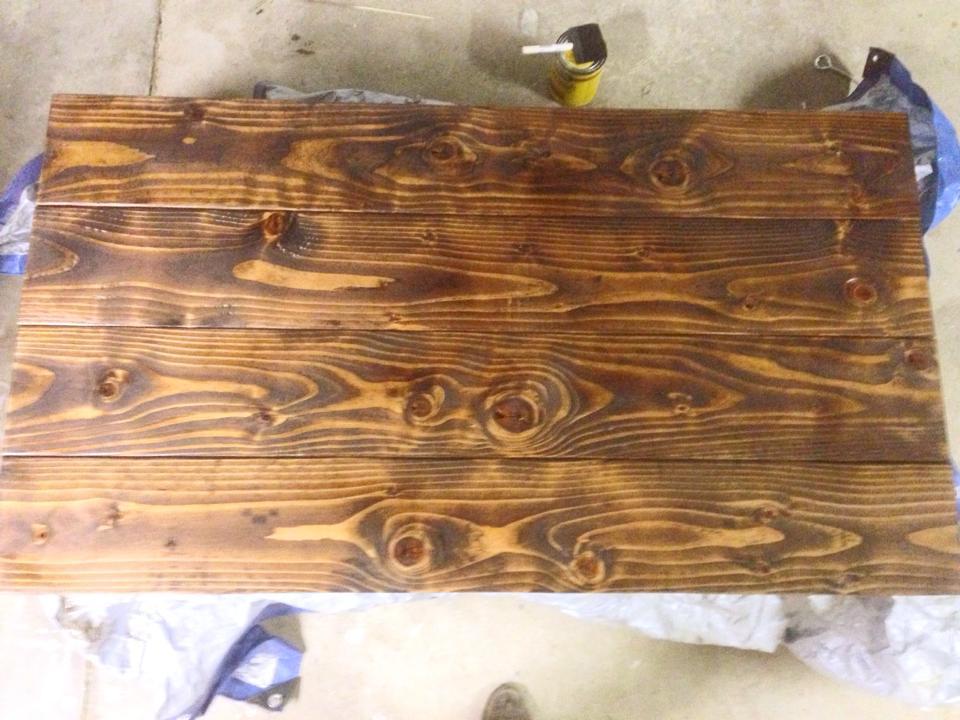
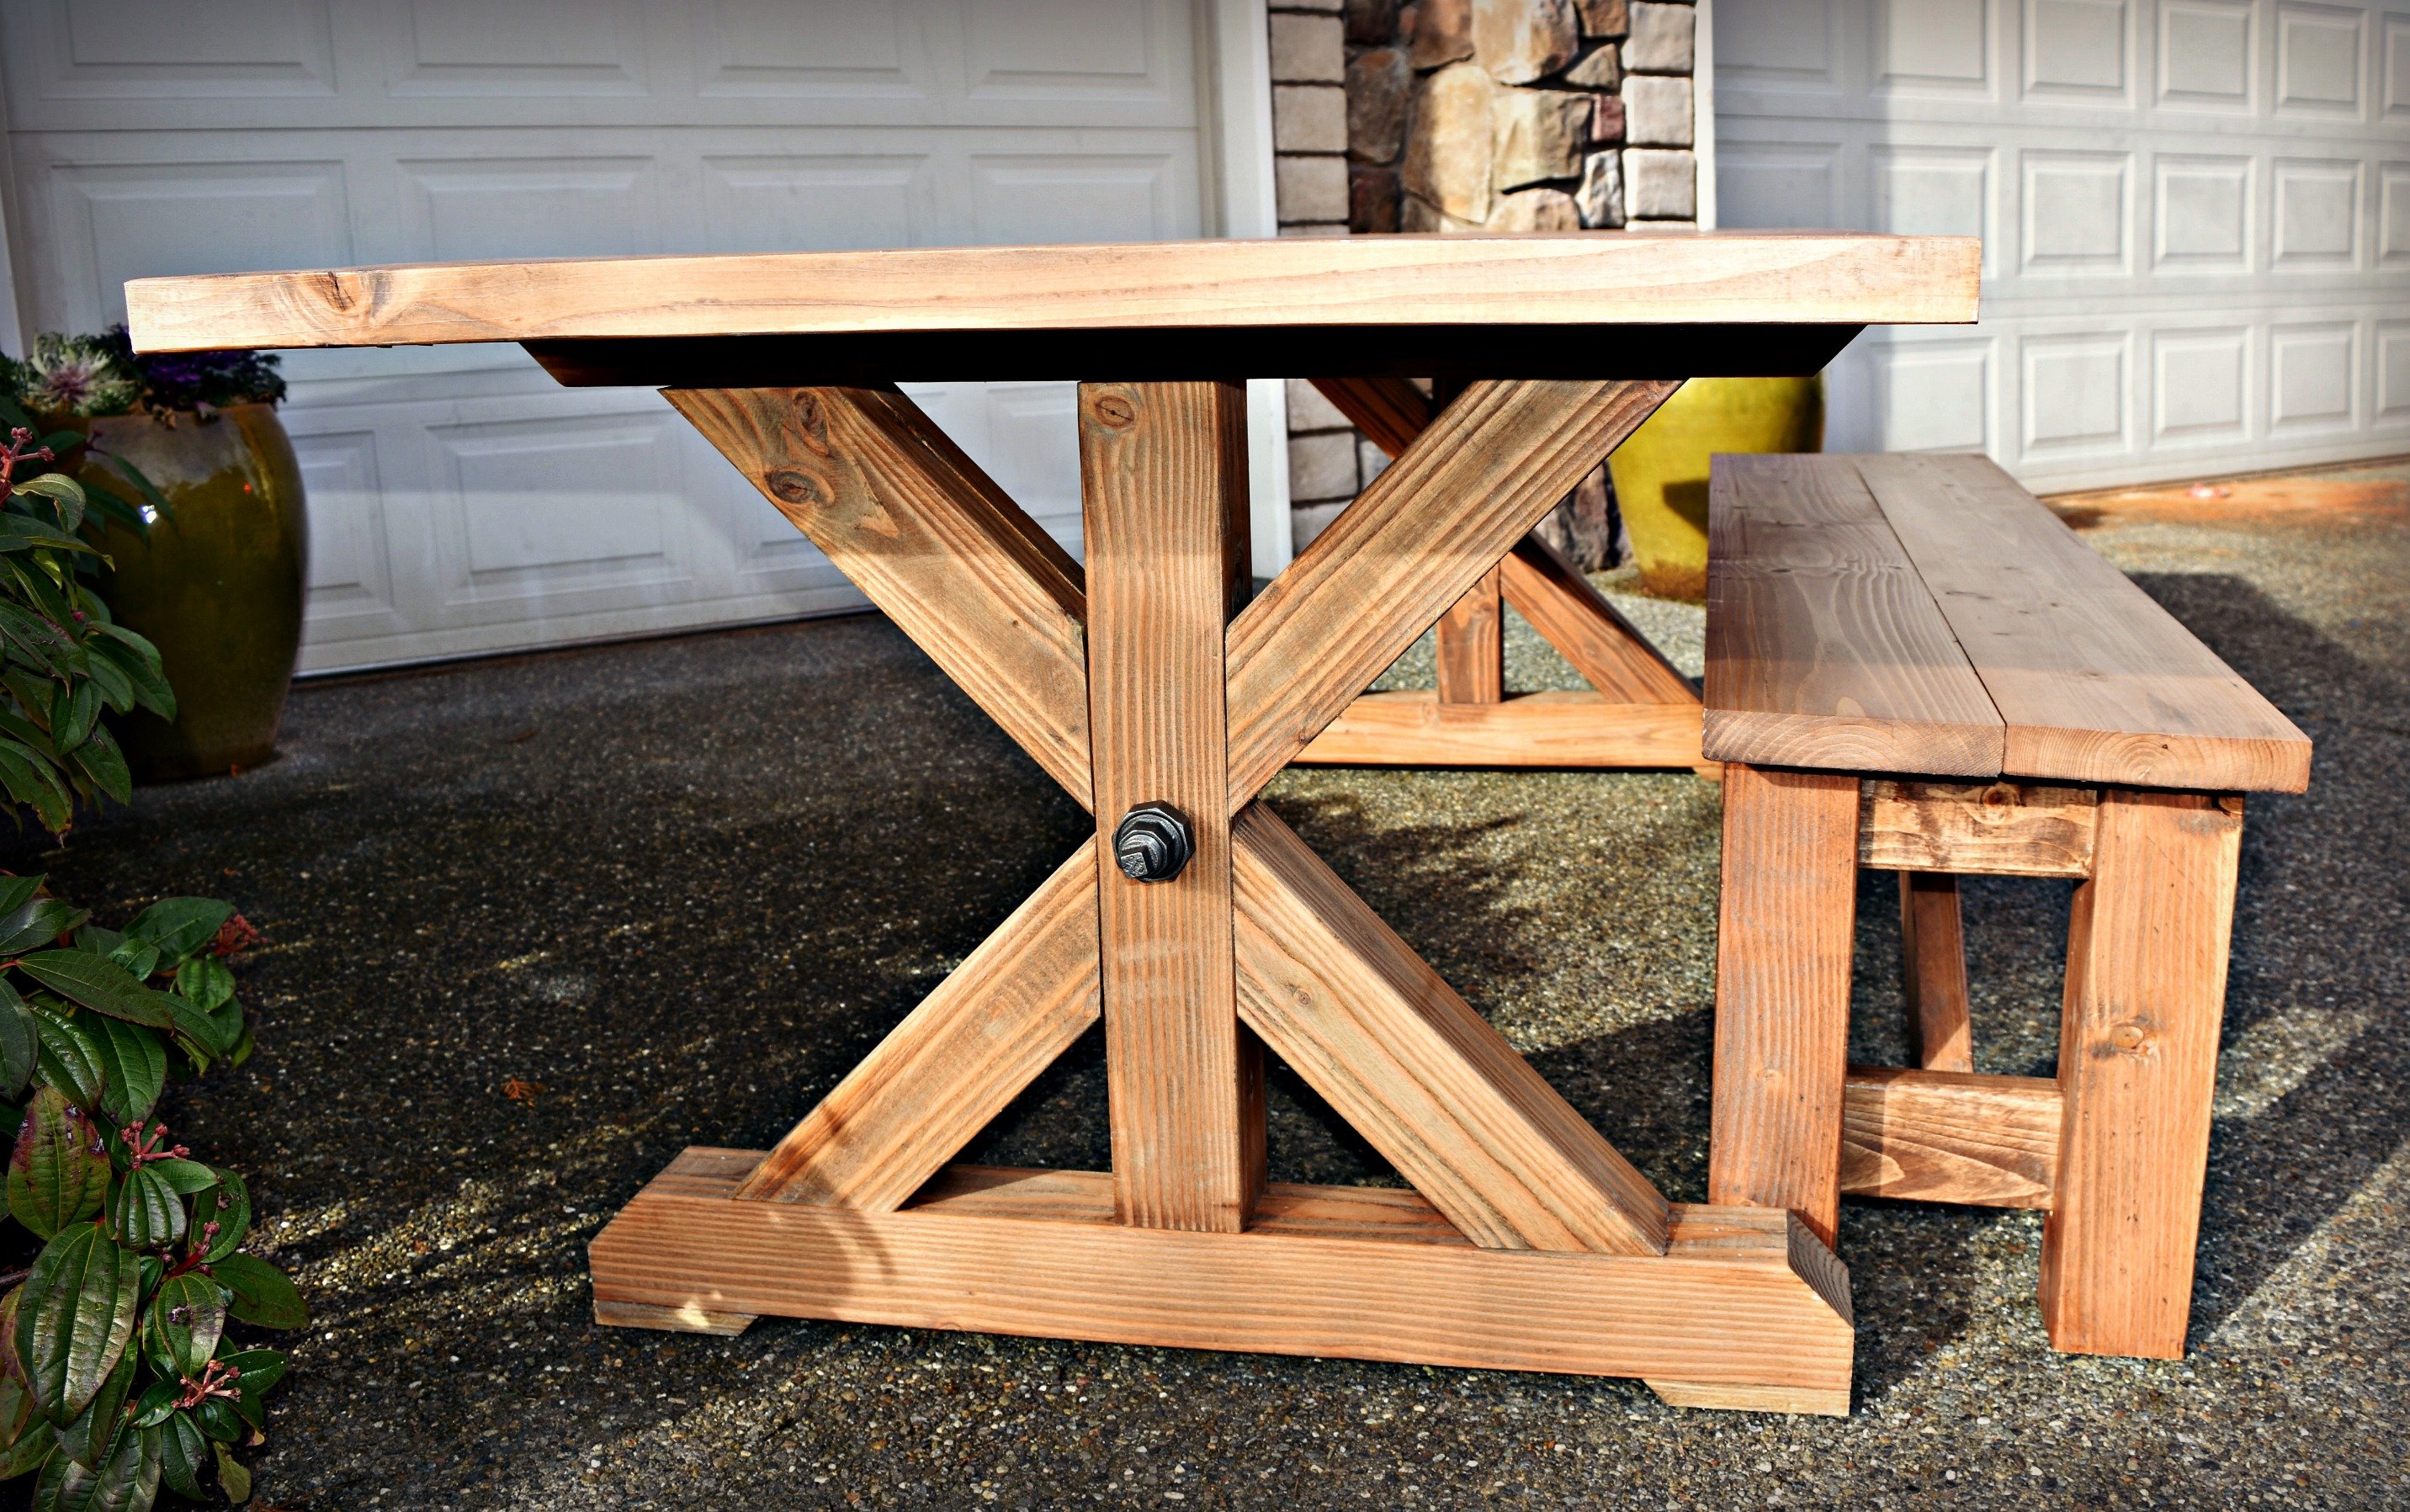
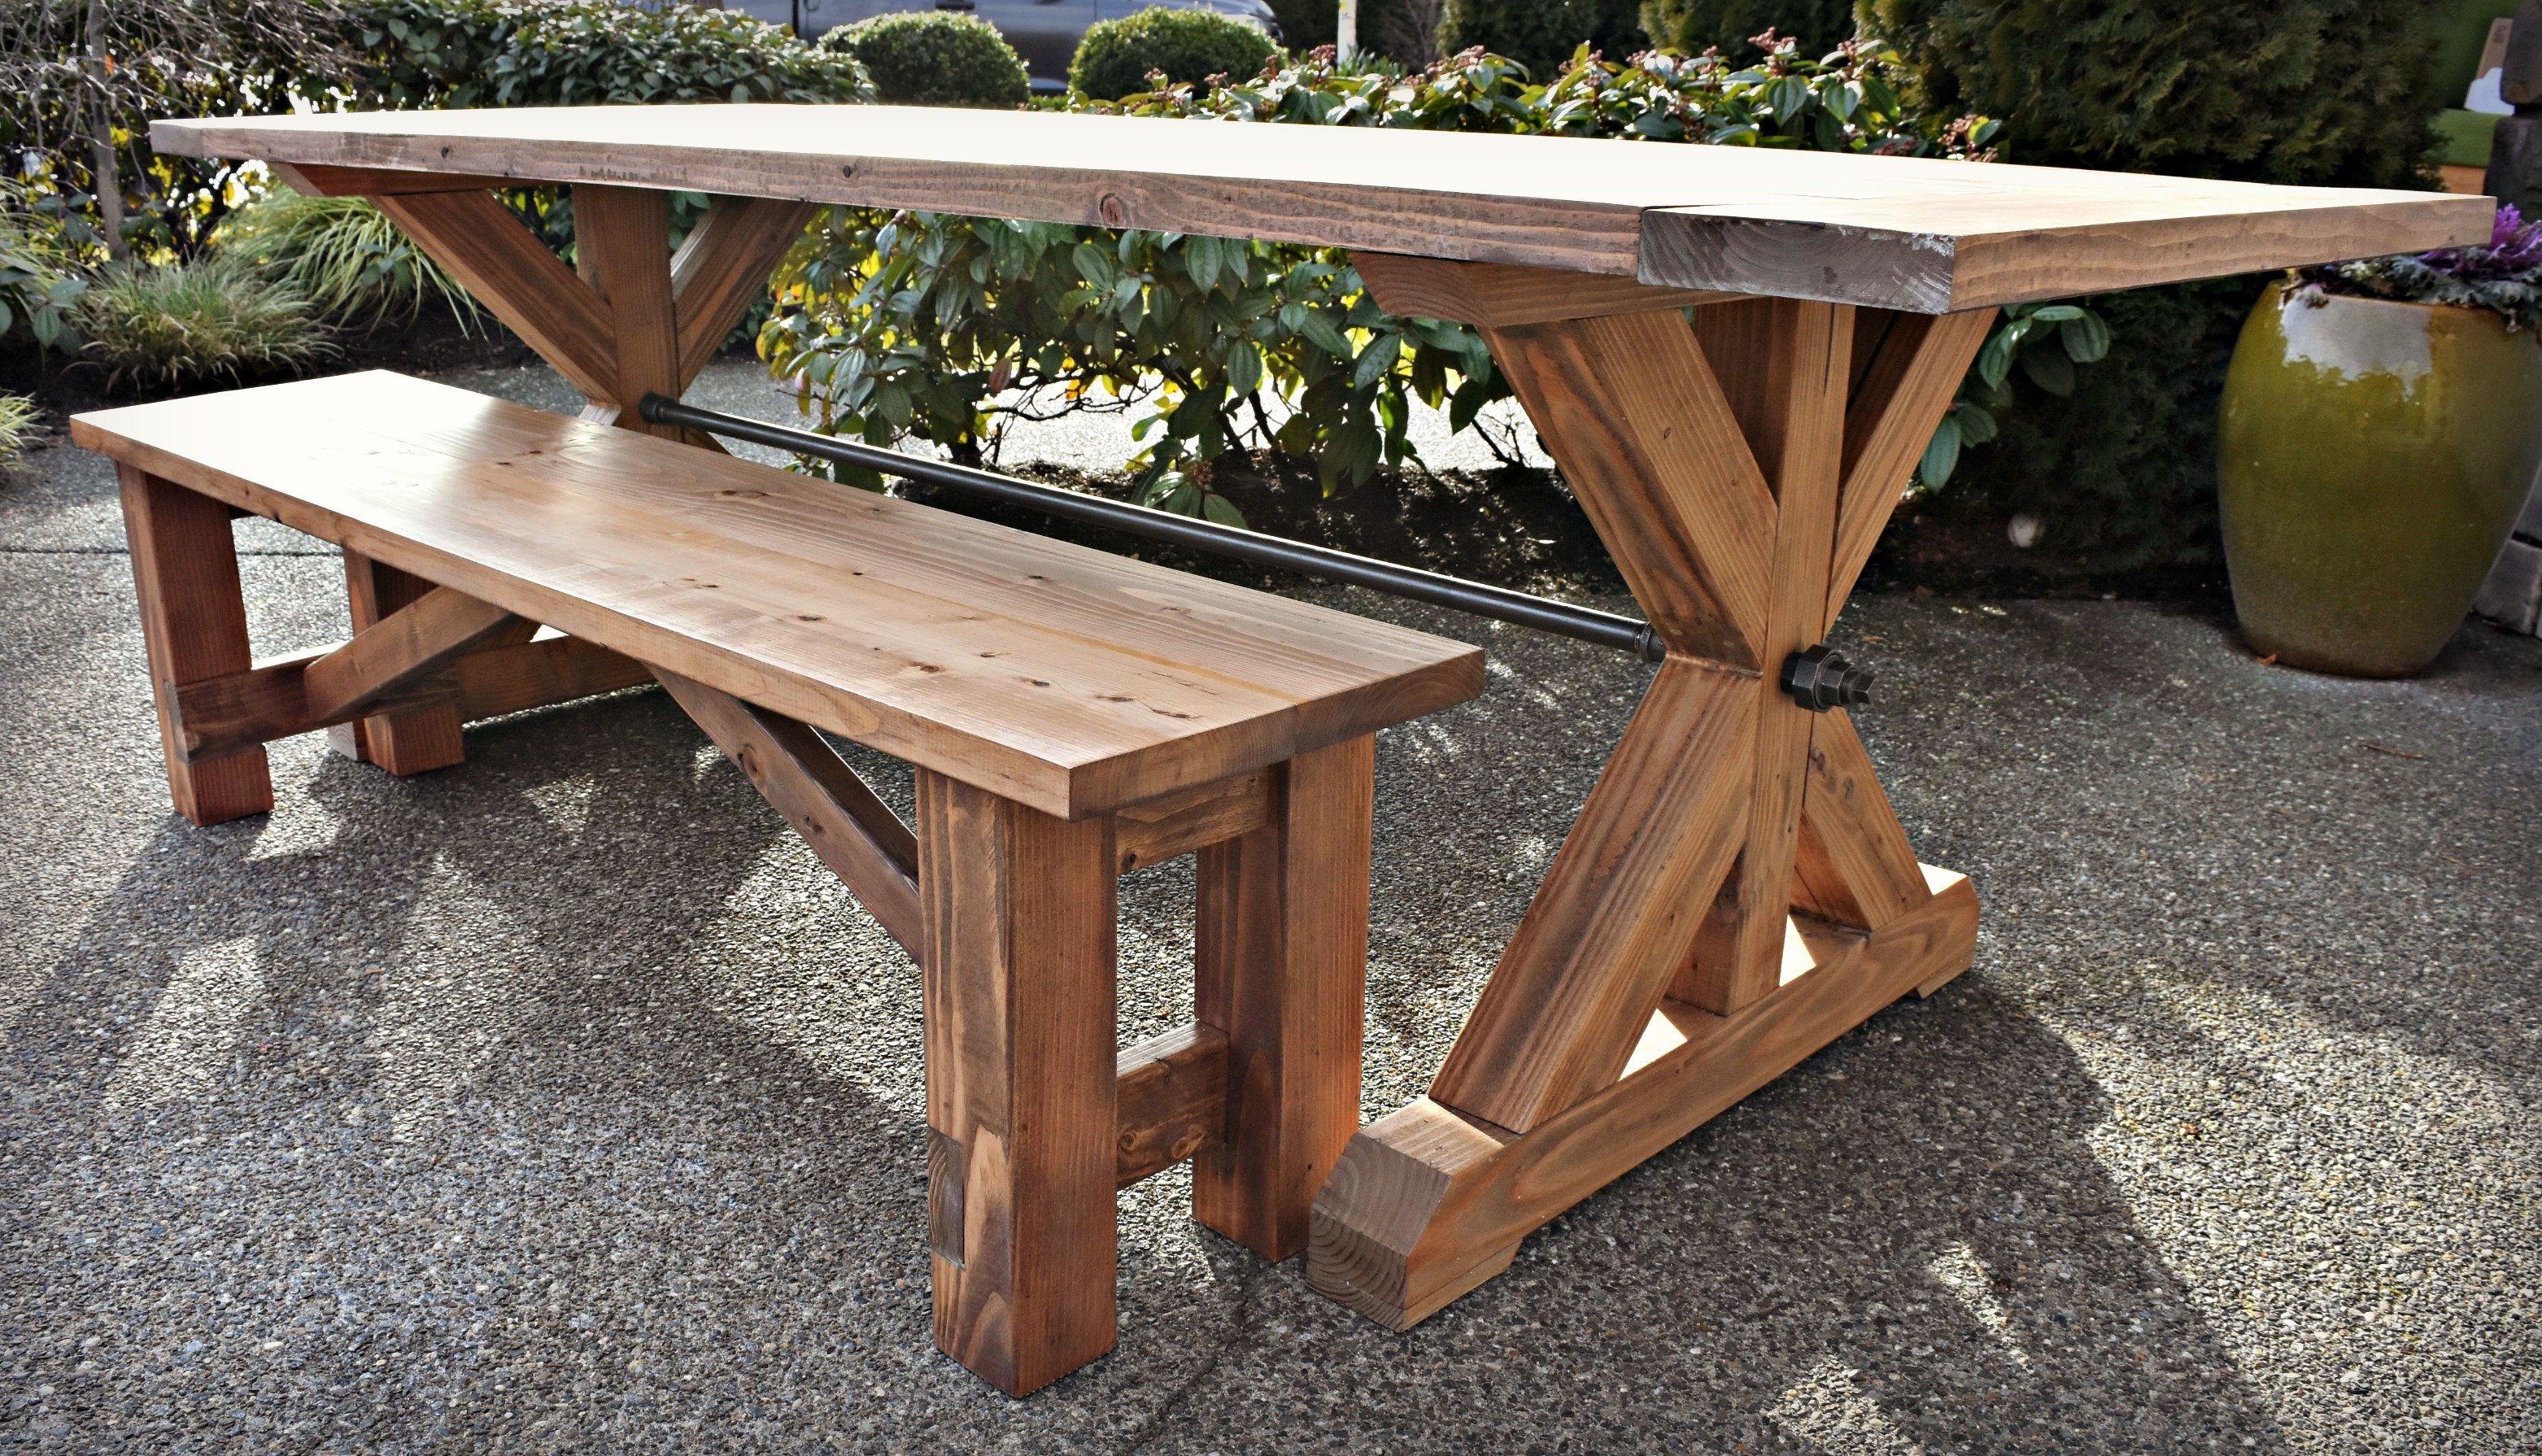
This table was inspired by one from Restoration Hardware. It was constucted using Fir and black pipe fittings from the local hardware store. Please check out more pics on my blog (I had trouble uploading them here due to file size). Thanks for looking!
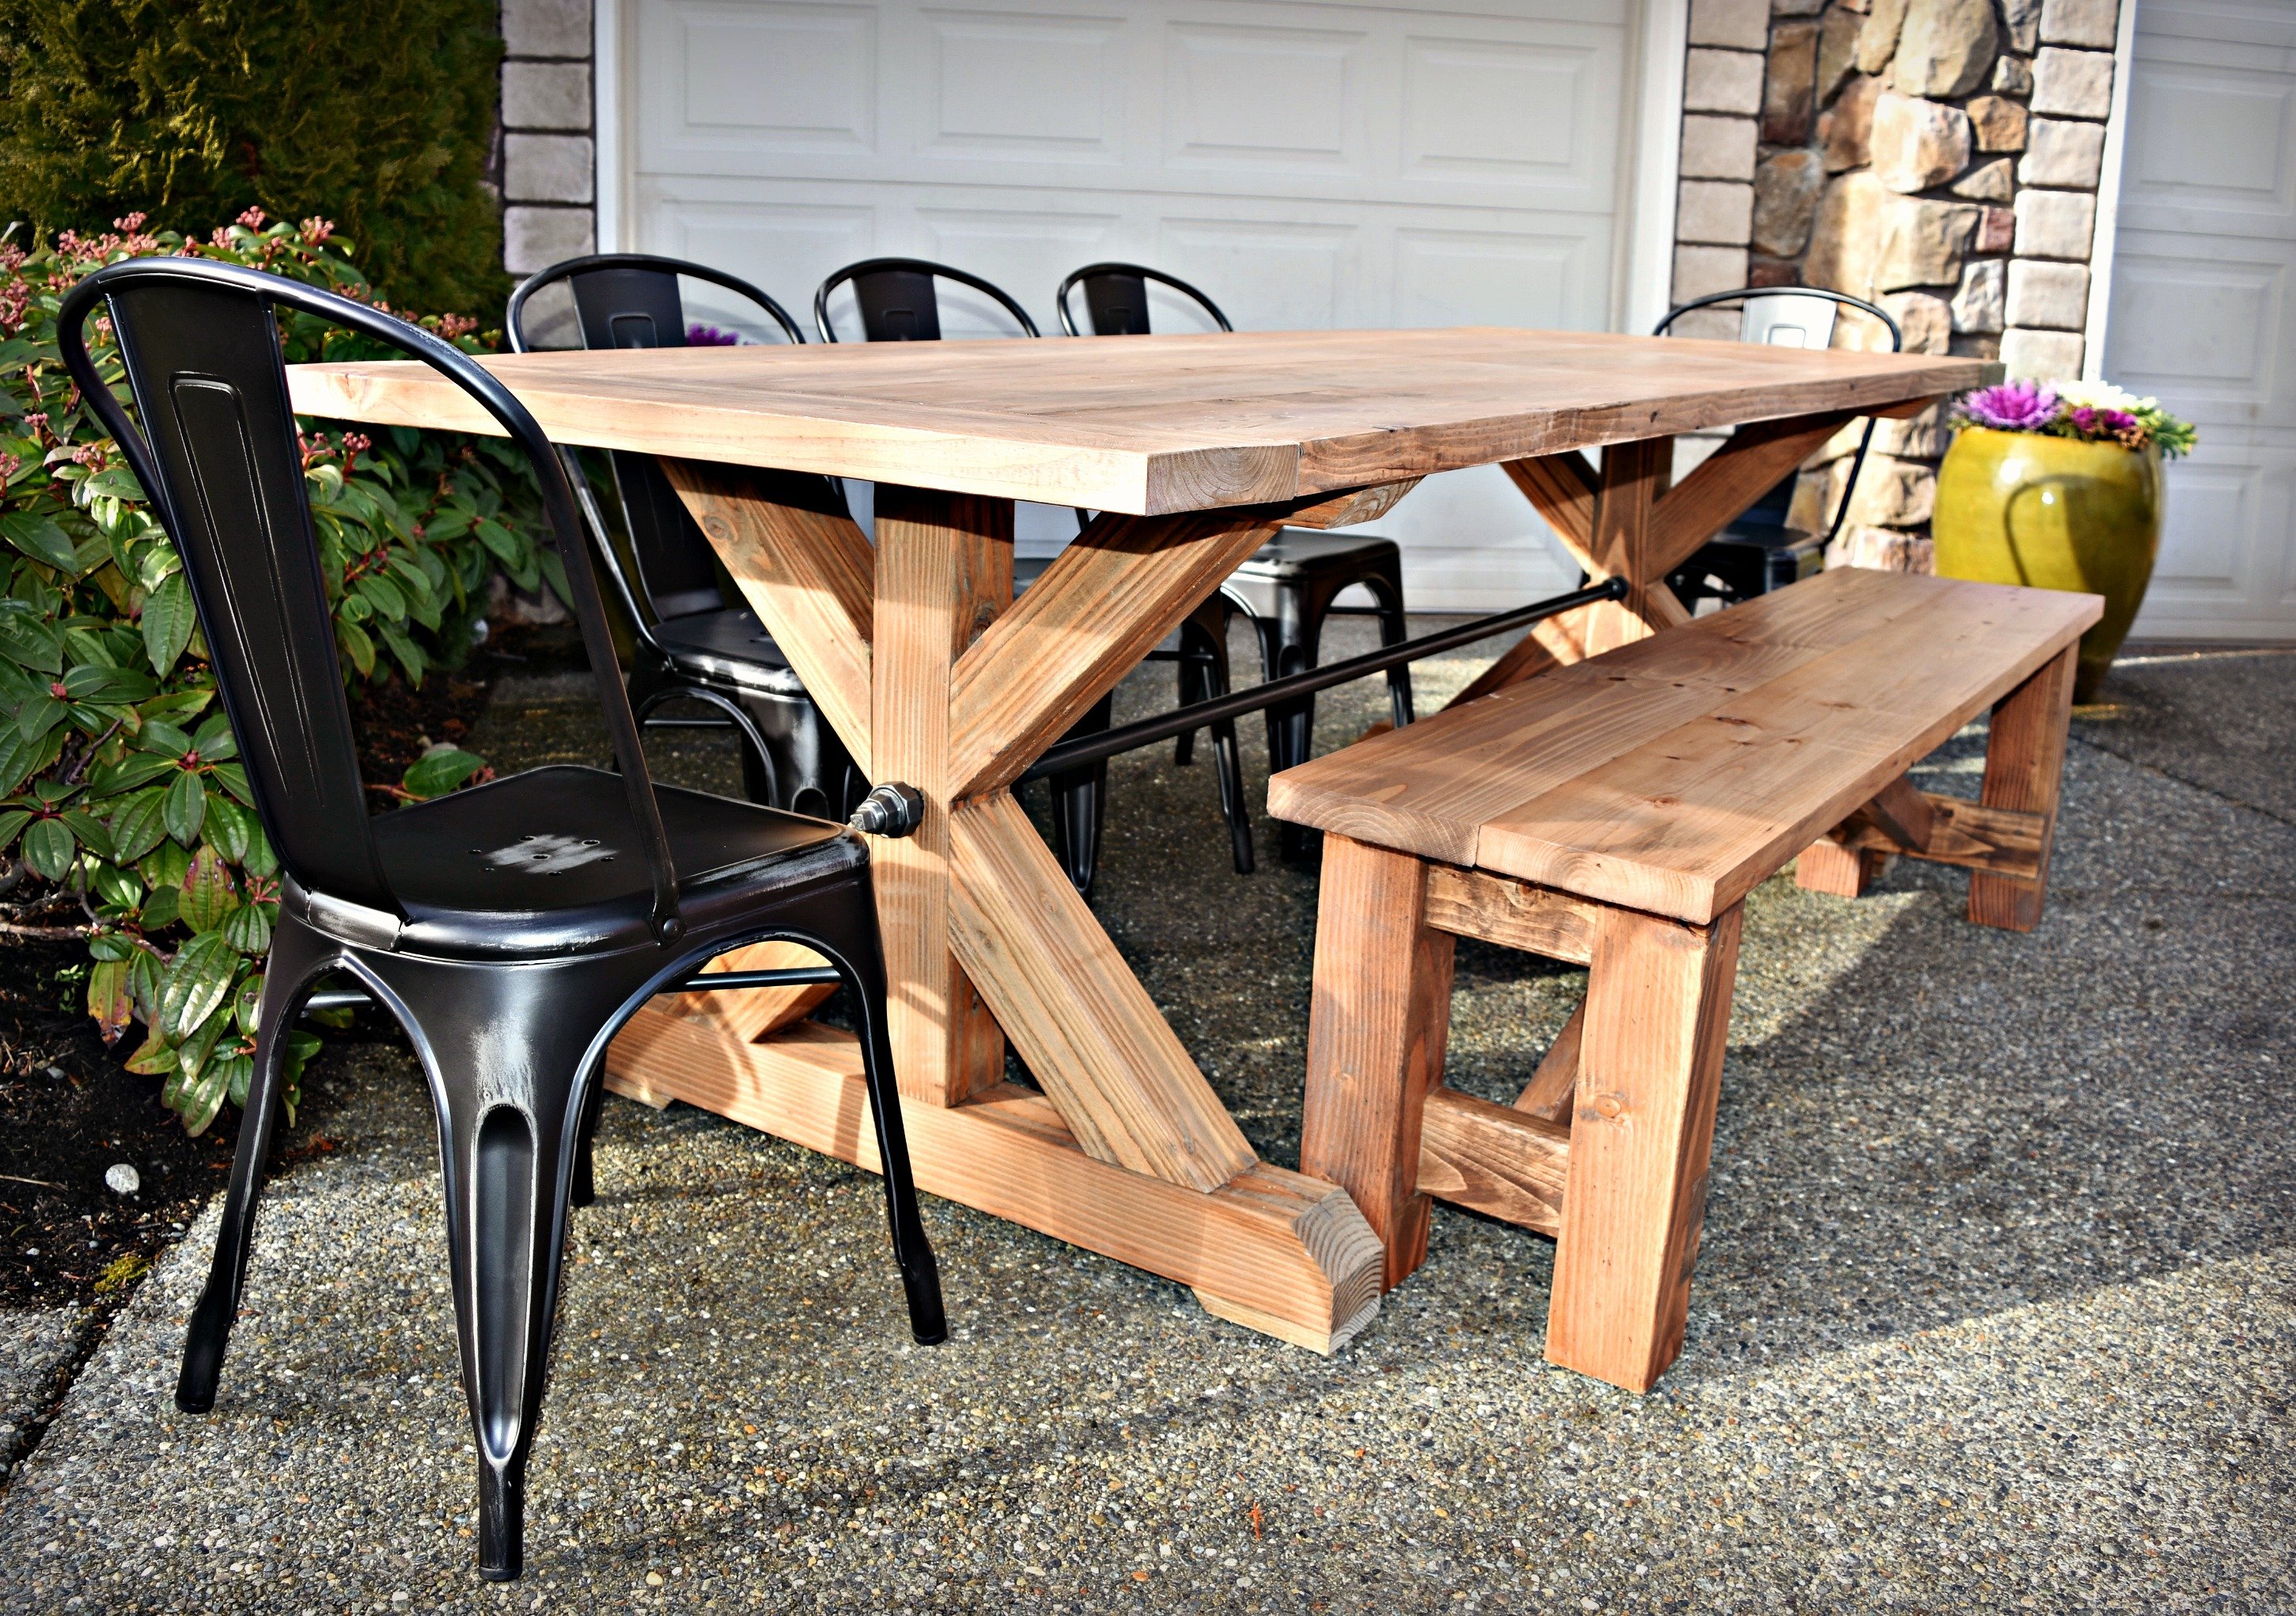

Thank you so much for the plans and pictures!! This table was the first piece of furniture I've built. Your designs made everything straightforward. Couldn't have done it without you. So far the family loves it. I can't wait to share memories around it for years to come.
We have a a fairly large and long dining room, and have a lot of family over for dinners, so I adjusted the plans to make the table 108" long and 46.25" wide. Should fit 10 comfortably and we can squeeze in 12.

My wife and I are very happy with this piece. It was challenging but not too difficult. The plans were very easy to follow.
I loved building this bench! It truly is the easiest upholstered bench! I used reclaimed lumber and it cost me virtually nothing!

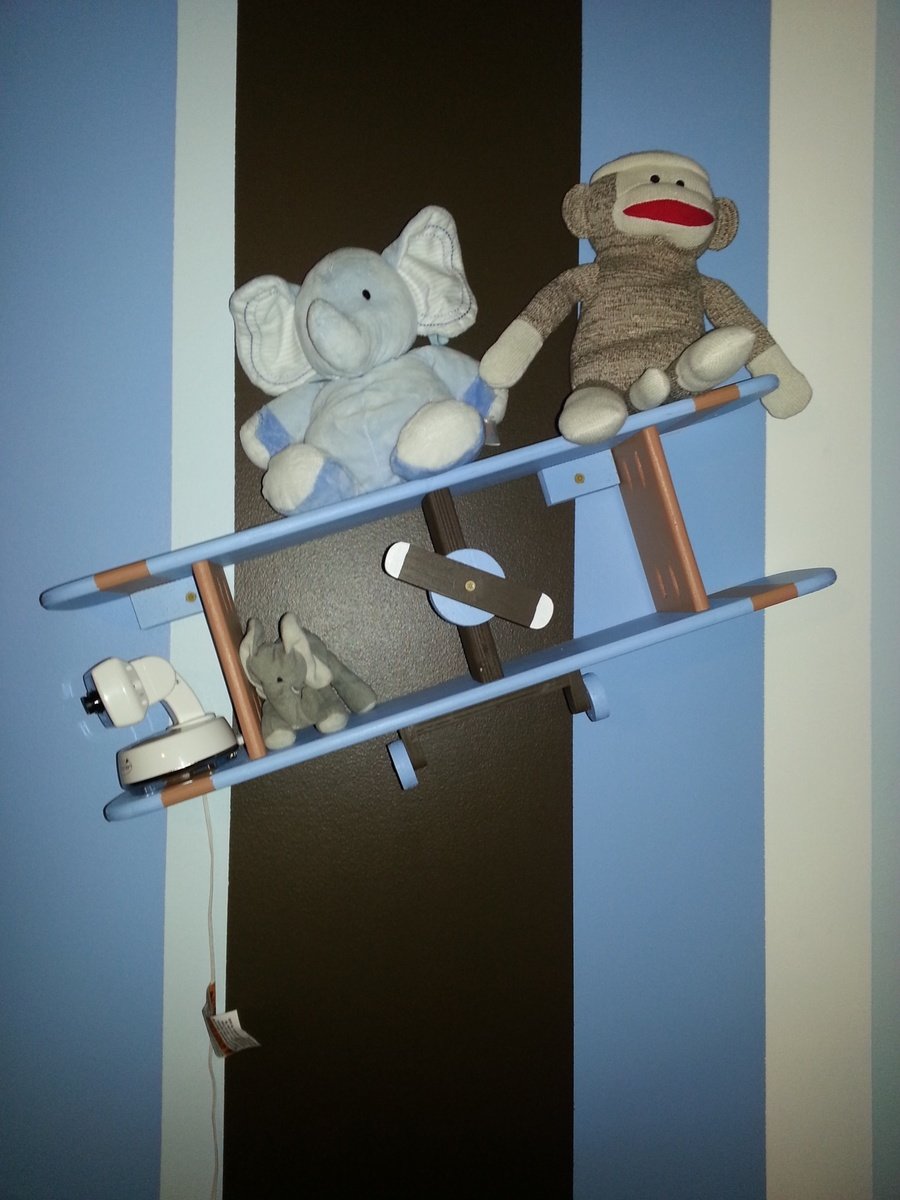
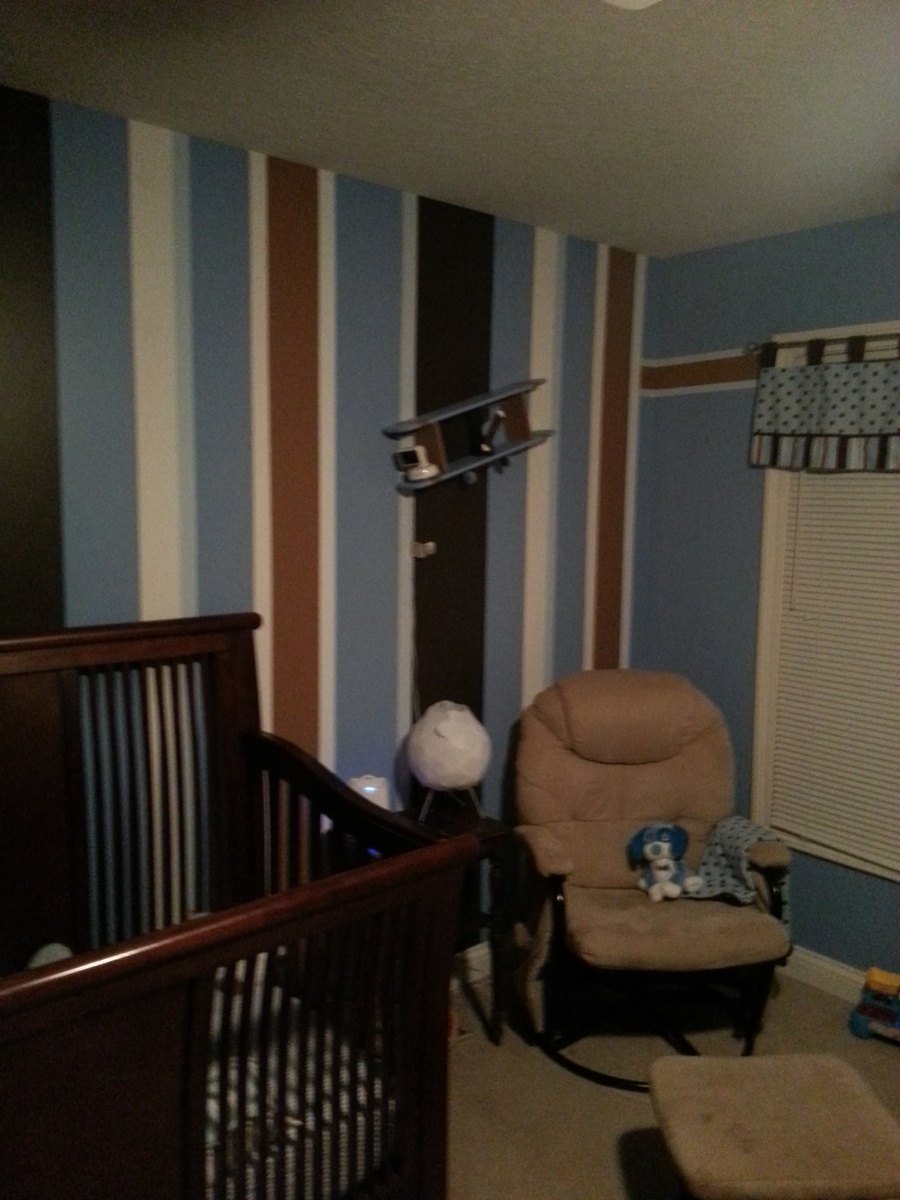
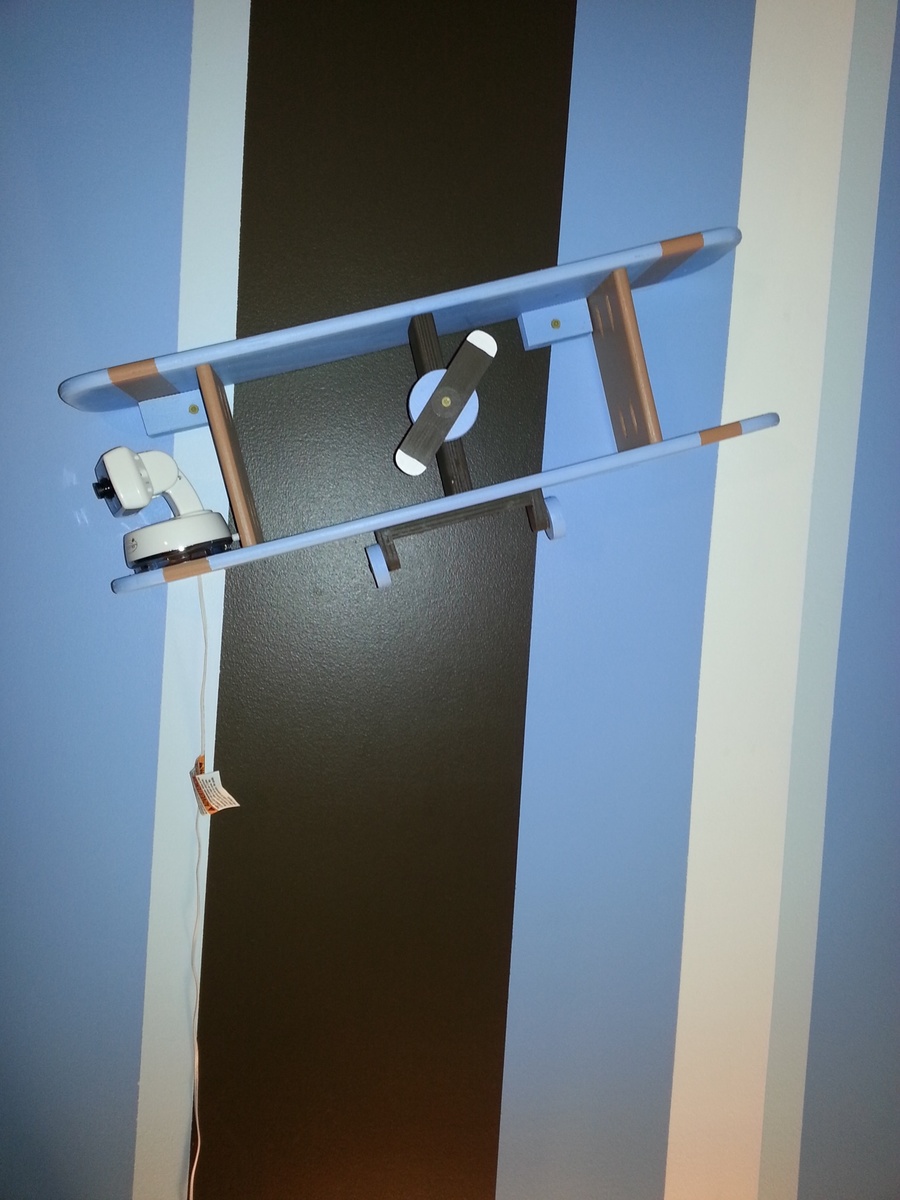
I just finished the shelf we’ve been needing for months…a shelf to hold the nanny cam out of reach of our toddler. I didn’t want a boring shelf so I used a design I found on anawhite’s site. This should have been a quick project, but as usual things took longer that I would have liked. I used all scrap ply I had laying around. I rounded the wings and struts with my router and put in a screw that grabs the bottom of the camera and keeps it from sliding off.
The paint was leftover from the stripes I put on Braxton’s wall 18 months ago. Unfortunately, the below zero temps ruined much of the paint as it was stored in the garage…it was still good enough for this project. I angled the plane to ensure we could look down into the crib, and now we get a full view of the room as well. Overall, I think it turned out great and compliments the room nicely and only cost was time.
Apparently, it will be a short flight for the stuffed animals as my wife said the plane looks good but not so much with them on it. I guess I’ll stick to building and leave the decorating to her LOL!
-- Tommy
Loved making this...conquered my fear of doors and drawers during naptimes!

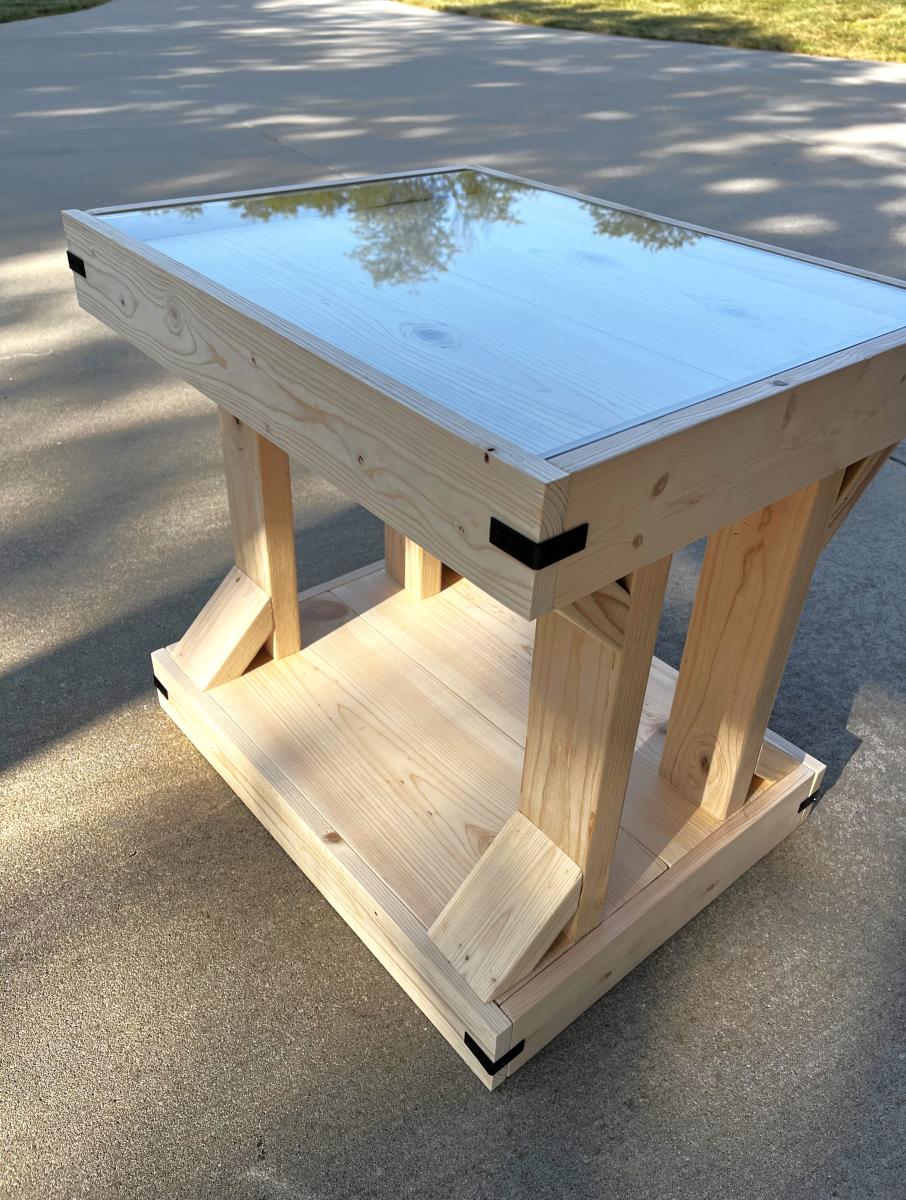
I made two of these side tables for my niece and her new husband as a house warming gift. I dropped the top down 1.25 inch and added a glass top so she could display items. They are going to be a surprise, so I left them bare. She can stain or paint them whatever color she wishes.
Donna Cox

Large Dog Crates from the plan. We used reclaimed 1x4 material which I milled down to the correct sizes. The tops are edge jointed 1x4's glued up. These were my first project with a Kreg jig! I have been wood working for MANY years and was amazed at how fast things went together with the Kreg.
The two crates are a little different. I shook up the stain for the second one so it came out alot darker. We like the difference but I may rebuild the lighter one in the future. They are finished with American Walnut stain and 4 coats of tung oil.


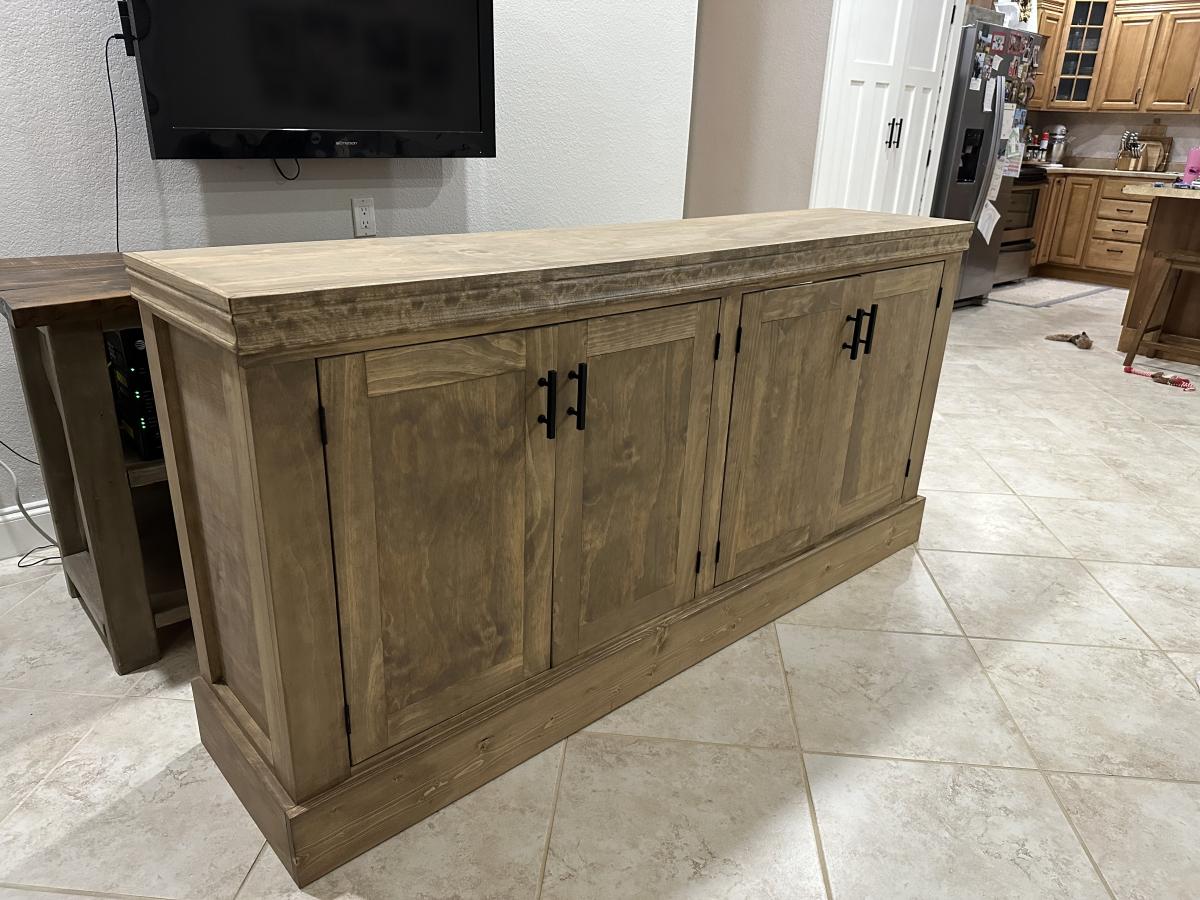
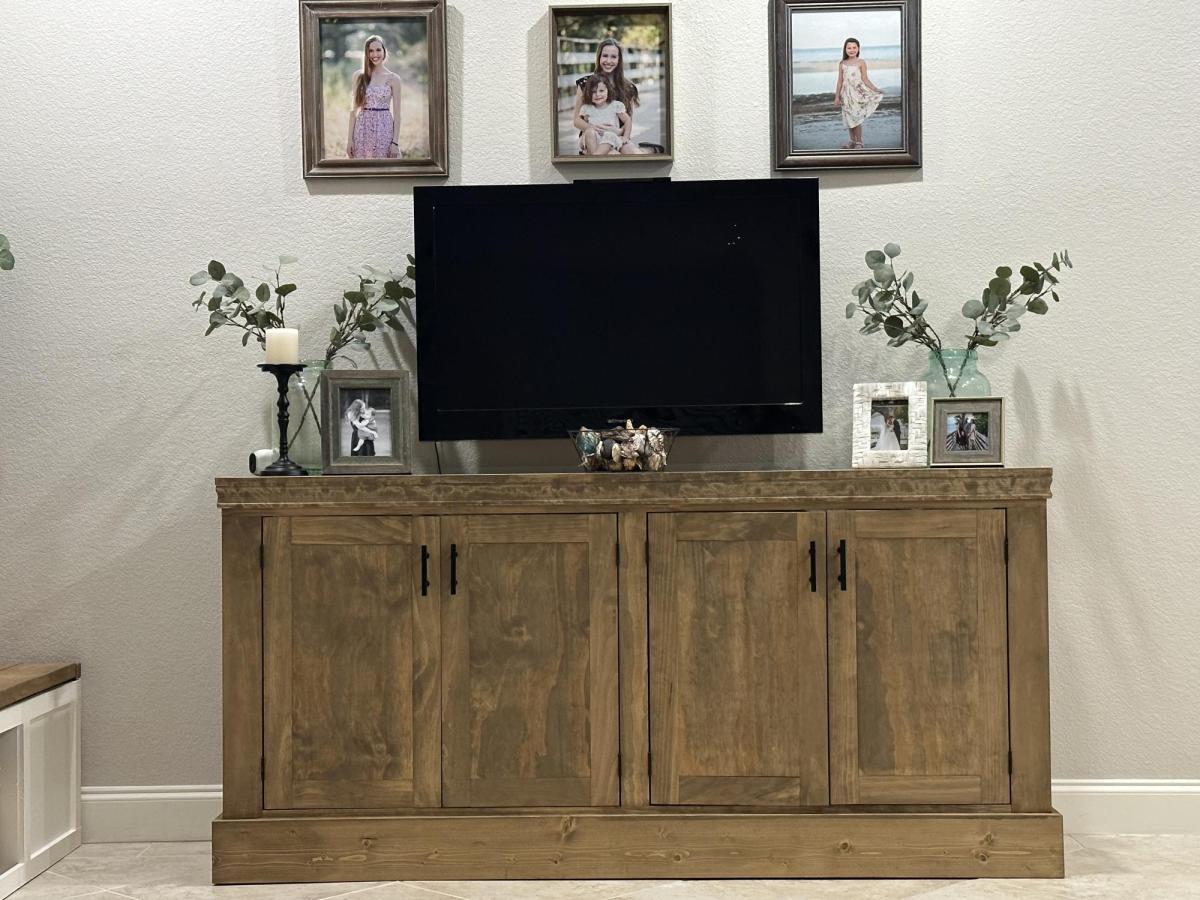
This was the first time my husband has build kitchen cabinets. We have used many wood working plans from this website. The cabinets are made of two sided prefinished maple wood.

Chamfered the bottoms of some 4x4 douglas fir, and used 2x6 douglas fir for the top. Stained in Minwax Dark Walnut/Special Walnut.
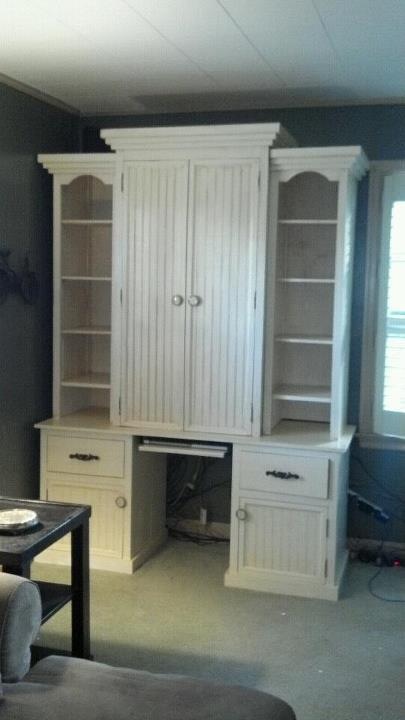
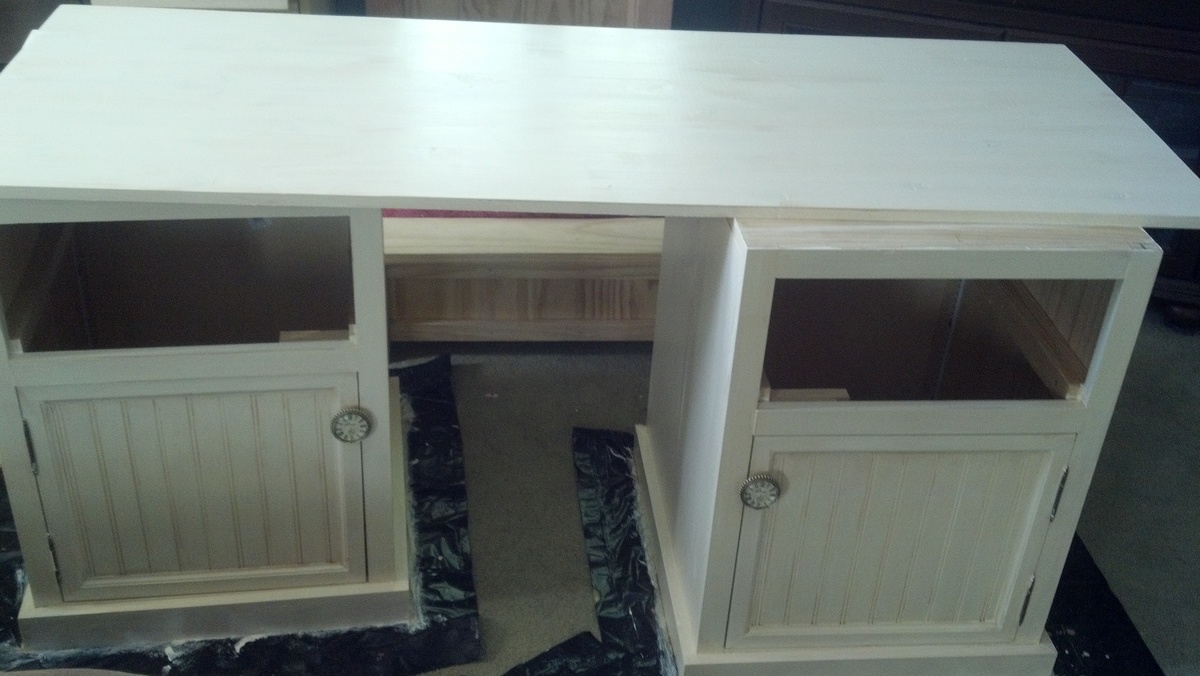
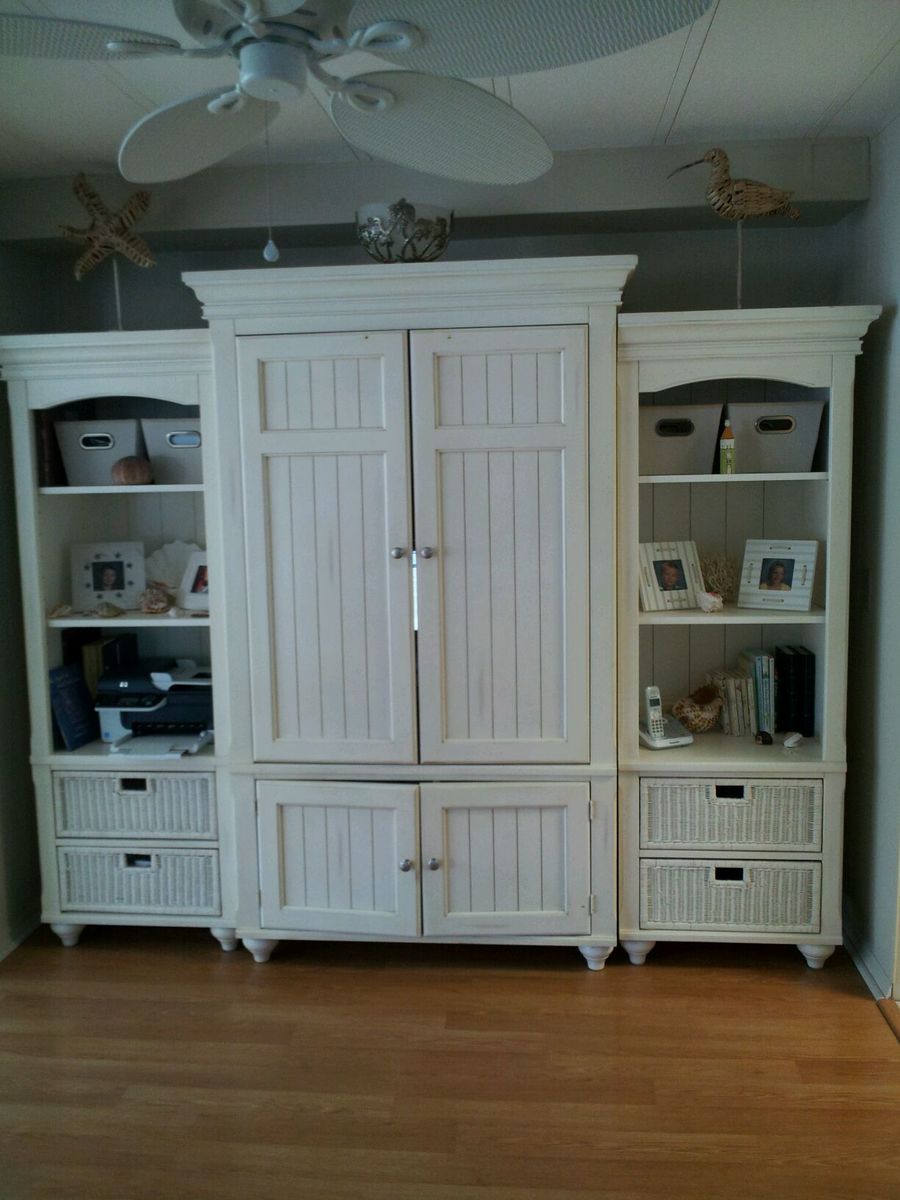
I made this computer desk with just an idea and a picture of my aunt's compter desk I loved! In her desk the middle section goes clear to the floor, but I wanted room for my legs. Her's also was wicker shelves on the bottom sides so I found a general cabinet plan and of course altered that. This was made in 5 separate pieces and put together!
The other picture is the desk in progress and the second pic is the desk I was kinda copying/altering.
Wed, 08/26/2015 - 13:26
This gorgeous desk/bookshelf/cabinet is just what I've been looking for. I'm new to your impressive site & can't access the plans...please help! Thank you for all the wonderful plans

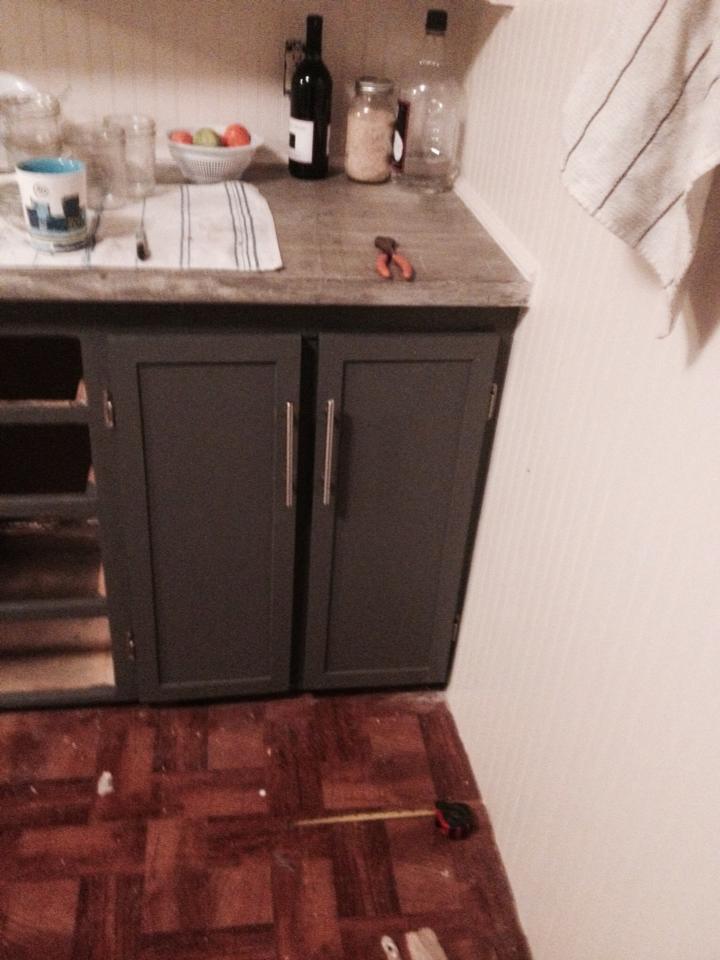
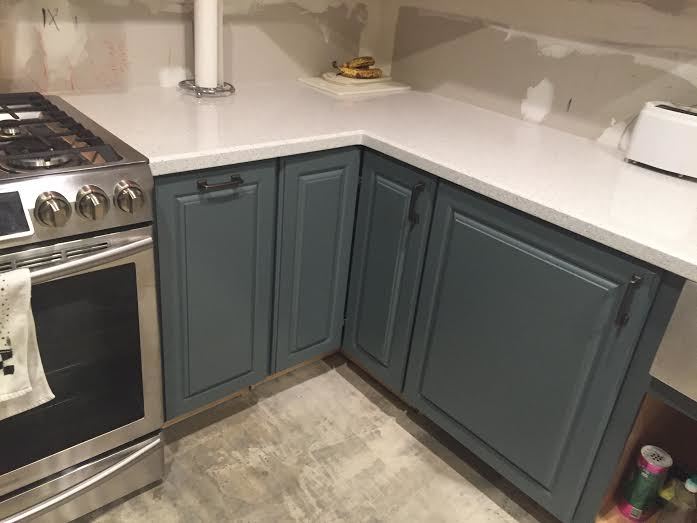
Pleas excuse the mess in the pictures. It is too cold to work in the garage up here in the northwest, so this project took over our entire kitchen and dining room. We built these frame and panel-style doors using Ana's plans from the mom-plex bathroom vanity! We are so excited because we spent about $100 including paint and have plenty of leftover materials for the drawers next week!
These are the original cabinets in our 75 year old house and they were in serious need of rehab. We even contemplated ripping them out and using Ana's cabinet plans to build new ones but after we removed the shelves, the carcass of the cabinets were still in good shape. We filled, sanded, painted and built these new amazing doors that I'm seriously losing my mind over. They are so beautiful and I don't think I could have ordered something better. Maybe better made but how sweet is it to save all that money by building them yourselves?
We'll post drawer pictures after we get those finished up and hopefully have a clean kitchen at that point. :)
Thanks Ana! Our home is becoming truly special with the skills we learned from you!