Tryde Console Table
This was the first project I did totally on my own. The day before I had made the Tryde Side Table with a little help from the man. I needed tool instructions.
I wanted to make something that would hold all my kids art supplies. I wanted it to be easy for them to find what they wanted and have a handle so they could carry it. The project is easy enough for a beginner. You need a table saw, drill, glue and nail gun (or hammer and nails). I have more details on my blog.
I really enjoyed building this toy box! I used rockler torsion hinges on this and loved how smooth they moved and the install. Thank you for the inspirational plans!!
A modern twist on storing throw blankets. It was made out pine, stained, and three coats of polyurethane.
This project came from a plan I recieved when I bought my kreg jig, not sure of it origins, it was awhile ago. I needed a place to hide dog food, biscuits are on the left and food on the right!
After seeing the patio table with beer/wine cooler, I wanted to build this for my brother and wife who recently bought a house. I asked them if they were interested and of course they said yes. I modified the original plans by adding a 2x4 on each side of the cooler to make the table wider. I also made the legs out of 4x4 vs the 2x4s that were originally called for. I used redwood and then stained it and used a varnish for the final coating. I probably wouldn't use the varnish again for an outdoor table, because it looks like it should be an indoor table vs outdoor. Overall, I'm pleased with the results and the best part about it, I get to enjoy it every time I go over for a BBQ.
Wed, 07/03/2013 - 13:04
Awesome table, do you happen to have the measurements you used. I'd like to make the same table but I need the lumber yard to make the cuts.
I built this coffee table from the Taylor's Coffee Table plans (http://ana-white.com/2014/02/plans/taylors-coffee-table) with a few "artistic"/necessary liberties. For the top, I used a slightly different pattern than shown on the plans. Starting from one side to the other, my plan includes a 1"x2", a 2"x6", a 2"x2", two side-by-side 2"x6", a 2"x2", a 2"x6", and finally a 1"x2". I liked the extra overhang that the 1"x2" included on the outside edges of the table.
I do not own a jigsaw, so instead of making the entire bottom shelf out of plywood, I made a "border" with 1"x4" boards with the adjoining corners cut at 45 degrees so that each side of the border matched up nicely. This allowed me to use a standard rectangular piece of plywood for the shelf "inlay."
As a first attempt at any sort of table, this turned out much better than I could have hoped!
My boyfriend and I wanted a calm relaxing beach feel at our Florida vacation home, however with kids in college and two getting married, we were on a tight budget. We found these plans on Ana White's website. He made the headboard and bench and I distressed it to make it look weathered. We used Minwax Dark Walnut as a base, let it dry over night, and lightly wiped it down in the morning. We then used Rustoleum "Chalked" in White Linen and applied it with a large stencil brush we found at Michaels craftstore. We applied it almost haphazardly, purposely making it look rough. The chalk paint dries quickly. We then brushed on some clear Americana creme wax. We are very happy with the end result, it was our first project build, and we nailed it. Thanks. Ana!!!
Made this for my grand niece, who was obsessed with Minnie Mouse. When done, my friend said I needed to add a foot rest, so I did!
Bookrack for my sons bedroom. First project with the kreg jig! But I used some regular screws and the air nailer here and there too... I love how it turned out, and how easy it is for him to find the book he wants, and put them away too!
This is a storage bench (toy box) that I threw together based on one of the projects listed on this site. I also added custom shelves on the interior to house all of the puzzles my daughter likes to play with. It is made of cedar and the interior is birch plywood. The shelves are the same combination. It is very sturdy and fits a lot more toys than I expected. This is the first project I've built that I stained...I originally tried applying with a brush but that was VERY challenging so I tried a sprayer and that worked very well, though I think I went a little heavy on it. I wasn't much of a fan of the Minwax 2-in-1 stain/finish...but hey, its a toy box that you can sit on so it's going to get beat up anyway, so there'll be another opportunity to re-finish it later. My build time was very drawn out because I only work on projects during nap time, so the time to complete is what I would estimate if you have a couple of days to solely devote to the build. What a great plan though, for an inexpensive, easy to build storage bench. Thank you!
Super easy. Done in less than one hour. Used Target's Black-Out curtains.
Amazingly easy to build!❤️❤️❤️ My new chairs. The table is made from the Ana White planter. We just used left over 2x6's and 2x4's to create a removable top. It makes a great table with Kentucky of storage.
Built this changing table for my granddaughter. I used select pine. My daughter has not decided if she wants to stain it or paint it yet. I pocket hole screwed the joints. It is very solid.
An easy end of the year teacher gift - framed chalkboards. I made these using furring strips and 1/4" plywood for about $5 each.
This is my first DIY furniture build. Had some issues with the Poly, but it turned out better than I thought. I used a couple of Turnbuckles with black hammer spray paint instead of the back slant supports. Made some mistakes, but learned a lot. Thanks Ana for the great site and all of the great posts.
Tue, 04/14/2015 - 19:33
Great build! How did you rough up or score the edge of the table top? Thanks.
Fri, 05/29/2015 - 22:51
Actually it was a pristine pine project board that was very easily dented and marked. If you notice the corner, that's from shortening it and roughly cutting with a circular saw. The end of the cut chipped the corner off and I just sanded it down with a rotary sander. Same sander for the edges gave me the tree ring look. I also went with cheaper 2x4 that had some blemishes and then sanded them down to give it a more lived in look for the side legs.
Built this for some dear friends ... turned out so pretty.
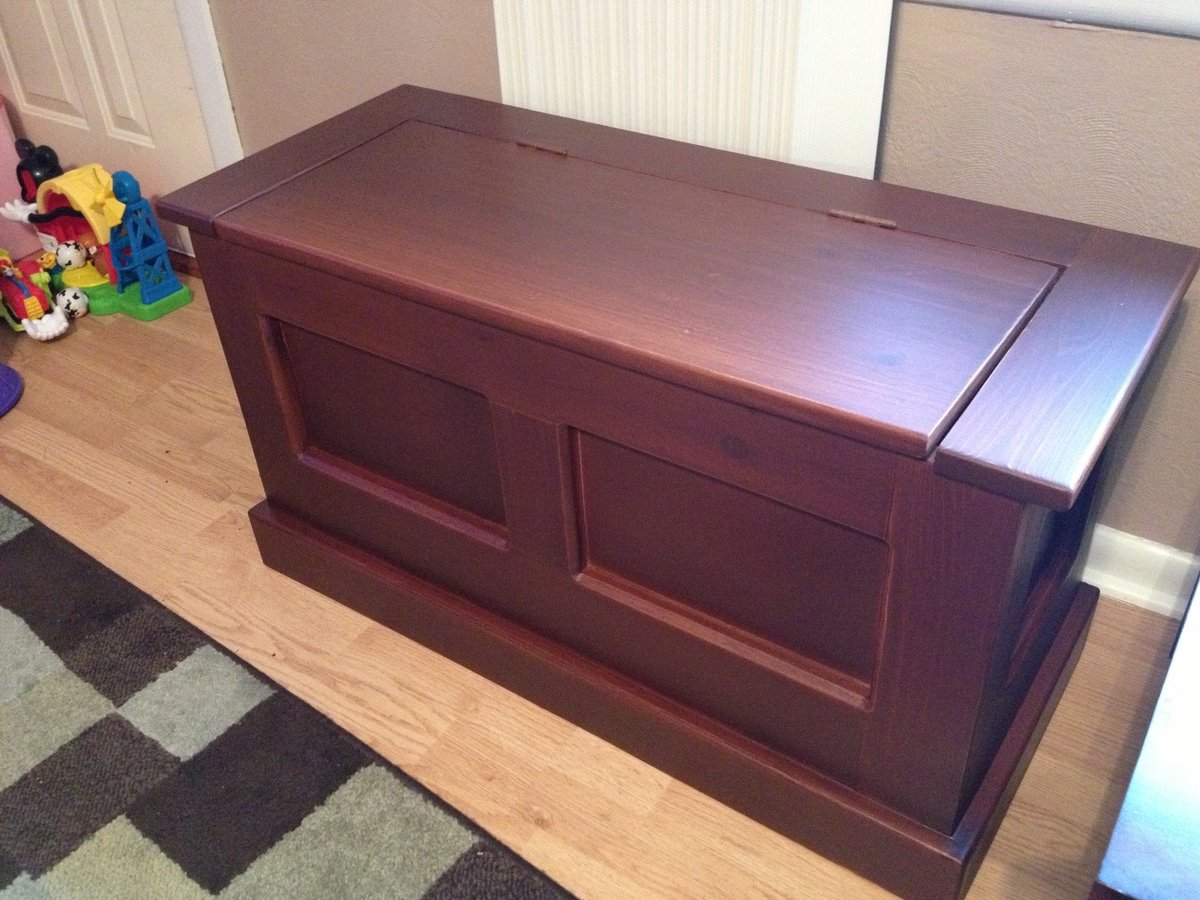
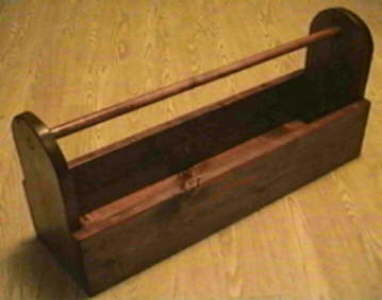
I work on projects slowly, so, ironically, this is the third Ana White plan I’ve used–but the first project completed in full! I put everything aside to work on the toolbox for two reasons:
(1) I got a jigsaw for Christmas (yay!).
(2) It will be a welcome helper when working on *other* Ana White projects! (Like, finishing the two that are partly done?)
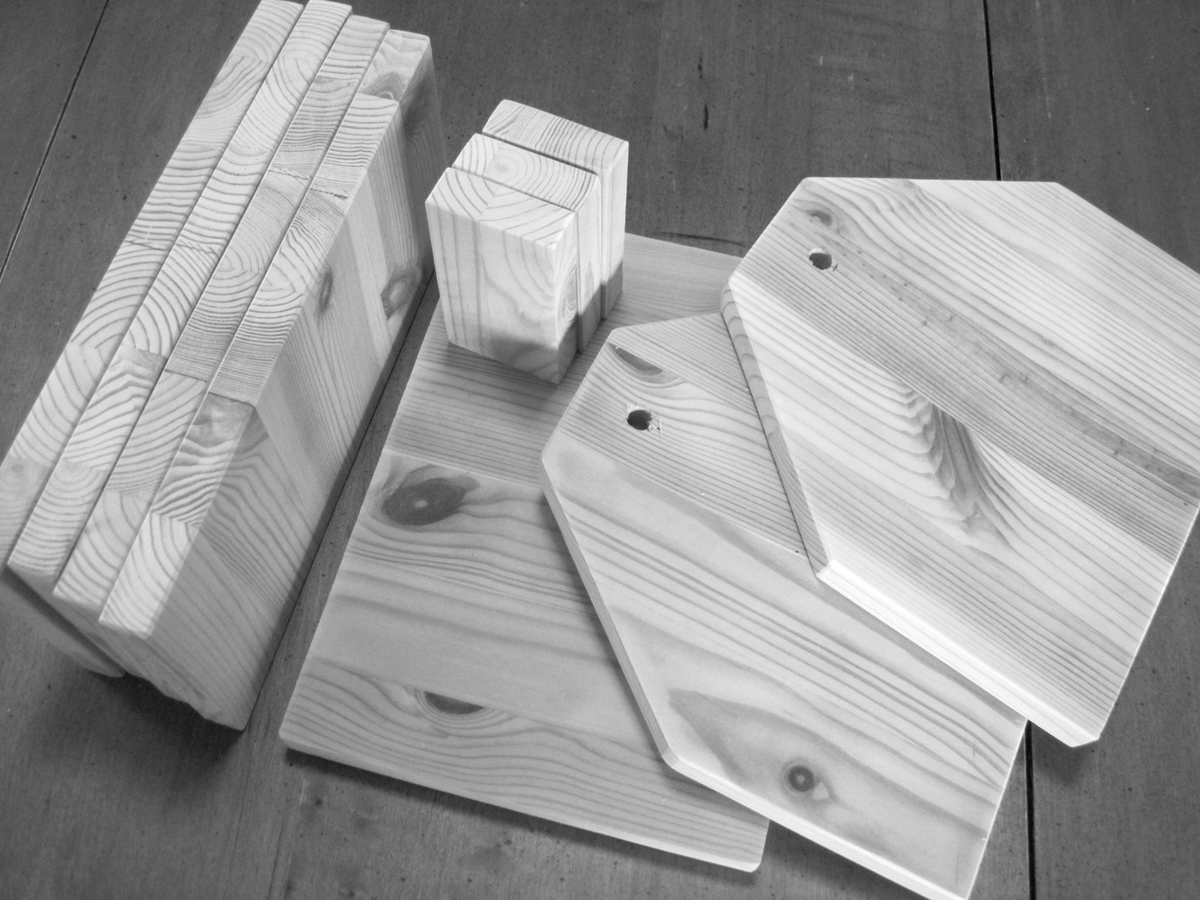
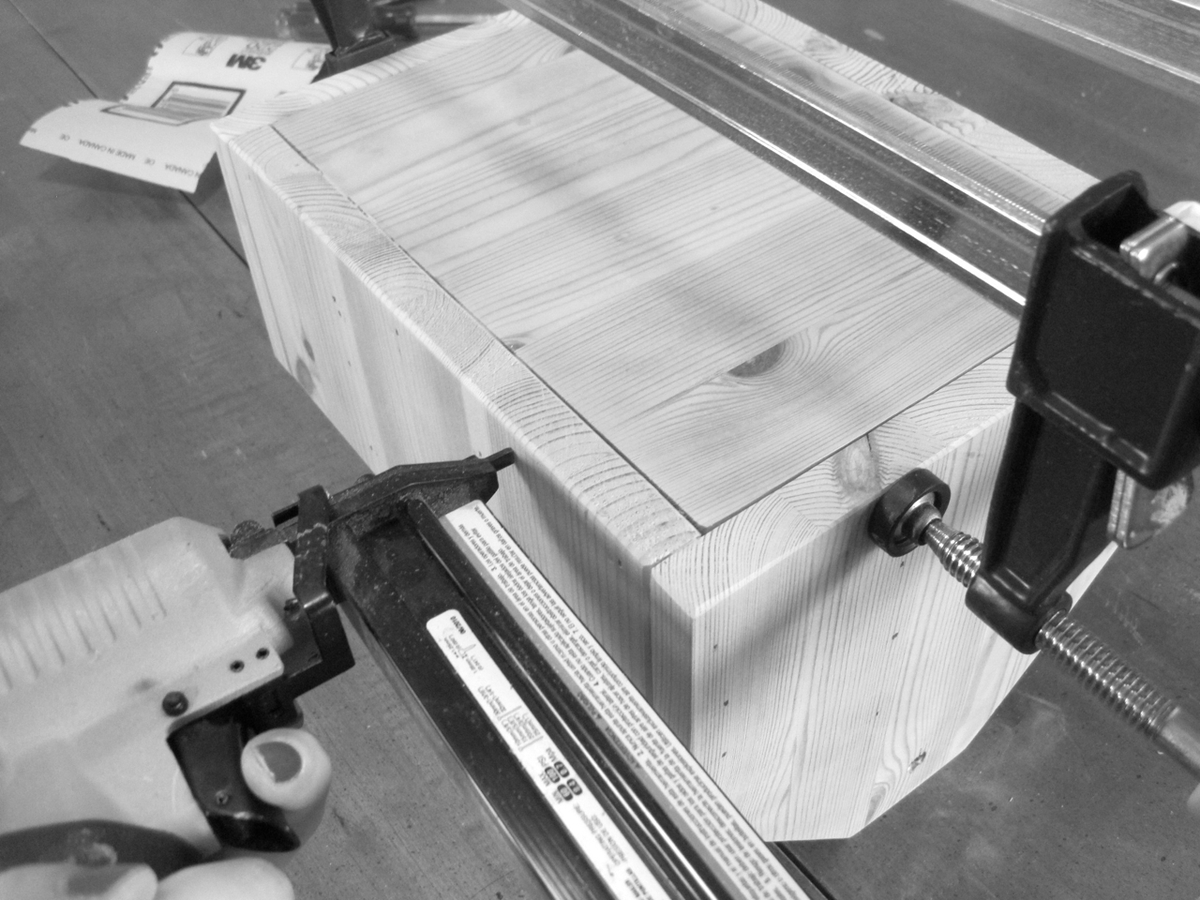
I used plain wood on the sides instead of moulding. If you decide to do this as well, you’ll need an 8′ length of wood and the dowel rod. The first time I tried to make this, I used cupped wood. (Looking at the short end of the wood, it all had a slight U-shape.) You’re probably shaking your head and saying: “You can’t use cupped wood! That’s the first thing you learn in Woodworking 101!” But by the time I saw that it was cupped (I checked for all the other types of warps, and asked the family member I was with–who will remain nameless–if it was warped the cup way, and was told “no”), the wood had already been cut by the helpful store associate. Besides, I had spent so long looking for a non-warped piece of wood that my legs and back hurt. Getting tired of wearing a winter coat in a hot store while doing aerobic activity, I thought: “I can’t ask for them to take this wood back. It’s cut already! I know! I’ll MAKE it work!”
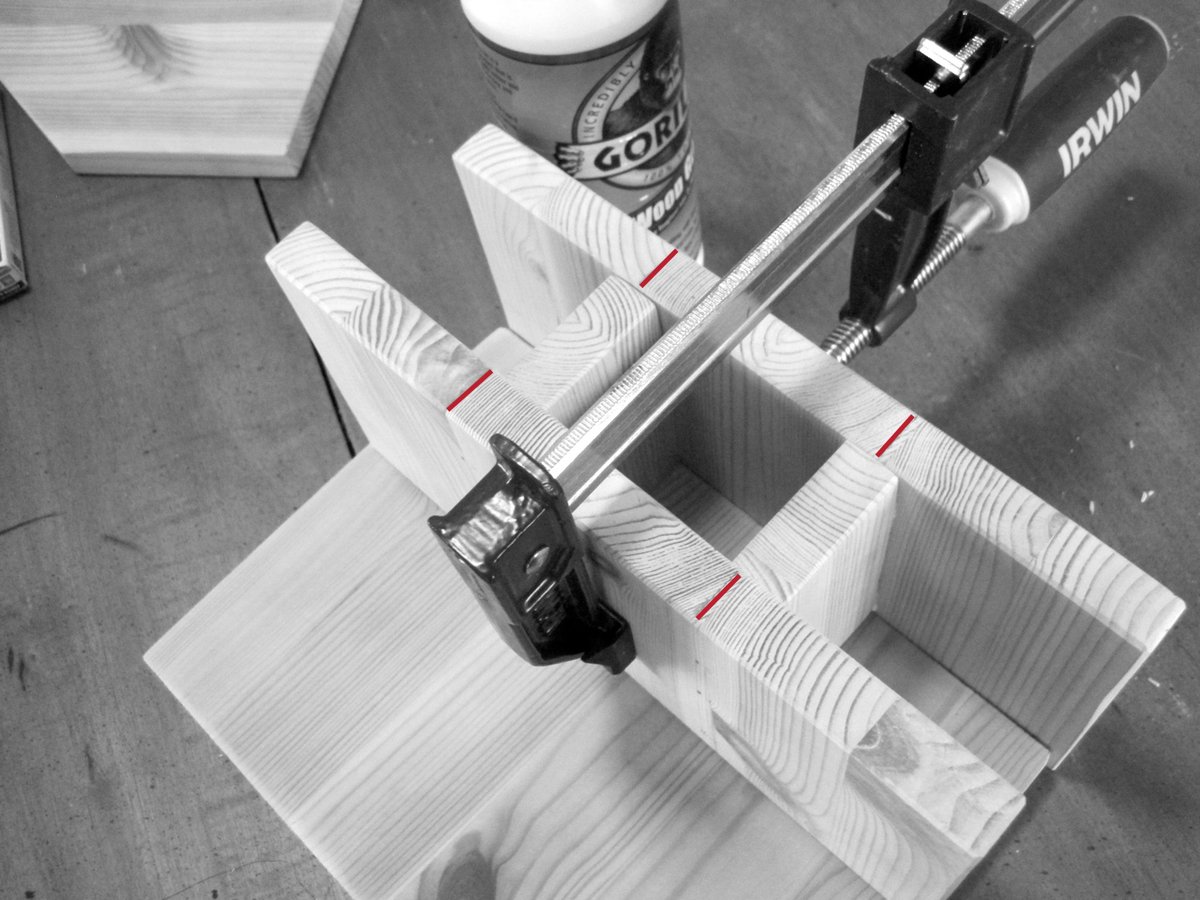
So, full of optimism and/or denial, I went home, cut my new 3/4″ dowel rod to size, and decided to try and work with the cupped 1″ x 6″. Let’s see, which direction should the warp go? Should the toolbox have a wobbly bottom? I tried to use the force of a Workmate to flatten the wood. As soon as I tried to attach two pieces together in a way that would hopefully flatten them both, the end piece of wood split. So I tried again, and it split again. It split in three places. This was after I had spent a long time cutting out and elbow-grease-sanding two “I’m-an-obvious-first-time-jigsaw-user” ends.
Sadly, the wood was better fit for feeding a fire than creating a toolbox. After lamenting my toolbox’s fate, I was told, “Well, at least you have a nice dowel rod!”
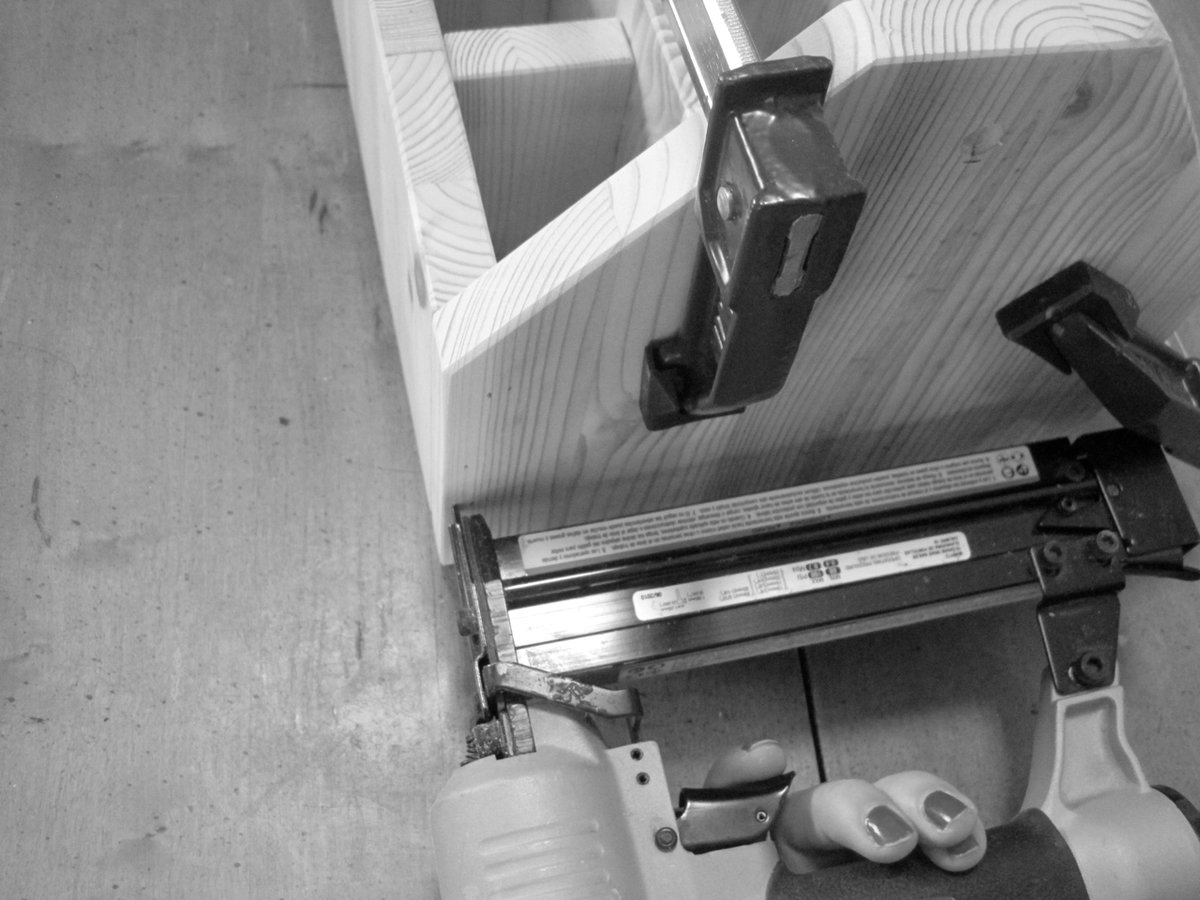
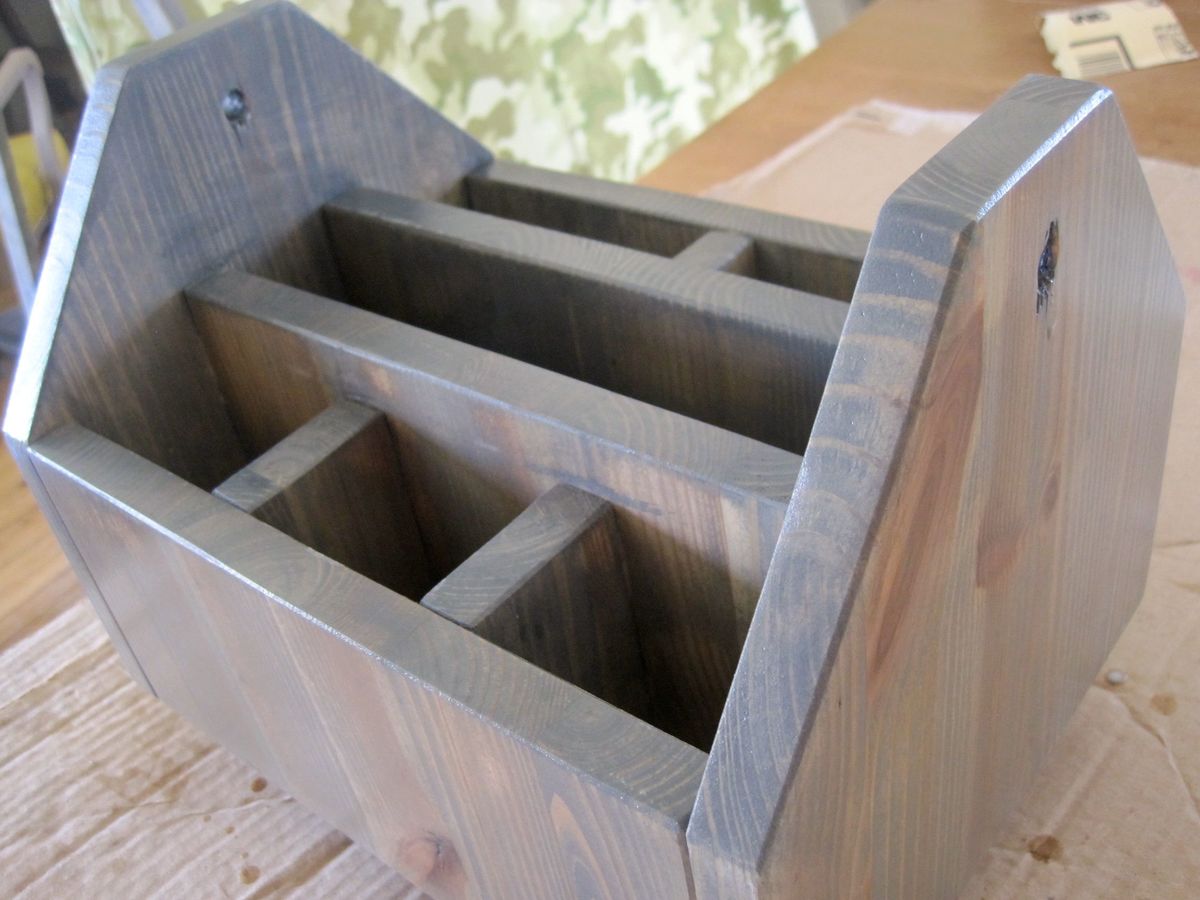
At a different store, two store associates tried to help me find a piece of wood that wasn’t warped or–especially–cupped. One of them reassured me that he was confident the project would turn out this time. Sure enough, the whole box went together in a snap.
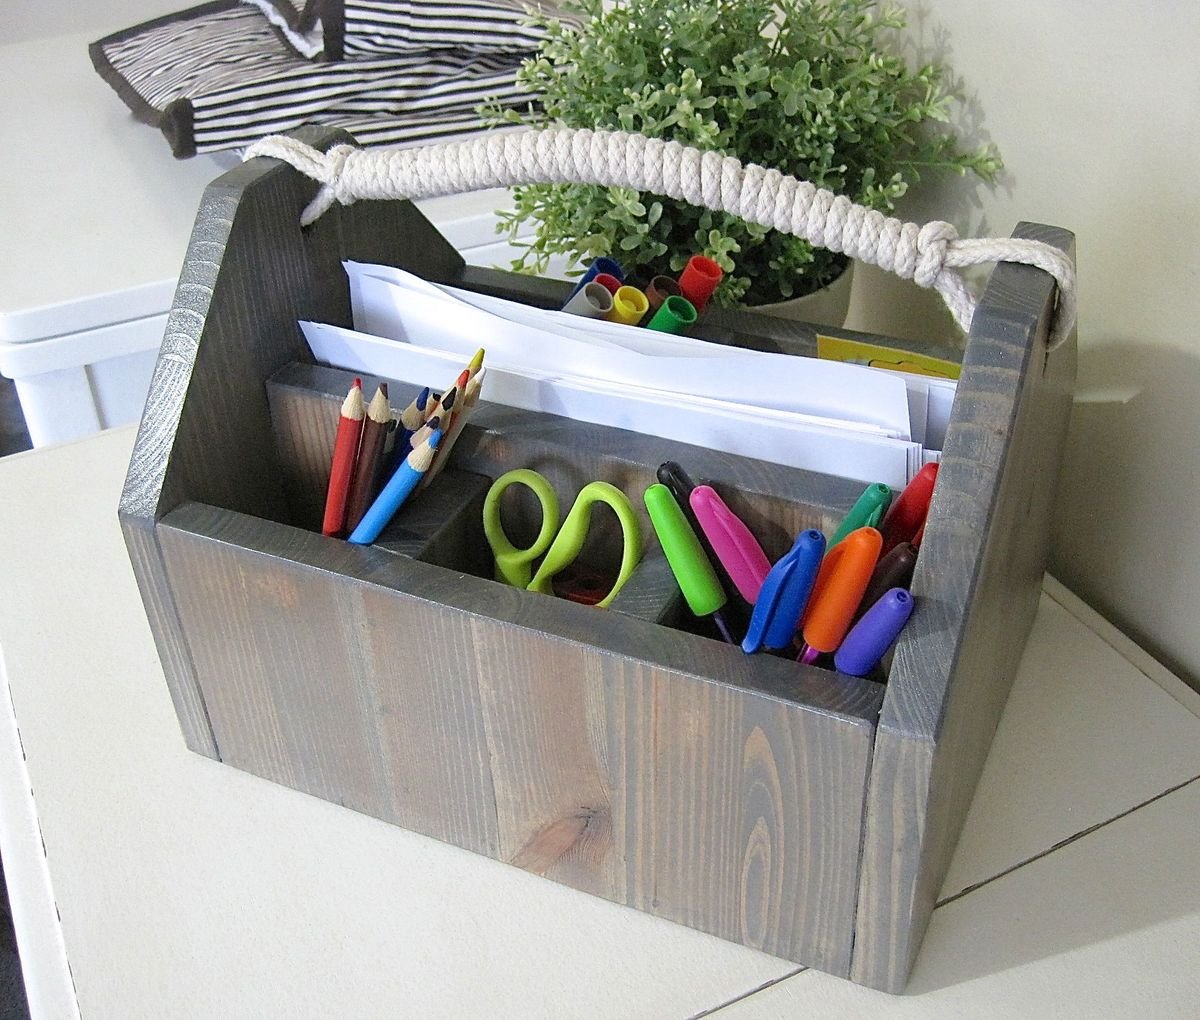
It’s a lovely, classic box and useful for so many different things, including craft storage/toting. This is a project that those of you who work more slowly, like I do, can probably easily finish in only a few days.
Well, as long as you find a non-cupped piece of wood. :)
---
This was first posted to the site in January. I've since found myself mostly using it for crafts. It's really handy to have!
I'm a novice furniture builder and felt I could tackle the Farmhouse Dining Room table and matching Farmhouse bench. With a lot of diligent detail work--especially sanding-my first two projects came out great. Because I was afraid to try the notching part of the plans, I decided to tweek the projects by attaching the stretcher boards with black cabinet screws. I achieved the rustic look I was looking for with both the table and bench!
I built this little hall tree, bench and shoe organizer for the garage entirely from scrap lumber and left over paint. Keeps us organizeed. I really like it.