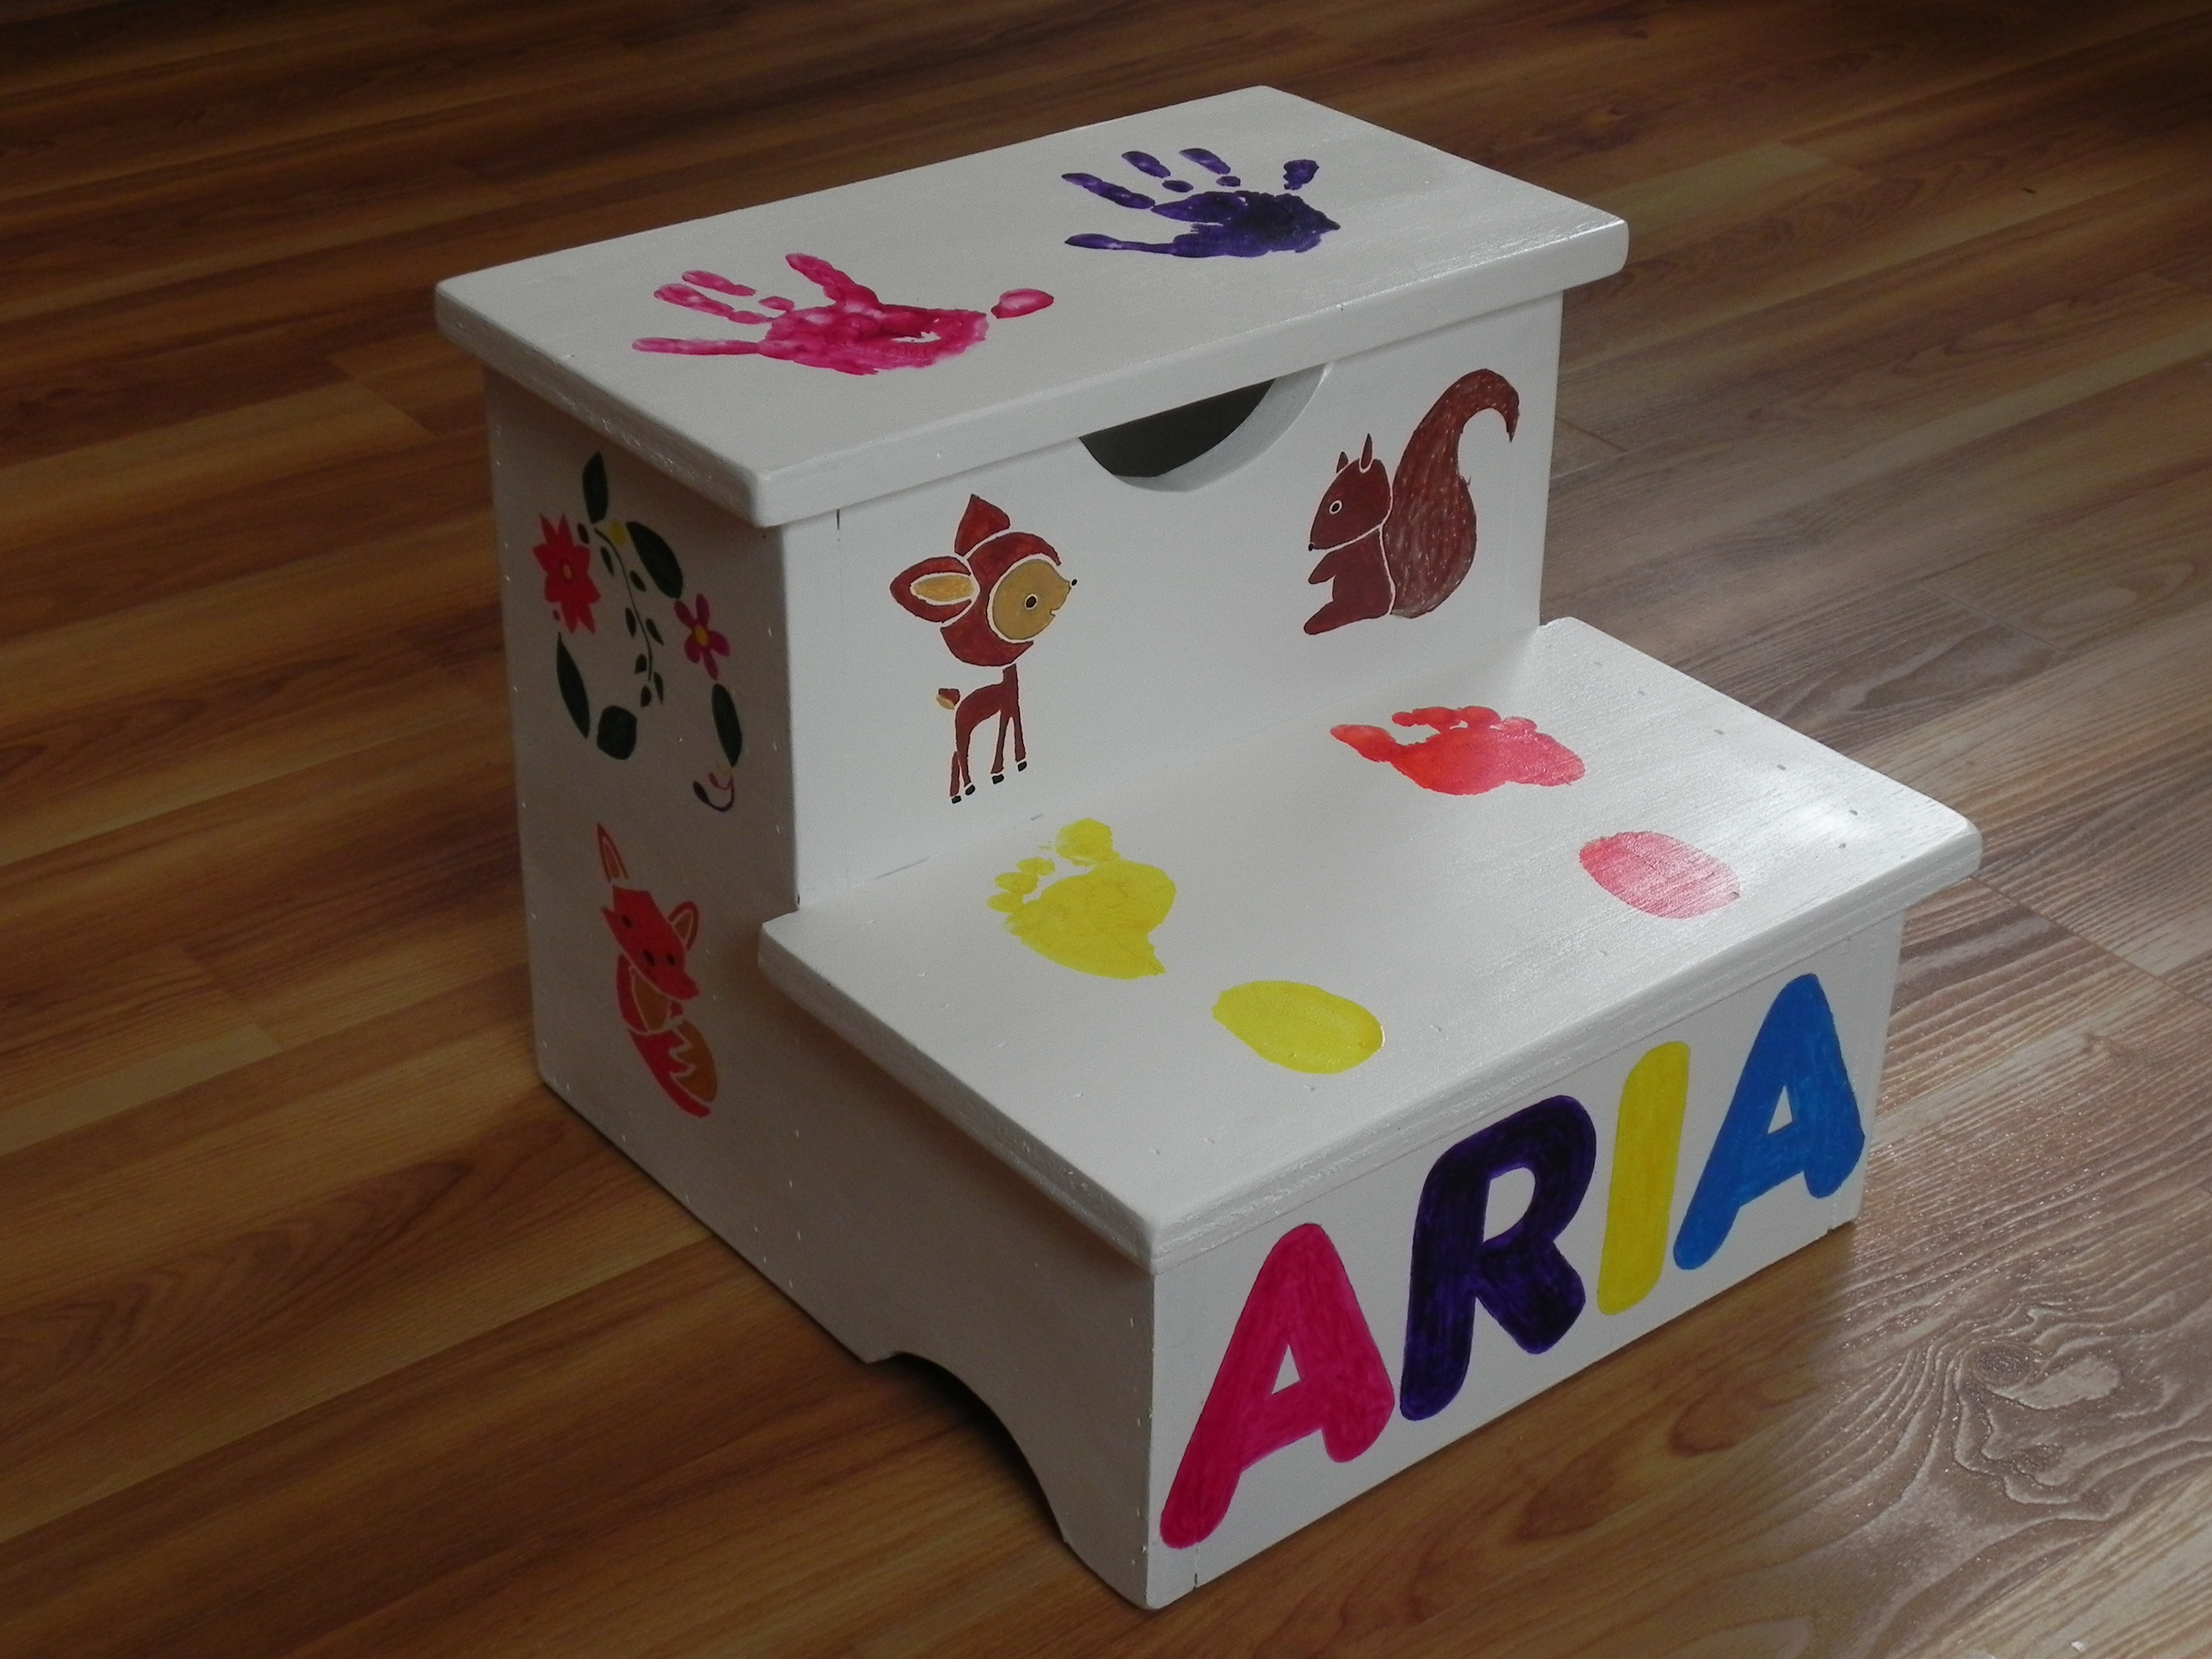
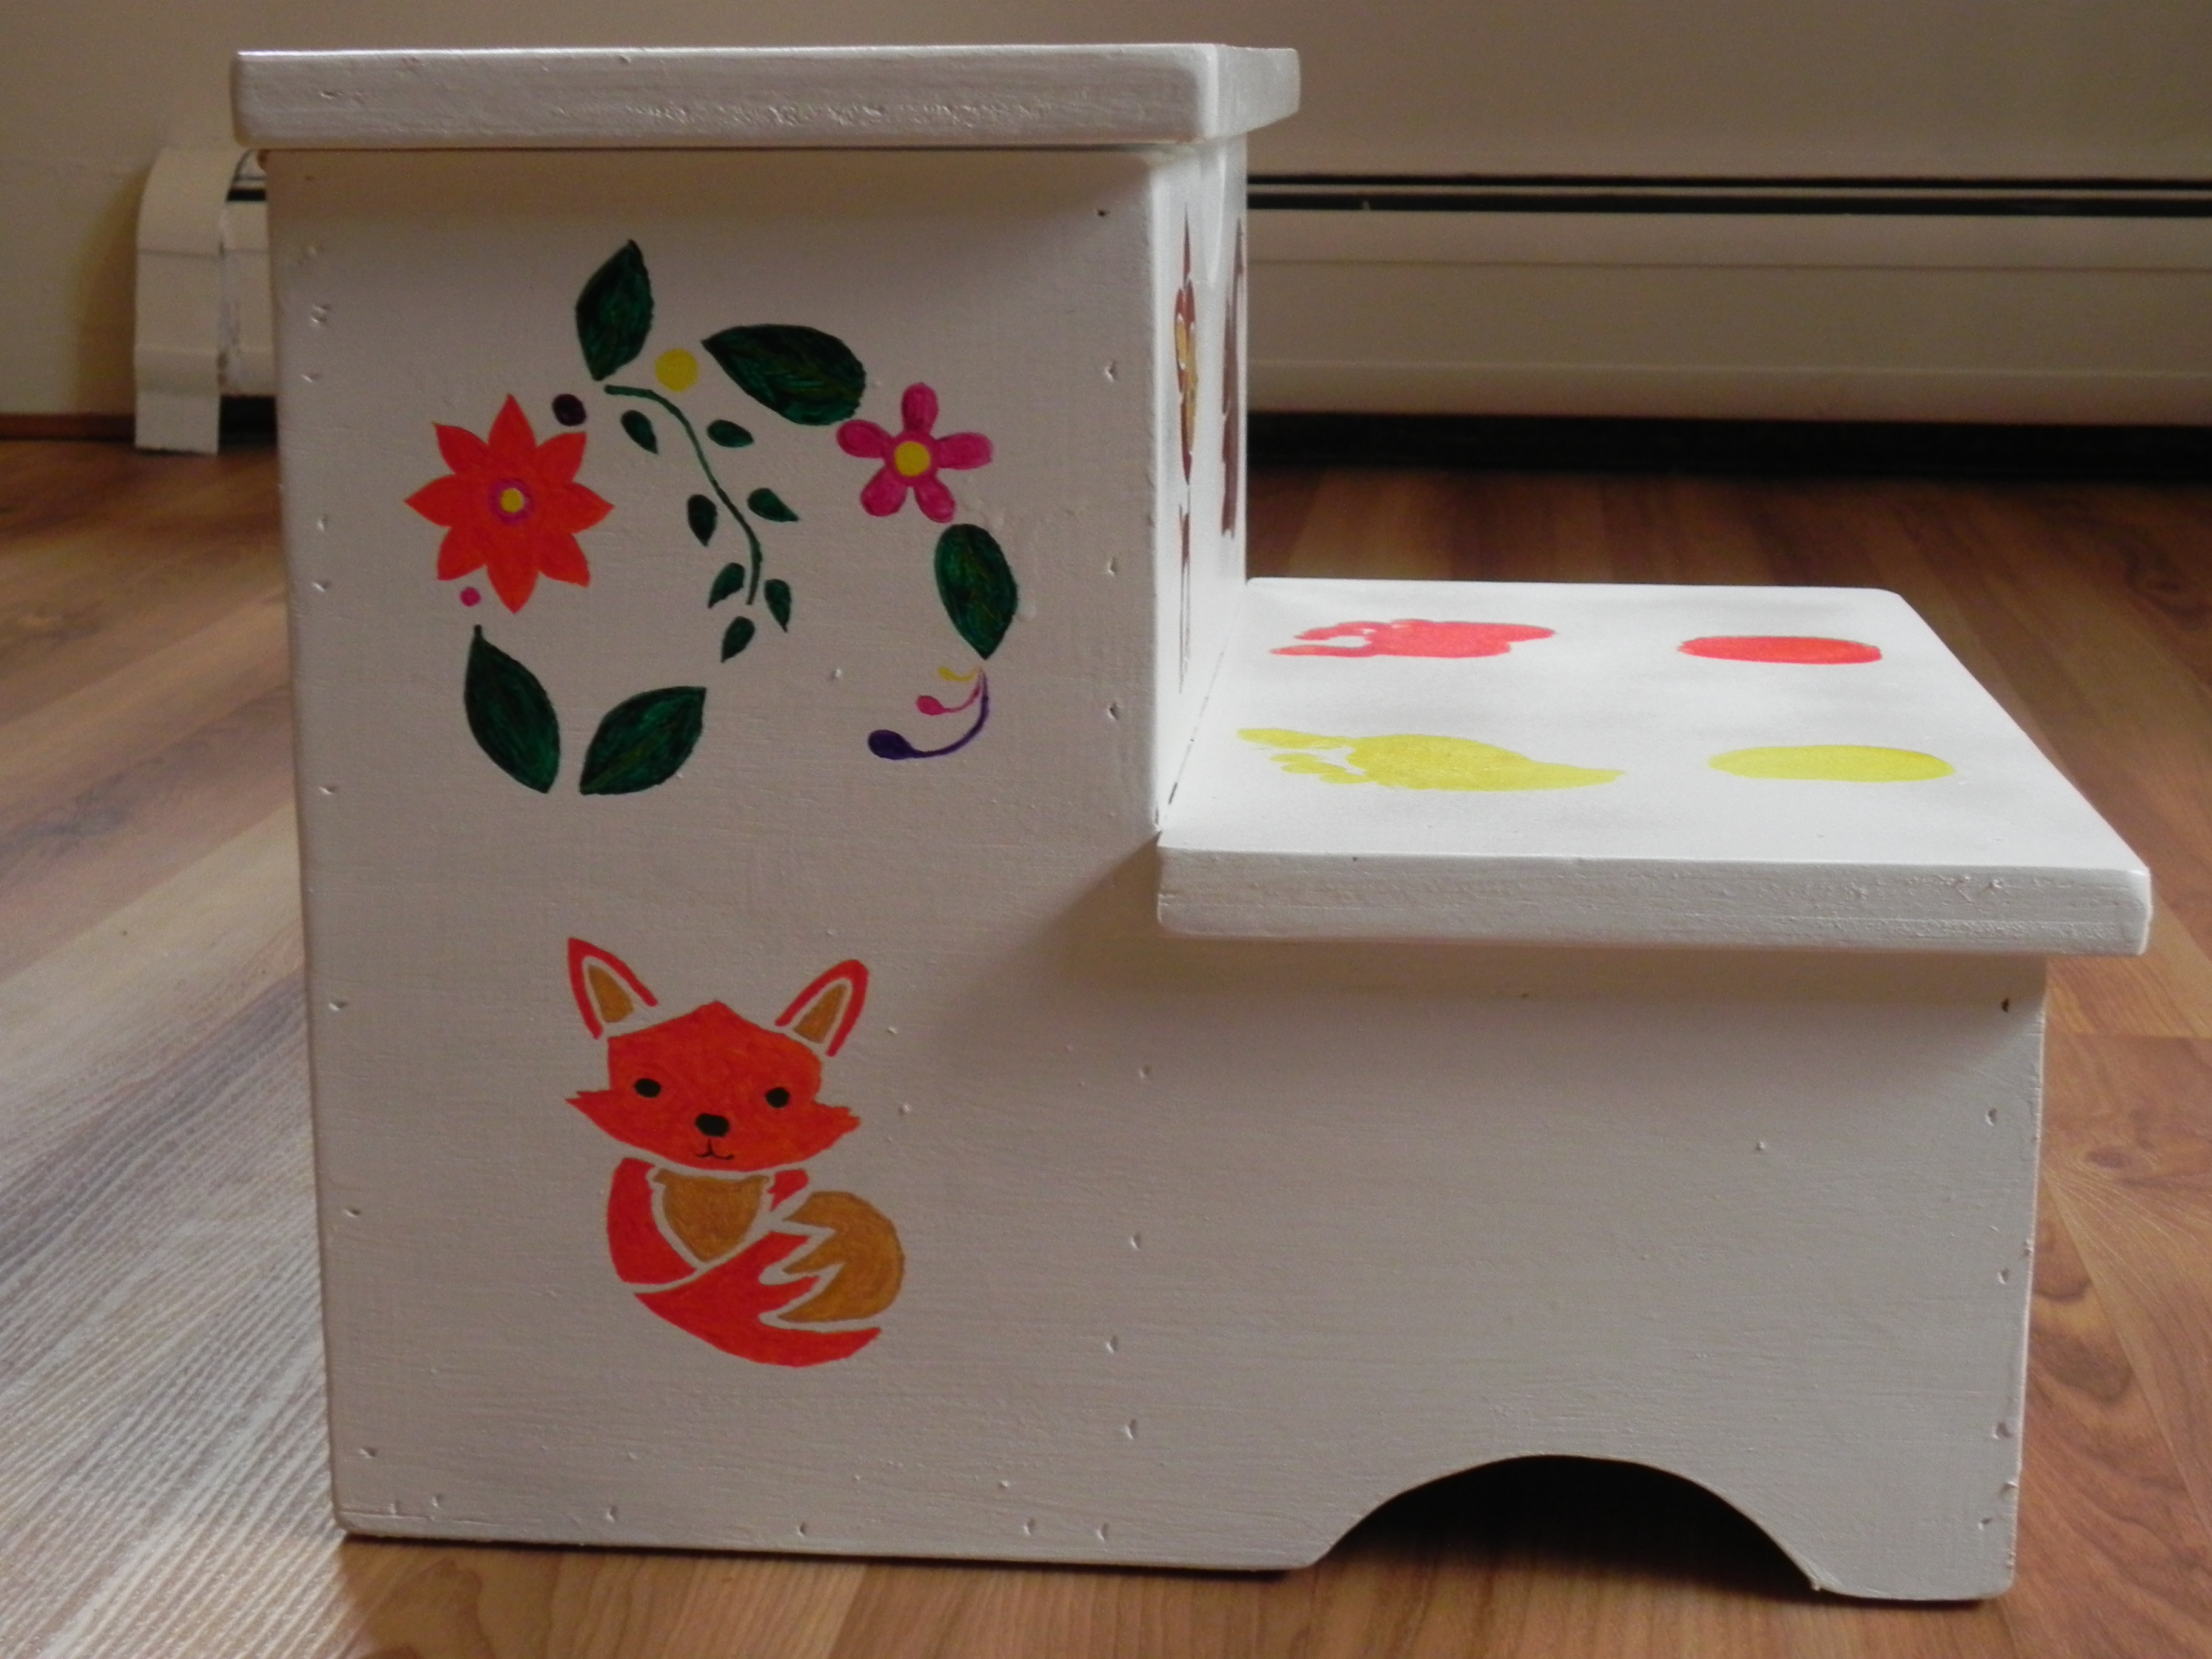
Restoration Hardware Industrial Wagon
![](/sites/default/files/image_359.jpg)
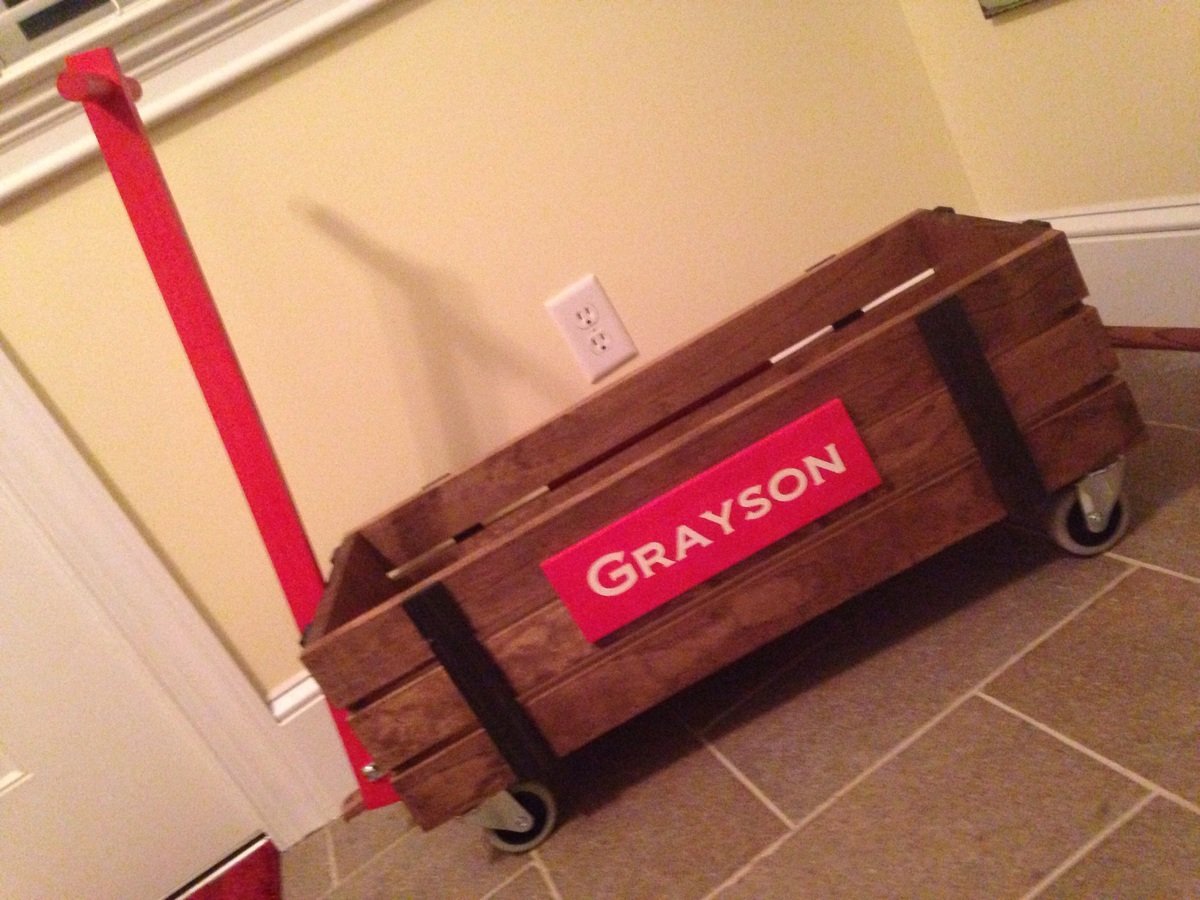
What new Mom wouldn't want this for a baby shower gift!!! Easy build
This farmhouse table I built is 40x84 and has 9" extensions on each end for a total of 102." I opted to go with 2x4 extensions instead of 2x2s for a durable look and feel!
This was my first bench build and I’m happy with the way it turned out! I adjusted the plans to account for wood movement of the table top using mortise and tenon joinery and draw board pins on the bread board ends. Also edge glued the table top boards and used z-clips to attach the bench top.
I finally talked my husband into helping me whip this thing up. It didn't take very long to put it together, but it did take a long time for me to figure out a finish I would like. I used the steel wool/vinegar and black tea stain, but it ended up too dark, nearly black. So I sanded and sanded and applied a wood stain on top of it. It looks great!
I am a Block Printer and Screenprinter, as well as indulging in other projects. I needed a fairly large table that would allow me to print fabric yardage fairly easily, as well as be able to layout the fabric to cut. I decided to build this table that I had seen on a couple of different sites. There was not much instruction on either site, but it was fairly easy, and I was able to figure it out pretty easily.
I wrote a more detailed blog post on my blog with details as well as what I learned while building this table.
I built this for my adult daughter’s Christmas present. I modified the plan to have three drawers instead of the cubby. I also tapered the bottom of the legs. I added a back piece to hold a mirror. I also added door knobs to the back for necklaces.
The top and the back board are both 4 boards glued and clamped together. I finished the edges of the top, drawer fronts, and the back board with an ogee router bit.
We have a 2′x4′ metal furnace cover that takes up a big portion of our dining room wall. To say it is an eye sore would be an understatement! We both love chalkboards, so I decided to make a cover out of chalkboard. Since it still needs to function as a furnace I made a cutout where the vent is. I covered that portion with a tin sheet. It looks so much better!
Learn how to make your own chalkboard paint in any color!
We started this project on a Sunday and finished Tuesday. We did make the legs taller to fit under our tv, so we also needed to adjust the front and back 2x4 support to be a little taller.
other than that, we followed the plans. I stained the top with Rustoleyum Dark Walnut and the bottom is spray painted, painted and distressed using the Shanty 2 Chic ideas.
LOVE this table! It was exactly what I wanted! Now, to find 2 small lamps to sit on either side. :)
Made this dresser for my newest Grand daughter. Turned out pretty nice. A few mistakes for sure!!! But I am proud and its functional. Worked on it off and on for a month.
Mon, 12/21/2020 - 11:23
Thank you for all the plans. I started wood working a year ago and I am still learning.
Recently found the plans and this is what I came up with
The plans are so easy to follow! They are a great jumping off point for customizing the coop for your own needs! We added a run door, ladder support, insulated floor and wall, removable window, and a loft door. The girls LOVE it!
Thank you for all the diagrams on this website, this project could not have been completed without these. The entire project took a month worth of weekends. I used 2 sheets of 3/4" Birch plywood, 2x12x10 Southern Yellow Pine (rip to 4" strips), and 1x8x10 Ponderosa Pine for the roof and slats. Our 3 year old loves the bed and could not wait to use it. All month he has been asking about his new room, normally he does not like change but he loved this bed.
I've made numerous modern Adirondack Chairs using Ana White's design. The most often asked question is "does it come in different sizes." So I scaled the chair by 80%. The "mini" is perfect for children up to the age of 10 or as lawn decoration. Email me at [email protected] for a copy of the "mini" step-by-step plans.
This was made from reclaimed wood from various building around the DC area.
Sun, 02/17/2013 - 07:28
Nice! Love the table and the pipe bracing is very cool.
American Girl Farmhouse Doll Bed.
Modification:
Customized a space for our trash bin, to lift it up to the main floor level. Now we can toss trash without leaving the kitchen. Fantastic!
Been wanting to make some Adirondack chairs for years; have about 10 different plans saved that one day I could get to. These 2x4 modern plans made getting them done quickly possible due to simplicity of the cut list and cheap cost of materials. The only real change I made was to use 2x6 for the arms; I cut a taper along outside edge and increased the length of the arms by about an inch and a half to overhang the front legs a bit. Since I just used basic framing lumber, I milled all of the boards first with table saw and planer to make square consistent edges. And, I chose to use pocket screws in as many joints as I could so I wouldn't have screw holes on any visible faces. Add in a lucky find at the big box store paint return; scored this blue exterior paint for $2.00 a quart, and my weekend project turned out pretty good. Now I've got two neighbors that want 'em.
This was my first time building a piece of furniture. I learned a lot and was able to hide most of the mistakes I did make. It came out good, and now I'm working on adding in some pull out drawers inside the cabinets for movie storage.
This was my first project (ever). There were a few times that I wanted to throw the whole thing on the floor and start over but I persisted and it actually turned out very nice. Way better than I had anticipated. Thank you for the plans!
My little girl needed a step stool after building a modern height bathroom vanity. She was so excited to help with the painting. This was a very fast build. I spent more time painting than building. I used scrap 3/4" purebond plywood and had the paint on hand. I also used a spray lacquer to seal the paint. I used glue and my brad nailer, but will also add screws for extra support now that it is painted. I used a CD to trace the curves and the edge of a 2x4 to trace the handle. Thank you for another great plan!
Comments
Ana White
Fri, 11/21/2014 - 09:27
Oh that's cute!
Oh that's cute!