Community Brag Posts
Farm table

I used some of the measurements that I found on your site and downsized them to fit my needs. The table was a wedding gift for my granddaughter. She and her new husband were very pleased. Thanks for your help.
Built from Plan(s)
Comments
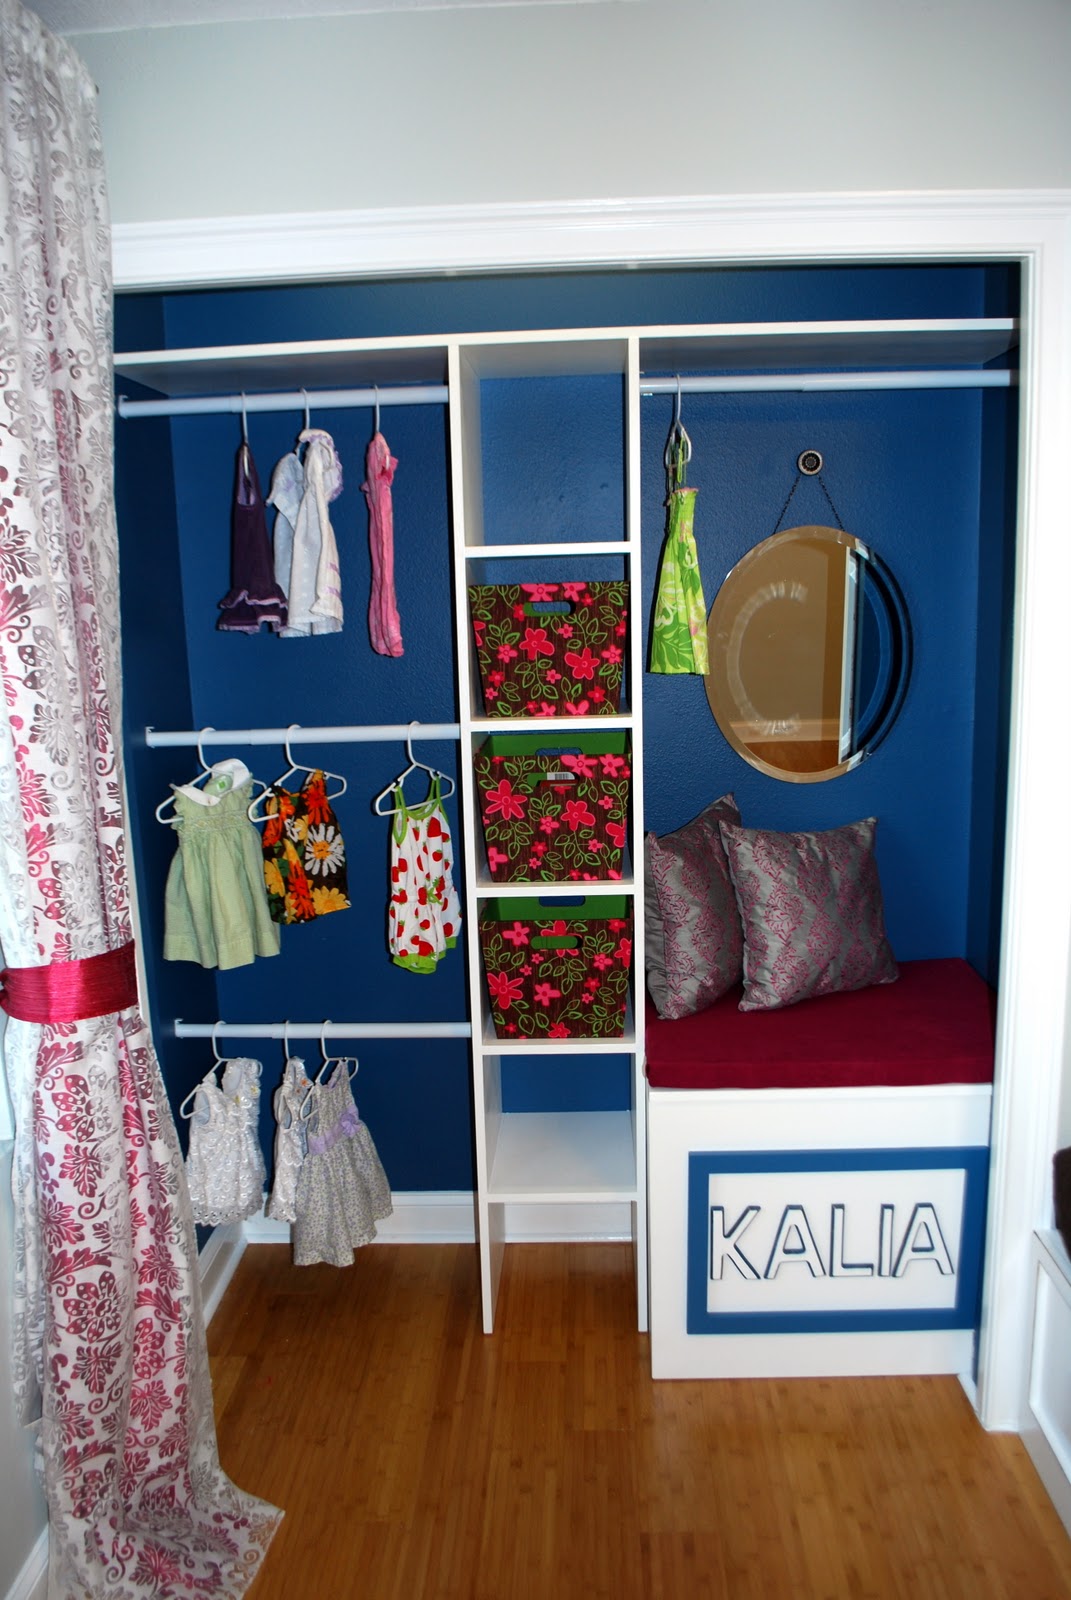
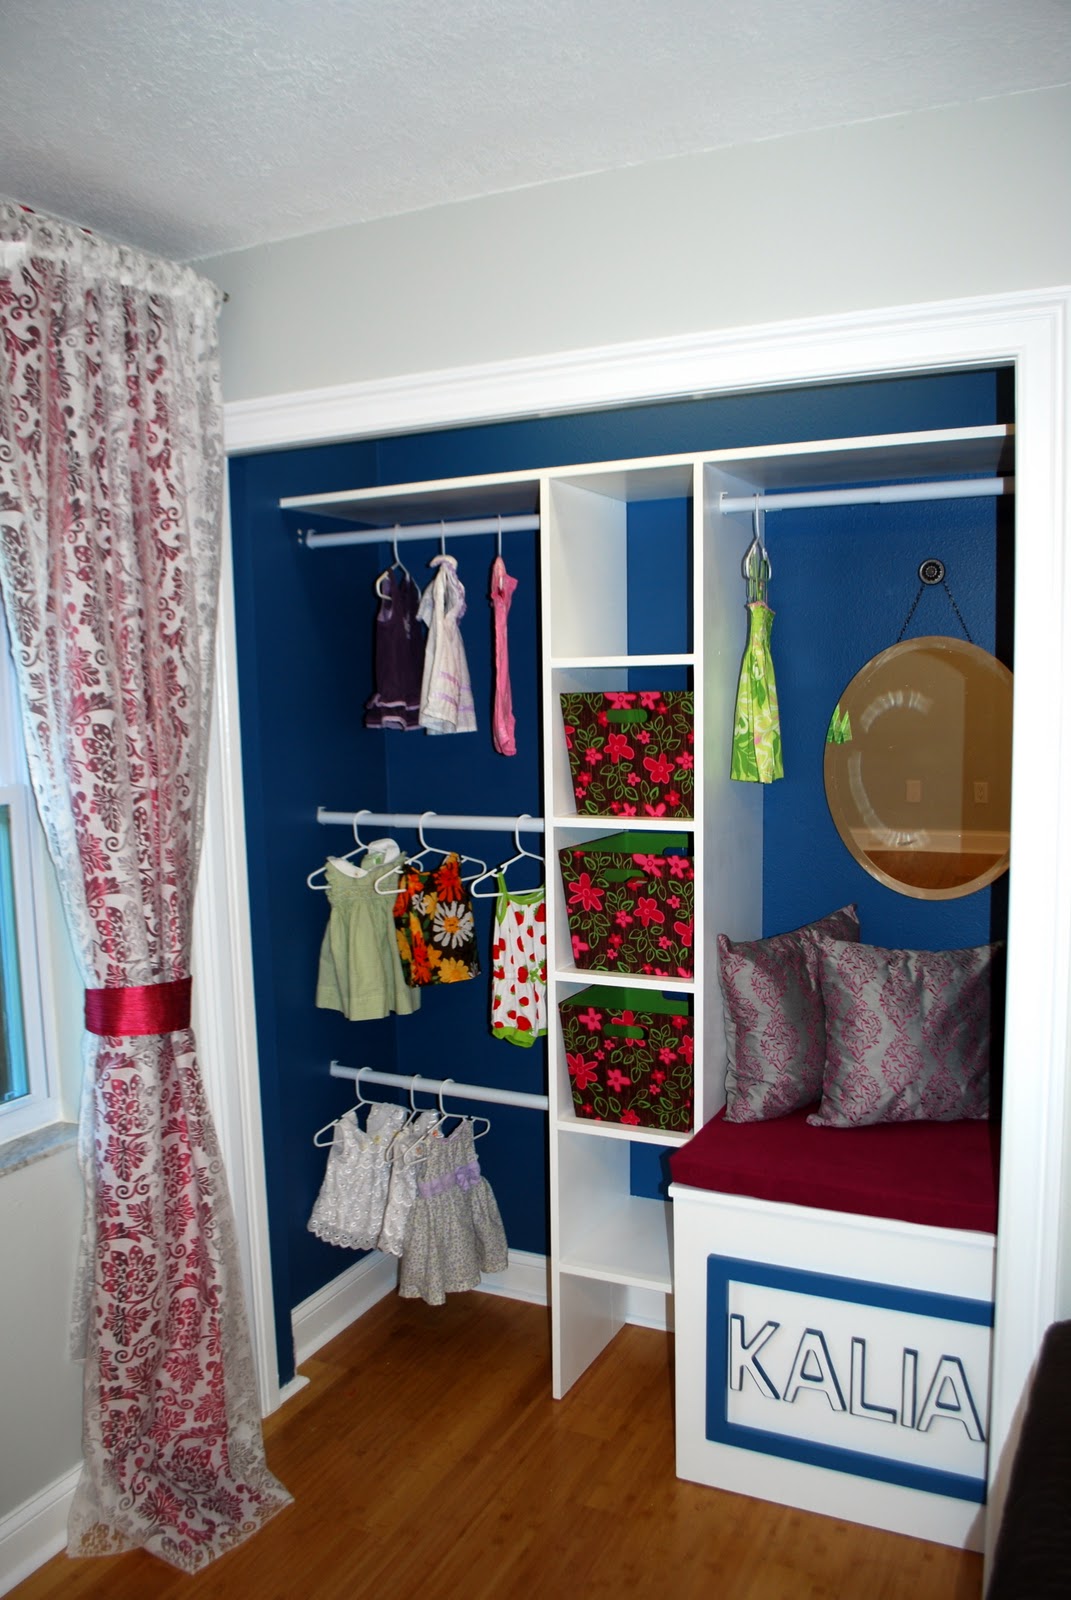
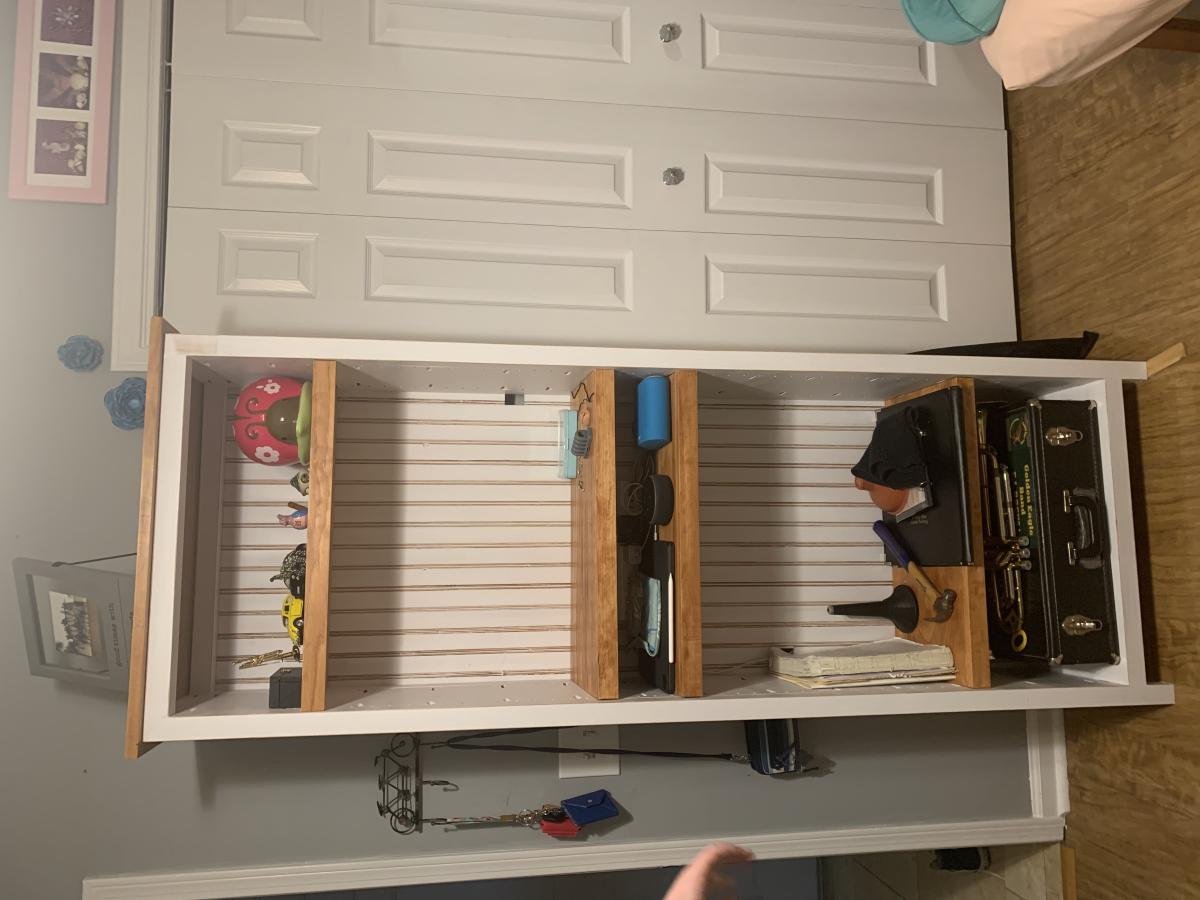
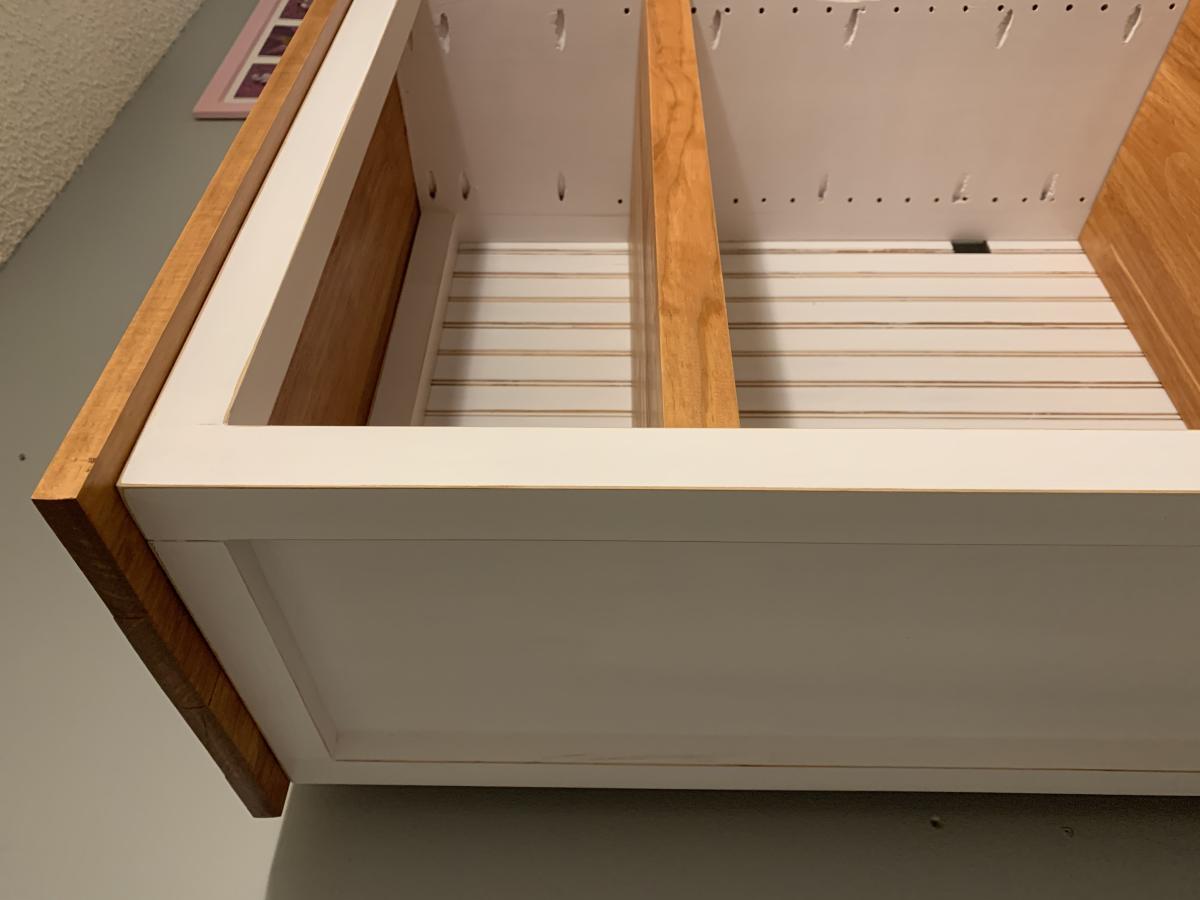
Built In Closet for Nursery Room
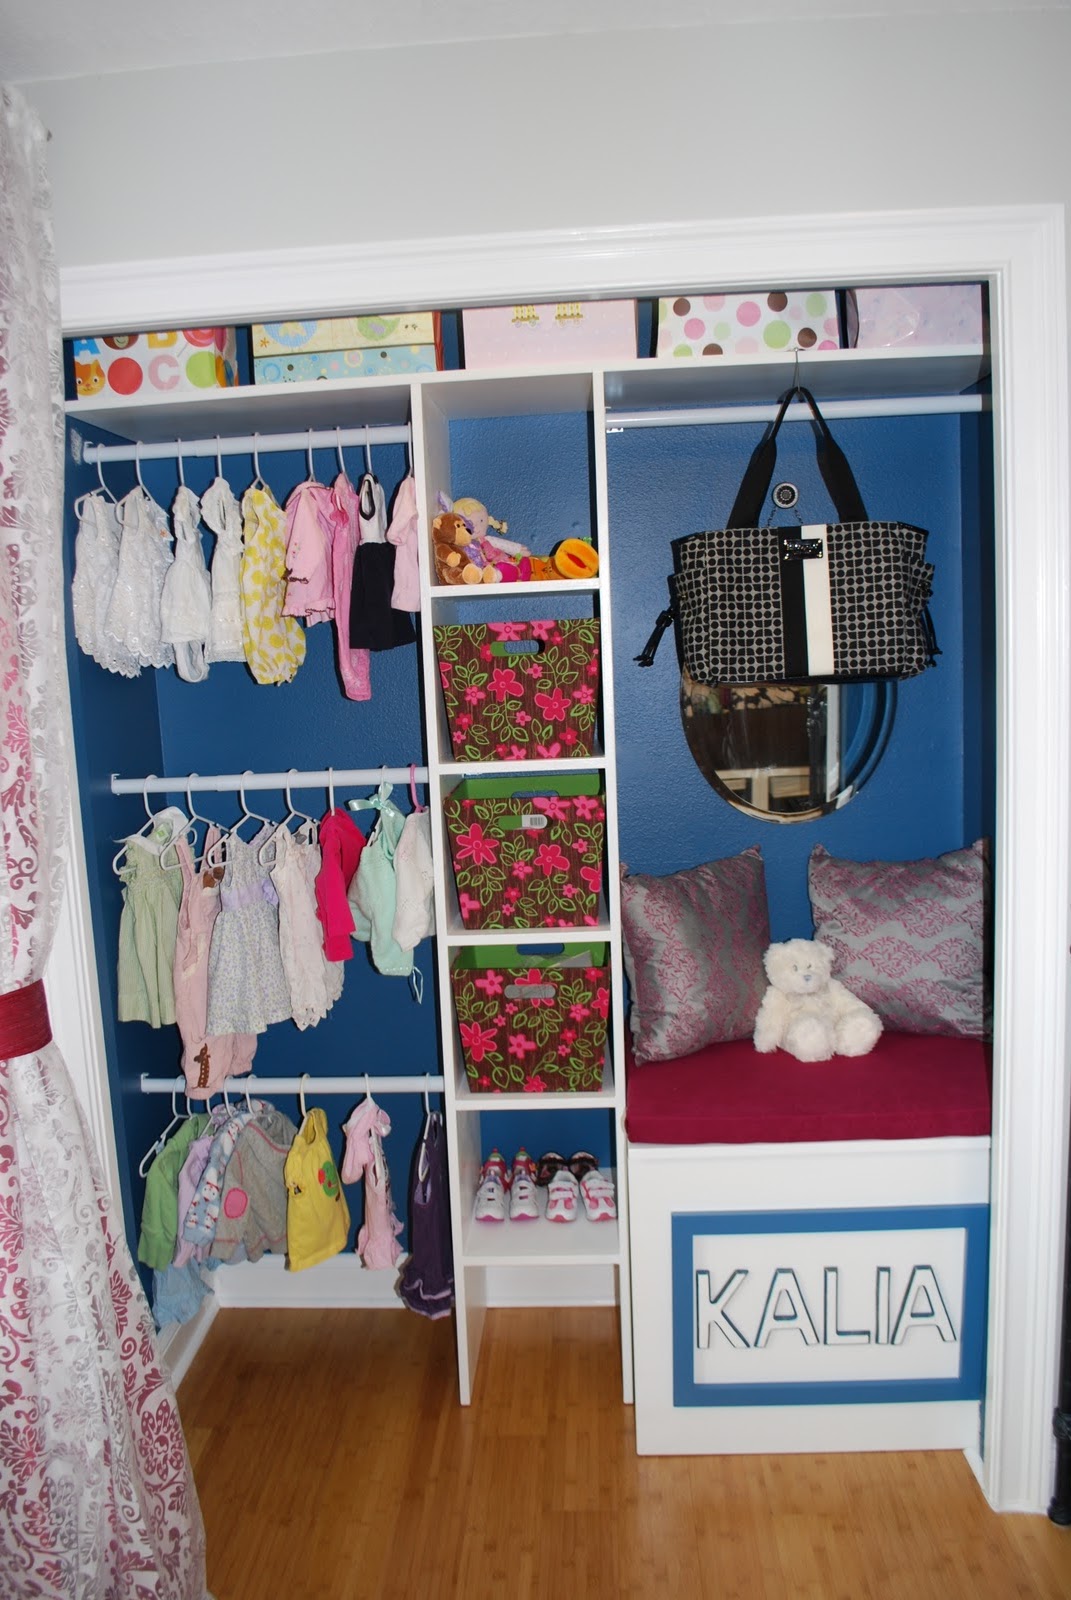
I didn't follow Ana's plans for this, I actually designed the closet system to correspond with my dimensions / wants / desires (see blog post), but this goes to show you that once you start building things, it's really hard to stop! I think in building brain now. I don't think in "how can I afford that" terms anymore, I think in "how can I make something similar, but BETTER?" Ana has helped us make our nursery for our first baby a labor of love!

Estimated Cost
$100
Estimated Time Investment
Afternoon Project (3-6 Hours)
Finish Used
We primed all of this with white primer and then applied a few coats of ultra white paint by behr.
Recommended Skill Level
Intermediate
Adirondack Side Table
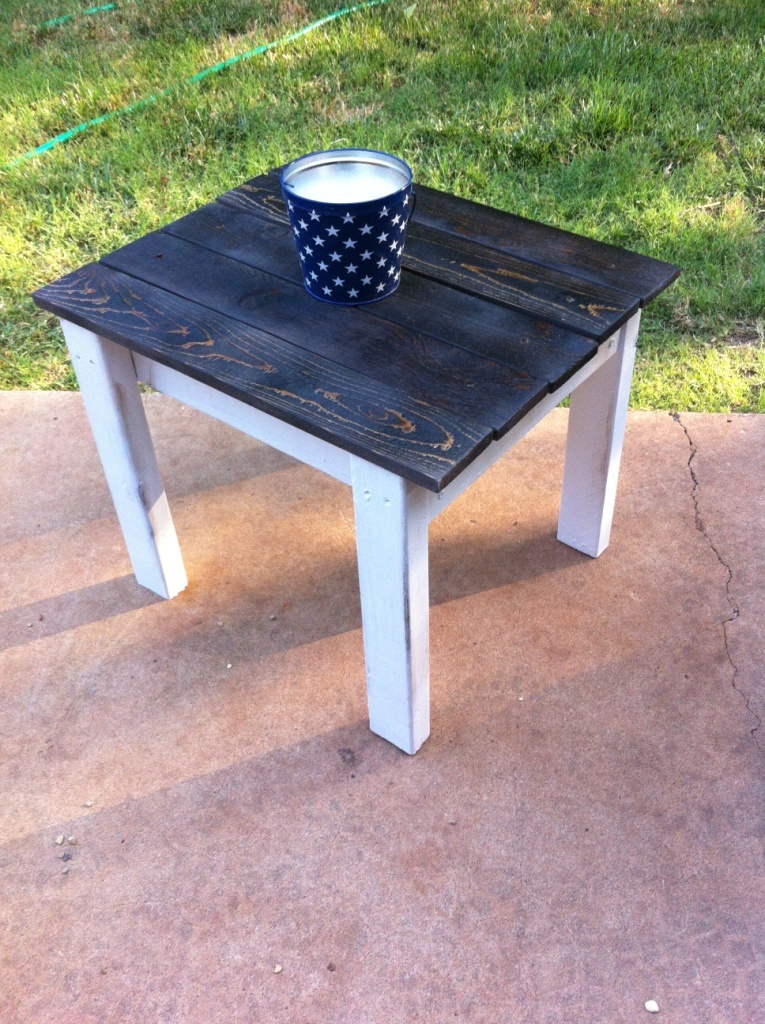
Adirondack Side Table made from leftover 2x3 pine and two cedar fence posts. Stained with Minwax Dark Walnut and sprayed with Minwax clear matte sealer.
Built from Plan(s)
Estimated Cost
$10
Estimated Time Investment
An Hour or Two (0-2 Hours)
Finish Used
Minwax Dark Walnut. Minwax clear sealer, matte. Leftover white paint for base.
Recommended Skill Level
Starter Project
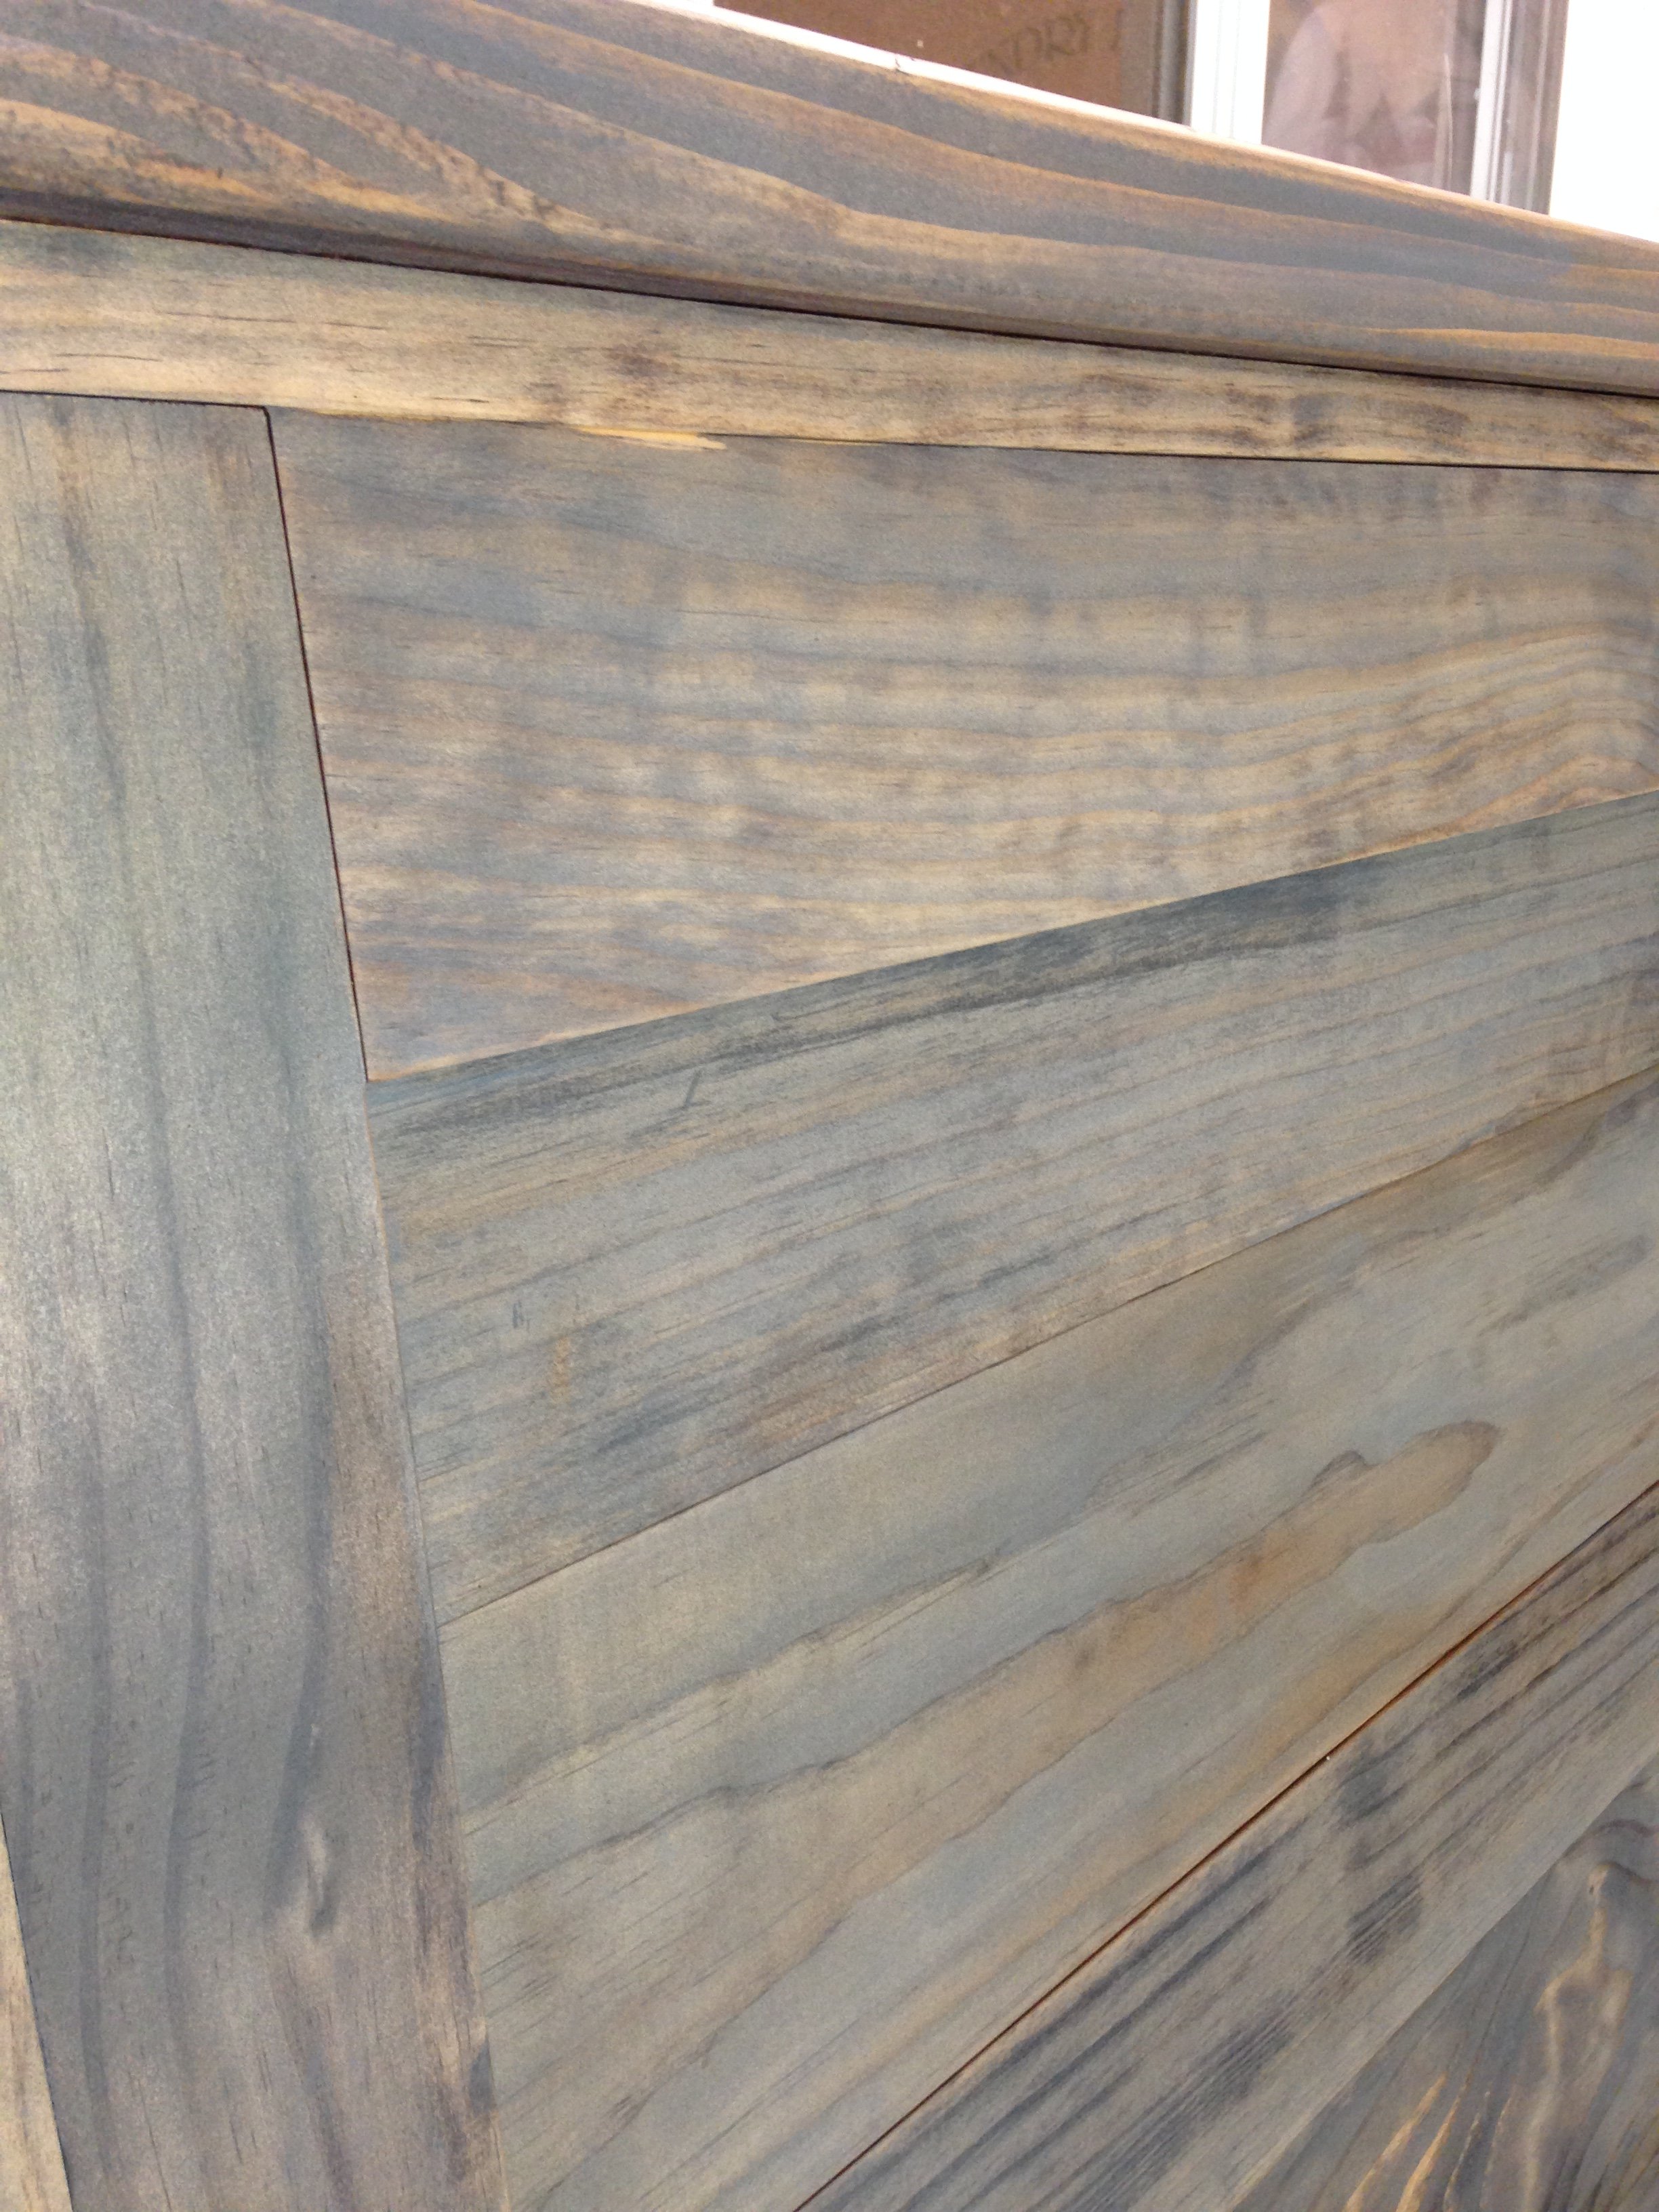
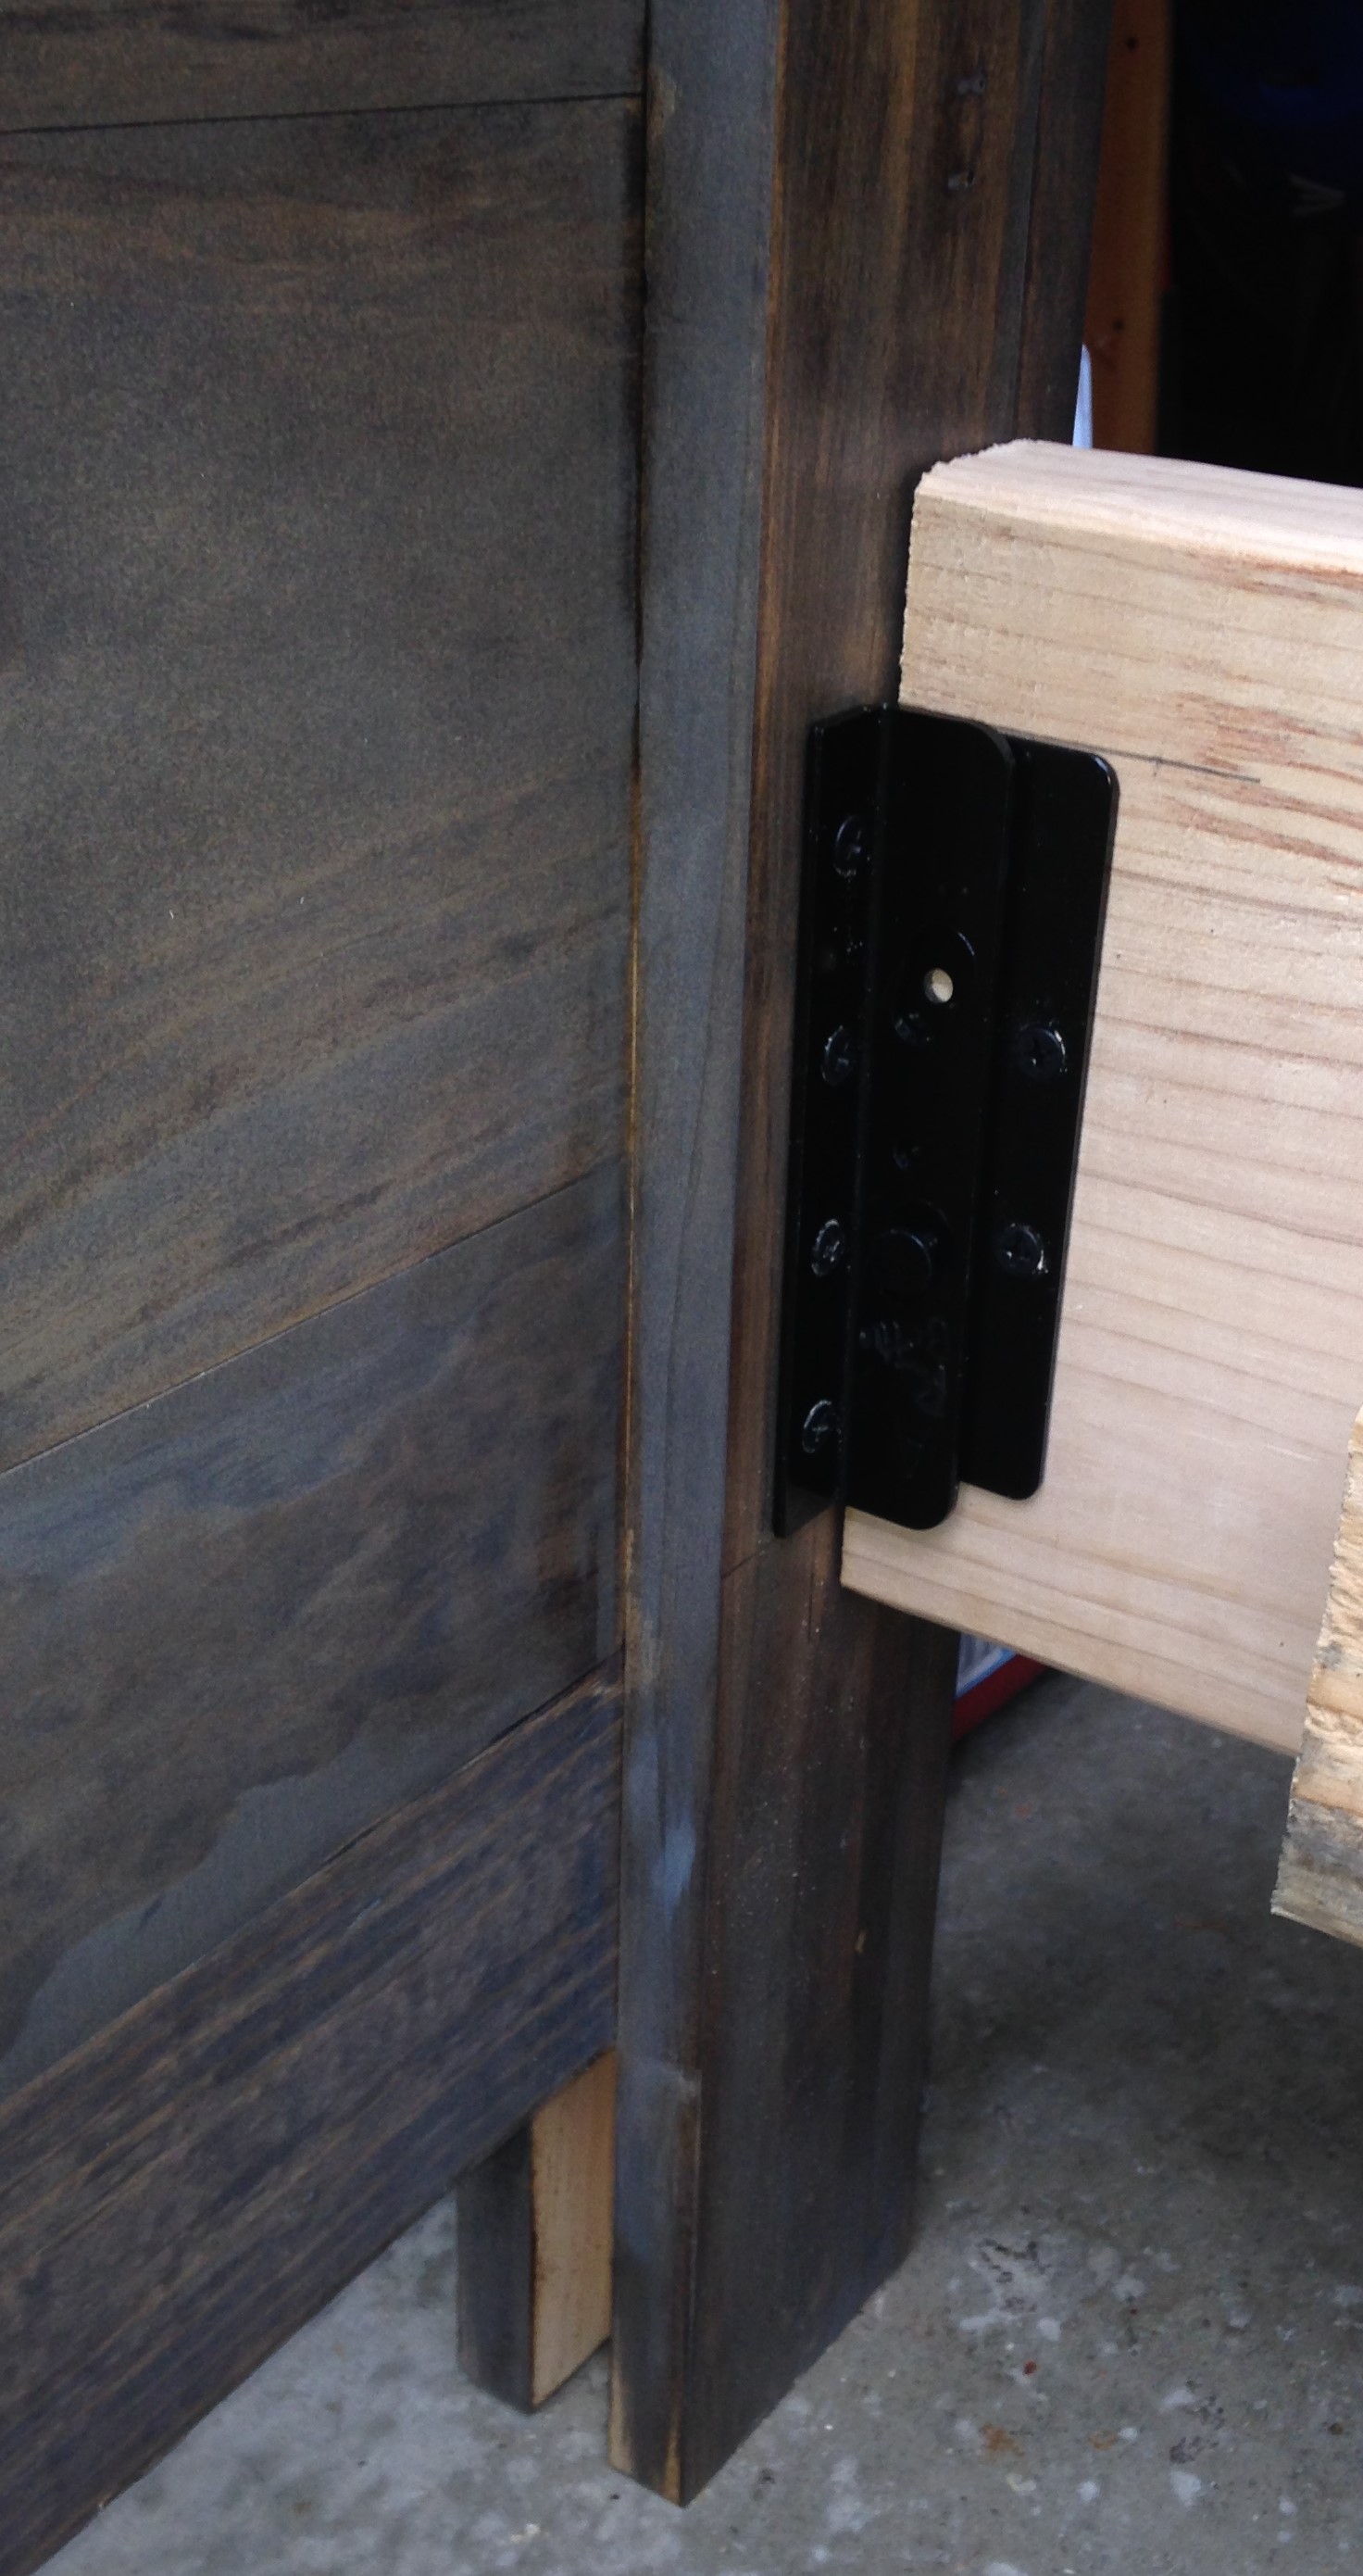
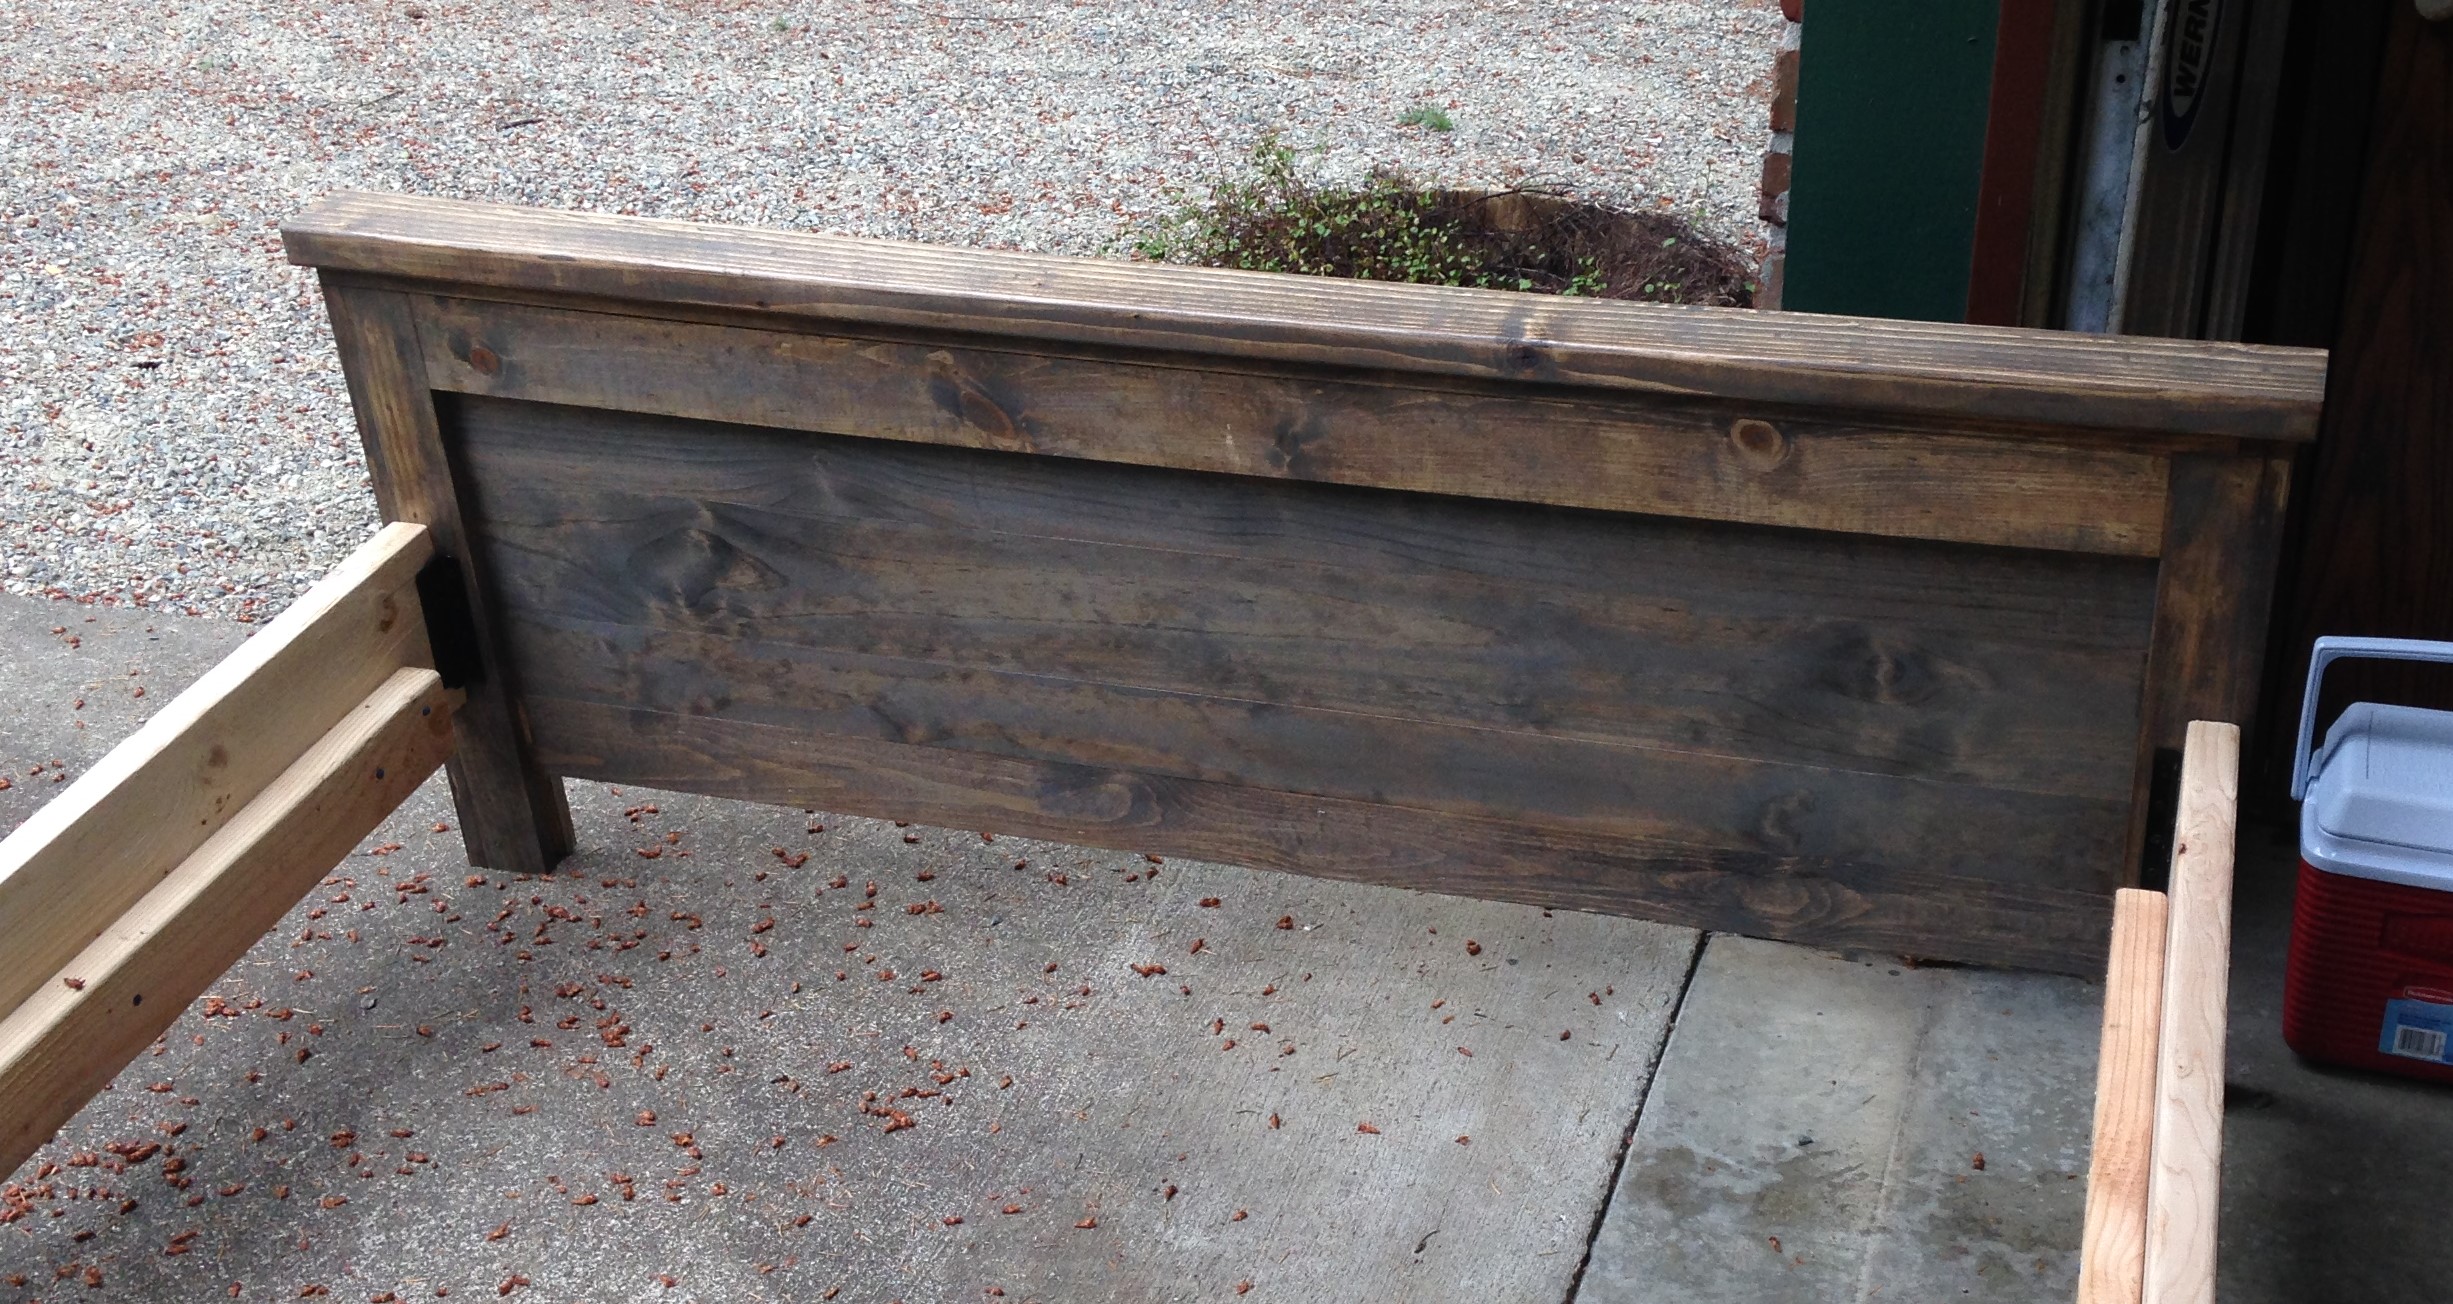
Queen Headboard and Footboard
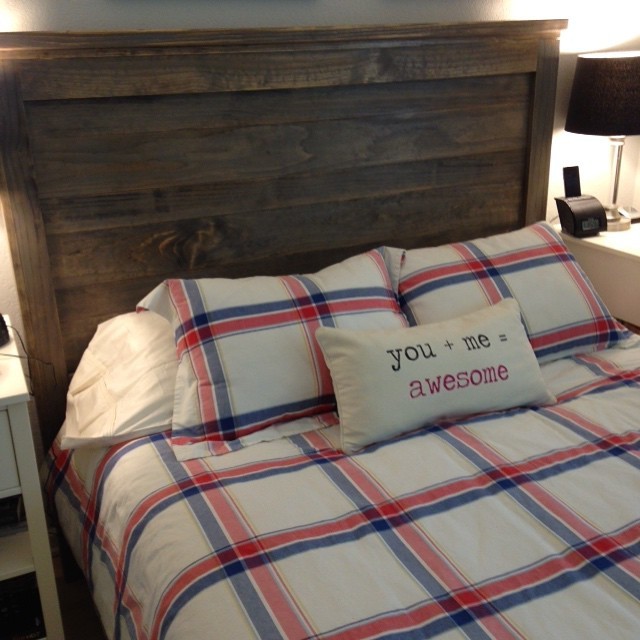
Decided to build for myself after many projects for my kids and friends. Liked the simple look of the reclaimed wood headboard. Very easy to build. After building headboard and attaching to a standard metal frame, I was very disappointed it the stability of the headboard. I was not interested in attaching headboard to the wall, so I decided on building a matching footboard as well as side rails. Rockler has some great hardware for attaching side rails, making it simple to be able to disassemble should I need to in the future. I did extensive homework for the stain as I was going for a weathered beach wood look. Used Dark Walnut wiped off almost immediately. Followed immediately by the weathered gray, which was wiped off immediately. After drying for 24 hours, finished with 2-3 coats of the gel topcoat. Easiest application is to use an old tube sock over a gloved hand.
Very pleased with end result and with side rails and footboard, it is very sturdy.
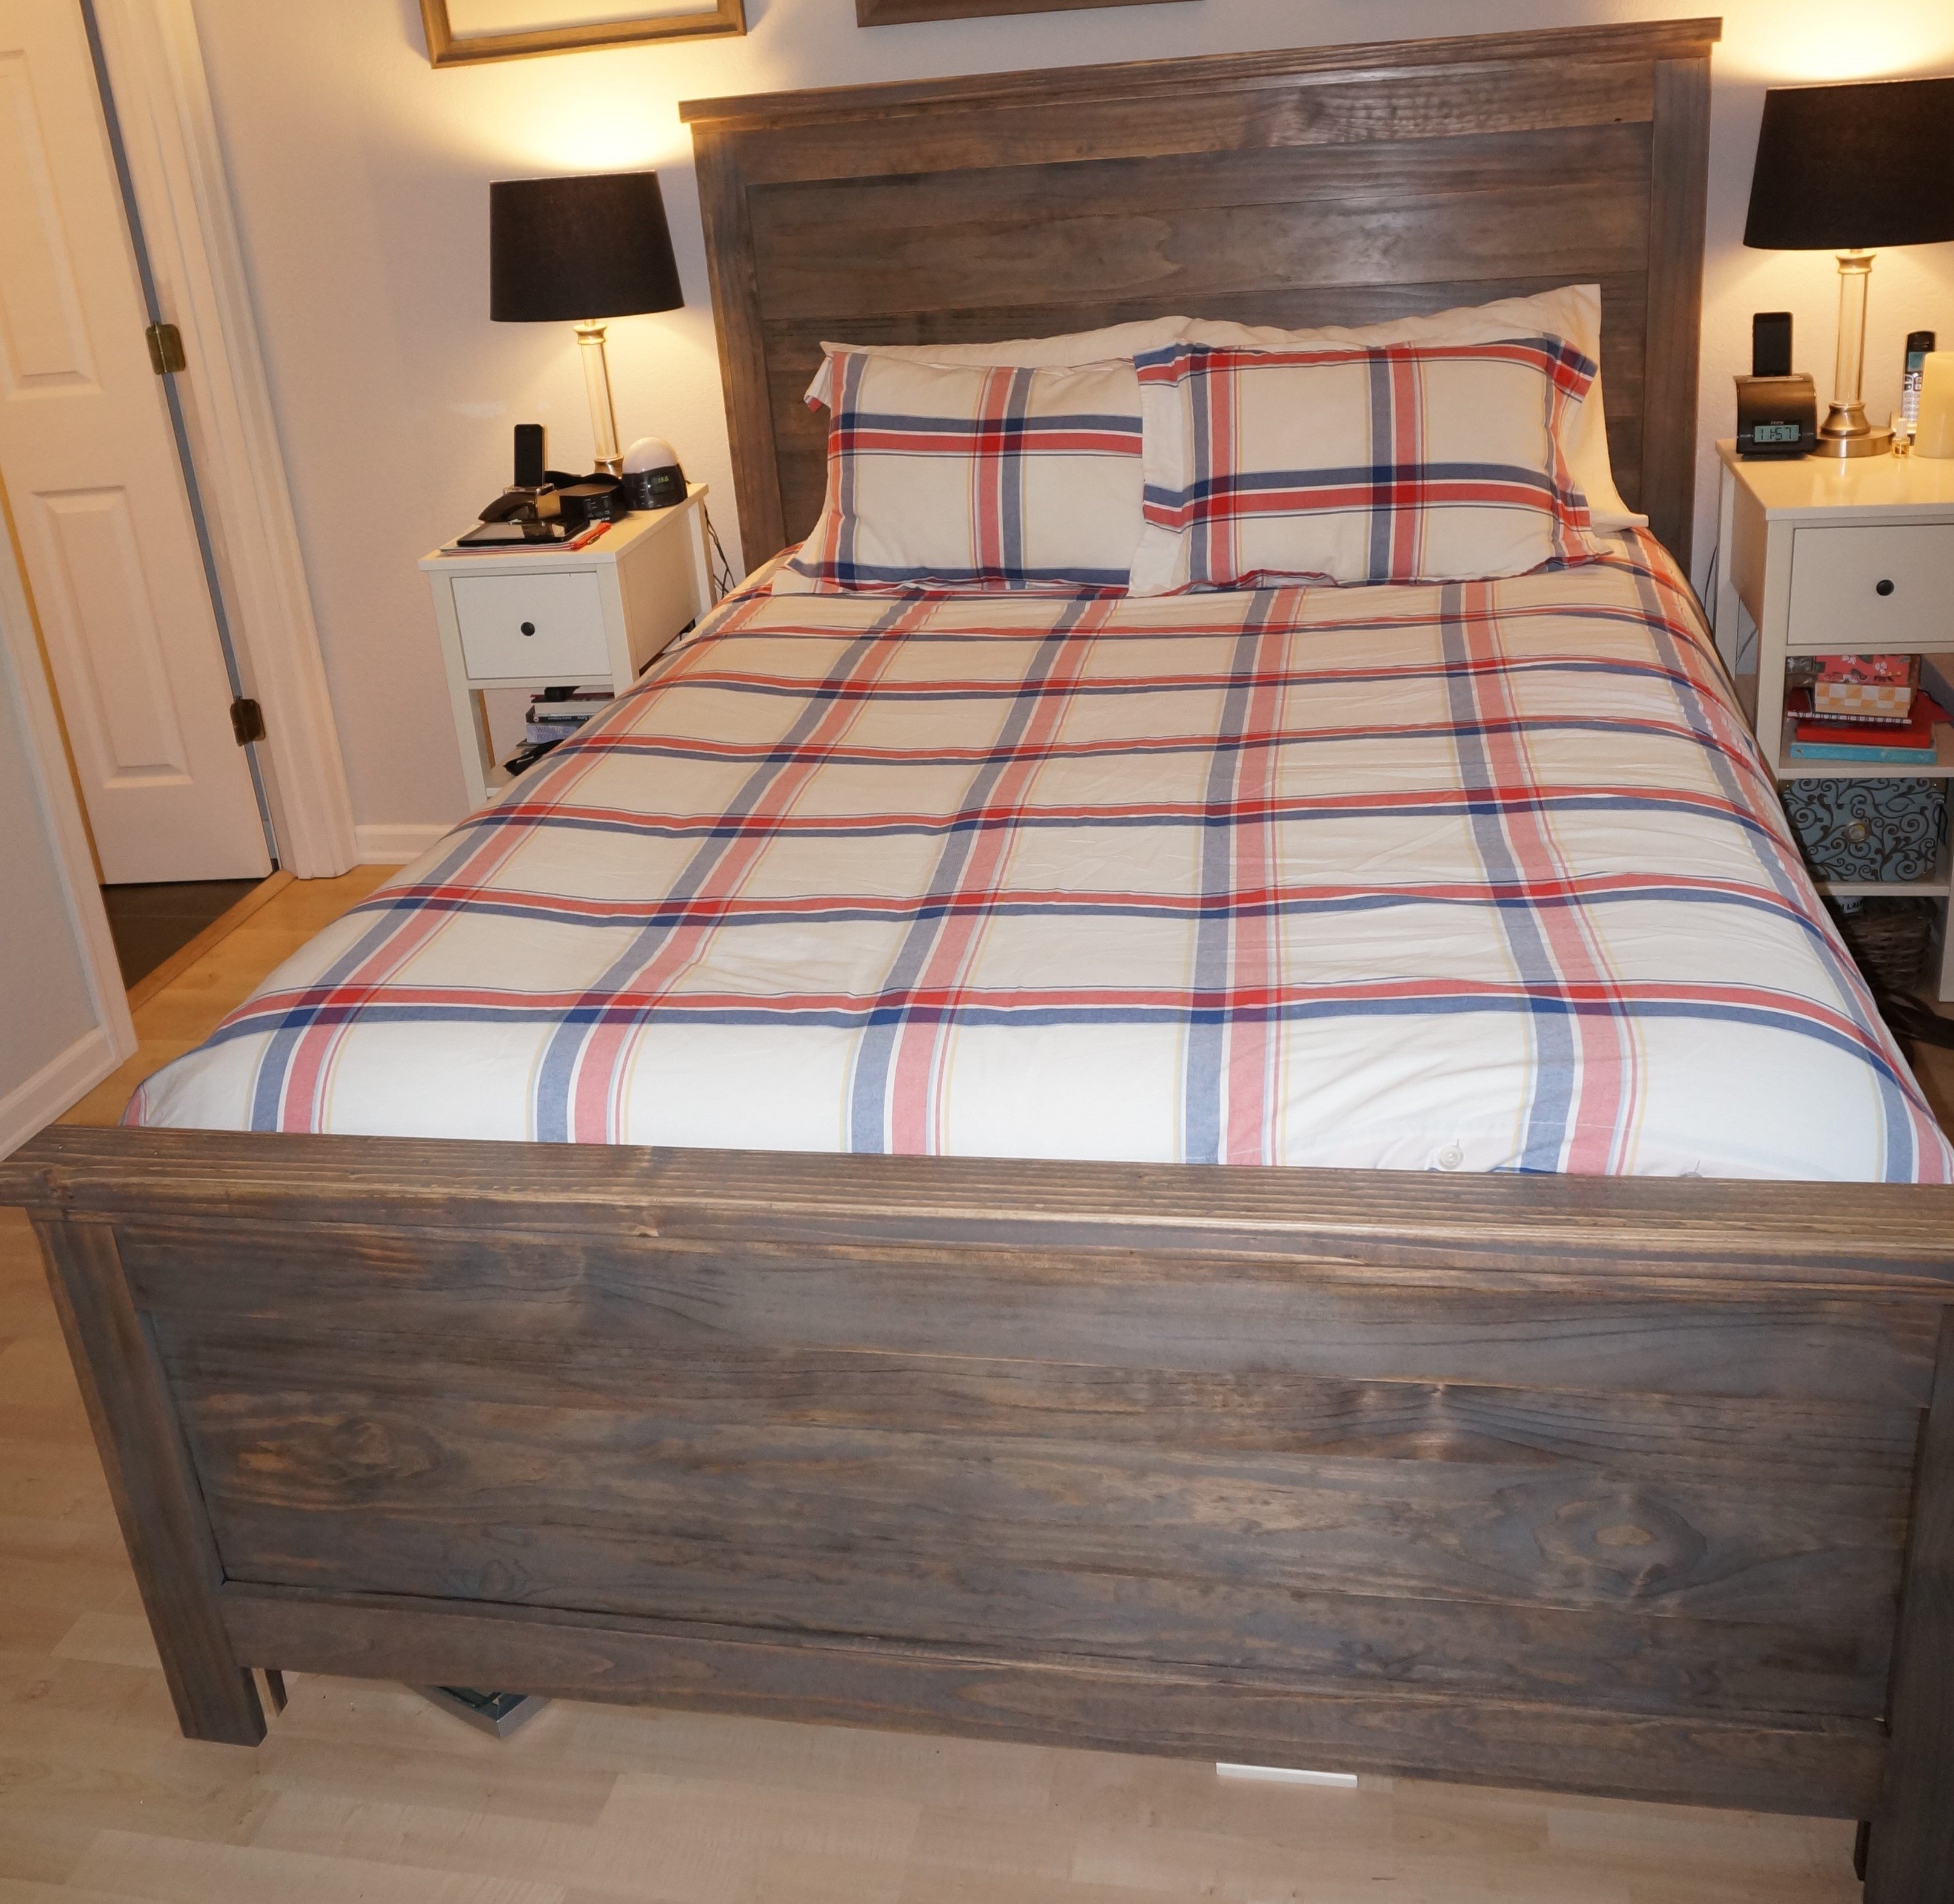
Estimated Cost
$300-I bought premium pine.
Estimated Time Investment
Weekend Project (10-20 Hours)
Finish Used
Minwax pre-stain conditioner, Minwax Dark Walnut, Varathane Weathered Gray. Finished with General Finishes Gel Topcoat in Satin.
Recommended Skill Level
Beginner
Comments
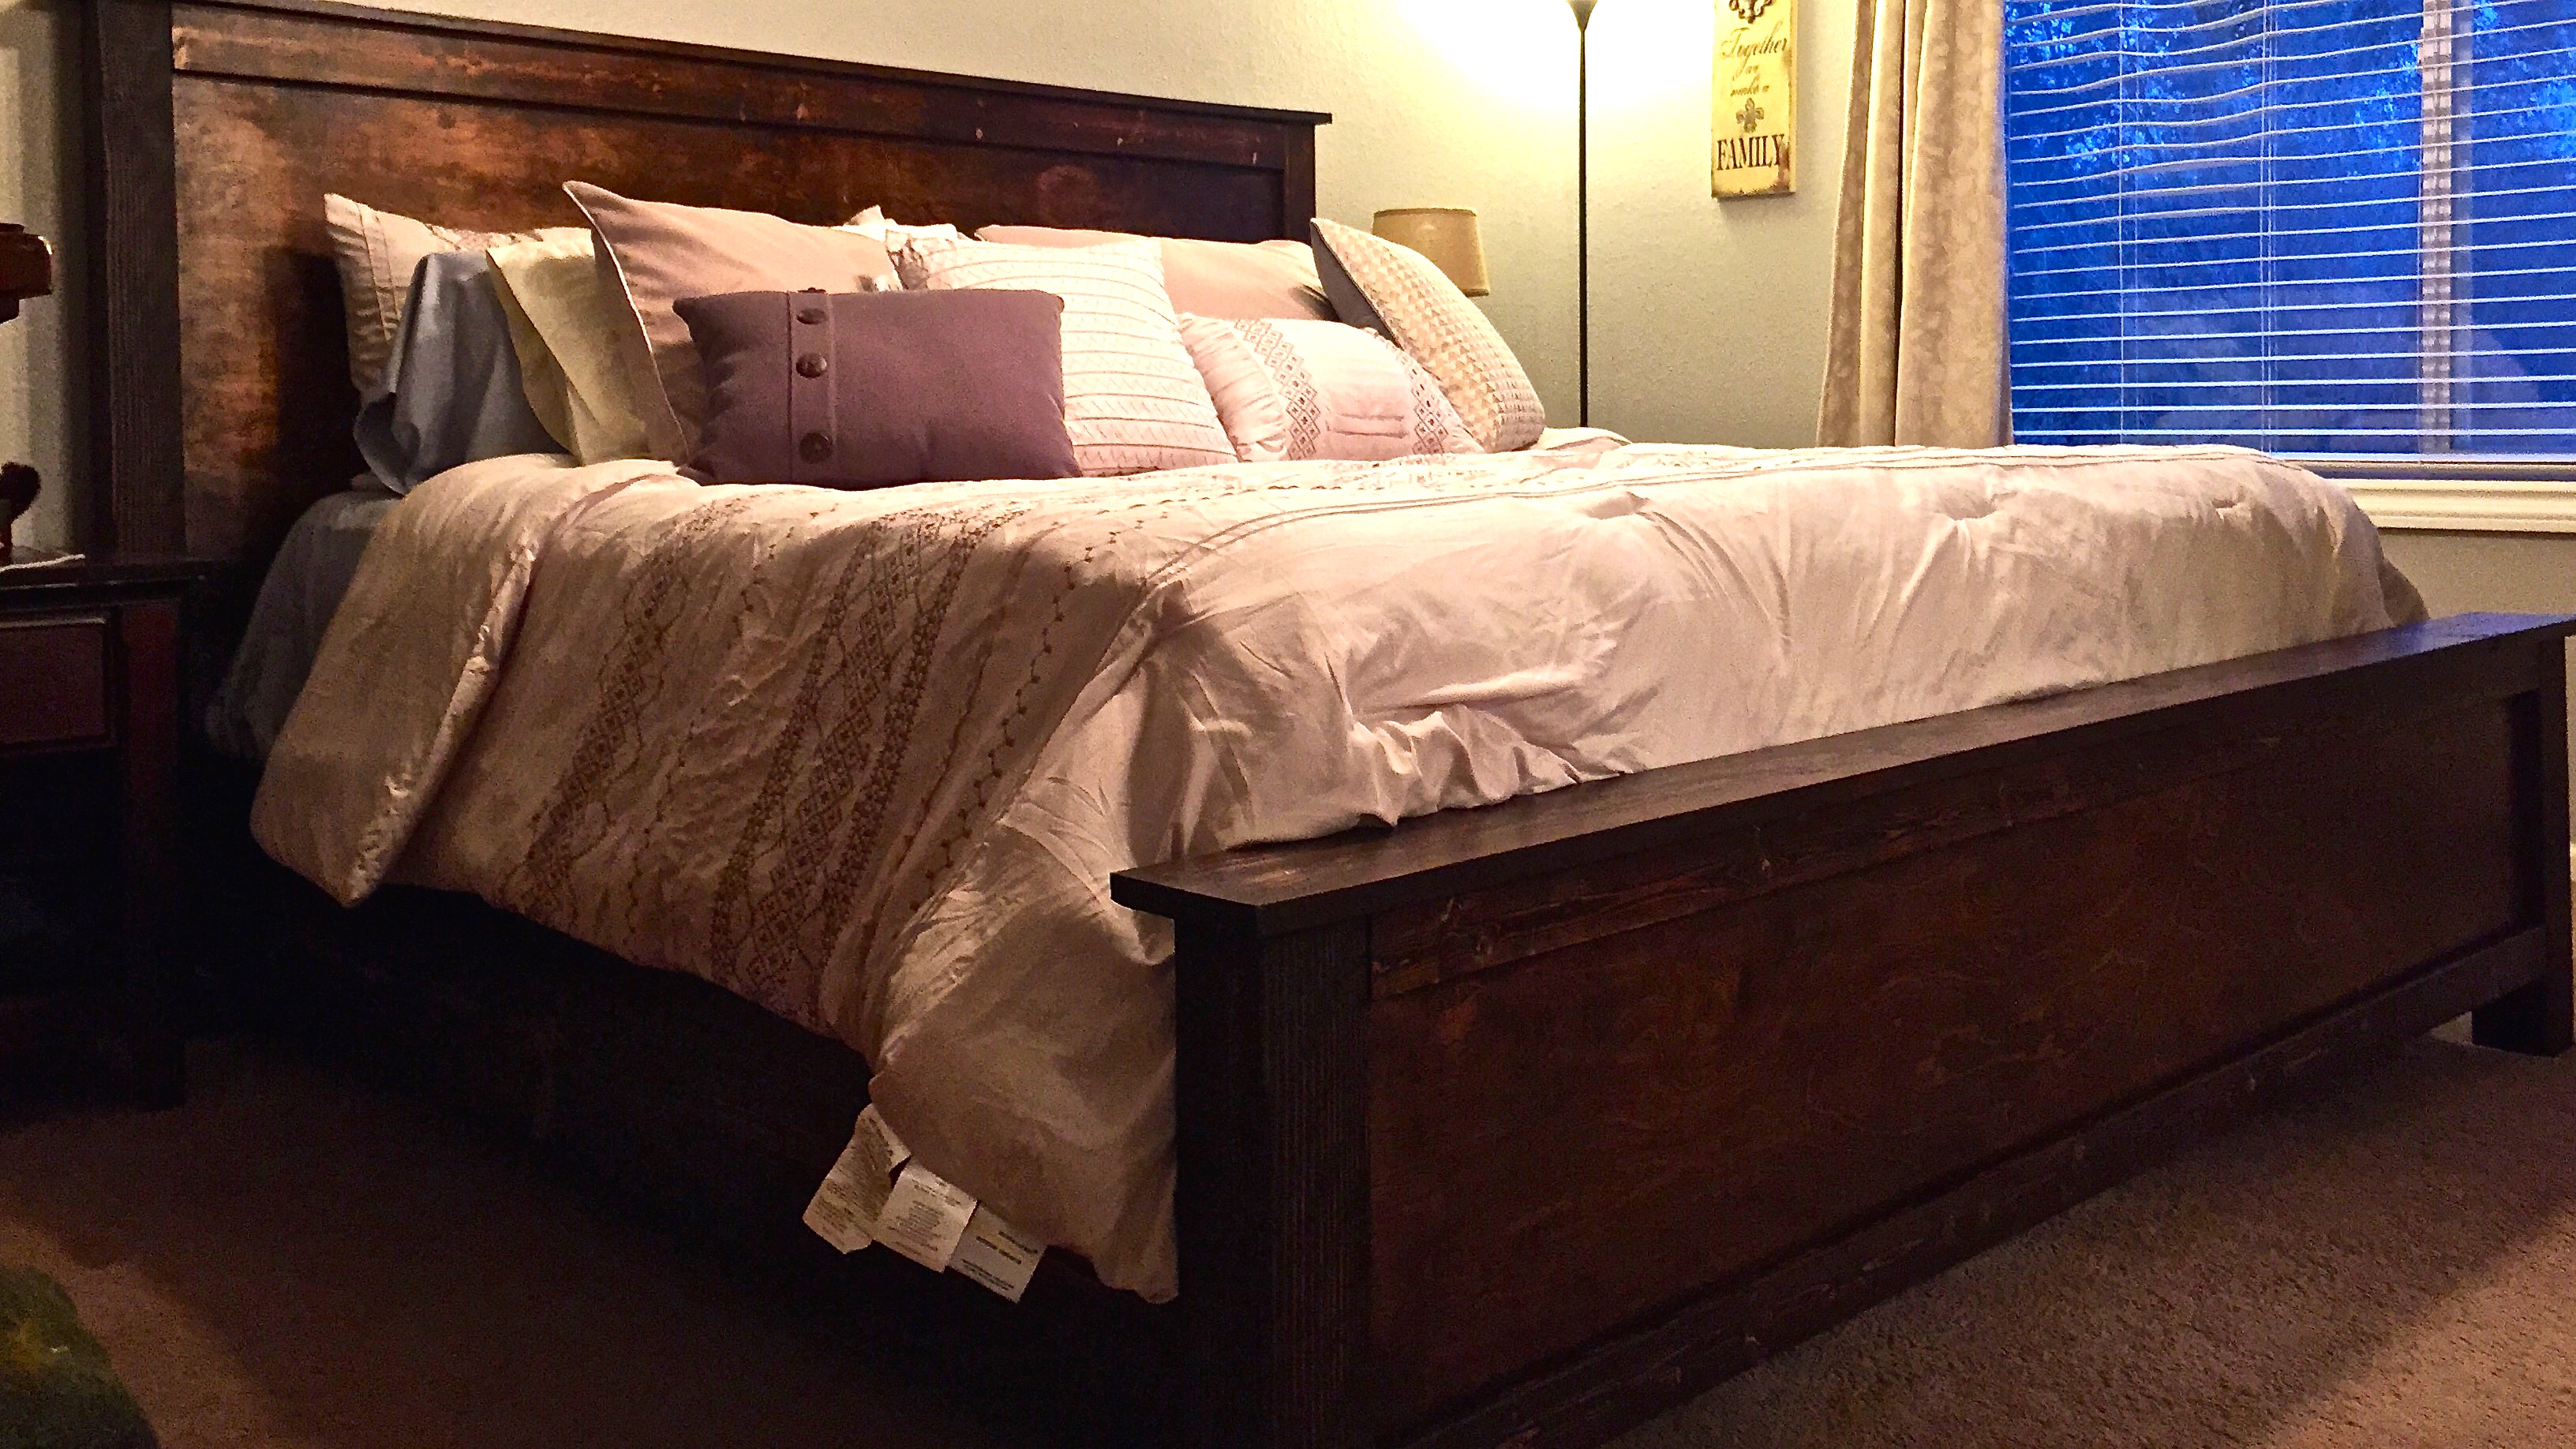
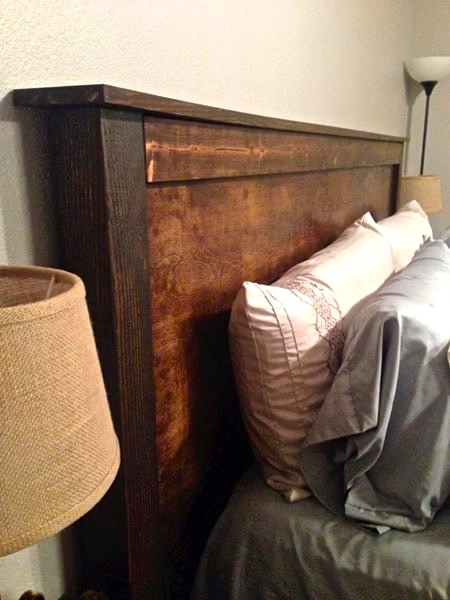
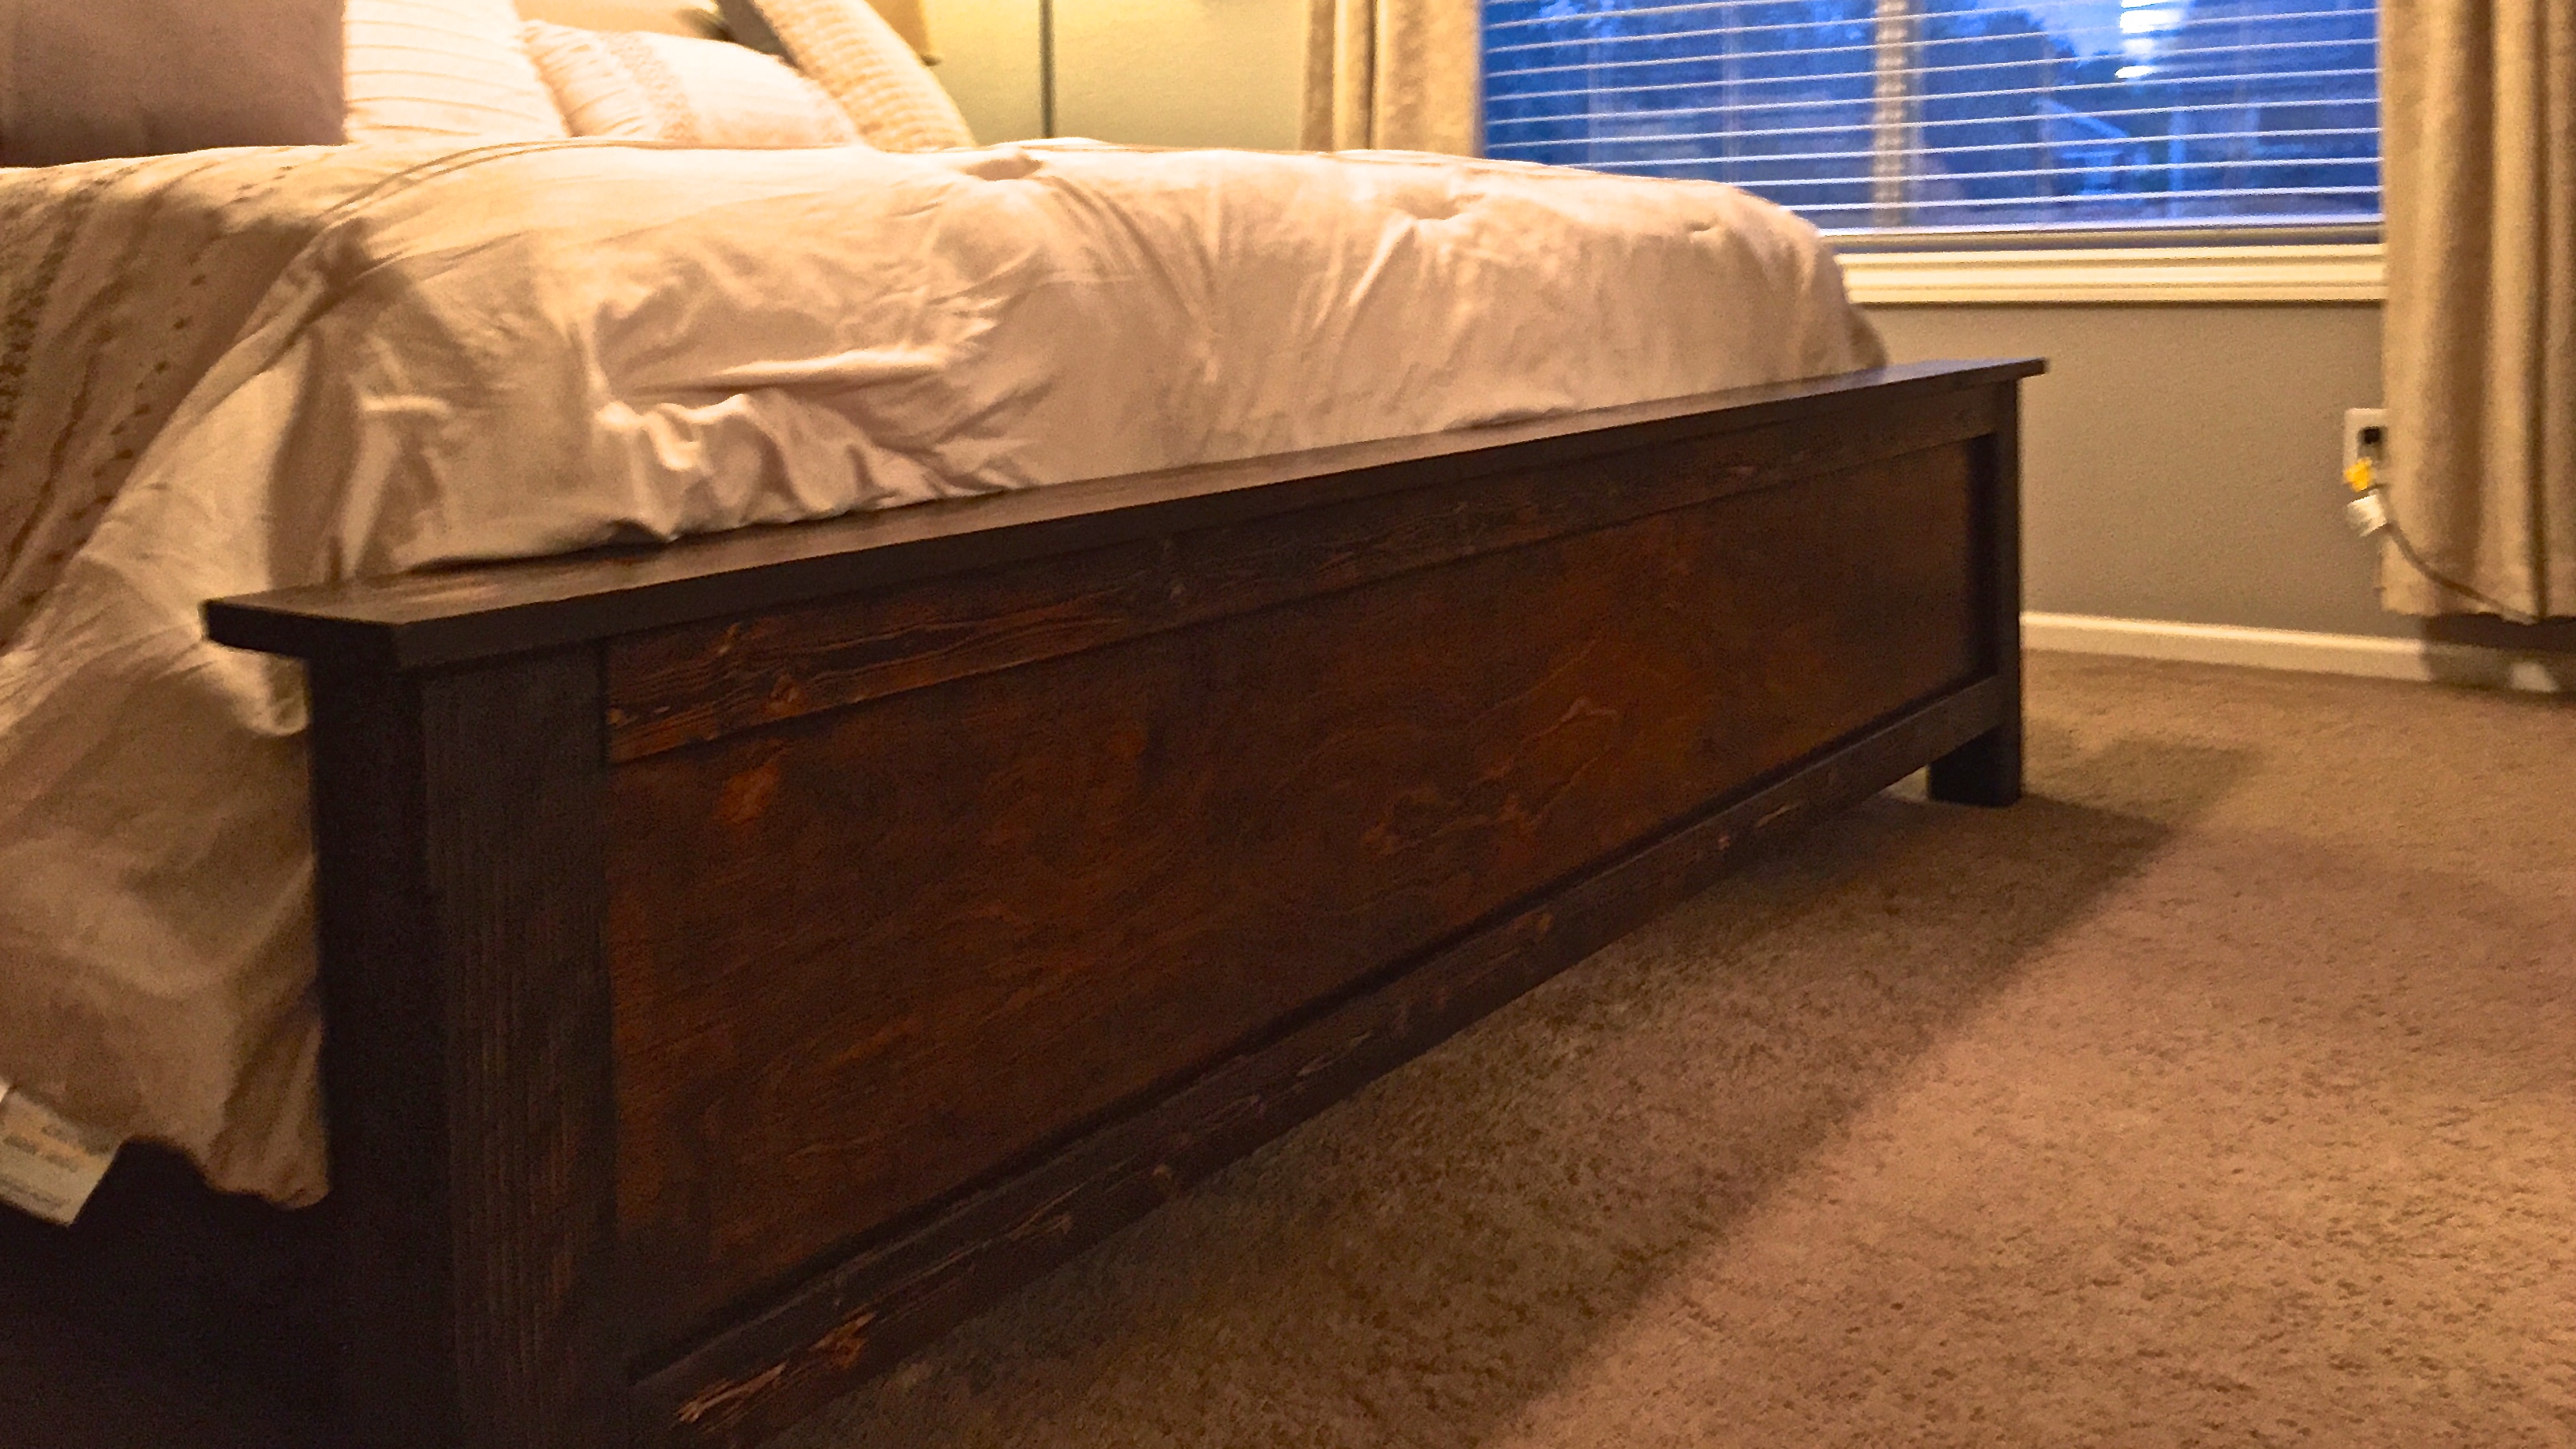
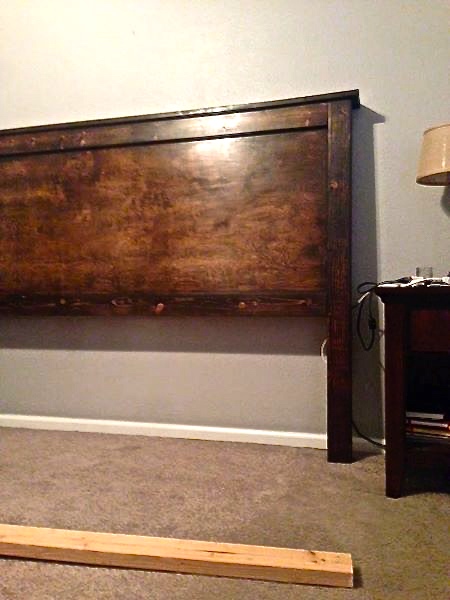
King size storage bed...

I saw your design for the queen and made the king for my wife. As you can see the mattress we have is not long enough because they are two small twins next to each other. We need a new mattress but it’s not in the budget yet.
I also made some floating night stands of my own design to match so the drawers would still be able to open on the sides.

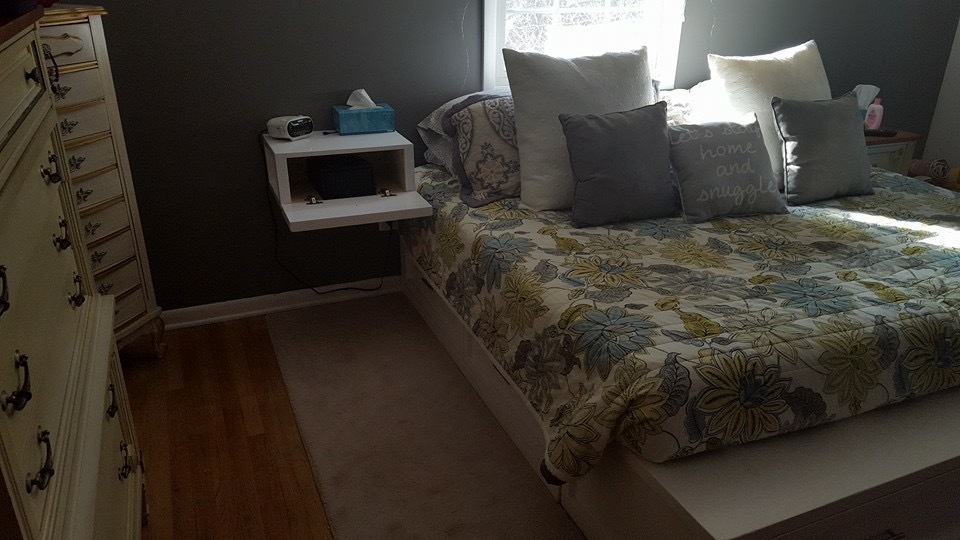
Estimated Time Investment
Week Long Project (20 Hours or More)
Finish Used
White paint
Recommended Skill Level
Intermediate
Book Shelf
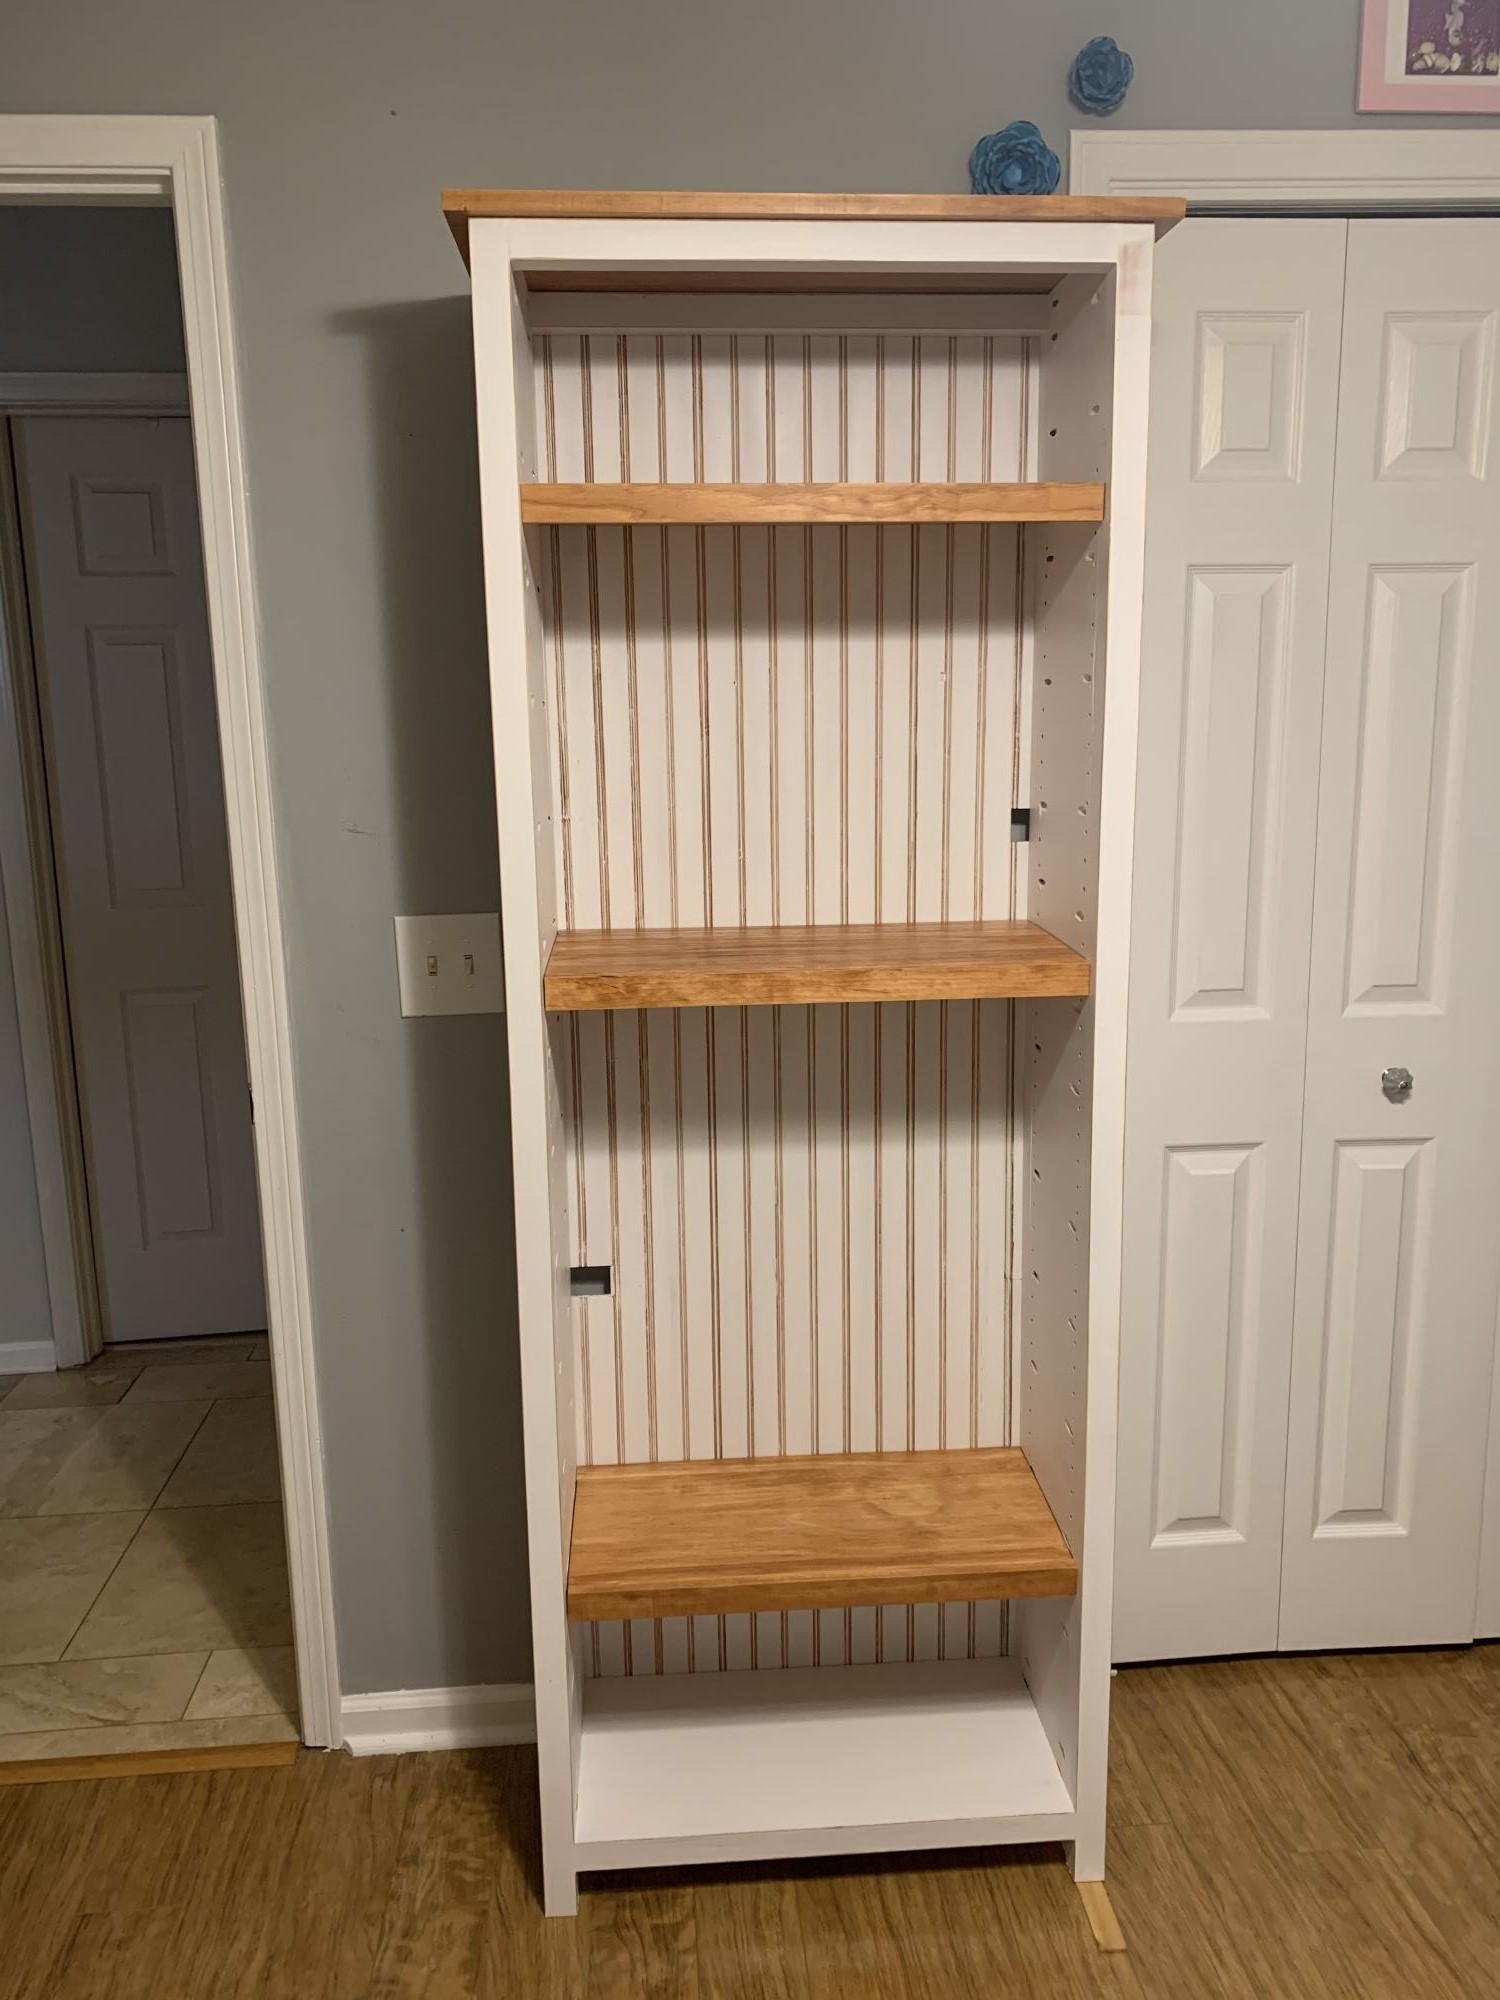
I used the Kentwood bookshelf plans and tweaked it to fit the space. My daughter loves it and is working on organizing her room. She is looking for the perfect mirror to put in the biggest shelf, and an earring jewelry box
Comments
Modern Queen Headboard

I built this headboard using the Outdoor Canopy Daybed plans for the sides. You could do it either way using the sides or back. I did modify it a little; had to make it 60" wide and 30" tall, then I just added 22" tall legs to get the height I wanted. Over all dimensions are a simple 60" wide X 52" tall. This one is made with 1 x 4's I had left over from a closet tear out project. It didn't cost me one single penny! I had the paint left over from another project. I simply squared it up with the top and bottom boards and then laid in the rest. For a more modern look I began board spacing at 3/4" then went to 1" on the next, 1 1/2" and so on... I loved building this. I have gone without a headboard for 2 long years. I was waiting for one to catch my eye, and it never happened, Until I found this site. Ana you have inspired me to take charge of my own home again. For years I'd study the "wishbooks" from Crate & Barrel and Pottery Barn drooling over what I wish I could afford. You have made it possible for EVERYONE to have the home they've always wanted. You have also inspired people to actually put forth effort for what they desire and to work for that goal. You are a God-send. Thank You so much!!!
P.S. I also built a Toddler Bed and will be posting it as well.


Estimated Cost
$20
Estimated Time Investment
Afternoon Project (3-6 Hours)
Finish Used
Painted
Recommended Skill Level
Starter Project
Simple Outdoor Sectional

This was the never-ending project!! Started off as going to be a 5-piece sectional that turned into a 6-piece sectional that was modified into 2 couches. We found it to be much easier for cushions to make 2 couches rather than having an odd number of back cushions or needing pillows that will constantly move around. Although more expensive, we really like the look of using 1" wood and they are definitely sturdy enough. The table was made by basically taking the bottom part of a side piece and doubling it to make the table 48". The project was half making the pieces and half staining, and once a coat of sealant is put on, the project will turn into more time finishing than building. I would recommend for anyone to find cushions before they start to build. 24" cushions are significantly more expensive than 22" cushions. Luckily the plans are simple enough that they can be easily modified to accommodate the smaller seat size.


Built from Plan(s)
Estimated Cost
$300 without cushions, $650 with cushions
Estimated Time Investment
Week Long Project (20 Hours or More)
Finish Used
Cabot Semi-Solid Ebony
Recommended Skill Level
Beginner
Comments

Tue, 07/09/2013 - 16:26
Gorgeous!
These look gorgeous! Love the finish. I like how you added some extra supports around the sides, that's a very good look! The curve top on the back cushions looks great too - where did you find them? ($350 for all 12 cushions is an awesome price!)
I made a chair!

I needed a couple of chairs to go with the Farmhouse Table and bench I made, but it made me ill to spend more on chairs than on the table and bench! So I thought I'd give this chair a try. I figured if it didn't turn out, at least I hadn't spent much to try (around $8 because I had a scrap of plywood). Boy, did it turn out! I modified the pattern by taking 2" off the front to back measurements and the side to side measurements. I used 3 1x4s for the back, and 3/4" plywood for the seat, and I didn't add the bottom rungs because I'd like the option of putting it over the cross supports on the farmhouse table. I sanded the tar out of the plywood, because with 5 kids, upholstering these chairs would be a joke. Primed and painted in colonial red.
Built from Plan(s)
Estimated Cost
$8
Estimated Time Investment
Afternoon Project (3-6 Hours)
Finish Used
Rust oleum American Accents Gloss Colonial Red
Recommended Skill Level
Intermediate
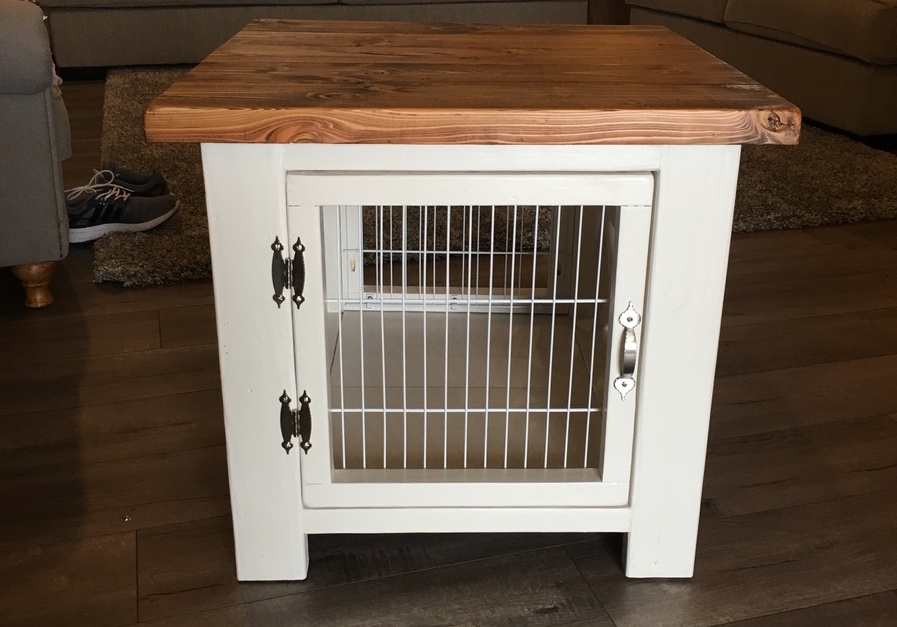
Rustic end table pet kennel

I was able to take the end table plan and modify it slightly to accommodate the kennal. I added the detail to the sides using a couple 2x2. The for door and rear I made a frame and then cut down some wire shelving. I think it turned out quite nice. Now the dog has a good place to sleep and I don’t have to have an ugly kennal in my great room.
Built from Plan(s)
Estimated Cost
75
Estimated Time Investment
Day Project (6-9 Hours)
Finish Used
Antique white chalk paint and a mix of about 4 stains for the top.
Recommended Skill Level
Beginner
Comments
Tue, 02/07/2023 - 13:55
Beautiful adaptation!
Better than anything you could ever buy! Thank you for sharing, it looks awesome.
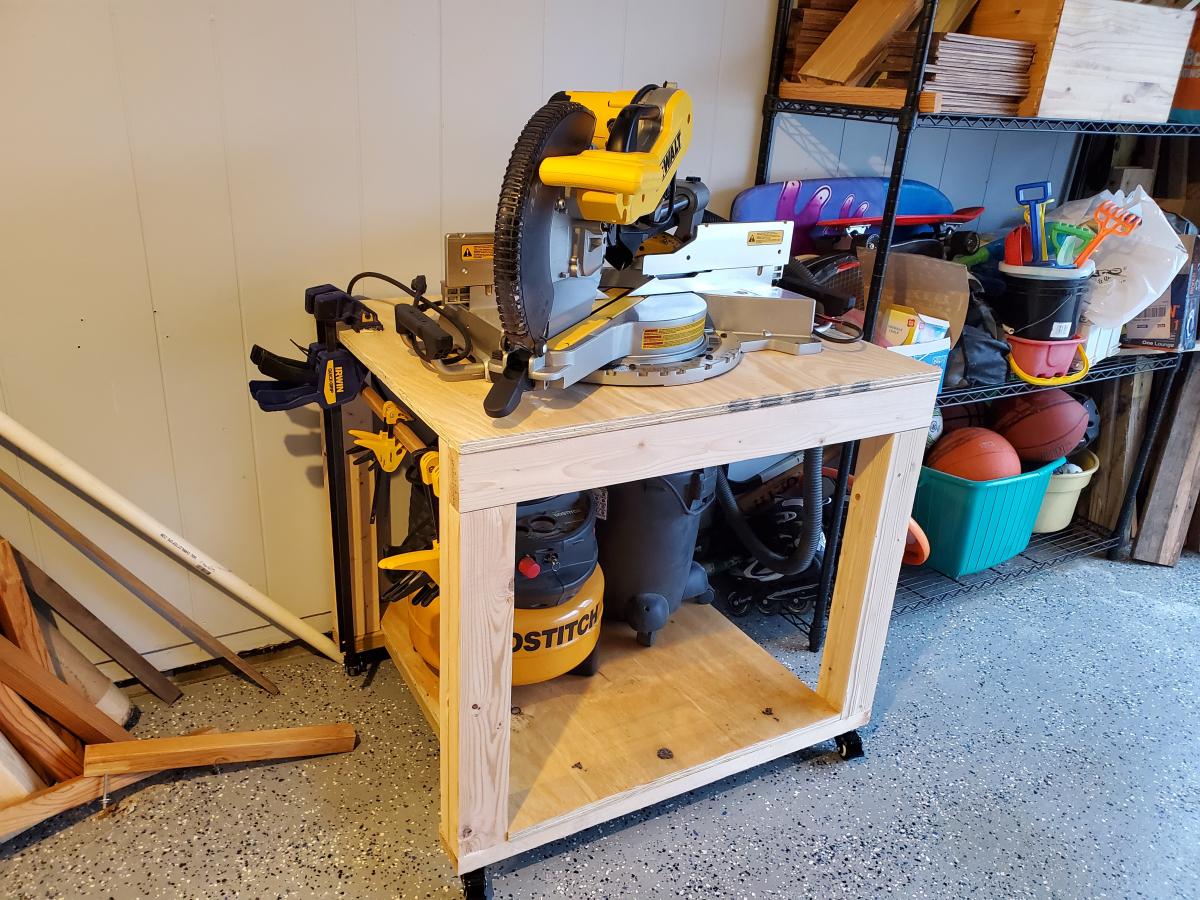
Easy DIY Garage Workbench with modifications

My fabulous husband bought me an awesome new miter saw for Christmas, and it is way too heavy to lug around! So my first project with the new saw was a workbench to mount it on! I added wheels so it can roll anywhere. I'm also very short and wanted to store a very tall shop vac on the lower shelf so I made modifications to accommodate that. I also made it 30" x 36" to make it just the right size for my saw. I will be using this piece as the center of other work tables I will build in the future!
Built from Plan(s)
Comments
My First Project-Outdoor Bar-height Table
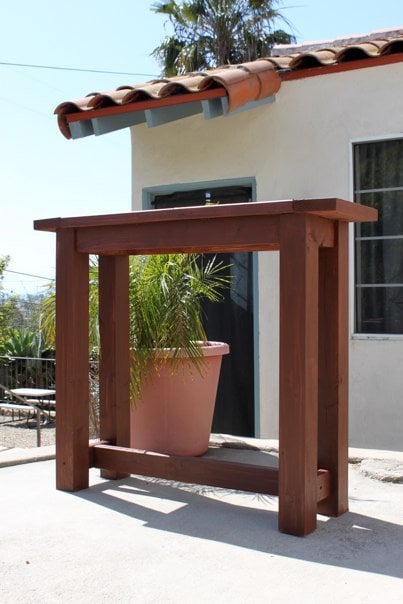
The fist project I tried was this console table. I wanted something bar-height for outside entertaining. It's not perfect, but it's still standing! :)
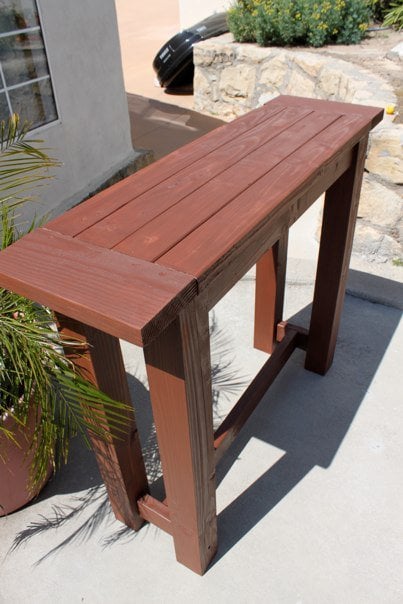
Built from Plan(s)
Estimated Time Investment
Afternoon Project (3-6 Hours)
Recommended Skill Level
Starter Project
chalkboard crate
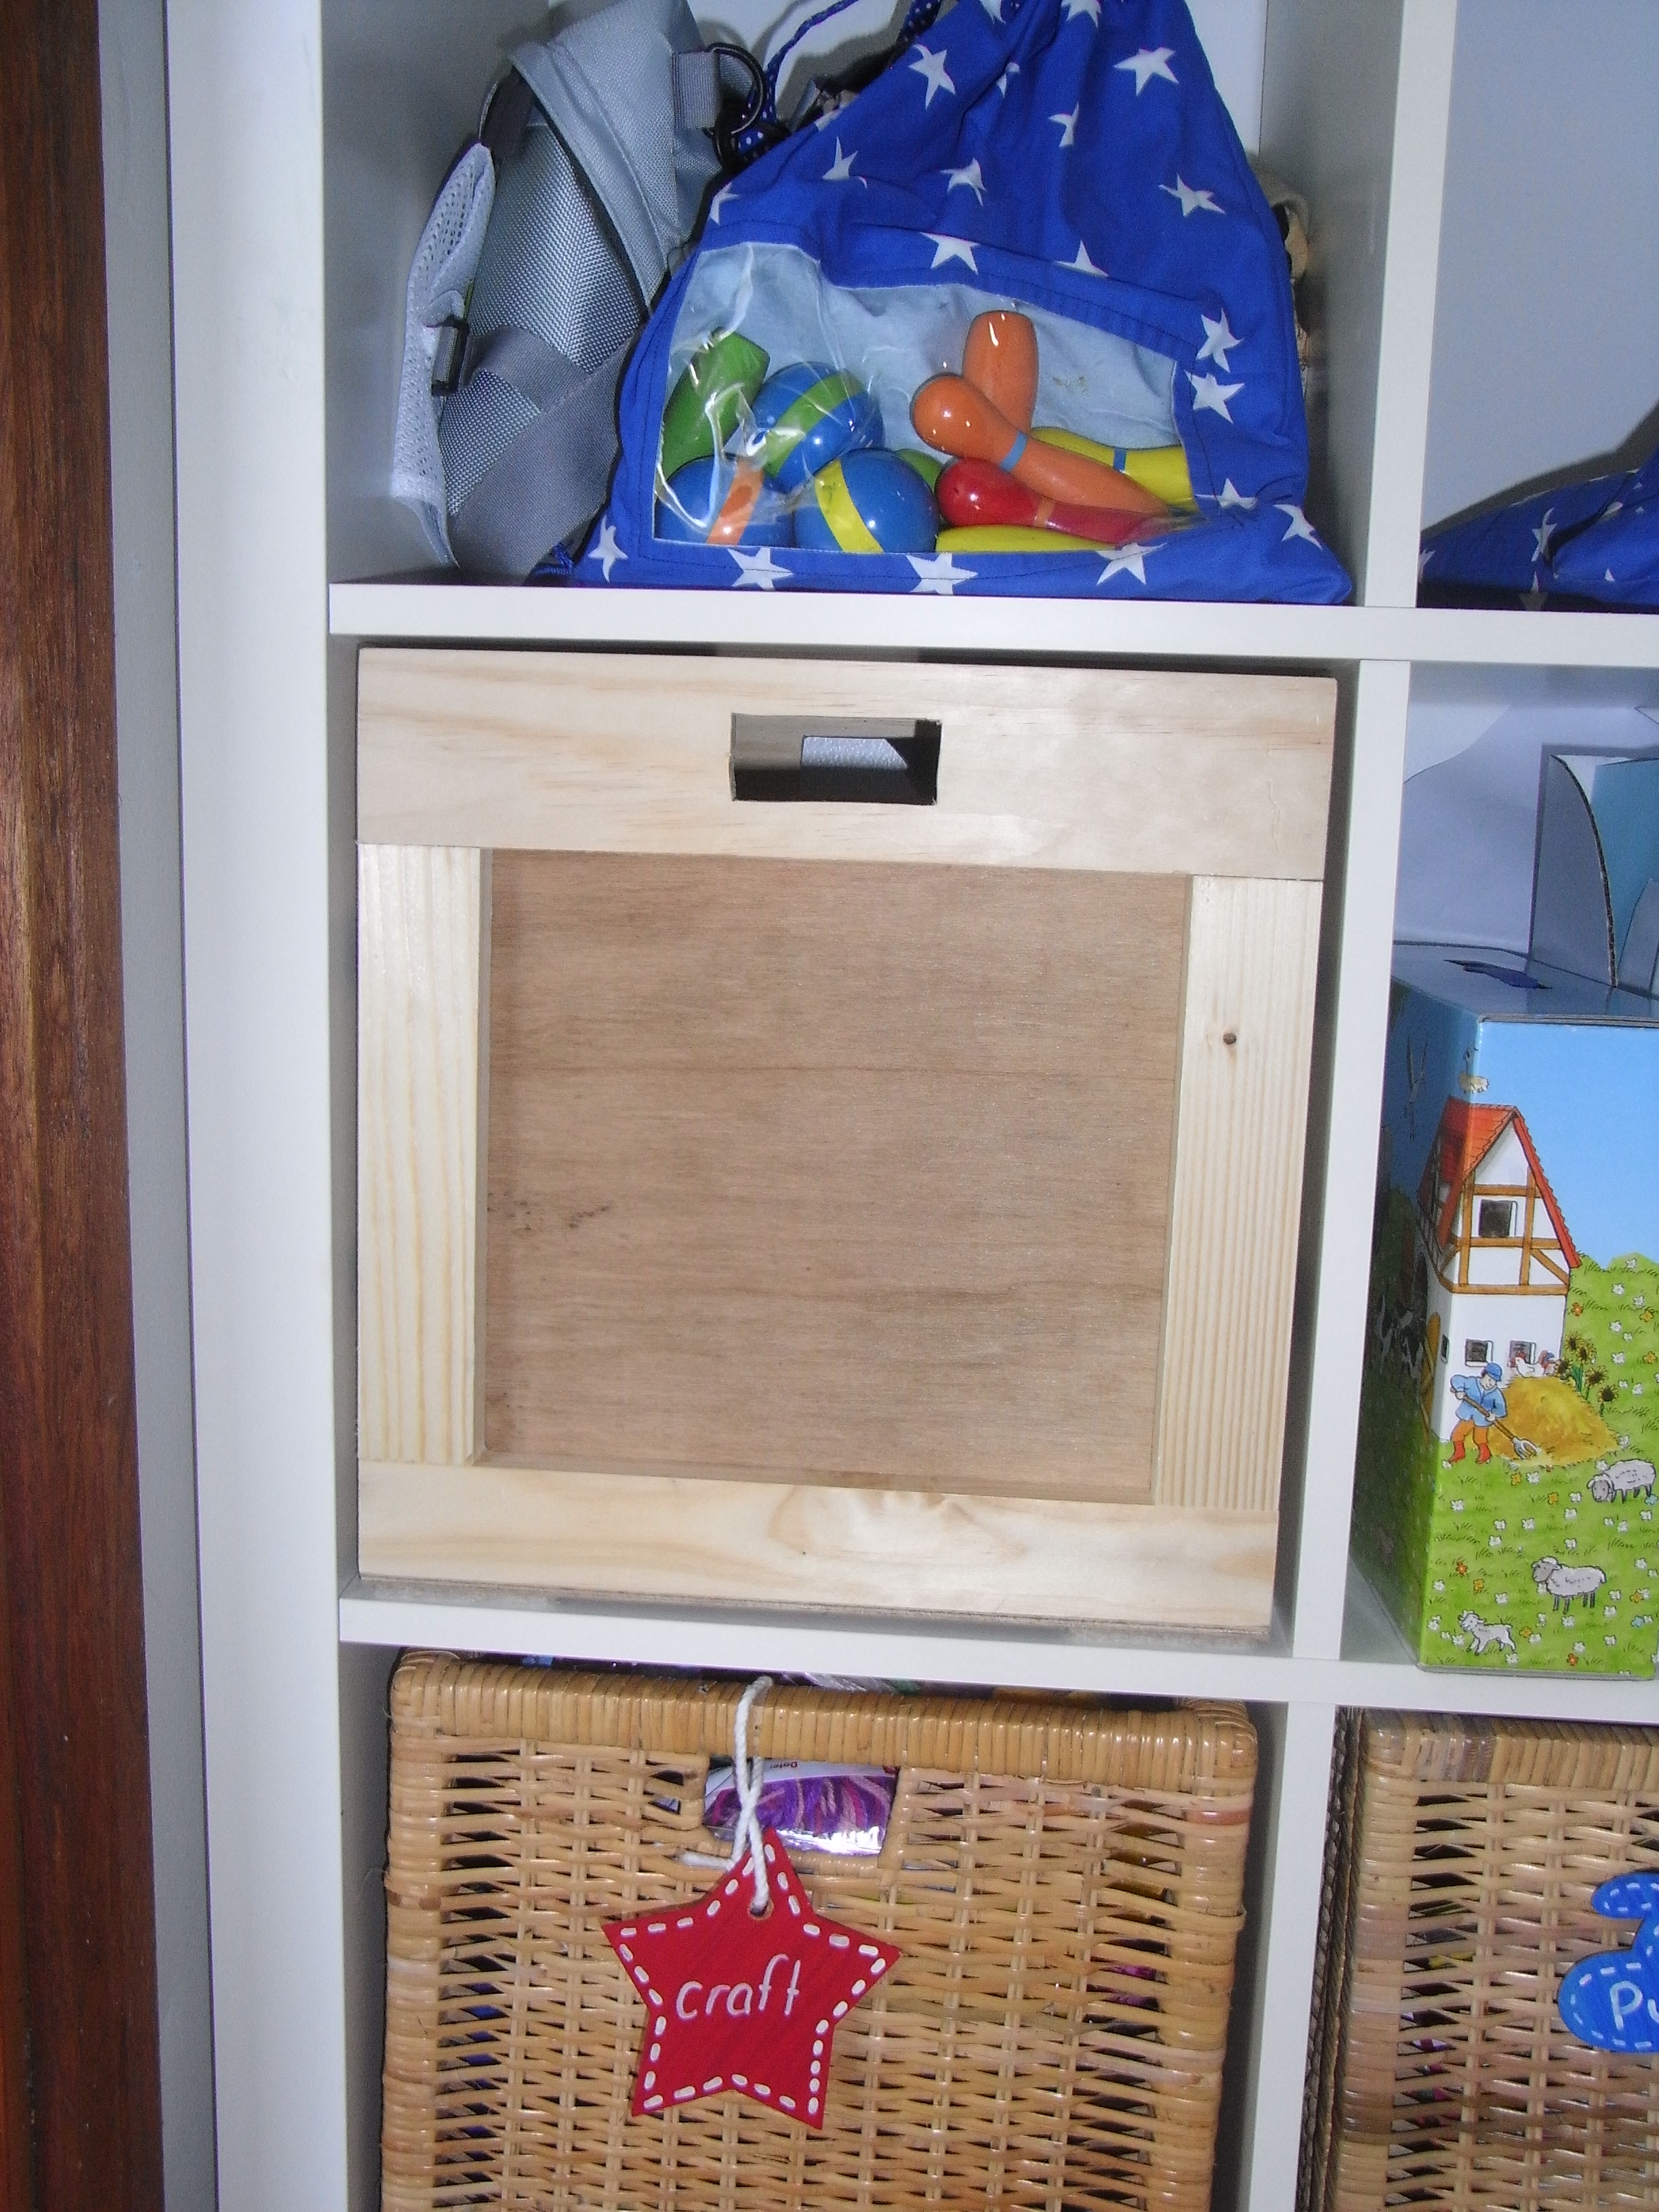
I changed the measurements in order for it to fit perfectly into the expedit unit. So easy, I will definitely be making more. Thanks once again Ana.
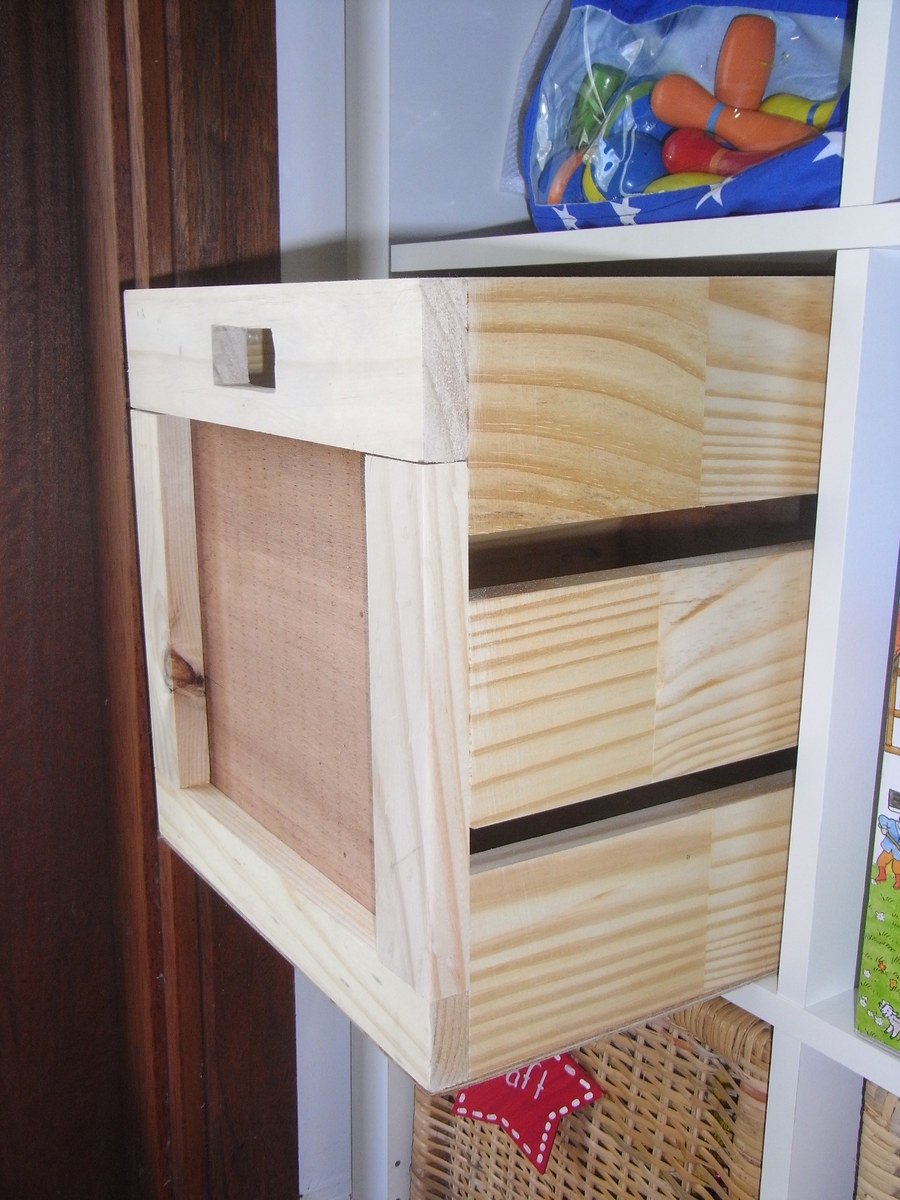

Built from Plan(s)
Estimated Time Investment
An Hour or Two (0-2 Hours)
Recommended Skill Level
Starter Project
Comments

Fri, 07/12/2013 - 15:42
I love the clean, natural
I love the clean, natural look of this crate. :) Definite contender in solving my problem of having a lack of baskets and bins.

In reply to I love the clean, natural by yurra-bazain
Sat, 07/13/2013 - 13:20
Thanks Yvonne.
Thanks Yvonne.
King of Beds, no shims

Built using birch as the main wood for the headboard and footboard, everything else is pine. Turned out great!
Estimated Cost
With special finishing agents, lumber, and hardware, $170
Estimated Time Investment
Weekend Project (10-20 Hours)
Finish Used
Rustoluem Kona Stain, Custom Poly/Oil/Thinner mix, Minwax Paste Finishing Wax
Recommended Skill Level
Beginner
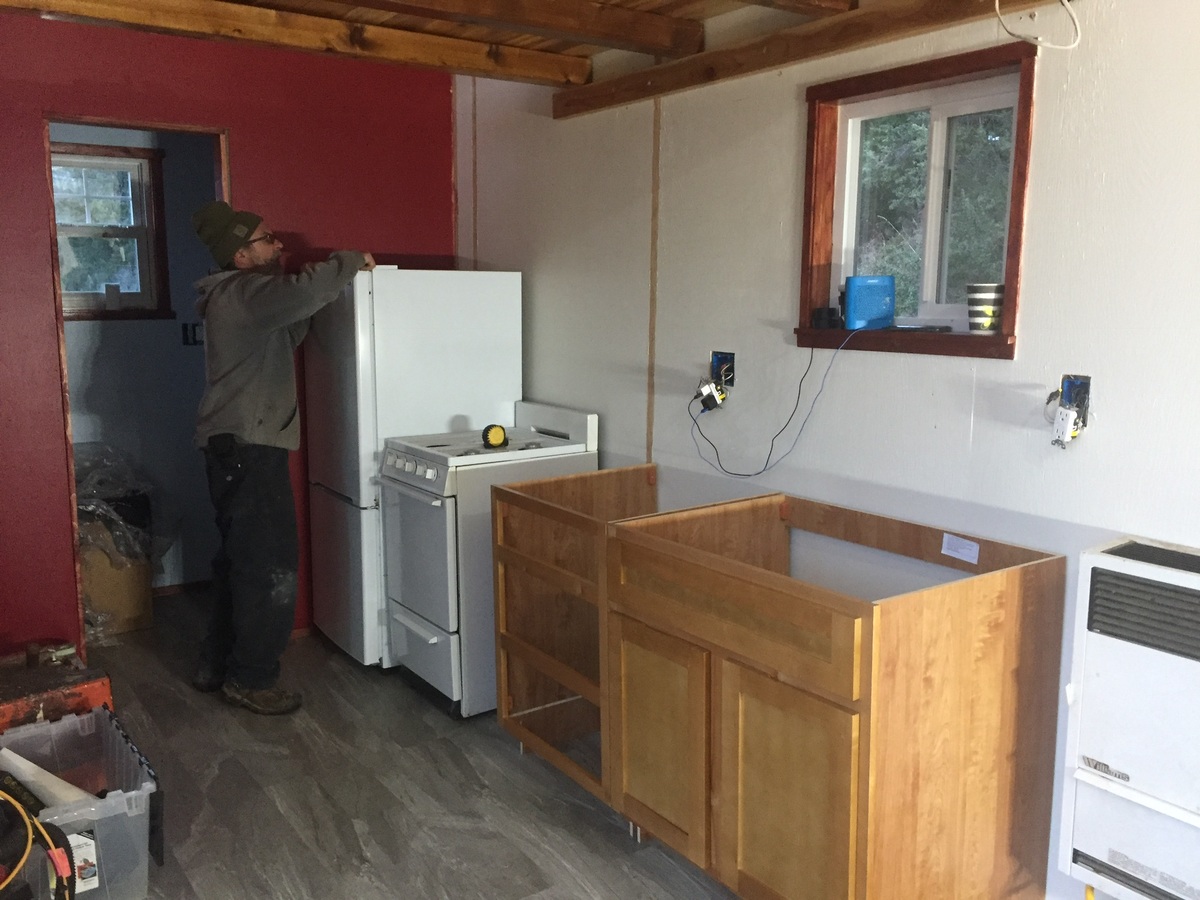
Tiny house MIL unit
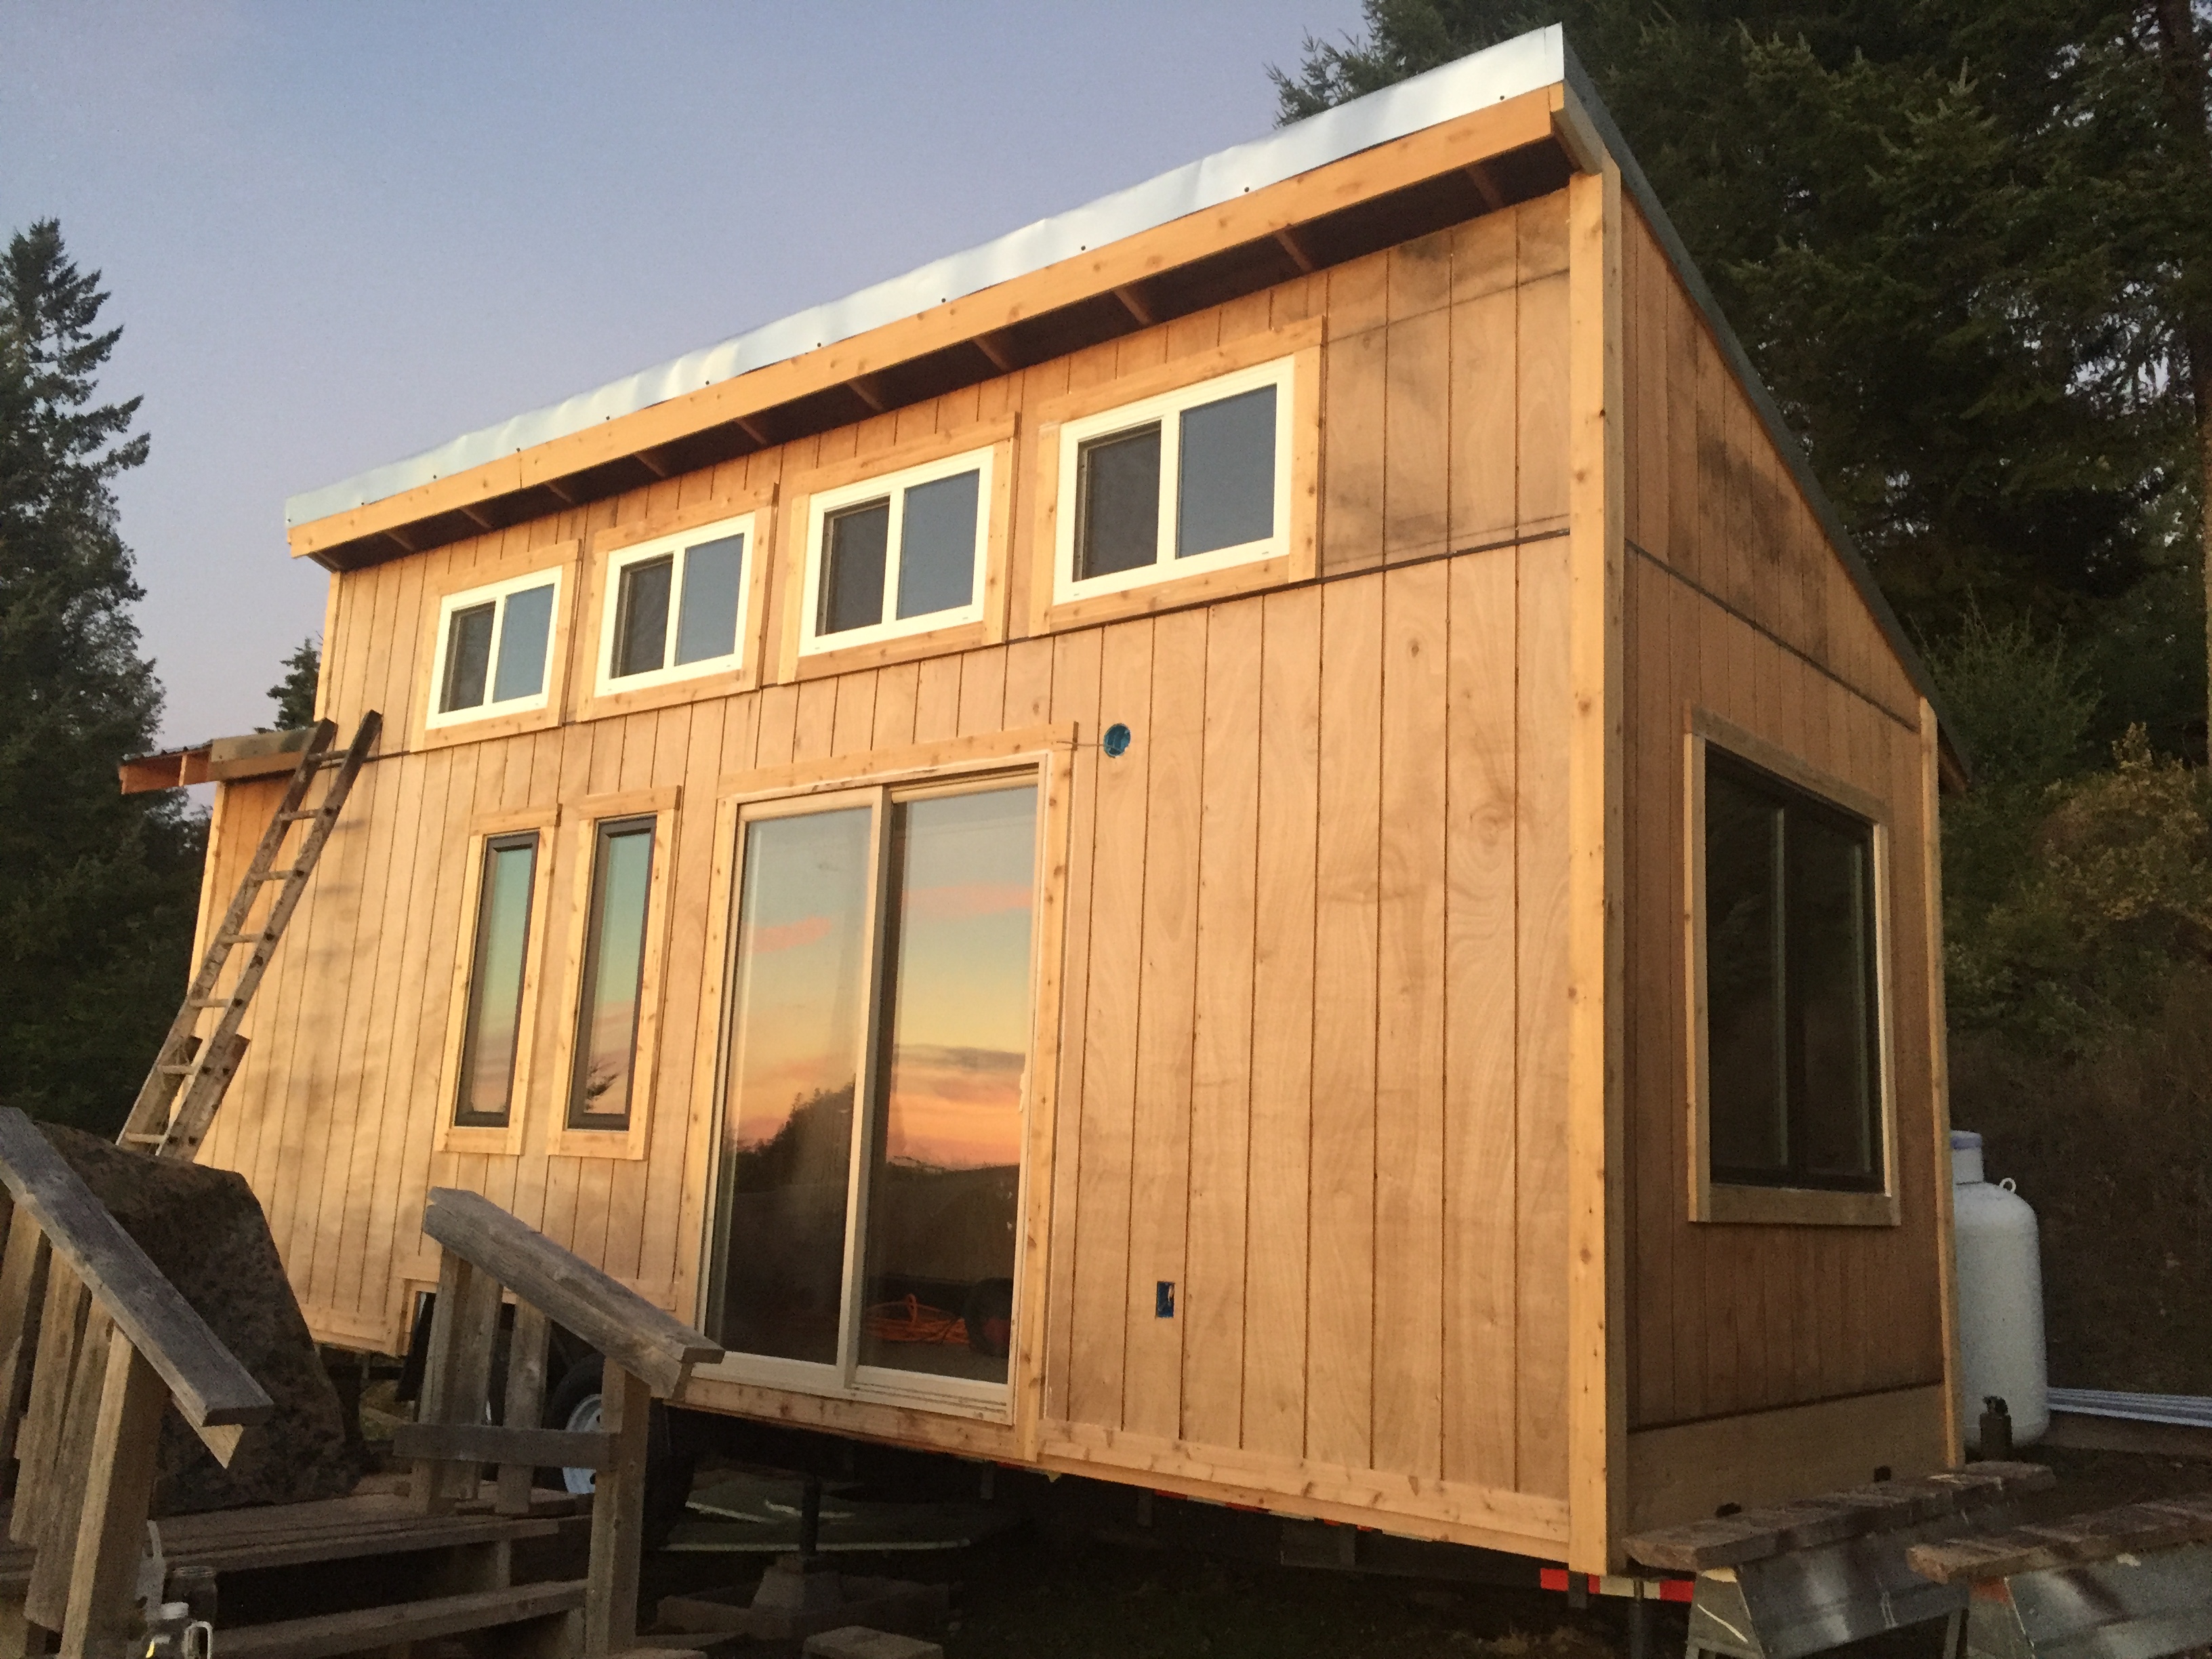
Ever since I saw the "wild rose" I knew it was the one I would build for my mom. I wanted a tiny house she would not have to climb a loft for her bedroom and still fit everything she would need. This is a brilliant layout! Many family, friends, and strangers donated money, time, appliances, and windows to get this house built. My husband and I have been finishing it up ourselves with some professional help in between since September and just put the appliances in today. Tomorrow the sink and counter-it's really happening, pinch me I'm dreaming! Thank you Ana & family, I can't imagine what kind of house my mom would have ended up with without your help. This was a really easy and fun build. Thank you so much!
Estimated Cost
20K
5 months
5 months
Finish Used
outside will be painted with stian. Inside we mixed a stain of red mahogany and early american to match the windows
Recommended Skill Level
Advanced
Flat Wall Bookholders
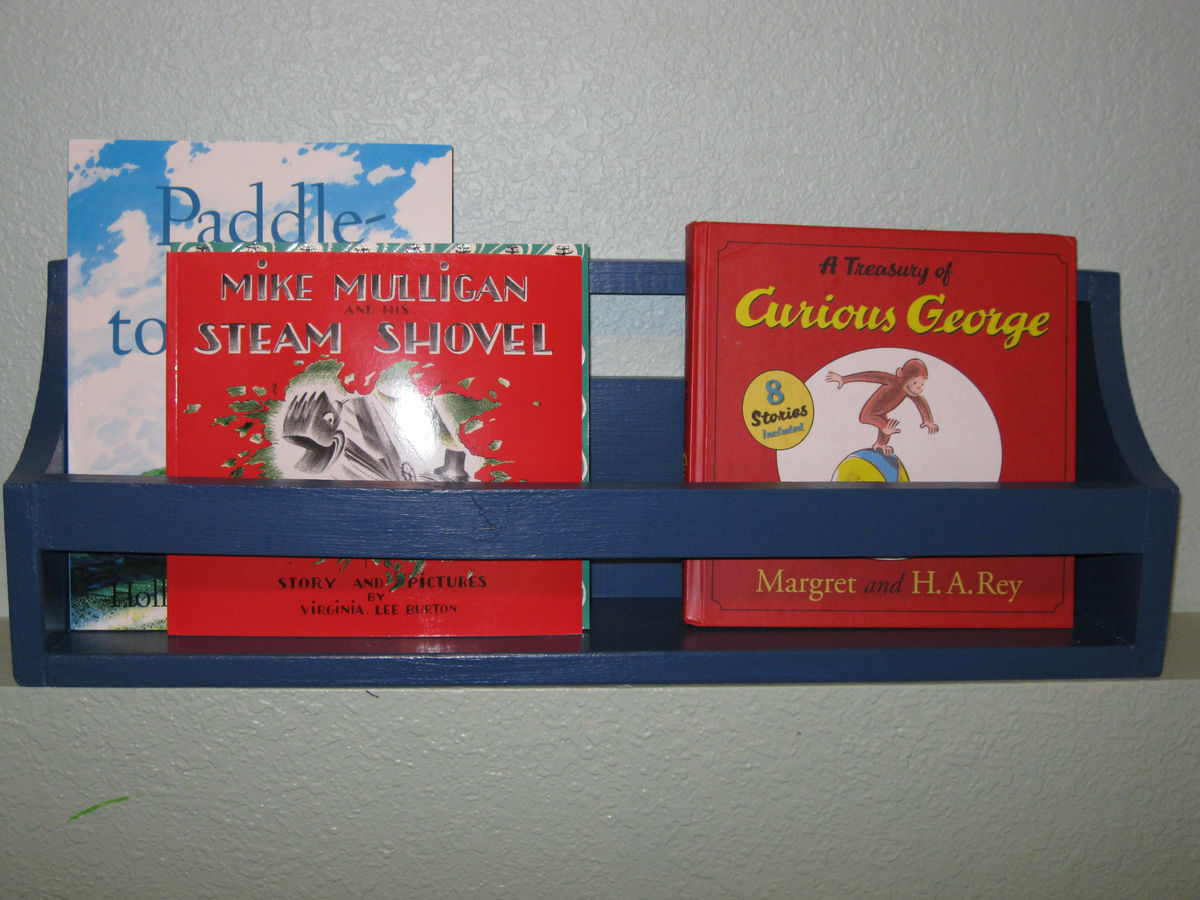
This was my first project and gave me the "umph" to get started as a builder. I loved them in Pottery Barn, but didn't feel good about how expensive they were to buy. So I bought a jigsaw and made two of these. One for each of my boys. I did the large size and I love them! They are a really pretty blue and hold a ton of books and were fun to make. I think I will make more for gifts and for our homeschool room.
Estimated Time Investment
Day Project (6-9 Hours)
Finish Used
Primer and Blue high gloss paint.
Recommended Skill Level
Starter Project
Woven Bench
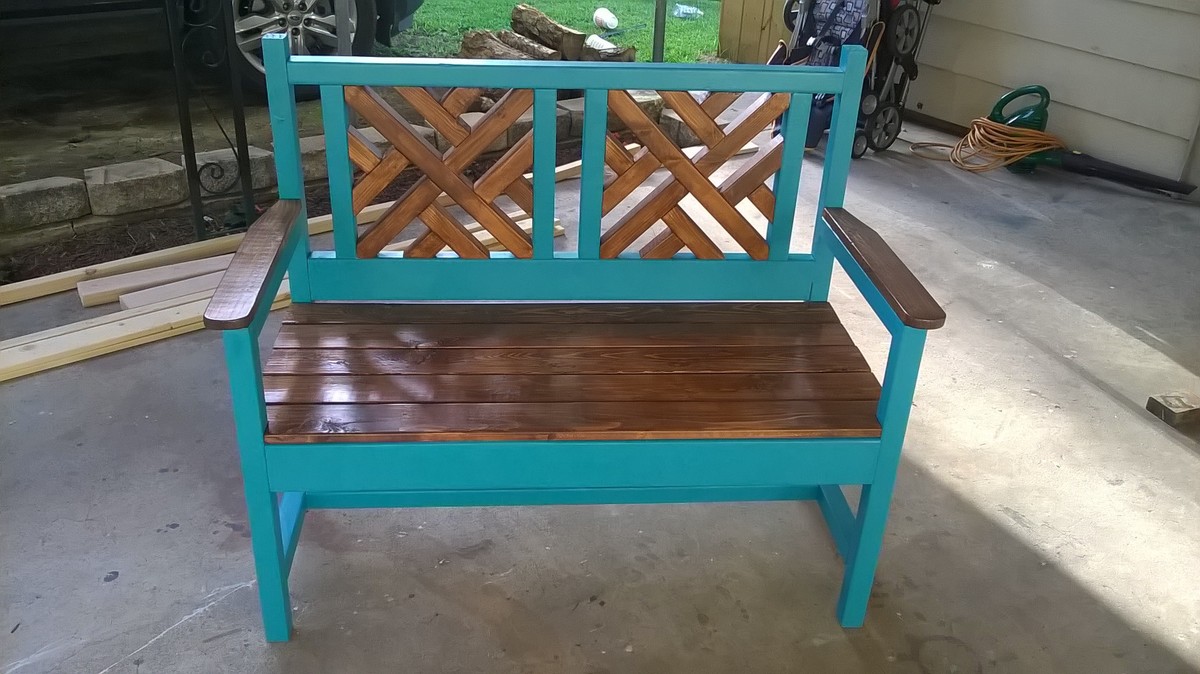
Turned into a more time consuming project than I first envisioned. I think it turned out great as everyone seems to like it. Going with the two-toned design made the finishing much more difficult but produced good results.
Built from Plan(s)
Estimated Cost
$35
Estimated Time Investment
Day Project (6-9 Hours)
Finish Used
Mixture of stains,
primer and indoor/outdoor semi-gloss paint
primer and indoor/outdoor semi-gloss paint
Recommended Skill Level
Intermediate
Comments

My First Project!
My husband and I just moved from an apartment to a house, the first place we've ever lived with a dining room! I knew I wanted to build a really special table for us and I LOVED this plan. It seemed straightforward enough, and my stepdad had all the tools in his workshop. So my stepdad, mom, and I built the table over the course of a weekend. It was SO fun and it looks perfect in our first little house!
Built from Plan(s)
Estimated Cost
It cost me about $100 to buy all the lumber, screws, turnbuckles and hardware, stain and polyurethane. I didn't have any of those things on hand before starting. If I had, it would have been less! I also didn't have to purchase any tools.
Estimated Time Investment
Weekend Project (10-20 Hours)
Finish Used
Wood was finished with Varathane Light Walnut wood stain and 4 coats (on the top) of Varathane Water-Based Polyurethane.
Recommended Skill Level
Beginner
Paper towel rack
Yea, I know these were posted way back in 2013, but I only recently found them. Was looking at some kitchen organization ideas and I knew I wanted to make a paper towel rack. I liked this idea and went with it. My variance from original was to use a dowel rod for the paper towel holder and I cut 45 degree angles in place of the radius.
Built from Plan(s)
Comments
Sat, 01/29/2022 - 08:50
Awesome organization!
So glad you found it and built it! Thanks for sharing:)