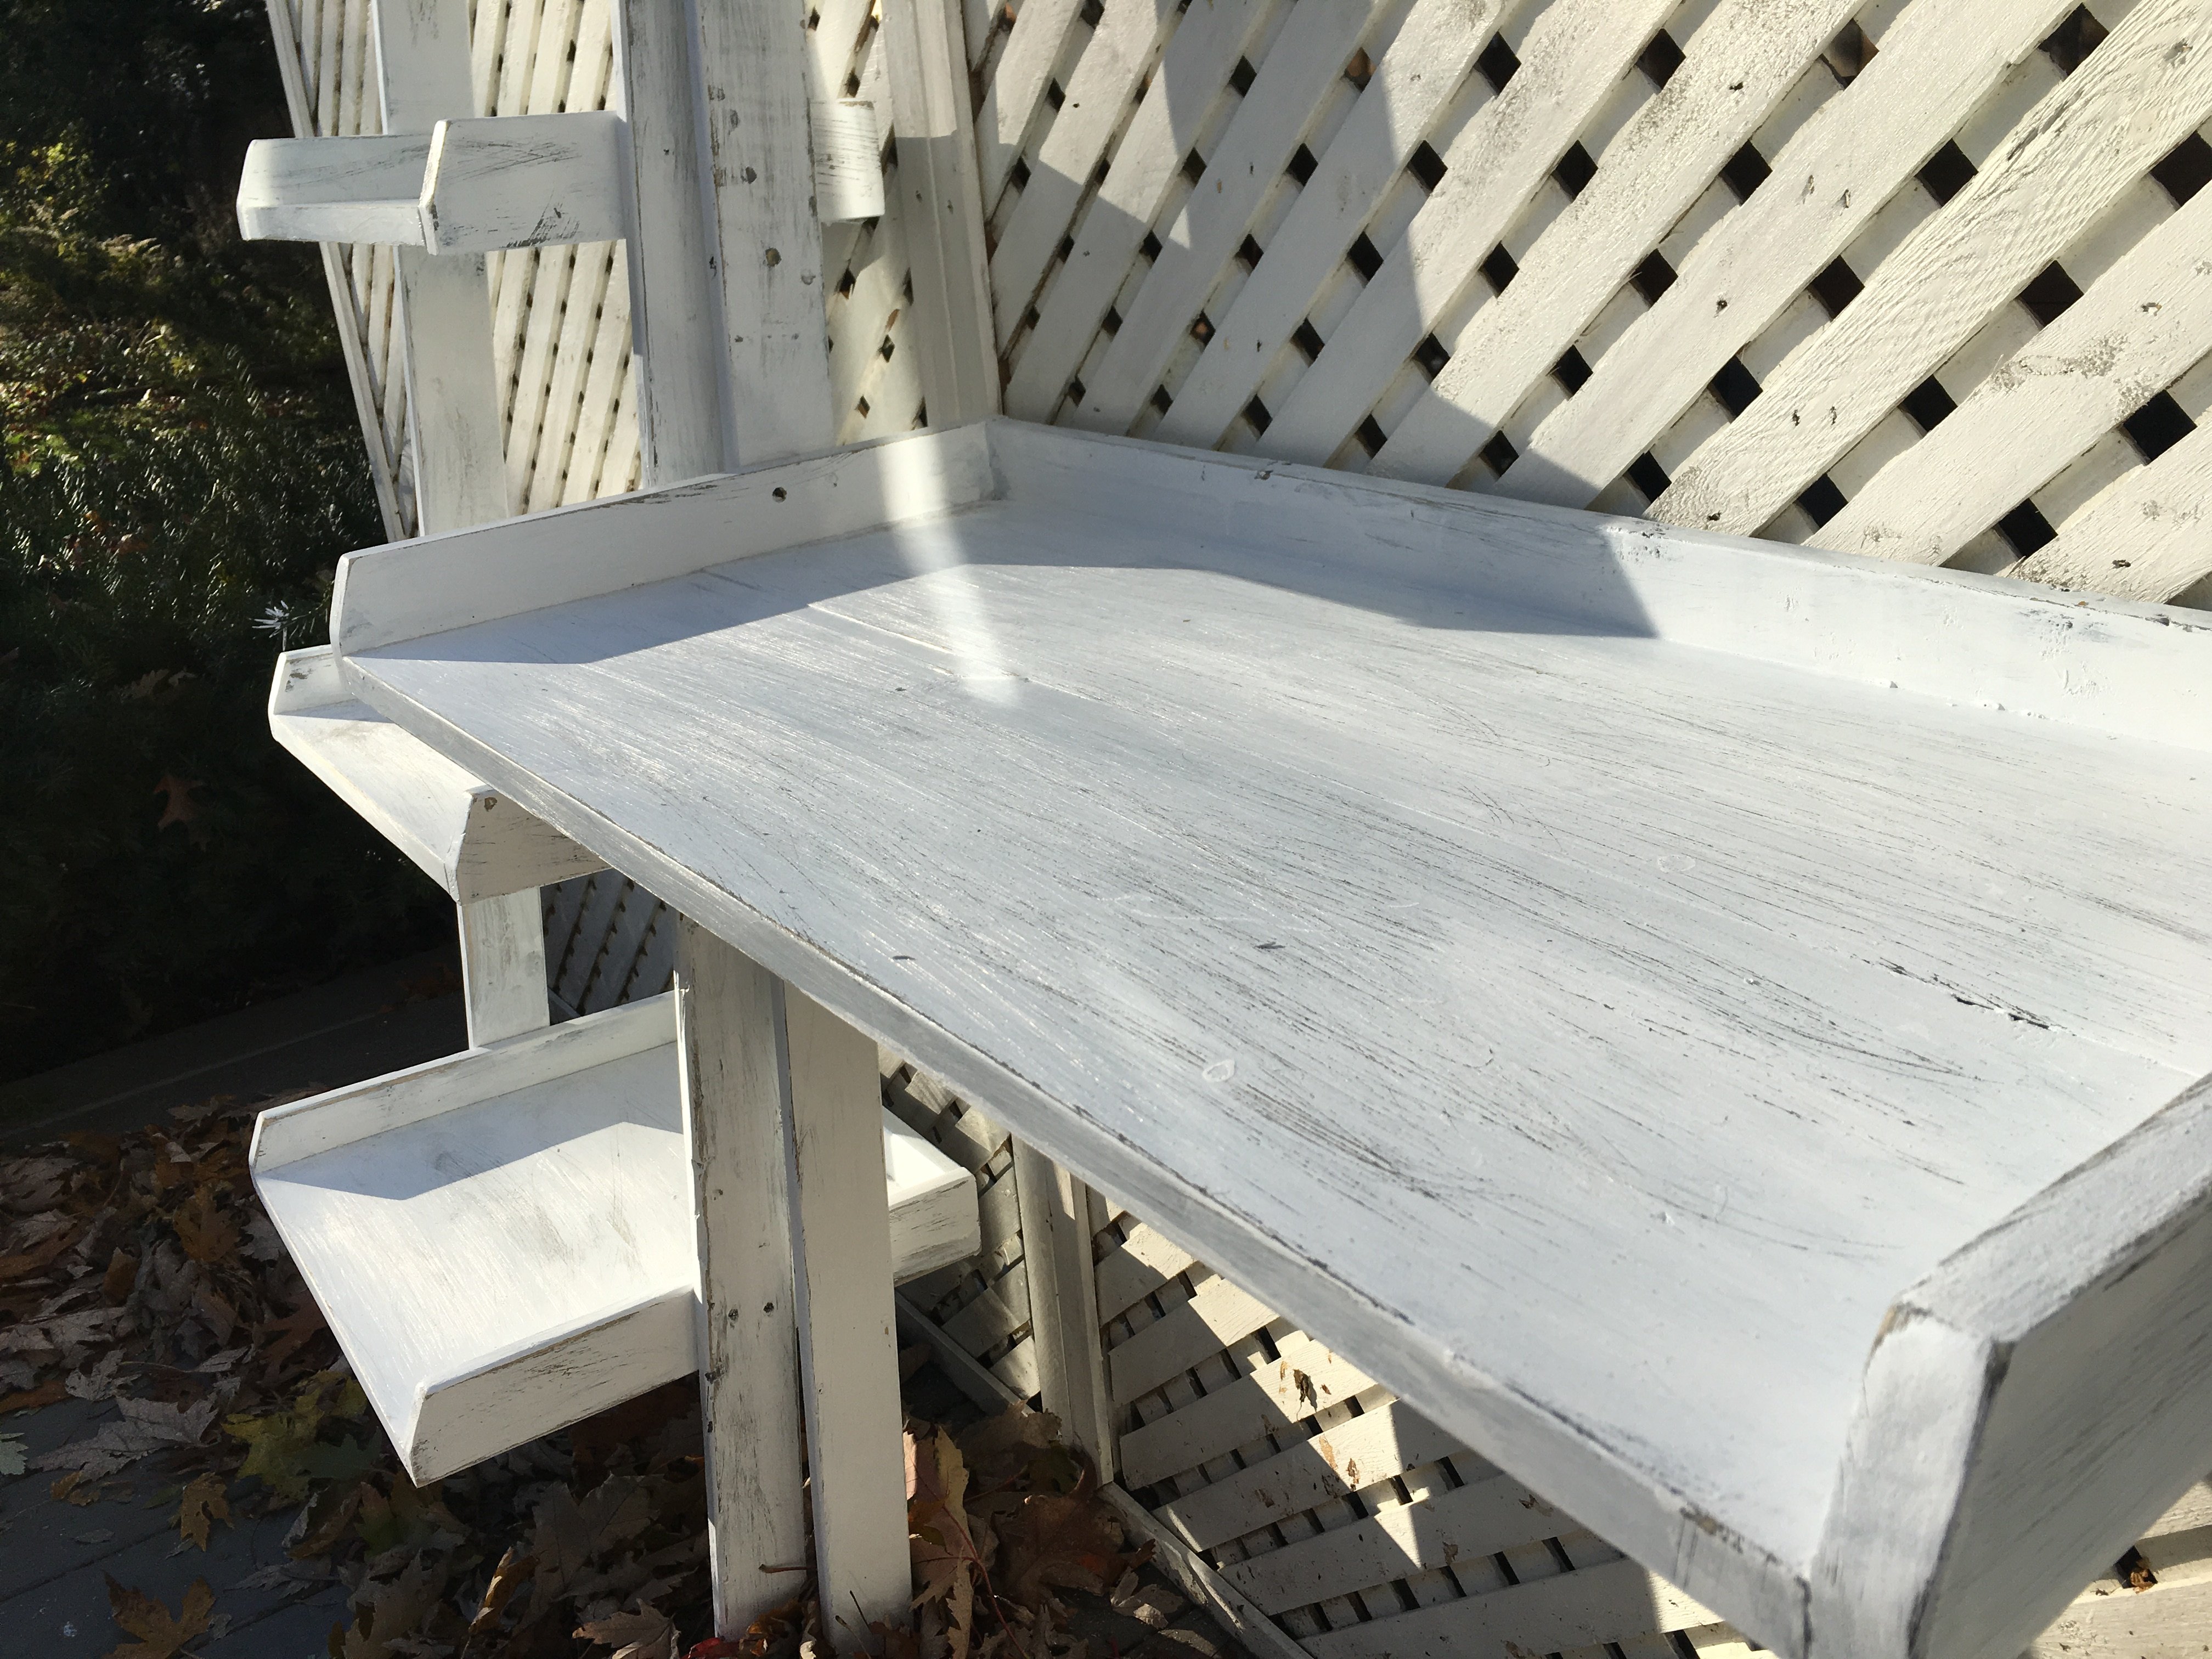
Farmhouse Coffee Station
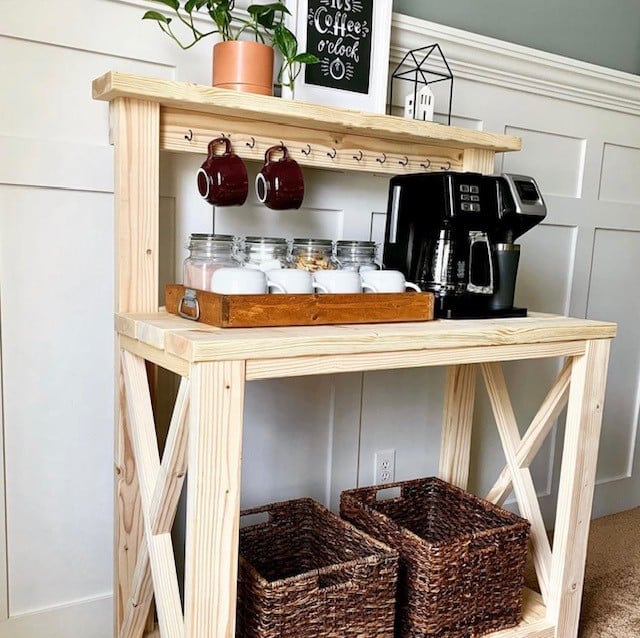
Built from the farmhouse potting bench plan
Built from Plan(s)
Seasonal And Holiday
Built from the farmhouse potting bench plan
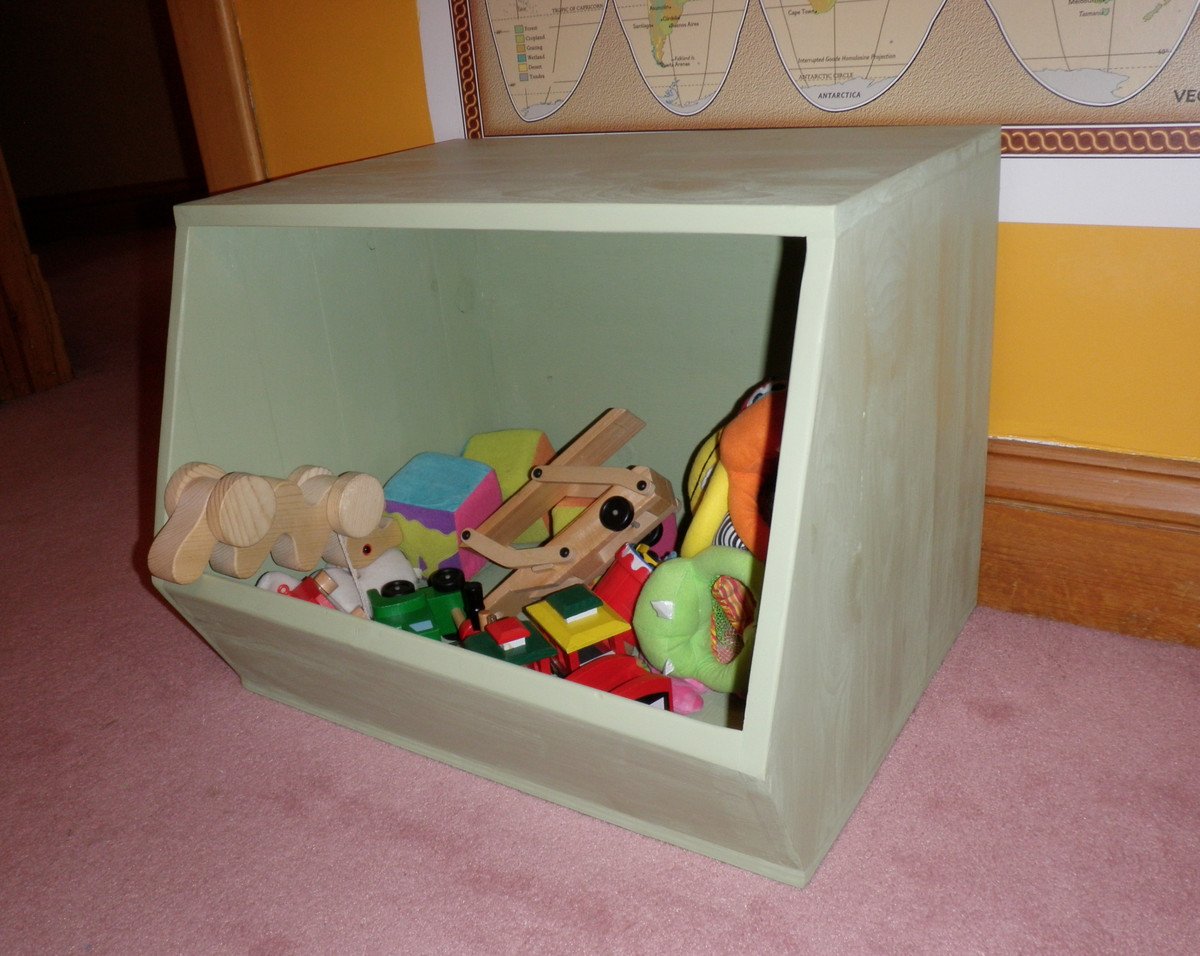
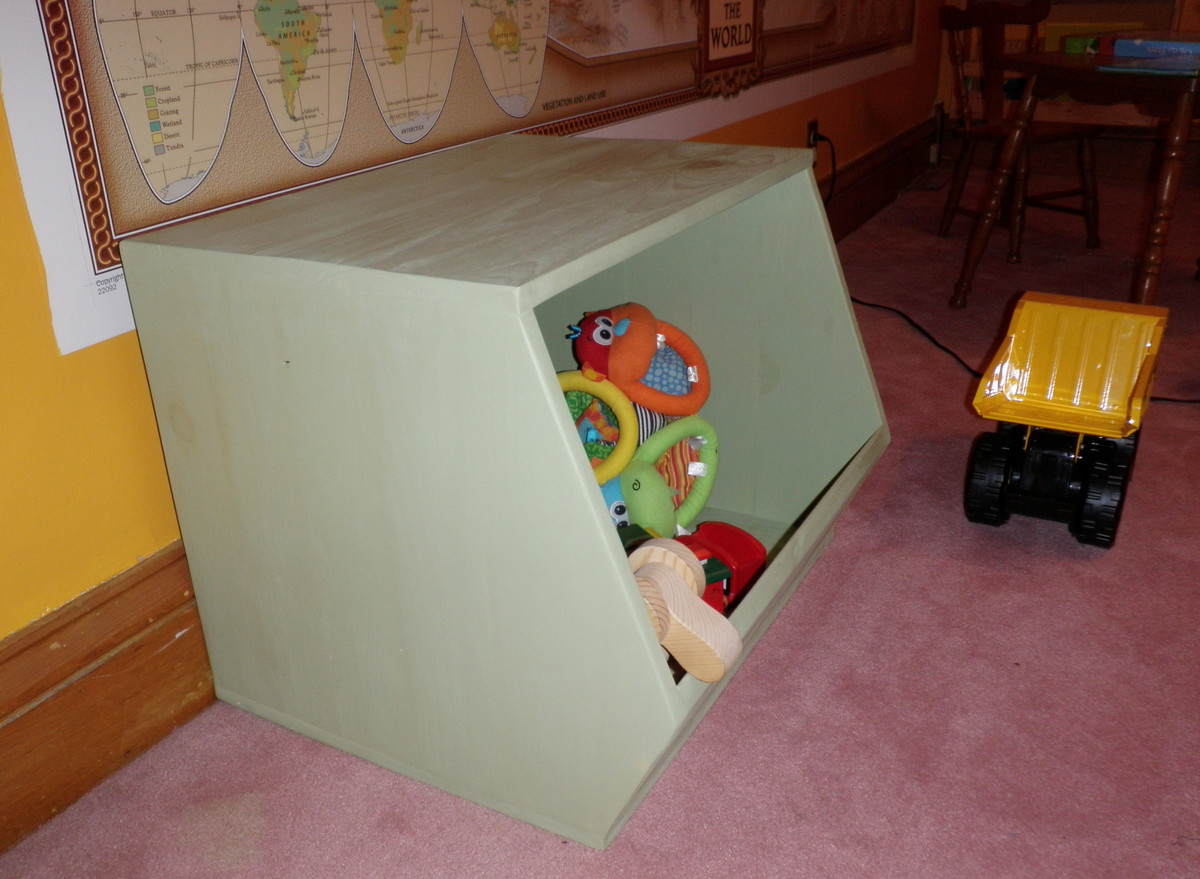
So, this isn't actually an Ana plan. But I wanted to post it as an example of a hodge-podge of toybox ideas that I built with a bunch of 1x3's, my Kreg Jig and some pieces of plywood I had lying around.
I actually made the top and ends by pocket holing 1x3's together and sanding them smooth. The bottom and back are plywood, and the front piece doesn't line up flush to the bottom, but it doesn't matter because you can't see it!
I wouldn't have attempted a project like this if it wasn't for stumbling upon ana-white.com and learning about the kreg jig and how FUN it is to actually build FURNITURE!
:)
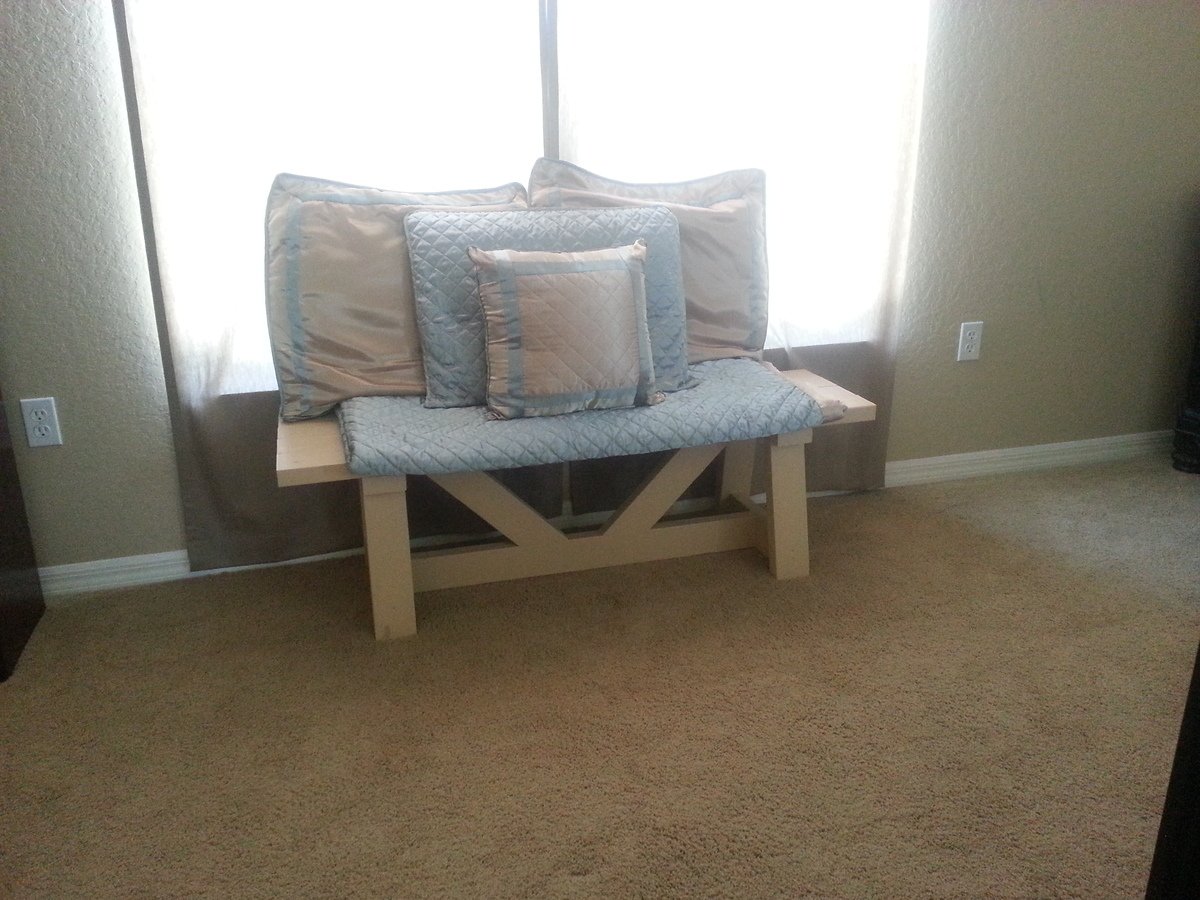
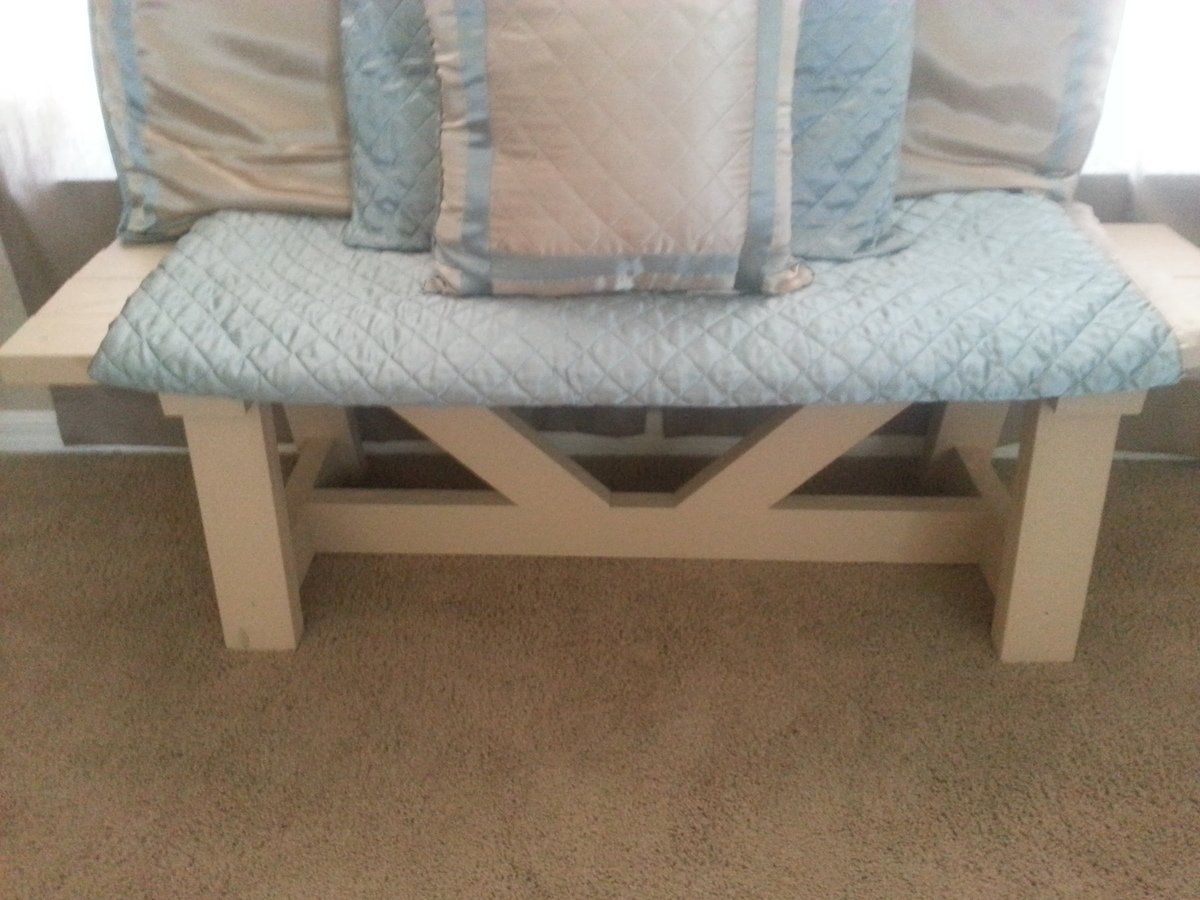
This bench was very easy to make and perfect for a family who hasnt tackle any wood projects. We are so happy and pleased not only with the results but how satisfying it was to make your own piece of furniture.
I recommend this project not only for the bedroom but for many places in the house, specially in the Entry way.
Very nice bench. I have now made three. This one is grey washed red cedar.
The plans are great. This went together really fast. I am cheating a little here, it is not quite complete; I need to add the side blocks on top and my wife would like a another panel added to the front at work height level, just for looks. But the overall look won't be changed. I struggled some with finishing (I usually do). A couple spots have runs I didn't see. One will be covered by the front panel I'll add,but another needs sanding.
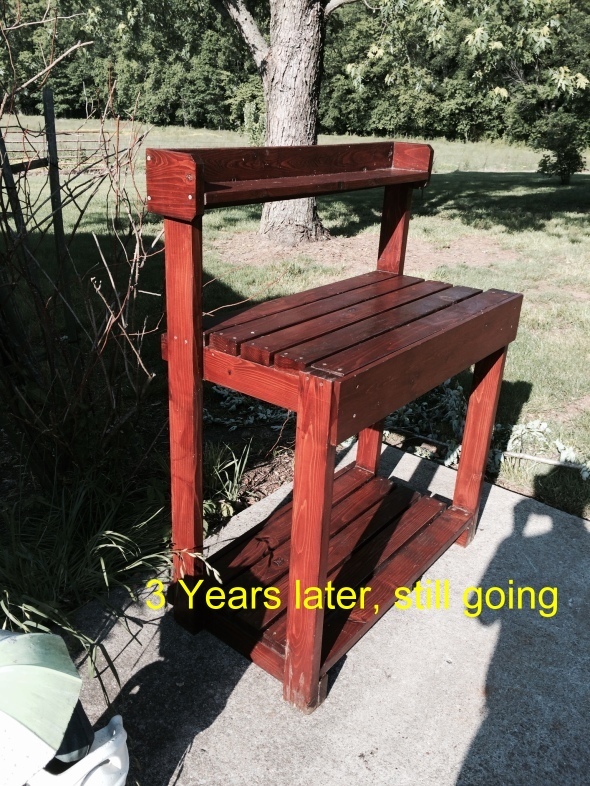
Just for fun I added a picture of the bench 3 years later. Its held up well to a lot of use and a lot of sitting out in the elements.
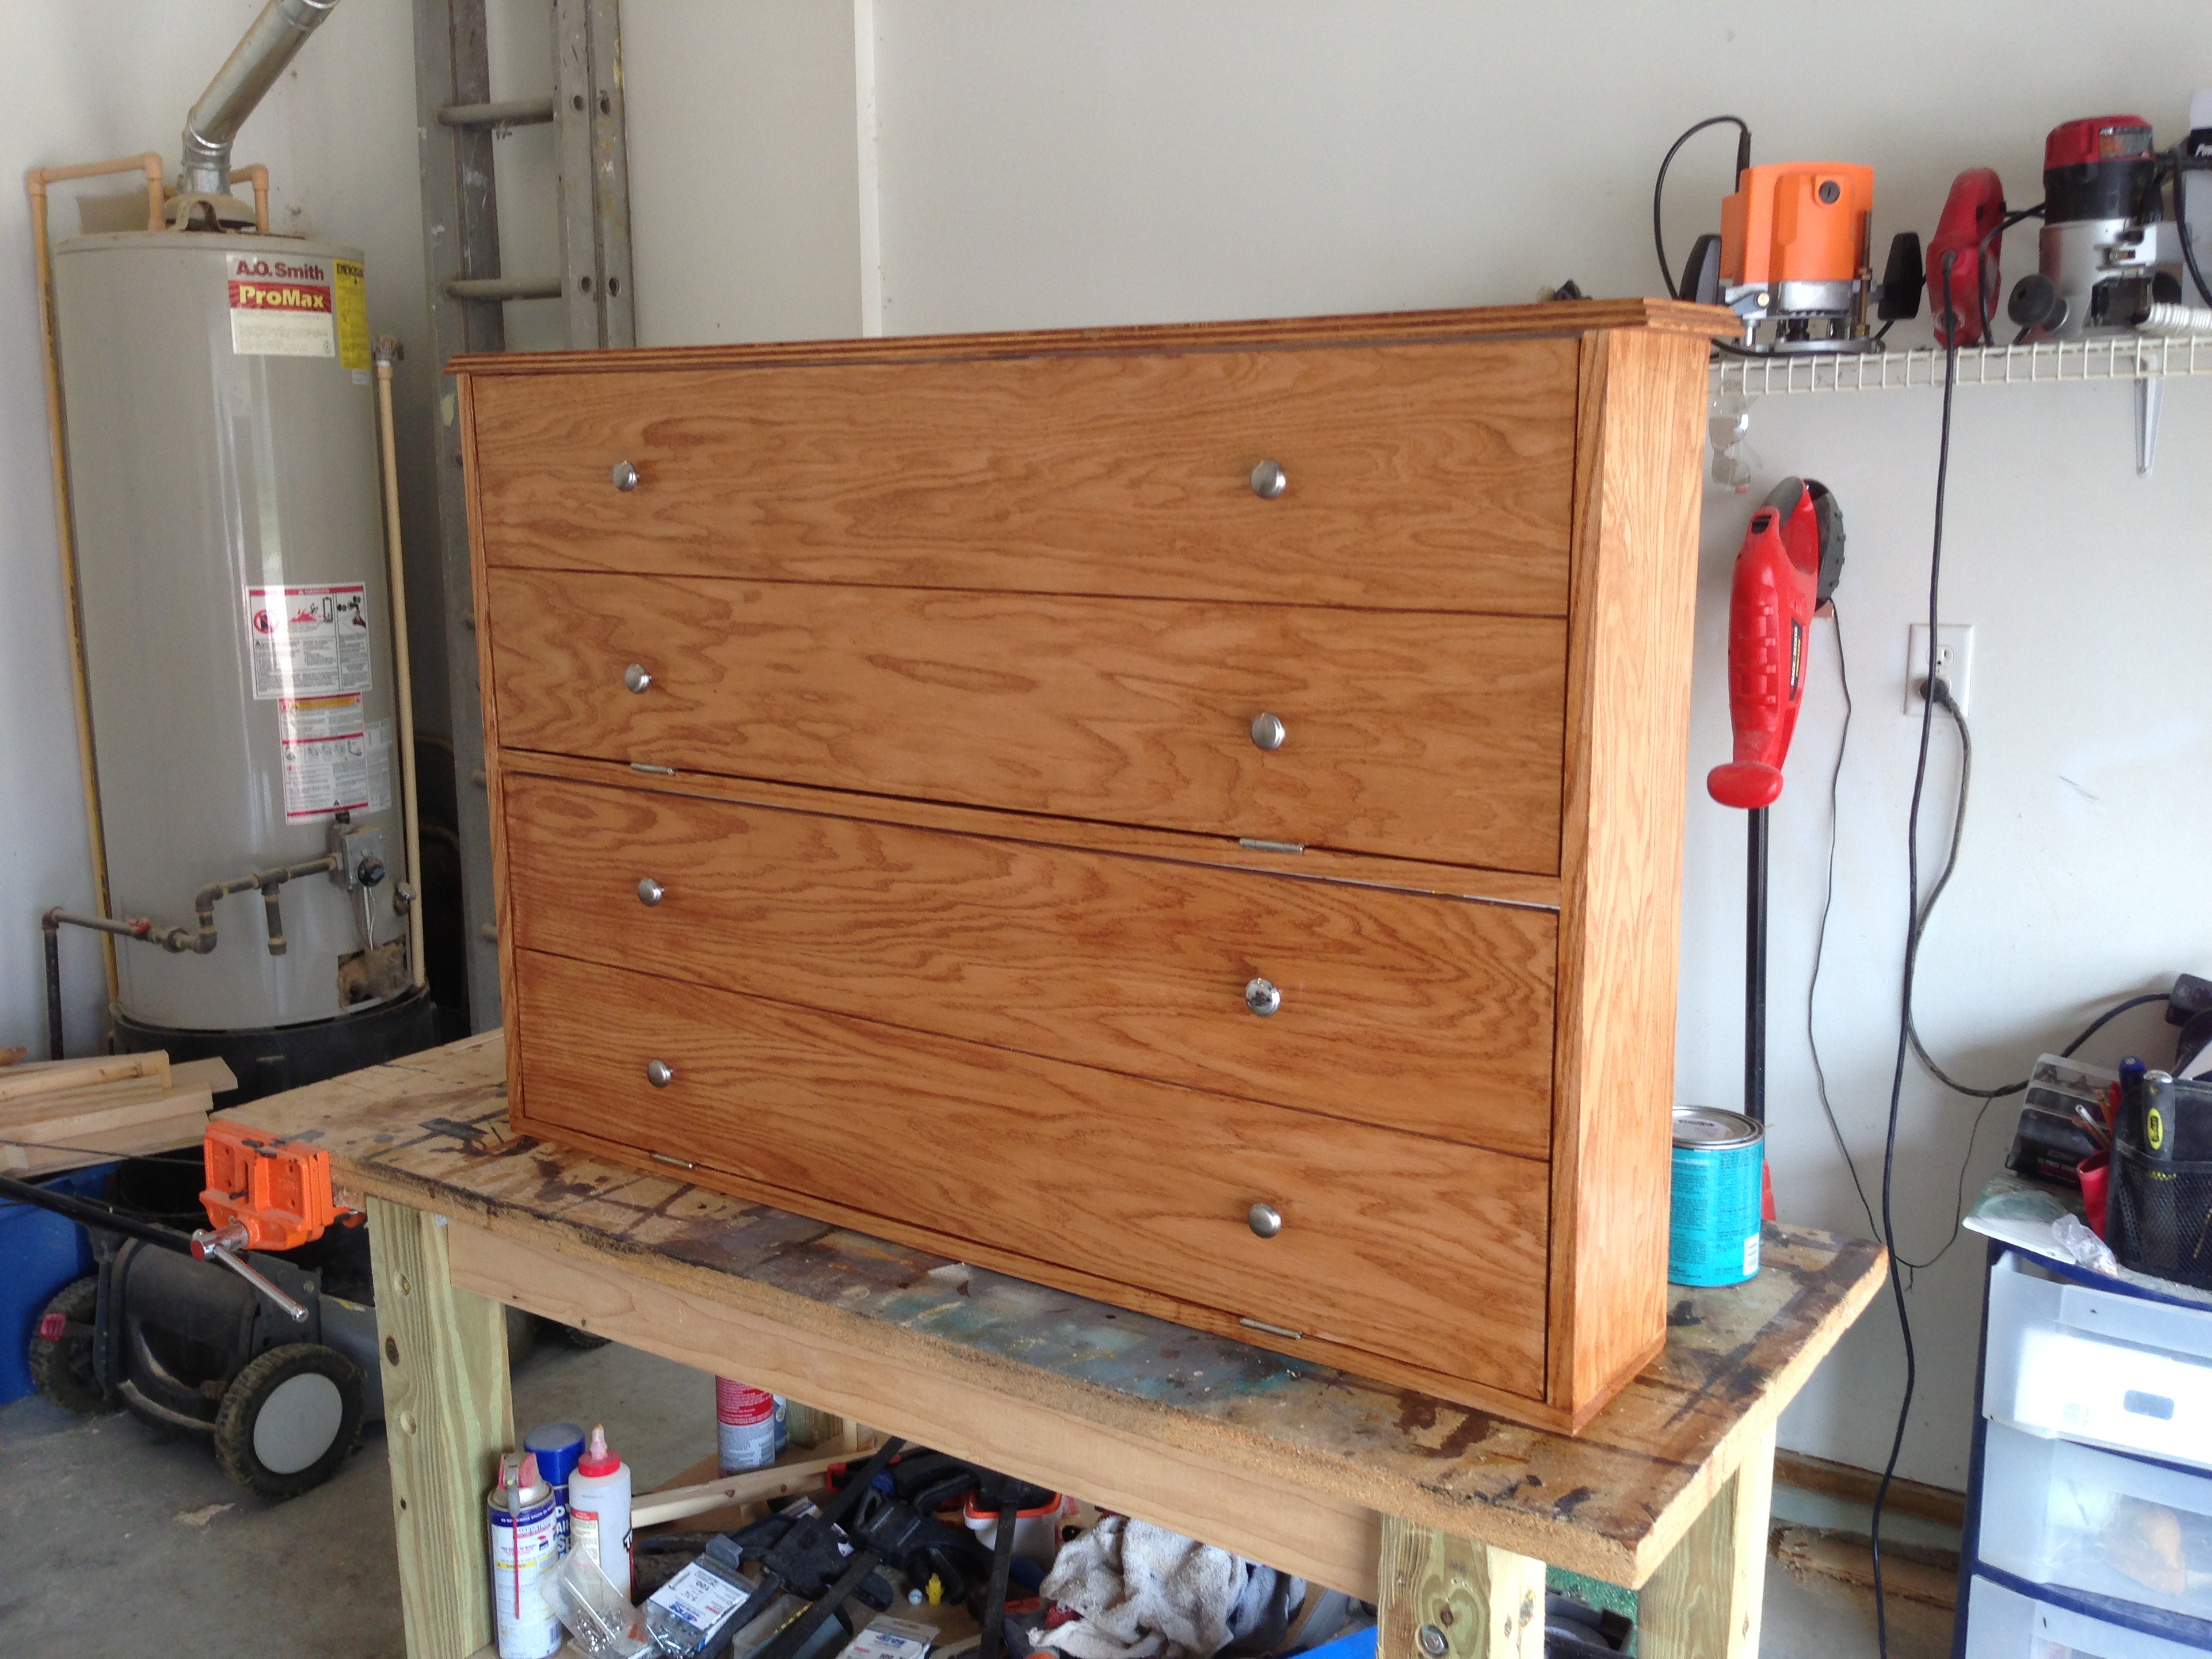
I used a 4'x8' sheet of oak plywood. The only thing that I had to cut back on was the center shelf. I made it a 1x6 so that I would have enough wood. I used veneer for the front pieces and amber stain with polycrylic.

This desk is massive at 3.4m long (over 11 feet). Initially it was going to be a homework station for the kids but my husband decided that he'd like to use it as his office.
I'm somewhat embarrassed that this took well over 12 months to complete and I was easily distracted by other projects along the way. I made many mistakes but I learnt something from every one of them.
I modified plans to suit my space and used sketchup to plan it all out.

Thu, 01/30/2020 - 09:19
I love this! Do you have more information on how you did the top? It looks like one solid piece, and I'm just curious where you purchased the panels and how you built the top to look so nice.
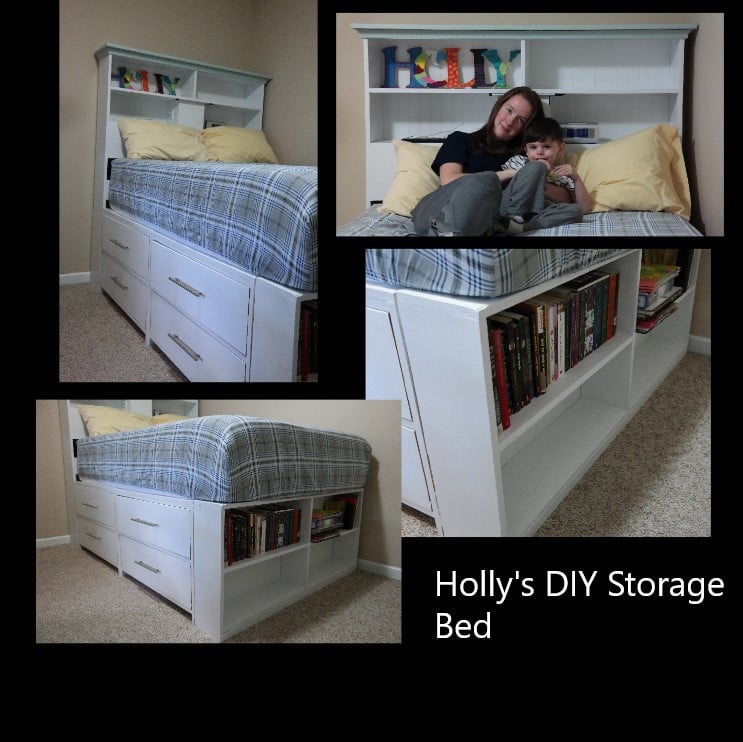
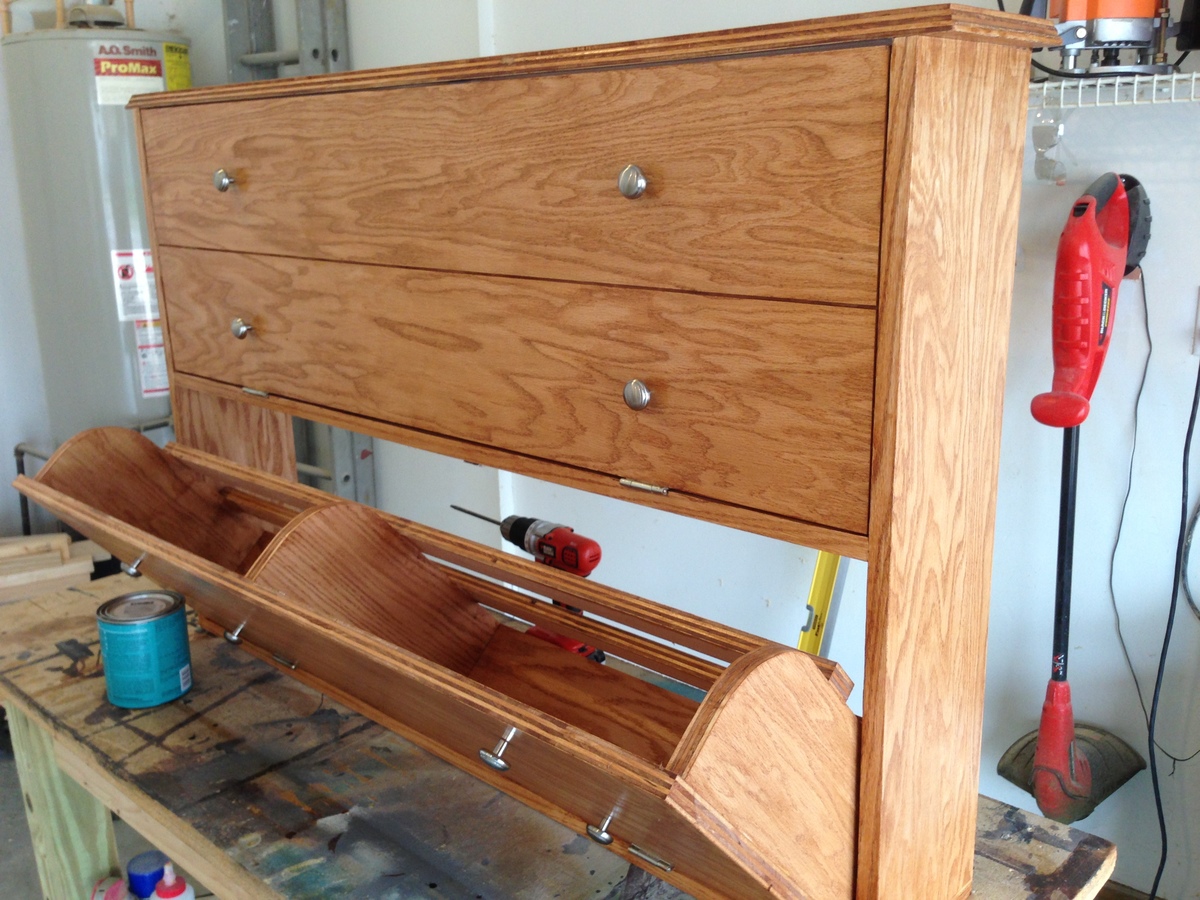
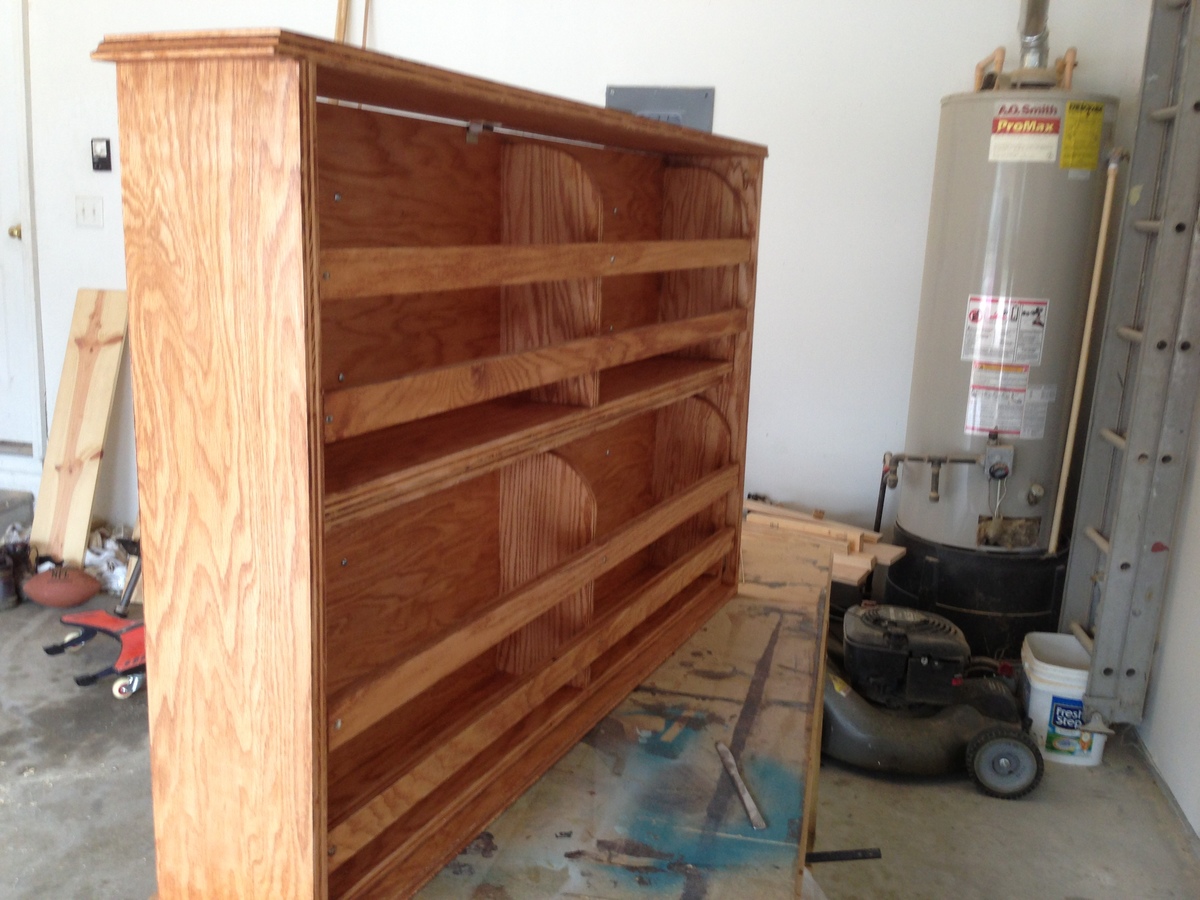
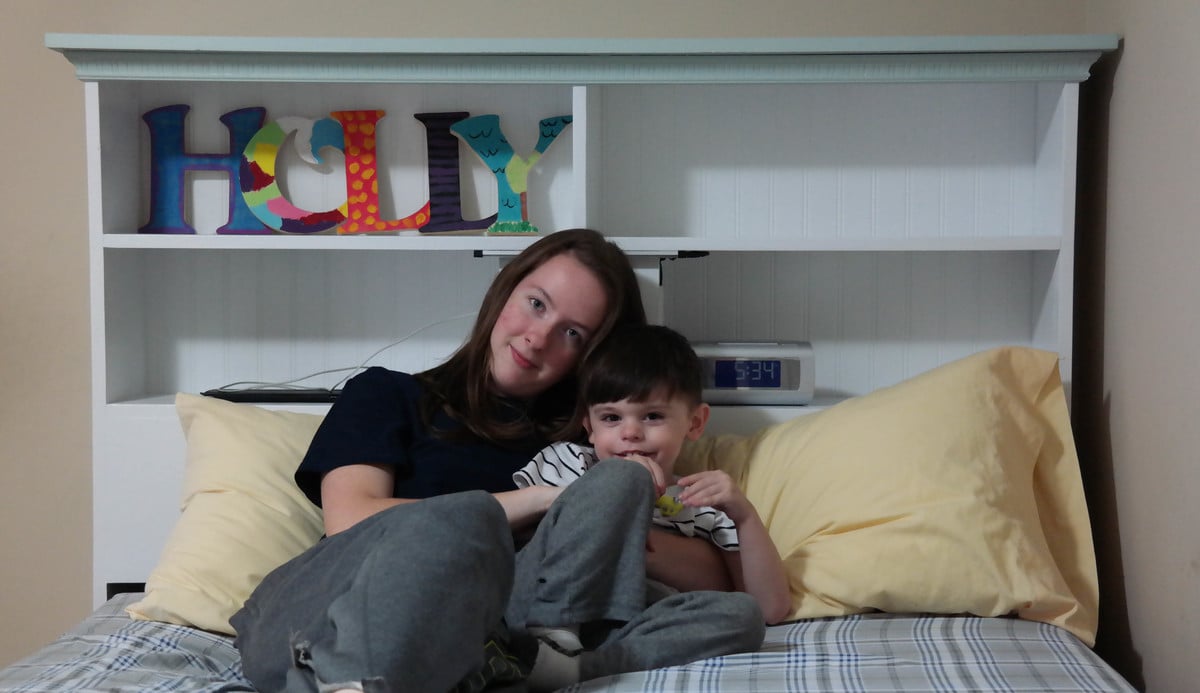
My daughter talked me into making her this custom full size storage bed, with a power center and a night light.
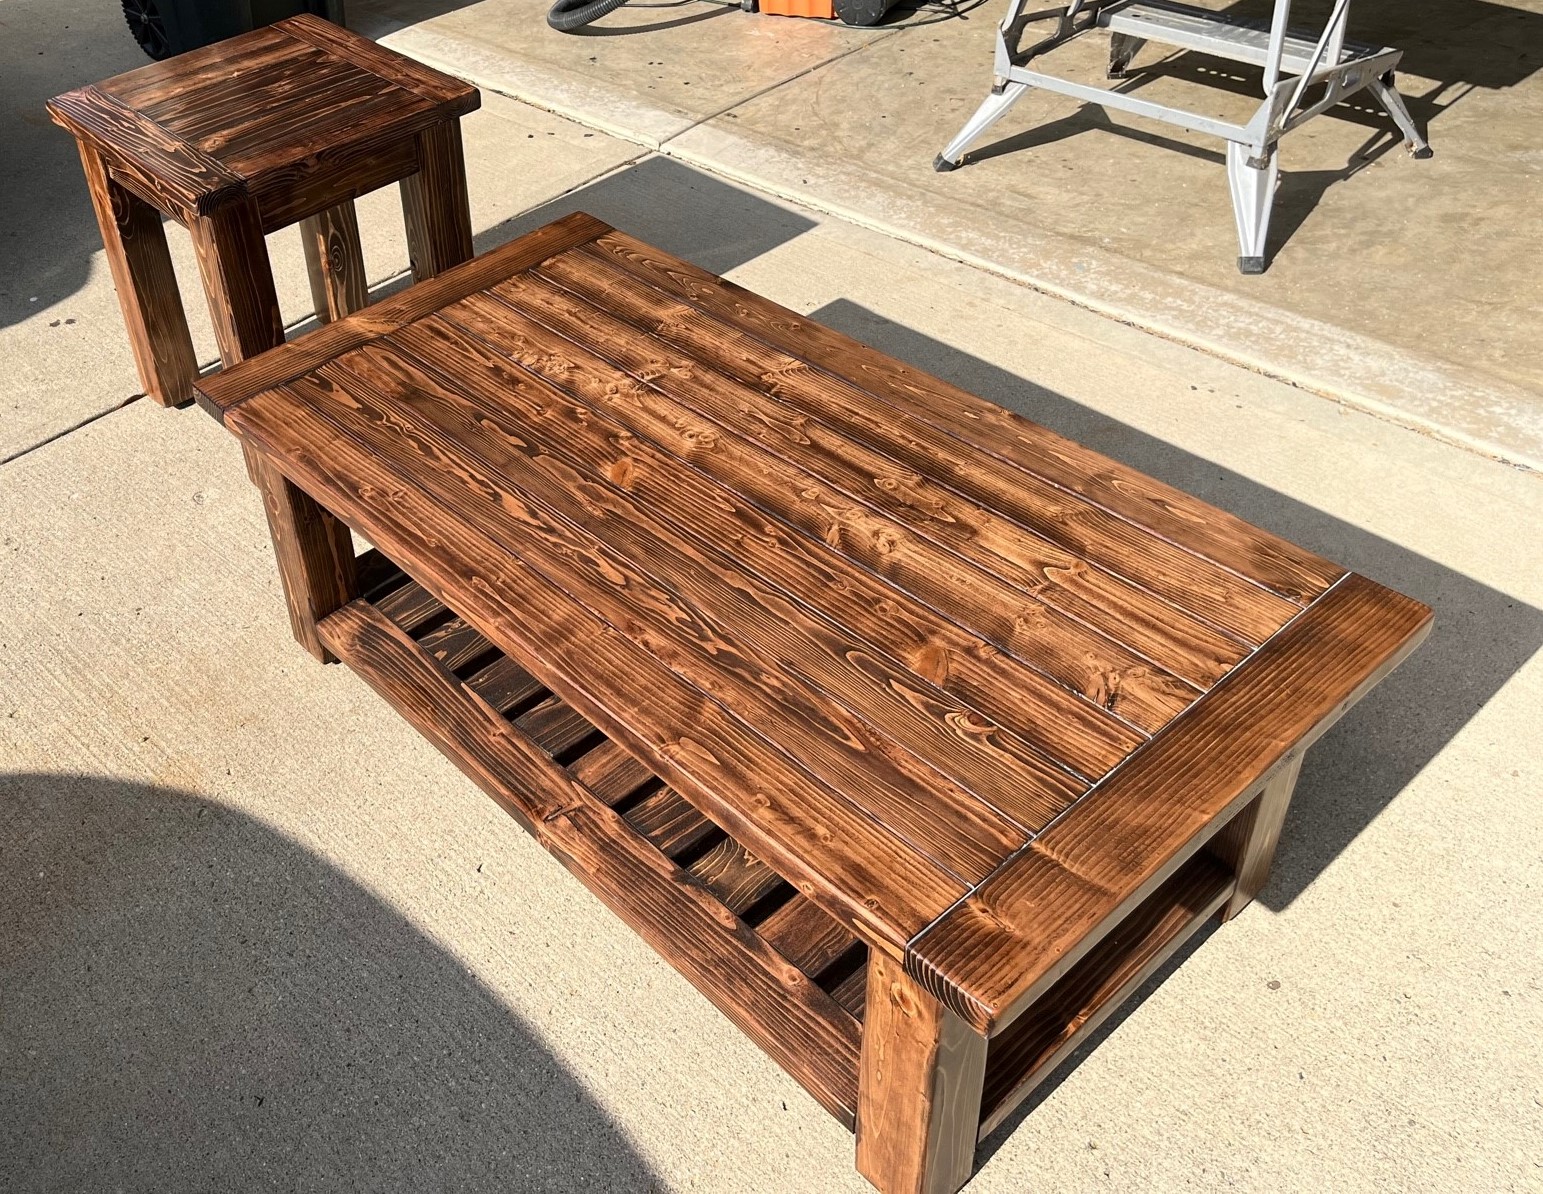
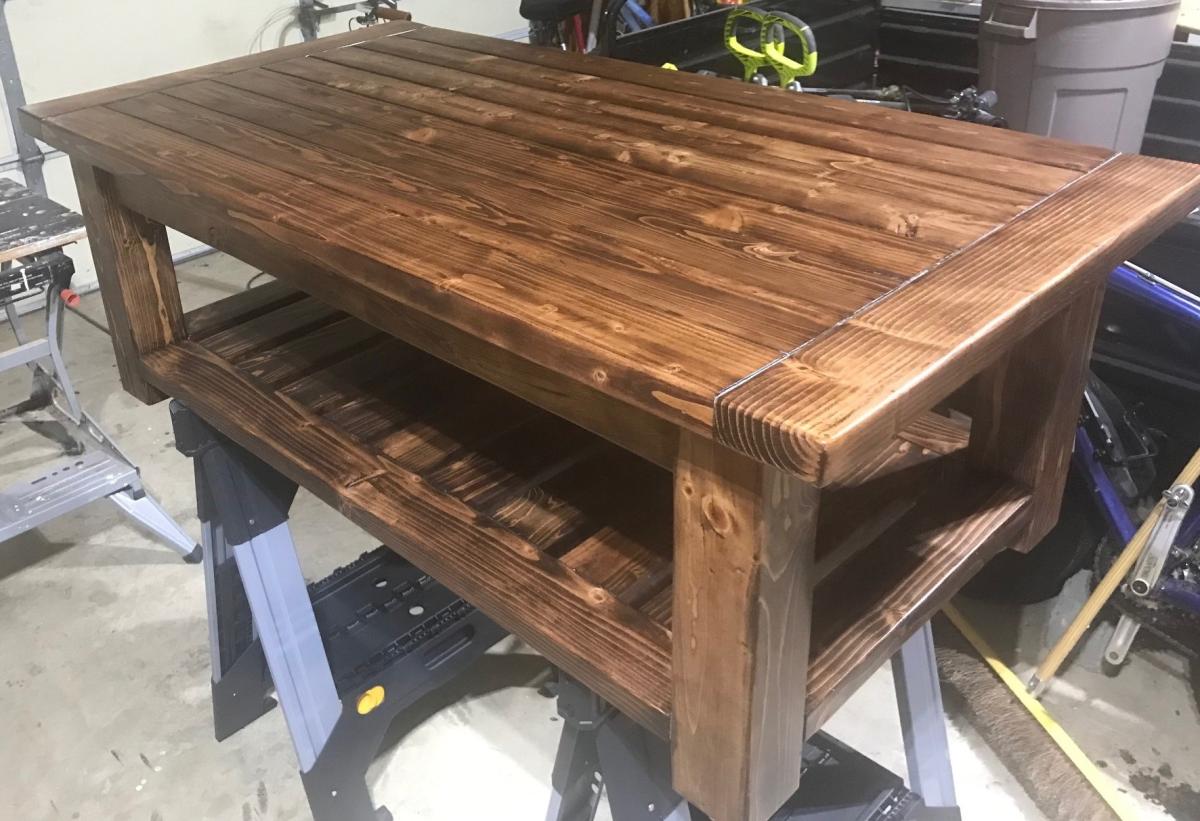
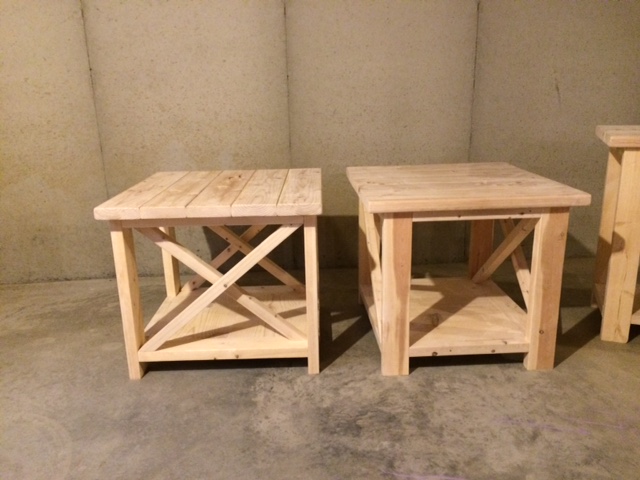
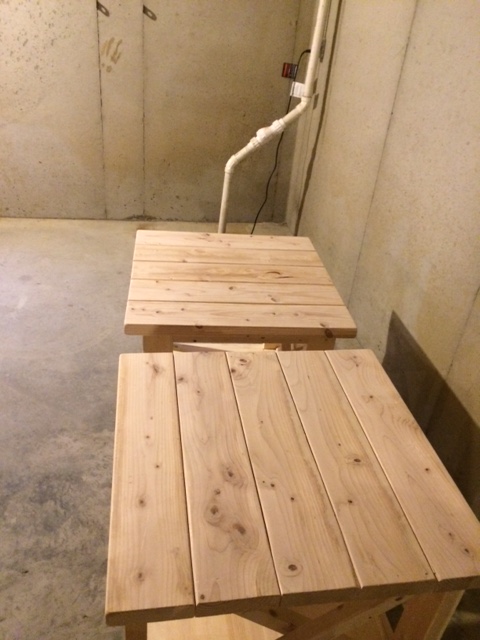
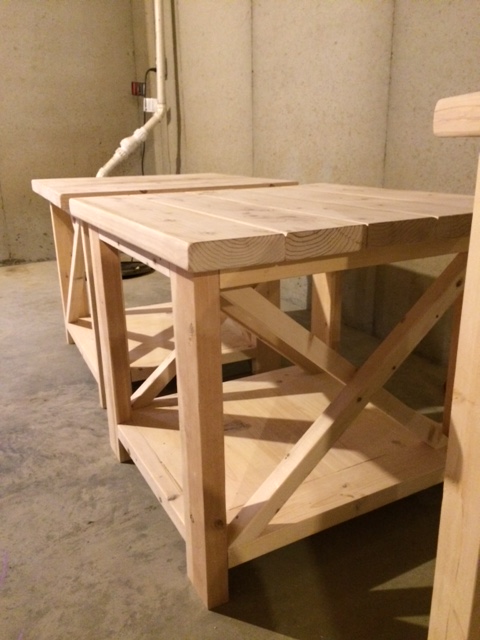
Oldest is moving out into their own apartment so thought I would help them save some money and built a Tryed/Tryde Coffee & End Table, although both are slightly modified:
- Coffee table I added the lower section
- End Table I did with pocket holes vs how the plans had it laid out.
For the end table , which I started after the coffee table, I "jointed" the table top pieces on the table saw - very slightly as I wanted to keep the more rustic looking individual boards. This worked really well and I wish I had done it on the coffee table too.
For the finish, which to me always starts with lots and lots of sanding (started at 60 grit down to 400 grit), I used a mix of Varithane Red Mahogany (4 parts) and Dark Walnut (1 Part), then several coats of Clear Satin Polyurethane. For some reason the end table was VERY glossy so had to use some 0000 steel wool to reduce the gloss.
So hooked on the pocket holes now going to upgrade my Kreg jig to the 720 :)
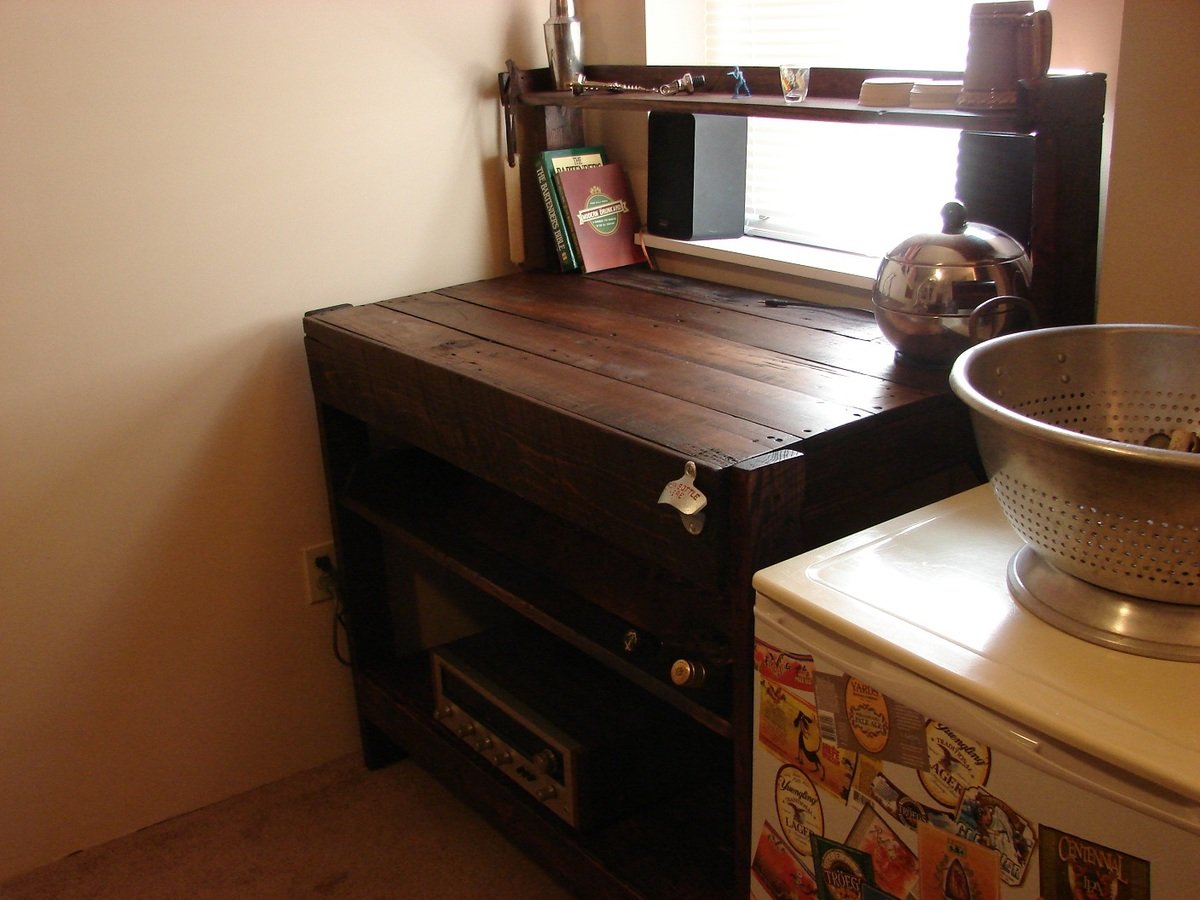
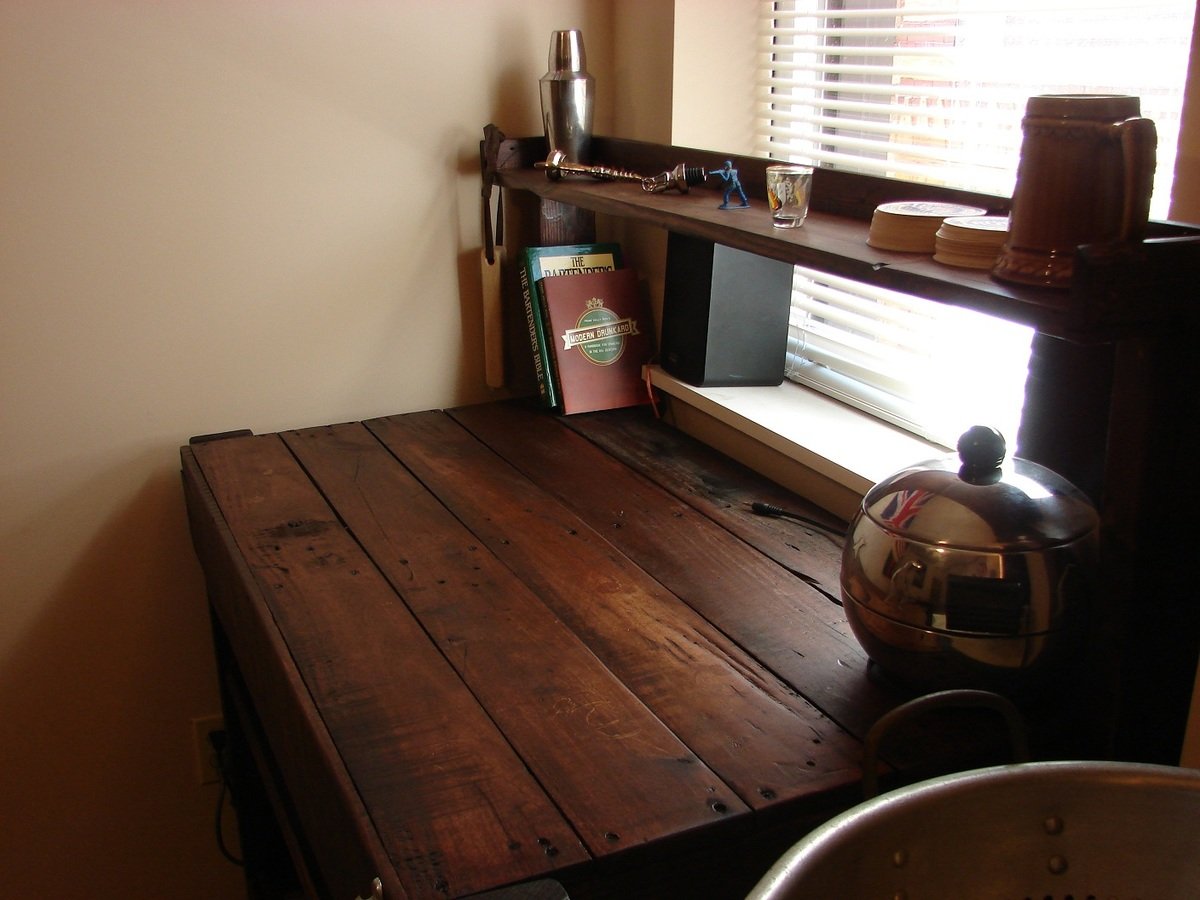
Roommate: "We need something in the dining room for making drinks."
Me: "How about I make something?"
Roommate; "Uh huh..."
He may have been skeptical.
*One week later*
Me: "Hey dude, got wood the the drink station out in the garage."
Roommate: "I was just out there, all I saw was a bunch of wet and beat up pallets."
Me: "Yea, that's the stuff."
Roommate: "..."
OK, he was skeptical.
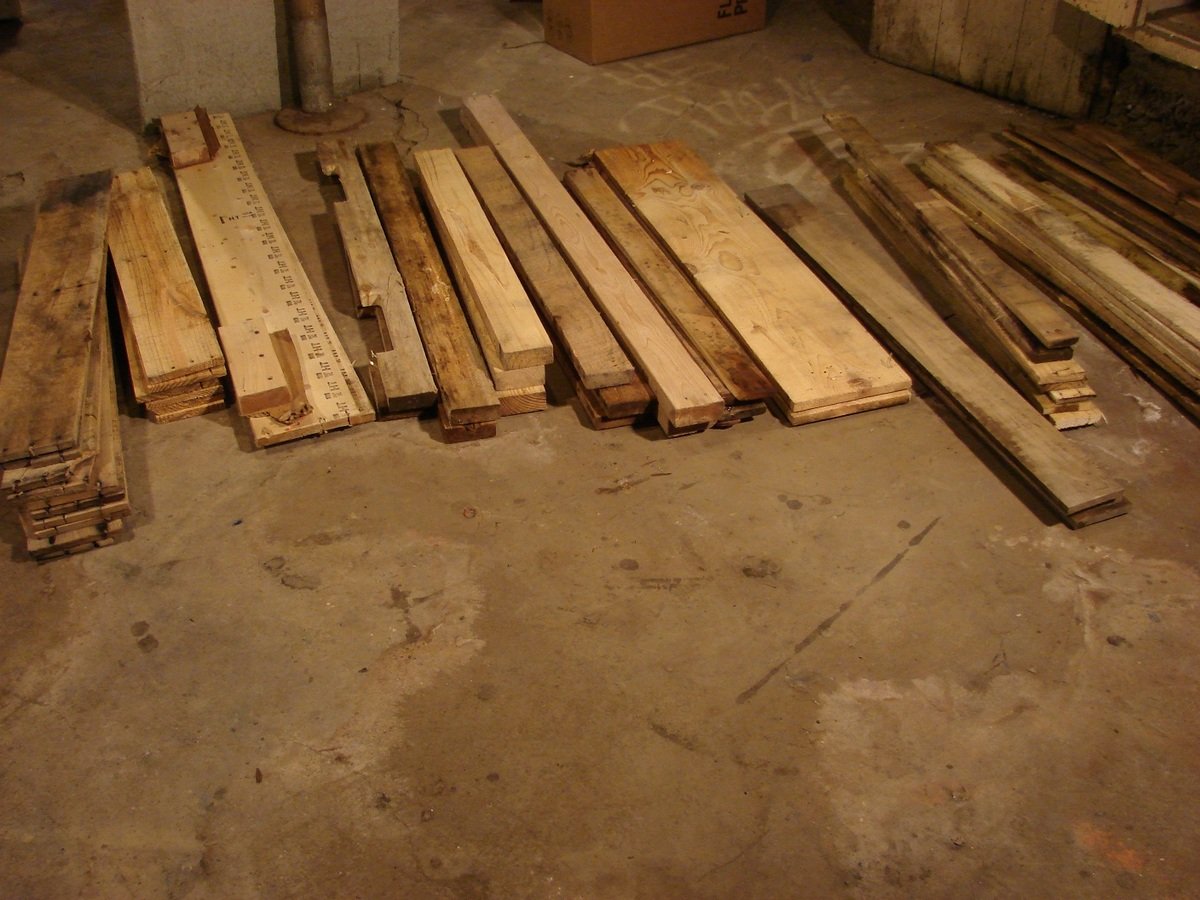
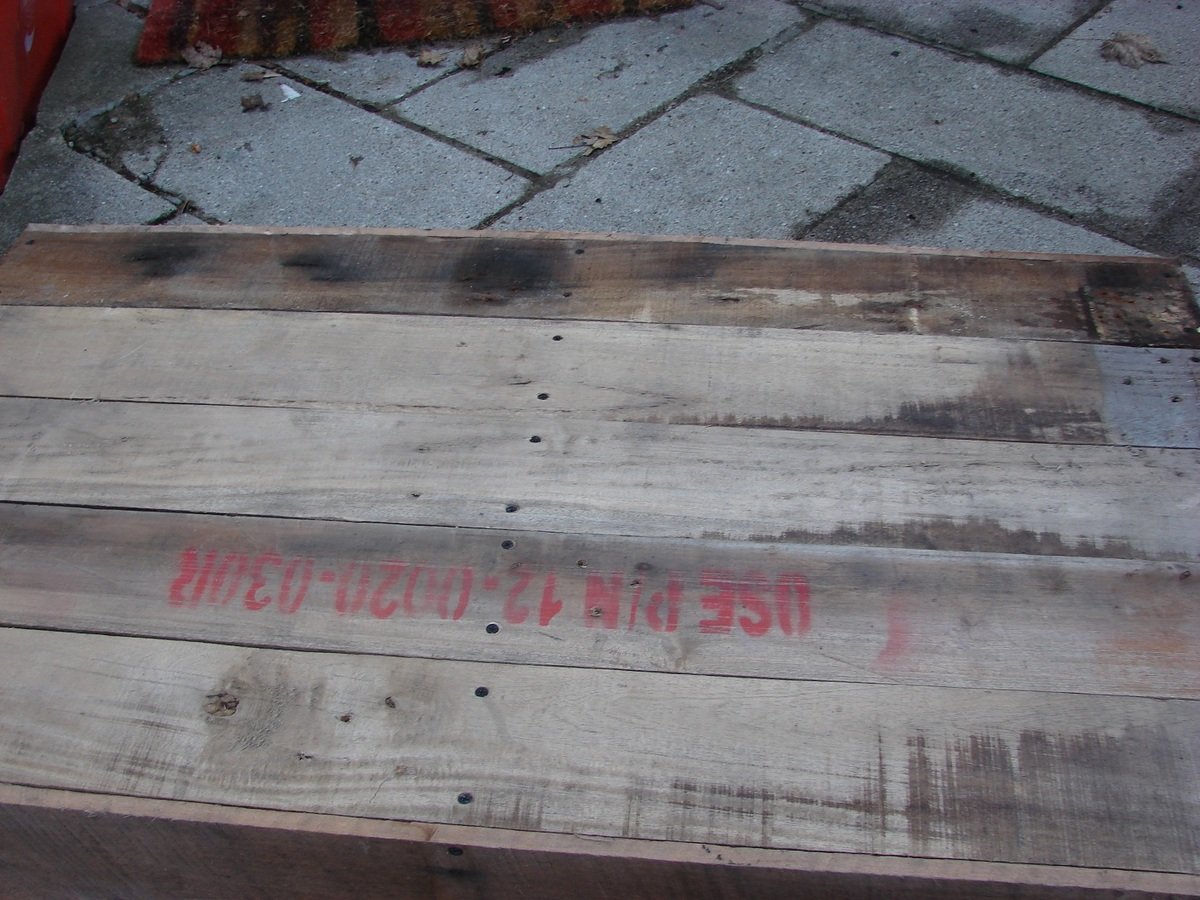
Well, a week later of evenings working on ripping apart pallets and then rebuilding them anew here I am. This whole project didn't cost me a dime, free wood, leftover screws, leftover stain, leftover poly.
I had wanted a rustic worn look which is why I went with pallets, I also like free stuff. That being said, I now know what most reclaimed pallet projects require wood that is no loner than 18 inches. Removing the planks whole and pulling out the nails without splitting it all is a royal pain. Needless to say once this pile of wood is gone I won't be doing something this large from pallets again.
Who am I kidding, yes I will.
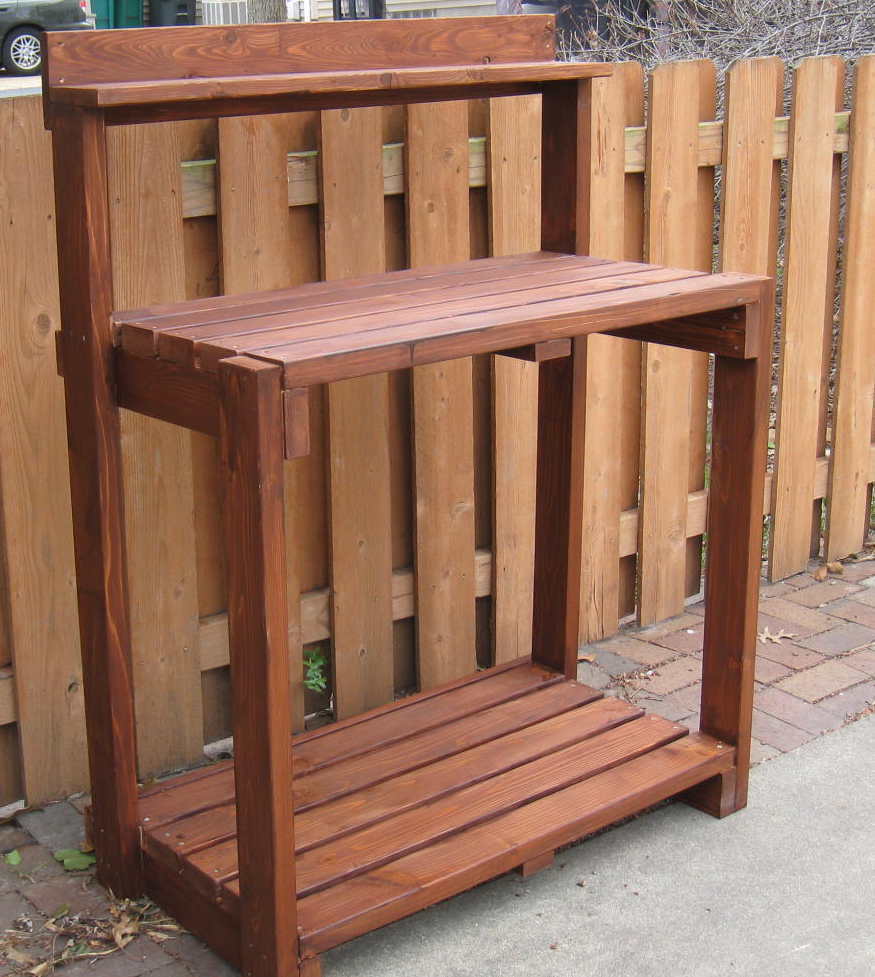
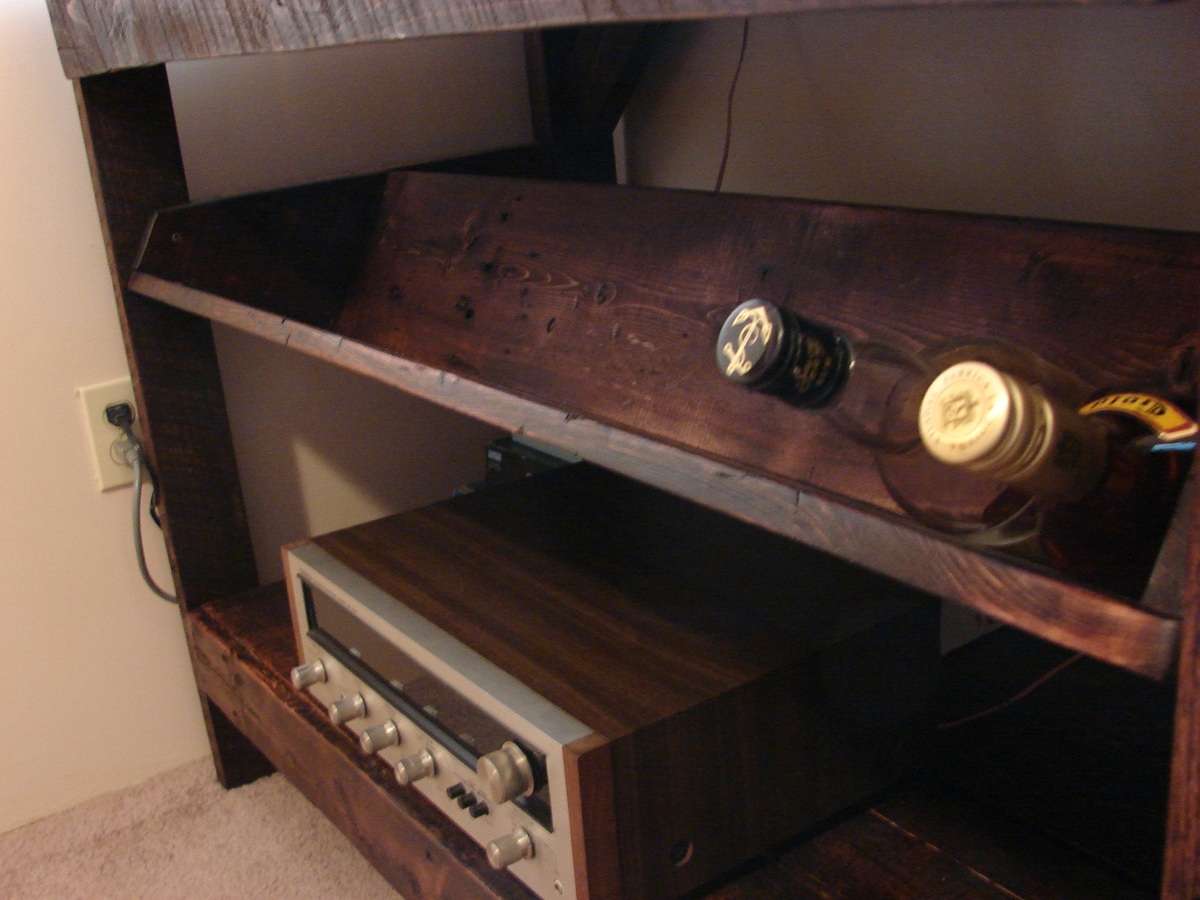
I modified the potting bench plan, it's a little wider and a little deeper to make best use of the wood I had. Instead of 2X4's for the top and shelf I used 1X6's without any gap. Well, there's a little gap due to the rough cut of the wood. Seeing as this was going to be a drink prep station I needed something for holding the bottles. At first I was thinking a typical X designed wine holder, then I stumbled upon the library console table design. So with that I made on of angled book holders and put it under the top. Voila, from books to booze.
All in all I'm fairly pleased with how it turned out and it certainly wouldn't have had this character had I bought the wood.
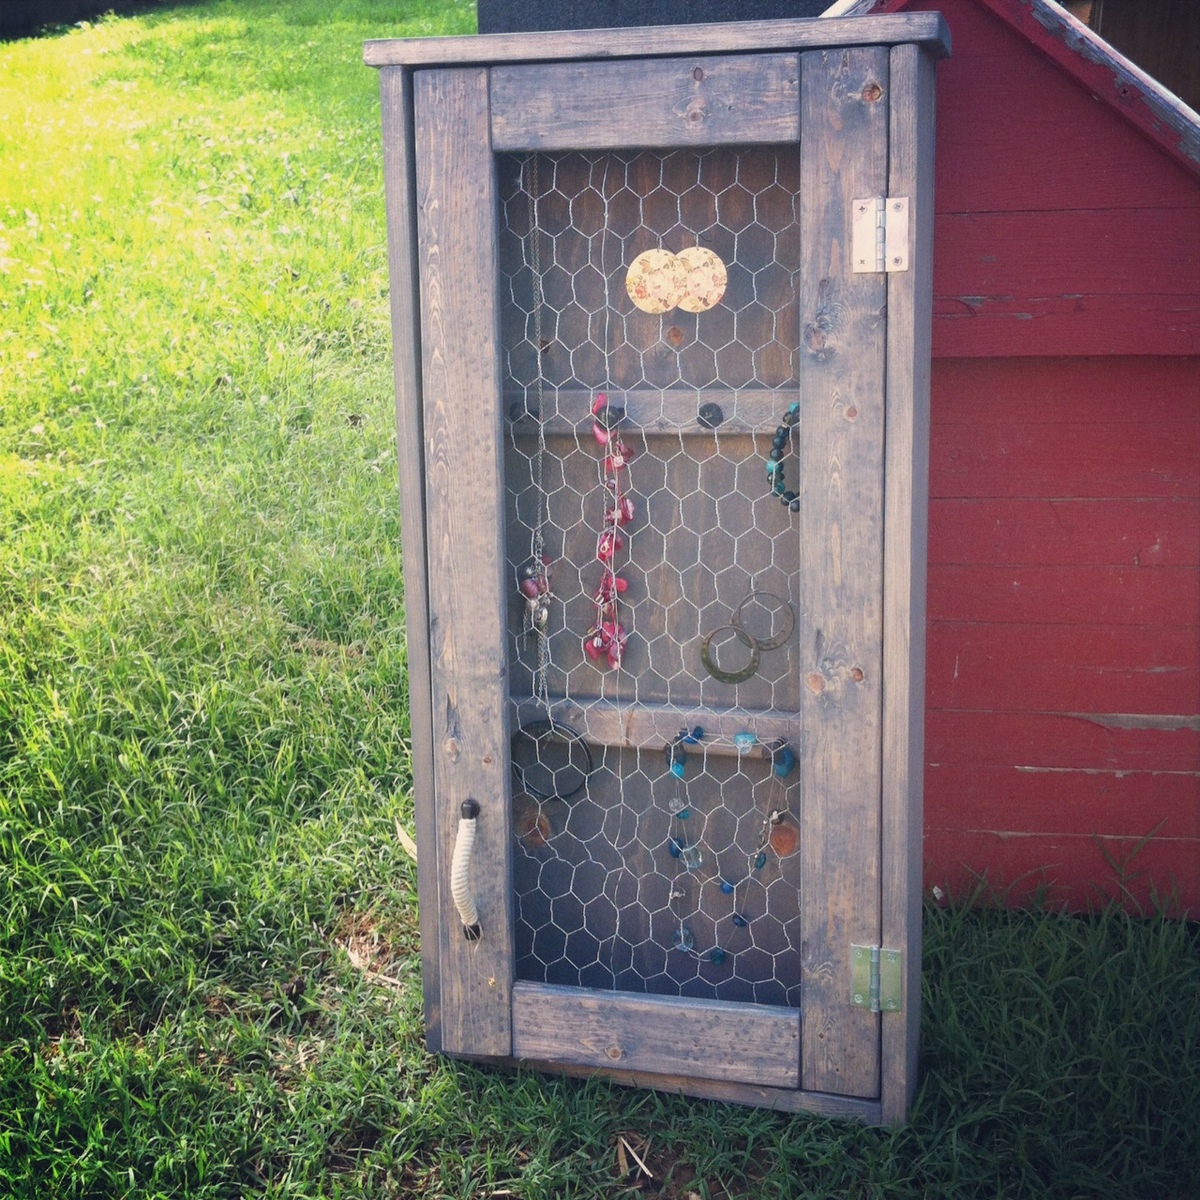
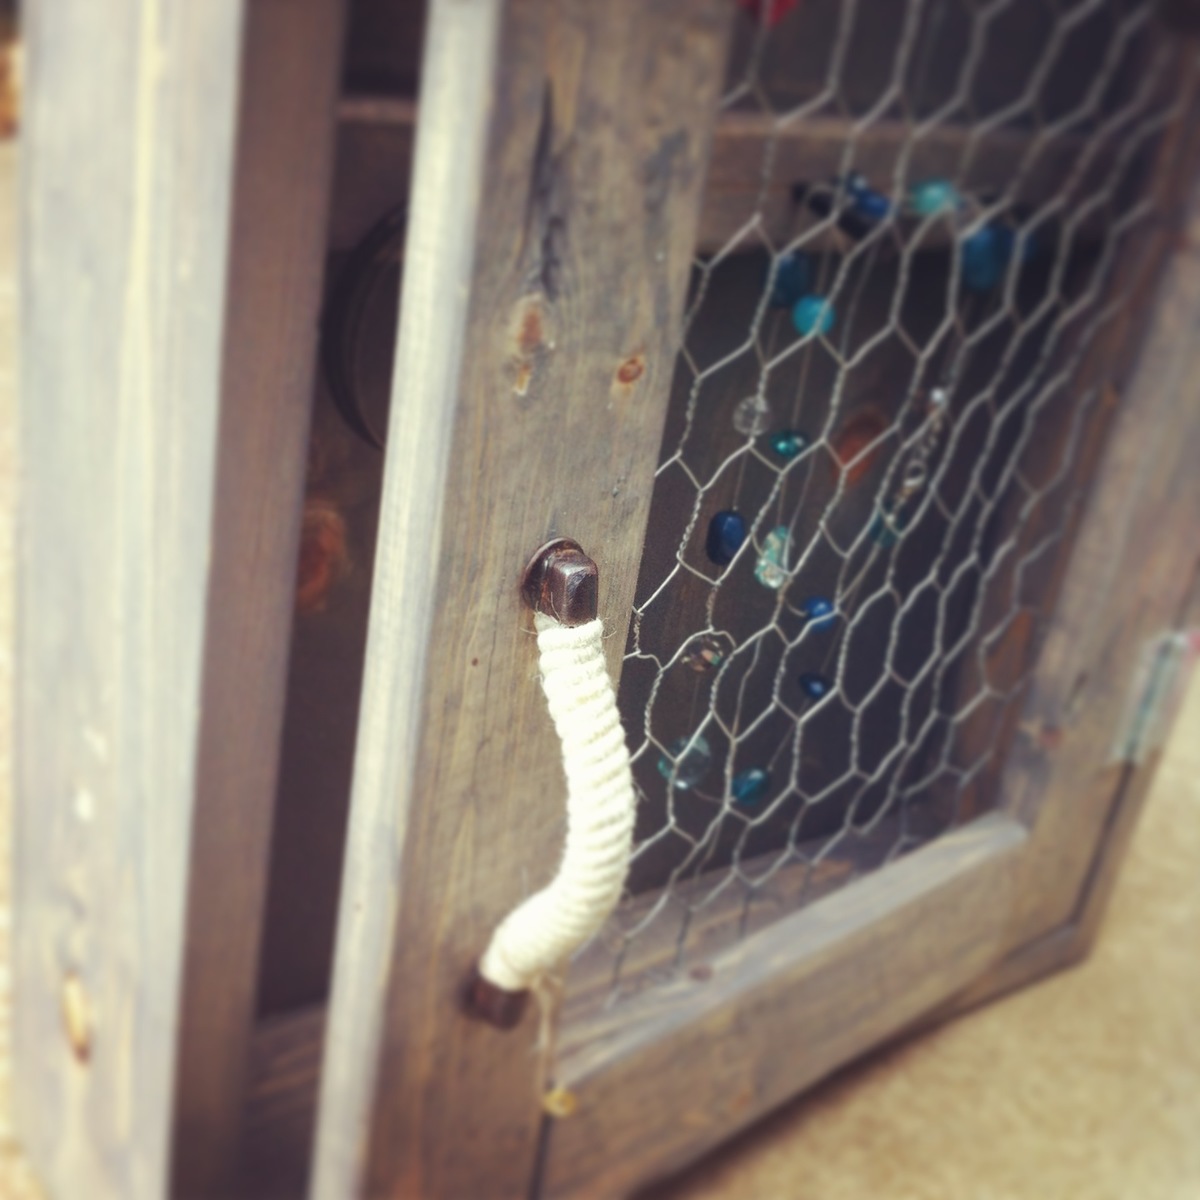
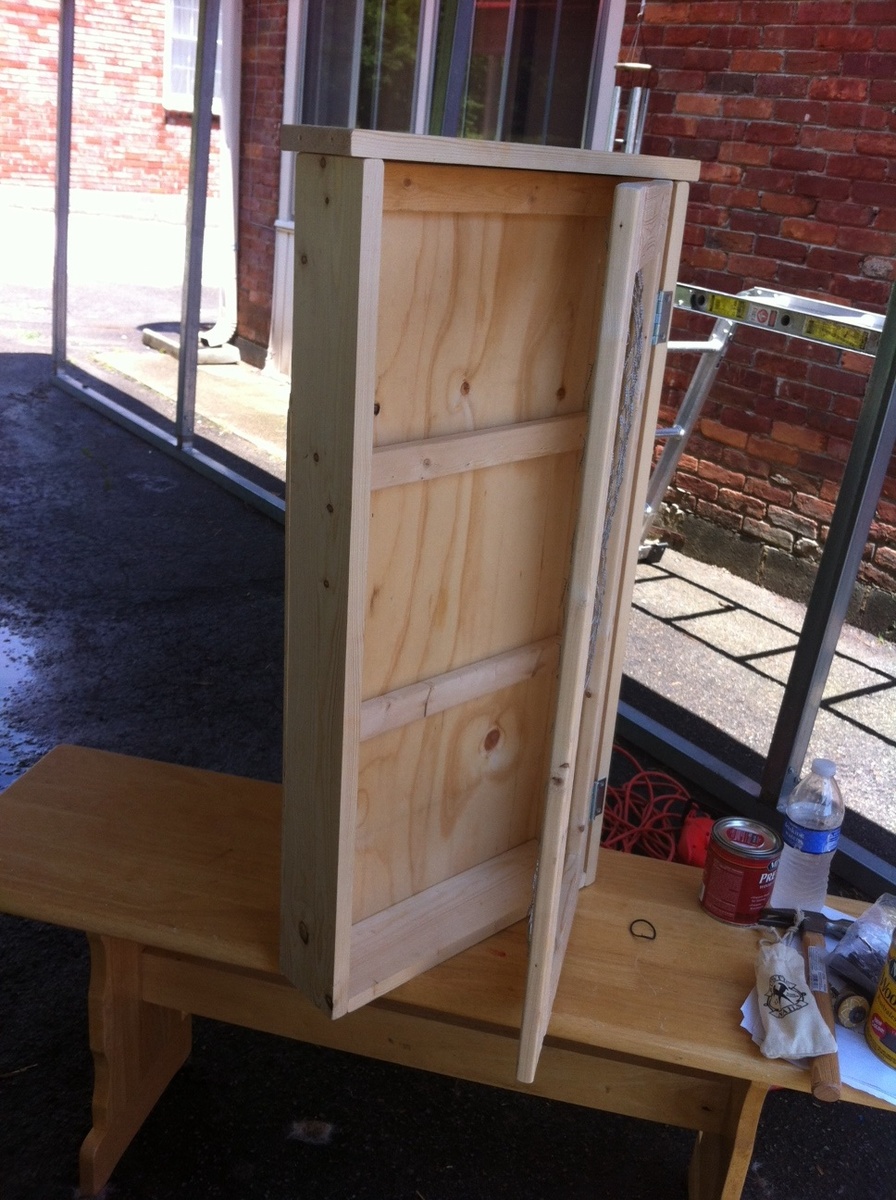
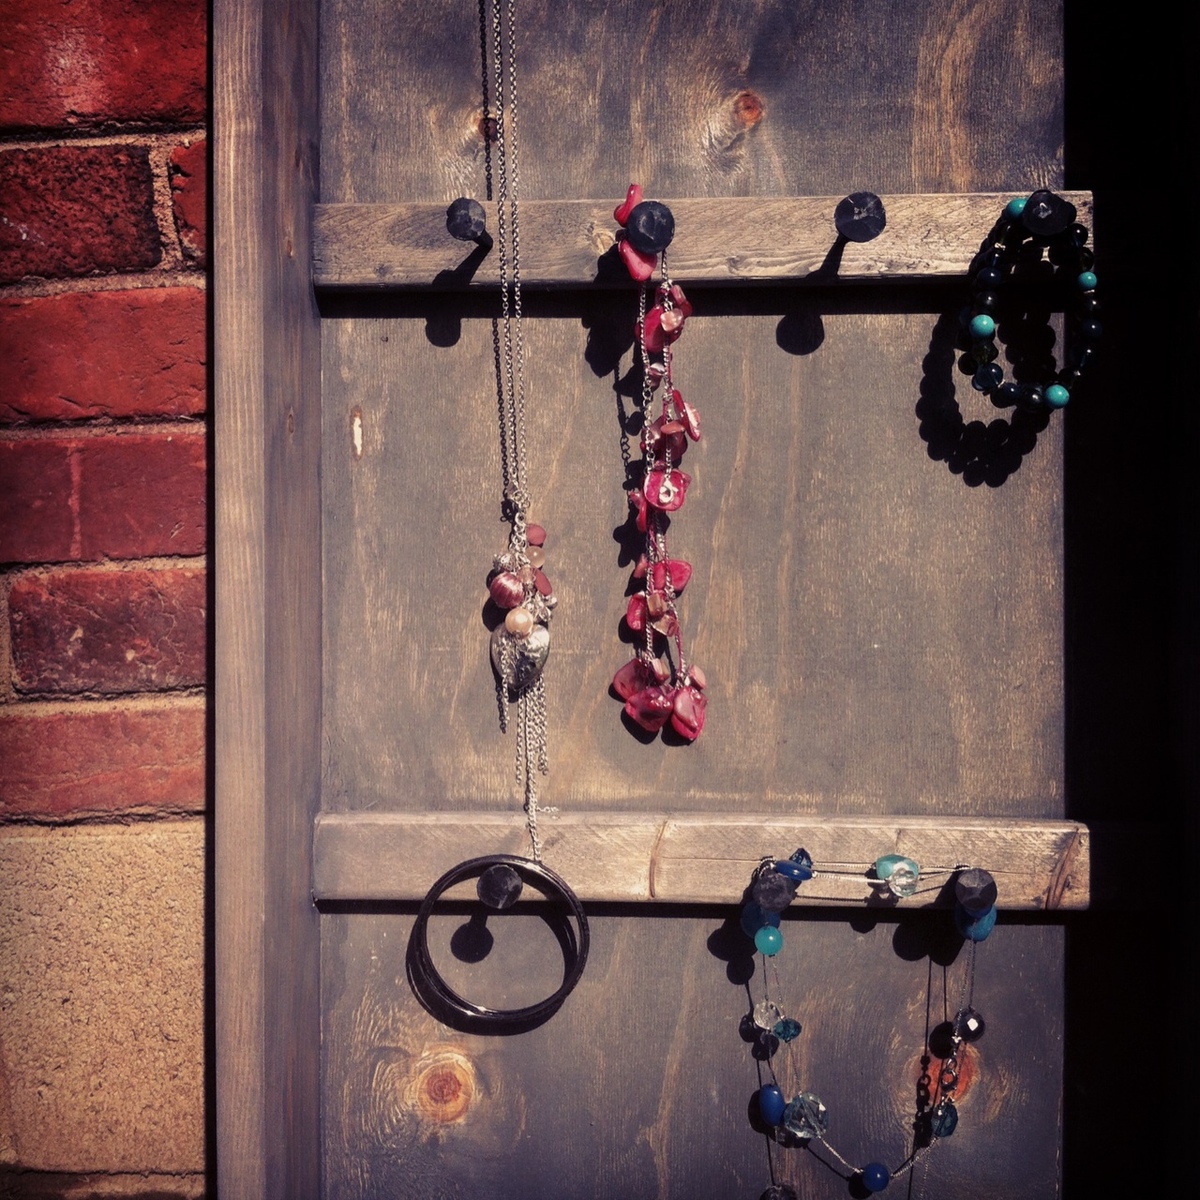
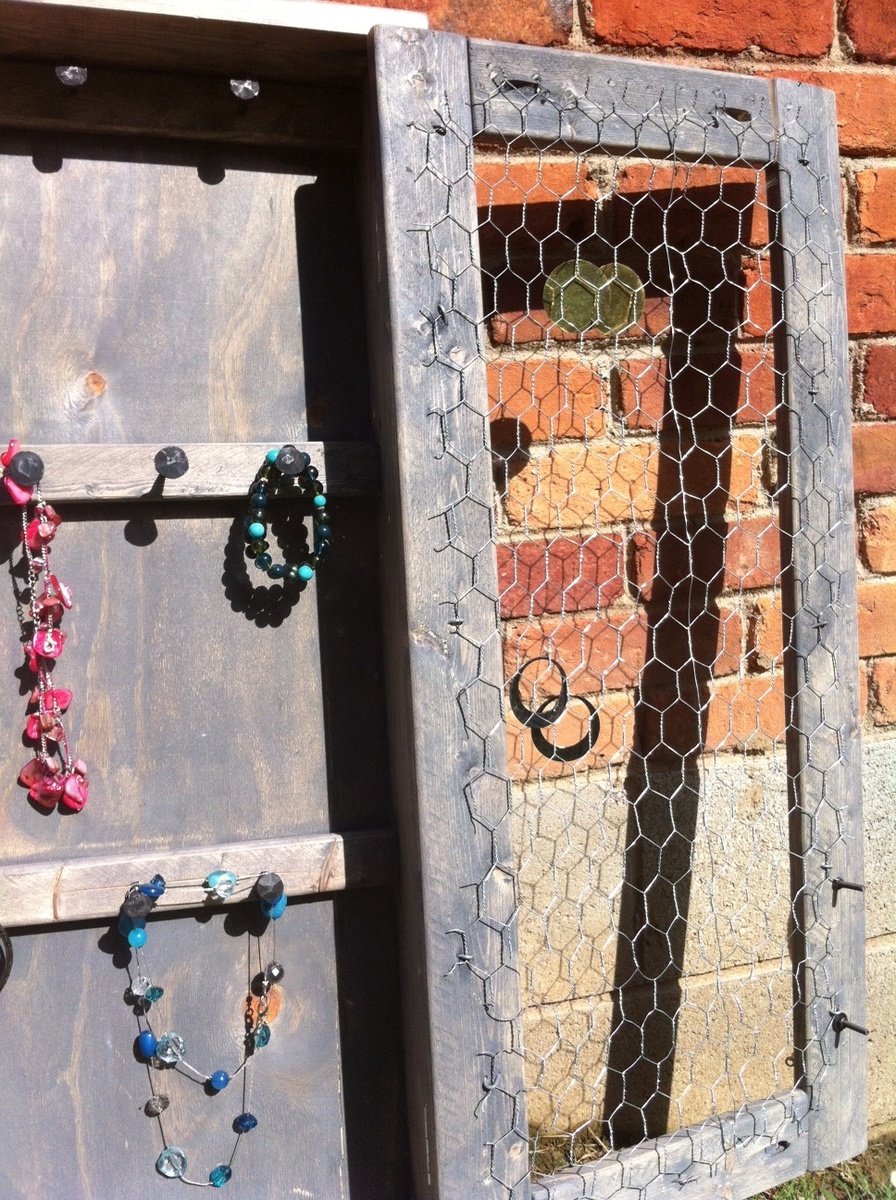
This project was a lot of fun to do. It was the second thing I've done from Ana's plans, but the first that I used power tools (the first was the Barn Beam shelves which only needed basics). I bought the Kreg Jig for this and it wasn't hard to use at all. The project was only more expensive for me because I had to buy all the basics and didn't have anything starting out. It did take me all day to complete, but that's because I was learning while going along. I found some awesome rustic nails and drawer pull at a local home decorating store. I love this cabinet and can't wait to hang it! (the door ended up a little un-aligned in one picture but I fixed that).

Thank You Ana White and The Friendly Home for making the Original! These end tables are a little different because I decided to make an "X" with 2 1x2s on each side (from top to bottom), to give it a little different look and depth. It was pretty easy to make!

My husband built this twin farmhouse bed for our son. I stained and poly'd. We modified the plans slightly to fit our needs. We also added the trundle.
Submitted by Jennie Wood

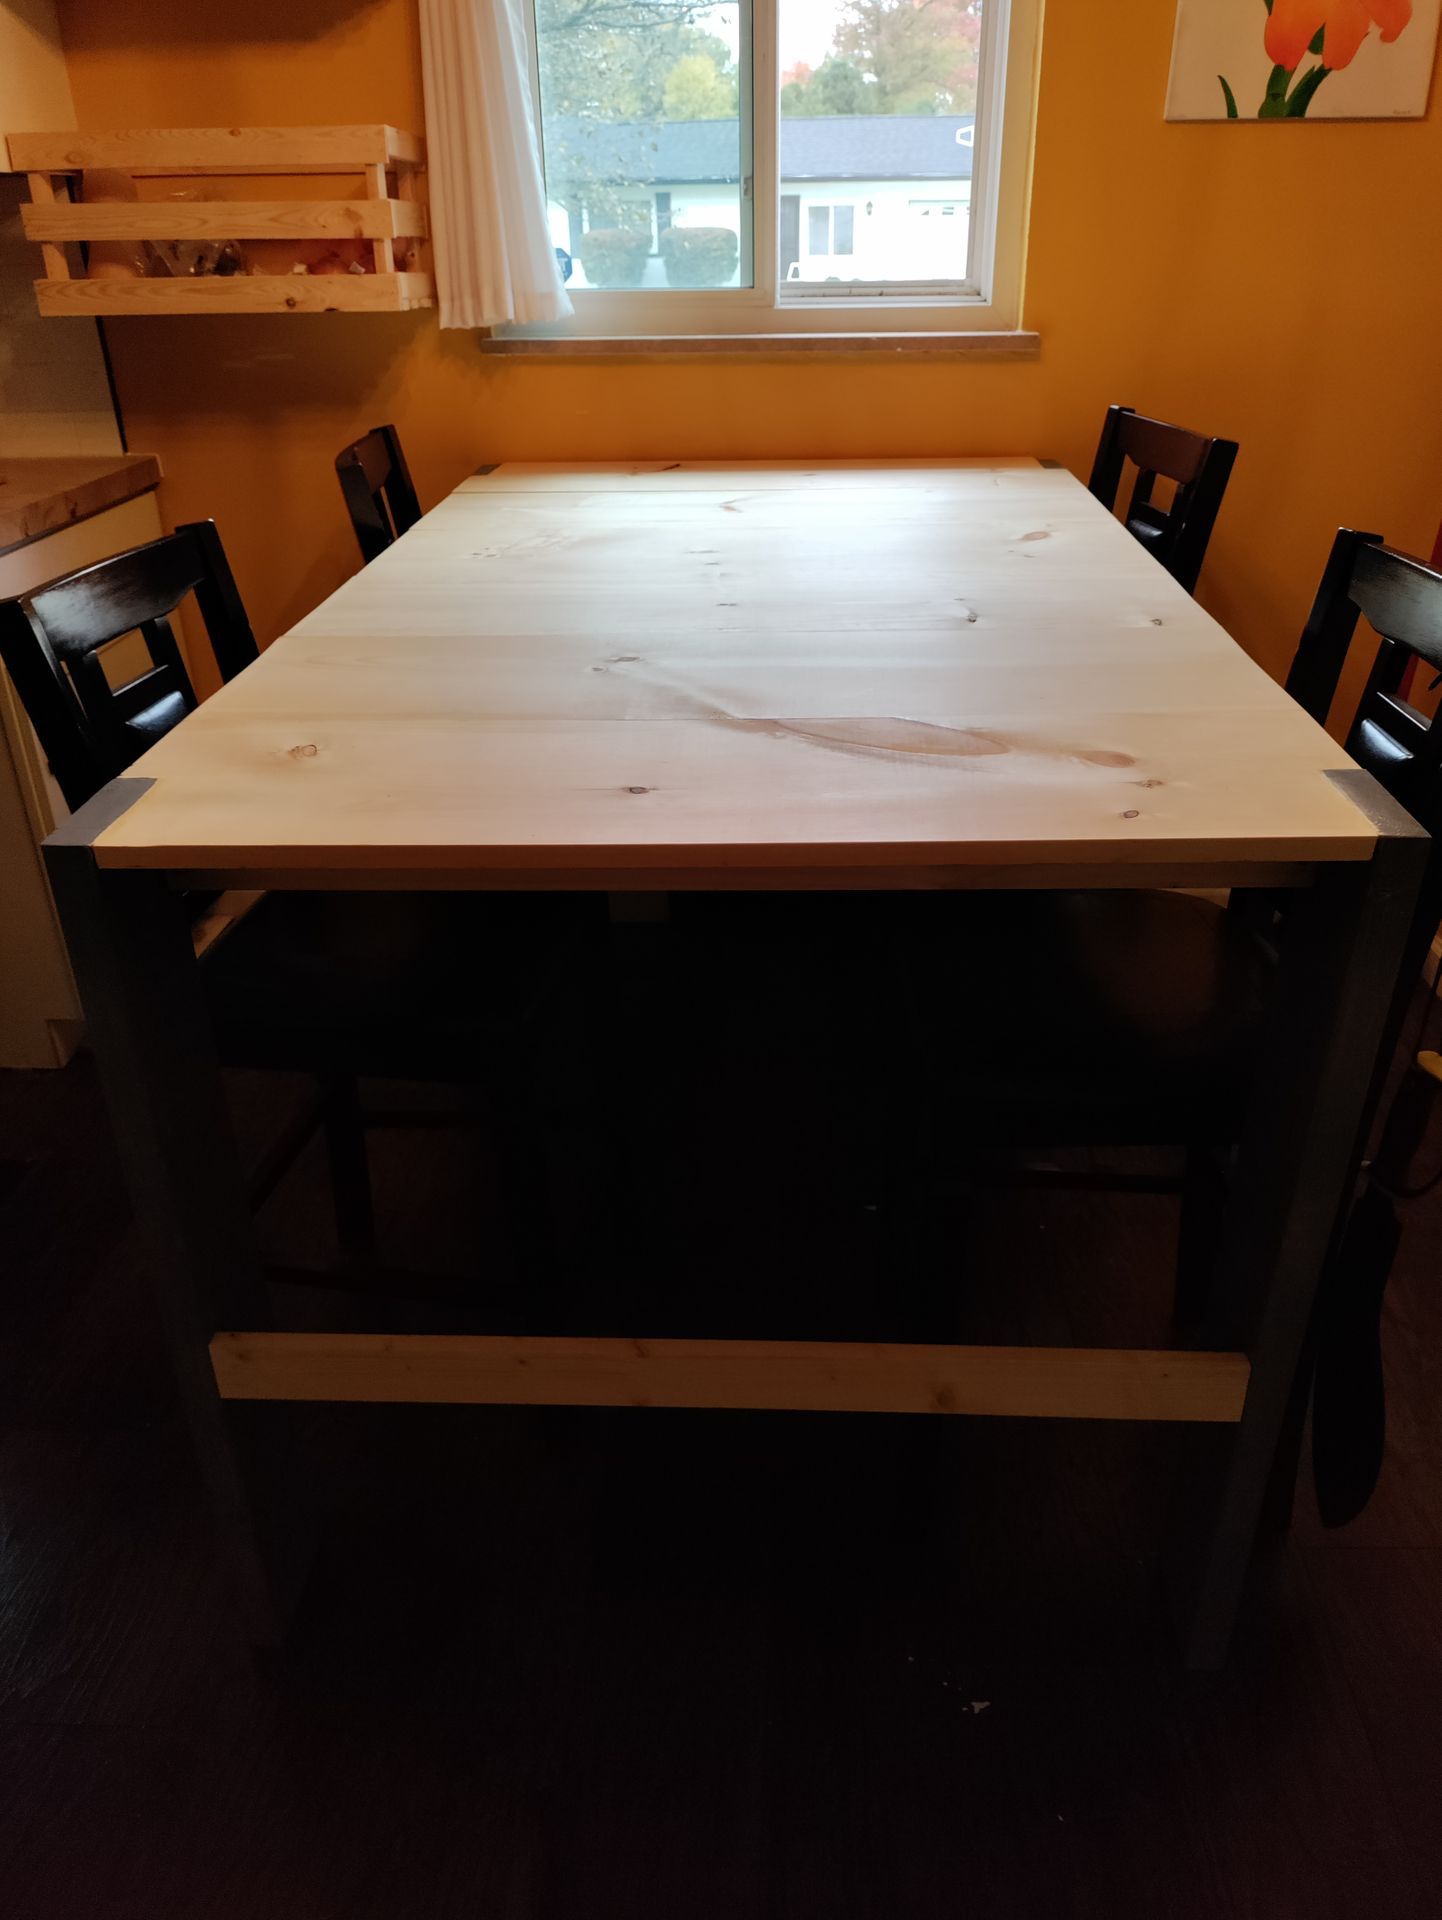
I loved the Chunky Leg Coffee Table and thought it would be perfect as a kitchen table! I made a few modifications, but it's solid and everyone loves it.
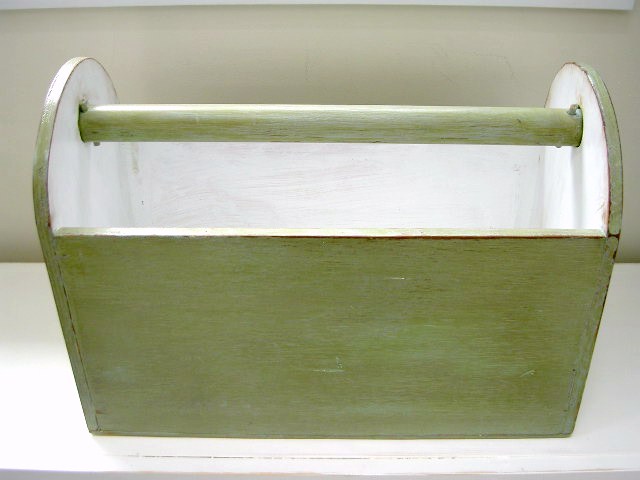
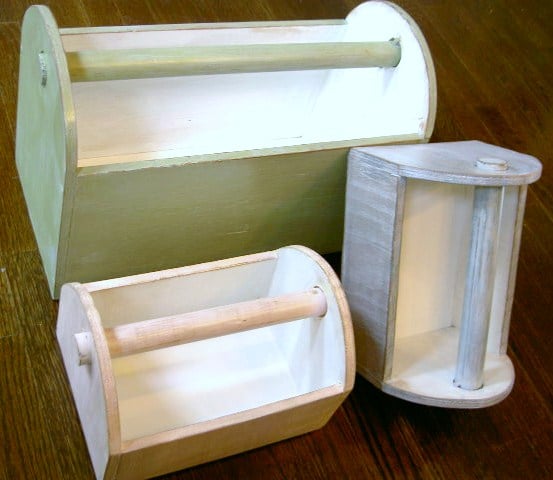
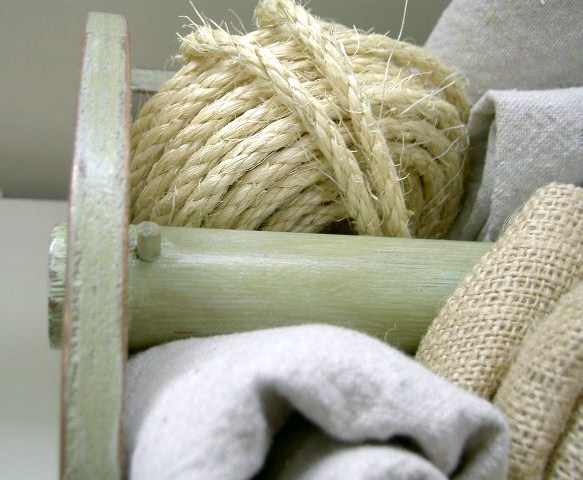
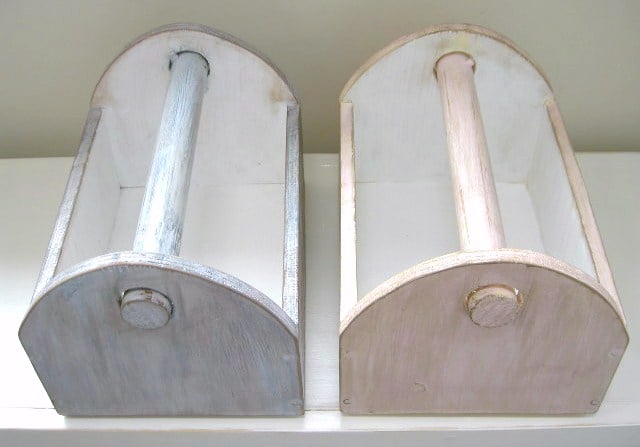
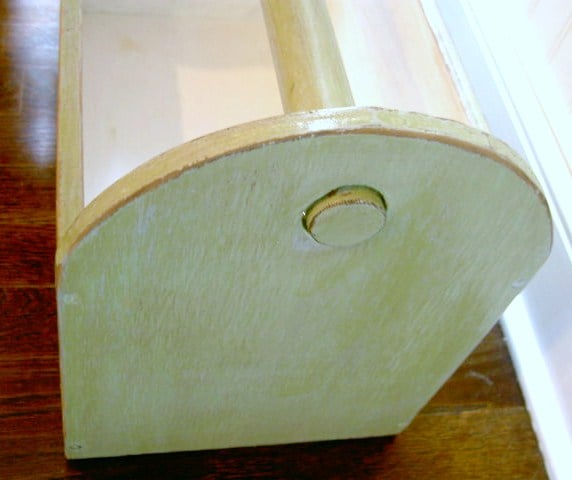
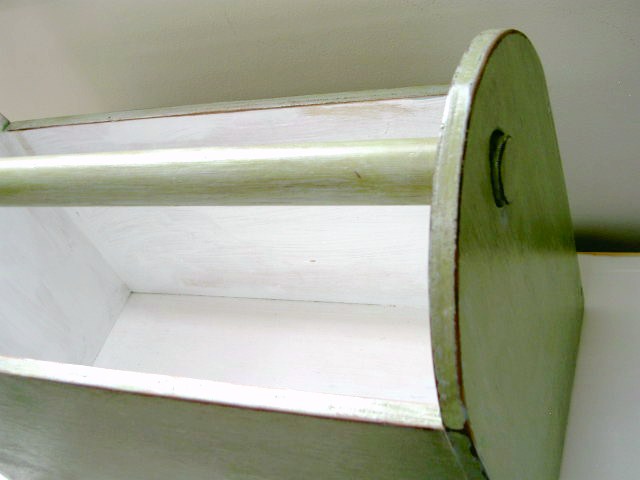
Storage caddy, knock off from Pottery Barn plus mini versions.
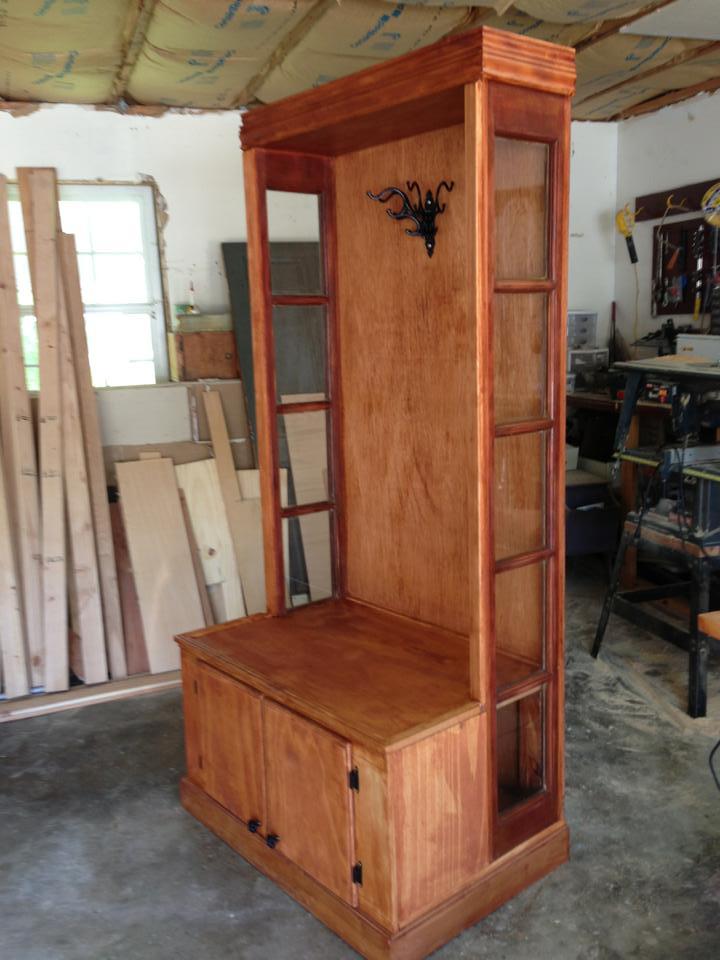
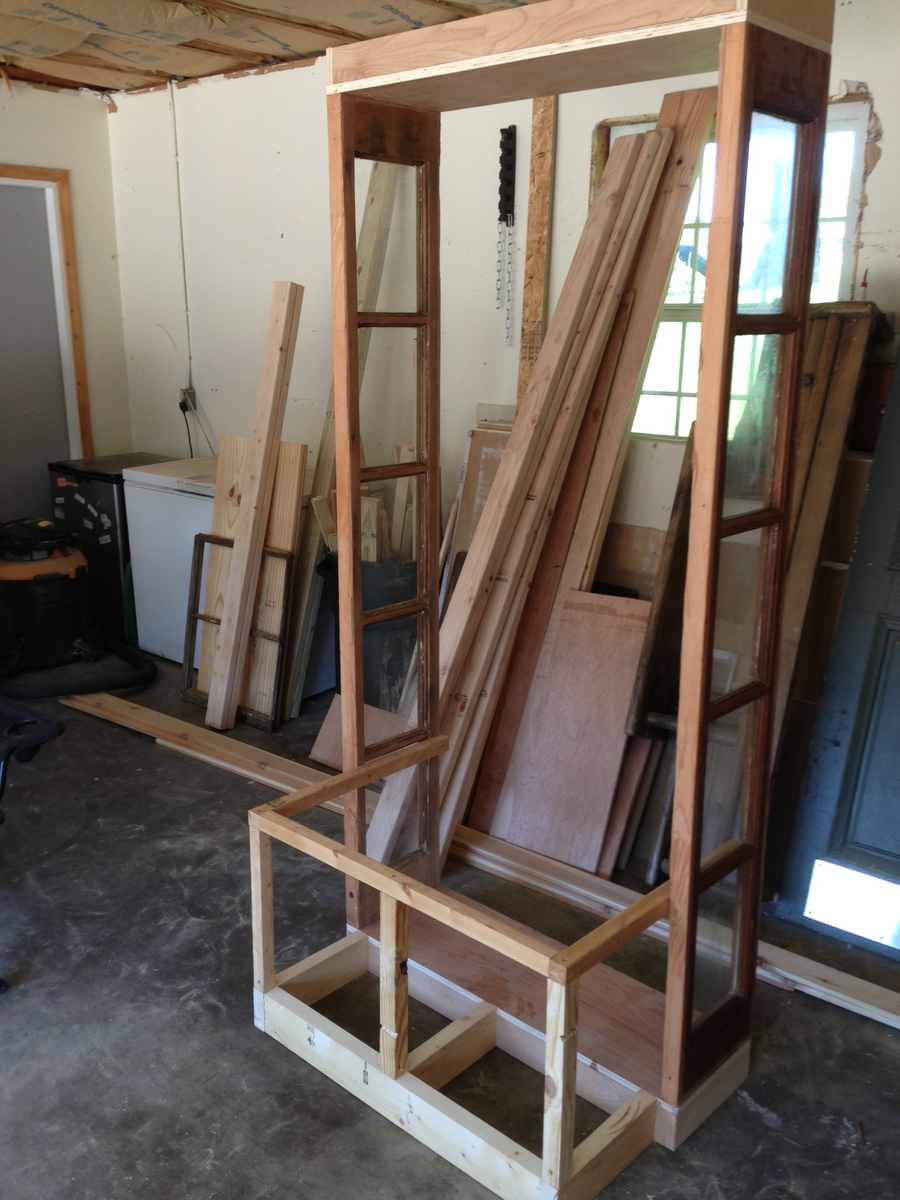
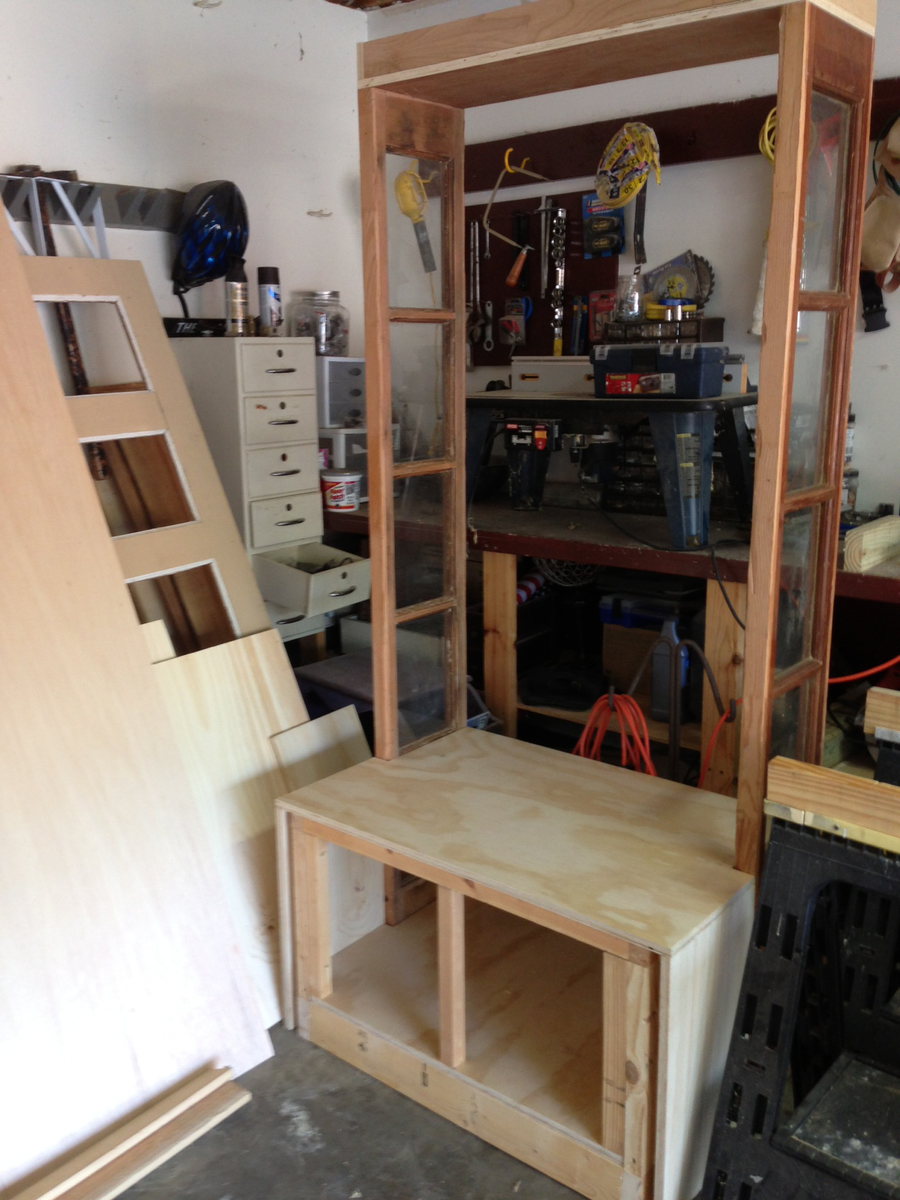
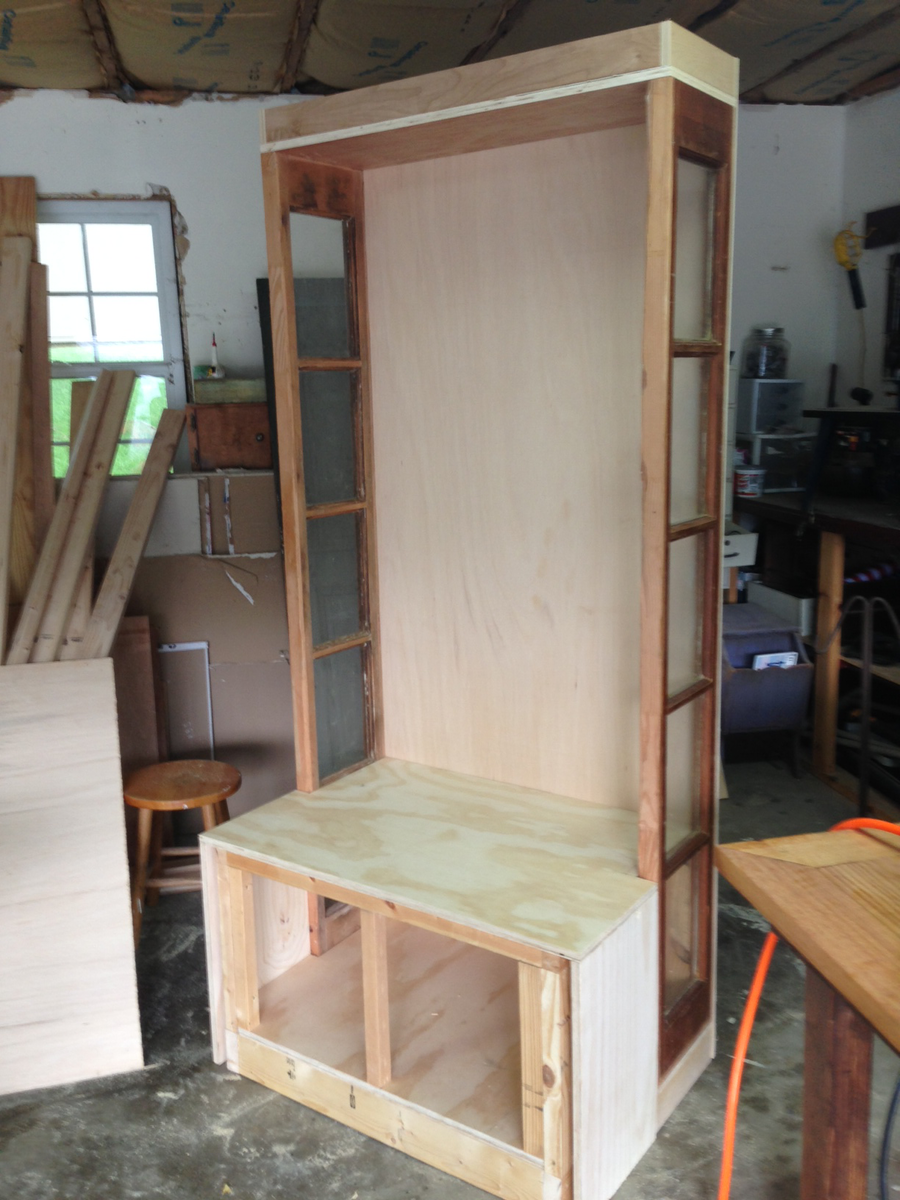
Had some old sidelights that a lady gave me when I bought an old door. They sat around until I figured out that the halltree is what I wanted to do!
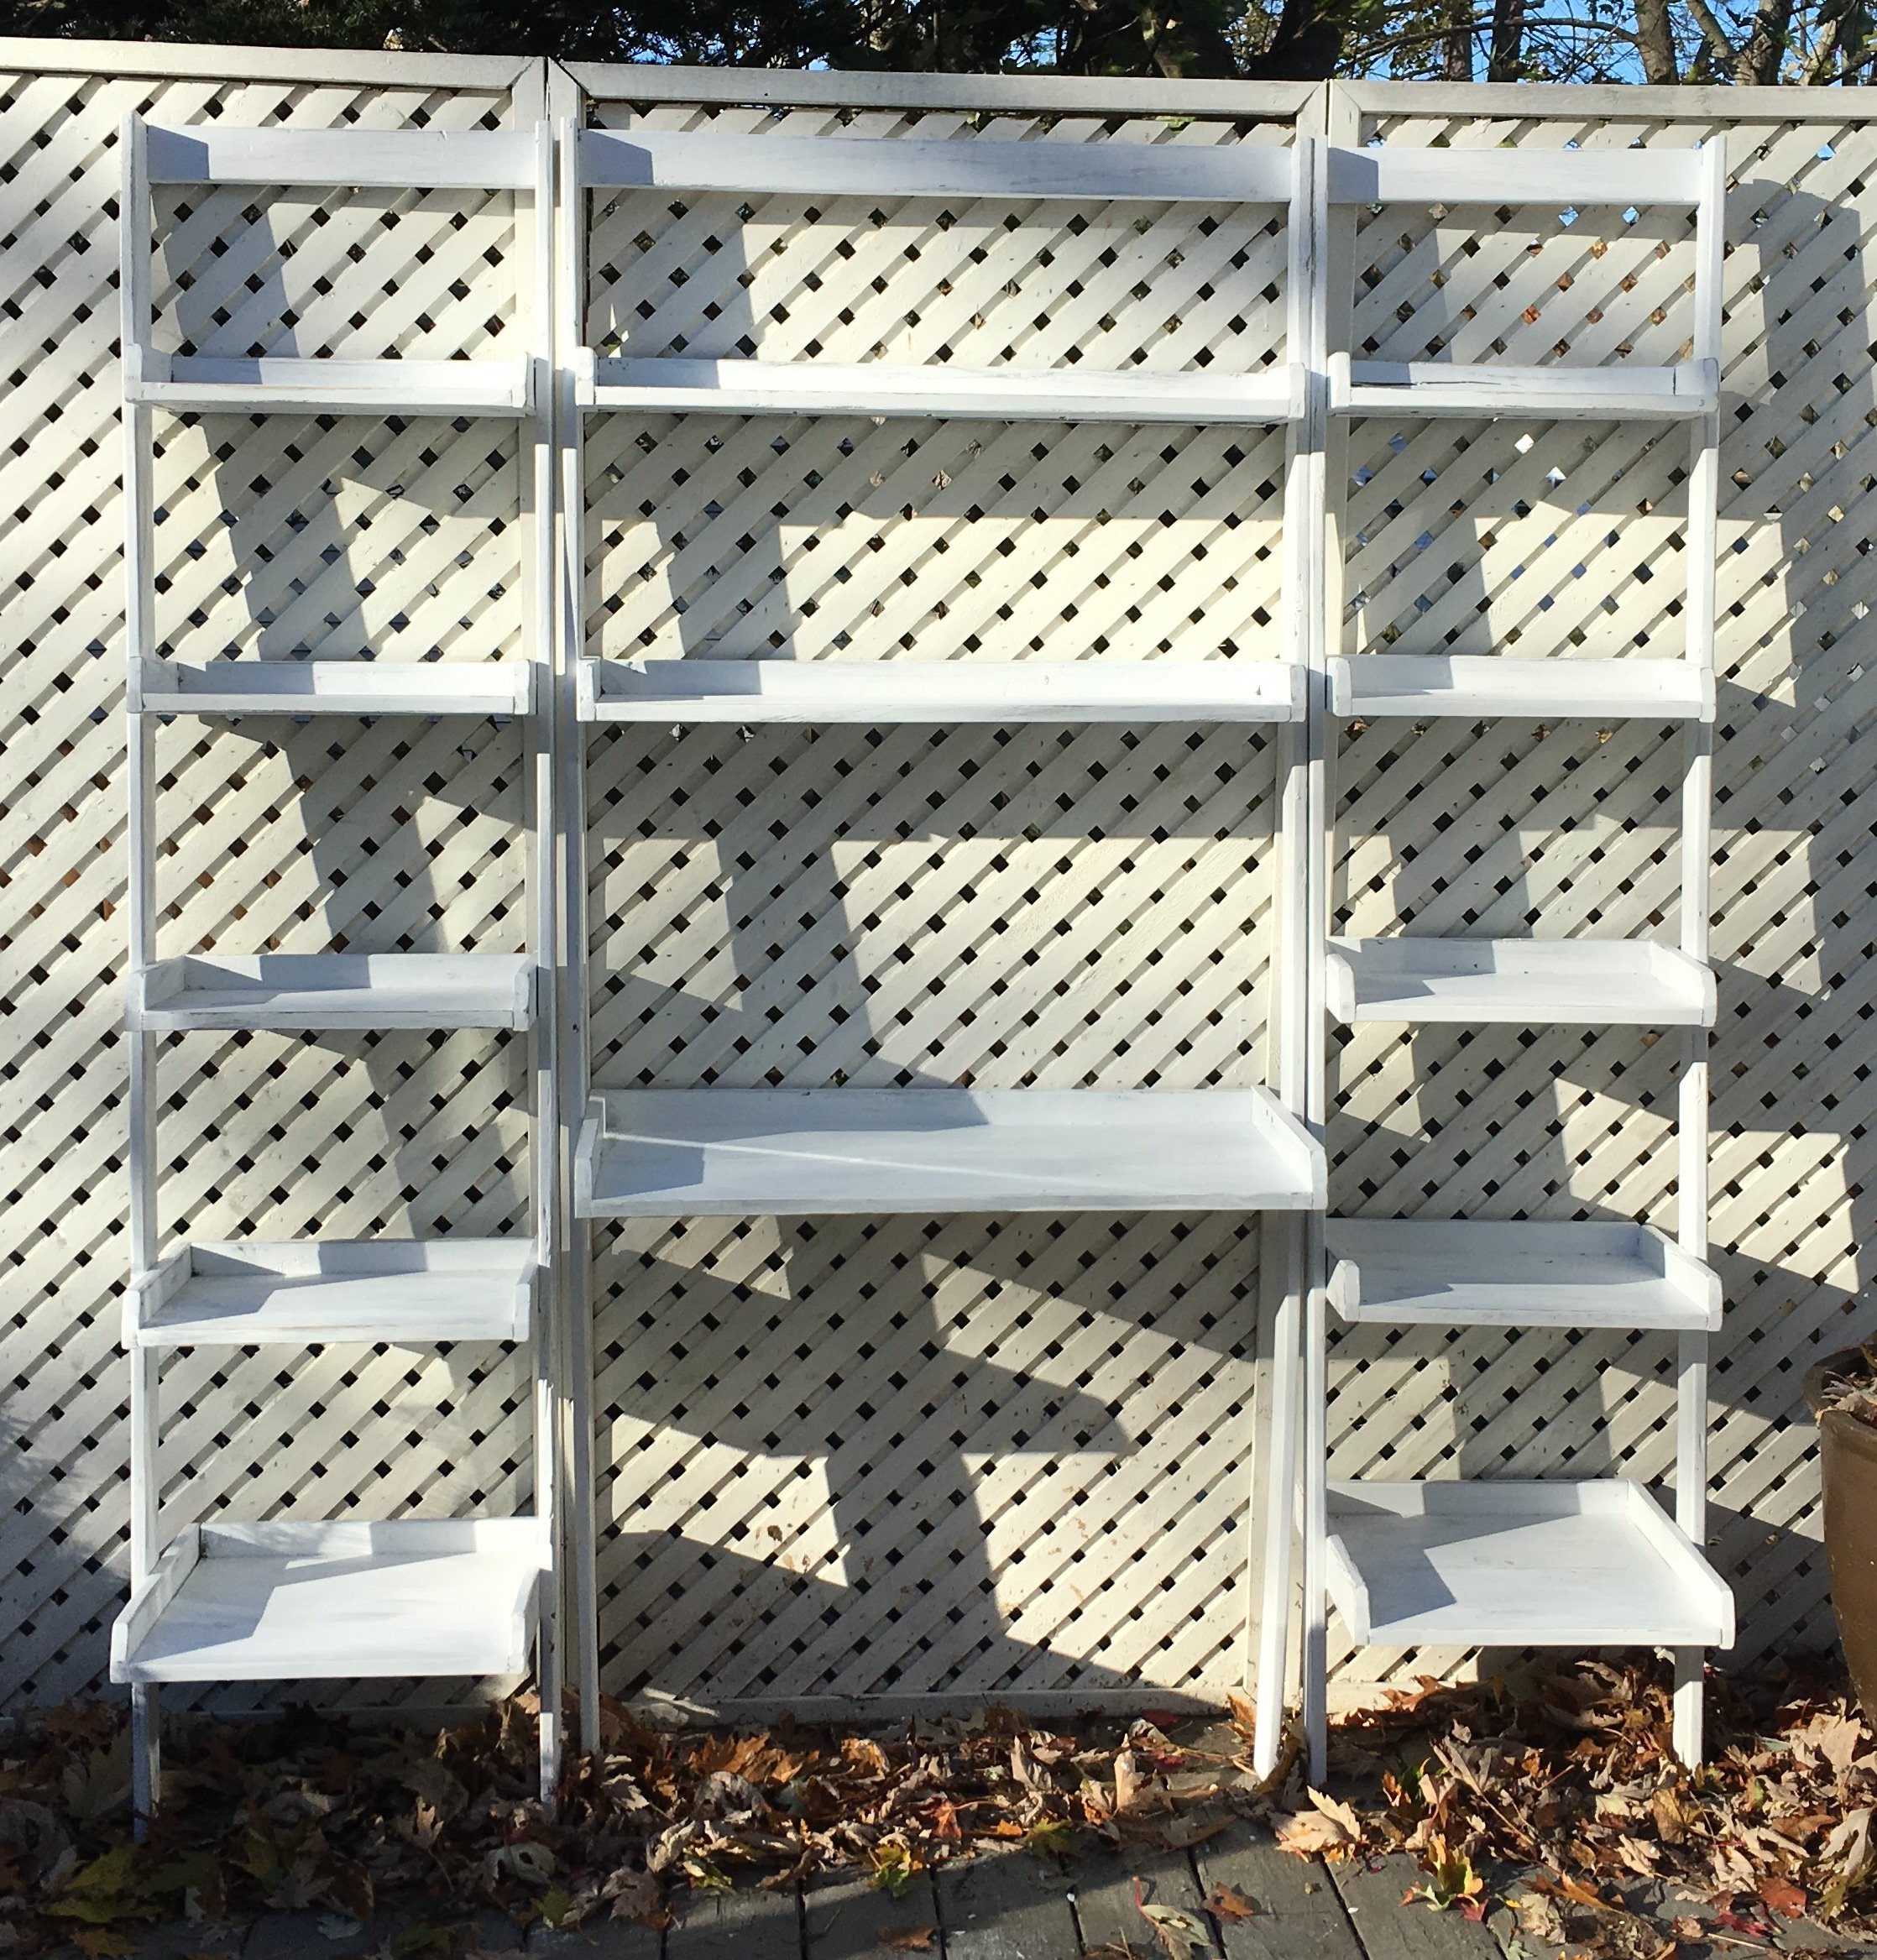
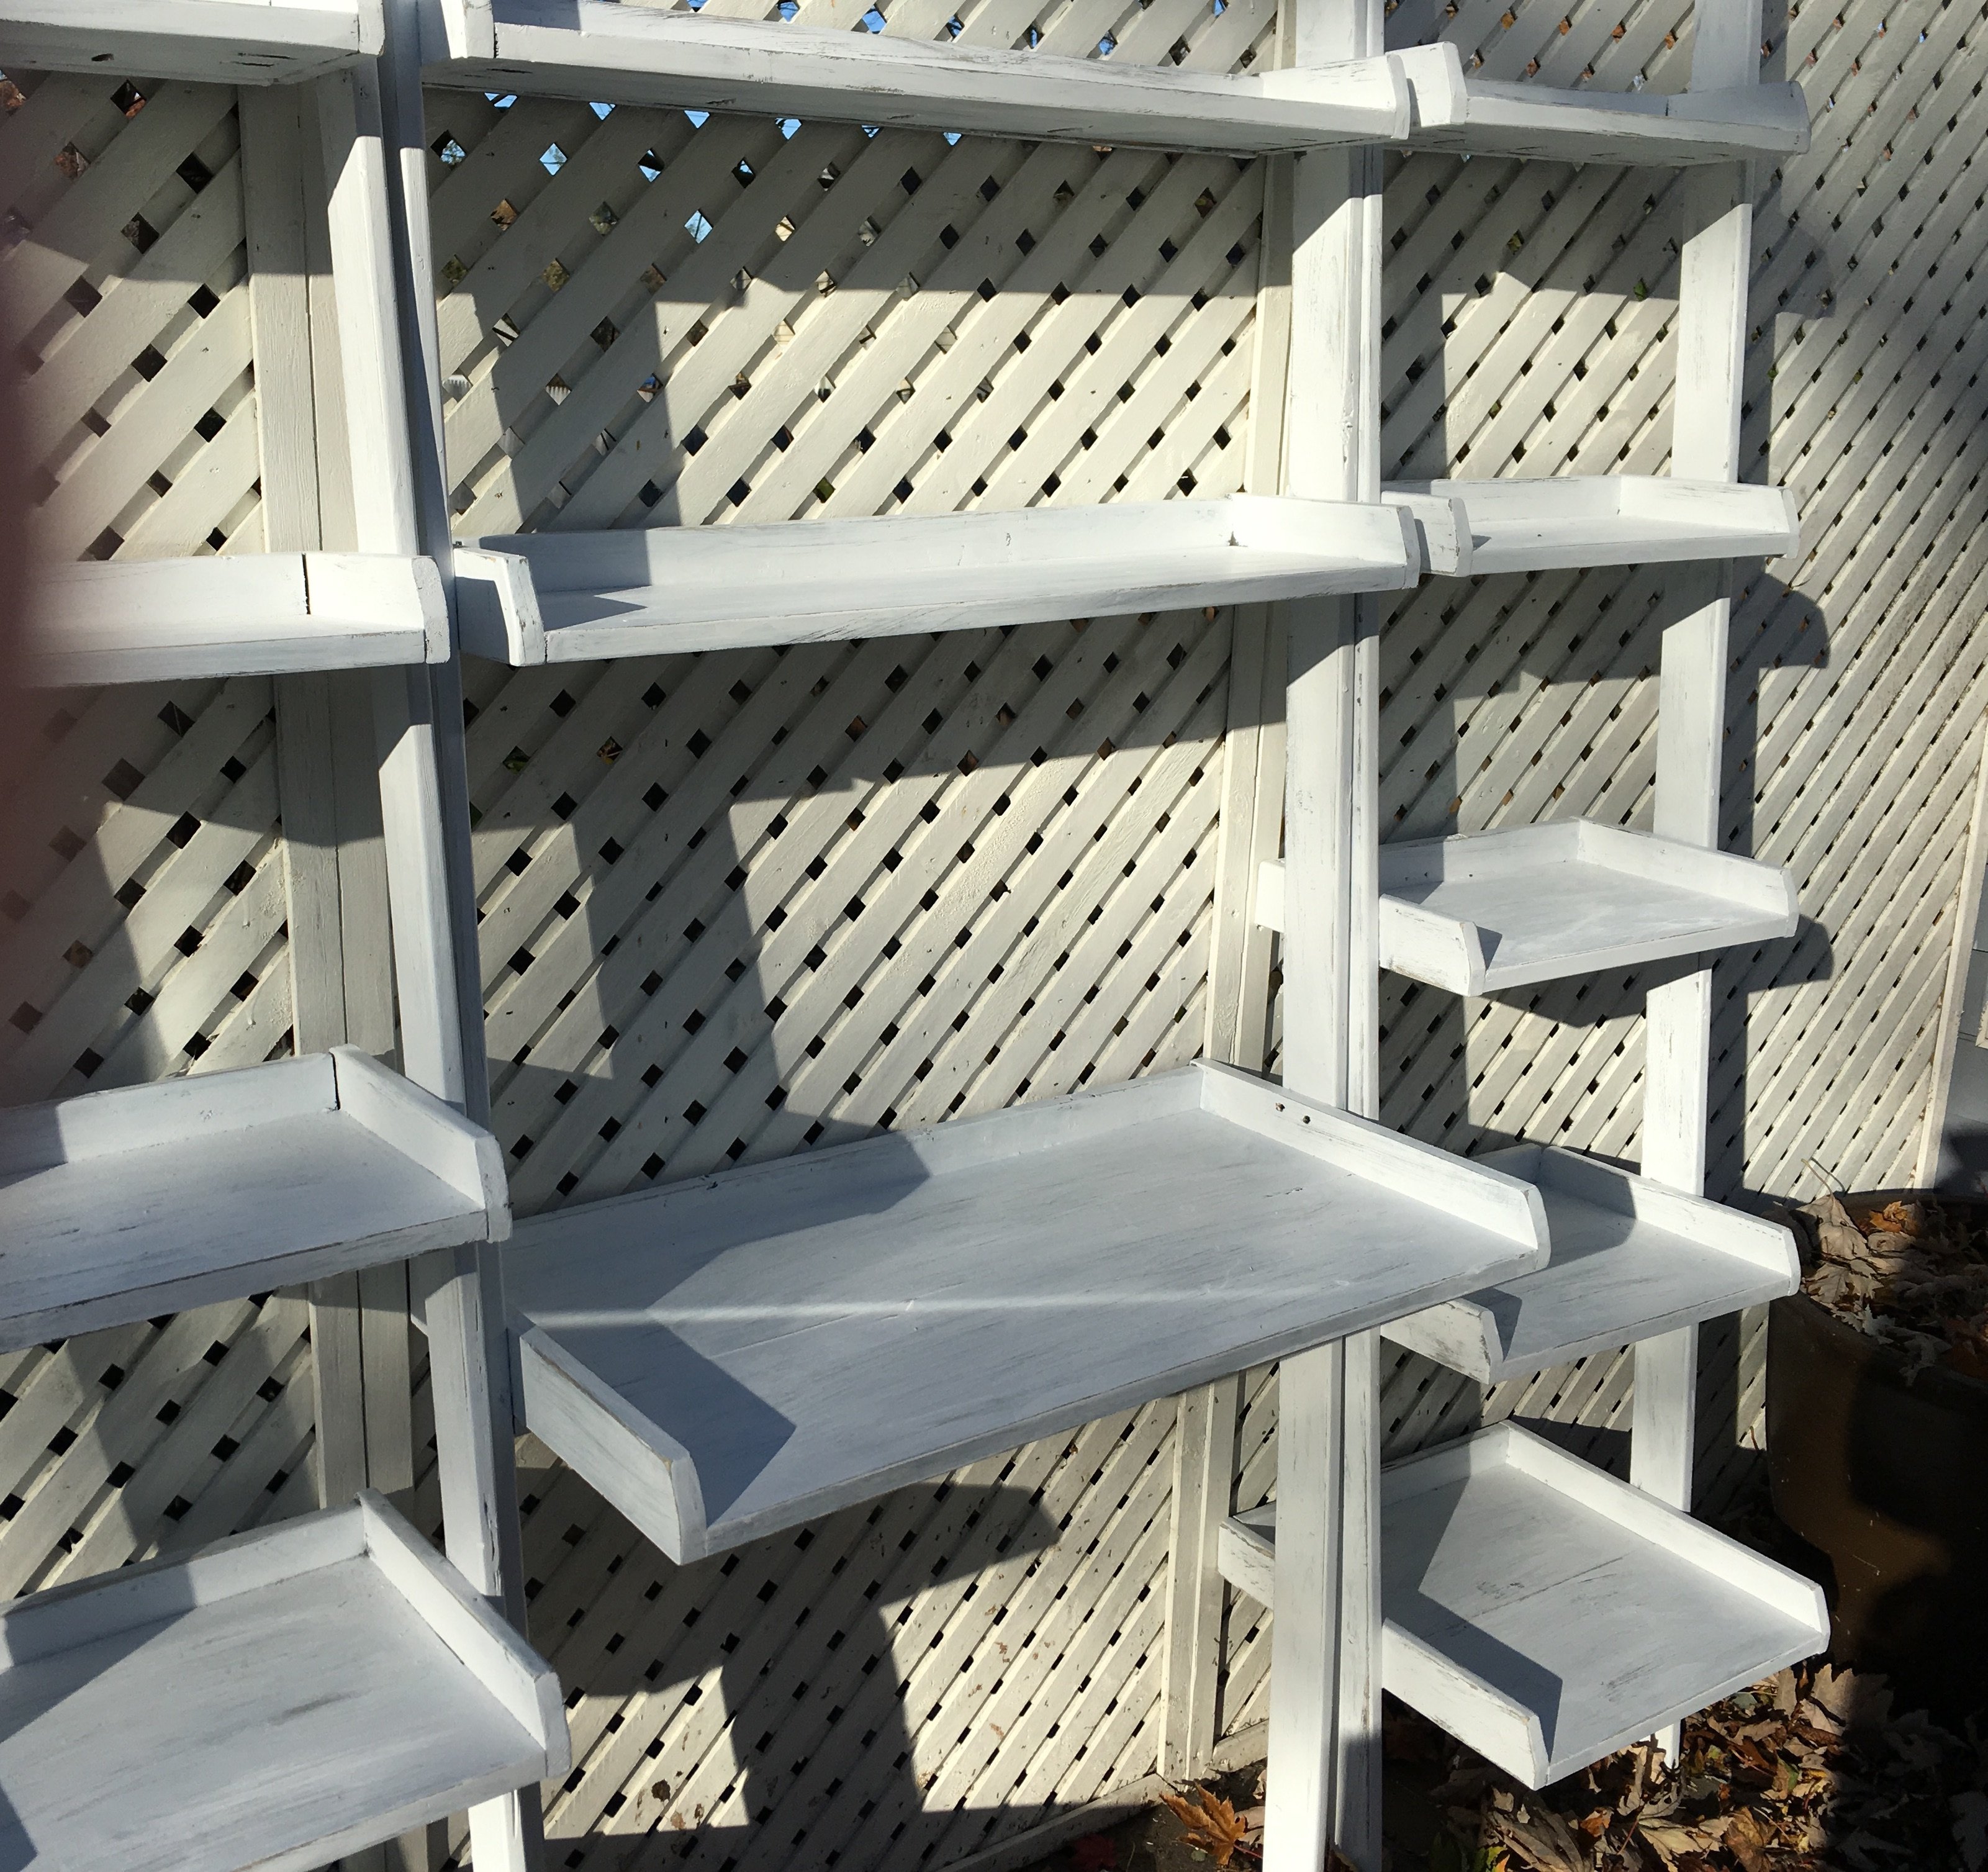
This wedding present for Dan's sister's wedding present took us a very long time to complete.
We finished all the little boxes and sides in an afternoon, but logical problems meant putting it all together took ages.
The Bride had specified she liked white weathered (rustic?) paint (can't think if there's a better name).
We finished it with two coats of grey stain, then two coats white paint that we sanded off a few hours after painting.
I think it came out great ! The edges are a little uneven and of course the shelves aren't completely level... but hey - rustic!
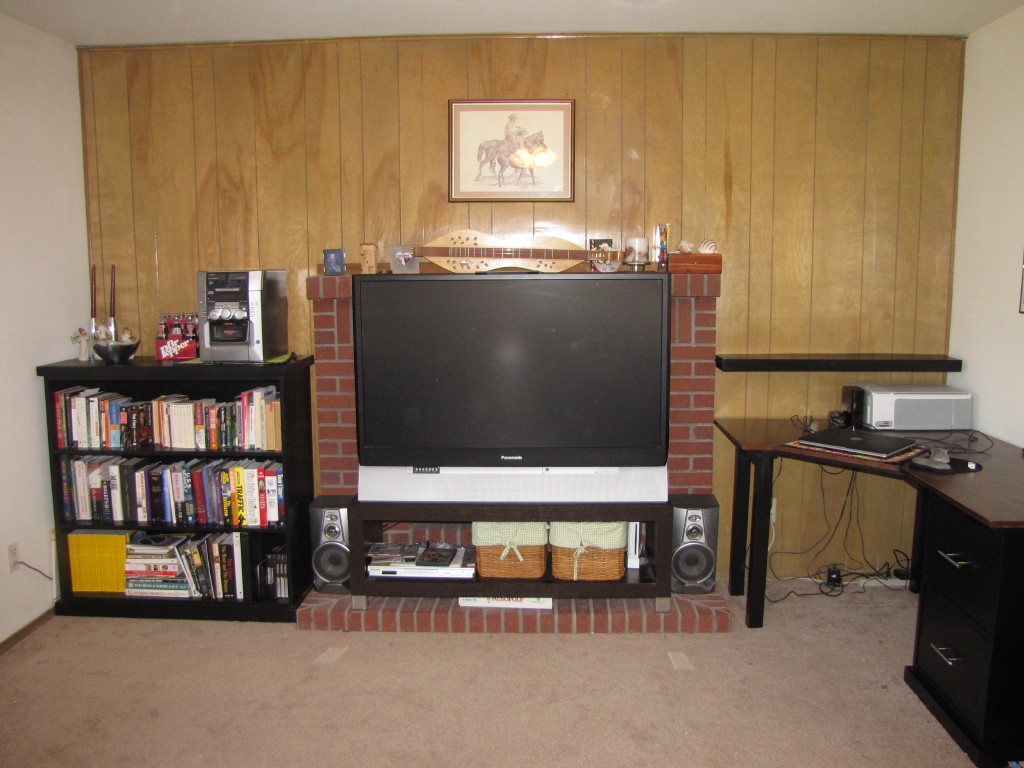
I added an additional shelf to the plan so the sides were longer. Used the pine plywood and Benjamin Moore Super Spec paint in black to match the desk I made.