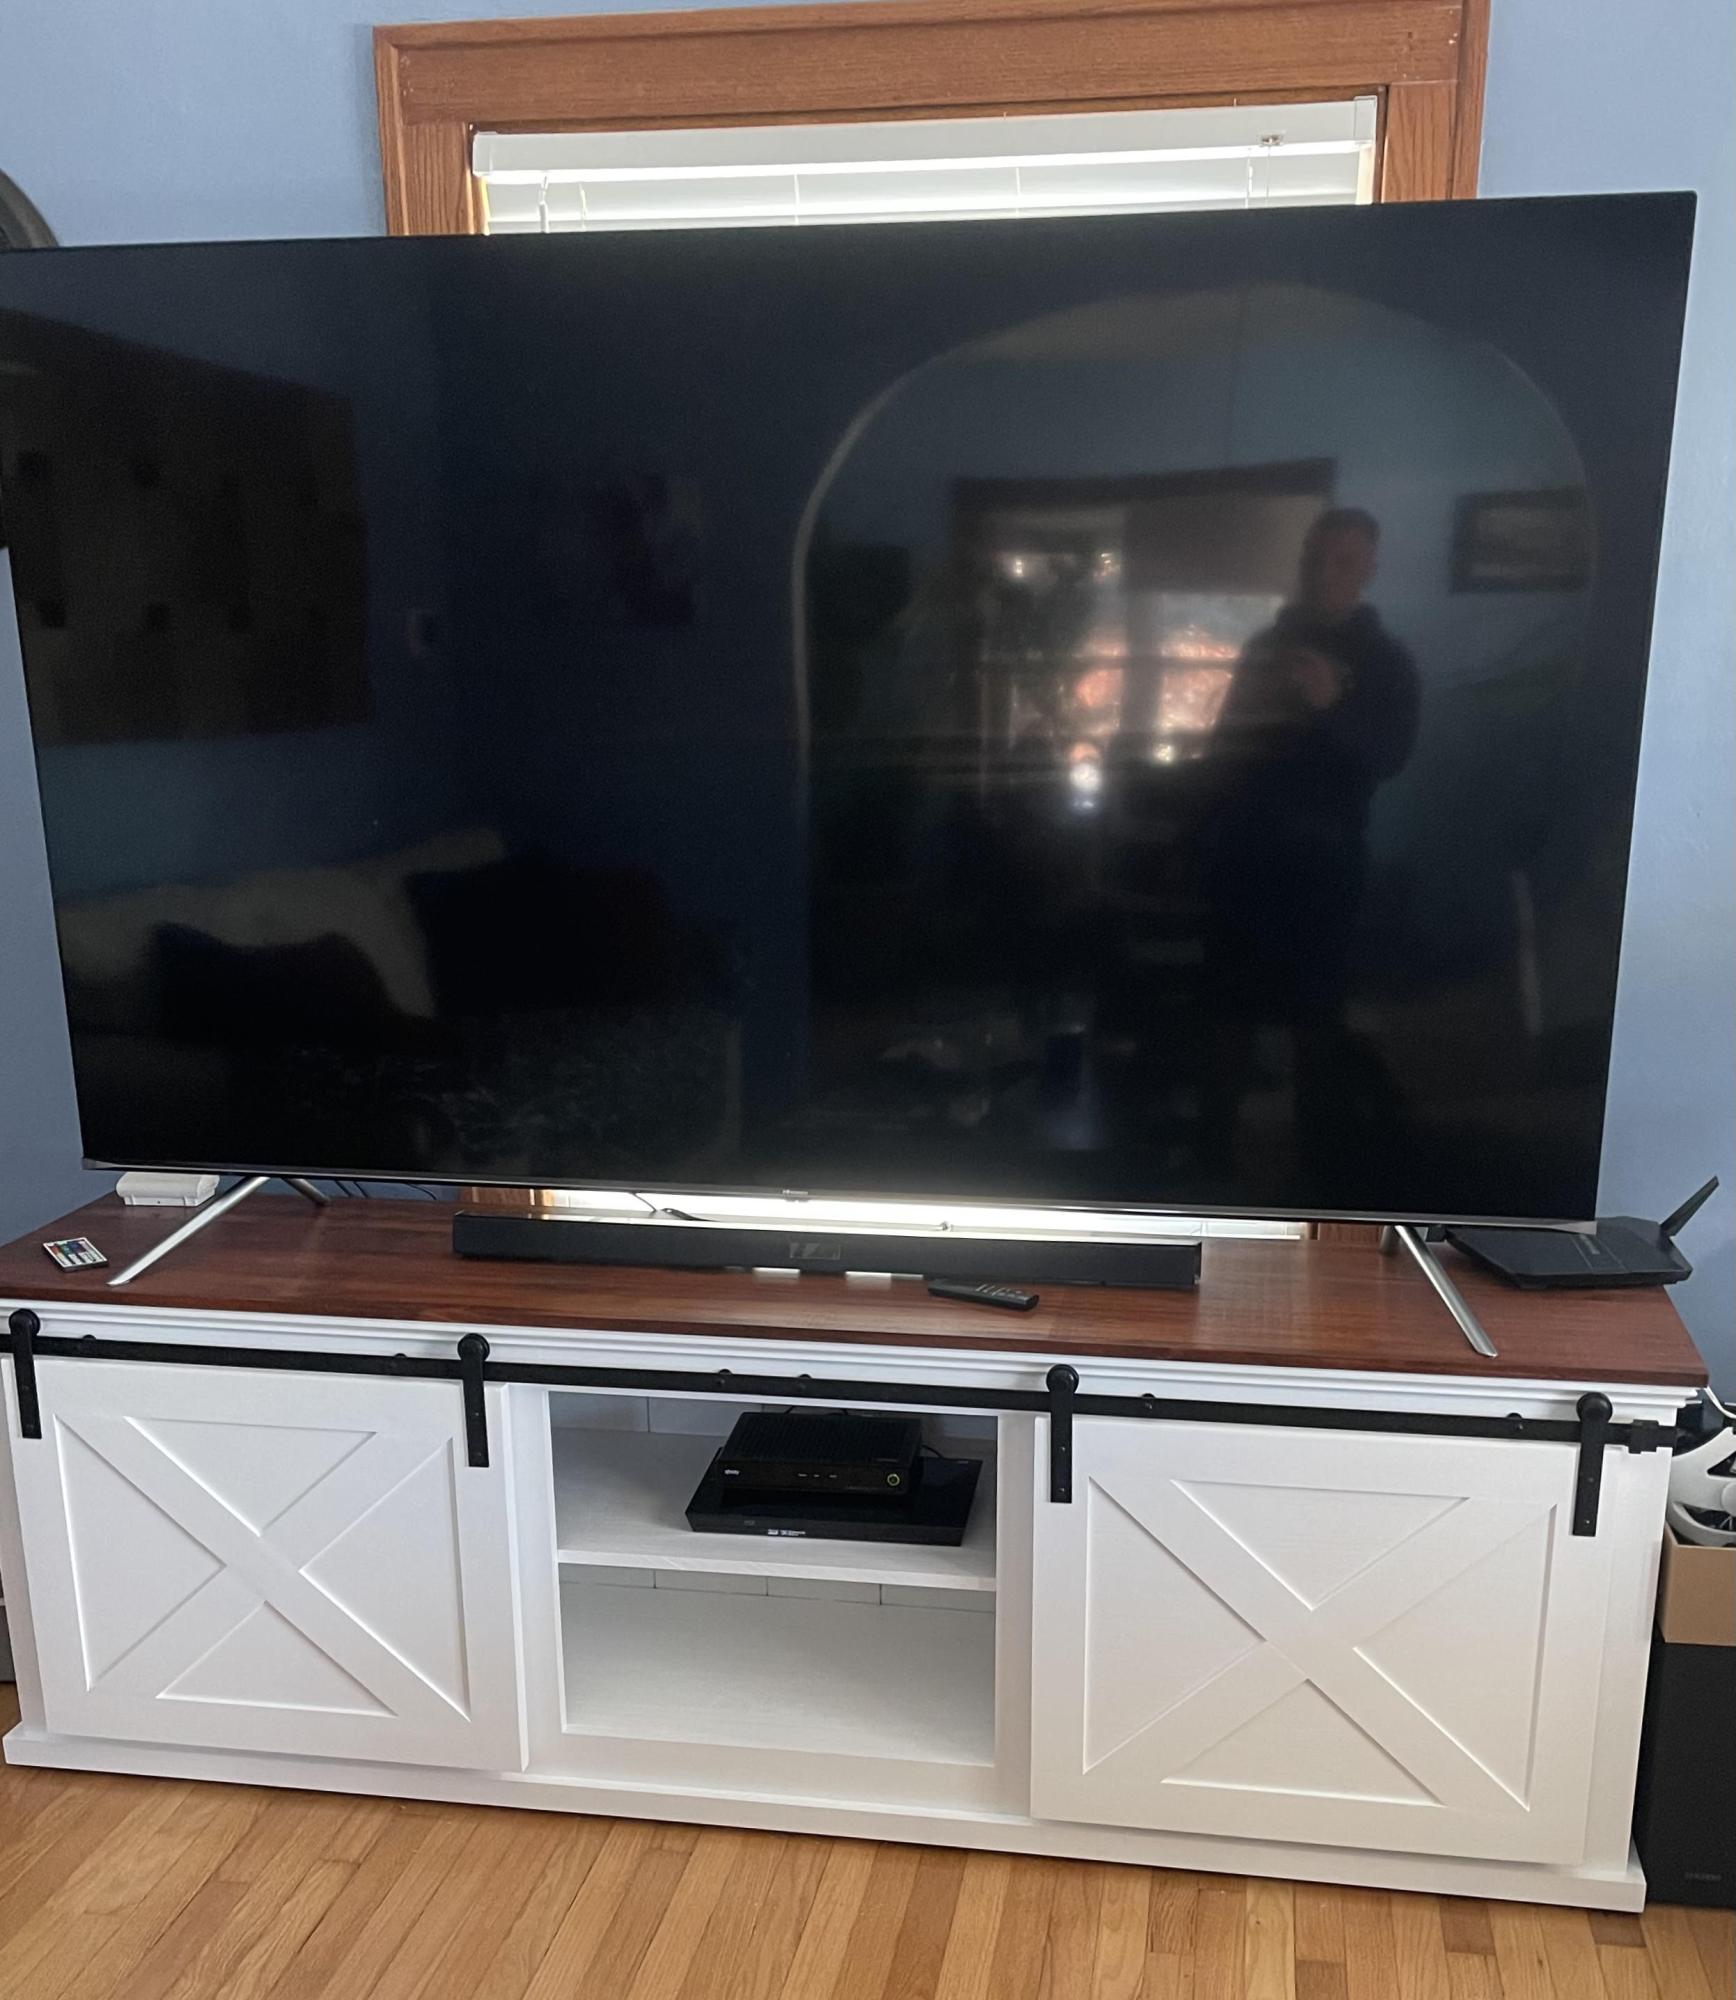
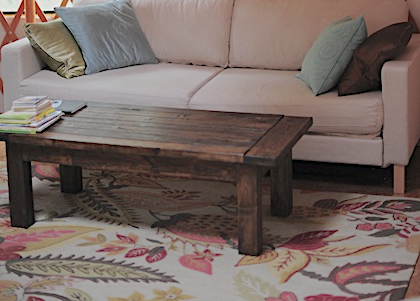
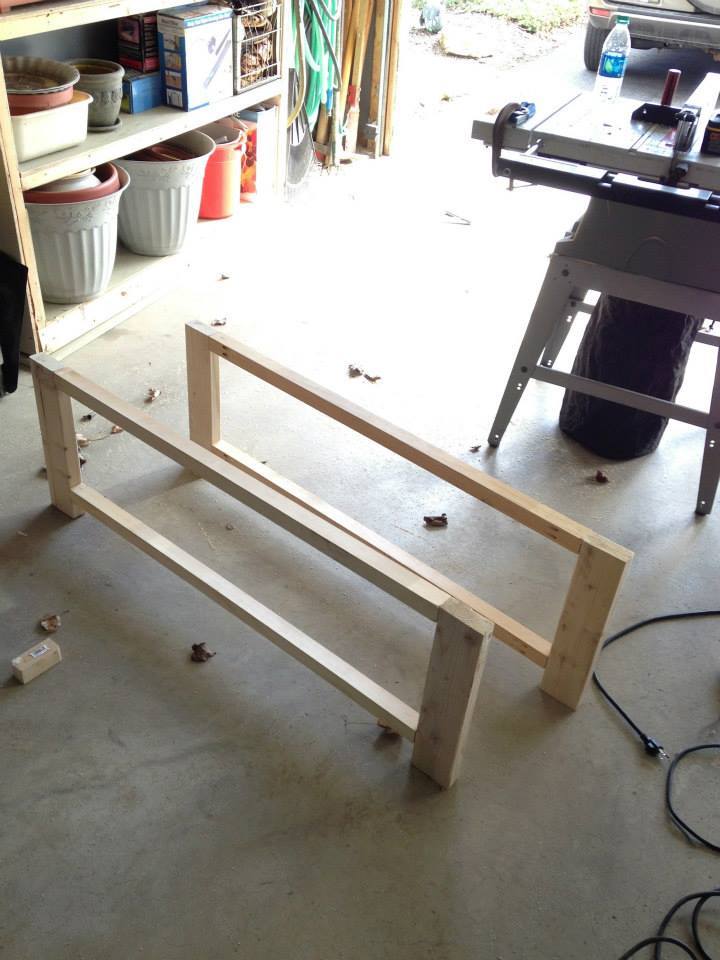
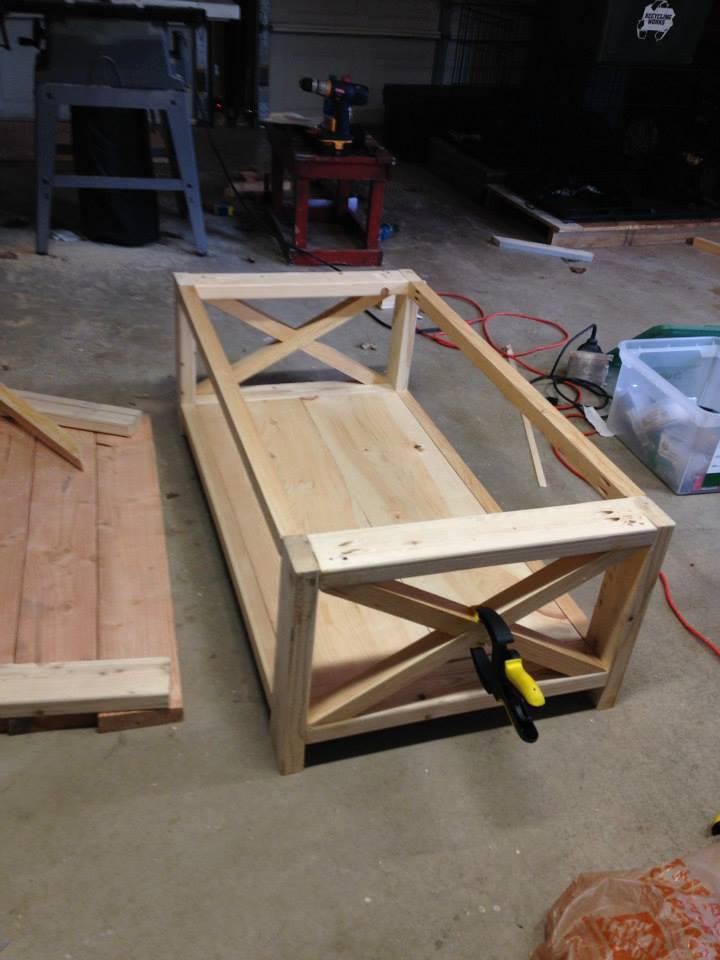
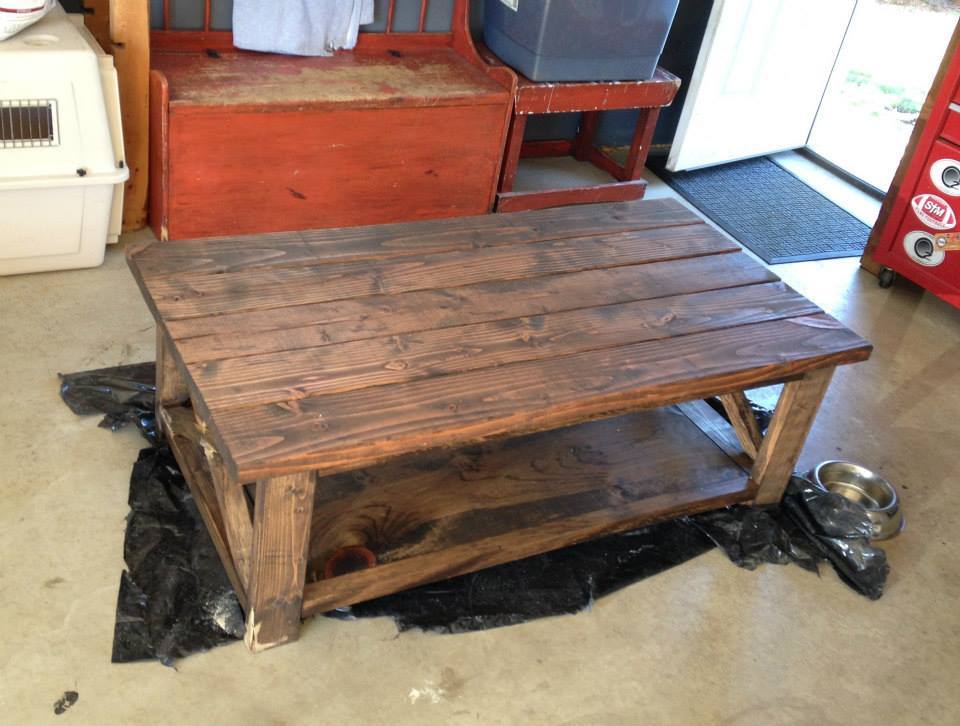
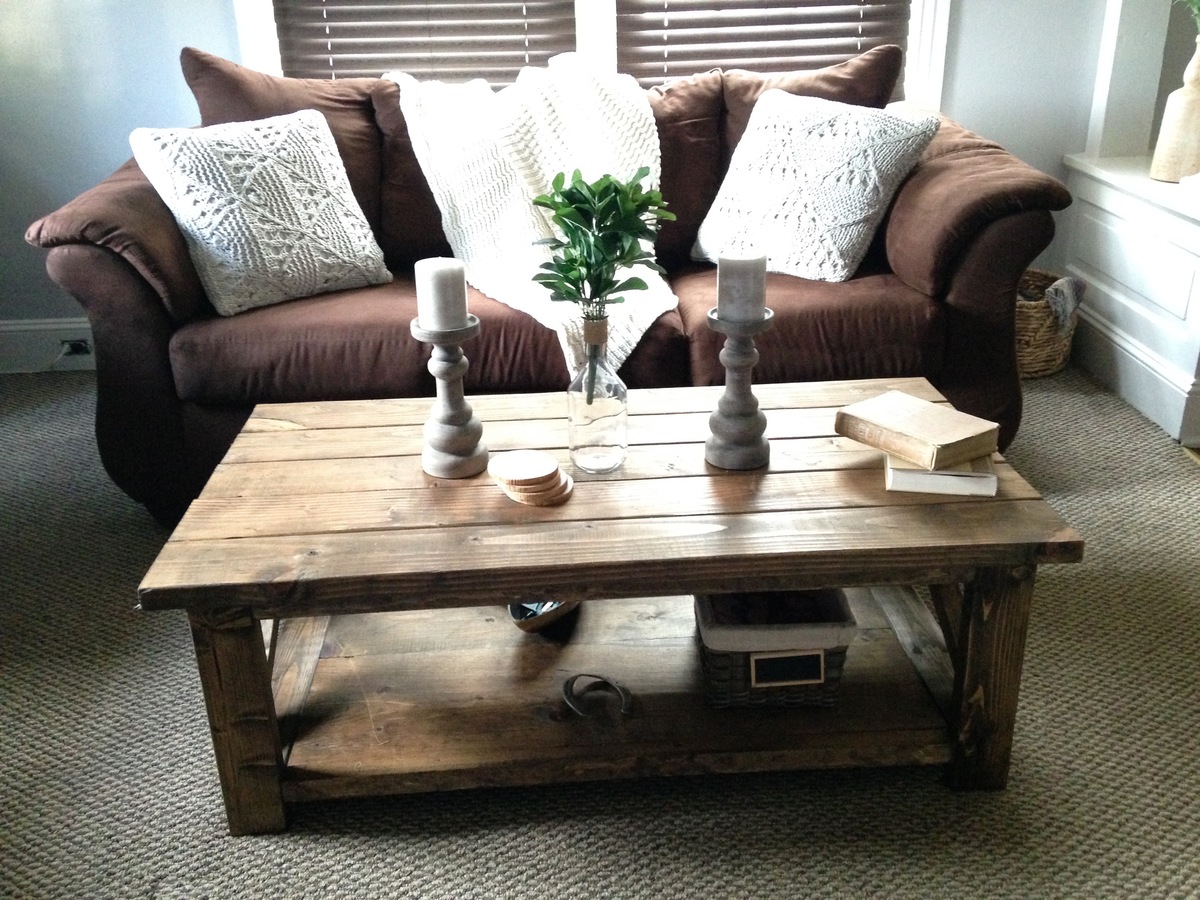
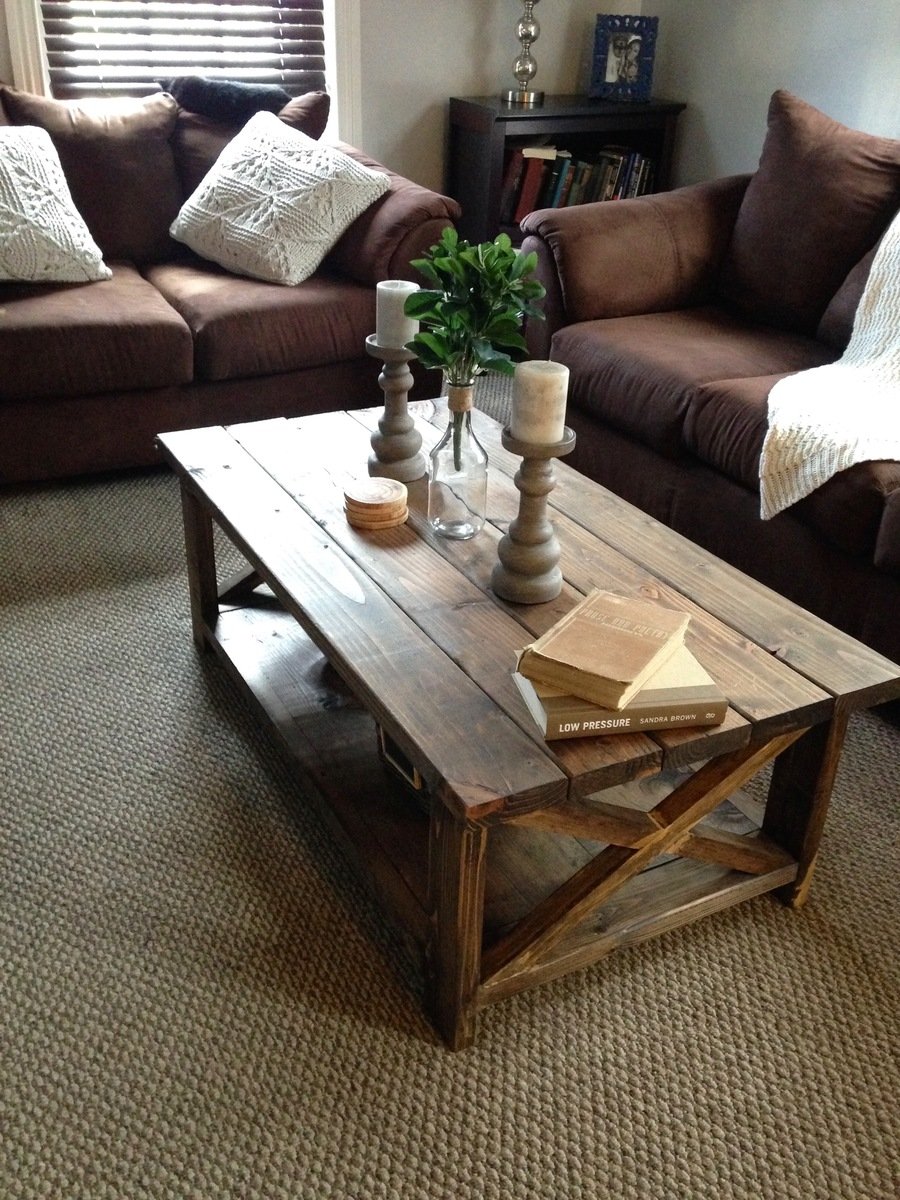
This was such a fun project and only took 1 day to complete! It was a lot more fulfilling to build my own coffee table than go out and spend $400 on one. It looks beautiful in my living room and is a perfect accent to my rustic, earthy decor.
This was built using waste from polycarbonate hurricane shutter project as well as free steel bed frames a neighbor had put out for trash pick -up. Only other materials required were 2 X 4 lumber , caster wheels and paint.
I love this bed! Building it was pretty easy. I used 2x4s instead of 4x4s because I could not get them un-treated out here in the country. I used the king size frame idea and dado'd (if thats how its spelled or even if thats the right name for it) the legs so the bed rails rested inside flush. See picture! I used 4" lag screws and washers to fix the frame together. Next time i'll countersink holes so you wont see them!I built the bedframe with the joists, and used my boxspring with my mattress. If we ever get tired of the height, we just take out the boxspring. I used 5 2x4s for the joists, and it seems super sturdy. I CANNOT move this bed on my own, not even shake it, its super sturdy and is not going anywhere...but at the same time, I can plop out the lags and it can be hauled away if need be.
This bed fits my house! It was built sometime before 1920, and yes has all the flaws of an old house, but also has all the wonderful things like original molding, 9ft ceilings, and underneath shag carpet is a gorgeous wood floor just begging to be refinsihed... so this bed just adds to the charm:)
I love it! Thank you Ana for the plans!
It seems as though I want everything. Thanks for posting sooo many detailed pics, I love that!
I am starting on the Toddler Bed for my son. :)
THANKS...
This project was super easy! It only took three hours to build and another 24 hours to stain and paint. Third project that I've made using Ana White plans, and was BY FAR the easiest!
I built this kids-sized chair using the "Classic Chairs Made Simple" plans on this website (http://ana-white.com/2011/01/classic-chairs-made-simple.html). I had to change the dimensions accordingly but it turned out just about right. I ordered the paint from Home Depot, getting the true Seahawk colors, then I used vinyl to create custom stencils to paint the designs on, the "12" number is a sticker I ordered online. This was for a friend's son and he really love it, especially with football season almost here. The painting and stenciling took the longest part, much longer than I anticipated but it was worth it.
I made a wooden game board for The Duke from Catalyst Game Labs. The Duke is a 2 player abstract strategy game. In some ways, it is similar to chess. For more details about The Duke visit the official website for the game where you can find the rules and files for a Print & Play version of the game. (Unfortunately, at the time of writing this tutorial the physical copy of The Duke is out of print.)
The game board for The Duke is similar to a chess board. It uses a 6×6 grid instead of the 8×8 grid in chess.
We needed something to help with our book storage problem - something easier for the kiddos to get to and also clean up. We've made the ten dollar ledges before for our kitchen, but this project was way more fun!
My husband built this is a weekend. We wanted each of our boys to have 2 rows for storage so we went with 4 total. Anchored to the wall and already in use
The Vintage Step Stool in green. I made this for my 2 year old so she can climb into her big girl bed :-) The color is the same as her walls and her name sign above the bed.
So for the finish I did this super easy no mess no fuss. I used water based min wax in walnut but here's the trick I dilute the stain with some more water until I find the finish I'm looking for. It gives it a very subtle brown with just a little grayish undertones giving it a more aged look but not much. I absolutely love the results pictures don't really do it justice.
My Wife took a position where she will be working from home. I also work from home 3 days a week. We needed a nice office area, but didn't have the space. I saw an article on LifeHacker and decided this would be the best fit for adding an office space to our bedroom. I have just begun woodworking and have no experience. This was a fun project... made a few mistakes, but they are not noticeable. I am not fully complete (haven't attached the shelves to the desk yet) as I want to do some other room renovations before everything is all set.
Finishing: Grey stain and furniture wax to make it less "blue/grey". Then a couple coats of polyurethane in a spray can.
This is my first day working at the desk... the only thing I would change so far is maybe to lower the keyboard/monitor shelf by a couple of inches, but this completely depends on your size.
I built the cedar shim headboard and bed for my daughter and her husband a few months ago. It turned out so beautiful that I decided to make bedside tables to match. I used the basic pattern with some adjustments to accommodate using a 1x8 for the drawer instead of a 1x6 to give more room for the shims.
The final tables turned out even more beautiful than I could have imagined. Thank you Anna for the patterns and the inspiration to create such beautiful gifts.