Community Brag Posts
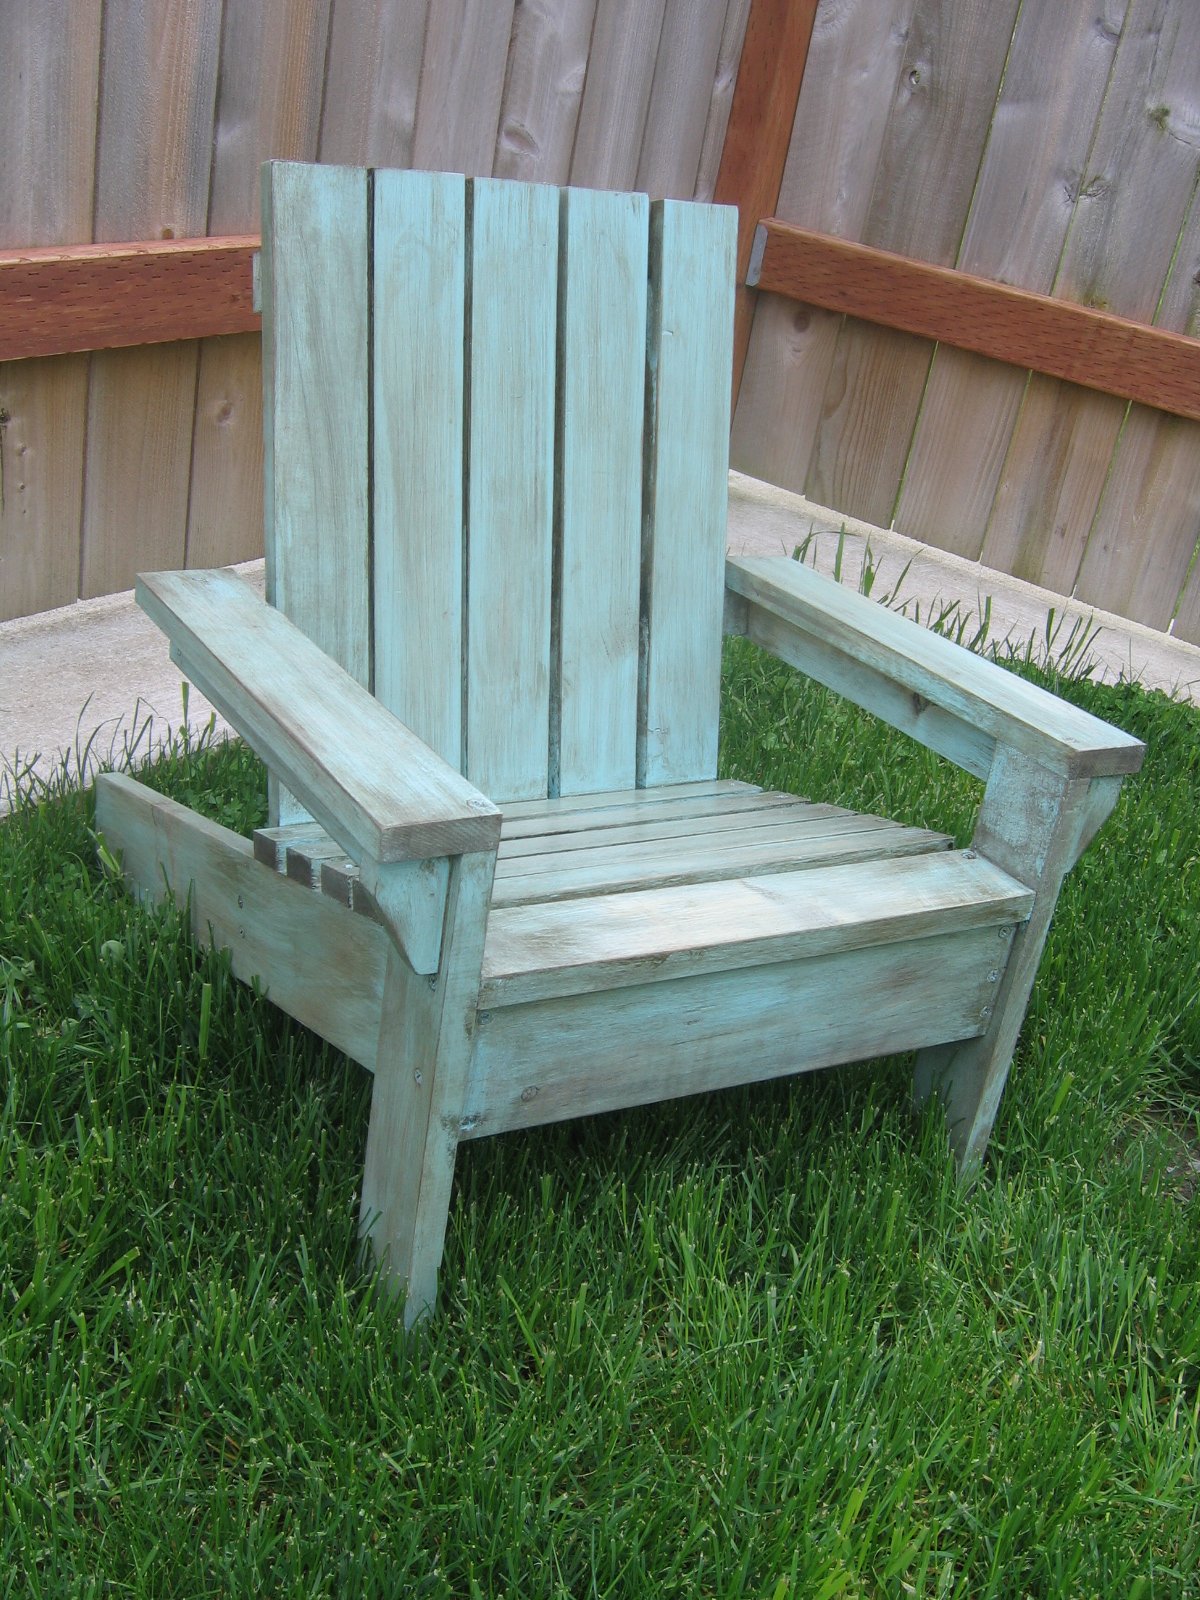
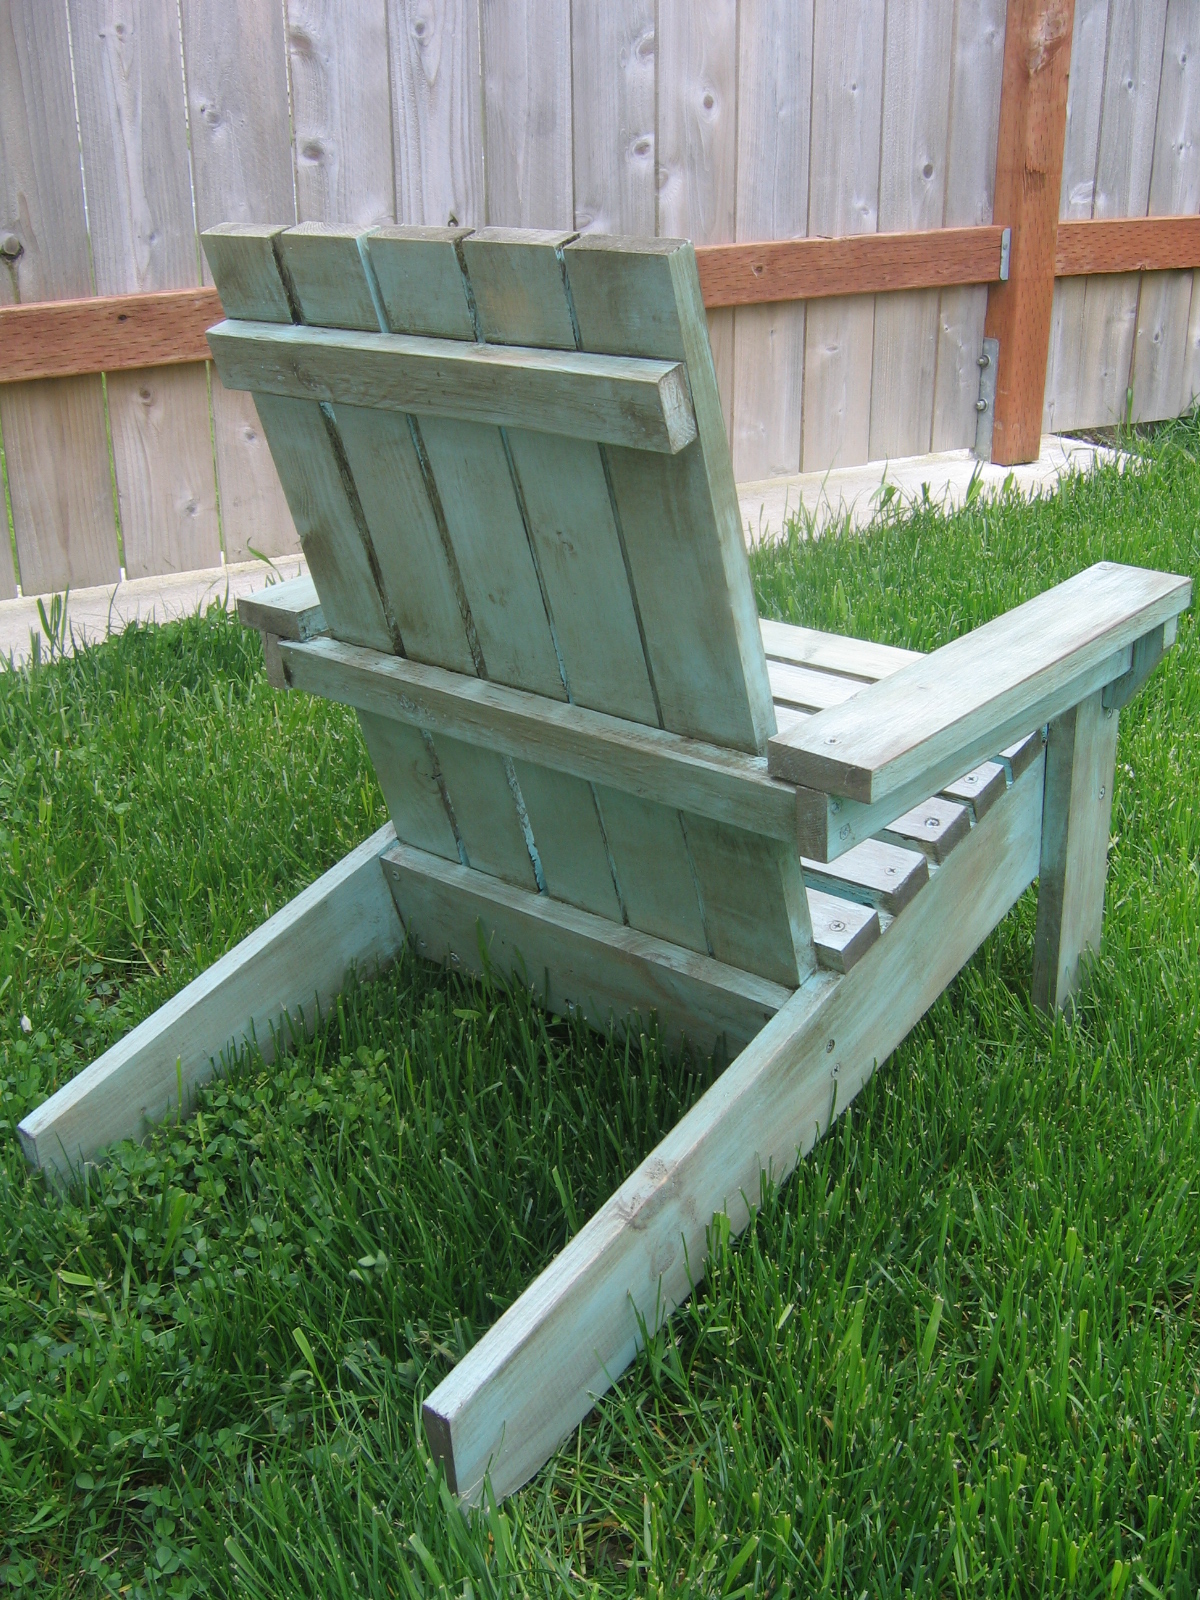
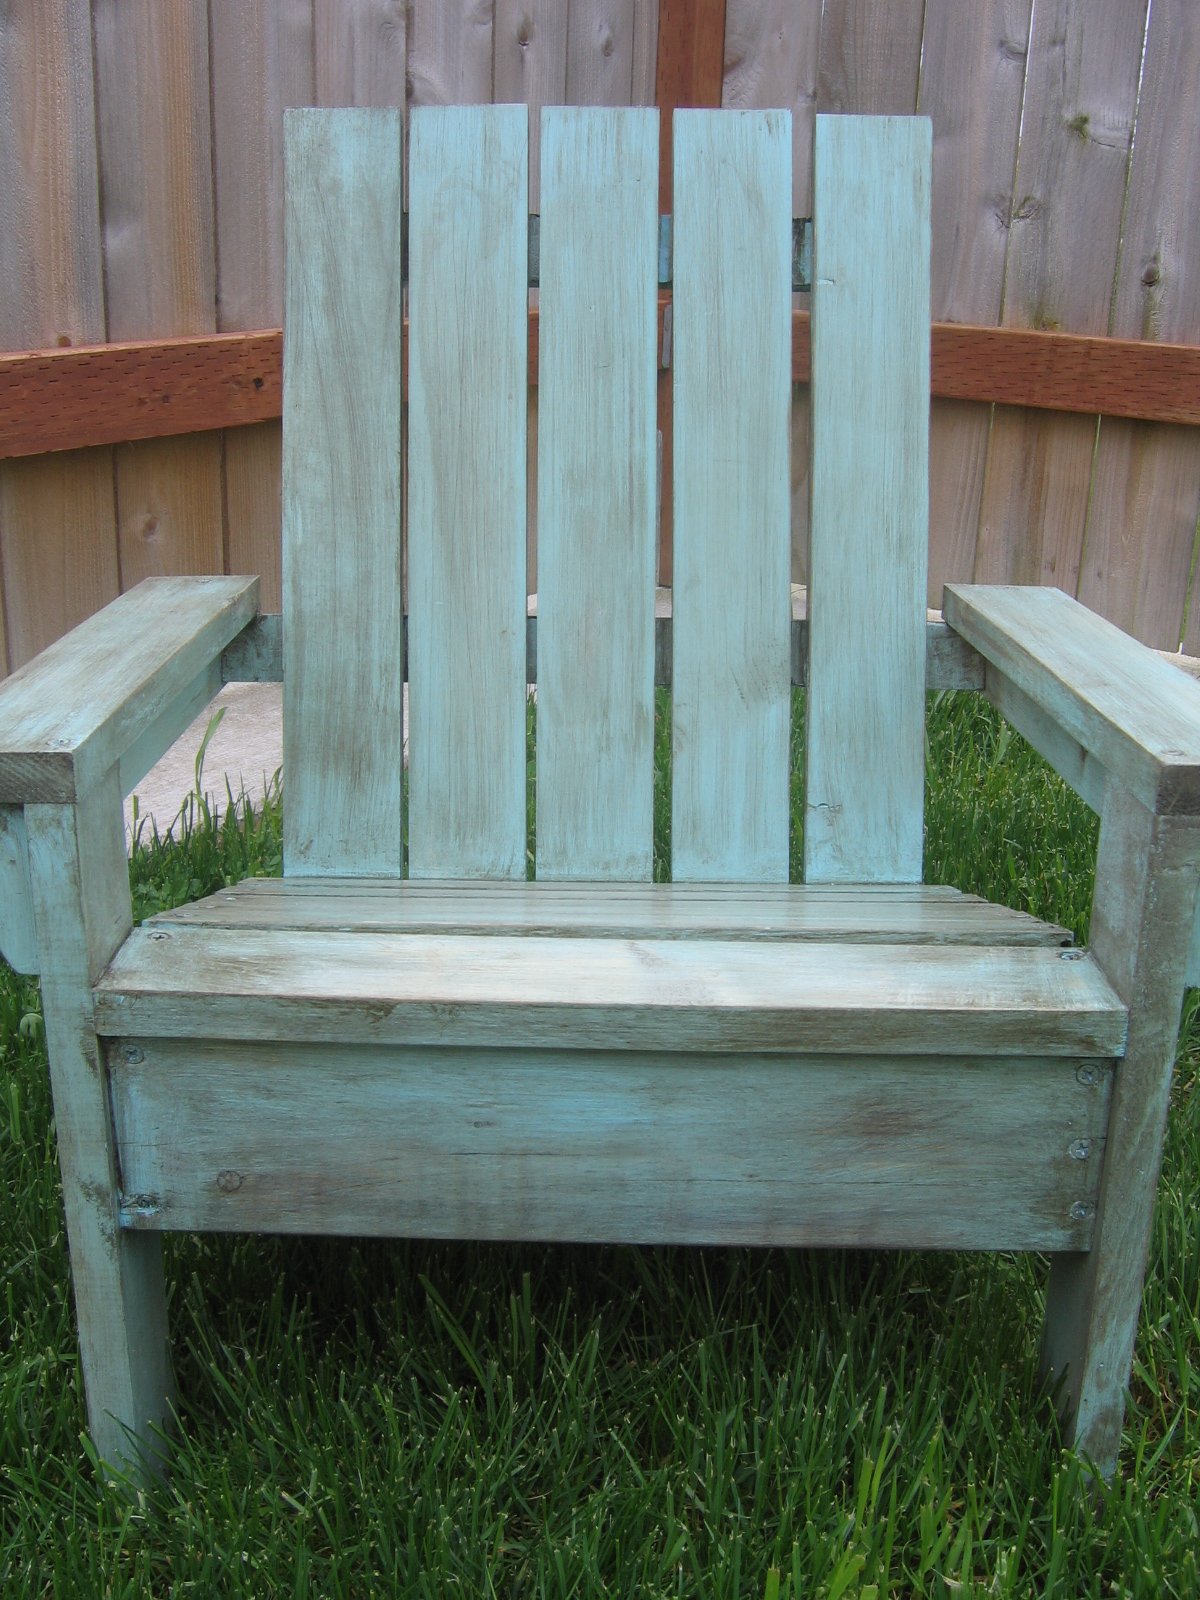
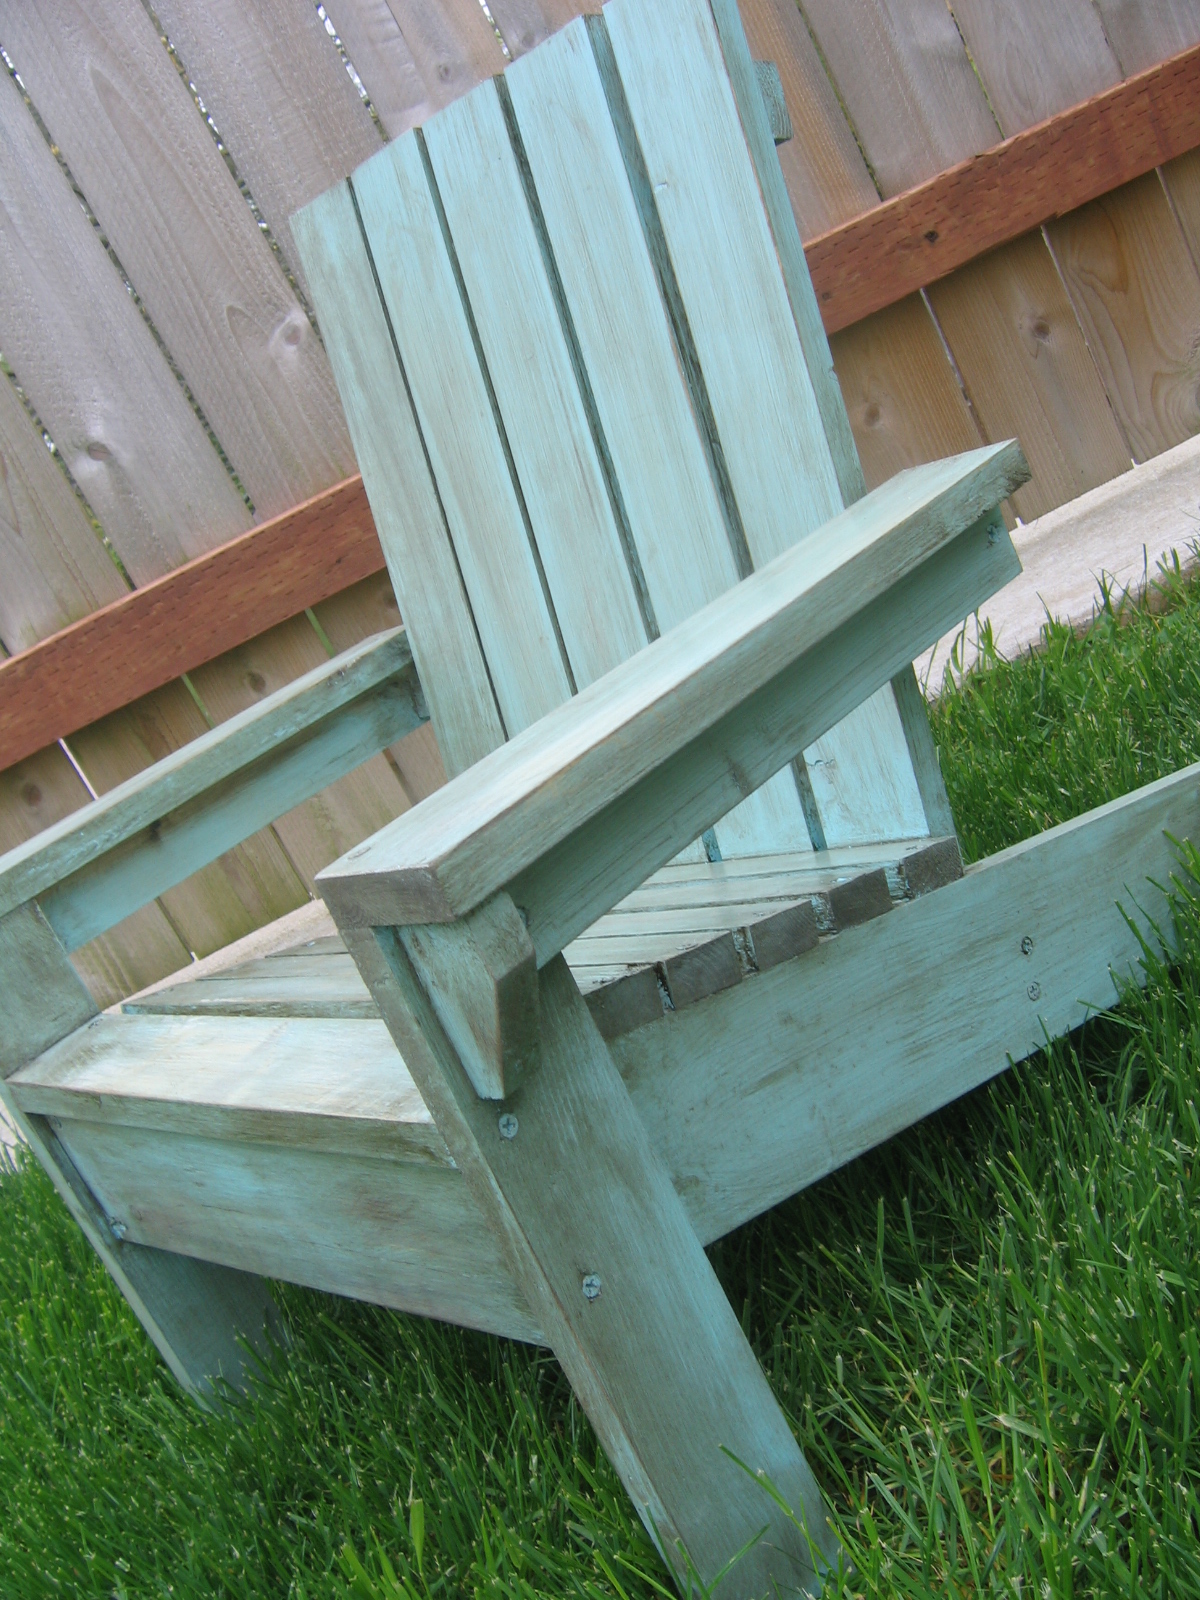
Bubba's Modified Little Adirondack Chair

I built this chair for my son's second birthday this last Saturday! Even though it is not perfect I'm super happy with the outcome. :-)

Built from Plan(s)
Estimated Cost
$30
Estimated Time Investment
Afternoon Project (3-6 Hours)
Finish Used
No Primer
Krylon Ocean Breeze Gloss Spray Paint
Sanded misc. edges
Made a mix of Minwax Jacobean stain with Clear Mixing Glaze - wiped that on for about 5 minutes and then wiped off
Krylon Ocean Breeze Gloss Spray Paint
Sanded misc. edges
Made a mix of Minwax Jacobean stain with Clear Mixing Glaze - wiped that on for about 5 minutes and then wiped off
Recommended Skill Level
Intermediate
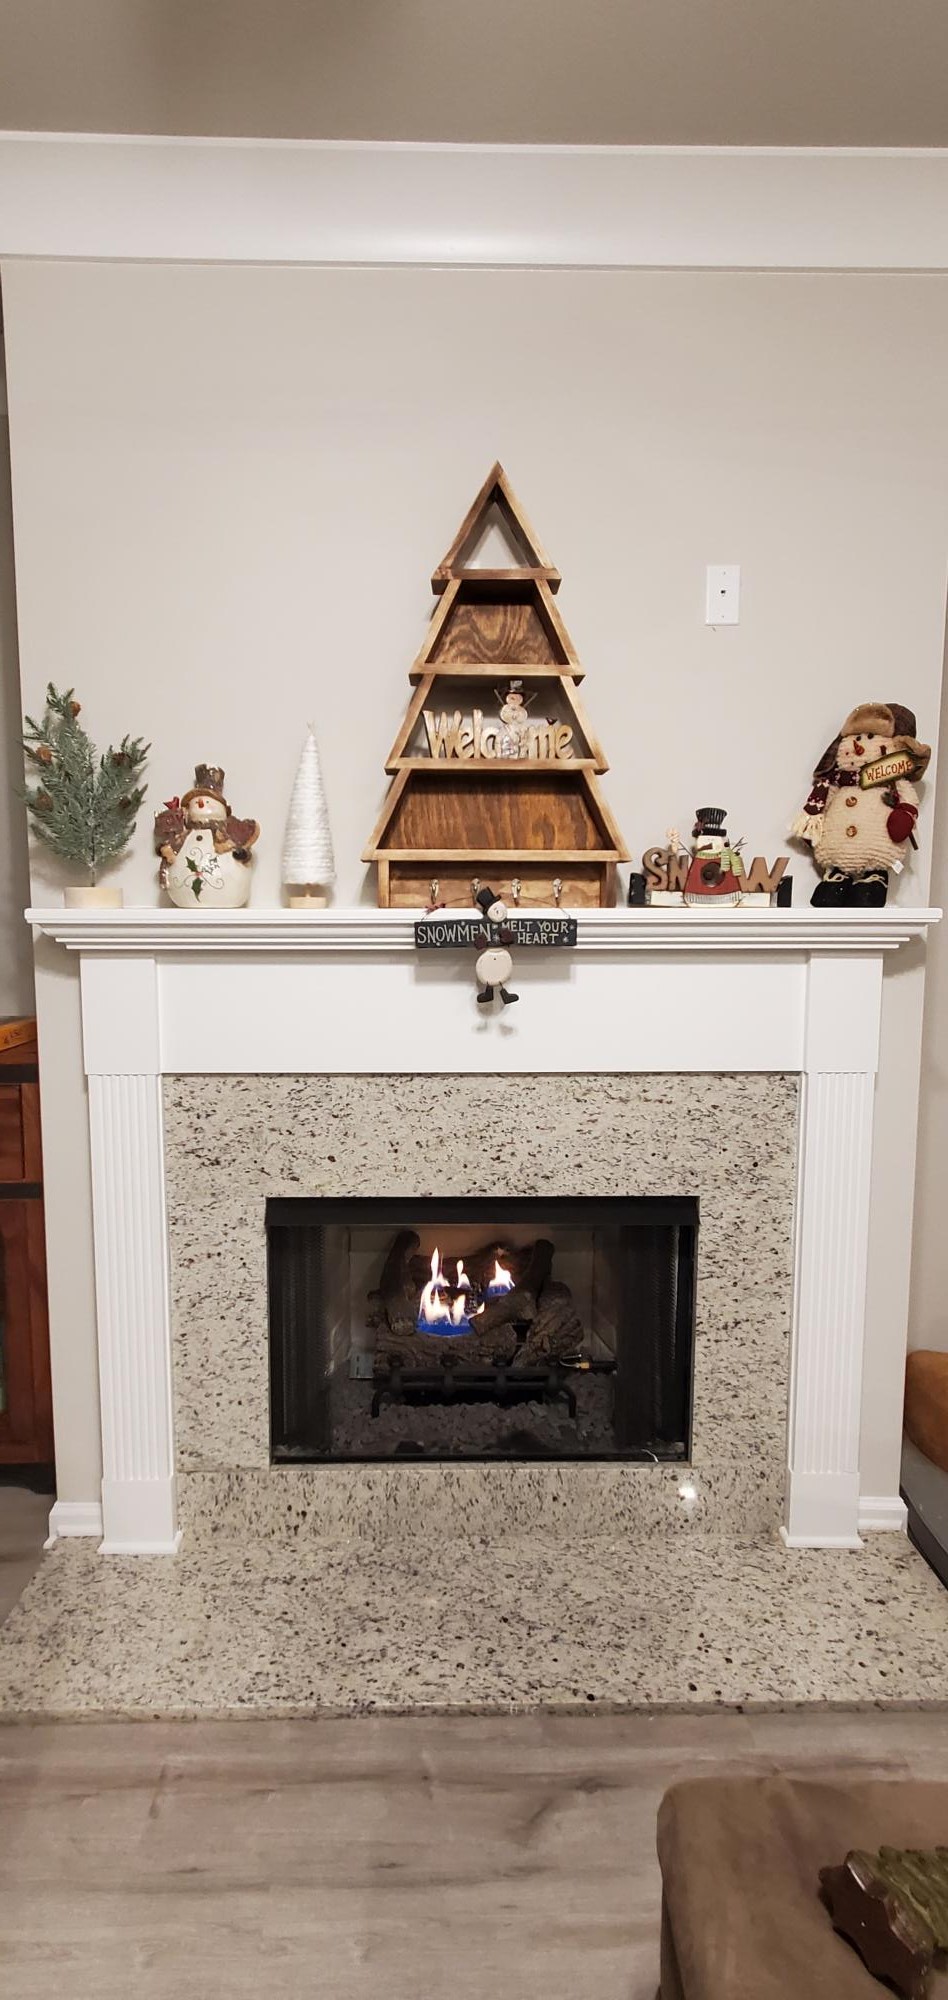
Fake built-in's
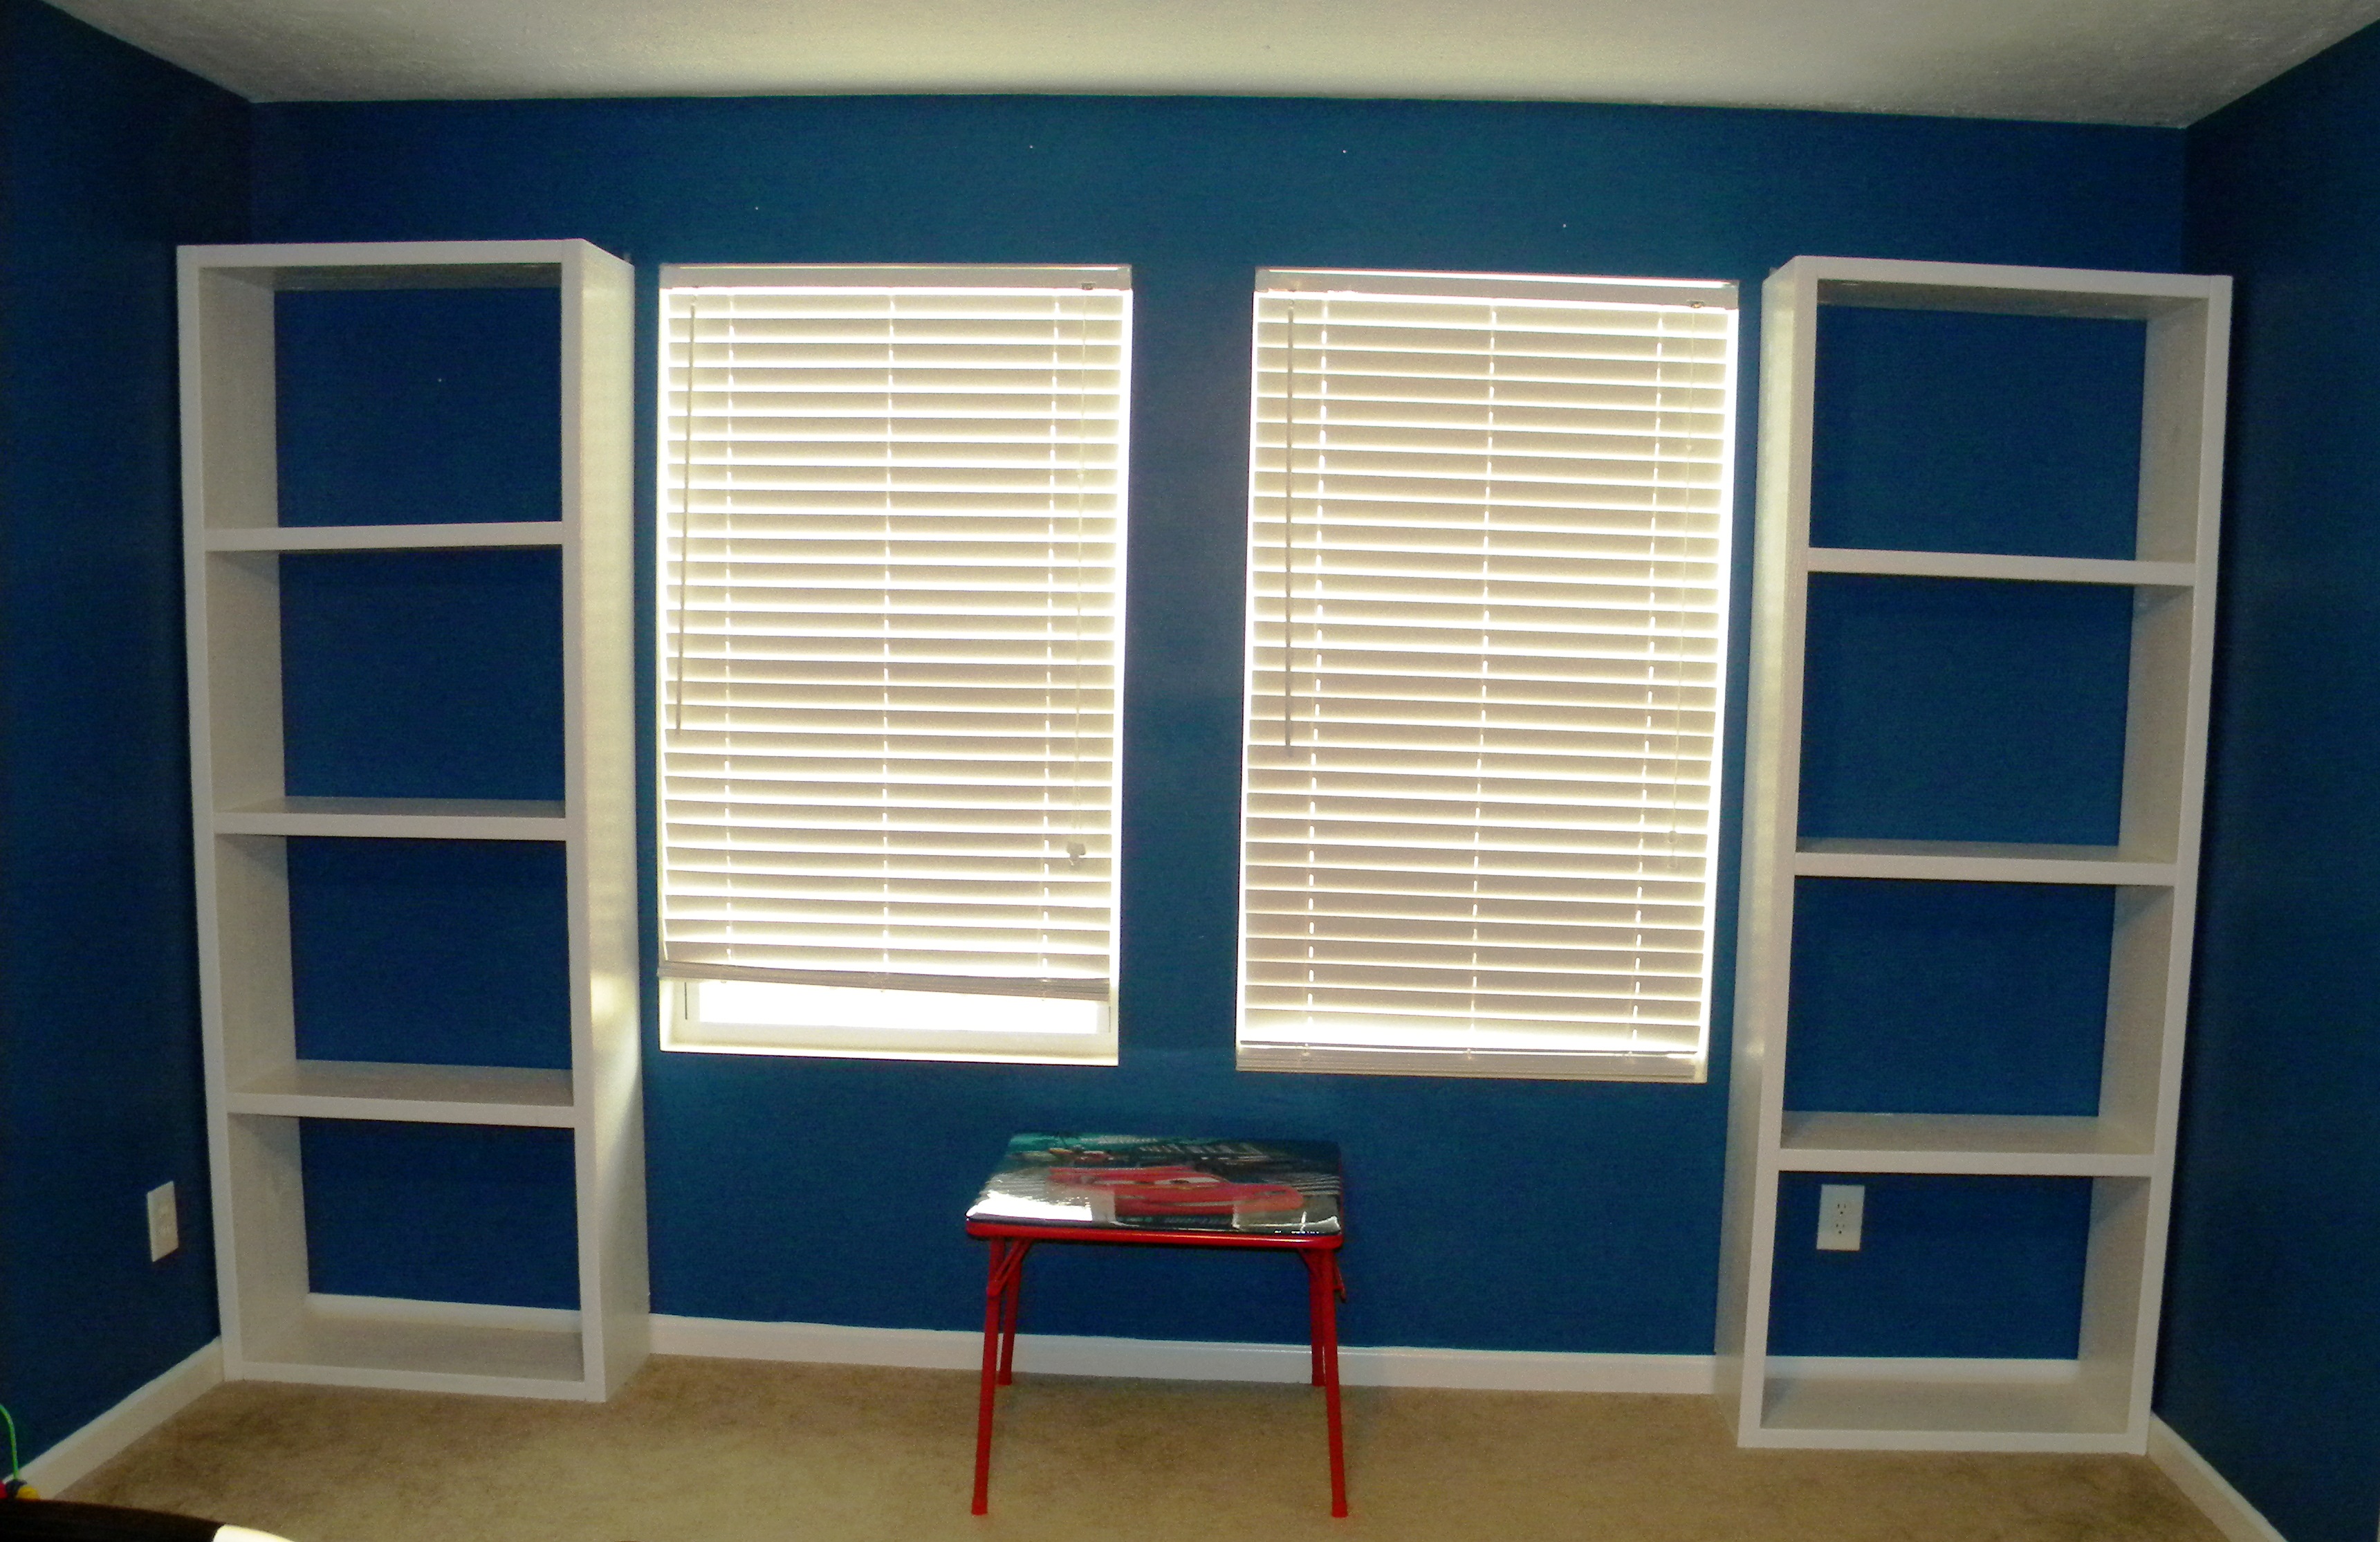
I modified this plan and made it 83.5" to match the height of my window.


Built from Plan(s)
Estimated Cost
100
Estimated Time Investment
Afternoon Project (3-6 Hours)
Finish Used
Valspar White gloss
Recommended Skill Level
Beginner
Comments
Wed, 10/22/2014 - 05:58
I love this!!!
This would be perfect for my 3rd bedroom!! Thanks for the inspiration!!
Baby doll chair
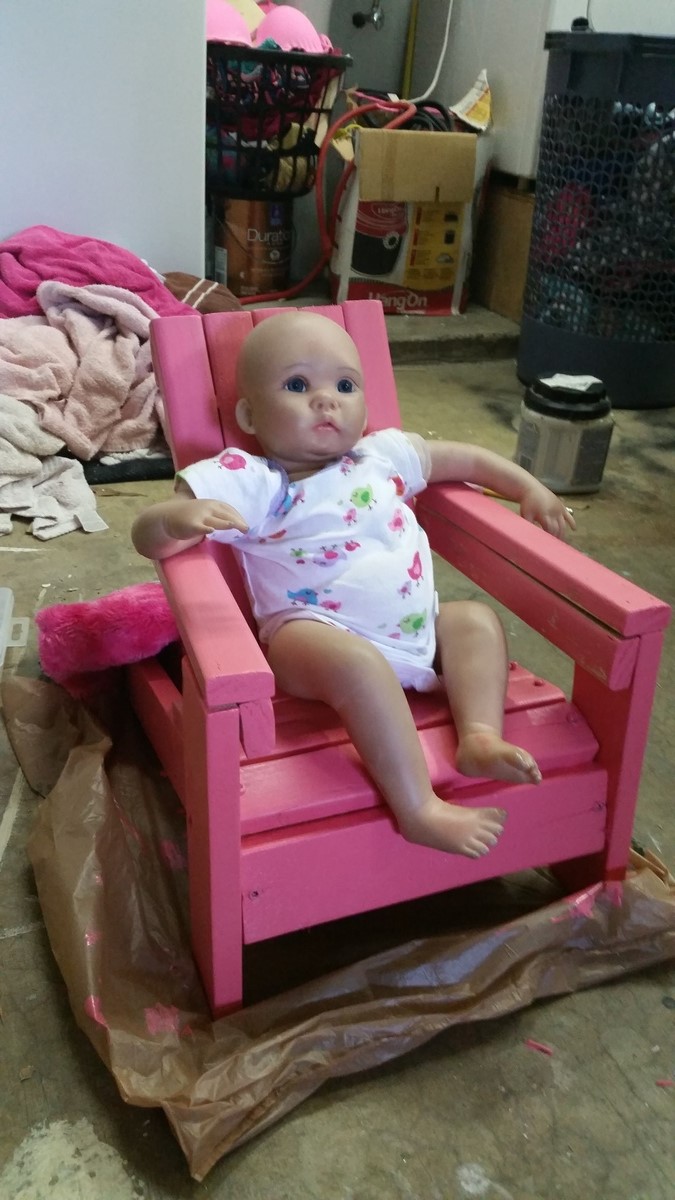
This was my first project to make from scratch by myself
Built from Plan(s)
Estimated Cost
$10
Estimated Time Investment
An Hour or Two (0-2 Hours)
Finish Used
None. I used treated wood
Recommended Skill Level
Starter Project
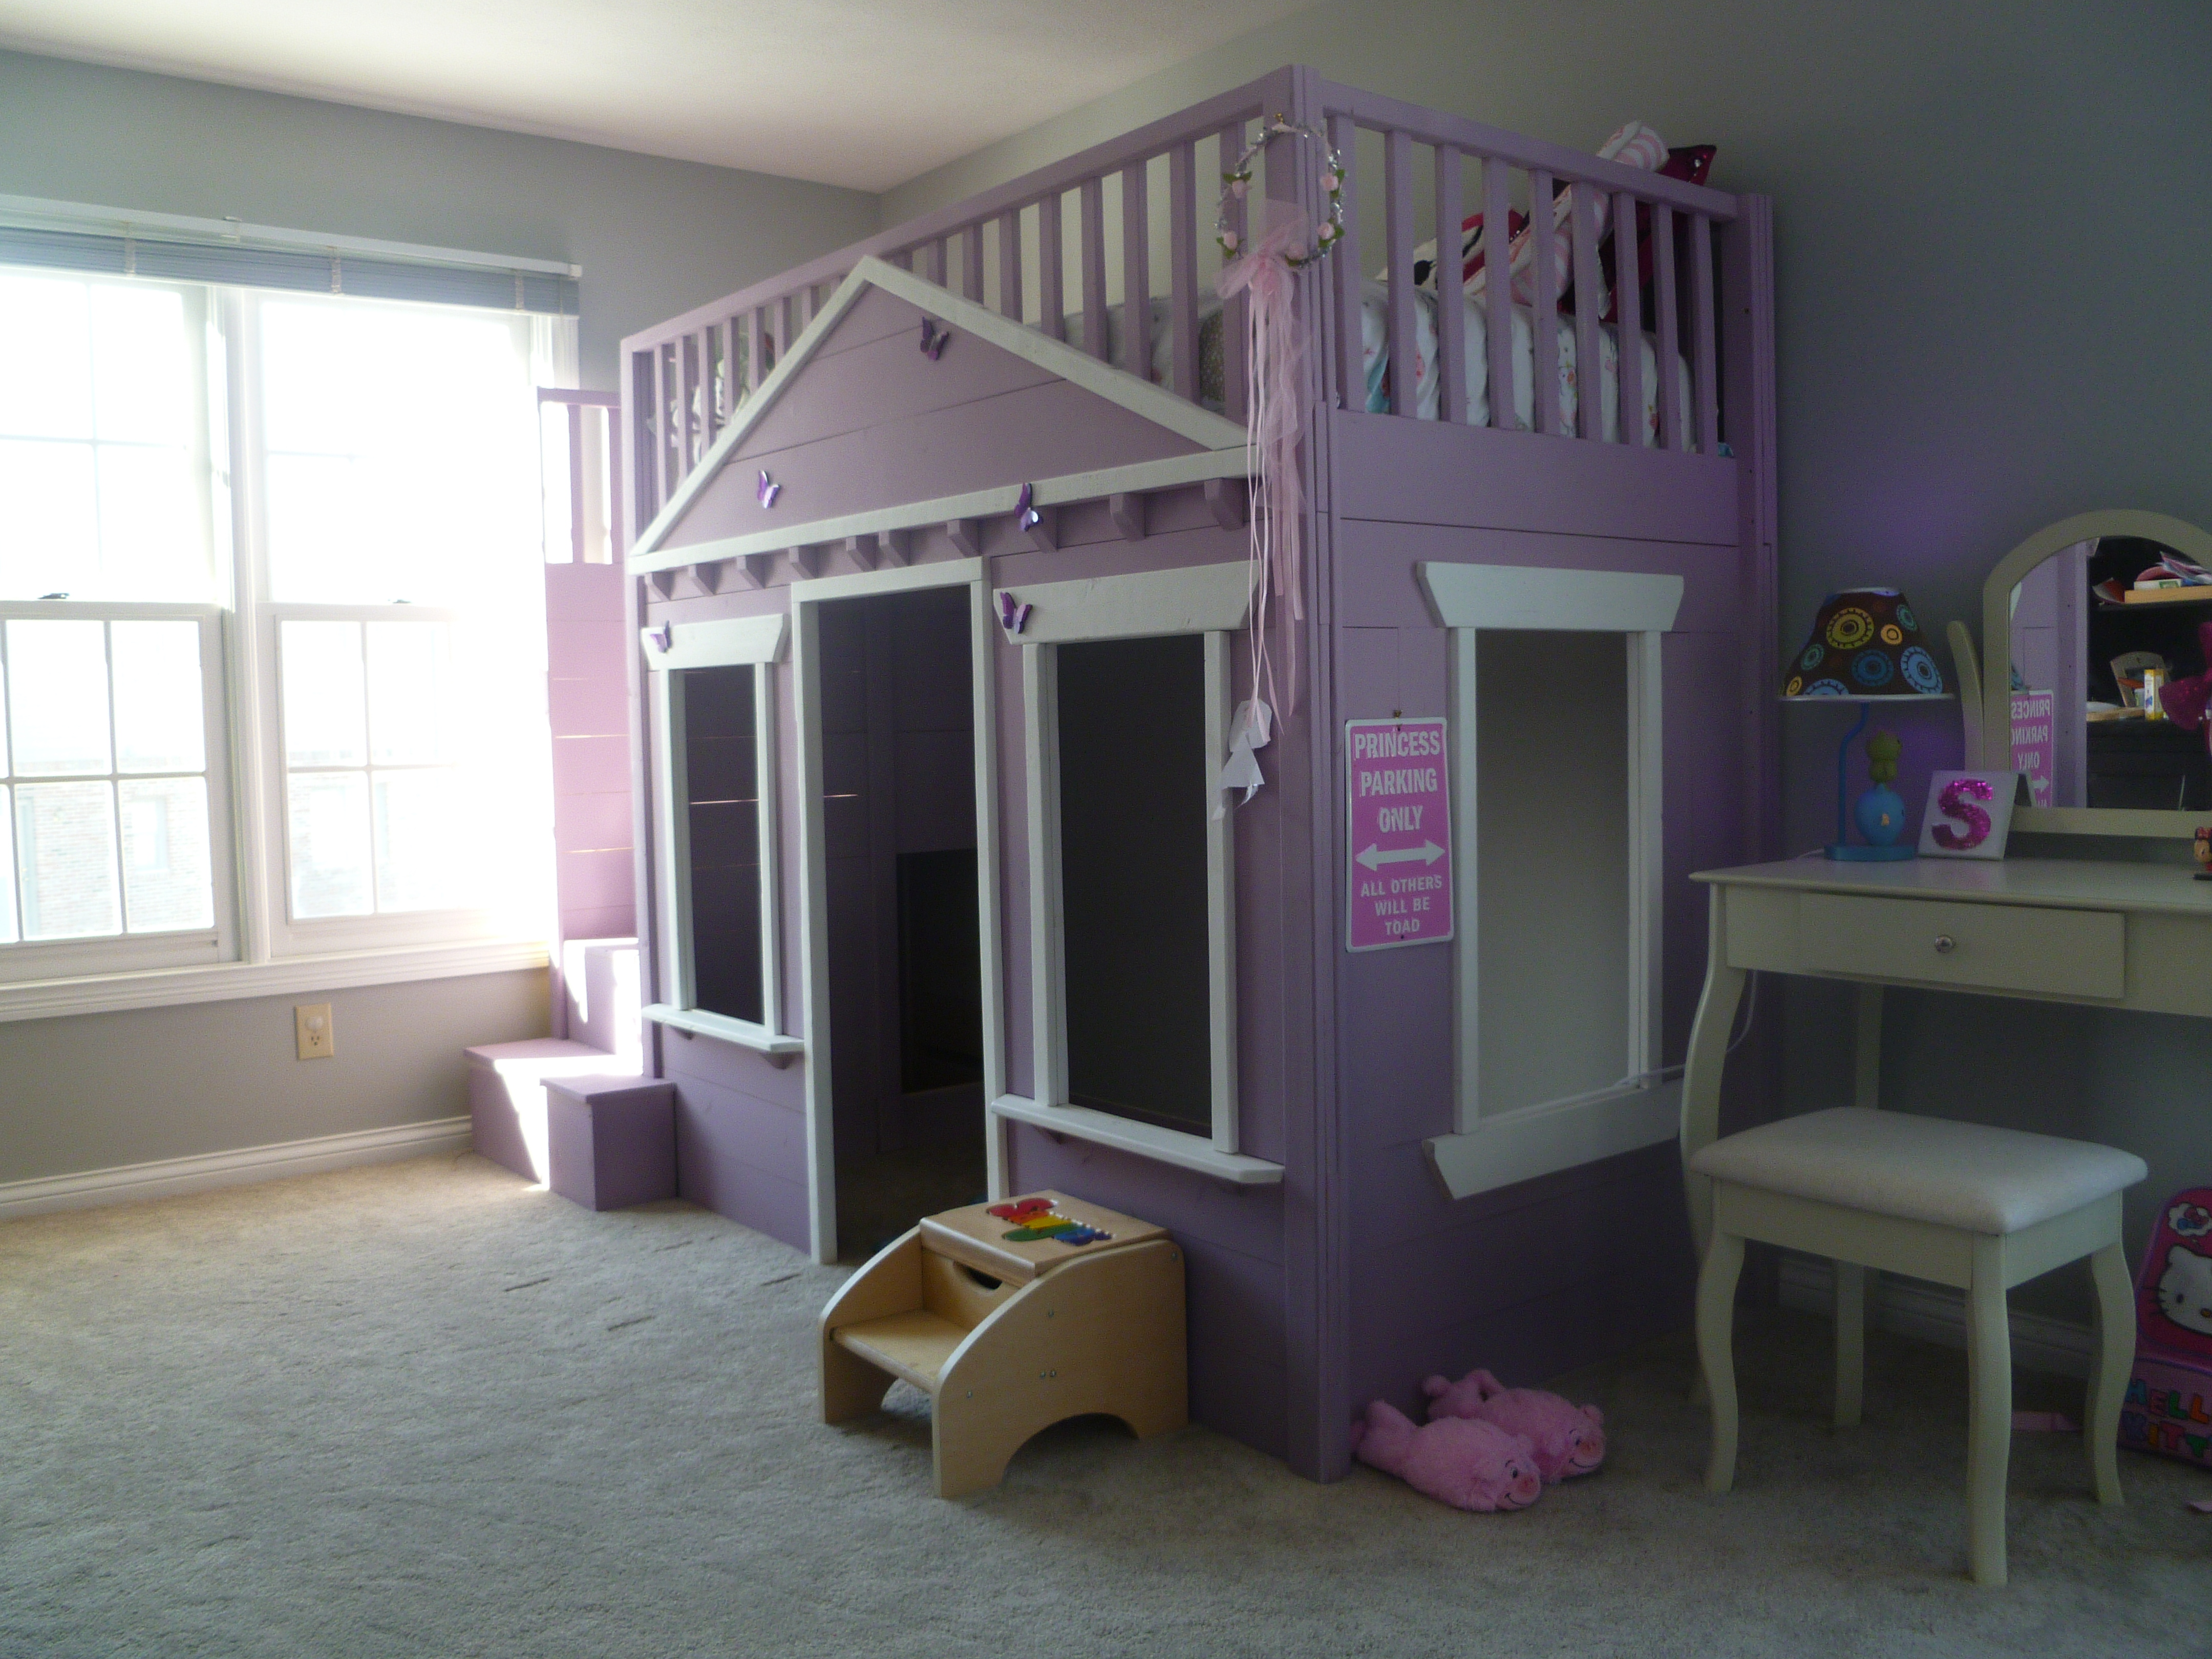
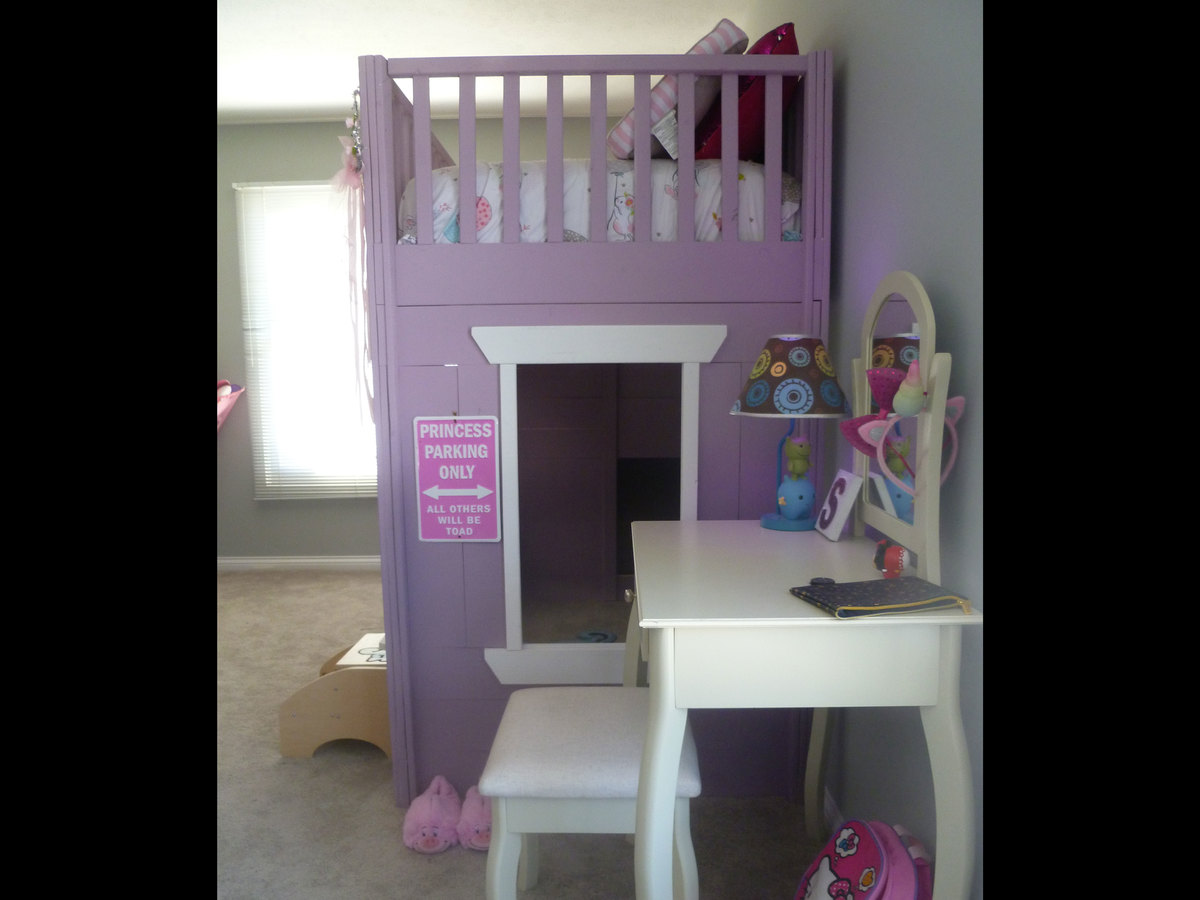
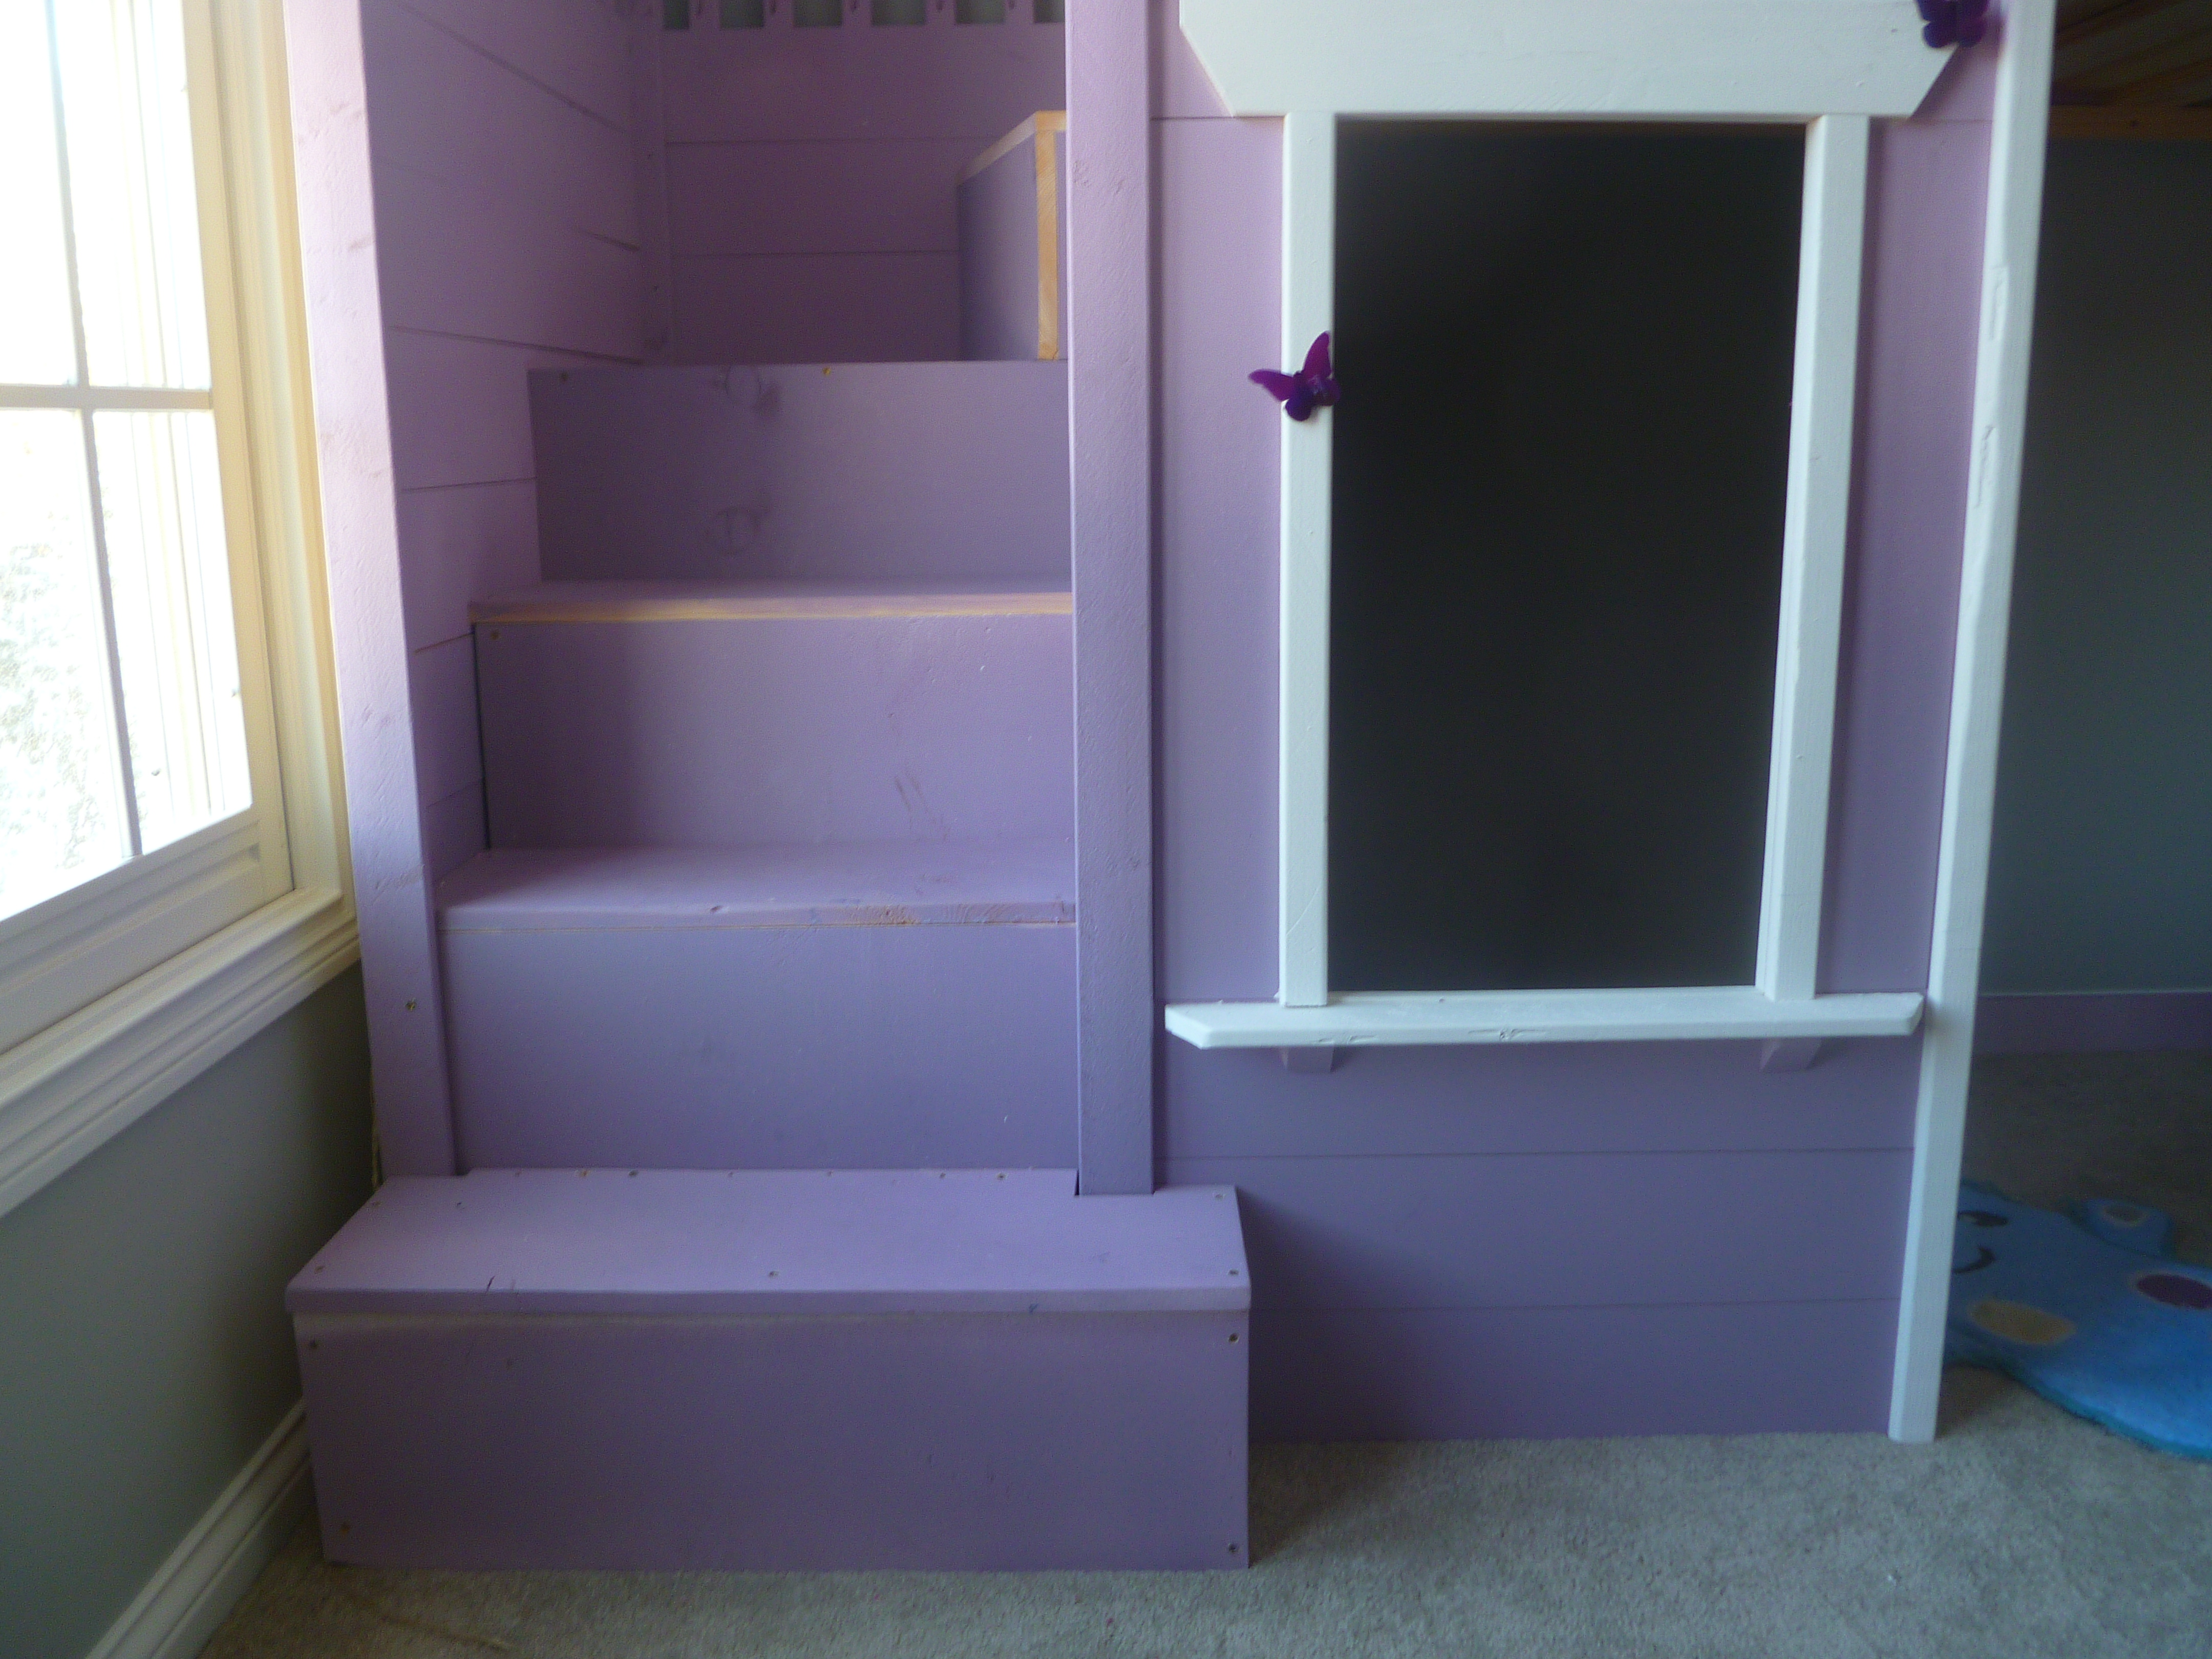
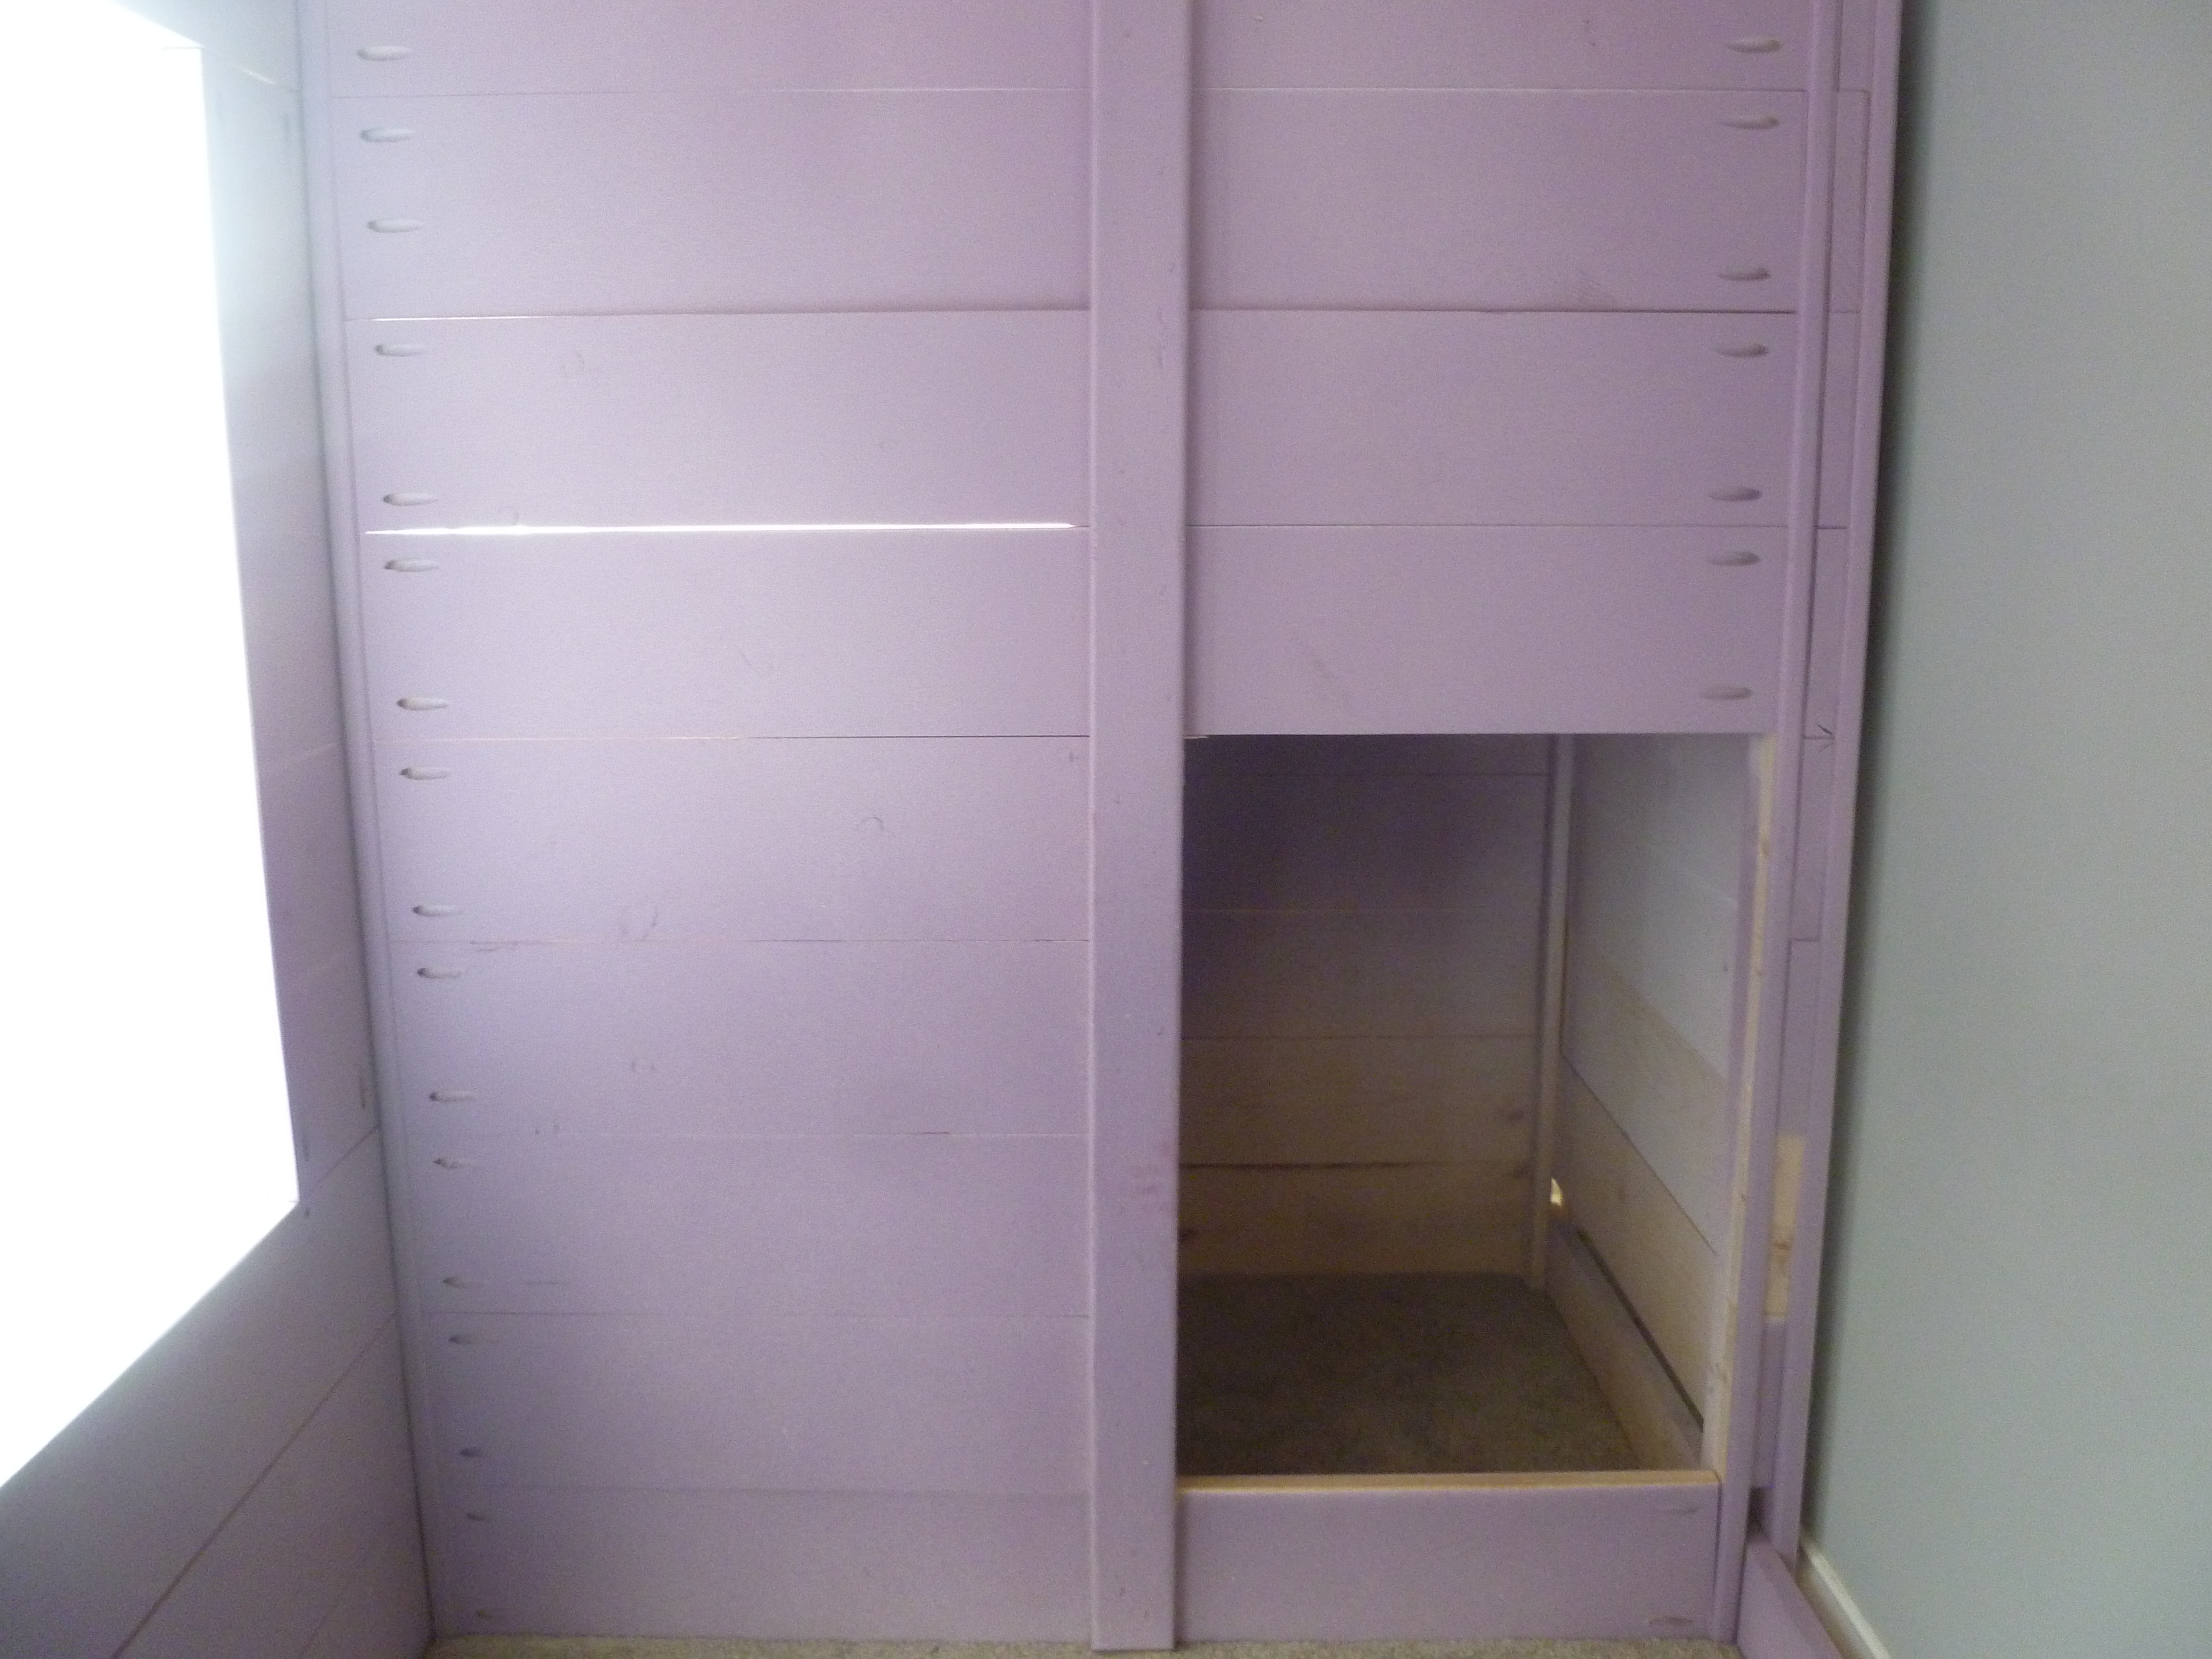
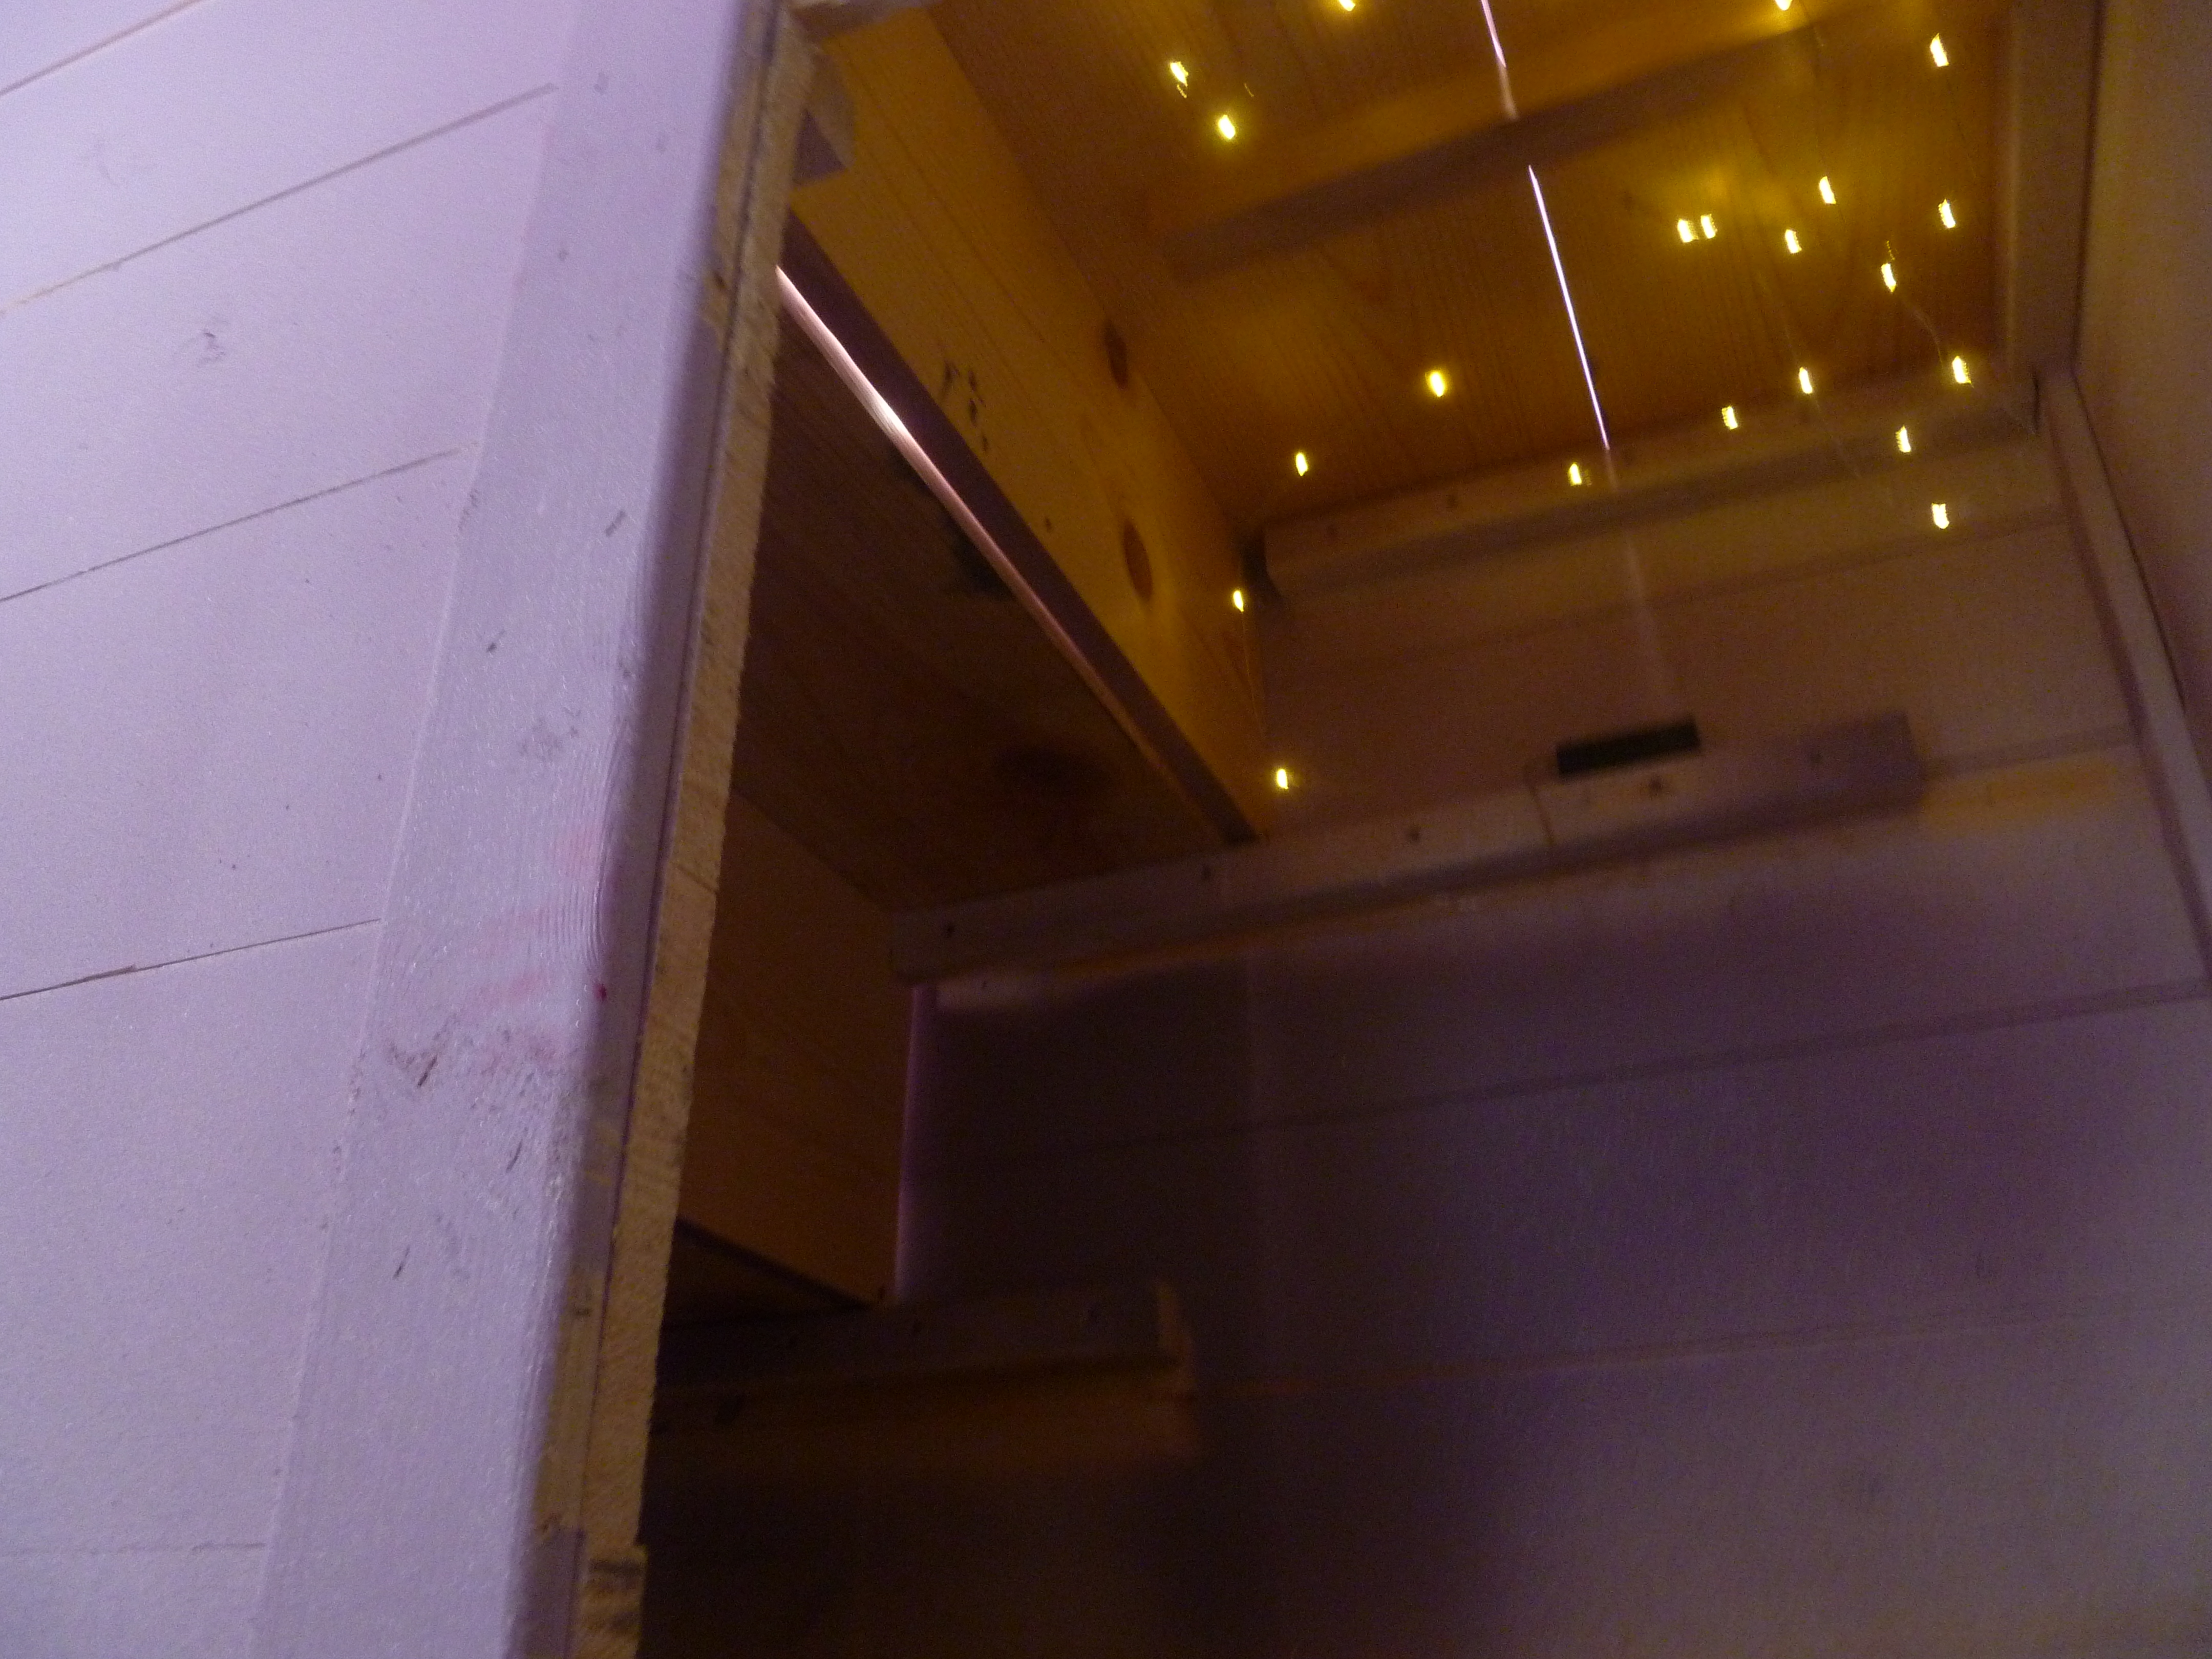
Princess Loft Cottage

Not 100% done, still have a few paint touch ups to do but I wanted to get this up here while my daughter's room was clean. We originally were planning on adding drawers to the stairs but the kids had so much fun playing under them while I was building it that we decided to open it up and add some string lights. It's also hard to see but the paint fades from purple at the bottom to pink at the top and has silver glitter added to it.
Built from Plan(s)
Estimated Time Investment
Week Long Project (20 Hours or More)
Finish Used
Purple, Pink & White paint w/ silver glitter
Recommended Skill Level
Beginner
Garage Workshop Bench
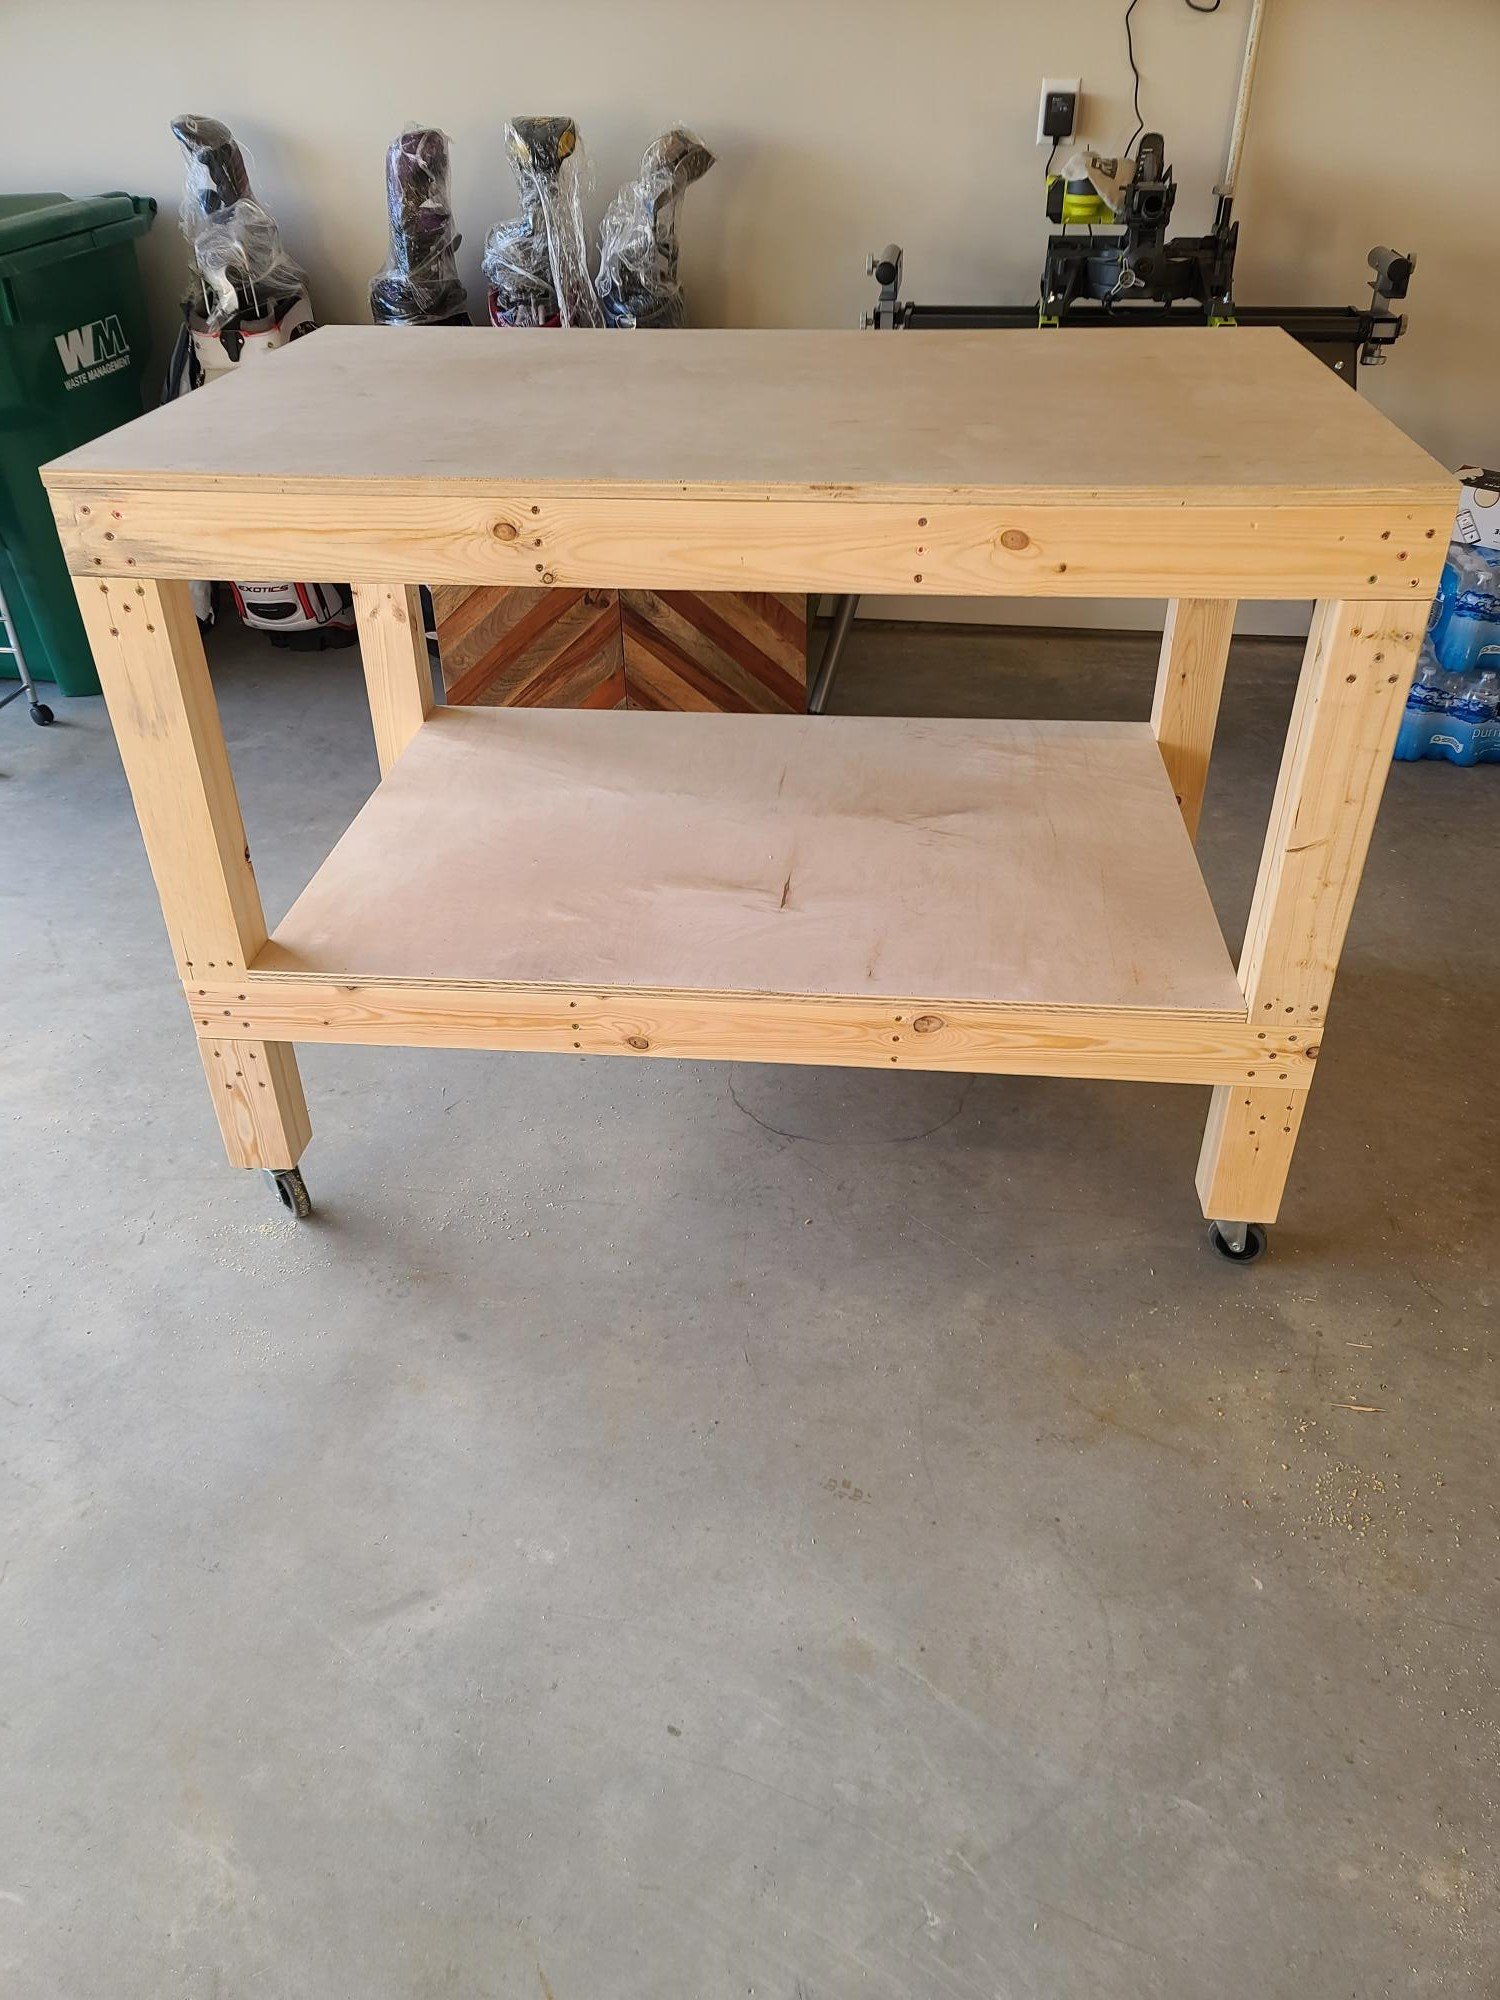
This was my second project, with so many more projects in mind, figured I needed to get started on a Workshop bench. This was a fun and easy project and such a great plan.
Built from Plan(s)
Comments
Spring Green Toy Bin
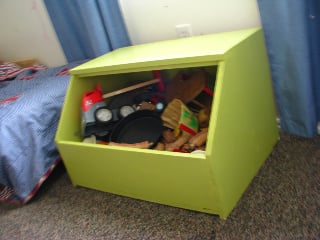
I desperately needed a toy bin the boys couldn't just dump over. This is a lot bigger than you'd think, but stores a LOT of toys! $30 for the project panel wasn't doable for me, planning on 3 of them. So I used 3/4" plywood instead since I was going to paint anyway. Then normal 1x12's and such for the rest. An hour to cut and build, the rest of the time was painting and waiting for it to dry.
Built from Plan(s)
Estimated Cost
Using project panel, $50. Using 3/4" plywood like I did instead, $25-30.
Estimated Time Investment
Afternoon Project (3-6 Hours)
Finish Used
Primed with Kilz 2, because it is really low odor and covers well. Then I mixed the yellow I had from a bookcase with the a blue from a dresser I painted, to make a nice spring green semi-gloss.
Recommended Skill Level
Beginner
Sweet Pea Bunk Bed (turned Beach House)

I was shopping around for a bunk bed for my 2 and 4 year old girls. I didn't want the standard, cheap metal frame for $200, but I also didn't want to spend $2,000 on a big box store bed (made in China) with a 300% mark-up! I stumbled upon Ana's site and was HOOKED! I found the "Sweet Pea Bunk Bed" and immediately printed the plans.
I was a little hesitant to take on such a project because I am...by no means...a carpenter. I found a few mistakes in the instructions, but was able to work through them. I decided against the tin roof, pergola, and flower boxes, but instead went with a "beach house" theme.
My girls LOVE LOVE LOVE it! They especially love the windows and the little shelf where they can put their favorite toy at night when it's time to sleep. I also let each of our kids (plus mom and dad) put hand prints on the rails of the upper bunk so my daughter on the bottom bunk has something to look at. Added a push button light too.
My adivce to anyone thinking of doing this bunk bed: Read through the instructions thoroughly first. Do NOT take shortcuts. Cut, sand and paint EVERYTHING before assembling.
I work full-time and take a few night classes (for fun), so this project took me 4 weekends to build (including a 3-day weekend, thanks to a holiday). Enjoy!


Estimated Time Investment
Week Long Project (20 Hours or More)
Finish Used
Paint
Recommended Skill Level
Intermediate
Comments

Bench and side tables
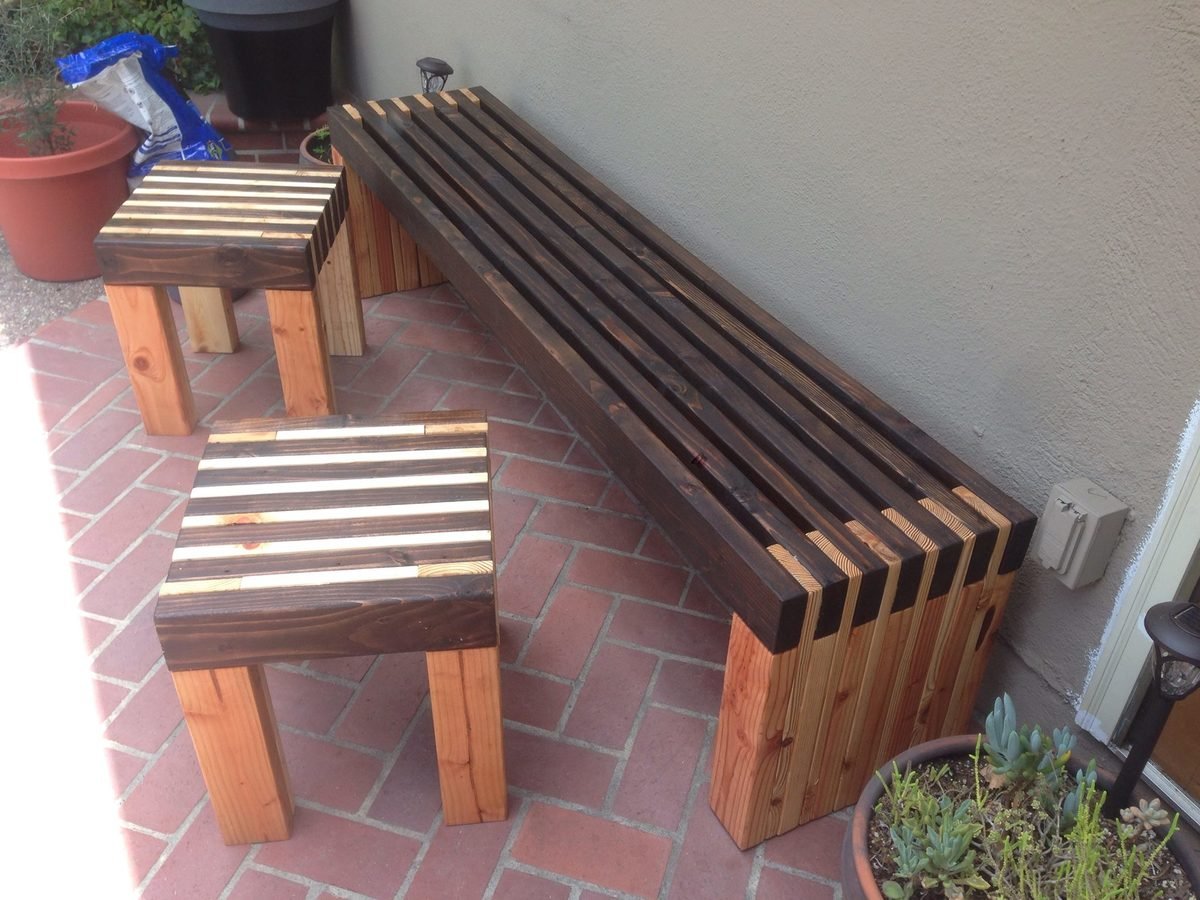
Bench was made using the plans on the site. I modified the plans to create these accompanying 15" x 15" side tables. cut list for each table:
7 2x4 at 15" each (stained for the top part of the table).
4 2x4 @13 1/2" each (for legs)
5 1x4 @ 15" each (used for the top of the table)
2 1x4 @ 8" each (used for the top of the table)
4 1x4 @ 17" each (for legs)
Time varies depending on if you cut, sand, stain, and treat the lumber for outdoor use. The estimated time below is does not include time for the stain/weatherproof treatment.
Built from Plan(s)
Estimated Cost
1 table: $10 - $15
bench: $45
bench: $45
Estimated Time Investment
Weekend Project (10-20 Hours)
Recommended Skill Level
Beginner
Comments
Sun, 08/02/2015 - 14:08
nice!
Love your color scheme. I'm going to attempt making this bench. Did you use both glue and nails and if you used nails, where did you nail it in and did you try to hide the nails later? I'm a complete nubie in terms of wood work. Thanks!
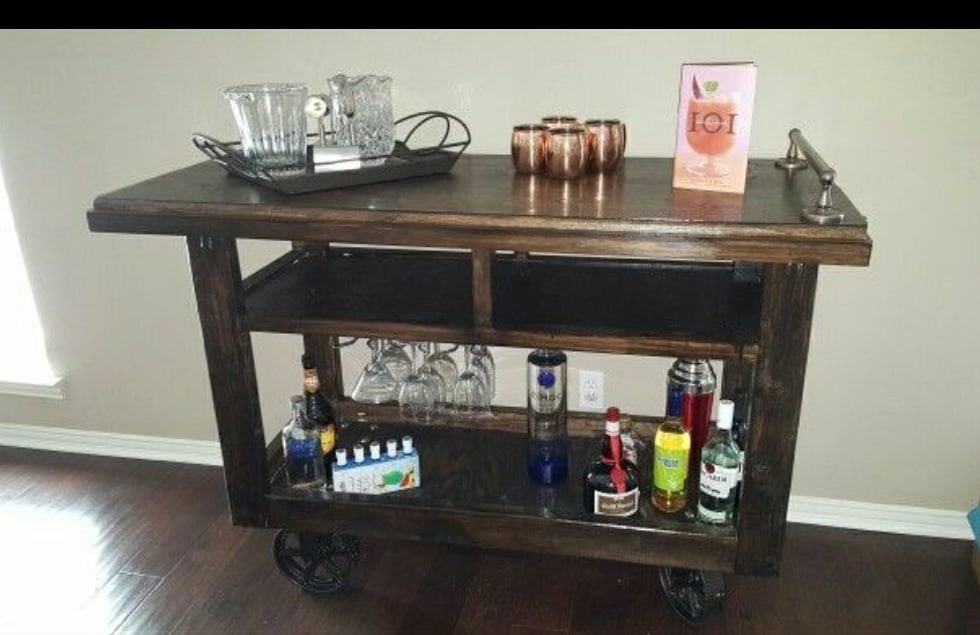
Bar Cart

Got plans from this site. Made two carts so far. Second one smaller. Iron wheel little $$
Estimated Cost
$200.00
Estimated Time Investment
Week Long Project (20 Hours or More)
Finish Used
Dark stain with clear coat polyurethane
Recommended Skill Level
Intermediate
30inch Simple Stool
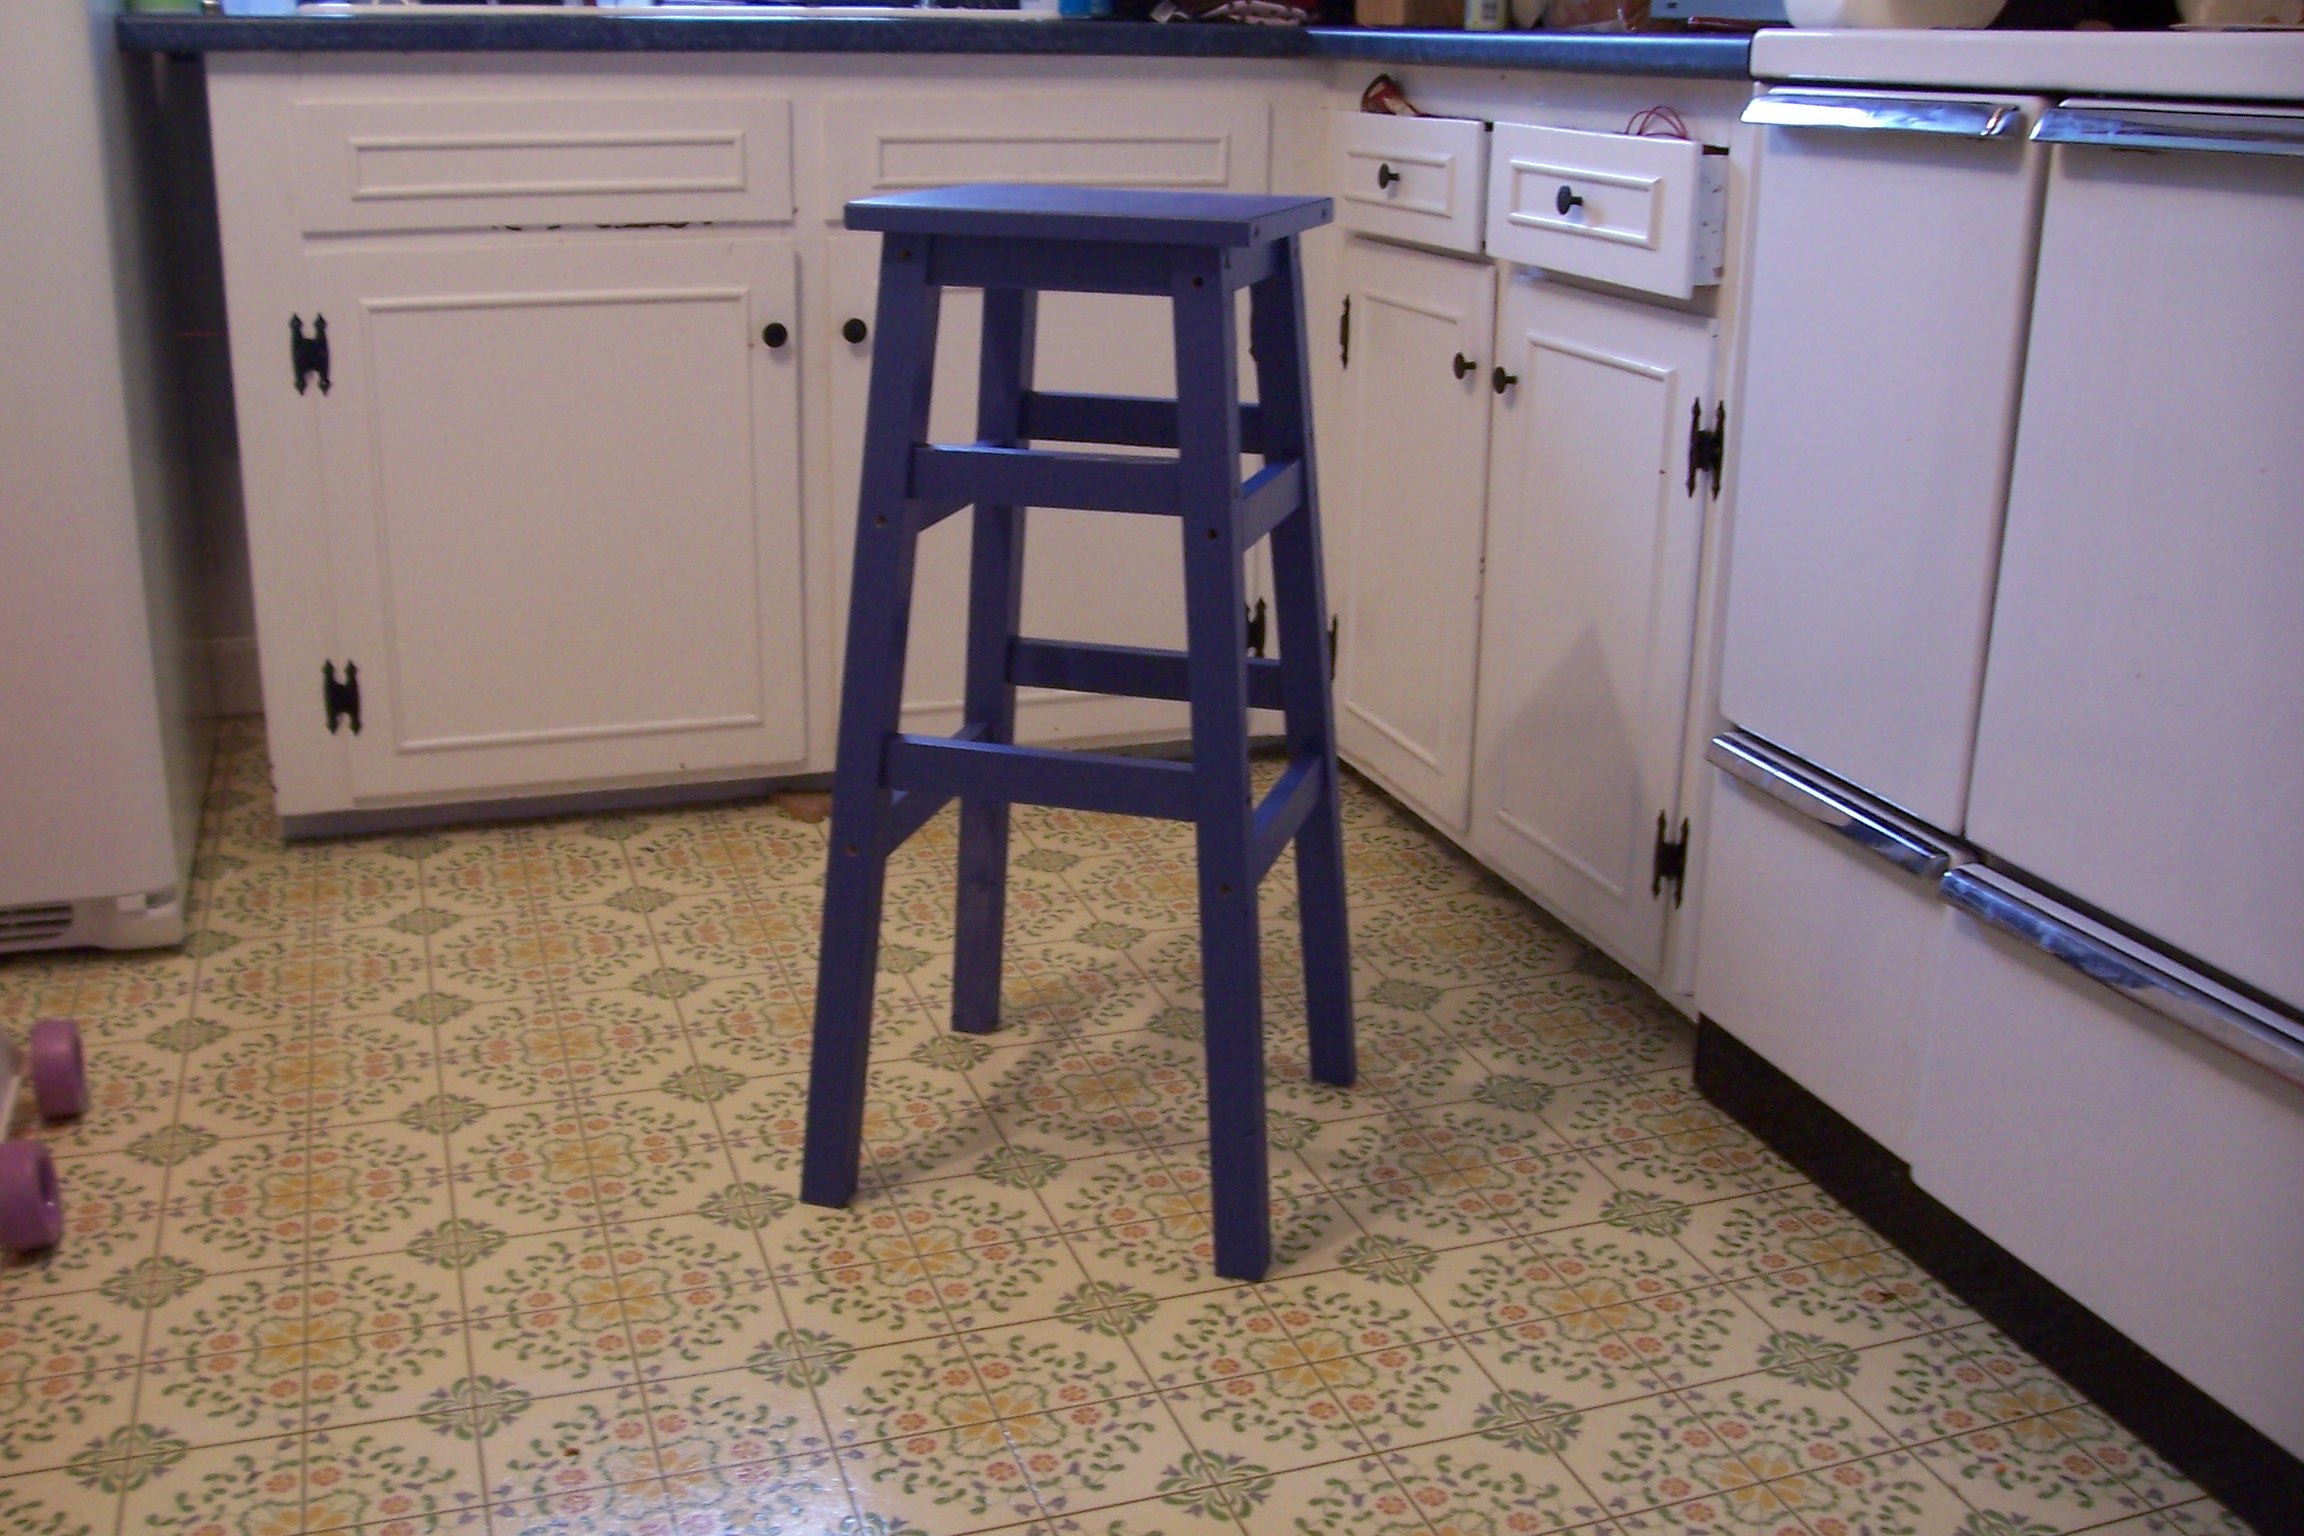
I'm doing a lot of projects in the shop this summer (starting with planing 240 fence pickts :S) and so I decided that this stool would be an excellent edition (better than plastic chairs) to the shop.
I increased the length of the legs to 30 inches (from the plan length of 23) and its quite solid with the increase.
I don't have a miter saw, so I did this with my table saw and the outcome was very good. Be sure you use a square to make sure your miter gauge is calibrated before making the cuts.
I used 1x2 and 2x2 (2) furring strips from orange that cost $3.12 and $1.47 respectively. I had some 1x12 scraps around and trimmed one down a bit and glued/screwed 1x2s on either side to make it wide enough.
I didn't fill the holes because filler is a bit pricey for the shop stool.
I think I'll make a round top for it eventually, but for now it does just fine.
Built from Plan(s)
Estimated Cost
$6.50
Estimated Time Investment
An Hour or Two (0-2 Hours)
Finish Used
Two coats of an interior paint I had in the closet.
Recommended Skill Level
Beginner
Comments
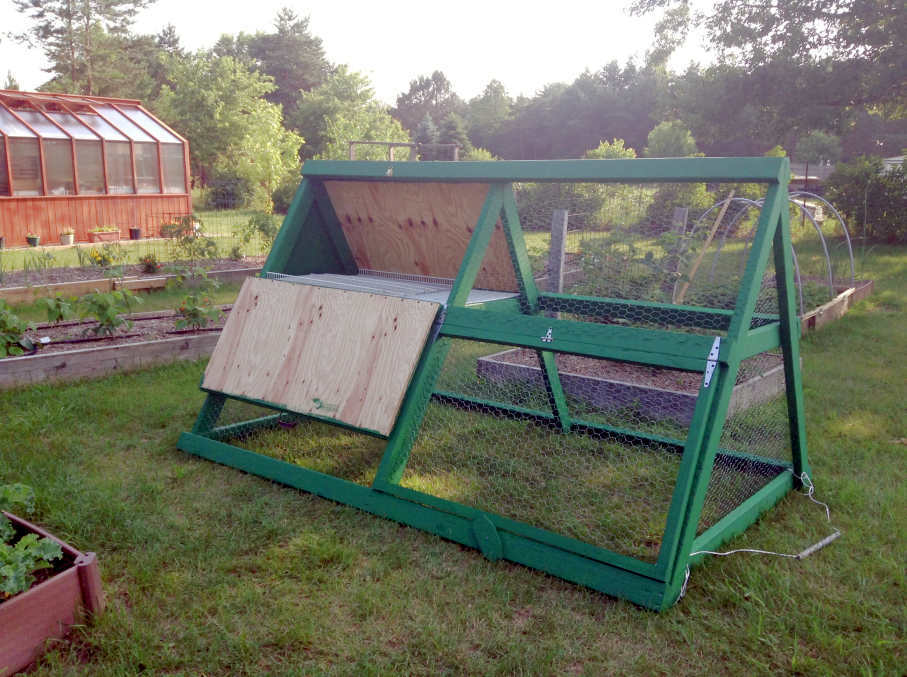
A-Frame Chicken Tractor
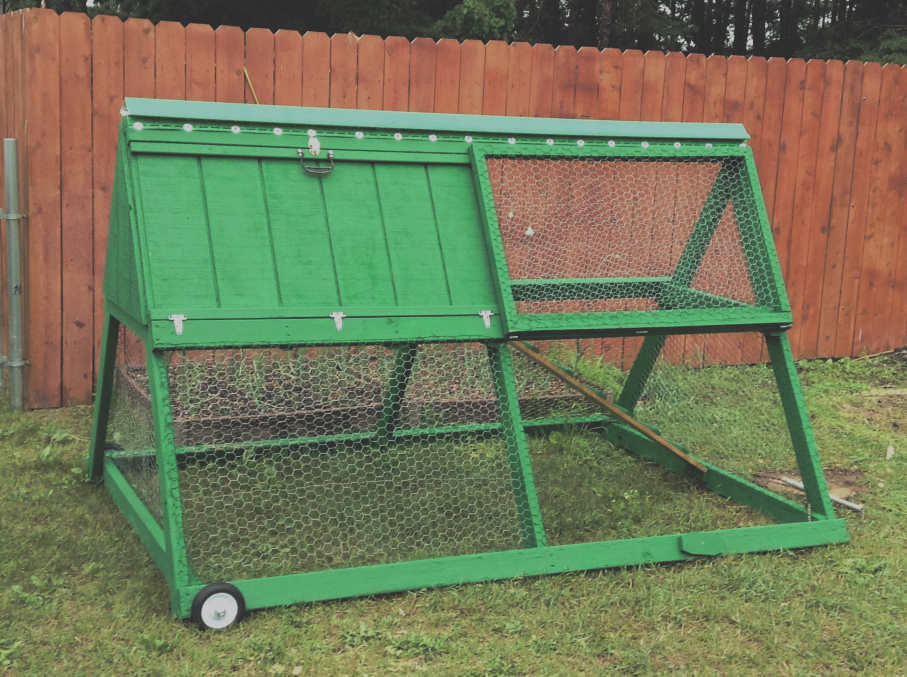
New to raising chickens, but eager to jump right in to it.
We bought a pre-made coop for the main home for our new chicks and it's very nice, not something I could do myself since I'm not yet at that level, but I saw this chicken tractor and thought it would come in handy for what I have in mind so I made up my mind to build it.
The lumber, chicken wire, staples, and wheels are all store bought new and came to about $75. The materials we had on hand were the screws, hinges, plastic coated metal shelving (used in the nesting area, I thought that would make it easy to clean), paint, and the corner piece of vinyl siding for the roof cap (hubby's brilliant idea, and I painted it green with spray paint for vinyl).
I did not try to build it quickly, I don't really know how much time it took me, but if I had to guess I'd guess total time would amount to about 3 afternoons, by myself.
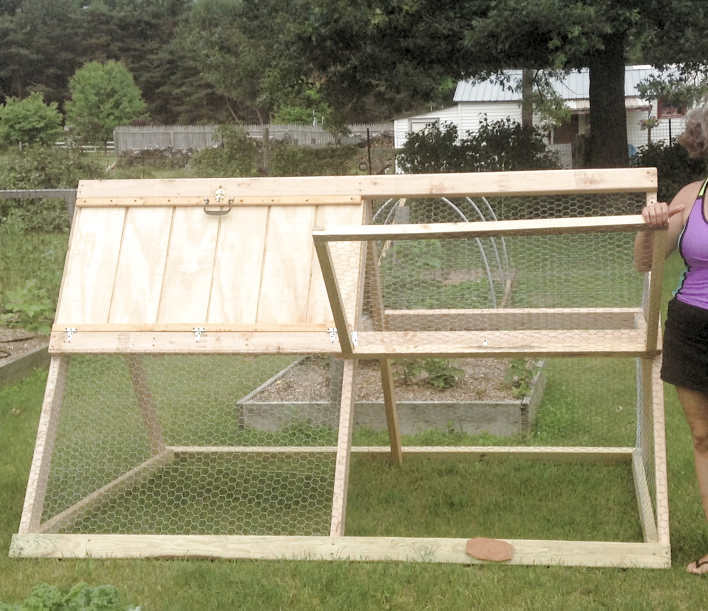
I wanted to leave the top on the one side open with the option to slap on the other boards if/when the need arises. I have the other t1-11 panels that can sit right in those areas because I stapled the chicken wire in a way that would allow it.
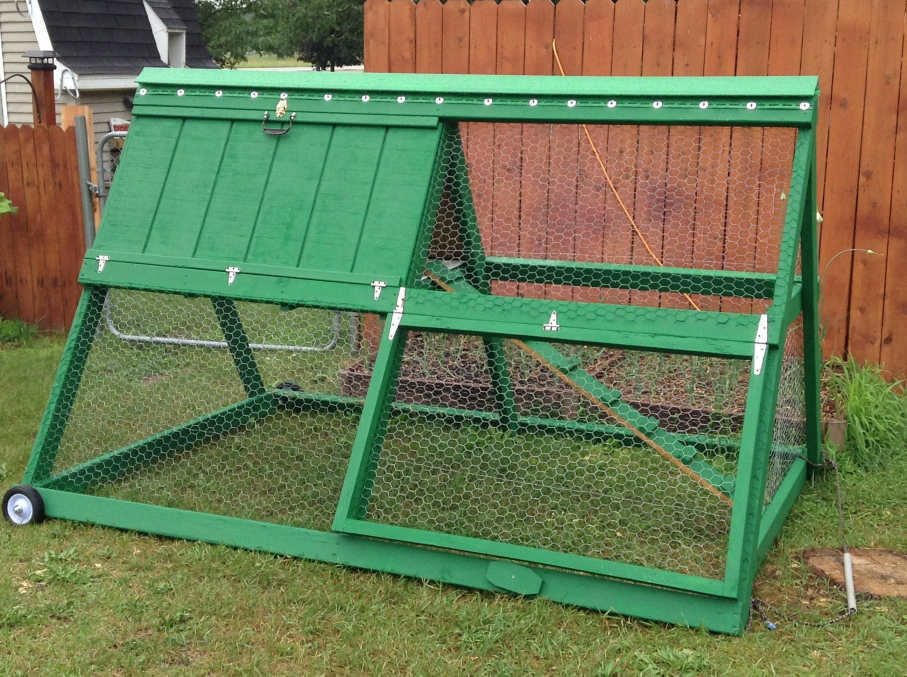
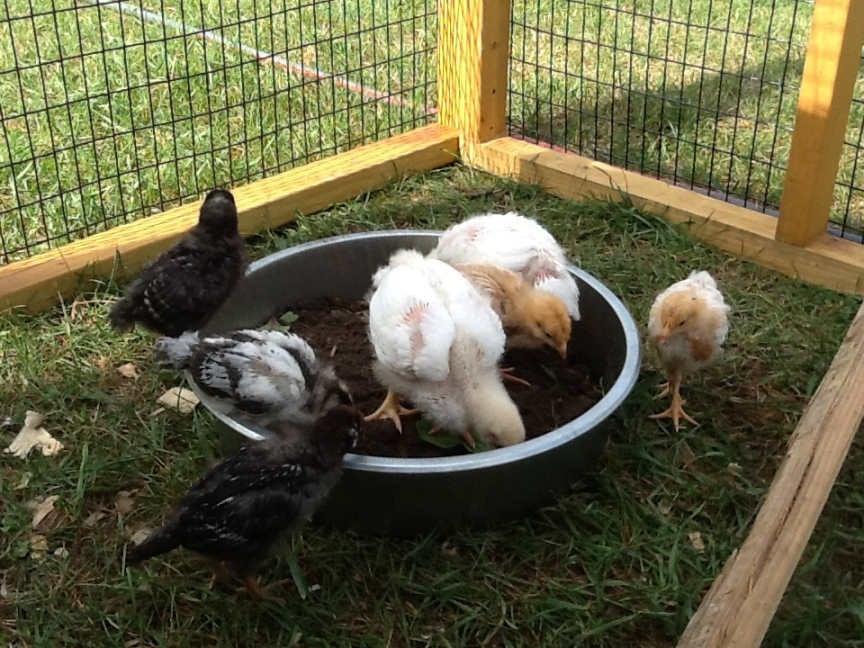
I also added a flip up panel as seen in the pictures for access. I didn't want a small door that I would have a hard time getting to things in there. I'm so glad I added this feature, it sure gives plenty of room for me to maintain the food and water dispensers as well as get in there and catch the little chickies :)
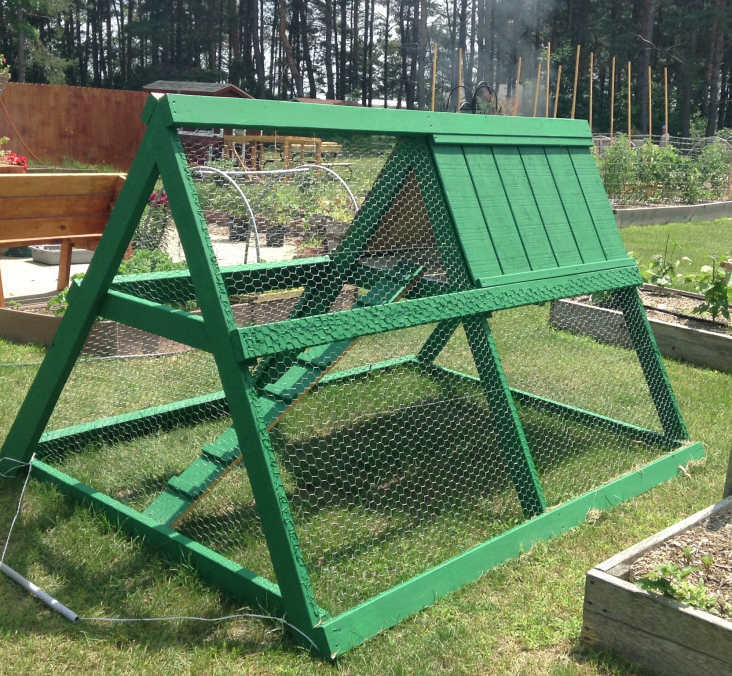
I wanted it green to blend into the wooded background in our backyard. I didn't want to take any beauty away from the cedar greenhouse and fencing we added last year, and this tractor would be moved from time to time and I felt this green that we had on hand was perfect to help it blend in rather than stand out.
This thing is heavy! I have a hard time moving it around and usually need my husband to move it so I won't hurt myself. I am considering some options... I don't like the rope I have on it to pull it, any suggestions would be appreciated.
As with the other items I've made with Ana's plans, this was fun and pretty easy to make. I love this site! Soon I will take on my next project, I've bought and gathered the materials, I'm anxious to get started :)
Thank you for looking :)
Built from Plan(s)
Estimated Cost
$75 - $85 for the new materials listed
Estimated Time Investment
Weekend Project (10-20 Hours)
Finish Used
Green exterior paint we had on hand.
Recommended Skill Level
Intermediate
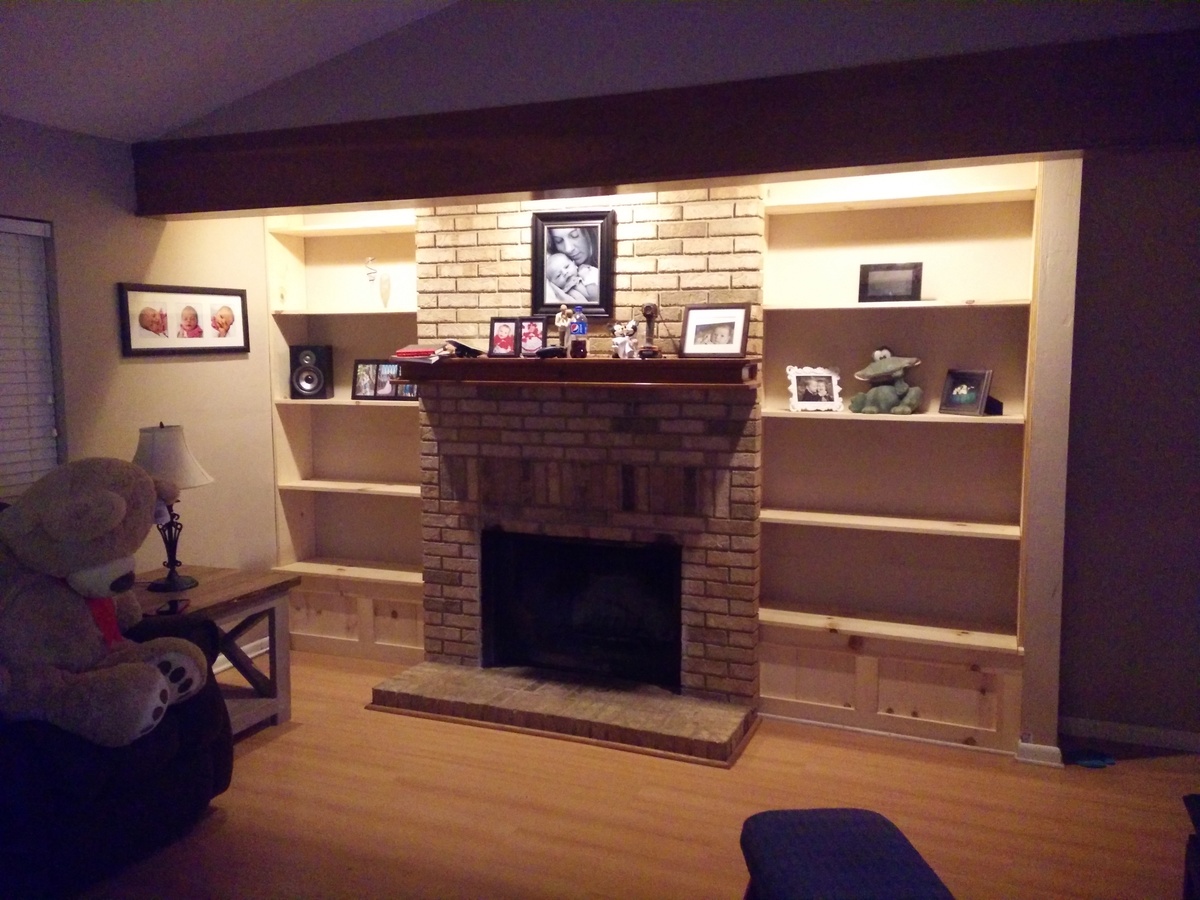
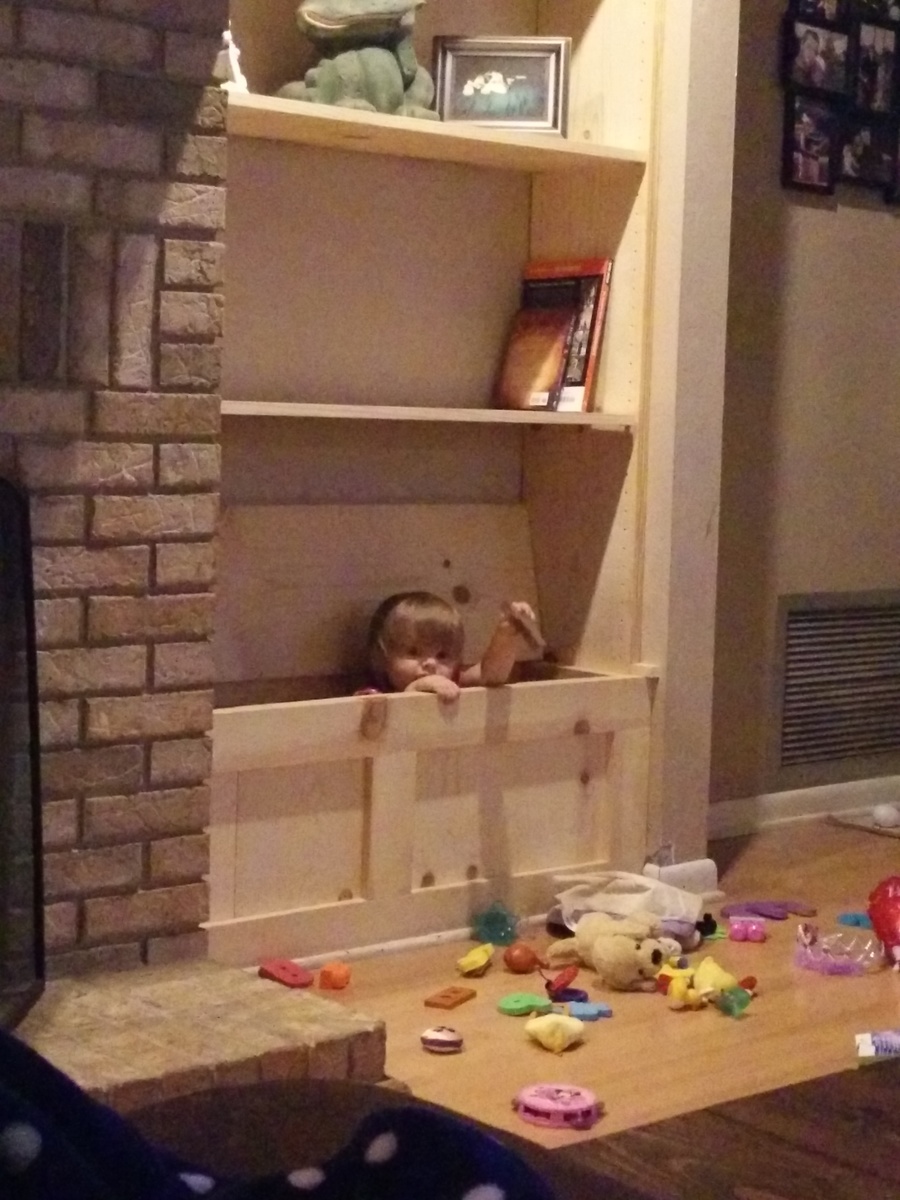
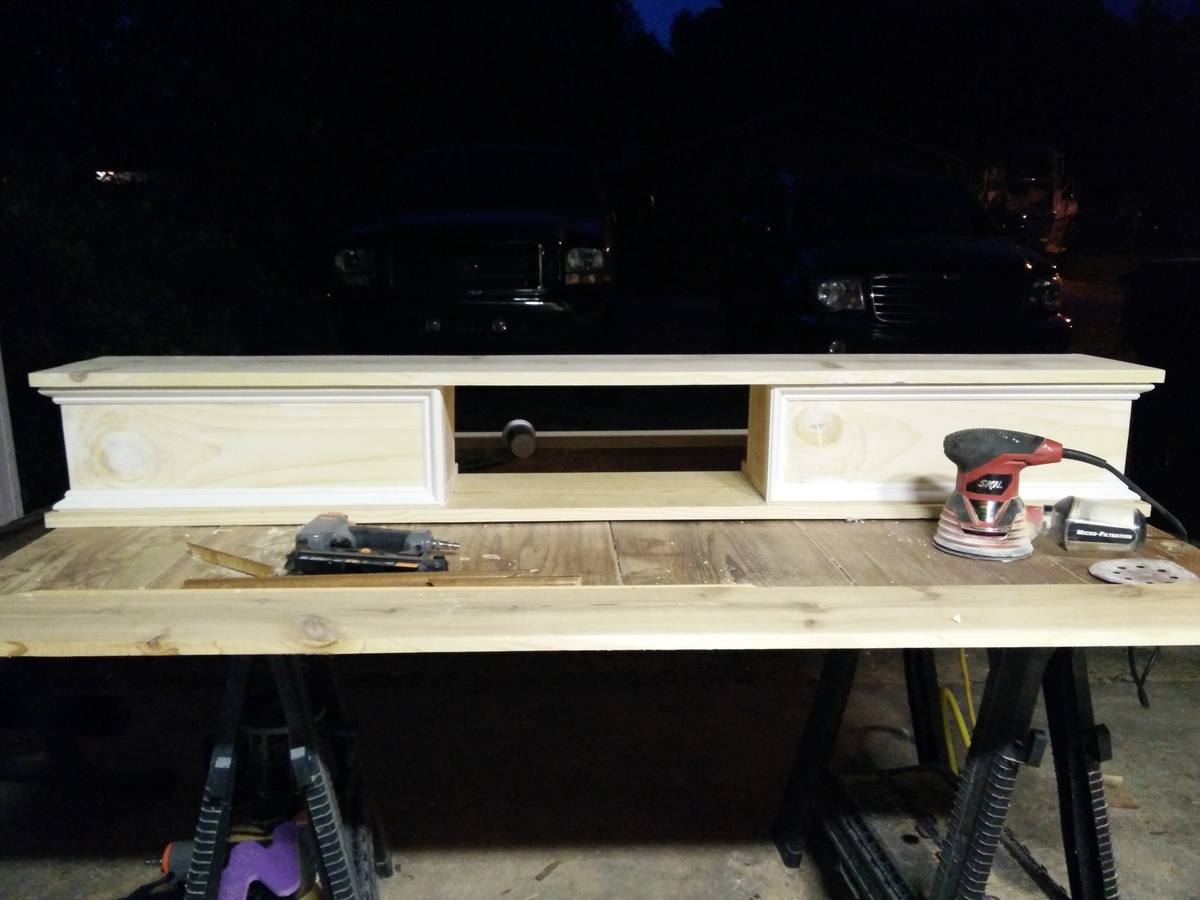
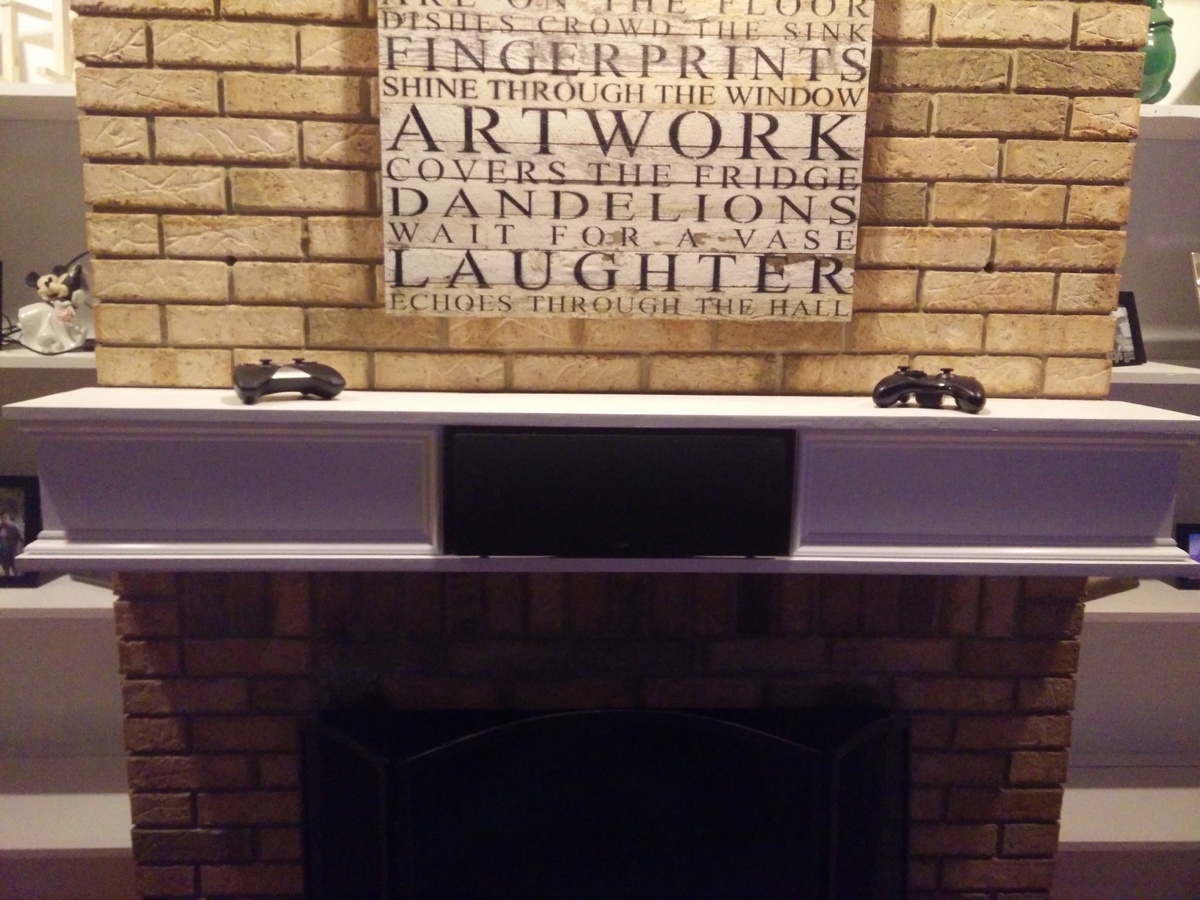
electronics geek mantle and built in's with toy boxes.
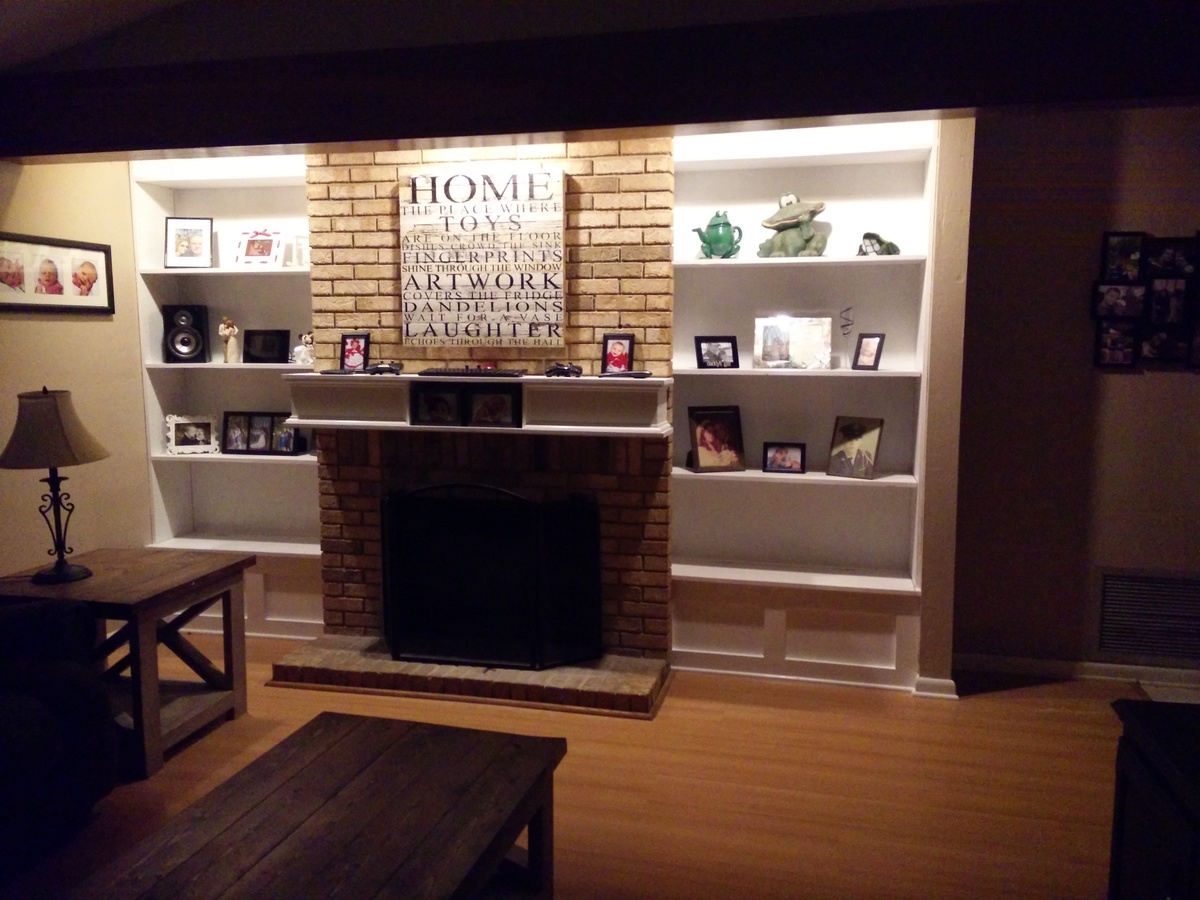
Well as any parent knows children have a lot of toys and pretty much take over every room in the house. Children also have fixation with pushing any button they see. So with that in mind I had to get creative. So one day while on break from work I walked next door to home depot (a bad and expensive place for me to work next door to) I walked by the discarded wood pile that is all 70% off like I normally do. Well to my surprise they had 20 10ft 1x12's sitting there. Some had dings and minor splits but I jumped on it and scored them all for $125.00. So when I found the time I started with building my bookcases with built in toy boxes then tore down that crappy old mantle that was up over the fireplace and got to work on a new one. We are mounting the TV over the fire place so I had to get creative and figure out (here comes my geeky side) where I was going to put my fairly large center channel speaker for my surround sound. well as you can see I just decided to build around it. I think it came out pretty cool and my little girl loves her toy boxes. I'm also happy I can now raise all my electronics out of the reach of curious little fingers.
Estimated Cost
$125.00
Estimated Time Investment
Week Long Project (20 Hours or More)
Finish Used
high gloss white latex paint
Recommended Skill Level
Intermediate
Patrick beach cottage dresser
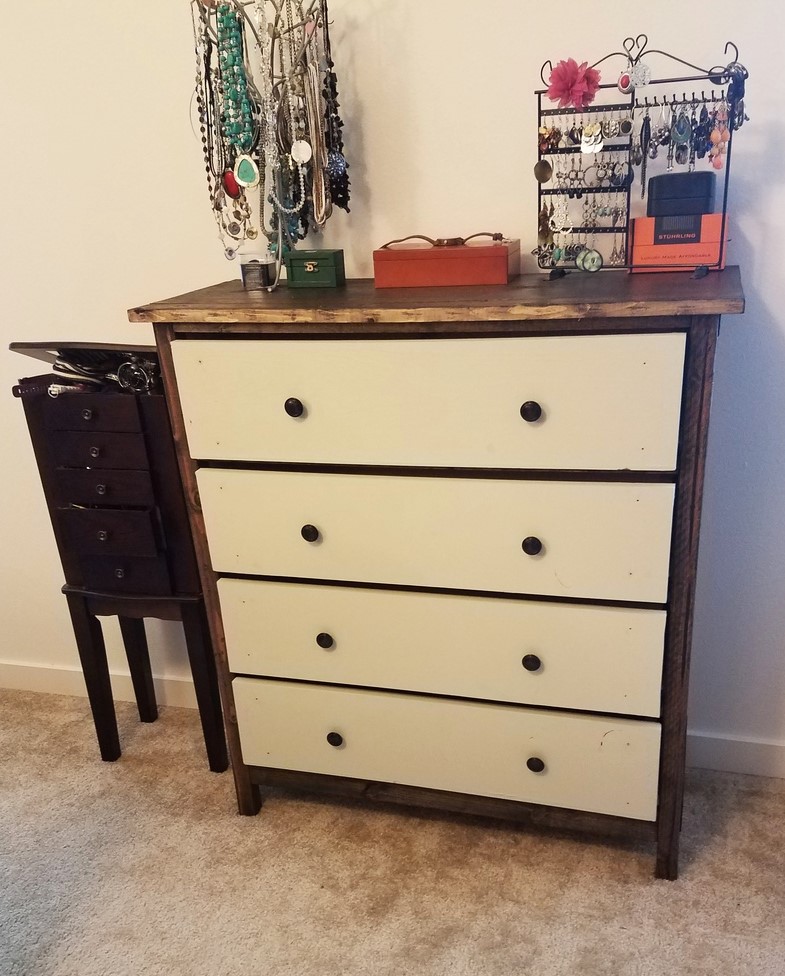
Put this together over a weekend. First time using drawer slides. They're a little finicky, just be patient.
Built from Plan(s)
Estimated Cost
150
Estimated Time Investment
Weekend Project (10-20 Hours)
Finish Used
Jacoba stain
Recommended Skill Level
Intermediate
For my Daughter's 1st Birthday
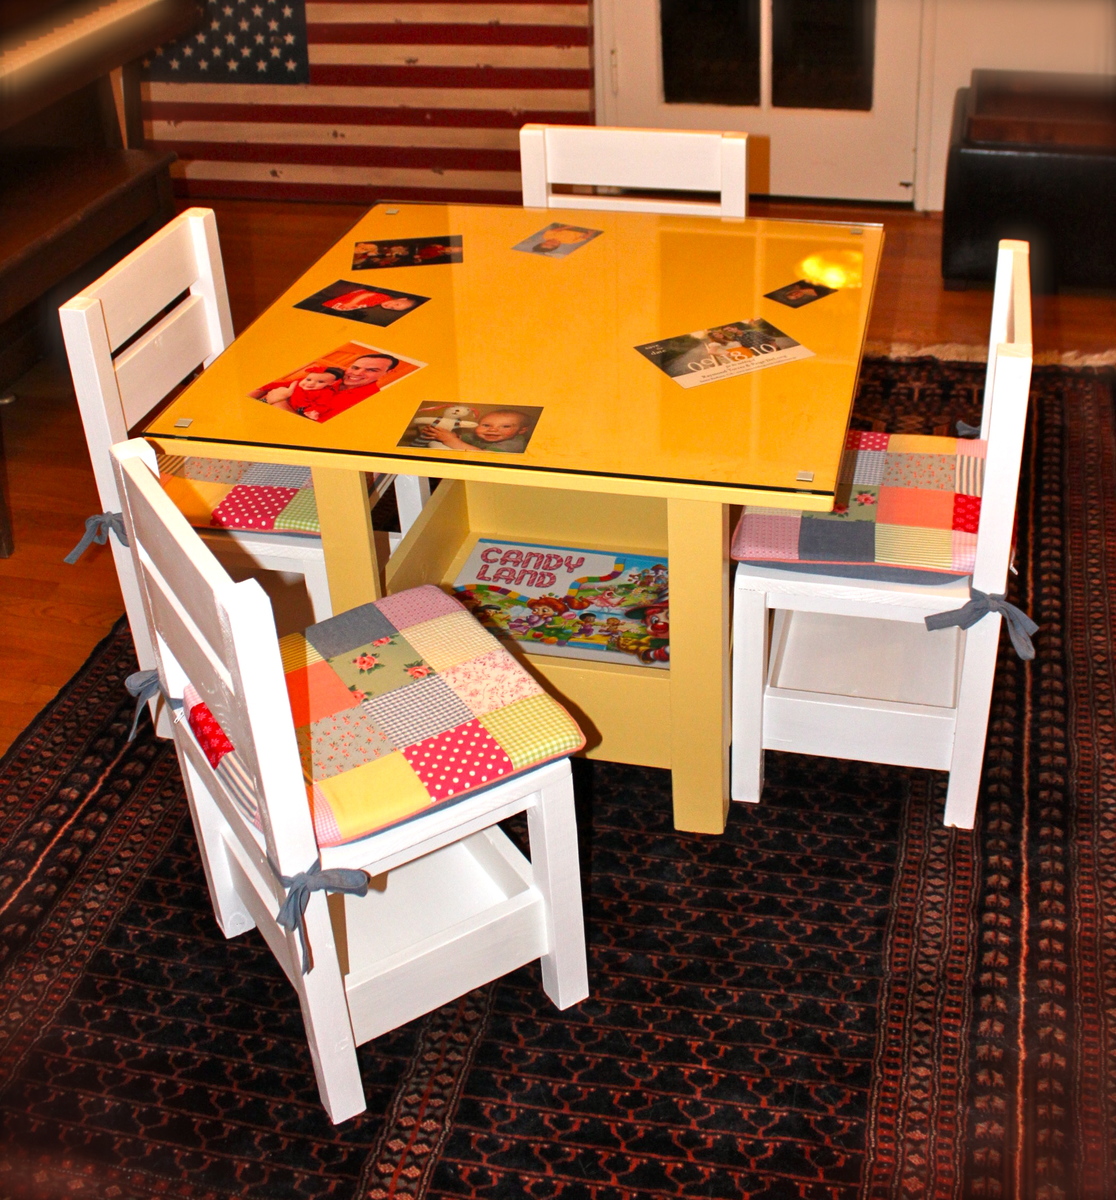
I wanted to build something for my Daughter's 1st Birthday that would last a long time. This was perfect!
Built from Plan(s)
Estimated Time Investment
Day Project (6-9 Hours)
Recommended Skill Level
Beginner
Princess Castle Loft Bed
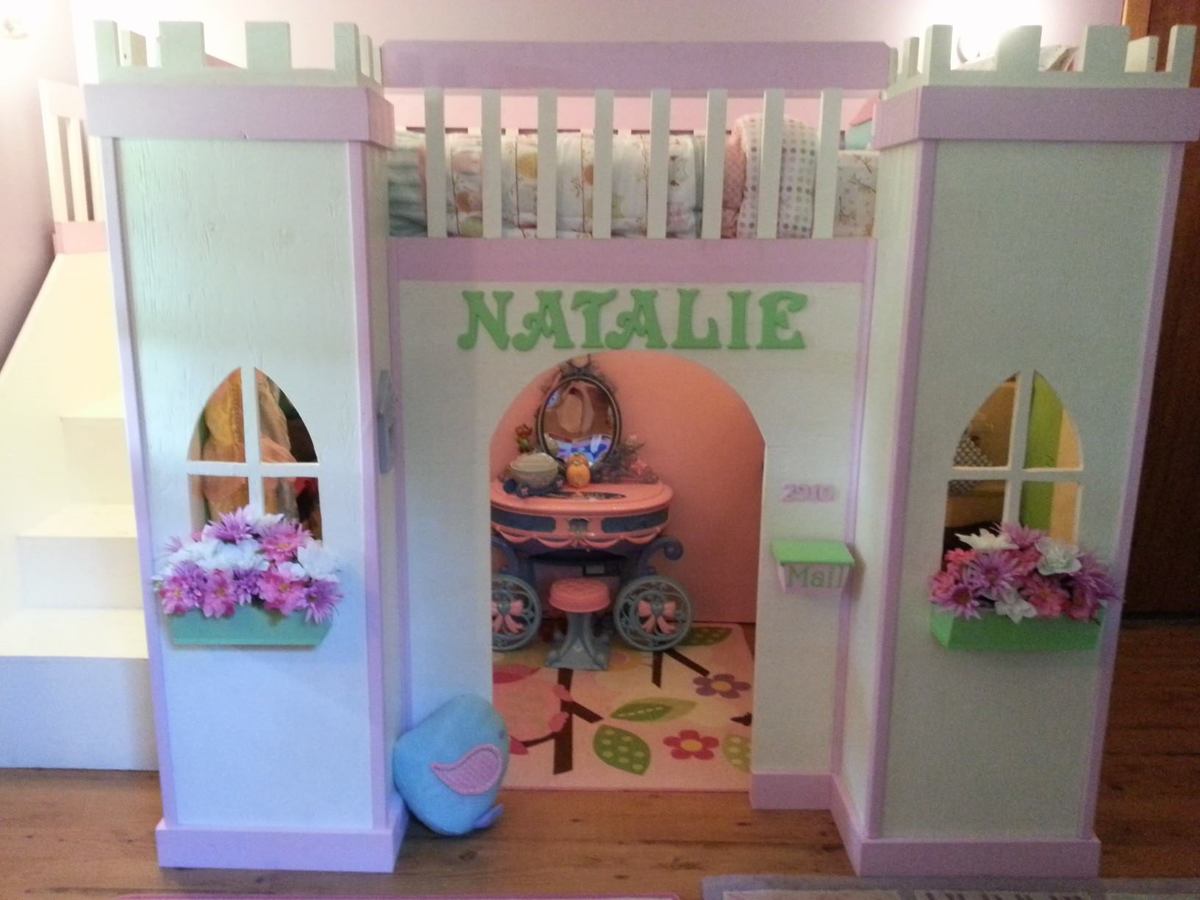
My Husband built this bed in about two weeks time (in addition to working 70+ hours at his real job). This past week I have helped with all the painting and decorating. As you can see he modified the plans to omit the slide. We hung soft white rope lights under the bed to illuminate the inside of the castle. My husband paired the rope lights with a remote control light switch so our daughter can turn them on and off safely. We are incredibly pleased with the results of our hard work as well as our sweet Natalie! Thank you Ana White for this amazing site of yours!!! My husband has also built from your site the clubhouse loft bed (PBK version) for our son, a computer desk, as well as the rustic X console table for me!!! We LOVE your site!!!! Thank you again!!!
Estimated Time Investment
Week Long Project (20 Hours or More)
Finish Used
Satin finish, paint and primer in one
Recommended Skill Level
Intermediate

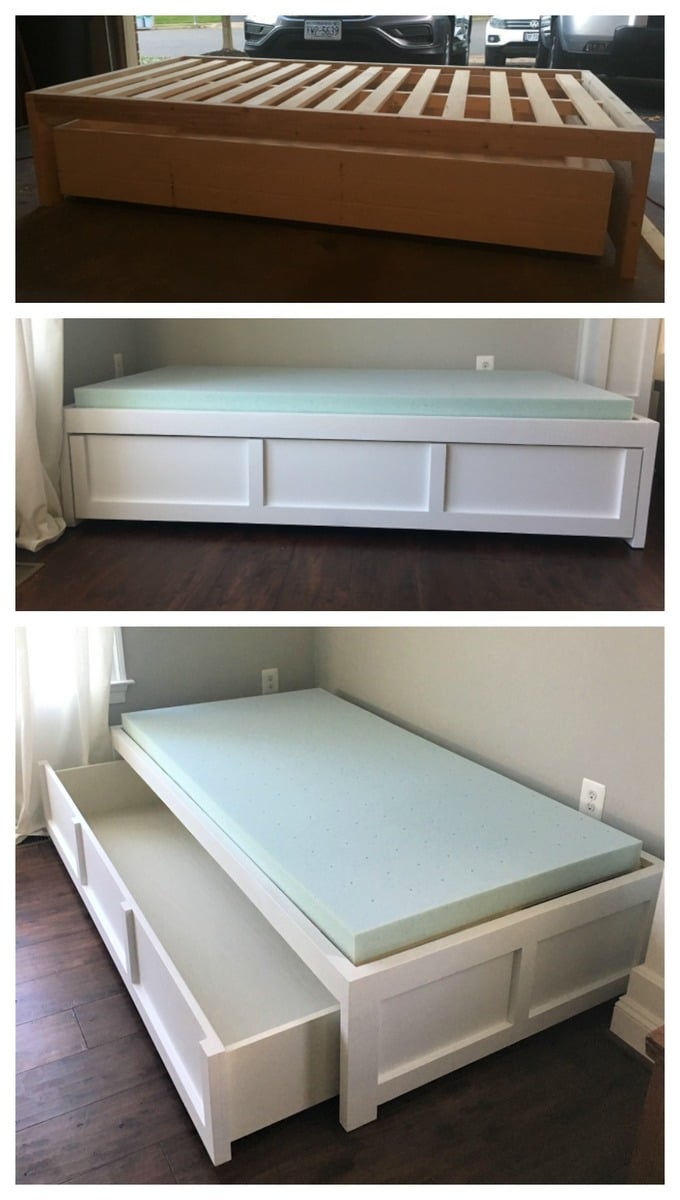
Daybed with Storage Trundle
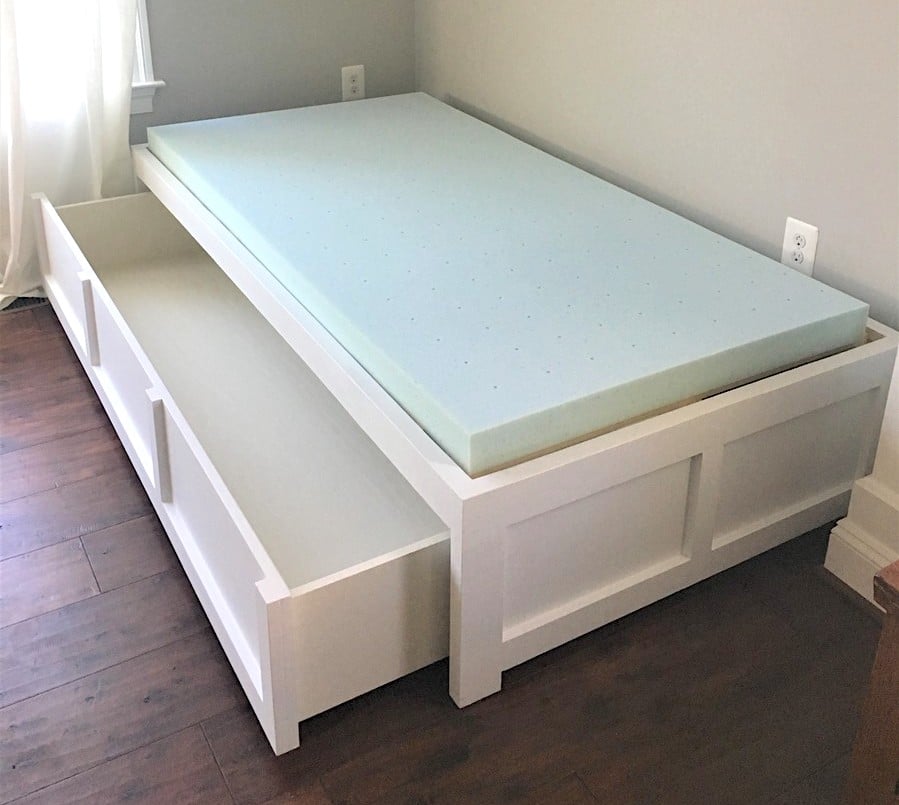
This was my first project from Ana's website and I'm hooked! I'm a beginner, but thank goodness for my Dad's help because I have a lot of learning to do!
I wanted the drawer to be 1 drawer instead of 3. I feel like it looks cleaner (without having to adjust 3 drawers constantly to make it look good when you push them in). I was thinking the bed could actually be used as a trundle bed in the future too! I use this to store toys right now and it is Awesome!
I increased the bed size to fit a twin mattress and increased the height of the bed slightly so that the drawer would be a little bit deeper. We also added a back to the bed and carried around the trim to make all sides look the same. We added a bumper to the back and sides of the inside of the bed so the drawer is easy to push in and fits in snug. Finally we reinforced the bottom of the drawer with more 1x4 boards so that if a child does sleep in it, it would be more sturdy. I now have kids come over and jump into the drawer (literally) and I'm glad we reinforced it.
The changes we made did add to the cost and our time (as well as being newbies), but I think it's worth it and the bed turned out beautiful!


Built from Plan(s)
Estimated Cost
$180
Estimated Time Investment
Weekend Project (10-20 Hours)
Finish Used
Behr Marquee (I'll have to find the name of the white color we used). We almost went with chalk paint, but after talking to the HD guy, he talked me into this paint and I'm glad we used it! So much cheaper and turned out beautiful.
Recommended Skill Level
Beginner
Comments
Sat, 01/15/2022 - 08:02
Any chance you have your cut…
Any chance you have your cut list for this? Will the trundle storage drawer fit a twin mattress in it? Also, you say you increased the bed size to a twin, was the original not a twin too?
Michael Collection Bookcase Unit

Couldn't wait to show it off, I'll post another picture when I have it in the room! This goes with the Michael Collection twin platform bed. The open area you see will be covered by the bed. Its a bit dusty still and the top isn't completely finished but I'm so excited how it has turned out!
Built from Plan(s)
Estimated Cost
$75.00
Estimated Time Investment
Week Long Project (20 Hours or More)
Finish Used
Minwax Red Mahogony and Minwax Clear Satin Wipe on Poly
Recommended Skill Level
Intermediate
Sturdy Workbench Modified
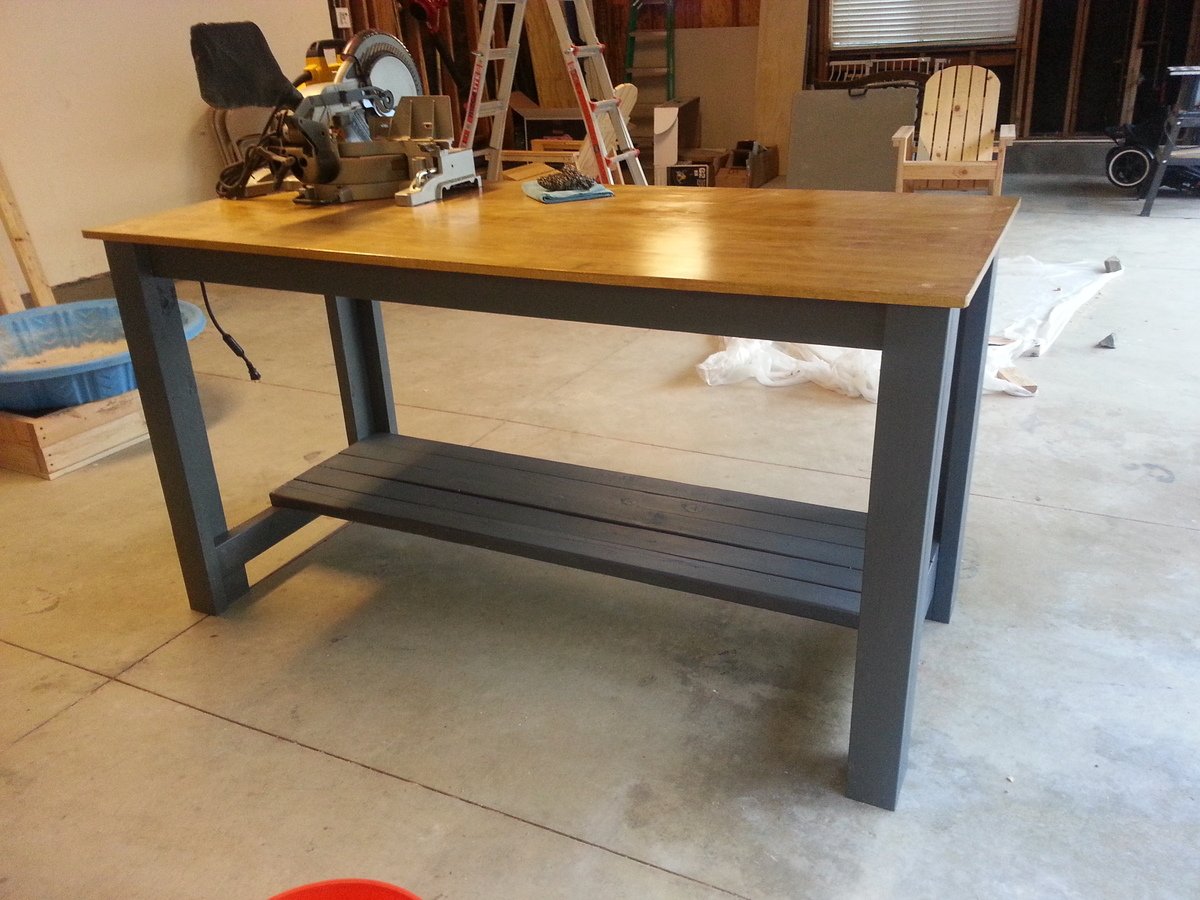
This is a modified version of the sturdy workbench. I made it six feet long, about three feet wide (I can't remember exactly), and 36'' high. Since I'm 6'2'', I needed a bench that didn't keep me constantly bending over.
I used Douglas Fir framing lumber and 3/4'' plywood for the surface. The plywood was a cheap replaceable option since hardwood is extremely expensive in my area. The wood warped a bit after I built it, so its clearly not perfect. But who cares, its a workbench after all...
I used left over paint / stain I had laying around in the garage. The gray is a custom mix interior paint, and the stain is Minwax Golden Oak. I used 1 coat of stain, and three coats of Poly.
Built from Plan(s)
Estimated Cost
$100
Estimated Time Investment
Afternoon Project (3-6 Hours)
Finish Used
Minwax golden oak 1x, conditioner 1x, and poly 3x.
Recommended Skill Level
Starter Project
Comments

Sun, 07/14/2013 - 20:31
Gray and Golden Oak
Looks great. :) I like the gray and golden oak together; two neutrals I would not have thought to pair.
In reply to Gray and Golden Oak by yurra-bazain
Mon, 07/29/2013 - 21:11
Thanks! It definitely stands
Thanks! It definitely stands out in the garage...
Comments
Ana White Admin
Tue, 12/28/2021 - 11:25
Great little tree!
Love the finish choice, way to go!