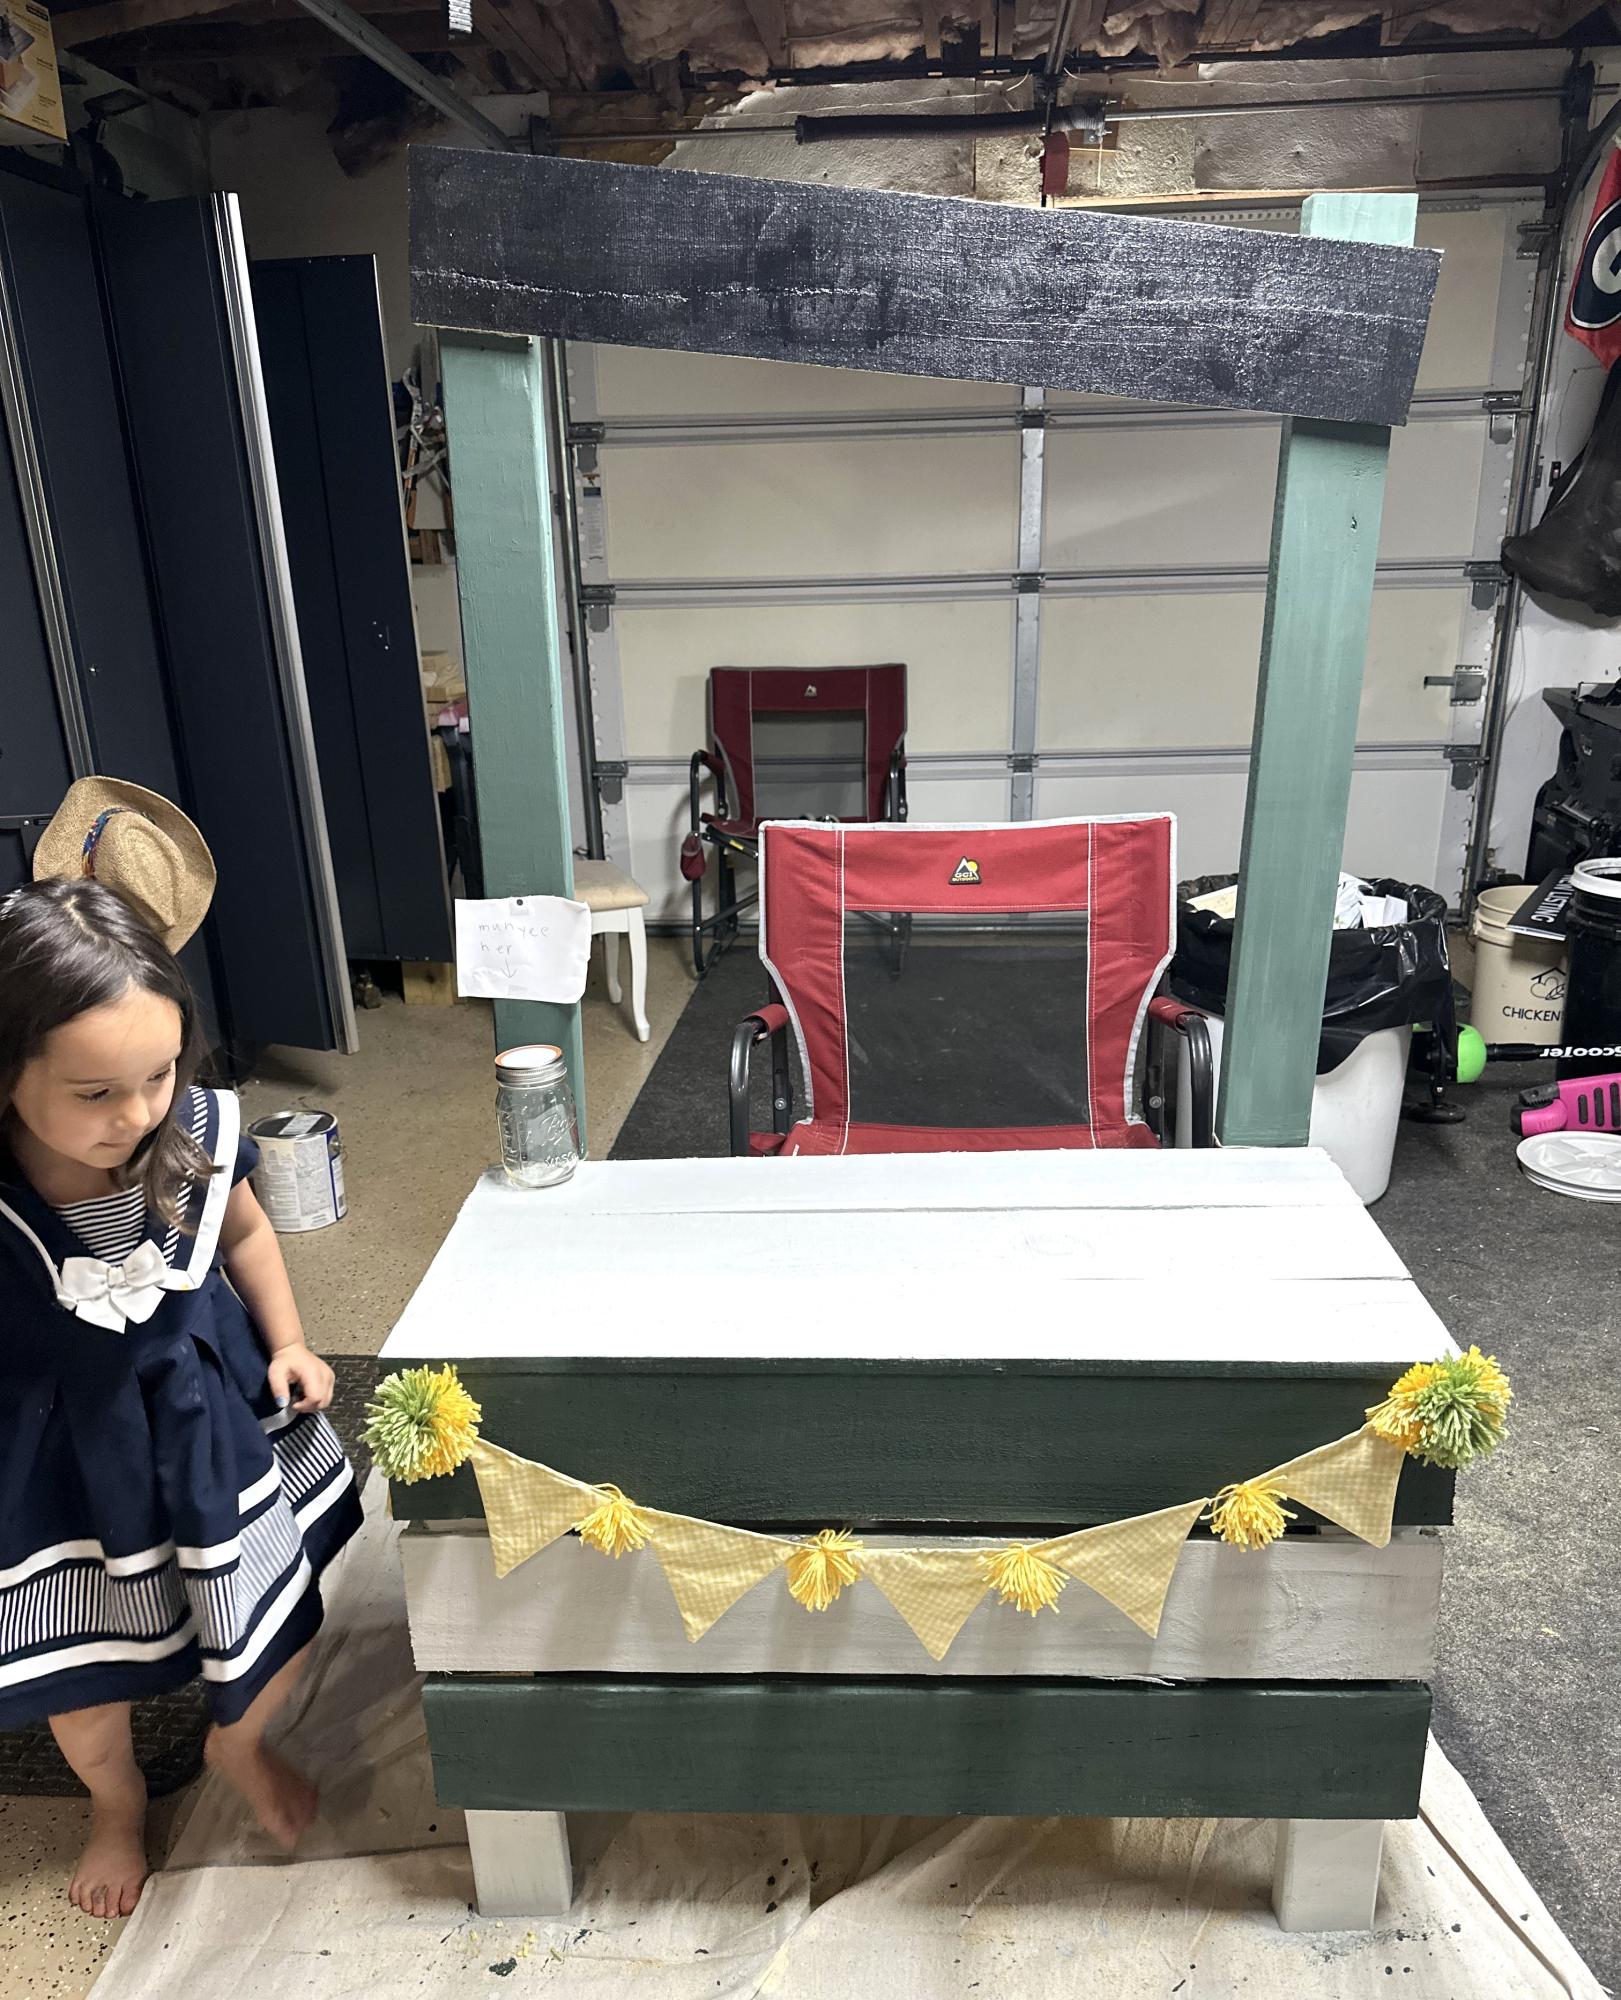
2 Hour Lemonade Stand
Two hours and done!
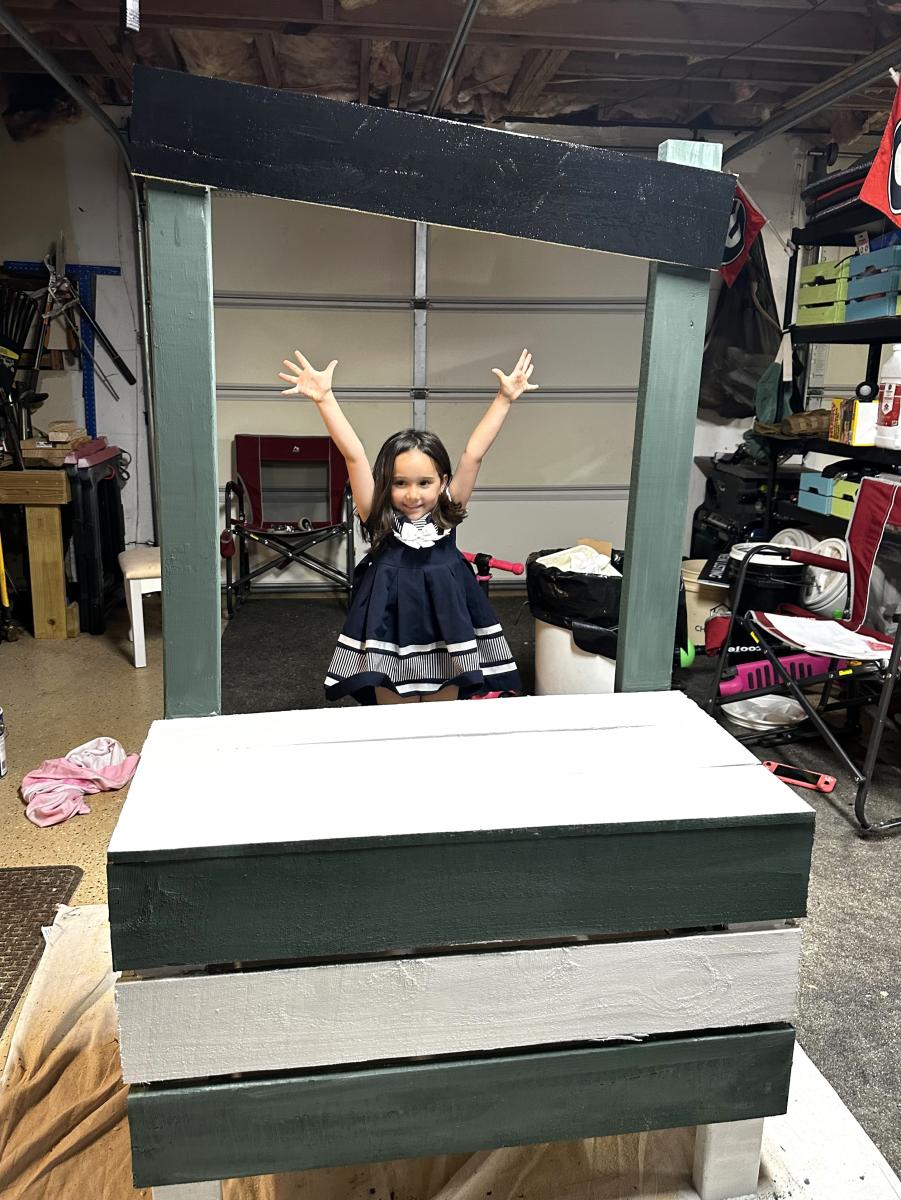
Built from Plan(s)
Two hours and done!

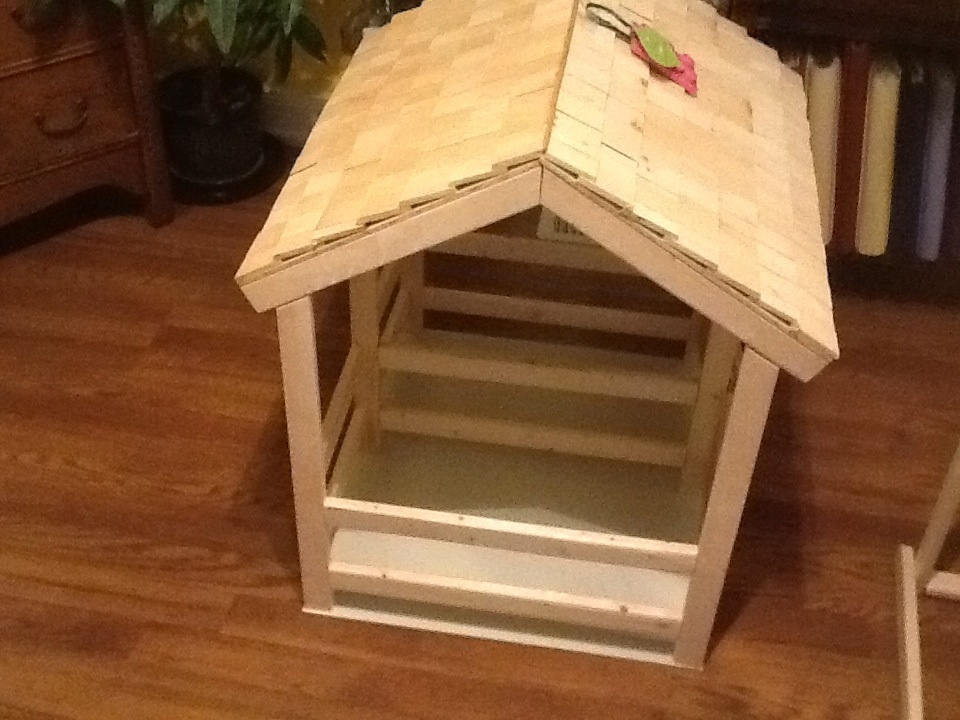
This was an upgrade from the Ana's project on the stable. I made the shingles from cut thin strips of wood nailed to a 1/4" roof with a pin nailer.

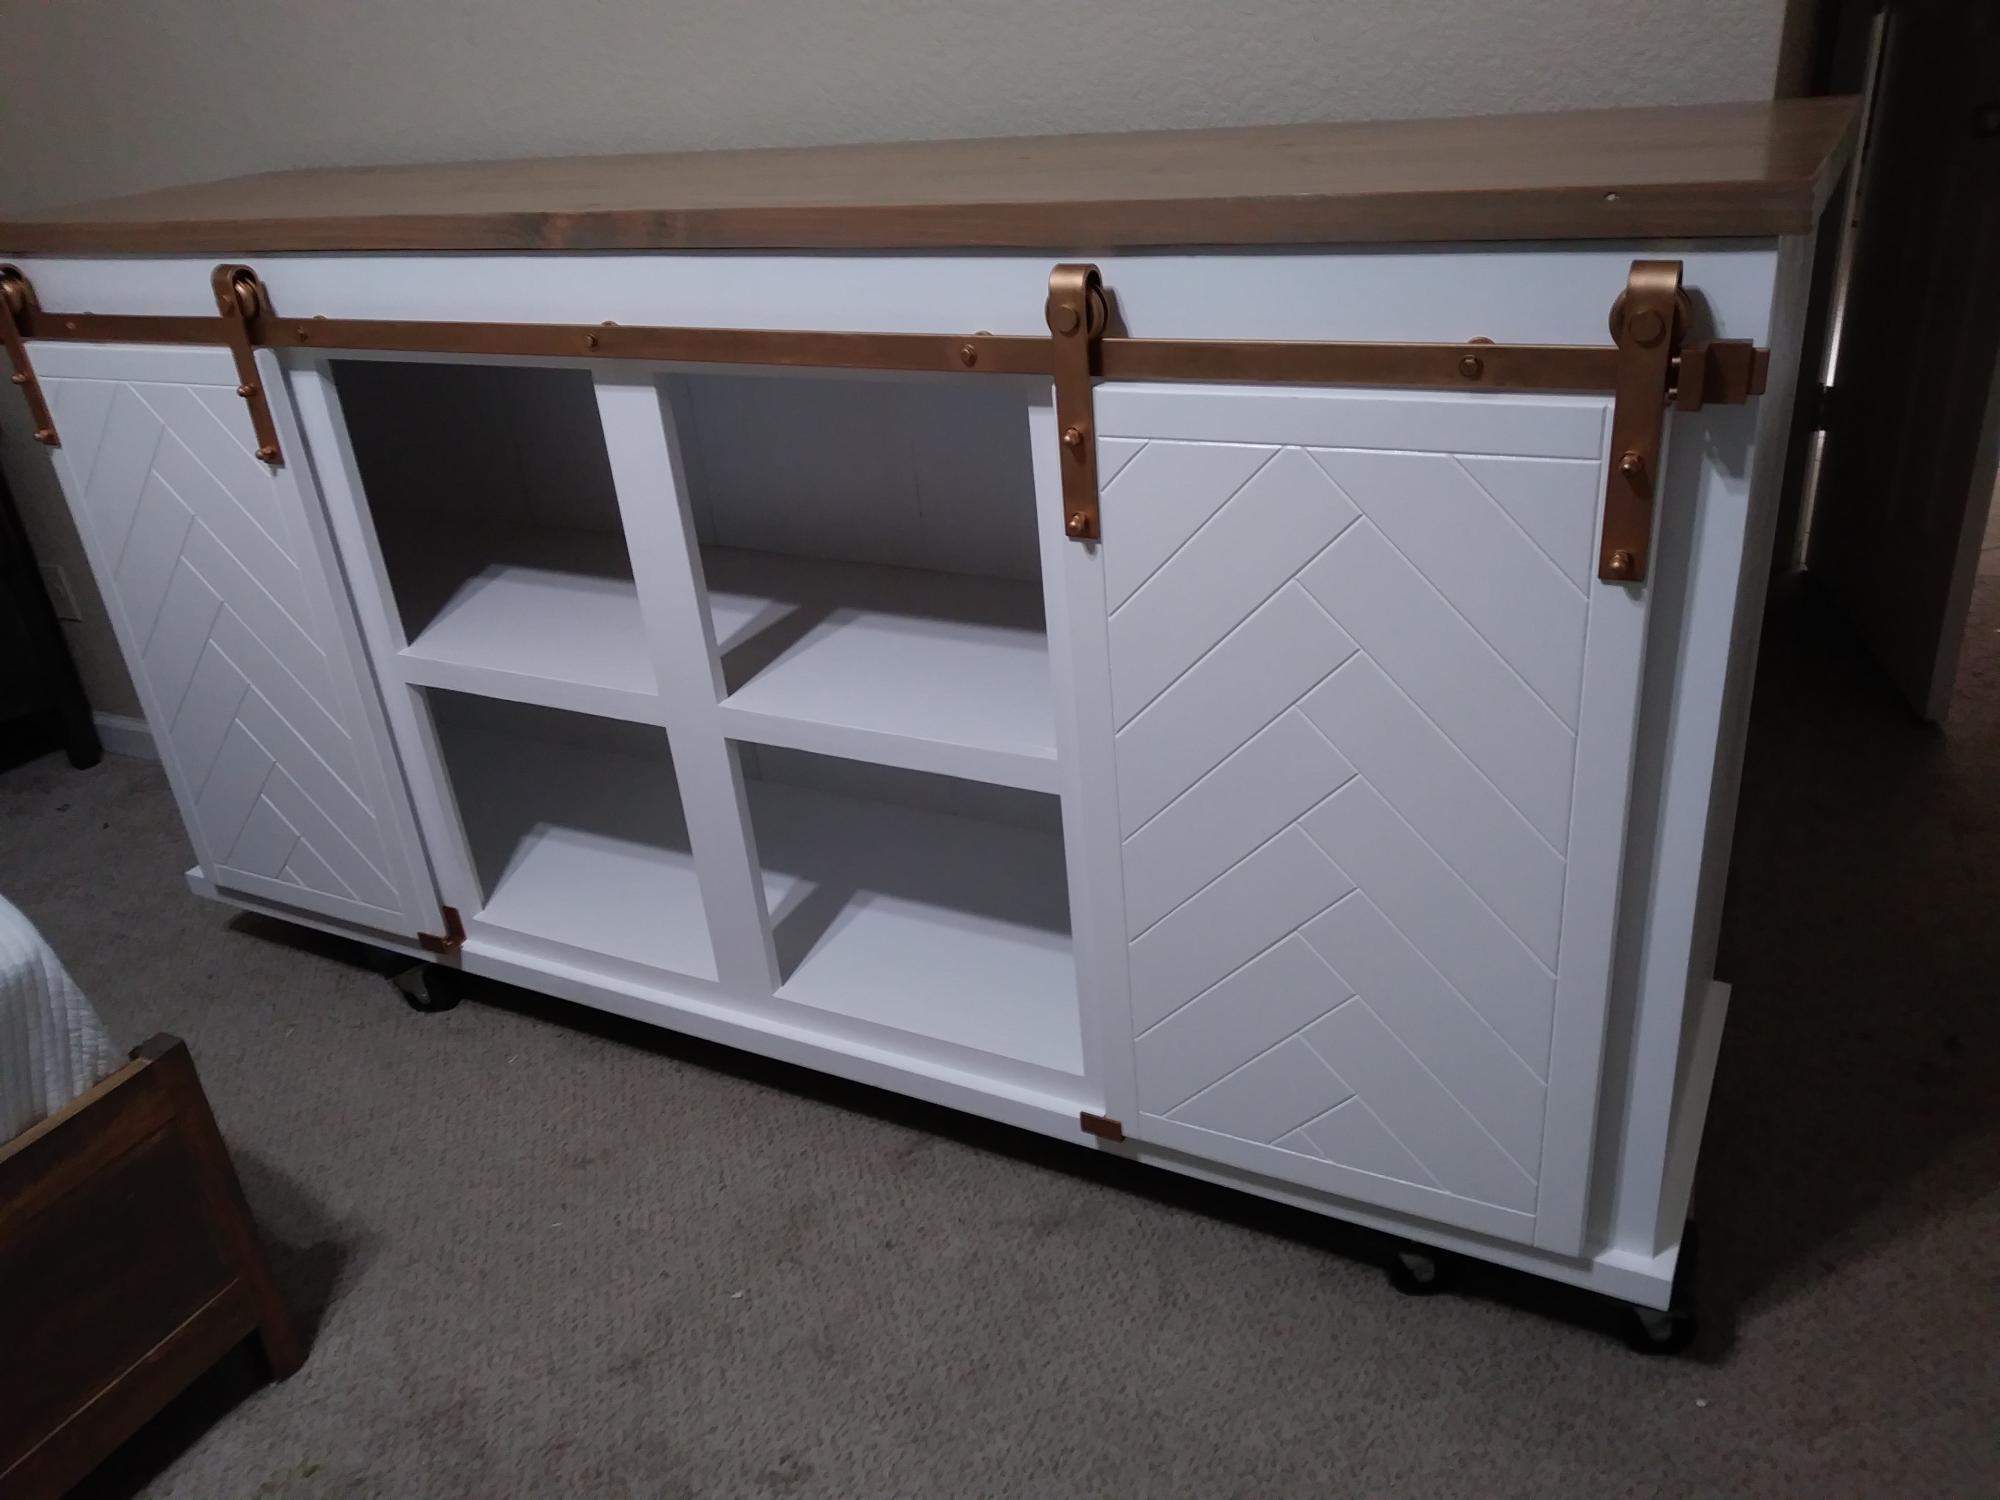
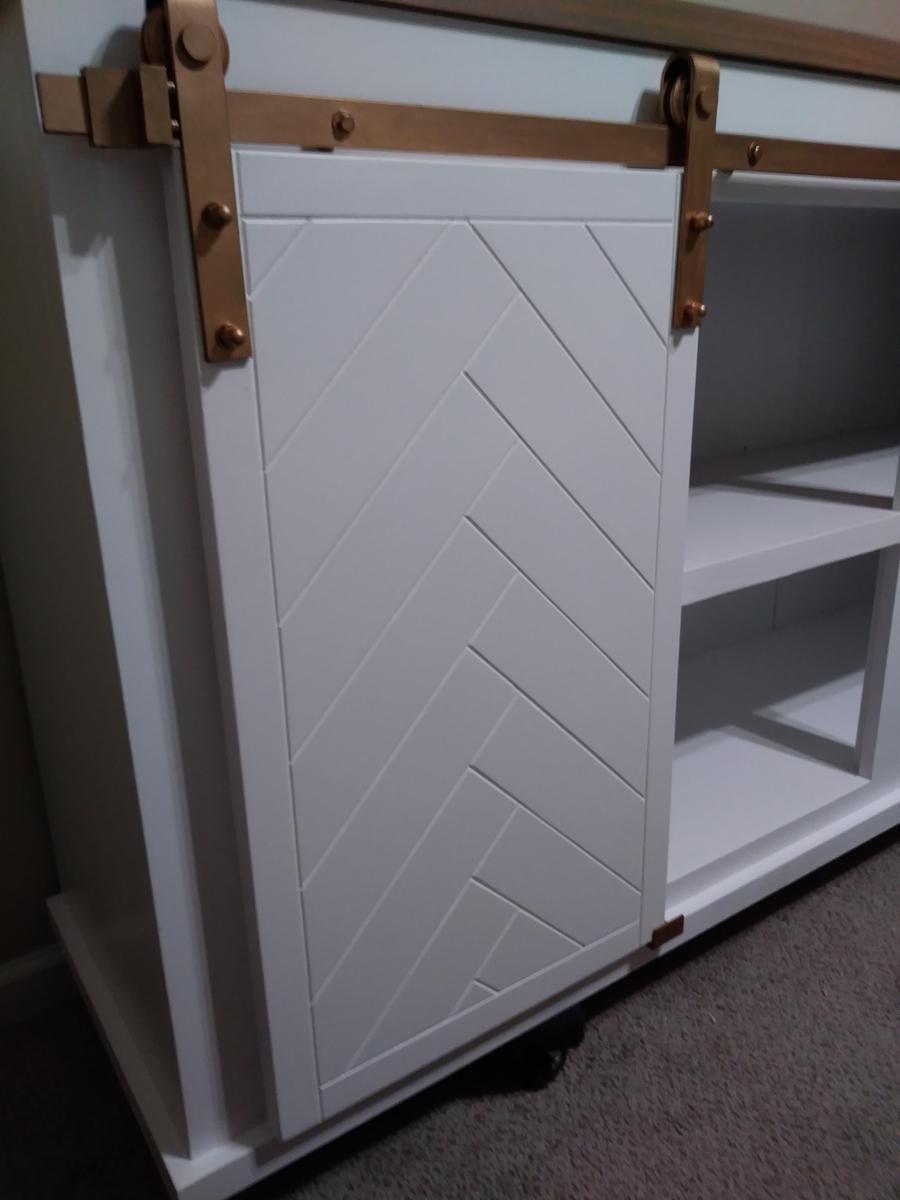
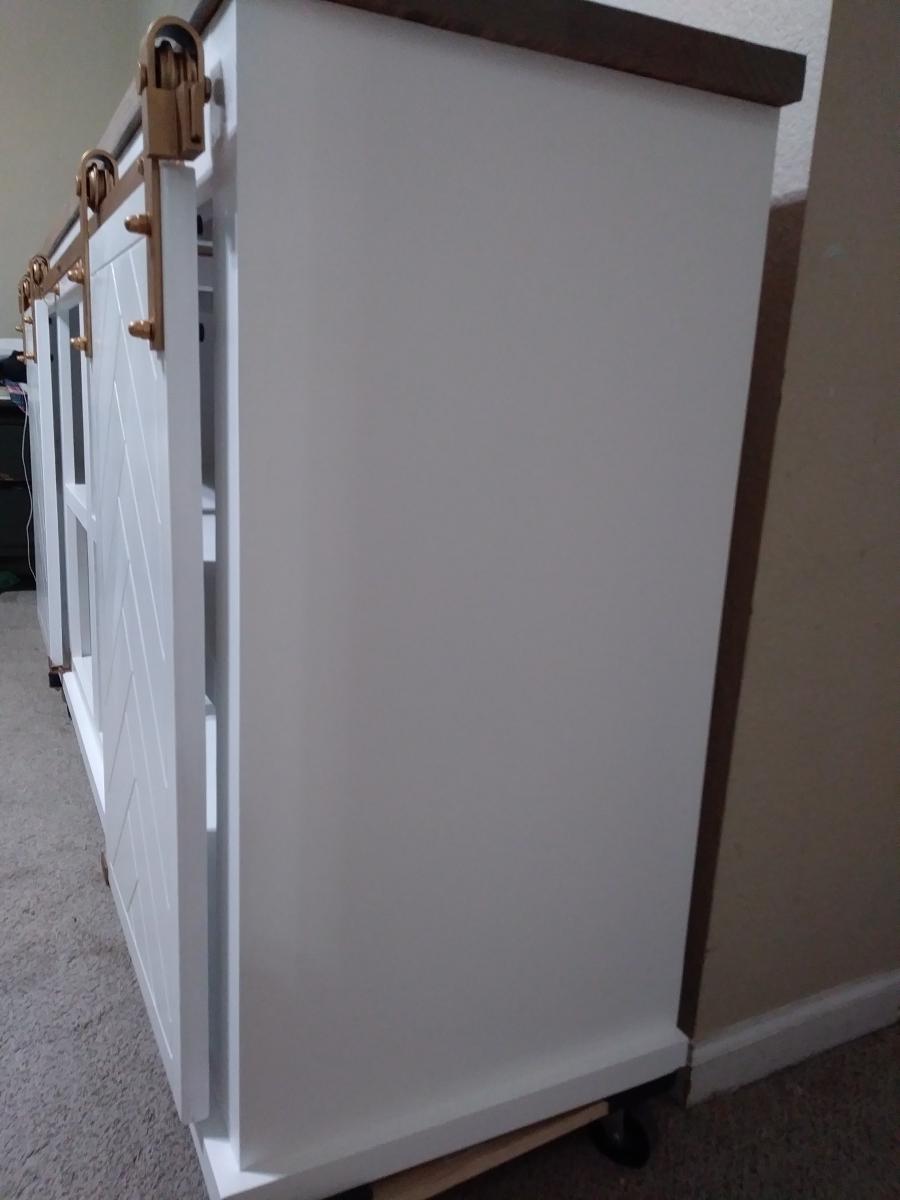
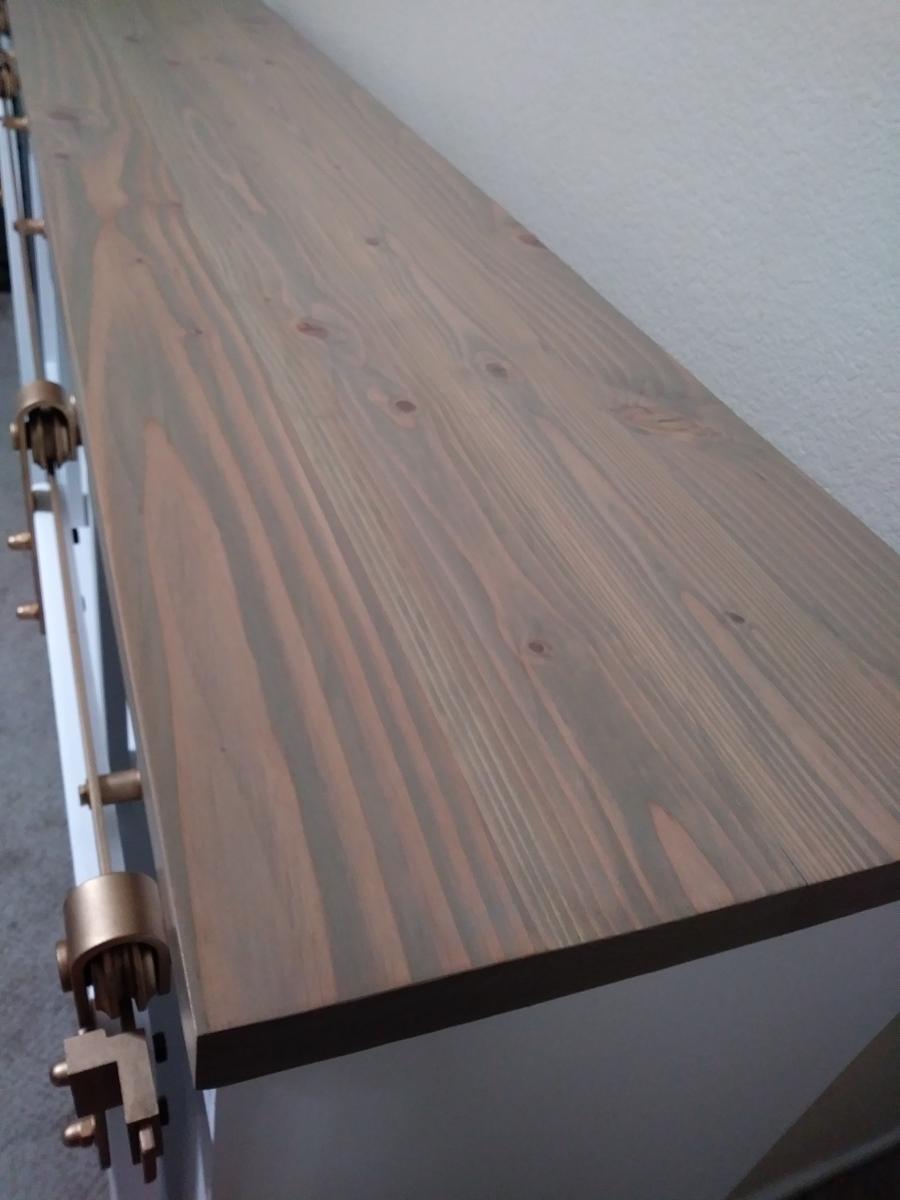
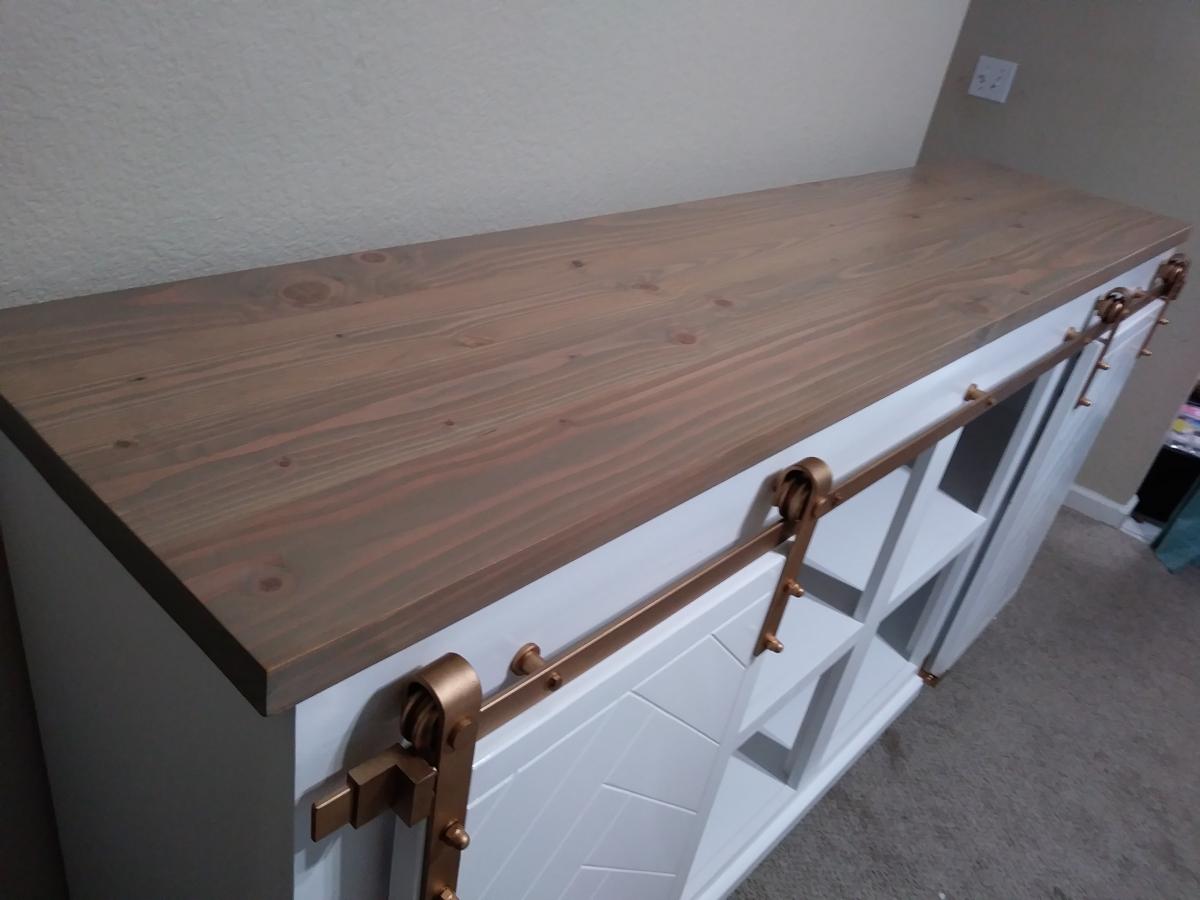
This console was made with herringbone doors and gold hardware. Everyone who sees it wants me to make them one :)

I’m no carpenter but this went well. I did it all with pressure treated because it is in the open. They filled in the area where there used be a hot tub. Surprisingly comfortable, too. Thanks Ana
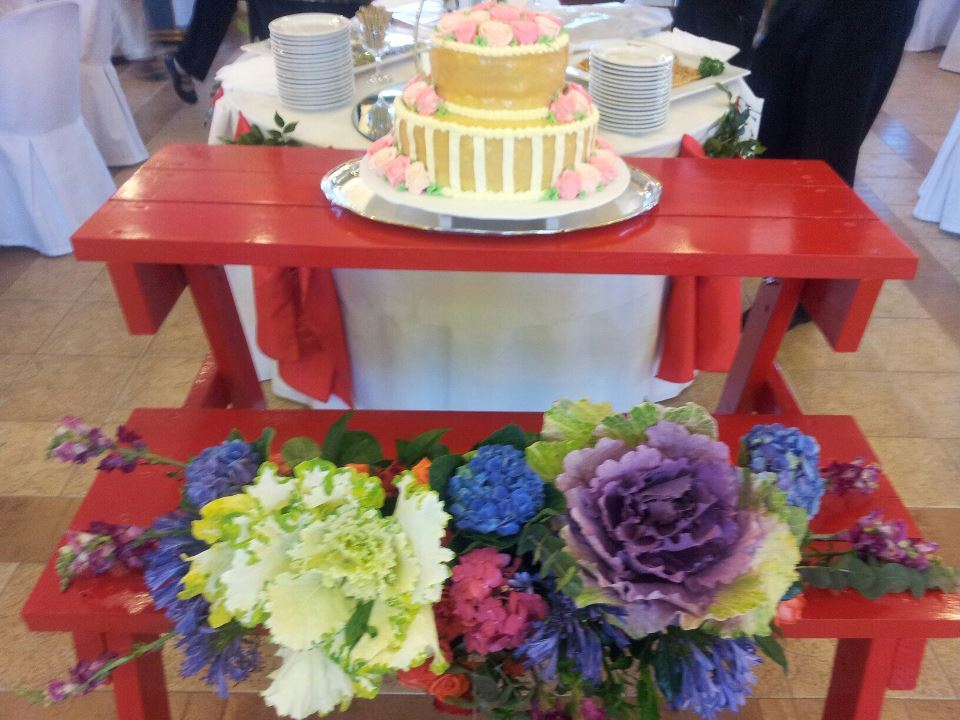
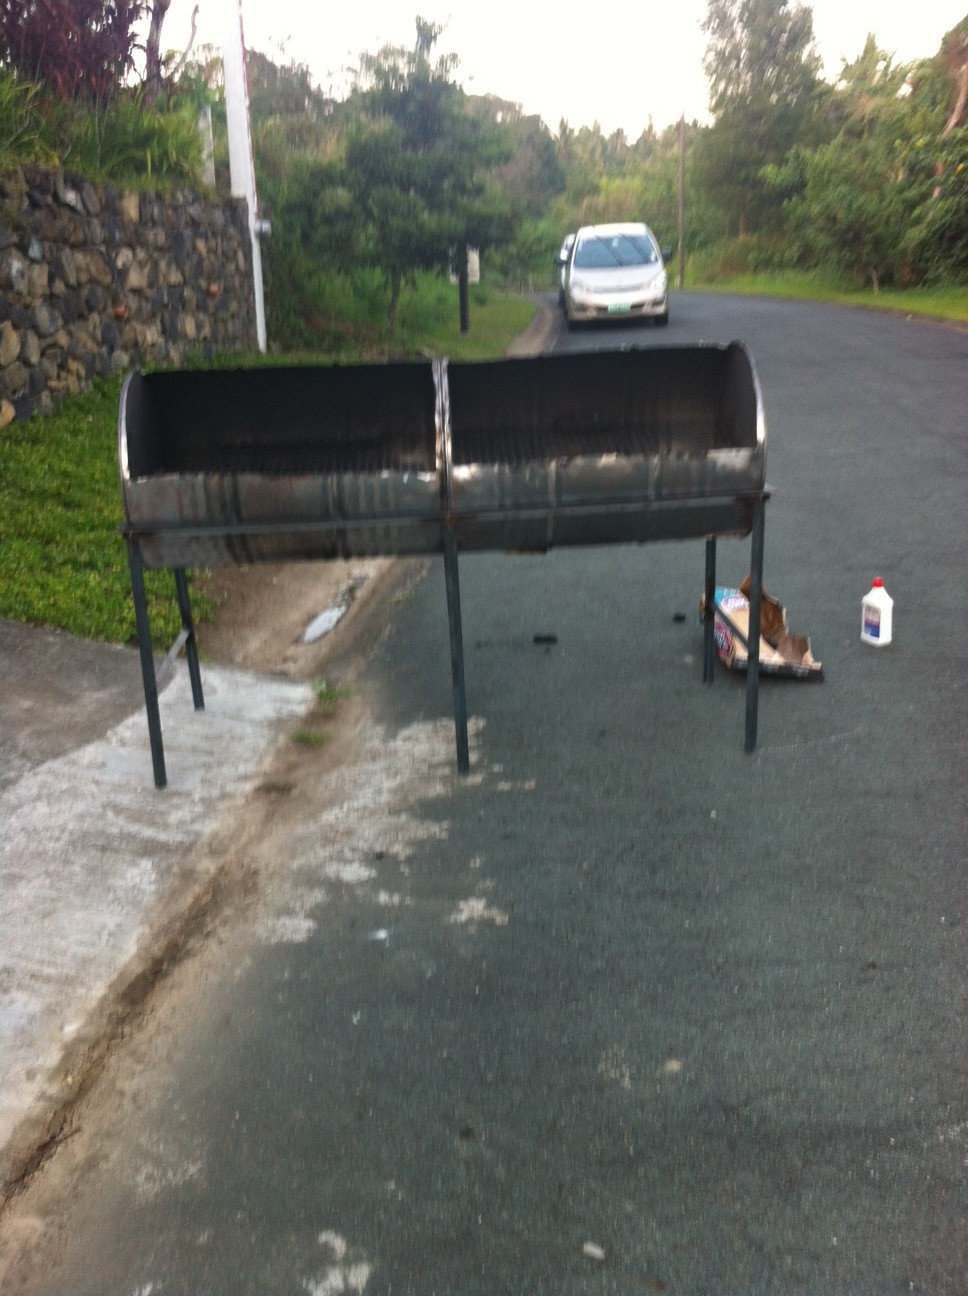
**The second pic is of the grill I built for our wedding. It was done in about 4 hours with NO plans, and a whole lot of on-the-spot thinking. All while precooking 120 lbs pork butt, 200 ribs, baked beans & whatever else that oven pushed through that day. I look forward to one day having the time to draw out the plans, and throw them up here :D **
Hey! It's been a while since I've posted anything with so much going on, but I thought I'd share a photo of a project I finished a while back. These were actually built as a gift for my in-laws to thank them for organizing our wedding. They were thrilled, and decided to incorporate the benches into the reception. As of late, I've been remodeling one living unit, one office, and one new studio & on top of that, getting married. I'm sure you can see how uploading something as simple as a photo is a chore in itself. Nonetheless, here is the finished project.
I changed a few things from the original plans; The biggest being the holes that convert from picnic table to bench. I realize not everyone is the same height, body shape, etc, so I took this into account. I actually have an additional hole on each side. One to pivot the table, one to lock it in as a bench, one to lock it in as a table, and one extra bench hole for those who prefer more of a decline/incline position. It all turned out great & works perfect for either bench or table. Very sturdy, and nothing but compliments. As a matter of fact, people asking over and over again where I bought it & for how much :D The reason I put 10-20 hours is due to the paint. I used three coats because, even though I used plenty of primer, pine just loves to soak it up. I also wanted to make sure every bit of it would be covered as much as possible for the weather conditions outside. It turned out having a rubbery coating feel to it, much like those of galvanized benches dipped in paint. Overall, very pleased with the outcome.
Cheers for the plans!

Wed, 02/22/2012 - 18:48
Congratulations on your marriage!
I love the red paint on the picnic table/benches. The grills remind me of growing up in Miami and having roast pig that was cooked in those huge steel barrels.
Wed, 02/22/2012 - 18:48
Congratulations on your marriage!
I love the red paint on the picnic table/benches. The grills remind me of growing up in Miami and having roast pig that was cooked in those huge steel barrels.

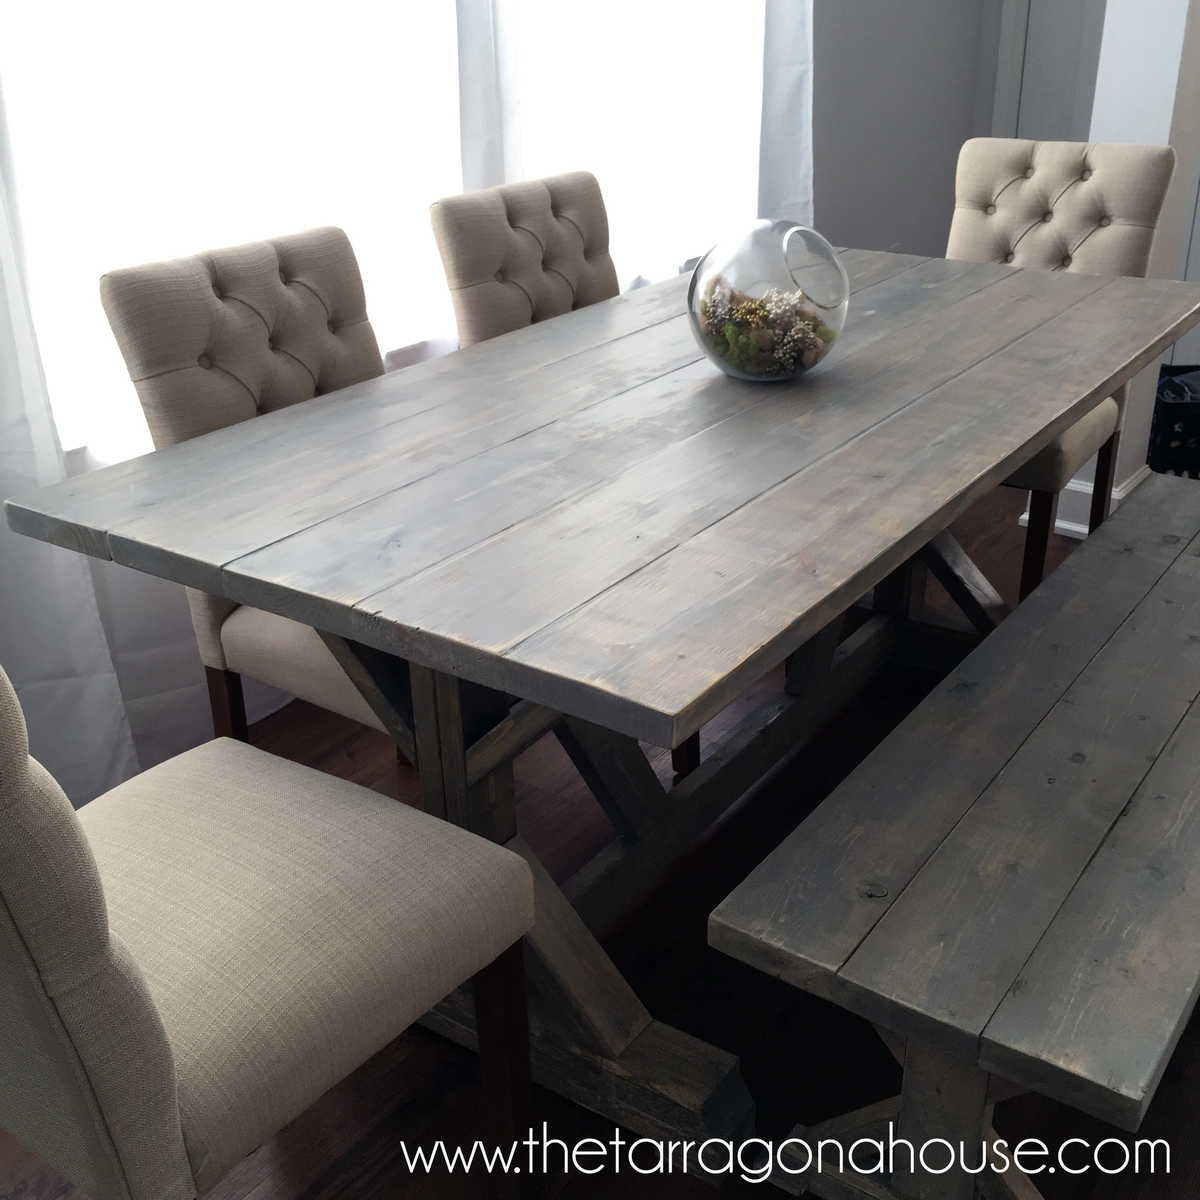
My husband and father adjusted the dimensions slightly on the farmhouse table and finished it out with mitered edges. The end result is beautiful and fits our big family well. We can seat 12 around our 8ft by 4ft table.


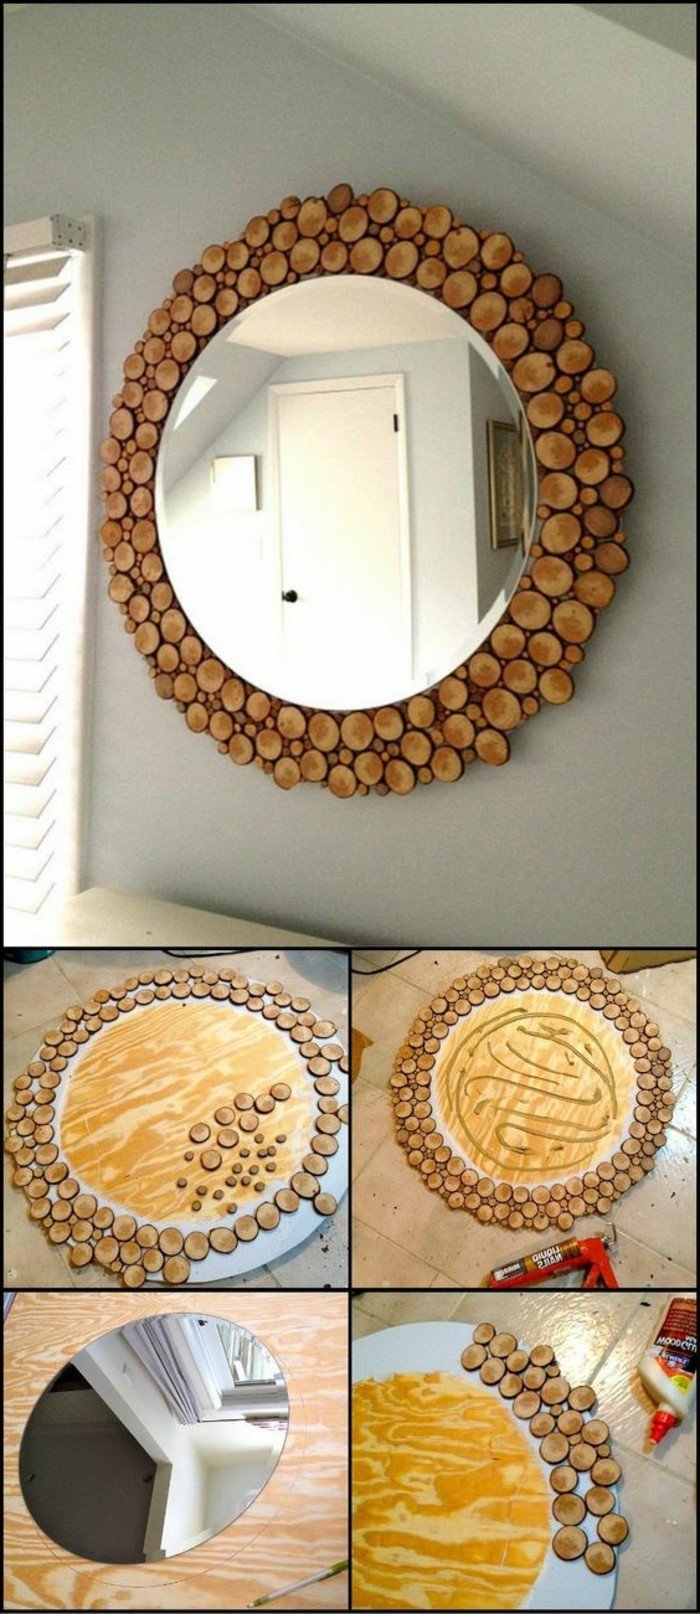
Für den Bau dieses Spiegels benötigen Sie eine Unterlage aus MDF. Eine dünne MDF-Platte zum Beispiel wäre Optimal.

Before you be be be be be be be be be be be be be be be be be be be be be be be be be be be be be be be be be be be be be be be be be be Damit Sie wissen, wohin Sie den Rahmen aus Holzscheiben kleben sollen.

Nachdem die Holzscheiben verklebt sind, kleben Sie den Spiegel fest in die Mitte des Spiegels. The whole can same method also with a eckigen mirror and wood scheiben made. Schickt uns euer Exemplar und wir veröffentlichen die Bilder hier auf dieser Seite. Falls Sie auch so einen Spiegel haben möchten, aber keine Zeit, um sich ein Angebot zu machen. Wir produzieren Ihnen den Spiegel dann.

Lieben Gruß und viel Spaß bei der Ausübung des Projektes. Wir sind auf eure Bilder gespannt!
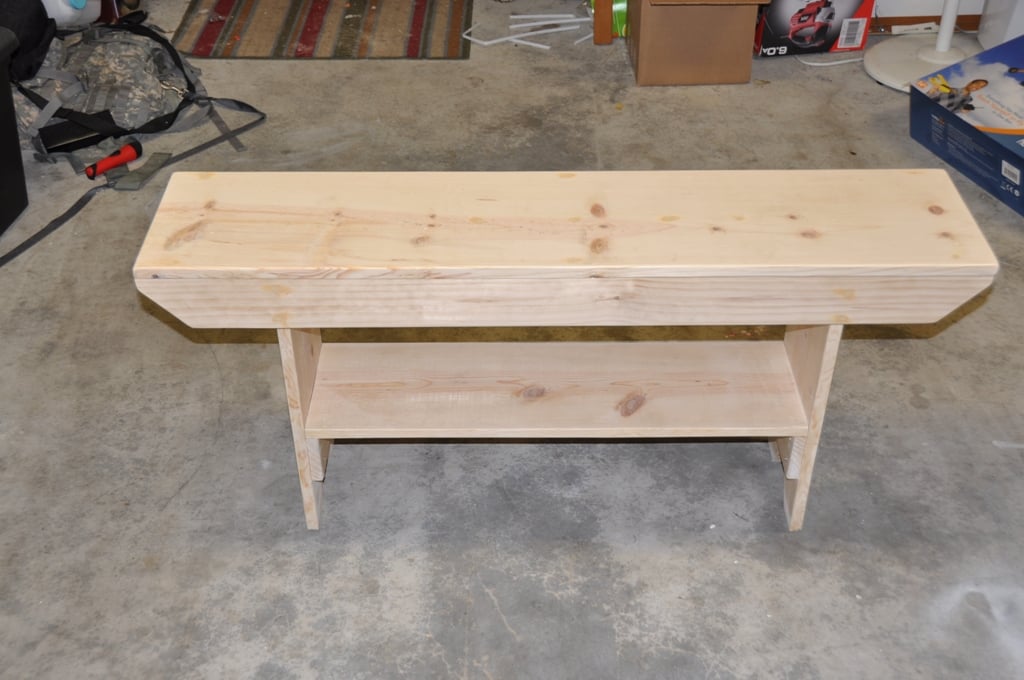
Was very easy to put together even with pocket screws.
Retired firefighter Joe
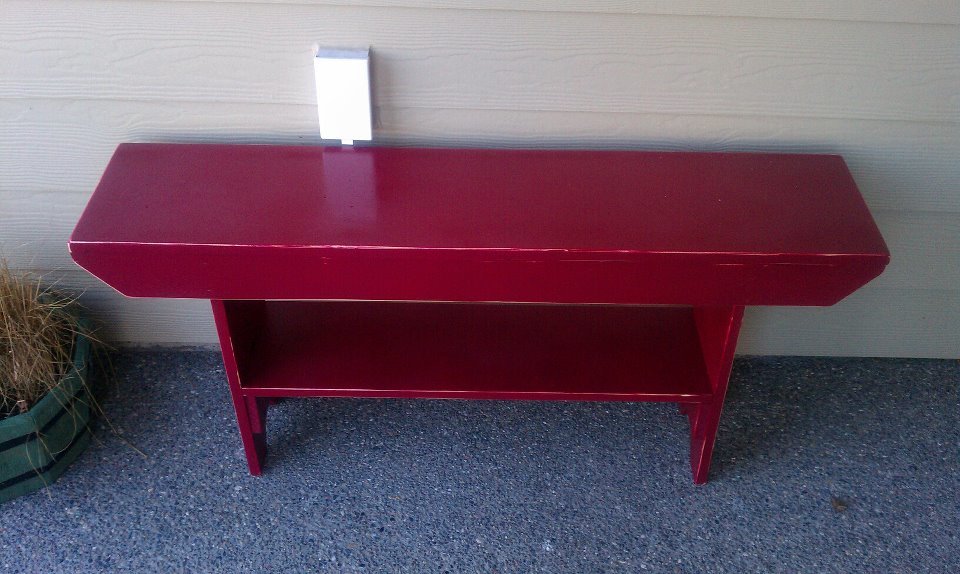
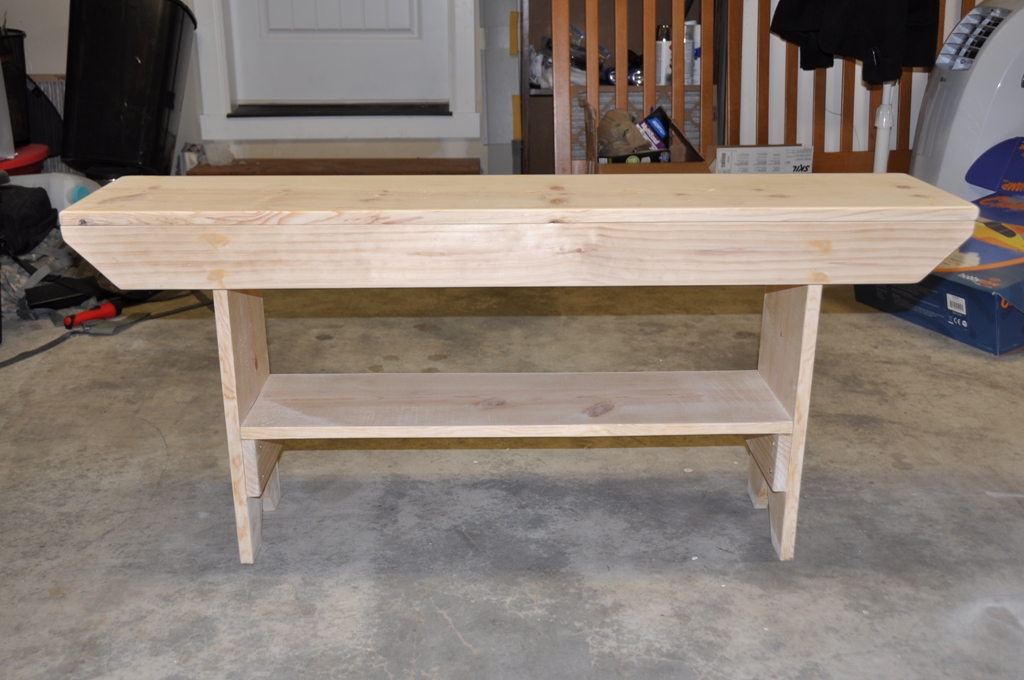
The wife and I kept going to these primitive shops and seeing these benches selling for $65-$85. I saw these and knew I could build it for way less. This is my rendition of the 5 board bench, only difference is I took the top support beam and make it into a shoe shelf.

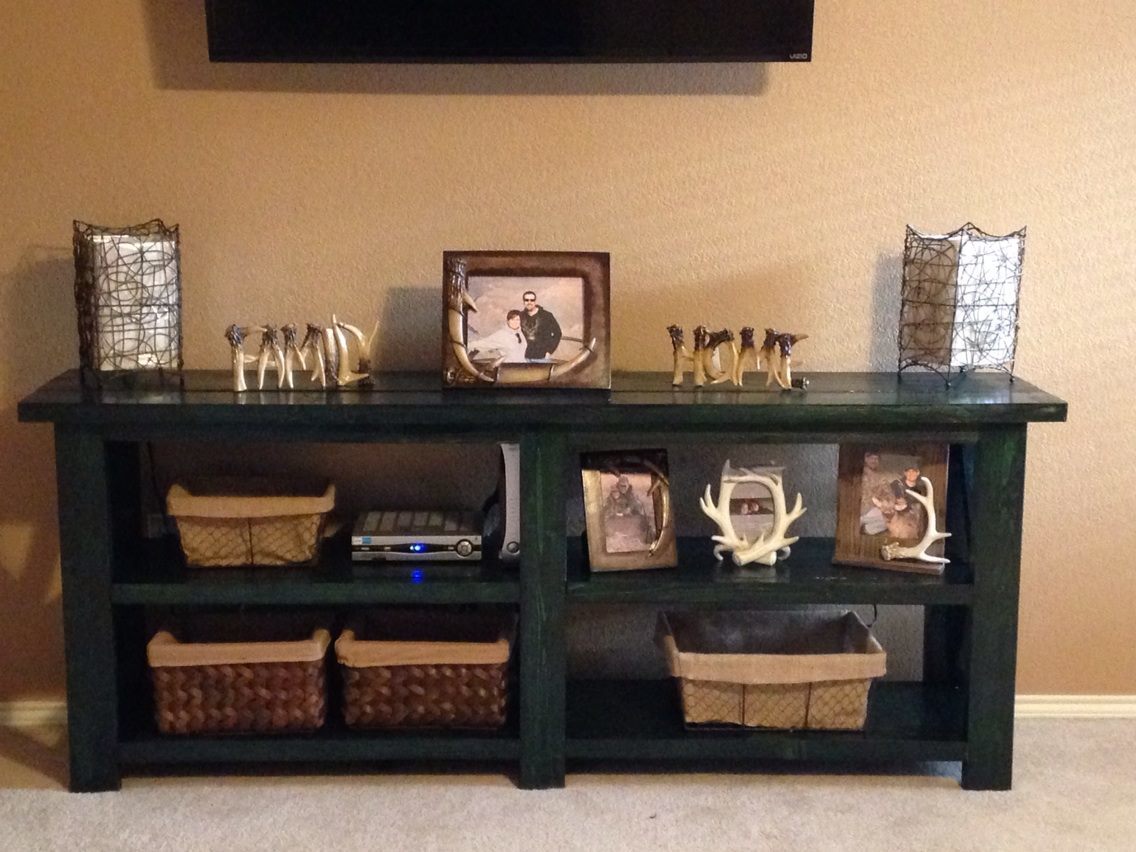
My husband and I spent Christmas day building this piece and I spent the next day staining. This was our first build together and I am in love with it. The piece looks great under the TV in our bedroom. Just the perfect accent piece I needed to finish off our recently redecorated bedroom. Next we will be tackling furniture for our spare bedroom that currently only has a bed and a mirror....

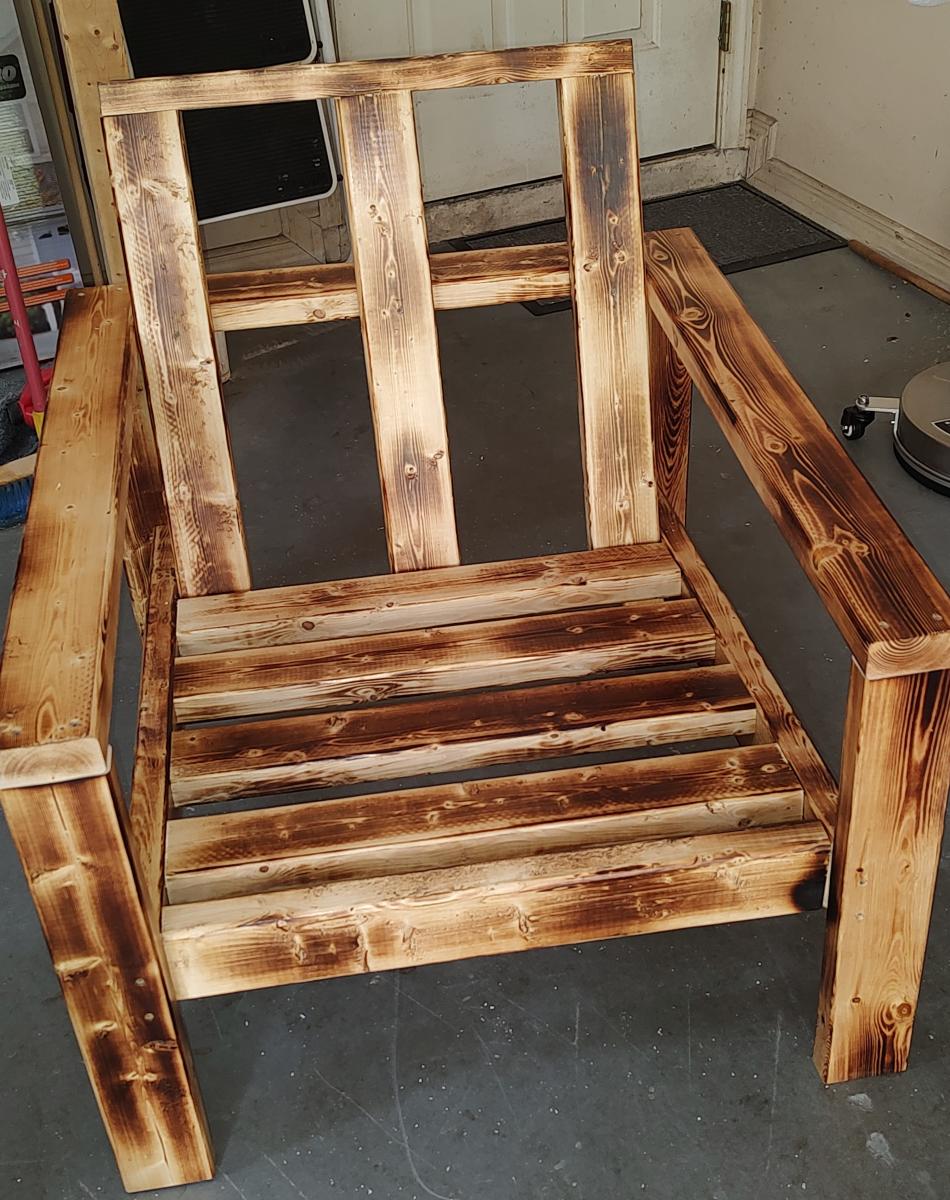
customer wanted a set of adirondack chairs for their husband. Who is a big Detroit Tiger fan. Followed the plans as is except for the back. It is supported by 2 1x3 running up the lines of the D. It is very sturdy. Once comment about dimensions, our lumber is not exact. 1x8 is 3/4x7.25 for instance. I had to compensate for that.. Thanks for the plans
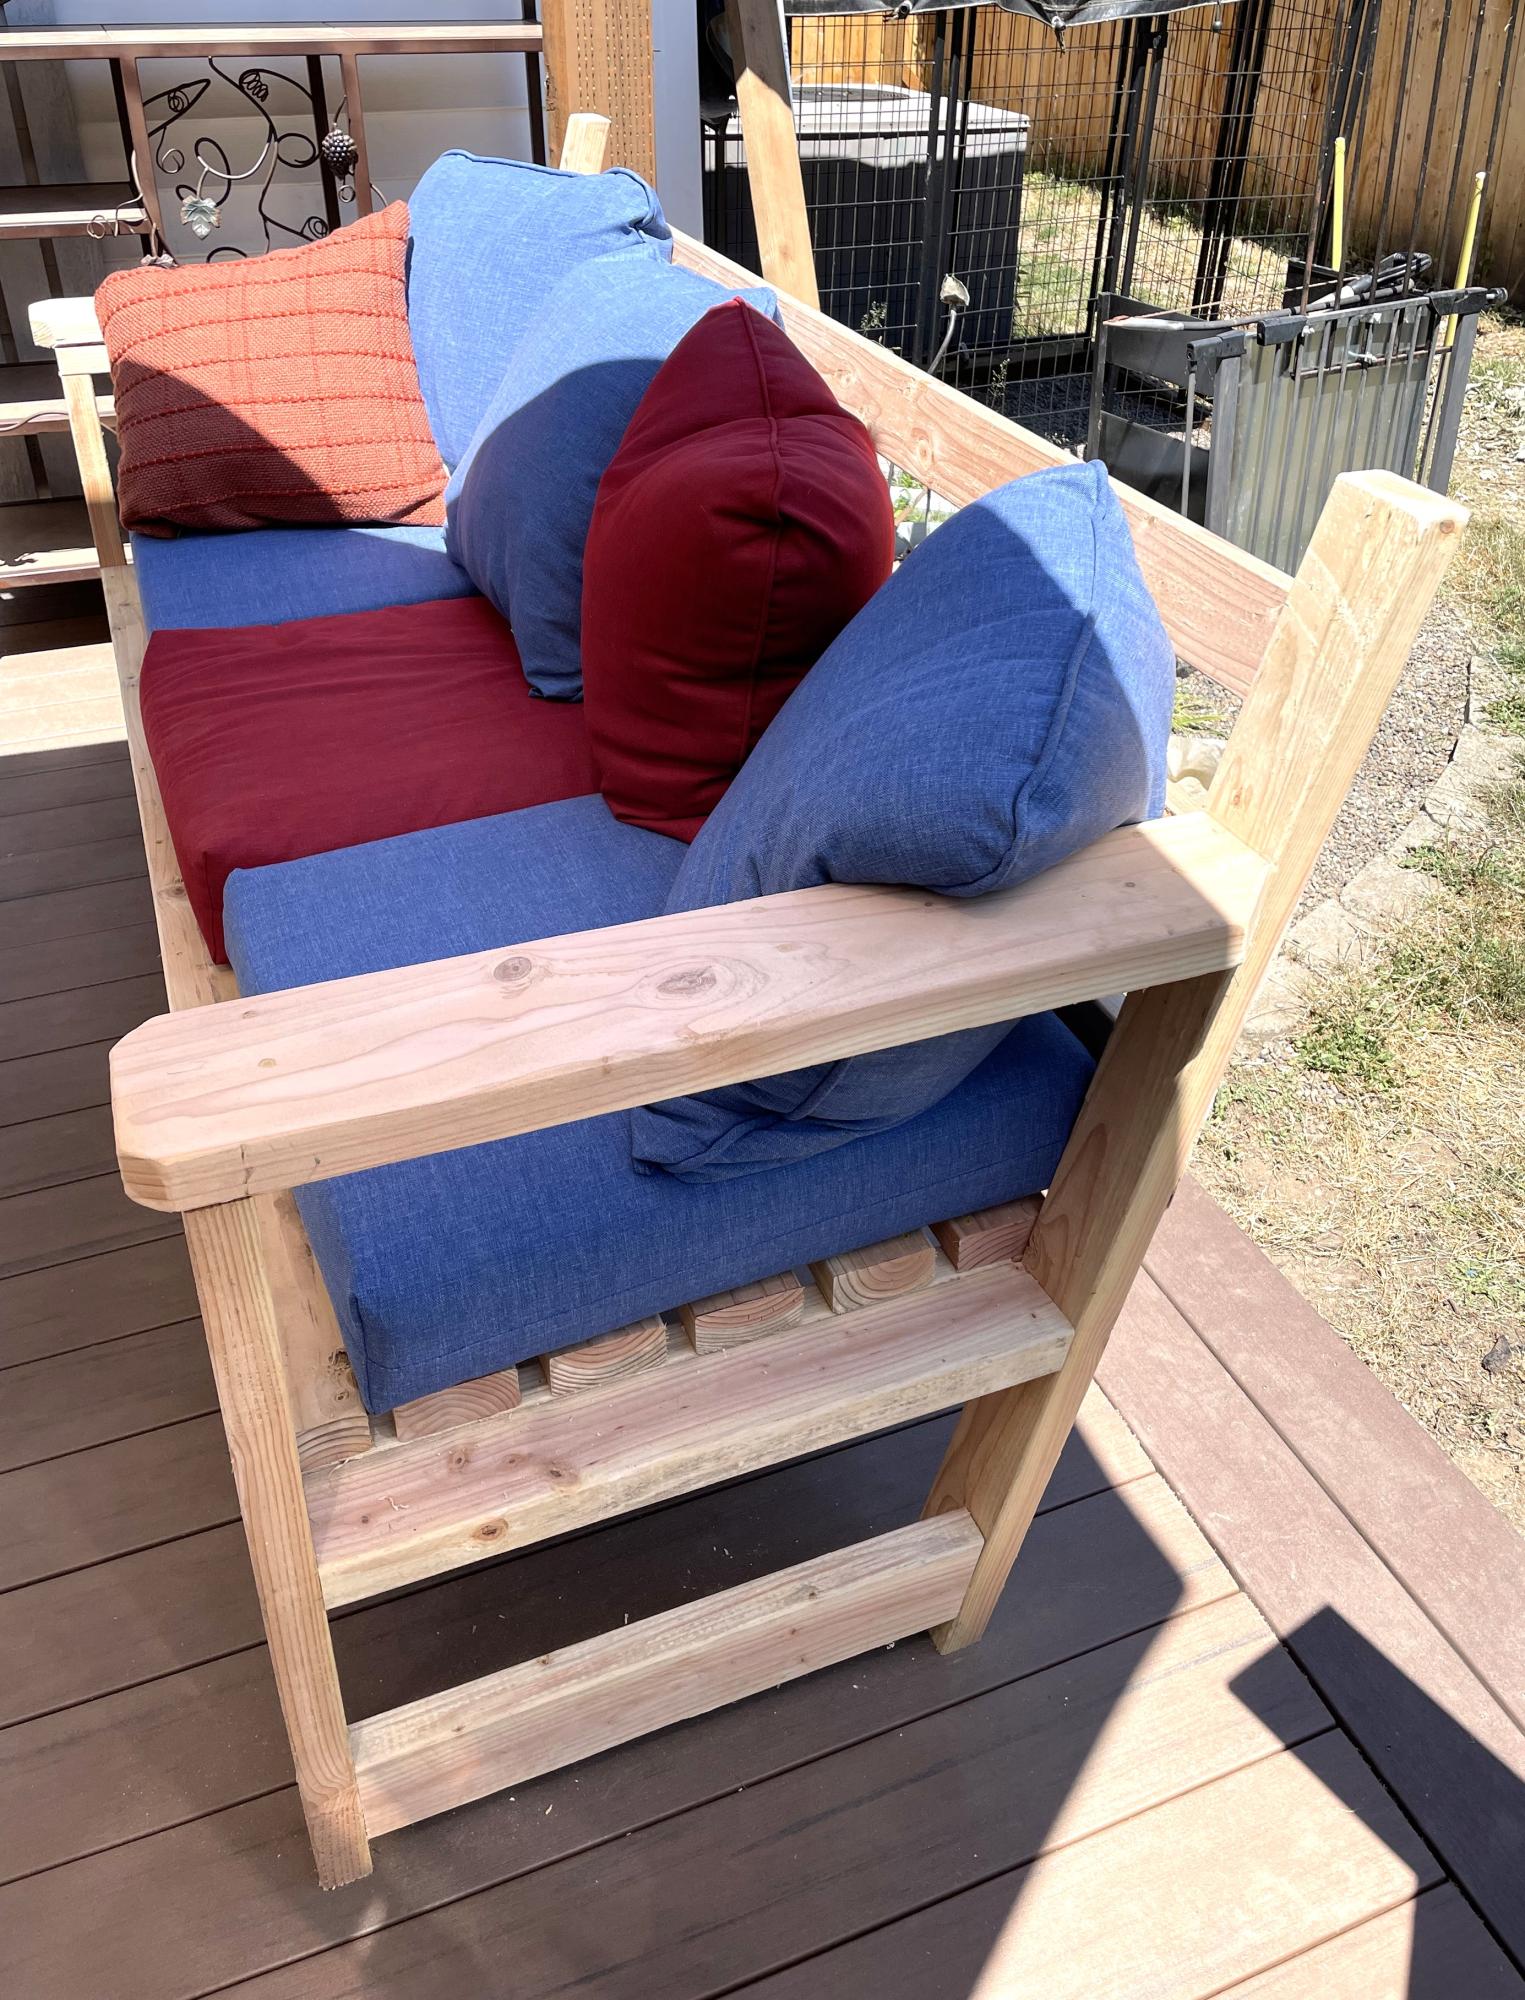
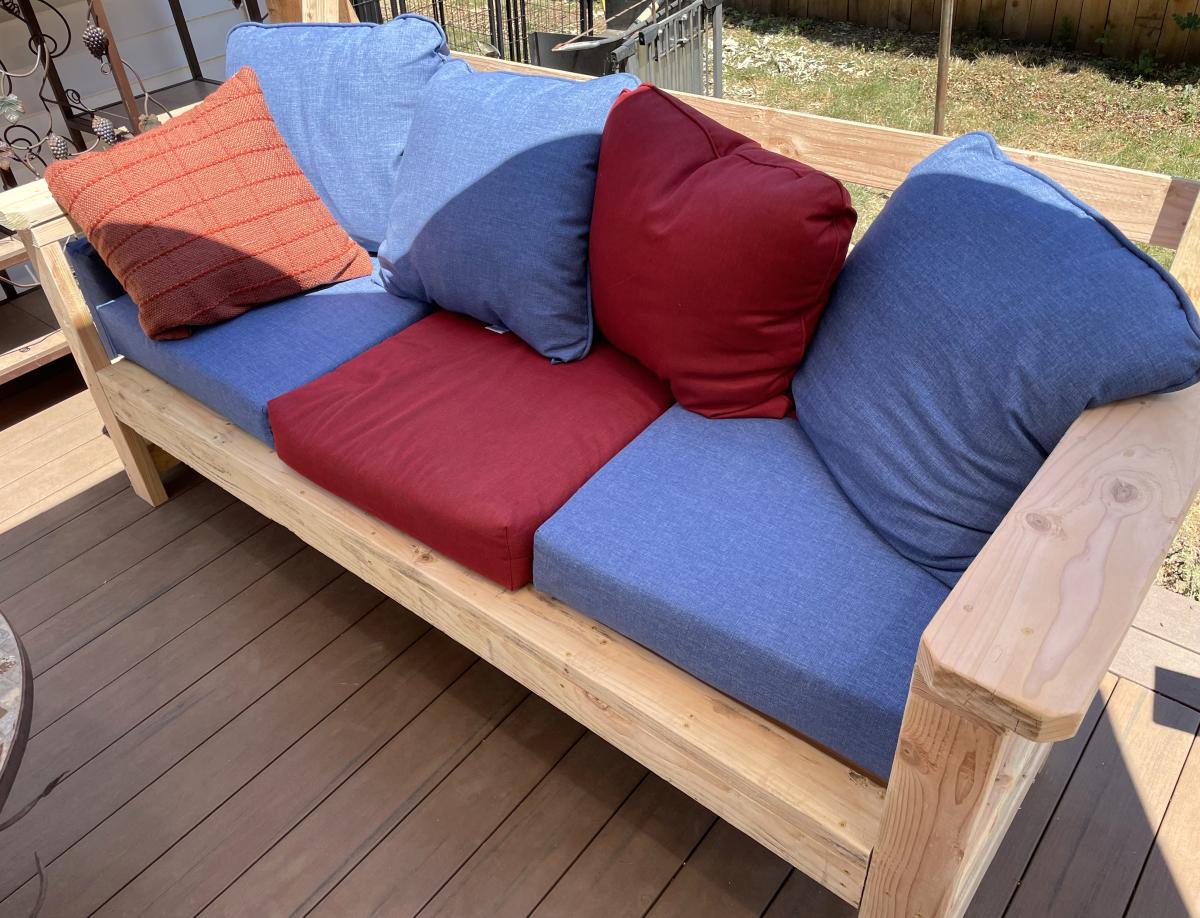
Used you basic 2x4 bench / couch plan but added a sloped backrest and more 2x4s across for more support.
Jerry
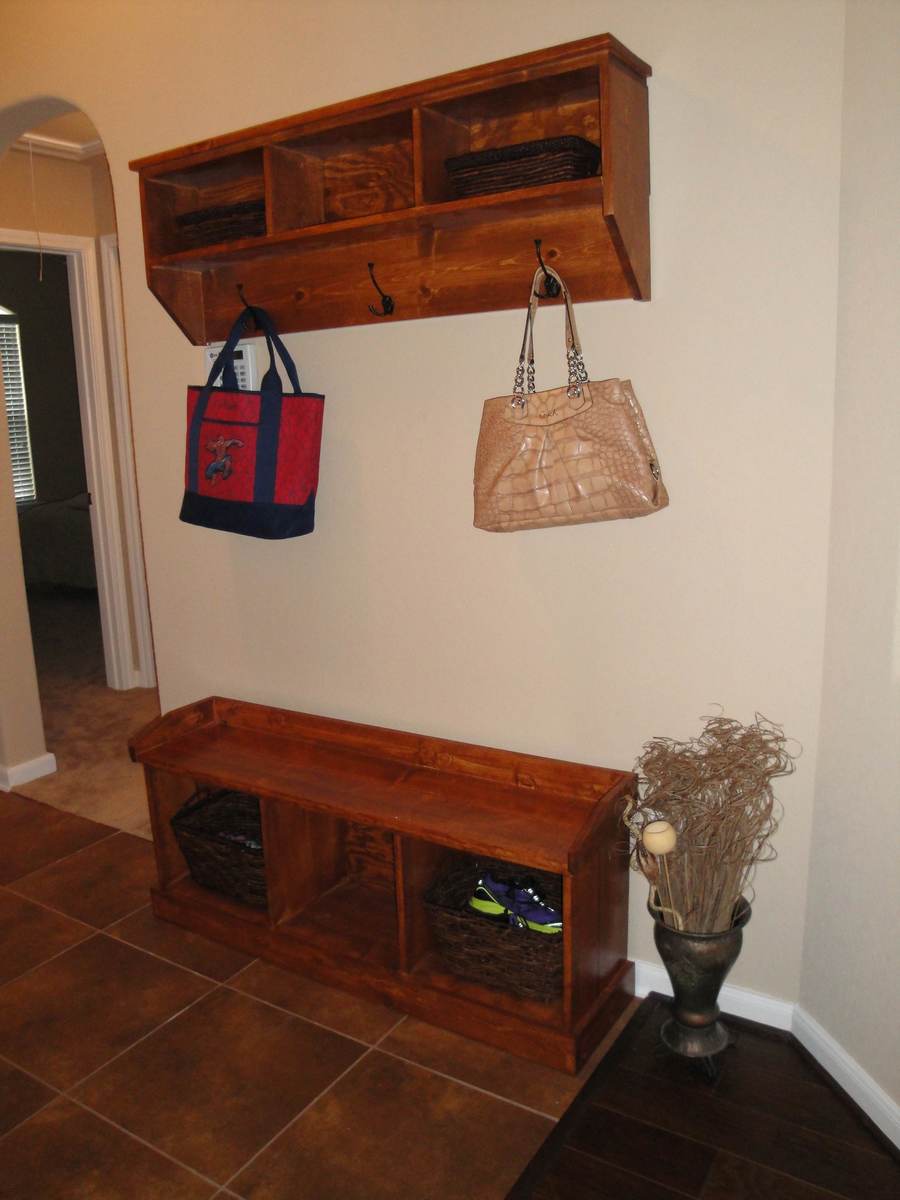
This was our first project! It was a lot of fun and a big learning experience for my husband and I. It has been used DAILY for our shoes, bags, etc.
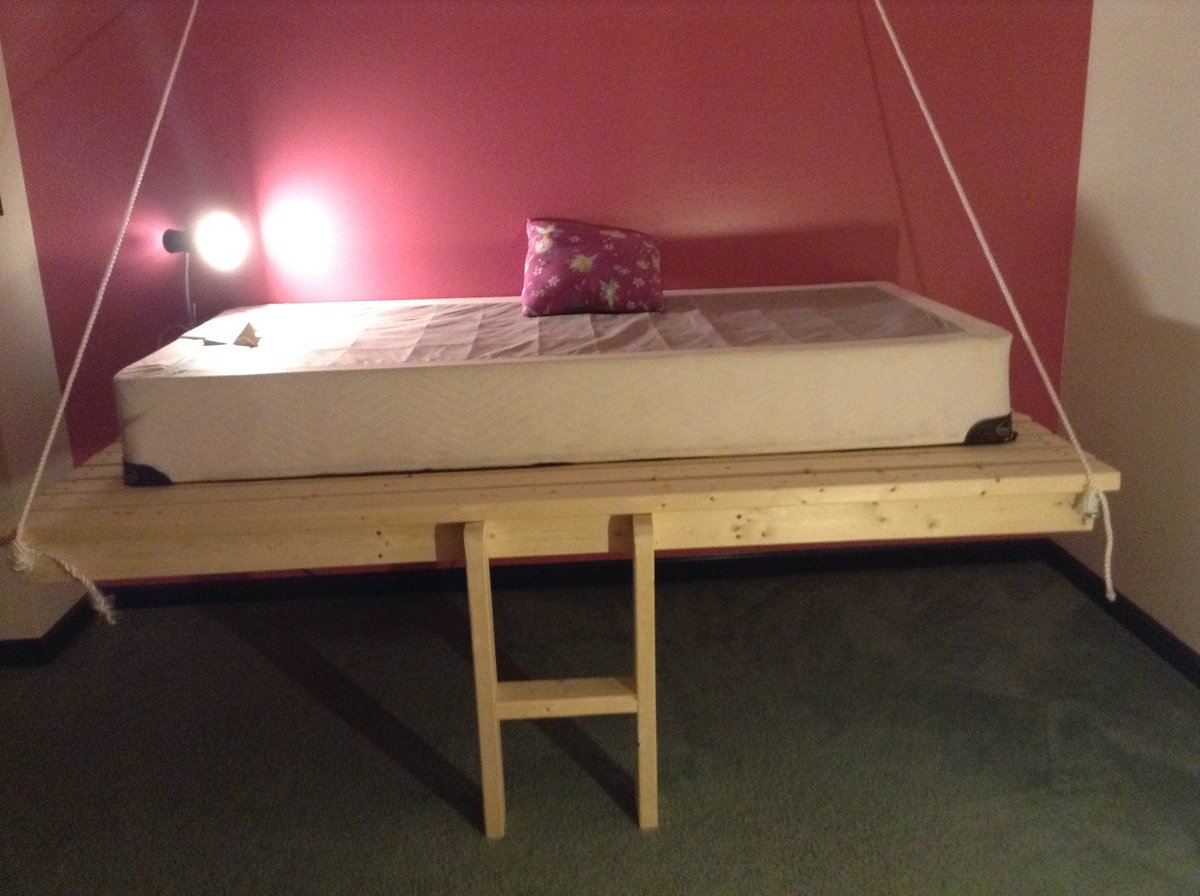
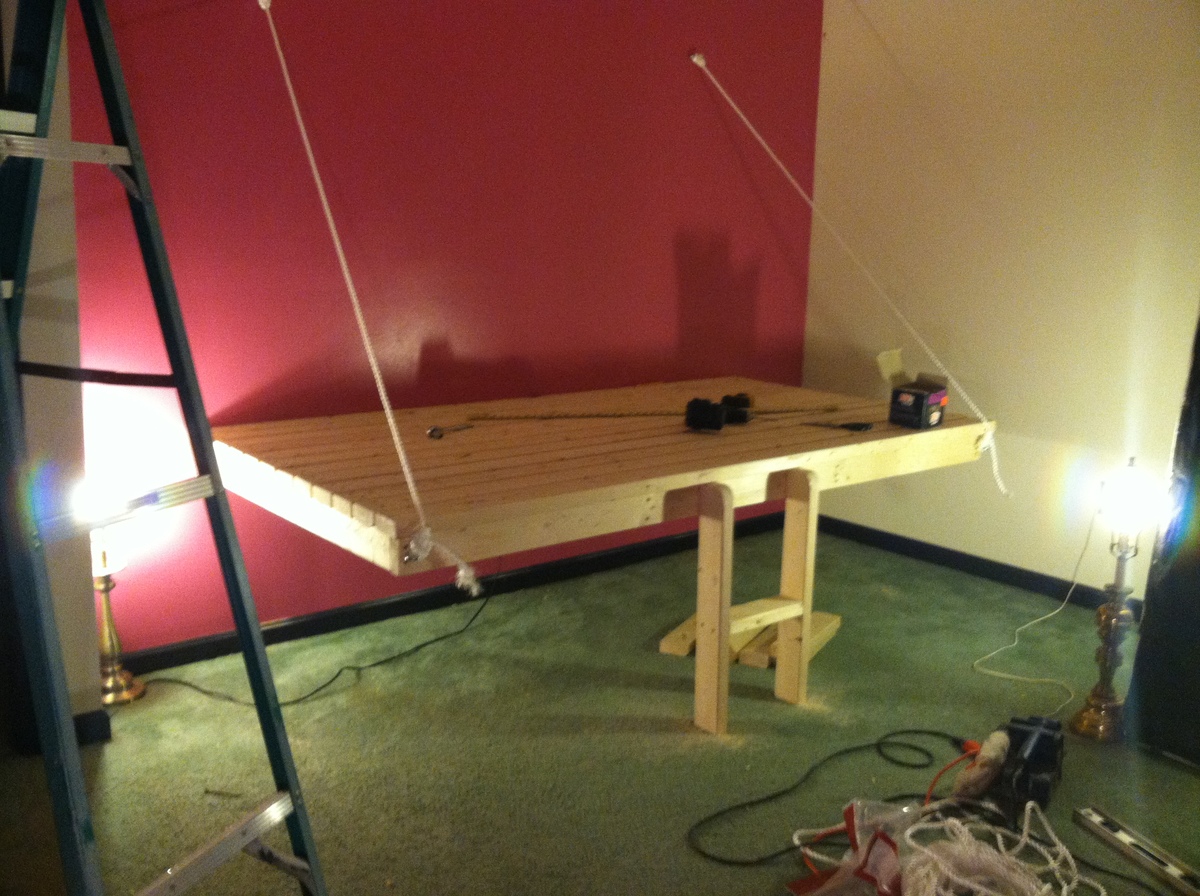
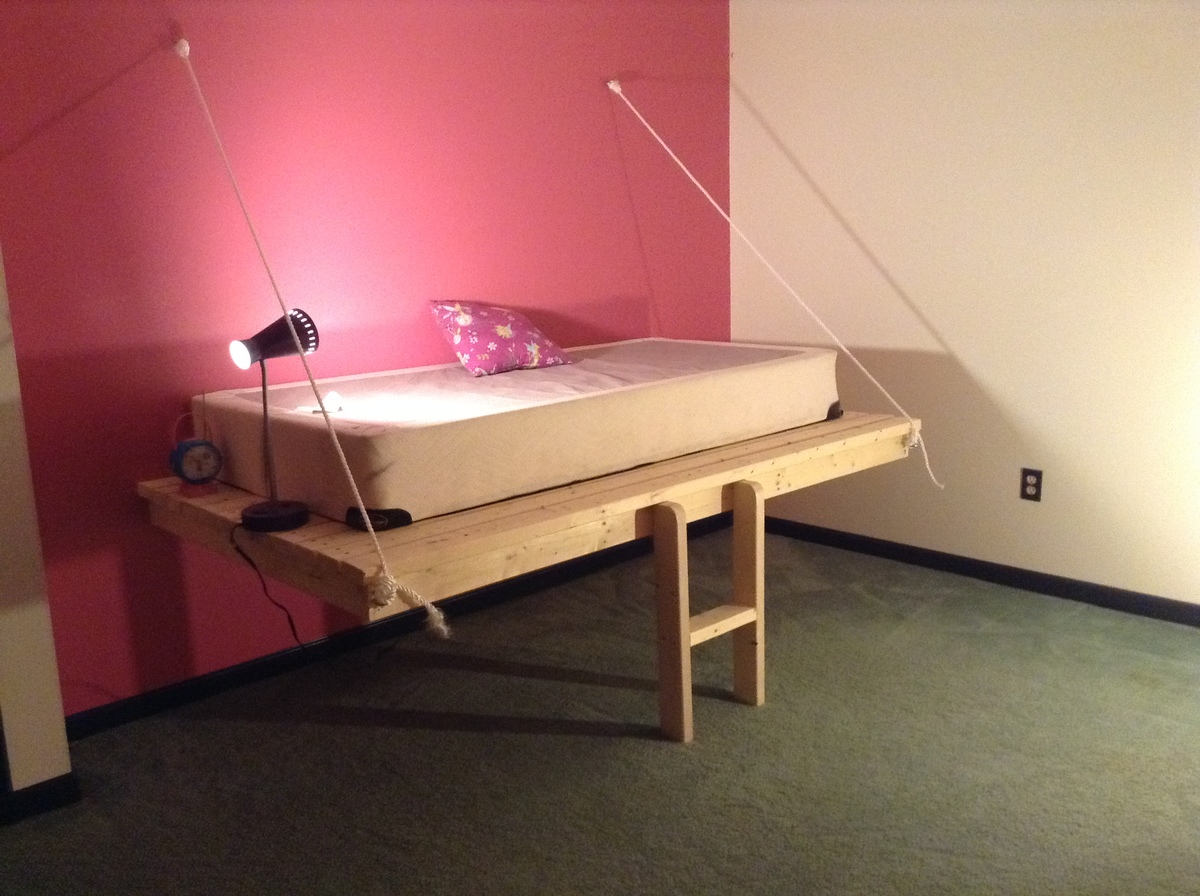
Inspired by the hanging day bed- everything was built as directed- then 5in X 3/8in lag bols used to secure to wall, as well as eye bolts and rope. Extra support added with ladder
Thu, 03/20/2014 - 10:48
I am wondering if you put both a box spring and mattress on this? Is there any way to see what it looked like all finished and set up? We are thinking of doing this is our daughters room so that we can put up two, but she may not go for it if it has no box spring. :)
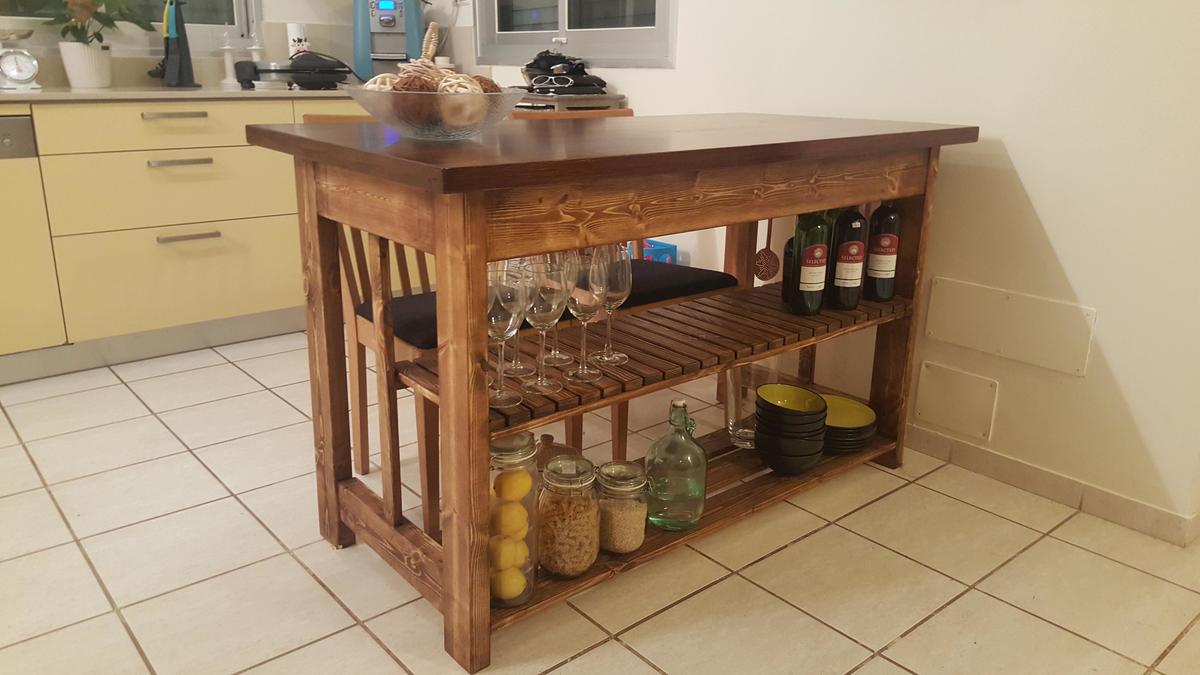
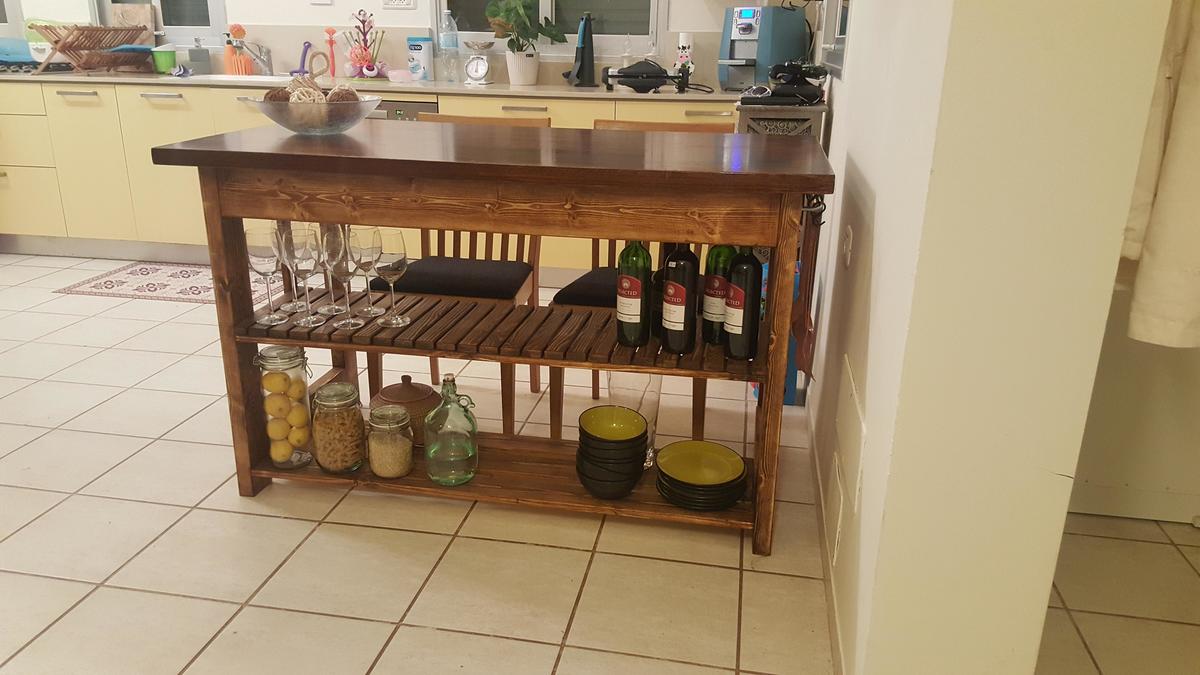
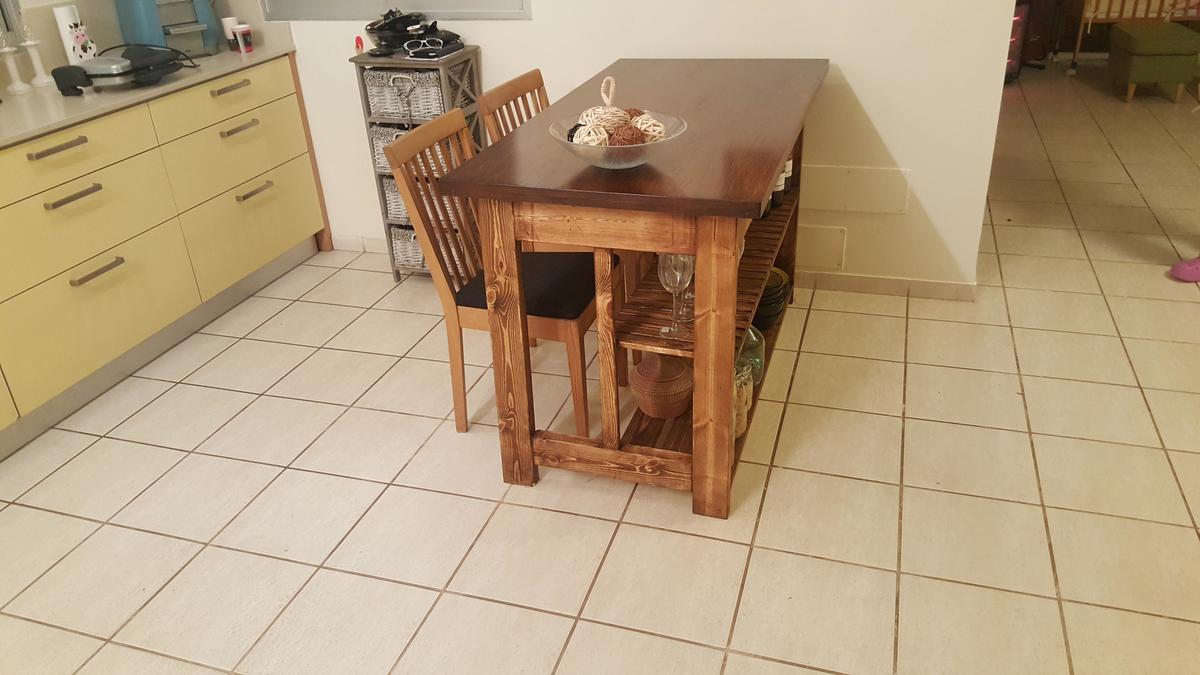
Made from Easy Kitchen Island Plan With a few changes.
Body built from pine, Top surface built of oak.
The shelves were shortened by half To make room for two chairs.
Body painted with varnish polished sporadically.
Top Painted with three layers of varnish after polishing.
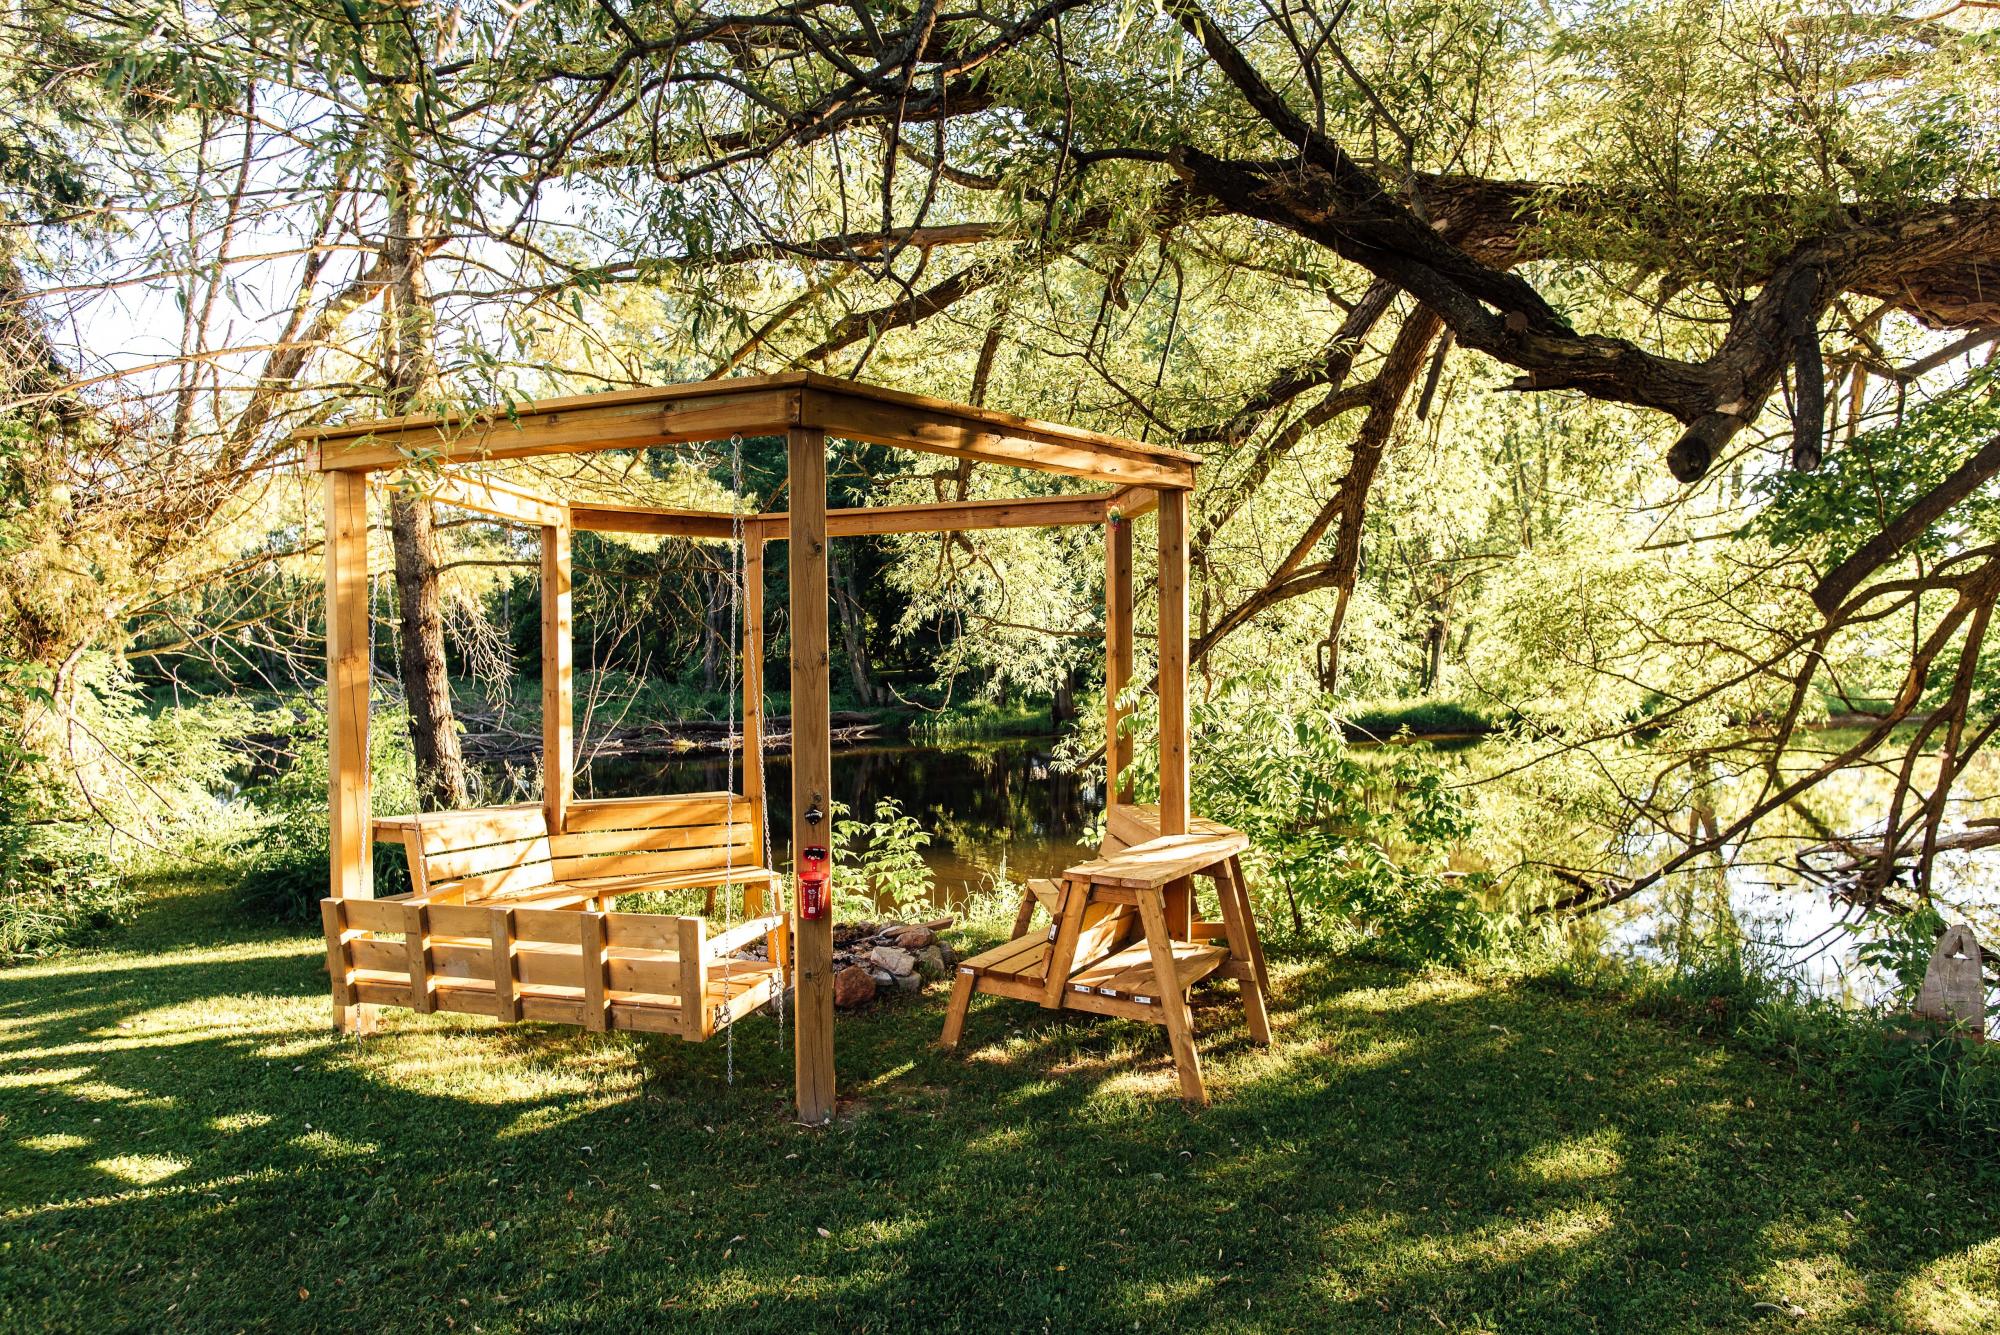
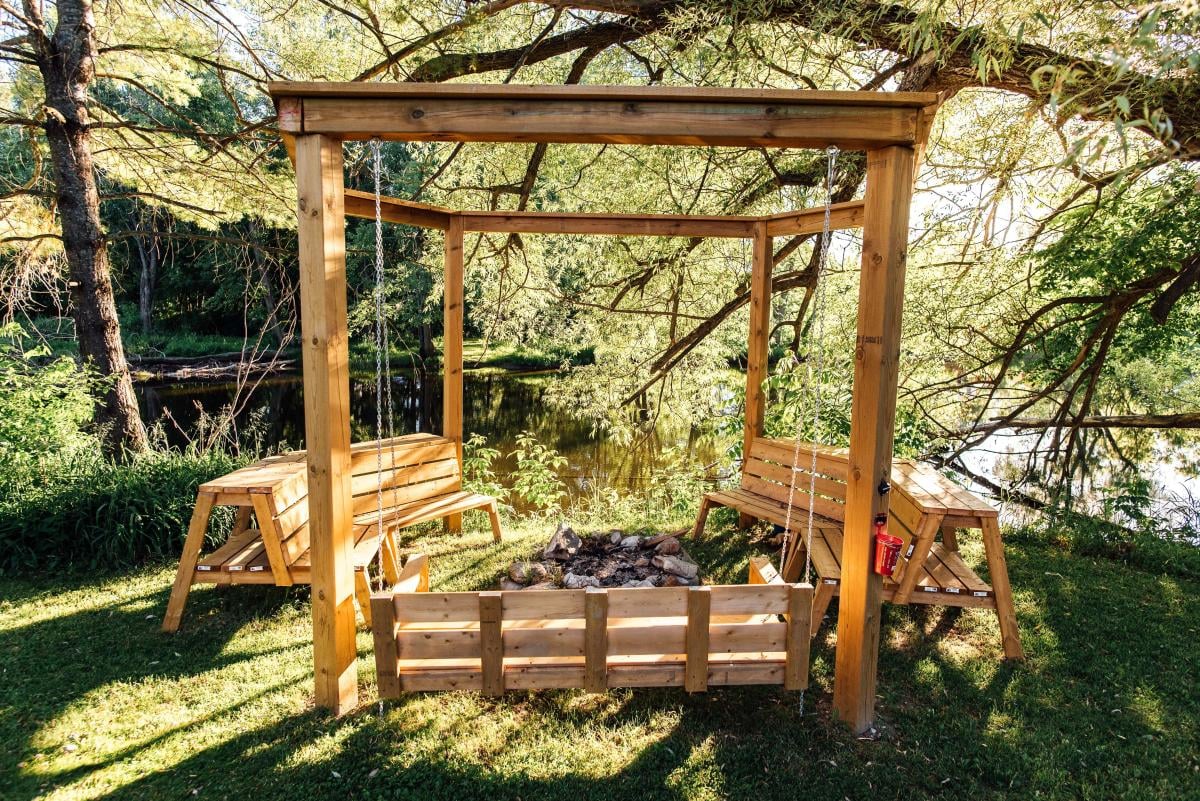
Fortunate enough to live on a beautiful river, my wife and I decided we were done bringing the folding chairs out for each weekly bon fire. Our three girls love s’mores and we wanted a great atmosphere with a place to easily grab wood and snacks in the dark while we enjoyed the outdoors. The combination of plans took us about a week to finish. The kids were away for the weekend and we rented an auger to drill the post holes. This proved to be the most difficult part of the project. It took nearly the whole weekend to dig out the unexpected granite and all the patience that we had in reserves. Once the posts were set, it was only a slightly uphill battle.
My wife made the bench in the time it took to return the auger and come home. The fire pit benches were also a pleasure to assemble and the most functional part of the project. I suspect the whole thing would have been faster if the large posts were easier to cut through. That treated lumber can eat saw blades! When setting the top posts it was also a two ladder and two person job. They were quite heavy and a little nerve wracking to set if you don’t love heights and a heavy load. We would do this project again in a heartbeat as it is a feature in our yard and makes for many enjoyable family and friend gatherings. The fire pit bench top is also great for hosting the entire bbq meal assortments to select from.
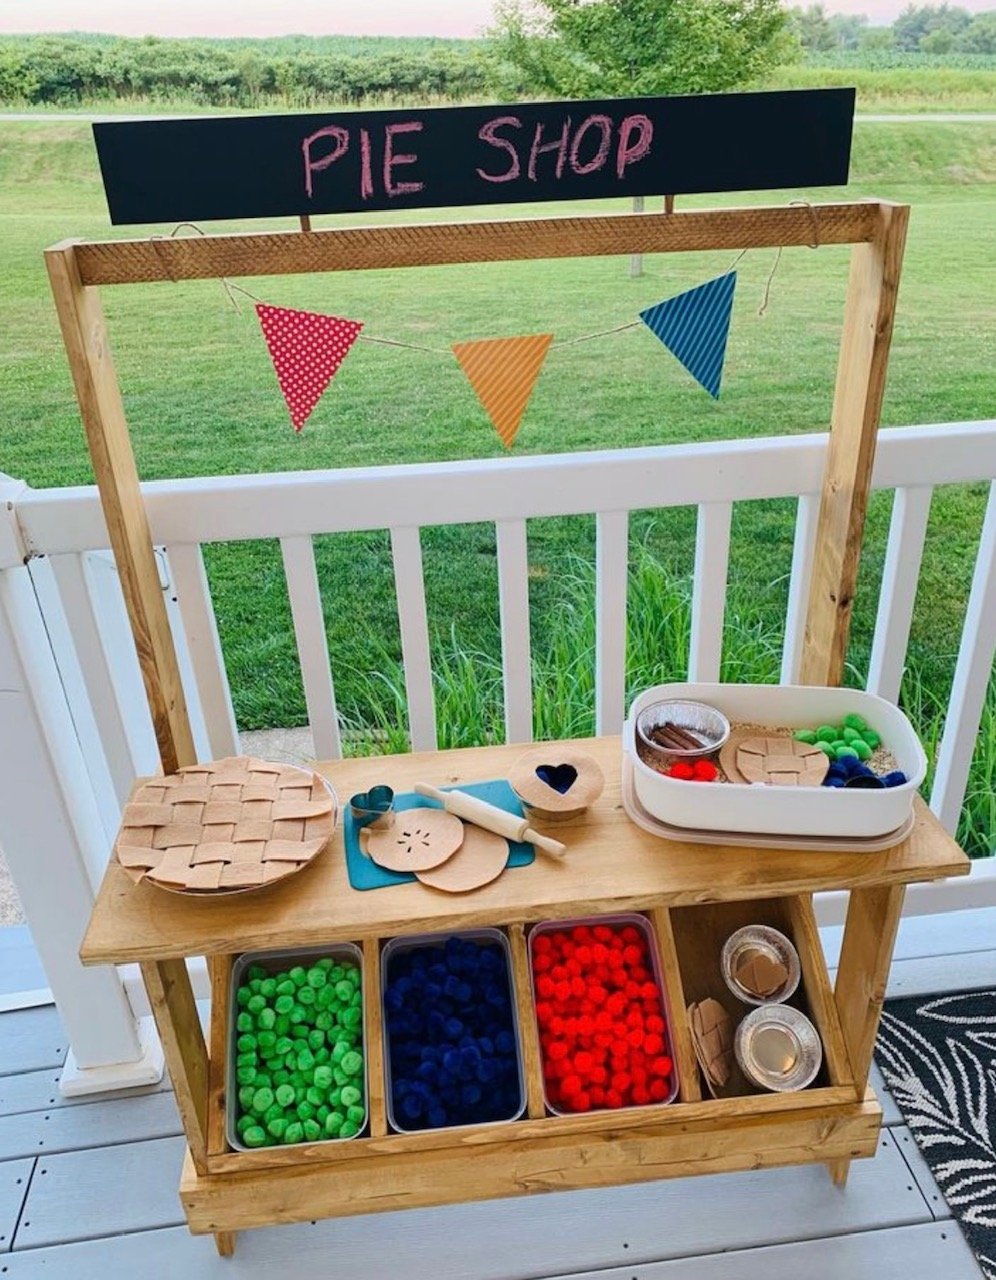
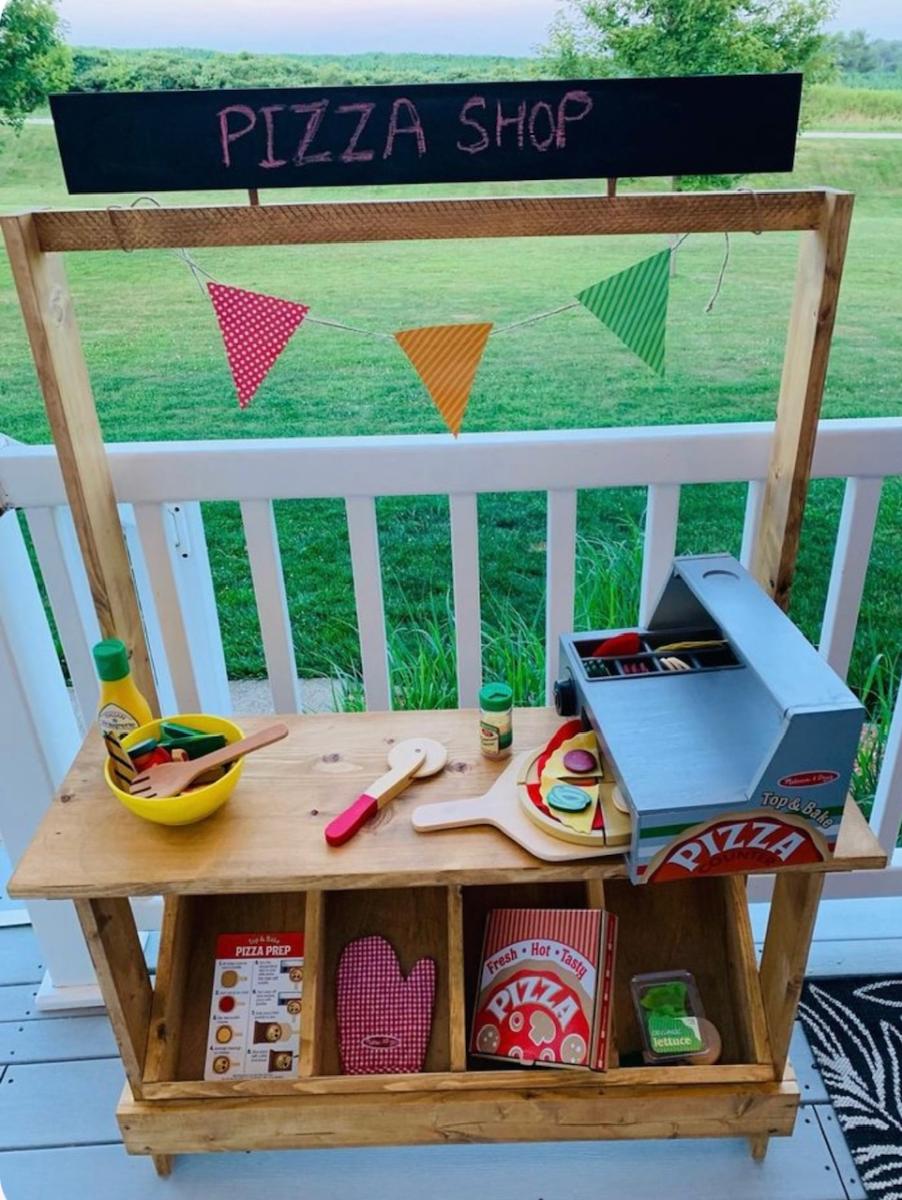
For a 4-H project this year, I want to make the Play Farmer’s Market Stand. I currently work at a daycare and I think the kids would love it.

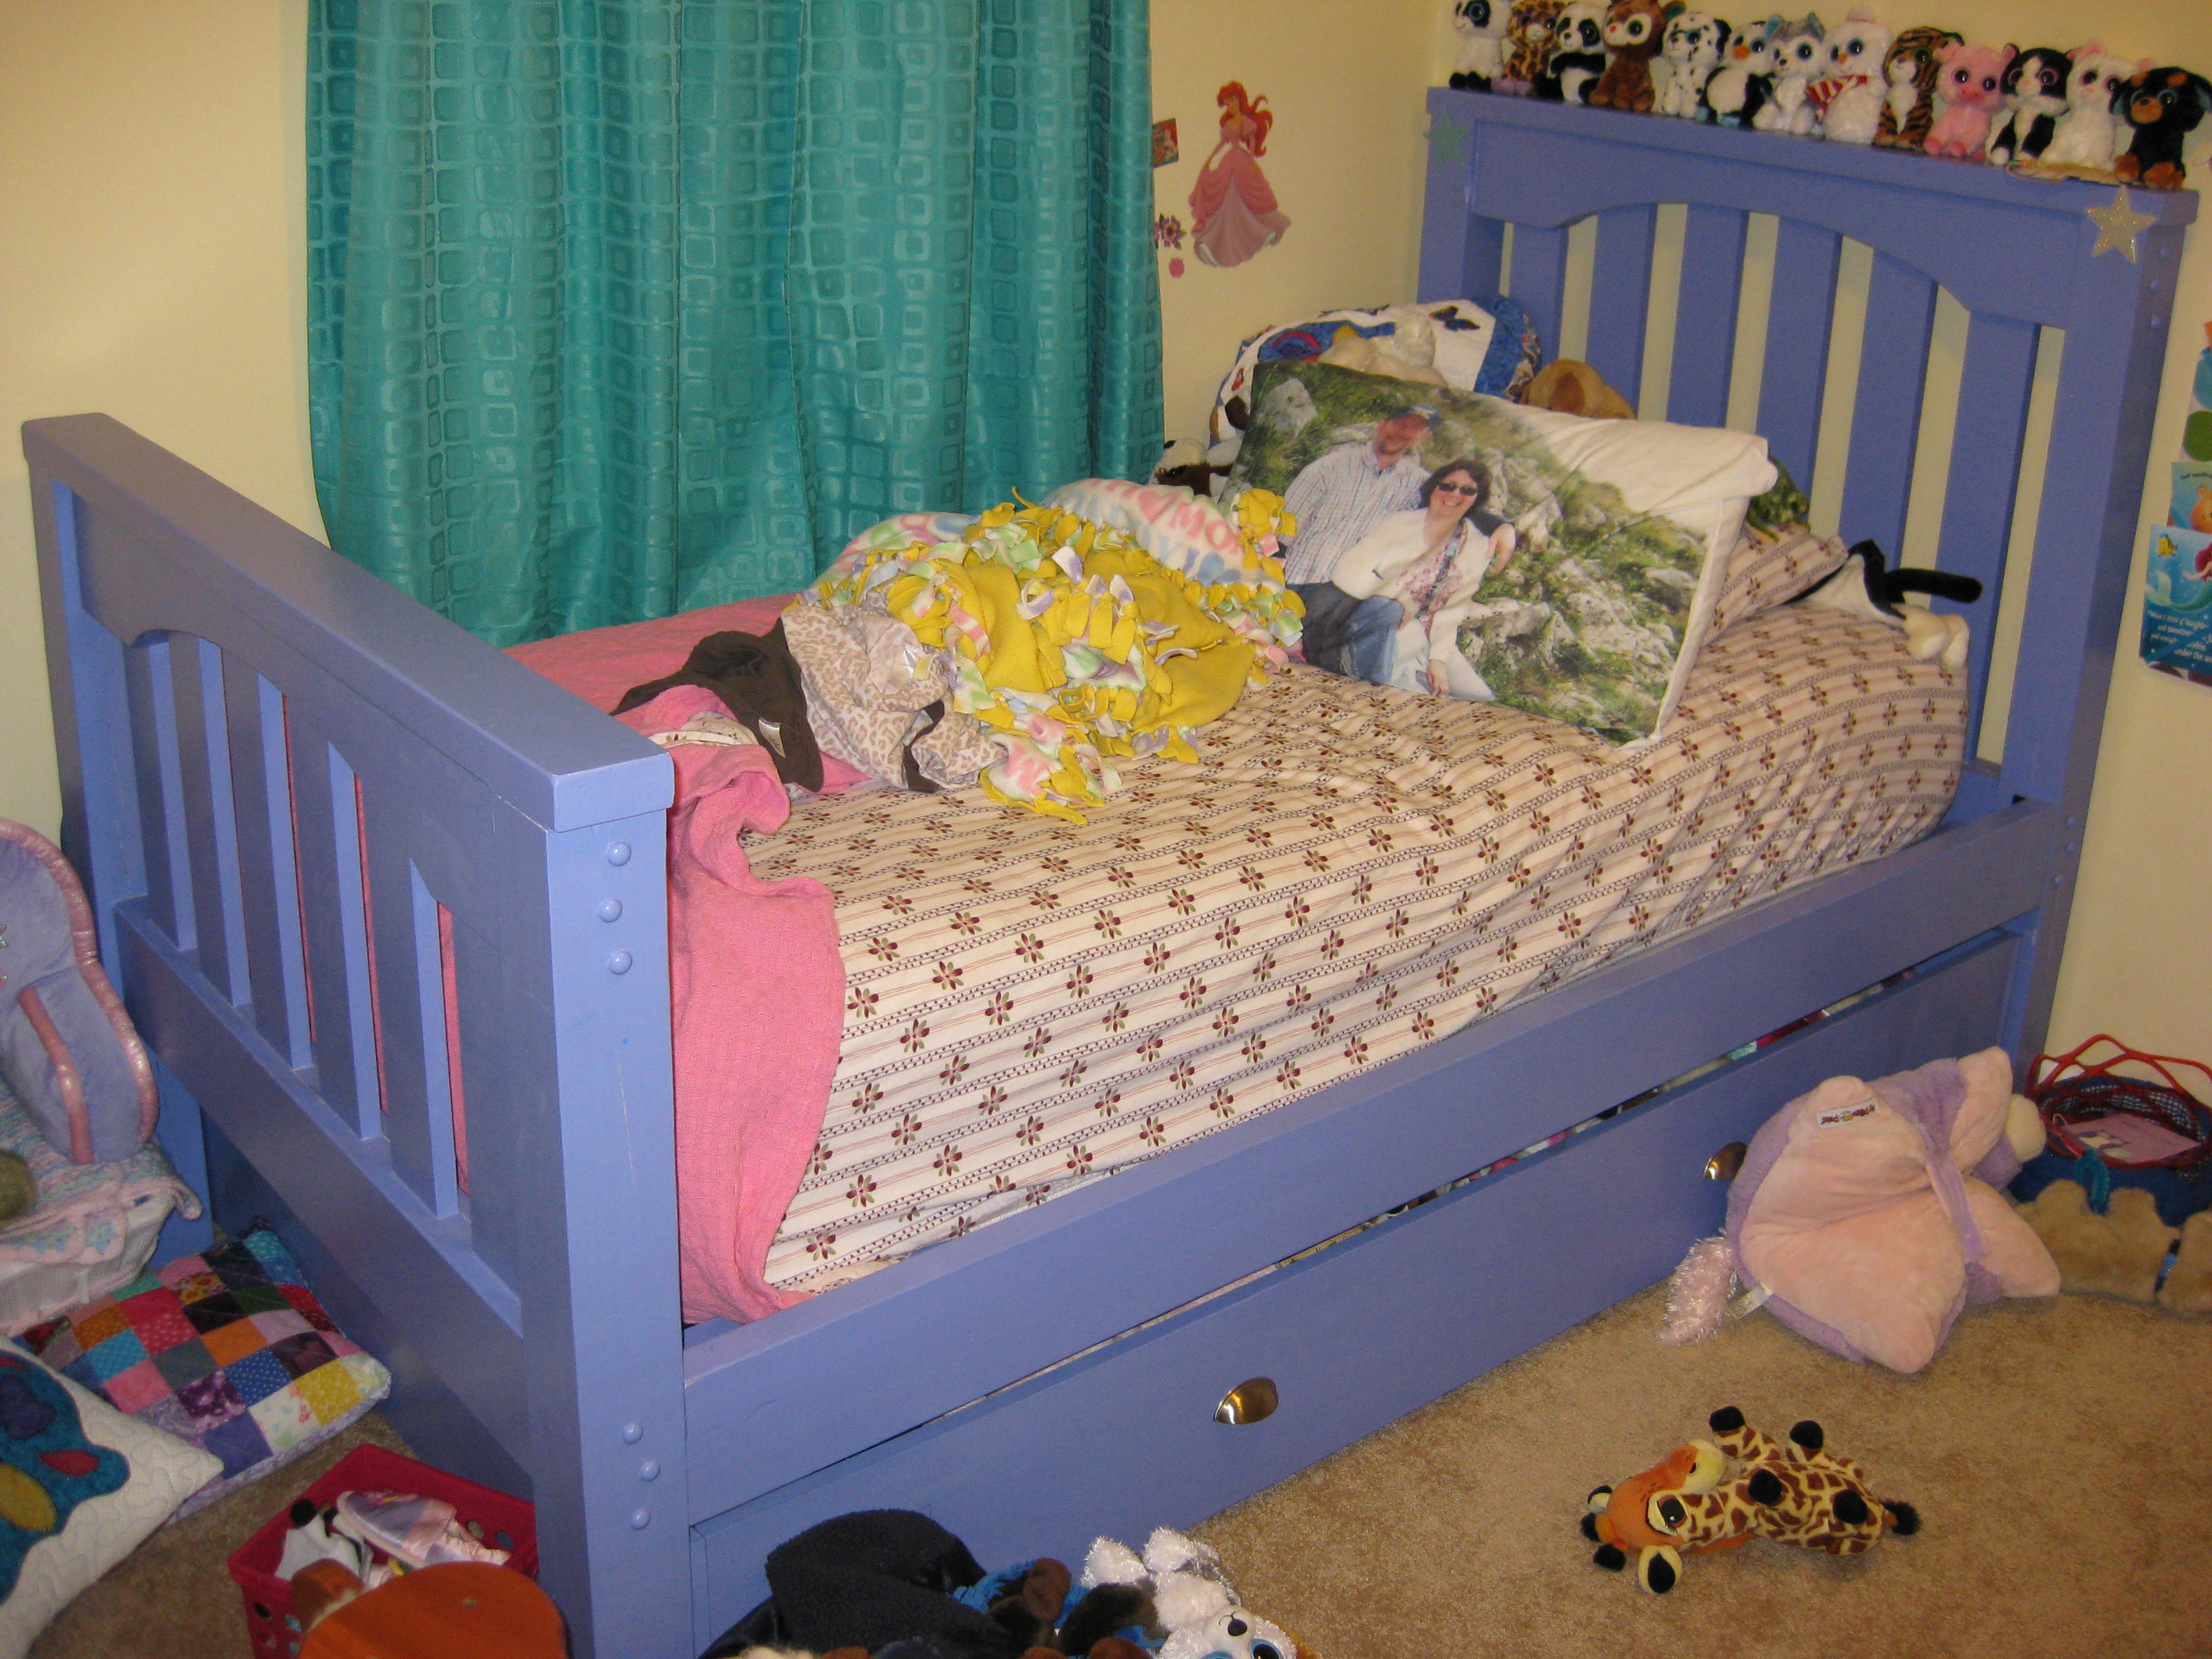
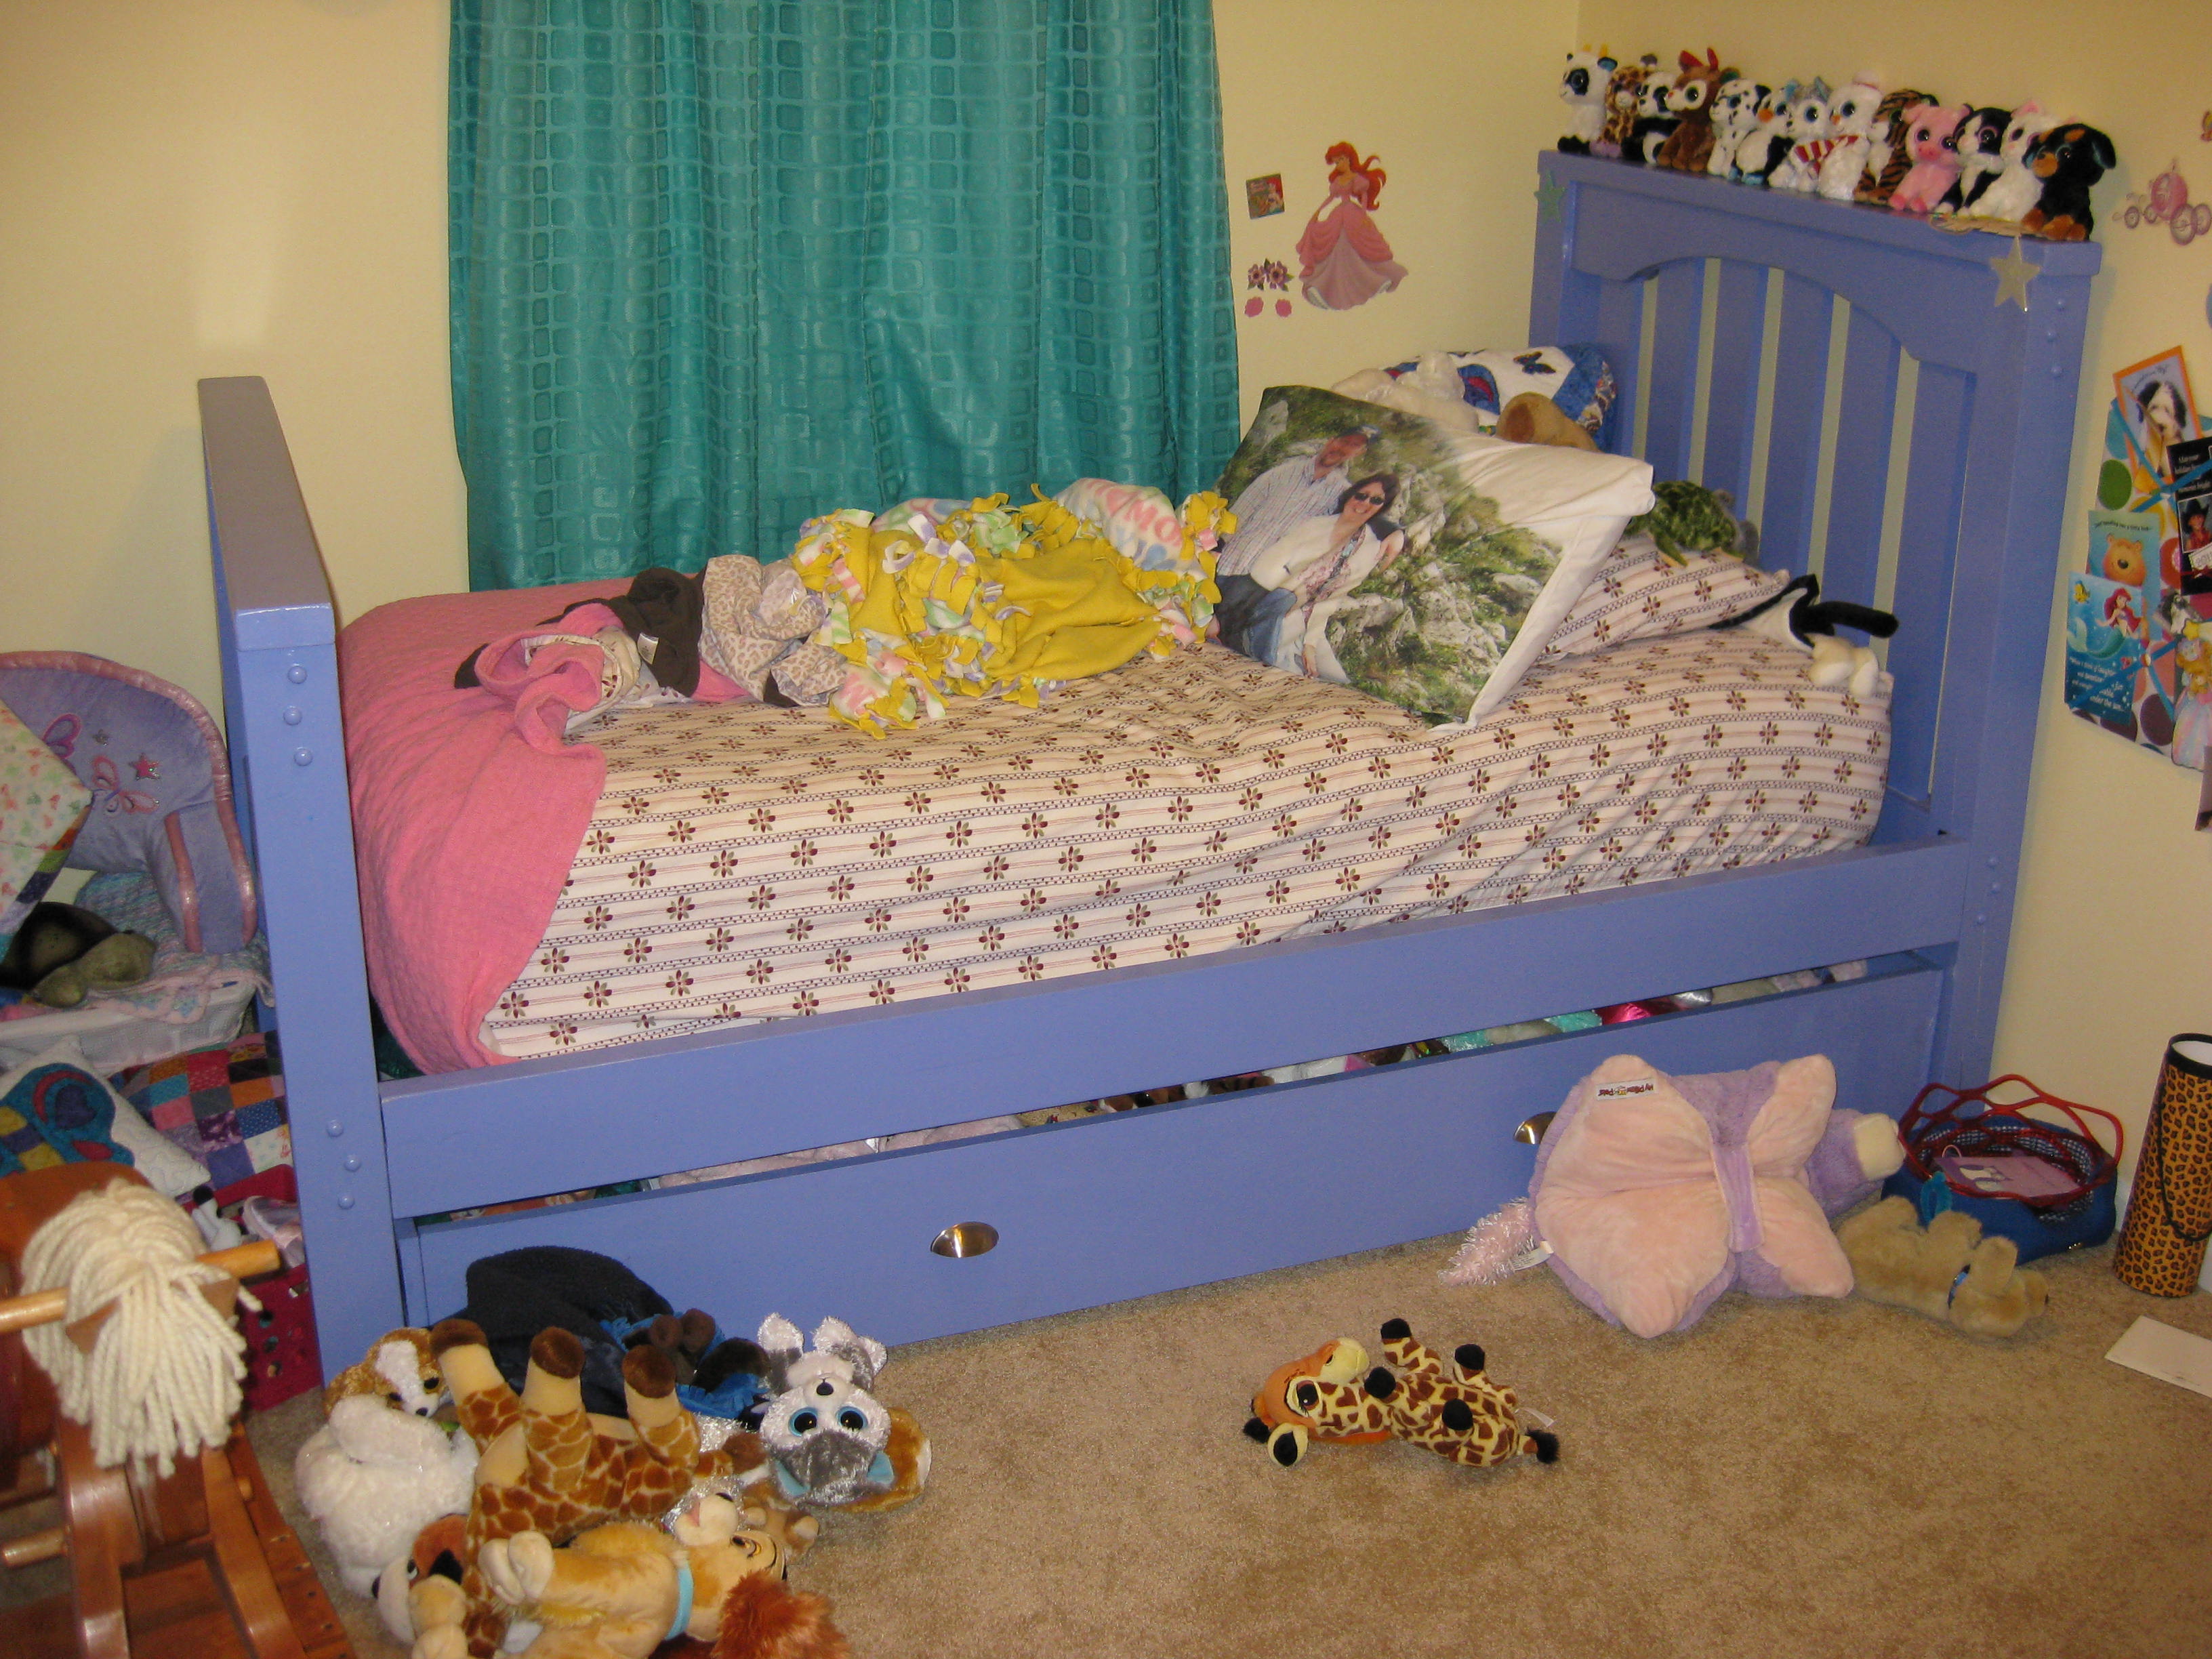
We had just moved from OH to NC and needed a bed for our daughter. We decided to build rather than buy when we found out the prices. We built it out of pine since we plan to upgrade to something bigger in a few years. The plans were easy to follow and we made a few changes to fit our needs and the trundle we built under it for stuffed animal storage for now. The process was simple since we bought all the material in one place. We glued each piece and used screws to hold it all together. We purchased brackets from online to allow us to remove the rails from the head and foot board for moving. Sanded each piece with 180 than 220 grit sandpaper and wood filled all the cracks for a smooth finish.
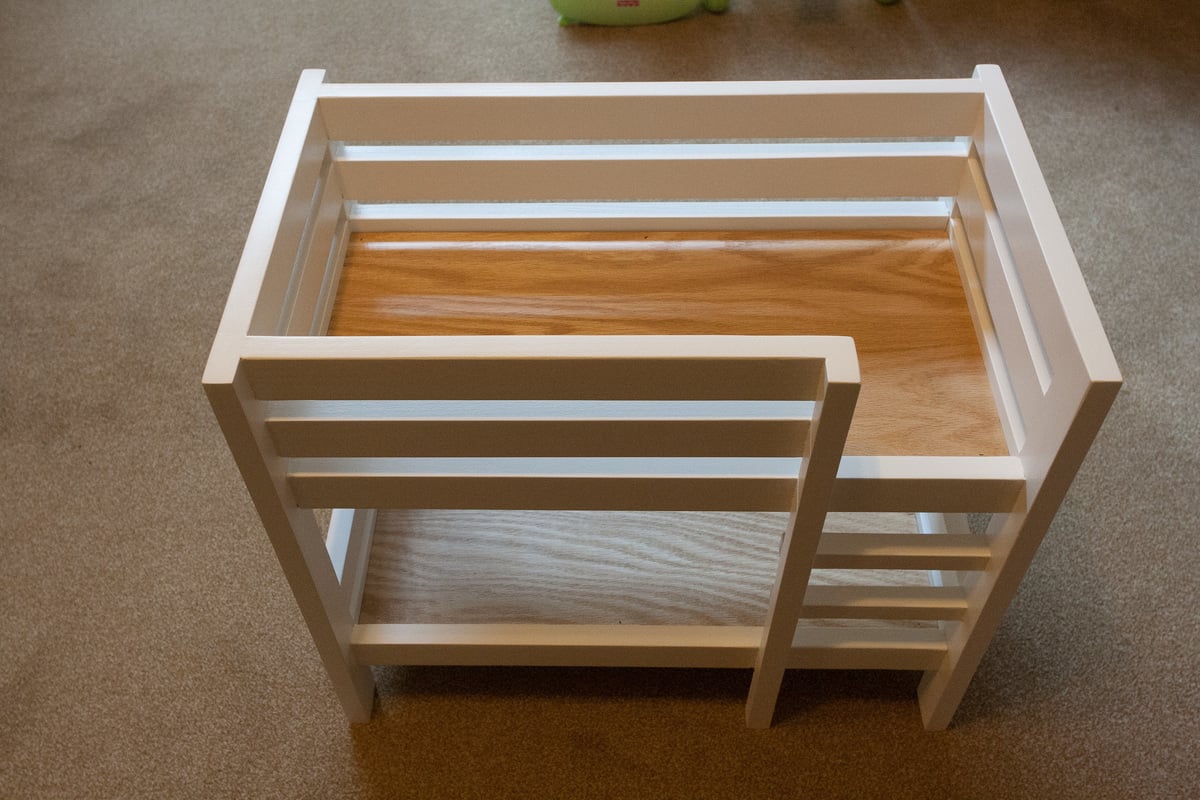
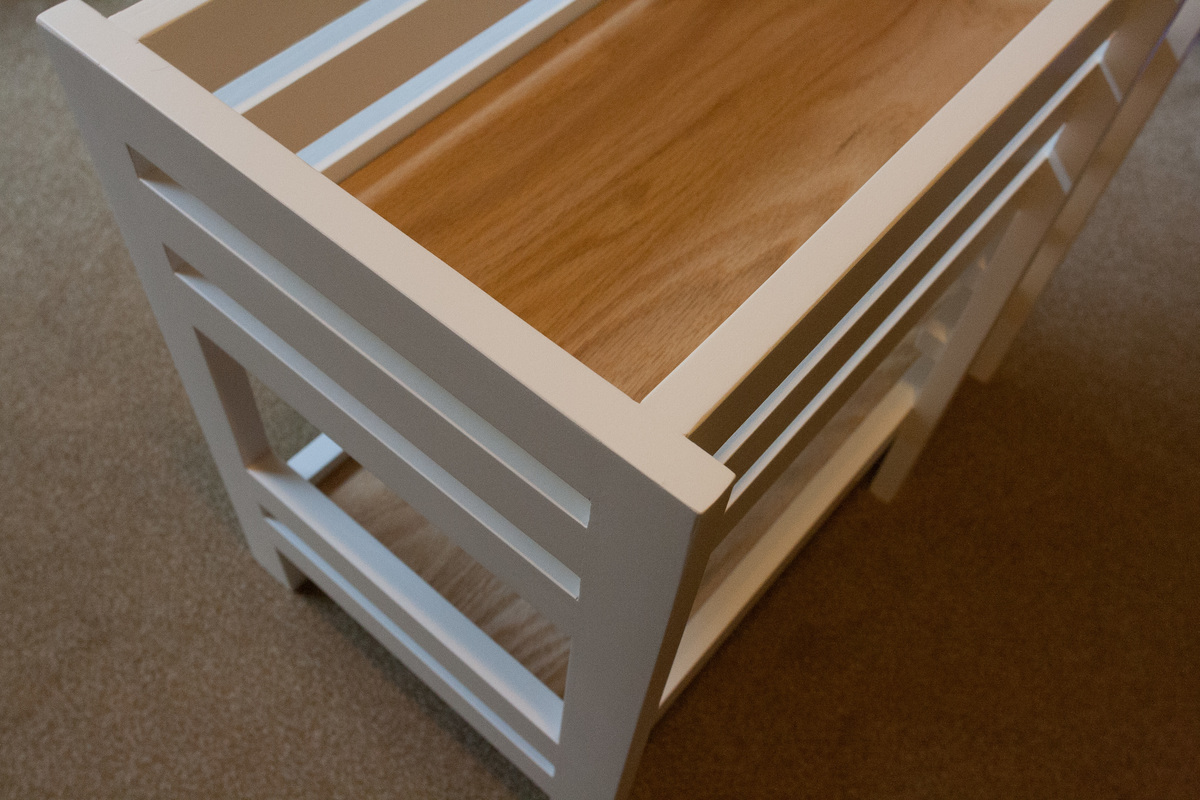
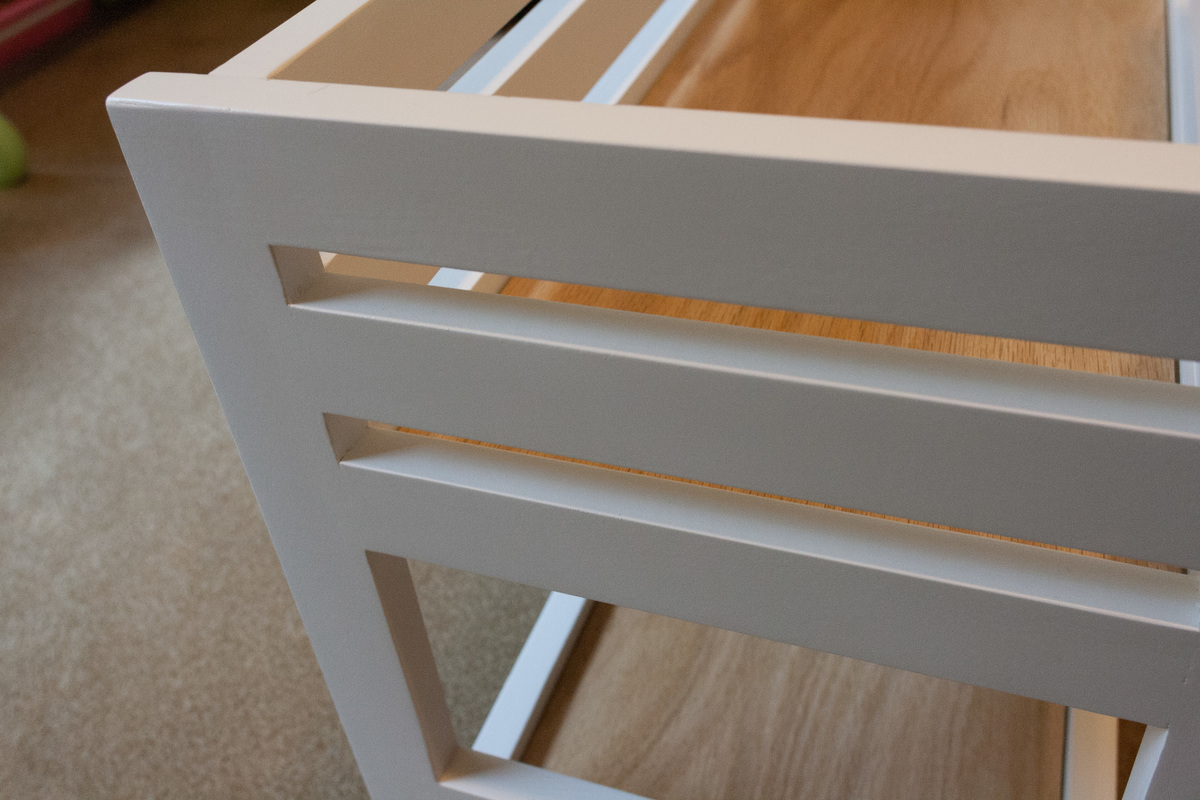
This doll bunk bed was constructed by my twin sons (age 9) and me as a Christmas present for their younger sister.
The tools used were:
Circular saw with Eurekazone tracks
Random orbital sander
320 grit sanding sponge
HVLP 4-stage sprayer
Dowelmax
Kreg Jig
18 gauge brad nailer
Various Clamps
Oscillating Multitool
Chisels
The Eurekazone tracks allowed me to easily rip the thicker stock for the ladder steps and also allowed for boards to be cut to identical lengths as necessary.
The Dowelmax was used for the head and foot of the bed. It allows for very close alignment of the faces. A quick sanding allowed for straight gap-free alignment. It also allowed the boys to easily drill straight.
The Kreg jig was used with two screws at the end of each board. This allowed the use of the Kreg 90 degree clamp in one of the holes. The holes were filled with the Kreg paint-grade plugs. The top boards were aligned by setting the bed upside down on the bench for alignment.
The plywood was attached using a gel cyanoacrylate glue with a few brads.
The oscillating multitool was used to flush cut the Kreg plugs. The little bit of plug left after that was trimmed off with a chisel.
Thu, 01/02/2014 - 08:47
I was looking at the closeups of your joints. The dowel joints are seamless. I used dowels when I made this bunk for my kids, but I didn't use "blind" dowels like you. I used simply drilled a hole through the joint, inserted a dowel, and trimmed off the extra (so called "through" dowel joints). I painted it so you don't see the dowel, but you're joints look nearly perfect and can be used with a clear finish. I'm envious.
Fri, 01/03/2014 - 11:21
The real key was the Dowelmax jig. You can easily get 1/100th of an inch accuracy across reference faces (basically as accurate as your fingertips can sense). After that, it's just a bit of sanding.
Using the pocket holes was a bit trickier for both alignment and filling in the holes. Using two pockets holes so that one could be used for clamping made the alignment easier. I would have skipped the pocket holes entirely, but I had dowel interference problems if I used dowels for both the ends and the sides. Pocket hole screws easily screwed into the end dowels that were hidden. The pocket holes would also make a clear finish more difficult (I'd probably stain it first to blend the inserts with the normal wood).
We get so many compliments on this table! Adjusted it to be a little shorter and narrower for our space.

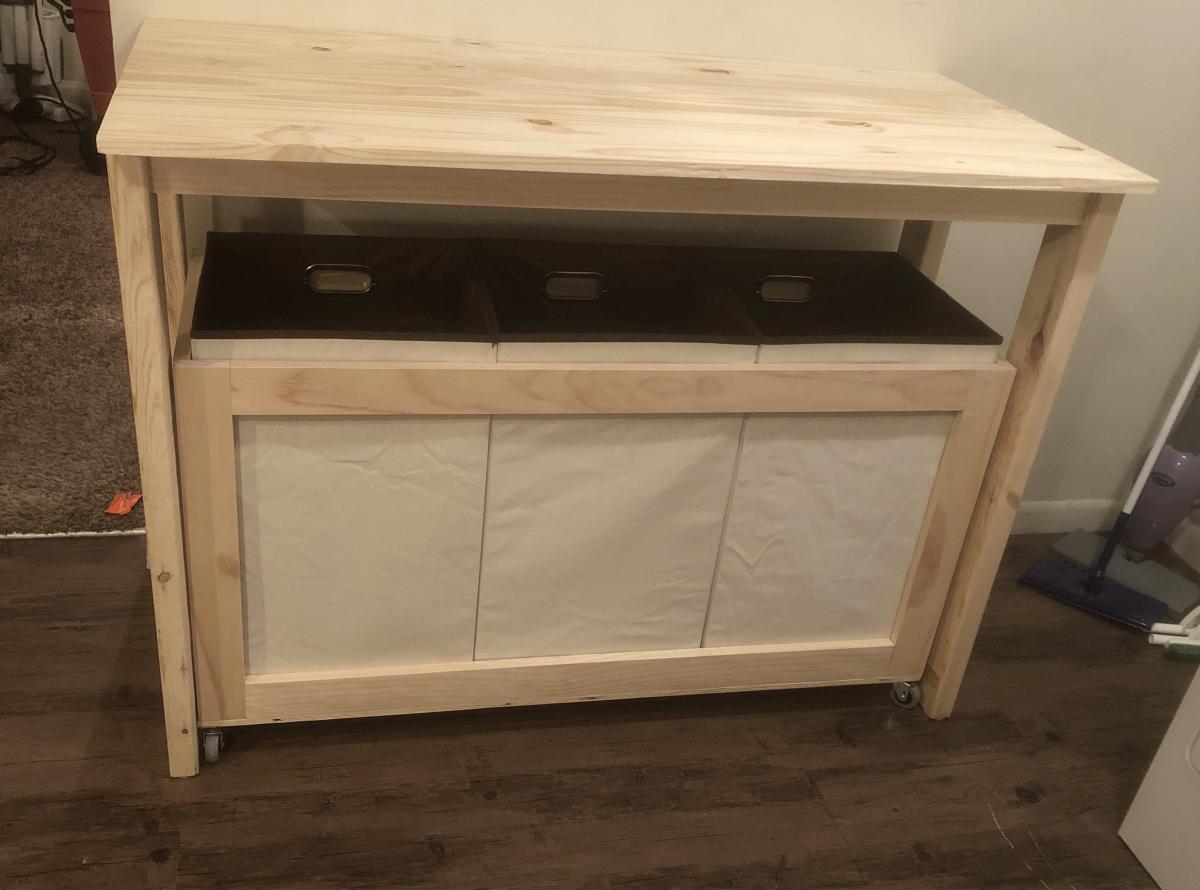
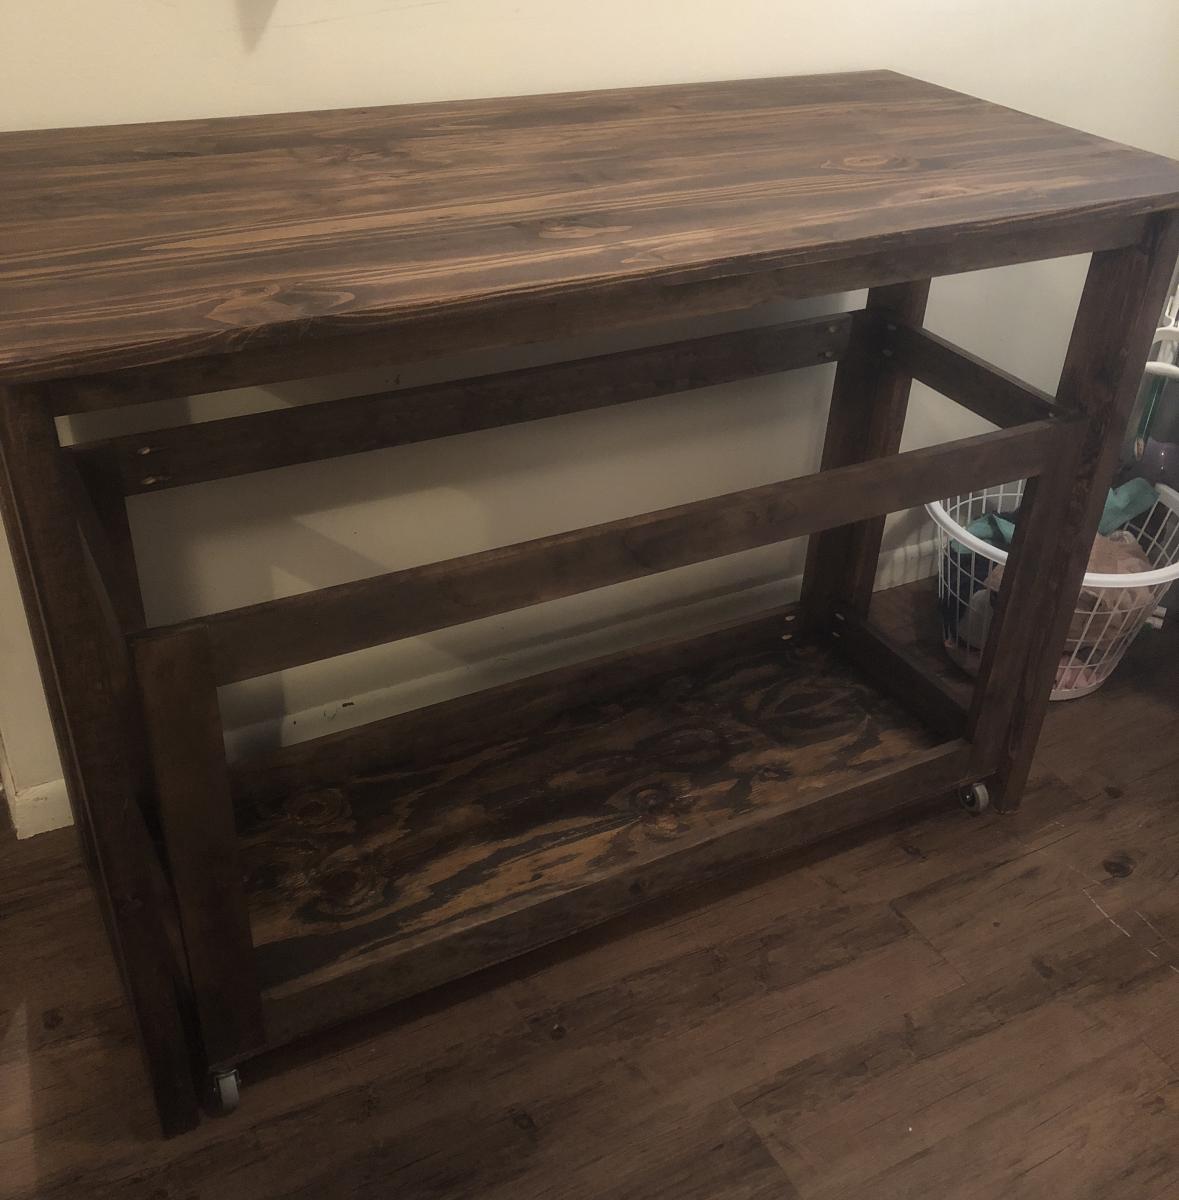
I built this project for my daughter’s birthday. Her laundry area was a mess in her kitchen and she had no place to fold the clothes. This laundry station keeps her laundry area tidy, and it looks great!