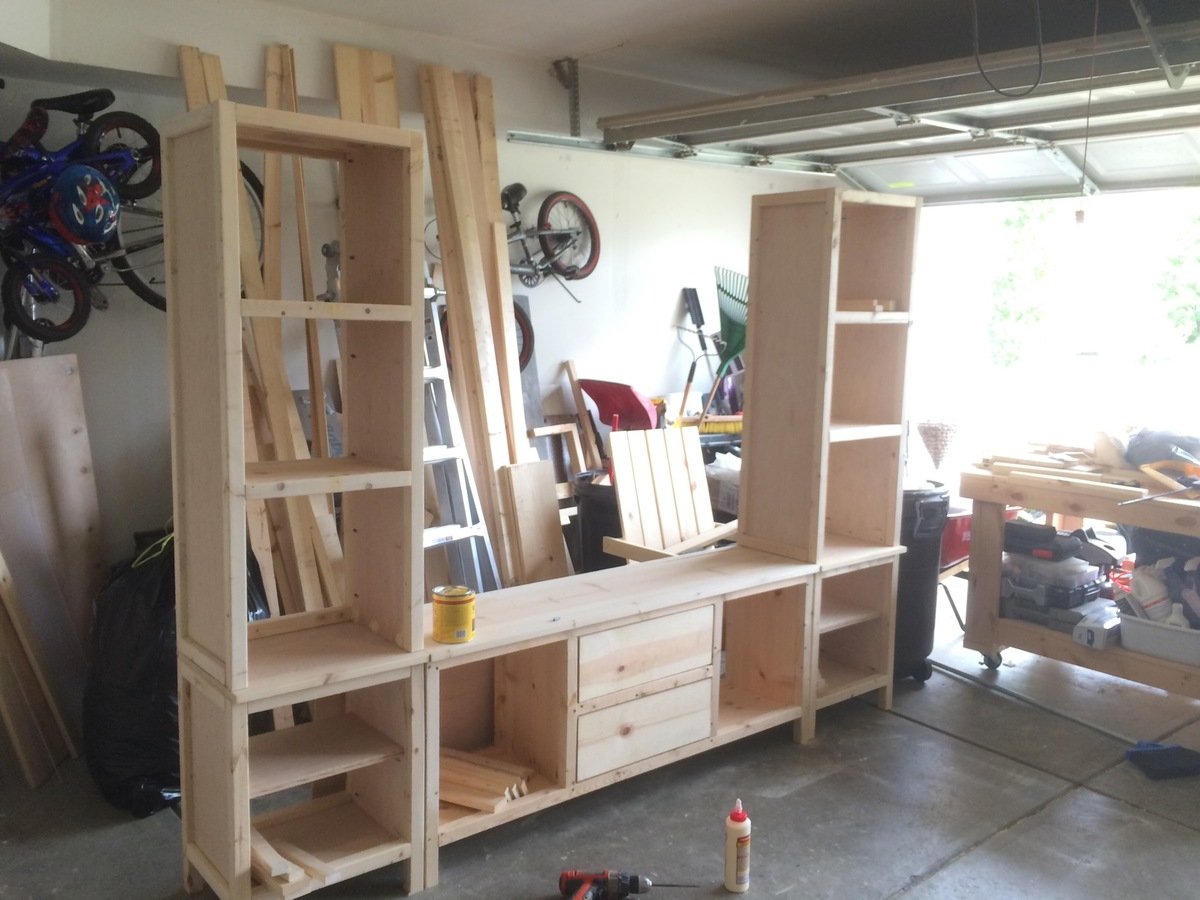
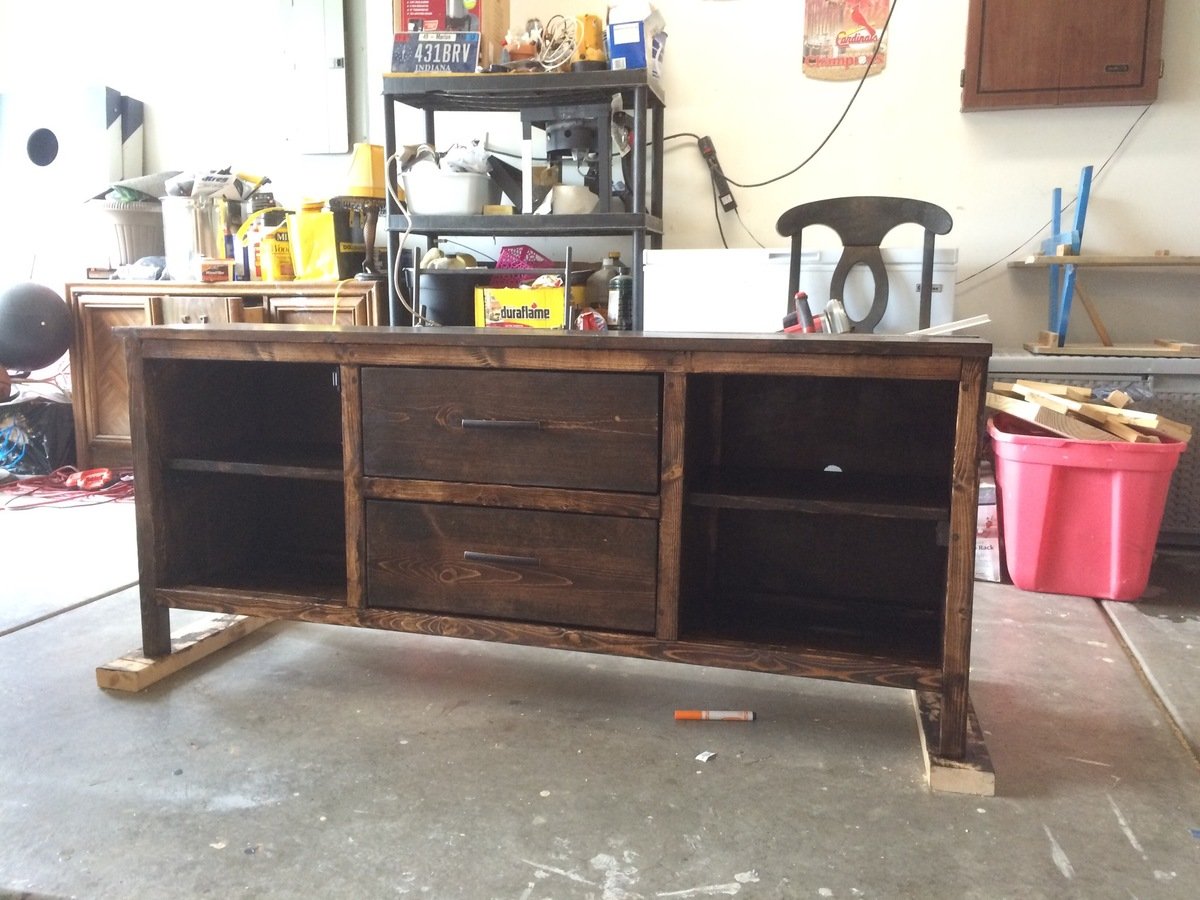
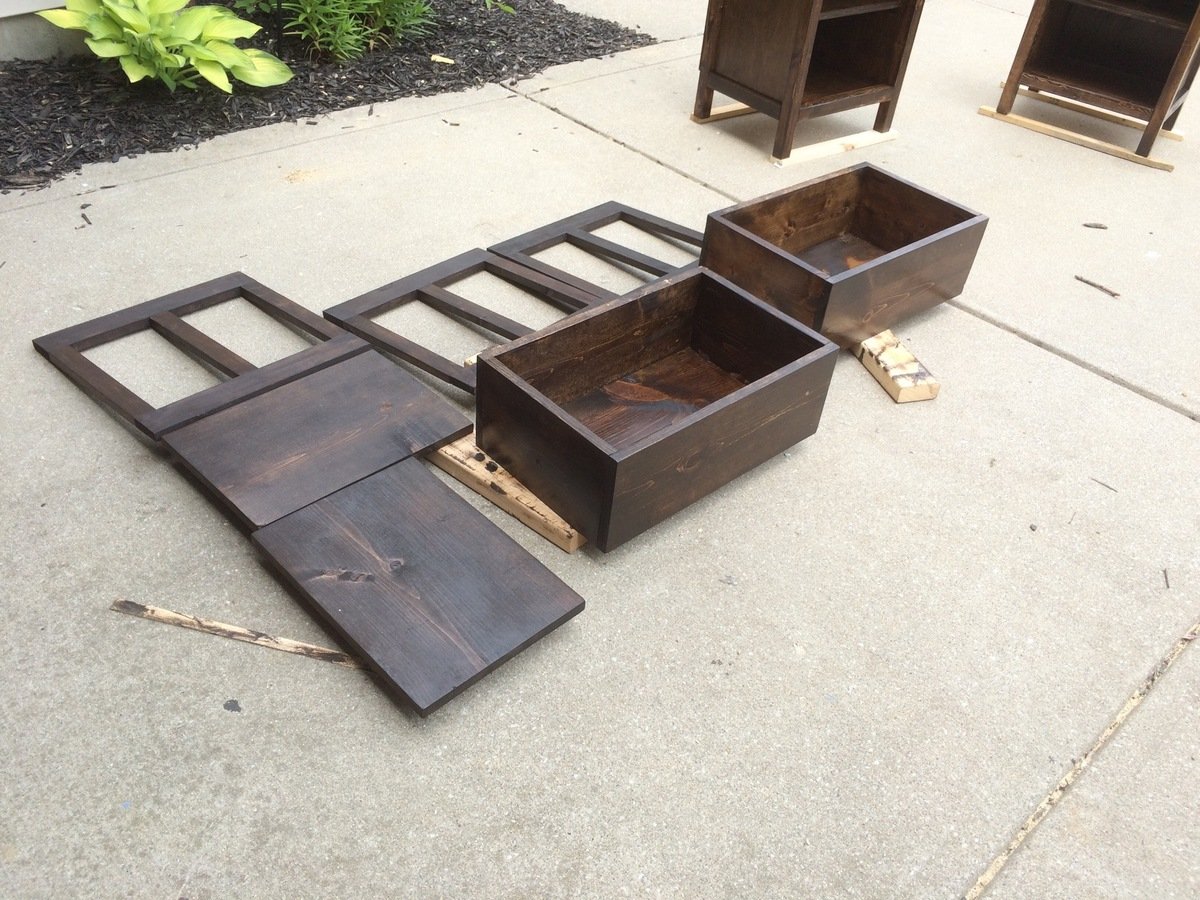
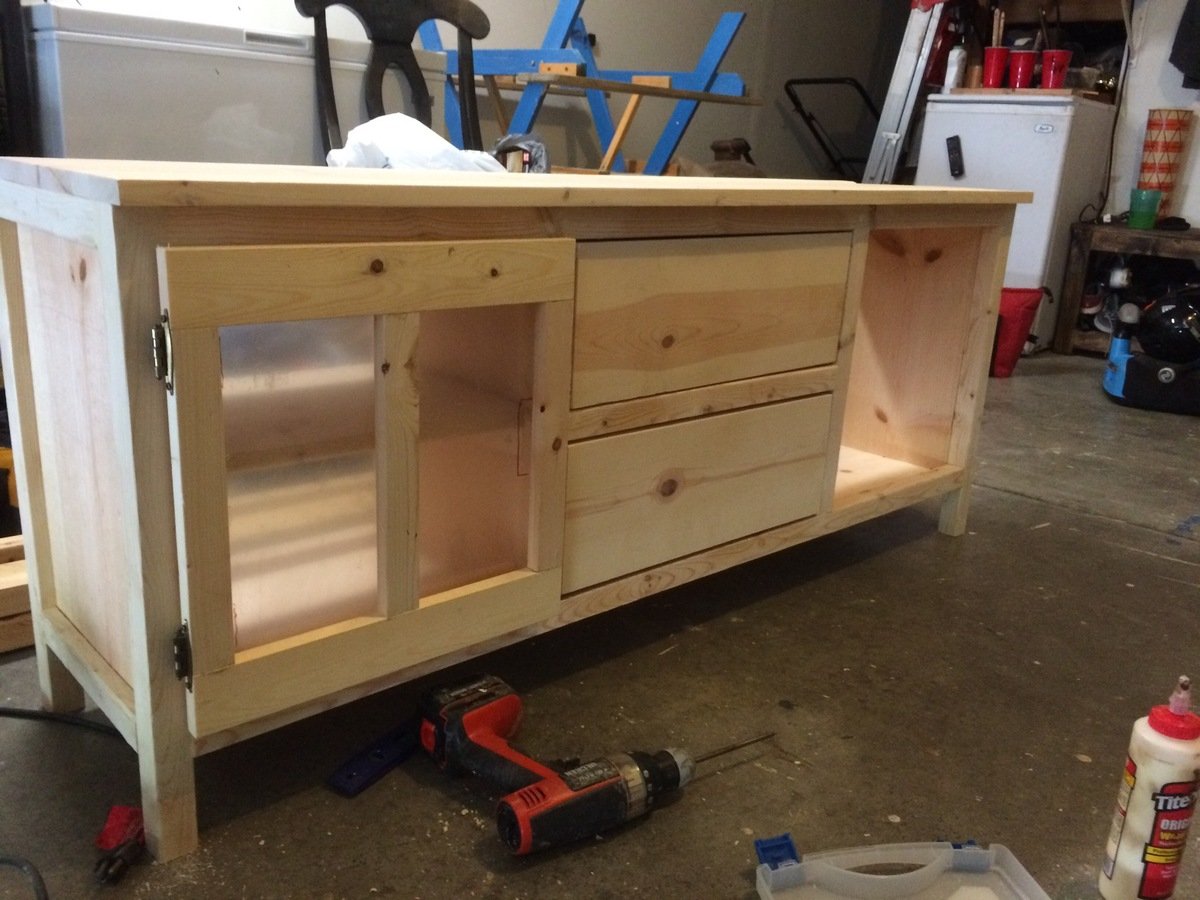
Mid Century Modern Entertainment Console
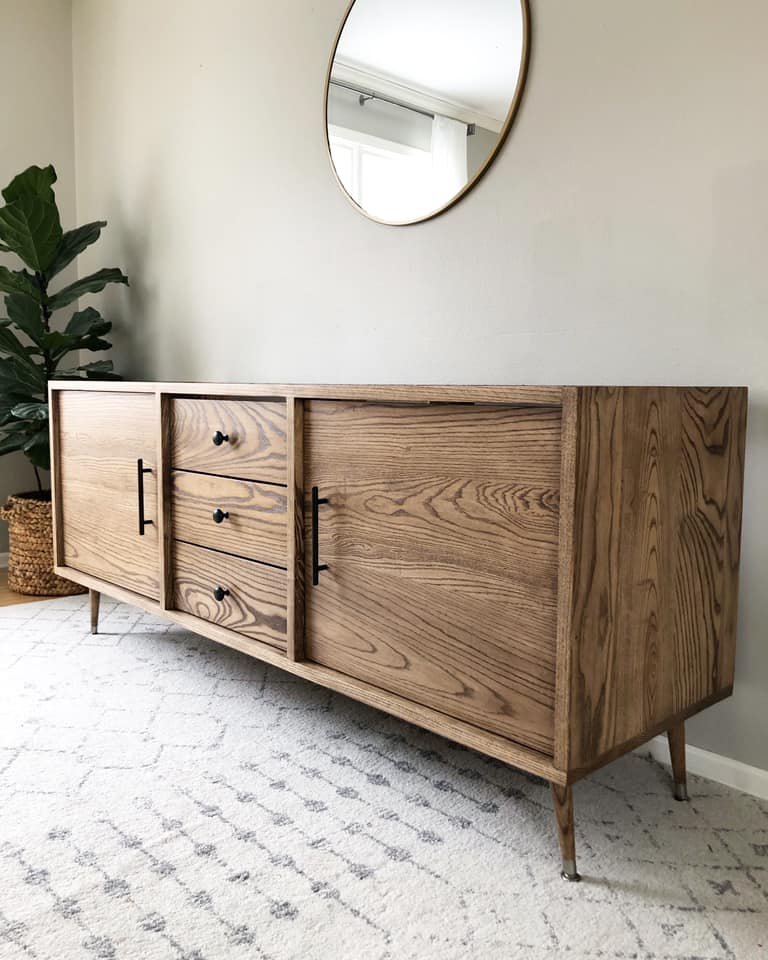
Built by Holli Peterson
Built from Plan(s)
Built by Holli Peterson
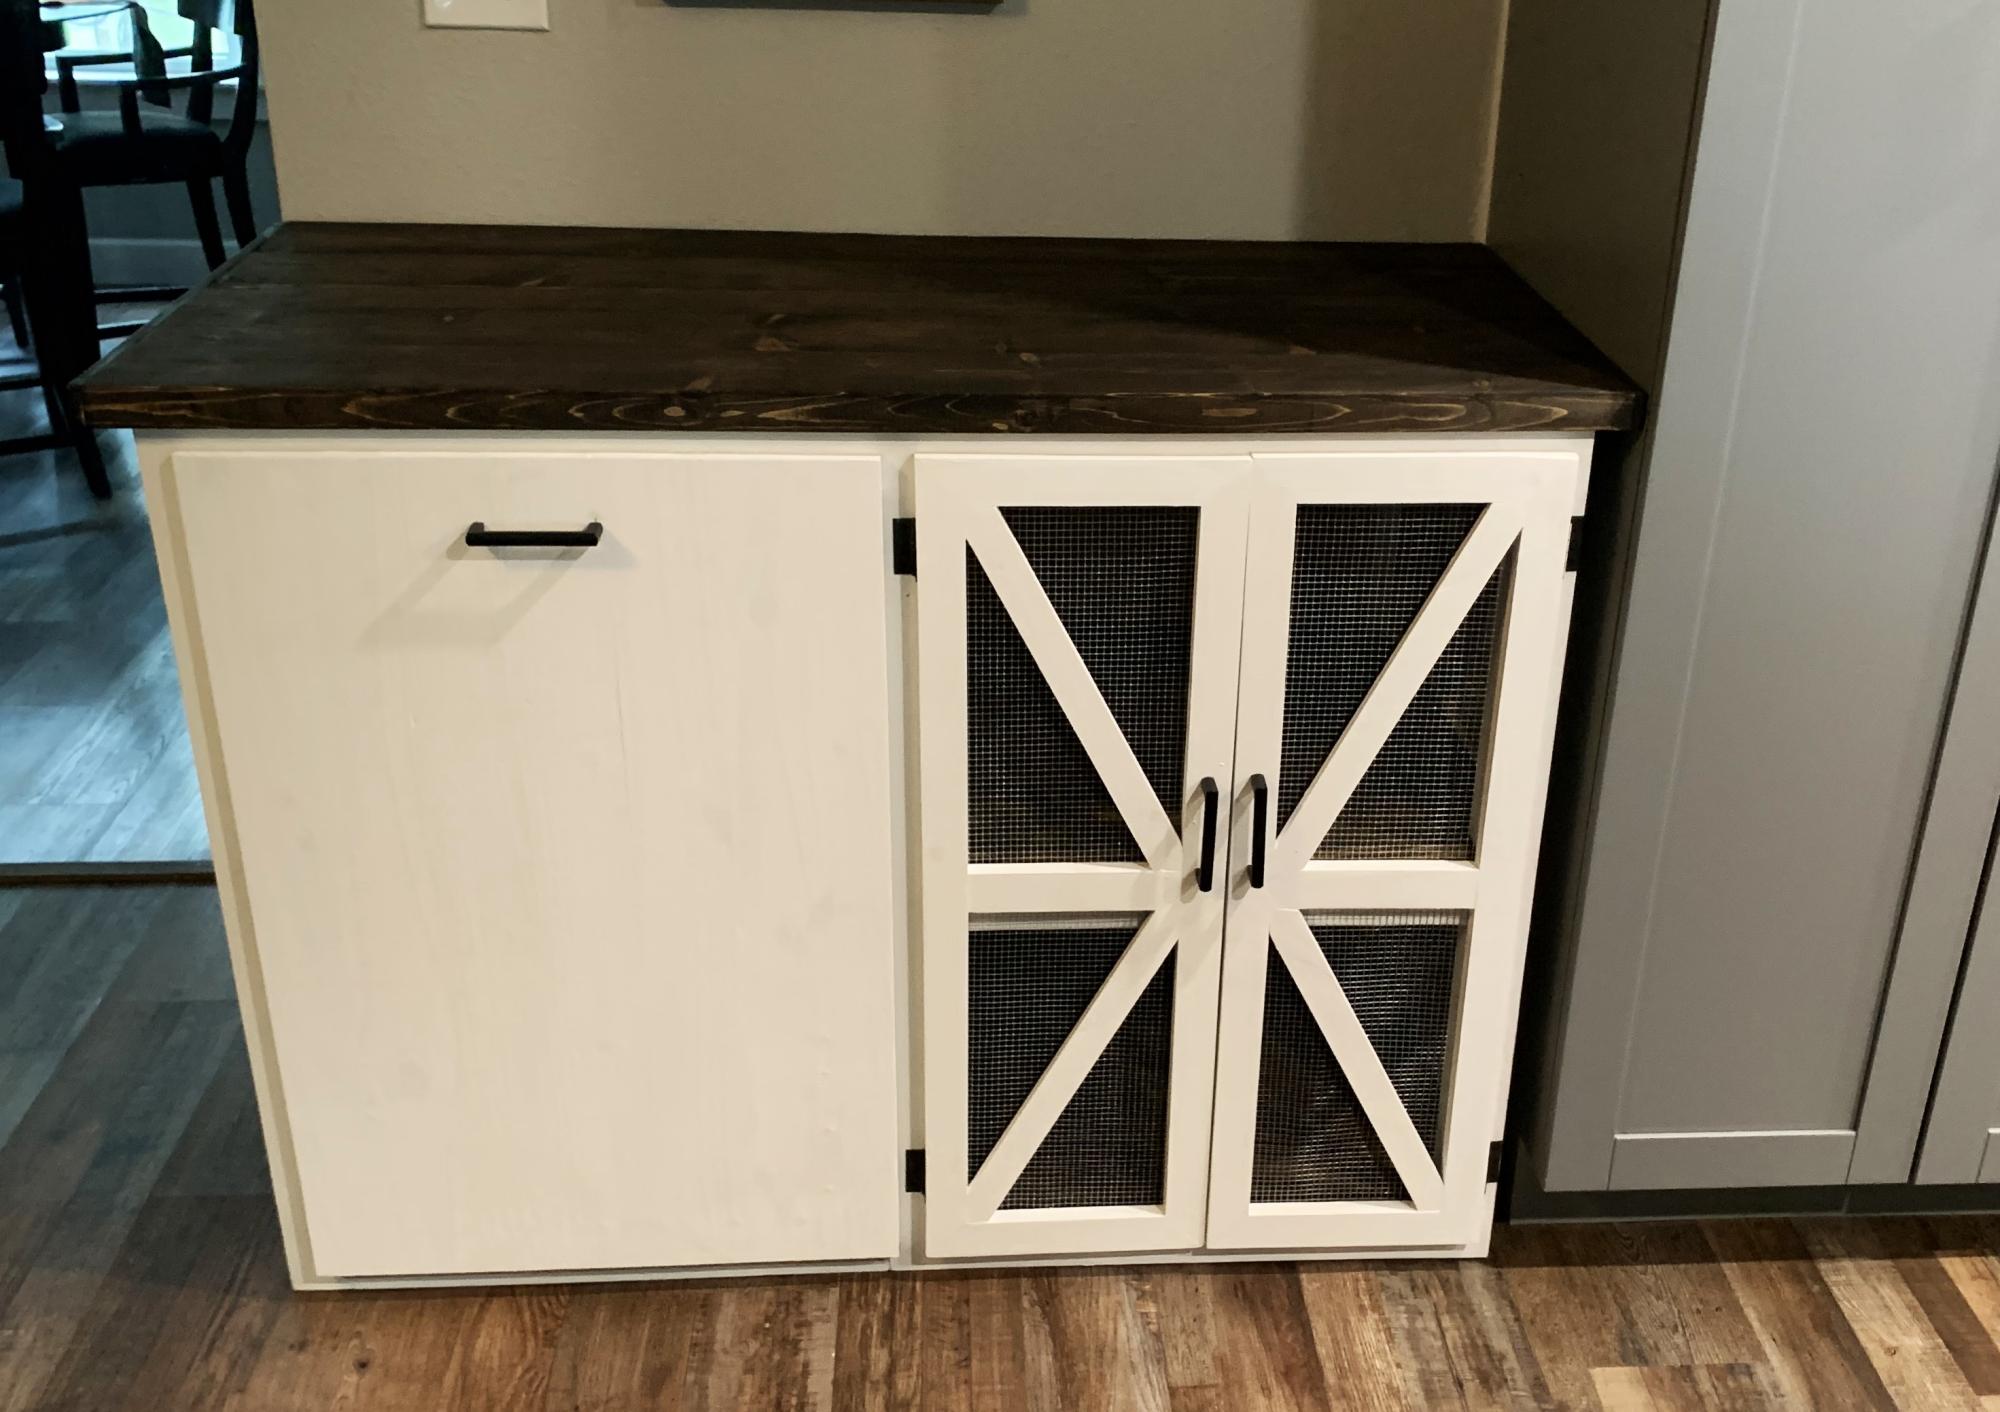
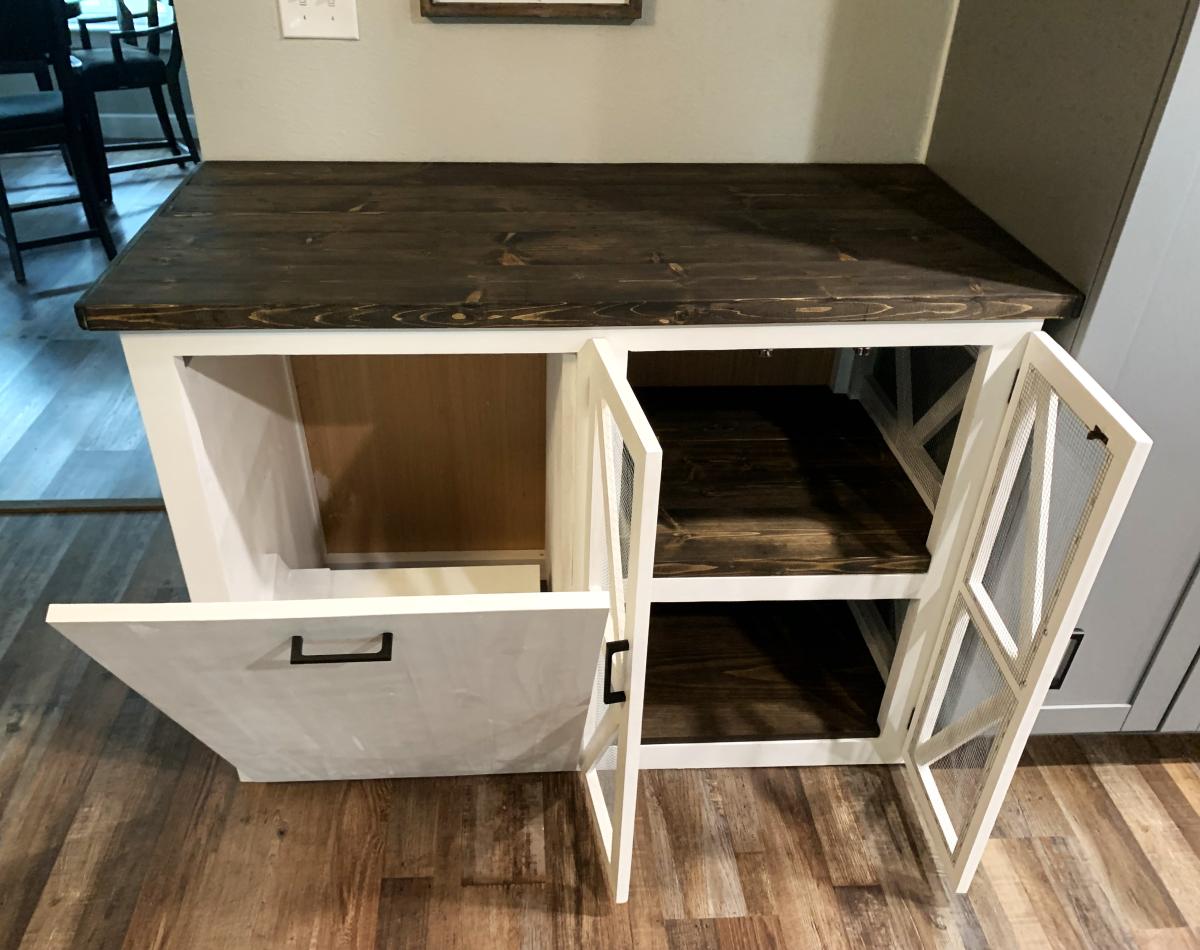
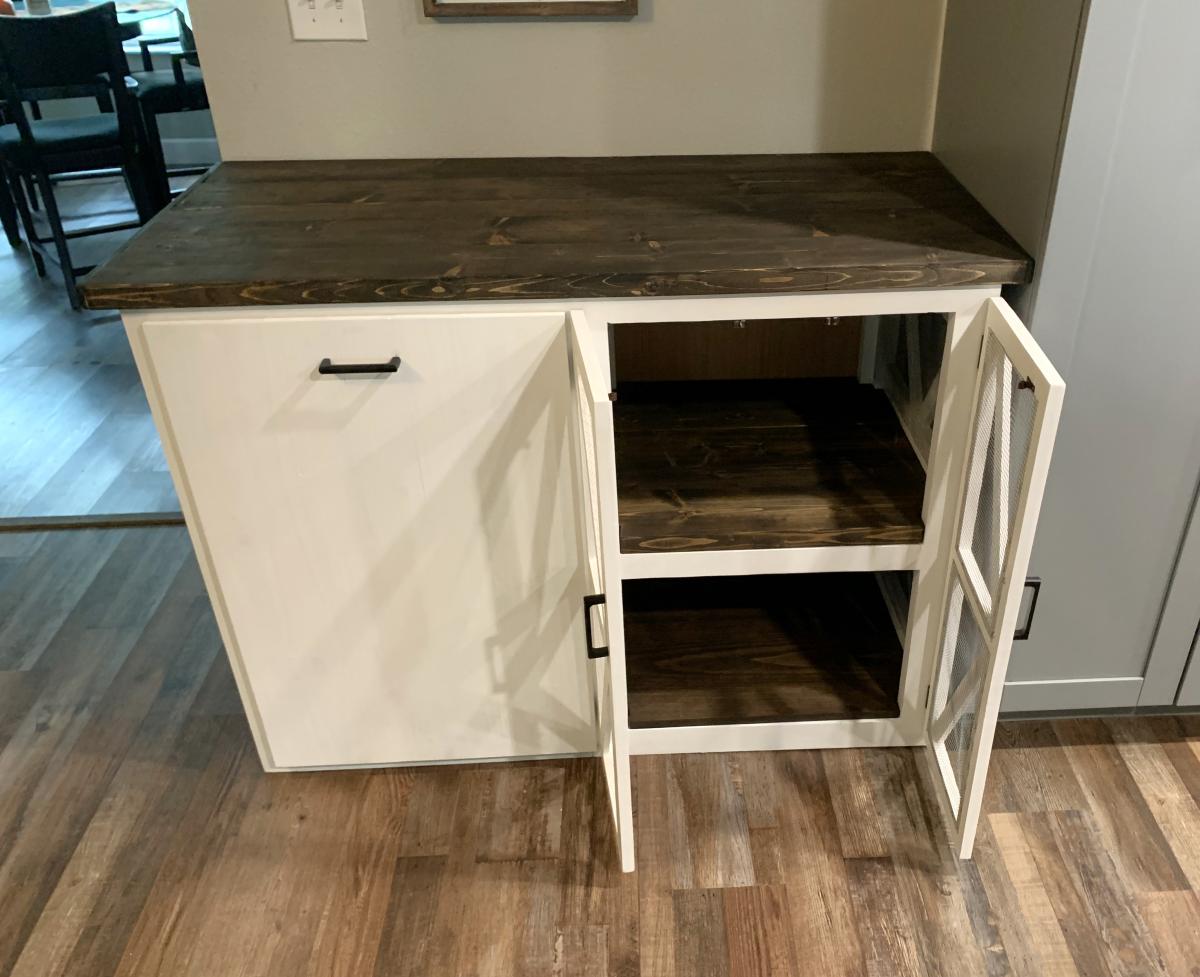
Coffee station with trash can holder and storage.
Royce and Lynn Ledford
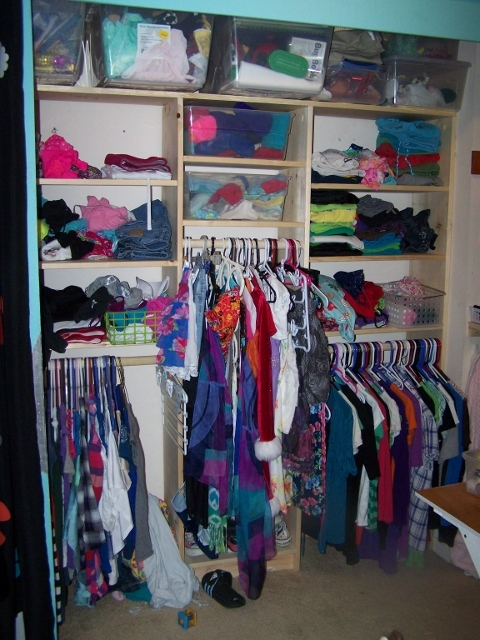
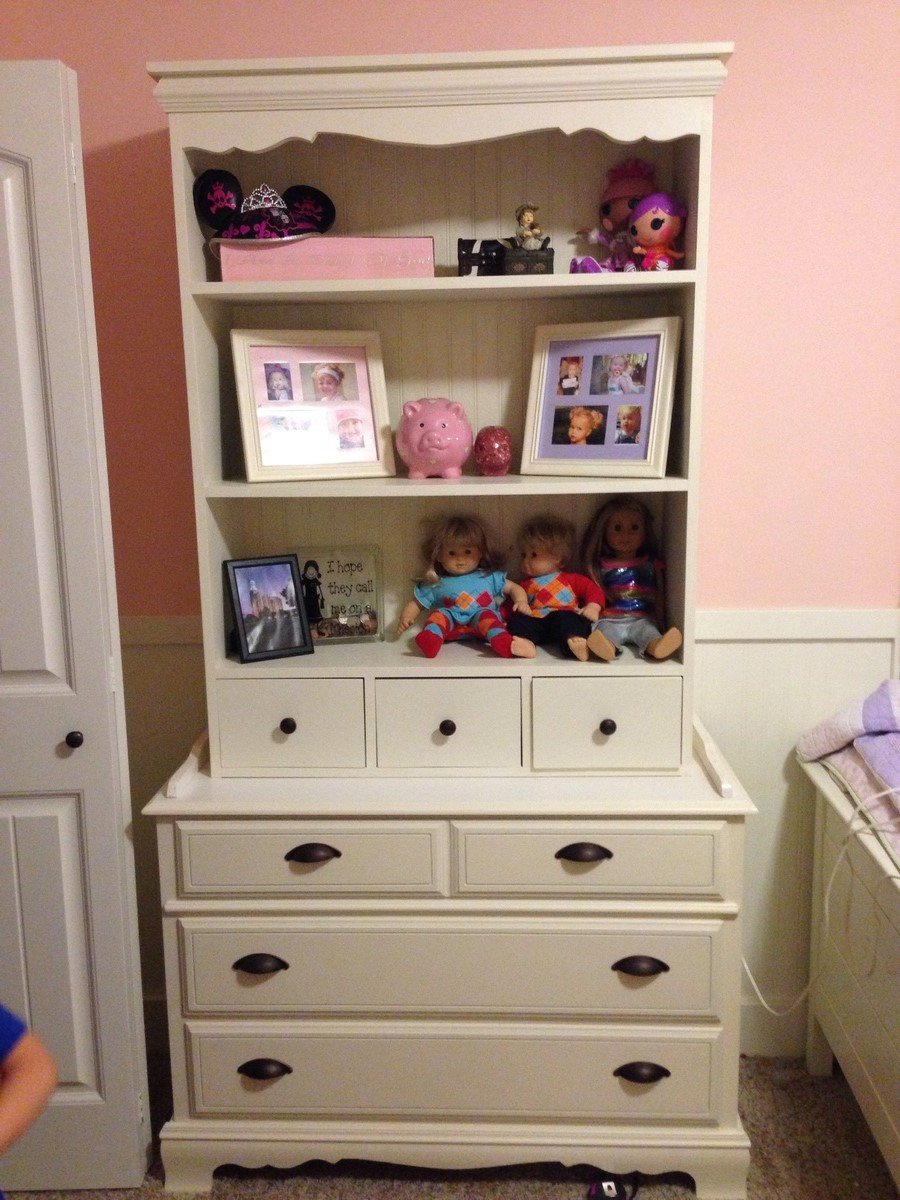
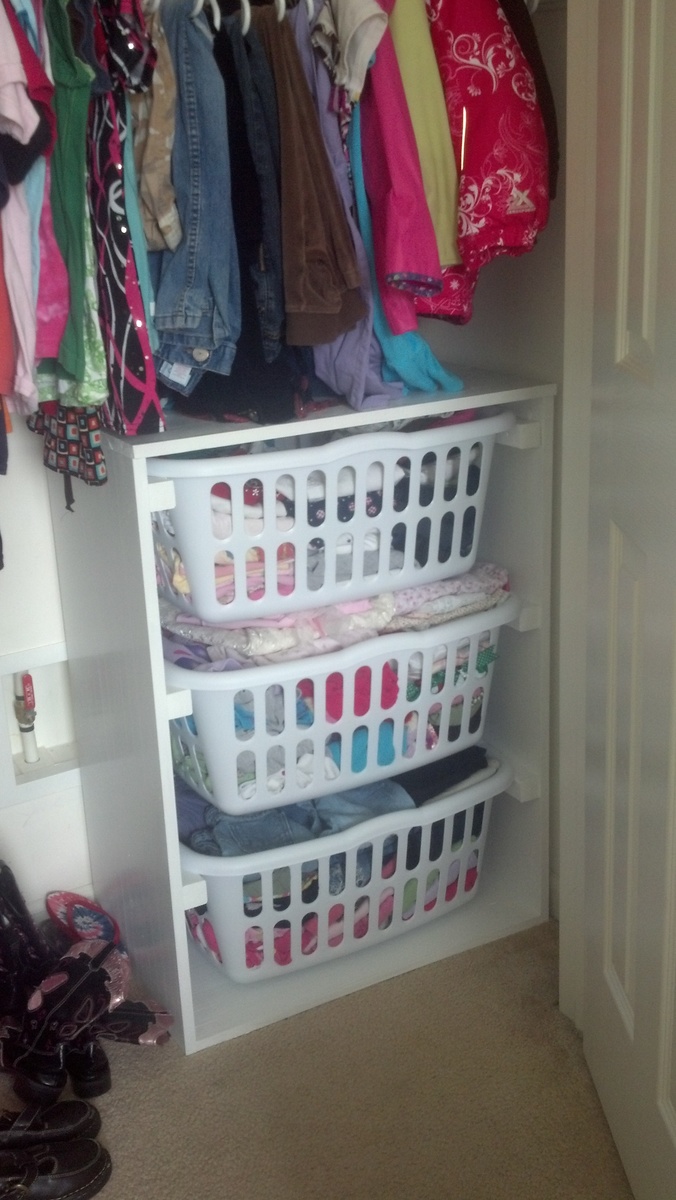
My two girls (9 and 12) share a room and their dressers (cheap from Ikea) were not only taking up too much space, but also falling apart!
I used Ana's closet organizer plan as inspiration for this, adding more shelves since they won't have any drawers to use.
All of their clothes fit (though its tight!) and they each have their own space, plus much more space to move in the rest of the room.
I made a google sketchup file to work with, but I'm not sure how to upload it?
Basically, I just bought 7 1x12 boards (6' length).
I used 4 of them as uprights: one on either side wall because I couldn't find any studs!?
Then one more is the top shelf (for storage of things they don't use often)
Then the final three were cut to make the shelves - I had very little waste.
One 6' wood dowel (1.25" diameter) for the closet rods. I screwed them directly into the vertical supports instead of using a bracket.
Additionally, I used a couple small 1x4 scraps to make a toe-kick for the middle bottom shelf and a brace at the top. I was going to use the top brace to attach the whole unit to the back wall, but it ended up being too tight a fit and too heavy to pull out to drill into it :) So I think its stable for now at least!
I chose to leave it unfinished because I was in a hurry and the boards I got (at Lowes) were really clean and smooth to start with. The girls have been using it for a few months so far and I don't see any problems with it (splinters, etc.)
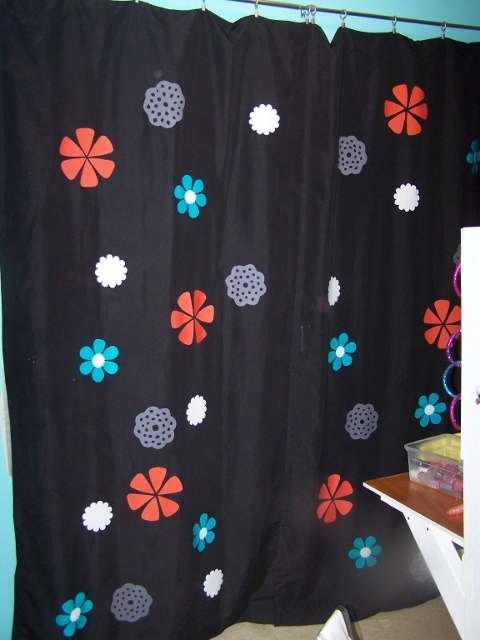
I managed to get a picture while it is tidy (hardly ever) and also a picture of the curtains I made to replace the doors - much easier to see the whole space now, and still close it up when (always!) its not tidy.
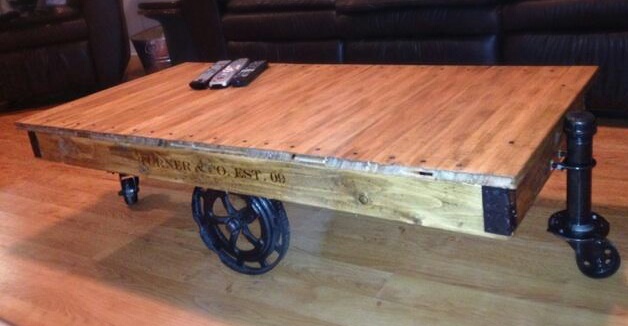
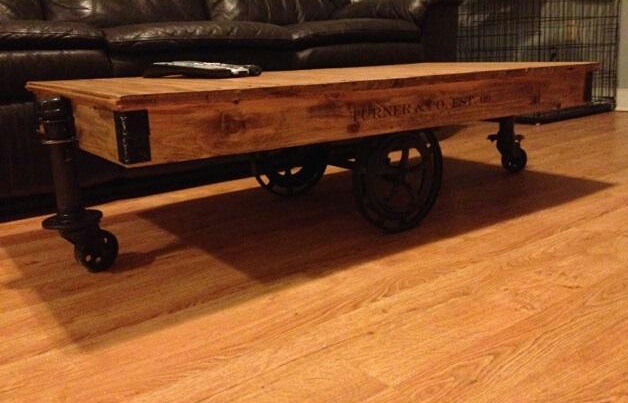
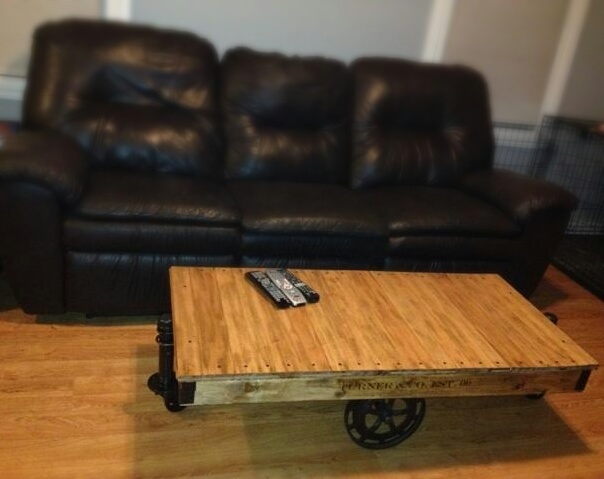
I absolutely had a minor design change. But there was not a single plan I found with measurments! Can always count on Ana White's blog! I found FREE unfinished hardwood being scraped and I was able to use it as my table top. I found the large wheels on ebay for around $20, they are old heavy duty 10 inch lawn mower wheels. I bought the frame wood and plumbing hardware from lowes, and the 4 inch casters from a tractor supply company! I also used a finish from this blog. Had an amazing time building this table, can't wait to DIY some more!

Easy to follow plans. Took about 3 hours to complete.

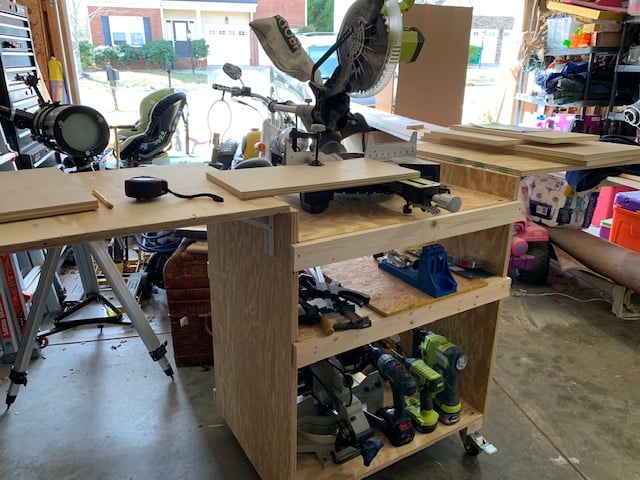
I desperately needed a cart and working space for my new sliding saw and other tools. I built an extra shelf to store the Kreg Jig! Awesomeness. My friends at the big blue box cut the plywood to spec for me! I am enjoying already! Most of the cost came from the brackets and casters - I chose heavy duty!
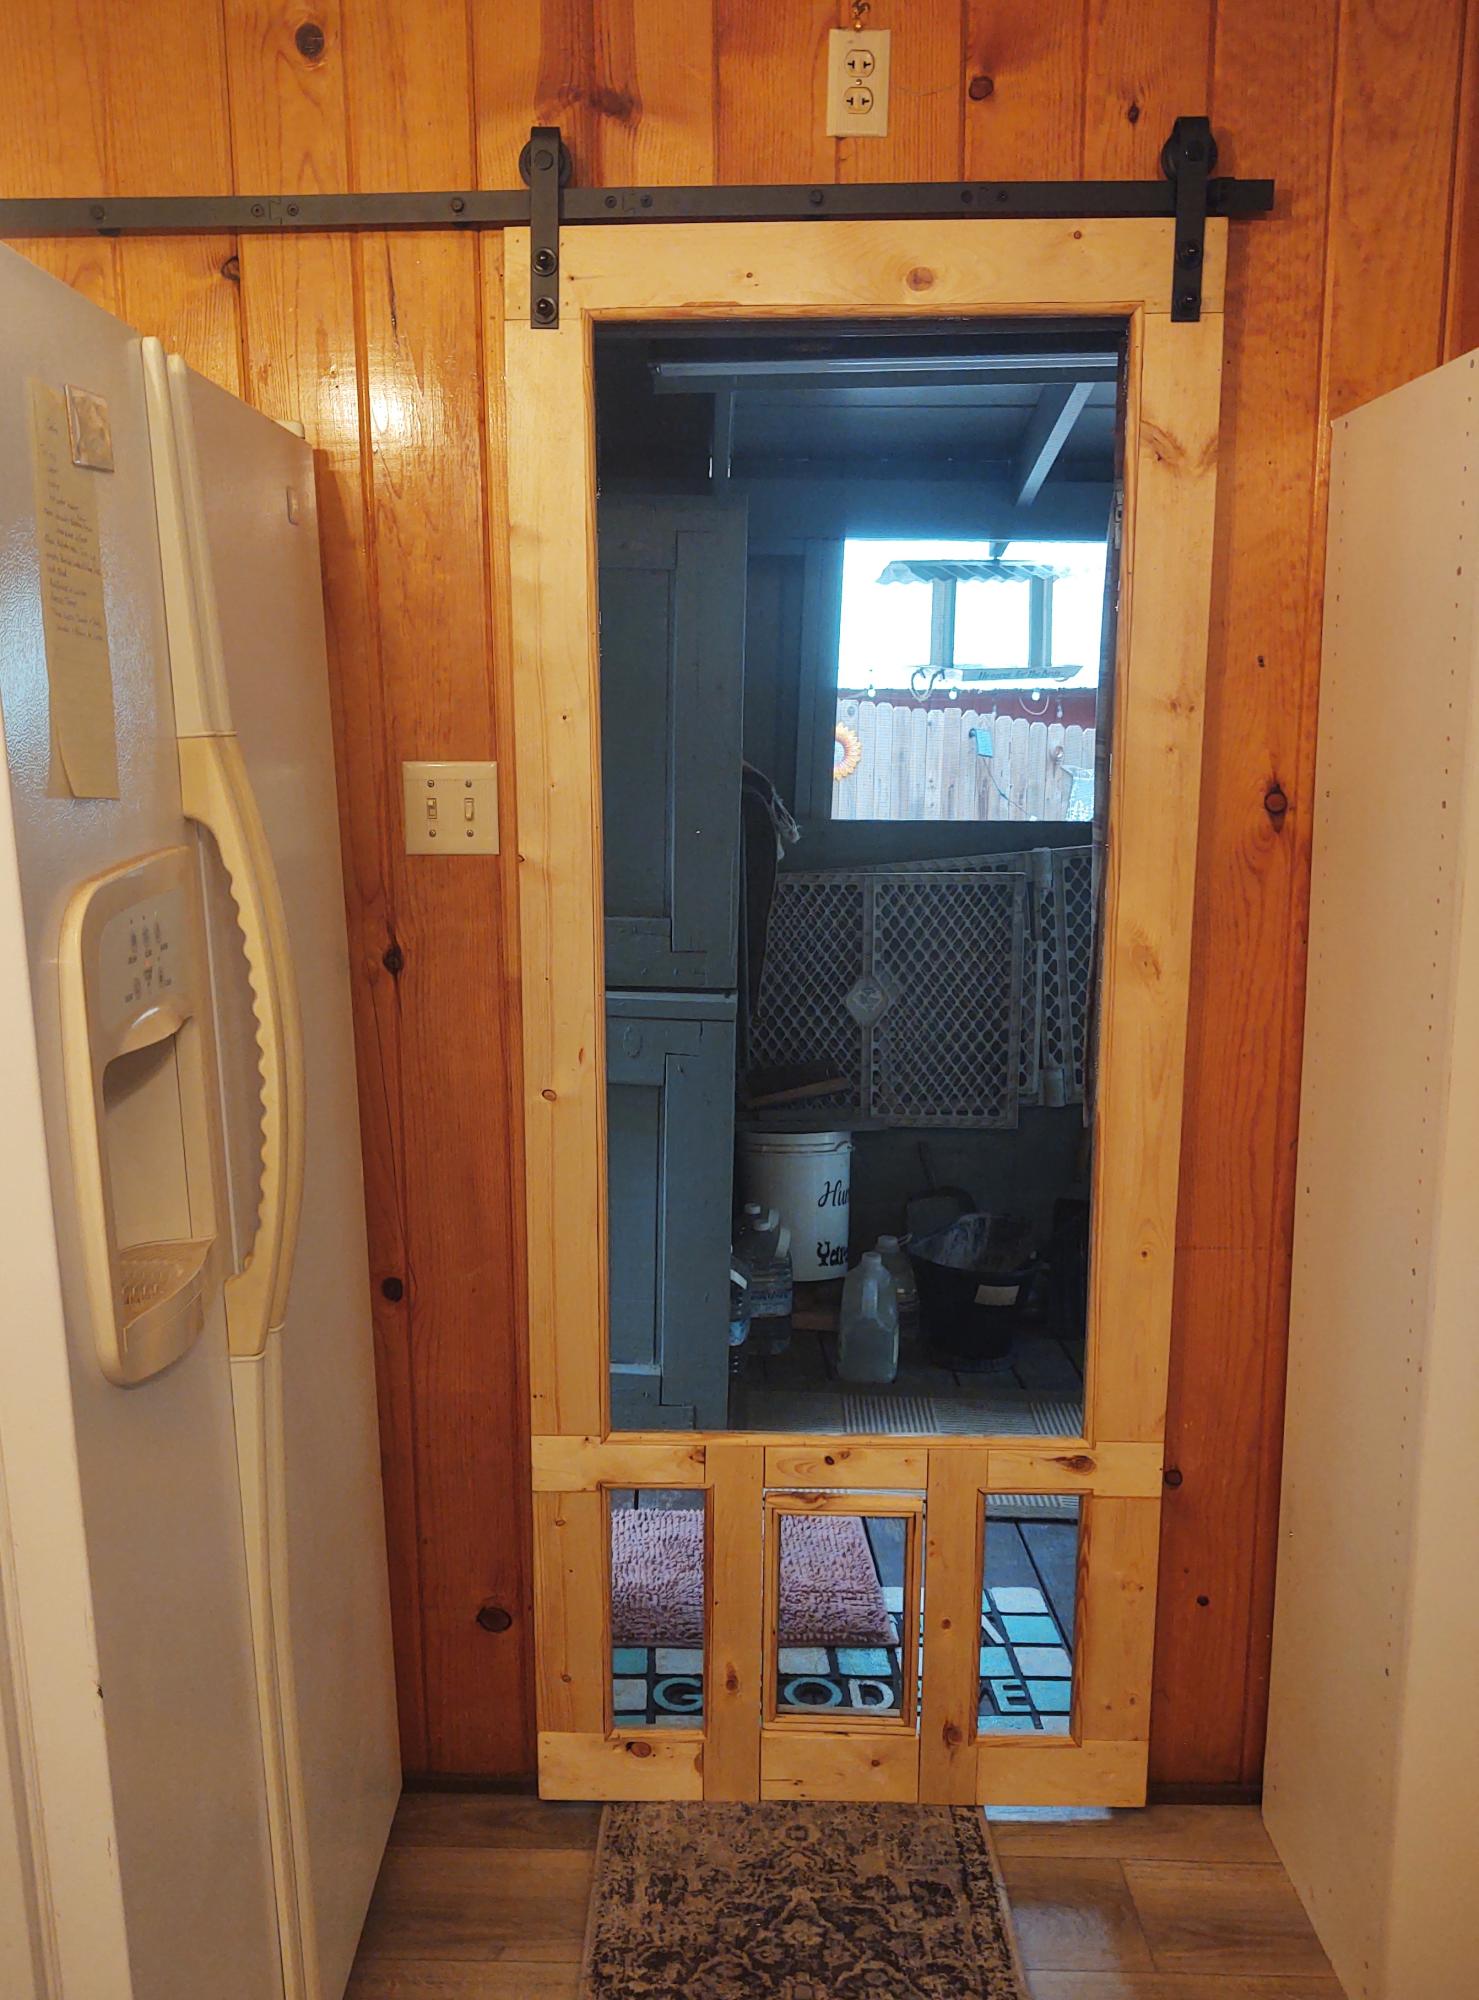
I needed a screen door but one on hinges wasn't a option. So I built one as a barn door. The center bottom panel is a doggie door. Lynda Westbrook
Fri, 10/20/2023 - 06:47
Do you have a problem with insects coming around the edges? Or is this an interior door and you just needed good air flow?

We made for our two oldest. This is our first couple project
Or rather a family project.
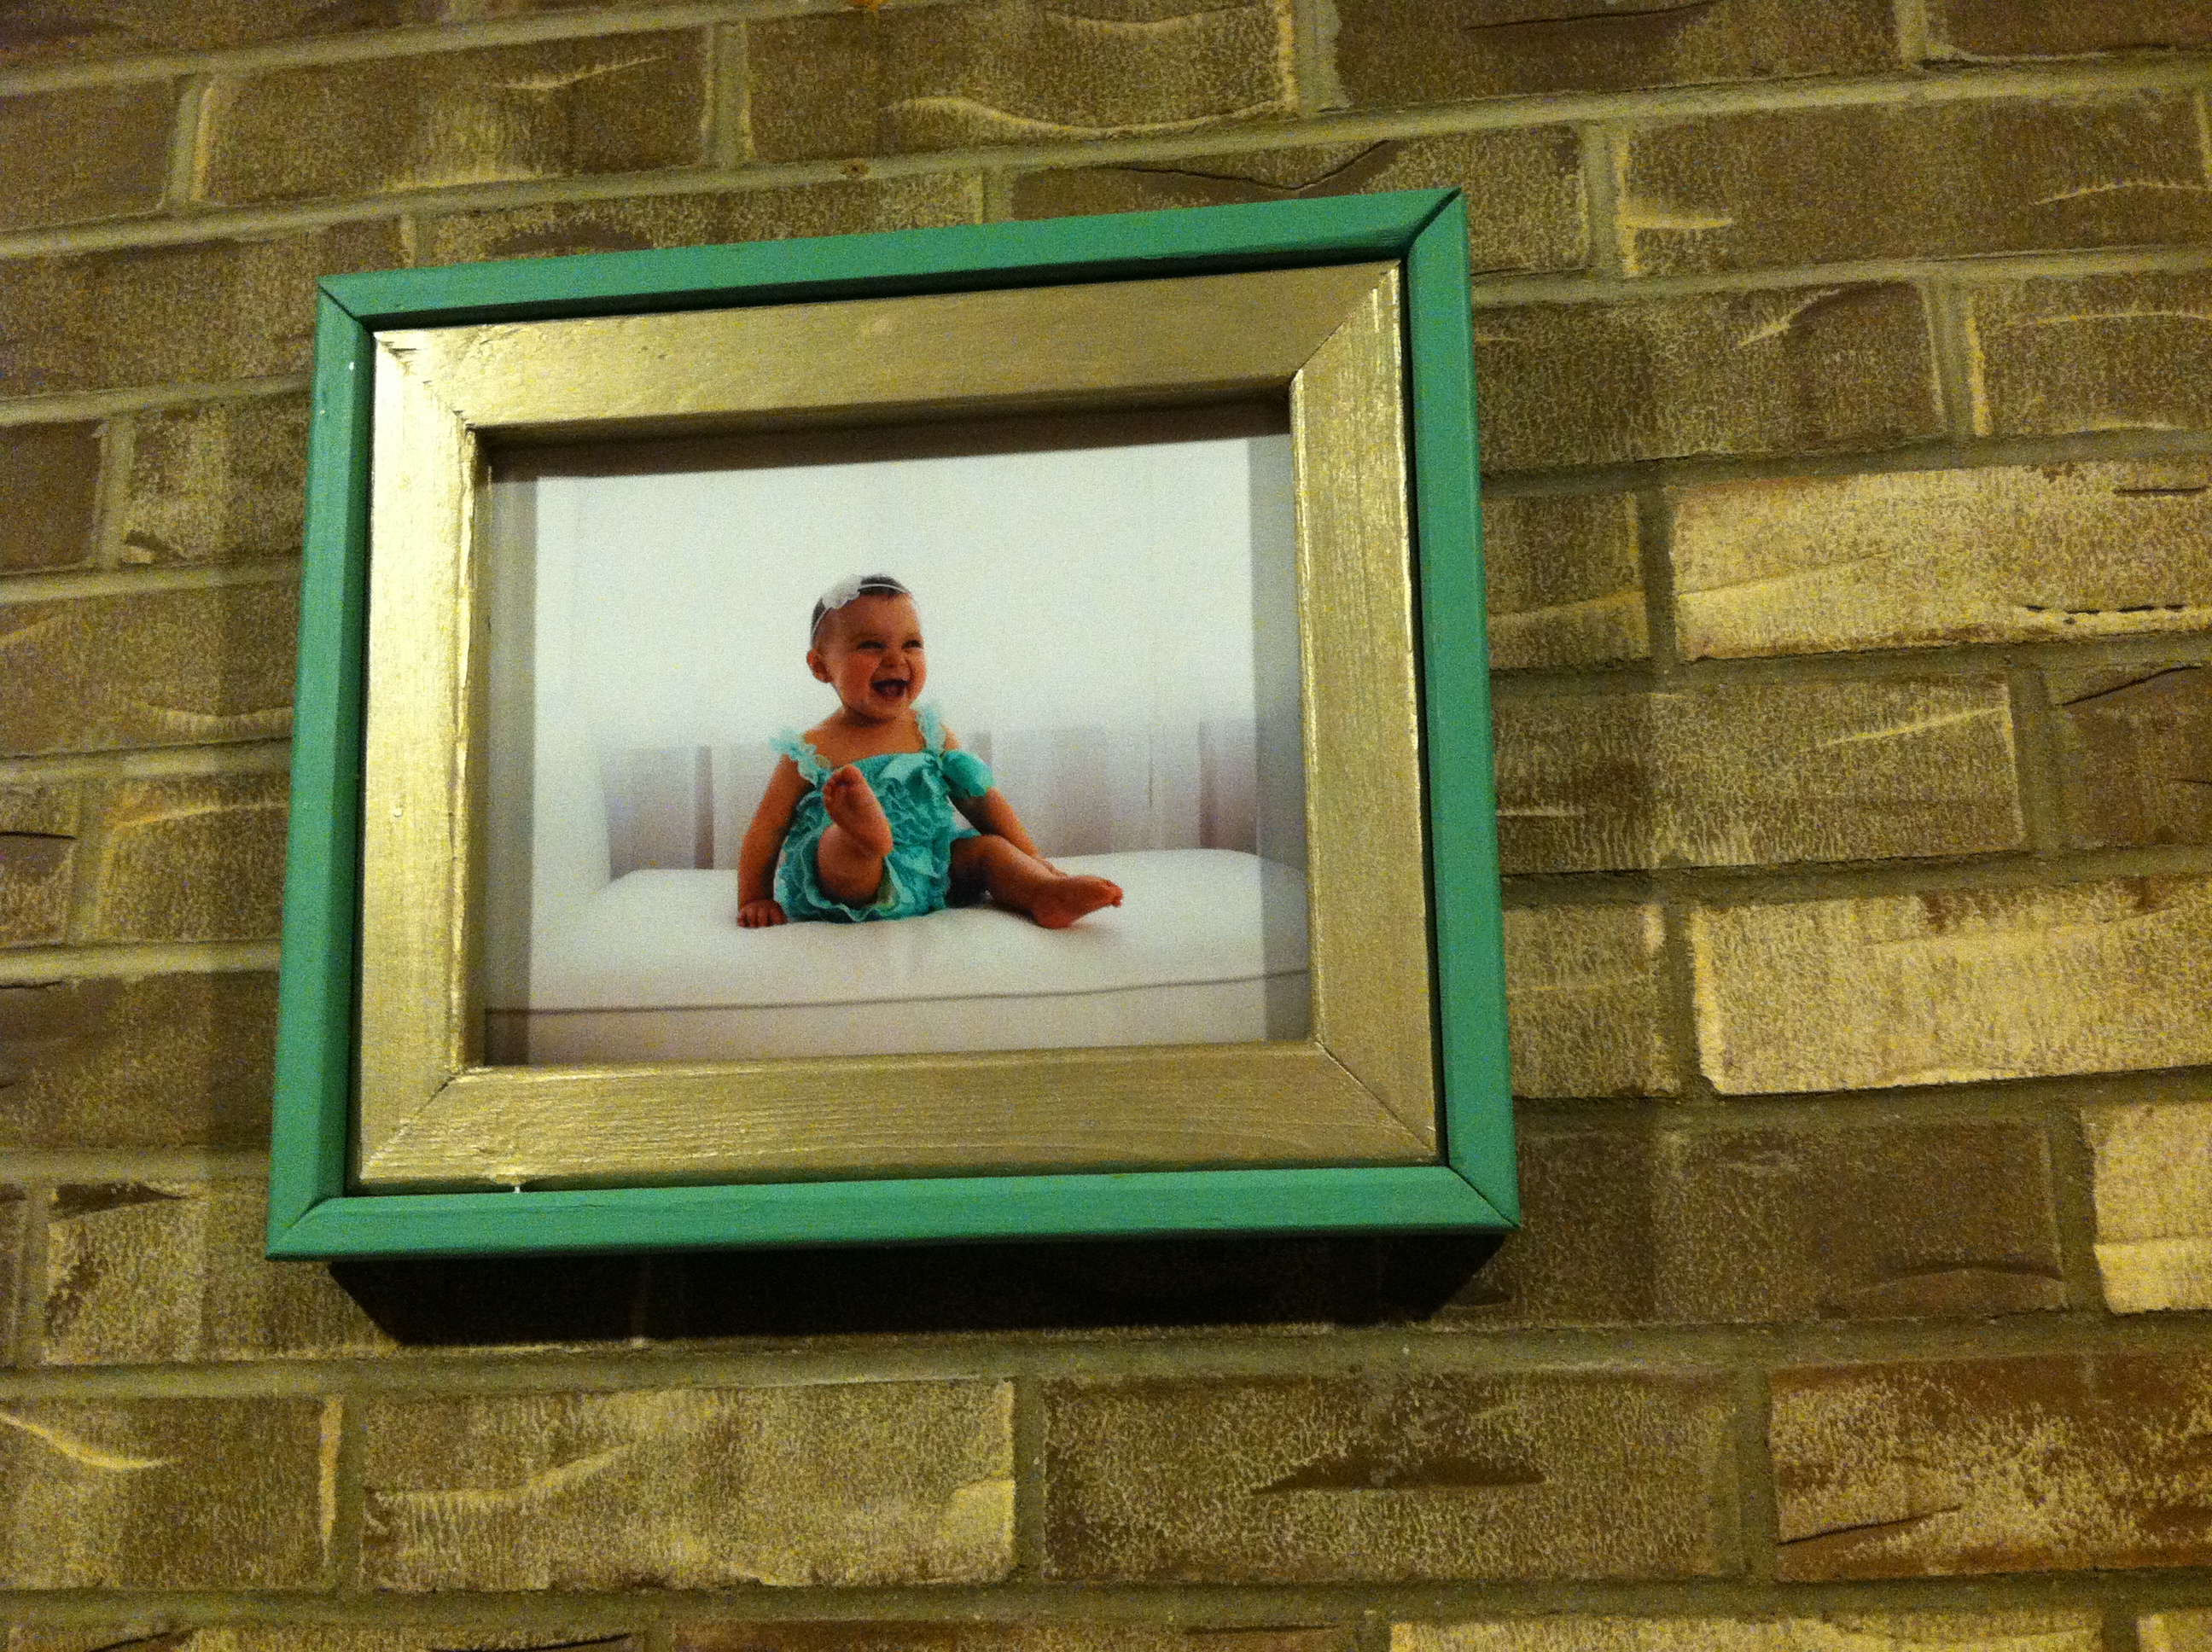
With some extra scraps of wood and paint, I tested my new miter saw by building this frame. I also finished it to match the green in the rustic media console cabinet that I had just built.

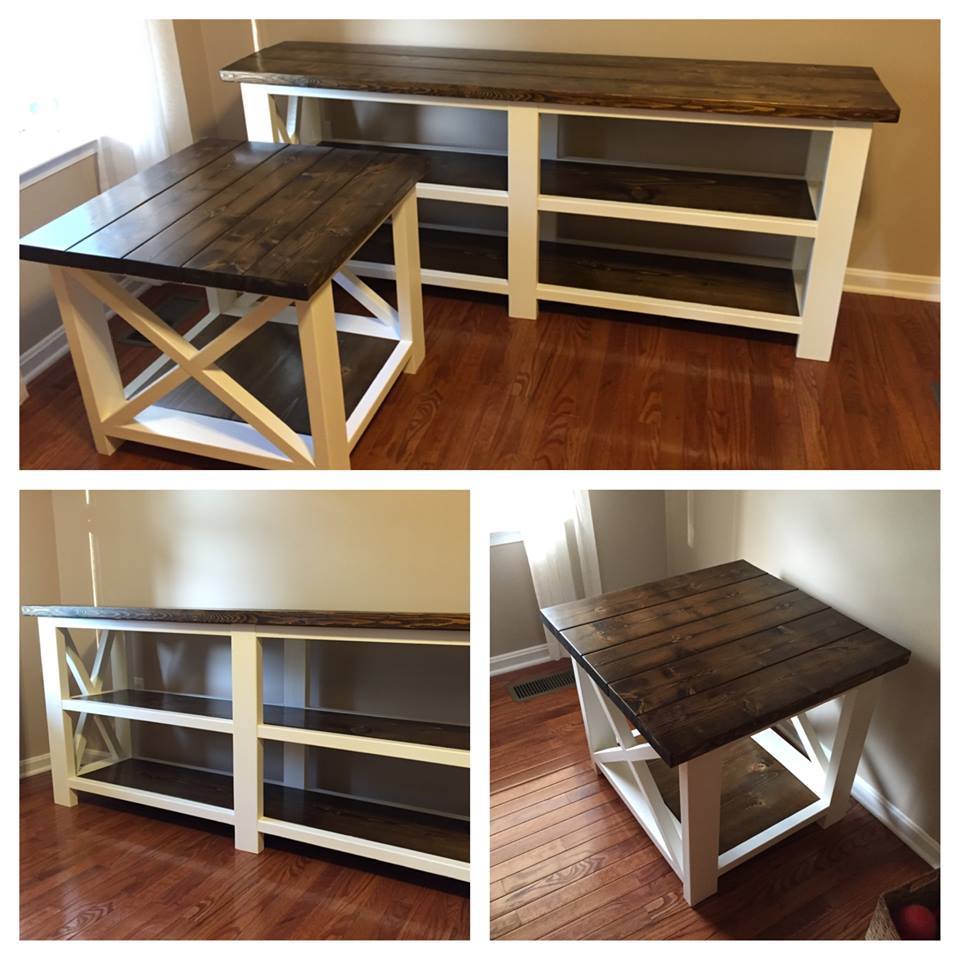
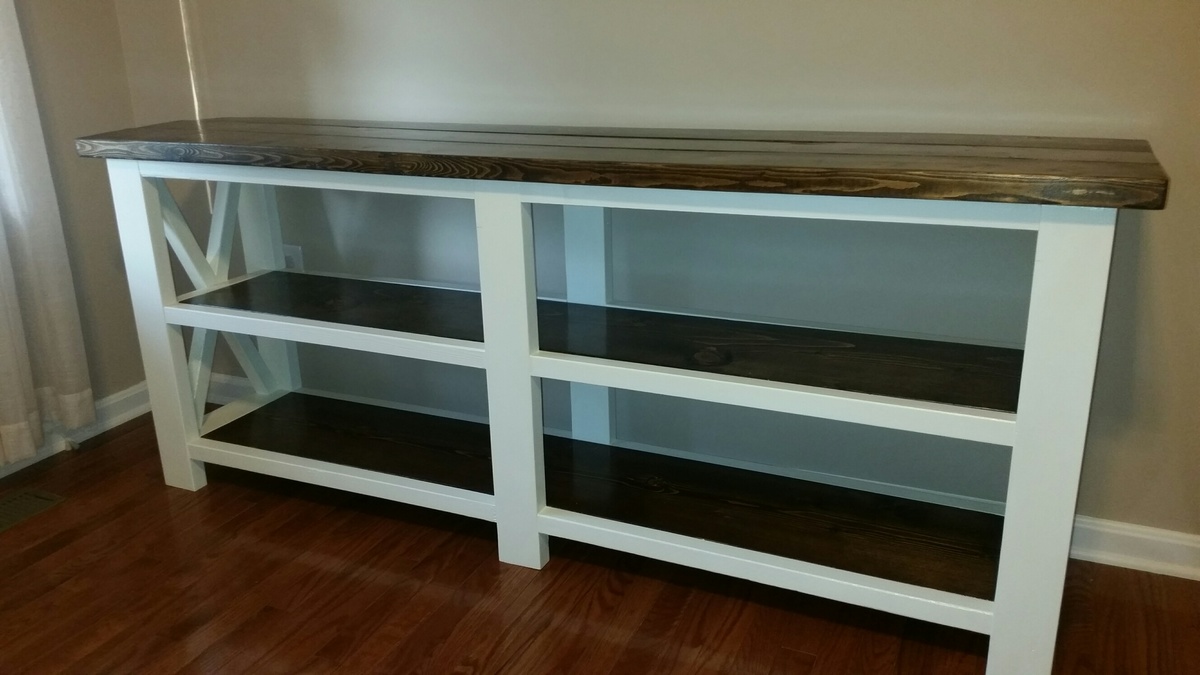
Built both using the rustic x end table and console plans. Wanted the shelves stained and inlaid so that took some thinking on how to assemble. Used valspar "white rose" paint and jacobean minwax stain.

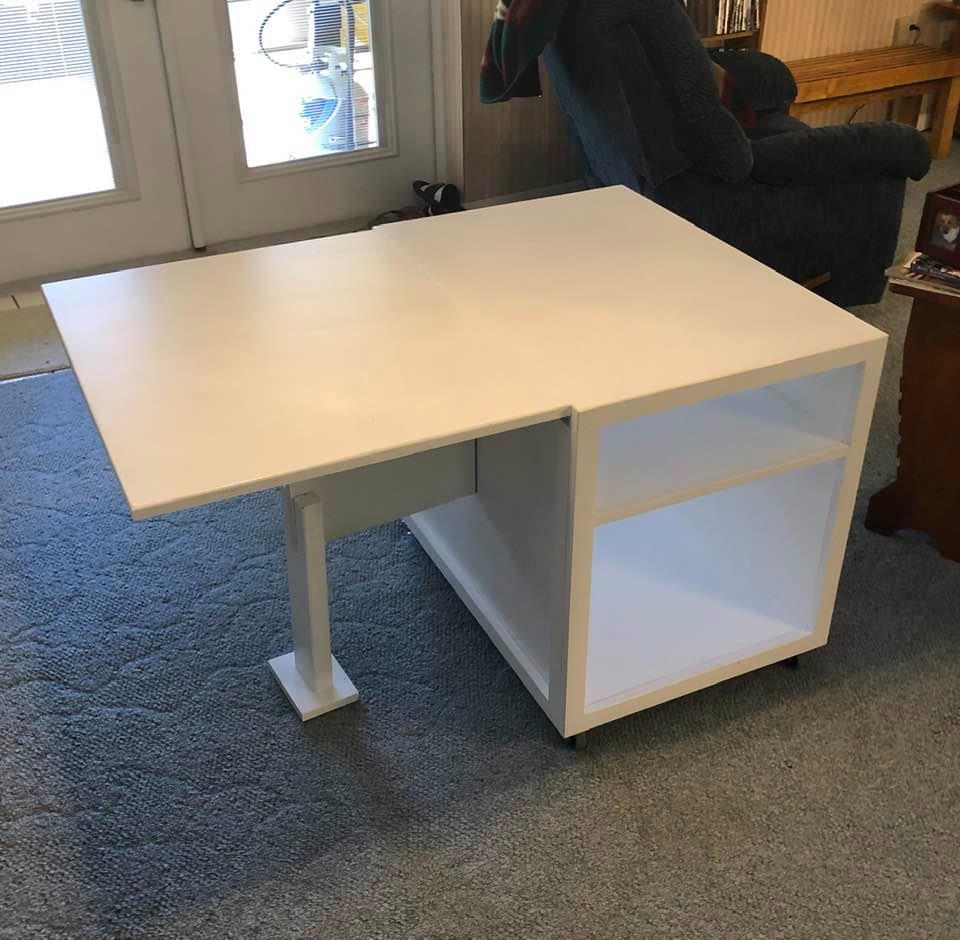
Using Ana's plan for a simple sewing table, I modified it to meet the needs of my daughter.
I only used 1 wing instead of two and made a brace that folds away under the leaf. On second thought I added a safety leg and foot to keep the table from tipping when the sewing machine is on top of the leaf.
I trimmed out everything but the leaf with 1 x 2 pine.
The top (with leaf raised) is 31 x 46 inches of work space.

Sat, 02/29/2020 - 14:55
The bottom and the shelf were both mounted in 1/4 grooves cut in the sides with a homemade router jig.

Definitely one of my favorite rooms in the house. Not shiplap but reclaimed wood. Had to deal with lowering everything because of the trunk lines but overall we love it.
Leslie Webber
We had to get rid of our standard dressers awhile ago, since they were in awful shape. We tried only hanging clothes, but that was a disaster too (our daughter stood on the wire shelf). I was so excited to find these plans. The dresser is super sturdy and was easy to build. No more problems with standing on them, heck I could even stand on them.
The angle iron was really expensive, so we went with wood rails instead. It was super easy to do and really cheap.


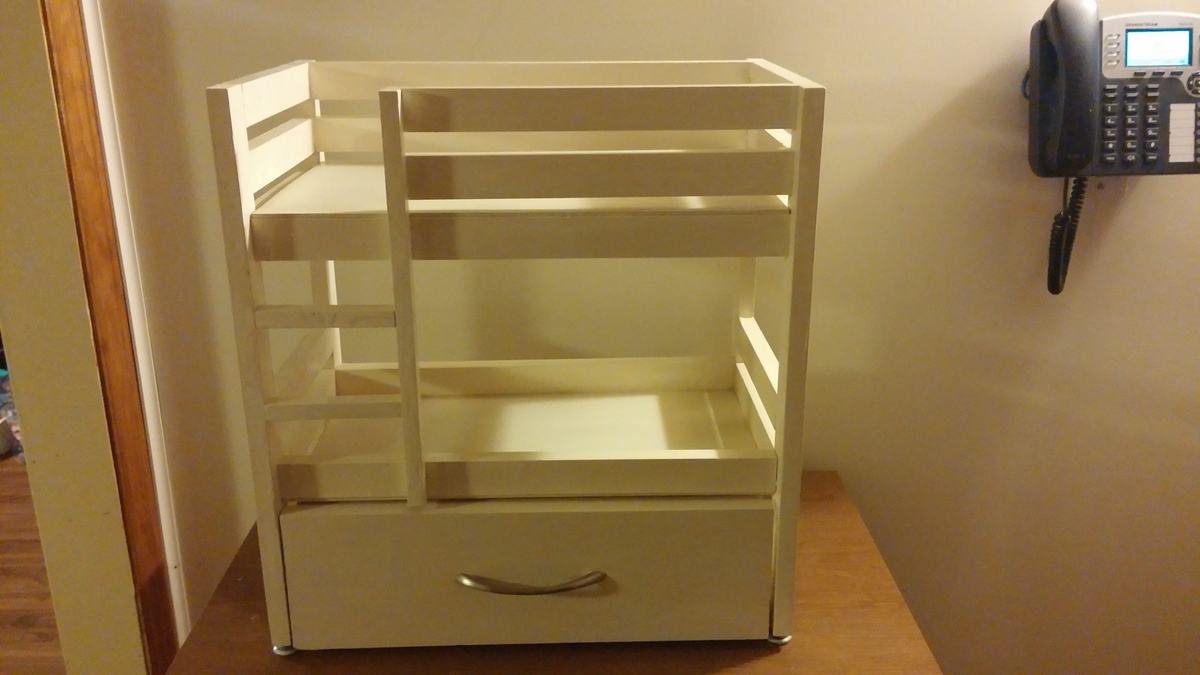
I used the basic bunk bed plans from the site, but made it a bit taller (21.5") and fitted a drawer under the lower bunk. The girls can store some of their Maplelea doll clothes in it.
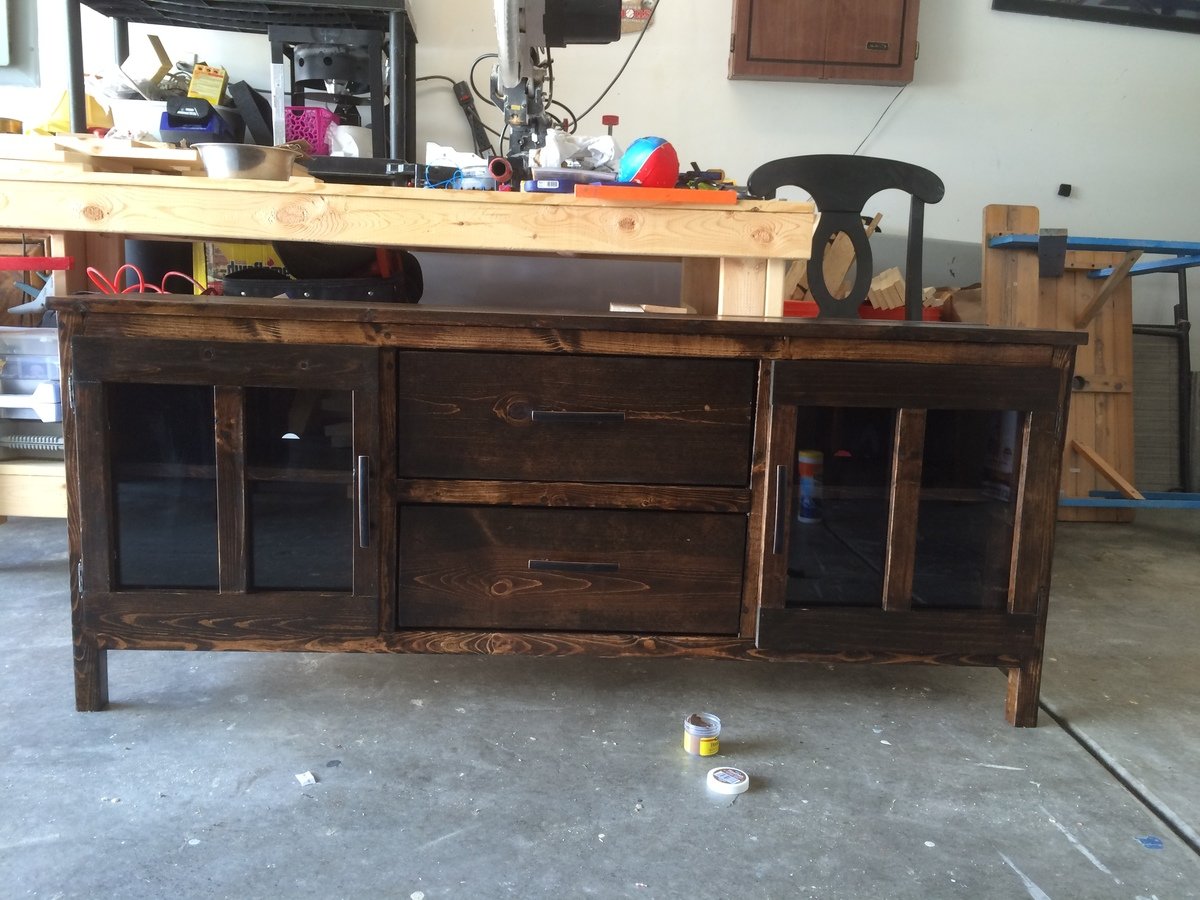
This was a fun project to build. I did change somethings around. I used plexiglass on all doors instead of plywood and it turned out great. Took a lot longer than planned but in the end it was worth it!
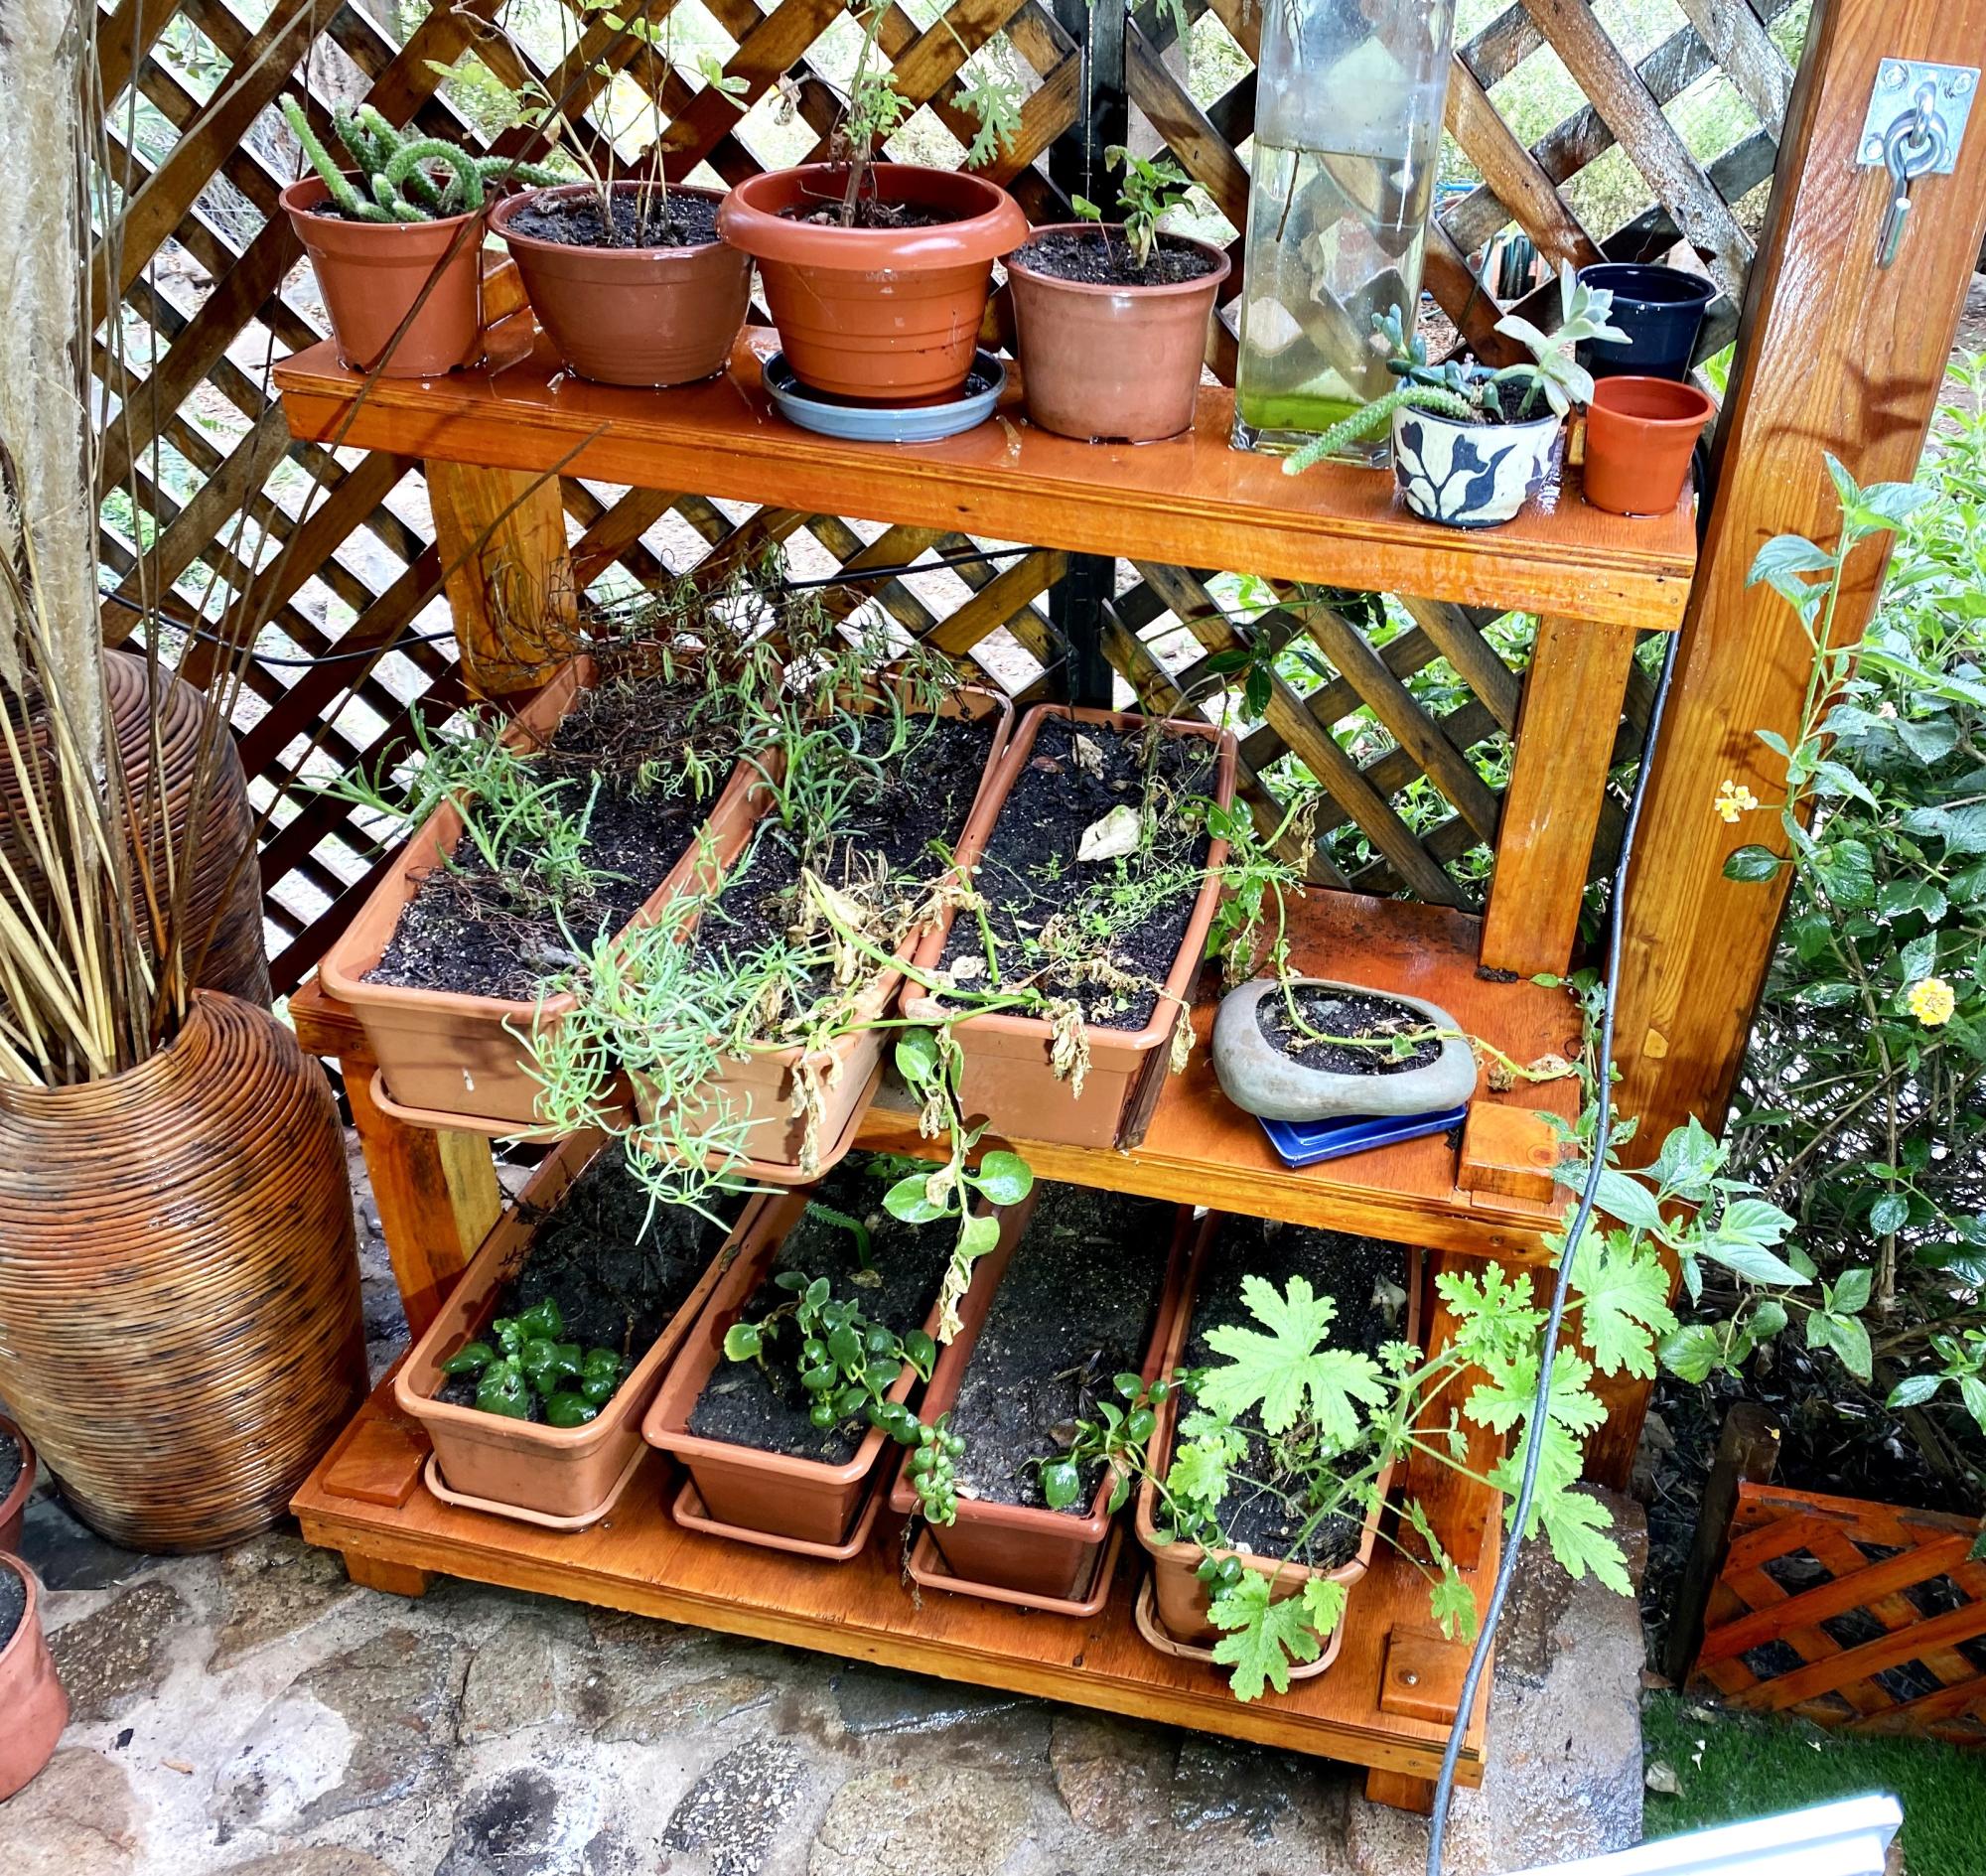
I built this potting bench using leftover pieces of pallets and play wood from other projects...
It is a three-level bench to maintain order with my pots where we start our seedbed crops and reproductions by cuttings.
Any comments to improve my design will be sincerely appreciated.
Regards
Claudio from Chile
I watched the tutorial video first and then got right to it. My two, little boys played in the driveway while mommy rocked her off-square bevel cuts. I modified the 1x2 and instead used what I had on hand - extra 2x2s. Worked out great. Also, I used three reclaimed pallet boards for the top of the bench. I added an extra cross-support to handle the load.
This is my first time trying something like this and it went great. I did mine with 2x4's. Thanks for all the great information. This took me a week, but I was only able to work on it during nap times for my baby. Uninterrupted it would of taken a weekend. The only negative thing is now my wife wants me to tackle a Farmhouse Table with benches. Pics soon to come of that I'm sure. Thanks again!
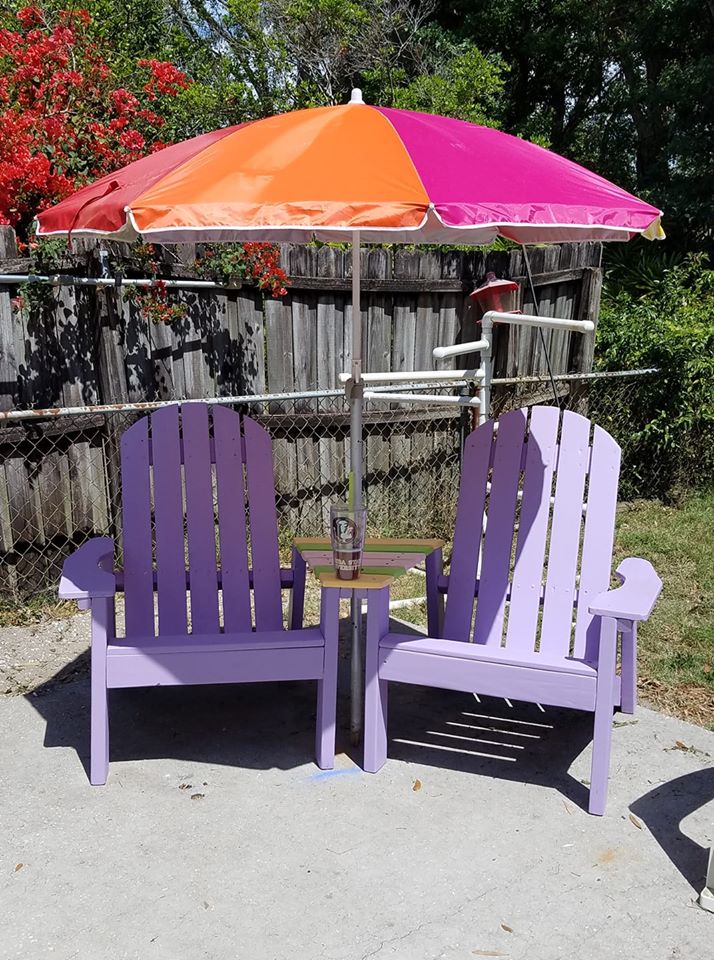
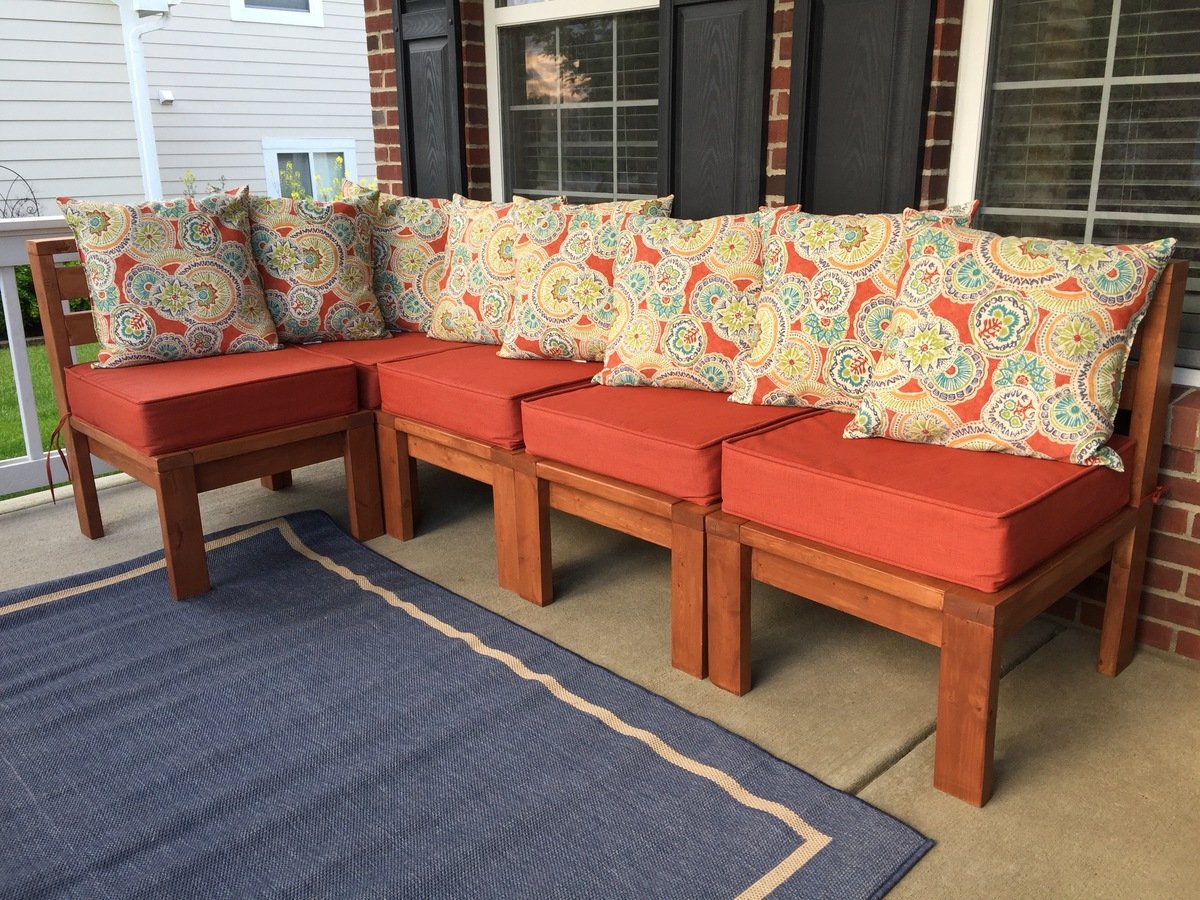
Love, love, love this plan! Easy to understand and build...it was sanding all the parts that took forever! ;-) It's been on my build list for a couple of years, and now looks great by my pool. I did use a more traditional arm style for the chair's 2 arms. I added the "table" between the 2 chairs by using scrap 1x4s, aligning them for spacing then used a chalk line, from corner of back arm 2x2/2x4 connection to the front 2x2/2x4 connect, and snapped a cut line. I then used a 1-1/2" hole saw and drilled a hole opening for the umbrella.
Thanks Ana! This is the second Ana White project I've tackled for the pool deck.