Community Brag Posts
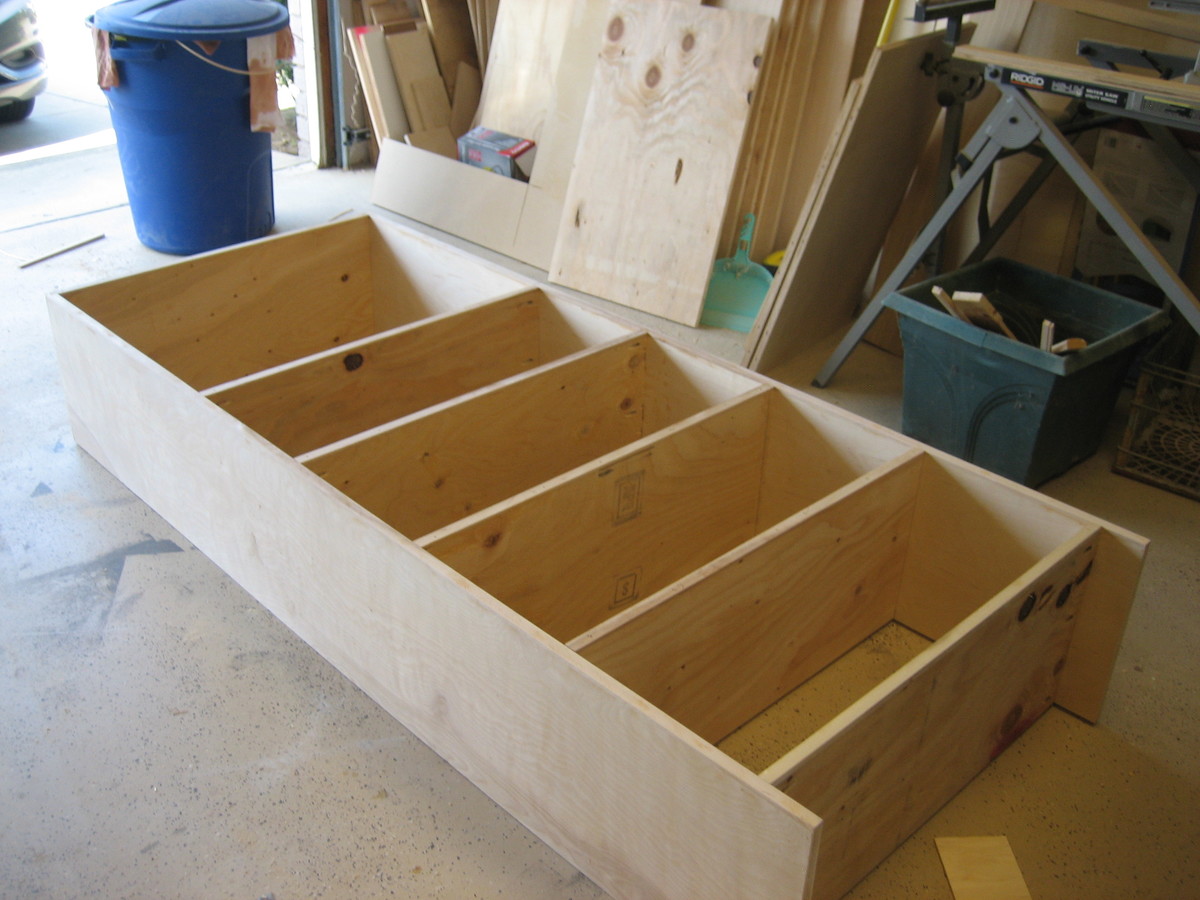
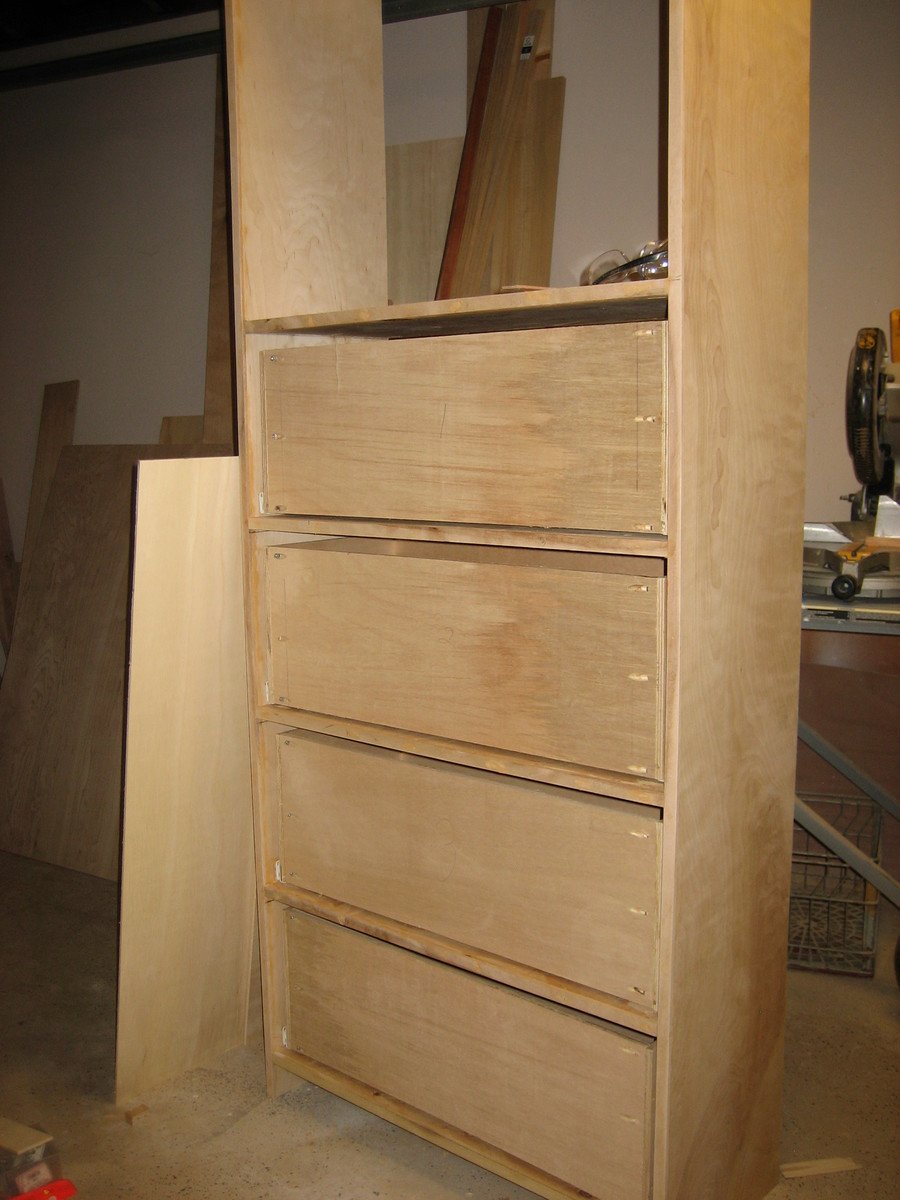
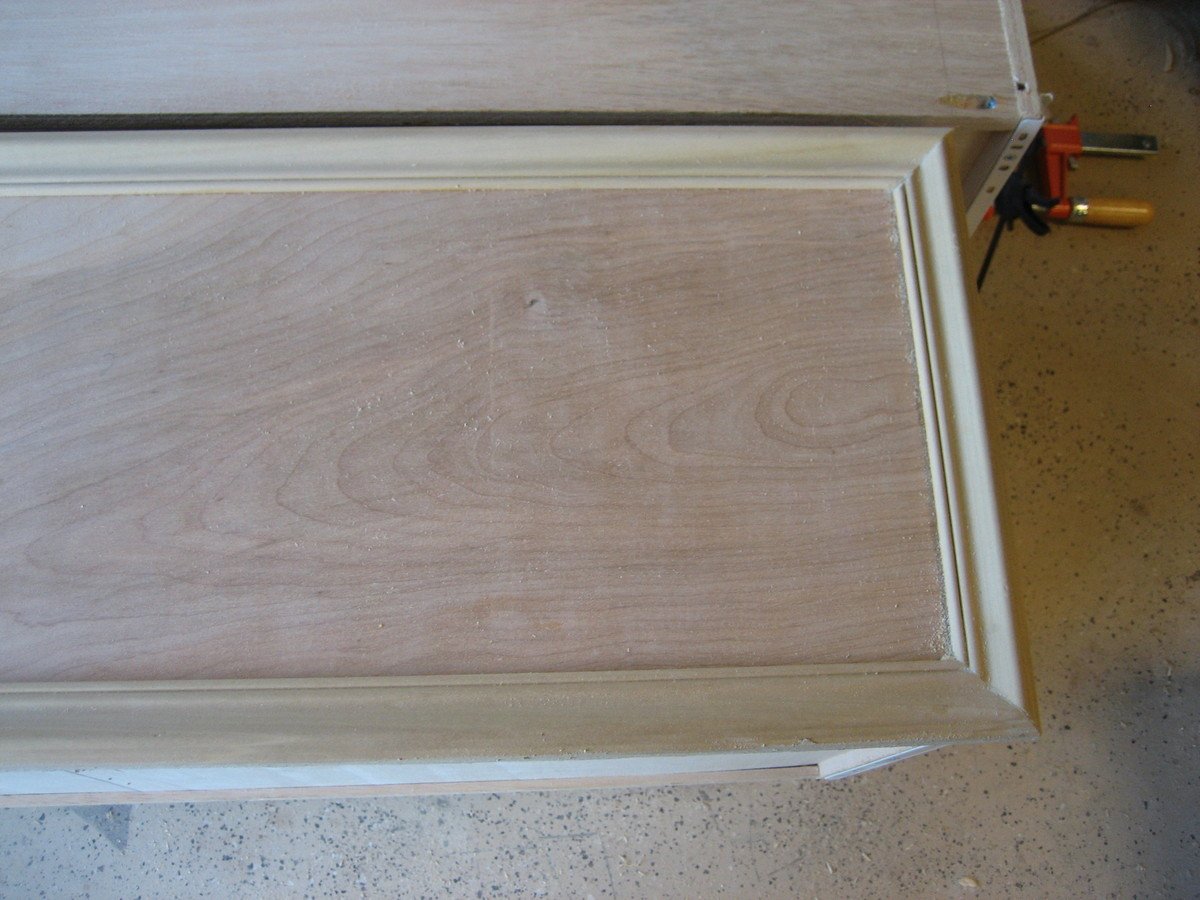
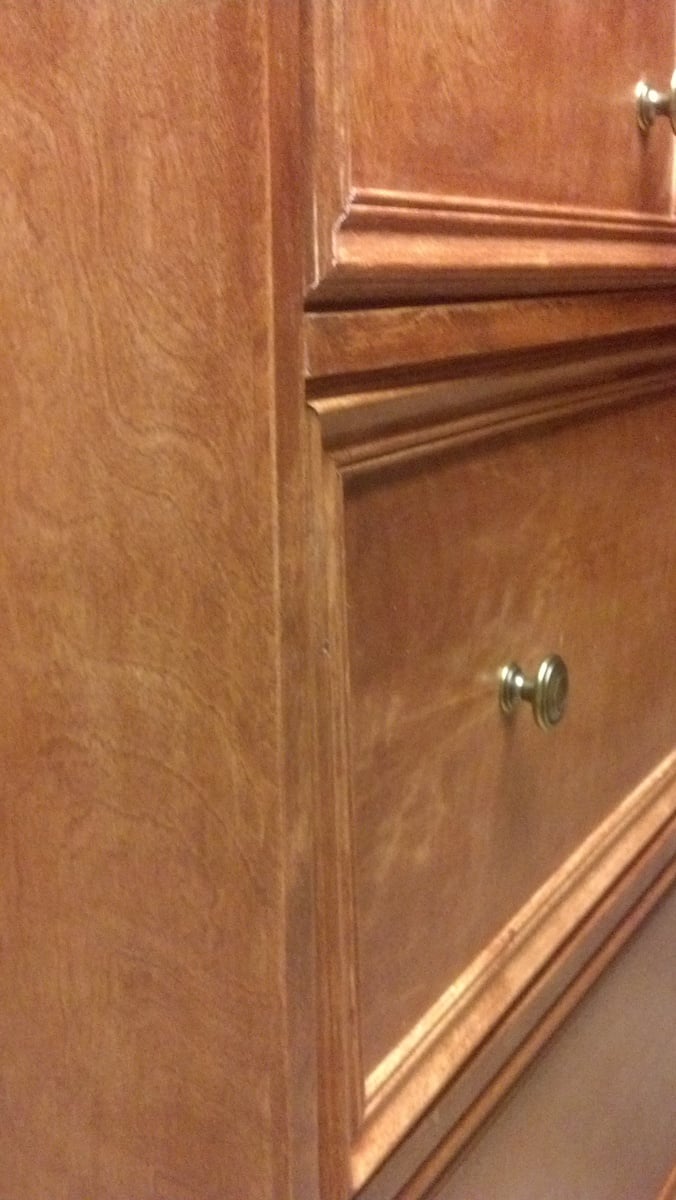
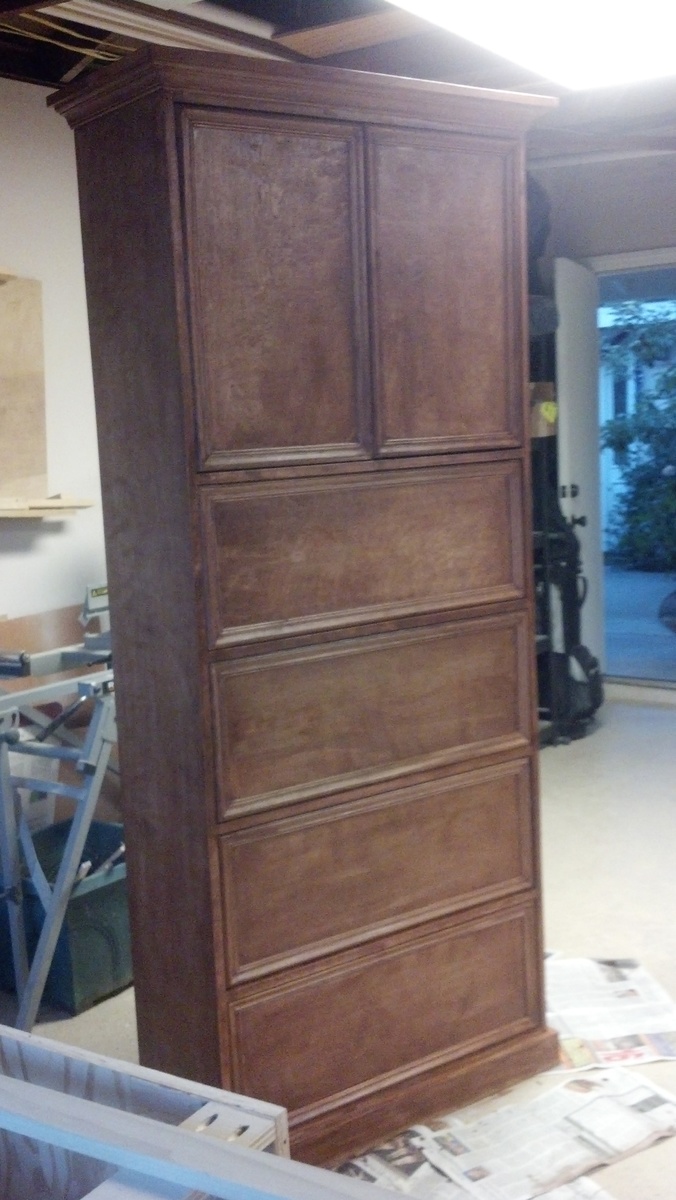
Custom Dresser/Armoire
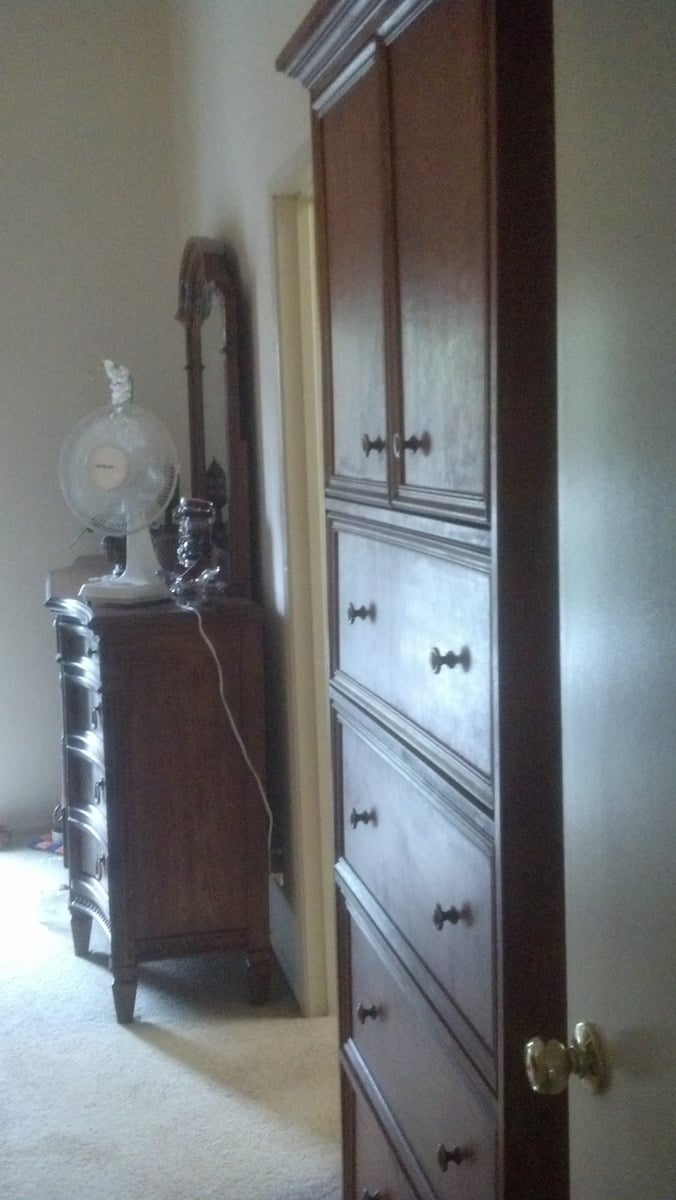
I like building things for others, especially when it's something that they can't find anywhere else. In this case, my friend has lived in her home for 20 years and never could find a storage piece to fit in this niche in their bedroom. When she asked if I could build something I was ready to try!
Because the dresser is 83" tall, 14 inches deep, and 33 inches wide, I didn't use one of Ana's plans. But, the Madison Dresser could be used as a jumping off point.
My friend is thrilled with this, and I hope they can use it for many years to come.
Built from Plan(s)
Estimated Cost
$300
Estimated Time Investment
Week Long Project (20 Hours or More)
Finish Used
Minwax stain, I think it was English Walnut. three coats, sanded between coats. Minwax rub on poly in a gloss finish. three coats, sanded between coat one and two.
Recommended Skill Level
Intermediate
Comments

Thu, 08/30/2012 - 14:47
great job. It looks
great job. It looks beautiful. You have the best of both worlds; not only is it a custom piece, the finish makes it look like professional quality.
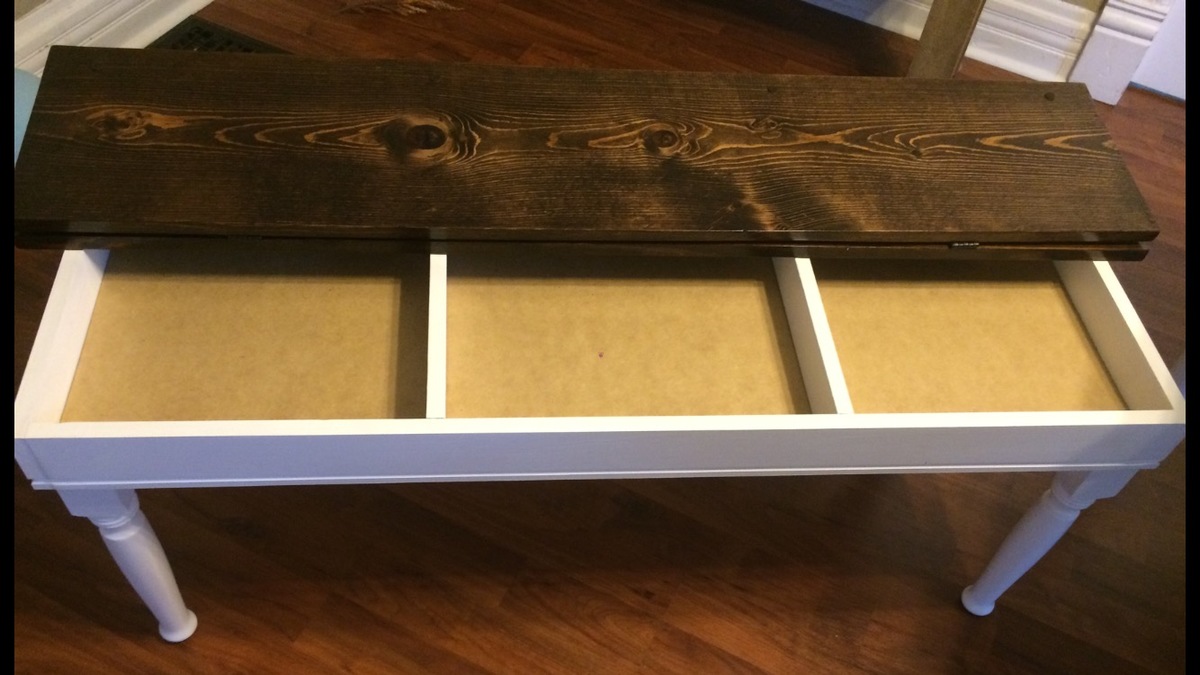
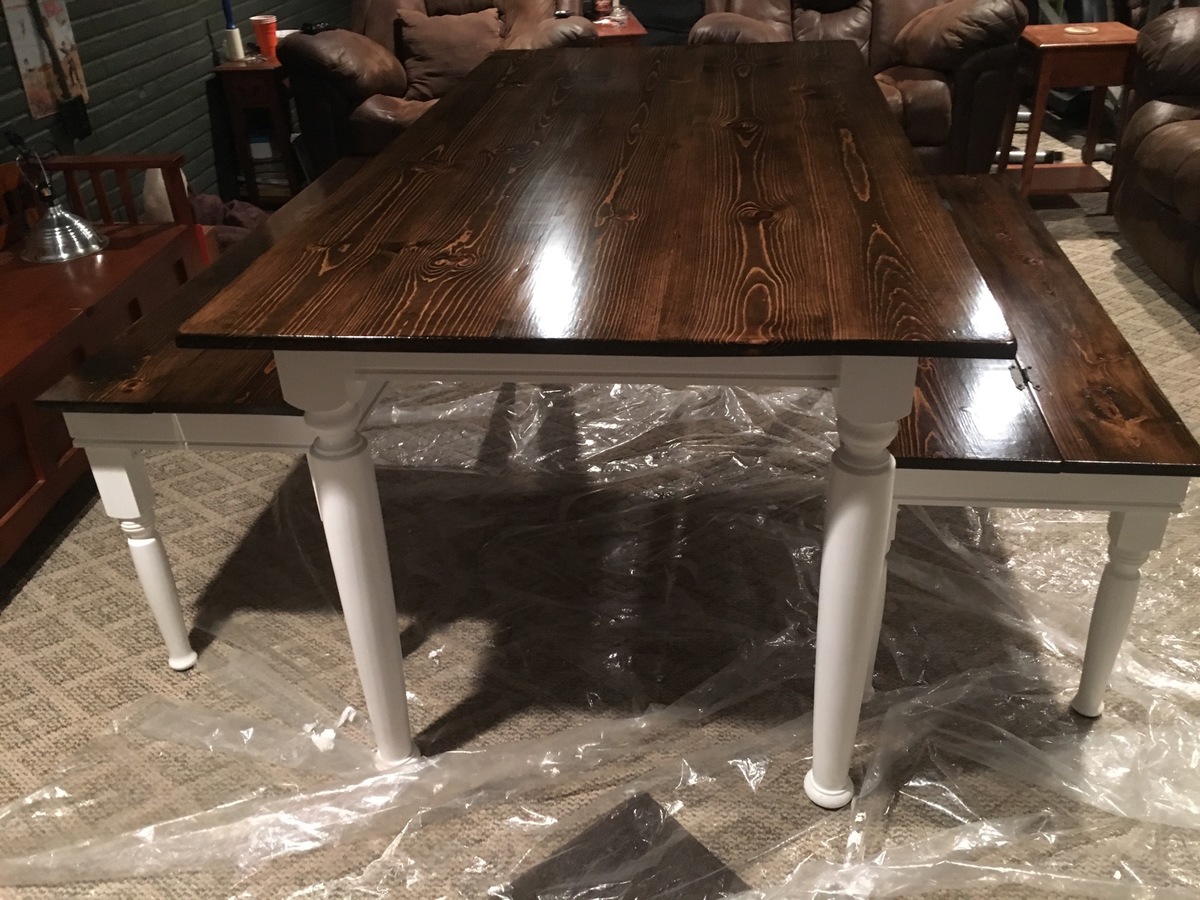
Kitchen table and storage benches
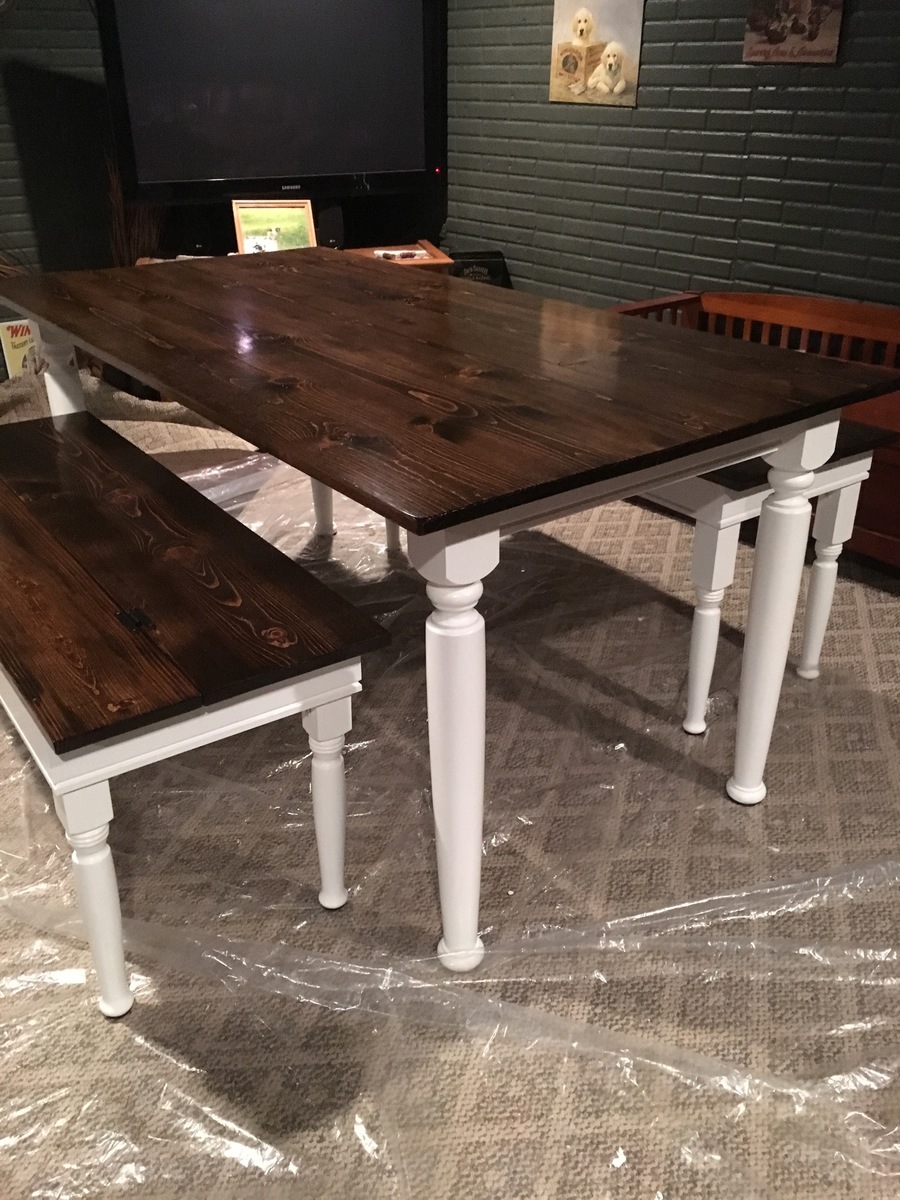
I built these for my son's new home. The bench seats lift up for storage. I was rushed to get them done for the housewarming/adoption party. There are things I would do better if I did another set.
Estimated Cost
$600
Estimated Time Investment
Week Long Project (20 Hours or More)
Finish Used
Minwax stain and Rockler Rockhard tabletop varnish in satin.
Recommended Skill Level
Intermediate
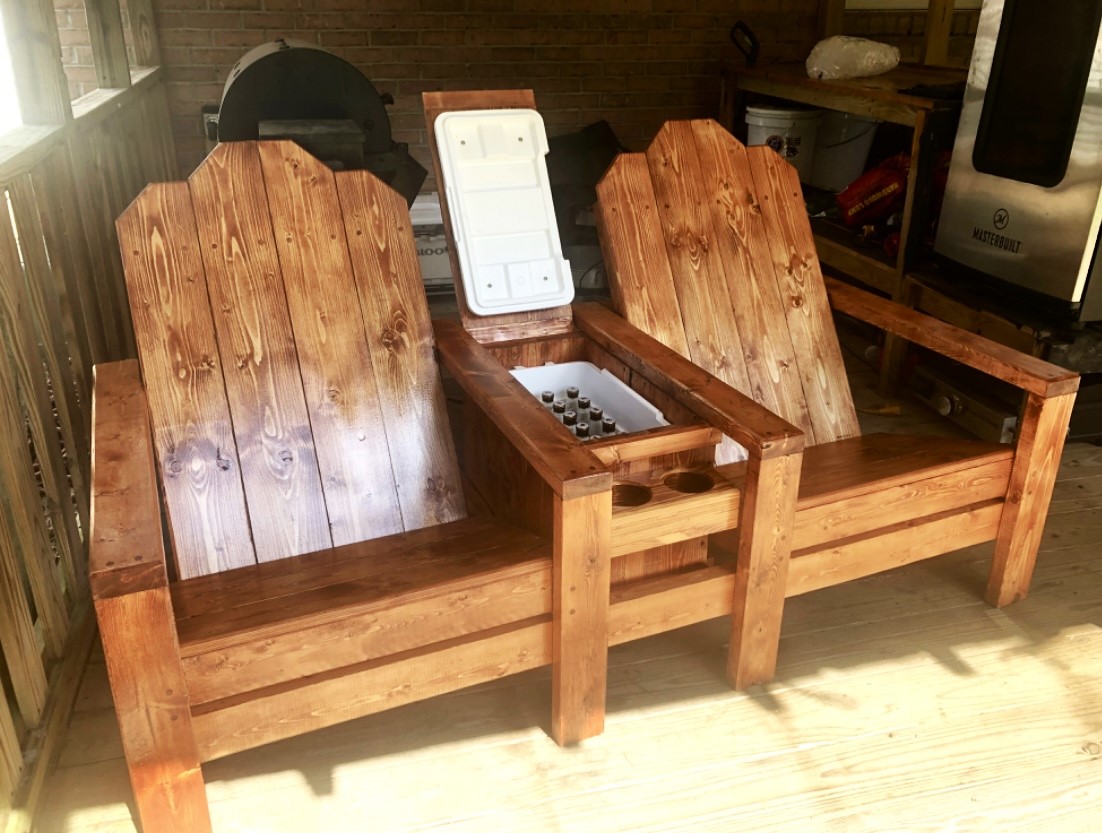
Patio Set
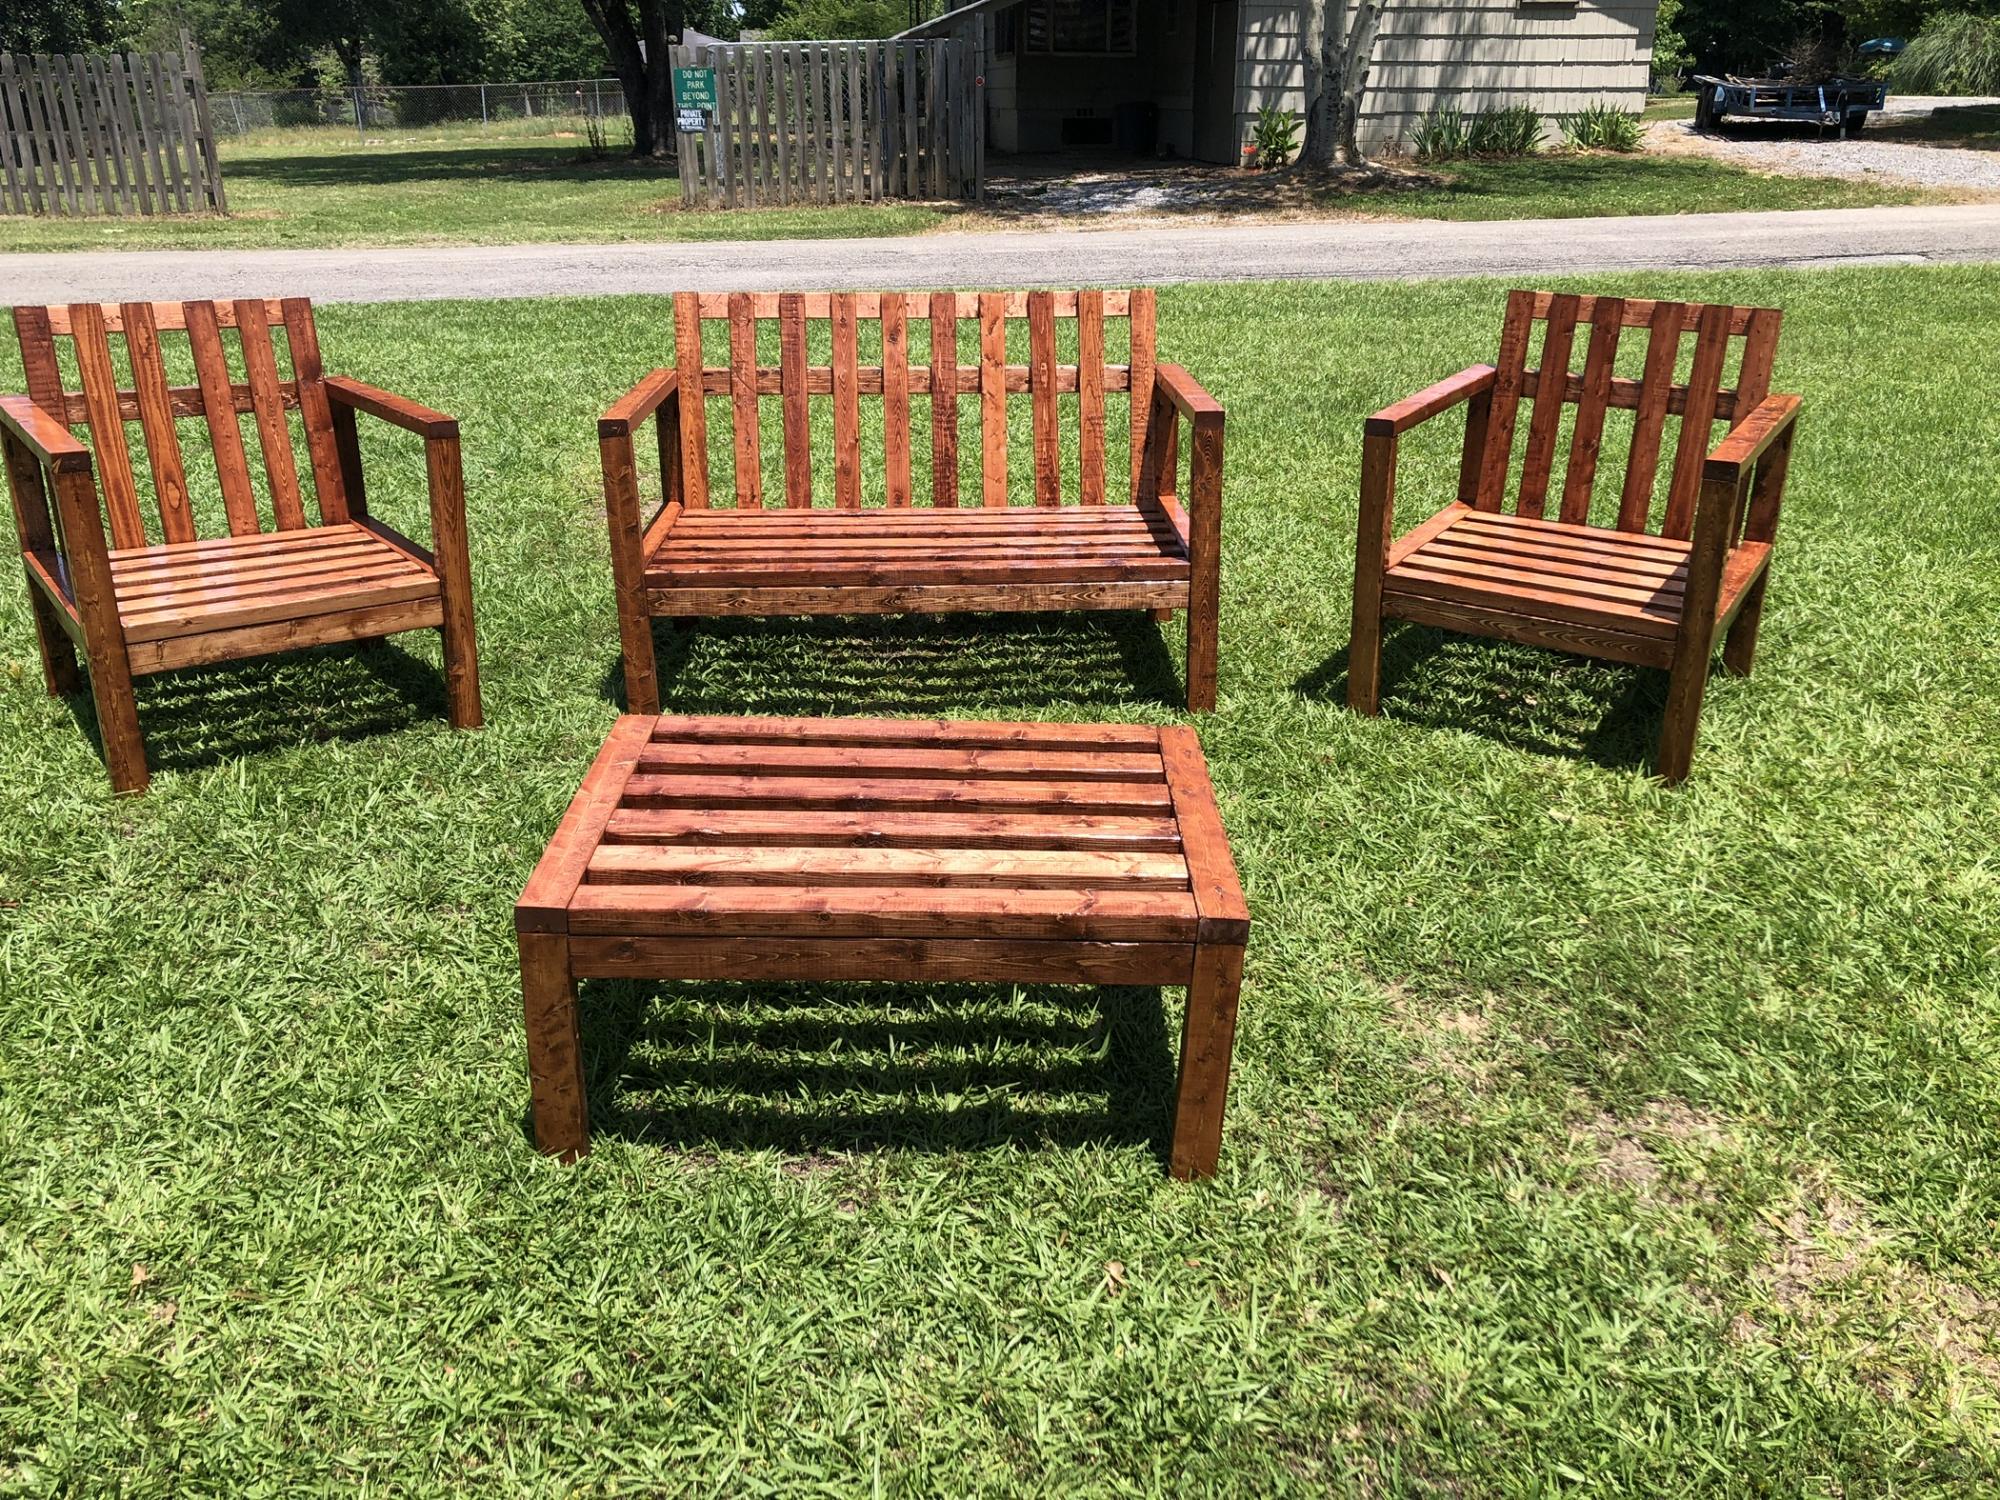
Ths set is based on the plans for the 2x4 sofa. It is very east to adjust the sizes to create the perfect piece for your space.
Using these plans I simply changed the seat sizes to 24" and 48" to create a chair and loveseat. I have also added a 1x4 across the rear of the seat to act as a bottom support for the 1x3 slats I added for back support. The other major change was using 2x3's instead of 2x4's. With the shortened length these can be a little less bulky with sacrificing stability.
Built from Plan(s)
Estimated Cost
$50
Estimated Time Investment
Day Project (6-9 Hours)
Recommended Skill Level
Beginner
Essential Outdoor Set

Hi Ana,
thank you for all you inspiring build plans
I have build a few of your 2x4 out door furniture plan
2x4 outdoor sofa
2x4 one arm outdoor sofa
2x4 outdoor side table
2 pcs of the essential outdoor chair for deep seat cushion.
Johan Janssen from the Netherlands

Built from Plan(s)
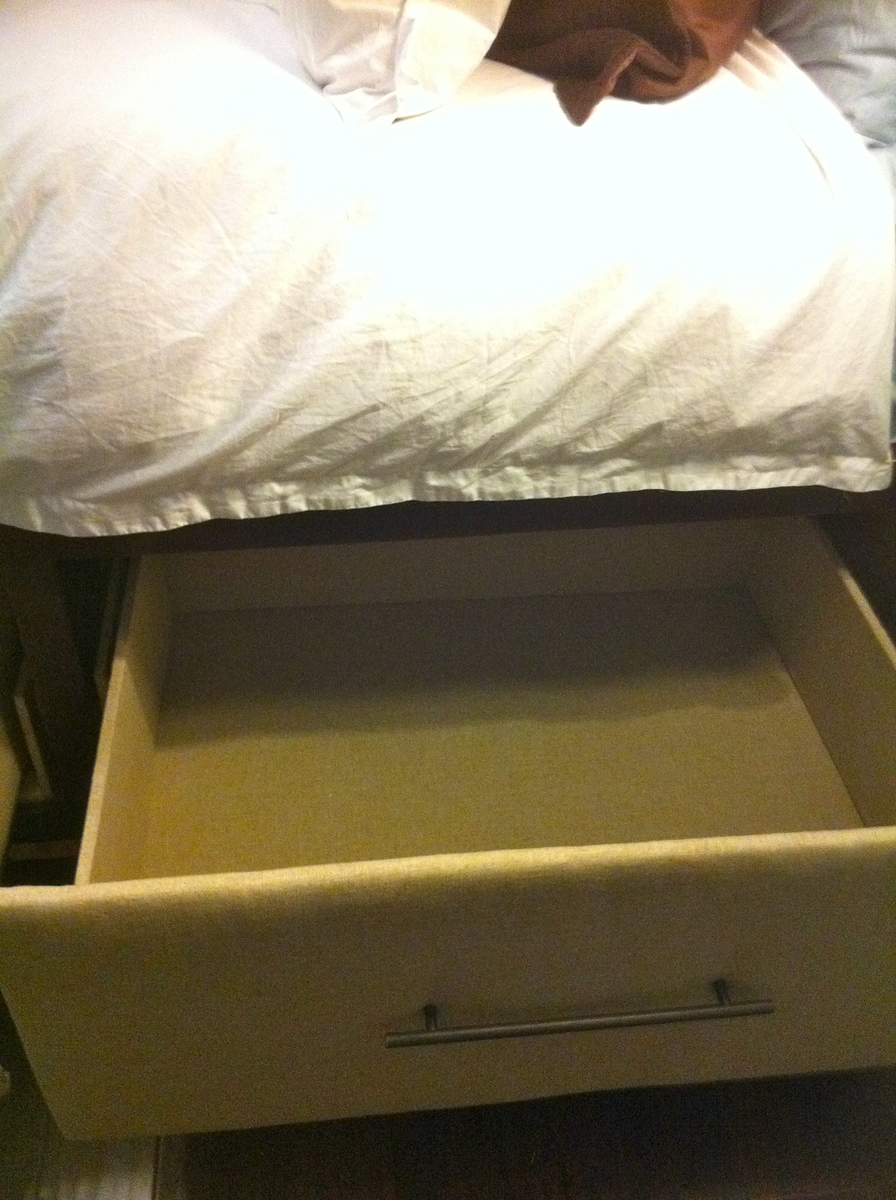
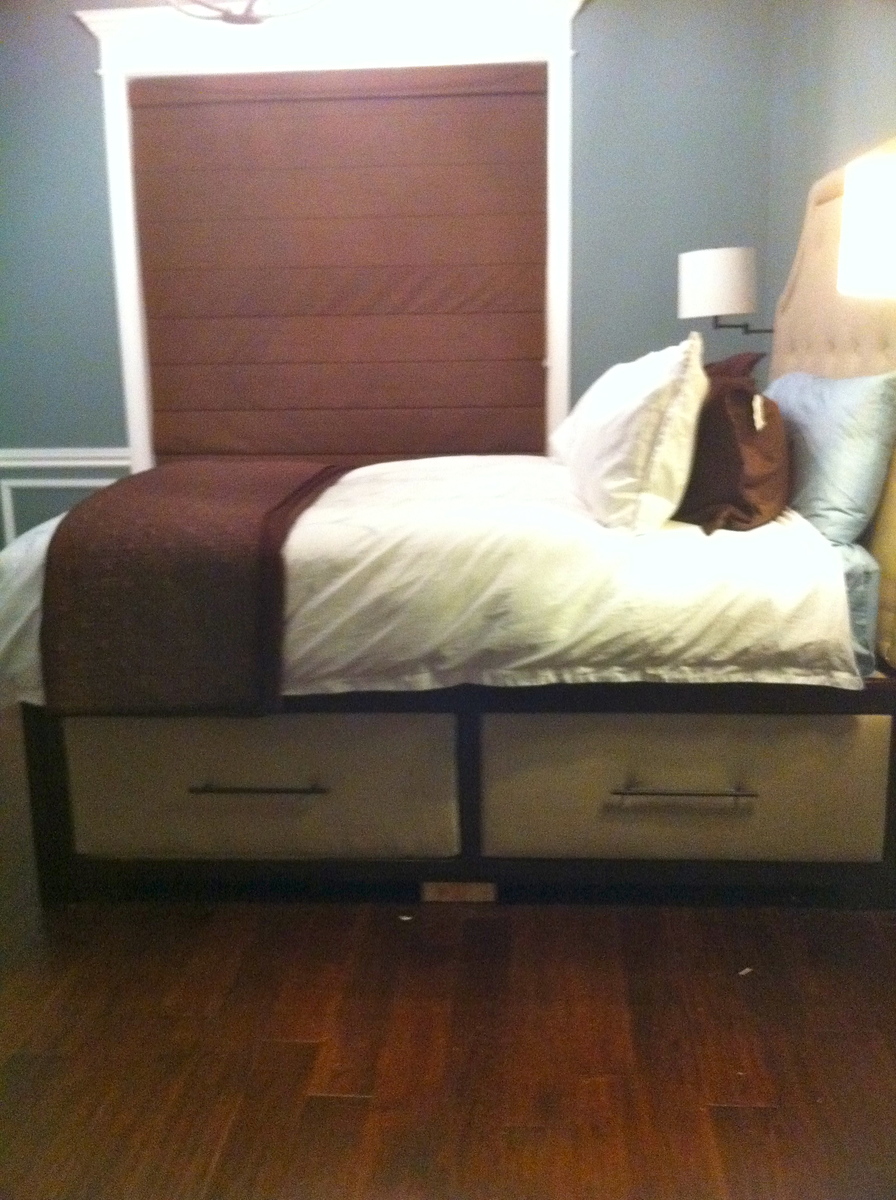
Storage Bed
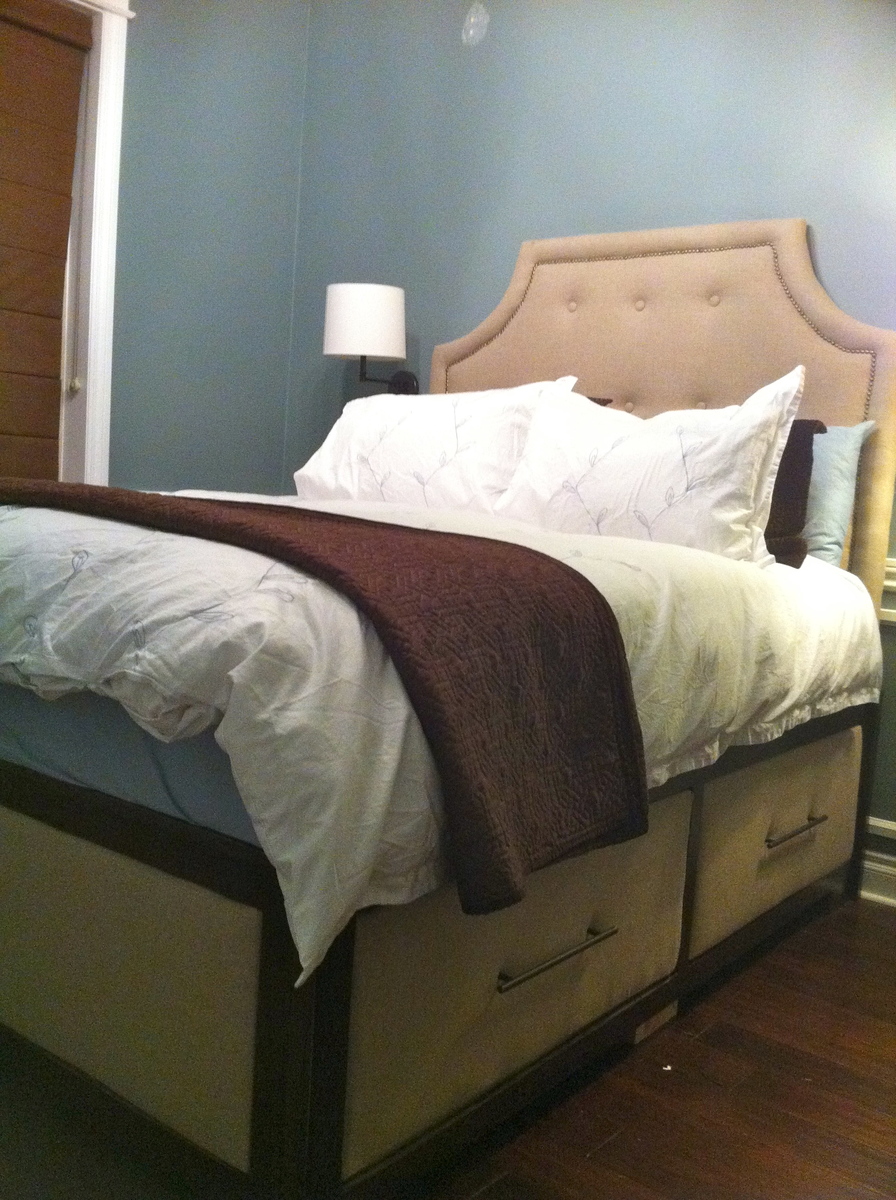
This is my most ambitious build so far. I wanted to make a really nice piece of furniture and I needed a bed so this is it. I wanted drawers and I wanted to make an upholstery headboard so I this is what I came up with. The headboard was so simple and took only a day. I searched youtube and found a video walking you through the process and was surprised at how easy it was. I built the bed with oak but I would do it differently next time. As it turns out I don't like the grain of oak and its so porous that I spent A LOT of time on the finishing part. I used wood grain filler to take away the porousness and used a series of stains and glazes to get the finished look I wanted. All in all I'm happy with the result but I think I could do it better next time.
Estimated Time Investment
Week Long Project (20 Hours or More)
Recommended Skill Level
Advanced
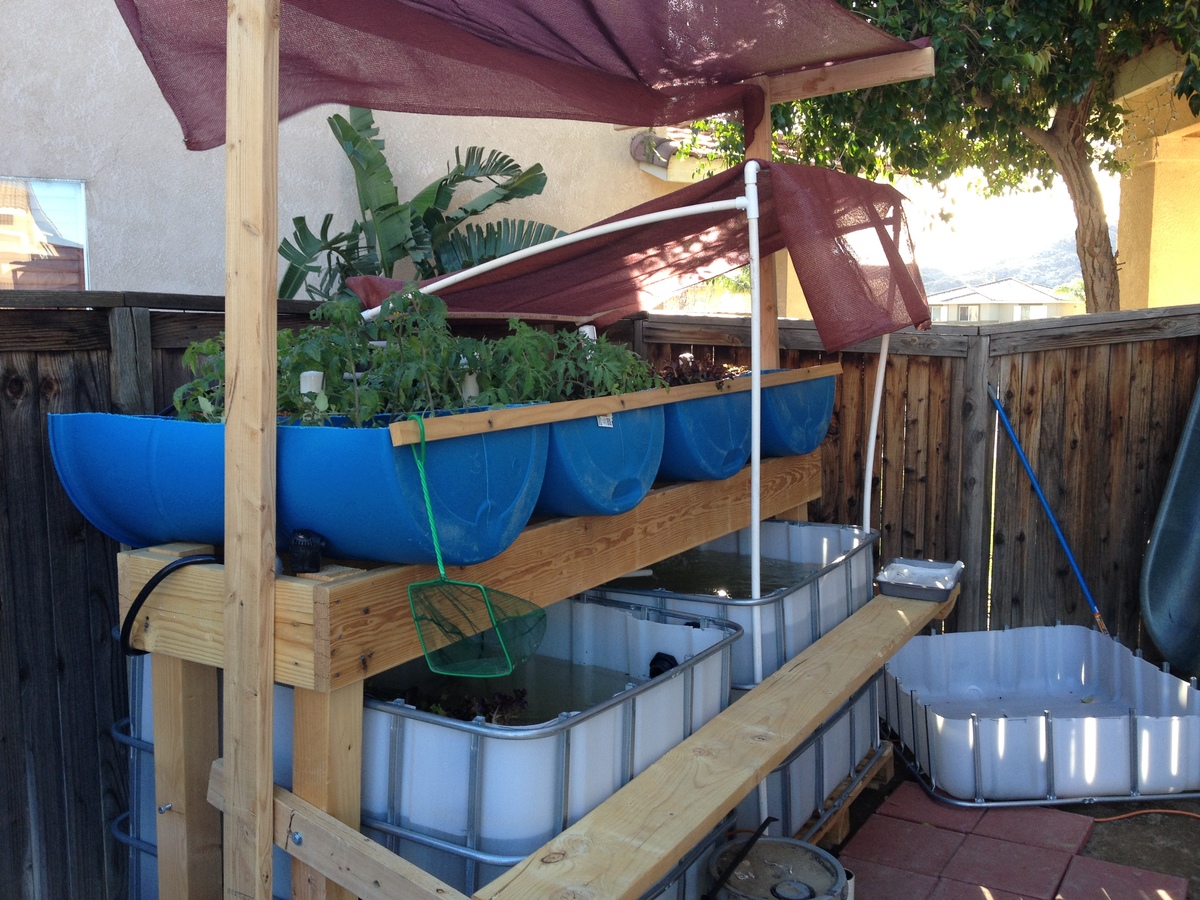
Aquaponics Garden
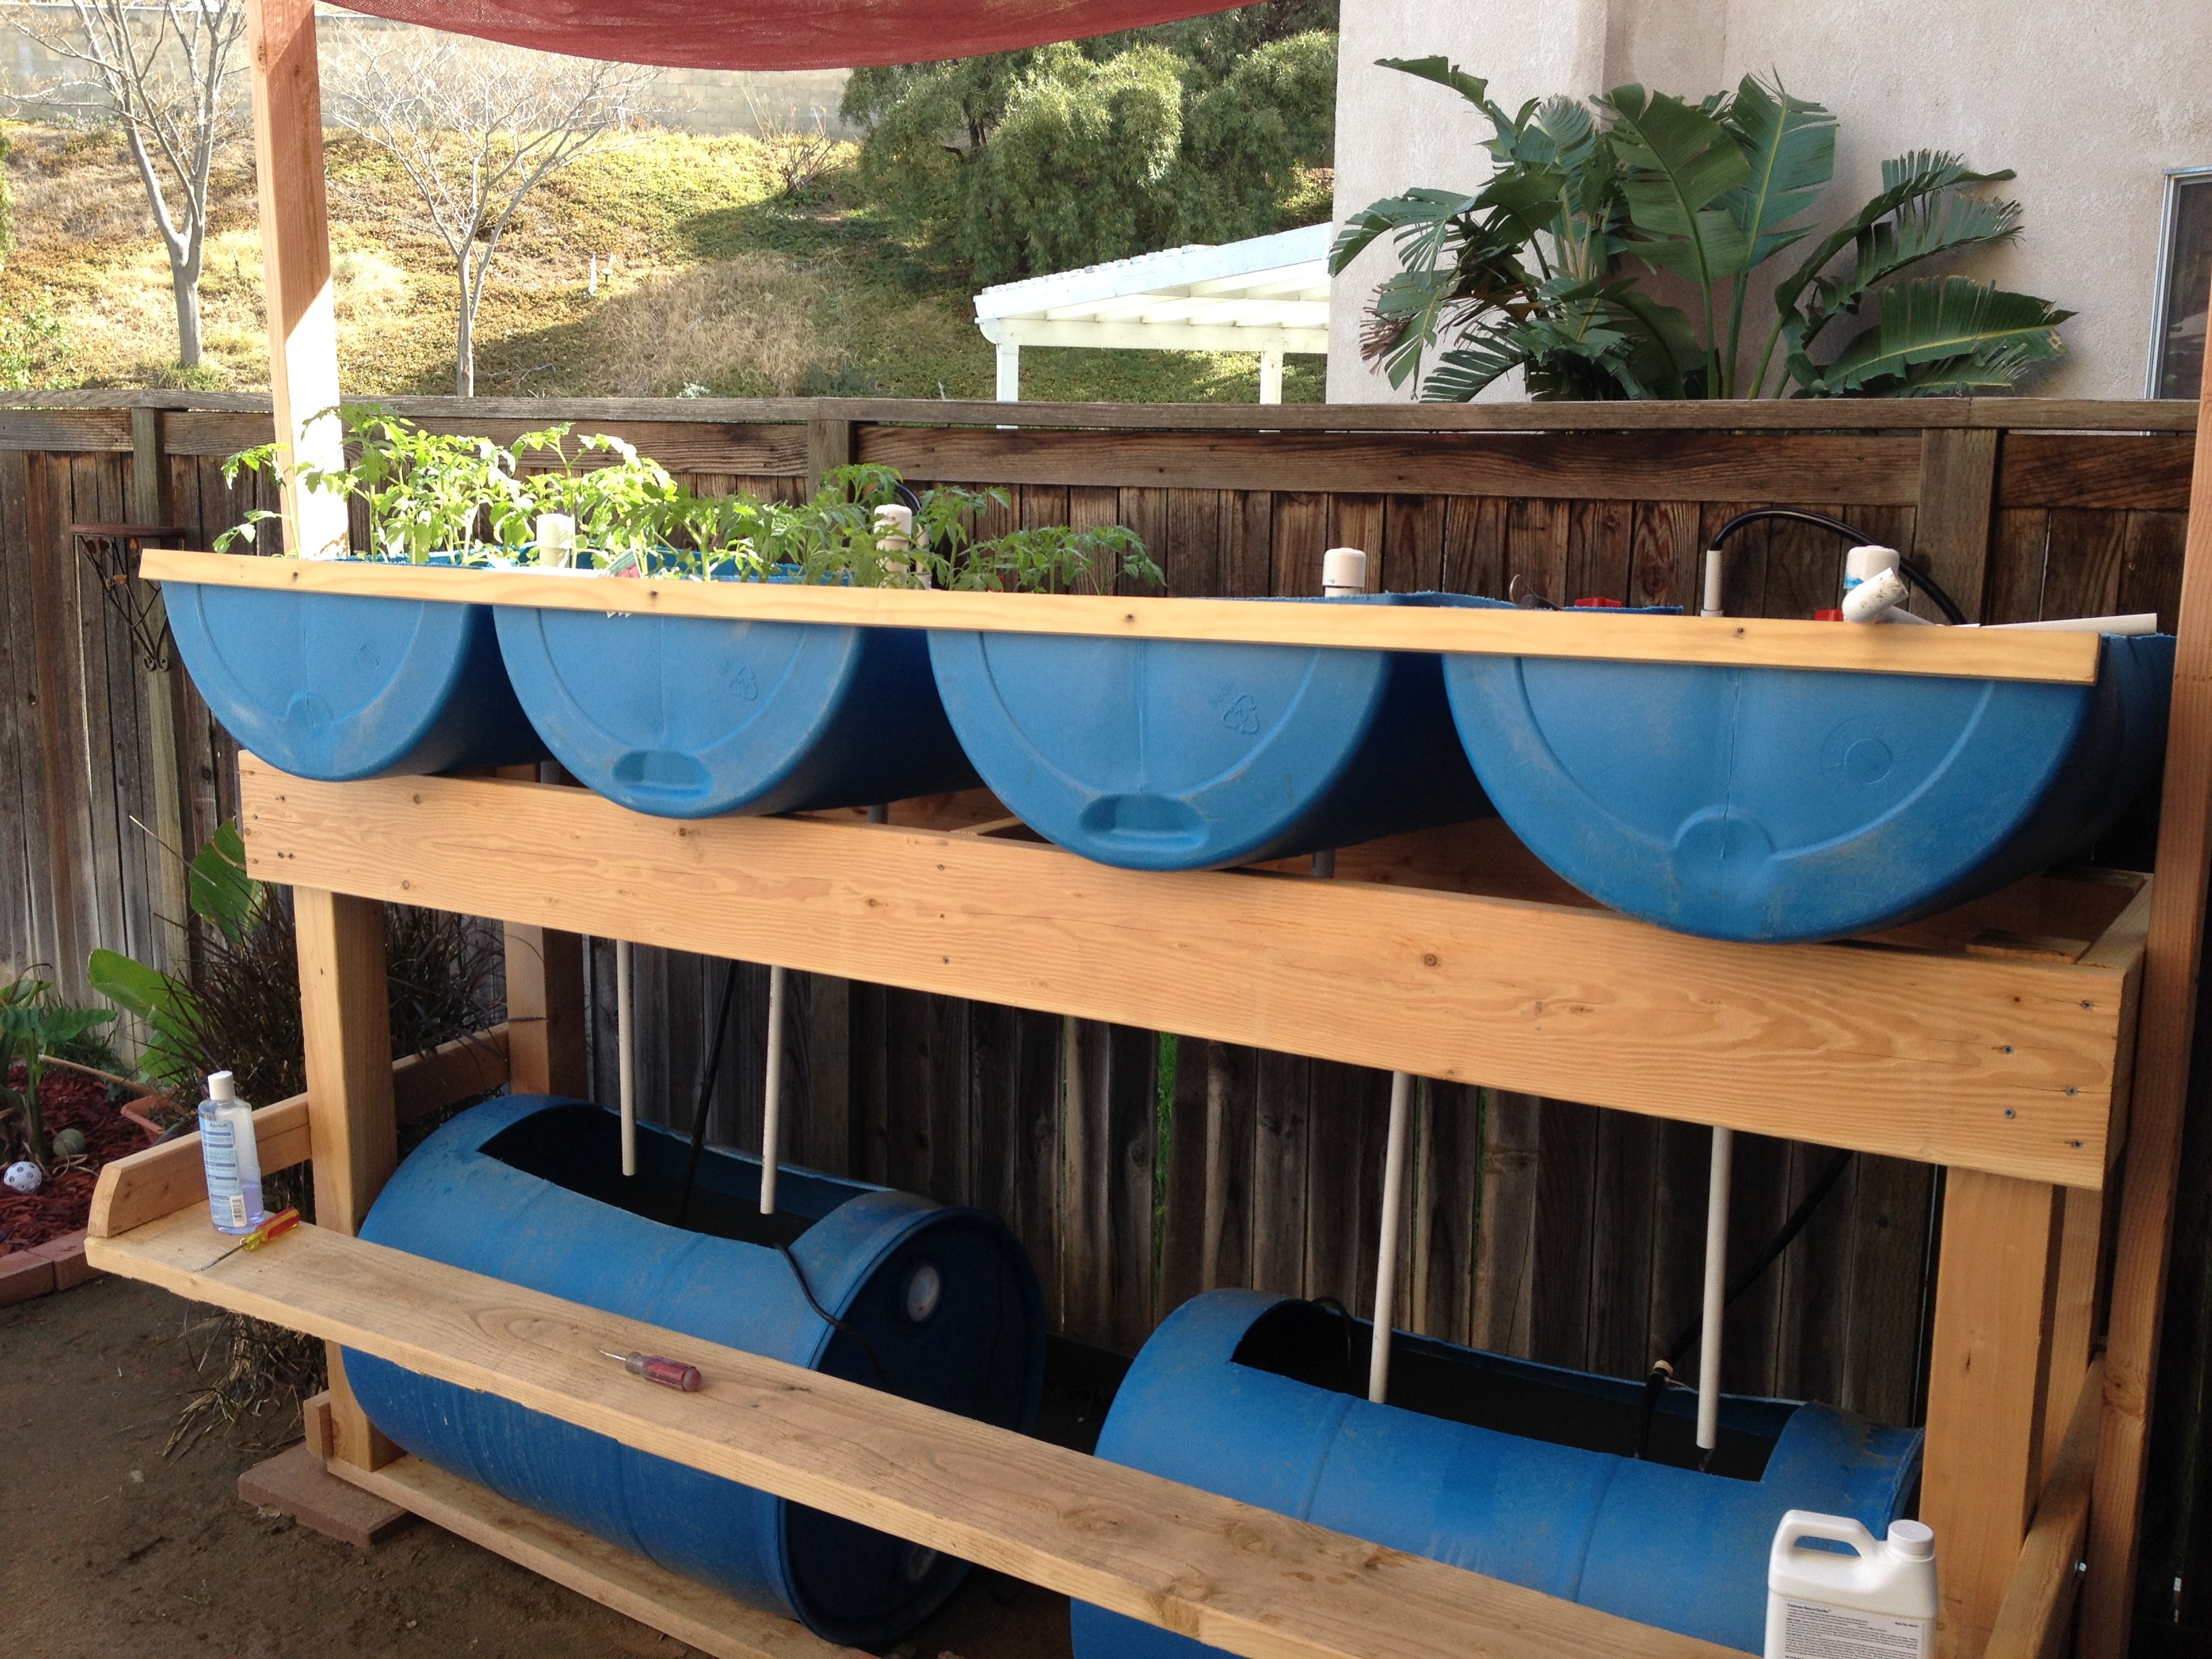
The better way to garden! I built the original, and then the fish got too big for the 55gal tanks below. Had to upgrade to 2 300gal IBC containers. Now I have 50 tilapia that are ready to eat, adn enough vegatables to feed us for the year.... awesome!
Built from Plan(s)
Estimated Time Investment
Day Project (6-9 Hours)
Finish Used
thompsons sealer
Recommended Skill Level
Starter Project
Farmhouse X console
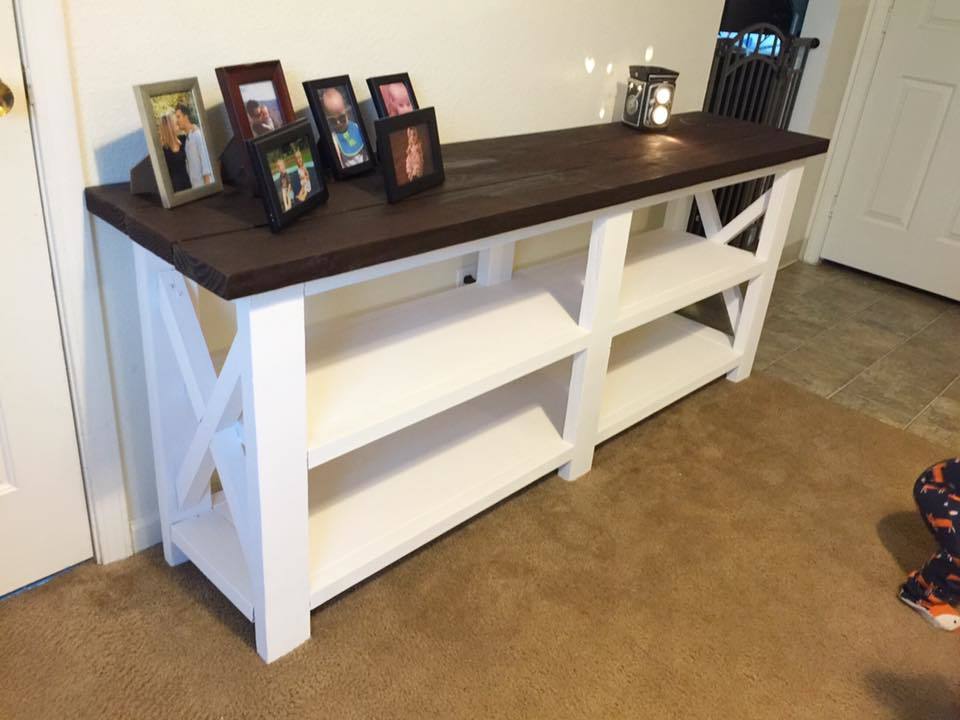
My very first time building a piece of furniture! Thank you so much Ana White for the plans, I have so much more confidence moving forward and building more!
Built from Plan(s)
Estimated Cost
Wood & hardware - $60
Paint & stain - $50
Paint & stain - $50
Estimated Time Investment
Day Project (6-9 Hours)
Finish Used
Varathane Carrington stain and Annie Sloan pure white chalk paint
Recommended Skill Level
Beginner
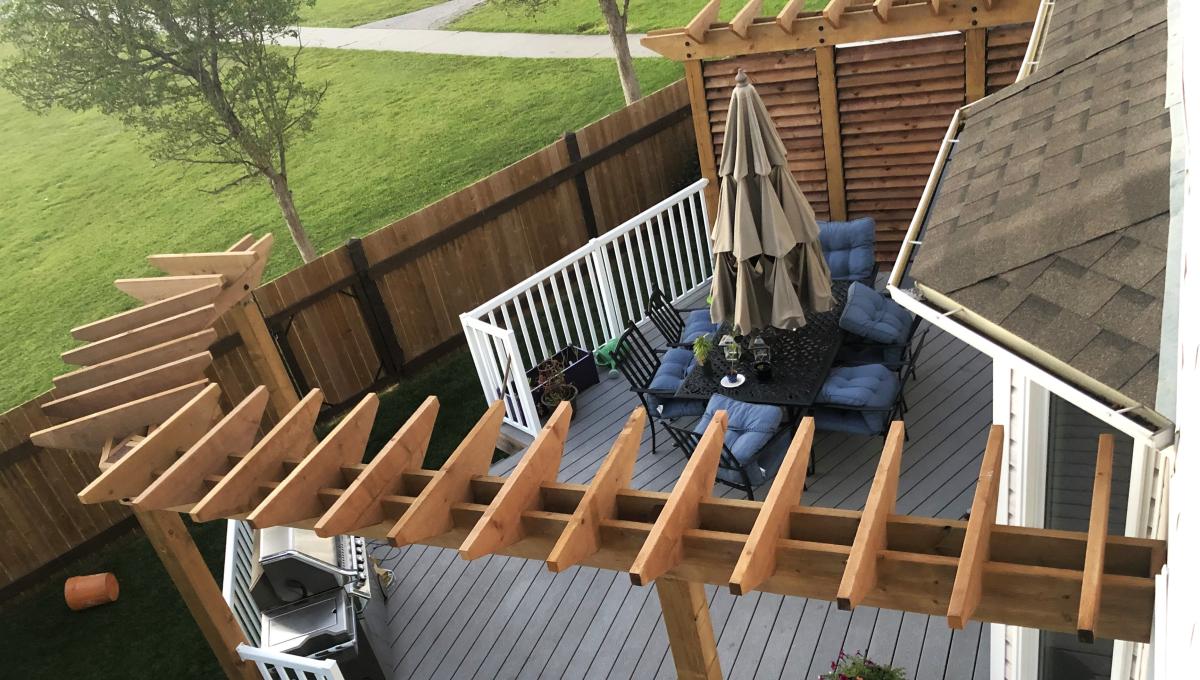
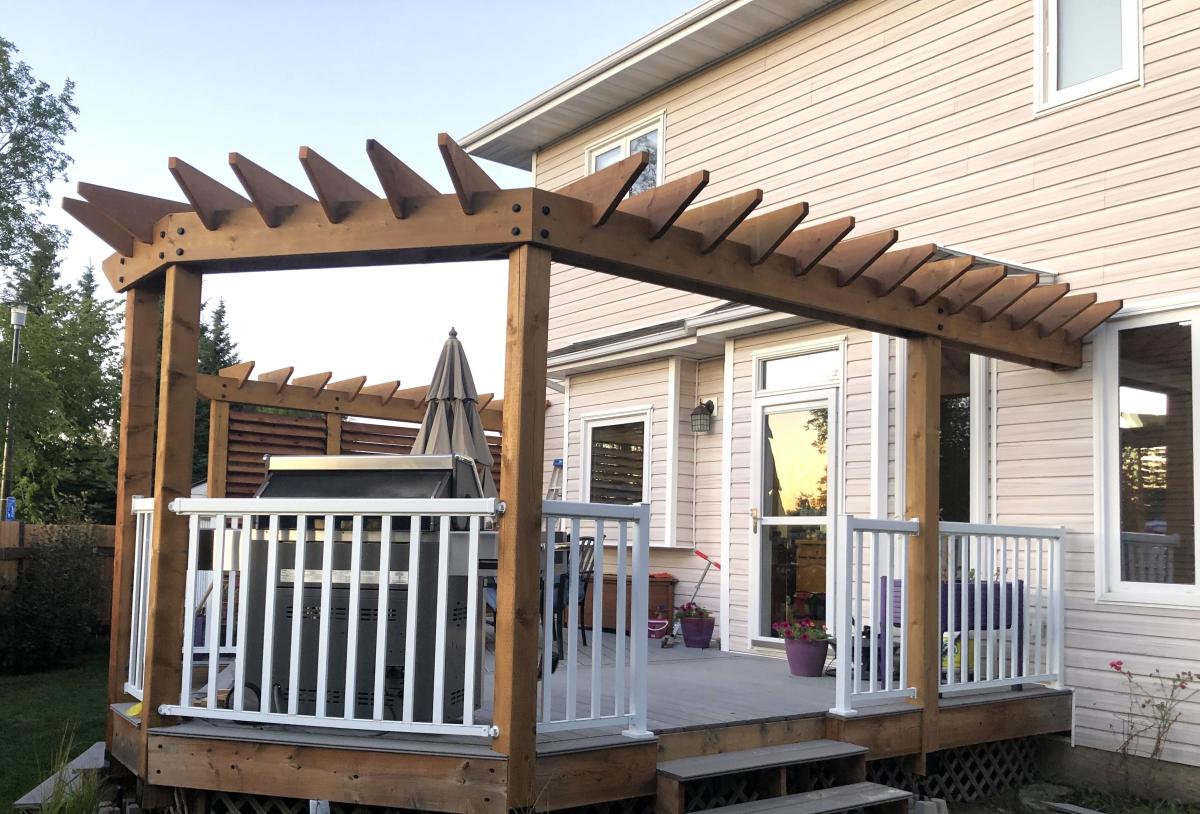
4x4 Truss Table & Bench
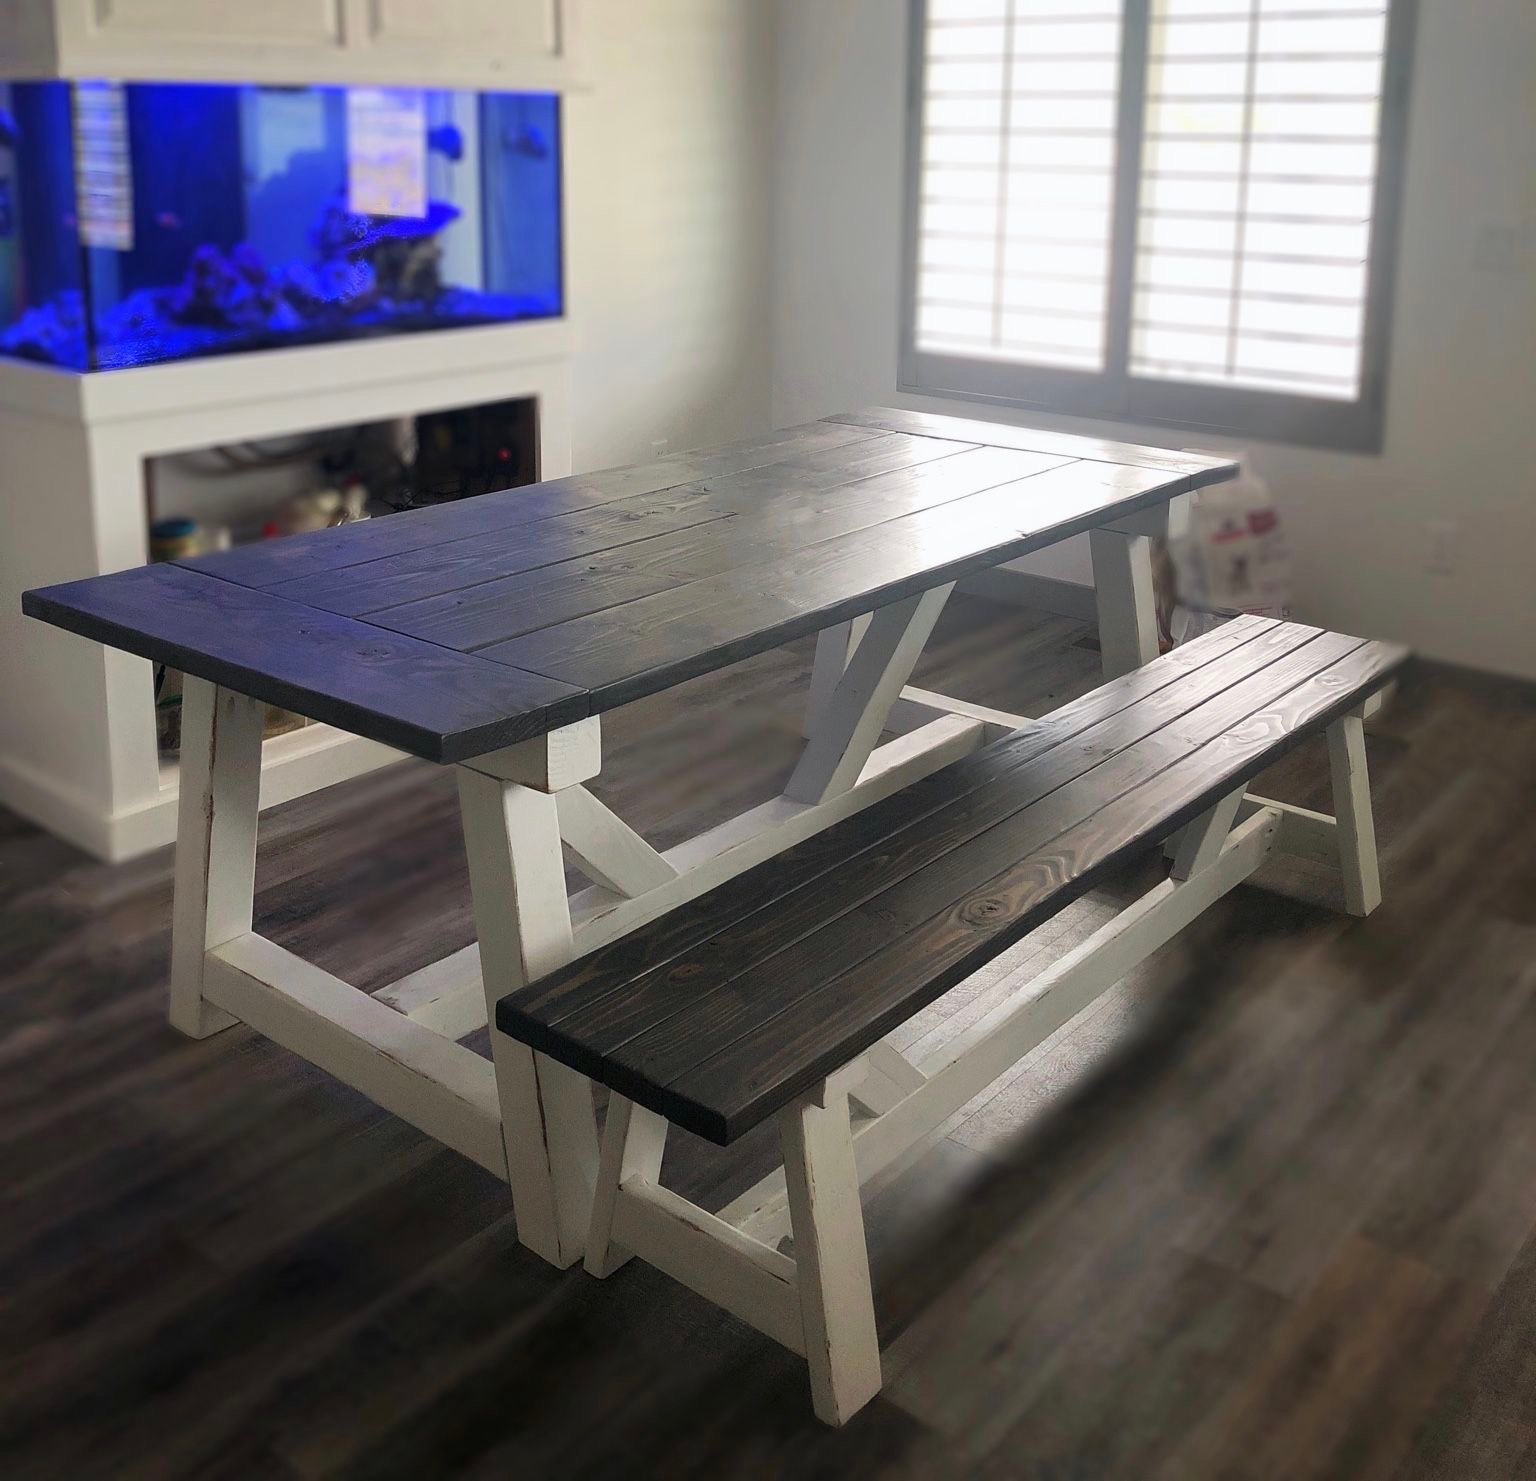
Modified the dimensions of the 4x4 Truss Table and bench.
Built from Plan(s)
Estimated Time Investment
Weekend Project (10-20 Hours)
Finish Used
Varathane Carbon Gray stain
Valspar Cool Gray (7006-10) paint*
*This is my favorite for a white paint - has cool undertones without being too bright, but definitely still white, even though it is called a gray. Matches everything.
Valspar Cool Gray (7006-10) paint*
*This is my favorite for a white paint - has cool undertones without being too bright, but definitely still white, even though it is called a gray. Matches everything.
Recommended Skill Level
Intermediate
Closet Laundry Tower
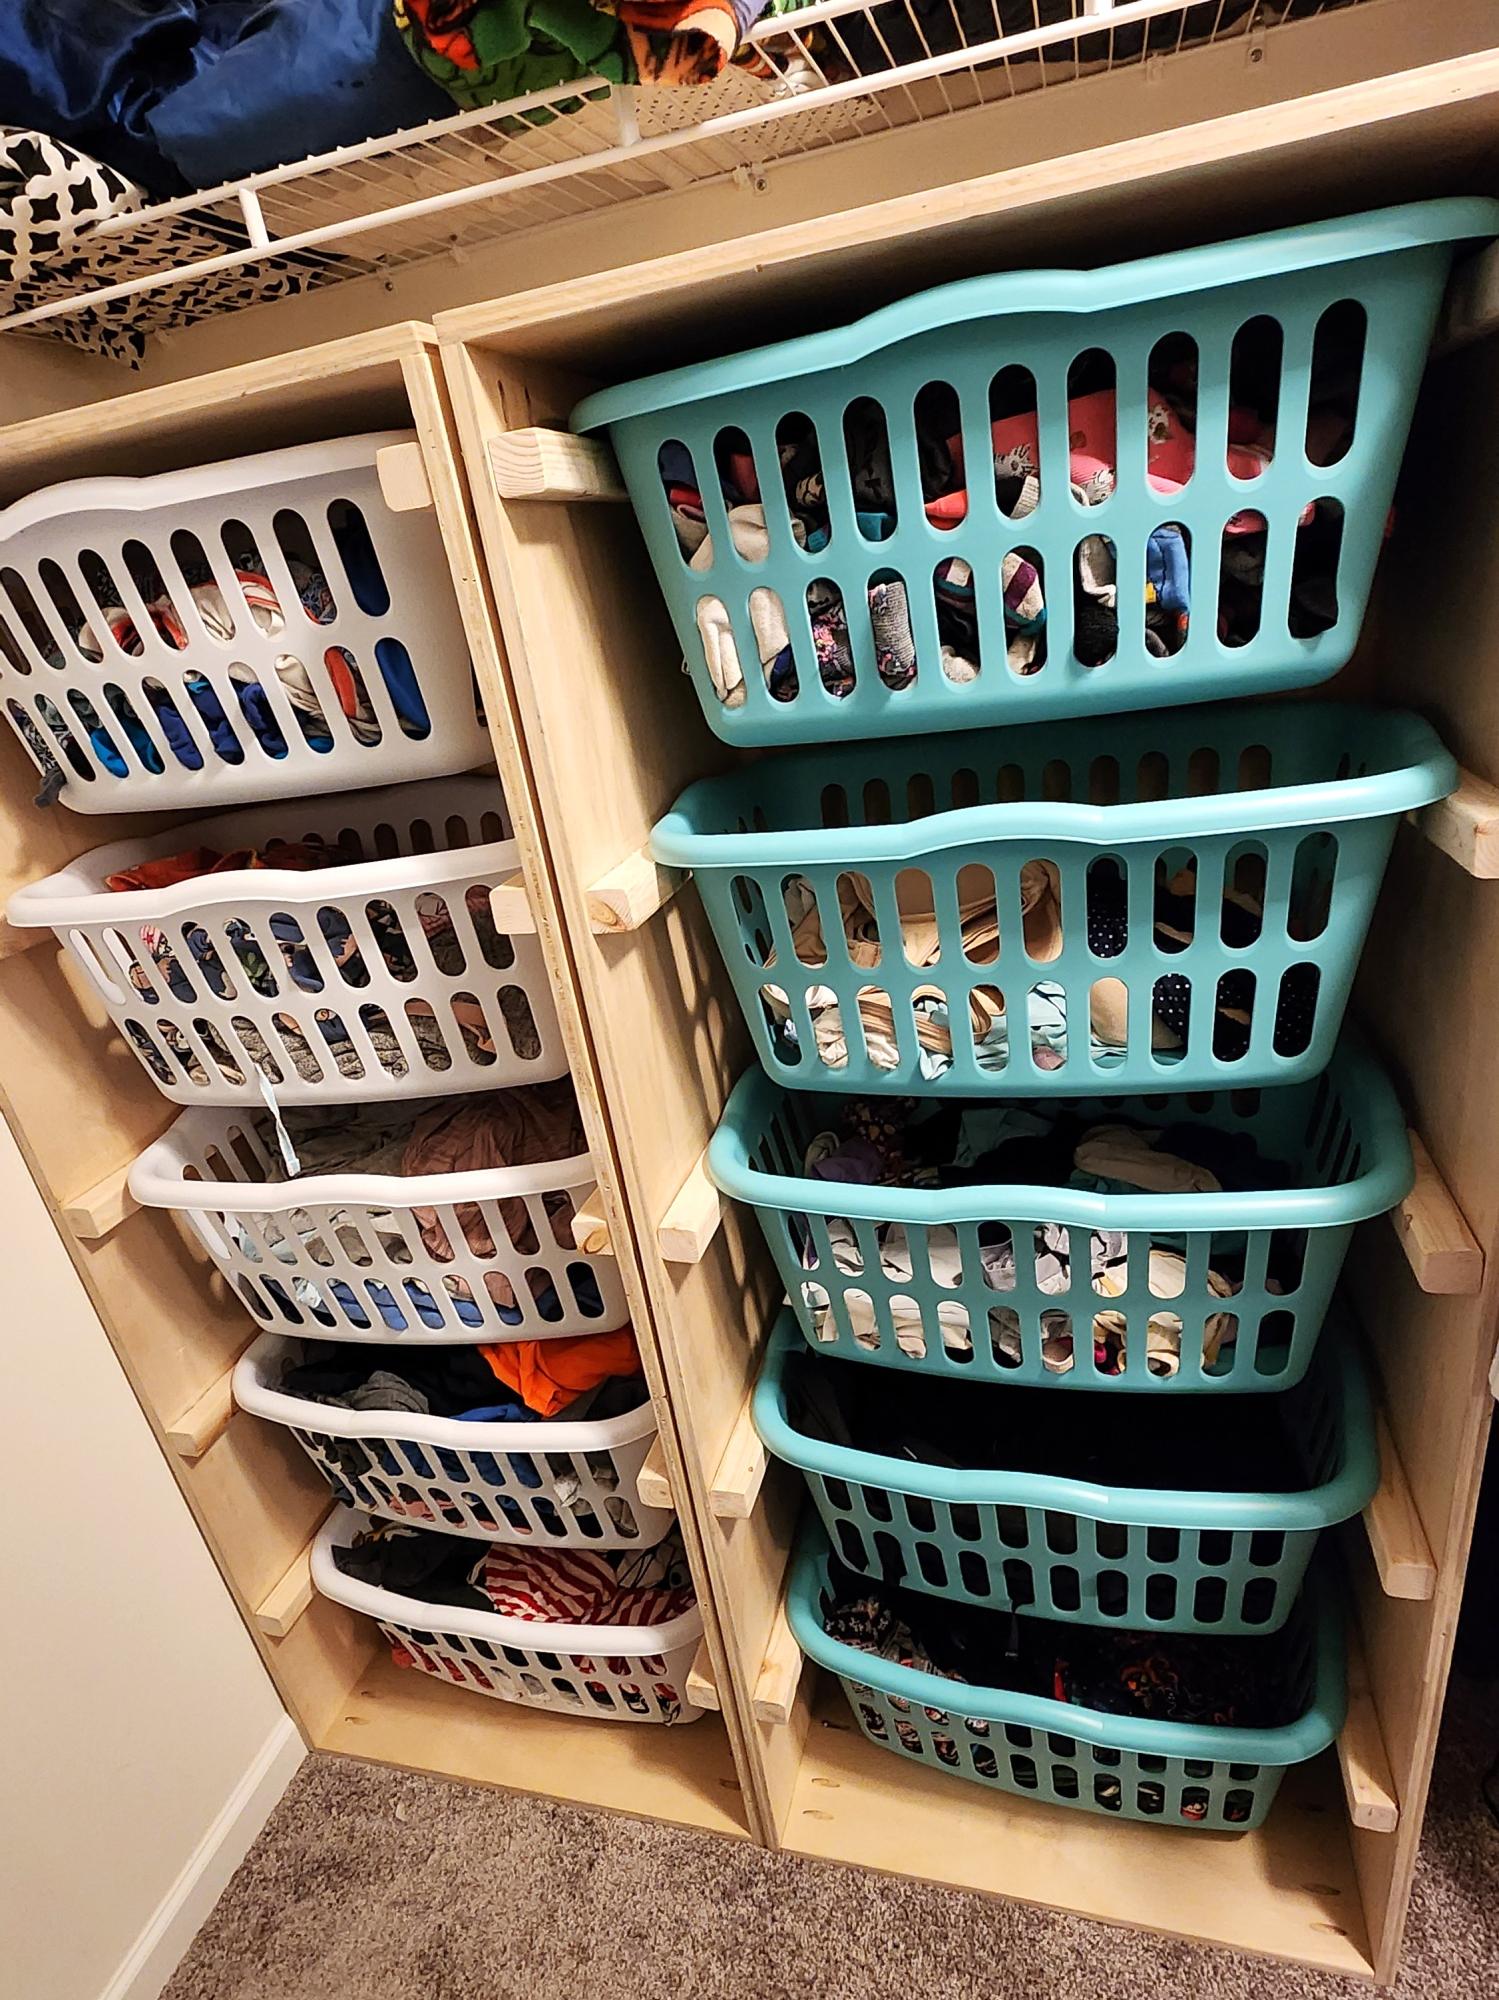
My husband and I are horrible when it comes to folding, so I made a total of 4 of these 5 high for our closet and they are amazing!!
Erin Z
Built from Plan(s)
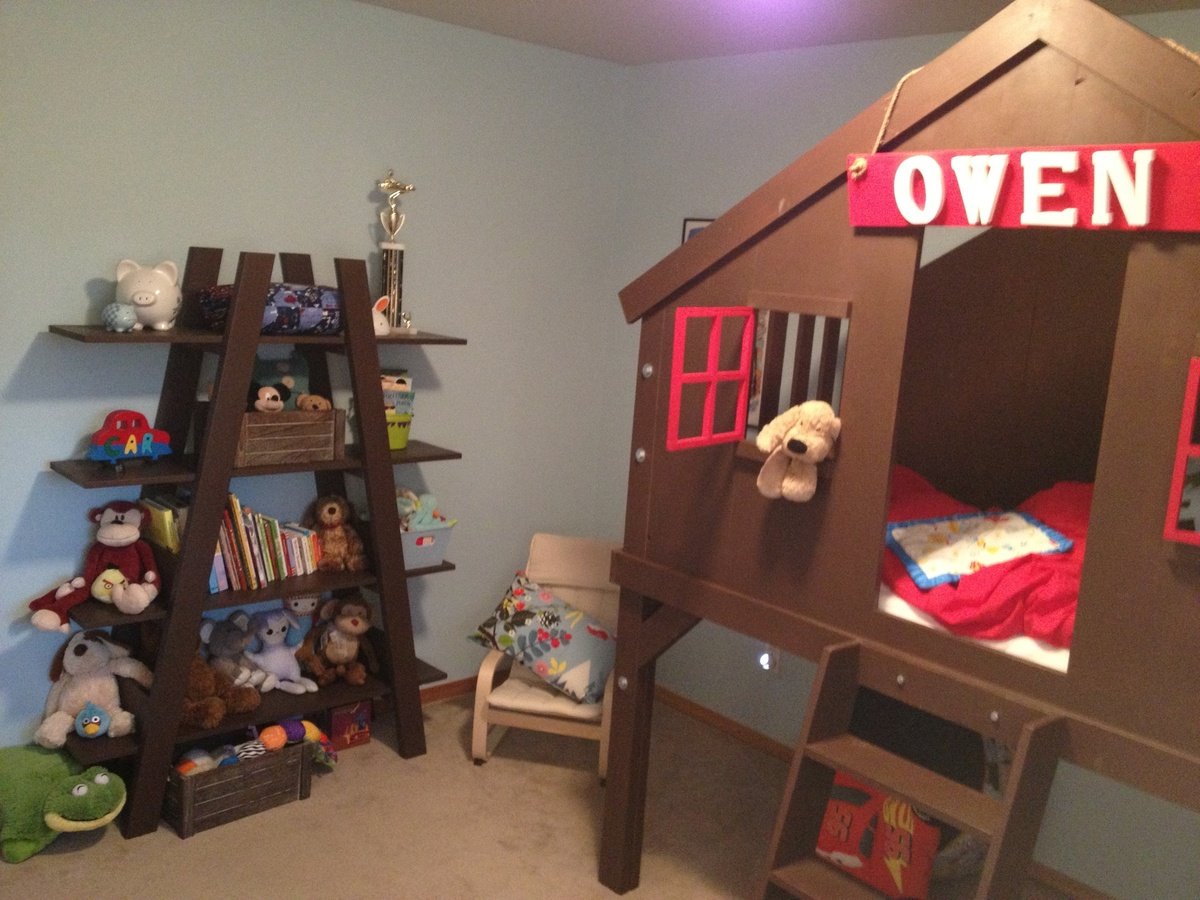
O's big boy room
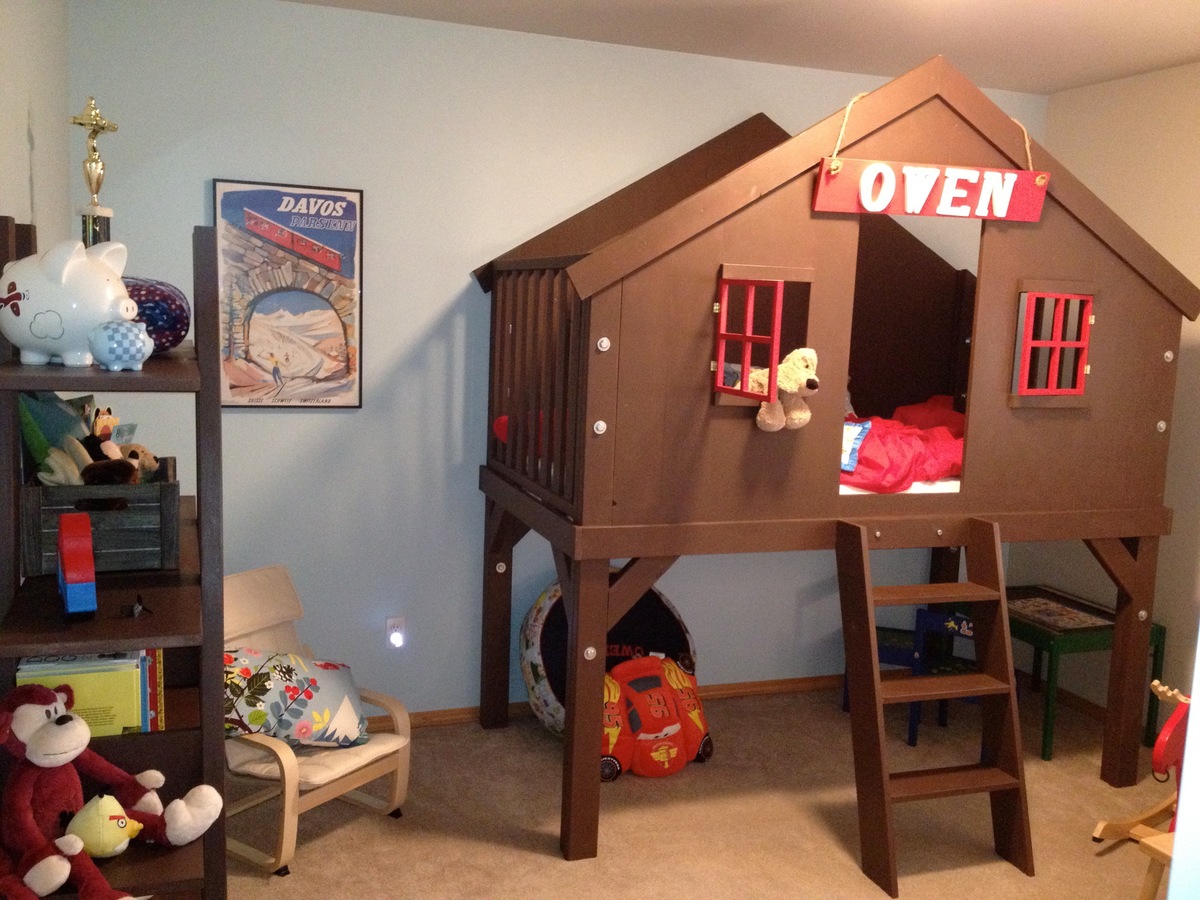
Our youngest was done with his little boy bed and so we decided we should make him a bed - he picked the clubhouse bed and we went to work. This was a fun build - I used the "Kreg" Jig for just about everything. We decided that he would need a new bookshelf and thought the truss shelves would look great next to the bed. He is so proud and excited for his big boy room, thank you Ana and Jaime for the plans and tips.
Built from Plan(s)
Estimated Cost
330 (Bed, Bookcase, hardware, paint and wax)
Estimated Time Investment
Week Long Project (20 Hours or More)
Finish Used
flat int. paint and paste wax
Recommended Skill Level
Intermediate
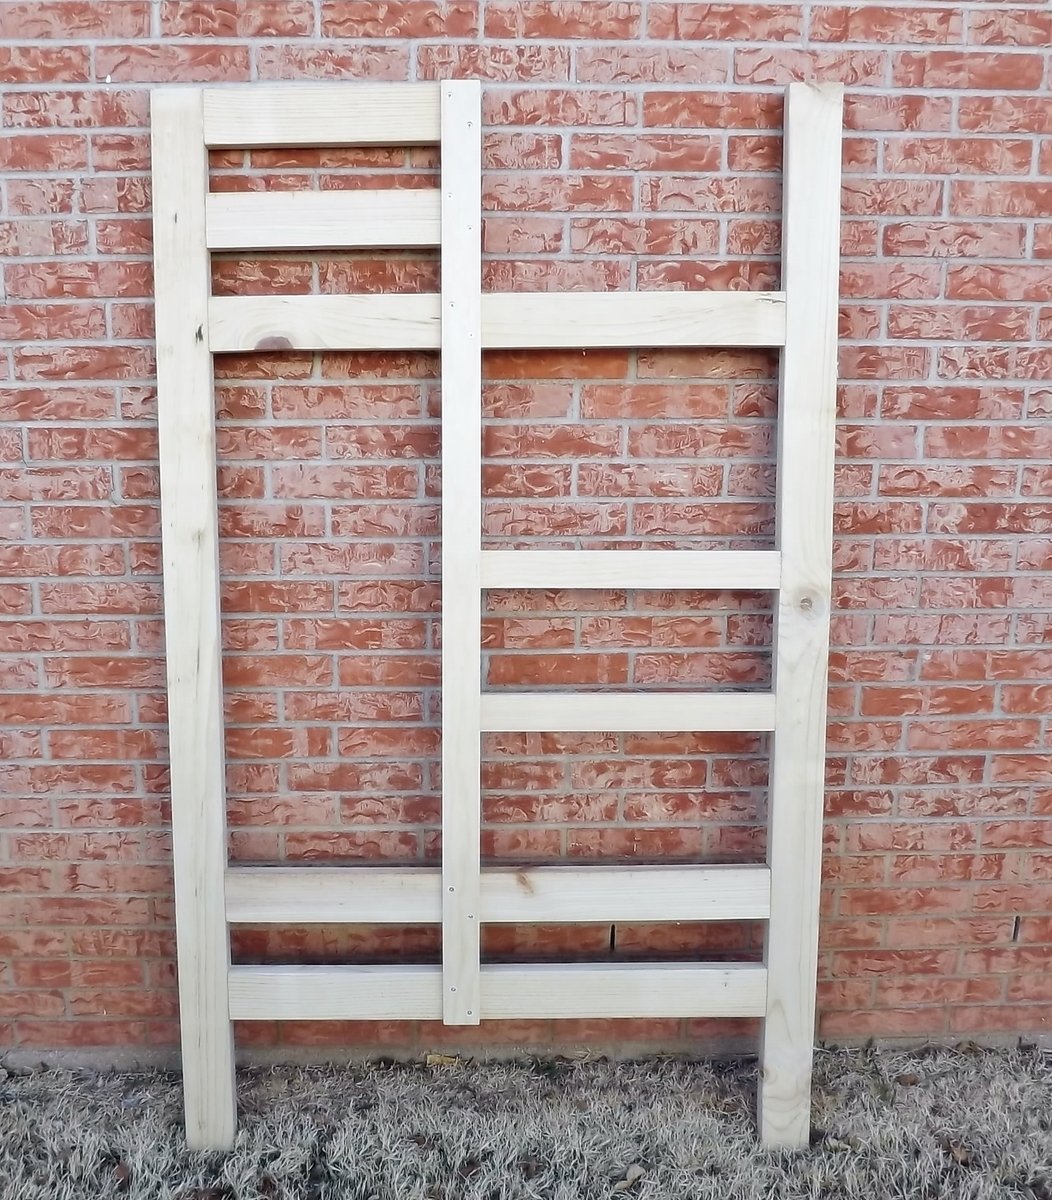
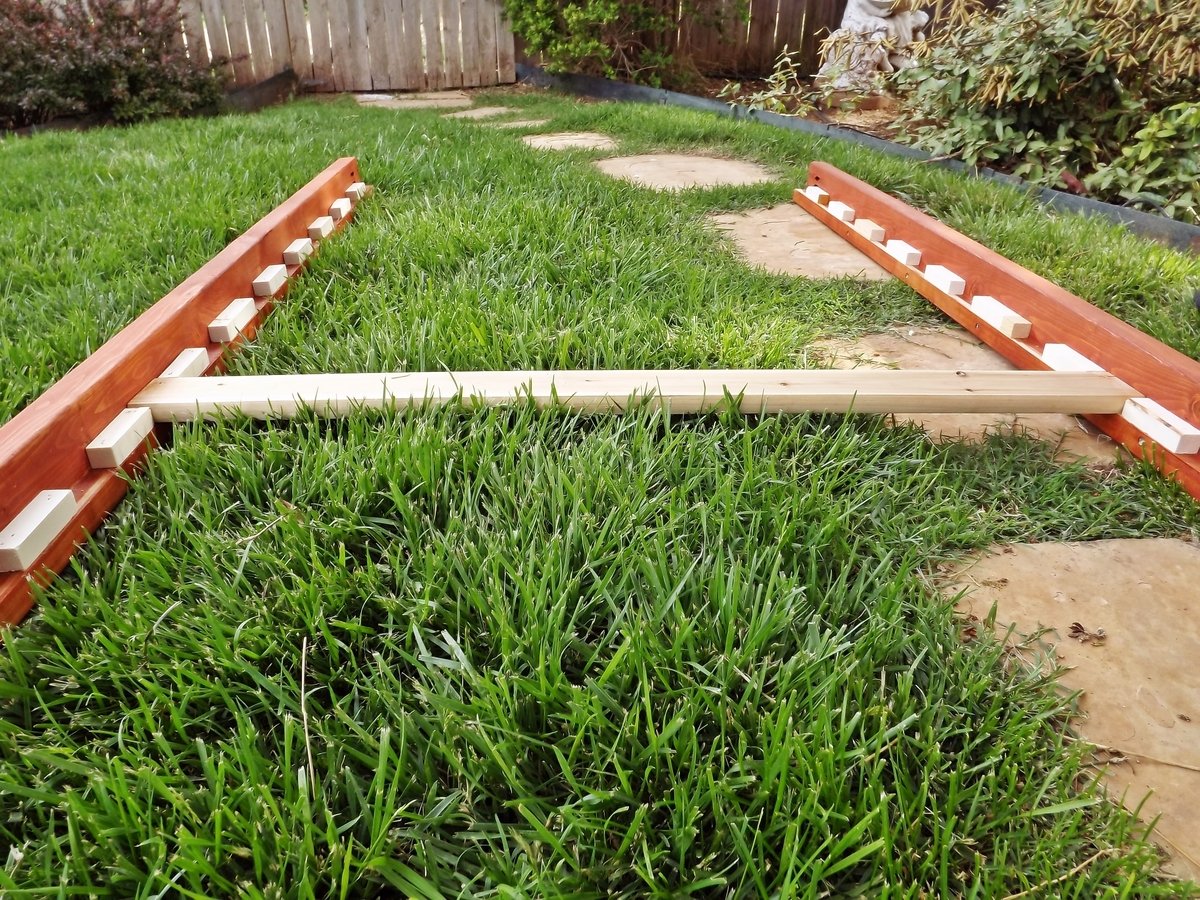
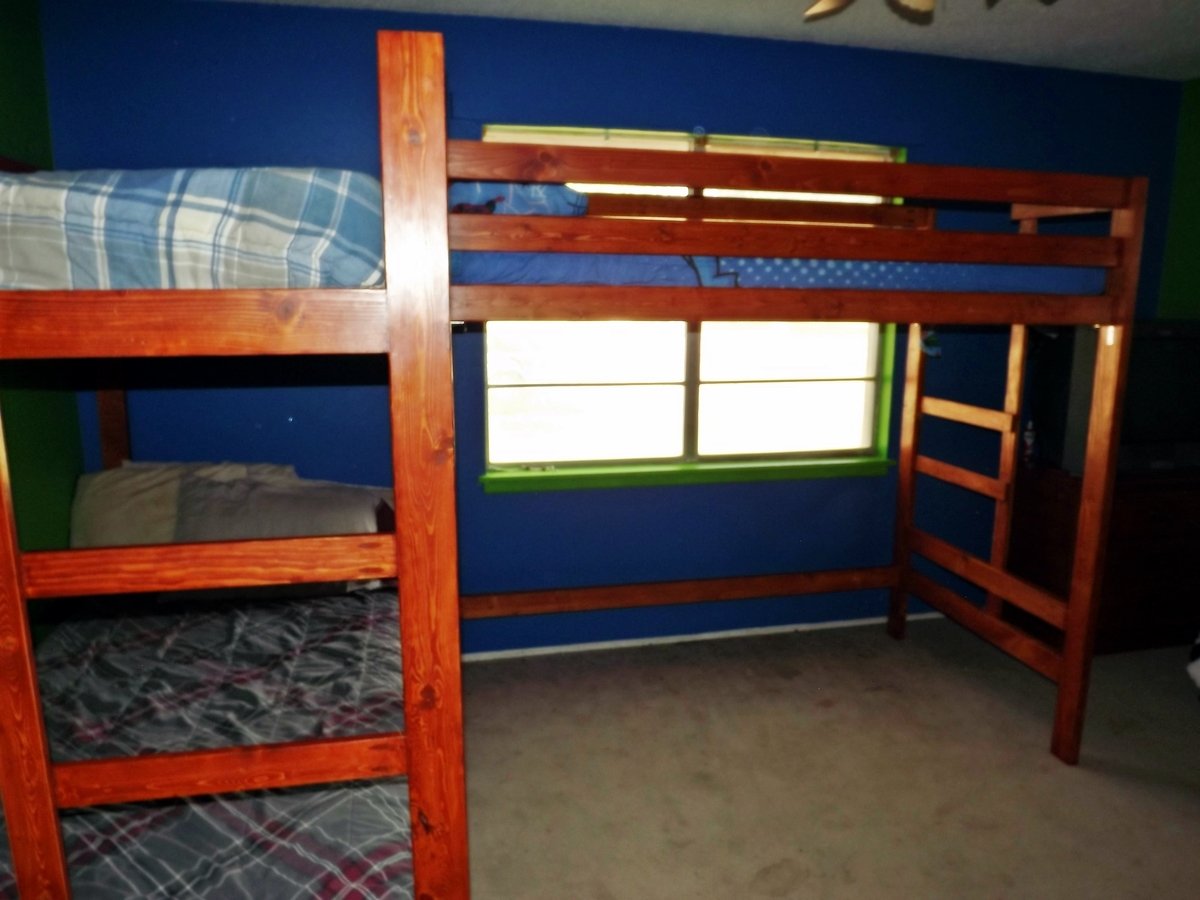
Bunk / Loft Bed Combo
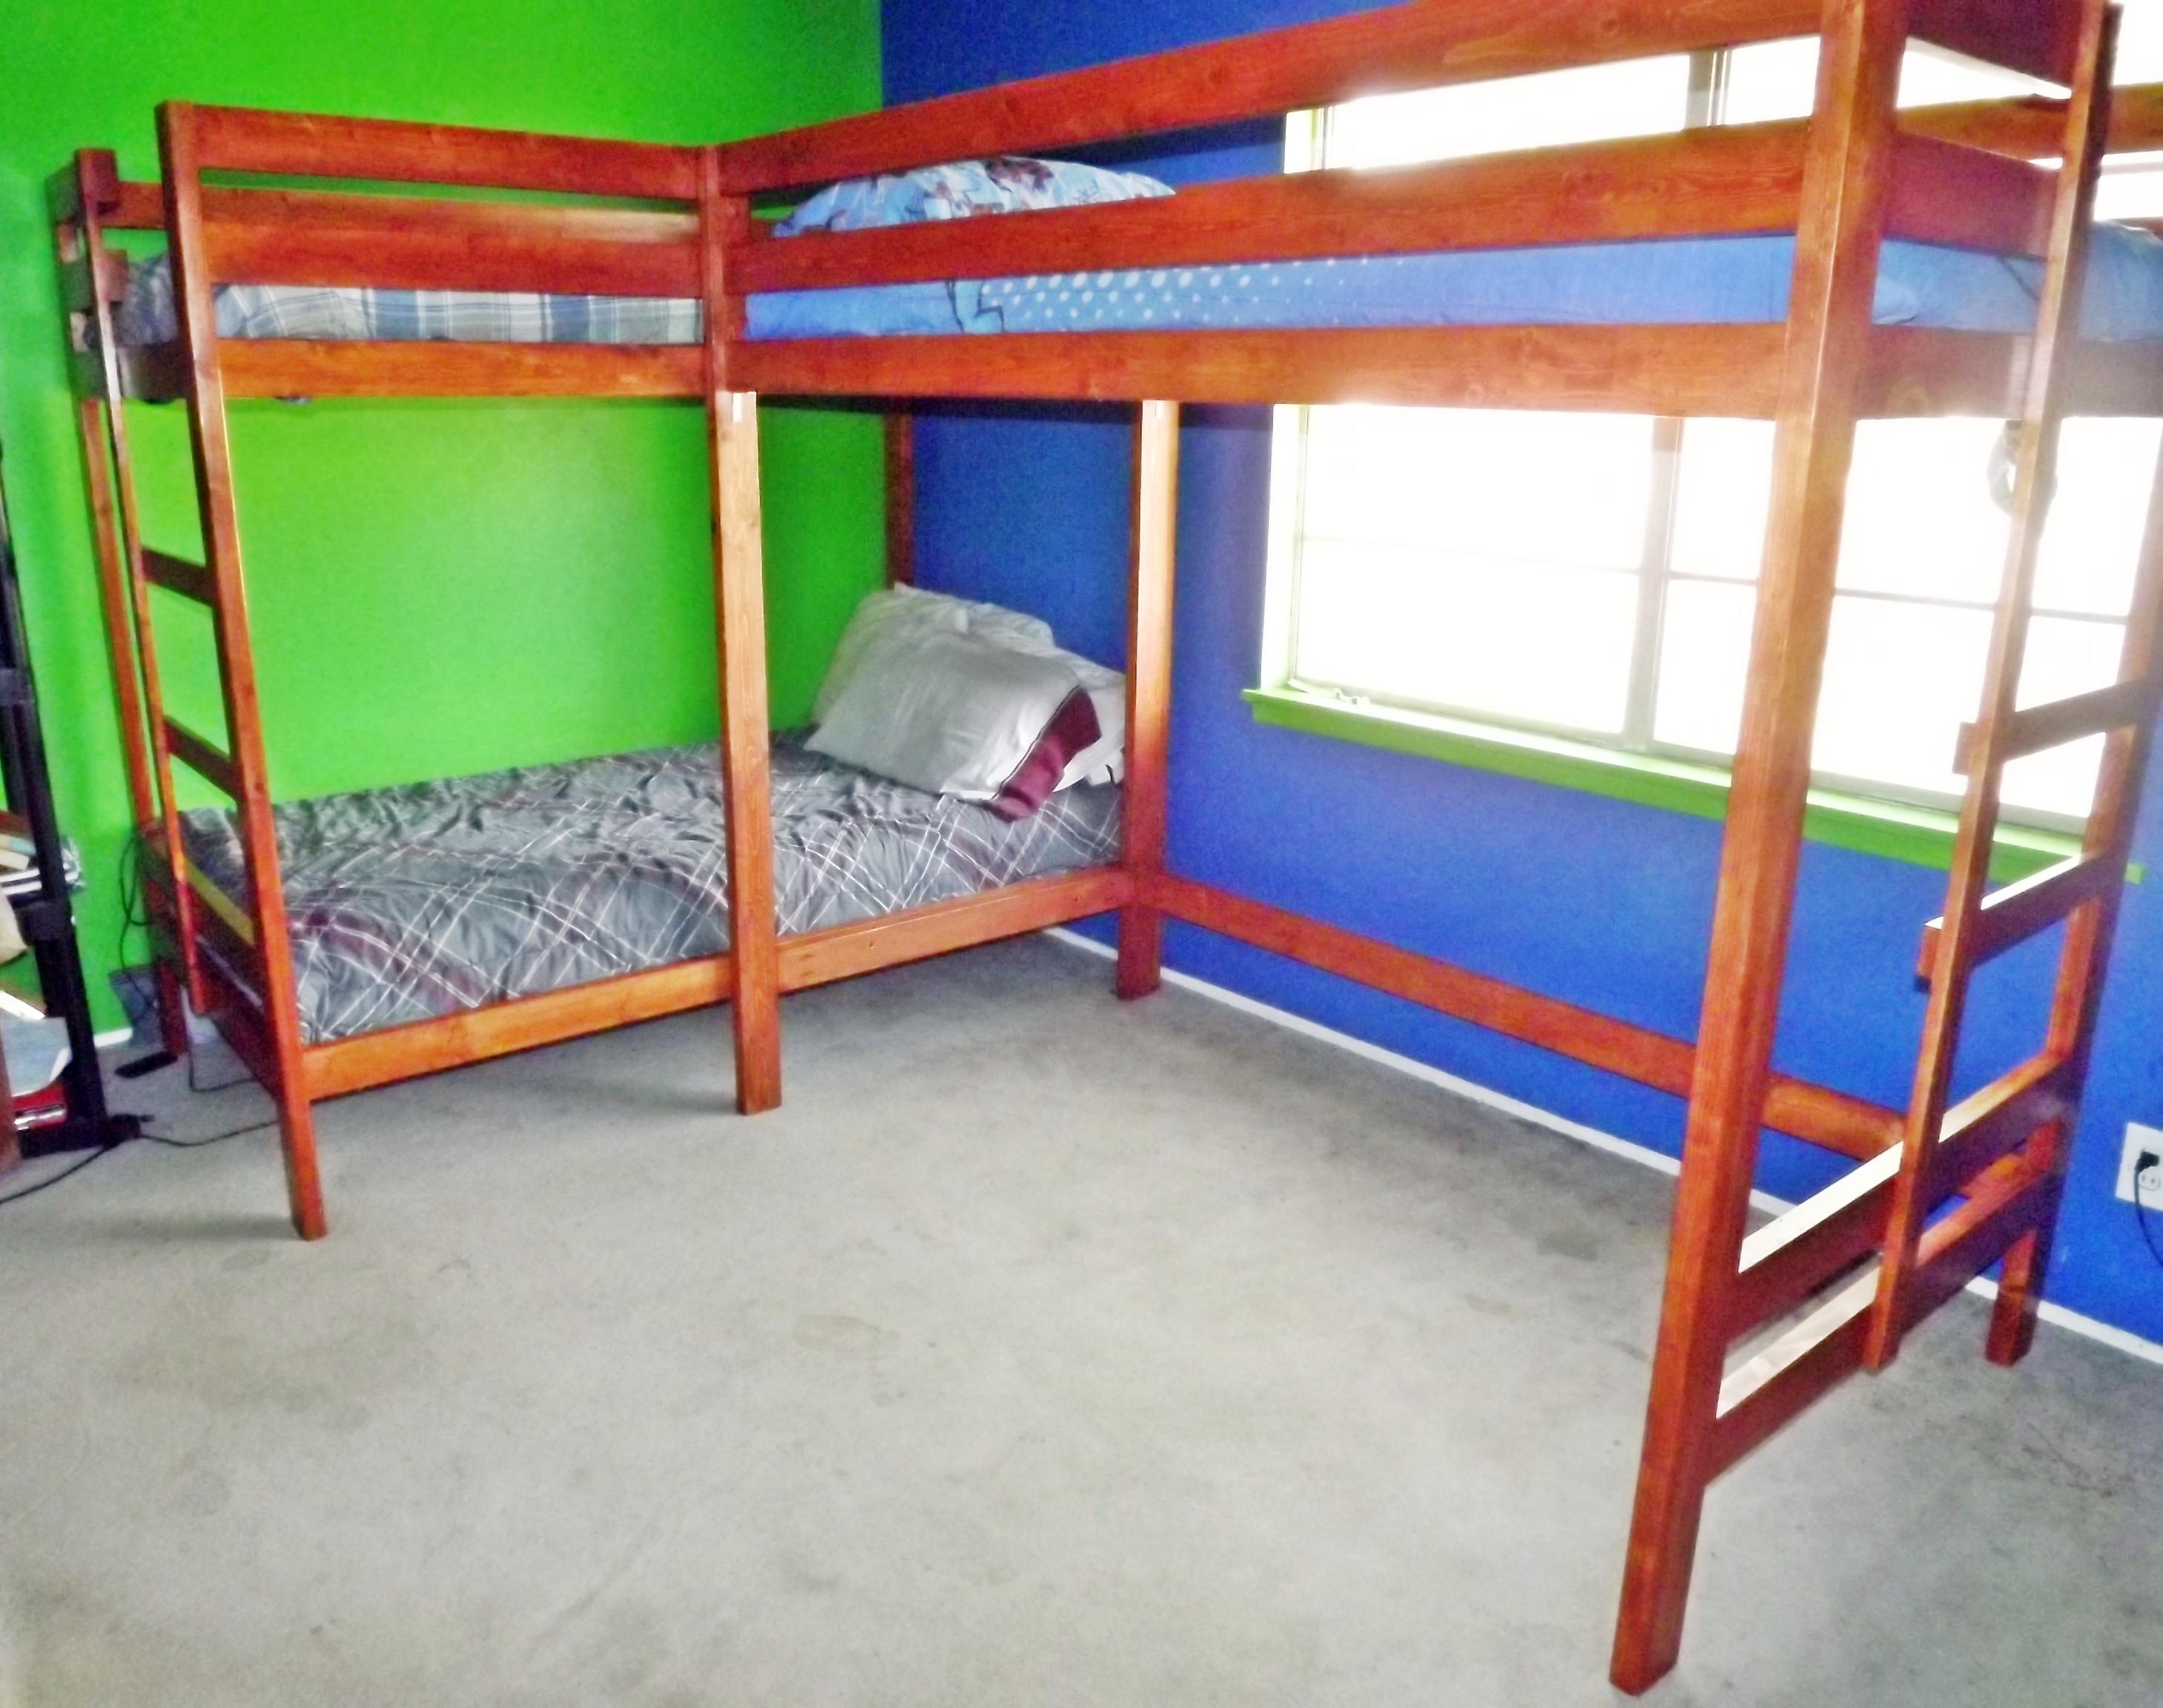
With three boys ages 17, 14, and 9 sleeping in one small bedroom, an efficient bunk bed/loft bed system seemed to be the perfect choice. I used the bunk bed plans from The Handbuilt Home, but I increased the height, and moved the steps to the end. The loft bed is basically the same as the bunk beds, but without the bottom bunk. I left the top rail off the head of the loft bed, creating a space so that they could crawl from the top bunk to the loft if desired. The short side rails on the top bunk are attached to the head of the loft bed.
The beds are modular and could be stand-alone beds, but I used TimberLok heavy duty wood screws to screw the beds together at the "intersection" on the bottom rail of the top bunk and loft, and the bottom rail of the bottom bunk and loft. That makes the beds very sturdy.
The entire system comes apart for storage or if a move ensues later. One other modification gleaned from a brag post was to use spacers on the cleats of the side rails so that you can just lay the slats down without having to screw them down. What a time-saver!
Thank you Ana White for the lovely plans and to all the brag posters for the ideas.


Estimated Cost
Around $225.00
Estimated Time Investment
Week Long Project (20 Hours or More)
Finish Used
I filled the knots and obvious spaces left by the rounded edges of the 2 x 4 where horizontal joined vertical. I then sanded from 80 down to 220 grit. I used 1 coat of Minwax Pre-stain conditioner, followed by 1 coat of Minwax "Gunstock" stain and 3 coats of Minwax wipe-on clear satin Poly. I used a cloth to apply the stain and poly, which provided a smooth, lovely finish. I like the rustic look of the wood knots and grain, but I didn't want primitive. It took almost 1 quart of stain, and a pint of poly for this project.
Recommended Skill Level
Beginner
Comments
Wed, 07/02/2014 - 11:56
Space Saver!
Look at all that florr space now! Great job, thanks for sharing!
Wed, 07/02/2014 - 14:18
Thank you for the kind words, Ana.
Thank you for the kind words, Ana. I don't know what they'll do with the extra space under the loft, but I'm sure the boys will think of something!
Sat, 07/19/2014 - 14:41
Sorry about the tripple
Sorry about the tripple comments somthing I did by mistake.
Tue, 07/29/2014 - 21:50
plans for the bunk beds
Jacqueline...sorry for the late reply, but I've been out of town and just now saw this. The plans for the bunk bed itself is from Ana's book The Handbuilt Home. The loft part is basically the same build, but I left off the bottom bunk. I did increase the height of the beds and moved the built-in ladder to the foot board. I tried to explain my mods in the "about this project" section of the post. If you have any questions, just email me.
Fri, 04/17/2015 - 18:39
moved the beds
Well, as I mentioned in the original post, I built these beds to be modular so that they could be moved or stored. Less than a year after the beds were finished and installed, my family moved. As we took the beds down, we made sure all the parts were labeled and grouped the slats for each bed. It was easy to reconstruct it at the new house, especially because the spacers between the cleats for the slats enabled us to just lay them down w/o having to use screws.
Monogrammed snowflake

Created using the plans/template from Ana White's monogrammed snowflake.
I decided to make a hanging B in the middle. Two small eye hooks and some thread.
Paint used was Krylon's ruby red glitter and a clear sealer
Built from Plan(s)
Estimated Time Investment
Weekend Project (10-20 Hours)
Finish Used
Krylon Ruby Red glitter spray paint
Recommended Skill Level
Intermediate
Seasonal And Holiday
Modern Outdoor Chairs and Sofa with Coffee Table
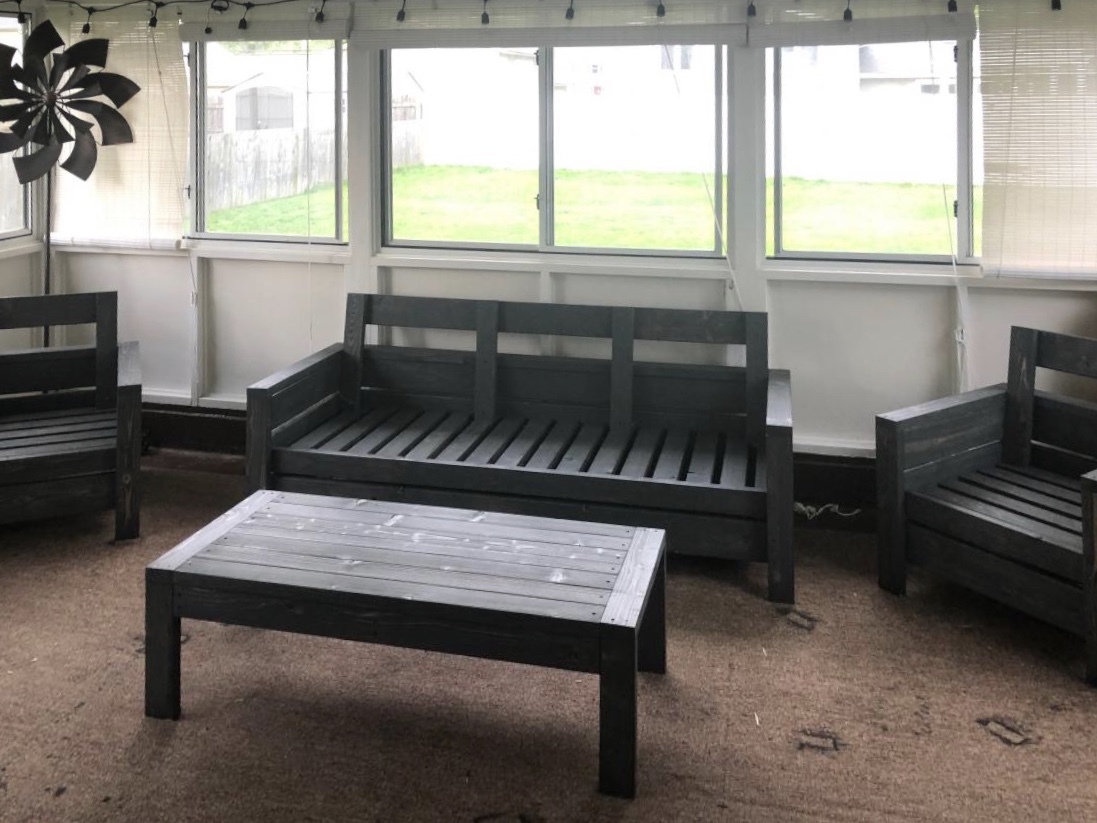
At the start of the COVID situation, I decided to make a furniture set for my three seasons room. I figured, i had all the tools, so why not. We used the Modern Chair and Modern Love Seat ( but extended the love seat for 3 seats). I added a middle support on the couch to accommodate the longer length. I also added the backs, because we found out that the cushions we ordered liked to fall off the back. I just made a 10 degree cut on 2x4's and added a 2x6 piece for the top of the backs. I also ripped a 2x4 down to make the table top close to seamless ( I did not properly join the 2x4's) It was a great project, my wife and i enjoy doing these projects together. We cant put a children's play set together, but we can create things from scratch.

Built from Plan(s)
Estimated Cost
$300
Estimated Time Investment
Weekend Project (10-20 Hours)
Finish Used
Varathane Stain ( Carbon )
Varathane Sparthane Satin Finish
Varathane Sparthane Satin Finish
Recommended Skill Level
Beginner
Rustic X End Table - Love it!
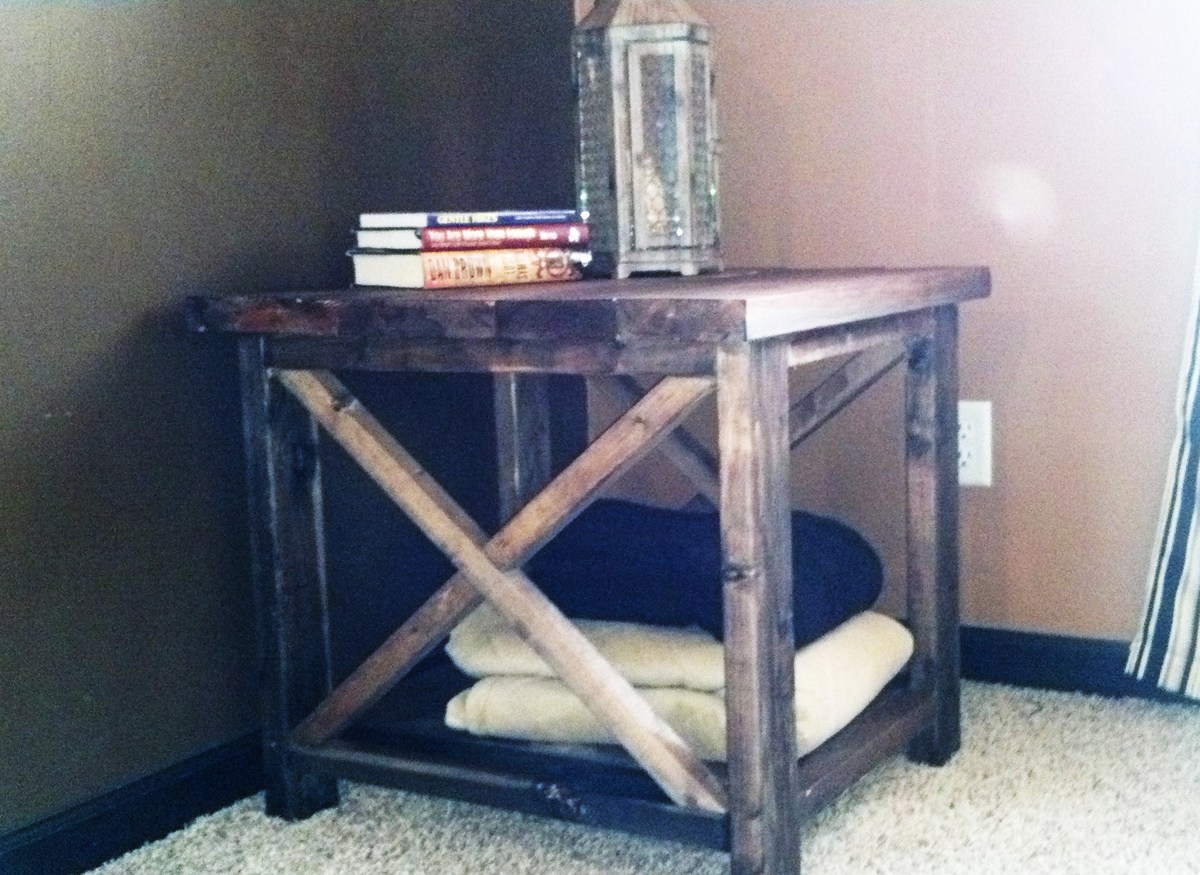
I love this plan and this table. This was my first project, and I think I turned out really well.
Built from Plan(s)
Estimated Cost
$20
Estimated Time Investment
Afternoon Project (3-6 Hours)
Finish Used
Oxidizing (steel wool dissolved in vinegar)
Recommended Skill Level
Beginner
Comments

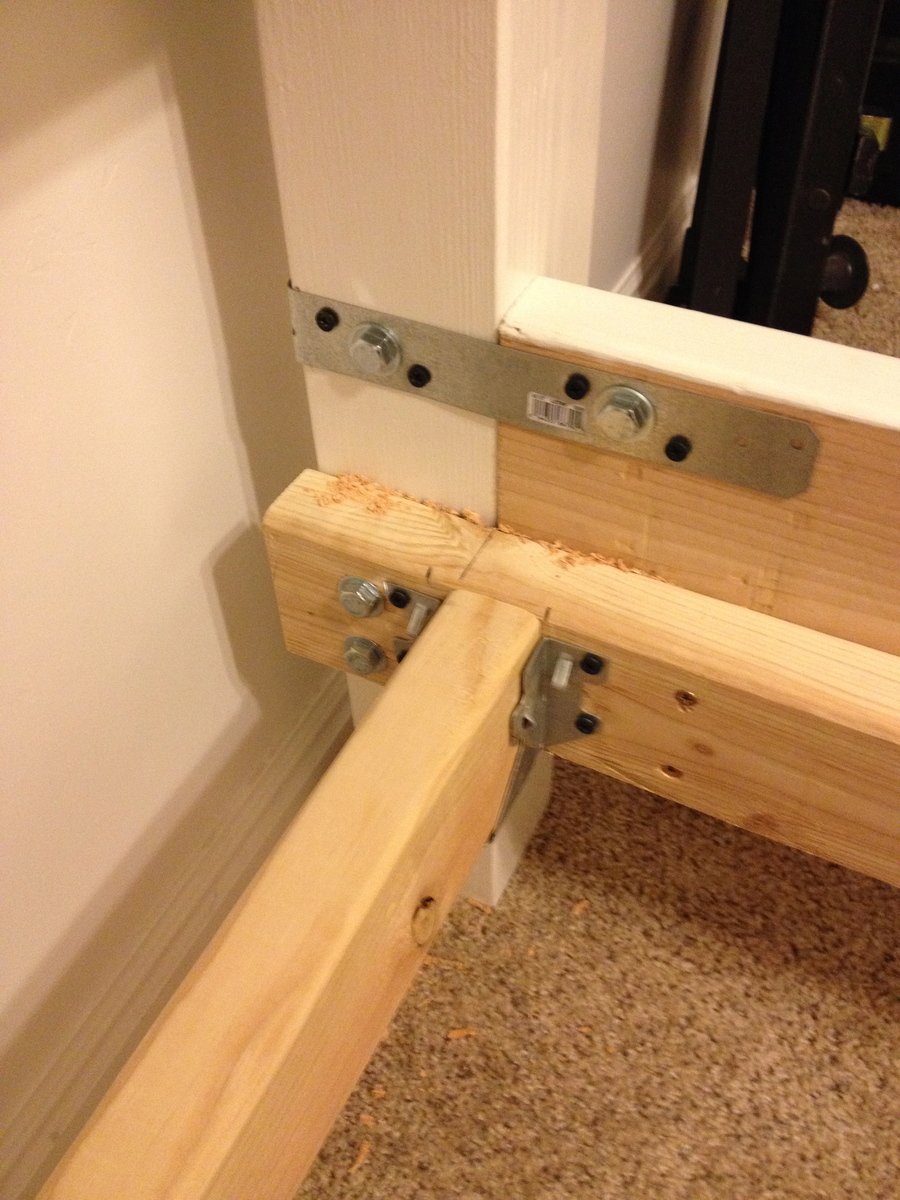
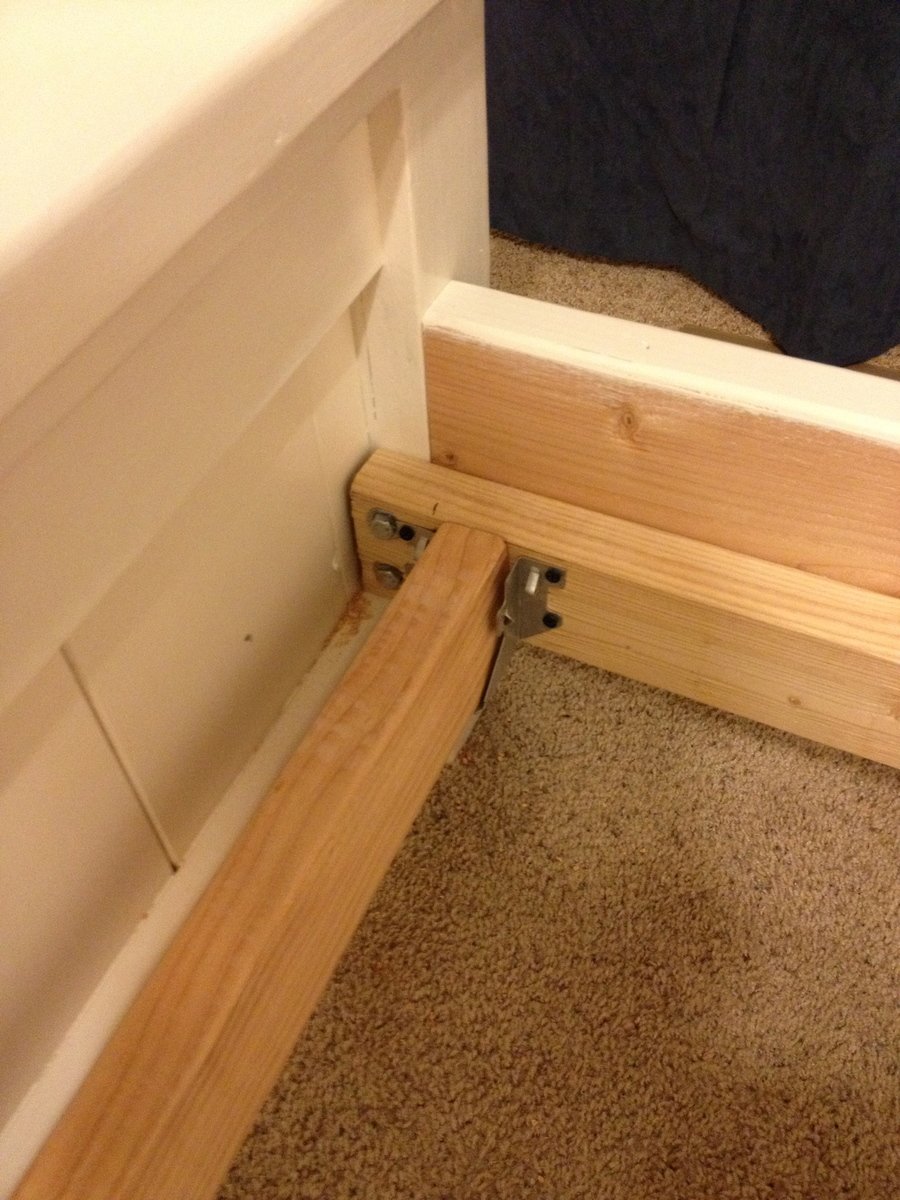
Farmhouse Bed - King
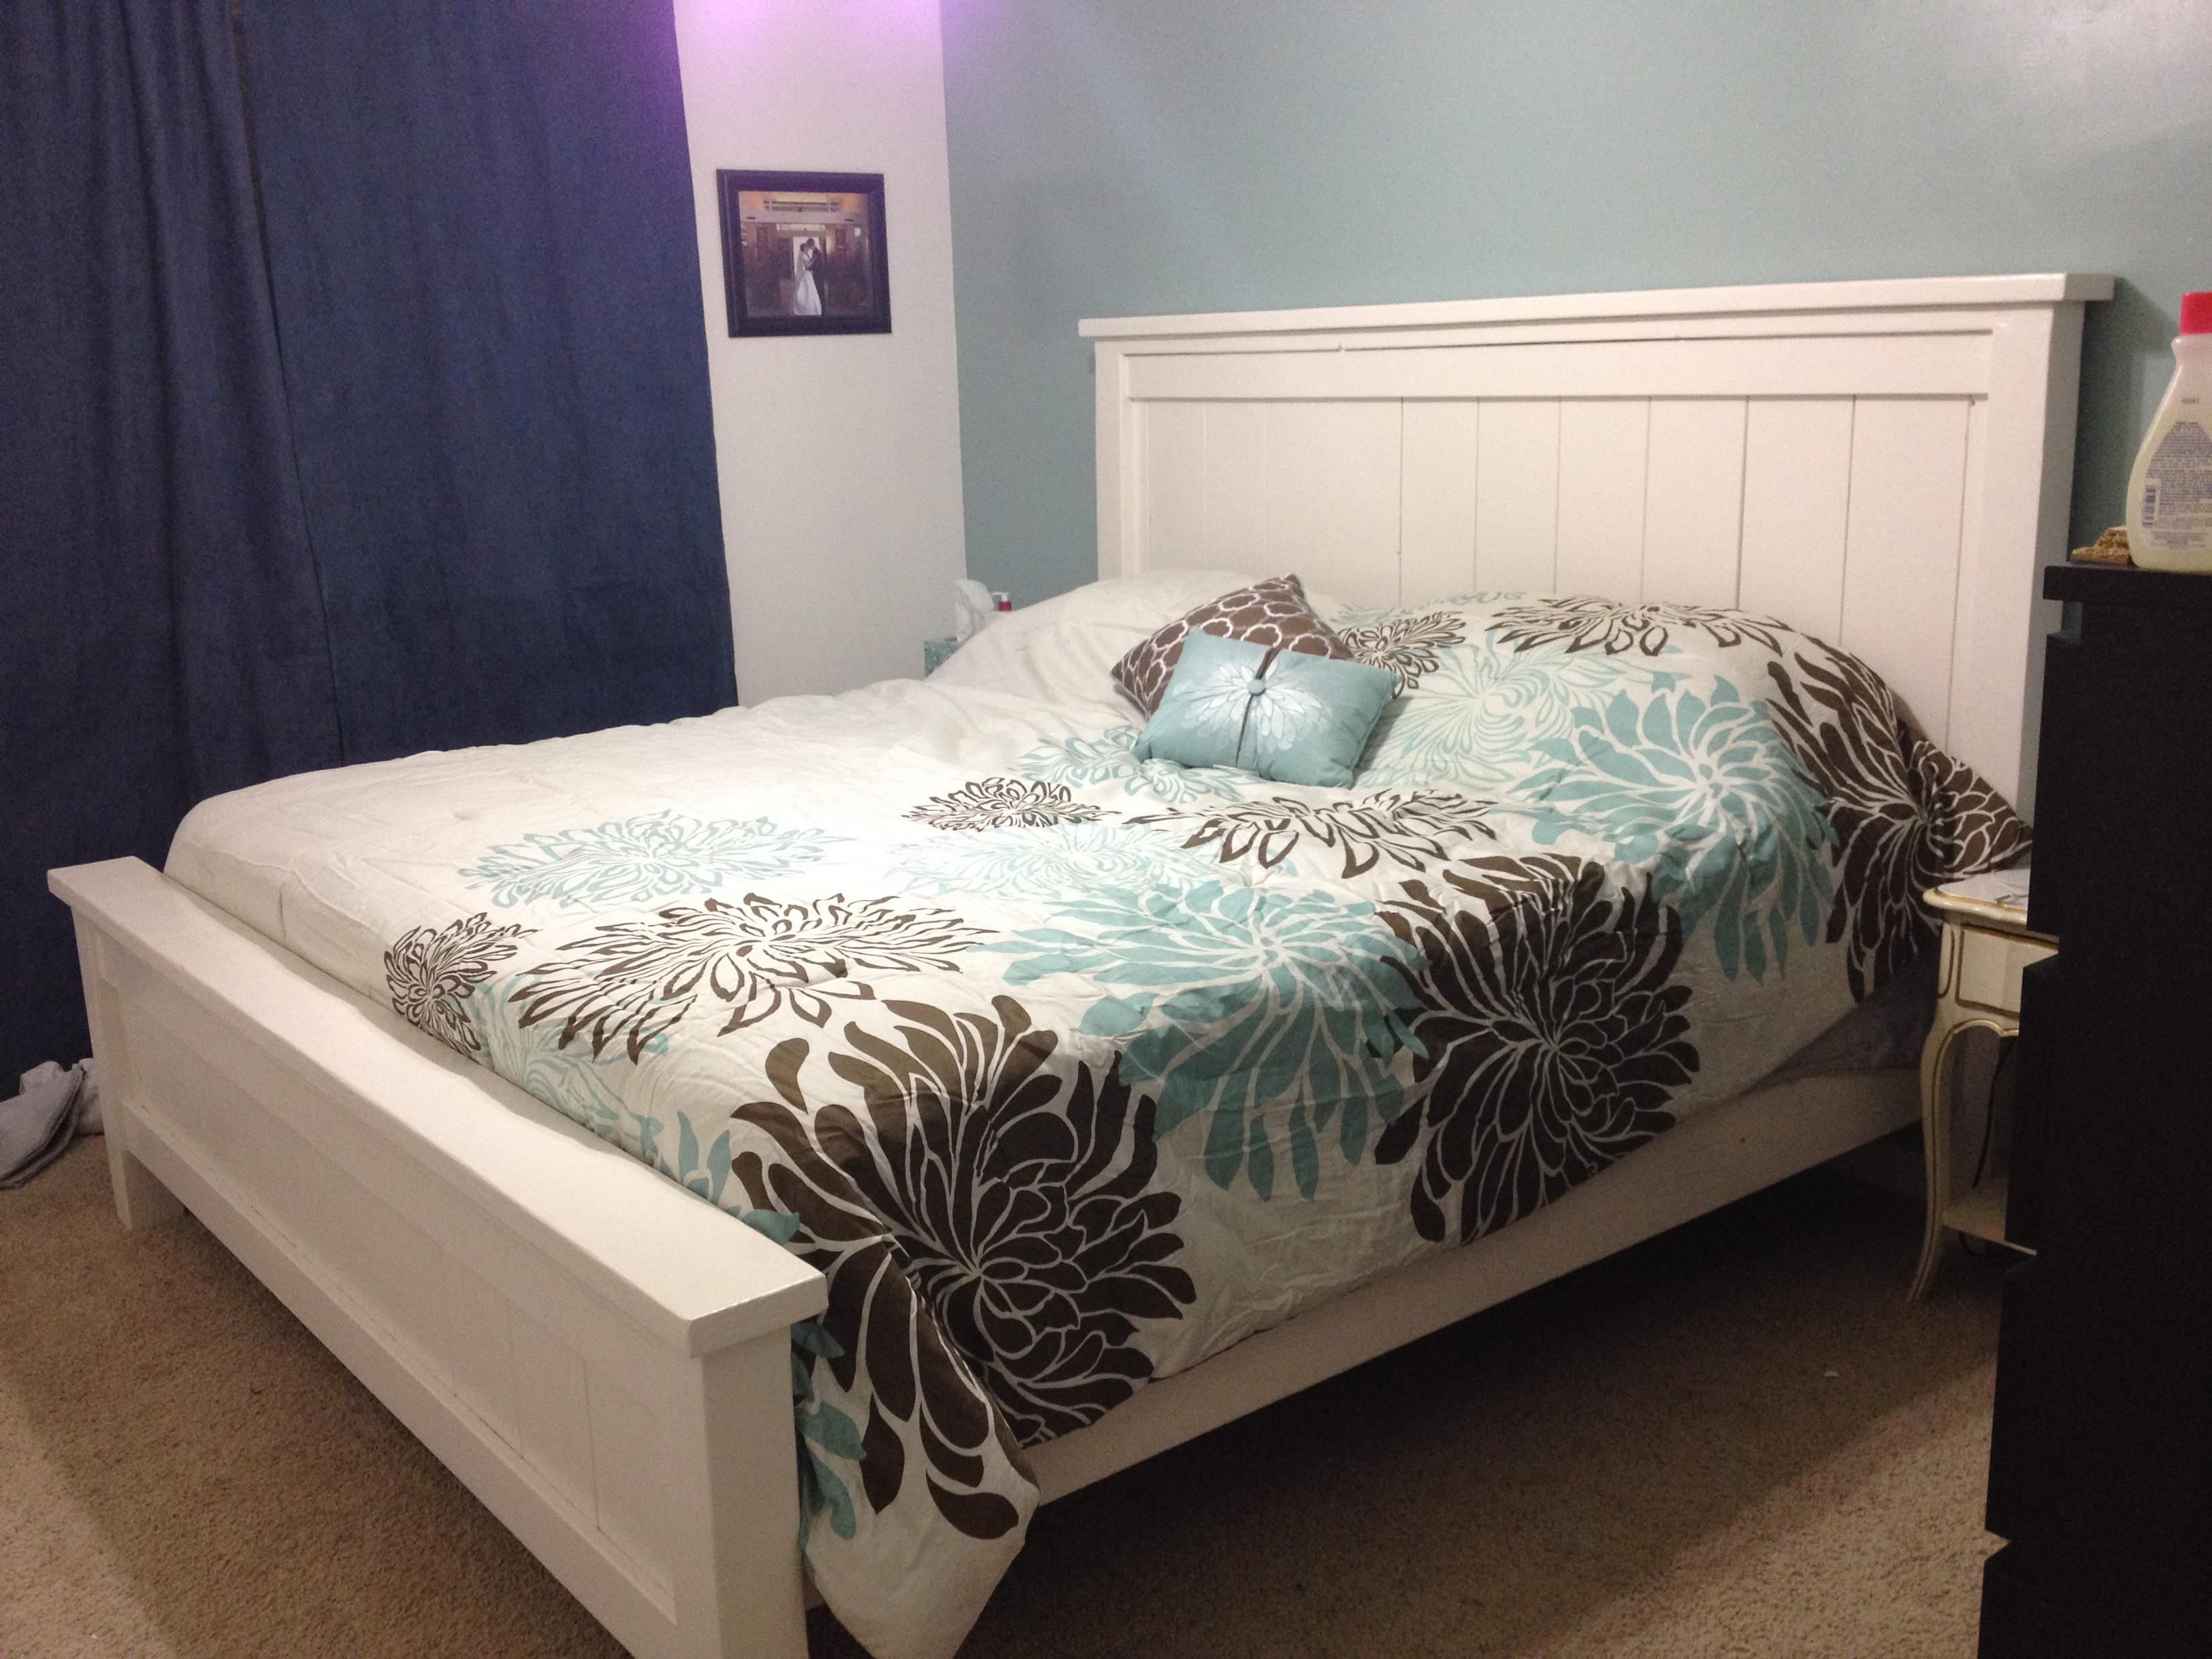
We built the farmhouse king size bed over the last week. We used 2x4 hangers to hold the 2x4's in place and used 2x4's to support the mattress. We put 7/16" plywood on top of the 2x4's to support the mattress. We struggled with how we were going to attach the side rails to the bed frame and finally came up with a way we felt would be strong enough. Please see the pictures included to see exactly how we attached the rails to the bed frame. We used lag bolts, and metal brackets.
Built from Plan(s)
Estimated Cost
200
Estimated Time Investment
Week Long Project (20 Hours or More)
Finish Used
Glidden Antique White Primer and paint combo in semigloss, we did 2 coats.
Recommended Skill Level
Beginner
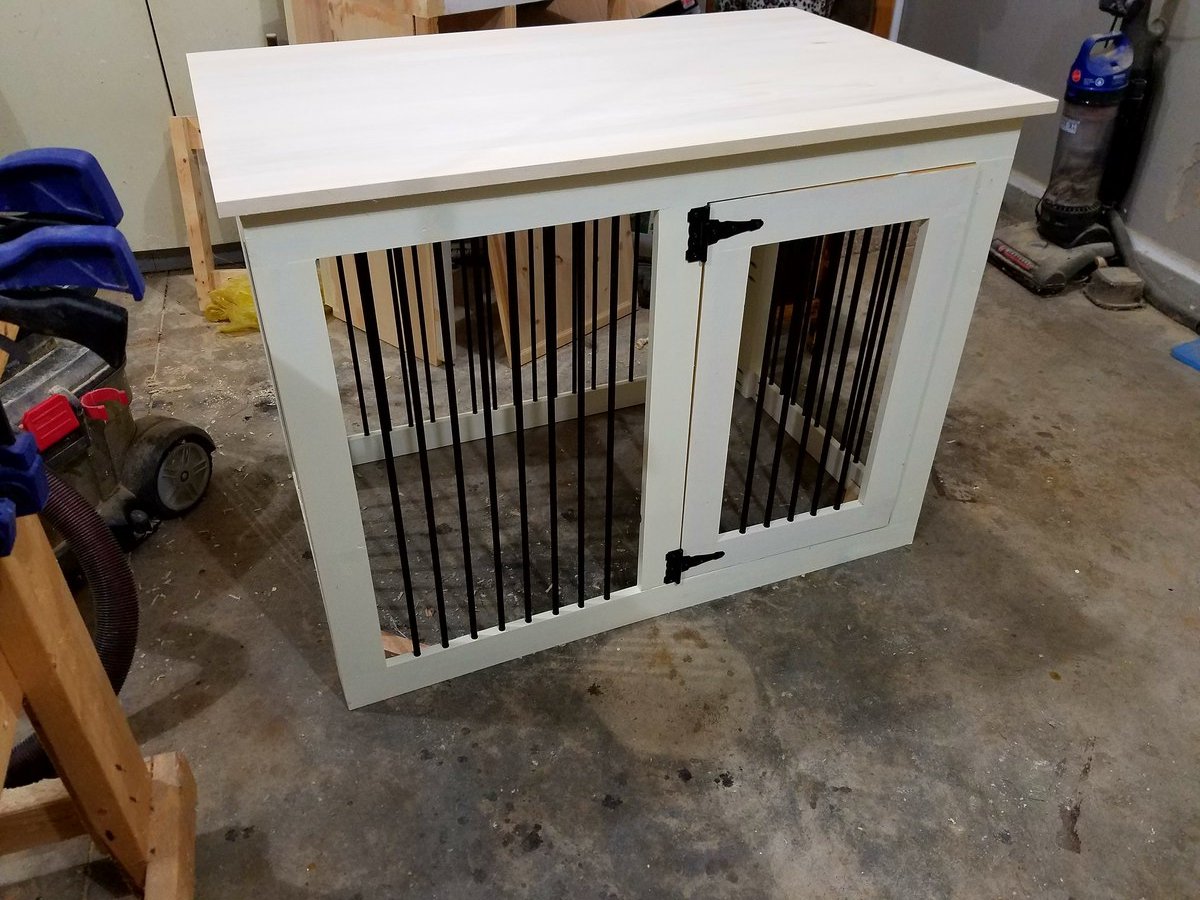
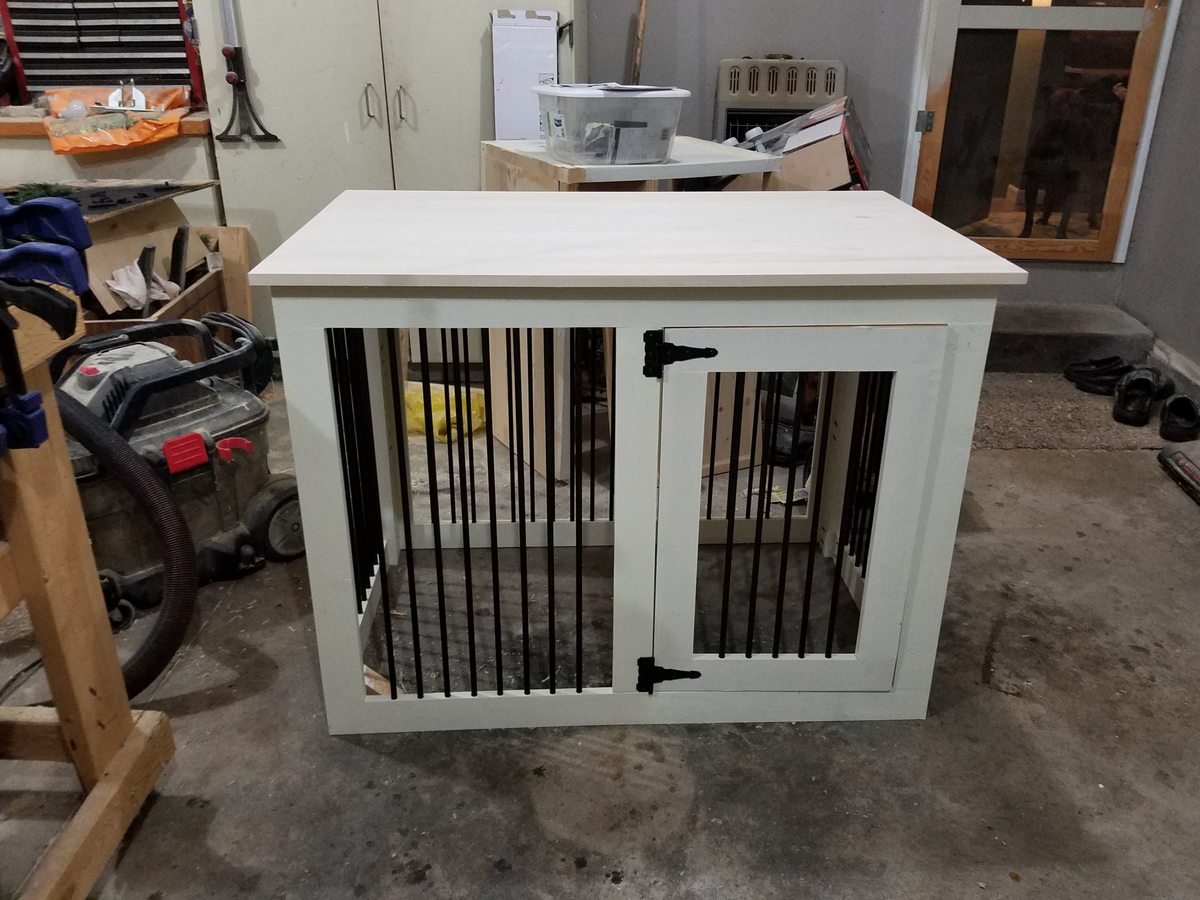
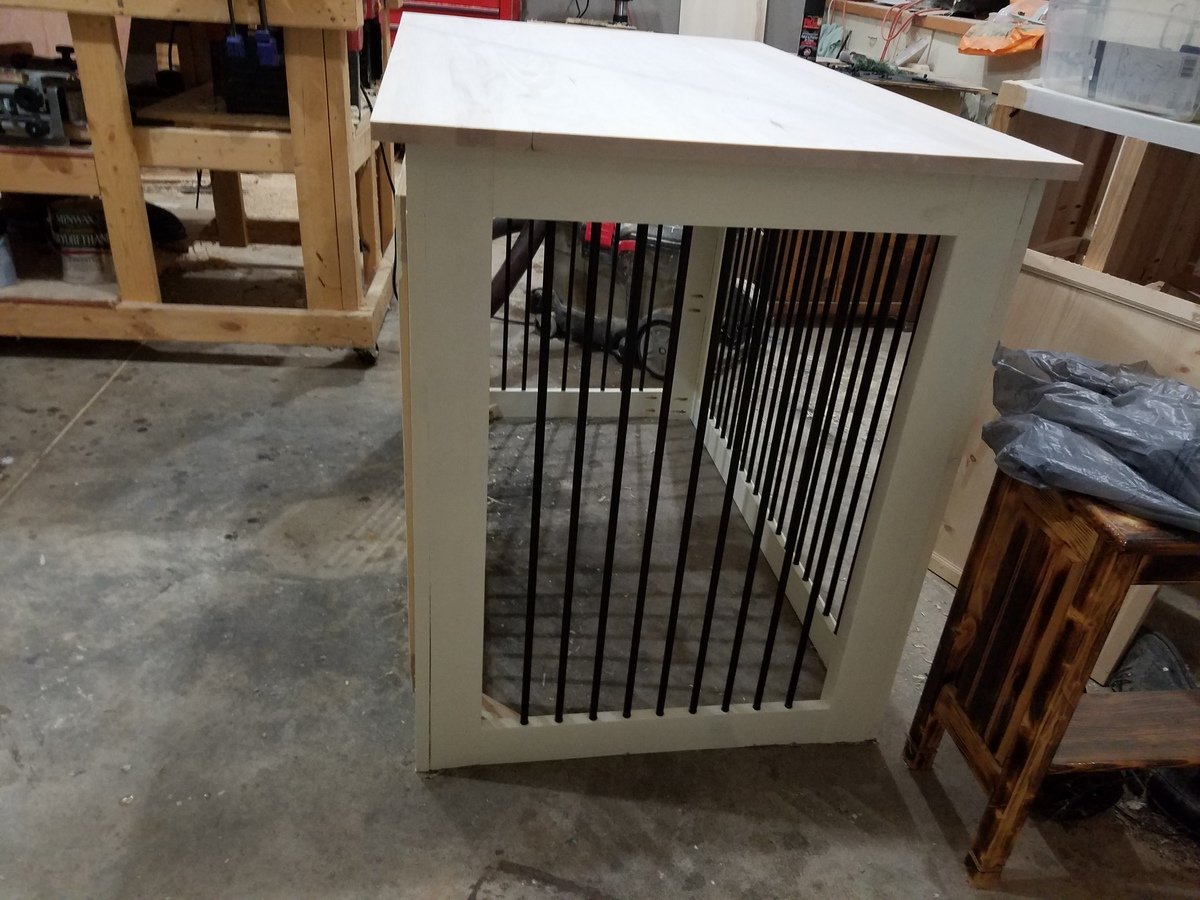
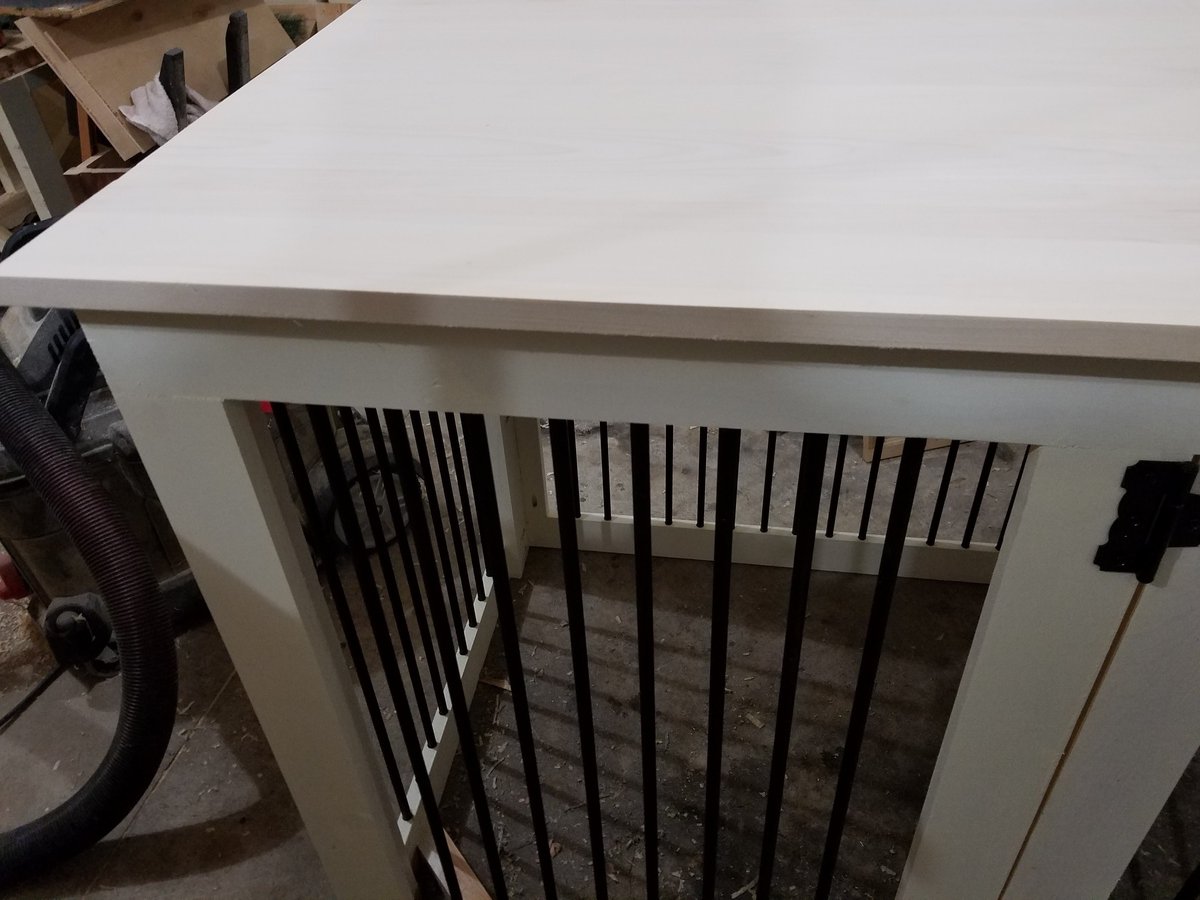
dog kennel by R&L Custom Creation of West Michigan
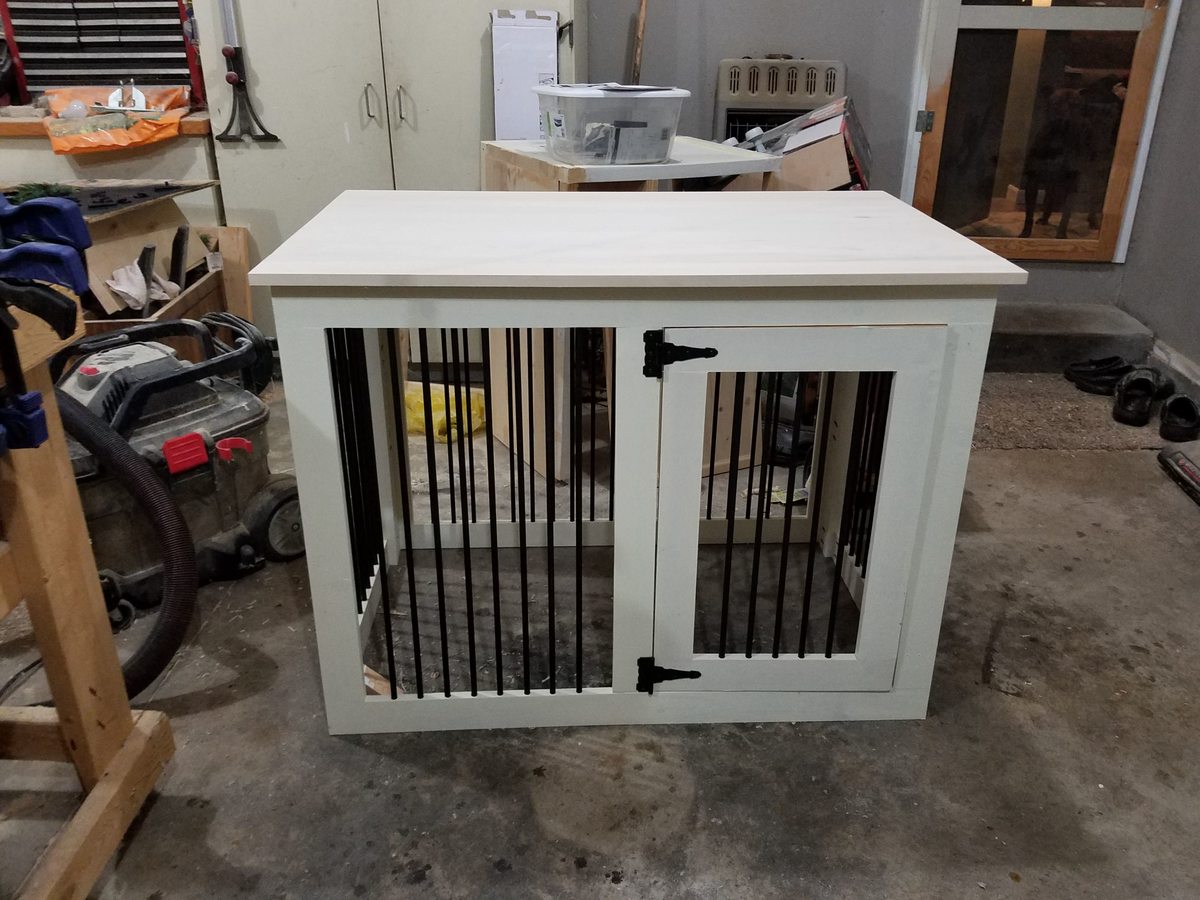
When your dog needs a home add gorgeous as your own
Estimated Cost
250.00
Estimated Time Investment
Week Long Project (20 Hours or More)
Finish Used
Gilded endive paint
Recommended Skill Level
Advanced
Comments
Sat, 10/08/2016 - 07:47
great project
i loved doing this project, but it is not for the beginner. I used a drill press to drill out 5/8 holes for the solid steel dowels. if you would like more information please email me @ [email protected]
Simple Bench

Really nice accent bench and super easy
Built from Plan(s)
Estimated Cost
$20
Estimated Time Investment
Afternoon Project (3-6 Hours)
Finish Used
Minwax special walnut , exterior satin poly , satin white paint exterior
Recommended Skill Level
Beginner

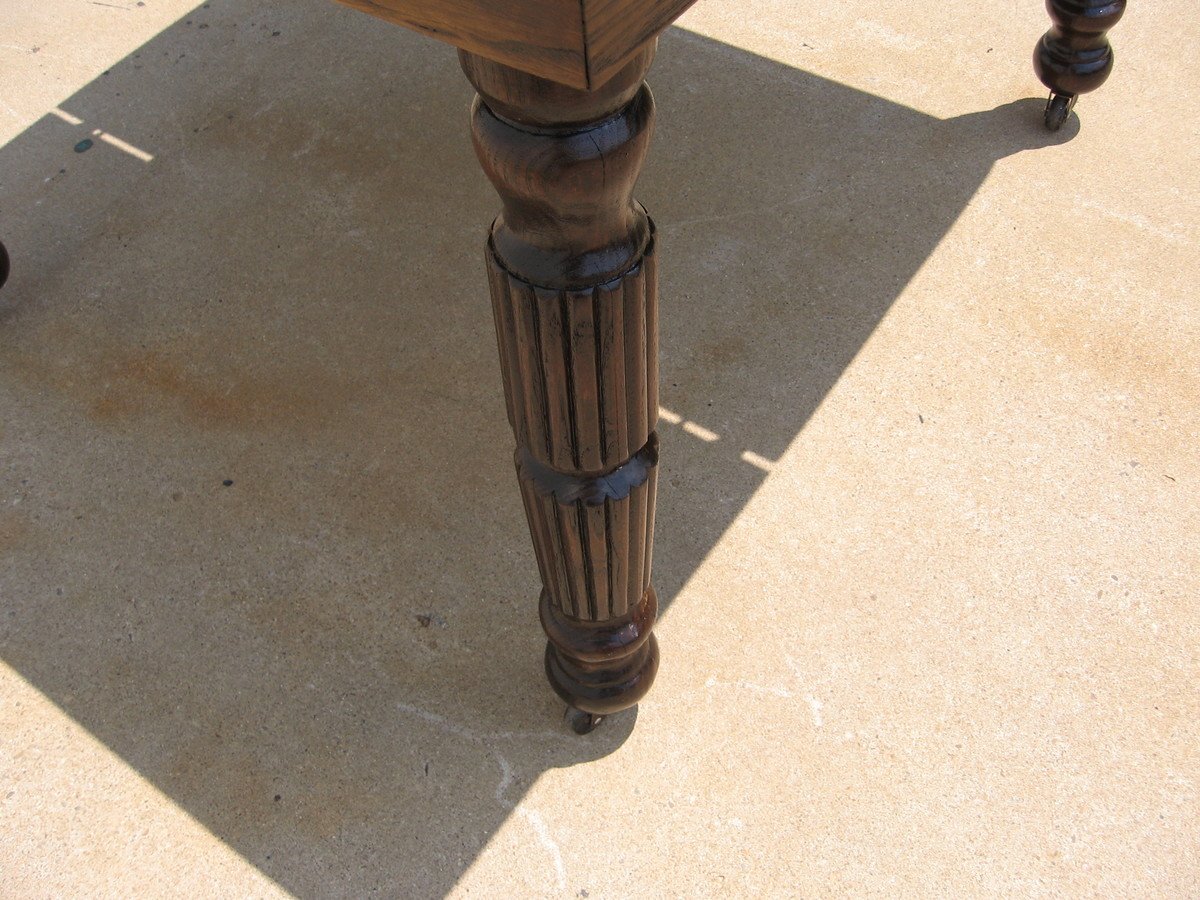
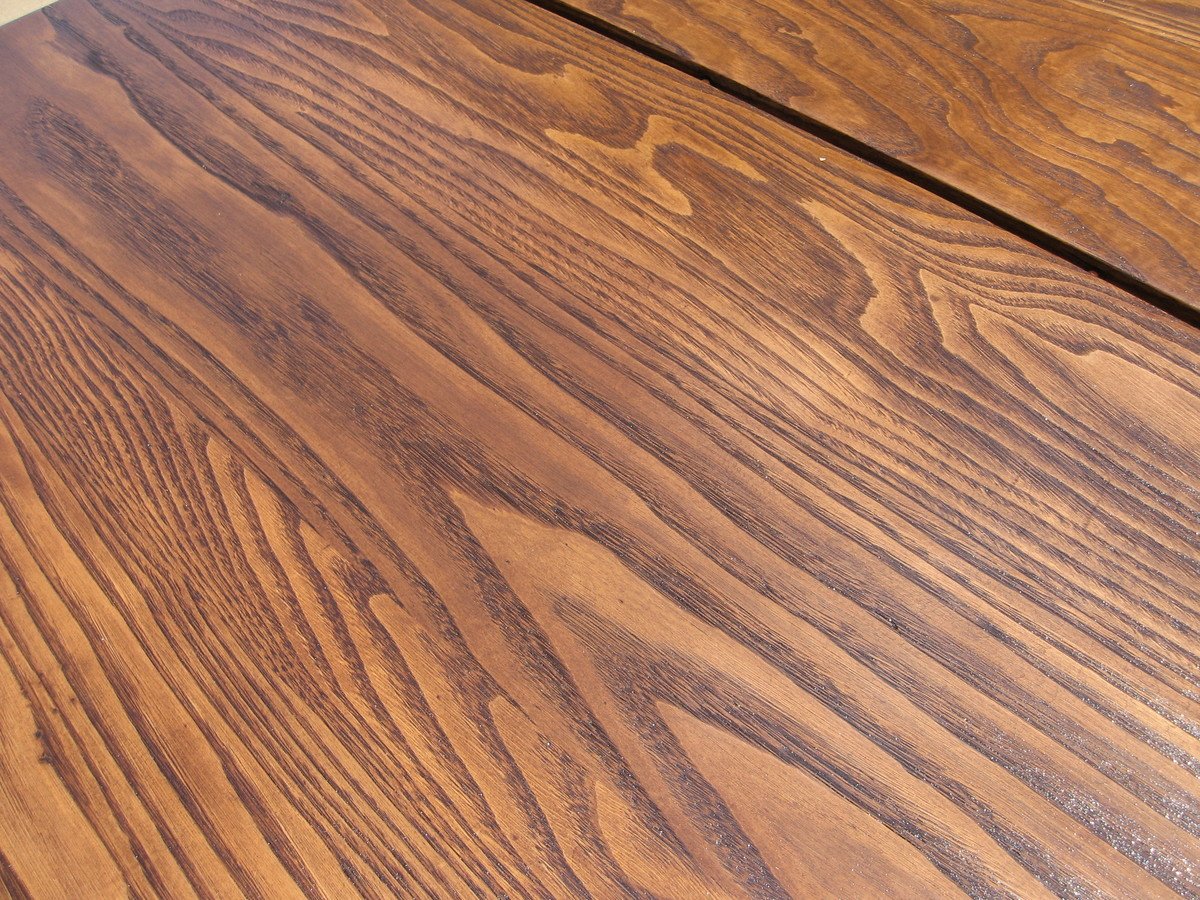
Refinished Oak Dining Table
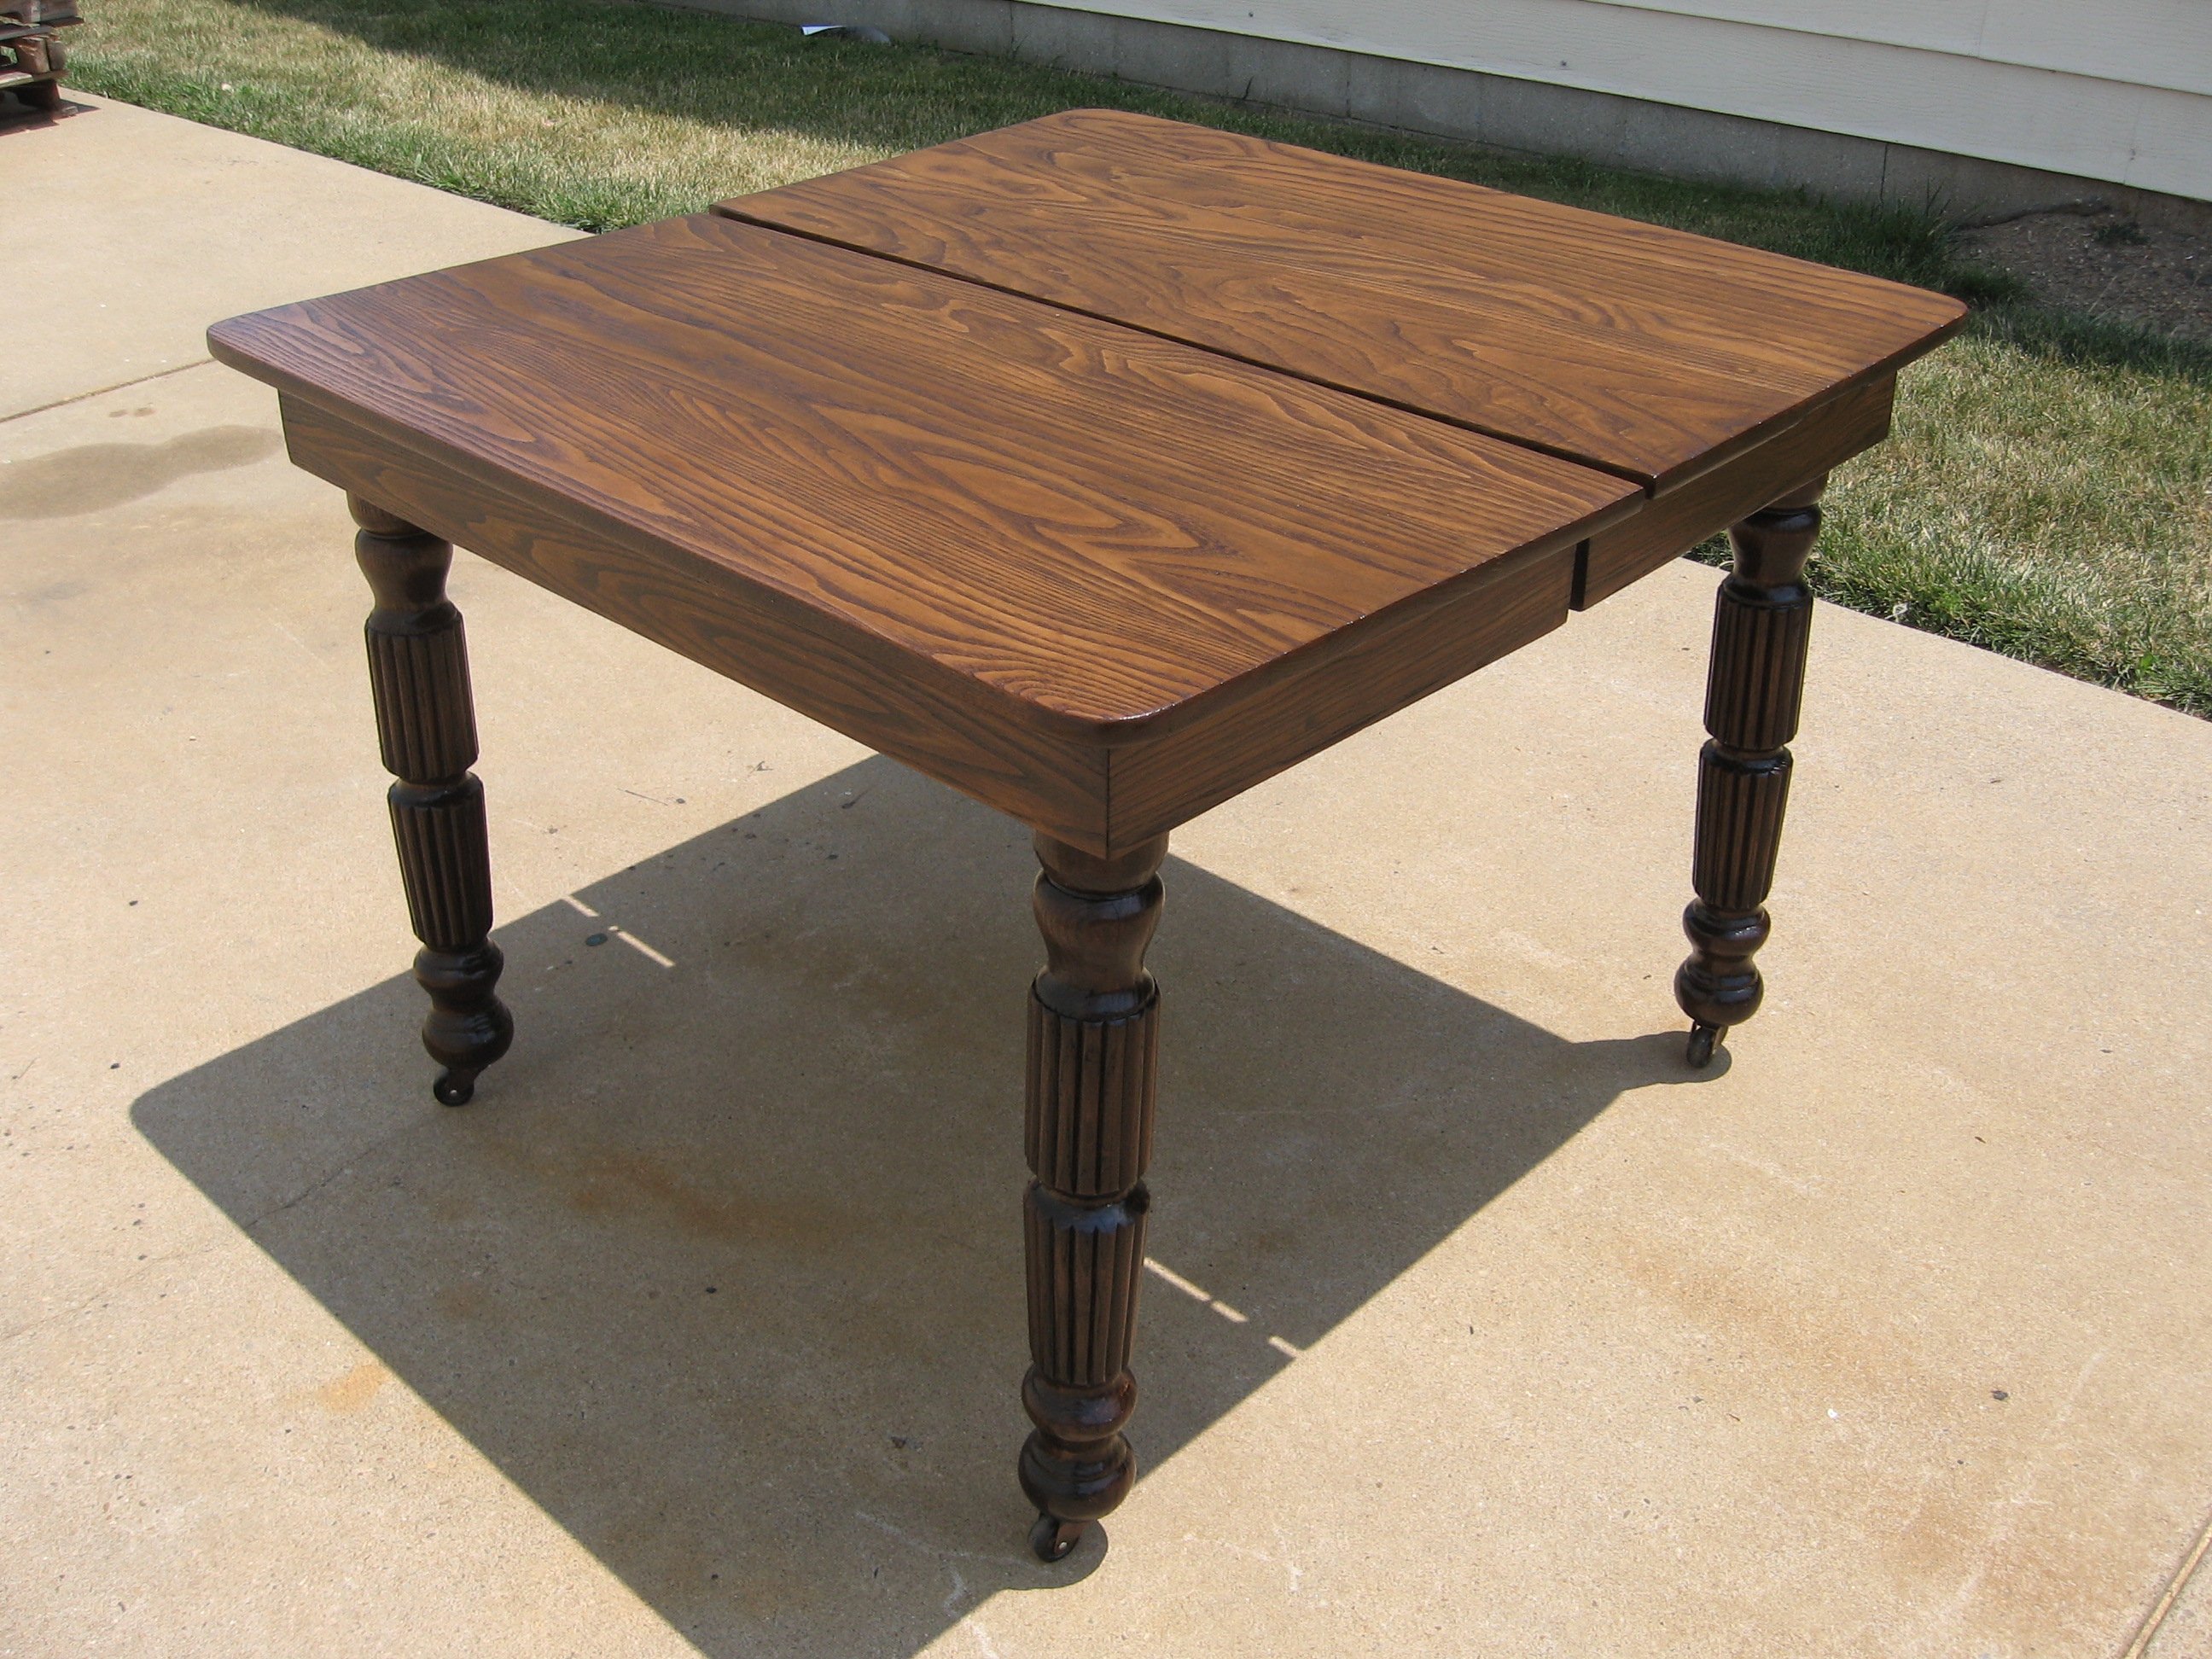
My father loved his woodworking and refinishing antique furniture. He built a wood shop years ago and loved spending he retirement years in there. He enjoyed going to auctions and the like and picking up antique pieces for $5 and $10. He had an antique oak dining table that someone had given him years ago. Cancer took him 4 years ago and he still has that shop full of antiques. I came across the old table and it was in sad shape. It was literally in several pieces and the legs were cracked. I decided to refinish the table.
I had some oak plywood and 1" by oak left over from other projects. I went ahead and removed all of the bracing and replaced all of it. I began stripping off all of the old finish. The underside of the table had been painted. The legs were the real challenge. Not only were the legs turned, they are fluted. I stripped off what I could with liquid stripper. I then used a power washer to help remove more. I then began sanding by hand every nook and cranny. I then filled all of the little cracks with wood filler. I used pin nails on the larger cracks. Once everything was stripped I began seeing a beautiful patina that only time can create.
I then began staining with Minwax Aged Oak gel stain. I used 2 coats on parts and up to 4 coats on other parts trying to get a uniform appearance to the wood. I used between 3 and 6 coats of Minwax quick drying polyurethane on the table. I sanded with 220 and 320 grit sandpaper between coats. I think it turned out pretty well.
The only thing I really had to buy was new casters. I think I spent about $10 for them. Everything else was left over from other projects. I worked on the project here and there between other projects I was working on. I think I probably had around 20 hours total on the project. Stripping and sanding the legs took the longest time. Somehow I think dad is smiling down at me when I finish his projects he had on the back burner.
Estimated Cost
$10
Estimated Time Investment
Week Long Project (20 Hours or More)
Finish Used
Minwax Aged Oak Gel Stain and Minwax fast drying satin polyurethane. The gel stain was brushed on and I wiped down after 10-15 minutes with a cotton rag dipped in mineral spirits. The polyurethane was brushed on and I sanded between coats. I used Briwax after the poly was dry to buff out the finish and add some protection.
Recommended Skill Level
Intermediate
Comments
Sat, 04/05/2014 - 11:53
Antique caster removal
Hello,
I have almost the exact table that you featured on a different project where you refinished an antique white oak 5 legged fluted table. I was wondering if you could provide info. on removal of these antique castors? My husband is tall and we would love to remove the original castors and possibly add wood furniture feet to add to the height of this short beauty. Any info. would be much appreciated. Thank you for your time!

In reply to Antique caster removal by Coconutpalm79
Wed, 01/21/2015 - 22:58
Antique caster removal
I'm sorry I have not been on in a while. Most casters come in two parts. The wheel usually has a stem on it. This can usually be removed by simply pulling it down. If it is stubborn then you may have to use pliers or channel locks. Once this is removed, you will find a sleeve that fits into the table leg. These tend to rust over time. Also they become quite stuck. I usually use a very fine standard screw driver to work them out. Occasionally the outer rim of the sleeve breaks off. I have used a drill and drill bit that fits the same size of the inner diameter of the sleeve. Use a very slow RPM on the drill and it should come out. Good luck with your table.