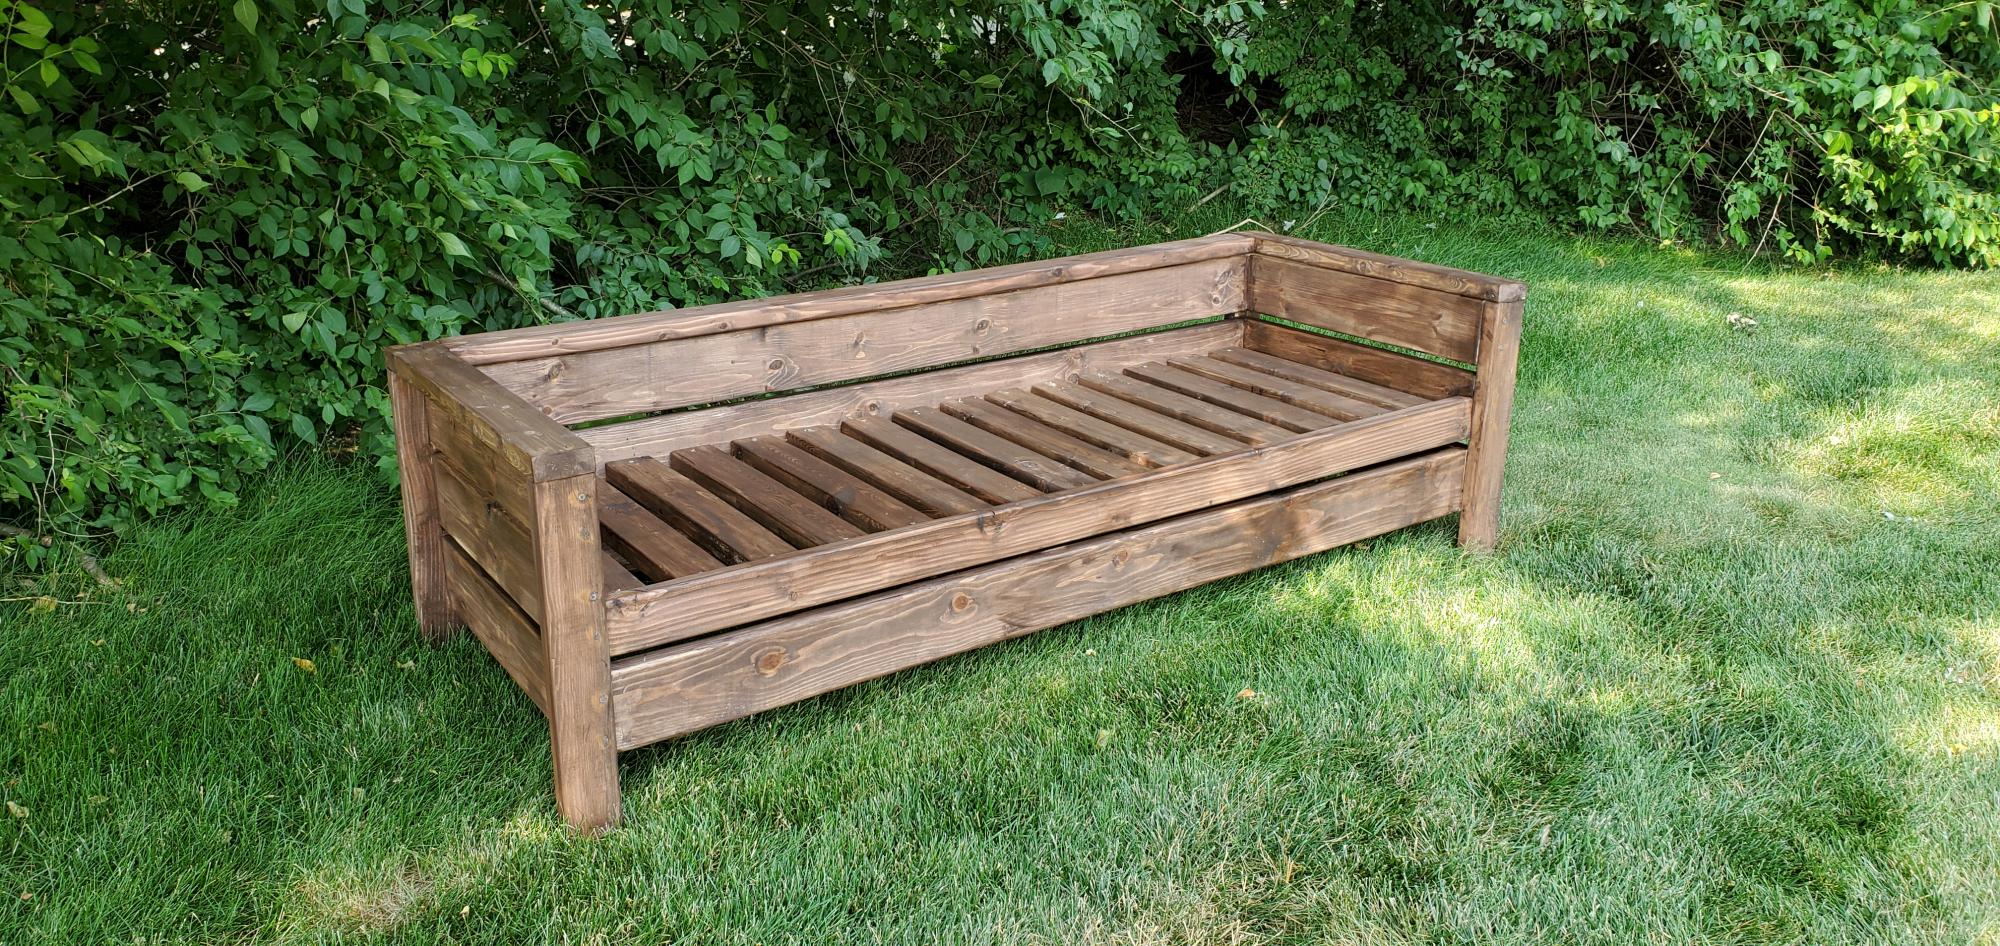
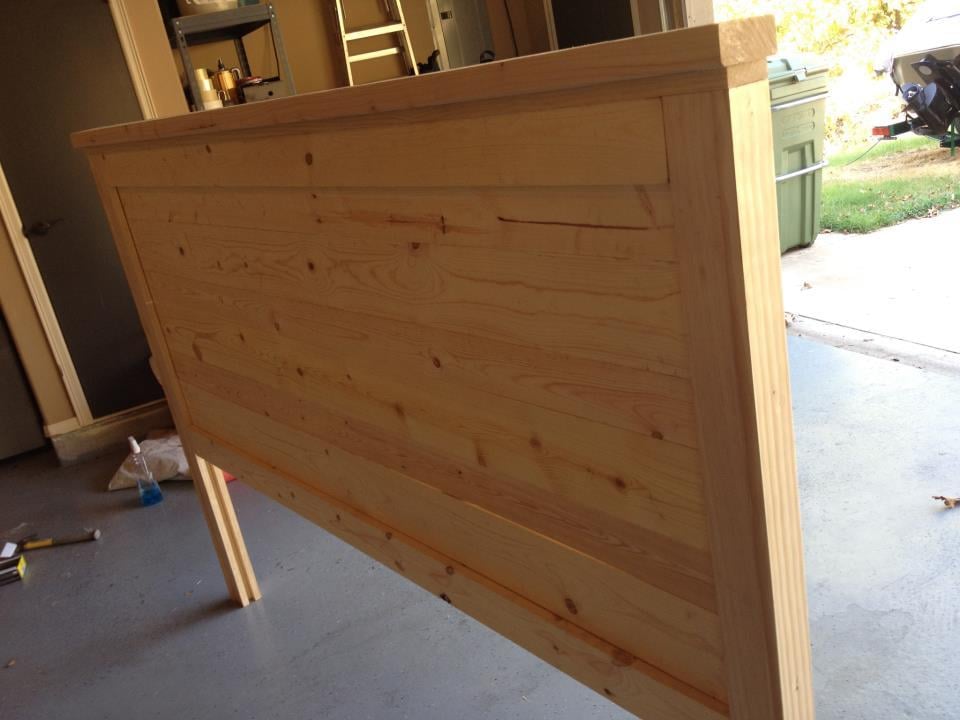
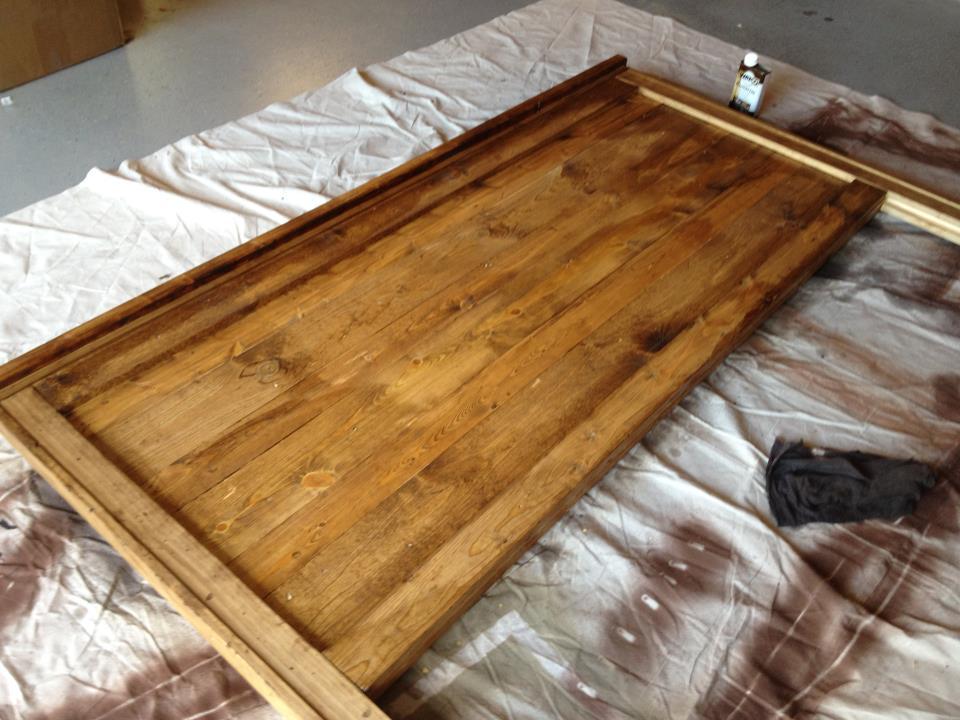
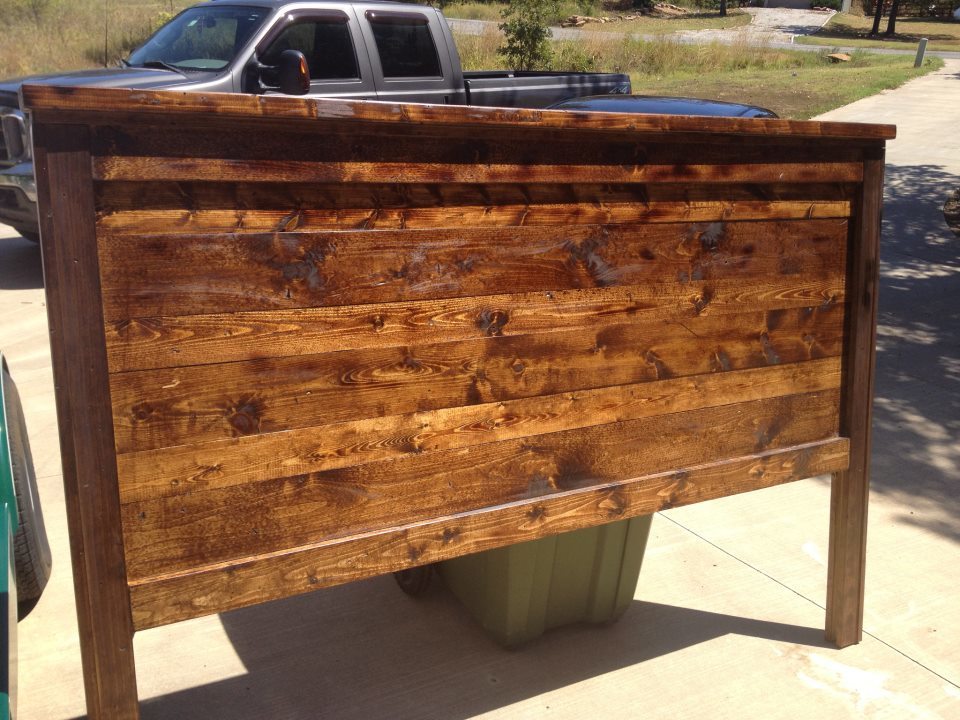
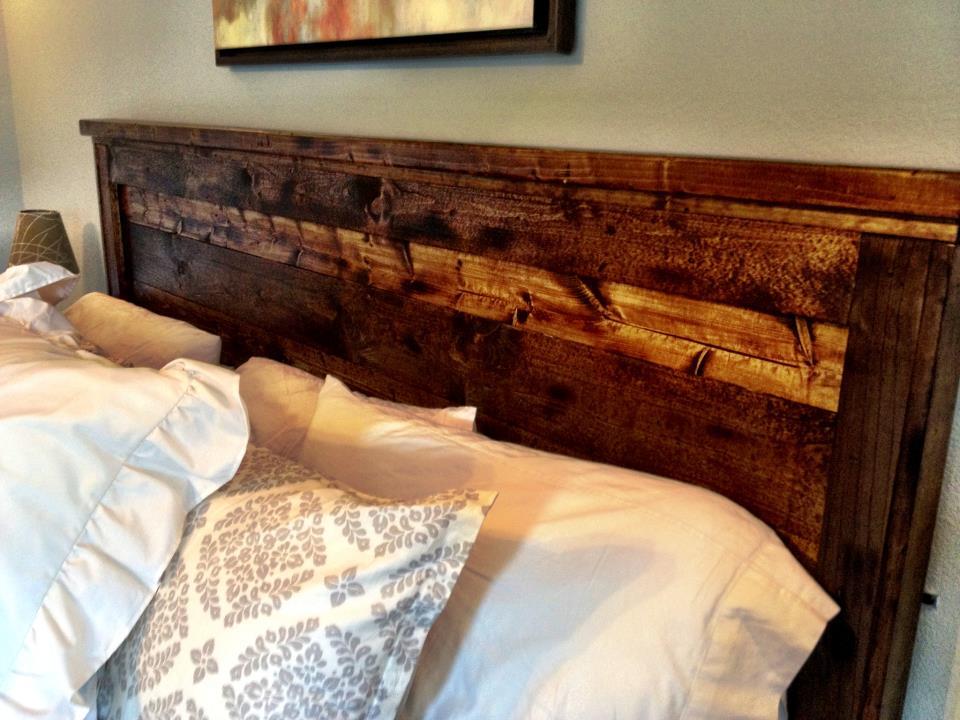
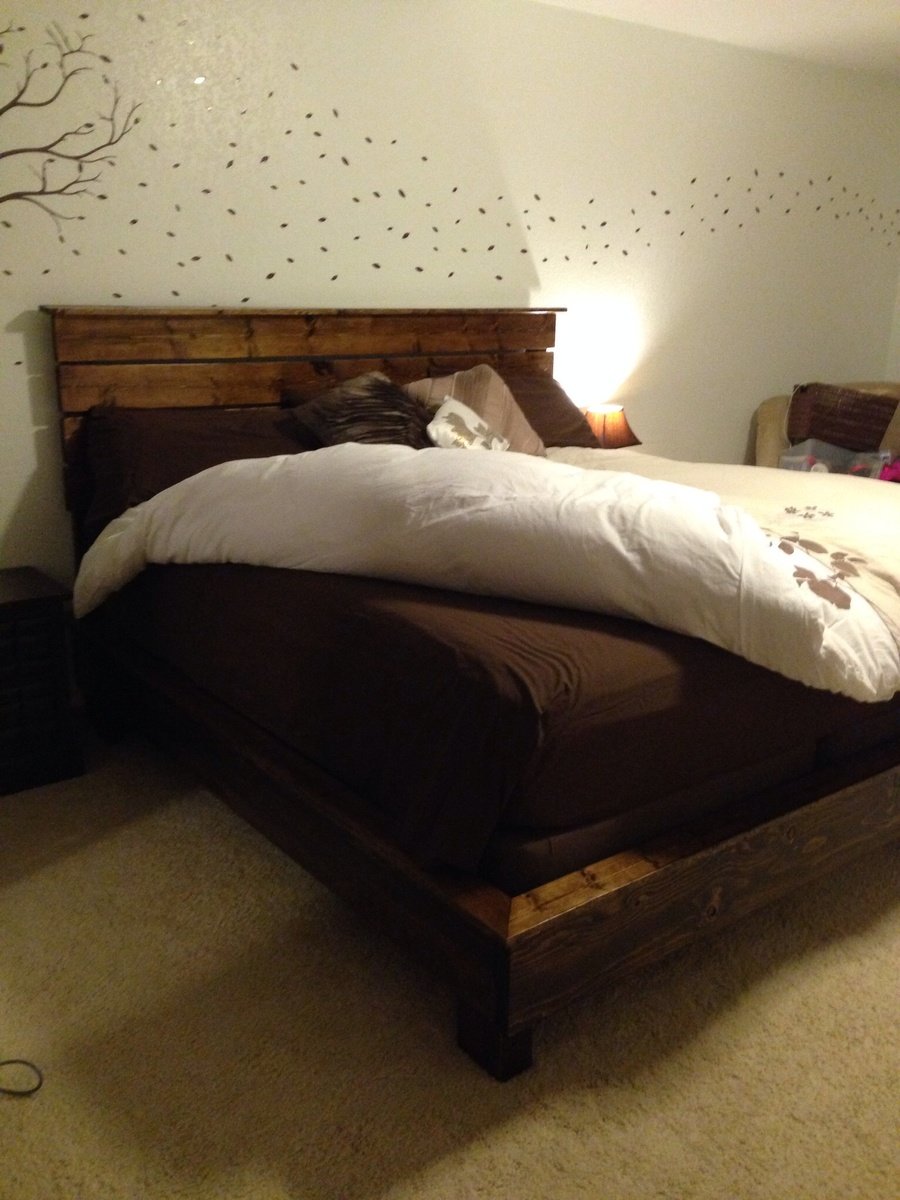
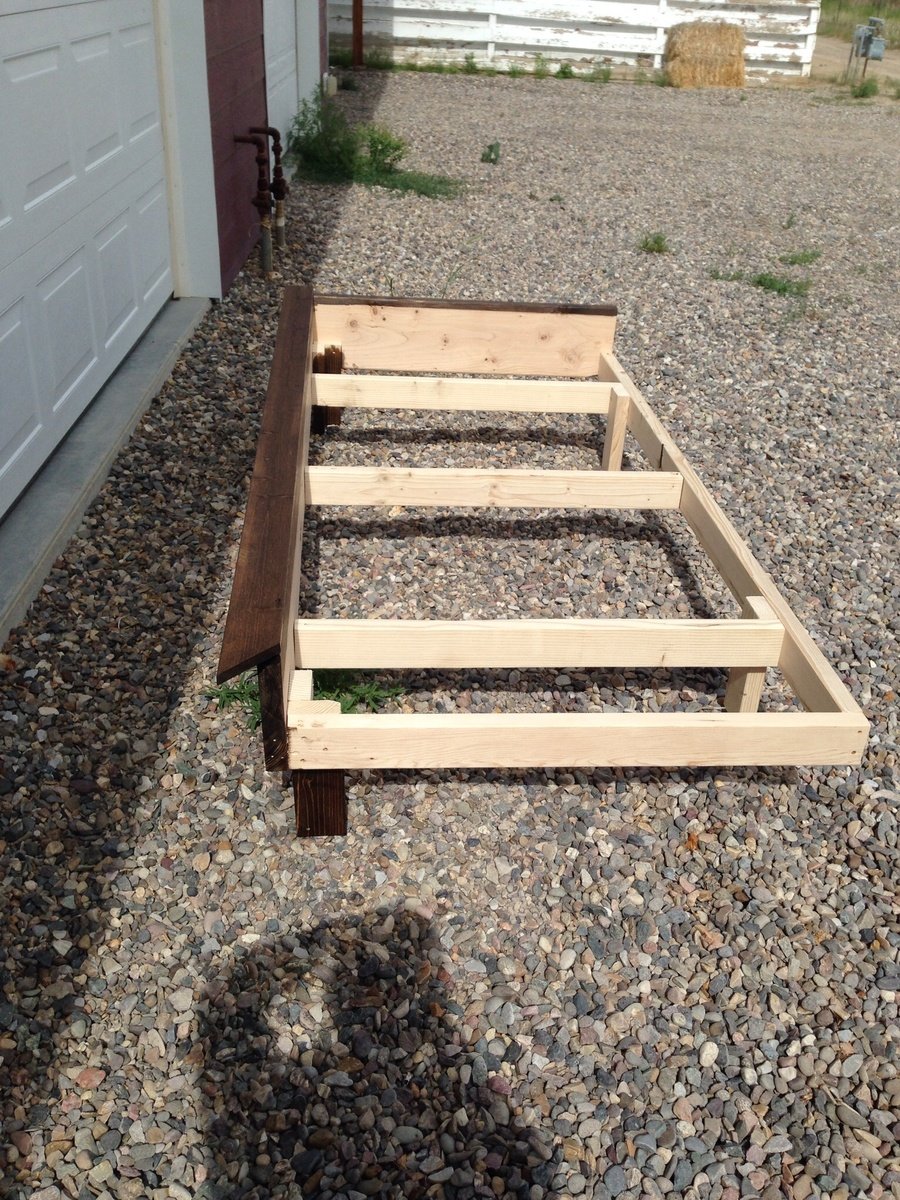
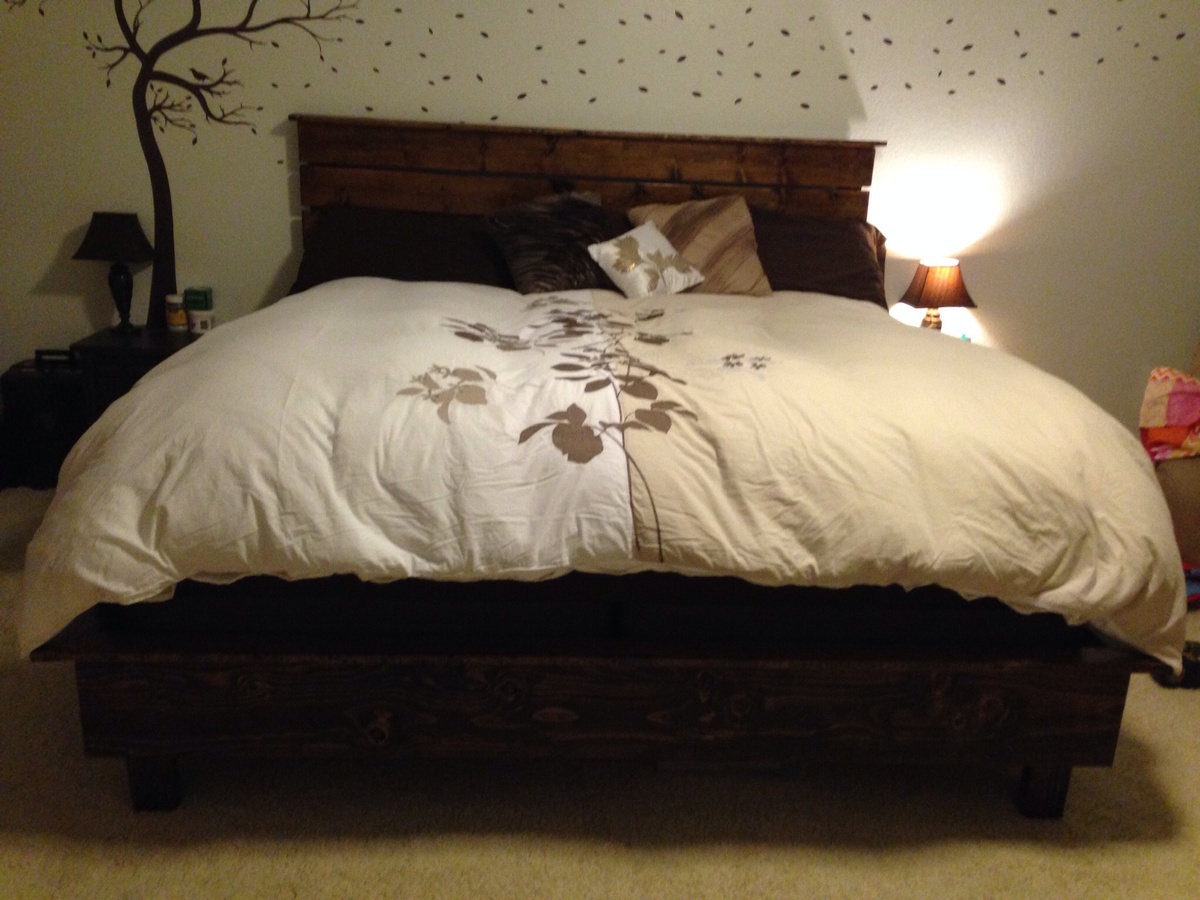
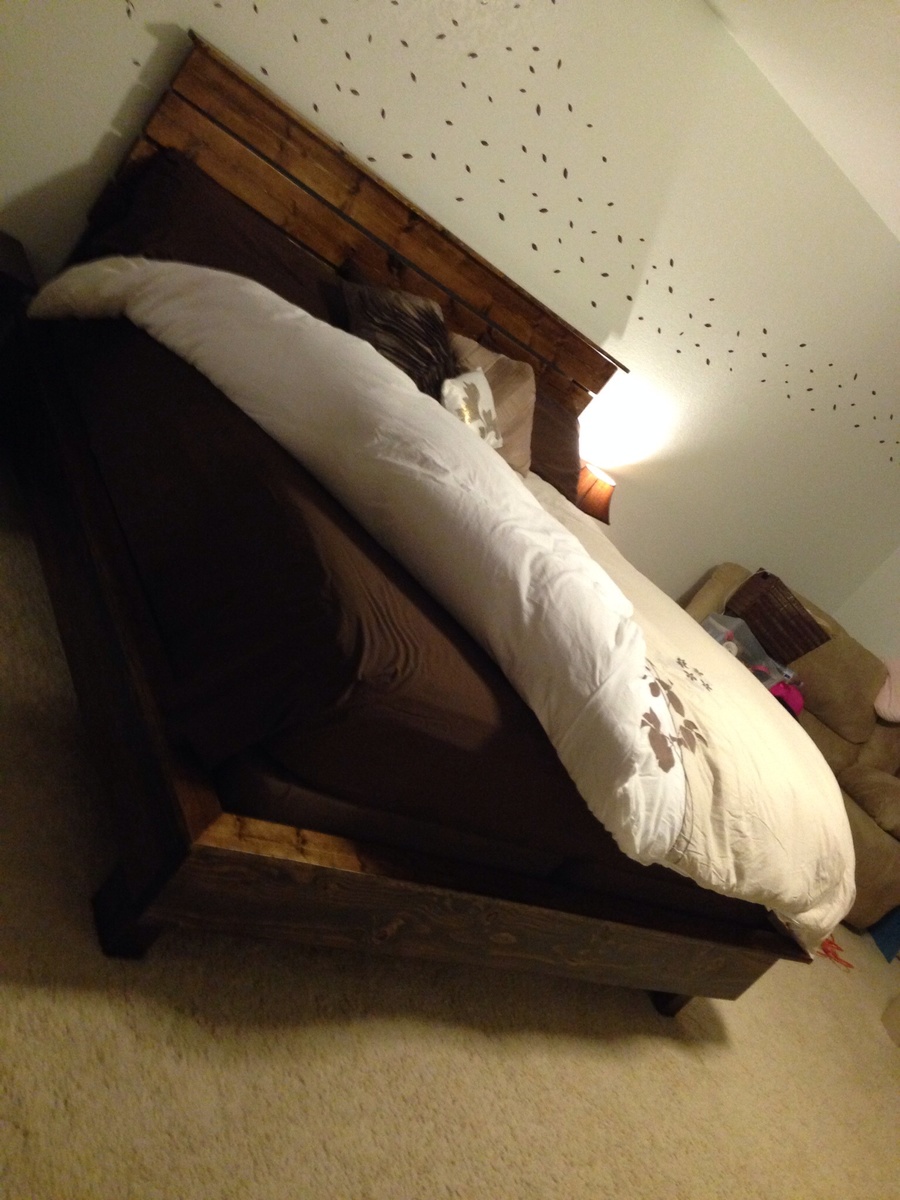
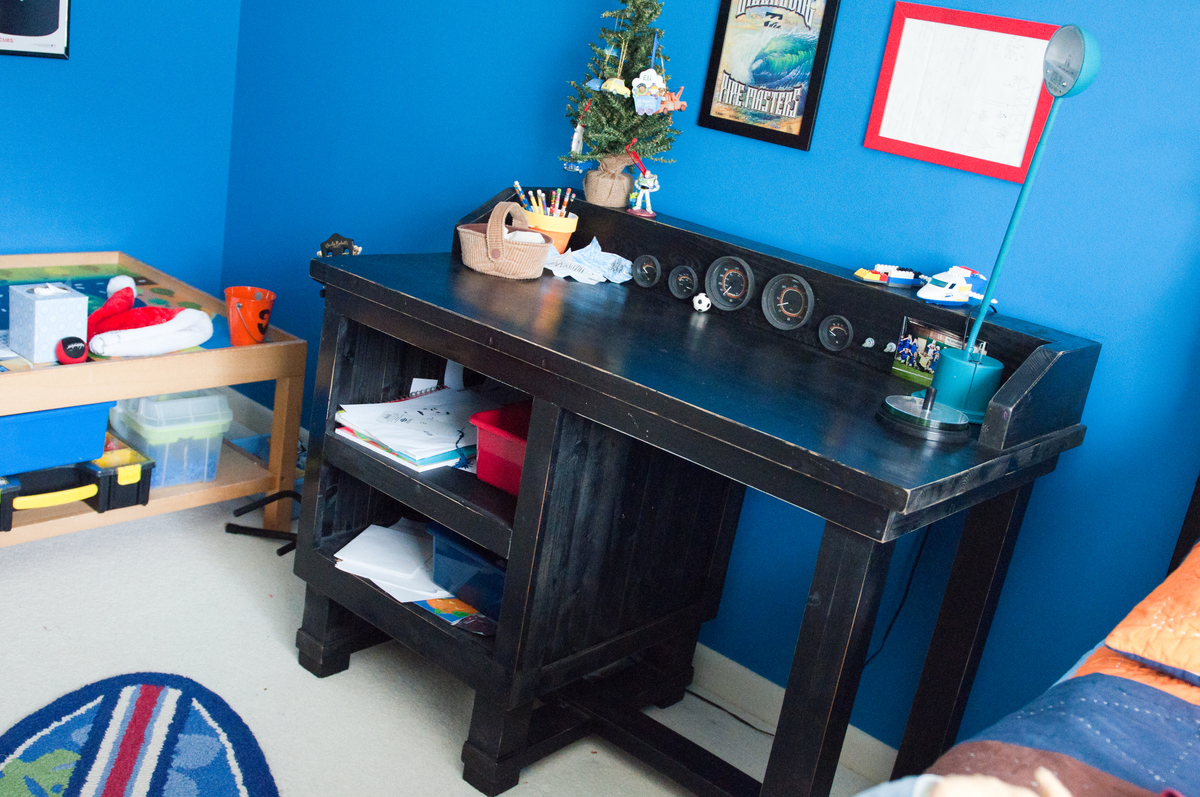
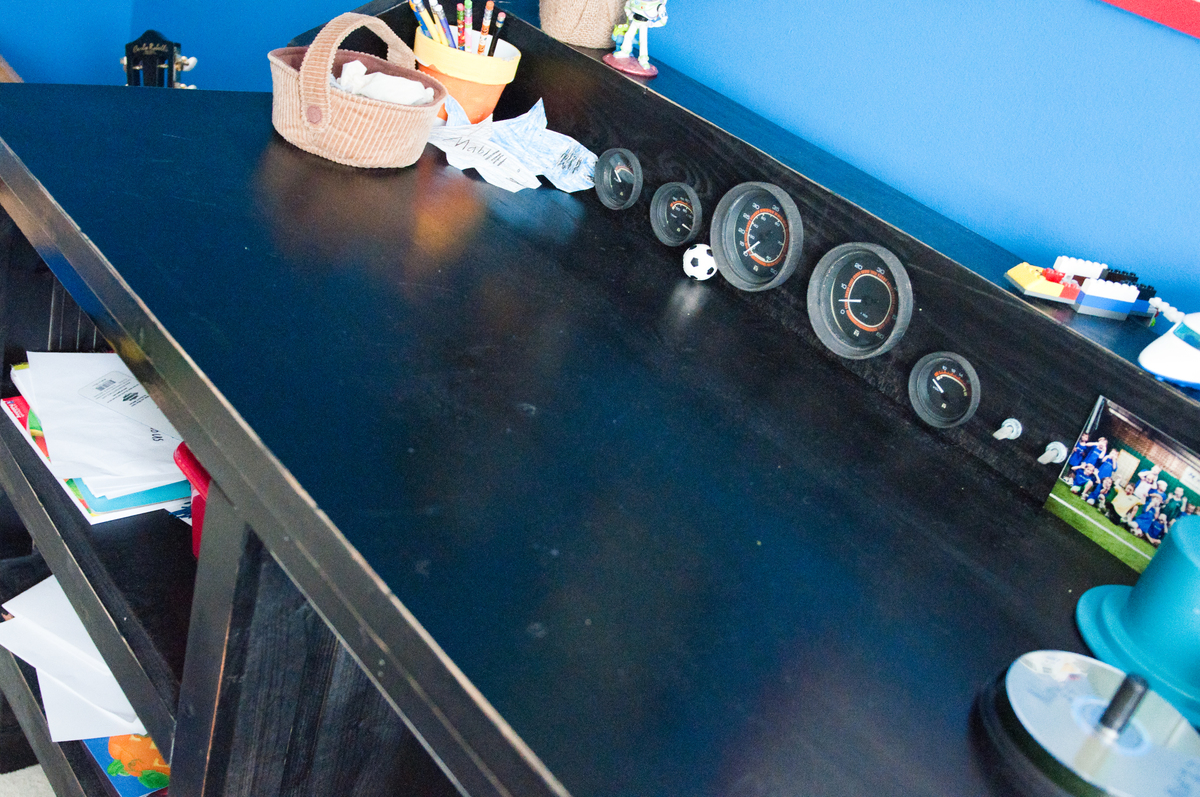
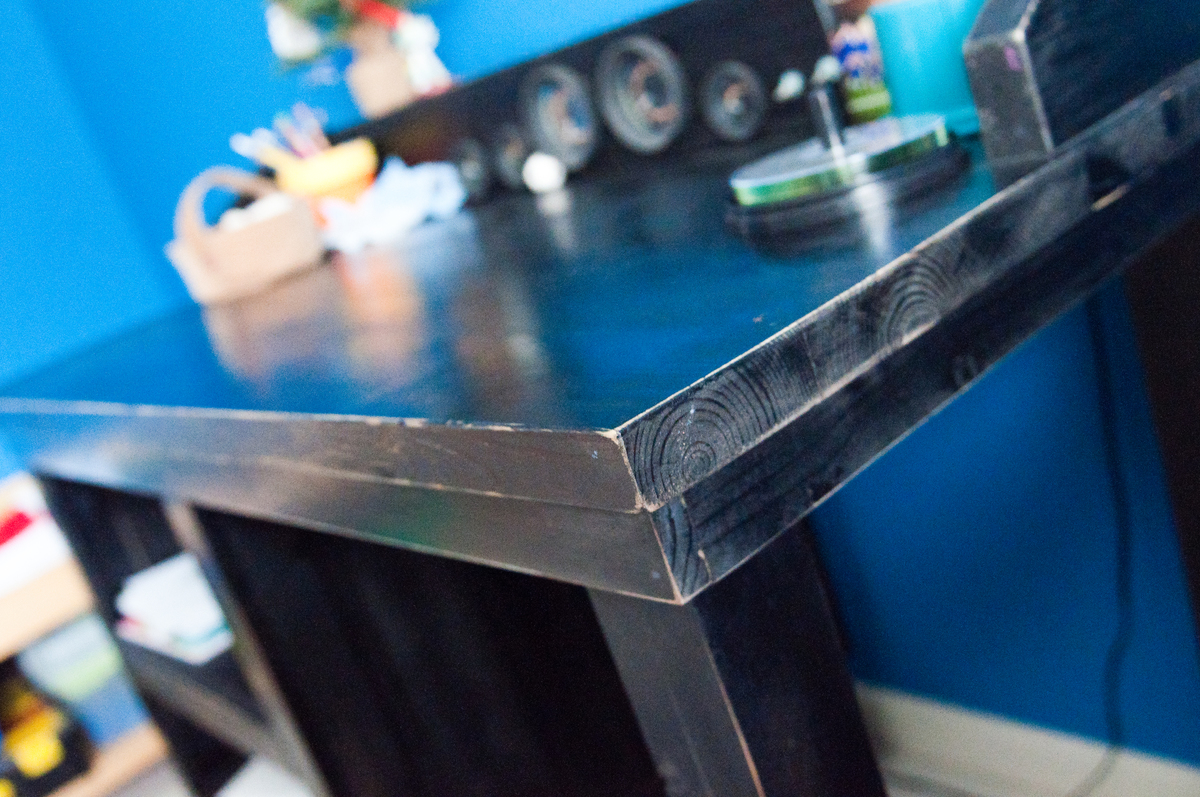
Community Brag Posts

Pair of Kentwood Inspired Night Stands

Submitted by AndyH on Fri, 11/15/2019 - 11:08

Wanted to build matching nightstands based on the Kentwood design which I liked. I also wanted to make sure the doors were hung for the appropriate side of the bed for easy opening. Hopefully guests will love these in their room!

Estimated Cost
$105
Estimated Time Investment
Weekend Project (10-20 Hours)
Finish Used
Minwax pre stain. Minwax Jacobean stain. Minwax Satin Polyurethene. Only one cost of Jacobean stain was enough. Two coats of Polyurethane.
Recommended Skill Level
Beginner

My project with coastal theme

Submitted by Anonymous (not verified) on Sat, 04/02/2016 - 08:12

My Brandy Scrap bed with drawers, with a coastal theme. Made from scrap left over from an accent cedar wall. Originally stained with vinegar and steel wool and added some white wash and blue wash for color!

Estimated Cost
$200
Estimated Time Investment
Week Long Project (20 Hours or More)
Finish Used
Vinegar and steel wool with white wash and blue wash
Recommended Skill Level
Starter Project

Farmhouse Console Table

Submitted by LatvianGal on Sun, 12/01/2019 - 18:31

This was my first furniture build, and my 20 year old daughter did it with me! We made some rookie mistakes, but we love it!  Super excited to make some matching end tables and or coffee table!

Built from Plan(s)
Estimated Cost
$85
Estimated Time Investment
Weekend Project (10-20 Hours)
Finish Used
We whitewashed the bottom and stained the top with Minwax Red Mahogany.
Recommended Skill Level
Beginner

Comments

Tall Loft

Submitted by Anonymous (not verified) on Sun, 08/06/2023 - 13:55

We just finished building this room and decided to finish it off with Ana's loft bed. It's mounted at height of 6 feet in order to accommodate our 18 year old.

Renae Gilford


Princess Bed

Submitted by camcginty on Fri, 03/23/2012 - 20:17

The bed was modified to allow room for a trundle, but decided we didn't want the trundle after all. The extra space does allow for more storage area and our daughter uses a stool since the bed sits up a bit higher. Brackets were added so that the bed could be taken down and moved easily. So glad the brackets were added, they made the bed solid for lots of little girls jumping. Decorative trim and accents were added to dress it up. Pratt & Lambert's Ovation Paint was used. I used a latex base coat and then applied the metallic pearl finish. The metallic finish needed to be sprayed on and ran easily, but what a beautiful finish!

Built from Plan(s)
Estimated Time Investment
Weekend Project (10-20 Hours)
Finish Used
Pratt & Lambert's Ovation Paint-Metallic Pearl
Recommended Skill Level
Beginner

Comments

Char O (not verified)

Sun, 04/08/2012 - 22:46

How much clearance did you have to add for the trundle? I am going to make my daughter this daybed and I would like for it to have a trundle beneath. Thanks for your help!

Farmhouse Table

Submitted by AmieH on Sun, 01/12/2014 - 14:38

We used the farmhouse table plans from this website, and modified the length and width. The finished length is about 8 1/3' long (100") and 45" wide.

This was our first build and my husband and I learned a lot! We could not find untreated 4x4s ANYWHERE in our area. We searched for days and called probably 10-15 places. We were just going to build with 2x4s, but my husband's work ended up having some pallets that used 4x4s come in with a shipment. They were not in the best shape, but we wanted it to look rustic so we weren't too concerned. Also, our 2x6s were a little warped, so they bow down at the ends. We searched through piles and we didn't really notice until they were on (breadboards). We did buy a Kreg Jig Kit and are so glad we did! We have used it for other projects and can't wait to use it for more. Such a great purchase!

I learned to ALWAYS do a test piece of stain first. This was new to us. We stained it the first time, and then had it spray coated with polyurethane (my stepfather does cabinets). I hated the finish! So I ended up spending an entire day (from 8 in the morning until midnight) stripping the 3 coats of polyurethane and stain. We could not get it all out, but got most of it. We then re-stained it with a lighter color (custom stain left over from our kitchen) and finished it with Minwax Wipe-On Poly. I like the more natural finish much better. If I could talk my husband into it, I would build another one so I could get the stain right.

Overall, I'm pleased with how it came out! The plans were easy to follow, and not hard to modify using a little math.

Estimated Cost
$150
Estimated Time Investment
Weekend Project (10-20 Hours)
Finish Used
Custom stain from Sherwin Williams (close to an espresso with a little bit of a cherry color). Wiped on, waited a few minutes, wiped off. Finished with 4 coats of Minwax Wipe-On Poly.
Recommended Skill Level
Beginner

Comments

krsparks

Thu, 05/21/2015 - 08:00

I'm new to this. Did your apron cuts/measurements change when you increased the length and width of the table? By the way, your table looks beautiful!

Barn Door Entertainment Center

Submitted by Anonymous (not verified) on Mon, 04/04/2016 - 19:27

I took the Grandy Sliding Door Console plans and added another middle section to make the entire plan fit the nook in my man cave. I manipulated the plans to have openings without shelves to fit a mini fridge and an area for blankets (currently in the wash). Total length is 12 ft and height is 37.5 inches high (36 inches + the top). I tried to stain it to match another table in the room and it worked out pretty well.

Built from Plan(s)
Estimated Time Investment
Week Long Project (20 Hours or More)
Finish Used
Minwax Ebony for the face/base and Minwax Colonial Maple for the top.
Recommended Skill Level
Intermediate

Wood star

Submitted by Anonymous (not verified) on Tue, 12/10/2019 - 17:53

First project in my back porch turned into a makeshift wood shop

Estimated Time Investment
An Hour or Two (0-2 Hours)
Finish Used
Non yet , still going tru options
Recommended Skill Level
Beginner

Closet Makeover

I hated the way my bi pass closet doors wasted so much precious space, as well as only having a single rod for hanging. I can't even post my before photo because of the embarrassing mess billowing out. On the both sides there are two bars based on the height of our own clothing and space needs. On the left side I made the bottom bar about 18 inches shorter than the top so that dresses can hang in that space. I also attached spare 1x12's to the rod brackets and am using them for shoes.

Another great thing about this closet system is my dirty laundry sorter! Before we just had random baskets in another part of the room for this job. Now we have a nice tidy spot and it really helps be keep up on our laundry.

Estimated Cost
Under $50
Estimated Time Investment
Weekend Project (10-20 Hours)
Finish Used
Sand smooth, prime, 2 coats of white semi-gloss paint.
Recommended Skill Level
Intermediate

Comments

Jaymee (not verified)

Sat, 03/31/2012 - 14:40

Closet makeovers on our to-do list as well, and I was wanting to incorporate the laundry dresser in them as well. Glad to see this done !

Rhyan Console Table

Submitted by Stacie on Wed, 01/15/2014 - 10:37

I built this console table for my son's room, and added a matching hutch for additional storage and display. It's a versatile piece of furniture. He uses it for games, books and collectibles, but it would be great for a tv and game system too. Thanks for the plans!

Built from Plan(s)
Estimated Cost
$75
Estimated Time Investment
Afternoon Project (3-6 Hours)
Finish Used
Minwax Ebony stain with several coats of polyurethane
Recommended Skill Level
Beginner

Comments

moosmani

Wed, 01/15/2014 - 12:52

Great! Thank you so much! I think this will be the perfect size for what I need. Yours looks so nice that I'd like to copy it. Did you use any plans to build the hutch or did you just make it up? I just love how yours looks! Thank you so much for posting!

Stacie

Wed, 01/15/2014 - 14:09

Moosmani, I made it up just based on a very simple hutch. Two days later, Ana posted plans for the School Desk Hutch. :/ A plan to follow would have been nice but honestly, the hutch was a very easy build. Good luck building yours and I look forward to seeing pics.

Dining Room Table

Submitted by RetroFit on Thu, 04/07/2016 - 18:18

This is our first real furniture project. We wanted a large enough table to be able to sit 10 people comfortably around without the table legs getting in the way of the people on the corners. We are really happy with the way this turned out. Each leg was joined with a double floating mortise & tennon. The overall dimensions are 47" wide by 80" long by 31.5" tall.

Estimated Time Investment
Week Long Project (20 Hours or More)
Finish Used
Danish oil and Polyurethane.
Recommended Skill Level
Intermediate

Comments

Brandiville

Sun, 04/10/2016 - 04:26

I would be very interested in the plan for this table. Do you mind sharing? It is beautiful!

Custom cornhole

Submitted by mandee on Sun, 12/15/2019 - 15:21

I made this custom cornhole game for my brother for Christmas. I drew the Texans logo freehand as well as the “M”.  

Estimated Cost
50
Estimated Time Investment
Weekend Project (10-20 Hours)
Recommended Skill Level
Intermediate

Hanging Bed

Submitted by cecimoreno on Sun, 04/01/2012 - 08:05

Hanging bed for my daughter built from the "Easiest Hanging Daybed Plans". Super easy to do and looks and feels great!

Built from Plan(s)
Estimated Cost
$60
Estimated Time Investment
Weekend Project (10-20 Hours)
Finish Used
Benjamin Moore Latex Paint in Early Dawn and topped with Minwax Paste Finishing Wax
Recommended Skill Level
Beginner

Comments

cecimoreno

Sun, 04/01/2012 - 12:26

Thanks! We just hung it up last night, so I can't say for sure yet- but putting her to bed last night was a breeze (at least compared to most nights :))

Birdie (not verified)

Sat, 08/18/2012 - 17:56

Love this bed! You did a great job! Quick question, did you screw this to the wall, or just leave it swinging free? I'm curious if it bangs agains the wall when your daughter gets in.

Thanks!

DIY Outdoor Living Room

Submitted by Anonymous (not verified) on Sat, 08/26/2023 - 12:09

I wanted a bar lounge on my patio so I built it from your plans. We had a July 4th party for the my family. It was so nice.
Everyone was surprised I had done it myself.
I also made a corner table but unfortunately it doesn’t show in pictures.
Thank you! Your plans are amazingly easy.

Donna-Tennessee

Built from Plan(s)

My Ottomans

Submitted by Angie5483 on Wed, 04/04/2012 - 14:33

I decided to make these awesome ottomans that were featured on Shanty to Chic. I love them so much. I am new to the DIY world but loving it. You can catch my adventures trying to make this bad boy at my blog at ifshecandoitsocani.blogspot.com

Built from Plan(s)
Estimated Cost
For both of them $40
Estimated Time Investment
Afternoon Project (3-6 Hours)
Recommended Skill Level
Beginner

Rustic 'X' Desk

Submitted by jphysc on Sun, 01/19/2014 - 18:45

This was a great project. I had some trouble with getting the X's perfectly connected (due to off square boards) and had to use some wood filler here and there. Beyond that, everything came together really well. The longest part was getting the finish just right.

Built from Plan(s)
Estimated Time Investment
Weekend Project (10-20 Hours)
Finish Used
For the base I used Miniwax Jacobian, spray painted in white, and painted in an off-white SW color. Used 80 grit sandpaper to get the look and finish just right. The table top is just jacobian. Everything has 2 coats of polyurethane.
Recommended Skill Level
Beginner

Pallet Reclaim Swing

I work for a large manufacturing company that frequently has 'desirable trash'. Found 3 beautiful, heavy-duty pallets with beautiful wood on them. Took them home, took them apart, and got to work. The wife had been wanting a swing out near our children's playset so she could sit and watch them. Used Kreg pocket holes for everything that I could so as to hide as much hardware as possible.

*Side note regarding why I did the rope the way I did - the original post had mentions of it being a bit tipsy (particularly with little ones!). With this design, there's no flip front or back and the rope only gets tighter the more weight that is applied.

Built from Plan(s)
Estimated Cost
Almost free, only had to pay ~$30 for the rope.
Estimated Time Investment
Afternoon Project (3-6 Hours)
Finish Used
Olympic Cedar Naturaltone Stain, foam brushed on and wiped off with rags.
Recommended Skill Level
Starter Project
Back