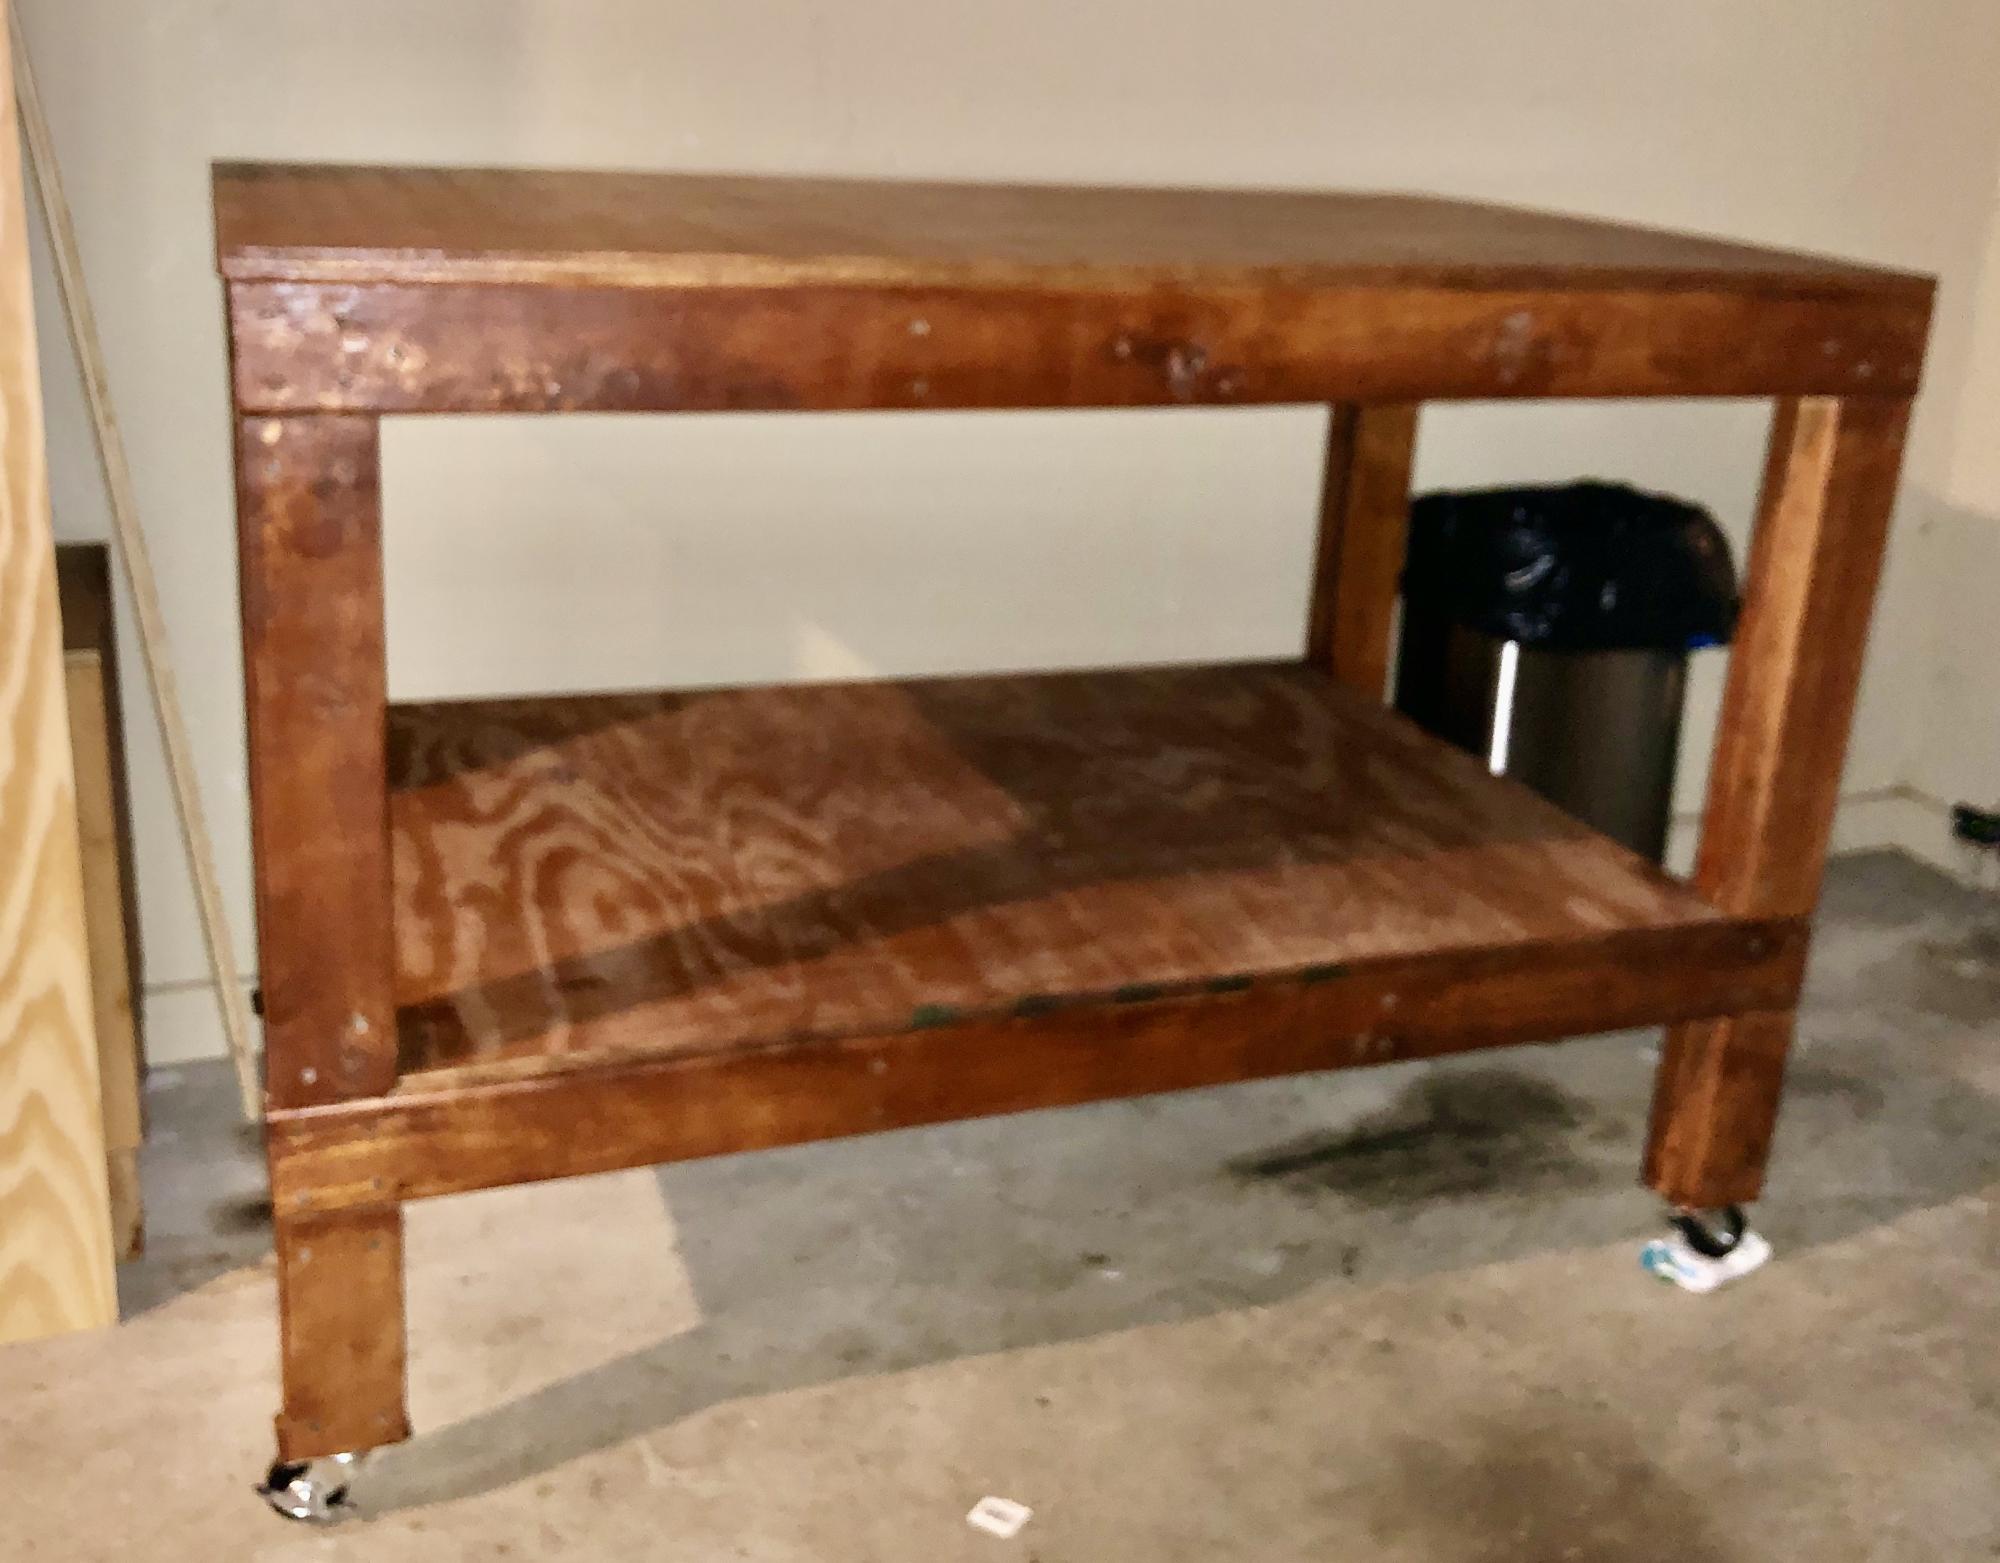
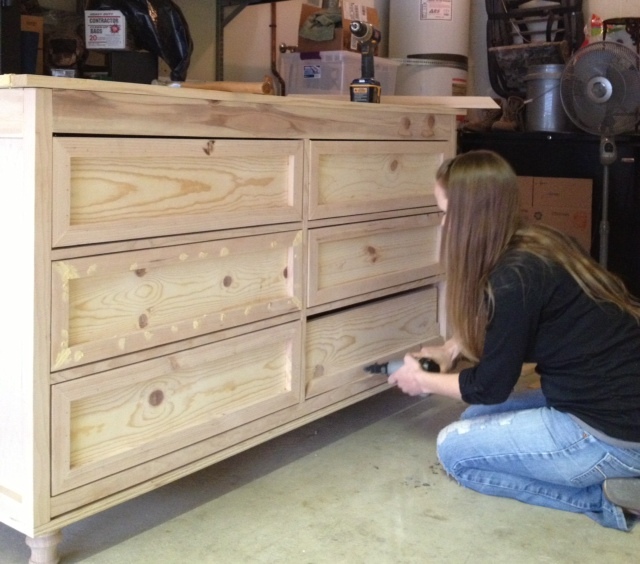
Apothecary Shoe Dresser
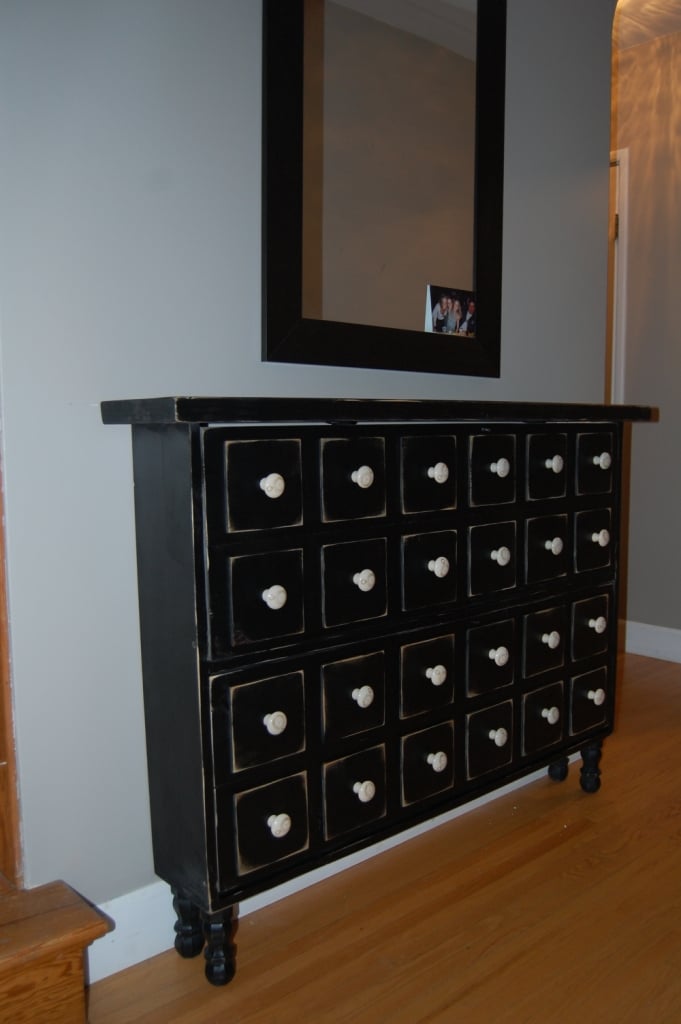
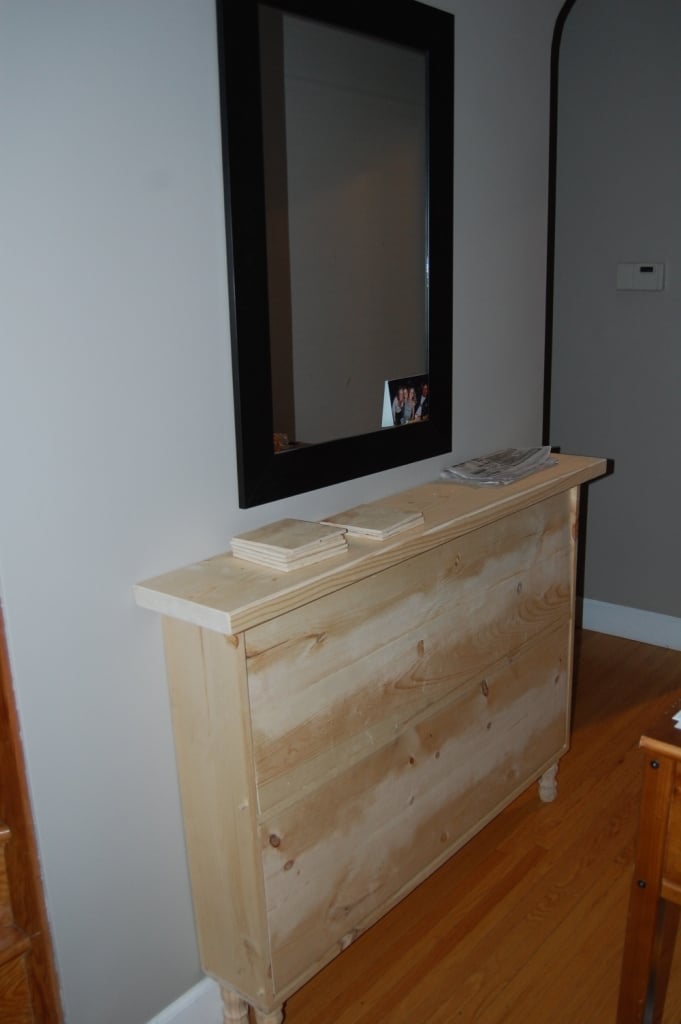
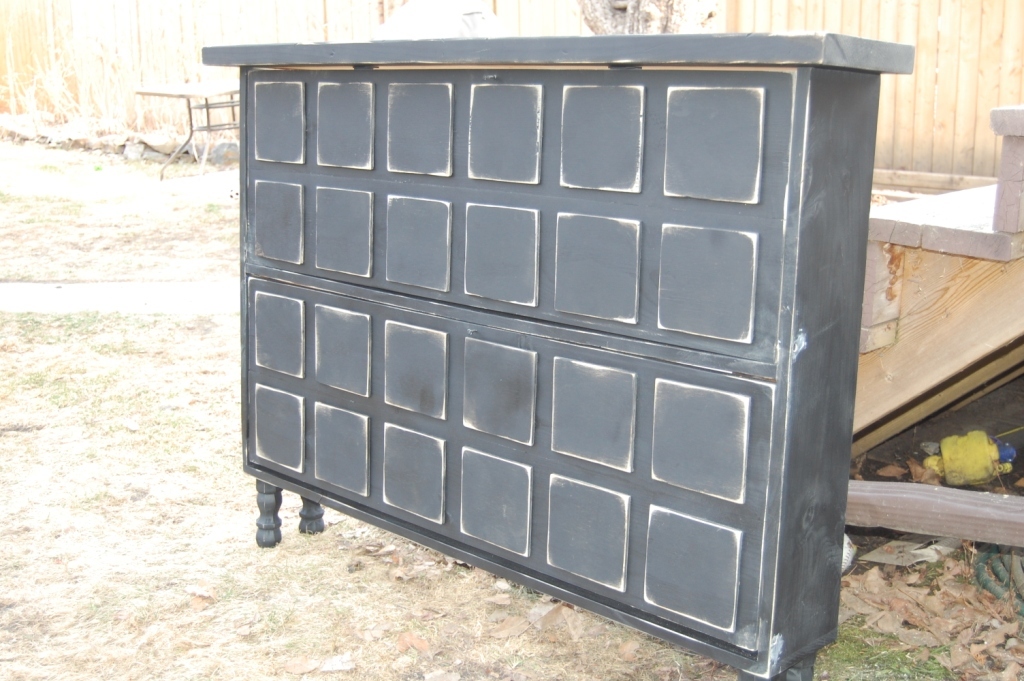
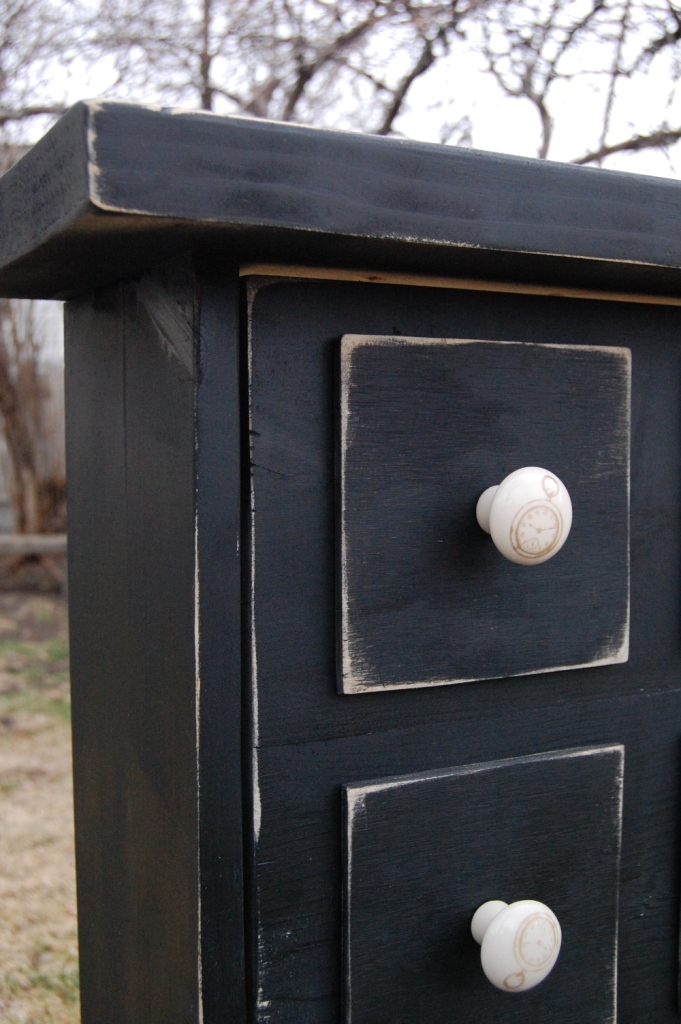
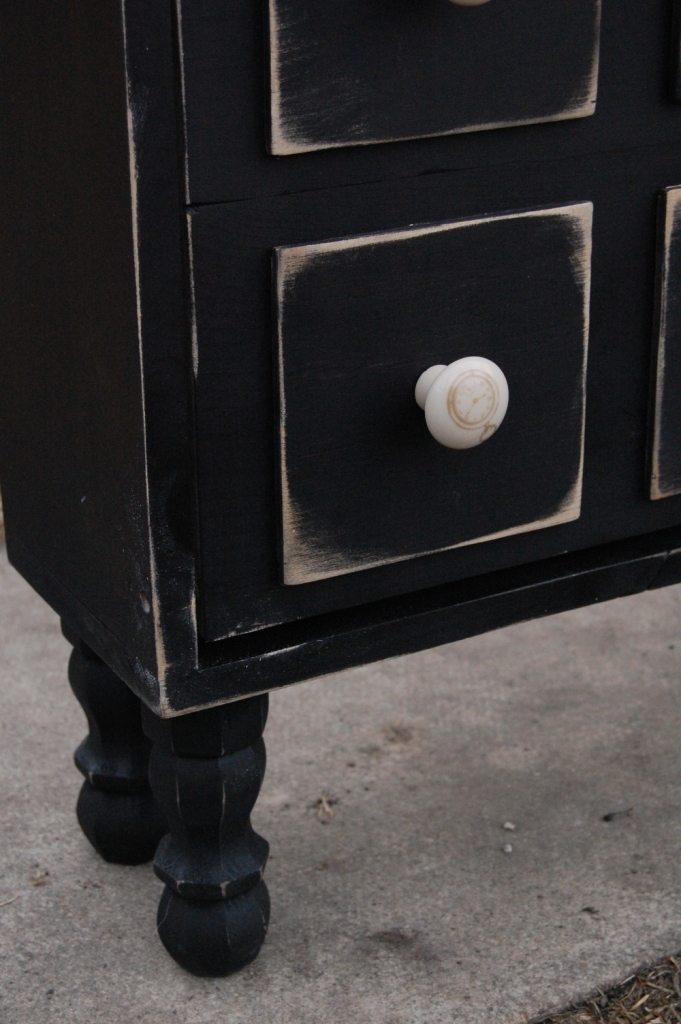
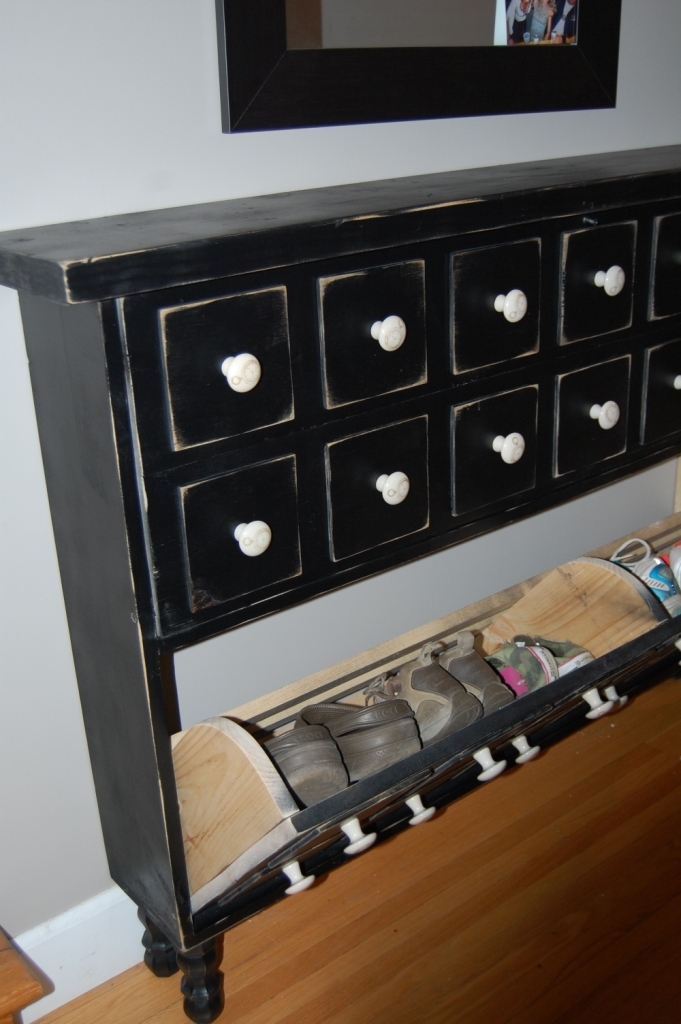
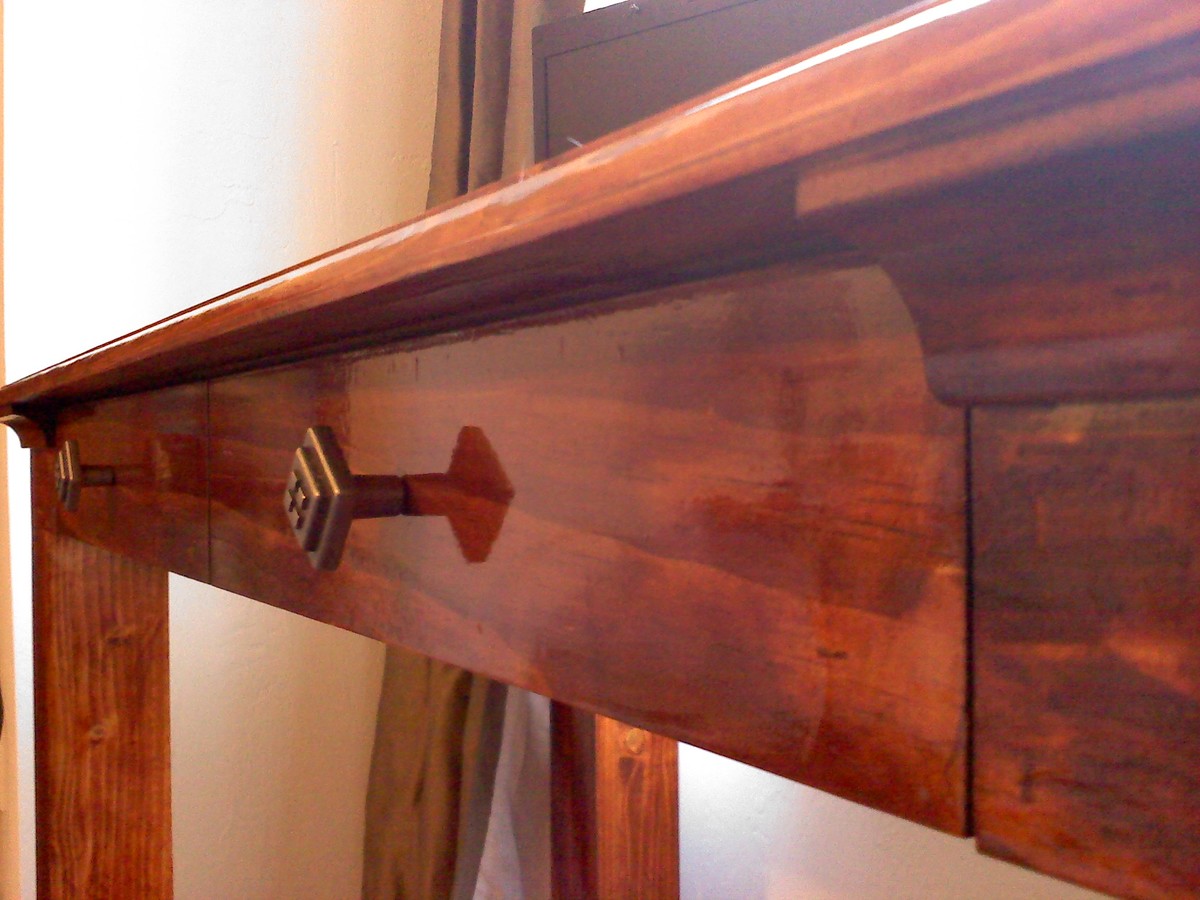
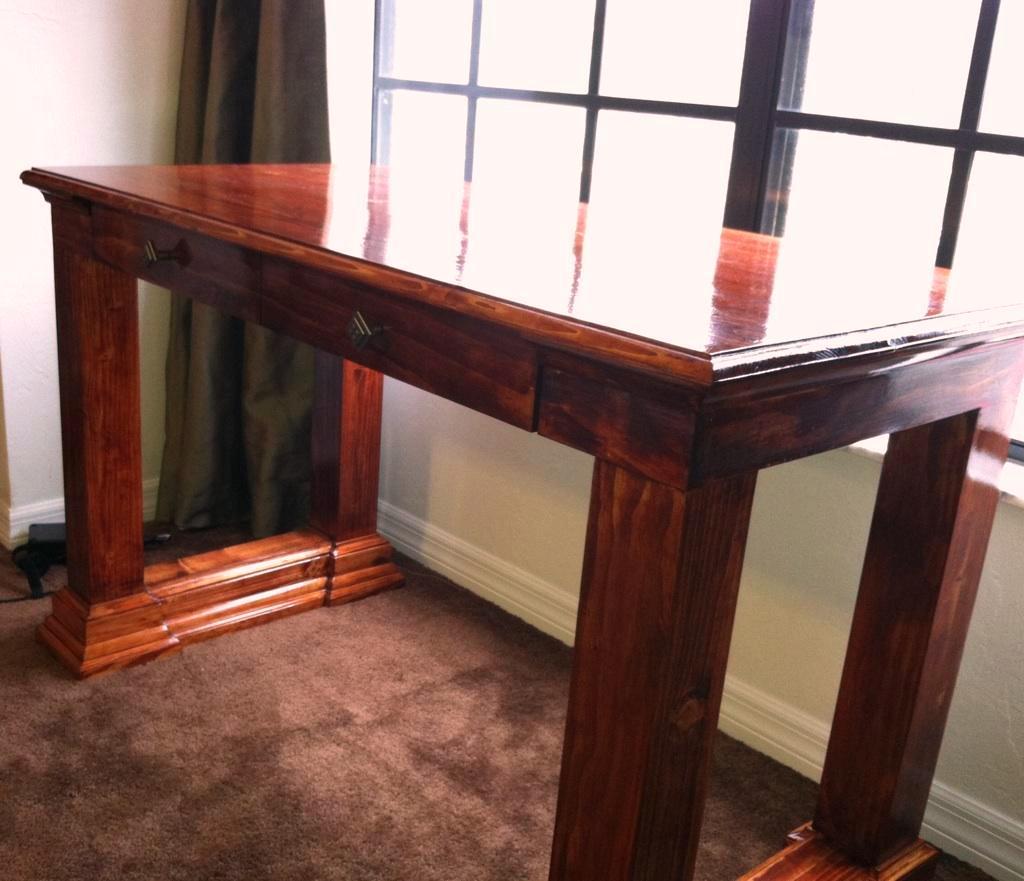
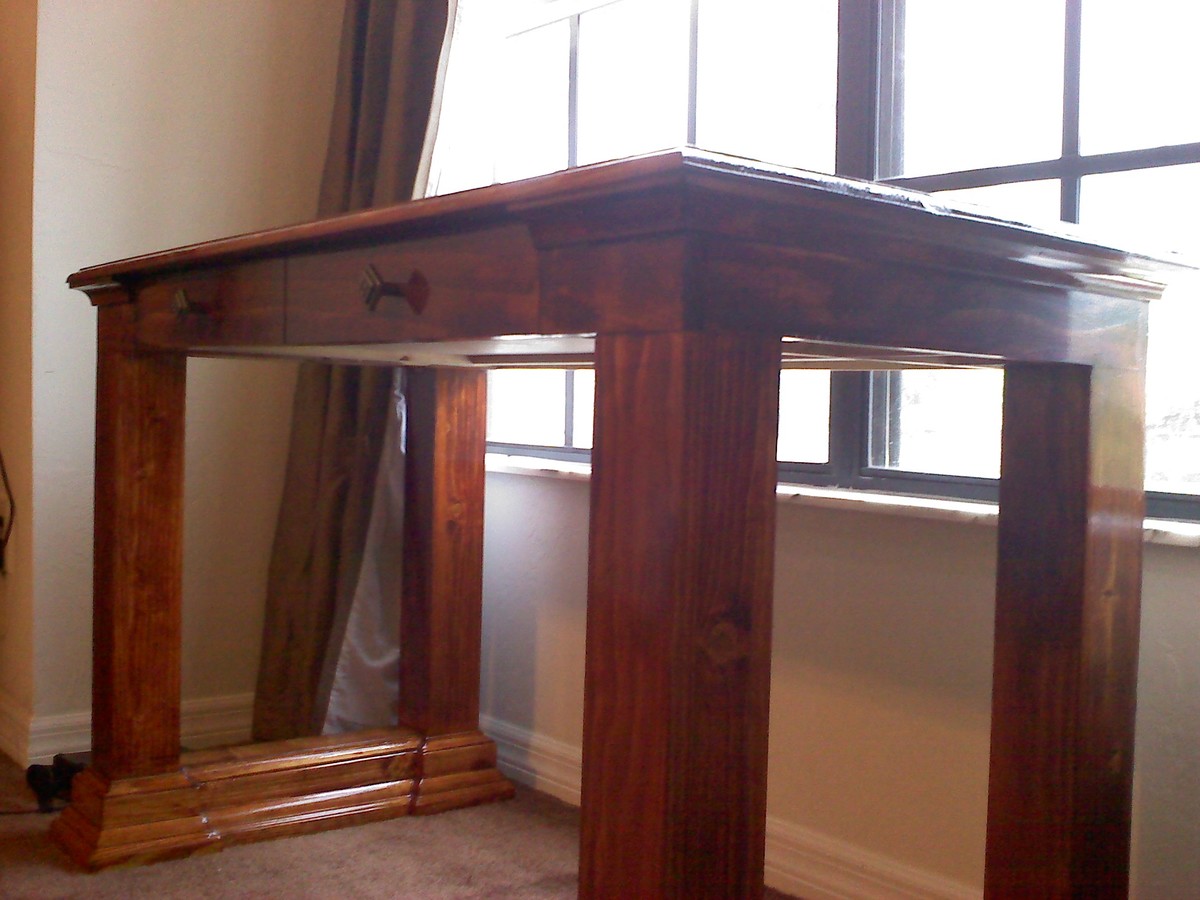
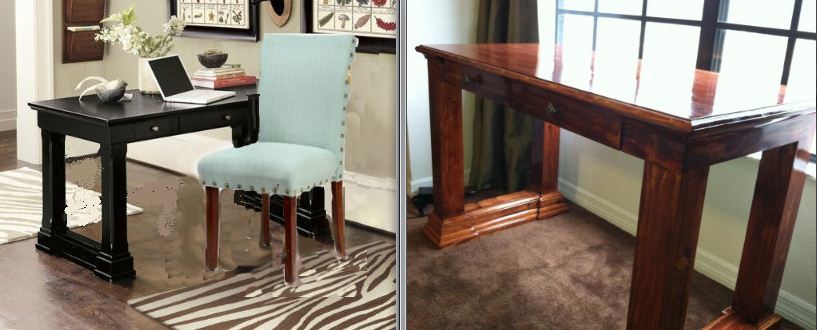
I have been planning to build the apothecary media console, but my desire for a new hall table and shoe storage won out. So...I transferred the look, and I love it! I wanted a vintage feel so I added legs, apothecary drawer fronts and knobs, a 2x10 top, and a distressed finish.
Built from Plan(s)
Estimated Cost
$150
Estimated Time Investment
Day Project (6-9 Hours)
Finish Used
Black spray paint, distressed with a sander and finished with varathane.
Recommended Skill Level
Intermediate


Comments
Michelle Caudle (not verified)
Tue, 05/01/2012 - 05:59
Apothecary
I LOVE it!!!
emilyrharvey@g…
Tue, 05/01/2012 - 07:52
You are a very smart cookie -
You are a very smart cookie - who would think that there are shoes in there! awesome~
birdsandsoap
Thu, 05/03/2012 - 10:56
awesome!!
awesome!!