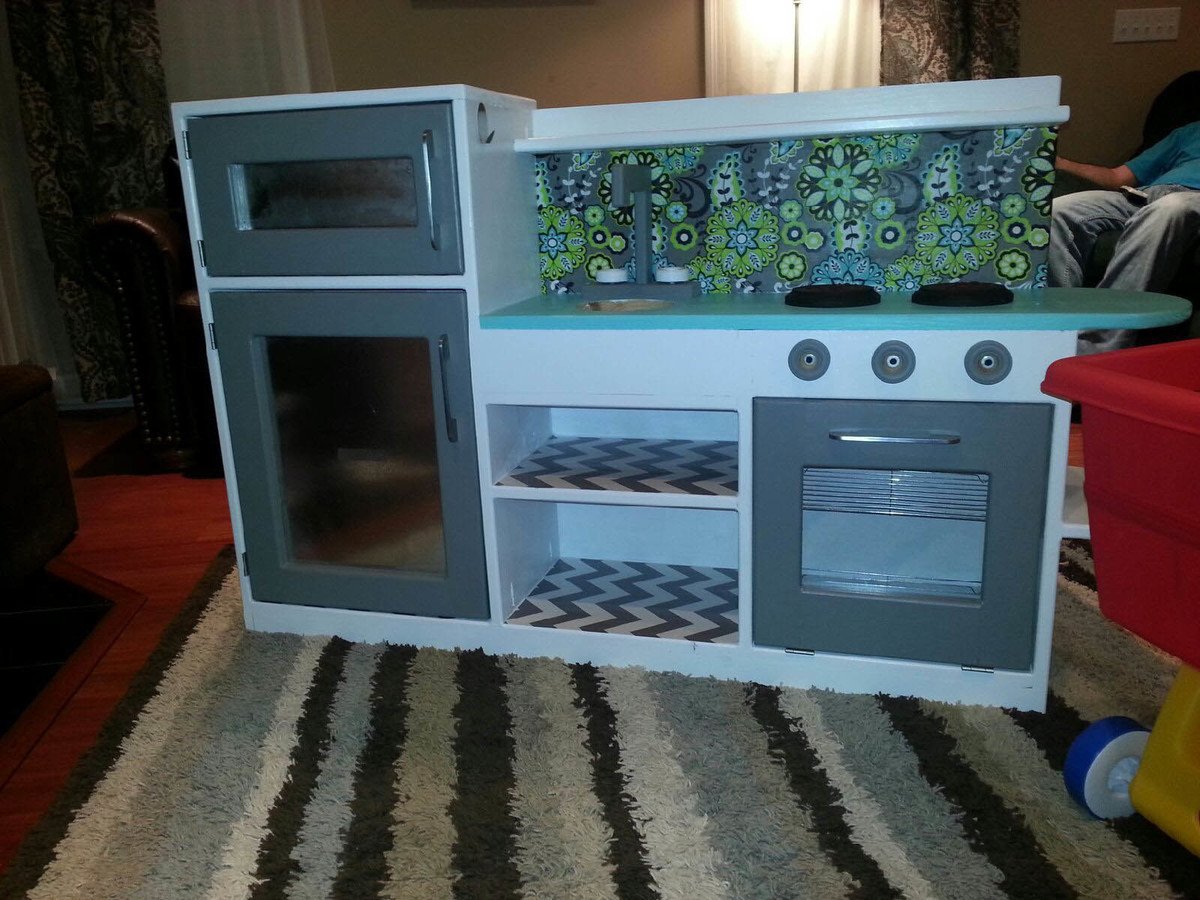
I wanted my daughter to have a play kitchen for Christmas - so I was excited when I found these plans on ana-white.com. My husband is a very skilled, self-taught, craftsman - so I knew he could do this! I'm pretty crafty myself - so combined, we made this awesome kitchen. We couldn't be prouder of how it turned out.
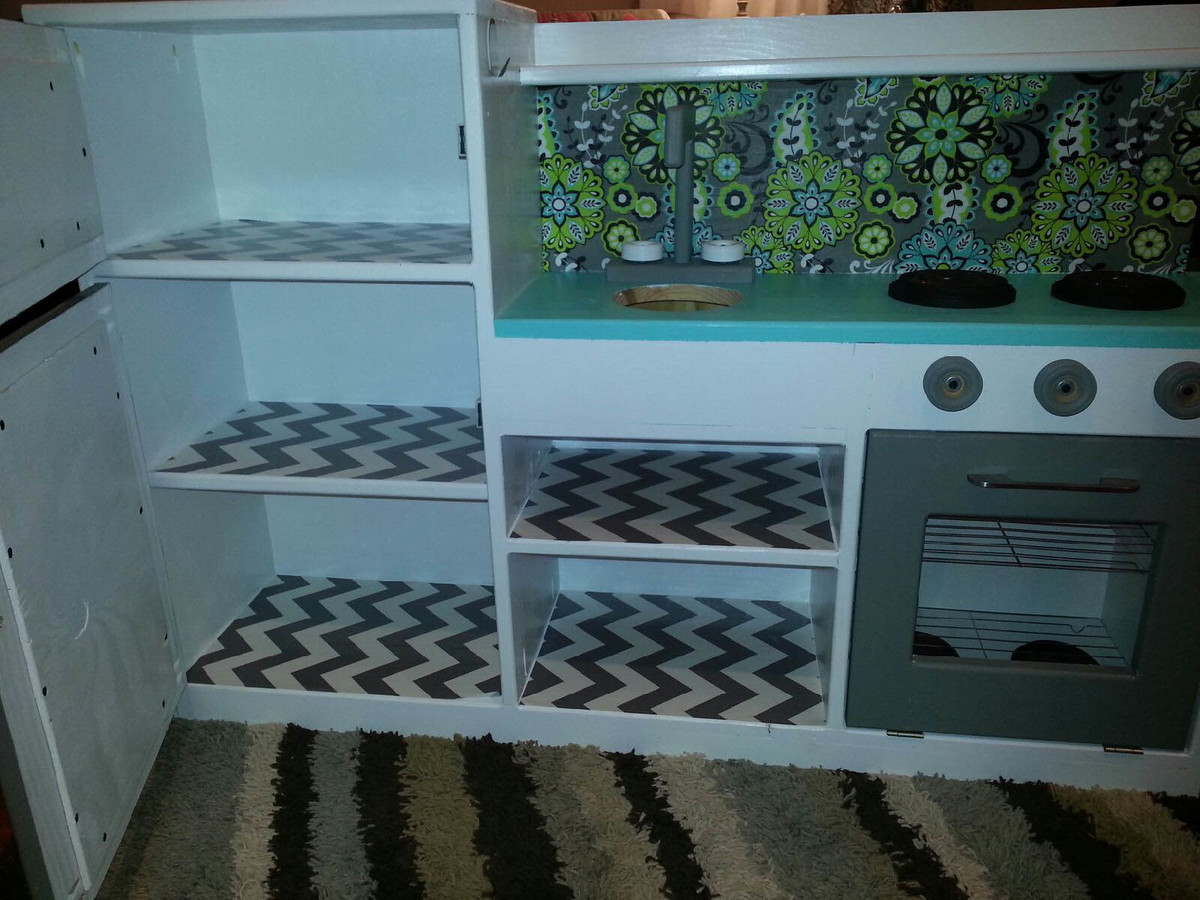
The back splash is a piece of remnant cloth from Hobby Lobby - I modge podged it on. The shelf liners are laminated fabric also from the Hobby Lobby remnant bin, that was put down with a little bit of spray adhesive. Oven racks are from the Dollar Tree - cookie drying racks. The stove eyes and oven burners are wooden disks from Hobby Lobby as well as the knobs. The stove eyes and oven burners have red glitter glue swirls on top to give the realistic "hot" look. The sink was a stray dog bowl we've had for a while. The handles were left over from another project we did a while back.
My husband built the faucet and knobs from plans he dreamed up as he went. We used metal sheets in the fronts of the fridge doors so she could put magnets on them.. like a real fridge! He also added an additional shelf in the lower part of the fridge. He used magnetic closures on each of the doors so they will stay shut nicely.
He built the entire kitchen in one day -- the drying time on the paint -- slowed us some due to the weather we've been having. Over all it took us about 1.5 weeks to finish - working on it a little each evening.
Our daughter loves it.. she's cooked us several meals since Santa brought her kitchen. LOVE IT!!