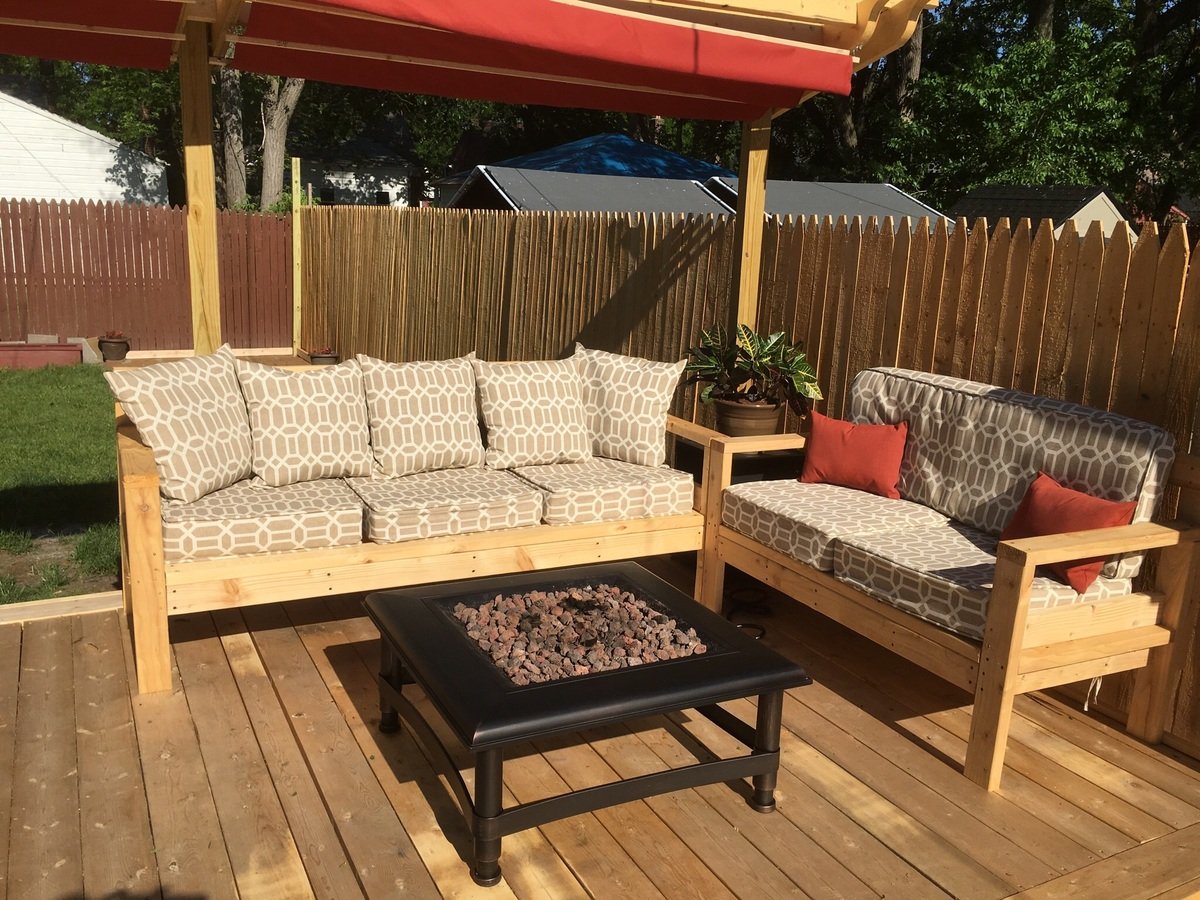
Simple outdoor sofa for the pool!
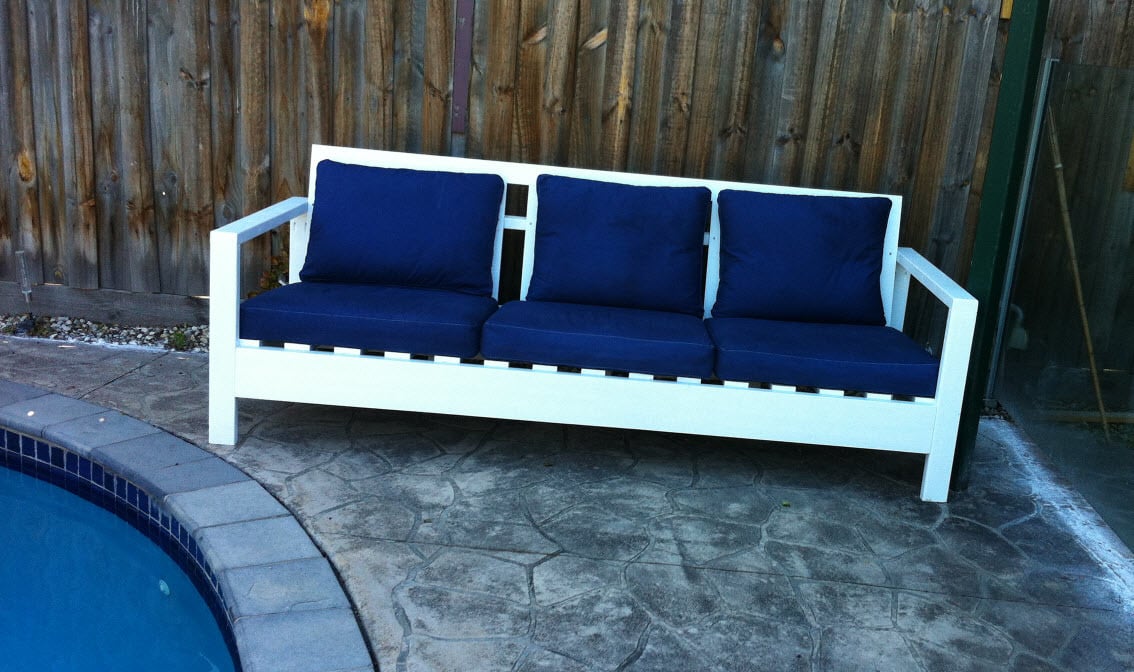
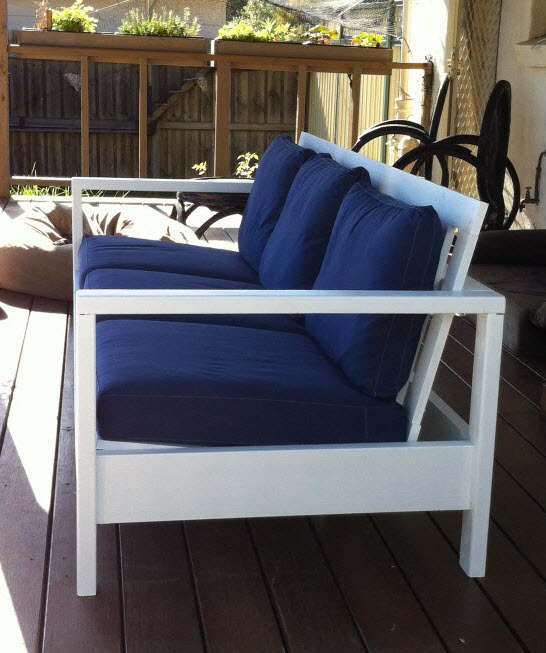
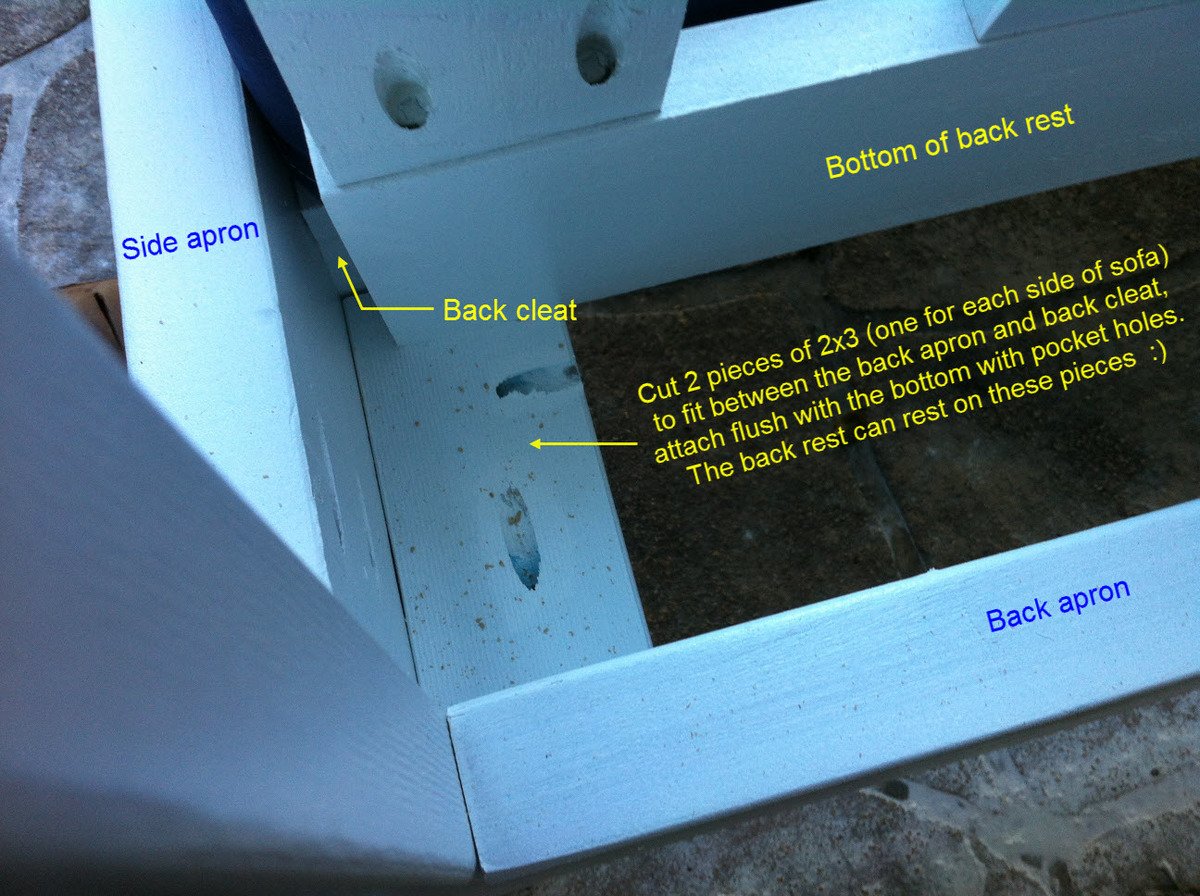
An easy build! Thanks for the plans, Ana. This was a housewarming gift for some friends and it now sits nicely by their pool. I got the cushions from Ikea (Arholma range) and sized the sofa around them. I used 2x3s for the frame and added a couple of 2x3 support legs under the back cleat for extra support. I also attached a couple of 2x3 pieces between the back cleat and the back apron for the back support to rest on. Now for the table... :)
Built from Plan(s)
Estimated Cost
$250 including timber, cushions and paint
Estimated Time Investment
Weekend Project (10-20 Hours)
Finish Used
Dulux Weathershield paint, 2 coats. Cushion covers were dyed navy blue with Rit.
Recommended Skill Level
Beginner