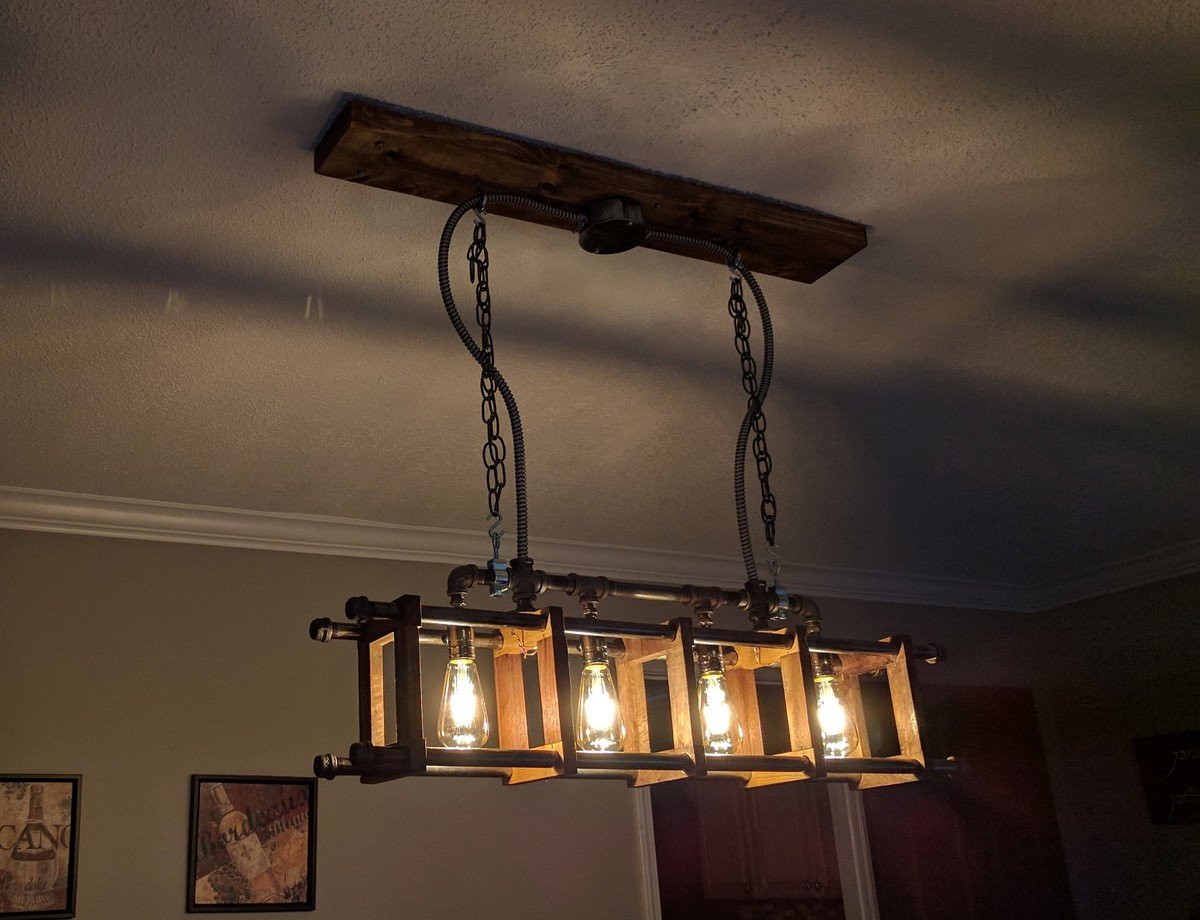
Industrial Chandelier
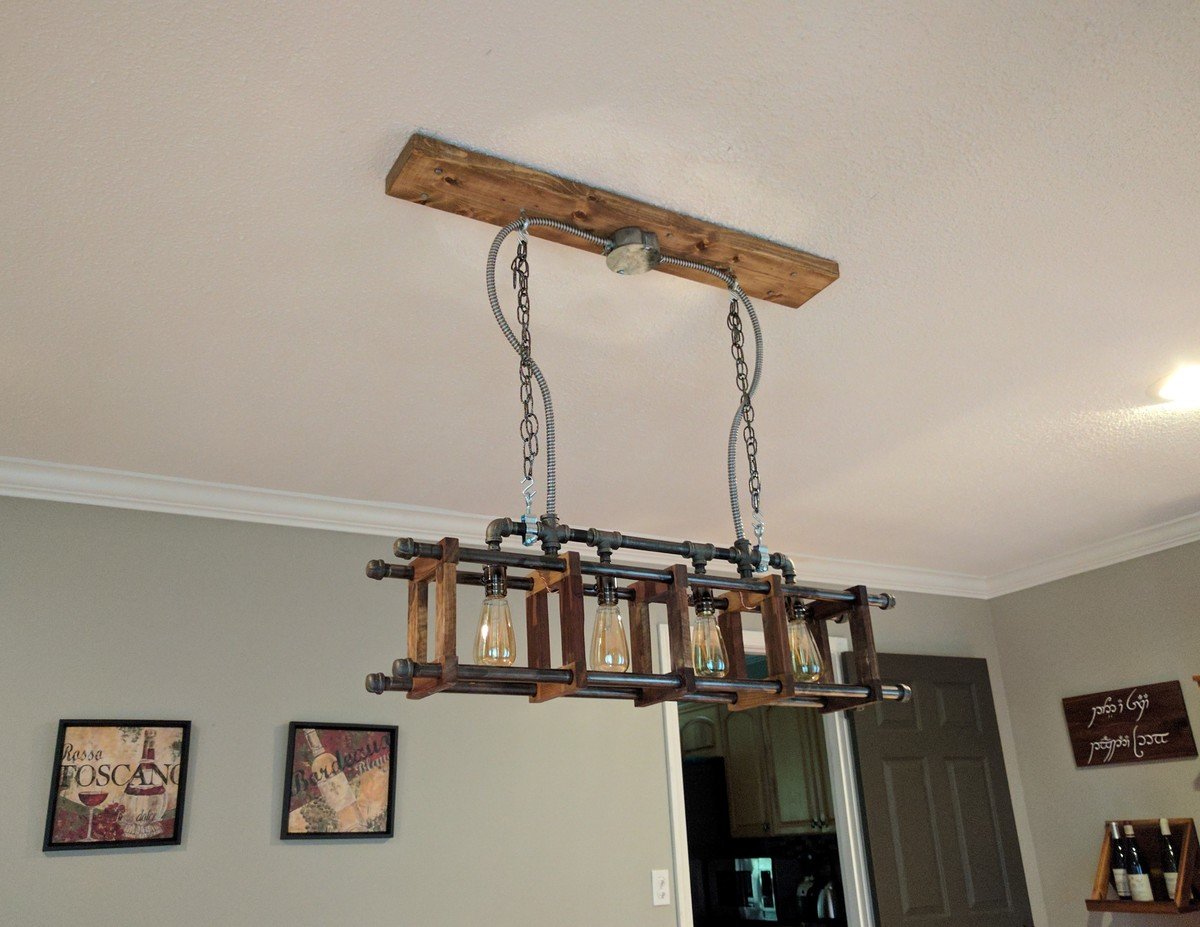
Industrial chandelier for our dining room made from black iron pipe pieces from Lowes and some leftover black walnut scraps. It was a sometimes frustrating design-as-you go project that required loads of help from my electrical engineer husband. Love how it finally turned out!
Estimated Cost
$220
Estimated Time Investment
Week Long Project (20 Hours or More)
Finish Used
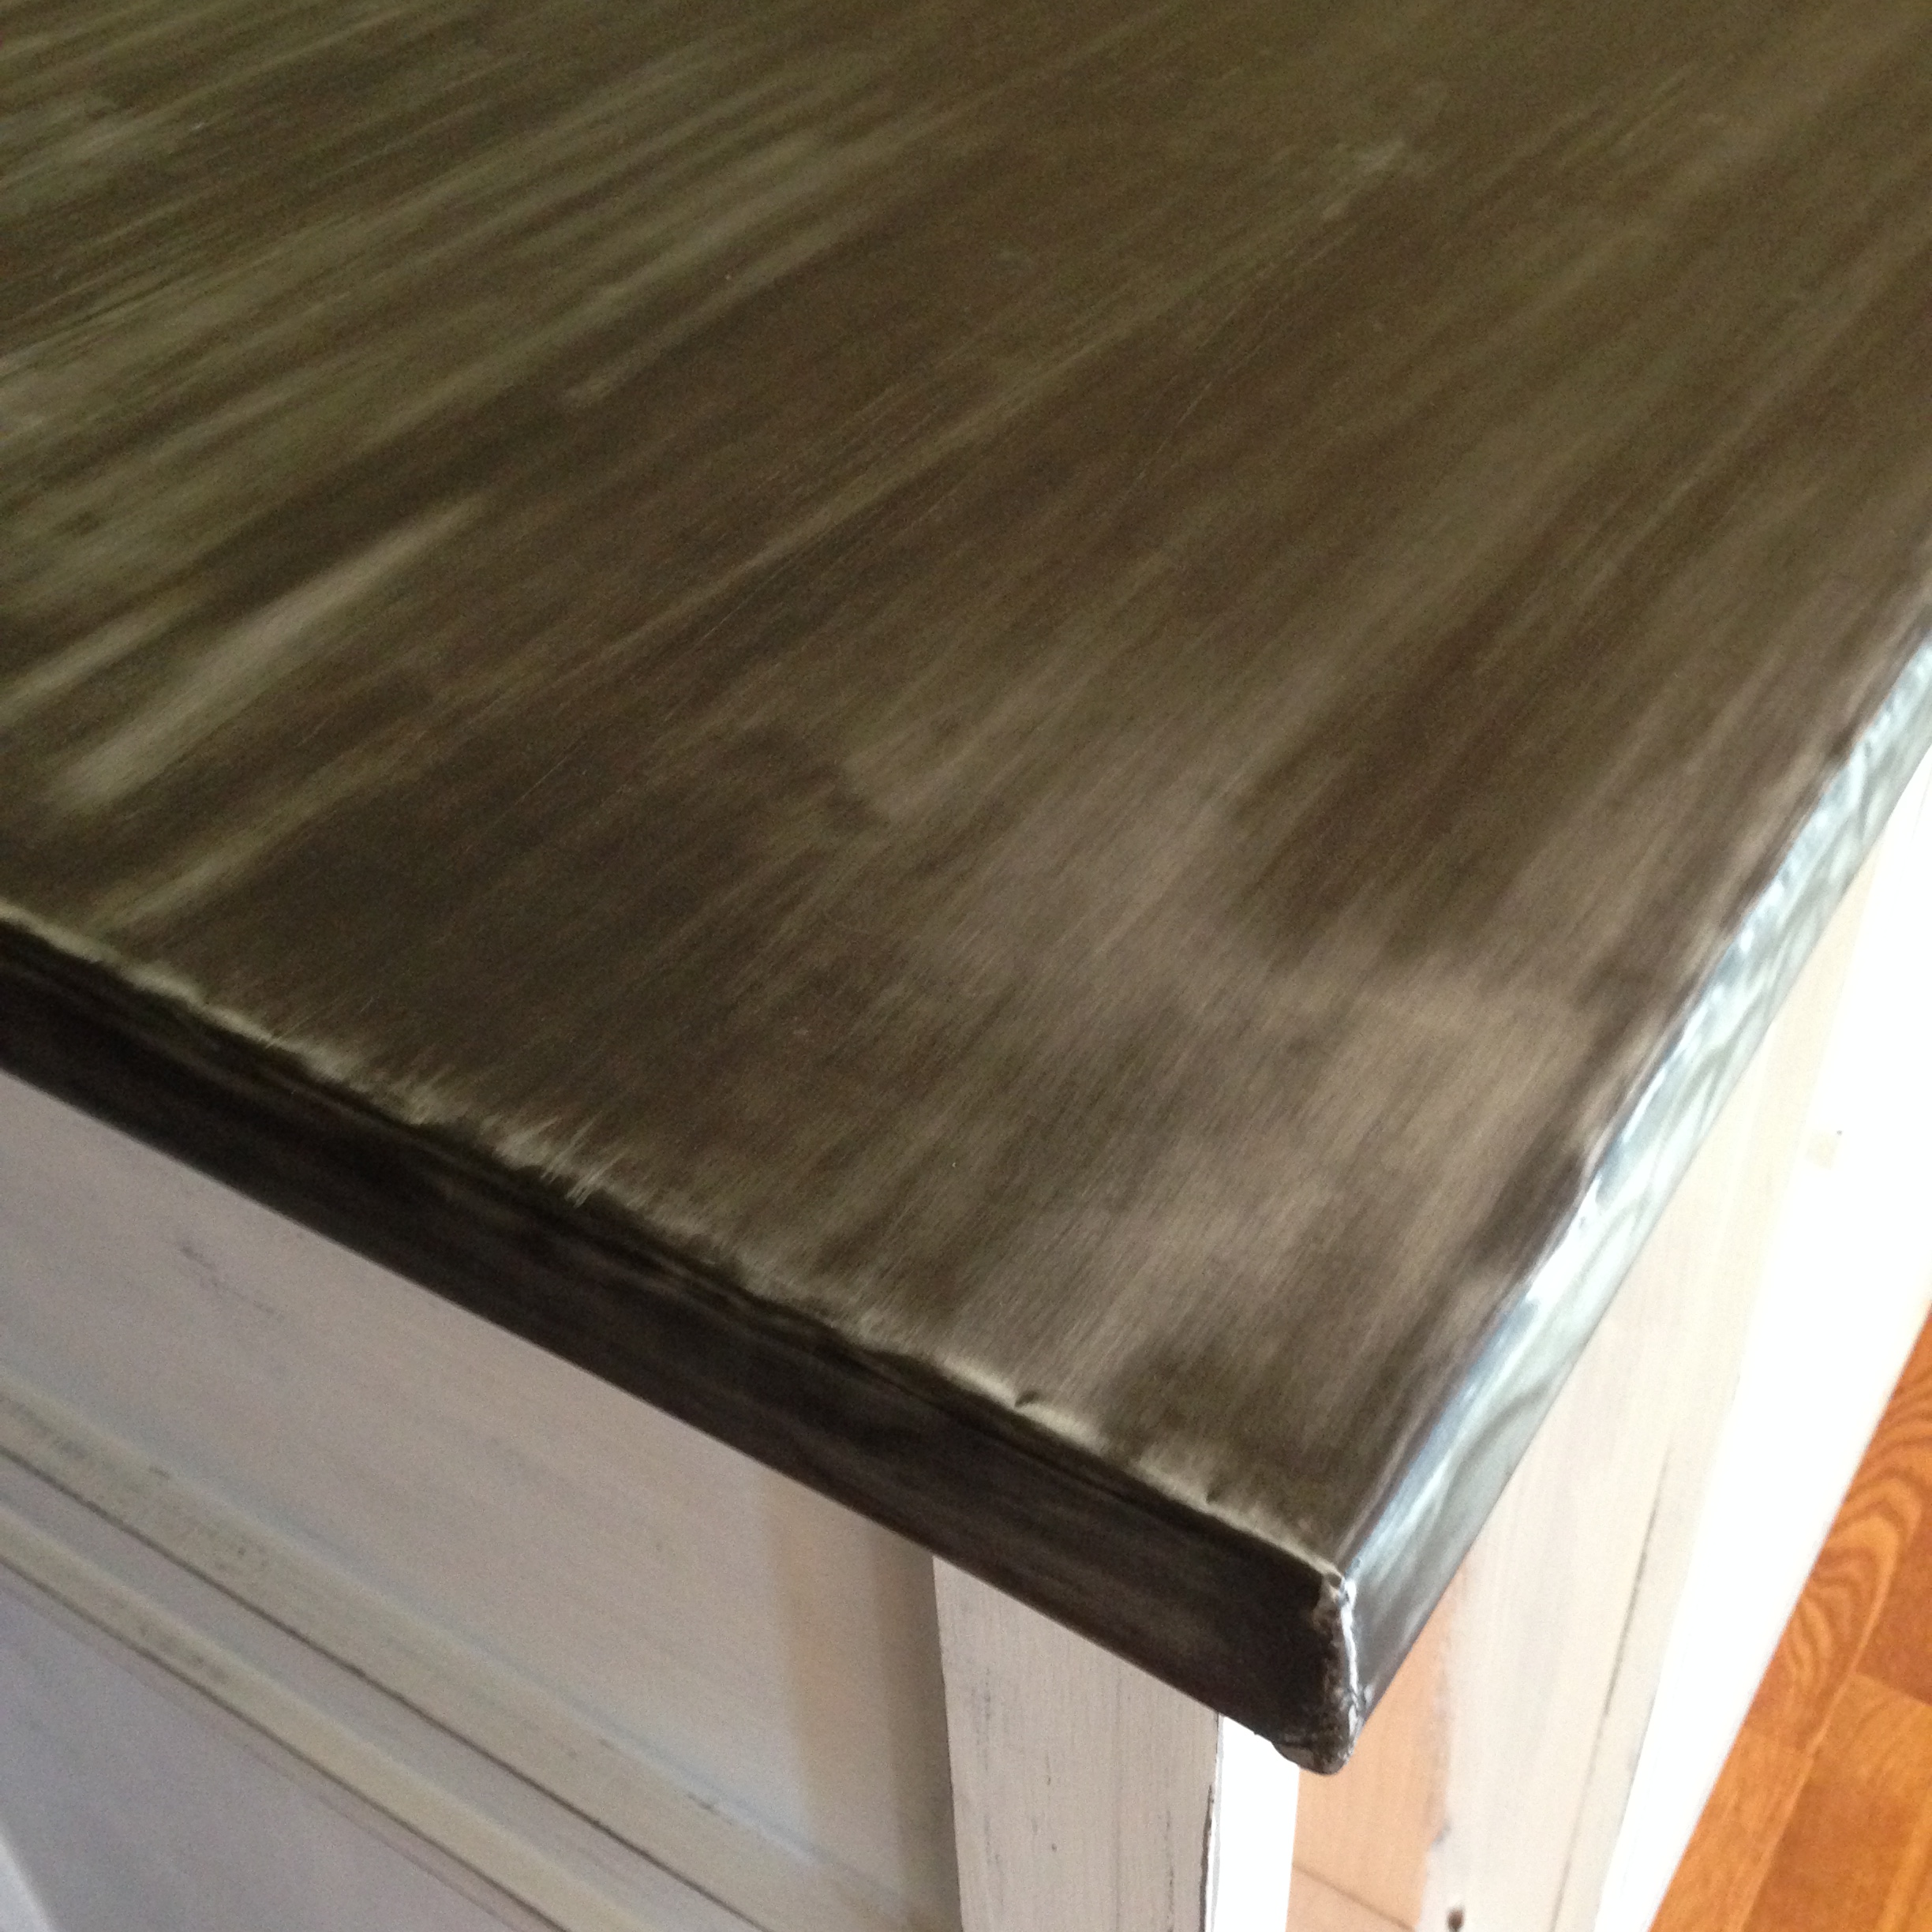
Minwax special walnut to match pine to other wood, then a coat of Waterlox to bring out walnut grain.
Recommended Skill Level
Advanced