Bench
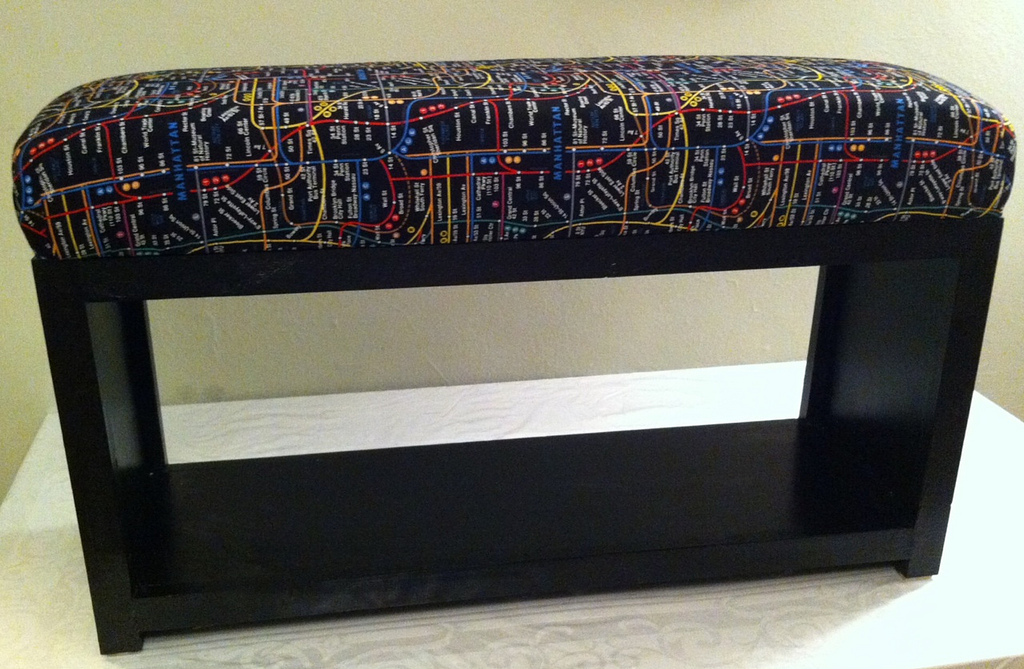
I chose to make the simple bench 2" shorter, and upholster it, using 4" foam and fabric.

Built from Plan(s)
Finish Used
black paint
Recommended Skill Level
Intermediate
I chose to make the simple bench 2" shorter, and upholster it, using 4" foam and fabric.
First Ana White build

Wed, 08/27/2014 - 16:36
Congrats on an awesome build! Great job, and I LOVE the finishes you used!
A modification of the plans from Shanty2Chic - built to fit the space. I eliminated the curves brackets - I wasn't able to pull those off without a bandsaw. Instead, the legs have black steele straps that will match hardware on the beams in the house.

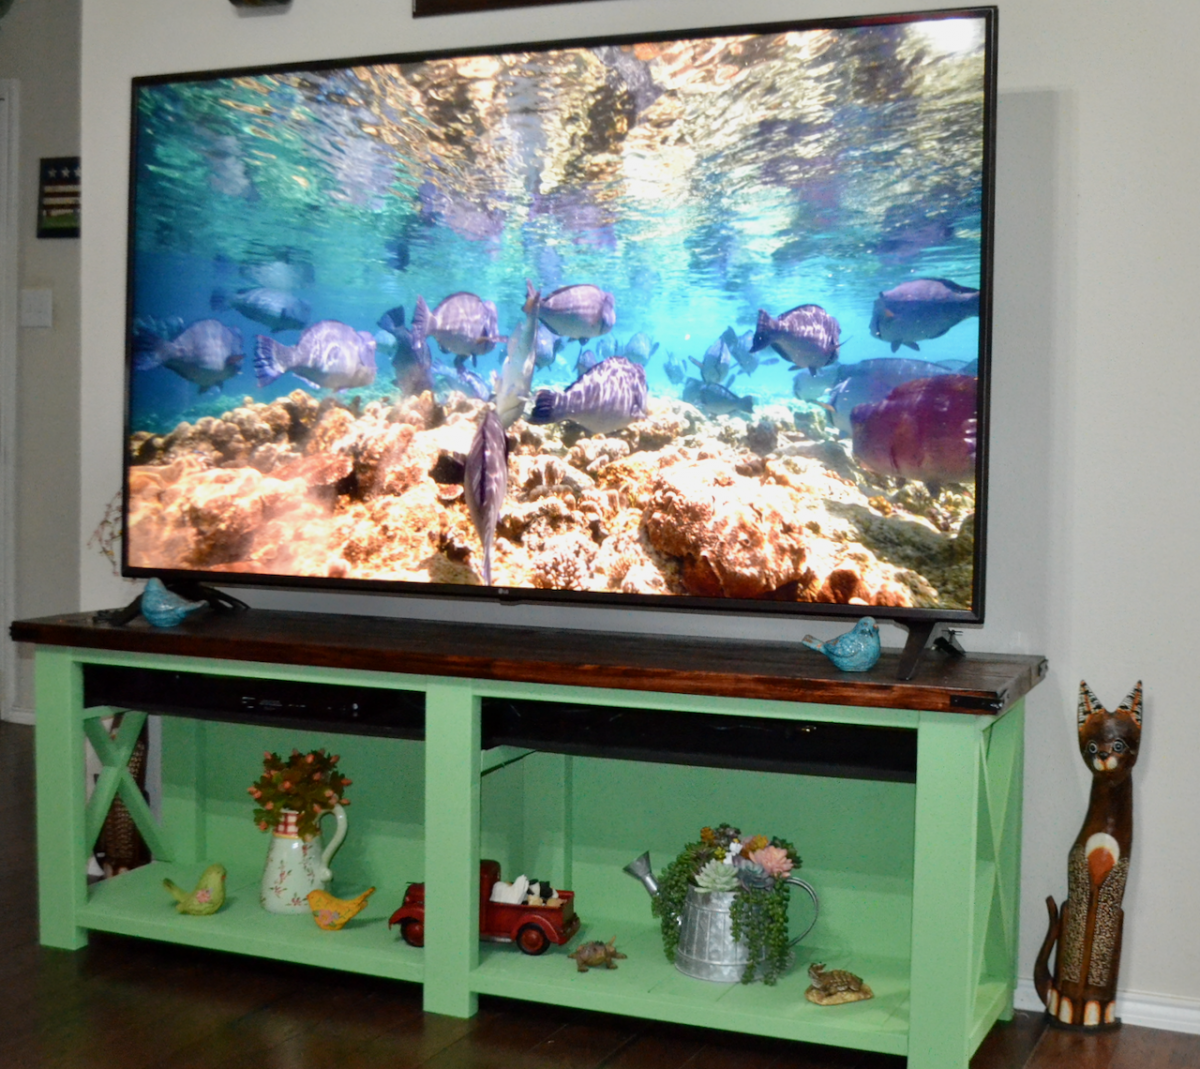
I modified the Farmhouse Console Table to serve as a entertainment center for our new 75" television. I removed the center shelf so that we could place our taller knick knacks there. I also put a 'hidden' shelf at the top and painted it flat black to hide the cable box, power strip etc. I also added a back to hide the wires. It turned out nice.
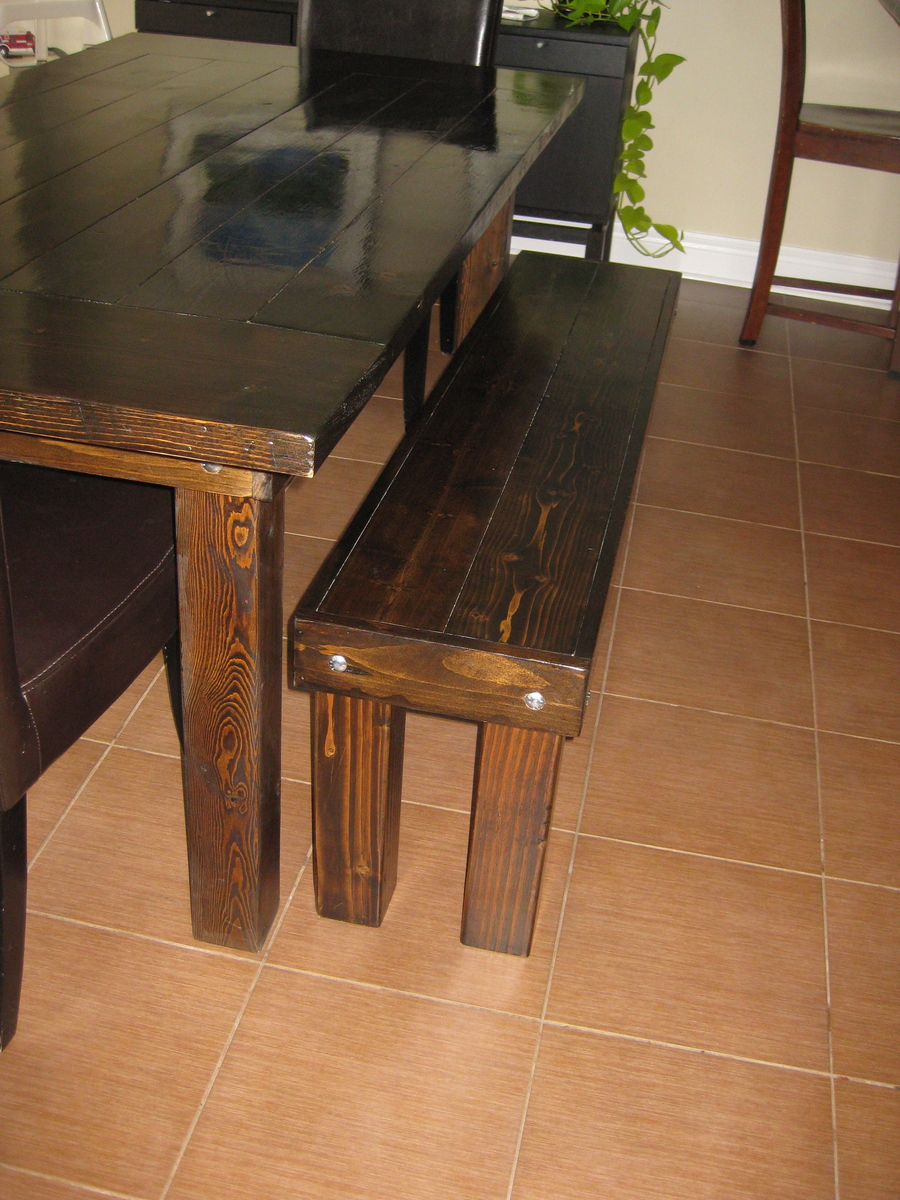
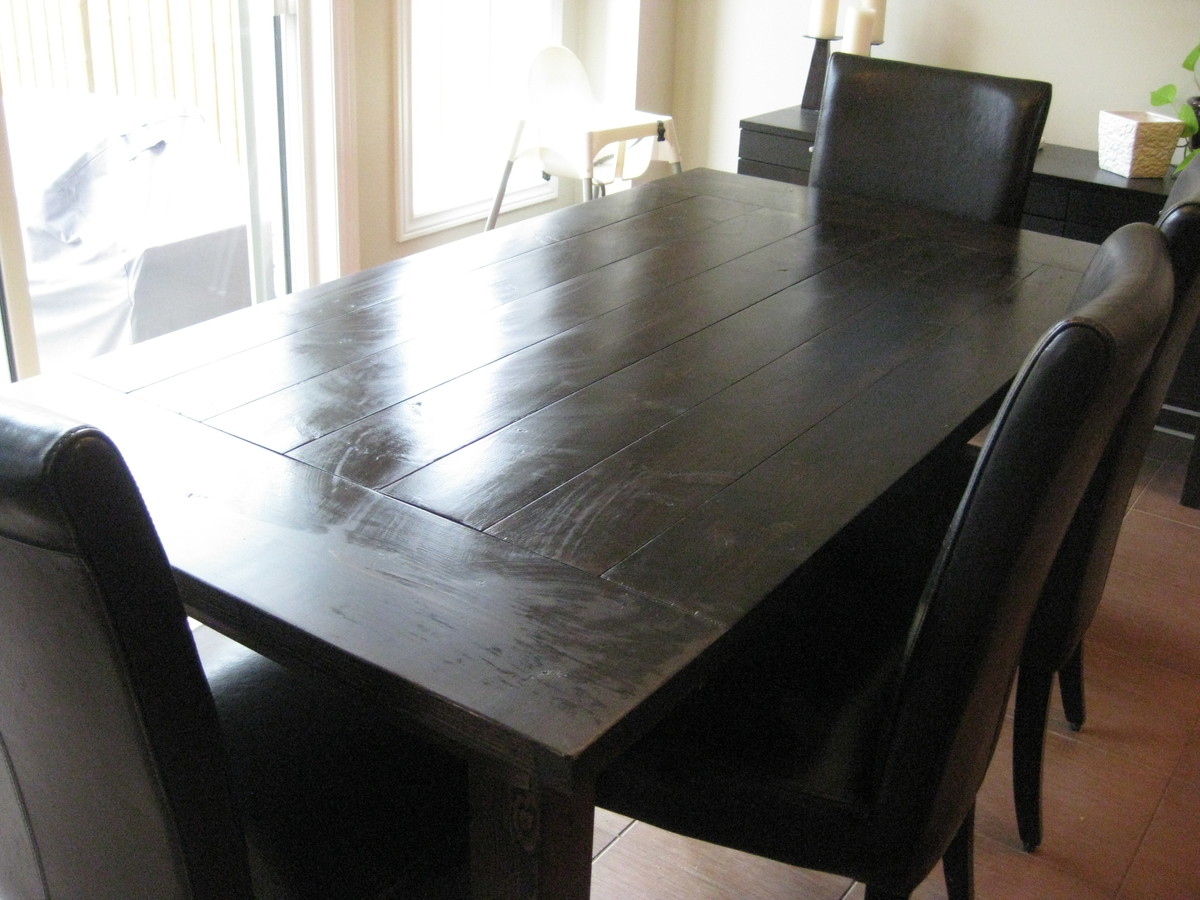
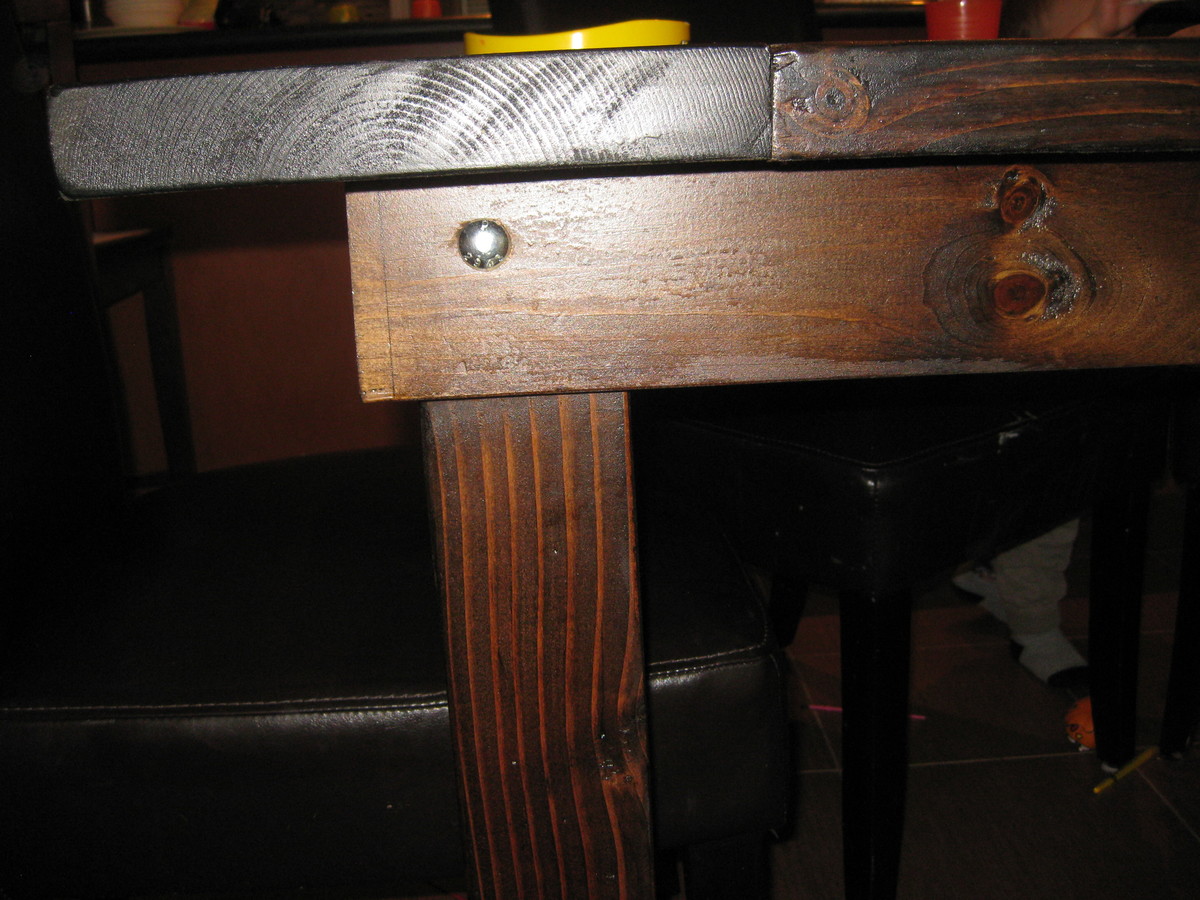
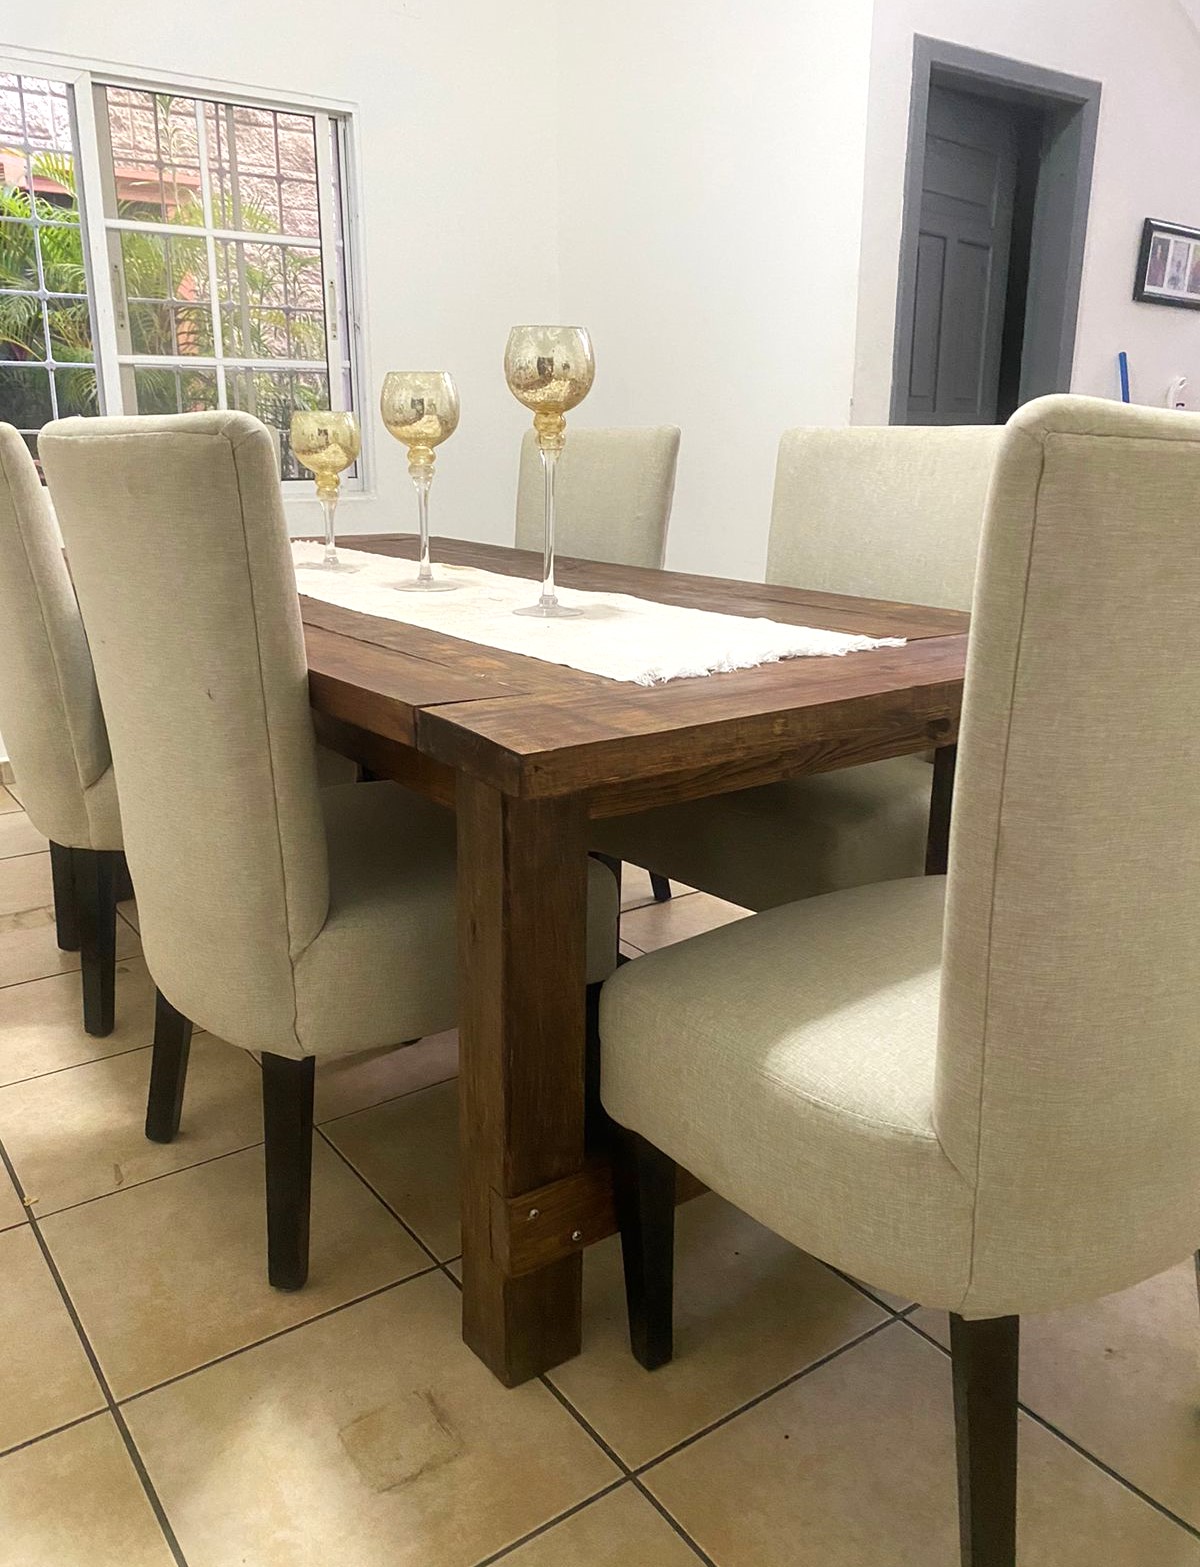
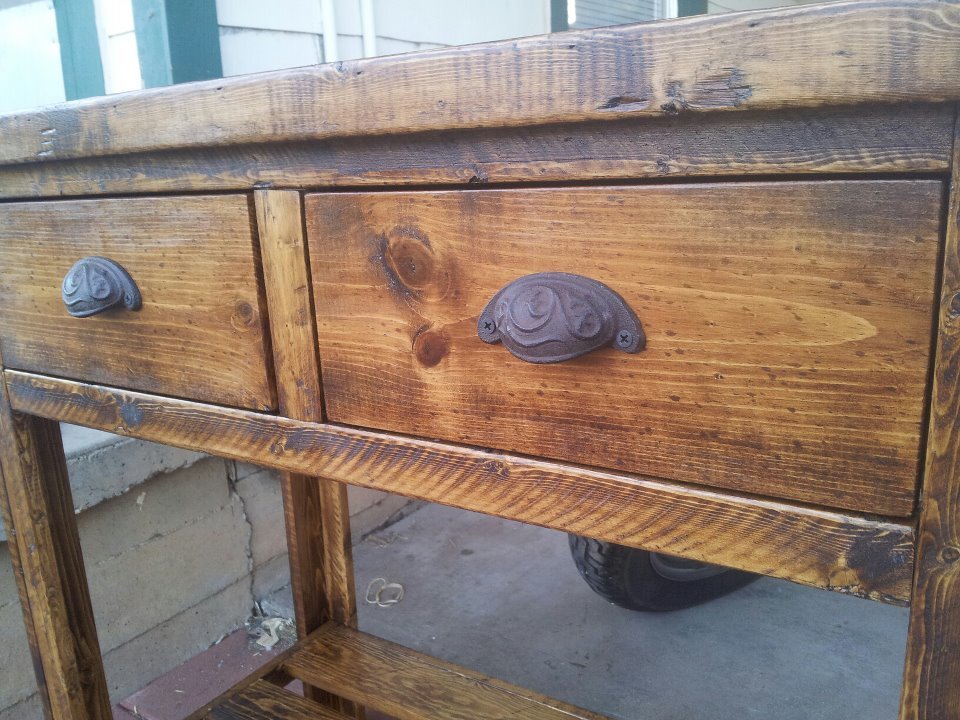
This was my first project inspired by Pottery Barn and while shopping in a local furniture store we realized the cost to have something very similar would cost $1500-$2000. This table was cut and prepped in my garage and then transported to my daughters house in my car and assembled and finished there. The bench is constructed from left over boards. I choose not to use 2X4 legs but rather opted for 4x4's. The length was shortened to 5' for a cross bar was not neccessary. I used carriage bolts to attach the legs to the shirt in case they ever needed to be disassembled. The top is not glued on, only PH screws used. This has been a very satisfying first project, thanks Ana for showing me the way to having lovely homemade furniture that really impresses, is very well made and for a fraction of the cost.
Fri, 11/09/2012 - 19:11
You did a wonderful job on the table and bench. I like the idea of using the carriage bolts and not gluing on the top. I have done the same for a couple of projects especially if you need to take a table apart or if the top should need repair.
This is my version of the pedastal table.
Fri, 08/29/2014 - 07:18
It looks great! That finish on top is beautiful. :)
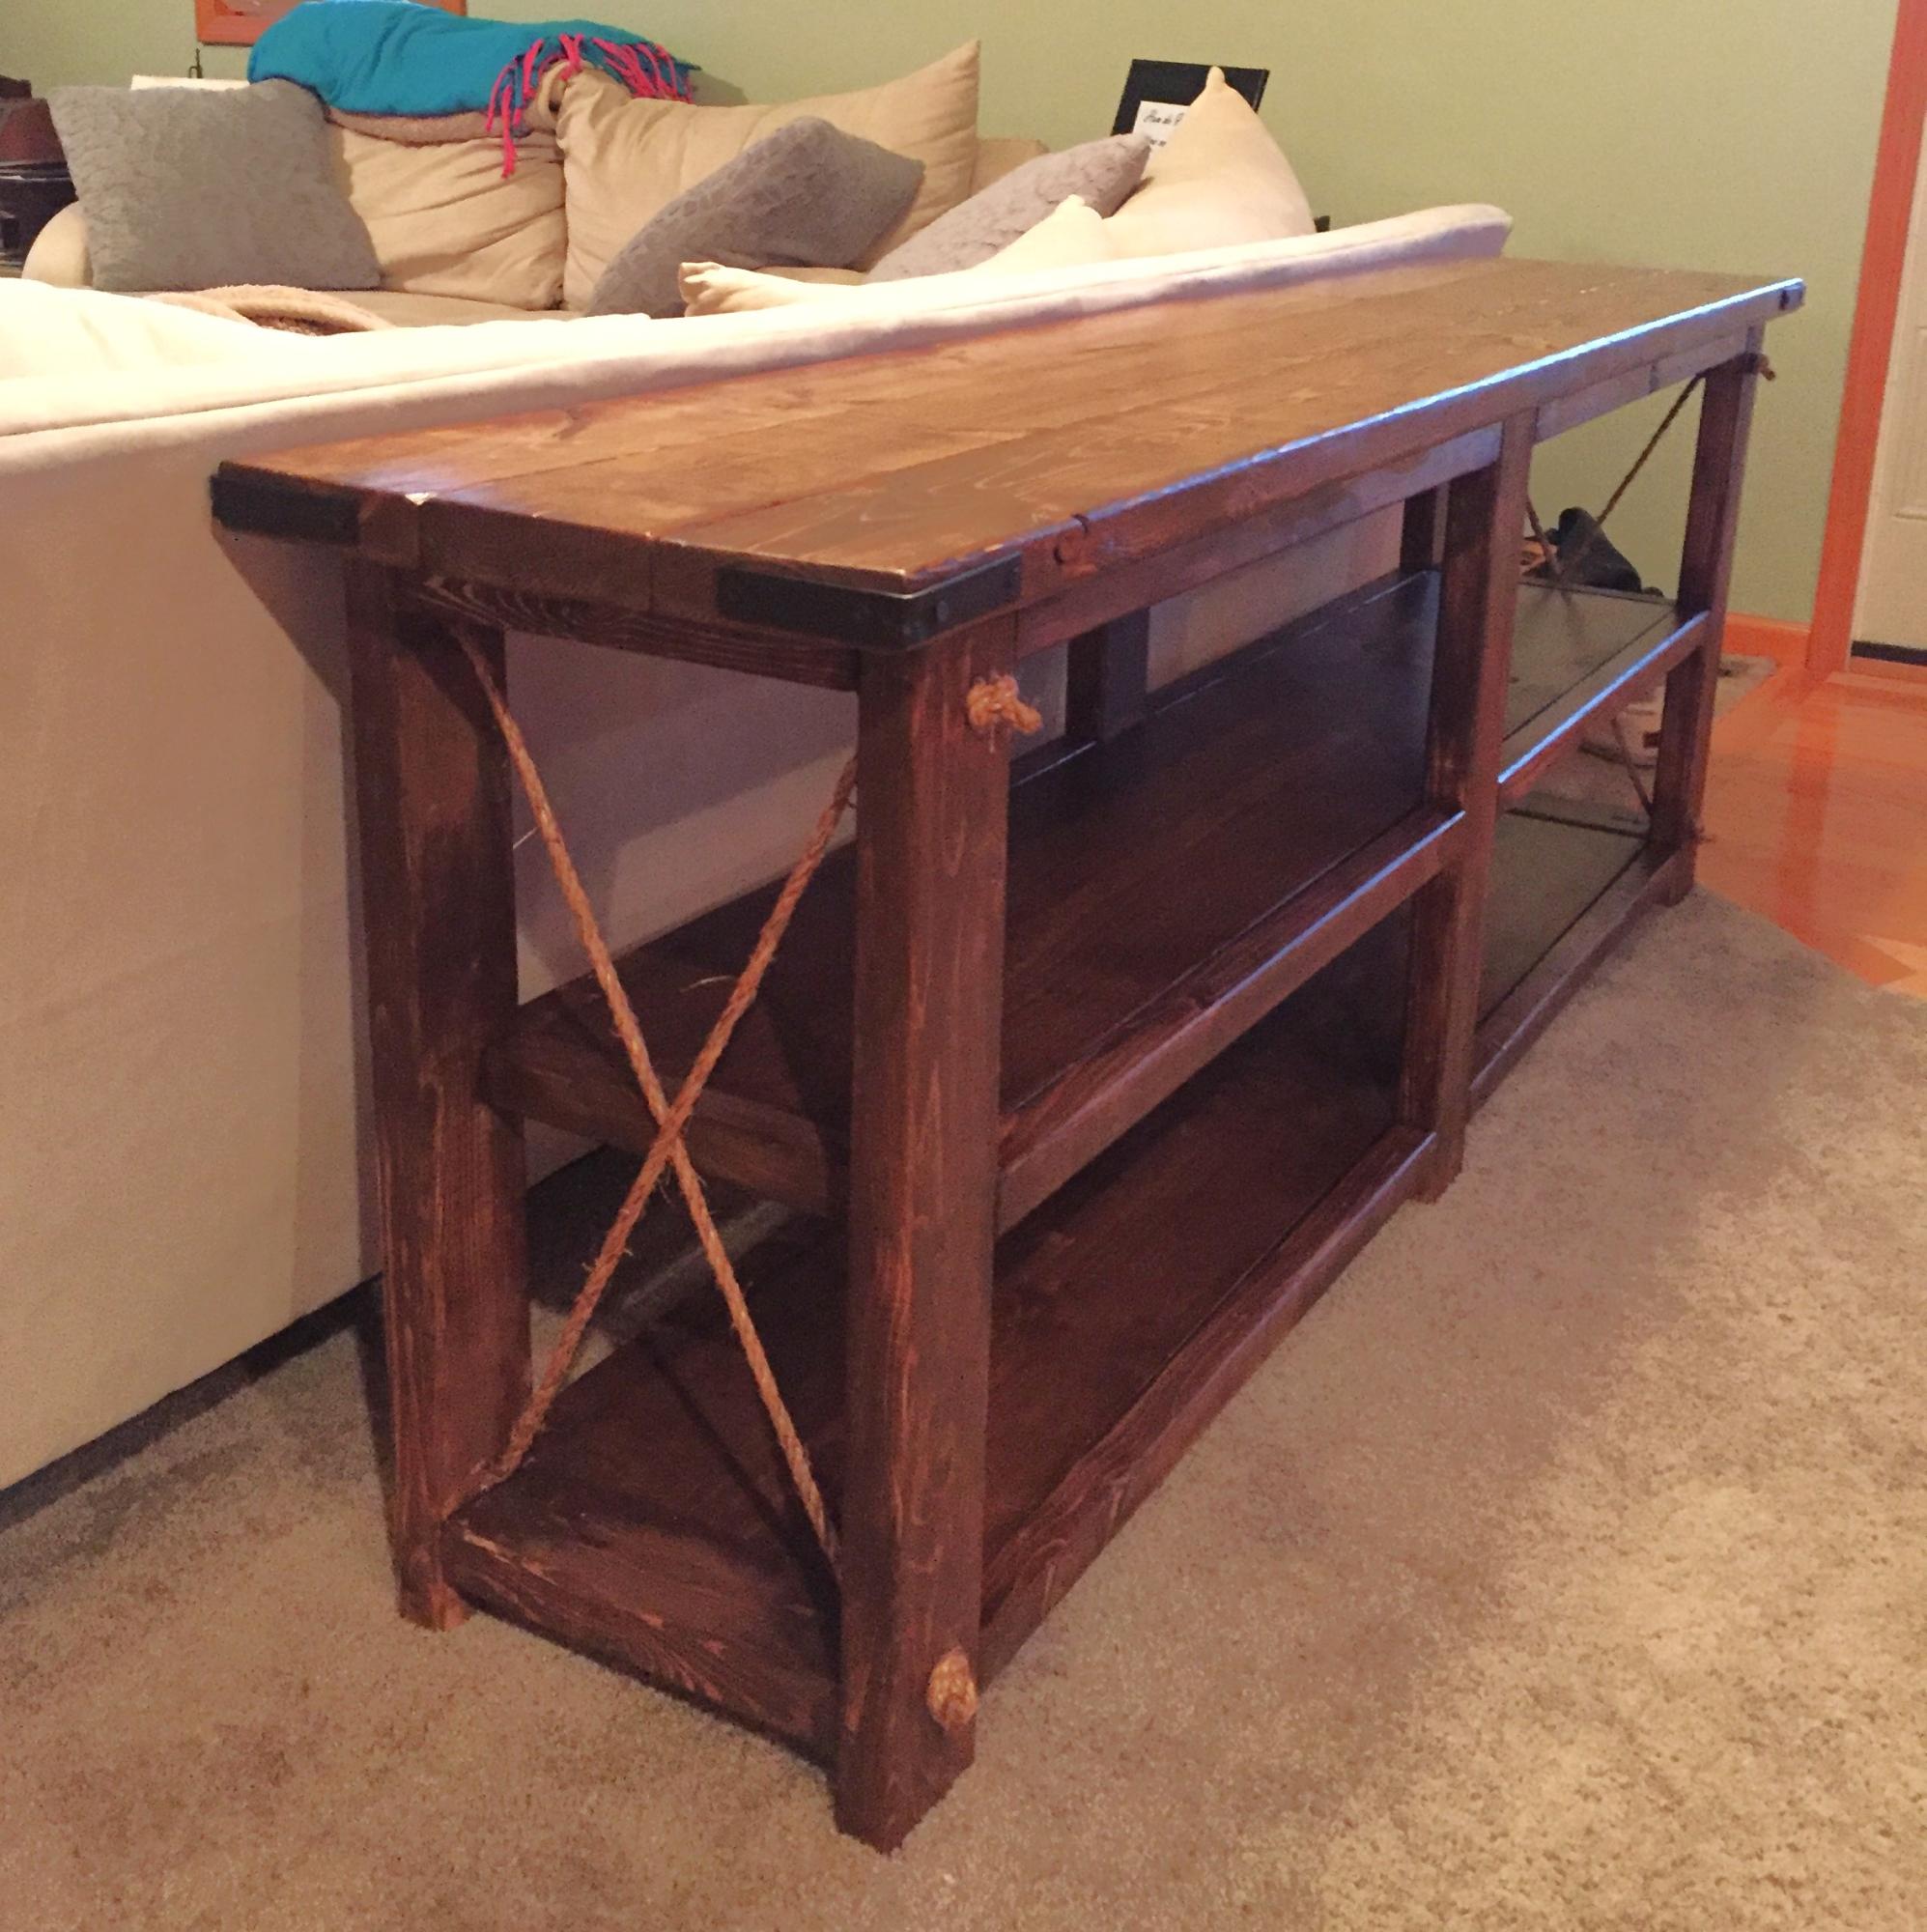
We took the plan from Ana and instead of the wood X's on the sides, we changed it to rope. We stained it a dark brown so this just gave it some more dimension... we love it!!
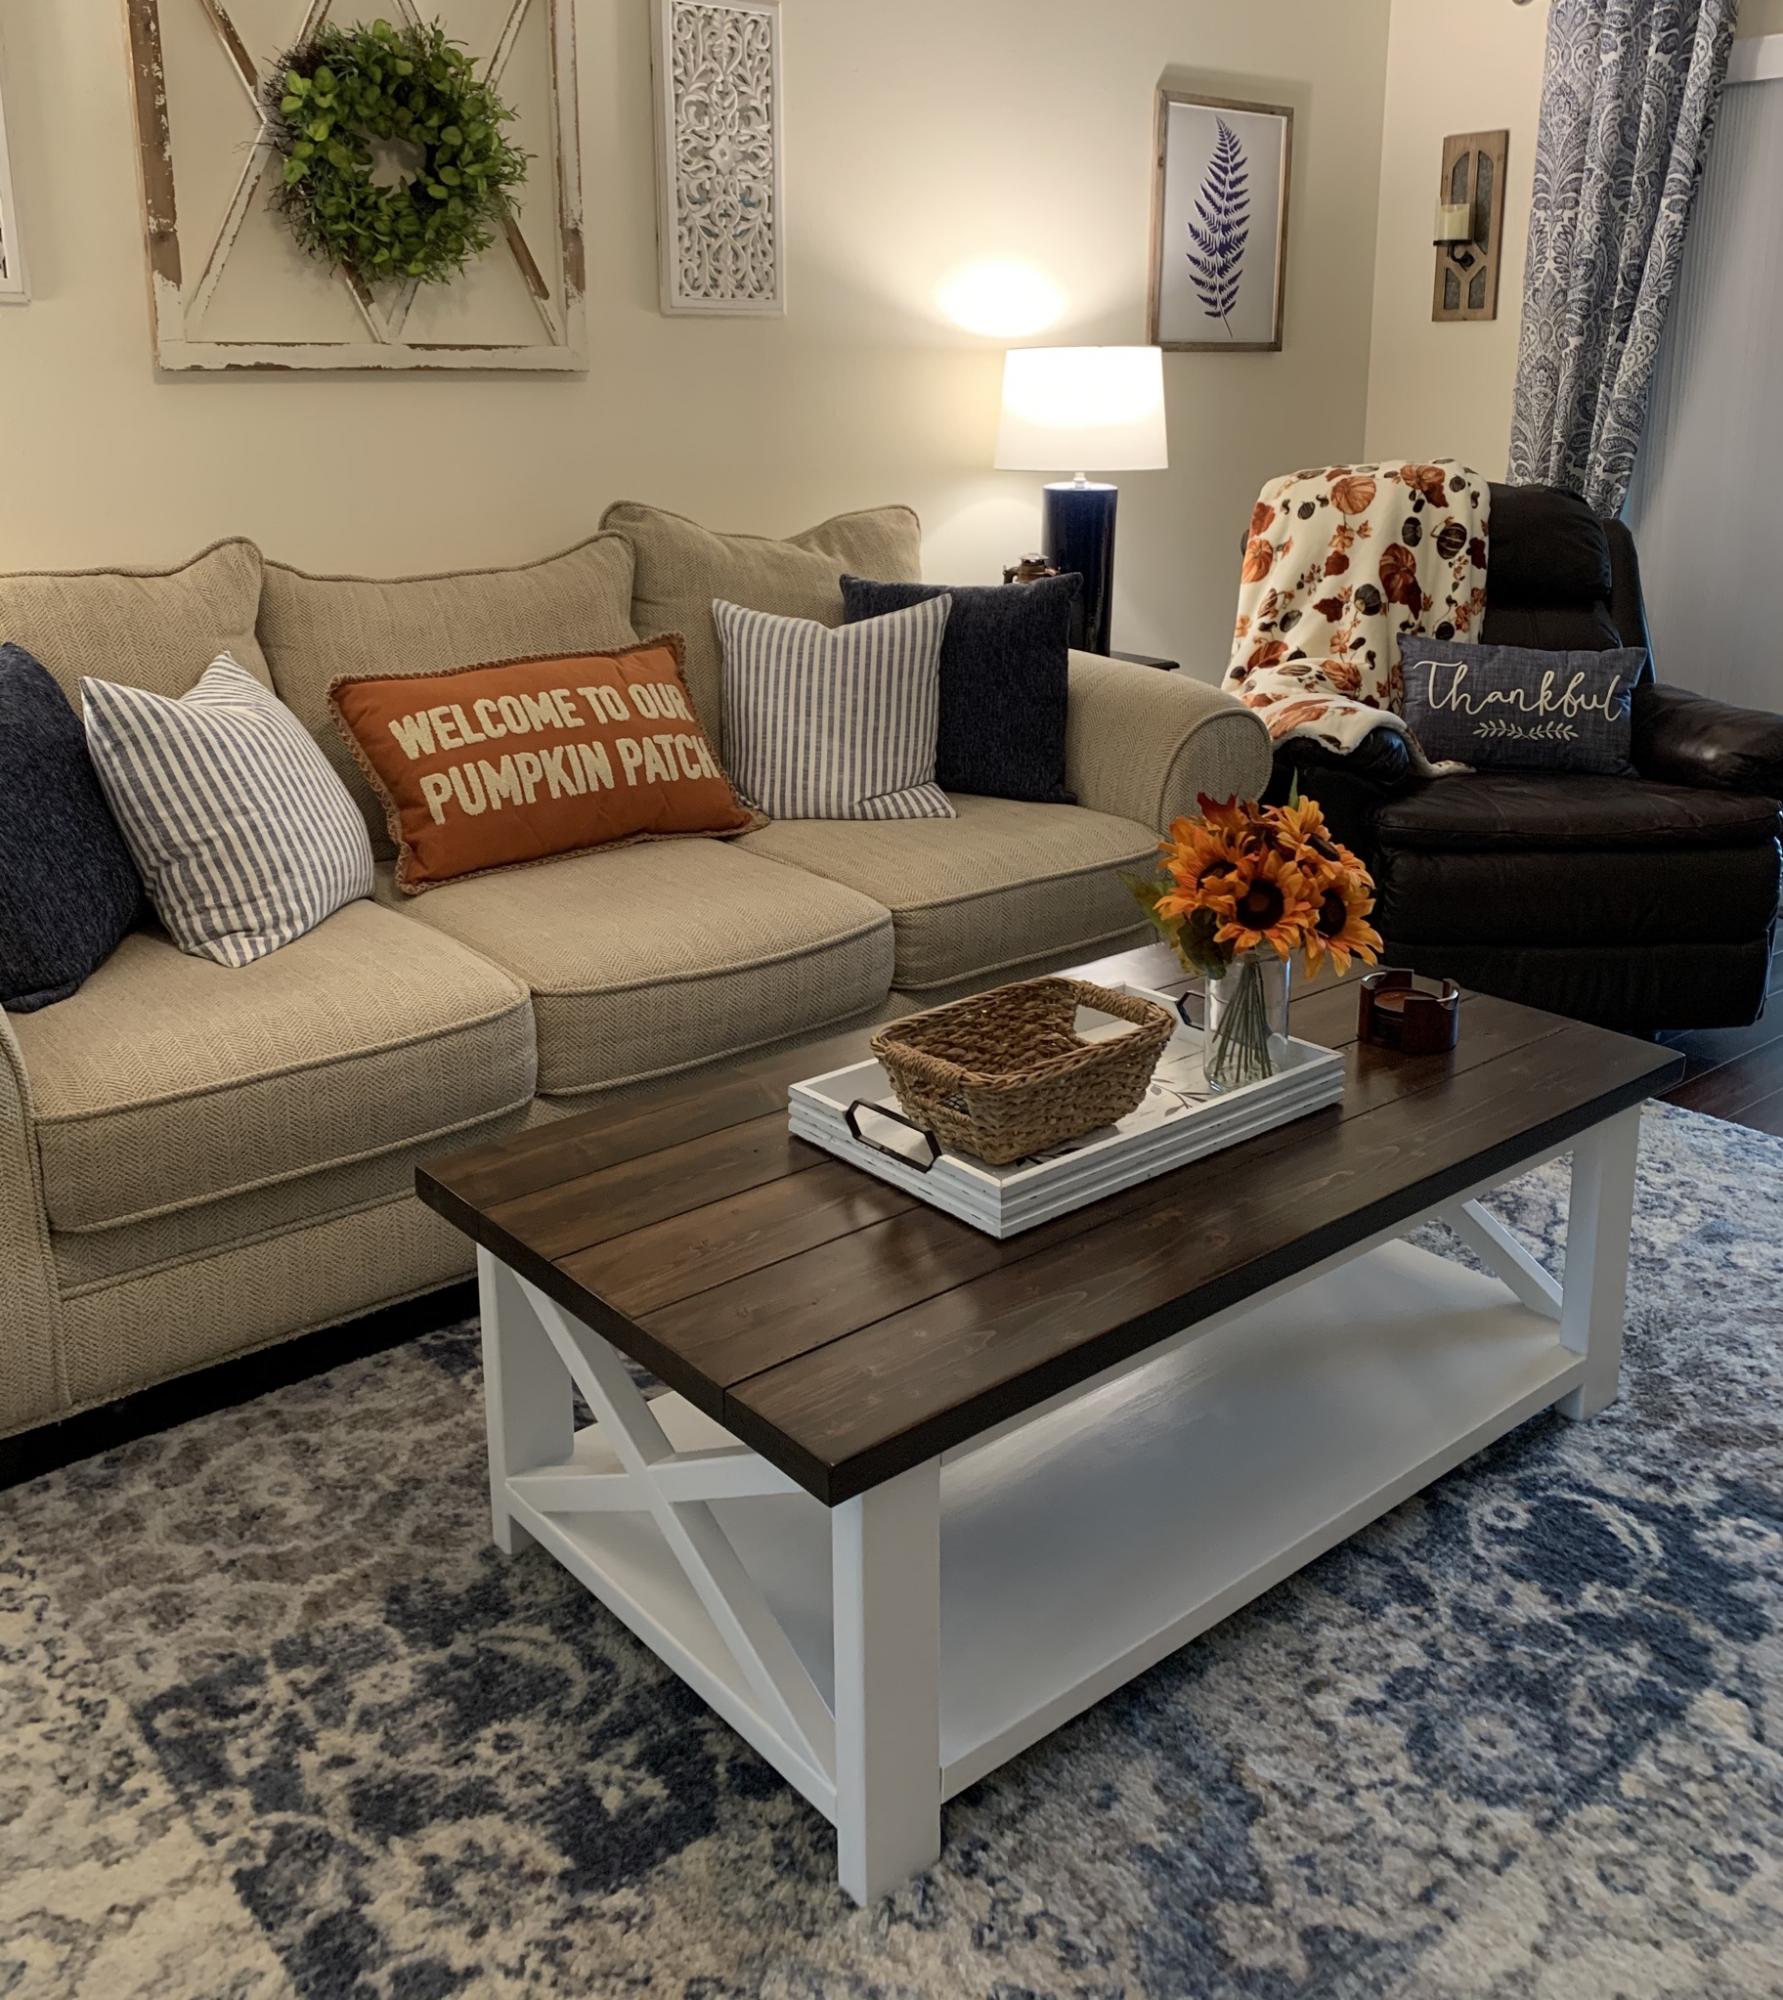
This was the very first project that my husband and I have ever built and it came out exactly as planned. We followed the instructions exactly as written and I’m in love with this table.
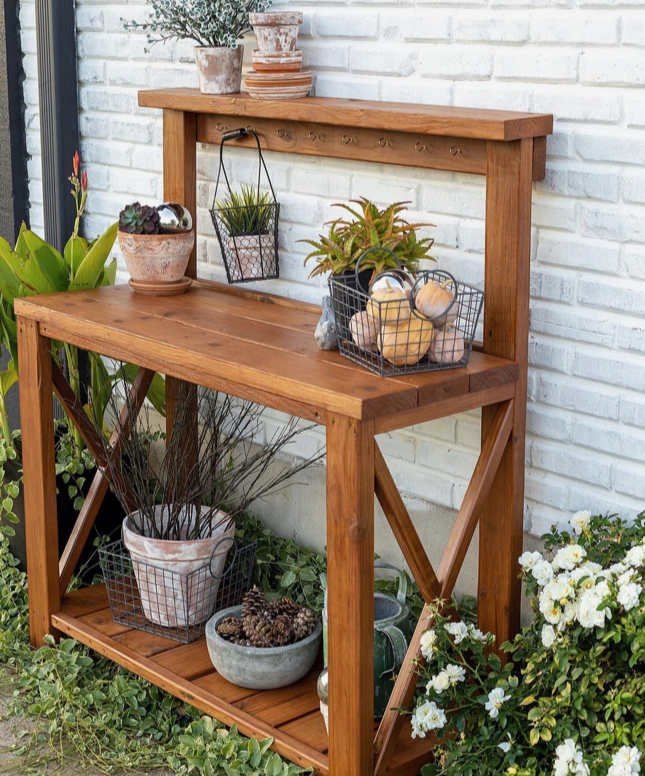
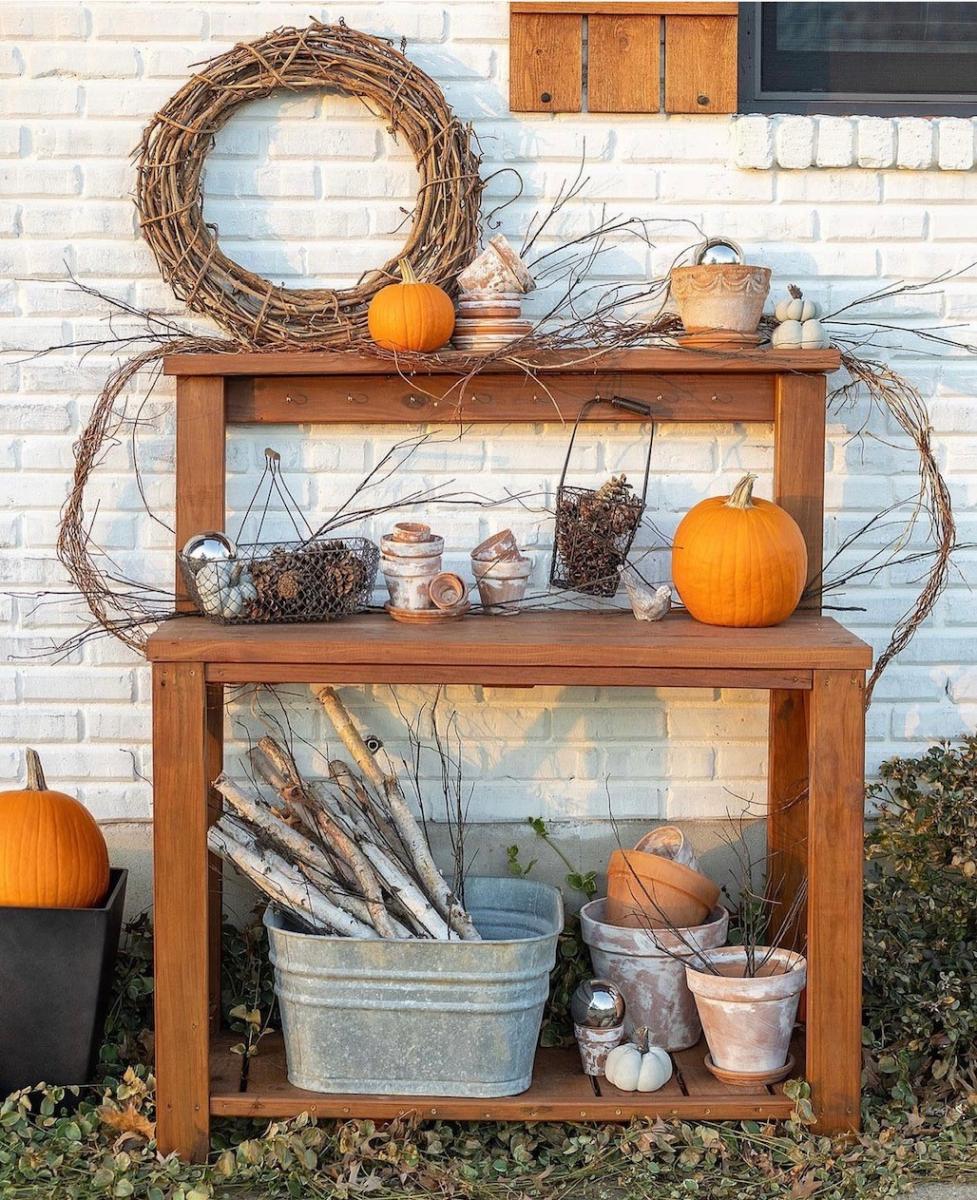
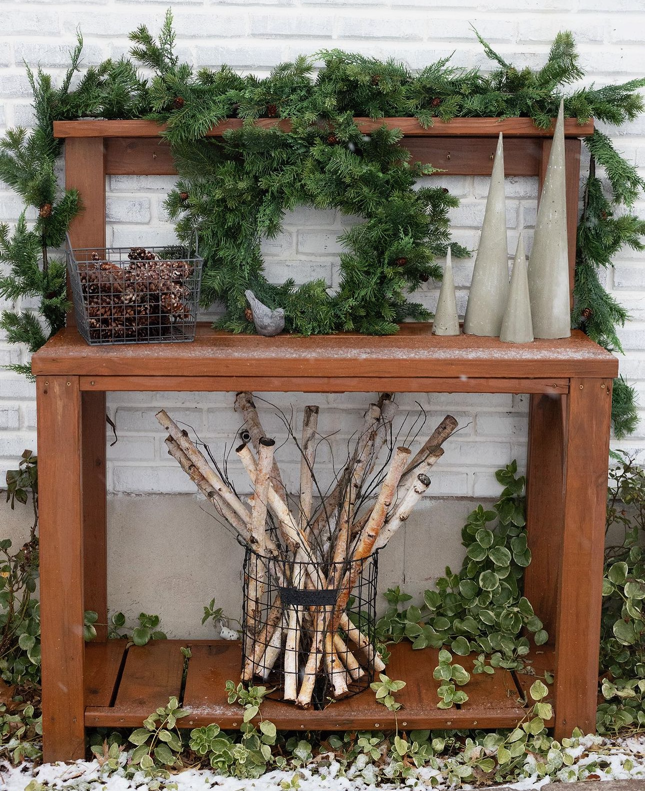
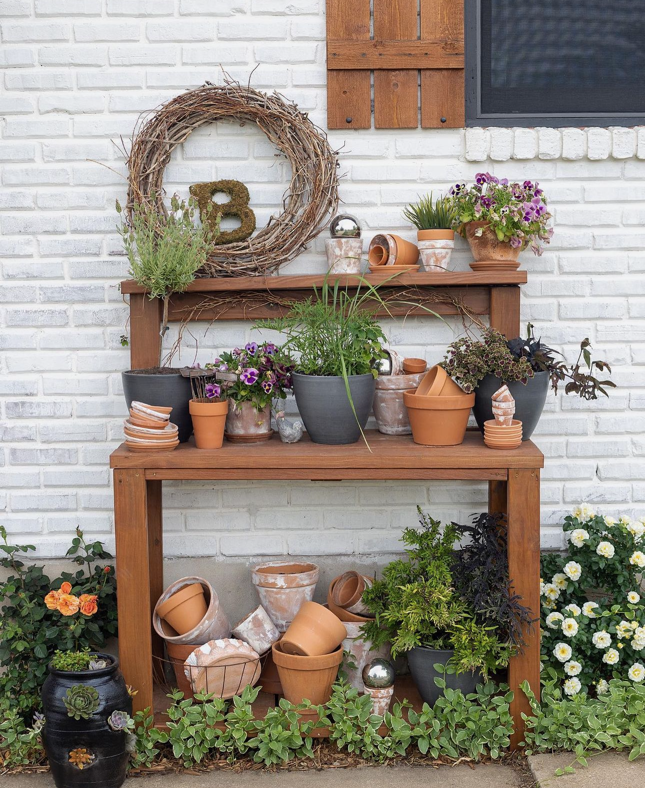
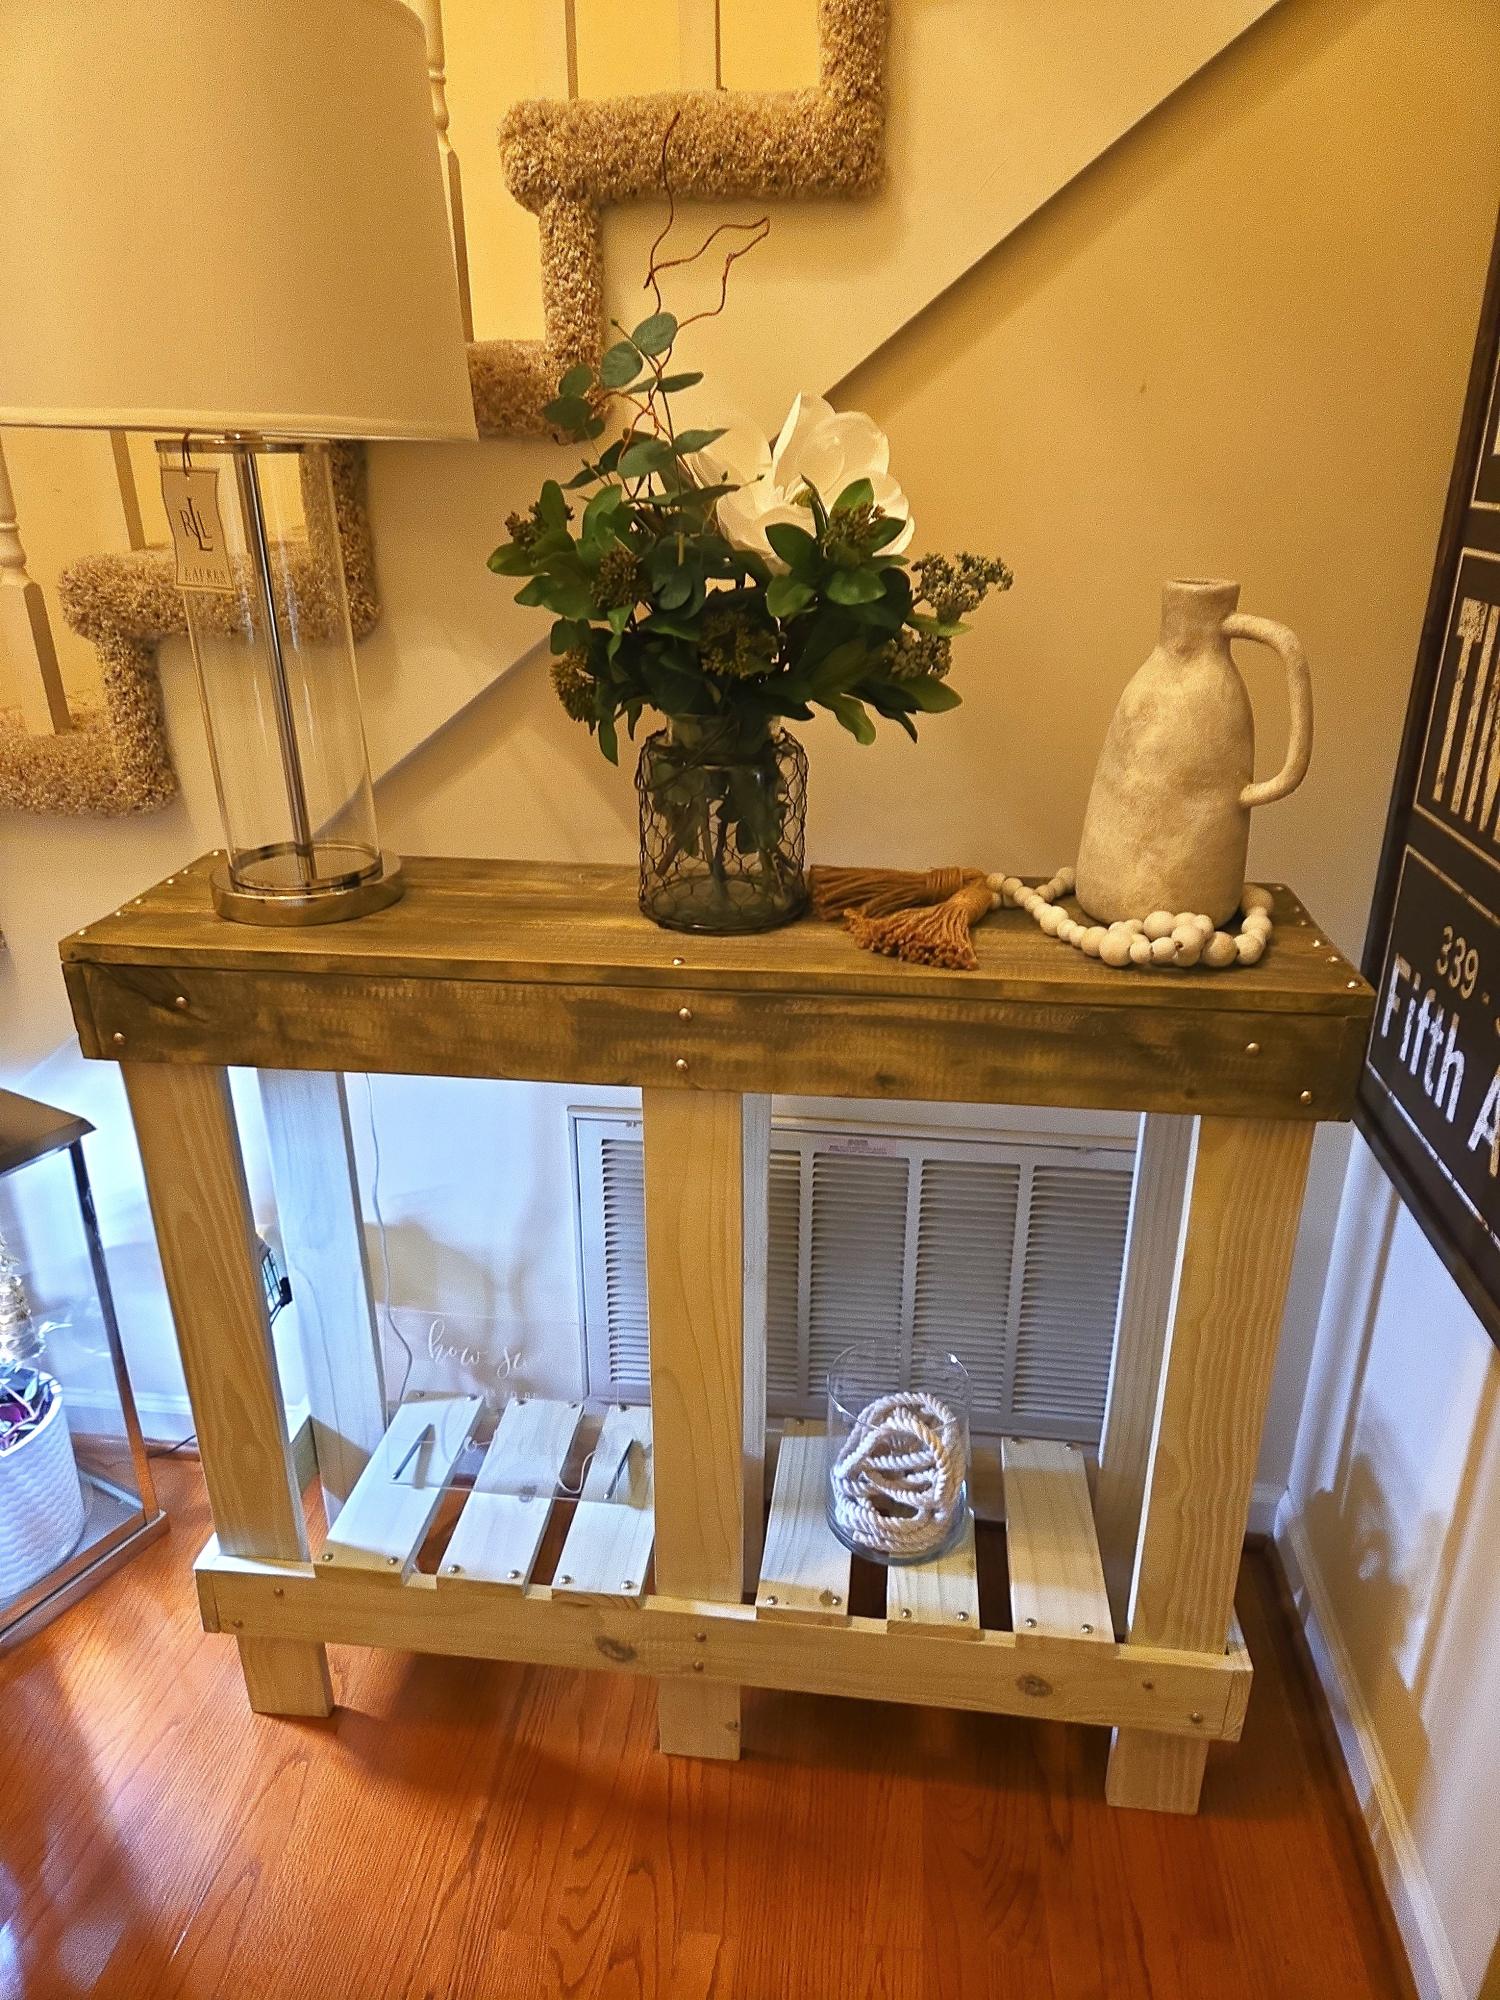
I wanted something with more height and room for decorating in addition to space for actually using it as a potting bench. I looked for ready-made online but nothing was exactly what I was looking for. I knew it was something we could build so I searched for free plans online. I love it because it has plenty of room for potting plants but also lots of space for decorating for the seasons and holidays. itsme_christyb
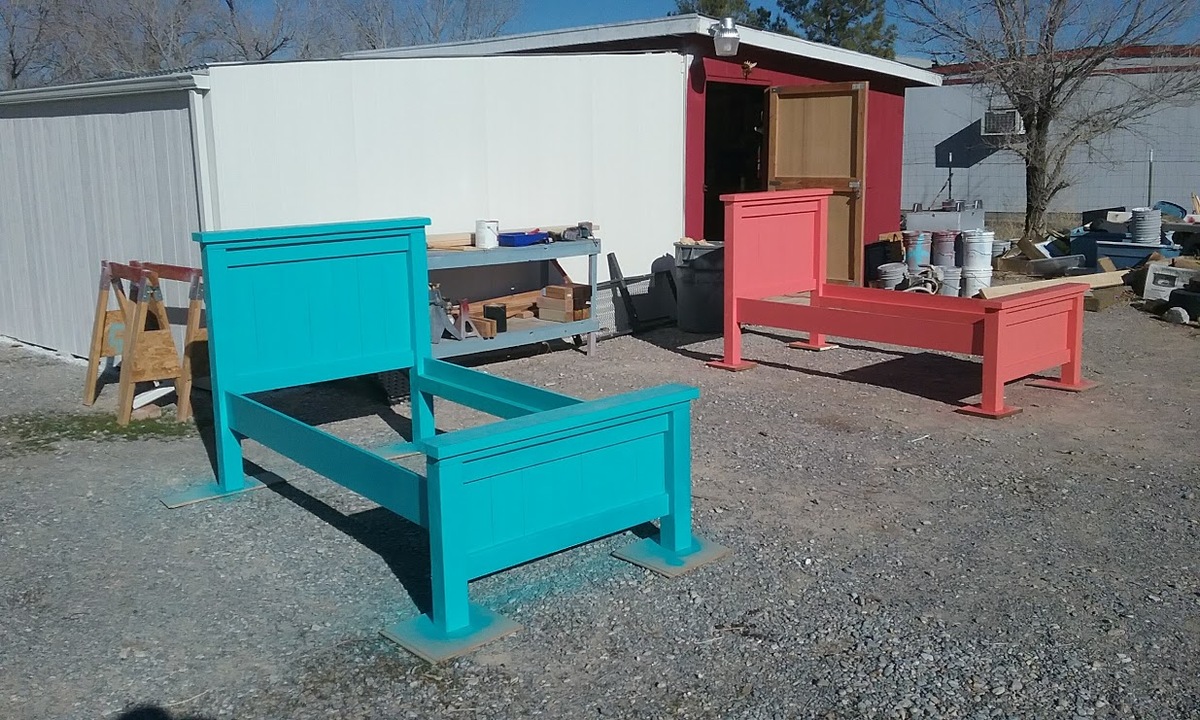
The farmhouse bed was the first project I tackled. Although it's far from perfect, learned so much and I love, love, love it!
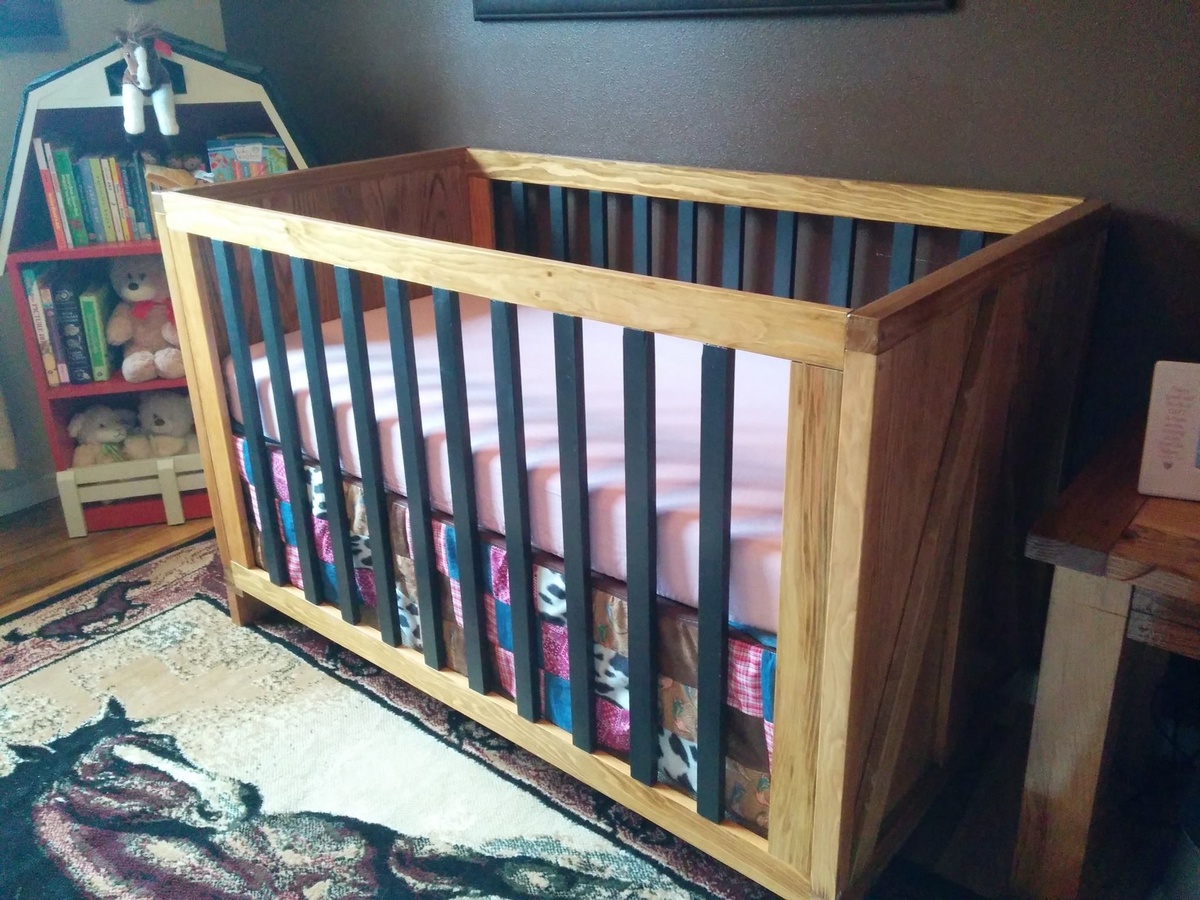
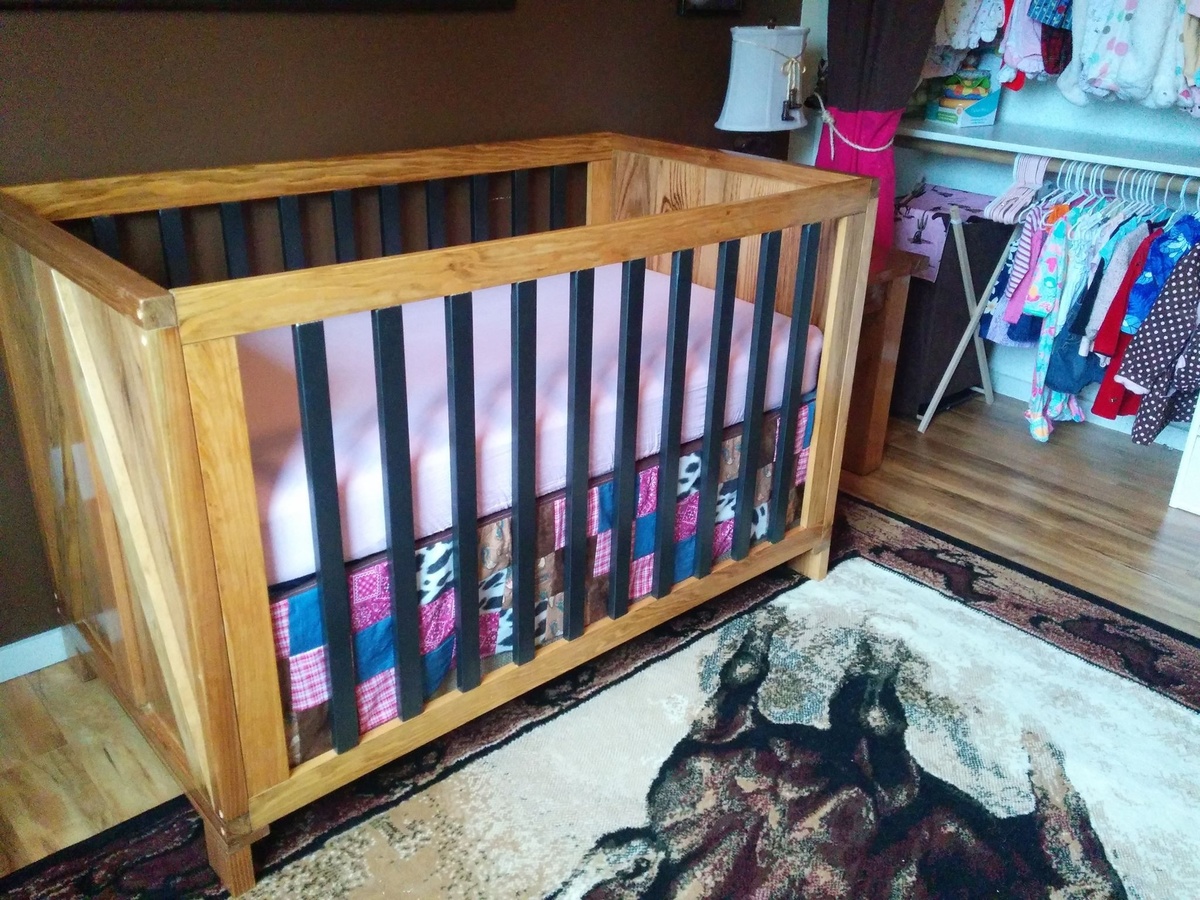
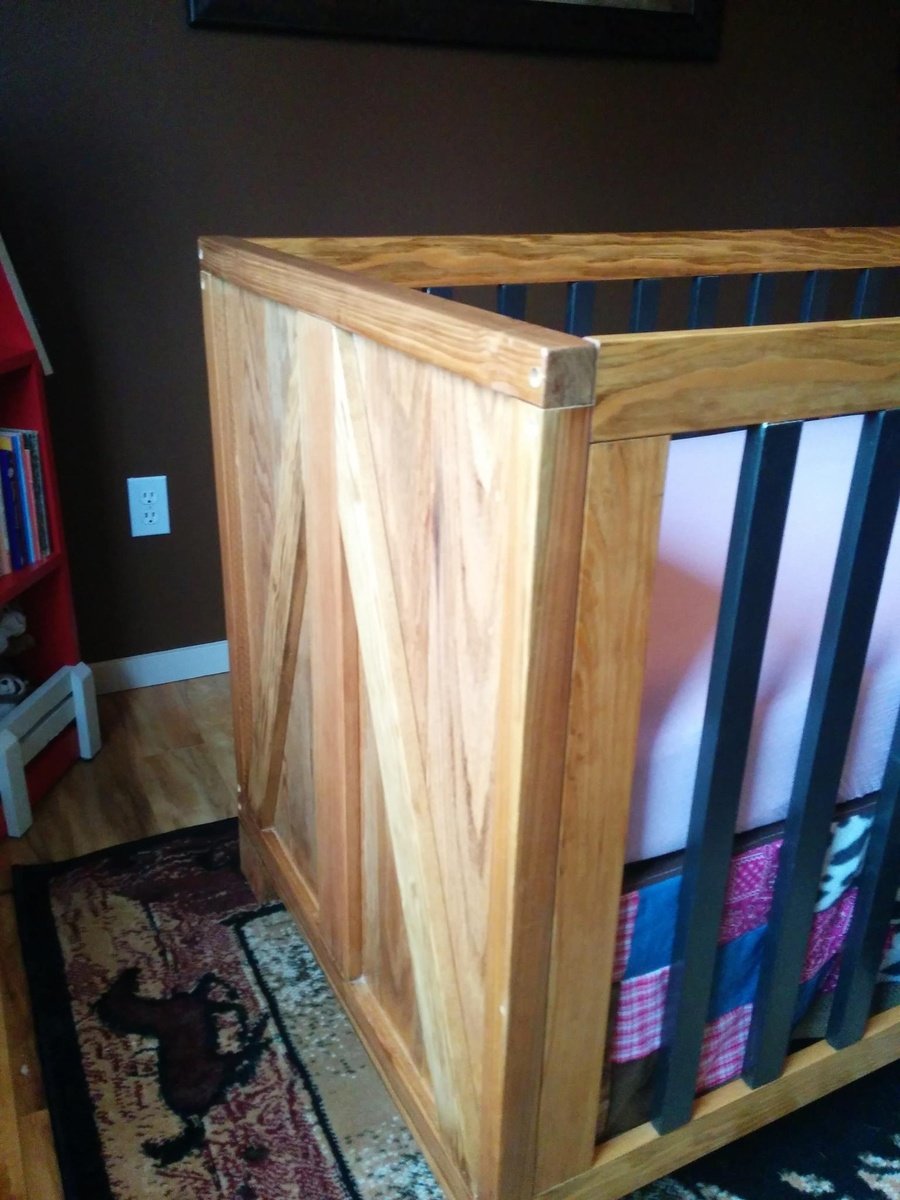
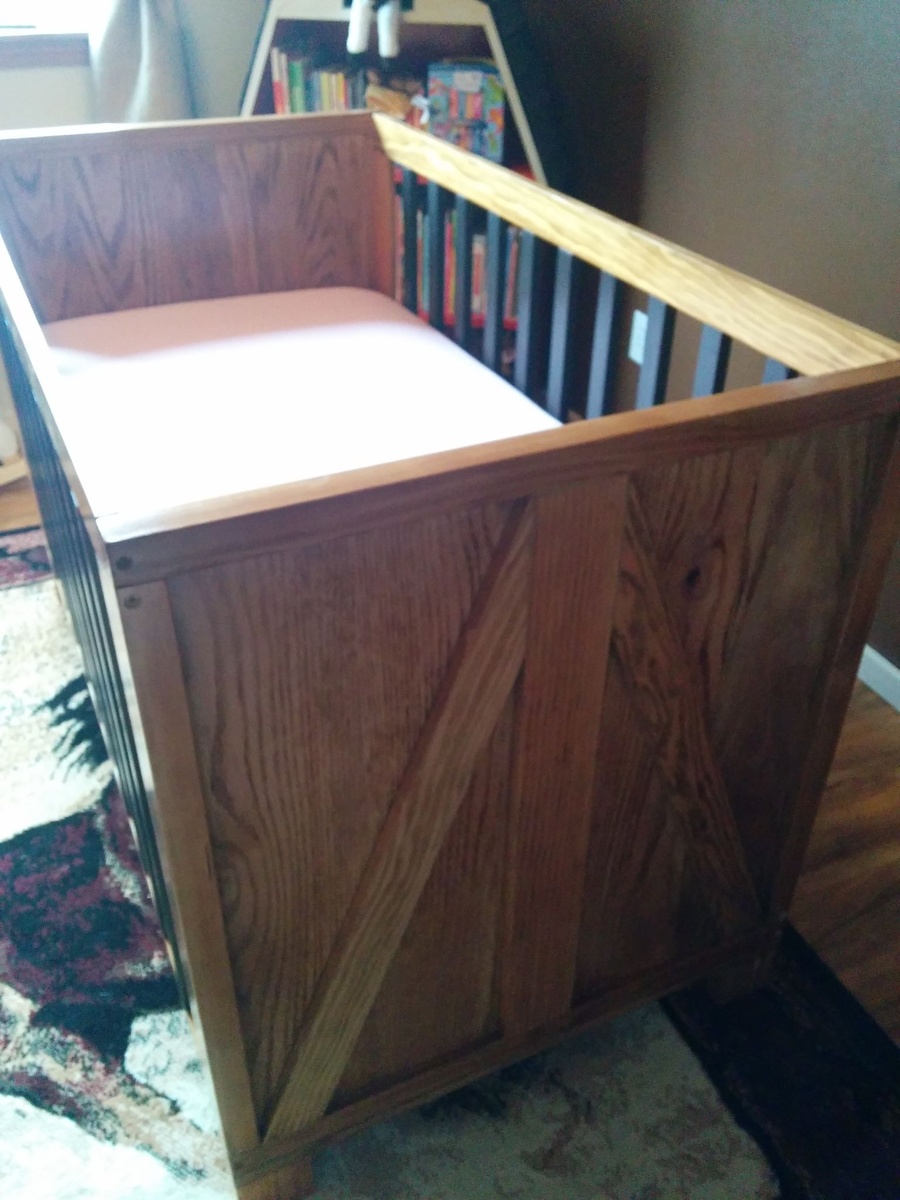
The crib was our last build project for our daughter's cowgirl nursery. My husband knew he wanted to build the crib long before we knew we were pregnant.
As a mechanical design engineer, he found crib dimensions online that put together a design of what we wanted in CAD. We wanted the end panels to look like barn doors. We also wanted the slat sides to look like the metal on a horse stall. This gave us the overall look we wanted for our cowgirl room!
We also built together a side table, closet system, barm bookshelf, and dresser/changing table. I cannot take any credit for the crib. This was all my husband's work. Excited to bring our daughter home to her complete nursery soon!


Sat, 08/30/2014 - 20:57
Such a lovely, heartfelt build! It's beautiful, and bound to be an heirloom. Great job!
Sun, 08/31/2014 - 12:51
What a beautiful build. He did a great job, and you can sleep soundly knowing it is safe since he is an engineer! I also love the barn bookshelf in the background of the pics.
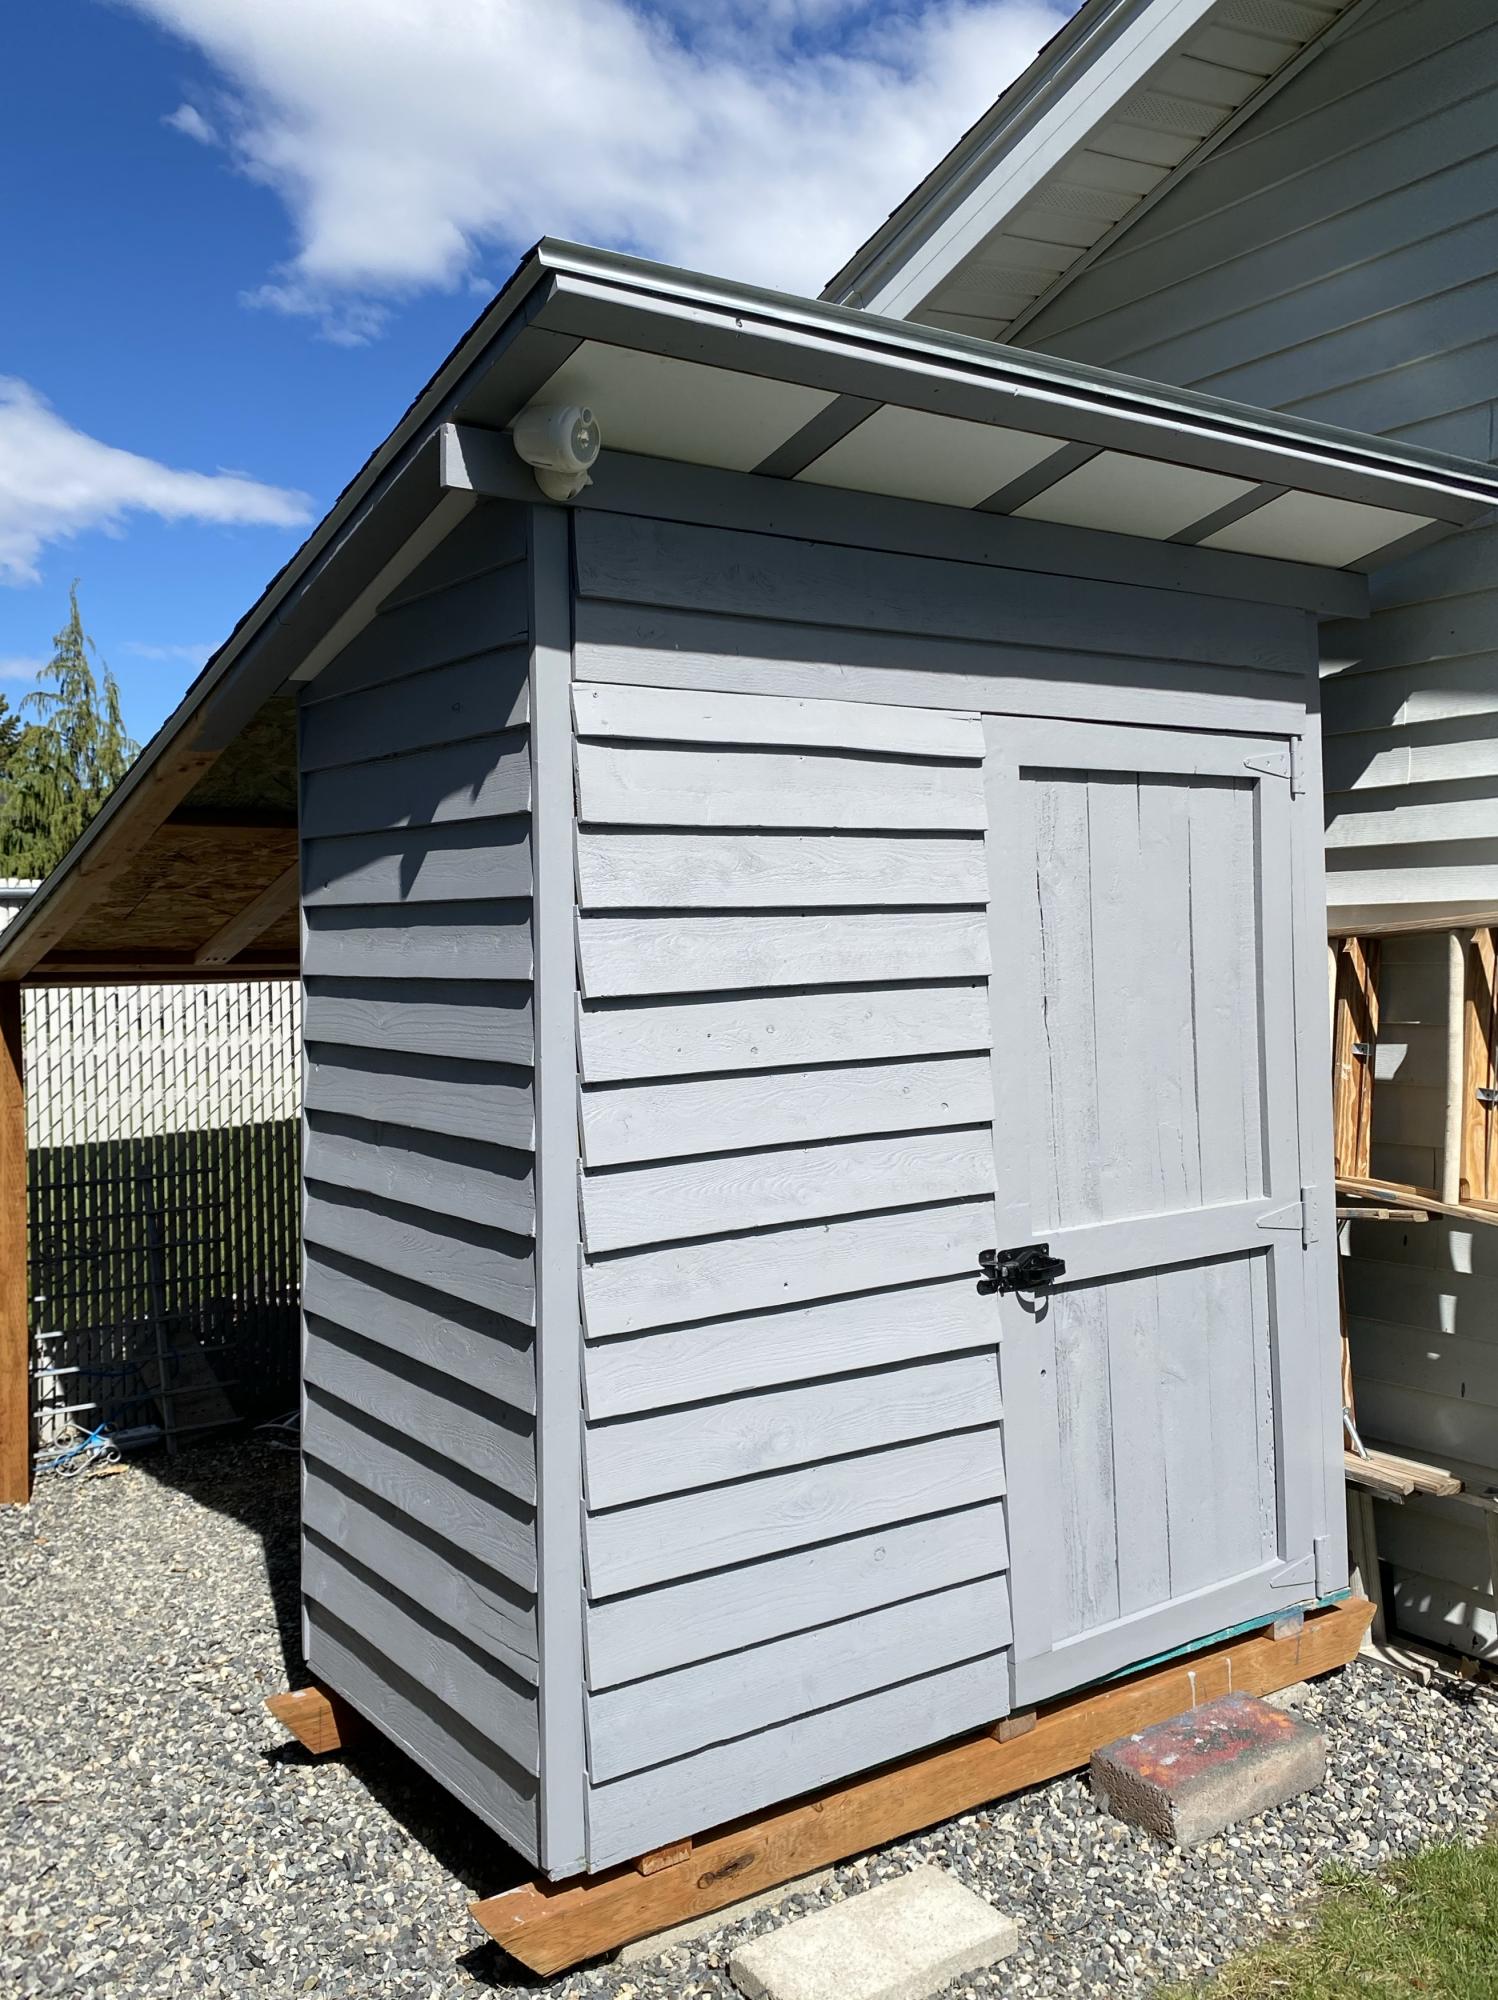
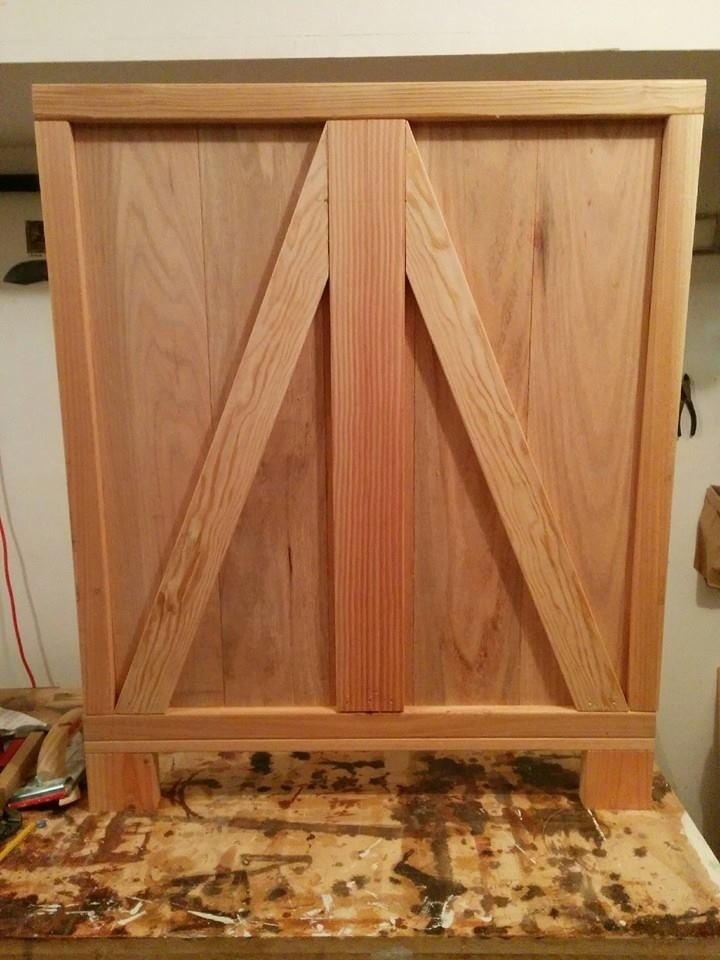
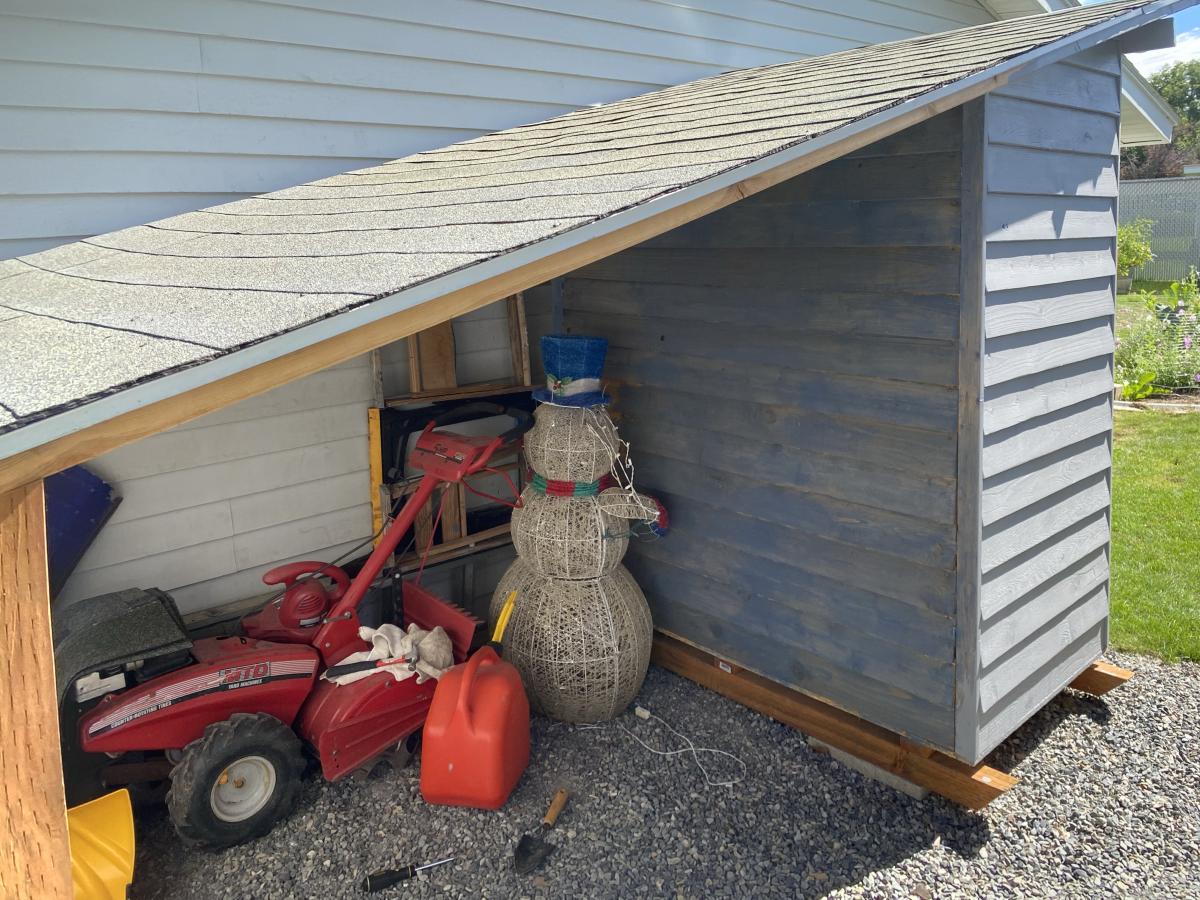
I really needed somewhere to park my rototiller and mower during the summer and ended up modifying the plans to include a lean-too/over hang area. This required flipping the shed to extend the roof line. I continued the 15• roofline and also then had to create and cover the soffits. I also reduced it to one door and placed it on a skid foundation so that technically it would be considered a temporary structure, no permits needed. I first used a semi transparent stain that looked much darker and grayer in the store but looked very blue and terribly streaky on the shed, see back wall area. I then restrained it with a solid stain, which I think looks much better and covered the streaky stain. Because I extended the roof and stained it twice, this really increased the cost, but I think it was well worth it. I can store all my yard and garden tools underneath and inside.
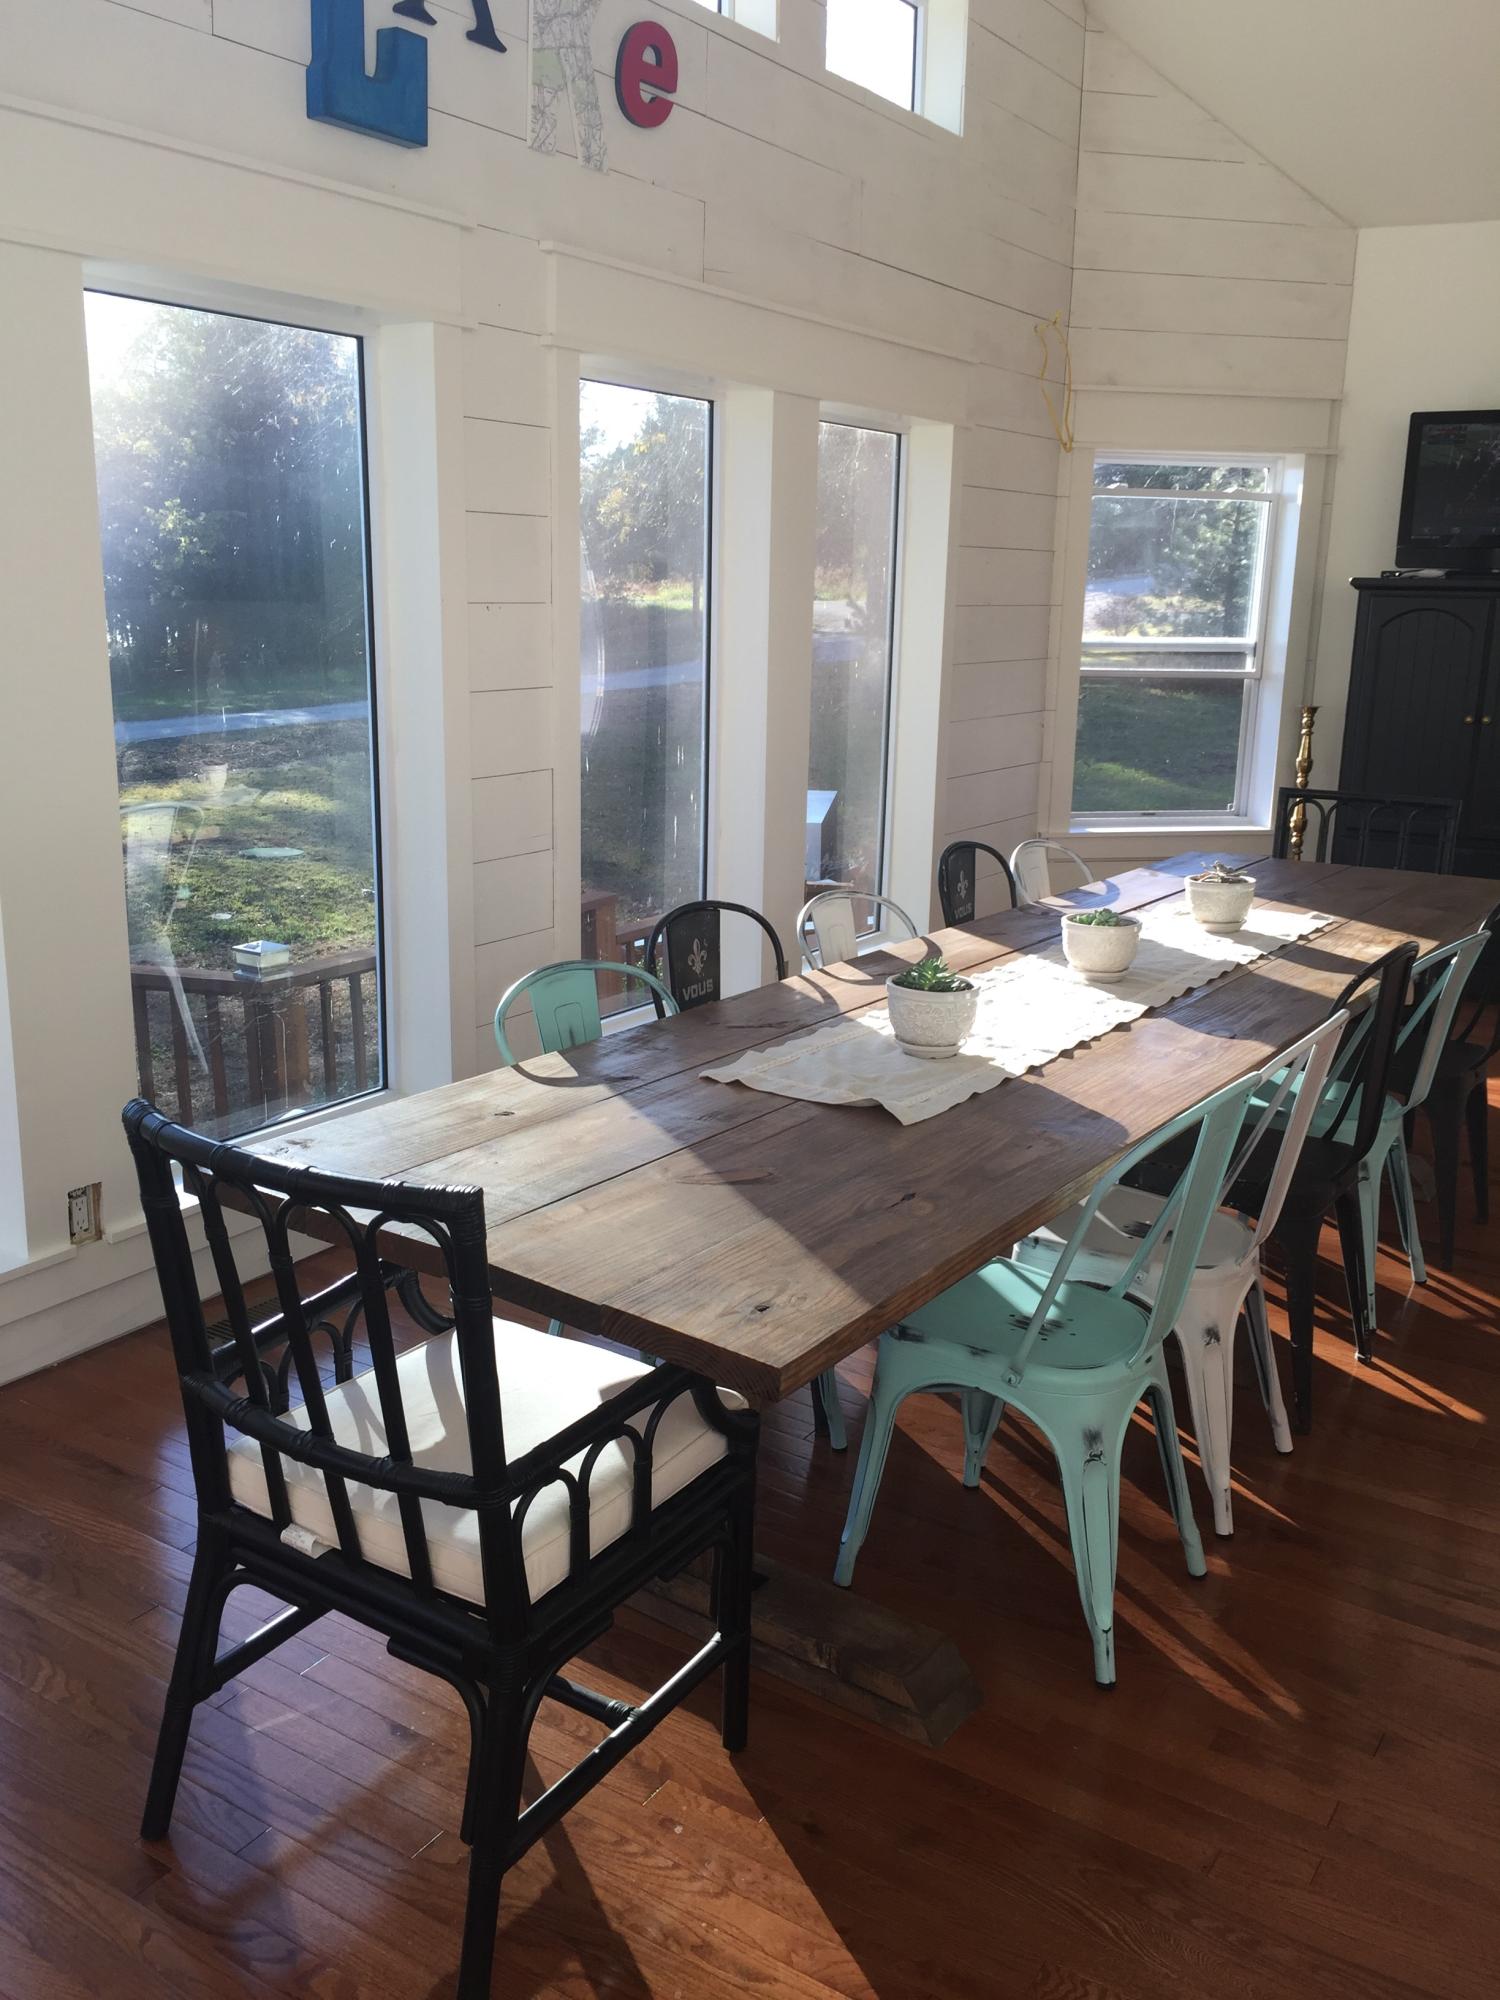
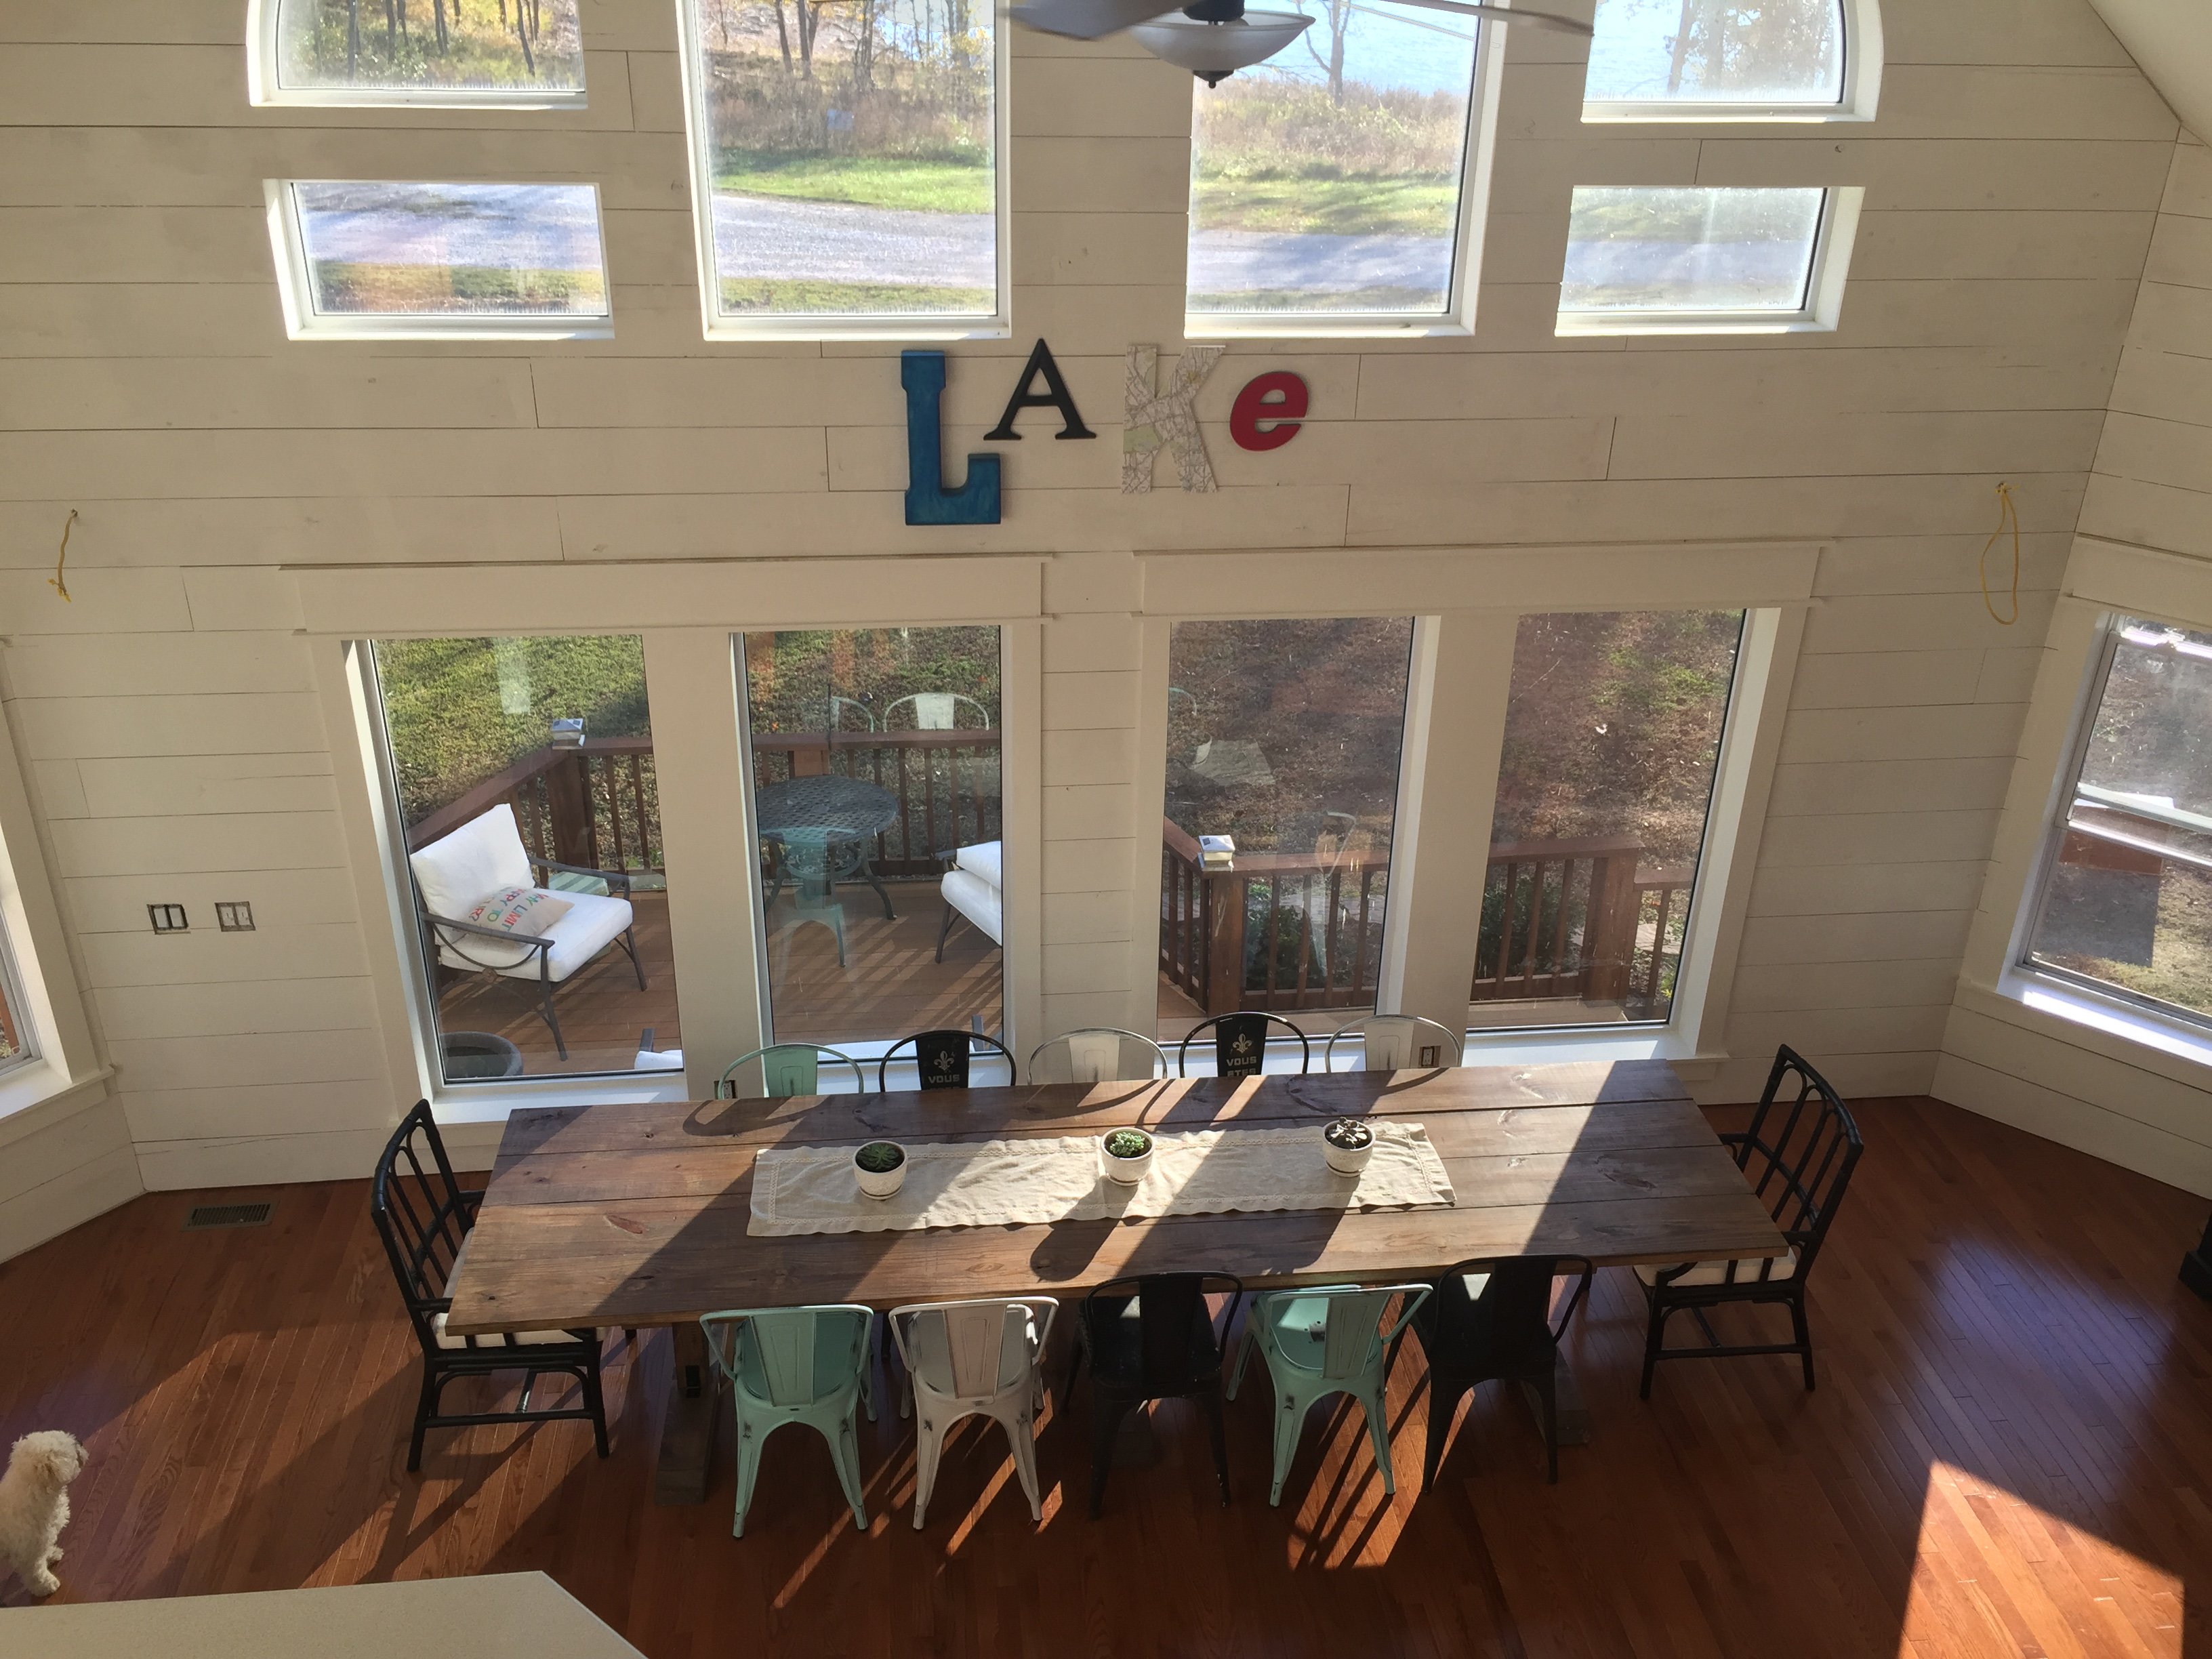
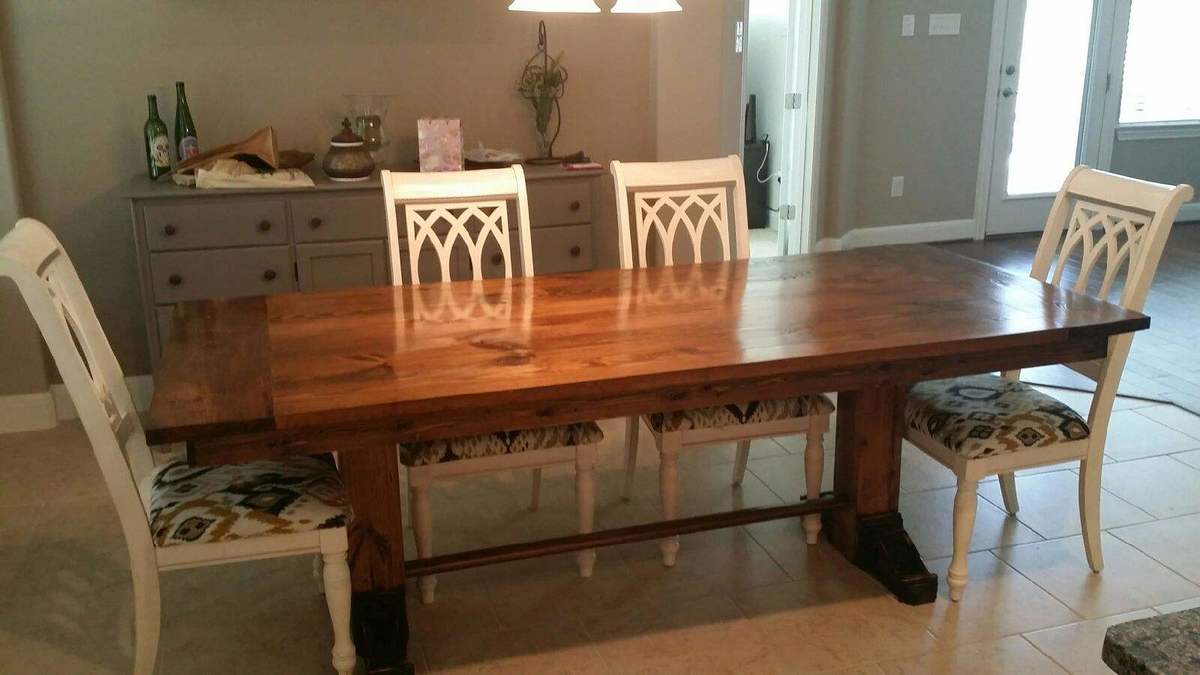
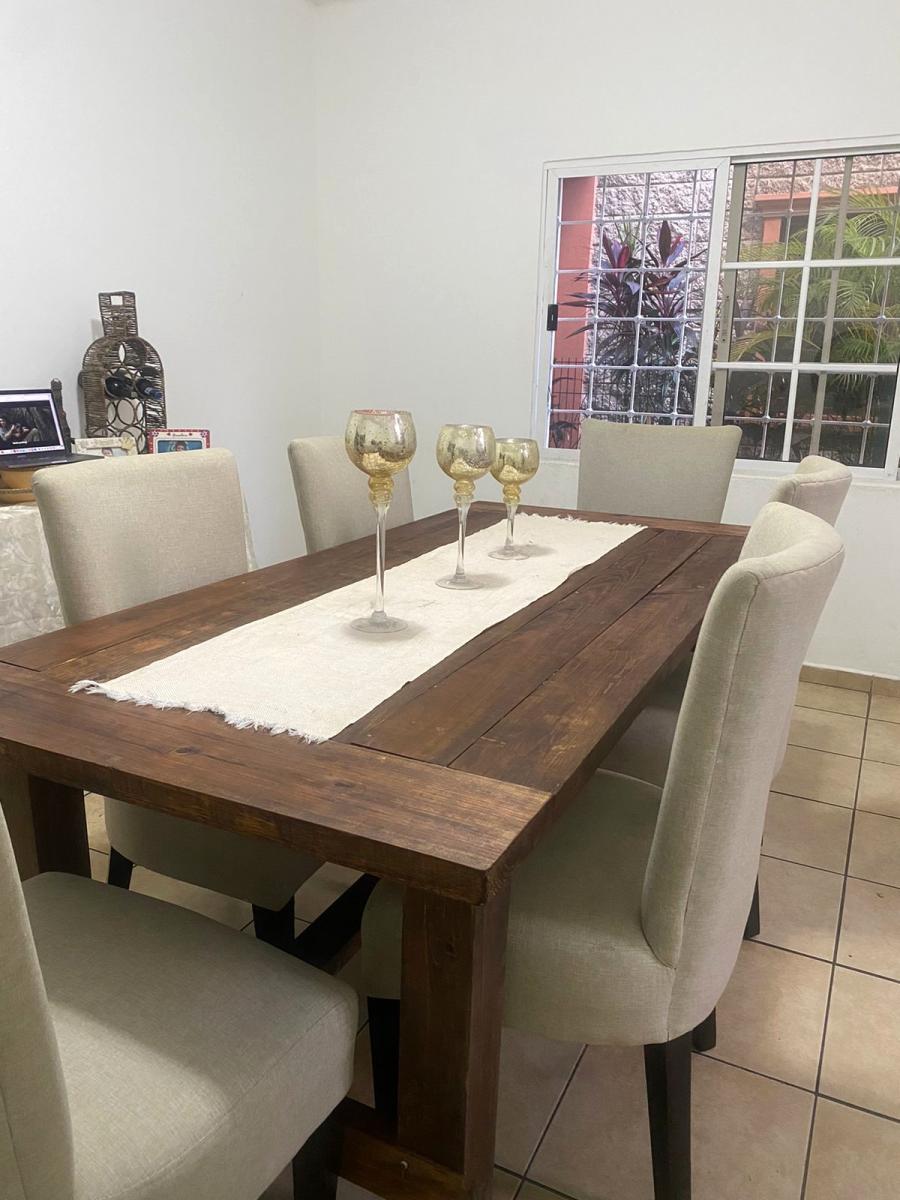
I followed the plans on this site, no modifications. I used all pine wood, sanded till silky smooth with a 120 grain sand paper and darkened with Varathane red oak stain and finished. This tuned out even better than I thought, have gotten multiple compliments on the table and just today I found the perfect chairs to go with it for the feel I was looking for. I had planned on an 8 seater table but the chairs are a bit wide to fit another, so if you are planning on using a similar style chair consider making you table longer.
All in all amazing plans!! Thank you Ana!
Claudia C. Lardizabal
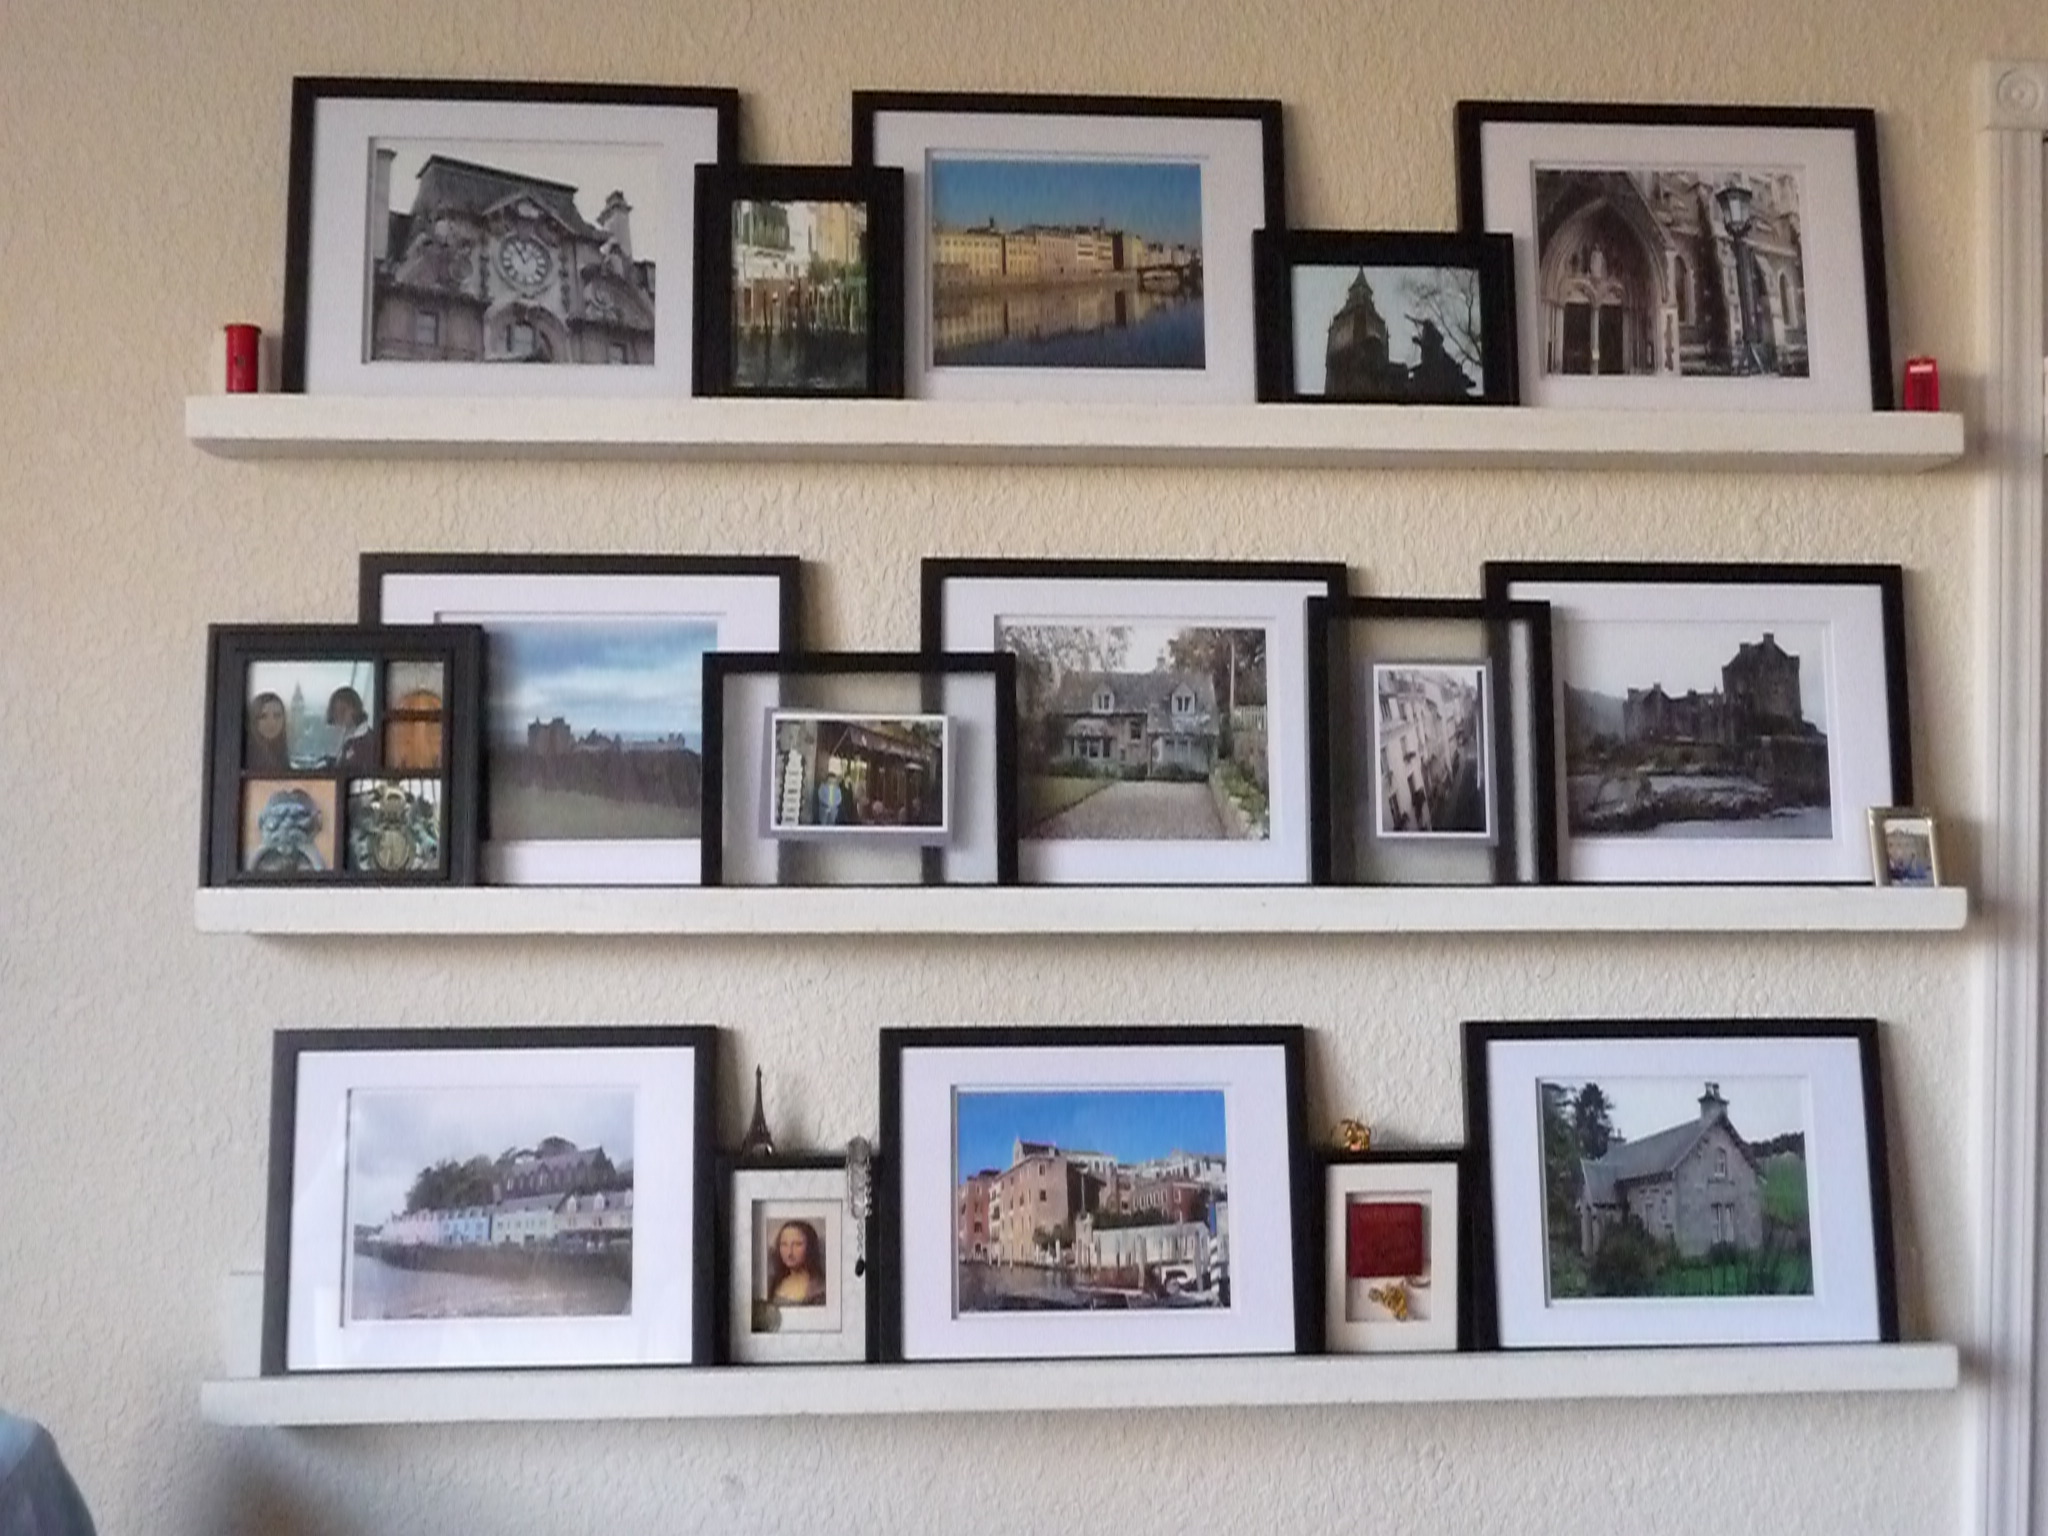
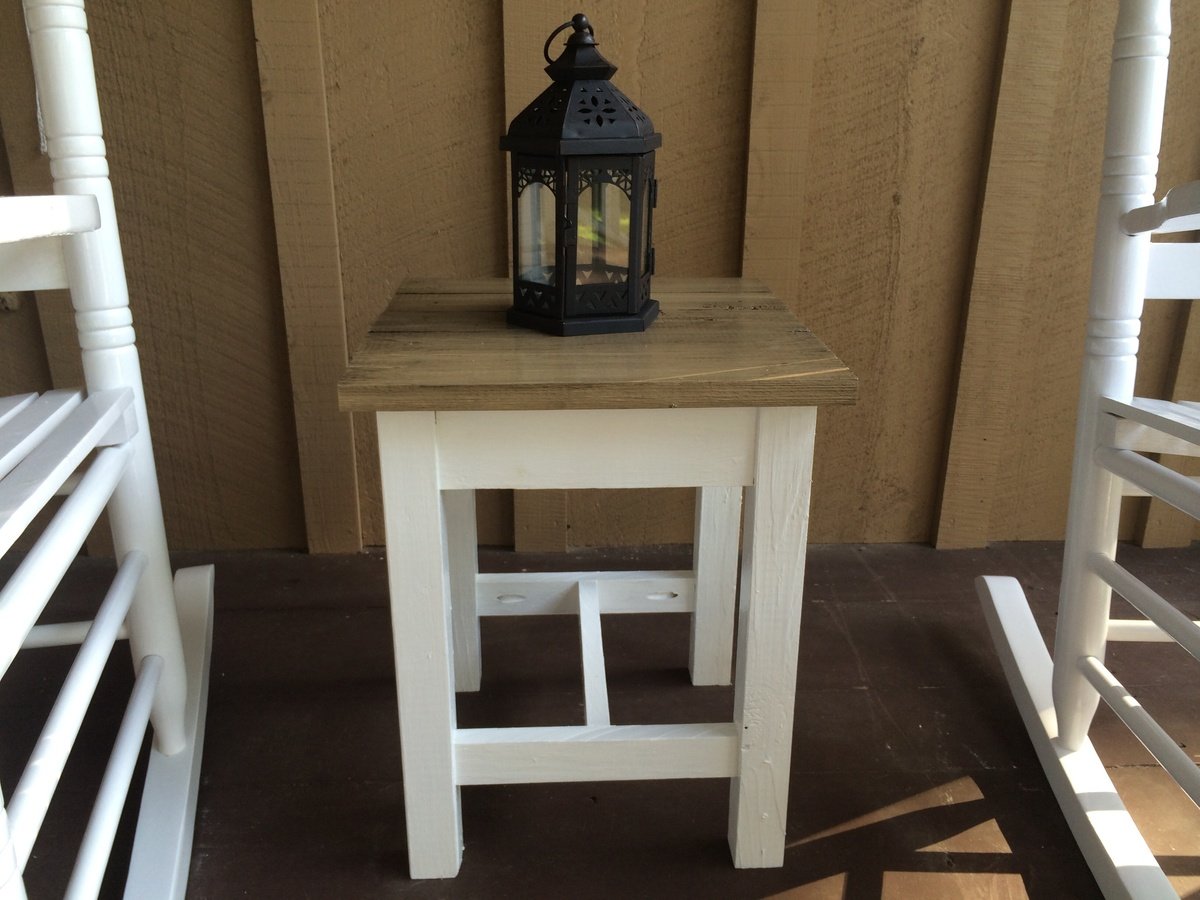
Fastened together with Kreg screws, and glue. I chose to put the pocket holes on the inside and back so they wouldn't show on the bottom. This does make the ledge a little less deep. Easy project for a rainy day !
Wed, 11/06/2013 - 06:30
Plan clothing for your trip so that everything can be worn together. This reduces the need to pack individual "outfits" and allows you to plan for the number of days you'll be traveling. If all of your clothes match, you don't have to worry about which are clean when you're doing laundry.
http://www.getbustours.com/
Wed, 10/30/2024 - 07:41
These beautiful, minimalist photo ledges by Ana White are a fantastic way to showcase travel memories, adding a personal and stylish touch to any space. The straightforward DIY project is accessible and versatile, making it easy to adapt to different home styles. If you're inspired by travel and considering new adventures abroad, check out these Golden Visa options: https://getgoldenvisa.com/golden-visa-countries
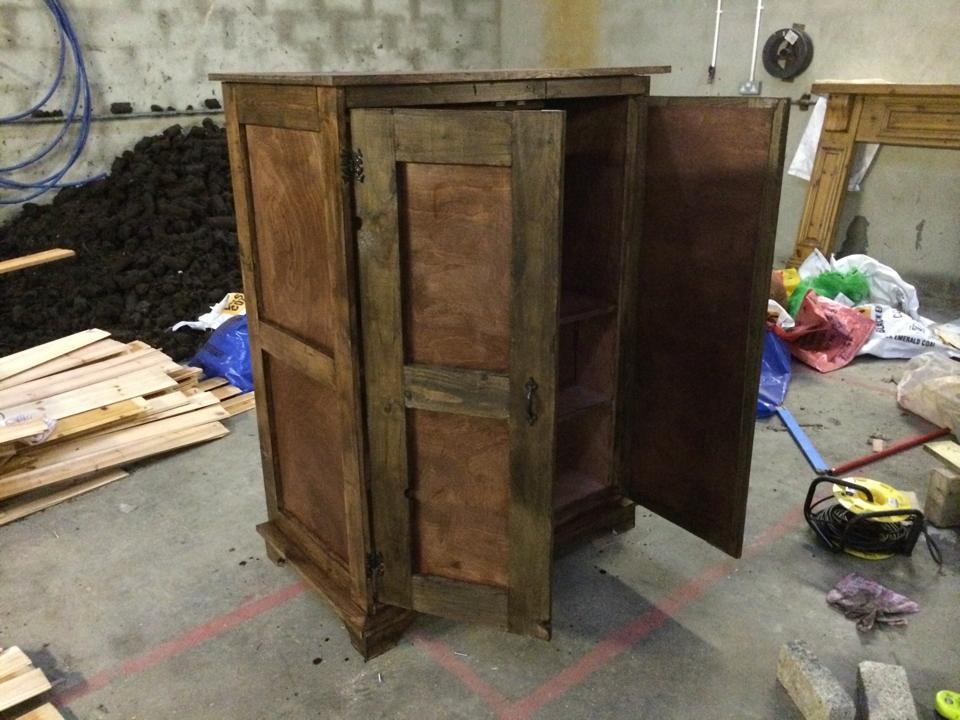
TV Toy Armoire 3/4 size
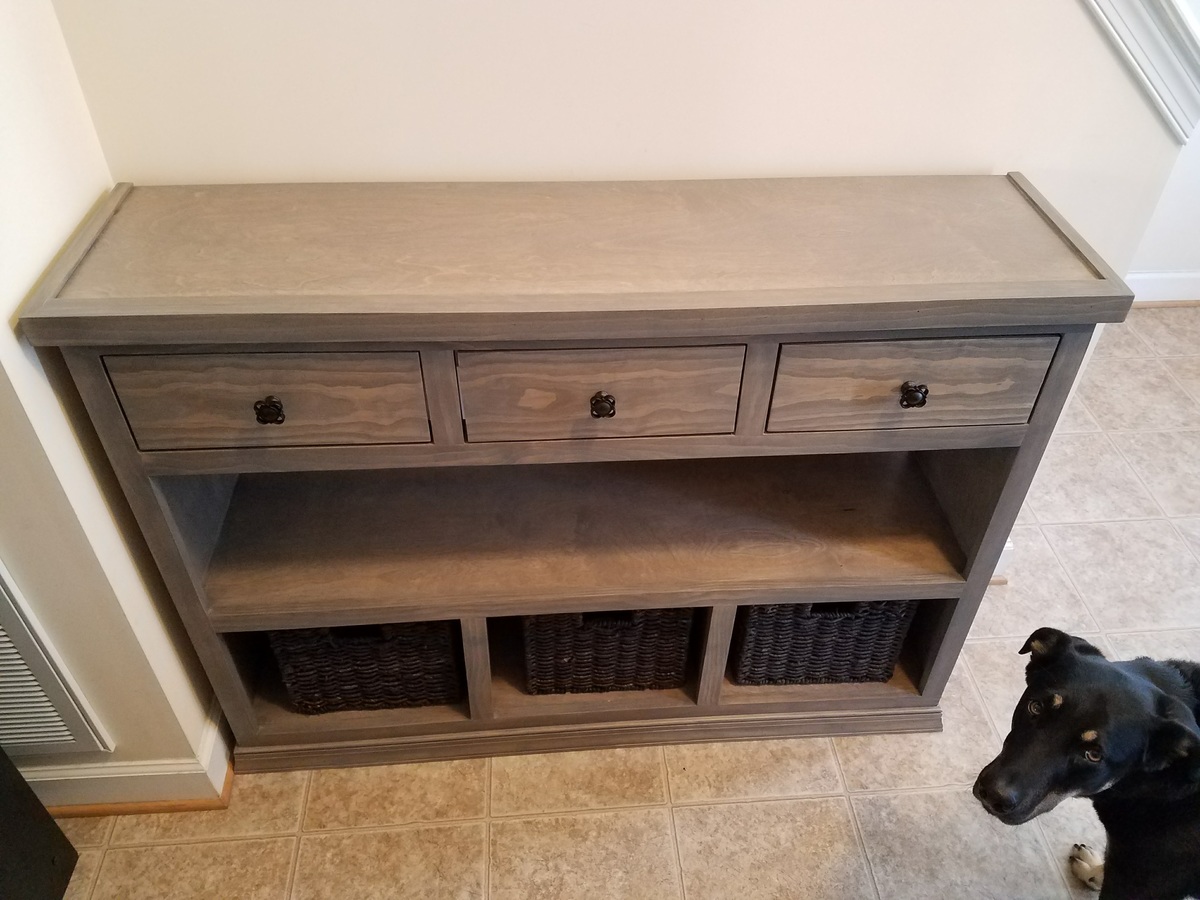
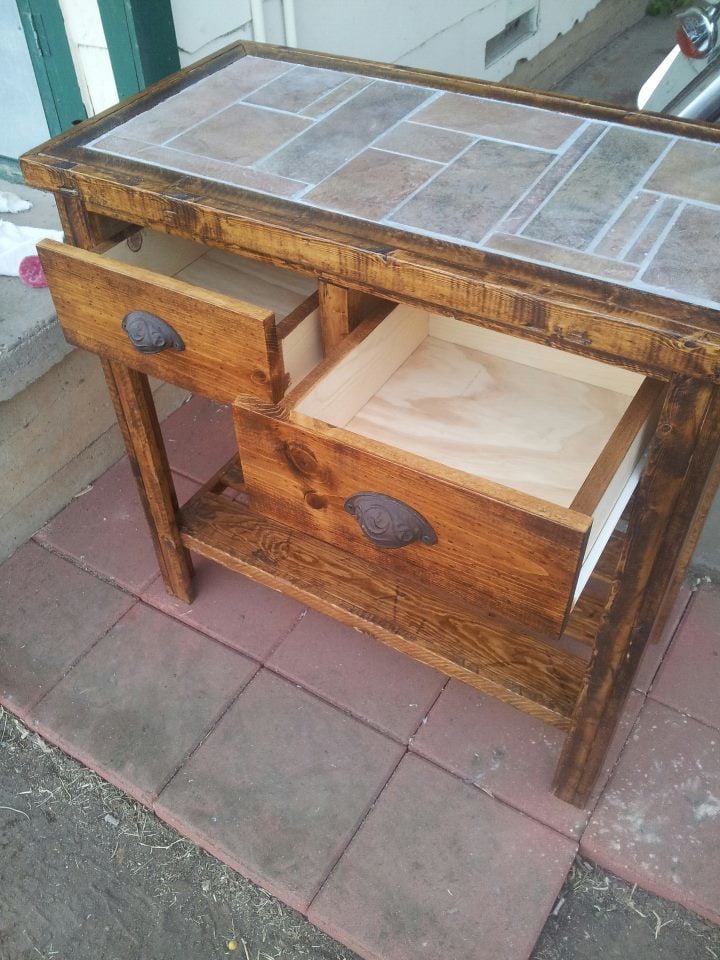
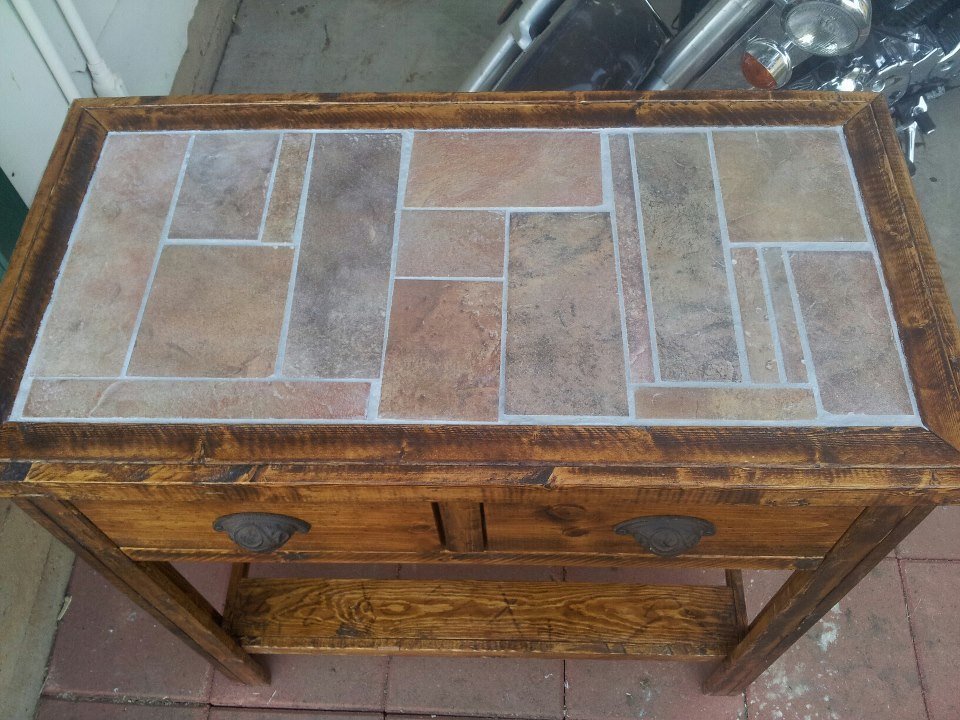
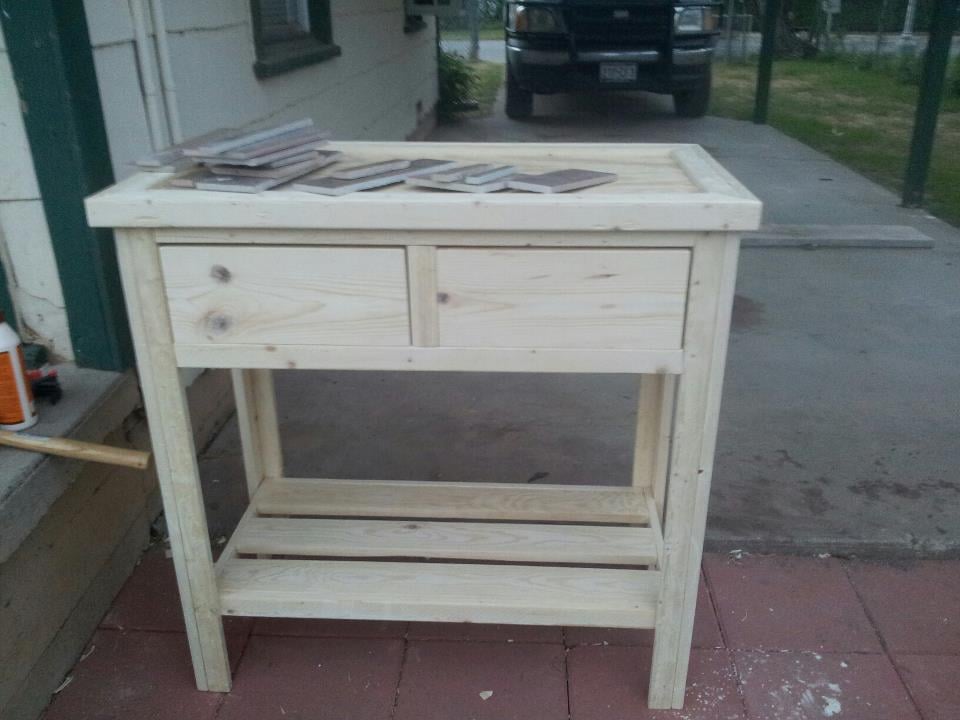
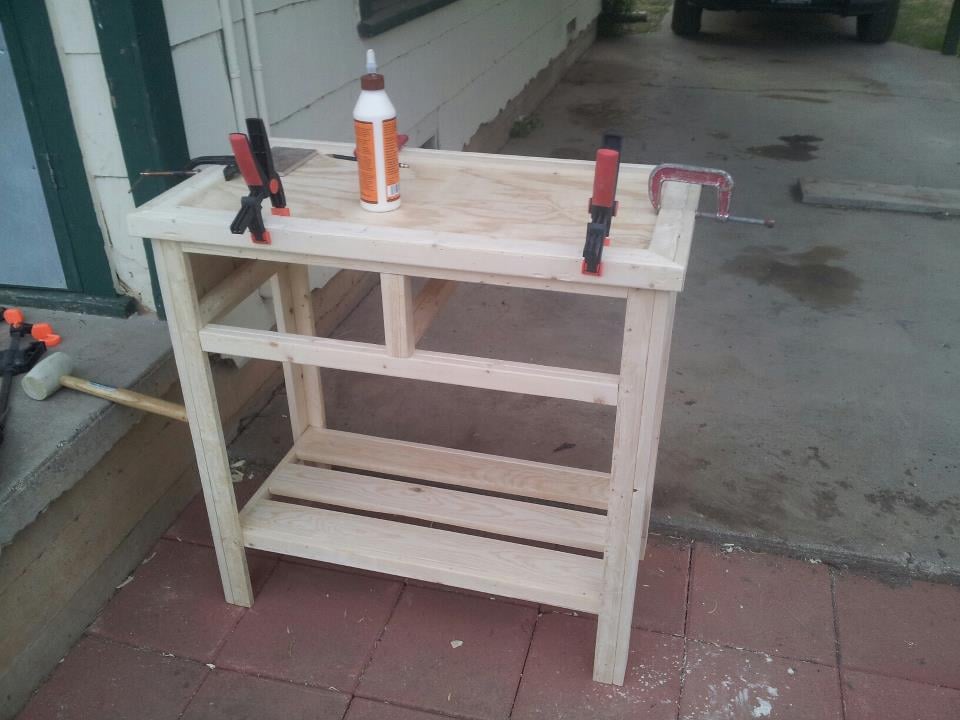
I modified the 3 drawer open console table design to fit in a somewhat narrower space.
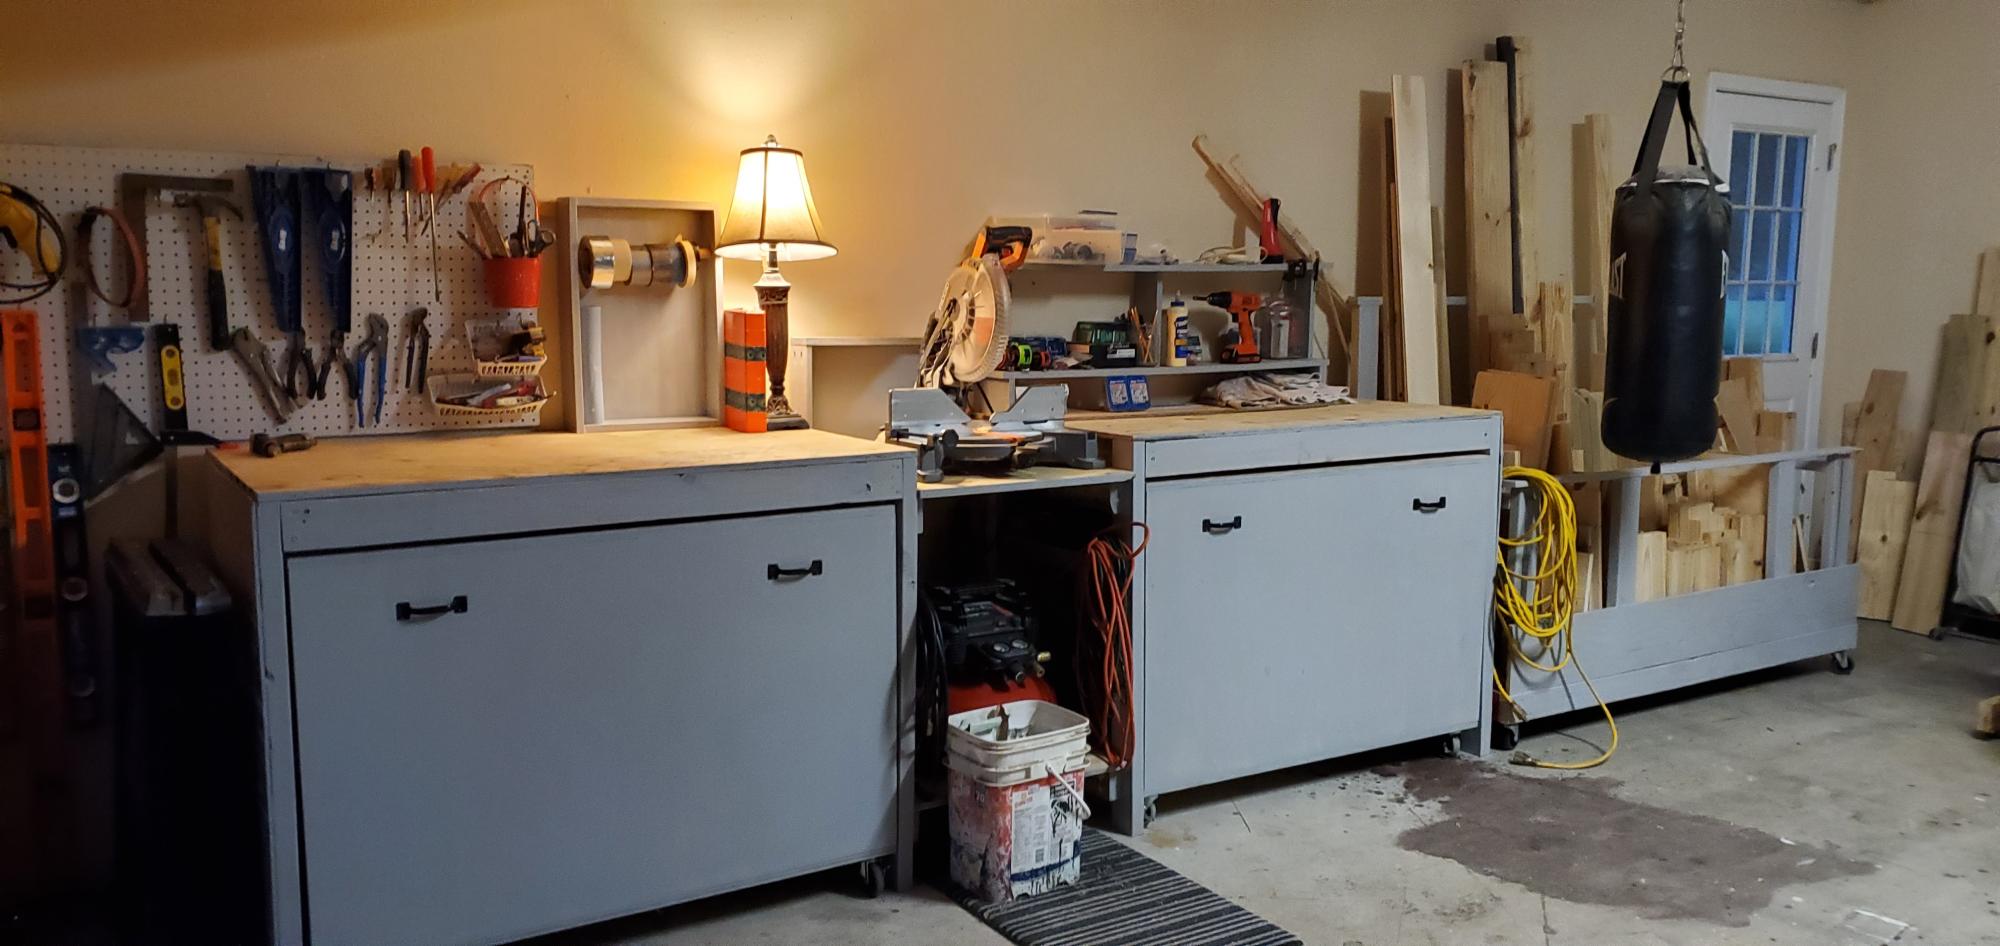
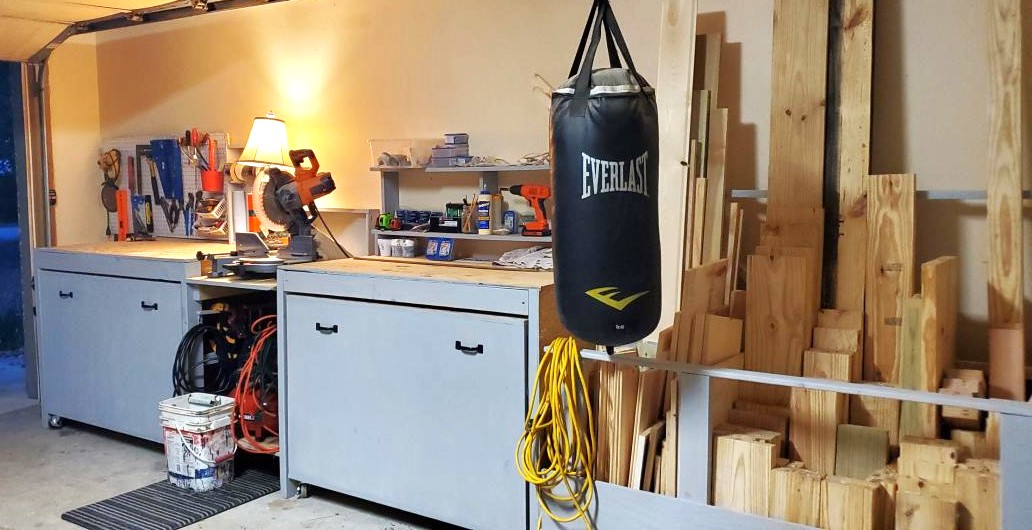
I finally finished my workbench this summer. I started the bench 2 years ago for my miter saw. Got busy with other builds, things for family, clients, etc. I still had most of the wood cut for the carts. Here it is in all its glory!!! Finally organization and I can actually park my car in my garage. Thanks Ana for all of your plans.
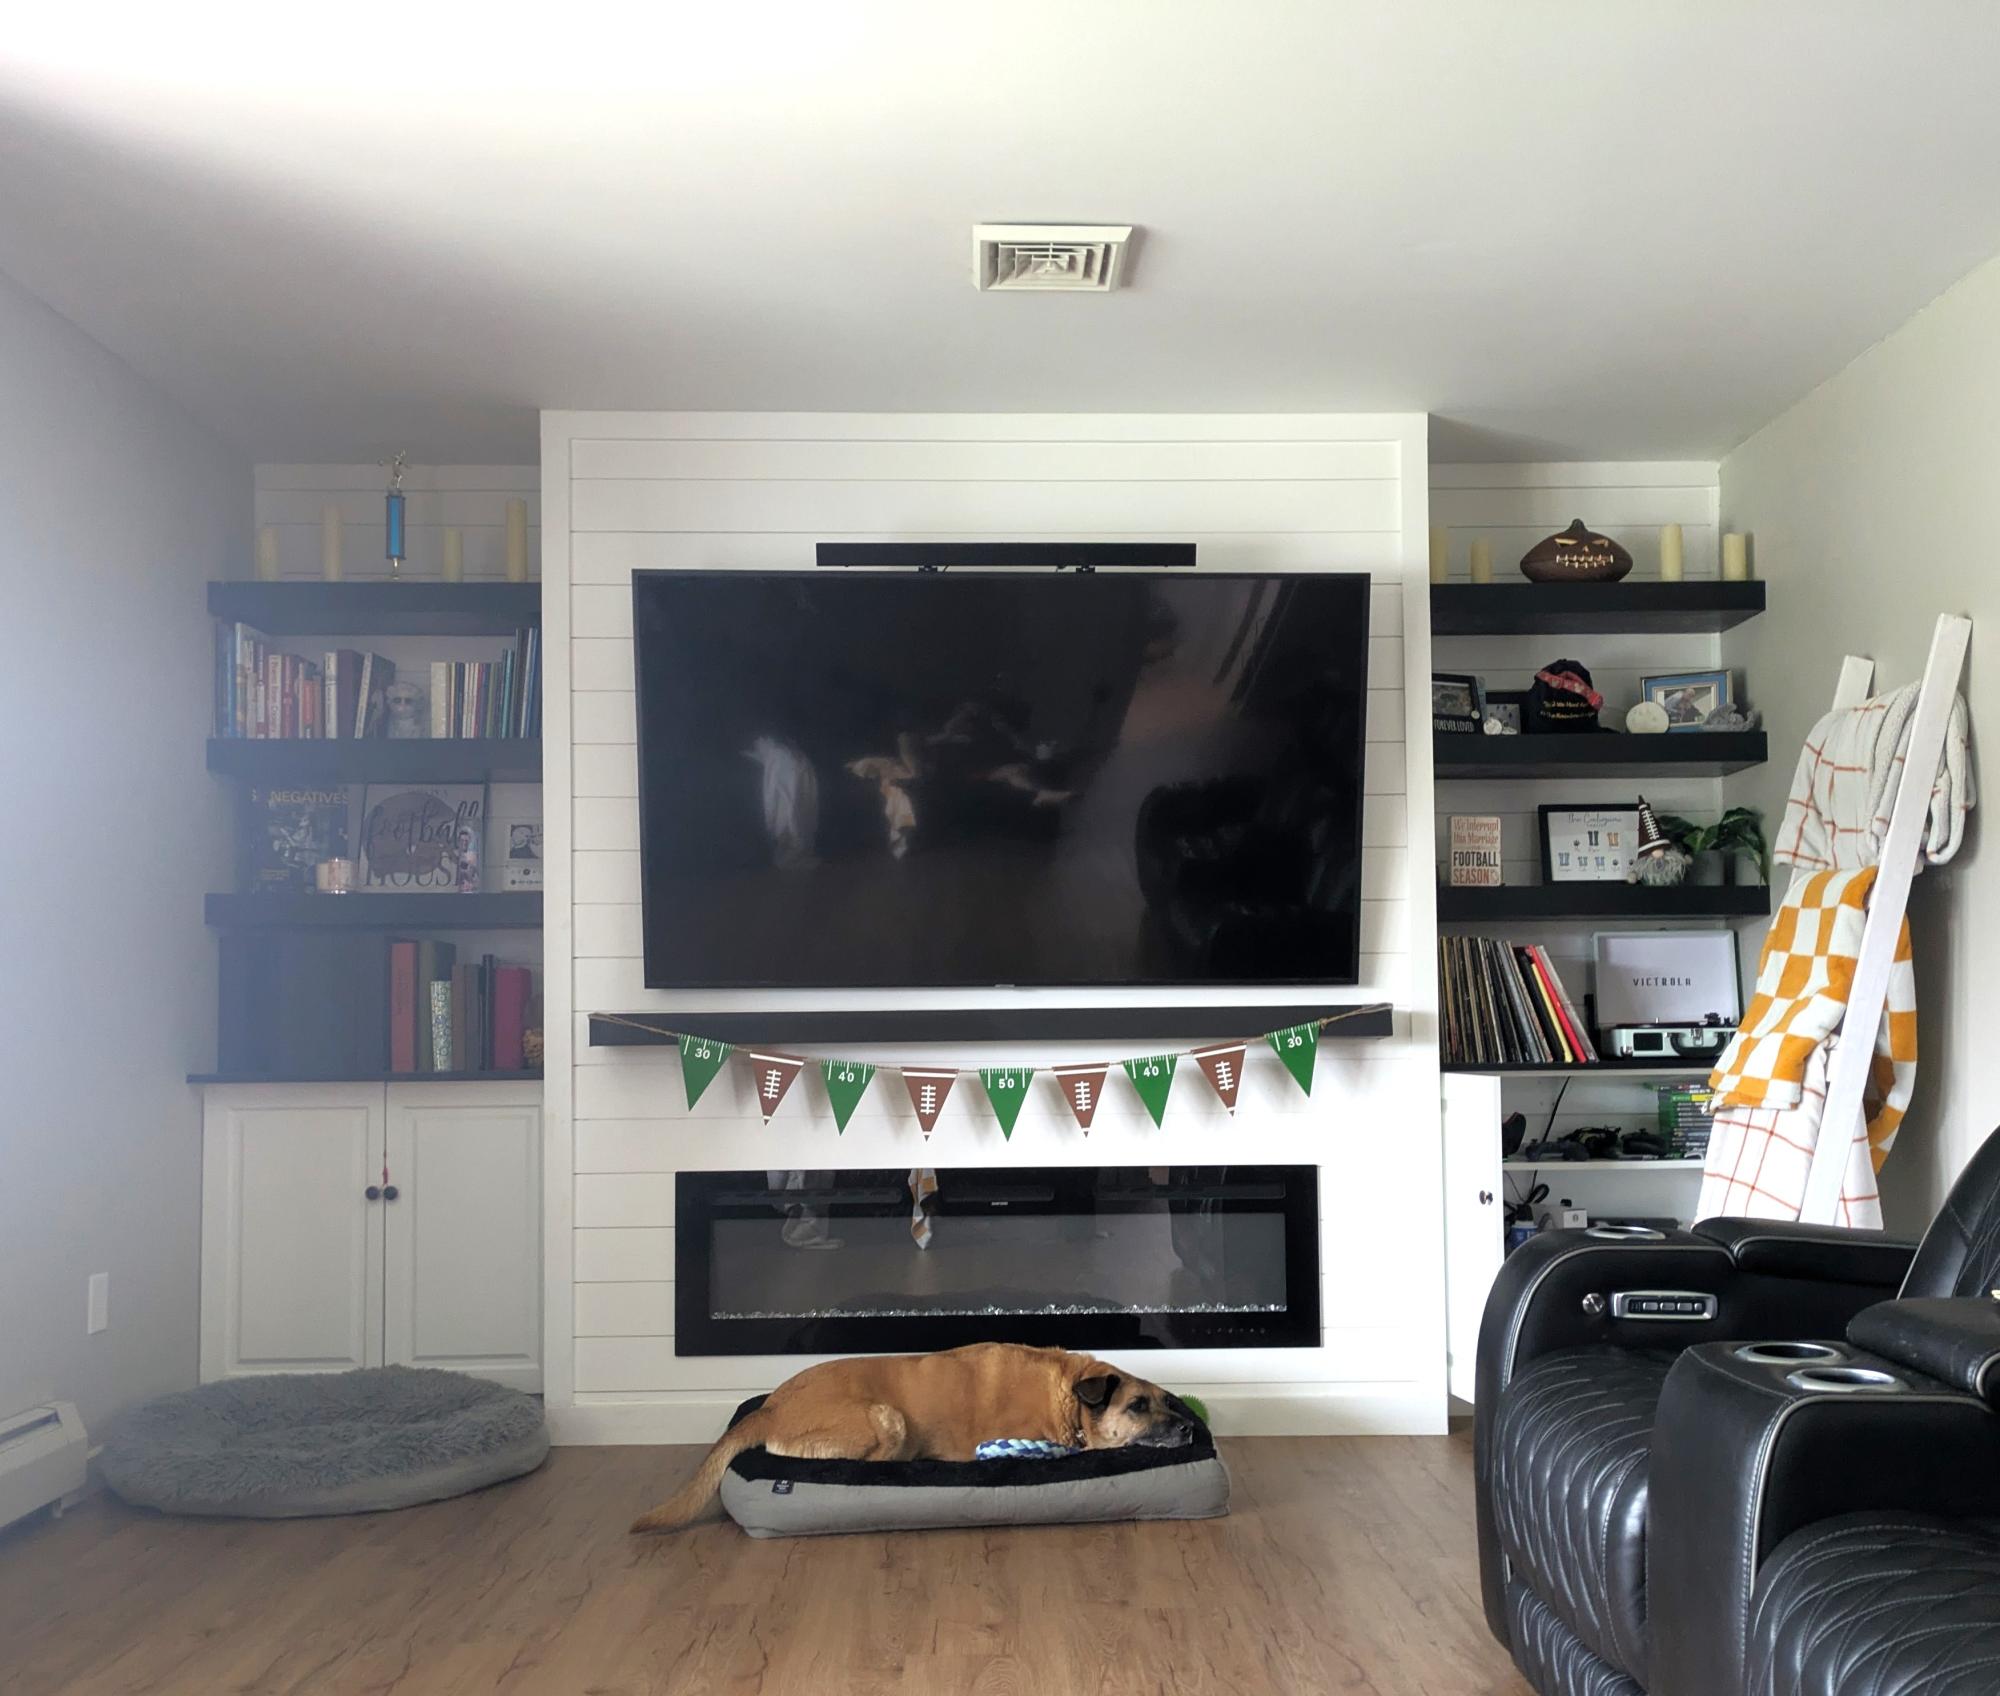
My take on the shiplap fireplace. Also, the blanket ladder was inspired by plans here as well (I think). - Ryan C.

Comments
Pam the Goatherd
Wed, 11/07/2012 - 21:27
Where did you get the fabric?
Where did you get the fabric? I love it!