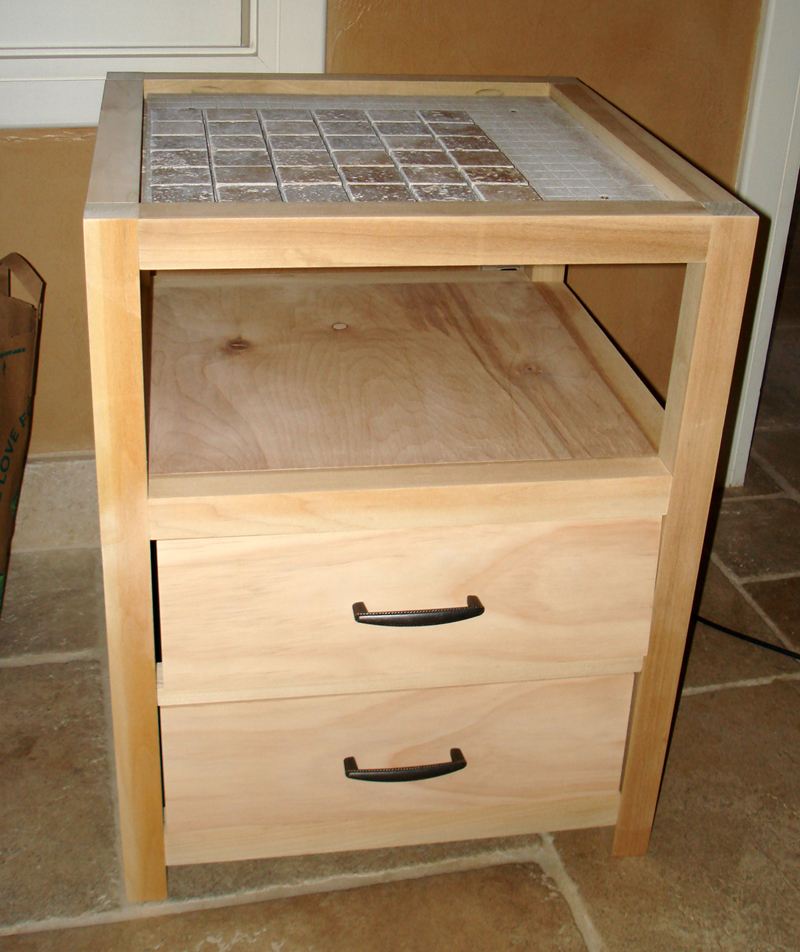
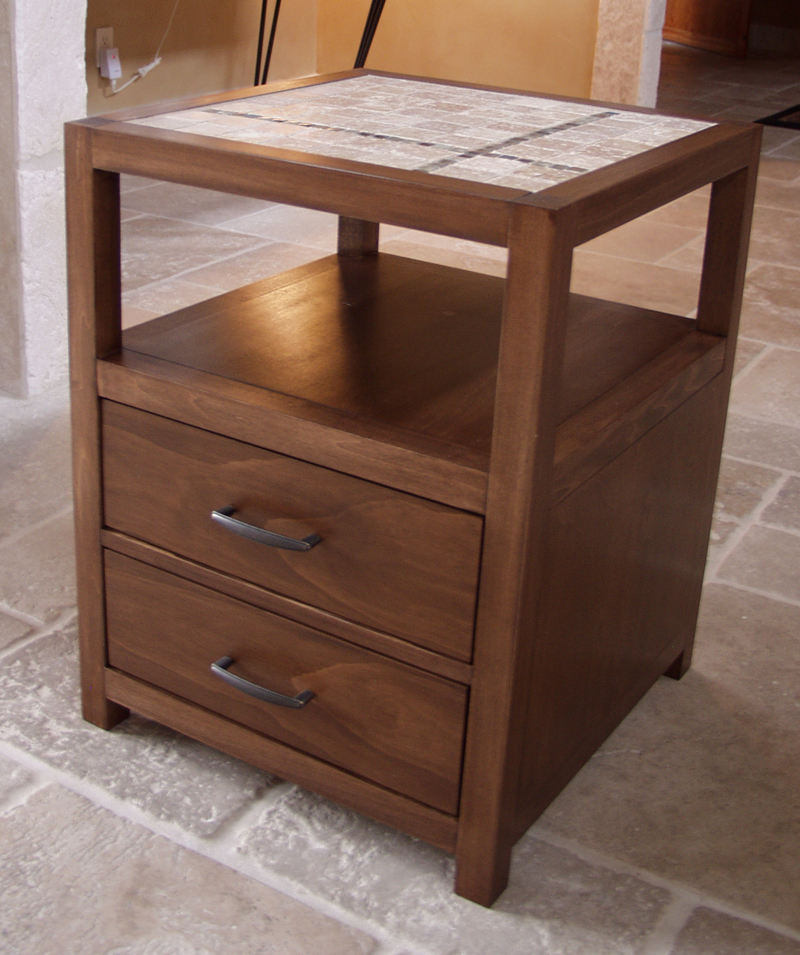
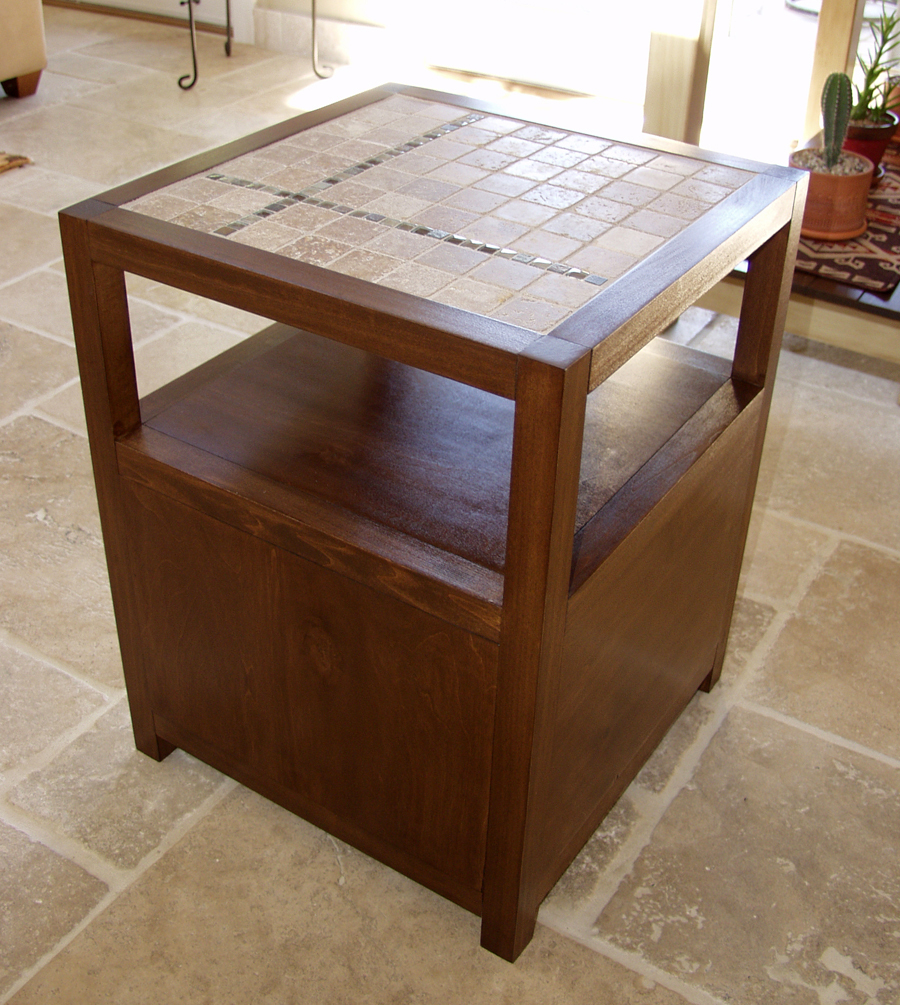
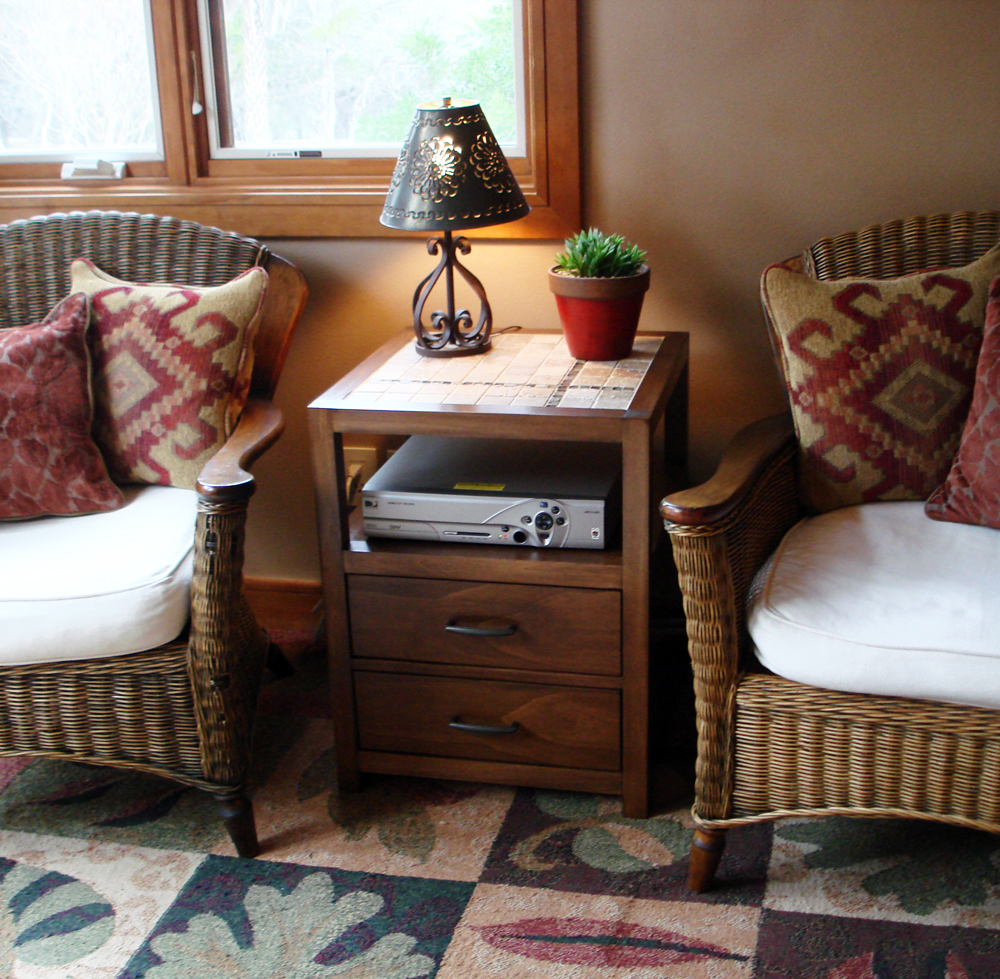
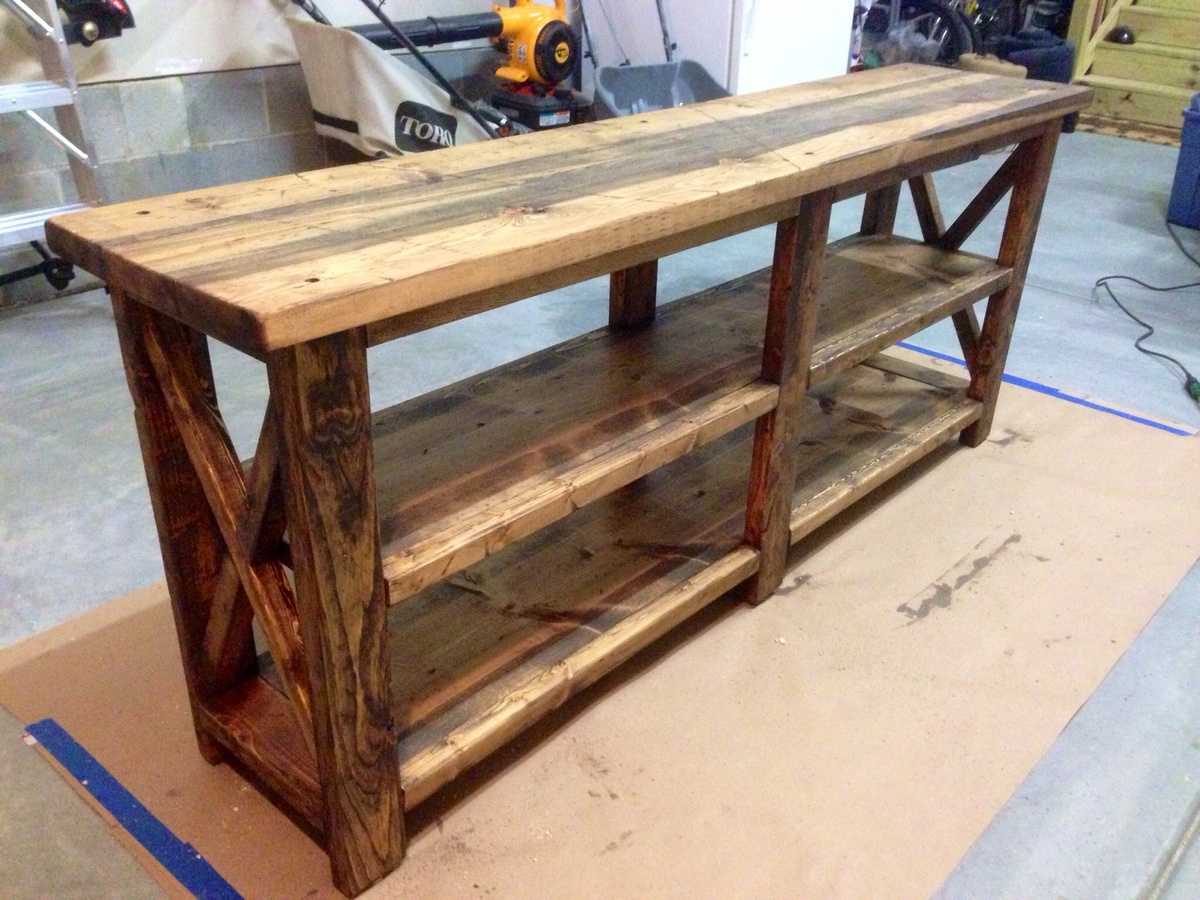
Rhyan End Table (or Nightstand) Modified with a Tile Top

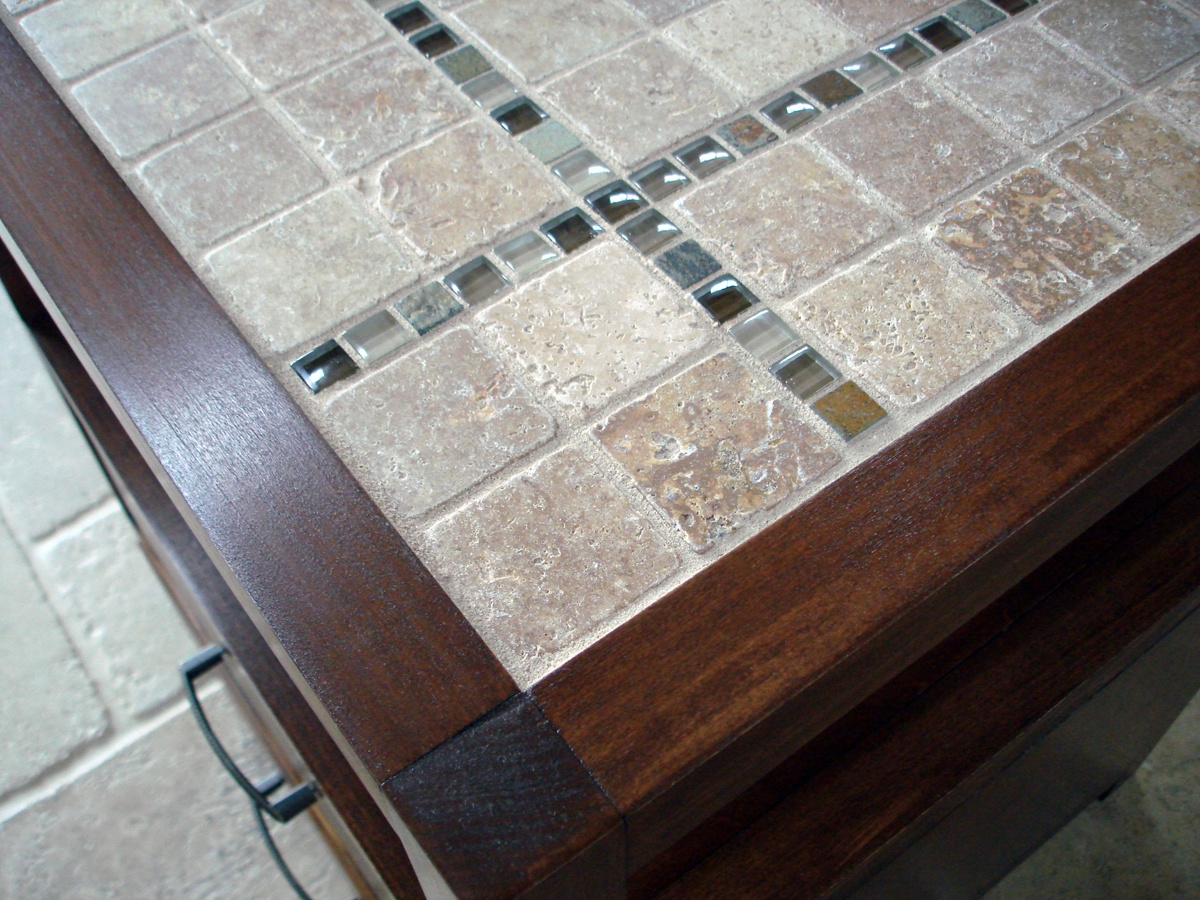
I used Ana's plan, but modified it to incorporate a tiled top. If you want to do the same, you simply align the upper shelf with the bottom of the 2x2 frame, fill it in with hardibacker cement board, and tile over that. My stone was thicker than the border used, so I made a narrow shim in order to accommodate and bring them all to the same level.
Built from Plan(s)
Estimated Time Investment
Week Long Project (20 Hours or More)
Finish Used
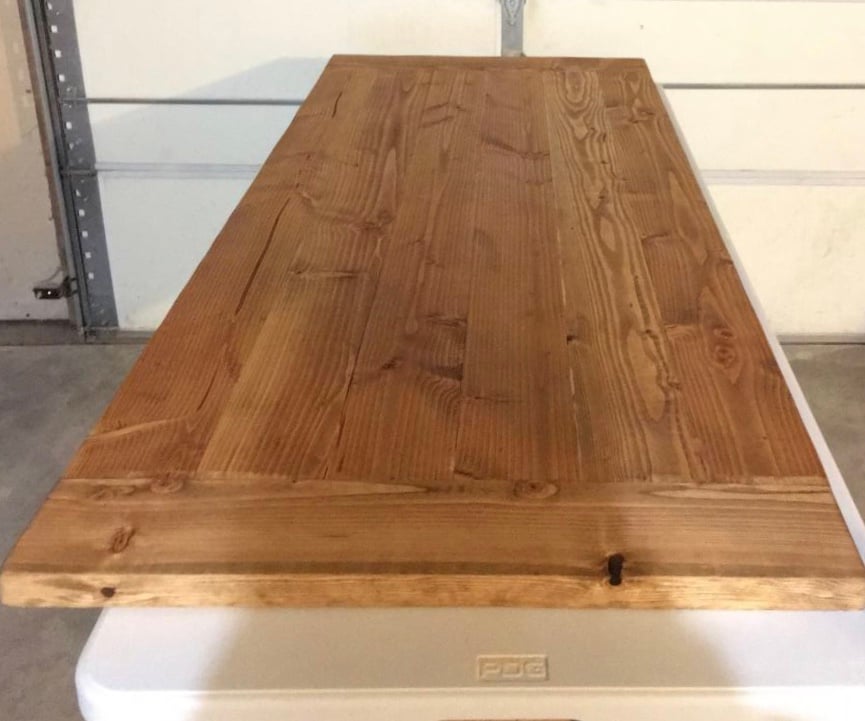
I labored over the stain and ended up doing multiple steps to get the finish I wanted:
1) Minwax water-based wood conditioner,
2) Minwax water-based stain in American Walnut,
3) Dilution of Minwax water-based stain in Onyx & Cinnamon Toast (3-to-1 mix),
4) General Finishes Glaze in Van Dyke Brown, and
5) 4 coats of Bartley's Satin Poly.
1) Minwax water-based wood conditioner,
2) Minwax water-based stain in American Walnut,
3) Dilution of Minwax water-based stain in Onyx & Cinnamon Toast (3-to-1 mix),
4) General Finishes Glaze in Van Dyke Brown, and
5) 4 coats of Bartley's Satin Poly.
Recommended Skill Level
Intermediate


Comments
Ana White
Thu, 02/02/2012 - 11:03
Beautiful Tiled Top End Table
Simply stunning! Love the tile top, but the wood construction is breathtaking! Thank you so much for sharing, absolutely love!
spiceylg
Fri, 02/03/2012 - 05:02
WOW
Joni - I concur with Ana, this is stunning. I've been wanting tile topped tables. Absolutely beautiful job on the whole thing! Looks store bought.
nicwolford
Fri, 02/03/2012 - 07:34
Outstanding.
I love the tile top and am blown away by the finish. Who knew poplar could look so rich!
oldpaintdesign
Fri, 02/03/2012 - 10:18
Fantastic Stain
Wow! The stain is amazing! It's so perfect! That takes a lot of time and patience, but clearly it was so worth it. Great job!
tracysmith
Sat, 02/04/2012 - 00:54
Everyone is RIGHT!
Love, love, love the stain on this. Your construction is perfect and looks like a high end piece! Congrats!
biz_kid1
Sat, 02/04/2012 - 14:26
Simply gorgeous!
You did a wonderful job on this!!!
Chayeri
Sat, 02/04/2012 - 15:54
Beautiful
You just gave me a good idea for the tile that was left over from my kitchen backsplash. That is beautiful and I love the color combination. Great Job
oddie316
Sun, 02/19/2012 - 00:23
WOW
I am amazed at the talent here. I am in love with your piece. you shouldbe proud
Julie D. (not verified)
Sat, 06/30/2012 - 11:24
AMAZING STAIN JOB!
This table is obviously put together like a pro, the tile top is beyond beautiful and creative but what really gets me is your GORGEOUS staining work. I struggle with staining on every project! Any advice or tips on how to get a beautiful finish like yours? You should give a tutorial!
In reply to AMAZING STAIN JOB! by Julie D. (not verified)
Joni
Thu, 07/19/2012 - 08:05
Staining
Julie, Thanks so much for the feedback. I hate to admit it, but I am unable to get anything to look decent with an oil-based stain; all I get is blotch. I see others on the site with gorgeous colors and finishes that I want, but I can't use them. I can only get consistent results with the water-based stain, and I have to use the pre-stain wood conditioner. With 2 coats of stain, I have fairly consistent results (applying with foam brushes and wiping off with paper towels). On this particular project, I had to mix several colors and layers to get exactly the tone that I wanted.
I'm on my last can of Bartley's gel polyurethane, and they no longer make the product. It allows such control in getting a perfect finish. I don't know what I'm going to use when my can runs out!!
Newbie07 (not verified)
Thu, 11/08/2012 - 10:26
Awesome
This end table is amazing; looks like an end table you'd buy in a high-end furniture store. The finished looks perfect and the tile top is really creative.
Question: where did you find the 2x2 poplar? I'm looking for some to use for the Rhyan Coffee Table and can't find anything longer than 3 feet.
In reply to Awesome by Newbie07 (not verified)
Joni
Thu, 11/08/2012 - 11:57
2x2 poplar
Thanks for the feedback!! I had to go to a bigger lumber yard to get the poplar 2x2s (Austin Fine Lumber in Austin, TX). The poplar was the cheapest (by far) of the better 2x2s, and the guys told me it wouldn't take a stain very well. They were wrong; it took the stain beautifully. The 2x2s were perfectly straight and had straight edges...much different than the ones from Home Depot or Lowe's.
AshleyArmstrong
Mon, 01/20/2014 - 15:45
How did you do the tile to
How did you do the tile to the wood ? We are building a coffee table and two end tables just like them, we just don't know which way is best to attach the tile