Step Stool
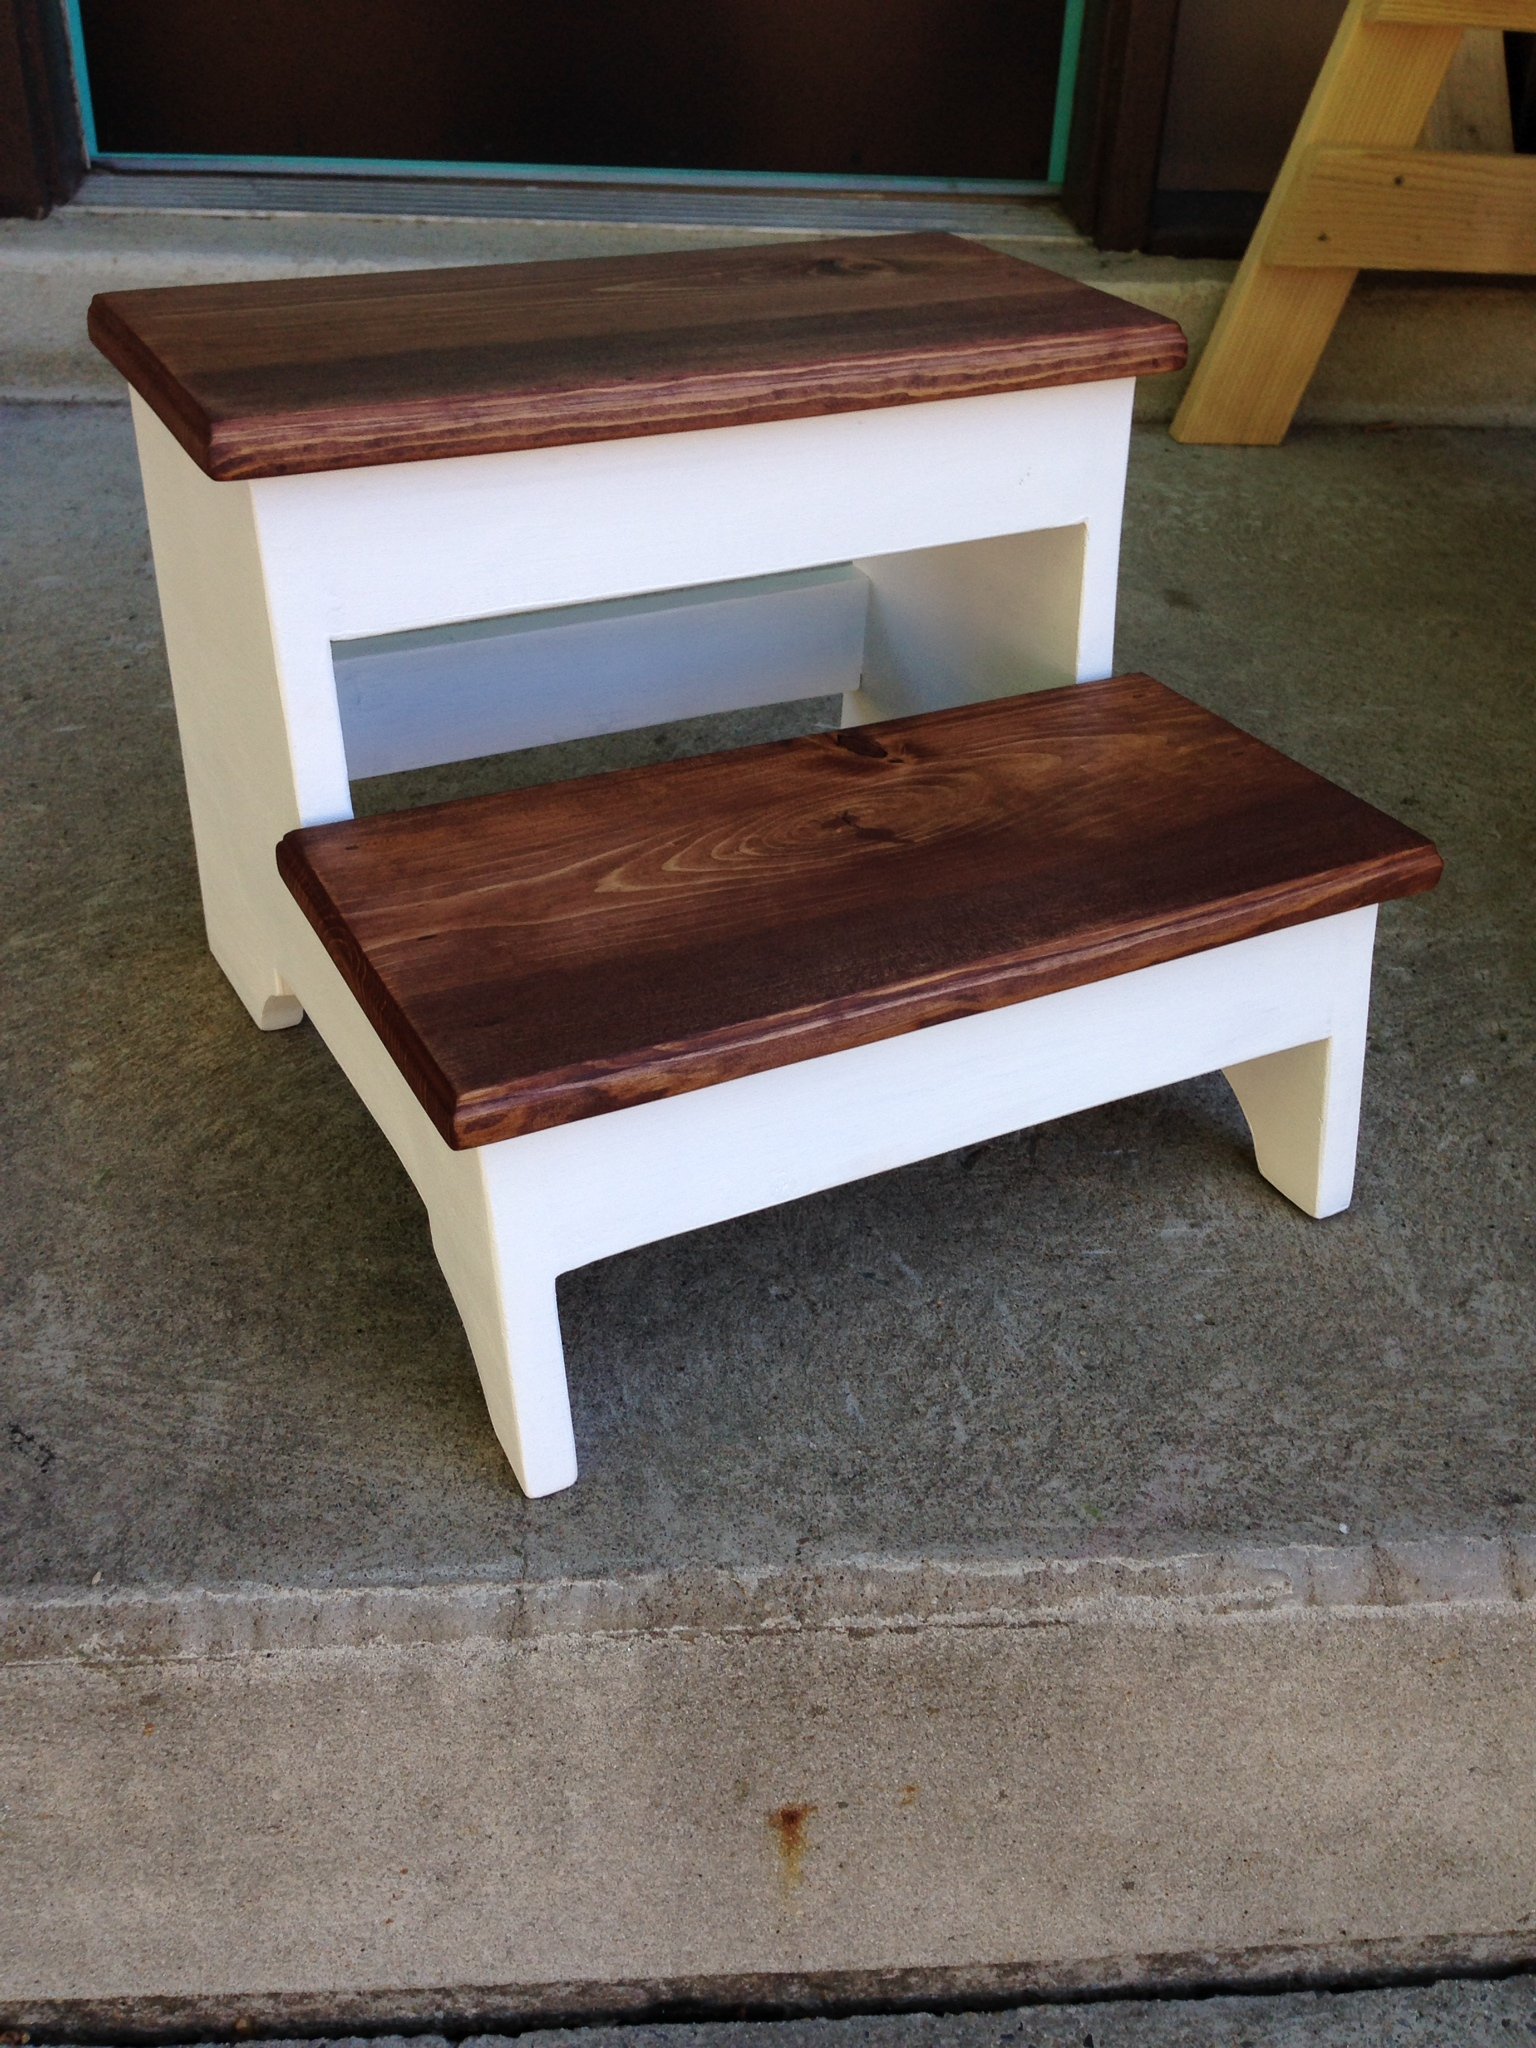
I needed a step stool for my son to be able to reach the bathroom sink to brush teeth and wash hands. This plan was exactly what I was looking for. As I do with all first time projects, I built this out of inexpensive pine. It is very sturdy, and holds me without a problem. I routed the edges of the treads, and used 1x3 material for the braces as opposed to the 1x2 called for in the plan. The plan was easy to follow and the cutting list worked perfectly. The most challenging part was creating the curves with the jig saw, but truly wasn't bad at all.
Built from Plan(s)
Estimated Time Investment
Afternoon Project (3-6 Hours)
Finish Used
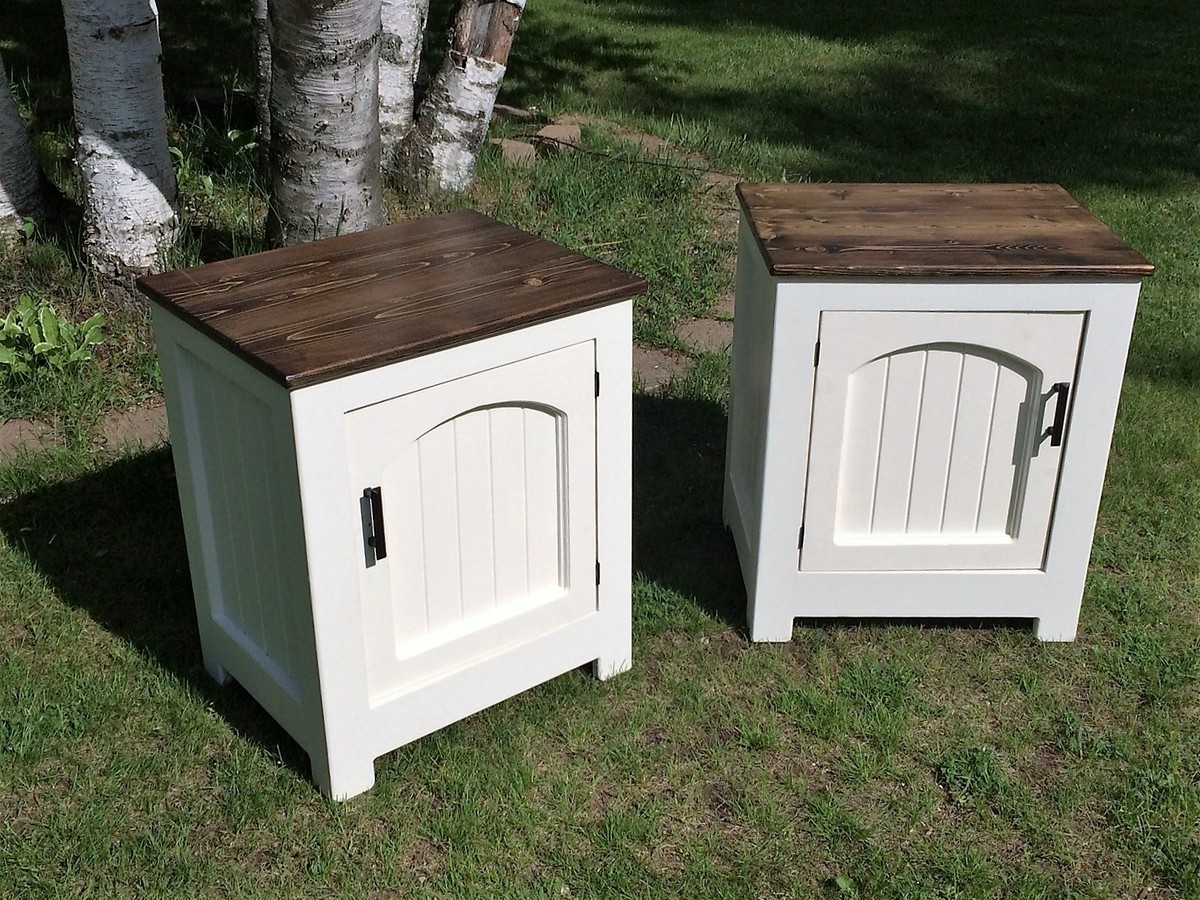
As I am contemplating switching out our carpeted stairway to hardwood, I wanted to play with the white and stained look. I used semi gloss Valspar paint, and Minwax English Chestnut stain. I also applied 3 coats of polyurethane to provide added protection from water.
Recommended Skill Level
Beginner