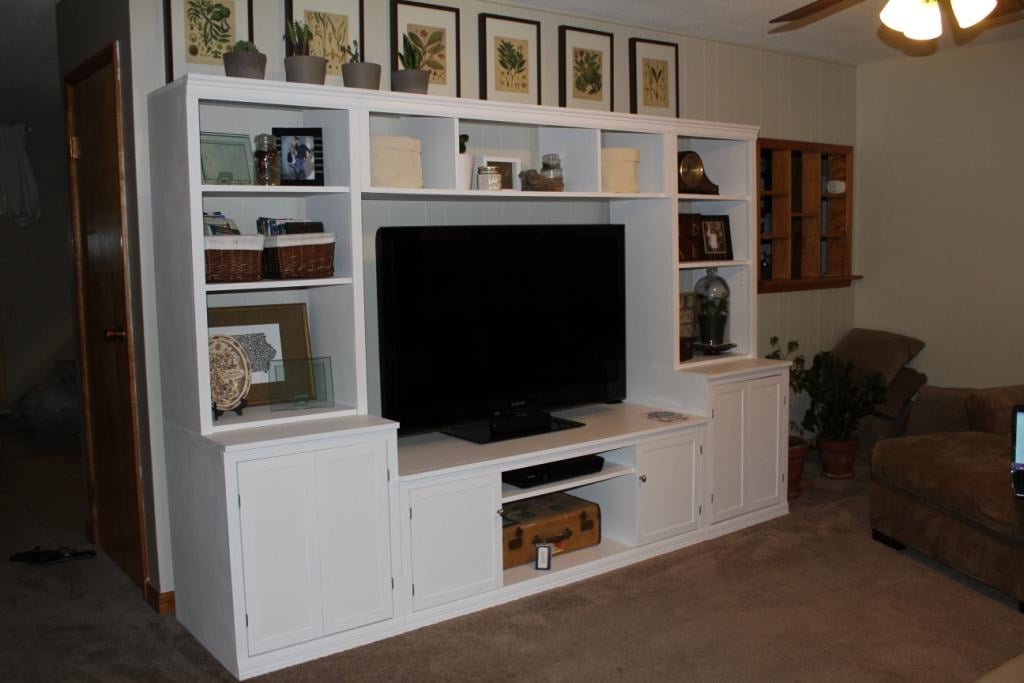
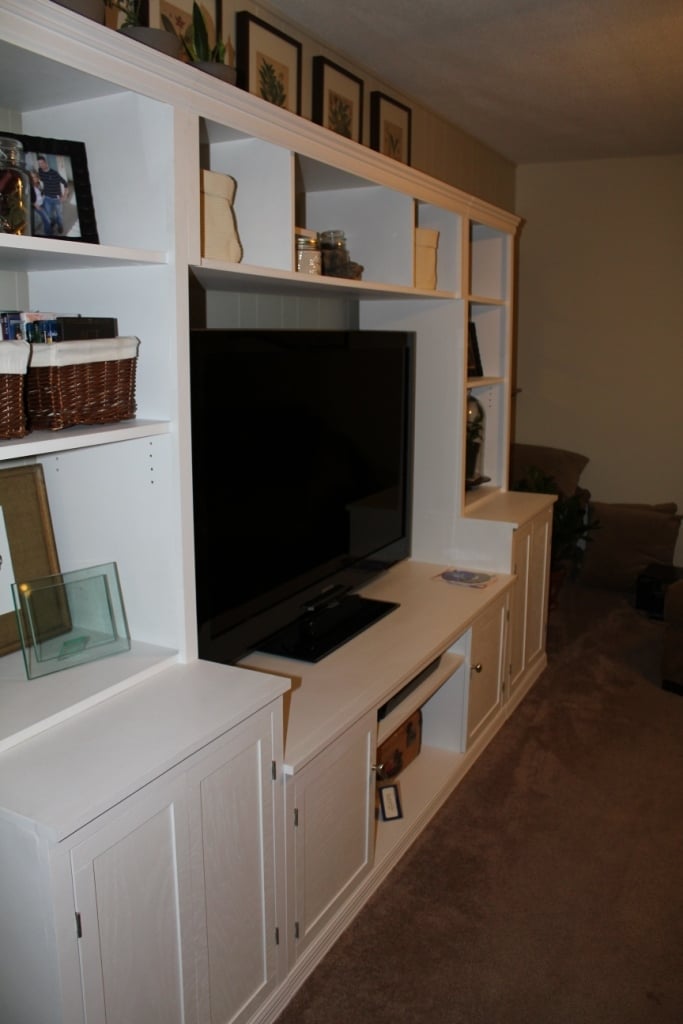
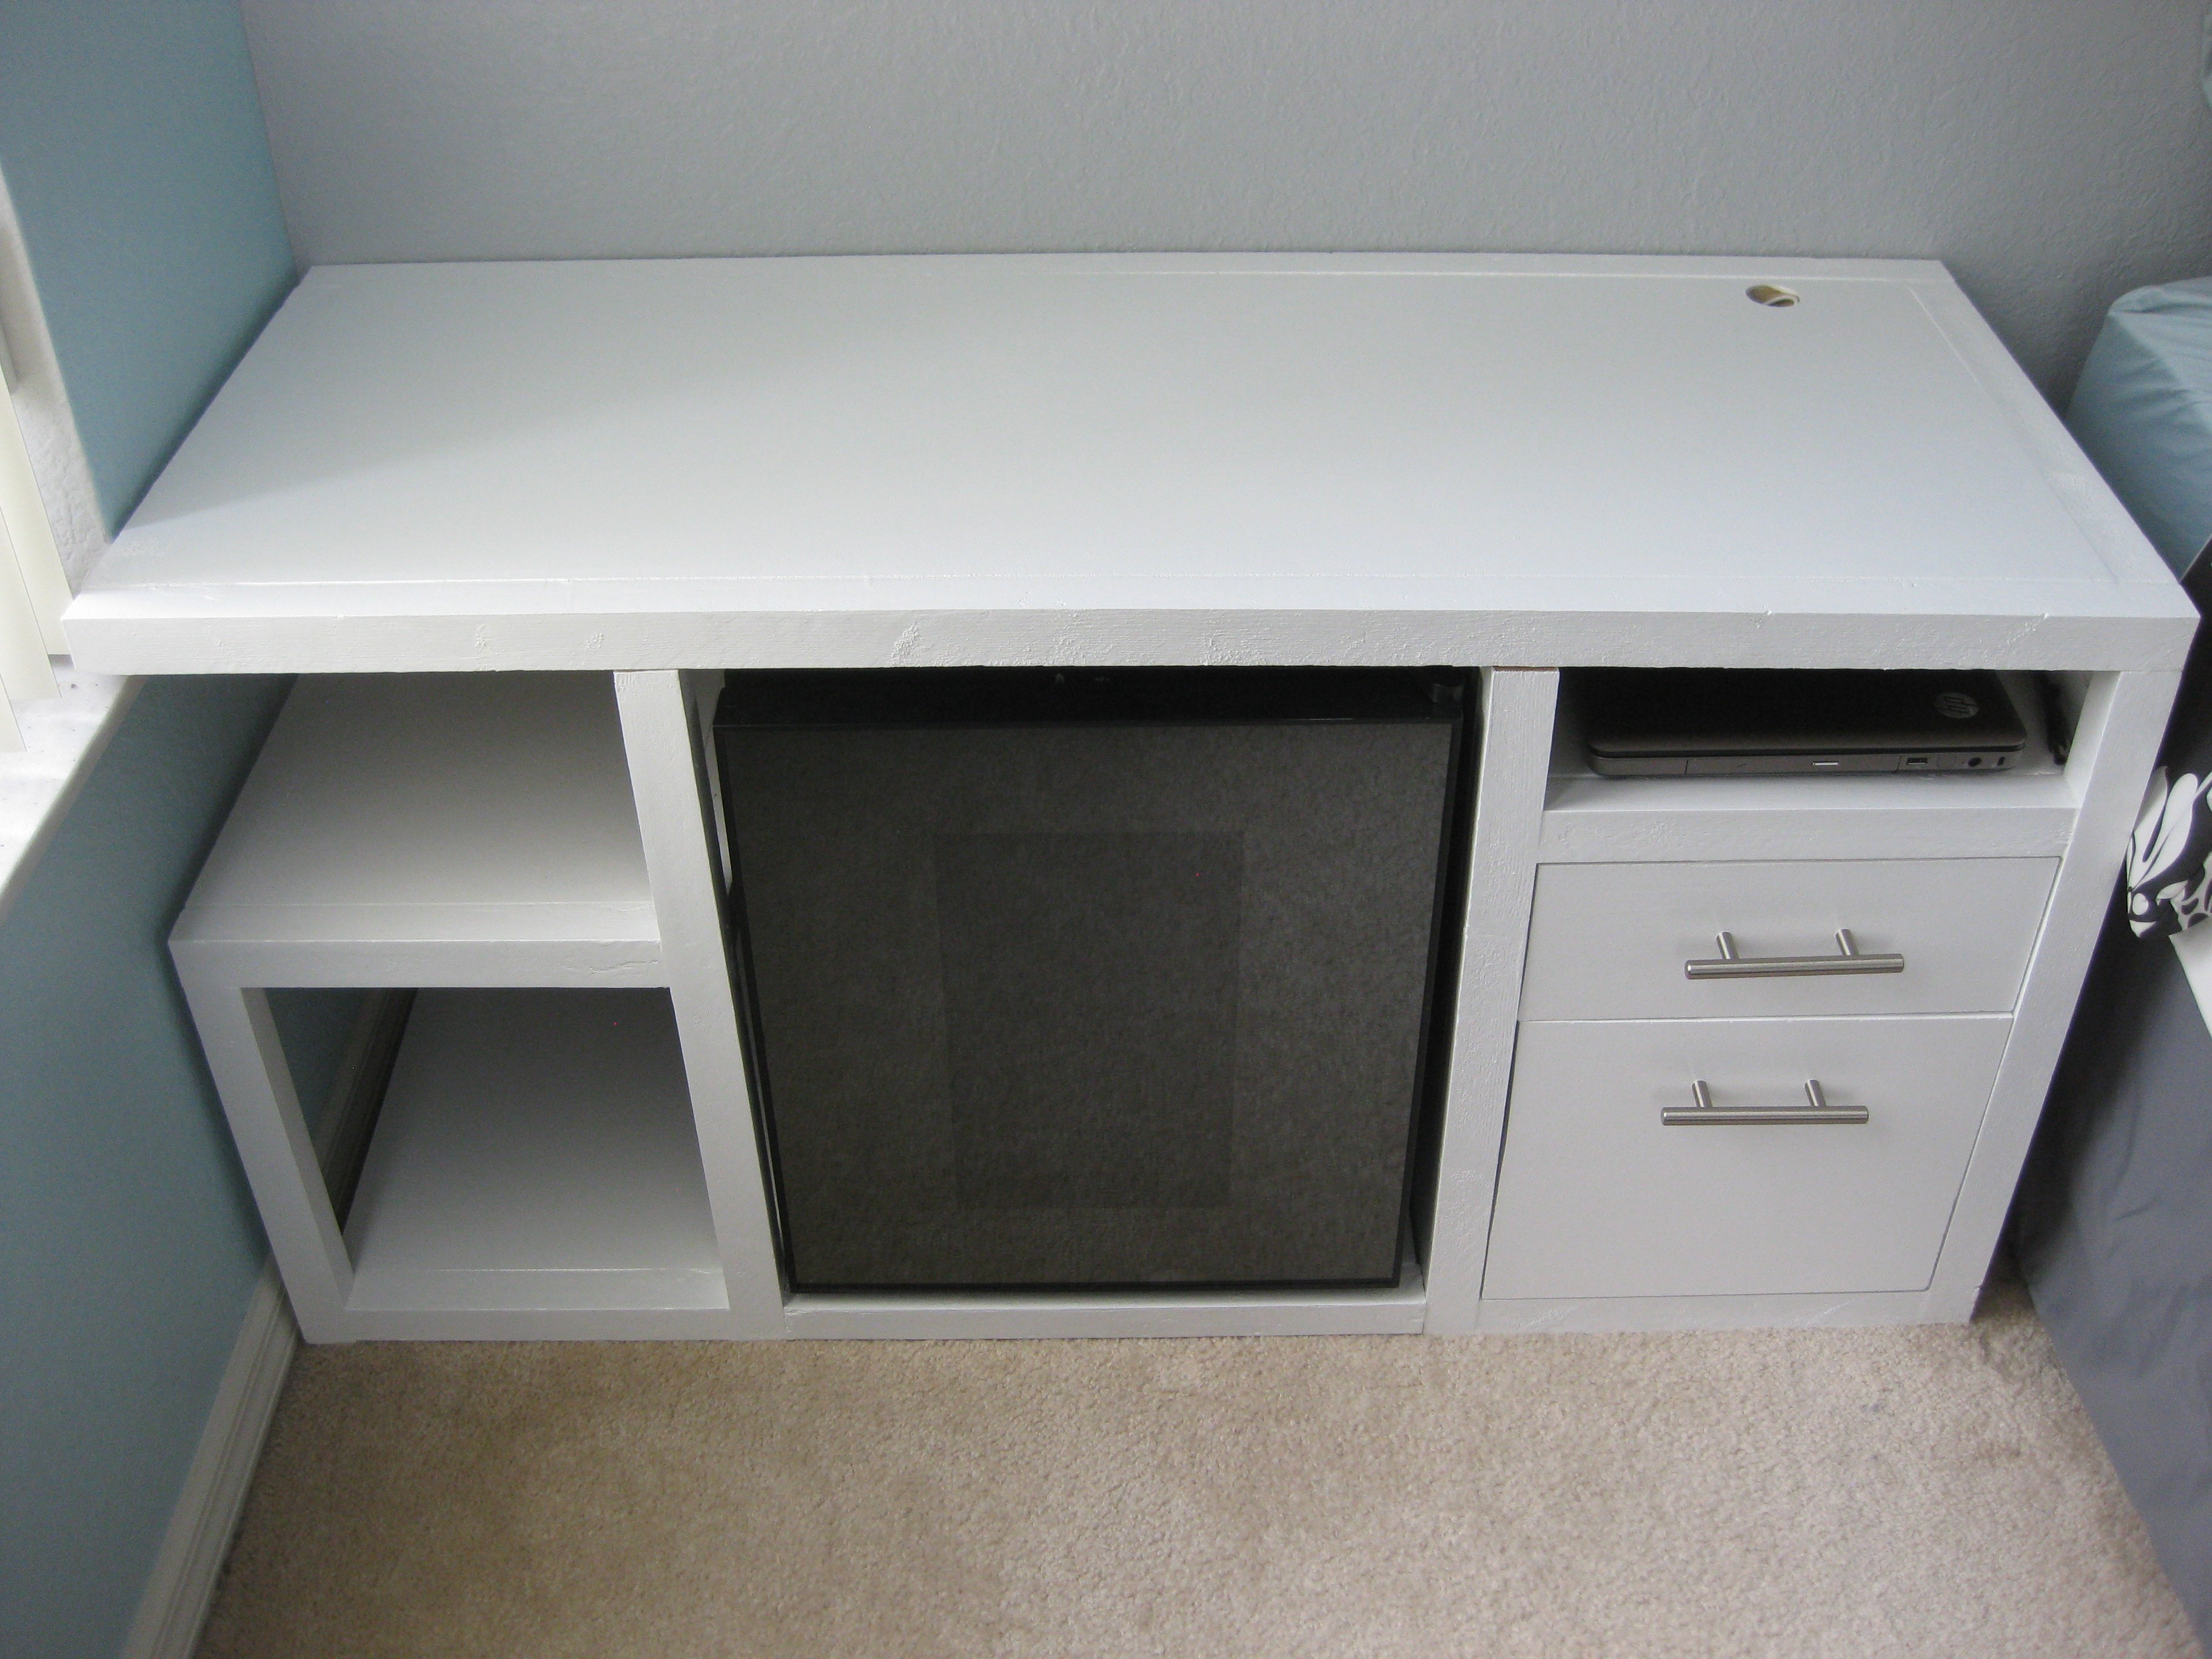
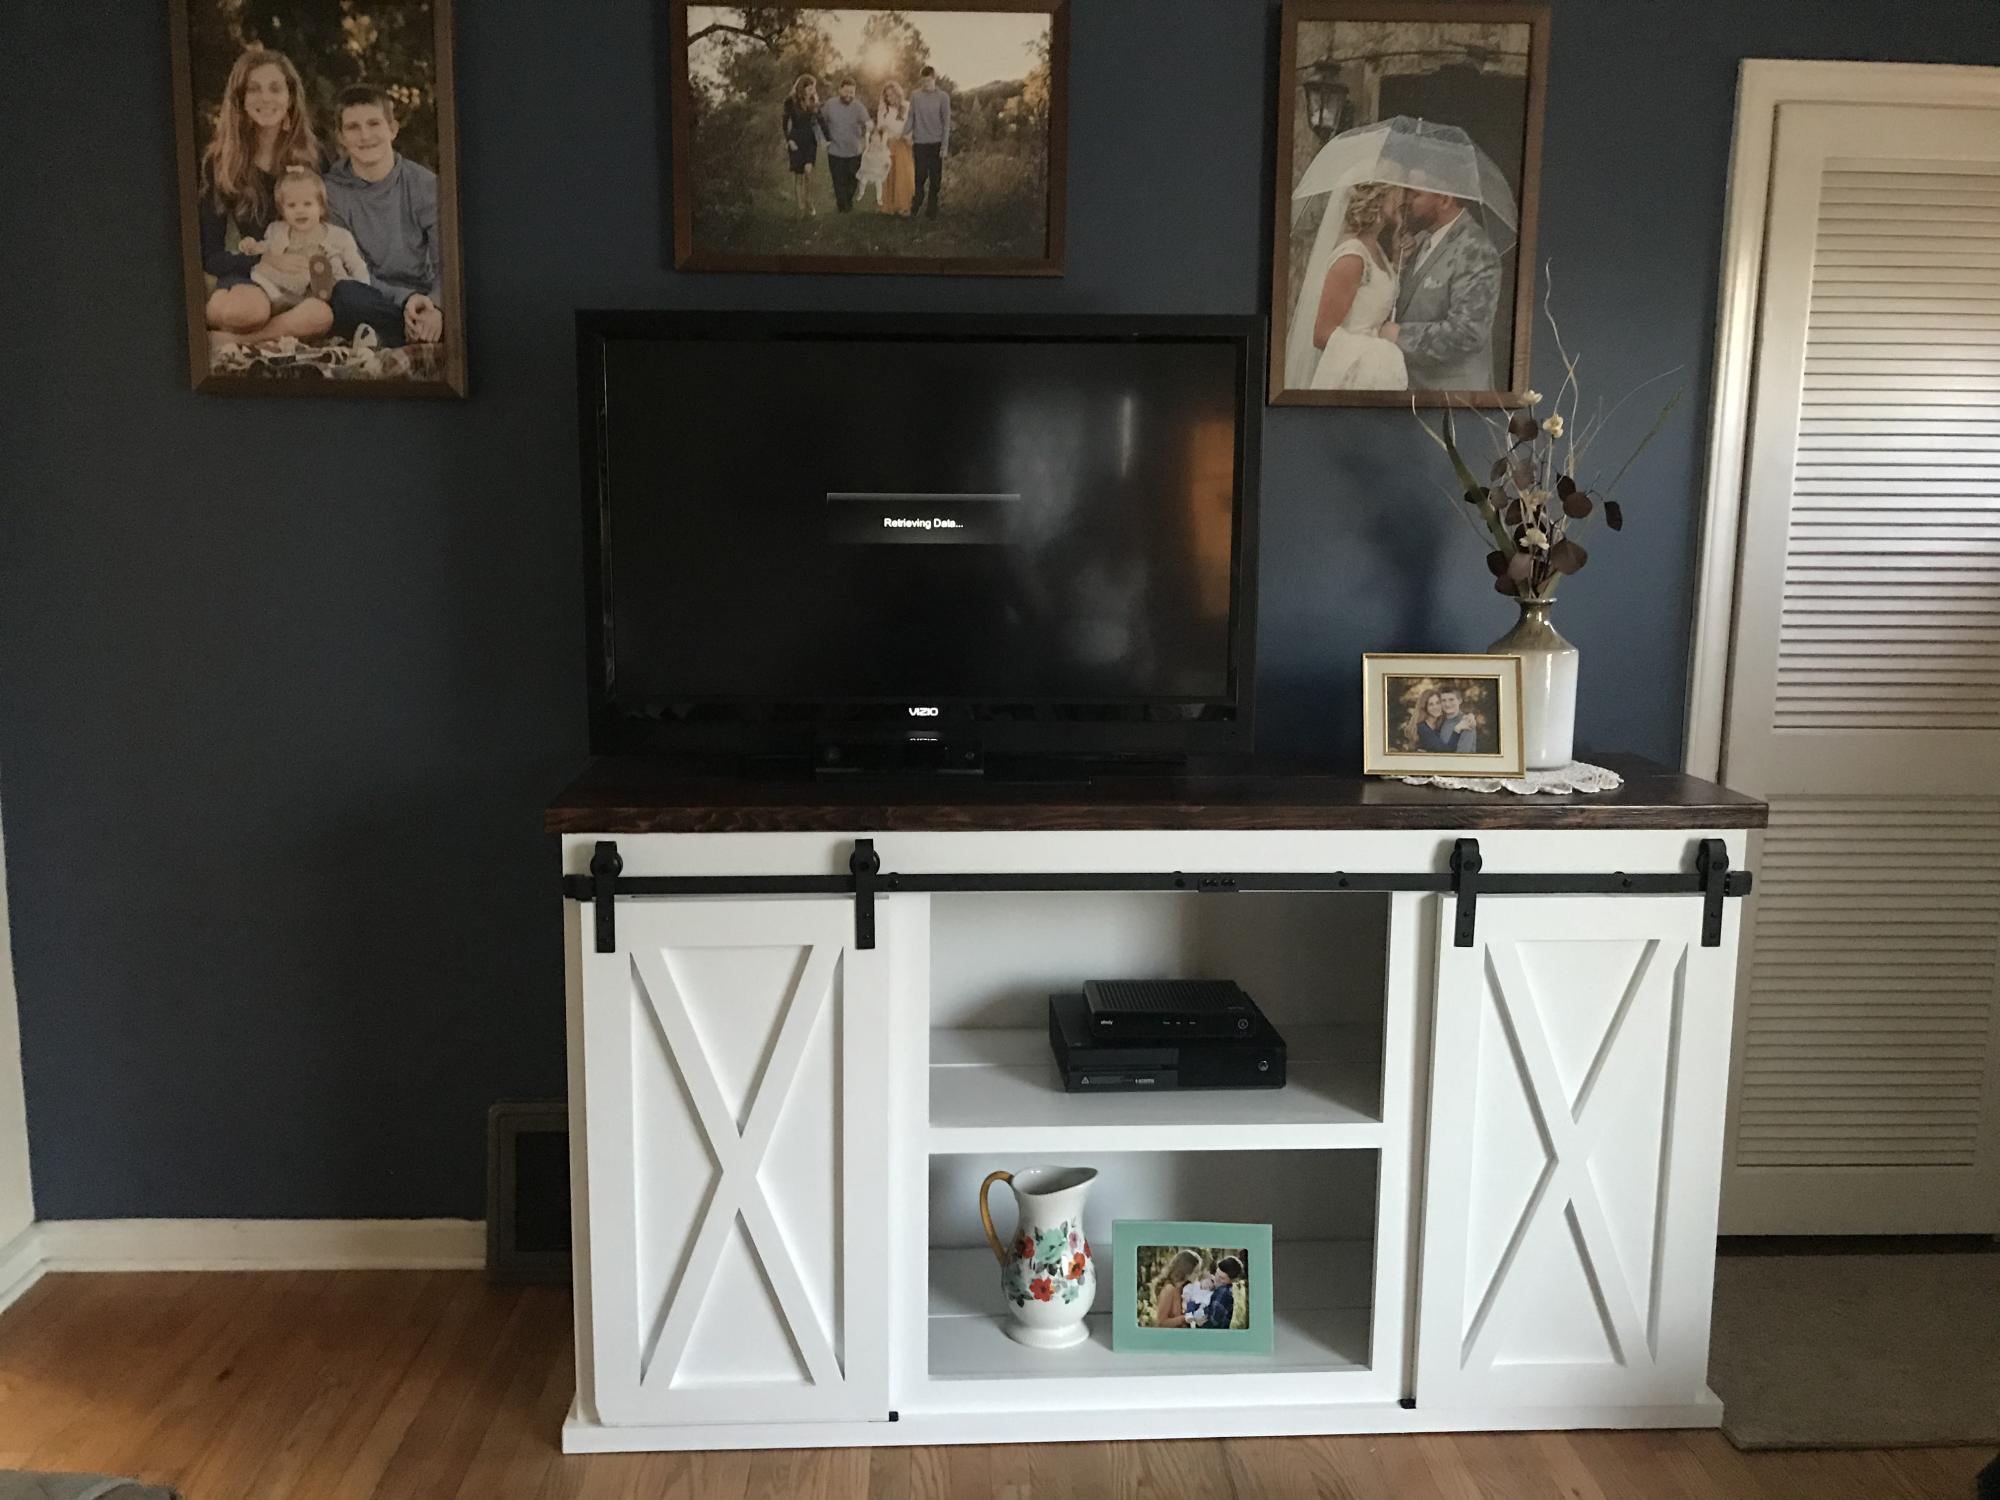
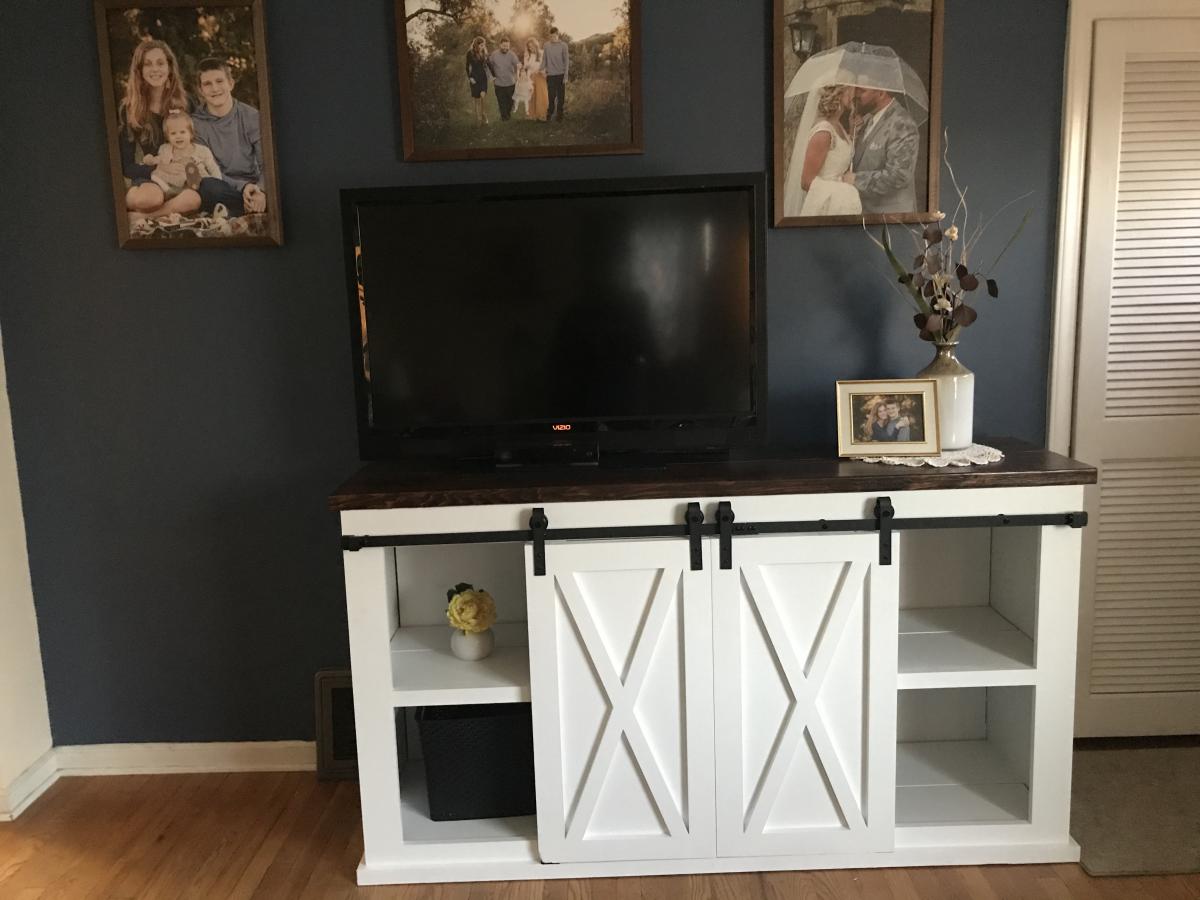
This media center was my hubby and I's very first project! It was definitely a learning experience and its definitely not perfect, but we love it! We love how much it looks like the pottery barn version and that WE MADE IT!!!
This project took us quite some time to complete..... and its still not 100% done as we still need hardware for the 2 outermost doors but are having a hard time finding ones similar to the pottery barn ones that aren’t going to cost us a fortune..... My hubby and I put this together piece by piece as we had time (which seemed to be few and far between). If you had uninterrupted time to work on this , one could probably start and finish it in a weekend. But because of lack of uninterrupted time and the learning curve of this being our first project it took us months to finish.
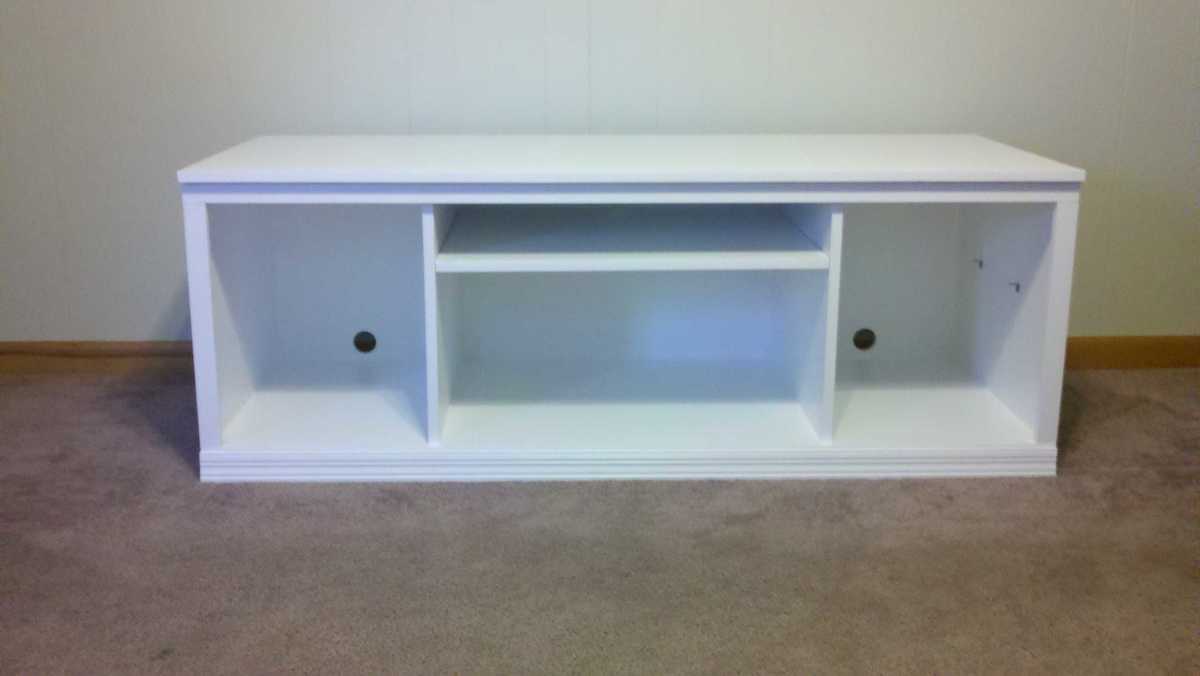
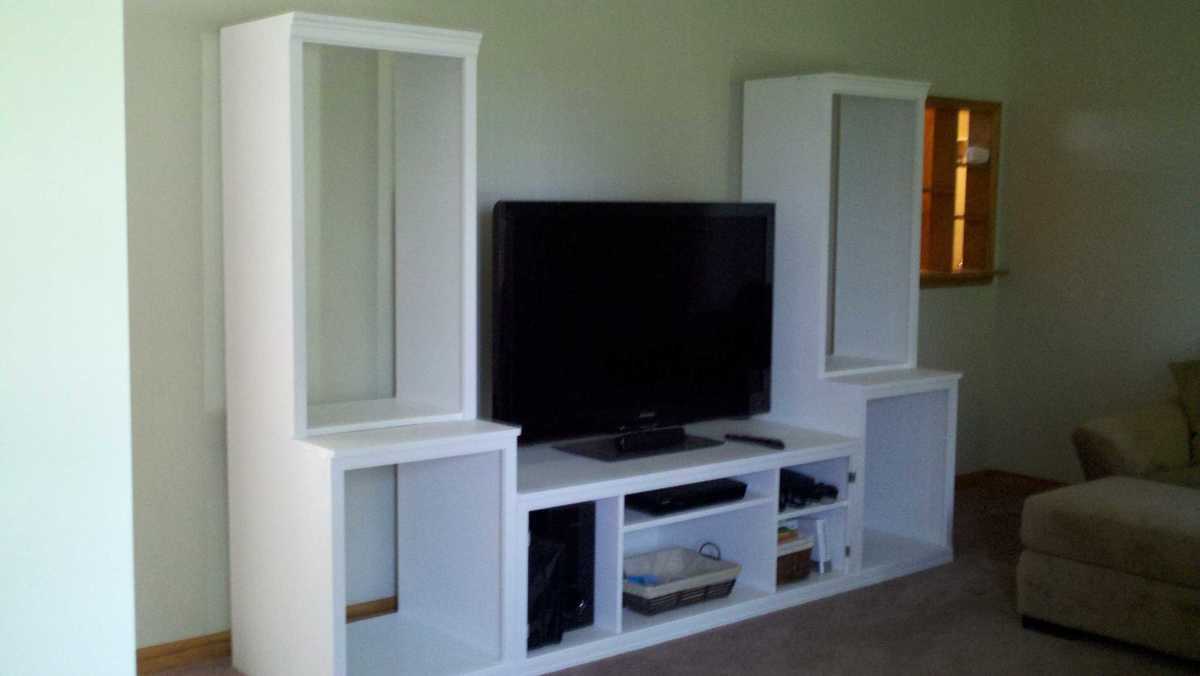
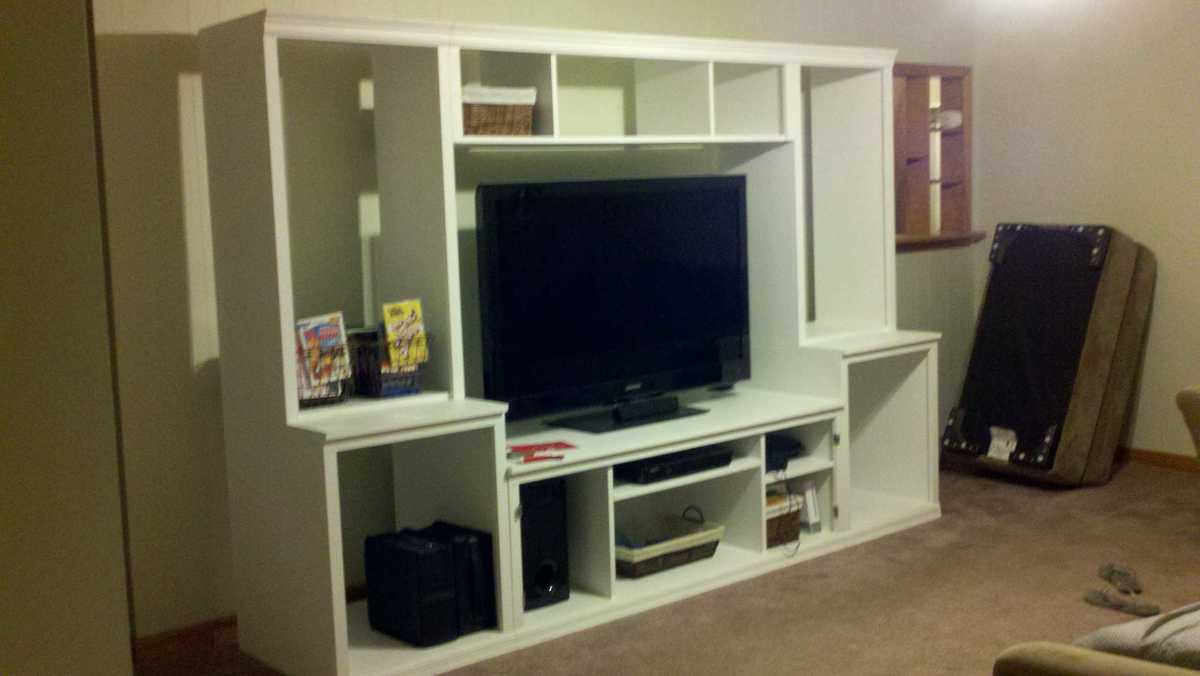
We got the TV base (the bottom middle piece) done first and we were so excited about it that before attempting the rest of the project, we painted it and set it up in the living room :) We were so excited to get the rest of the media center made but my hubby got busy with work and was unable to help me. I got antsy, so antsy in fact that finished the rest of the project COMPLETELY on my own!! And I am SO PROUD OF IT!!! I made and painted the rest of the media center except for the doors because i (not sure why) was completely intimidated by the doors so I procrastinated making them, so the media center sat in the living room for a month or 2 without doors or the adjustable shelves on the towers lol. Last week I finally got up the courage to make the doors and they (to my surprise!) really weren’t that bad!! I painted them and the adjustable shelves and finished assembling the media center. Its now finished and decorated except for some of the door hardware!!! SO EXCITED!!!
Since this was our first project we hadn’t bought a Kreg Jig jet (we have since bought one) and I HIGHLY recommend getting yourself one. It would have made this project so much easier.


Comments
Ana White
Tue, 04/28/2020 - 09:21
Beautiful job! Thanks for…
Beautiful job! Thanks for tip on boards, I'll double check the shopping list.