Community Brag Posts
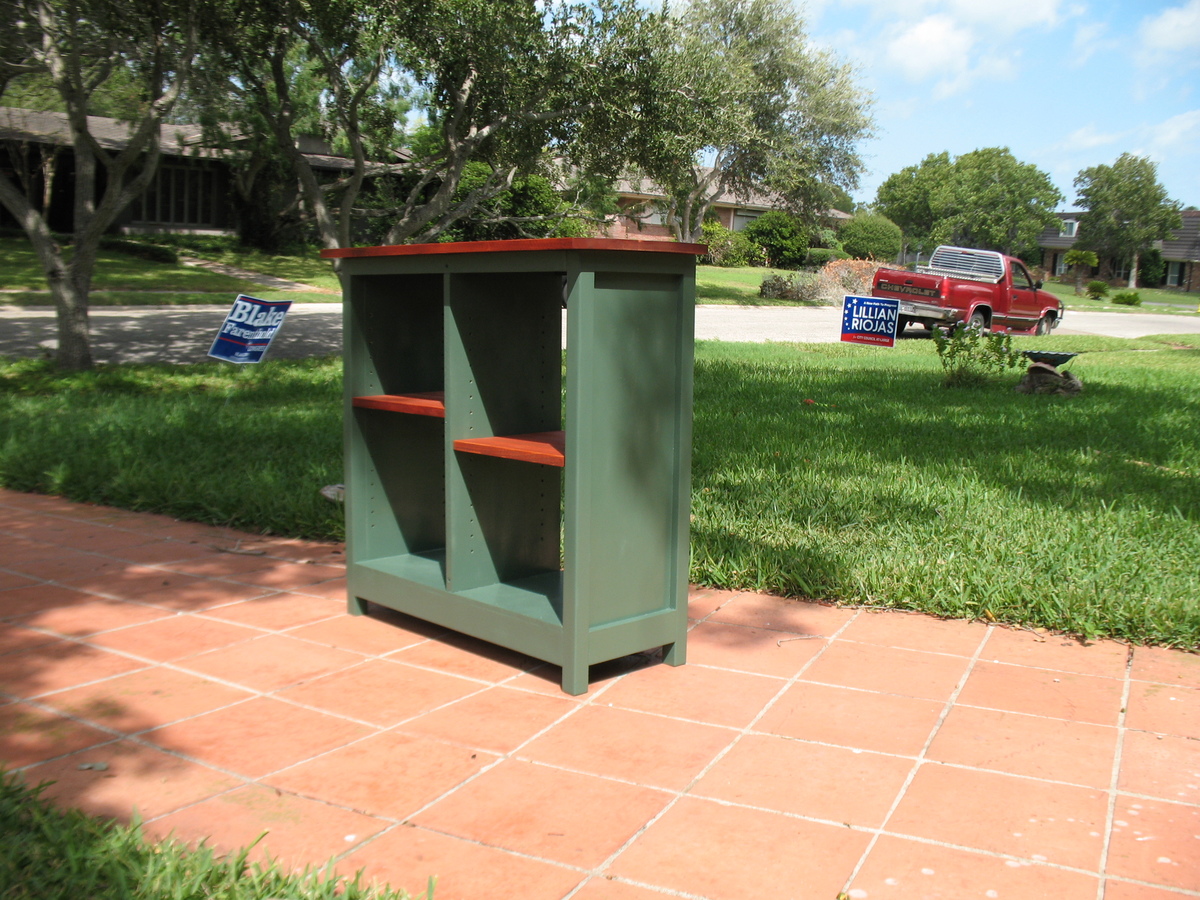
My Version - 4 Cubby Bookshelf
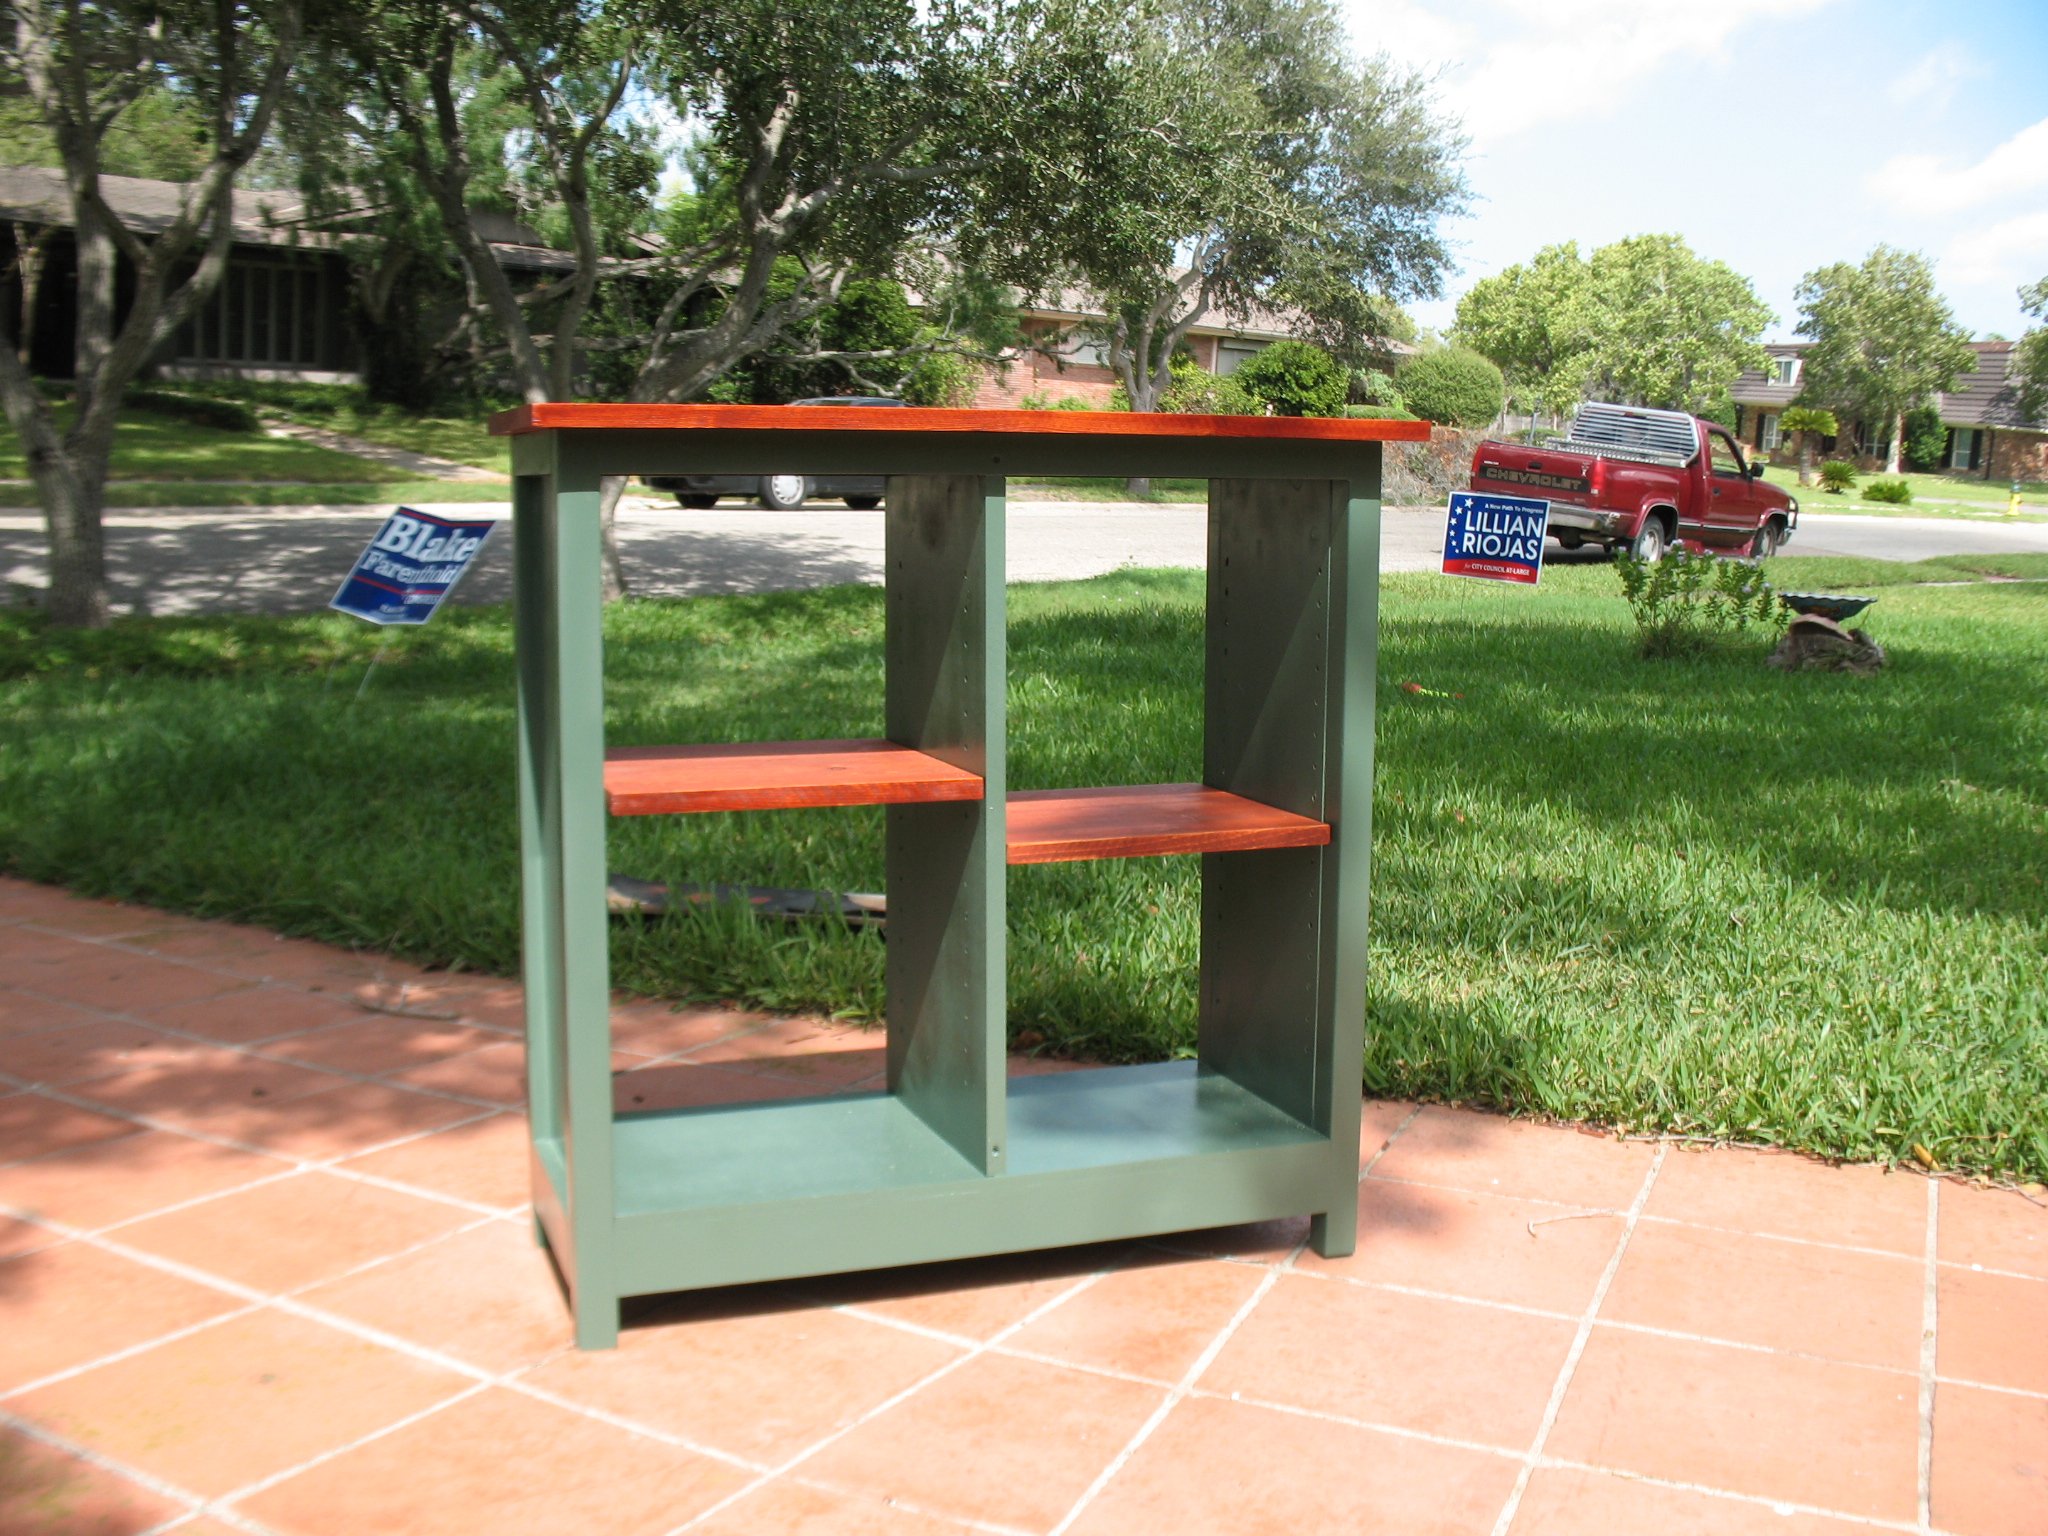
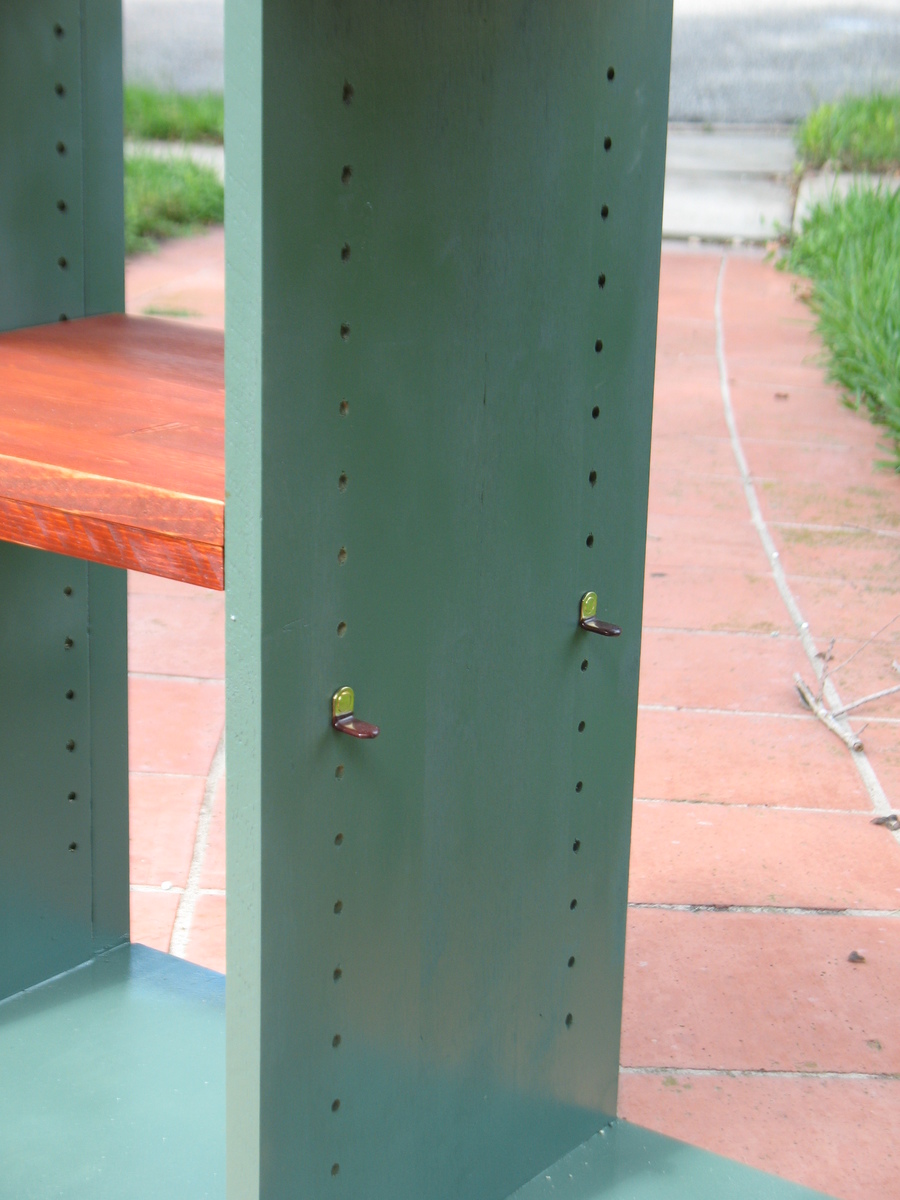
I was inspired by Ana's 4 Hole Cubby Bookshelf and a bookshelf I saw on line one night. So I incorporated the two somewhat. I took stair parts for the corner legs and connected them to form a frame with 1x3 on the bottom and 1x2 around the top. Then installed the inside side walls such that the ends are inset. I added a top with an inch or so of overhang on the sides and front. I also made the two shelves adjustable with my new Kreg Shelf Pin jig. It was so easy and accurate. Dimensions are about the same as the 4 Hole Cubby but I admit I winged it at times. Came out very nice and now the wife wants to add another shelf and I think there is plenty of room.
Built from Plan(s)
Estimated Cost
About $50. I overbought the wood and the legs and top cost $16 so I think $50 is a good guess.
Estimated Time Investment
Day Project (6-9 Hours)
Finish Used
Stain - Minwax Gunstock 231
Paint - Rust-o-leum Moss Green enamel spray
Paint - Rust-o-leum Moss Green enamel spray
Recommended Skill Level
Intermediate
Comments
Fri, 10/05/2012 - 04:50
I Cannot Tell A Lie
If you have not noticed I put the top on facing the back of the bookshelf. How stupid can I be? I'll answer that question. I am often stupid but at least not dangerous. I will add trim to the front to hide the stuff I don't want you to see and then post a new photo.
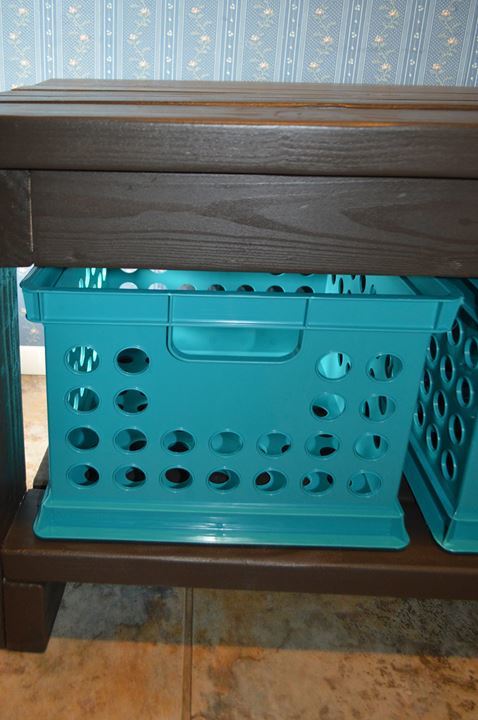
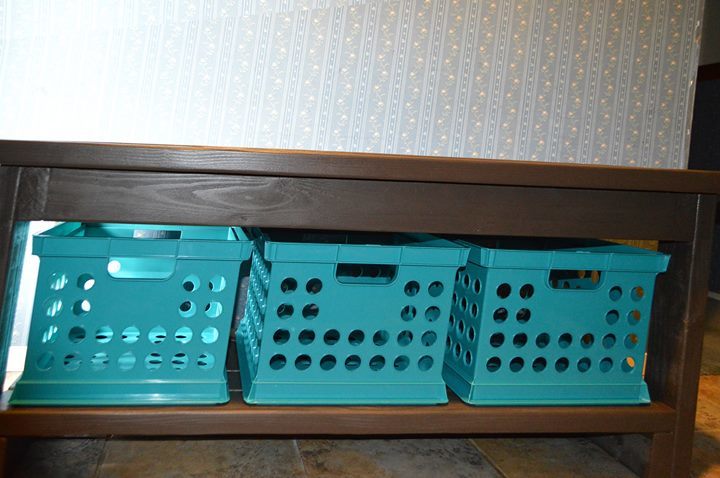
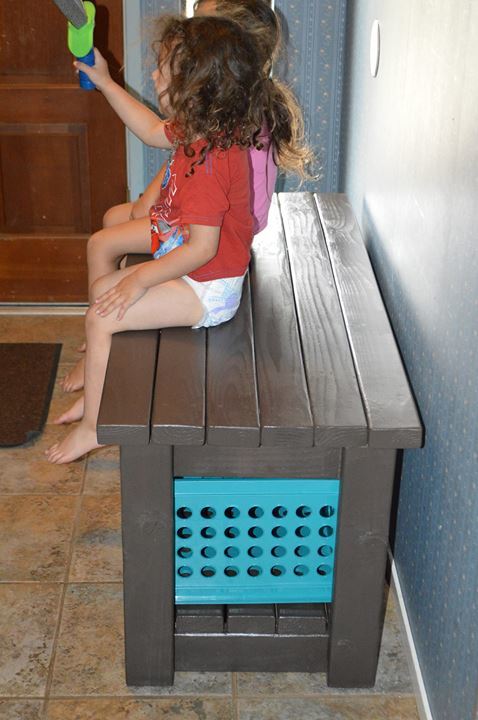
2x4 Bench
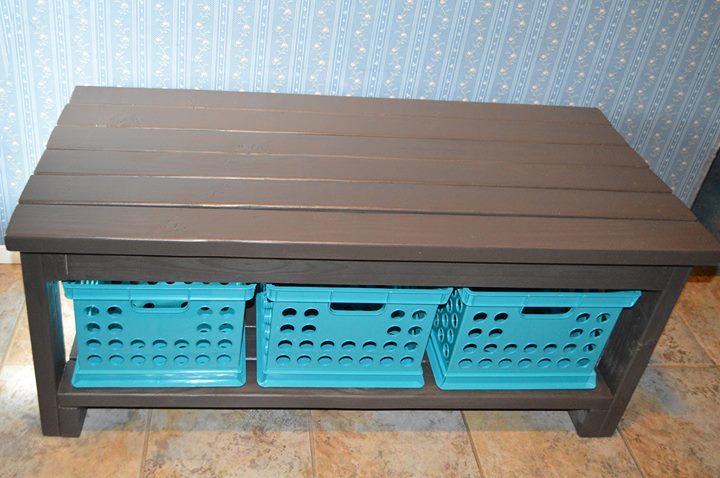
I found this plan on morelikehome.net and had to try it this was my first project in 20 years and I had so much fun building it. I am looking forward to building more in the future! Enjoy!
Estimated Cost
50.00
Estimated Time Investment
Day Project (6-9 Hours)
Finish Used
Brown semi - solid stain
Recommended Skill Level
Beginner
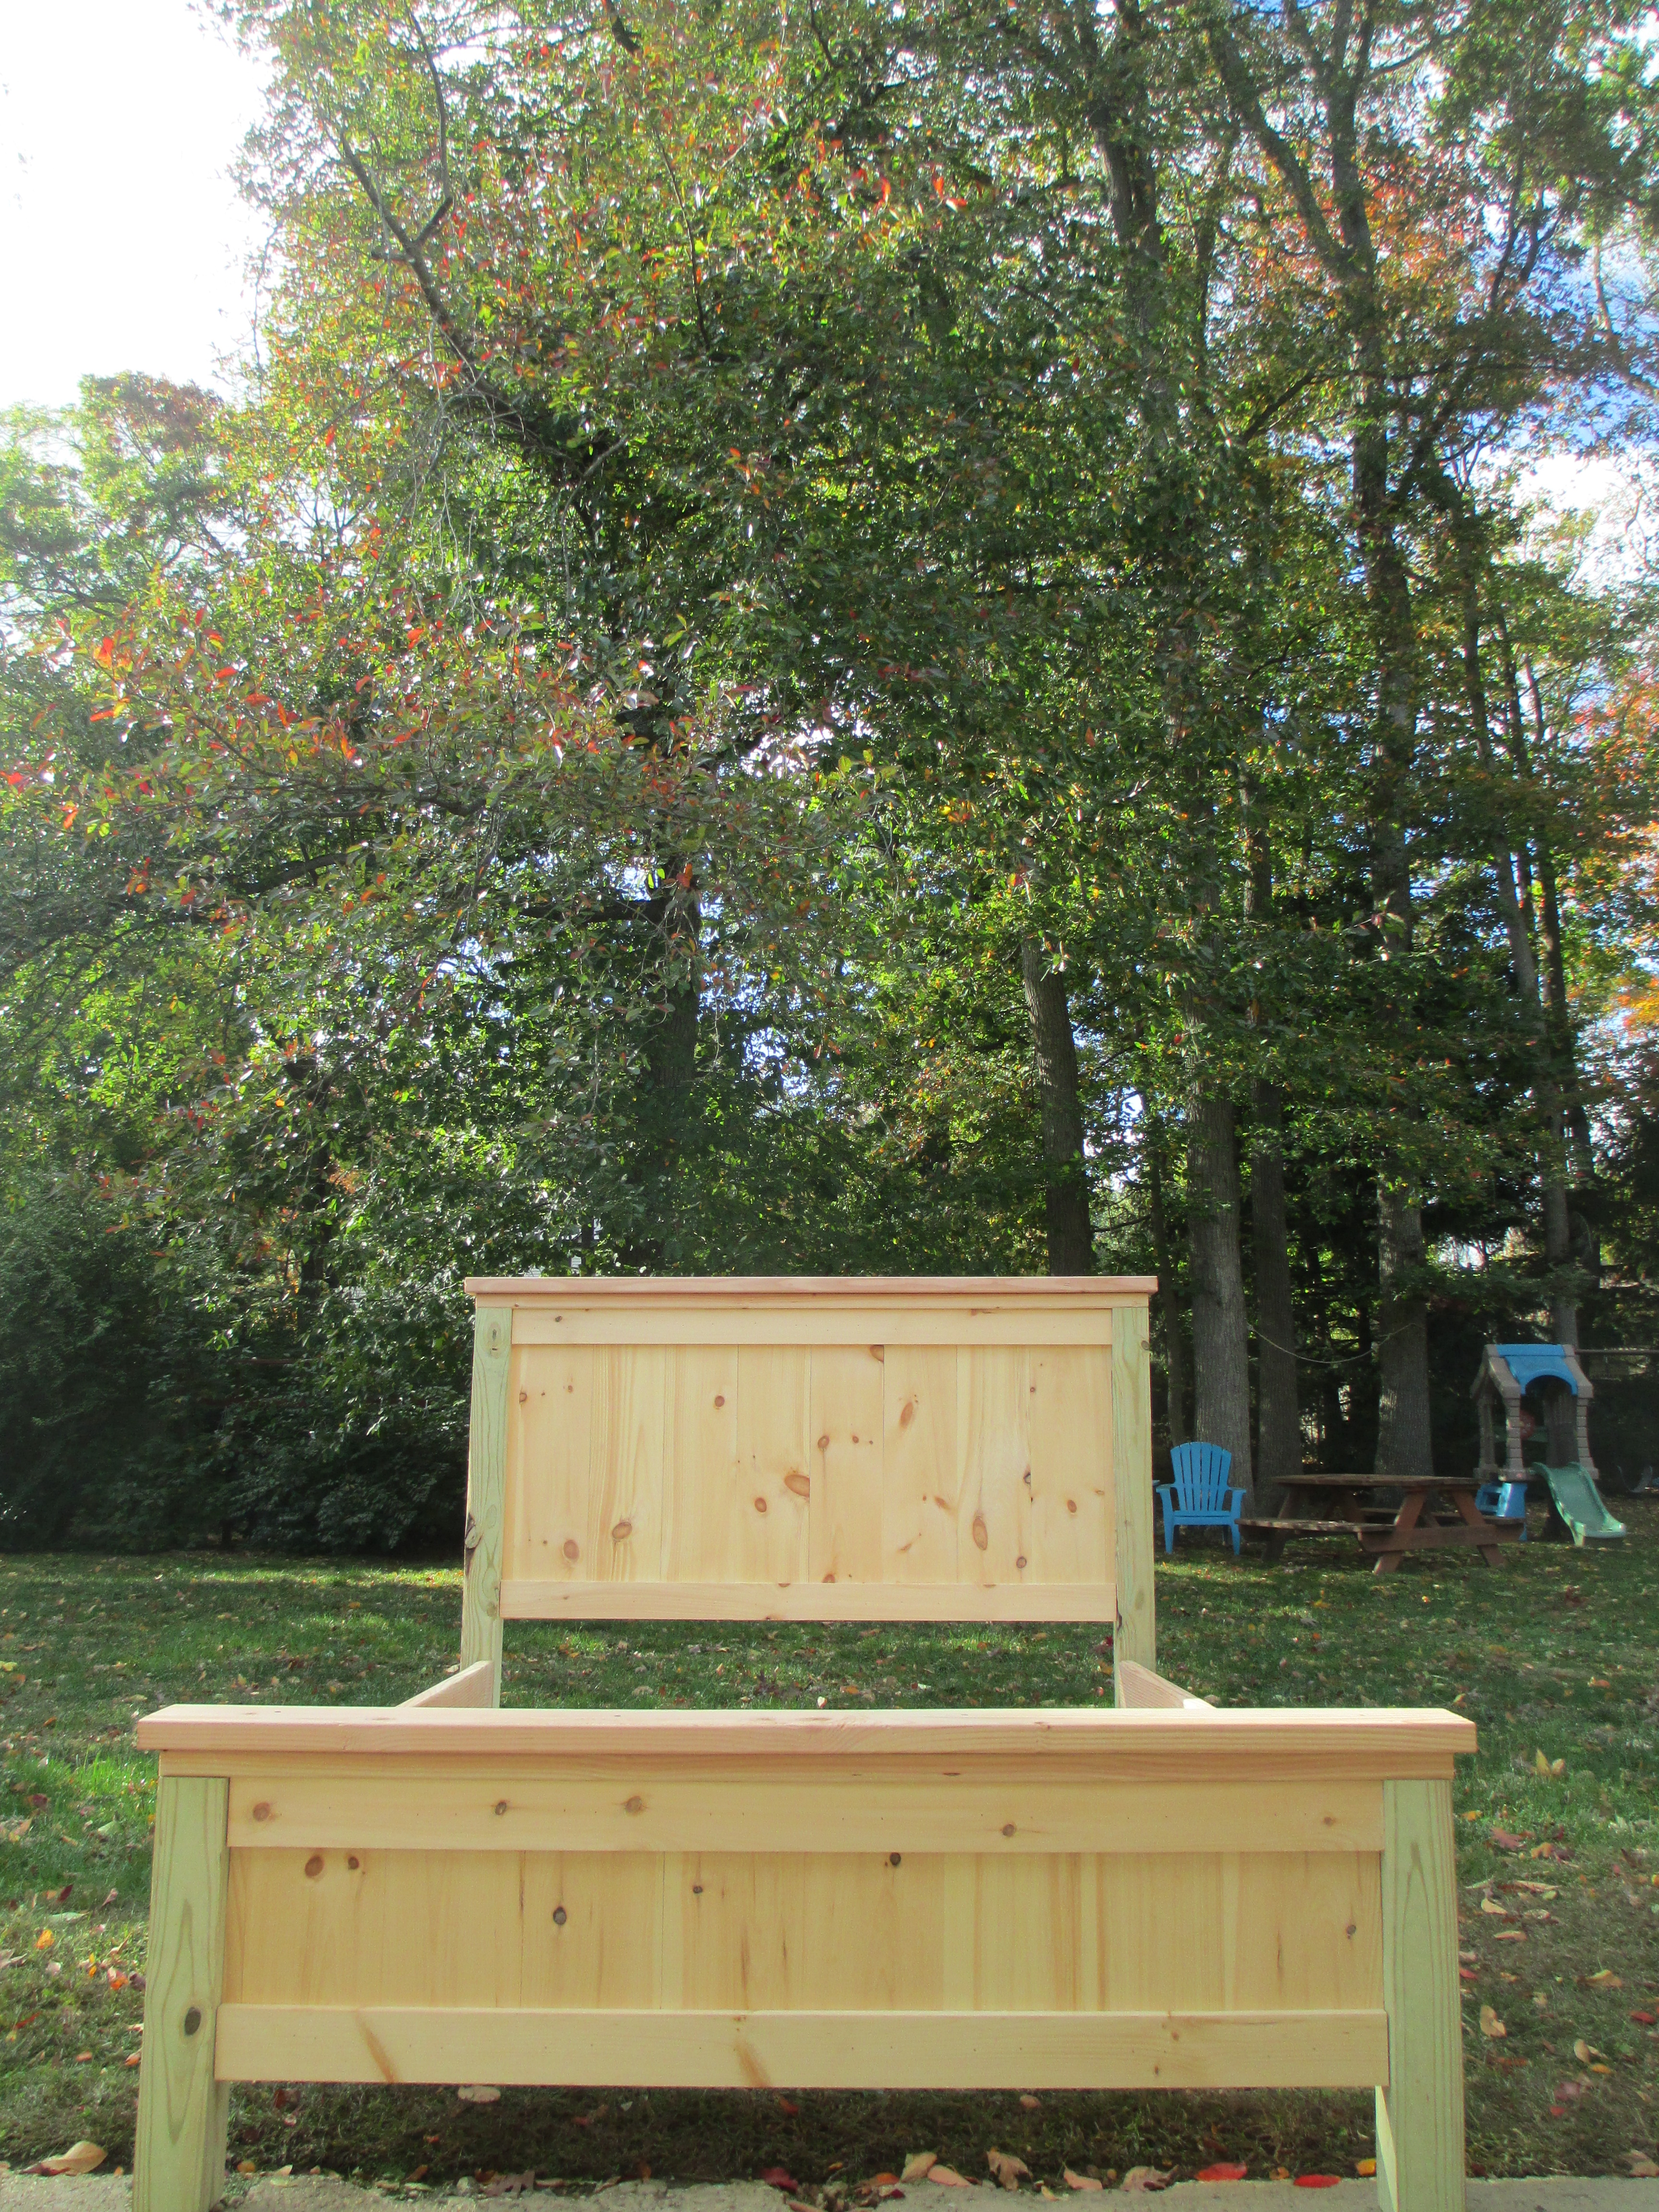
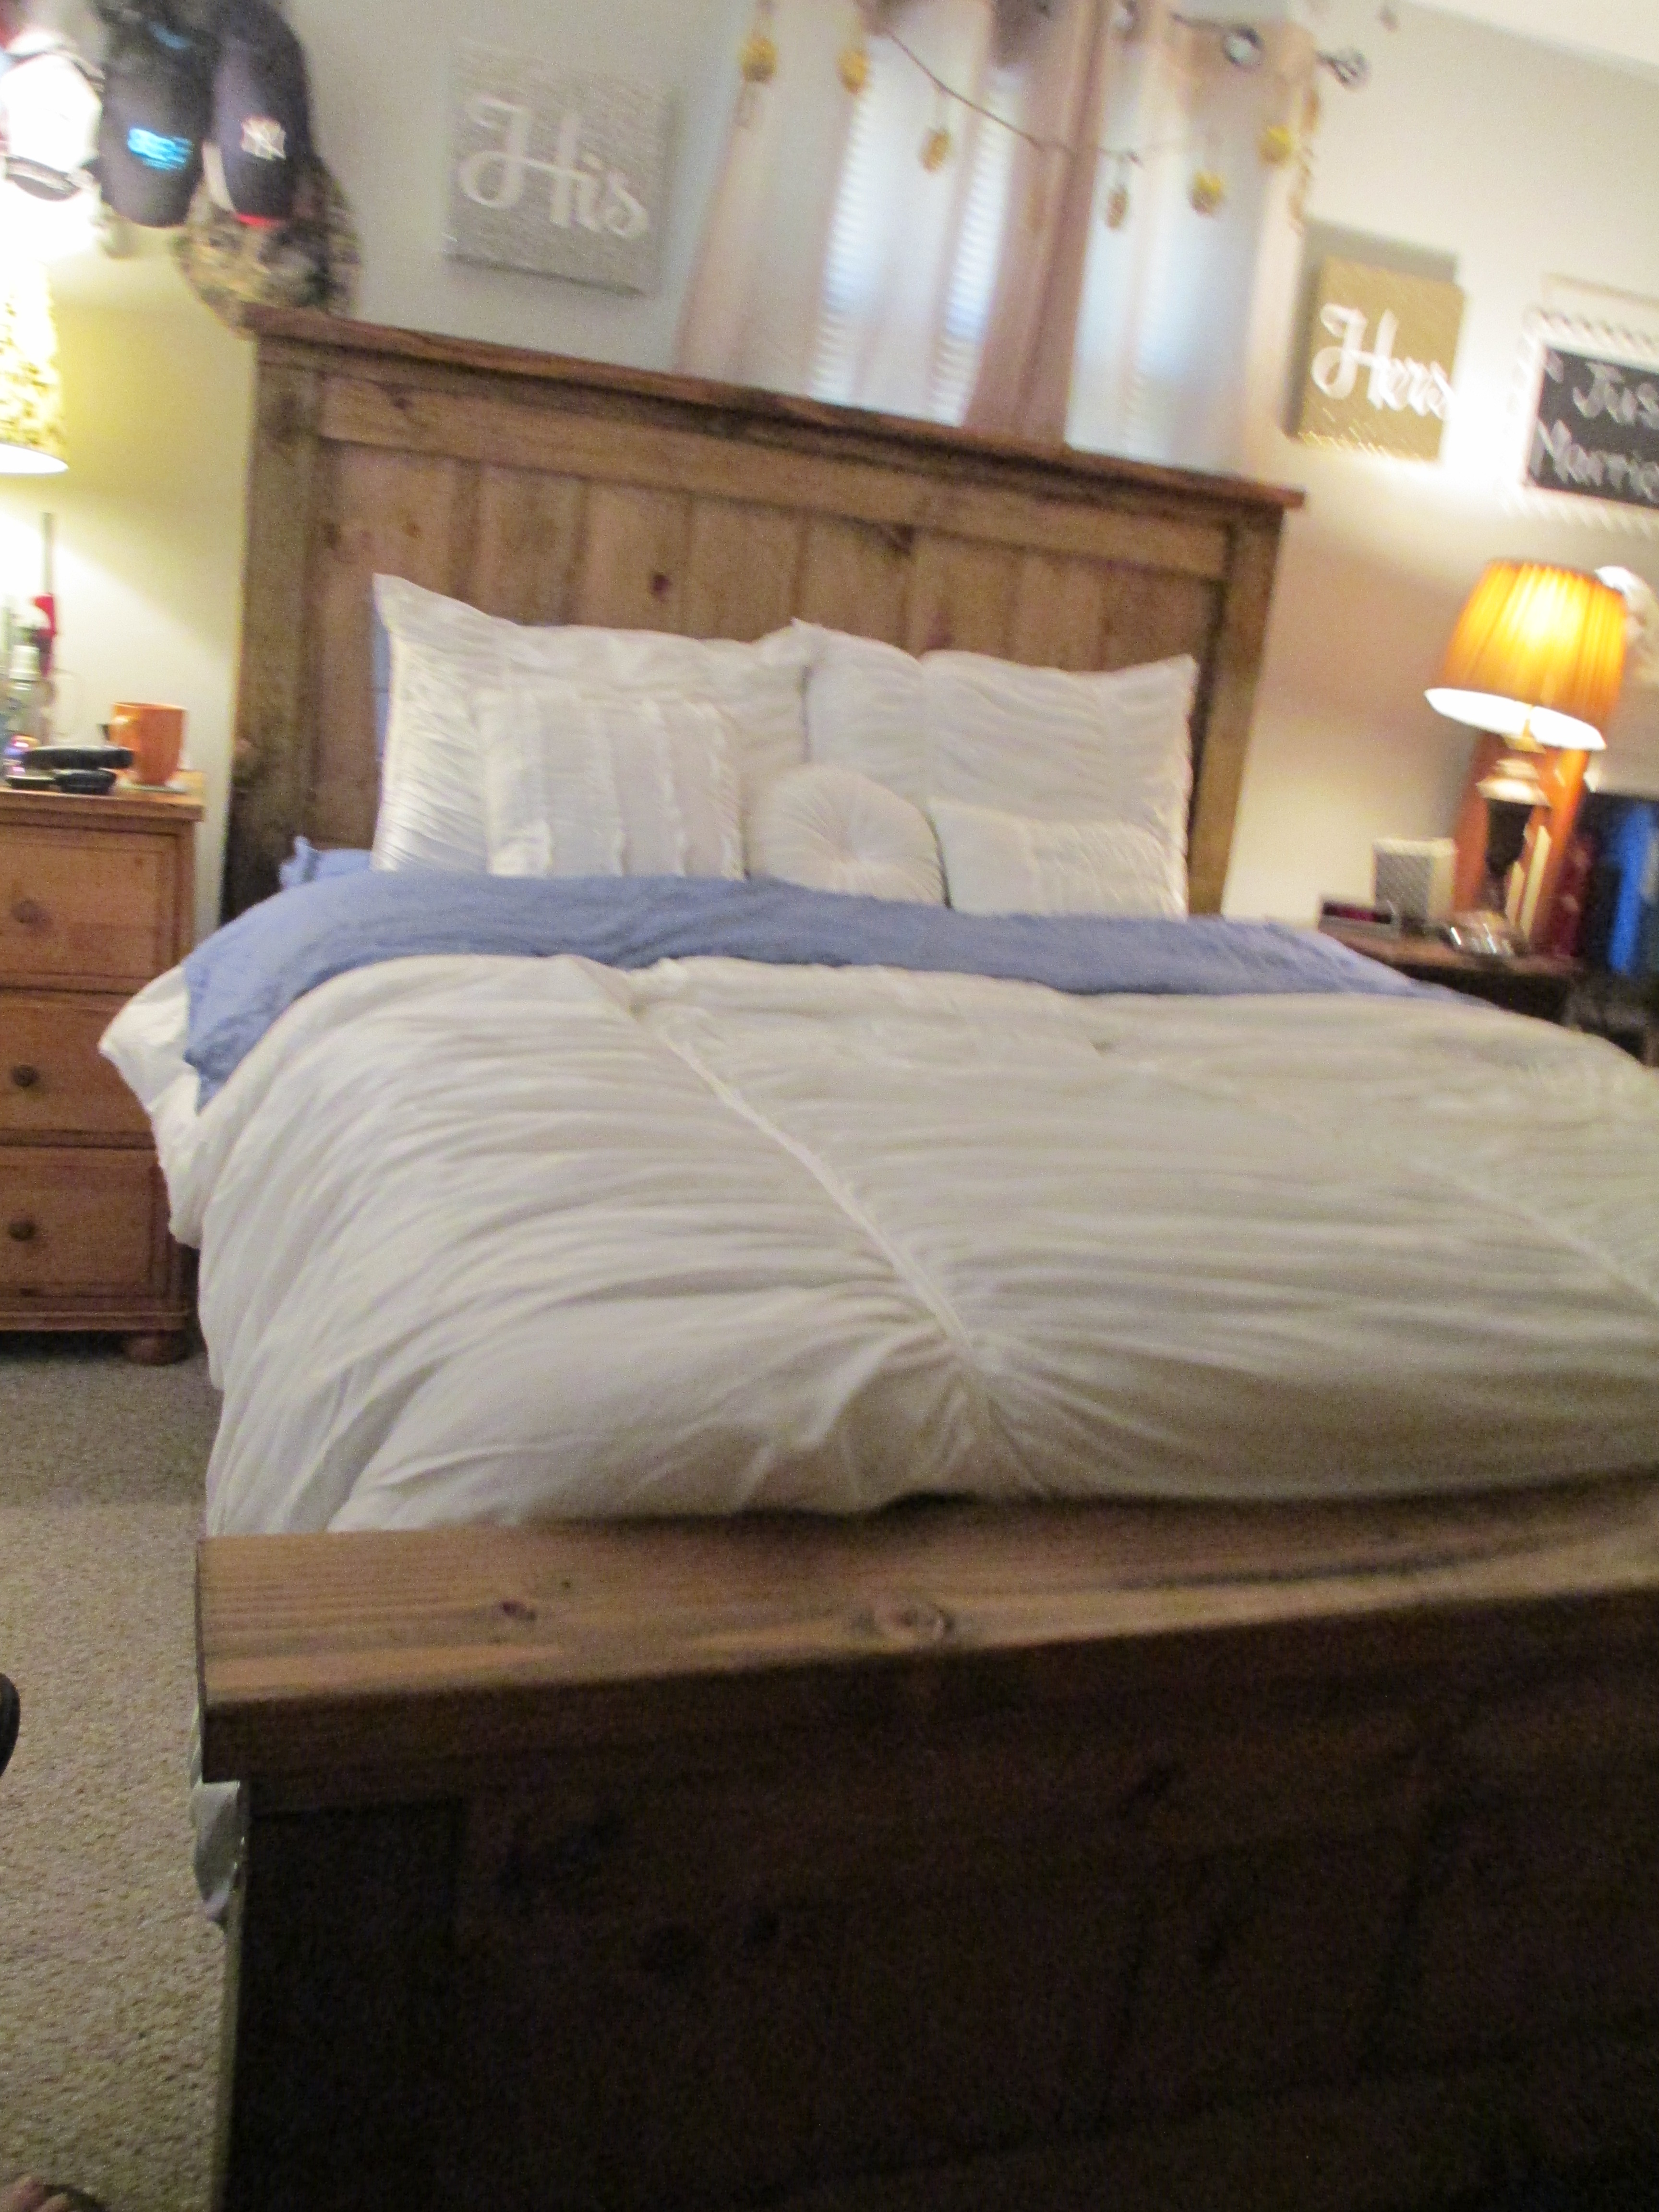
farmhouse queen
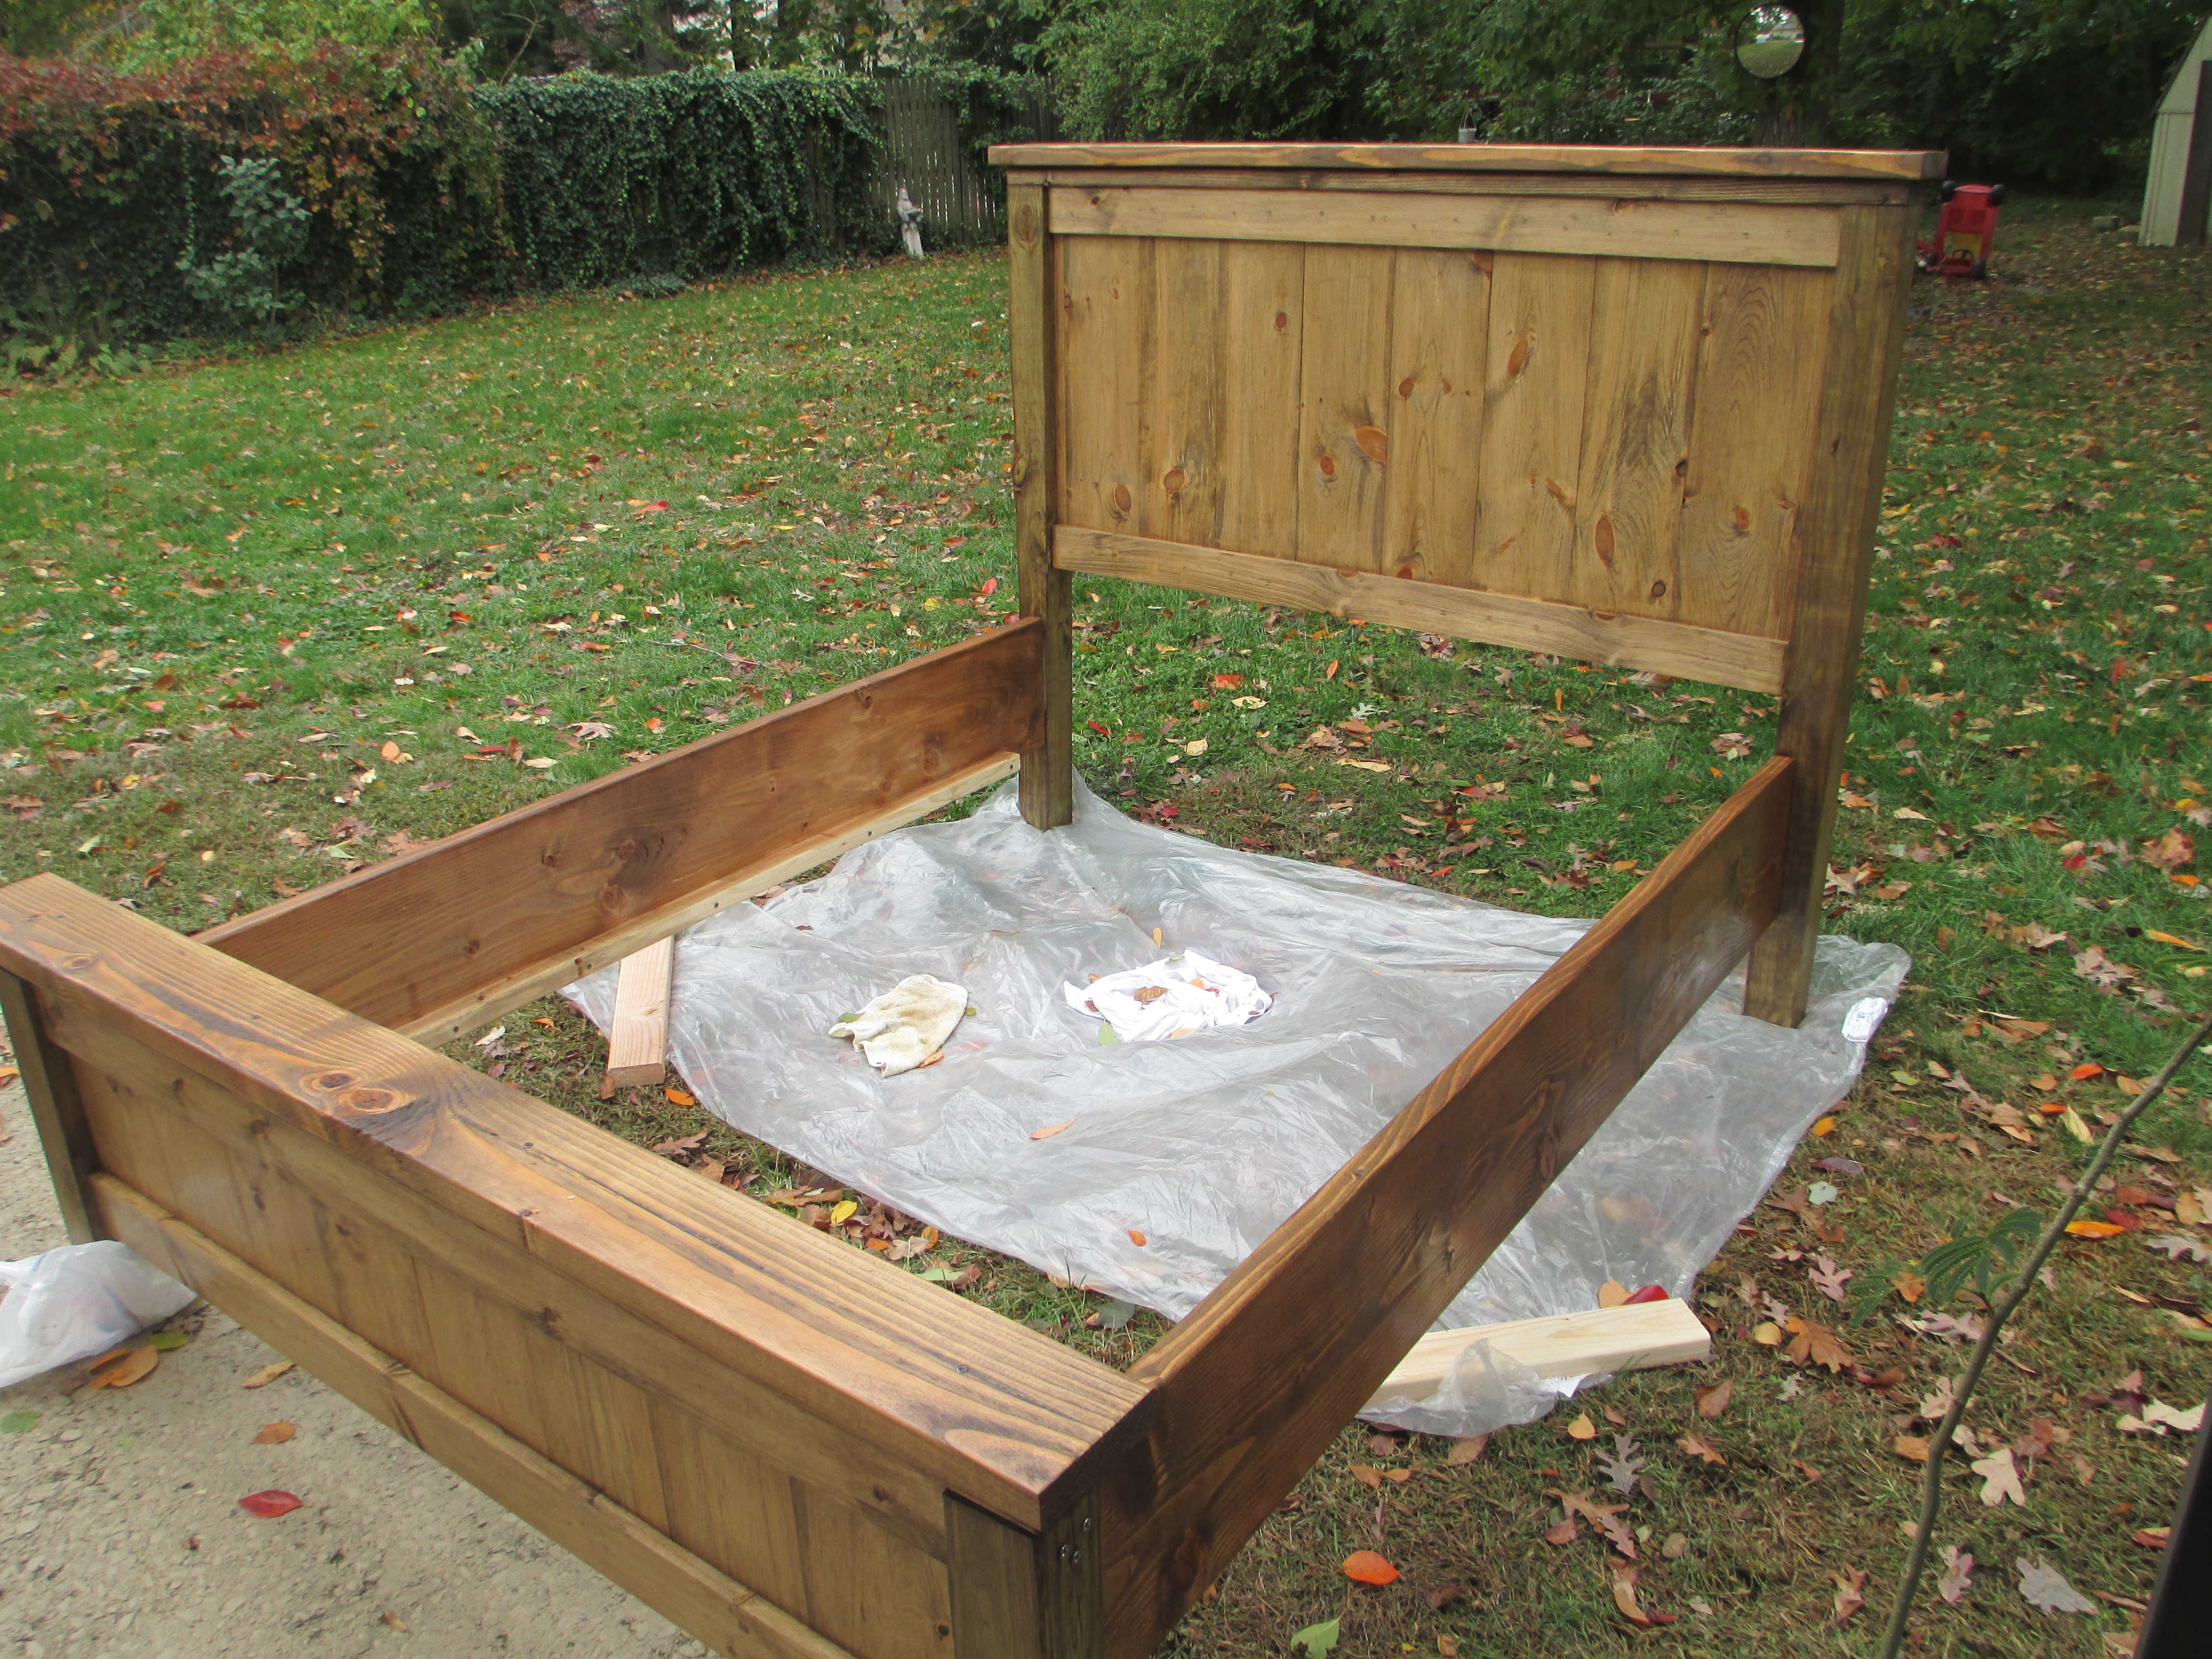
This was my second project. I built it with my hubs and we had a blast. We have a boxspring so we used 2x6s, but laid them flat. We also used 2x12s for the sides and instead of attatching the sides permanantly we used bed hooks that we ordered online to attatch the sides. 4x4s were impossible to find. We ended up buying treated ones and sanding them for ages.
Built from Plan(s)
Estimated Time Investment
Weekend Project (10-20 Hours)
Finish Used
minwax special walnut
Recommended Skill Level
Beginner
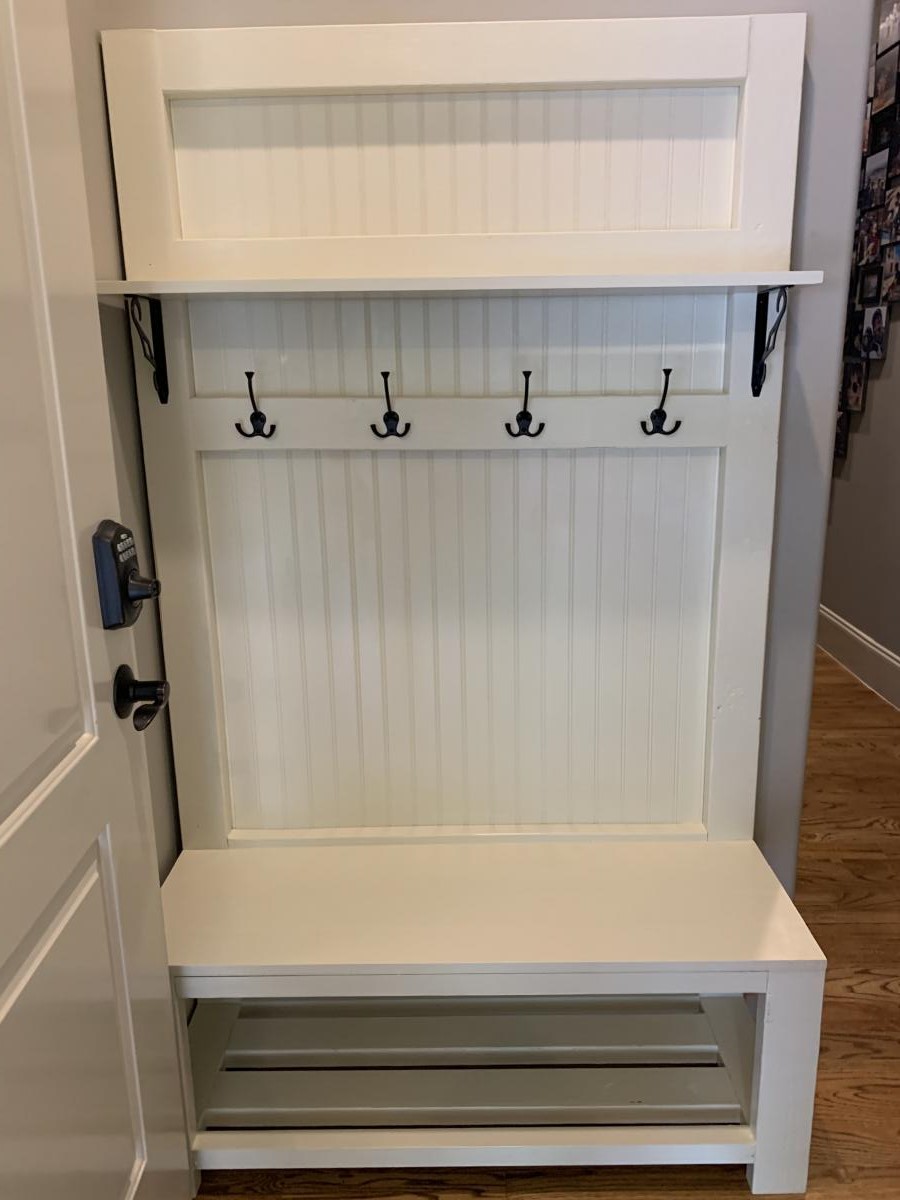
Rustic Hall Tree with a Few Tweaks
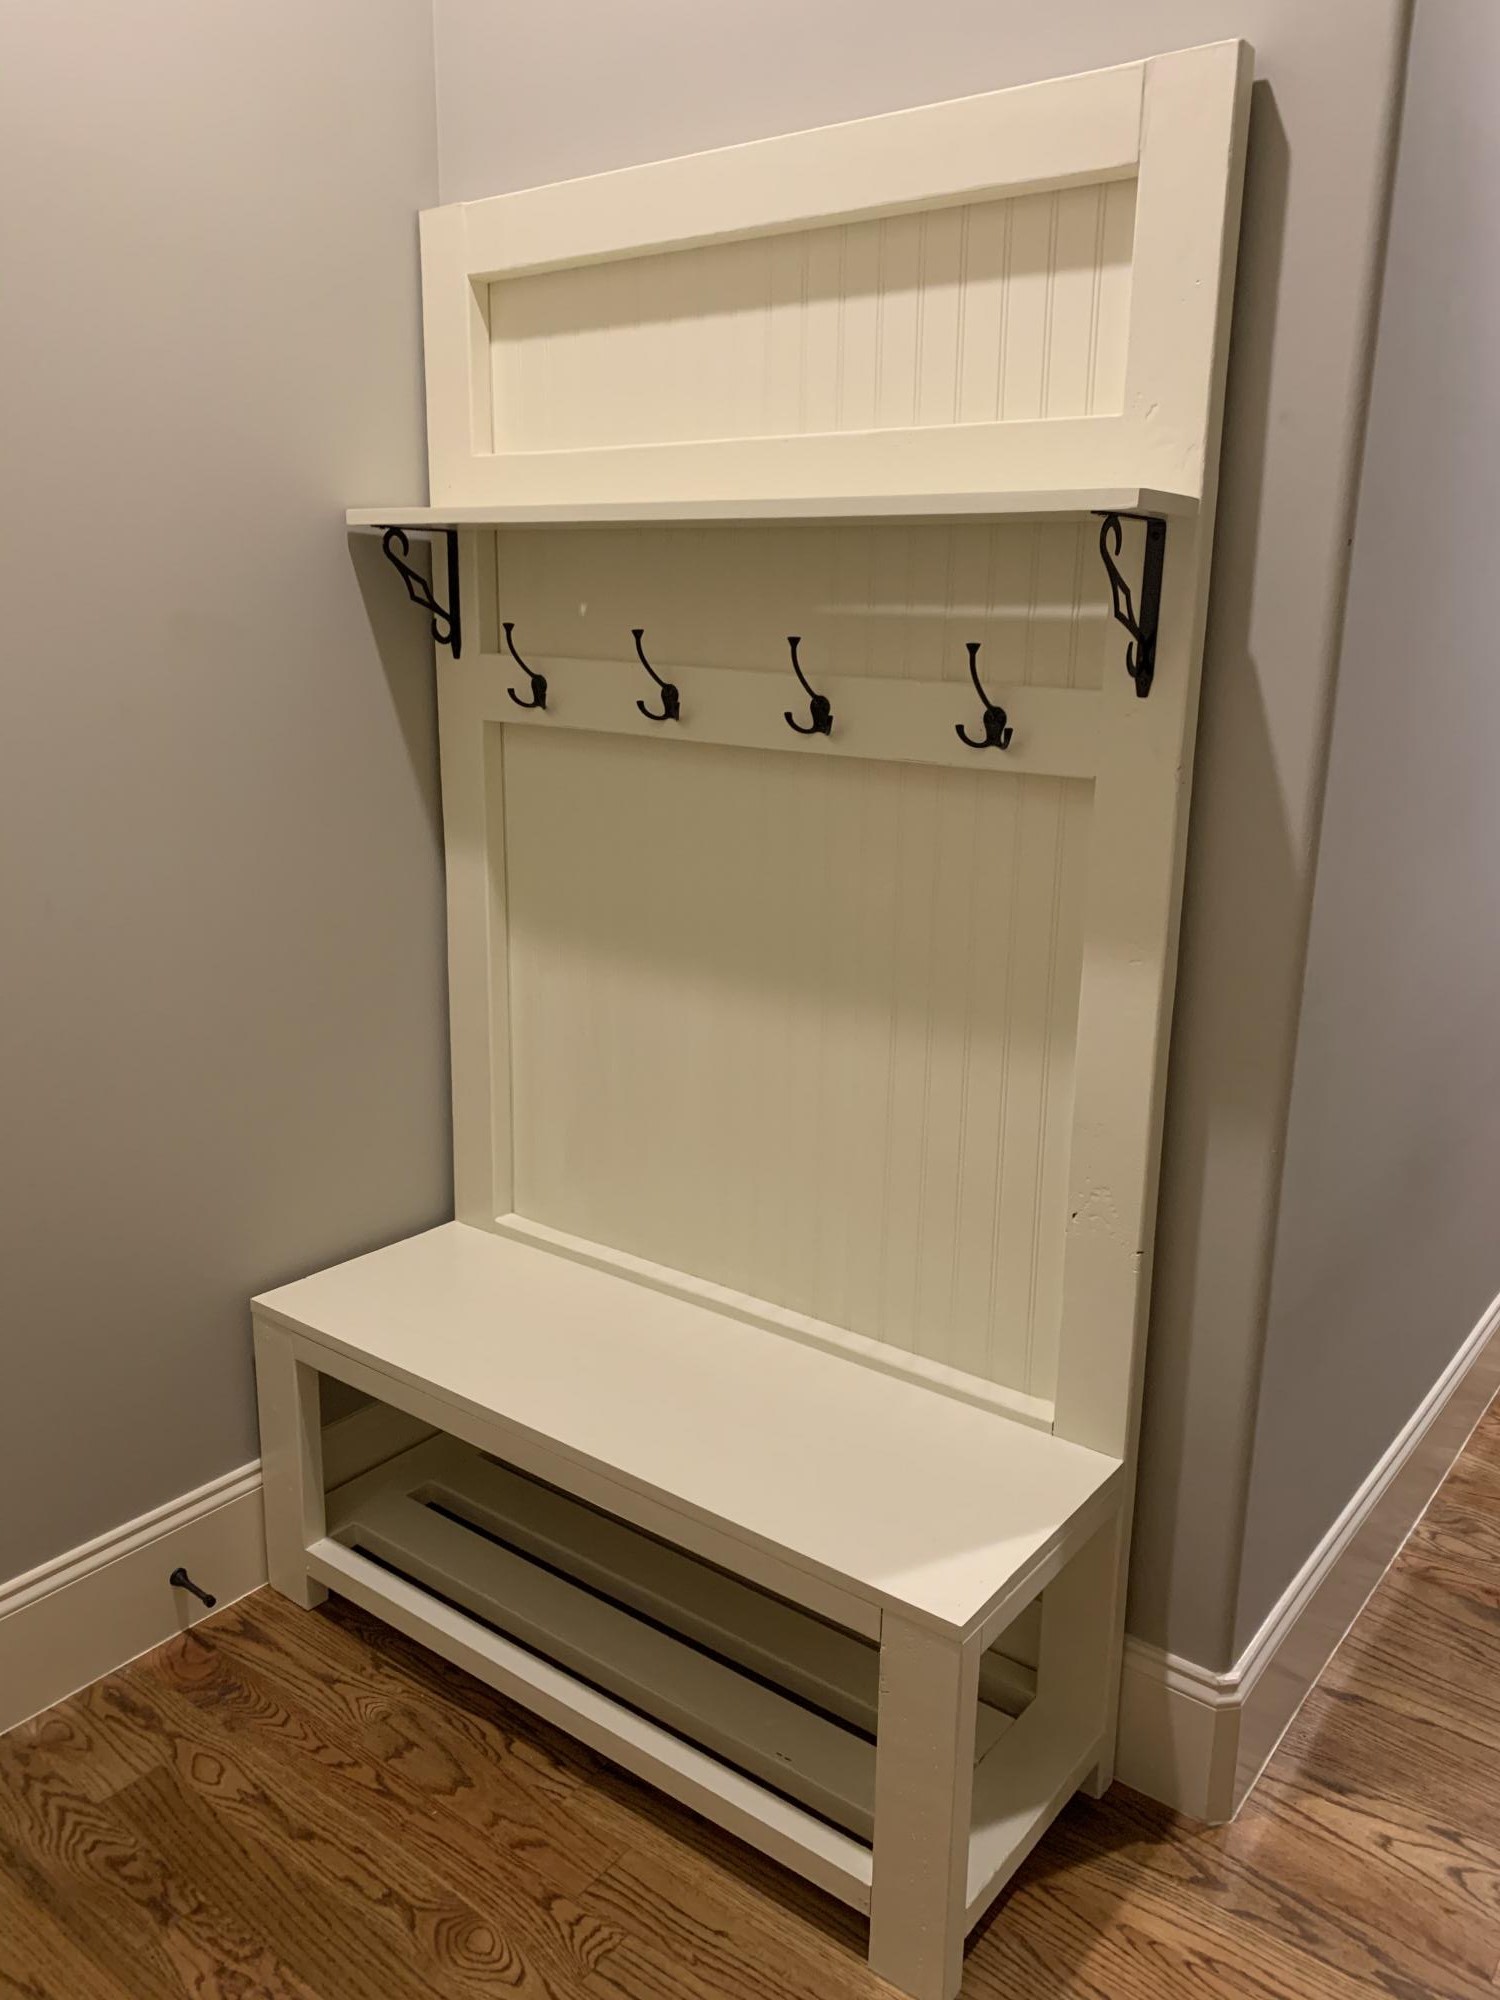
Made a few tweaks to support using some leftover wood from a previous project and hide a seam in the beadboard.
Built from Plan(s)
Estimated Cost
150
Estimated Time Investment
Weekend Project (10-20 Hours)
Recommended Skill Level
Intermediate
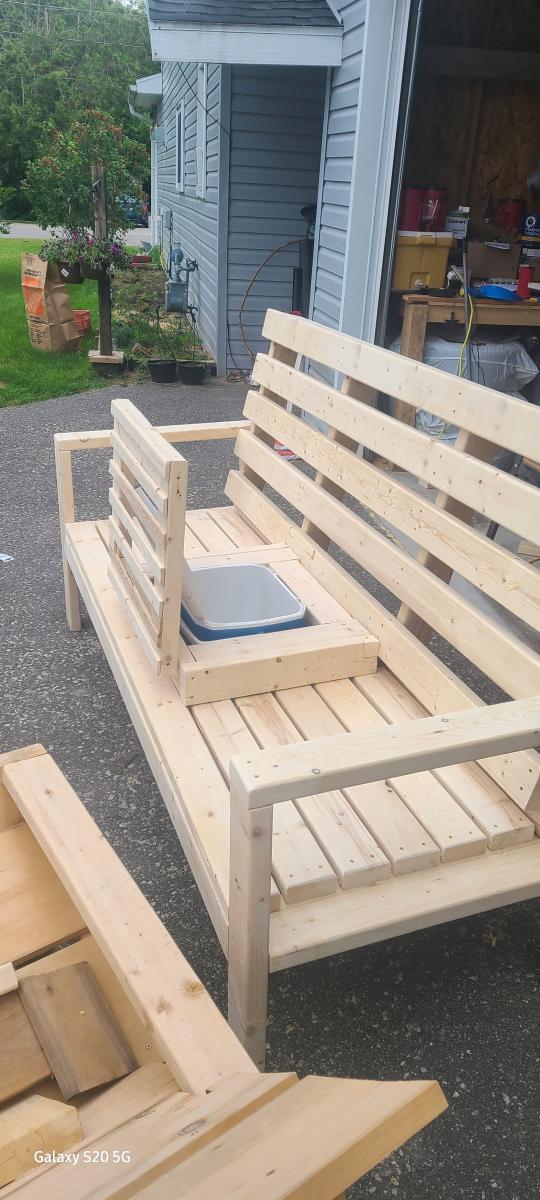
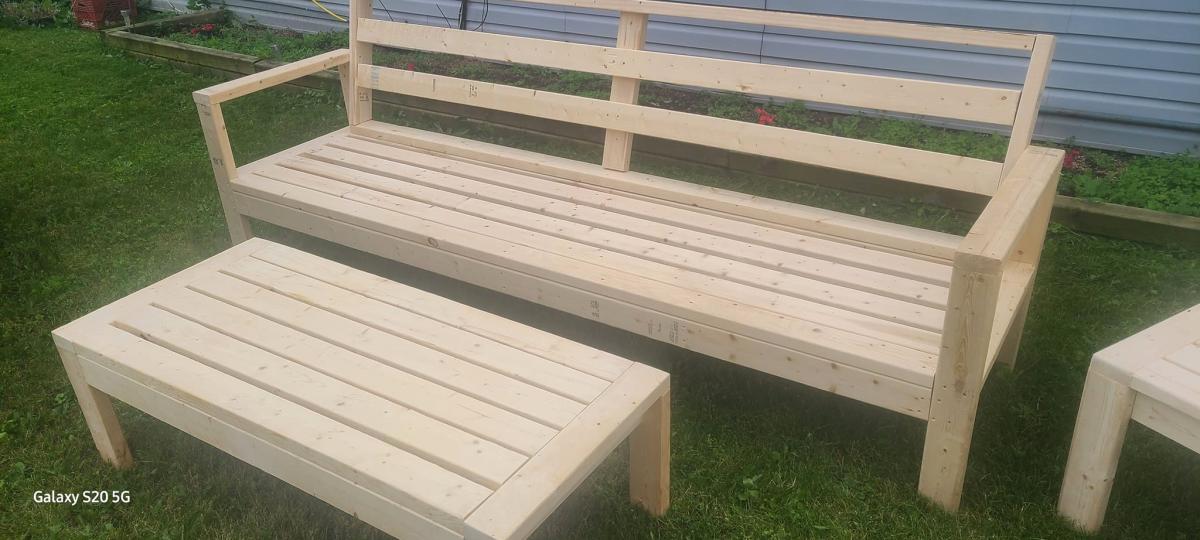
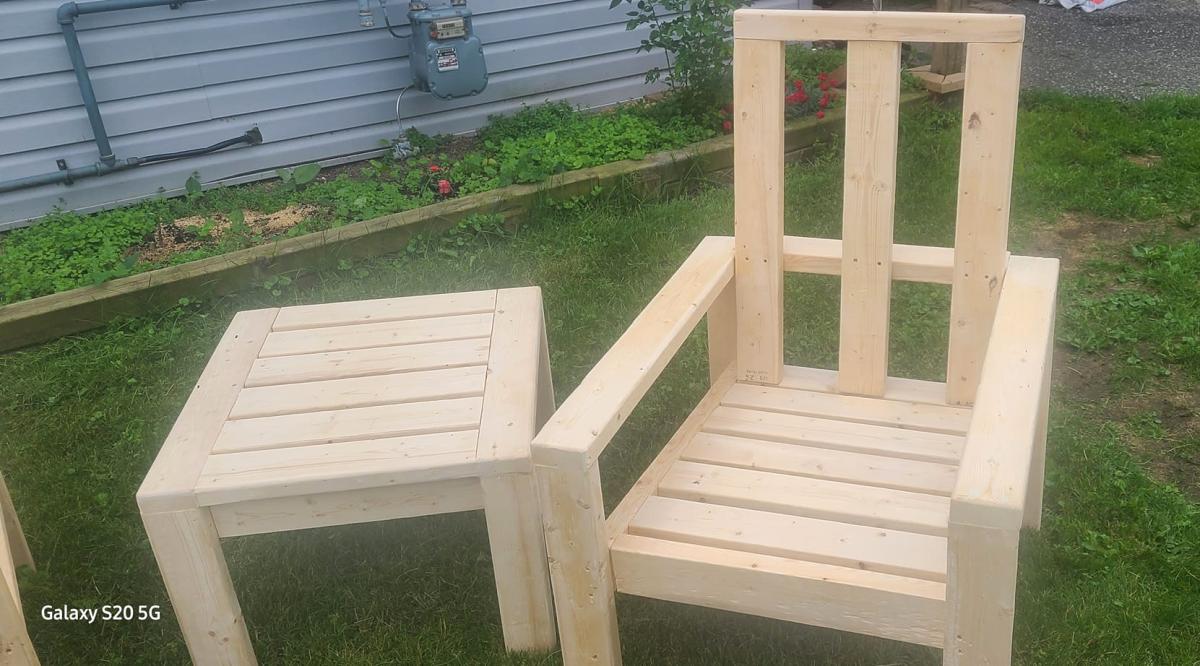
Outdoor DIY Wood Furniture
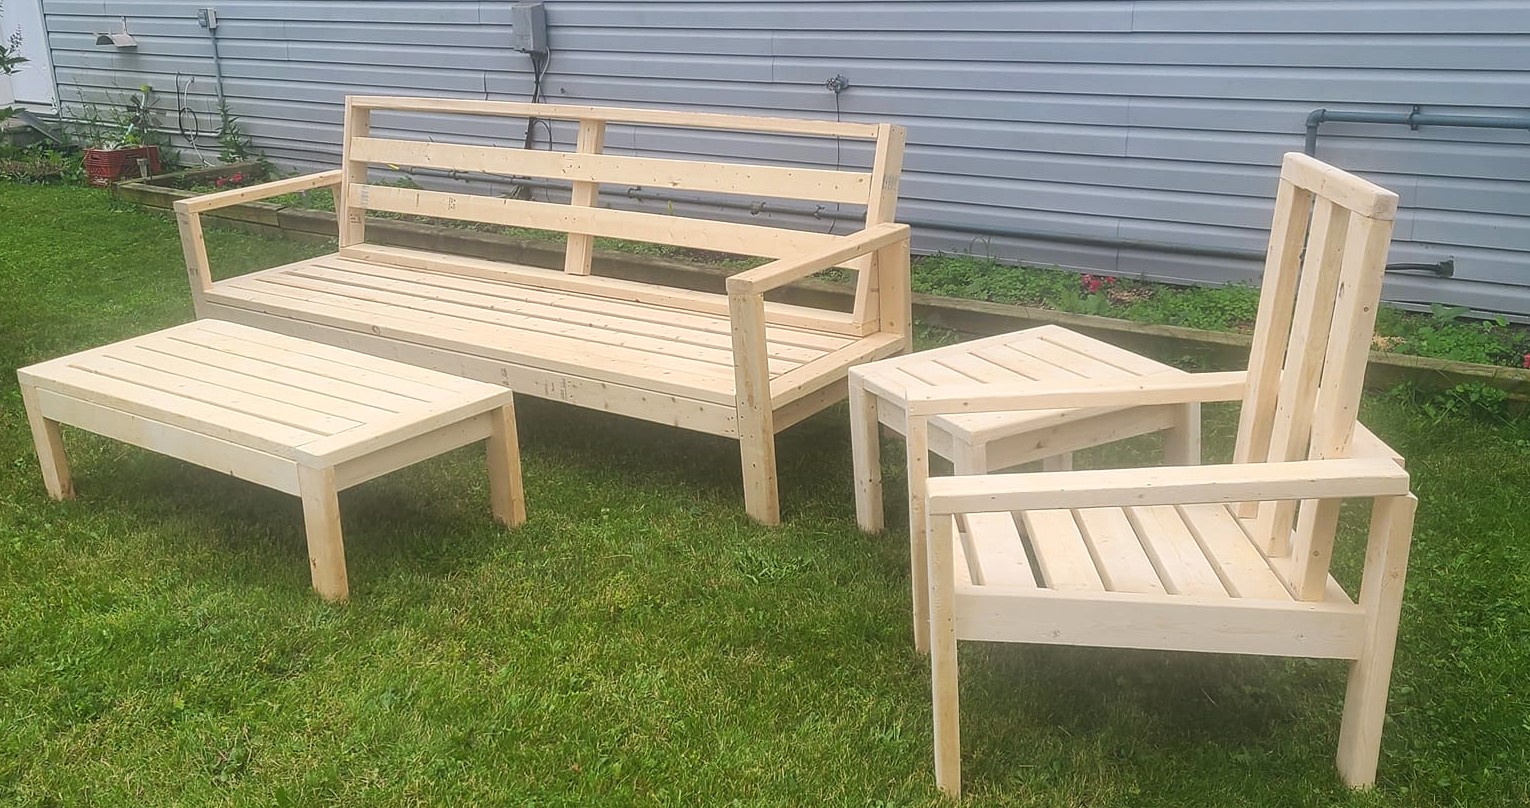
Second pic is a 6ft variation of your bench with a cooler installed in center. The other 3 pics are also from your plans, this is an 8ft bench with coffee table, end table and chair. not sure where I went wrong on the angle for chair but the length was correct however as you can see the back of the arm came up 1" short.
John Dunn
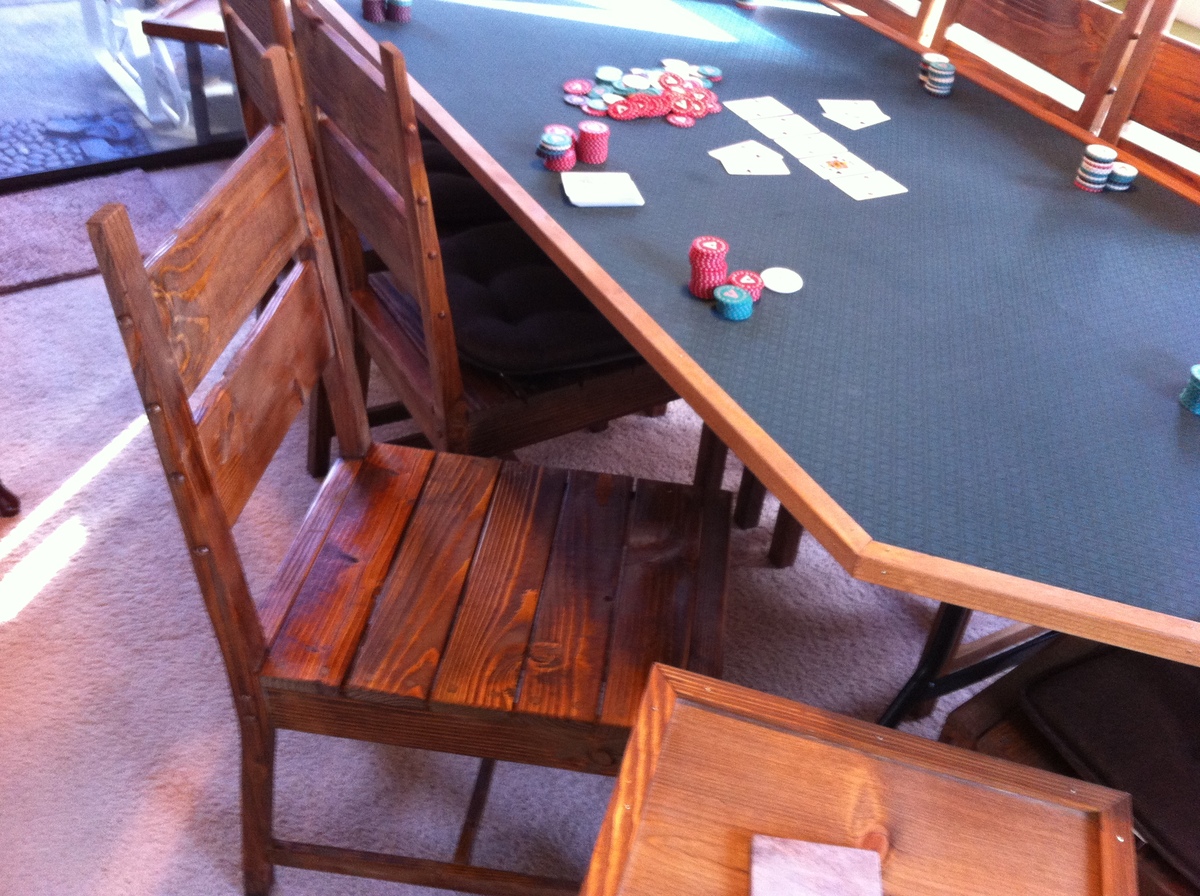
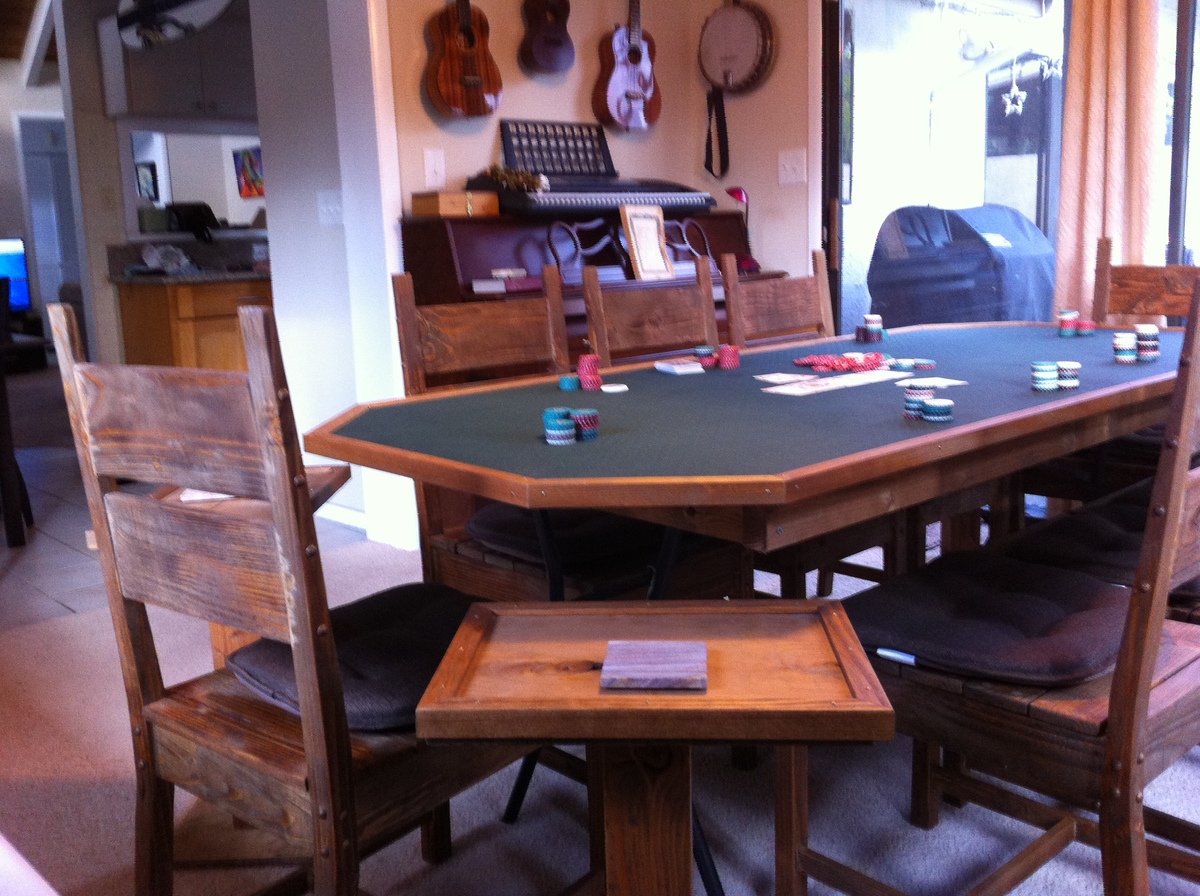
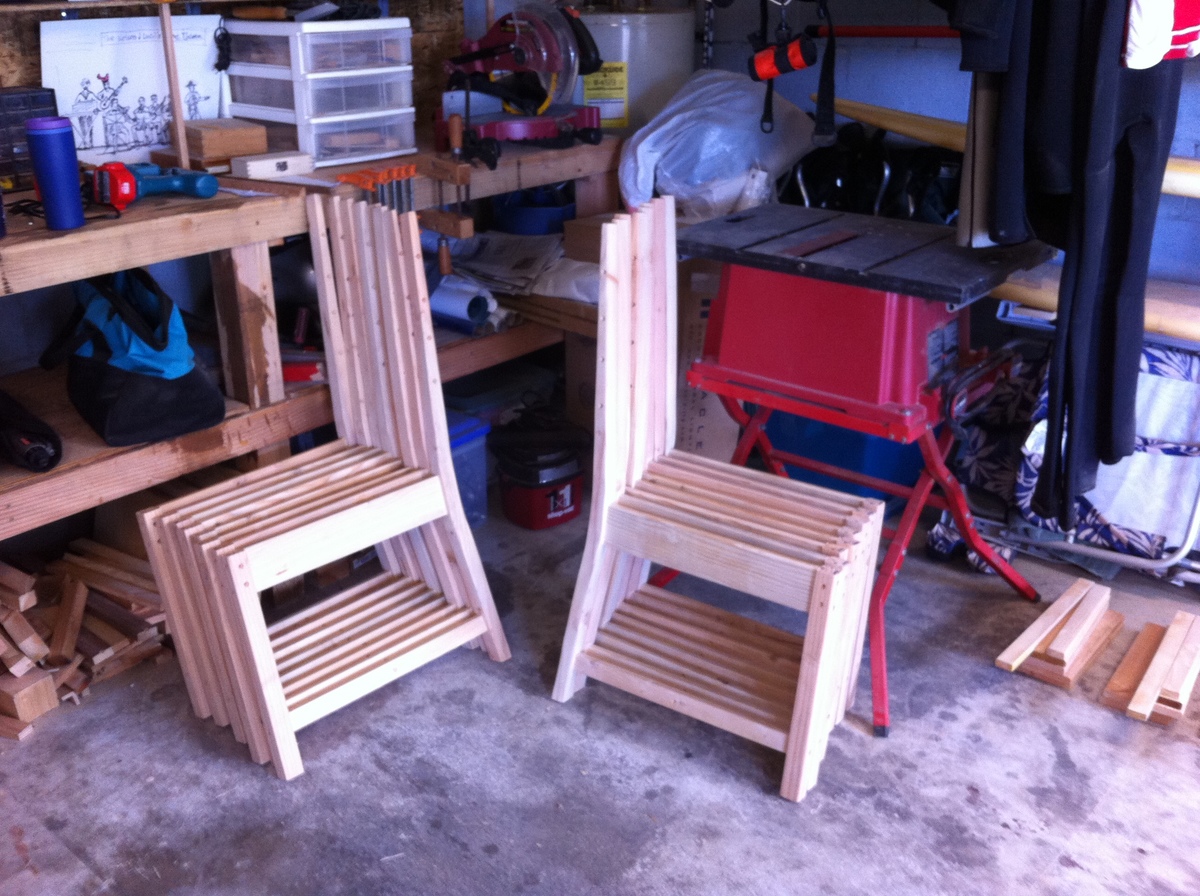
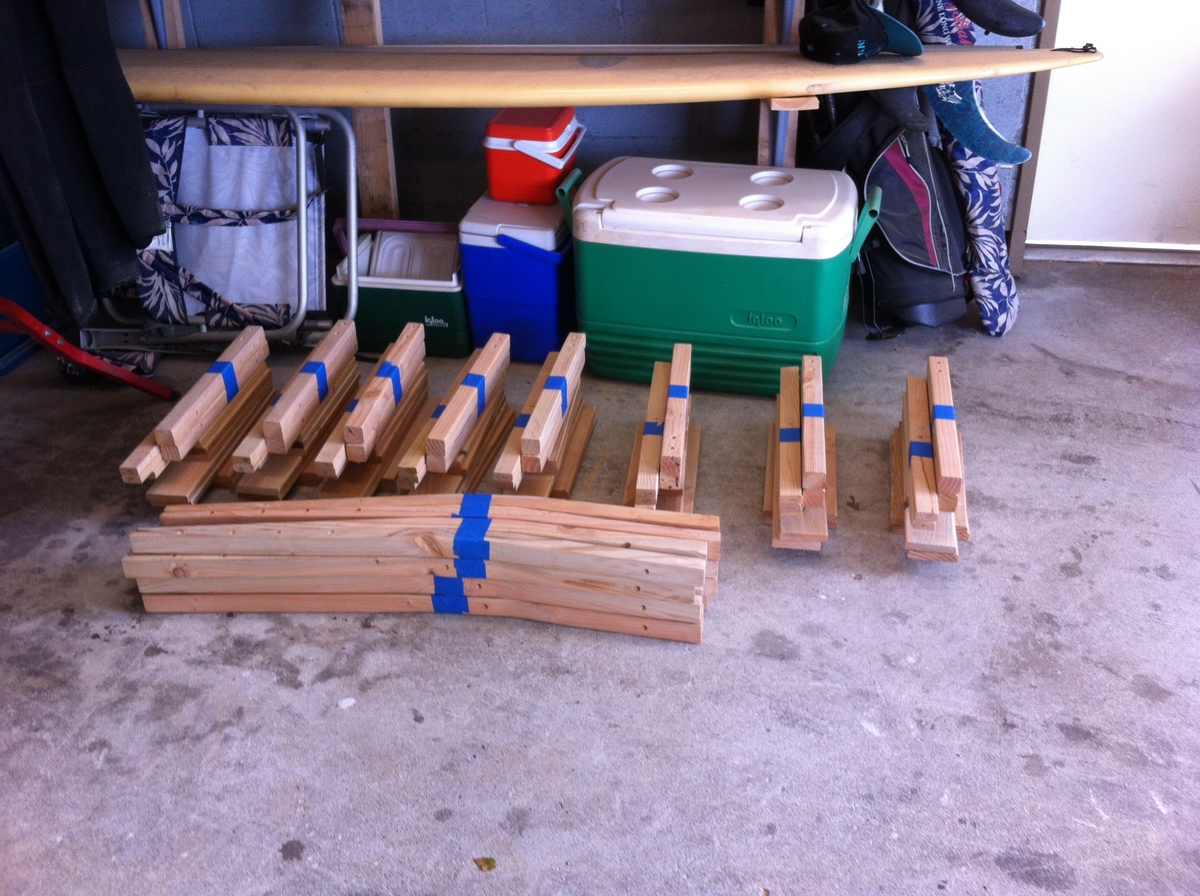
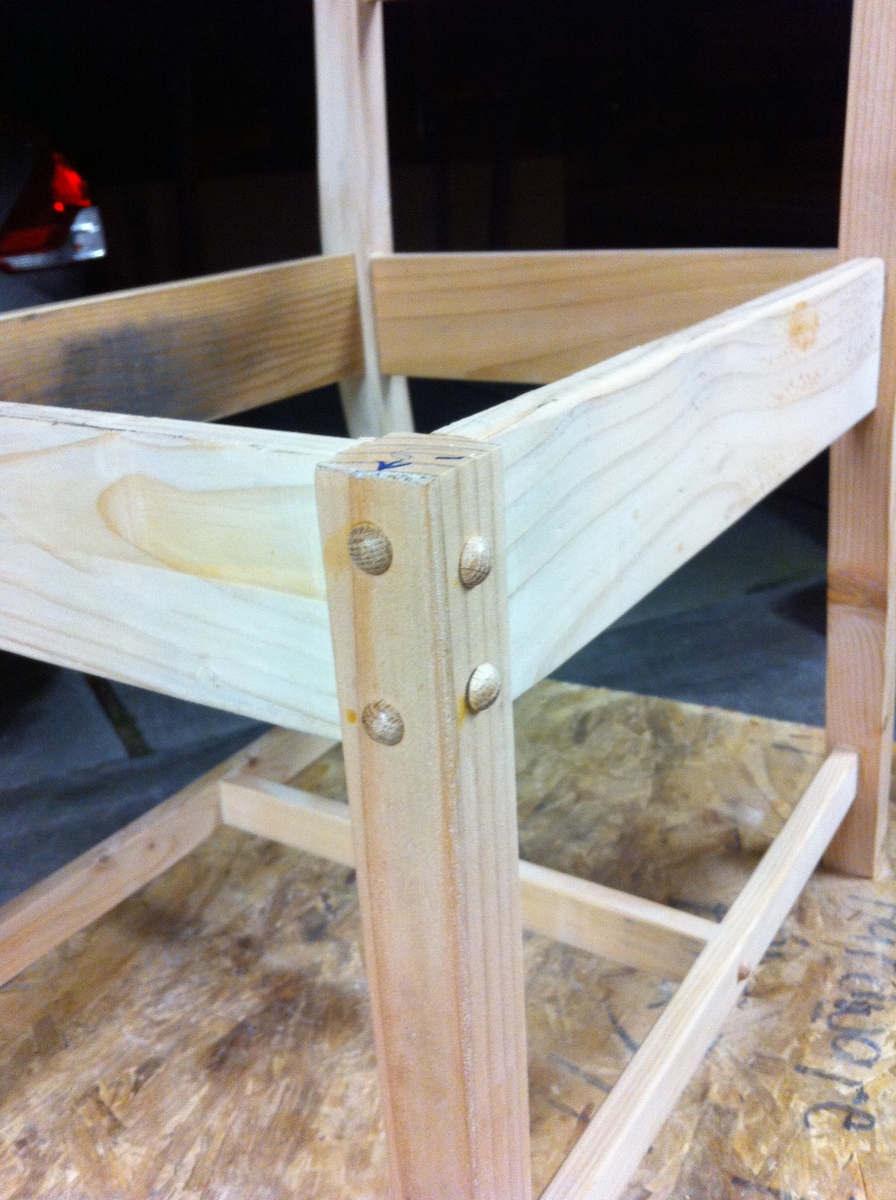
Classic Chair X 8, a poker room is born
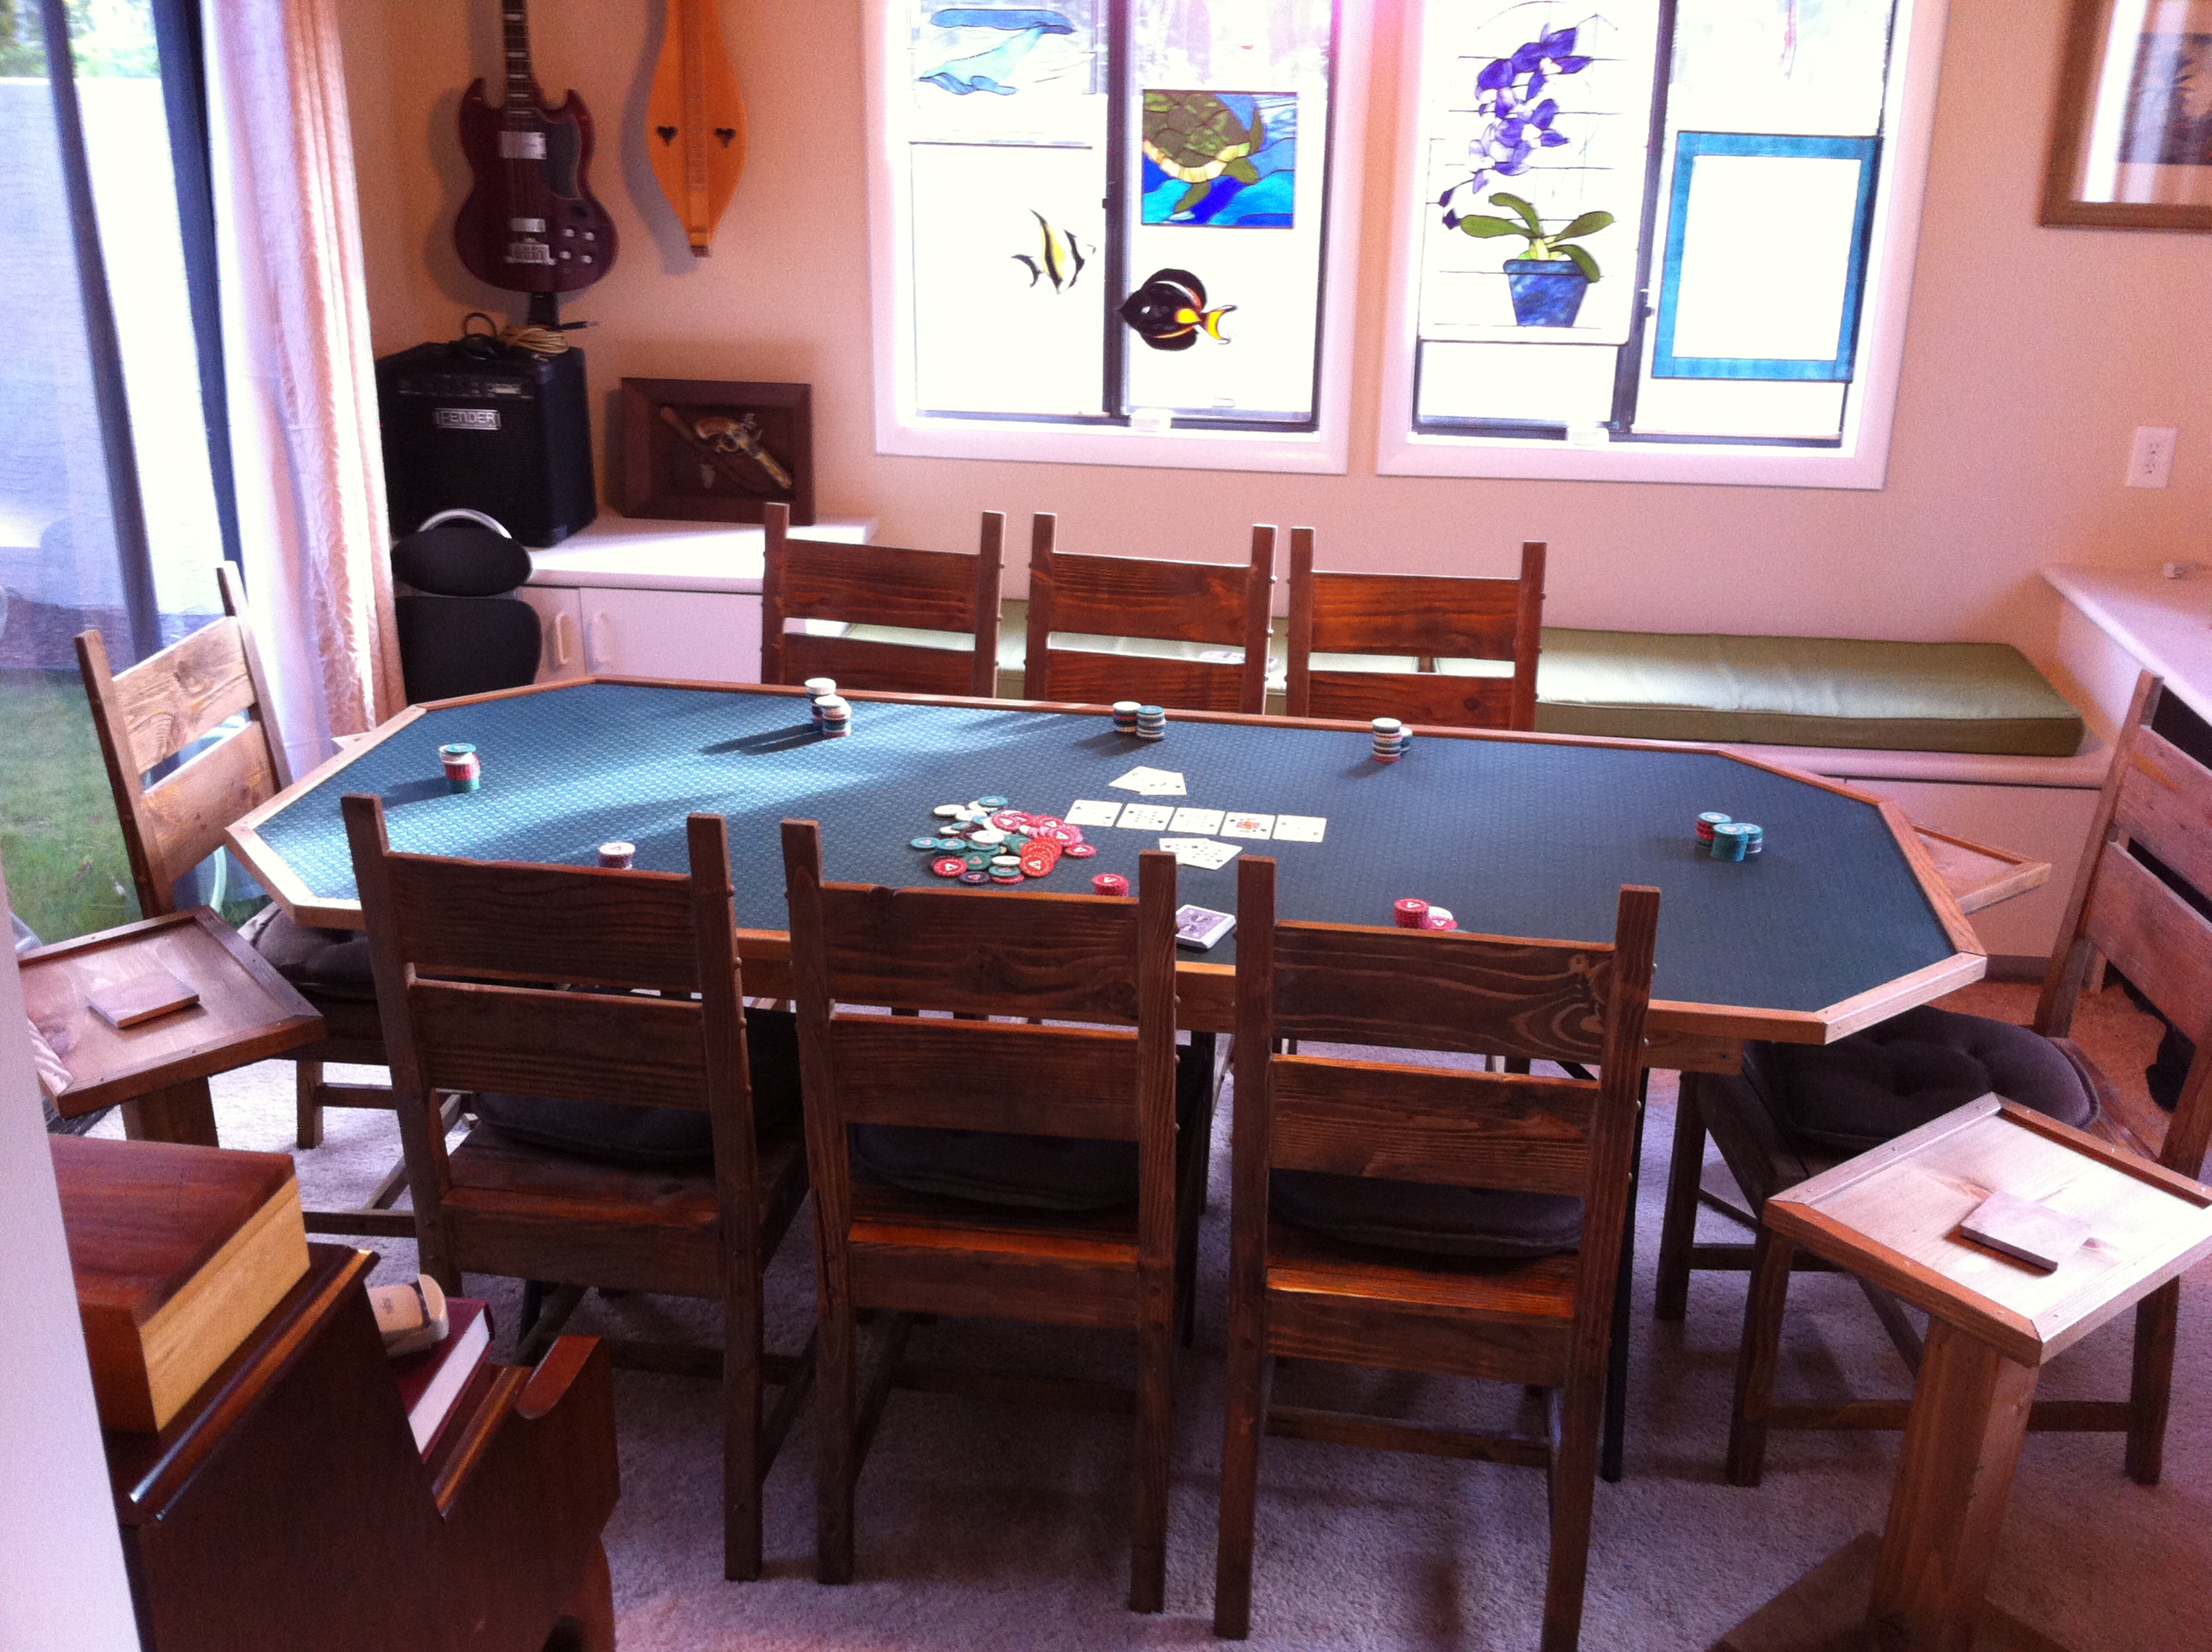
Great, beefy chair with a rustic look around the poker table with side tables (another project that took longer than anticipated); the plans were great and easy to follow. I made a few modifications:
- Reduced the width from 19" to 16" to fit around the table.
- Made the seat out of 1x4's horizontally mounted with an extra support underneath. It helps to keep the cushions from sliding and I liked the look.
- Rather than pocket holes I counter-sunk and used oak plugs.
I did the whole thing assembly-line style creating "kits" as I went along. That allowed me to make jigs for each cut so things were reasonable close from chair to chair. Also, I only made one attempt at the jigsaw cut for the rear angle...the jigsaw got very upset. For the rest, I used the chop saw to make little slices and then chiseled and sanded.
Two coats of Danish Oil on everything gave me the look I was trying for, kind of the back-room-in-an-old-John-Wayne-cowboy-movie vibe. Leave your pistols at the bar.
The times and costs are per chair, the whole thing took a whole lot longer!
Estimated Cost
$35/chair
Estimated Time Investment
Weekend Project (10-20 Hours)
Finish Used
Danish Oil, Dark Walnut
Recommended Skill Level
Intermediate
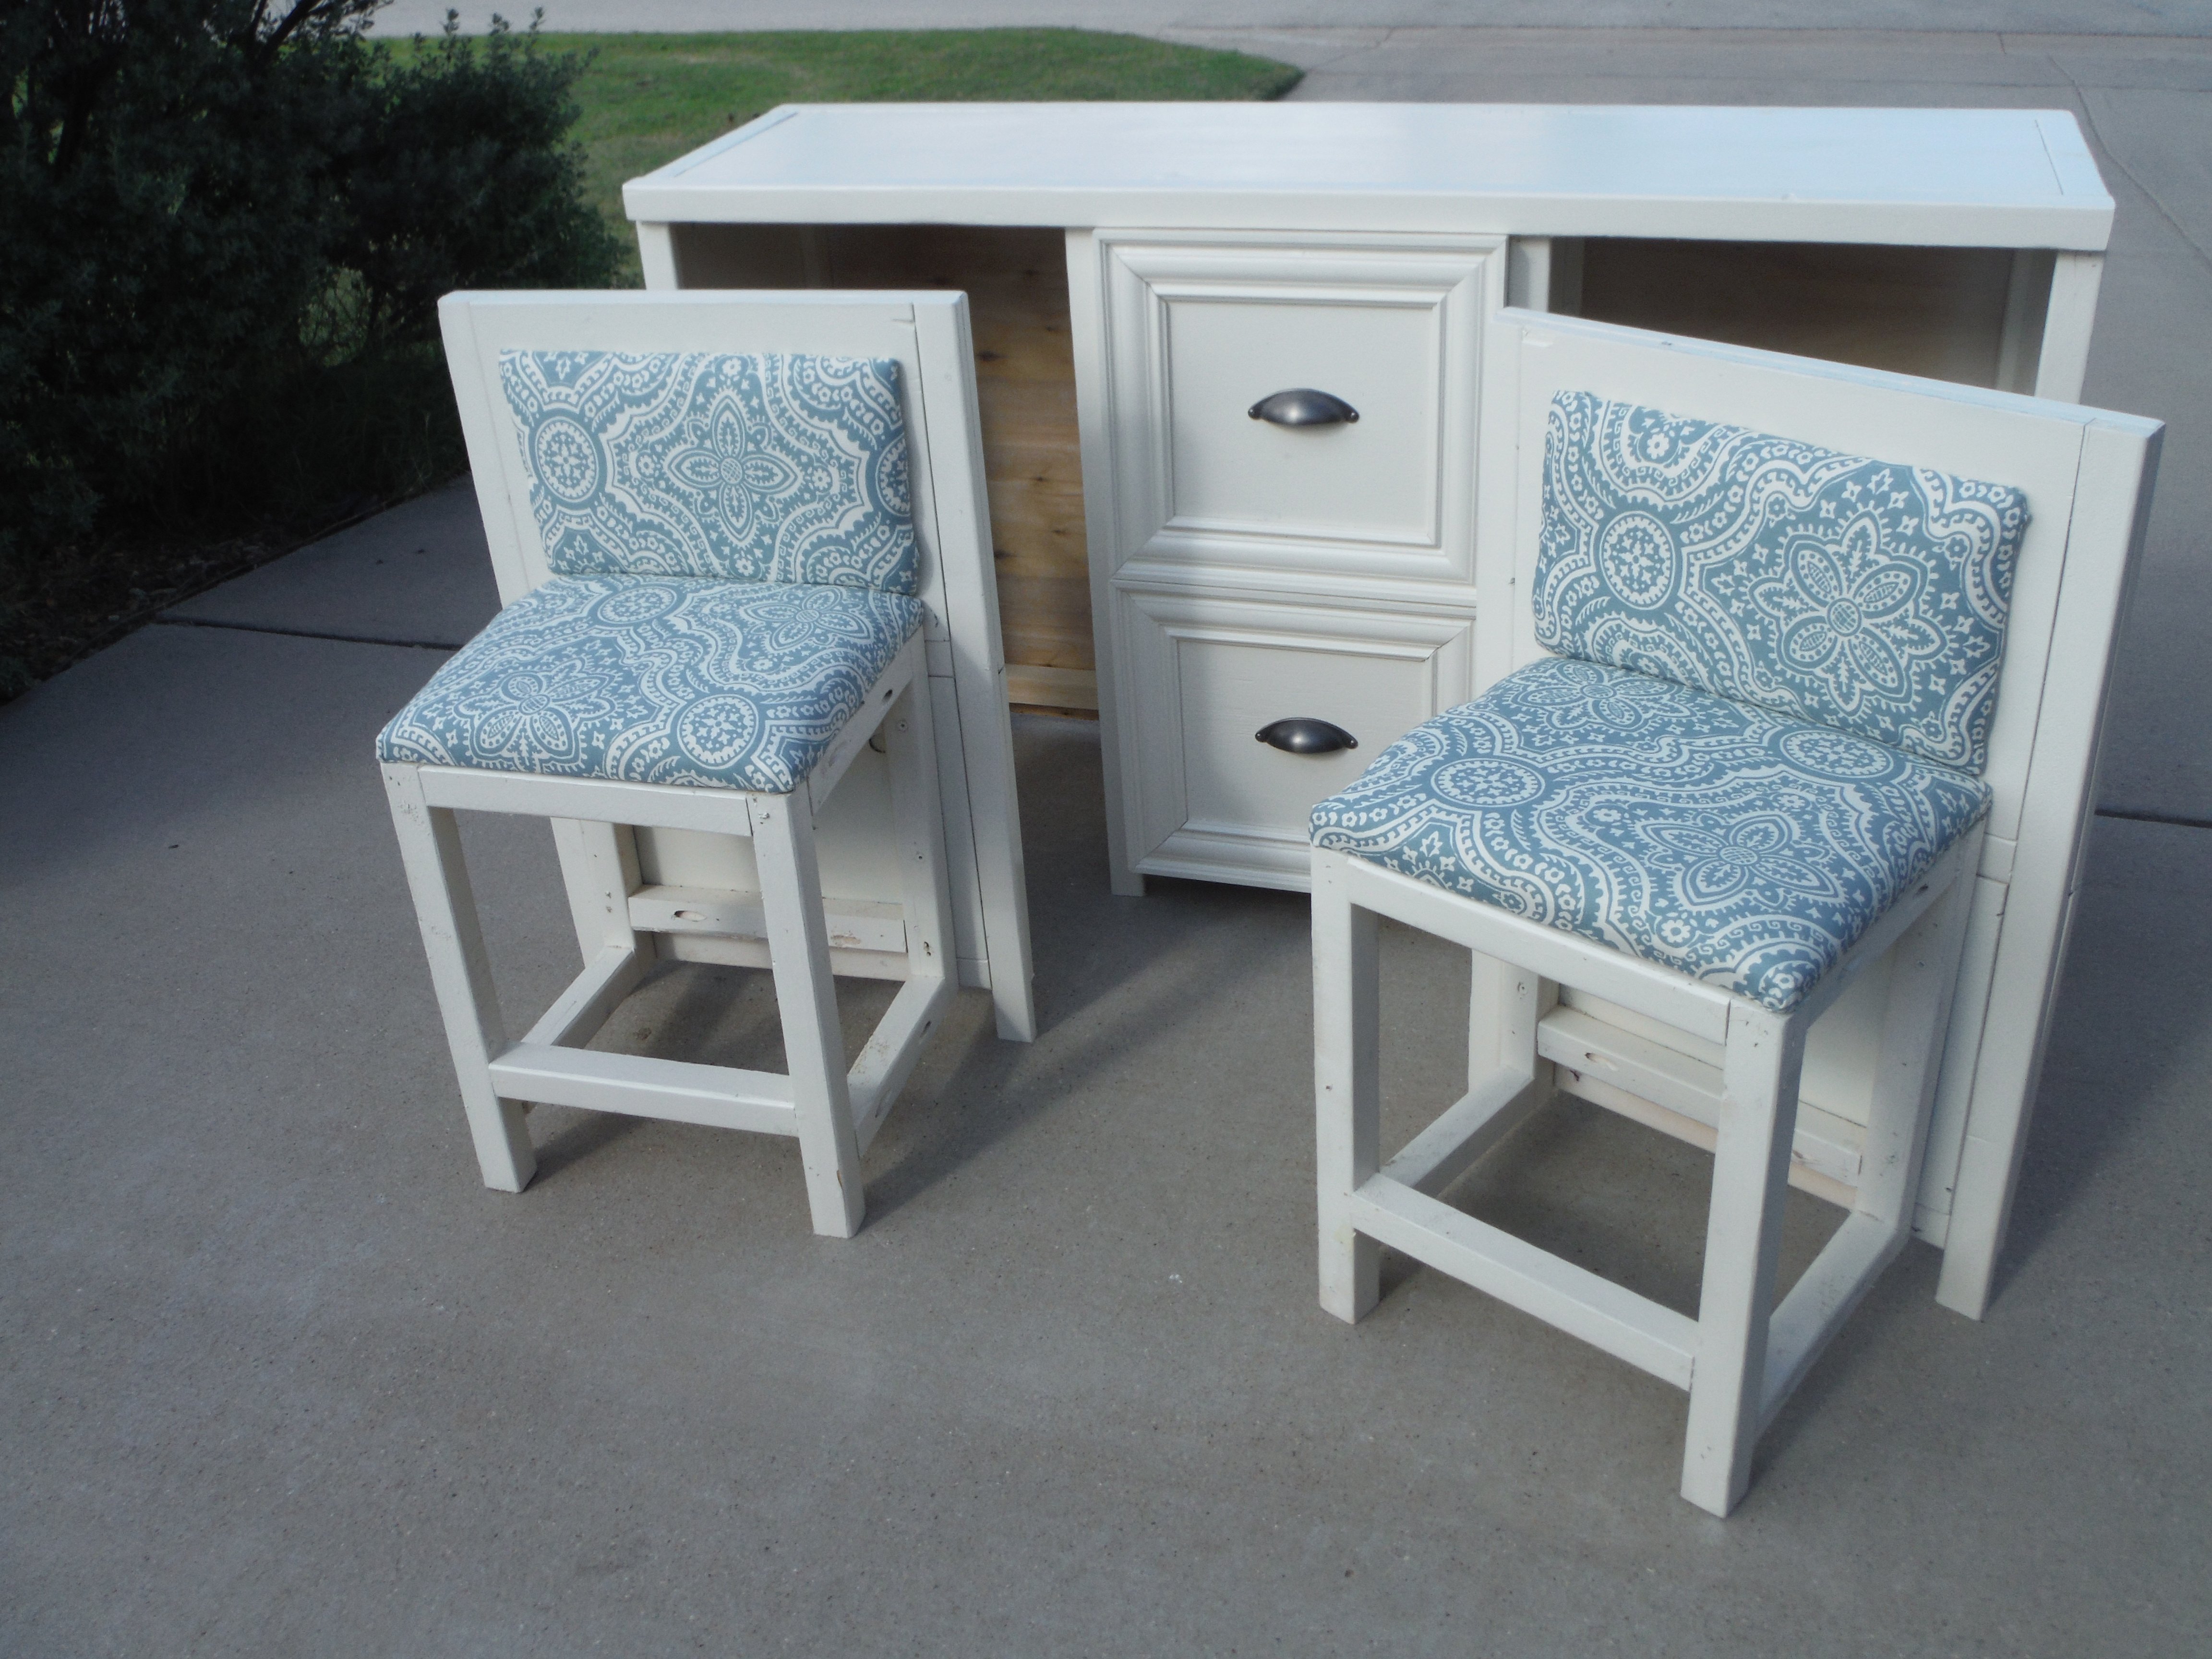
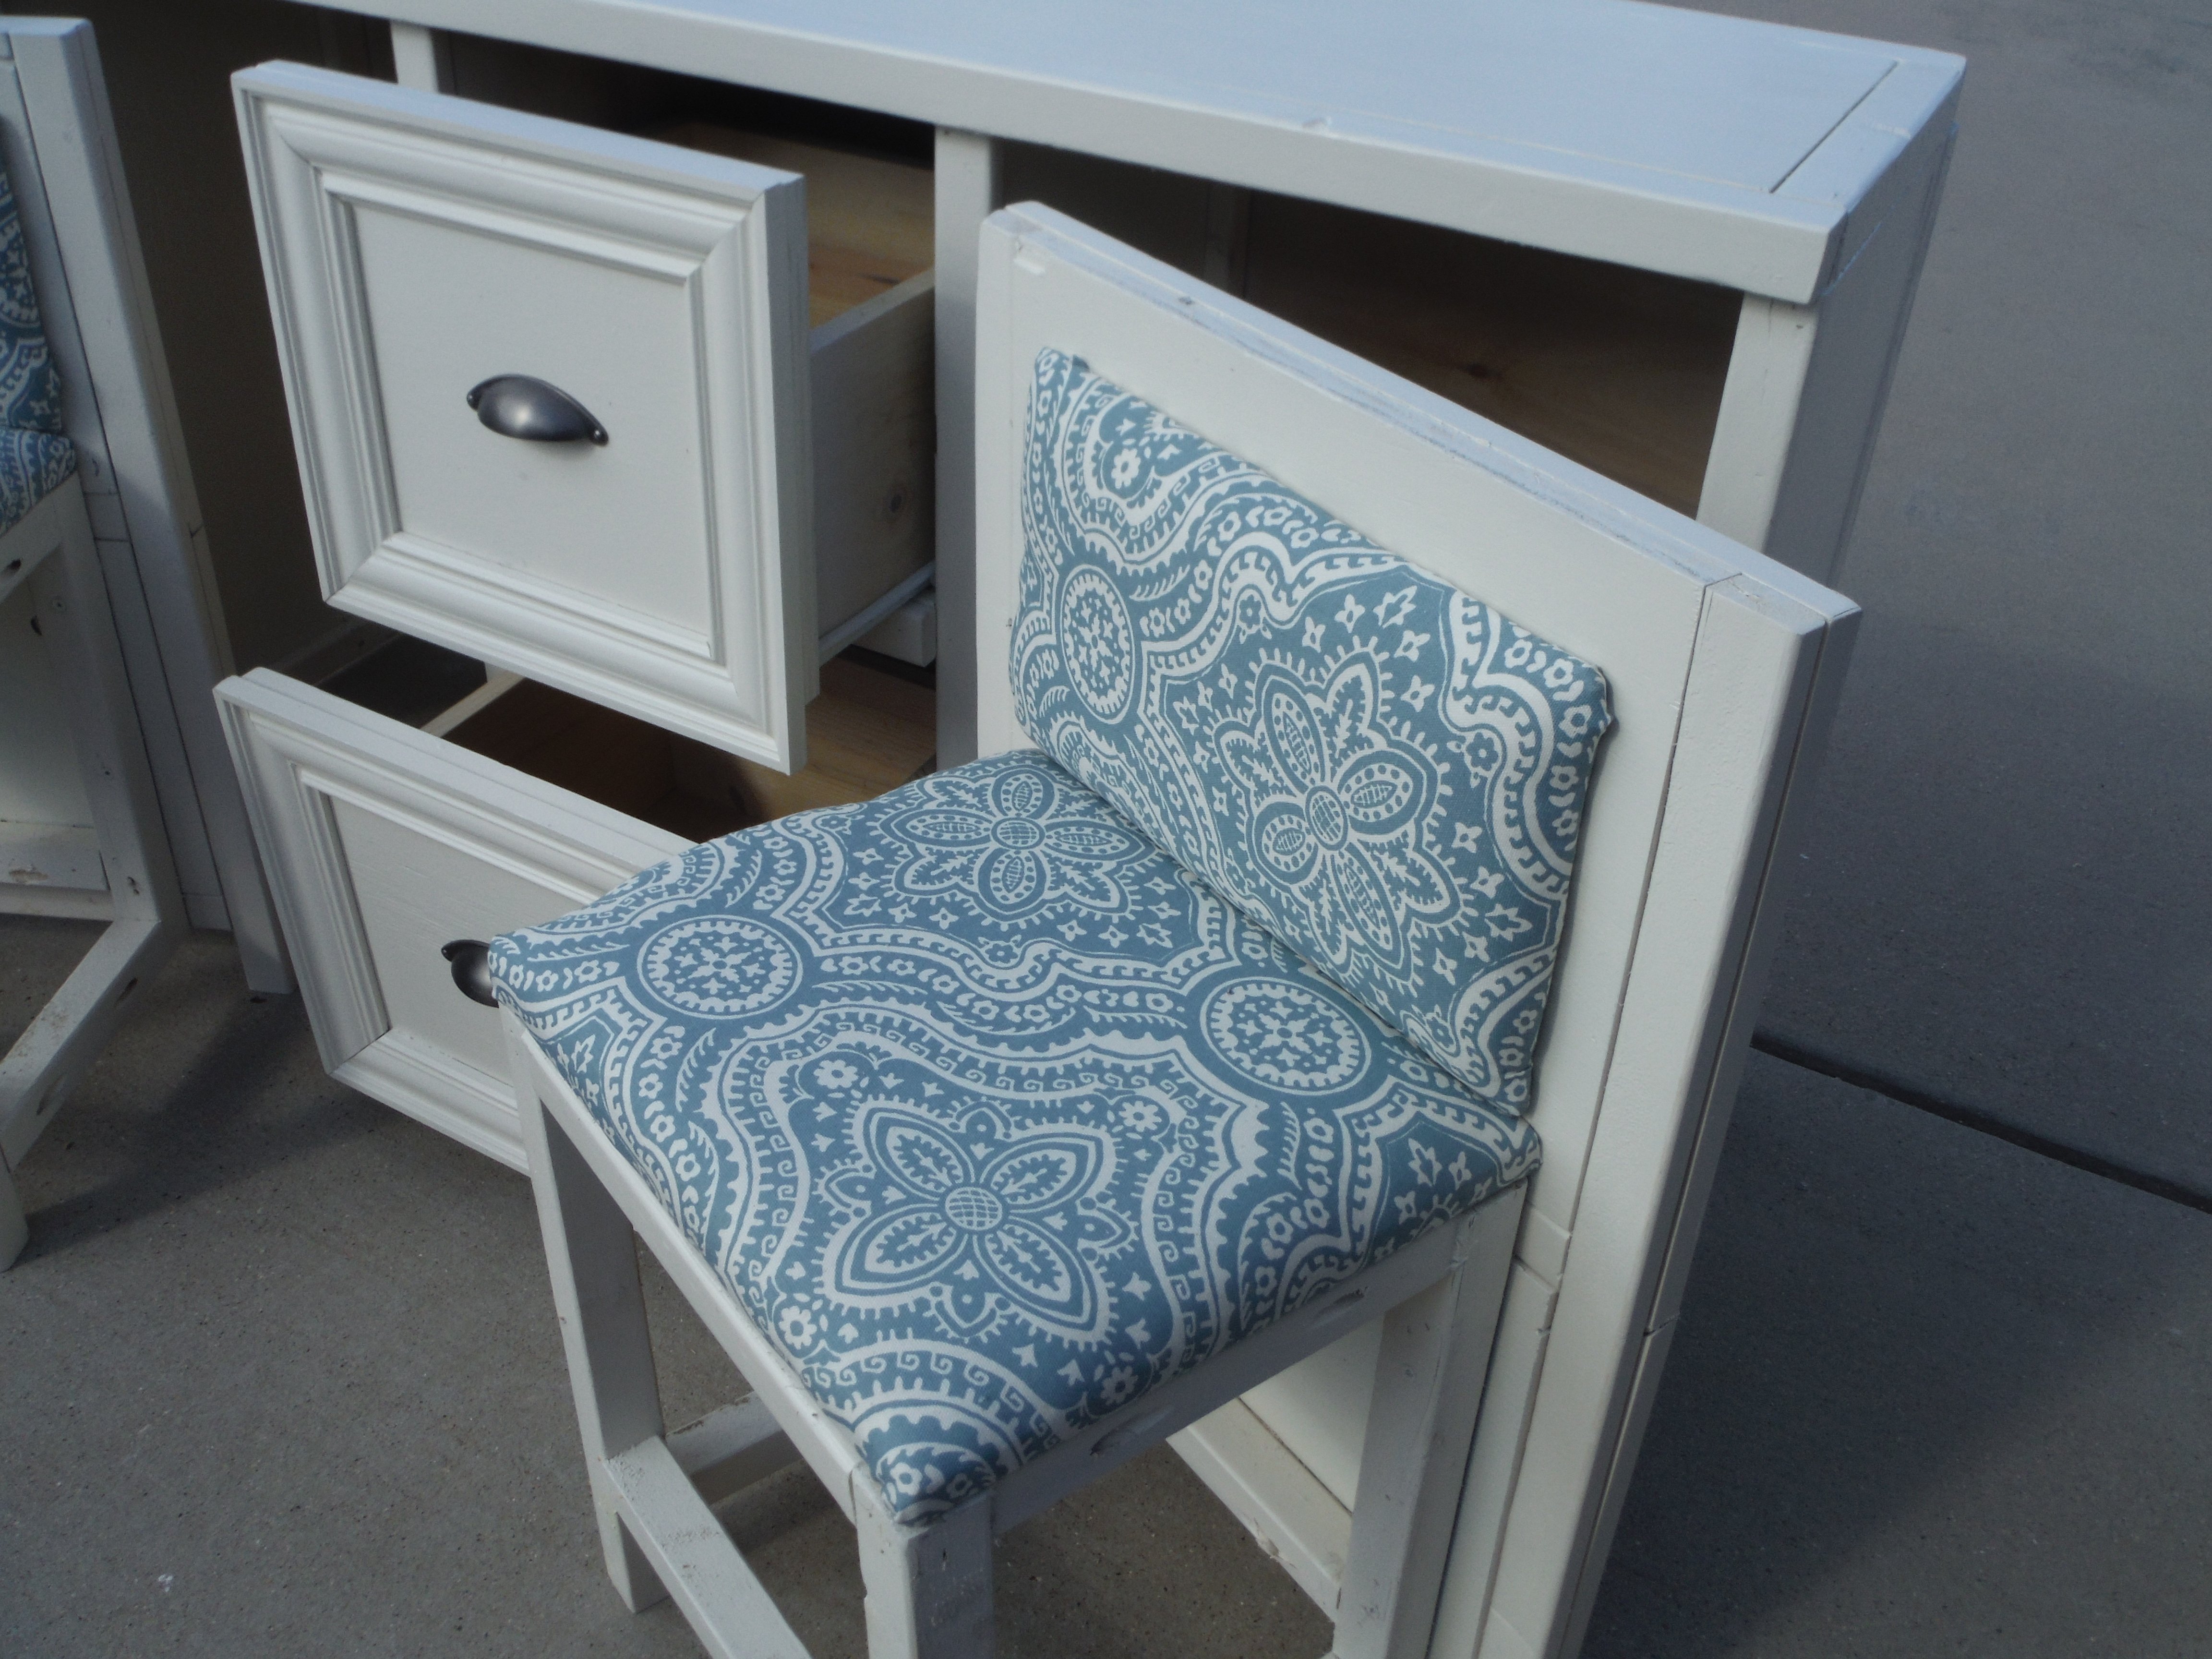
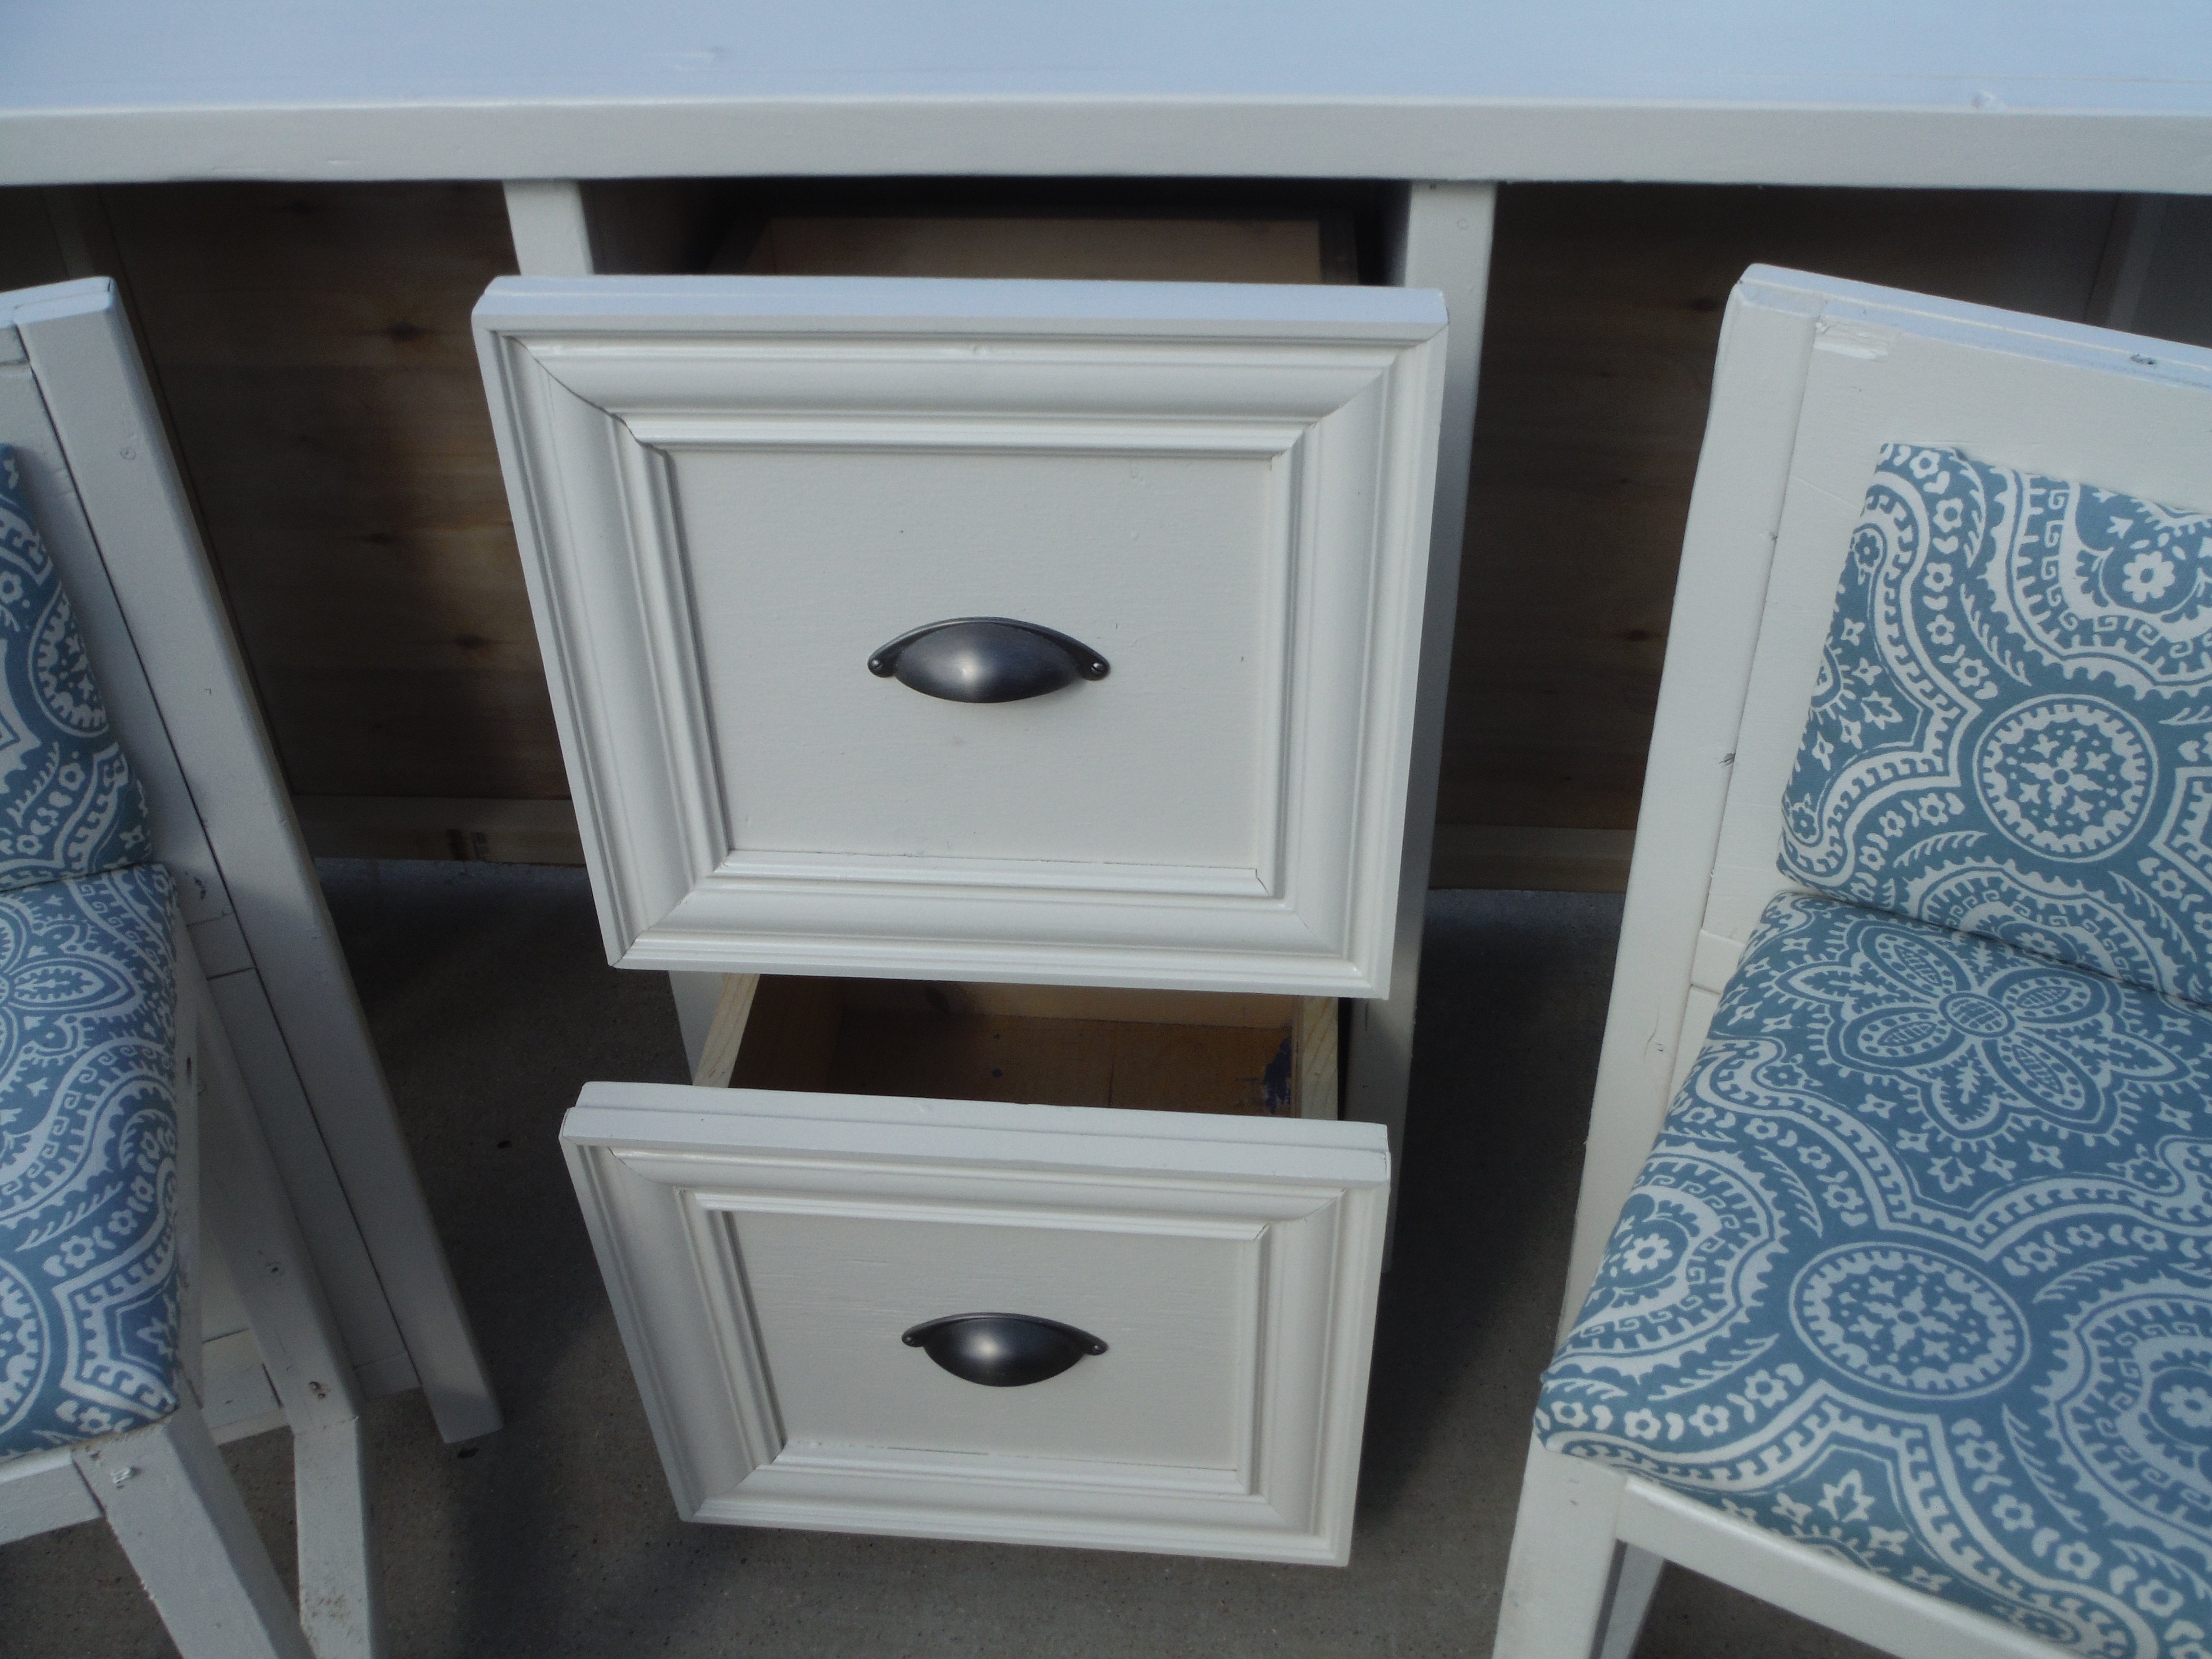
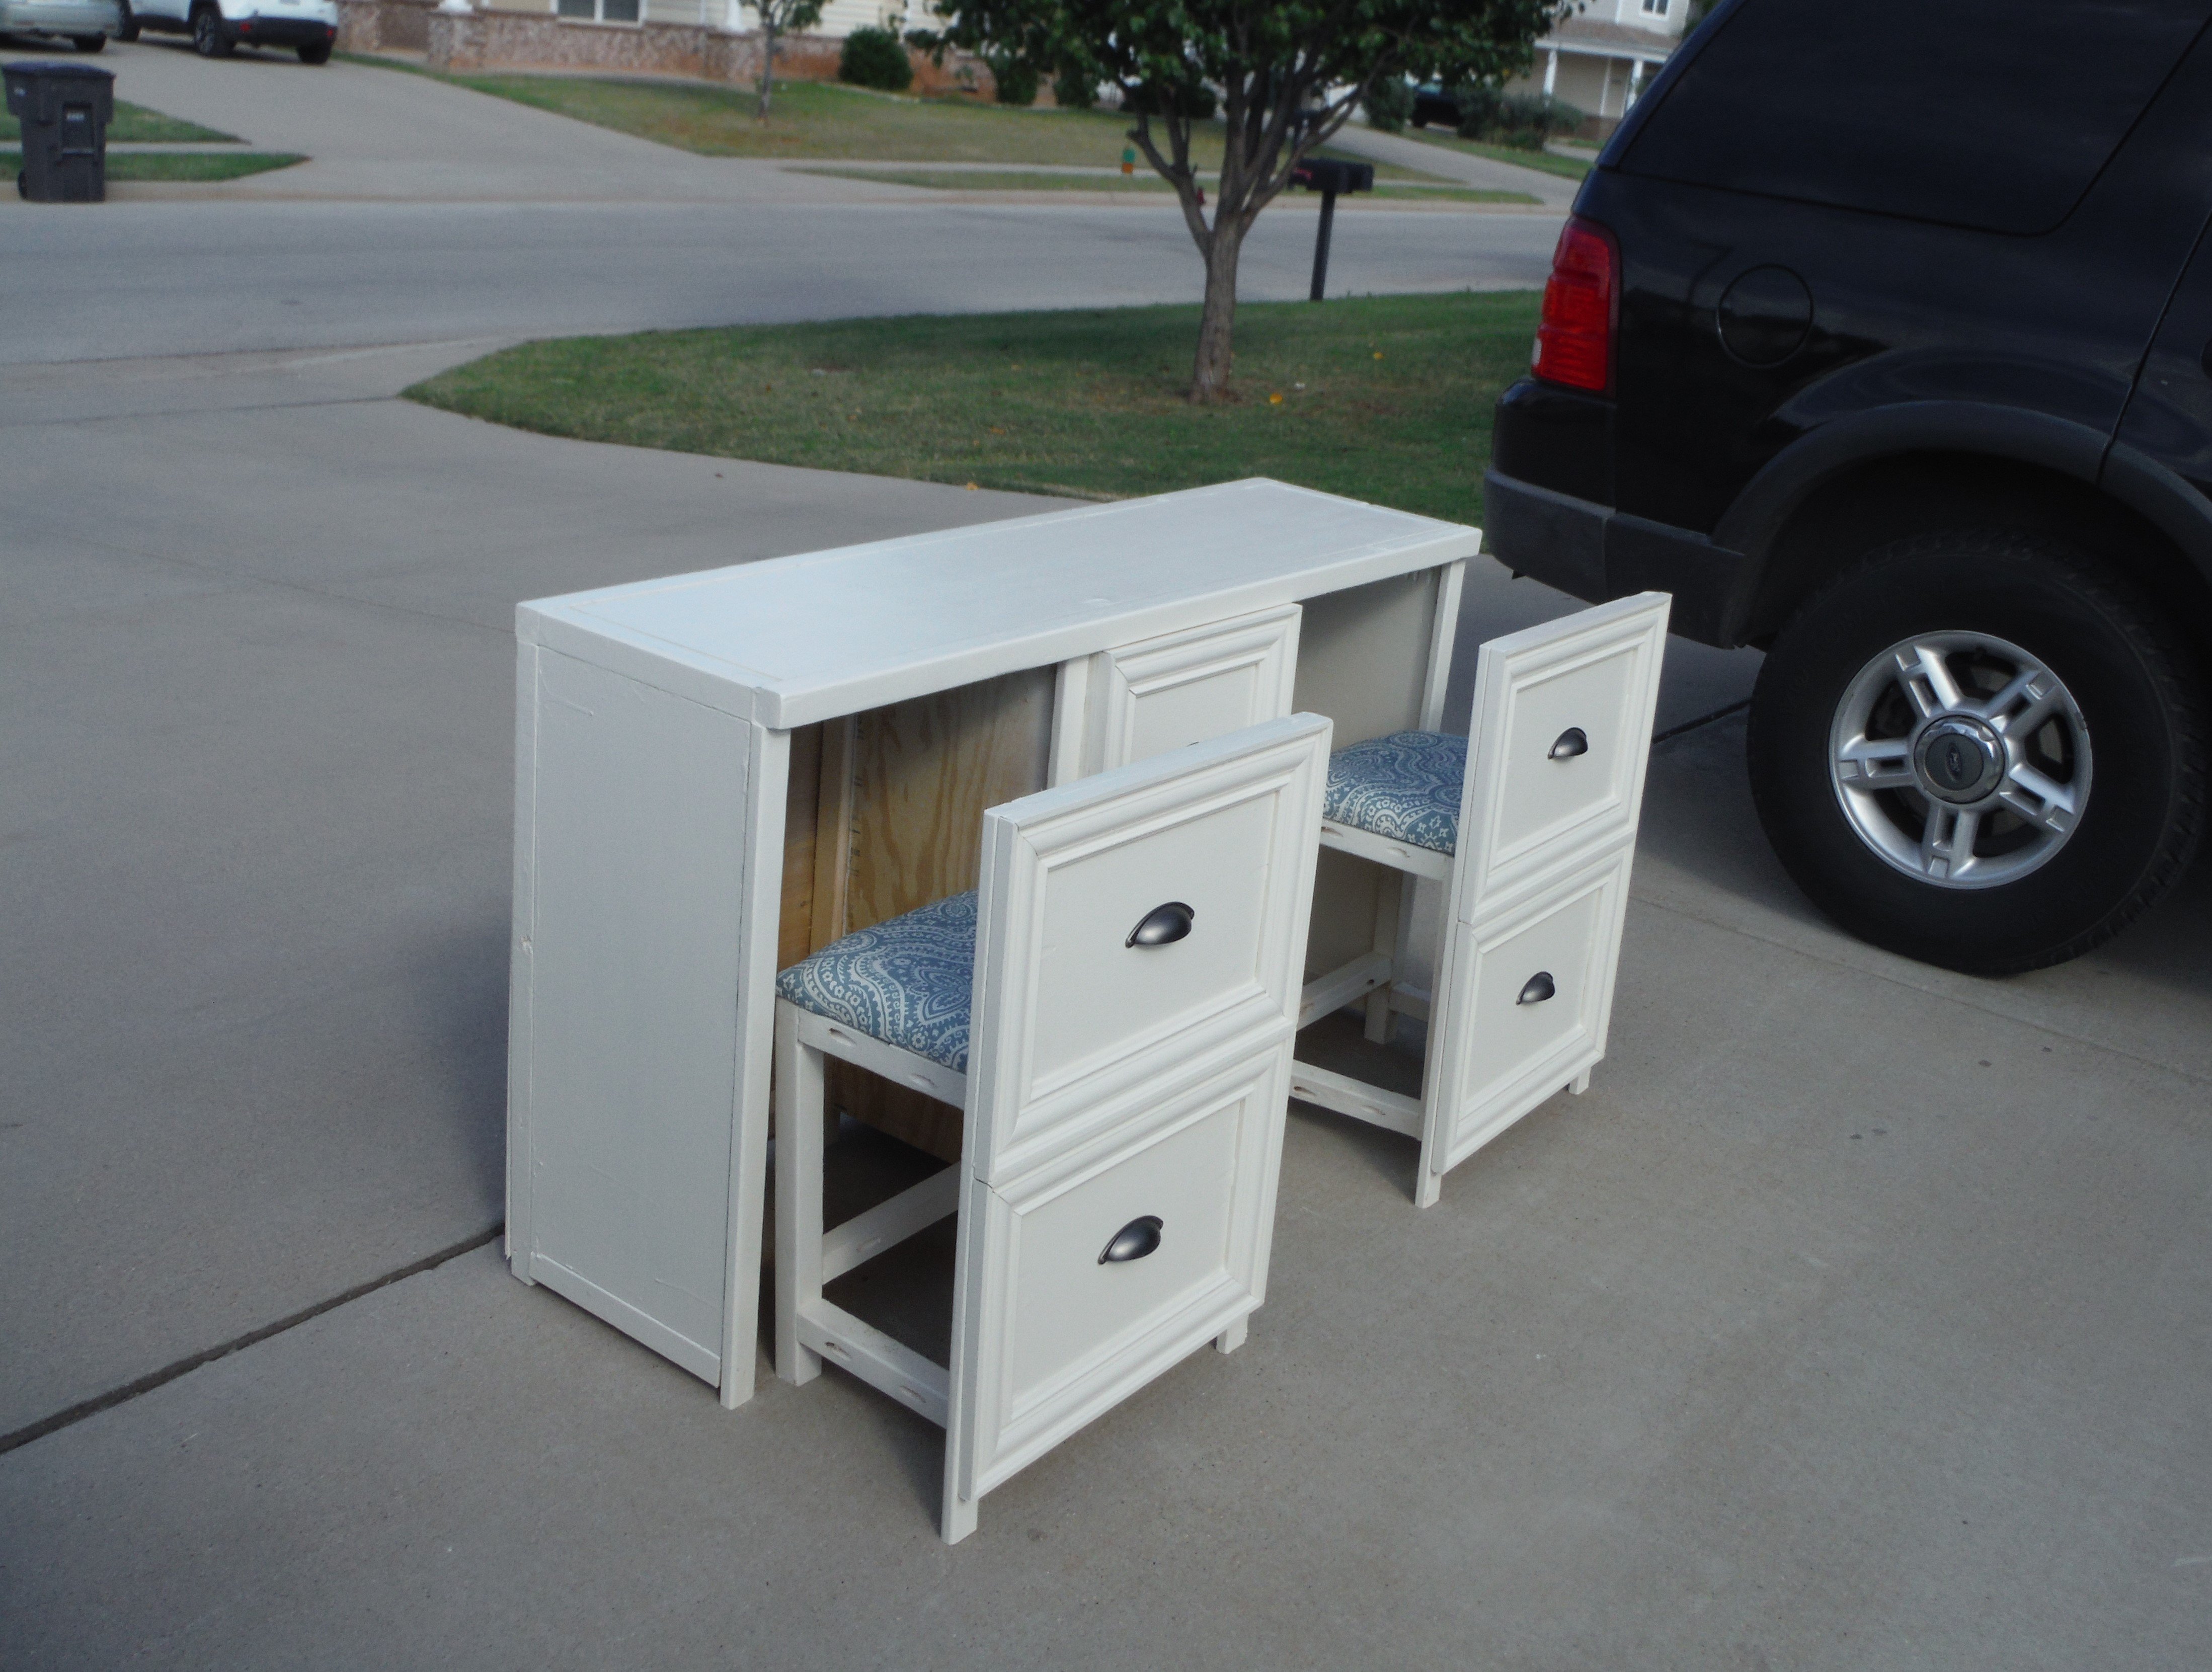
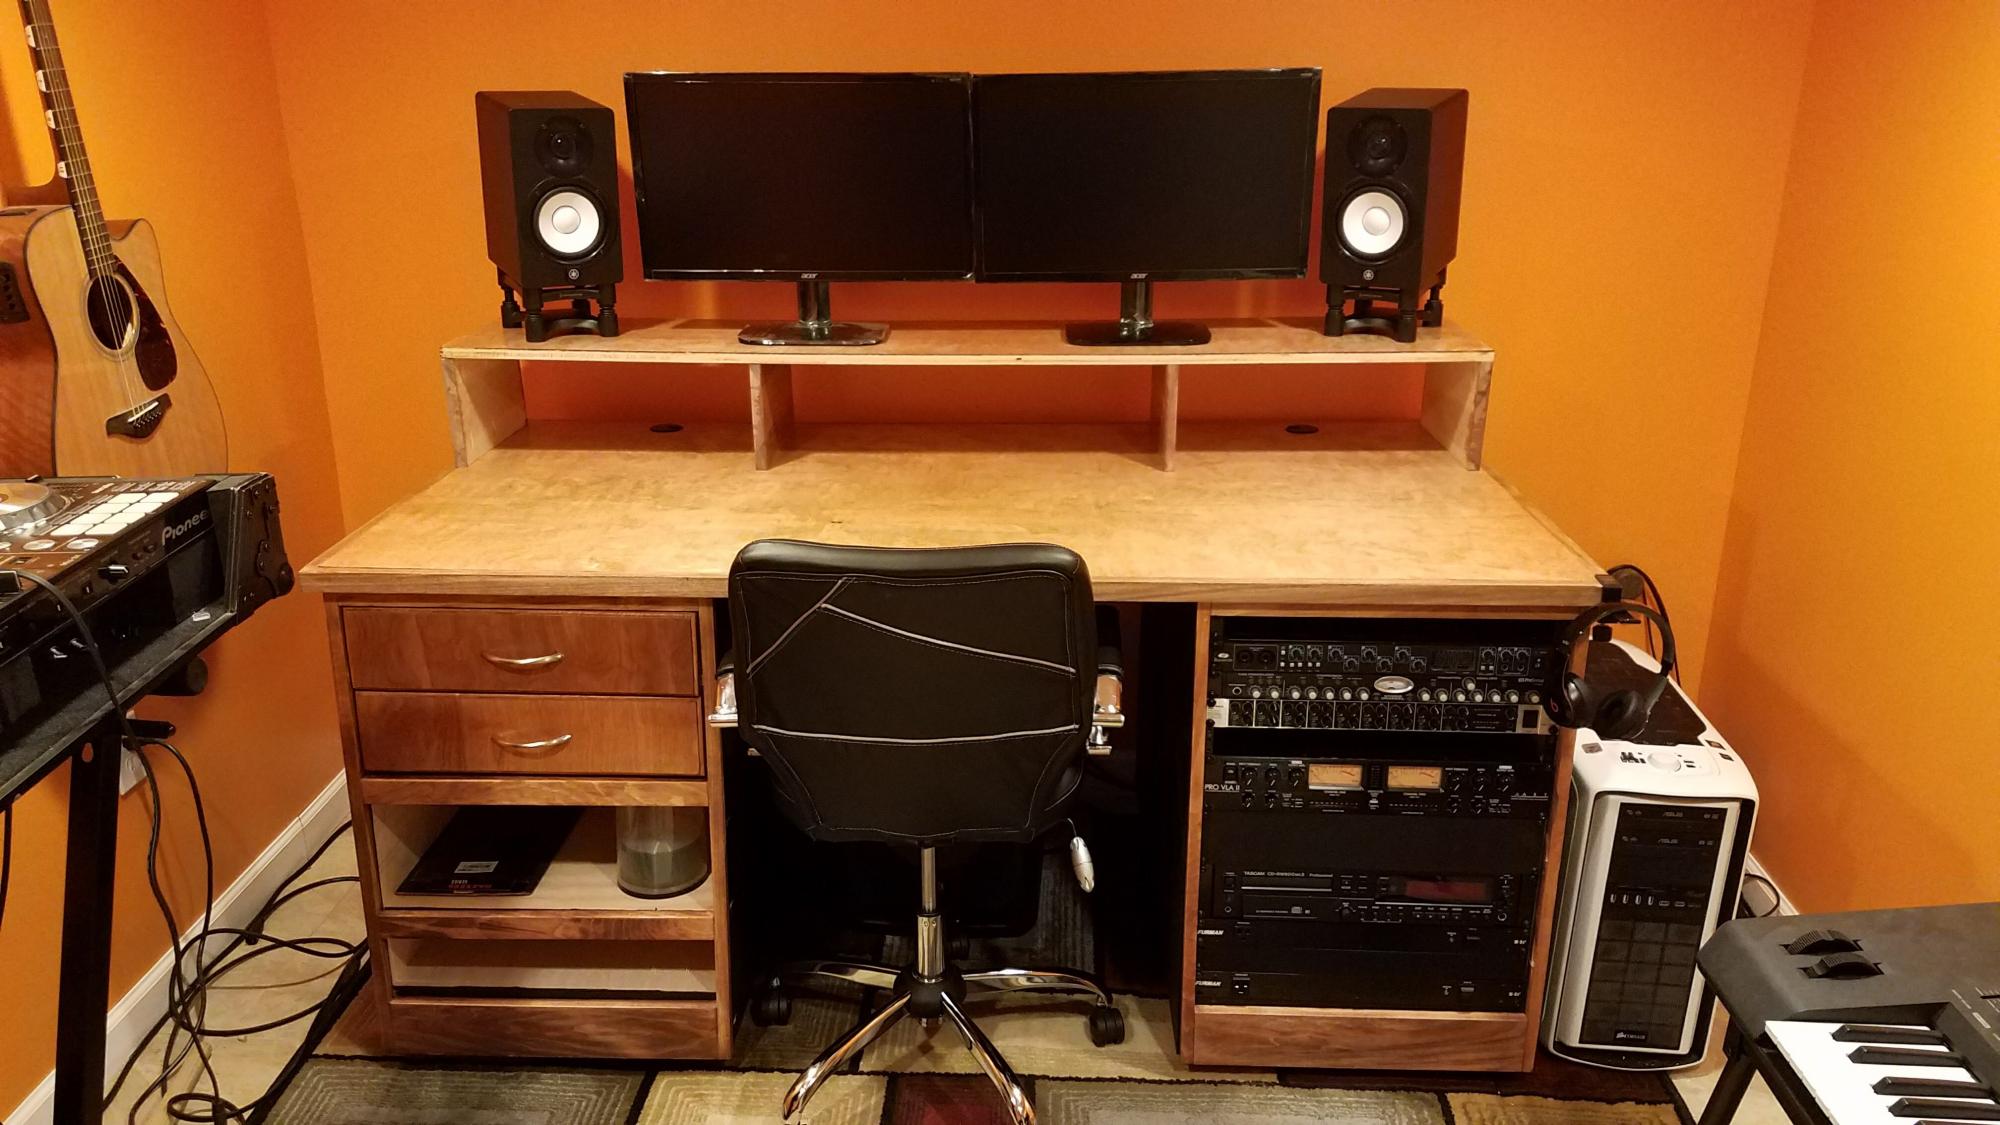
Hidden Desk
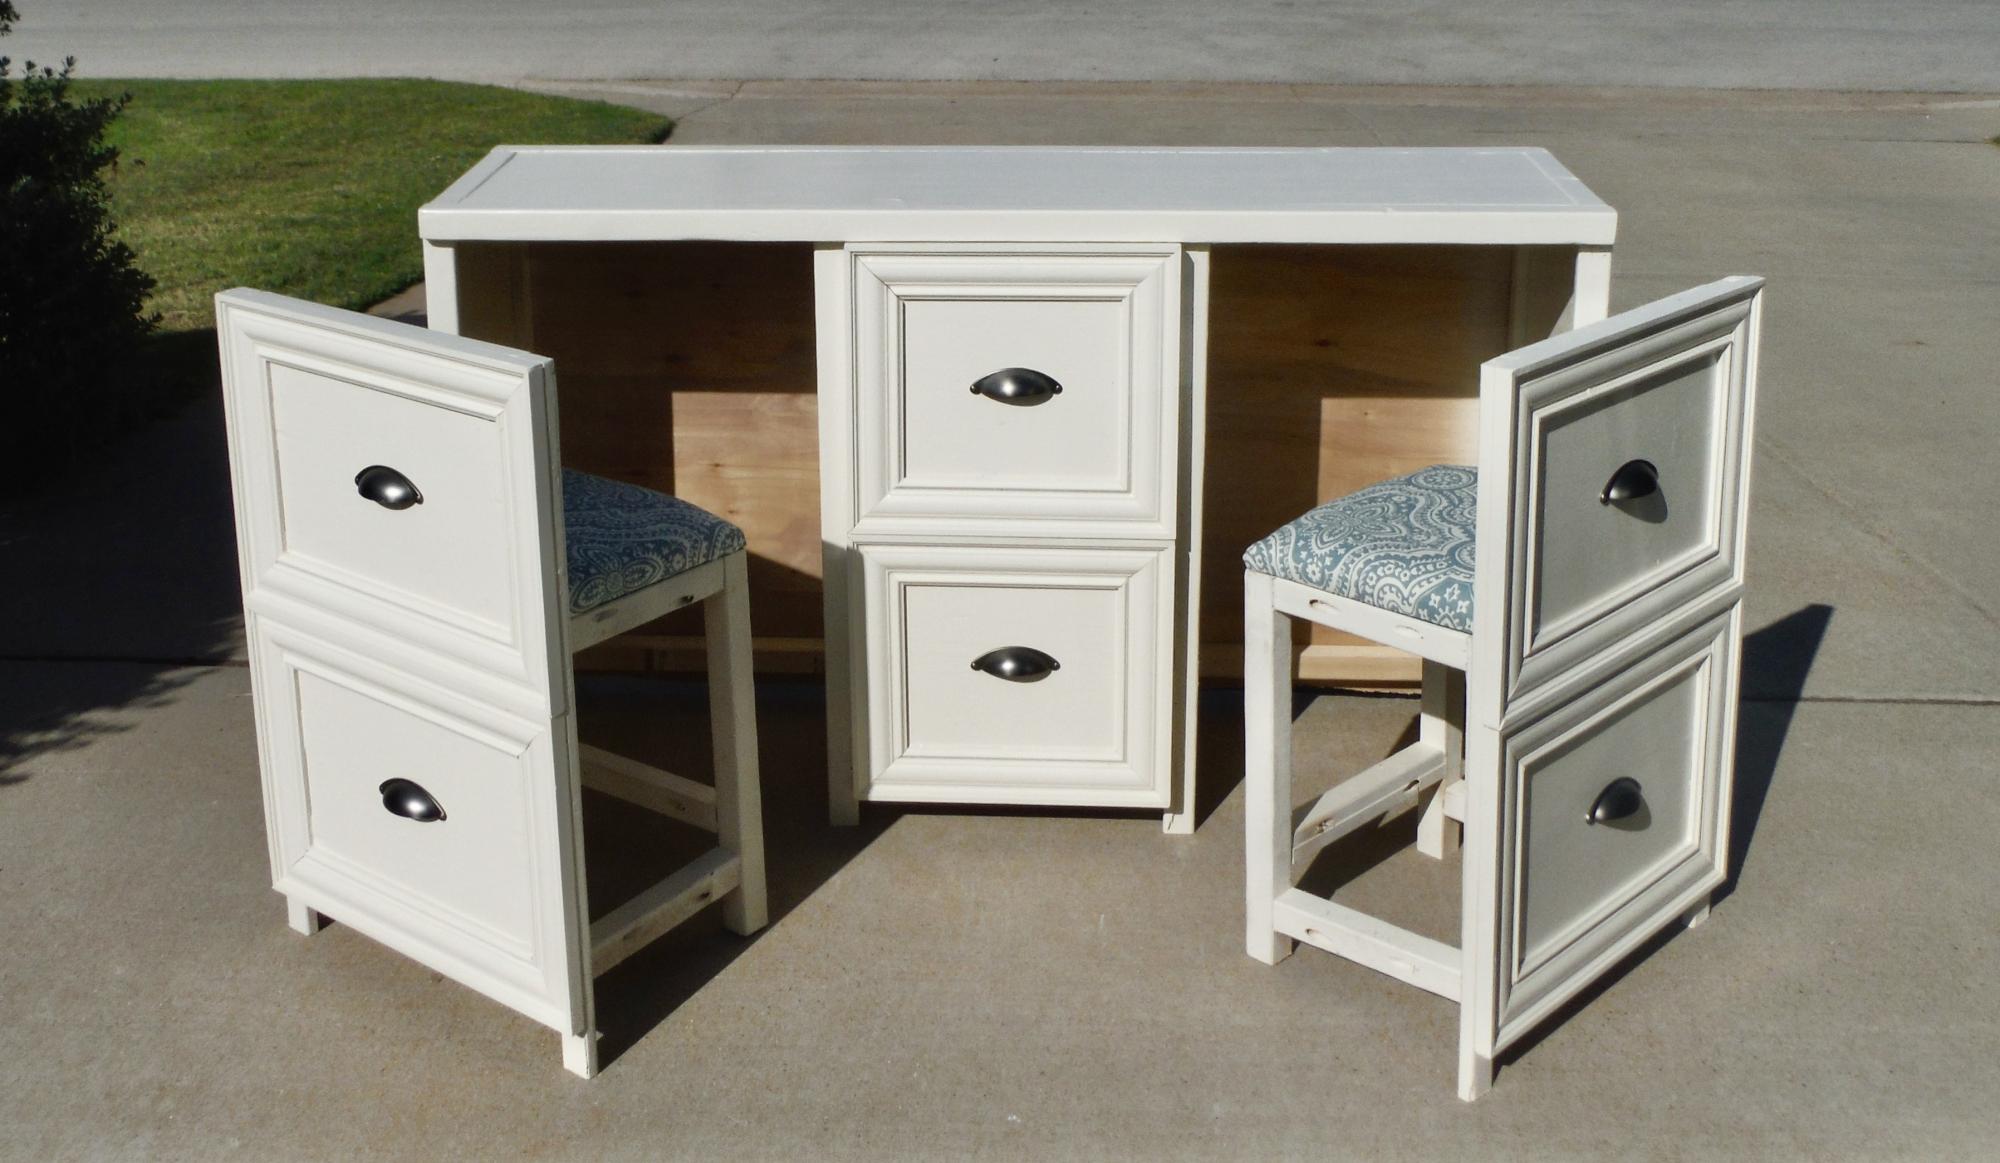
This is my favorite build so far!! Mines measure 52Wx30Hx14D. I use 11 3/4(1x12) strip plywood boards instead to fit our space.
Built from Plan(s)
Estimated Cost
$100
Estimated Time Investment
Week Long Project (20 Hours or More)
Finish Used
Rusteolum Heirloom white spray paint. Two coats of polyacrylic in satin.
Recommended Skill Level
Intermediate
Comments
American Girl Doll Bunk Bed
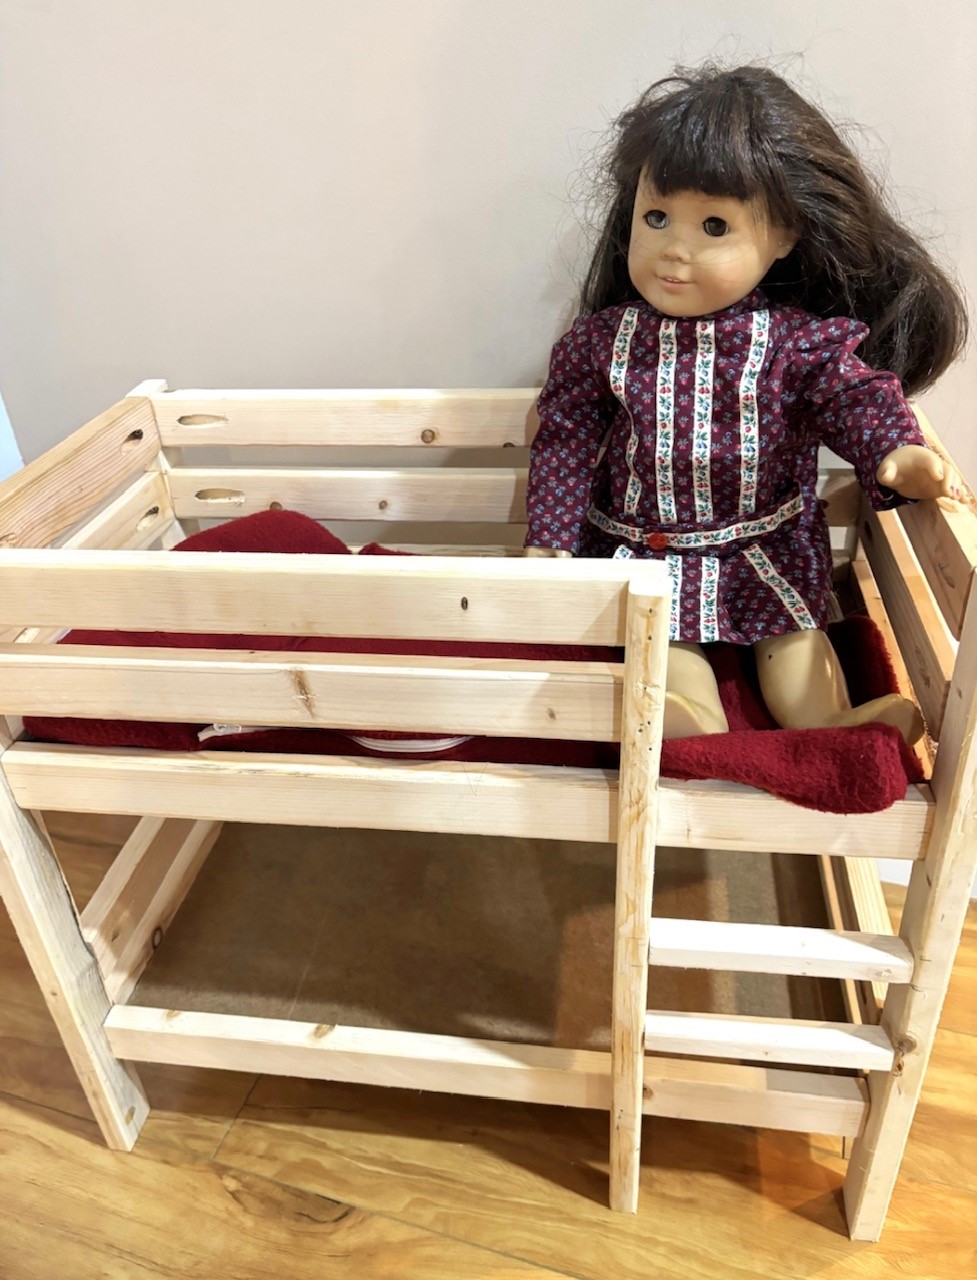
Made this for my granddaughters! They love it!
E Sewitch
Built from Plan(s)
Letter H Shelf
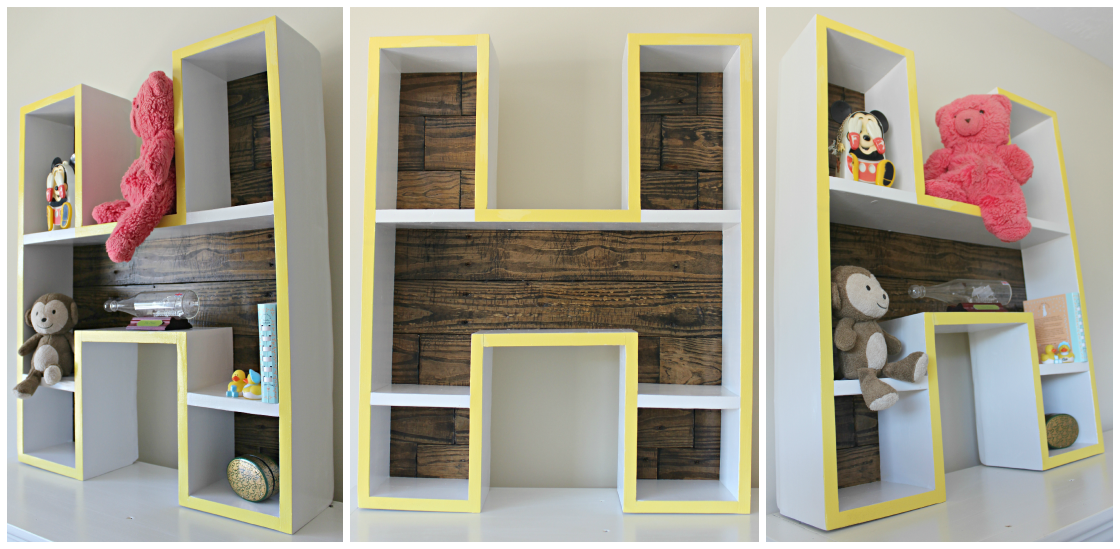
We're expecting a baby in November and we picked this as our first Nursery Decor project!
We were originally inspired by the Letter Z project we found on here on Ana's site. So we went ahead and made our own design on google sketch-up. It was a good first project for us to learn how to use Google sketch-up (although we still aren't very good at it).
We wrote about building the project on our blog here: http://thehuth.blogspot.com/2012/10/brought-to-you-by-letter-h.html
This was a fun project and we love the way it turned out!
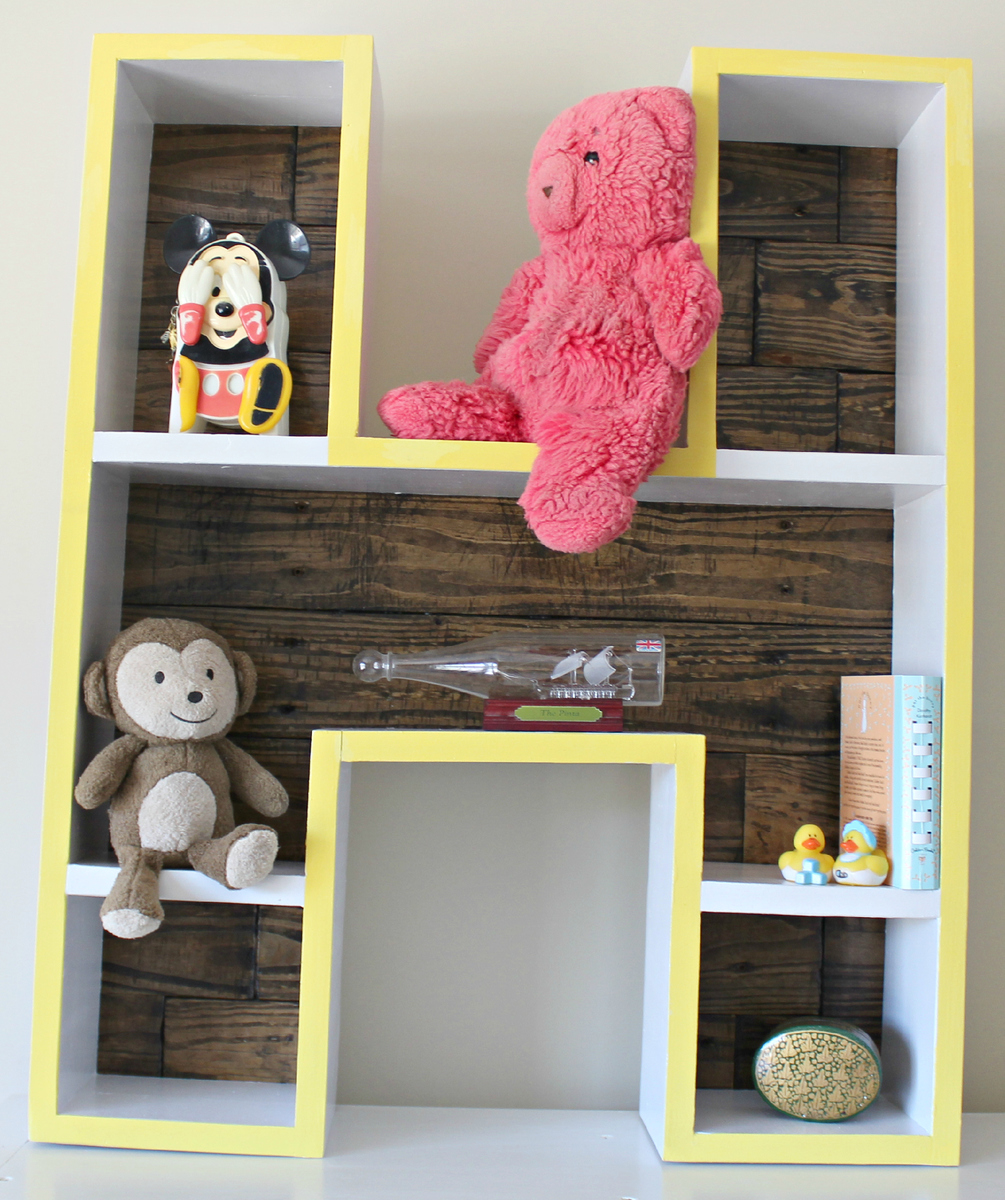
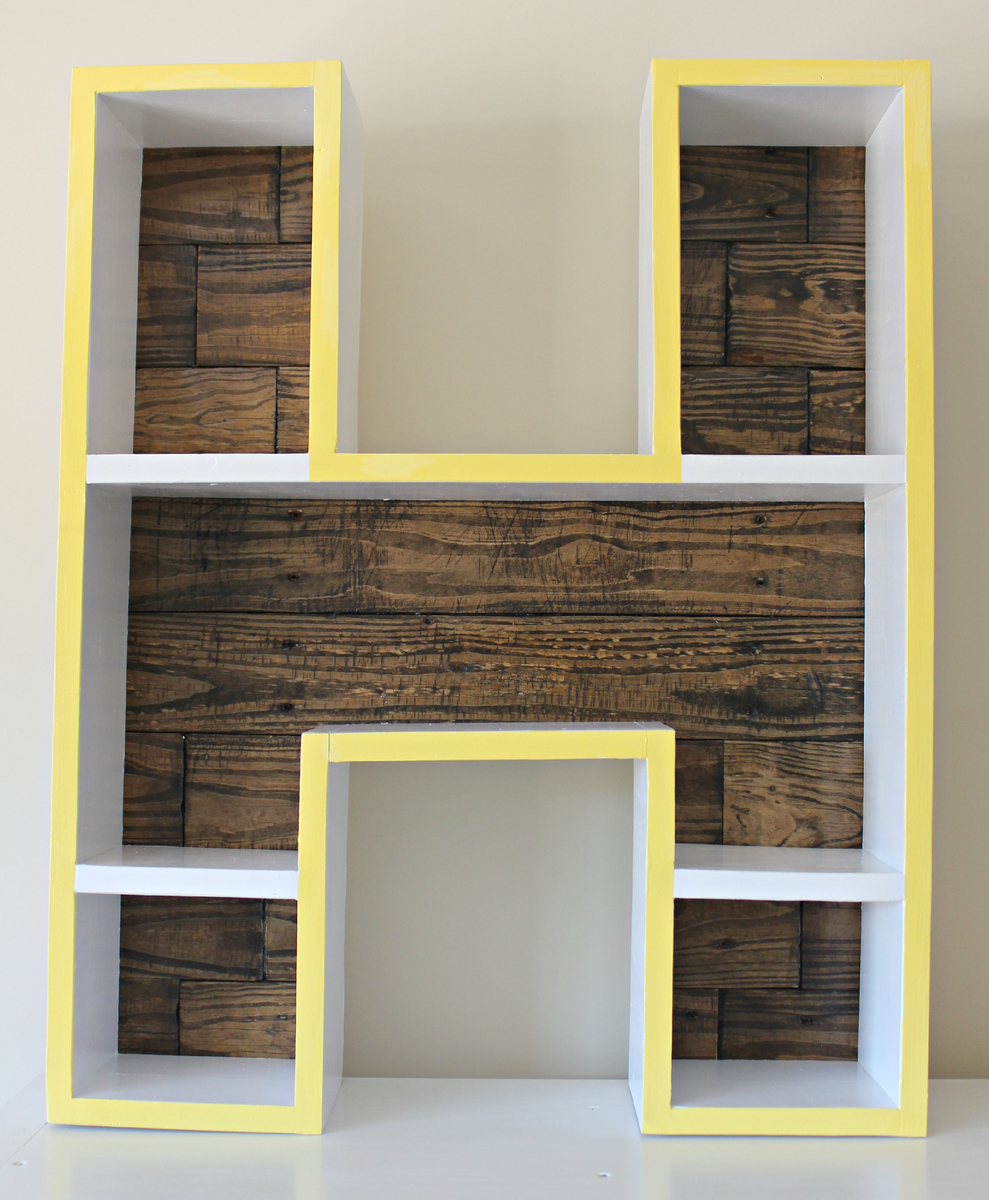
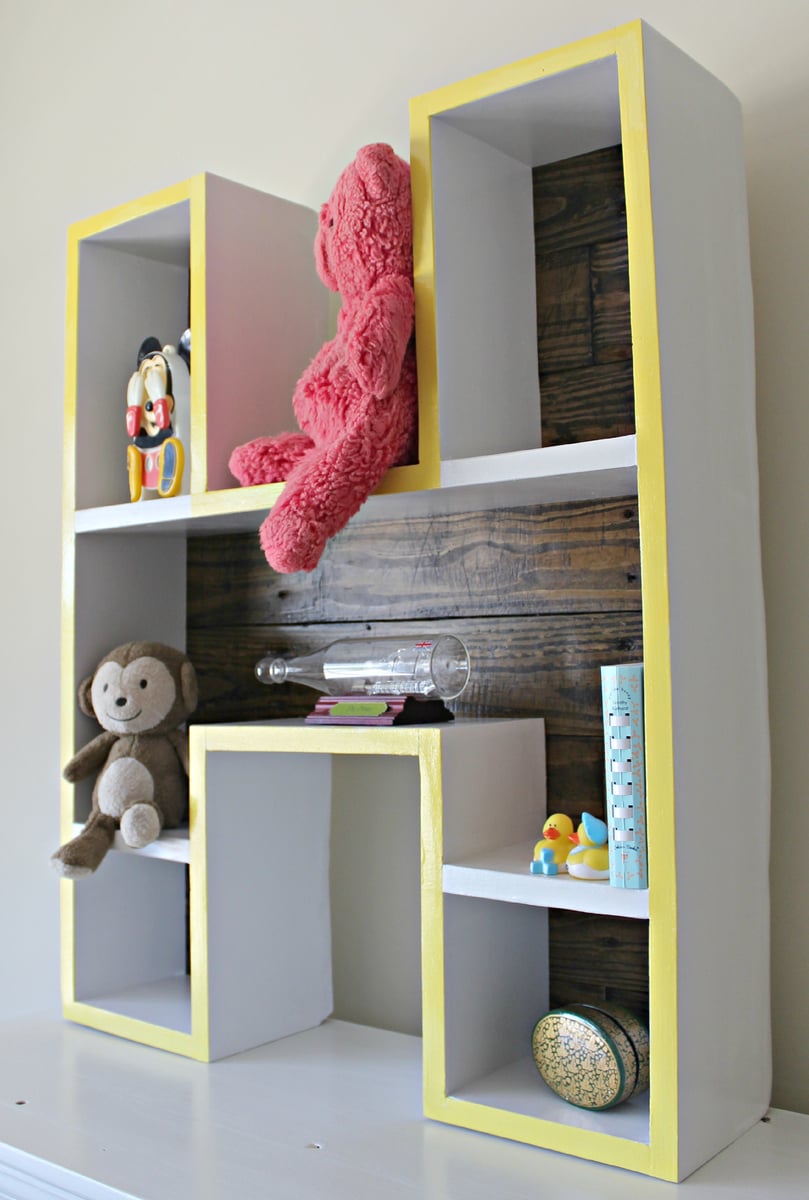
Built from Plan(s)
Estimated Cost
25-30
Estimated Time Investment
Day Project (6-9 Hours)
Finish Used
-Behr Paint- Irish Mist
-Polycrylic (We used Minwax Polycrylic Protective Finish)
-Polycrylic (We used Minwax Polycrylic Protective Finish)
Recommended Skill Level
Beginner
Comments

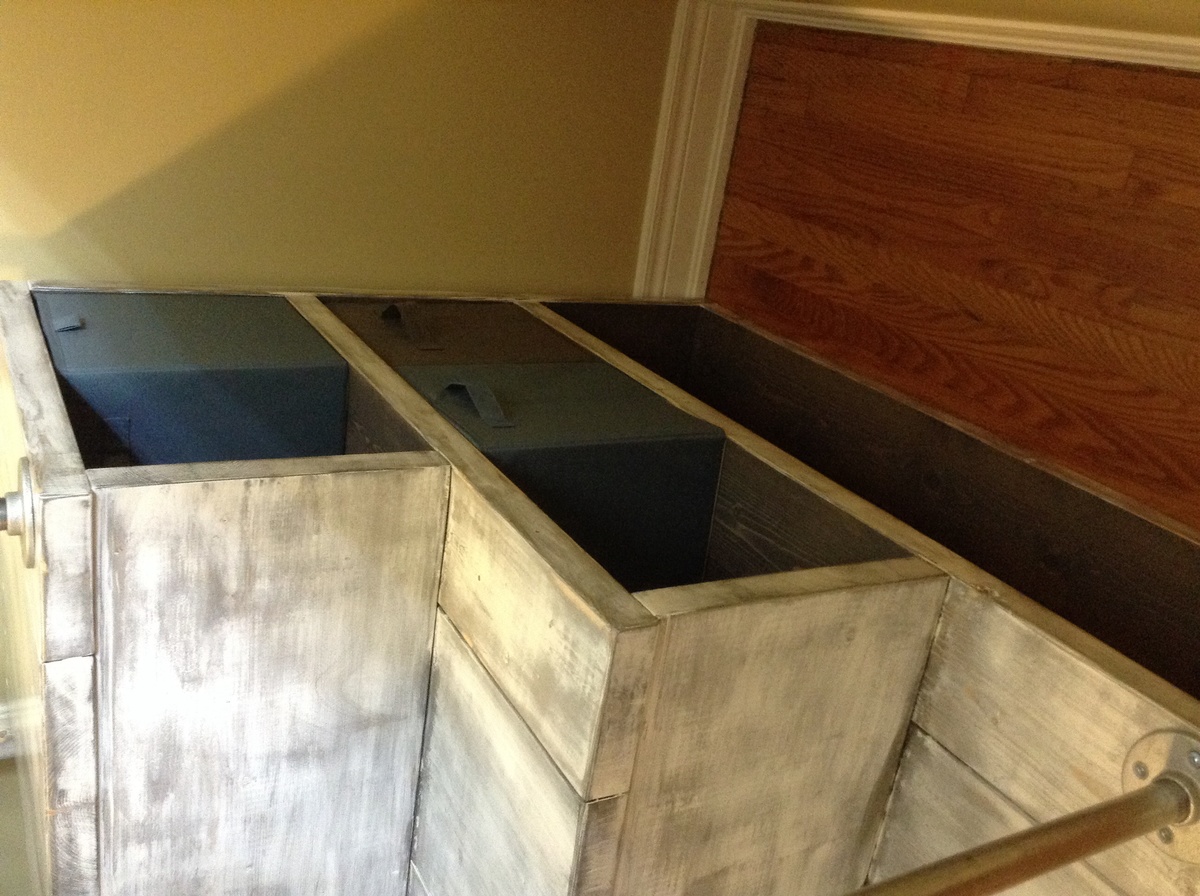
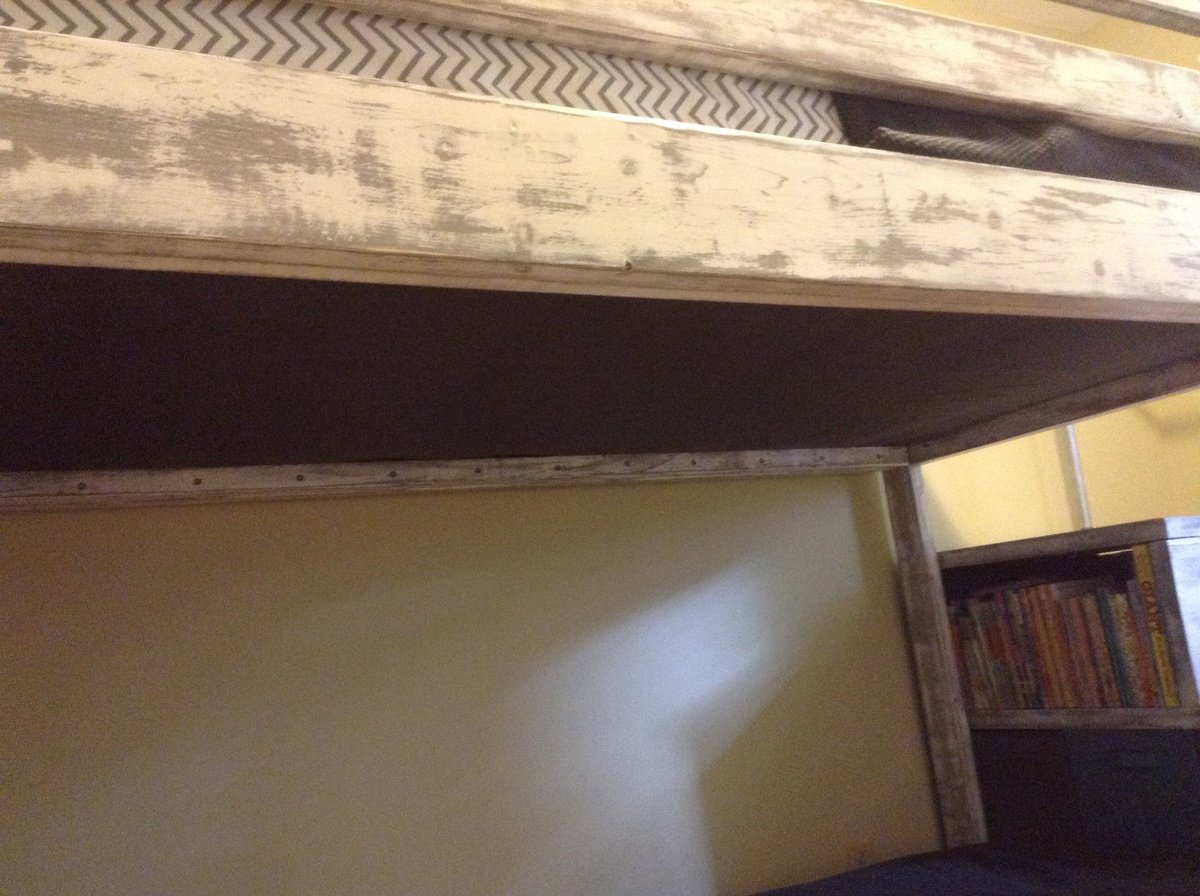
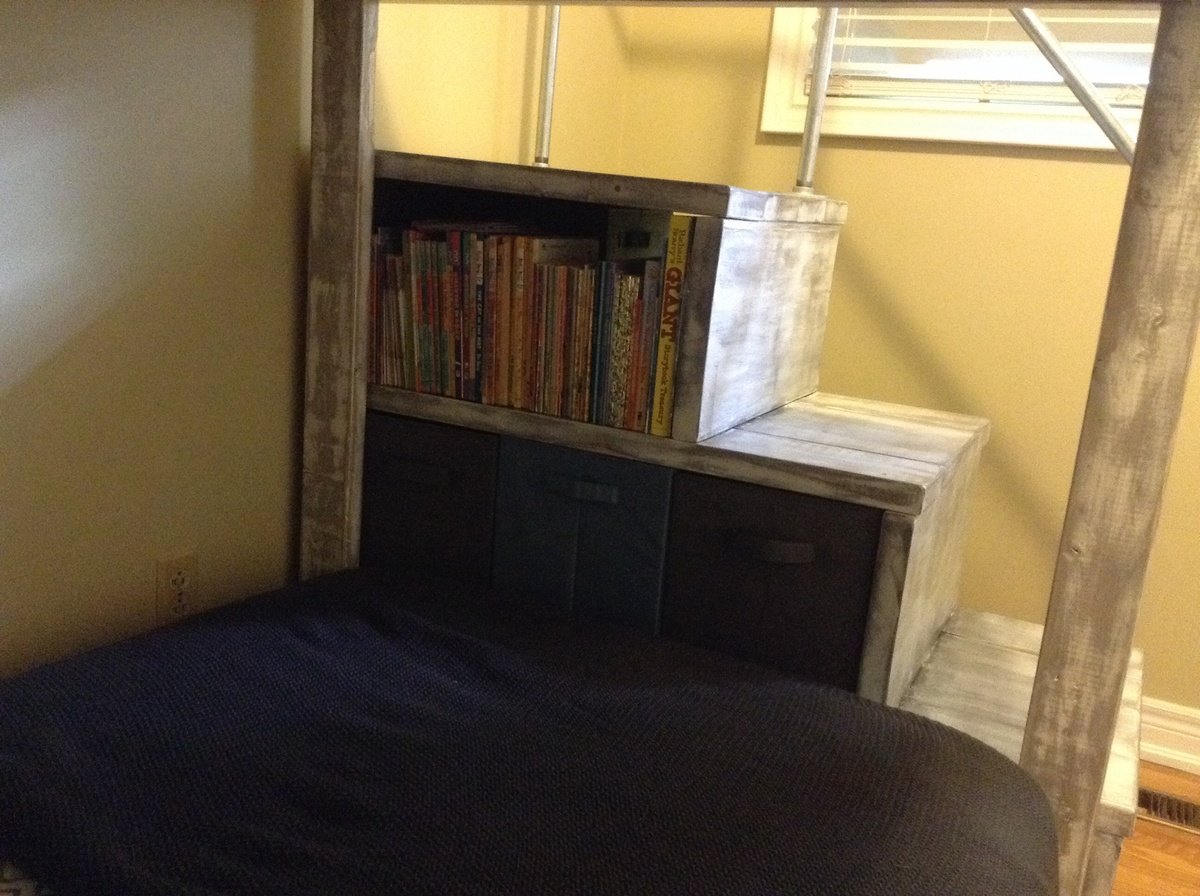
Bunk Bed Build!
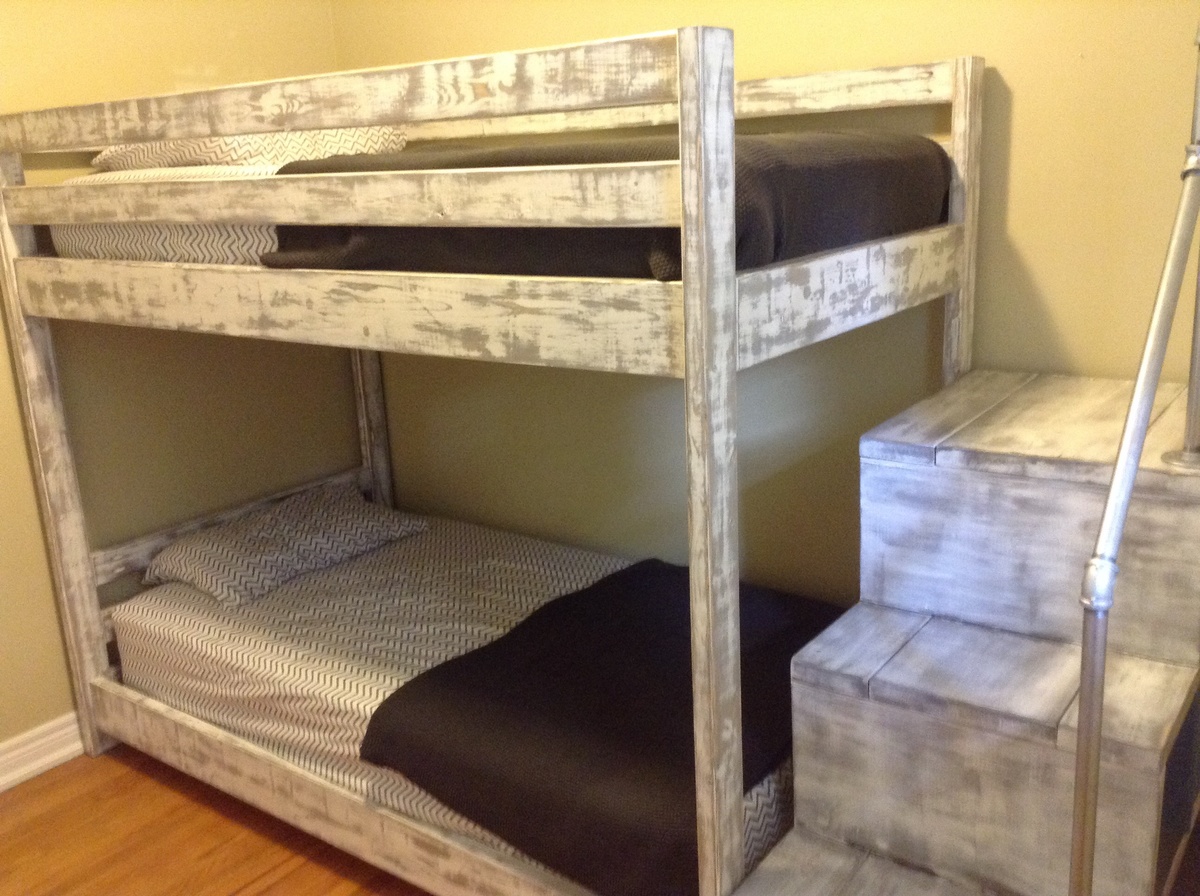
I built this for my kids who are now having to share a room due to another baby on the way. These plans appealed to me because it's junior height and it had stairs instead of a ladder, both of which made the top bunk sleeper feel safer. It was my first furniture build but I do have quite a bit of building experience. I was pregnant but loved these plans and had to build it! I stained/painted each piece separately before assembling it. I also drew up my own stair plans so I could add more storage (it fits 18 cube storage bins!) and built it using 2x6s and 2x12s and galvanized steel pipes for a railing. I added a bottom bunk as well. Under the top bunk mattress, I stapled a $7 grey flat sheet, with the staples hiding, to cover up the 2x4s supporting the upper mattress. The kids love it! Thanks Anna for the inspiration!


Built from Plan(s)
Estimated Cost
$250
Estimated Time Investment
Weekend Project (10-20 Hours)
Finish Used
Minwax classic gray, then flat latex white ceiling paint, distressed with sandpaper, then top coated with two coats of minwax polycrylic.
Recommended Skill Level
Intermediate
Mini Firewood Shed
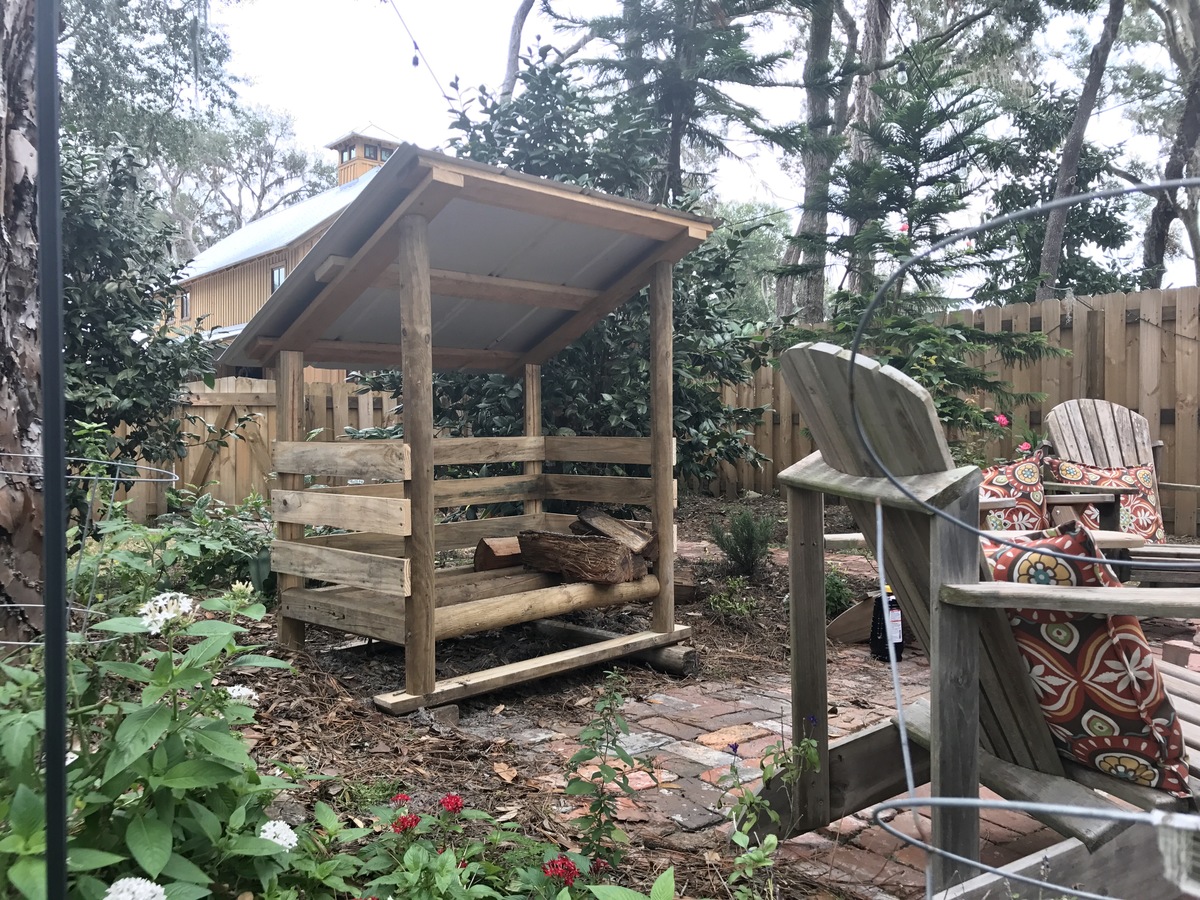
I made this using plans submitted by pericles49. Thank you, pericles49!
I altered the design to use materials I had laying around, and changed the size to fit my space. That made it take a little longer - especially because changing the fastening pattern is still tricky for me - trying to keep screws from hitting each other.
Design
I made mine a little deeper 27-1/2" instead of 24 on the plan.
Materials
- Landscape timbers I had laying around. To save on weight, and wood, I ripped a couple of the landscape timerbers down the middle.
- Roof - 5-V crimp tin roof
- 1x4 pine boards (2nds from other projects)
- 1x4 and 1x2 cyprus boards (2nds from a construction project)
What I'd do differently next time
- The weight of the firewood is resting on the screws that fasten the floor to the posts. Next time I'll make the wood support the weight, and the screws just hold it in place.
Built from Plan(s)
Estimated Cost
$6
Estimated Time Investment
Afternoon Project (3-6 Hours)
Recommended Skill Level
Beginner

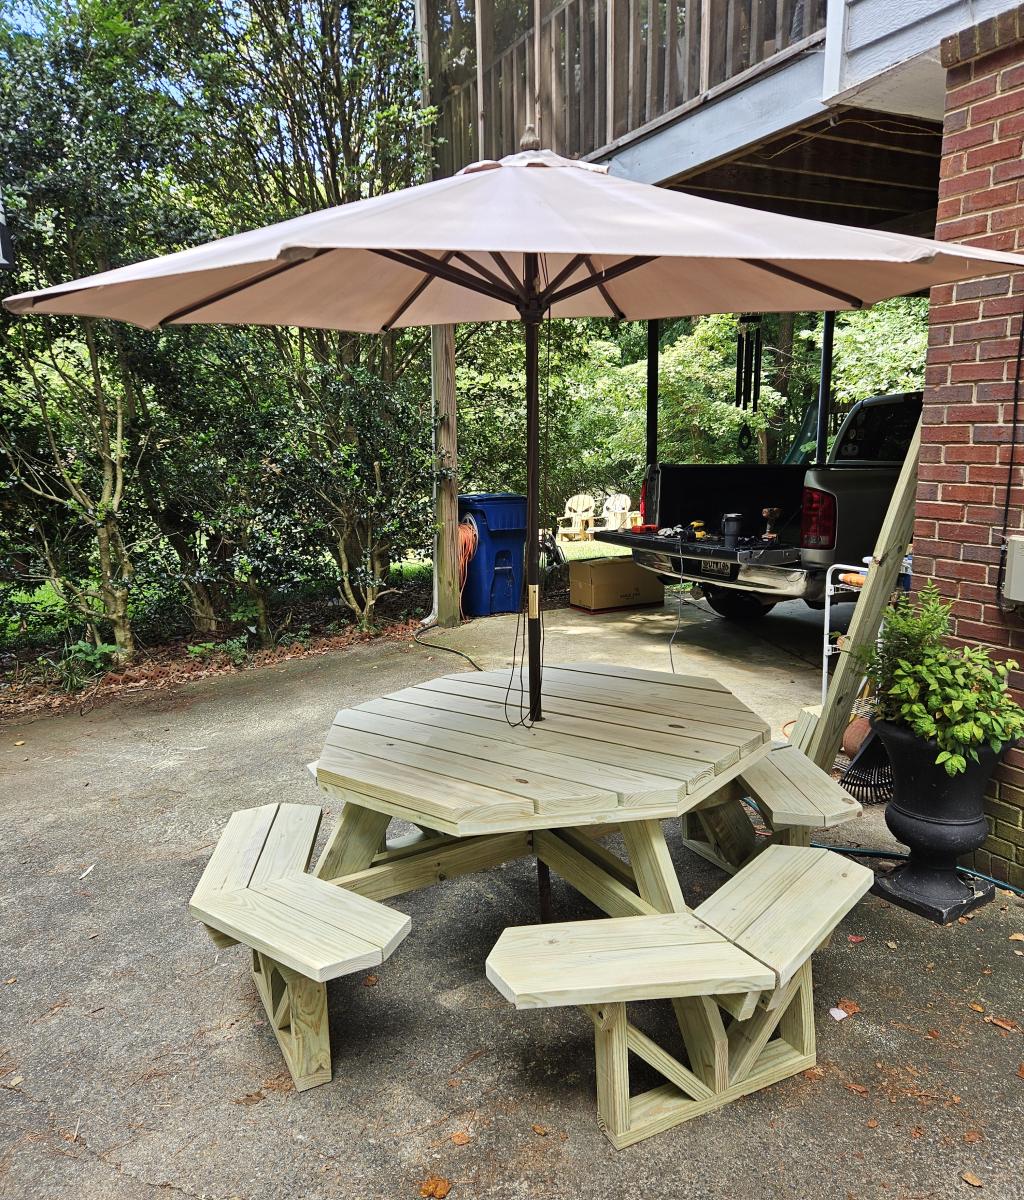
Family Picnic Table
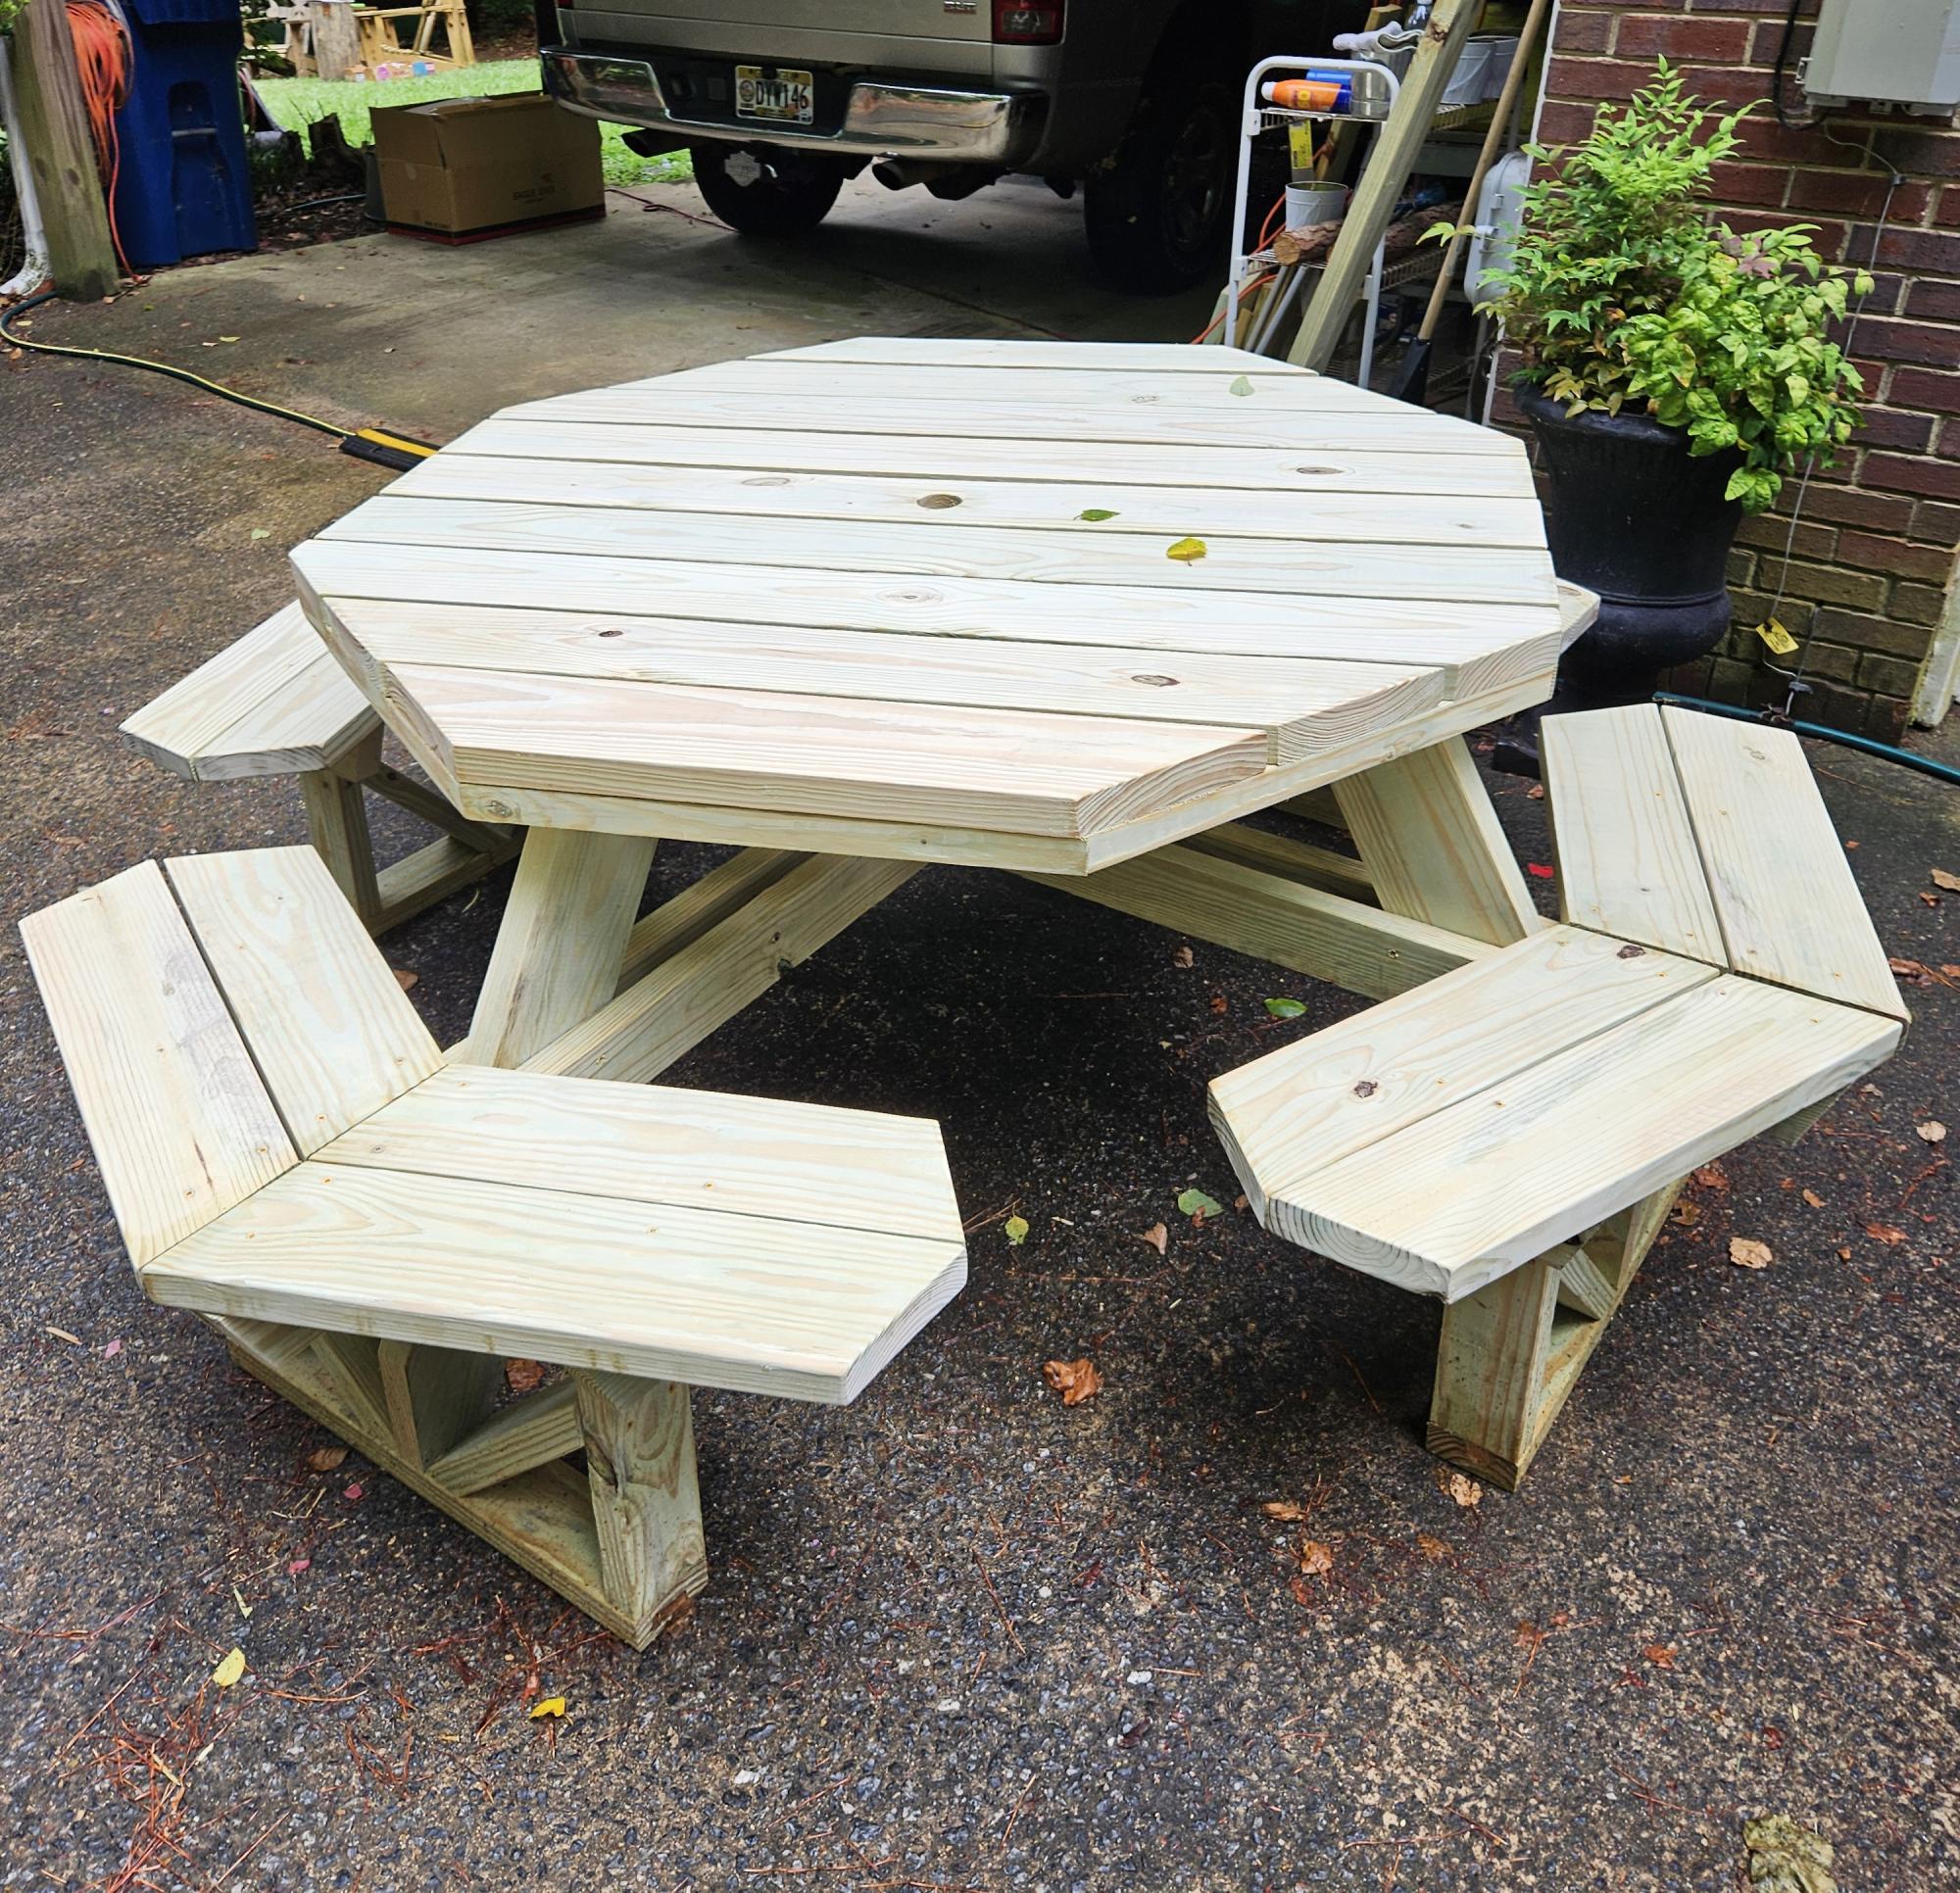
This is my favorite picnic table design. It seats 8 comfortably and everyone is sitting and facing each other for meals, drinks, and conversation. Also no one has to step over a seat to sit down so it works well for older family members.
Tom Farrell
Built from Plan(s)
My Pallet Bookshelf
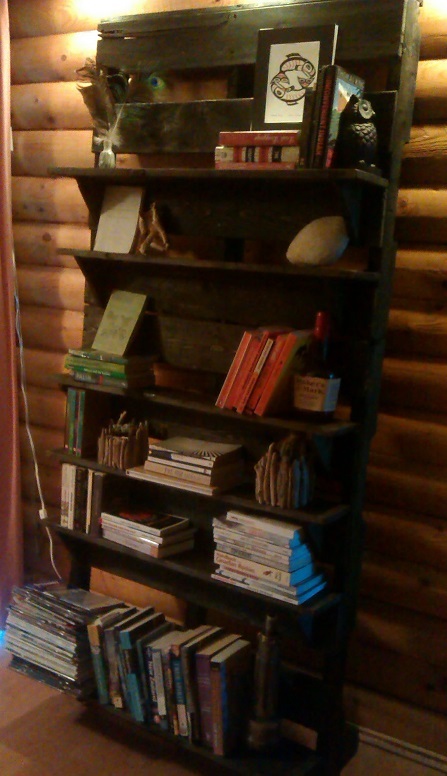
I live in a small northern town that has very little choice for affordable furniture. After scouring kijiji for months I decided to make my own.
I was very happy with how my bookshelf turned out - using 2 pallets. I used wider shelves than this post said because my books won't fit on 4" shelves, and it was next to impossible to remove the pallet slats for re-use without splitting them. I used 4 - 6" and 2 - 8" shelves.
Power sander was my best friend.
Buying the shelving and stain cost me $20 for this project!
Estimated Cost
20
Estimated Time Investment
Day Project (6-9 Hours)
Finish Used
Ebony Woodstain.
Recommended Skill Level
Starter Project
First Project

Well, I started with one chair and finished with a full set. Not bad for a first timer. Definitely room to improve. Little tip if you're going to make this amazing set... raise the backs as they are too low with thicker cushions. I built a casing to go on top after the fact. Pretty happy with how it all turned out. Thanks Ana for the plans... now onto the next project!


Comments

Fri, 04/28/2023 - 08:41
2X4 & 2X6 starting set
Very nice workmanship. I'm curious as to how comfortable they are with the straight 90* backs? Let me know please at [email protected]. Again nice workmanship.
Fri, 04/28/2023 - 08:41
2X4 & 2X6 starting set
Very nice workmanship. I'm curious as to how comfortable they are with the straight 90* backs? Let me know please at [email protected]. Again nice workmanship.
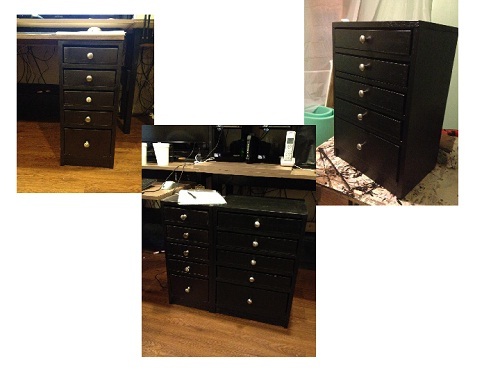
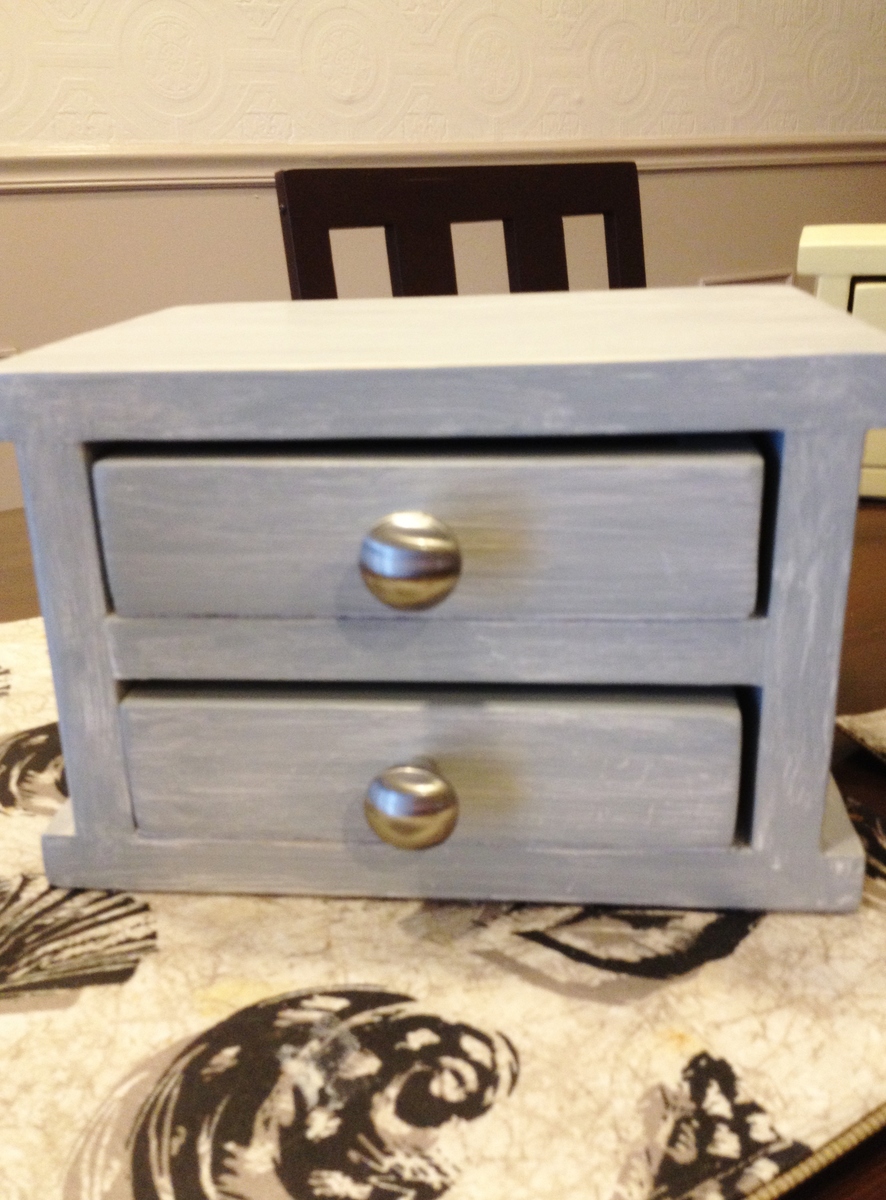
Lots of Boxes
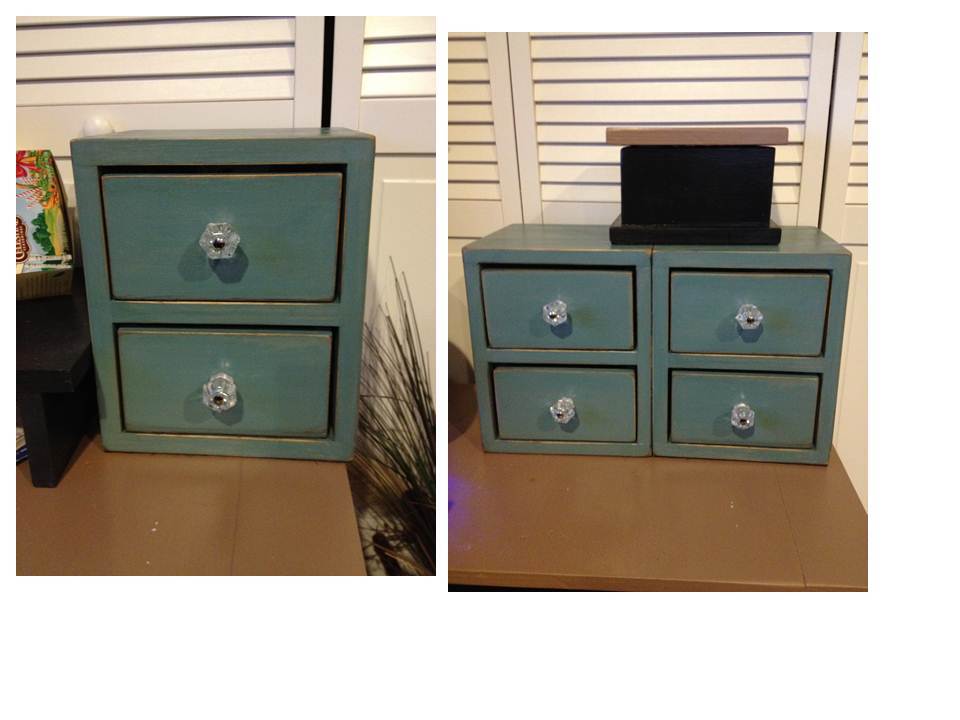
Over the last several weeks I’ve built a few different variations on the Easy Jewelry Box plan:
A narrow tower style one for my Hubby to use in the office at home, using 1x6 and 1x3 for the drawer sides, and 1x10 for the dresser box sides (no overhangs on this one) measures 10 ¾”wide x 24 ¾” tall. The drawers are not lined. The bottoms on these drawers don’t have felt – I used wax on the bottoms of the drawers, and also on the shelves, and they slide just fine.
The wide tower – this one is wide enough to hold paper and office supplies, and was made to the same height as the original narrow tower. The drawer sides are 1x3 and 1x6, with 1x12 as the dresser box sides (measures 16 ¼” wide x 24 ¾” tall). These are unlined, and also got wax on the bottom of the drawers and on the shelves.
I’m going to make a top to go across both of them so it’s the same height as the keyboard/mouse, and paint it to match the desk surface (BTW – the desks are a variation on the Rustic Table).
Distressed storage – the drawers for these are some strips of ½” plywood that were left over from another project. The dresser boxes are from 1x8. Also for these I left off the overhangs, and used the Minwax stain pen on the edges for a painted distressed finish. I liked the first one, and ended up building another to match. Each one measures 8 ¾” W x 10 ¼” T x 7 ¼”D.
Also, one of the easy jewelry boxes made exactly to the plan, with a weathered gray finish and the optional drawer divider. I’ve built more of those in different finishes, but they will be gifts, so I won’t brag those just now.
I used up a lot of my scrap wood, and the paint was what I already had on hand. Most of the knobs are from Target (the multi-packs were cheaper than buying the single knobs).


Built from Plan(s)
Estimated Cost
$15 for distressed blue (felt & knobs, wood was scraps), narrow tower $50 for wood & knobs, wide tower $60 for wood & knobs; Distressed gray: $30 for wood, felt, & knobs
Estimated Time Investment
Afternoon Project (3-6 Hours)
Finish Used
Office towers: Oil Rubbed Bronze and Black Semi Gloss paint; Distressed storage: Benjamin Moore Blue Echo, distressed, with Minwax stain pen in Early American on the edges and a few streaks rubbed into the blue, with a coat of Minwax water based wipe-on poly; Distressed gray: 1 coat white, 1 coat gray (Ace Greek Column), distressed with sandpaper then added a coat of Minwax water based wipe-on poly
Recommended Skill Level
Beginner
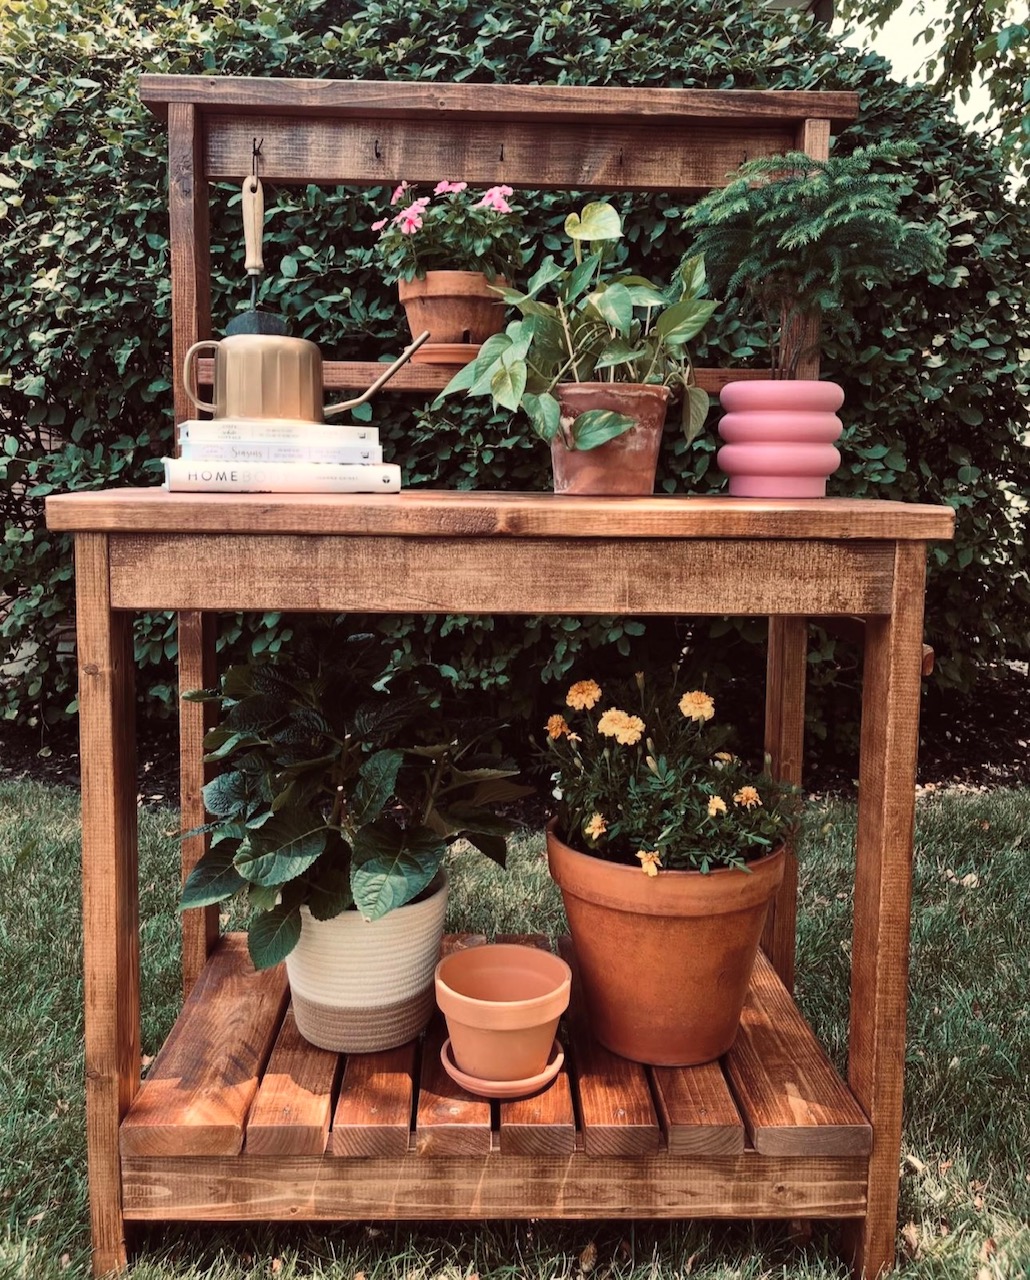
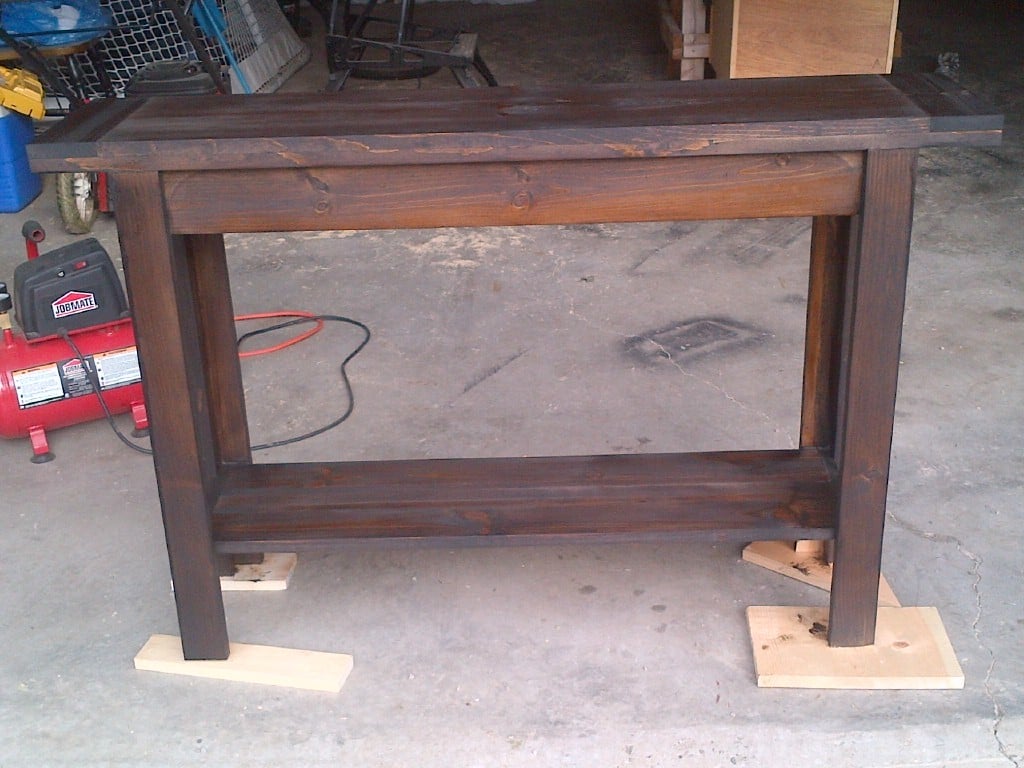
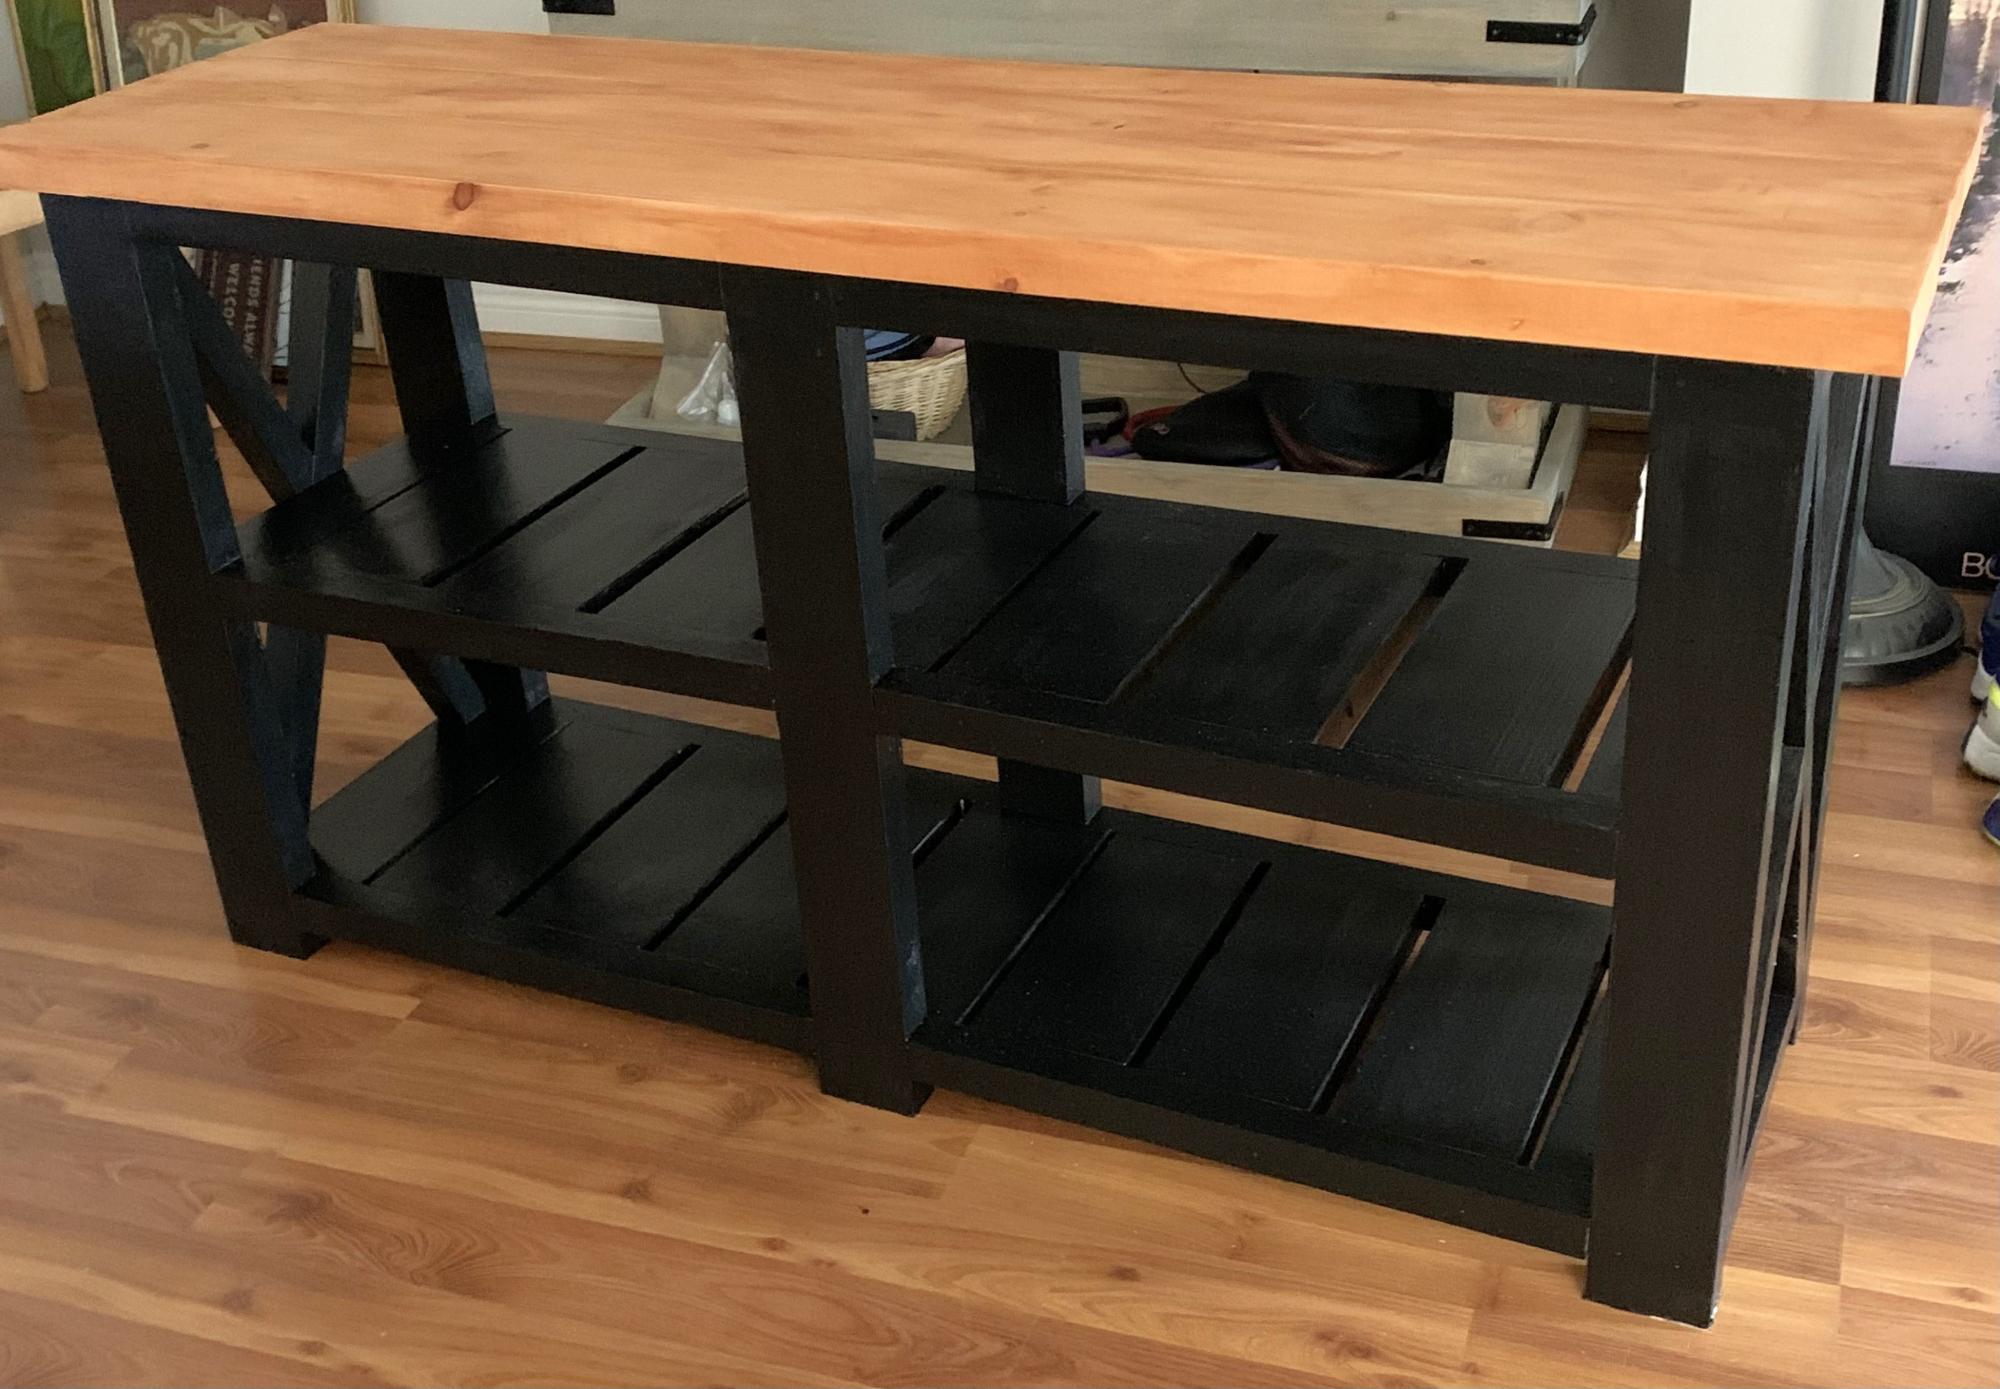
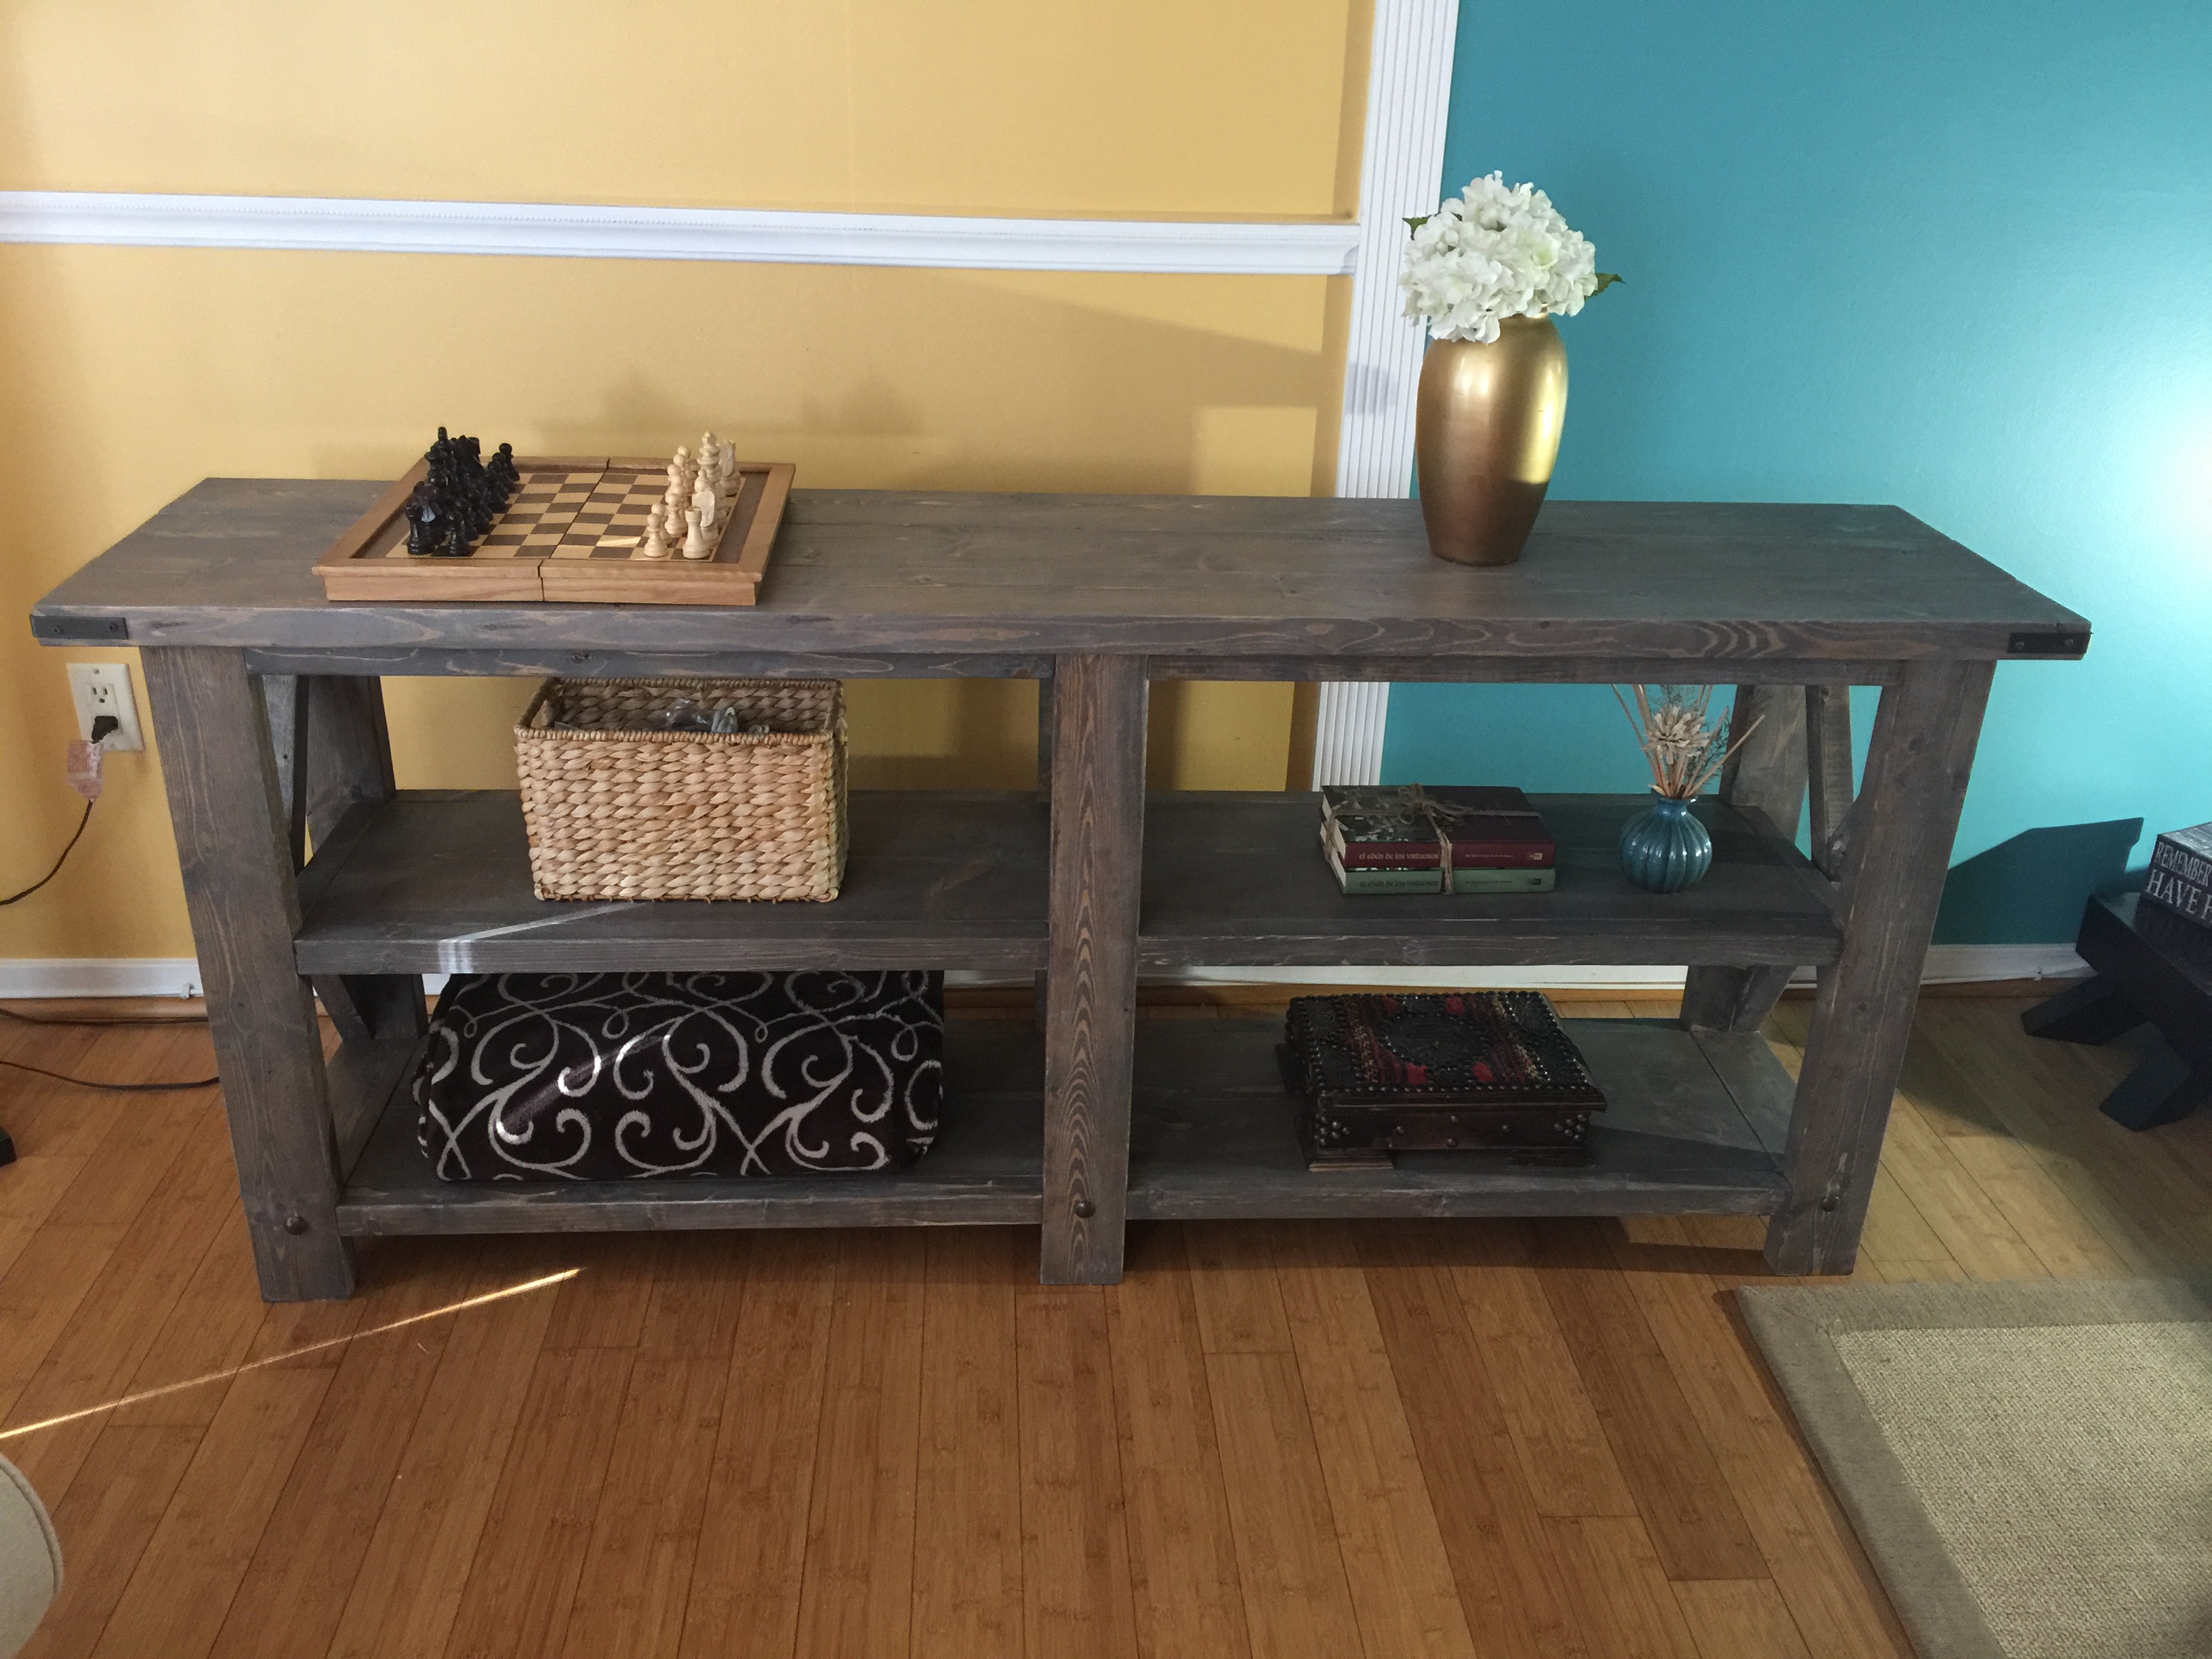
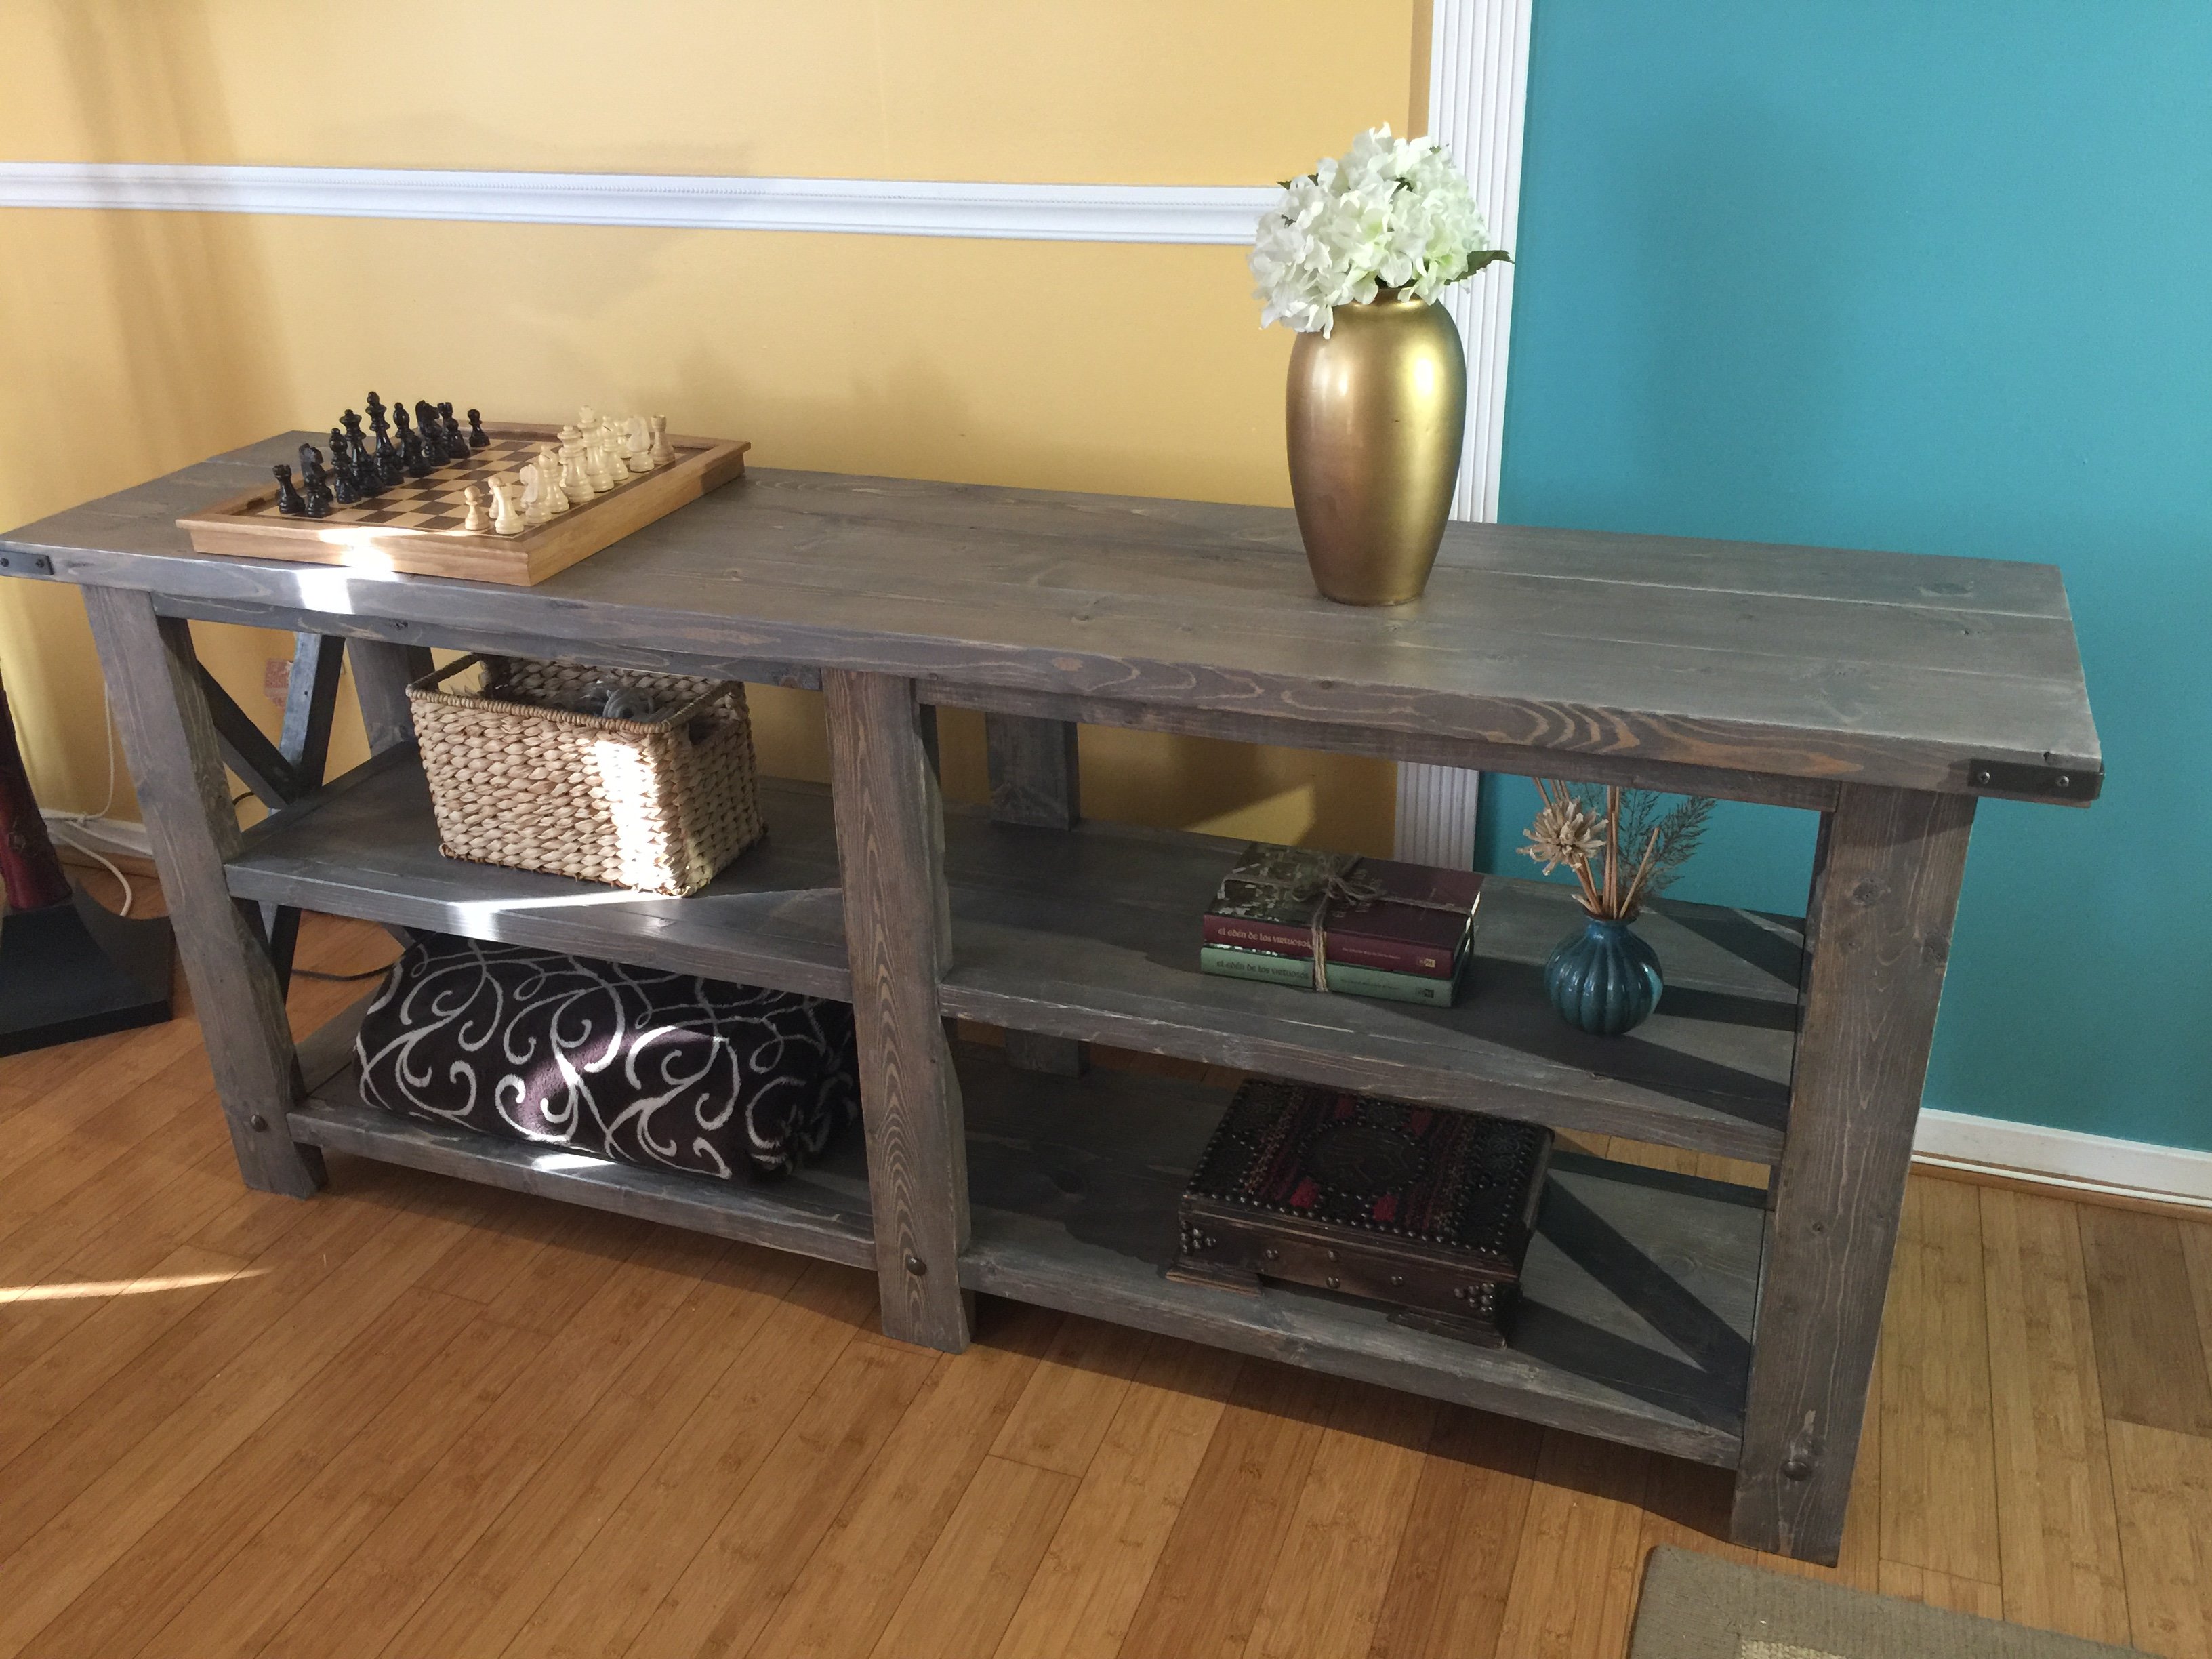
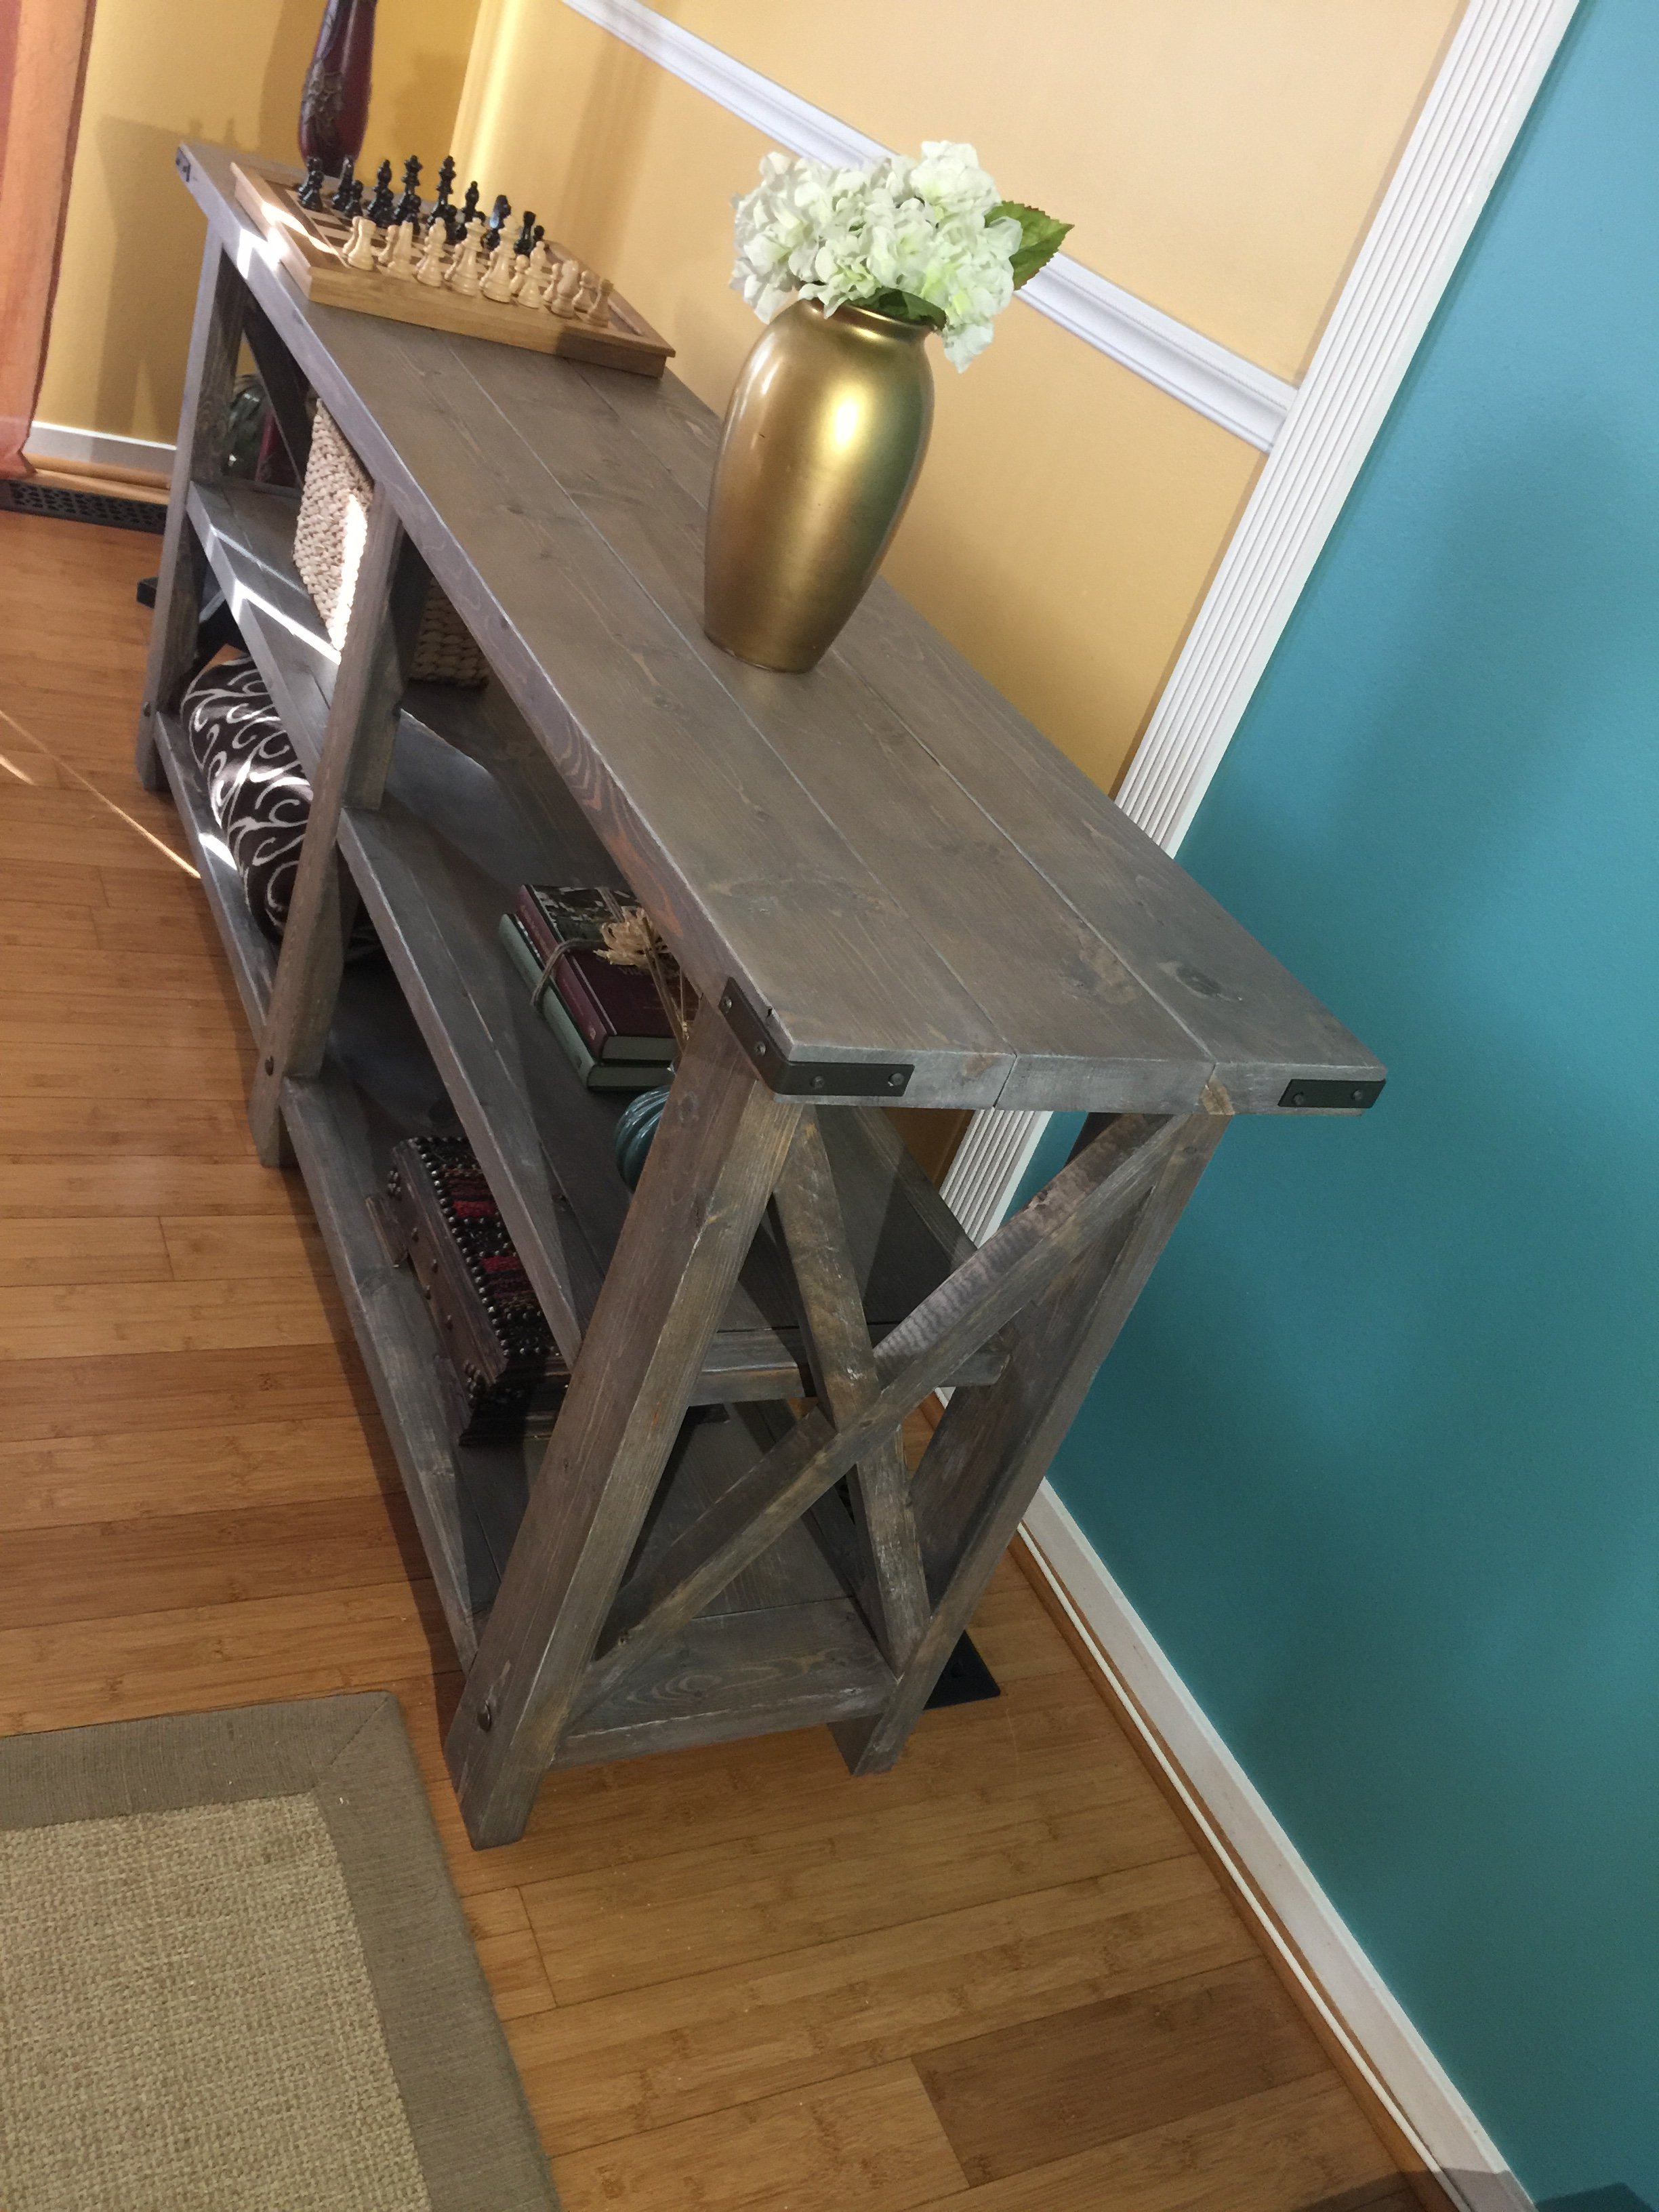
Console table

My husband made one for me and we loved it so much that he made a second one that we sold just a few hours after it was finished.
He is now working on a set of console, coffee, and side tables; and later he will attempt to buil a round dinning table for our house... wish us luck!
Built from Plan(s)
Estimated Cost
$70
Estimated Time Investment
Weekend Project (10-20 Hours)
Finish Used
Minwax grey, minwax walnut, white wash
Recommended Skill Level
Beginner