Community Brag Posts
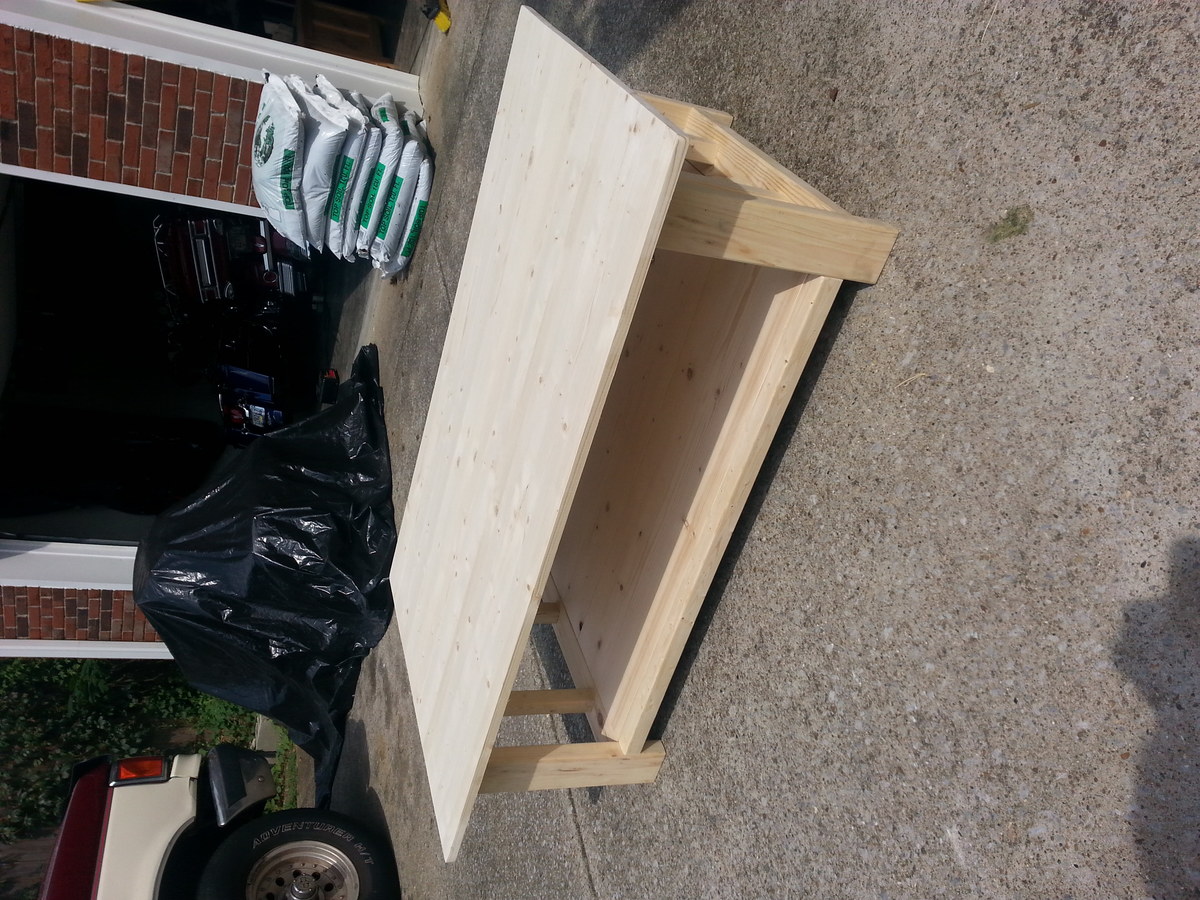
Farmhouse Coffee Table
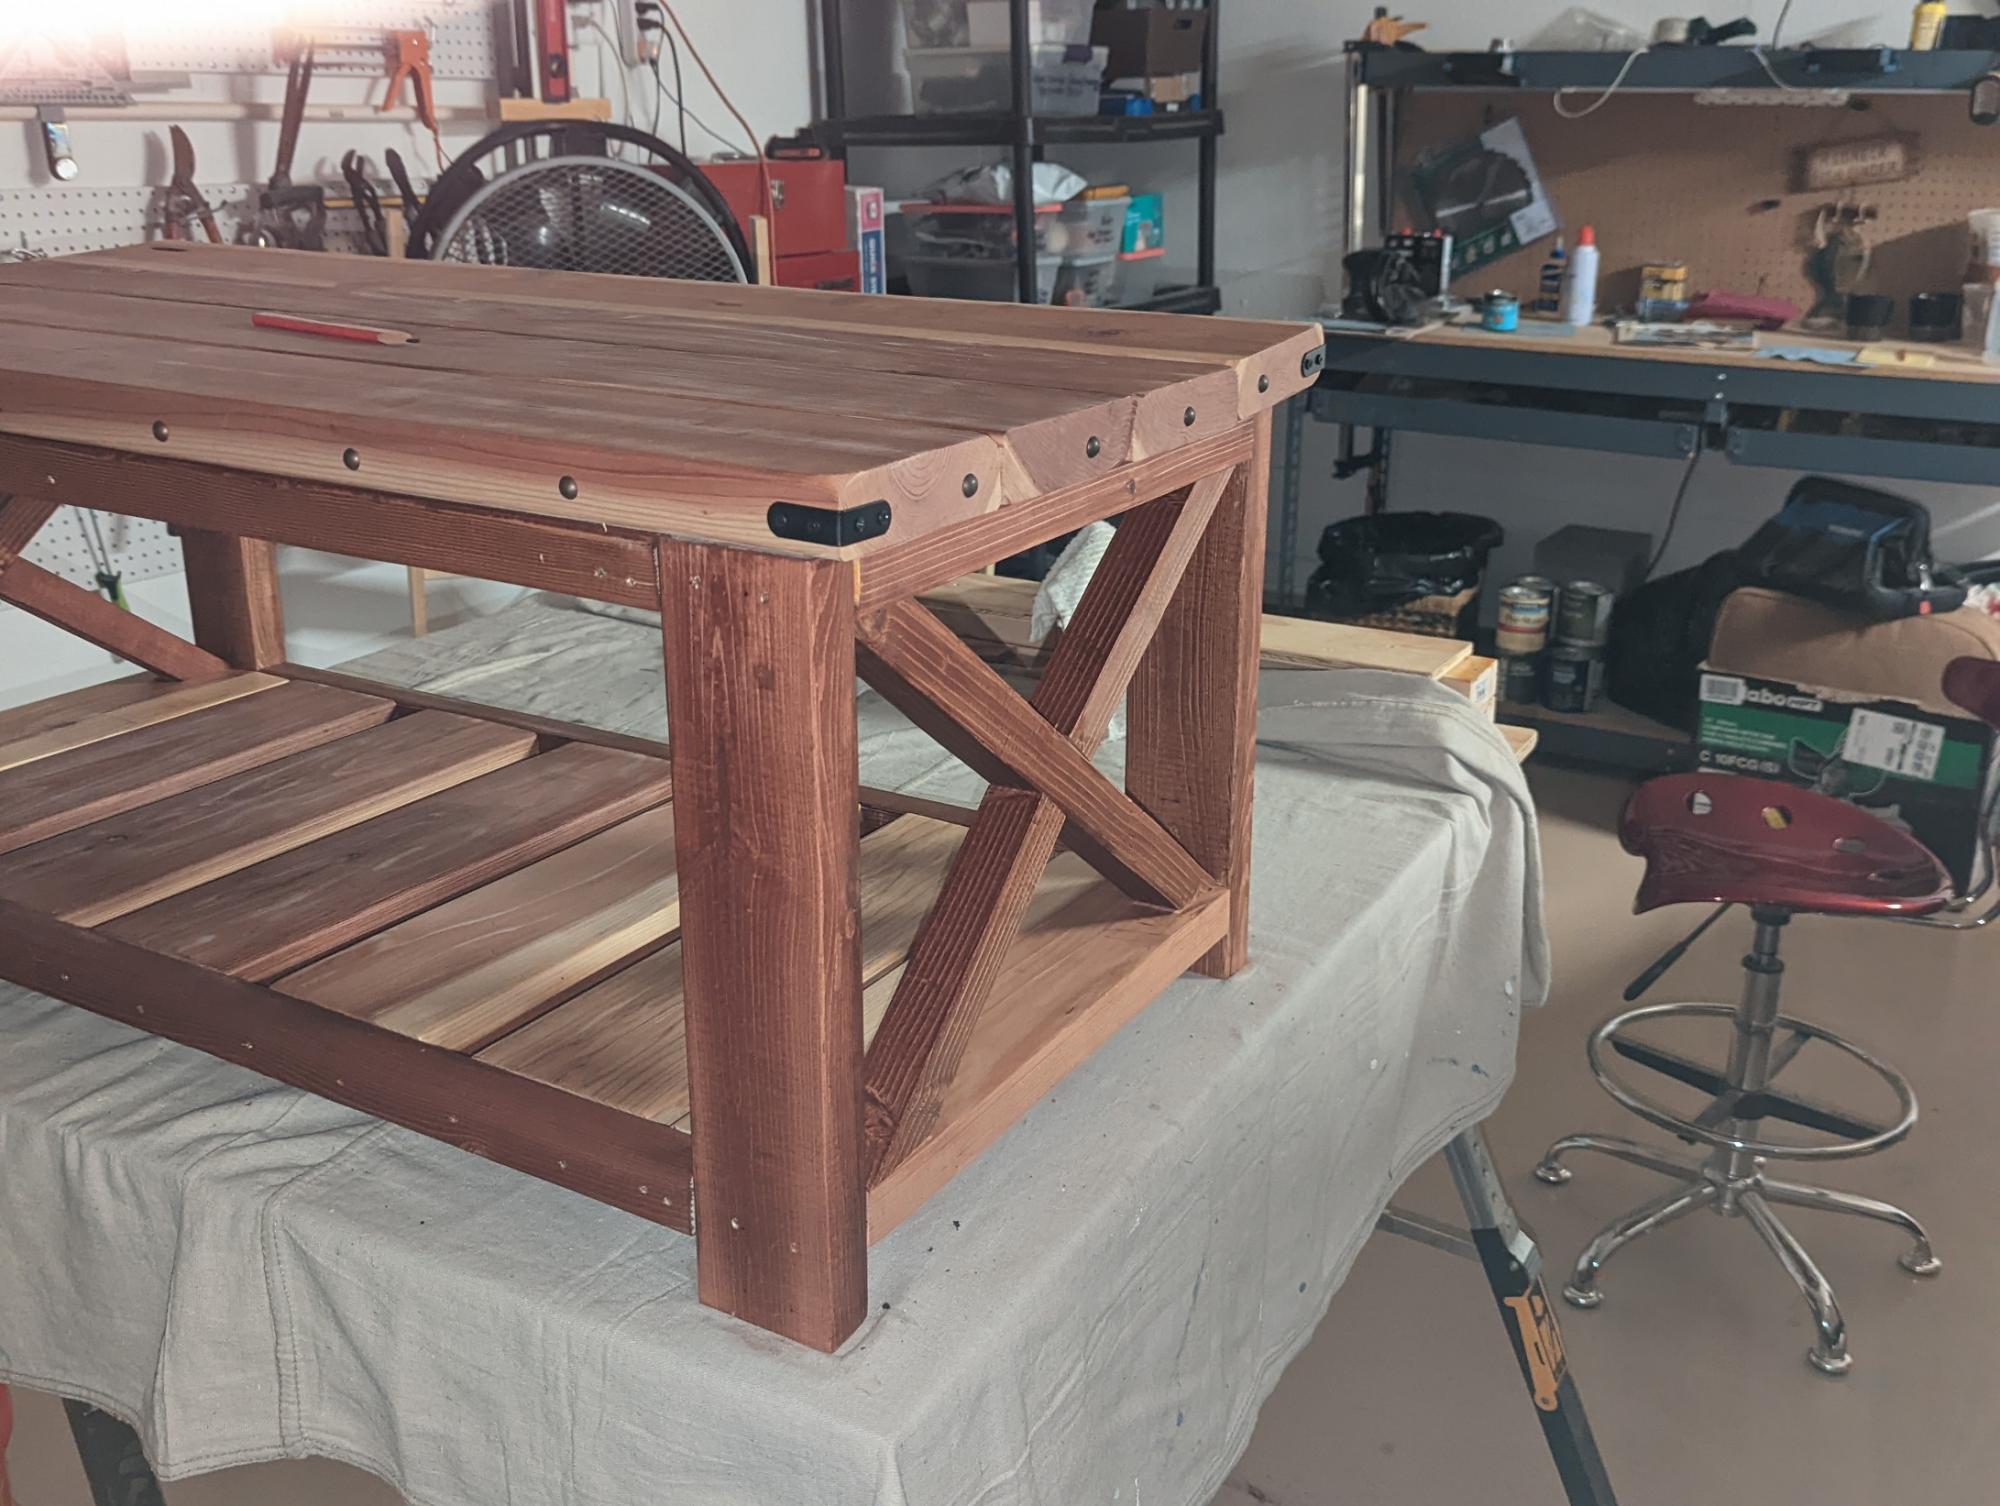
I really had a lot of fun with this project Ana, so thank you for both the plans and that YouTube tutorial. Built almost exactly like your plans, with the exception of those nail heads I added around the perimeter. Decided to use redwood for the 2x6's, and that seemed to add more wood beauty, but I also ended up with one board that was slightly bent. I fixed that with some wood filler. Finished with clear shellac.

Comments
Tue, 08/16/2022 - 11:01
Gorgeous build!
Love all the extra details and gorgeous wood, looks fantastic!
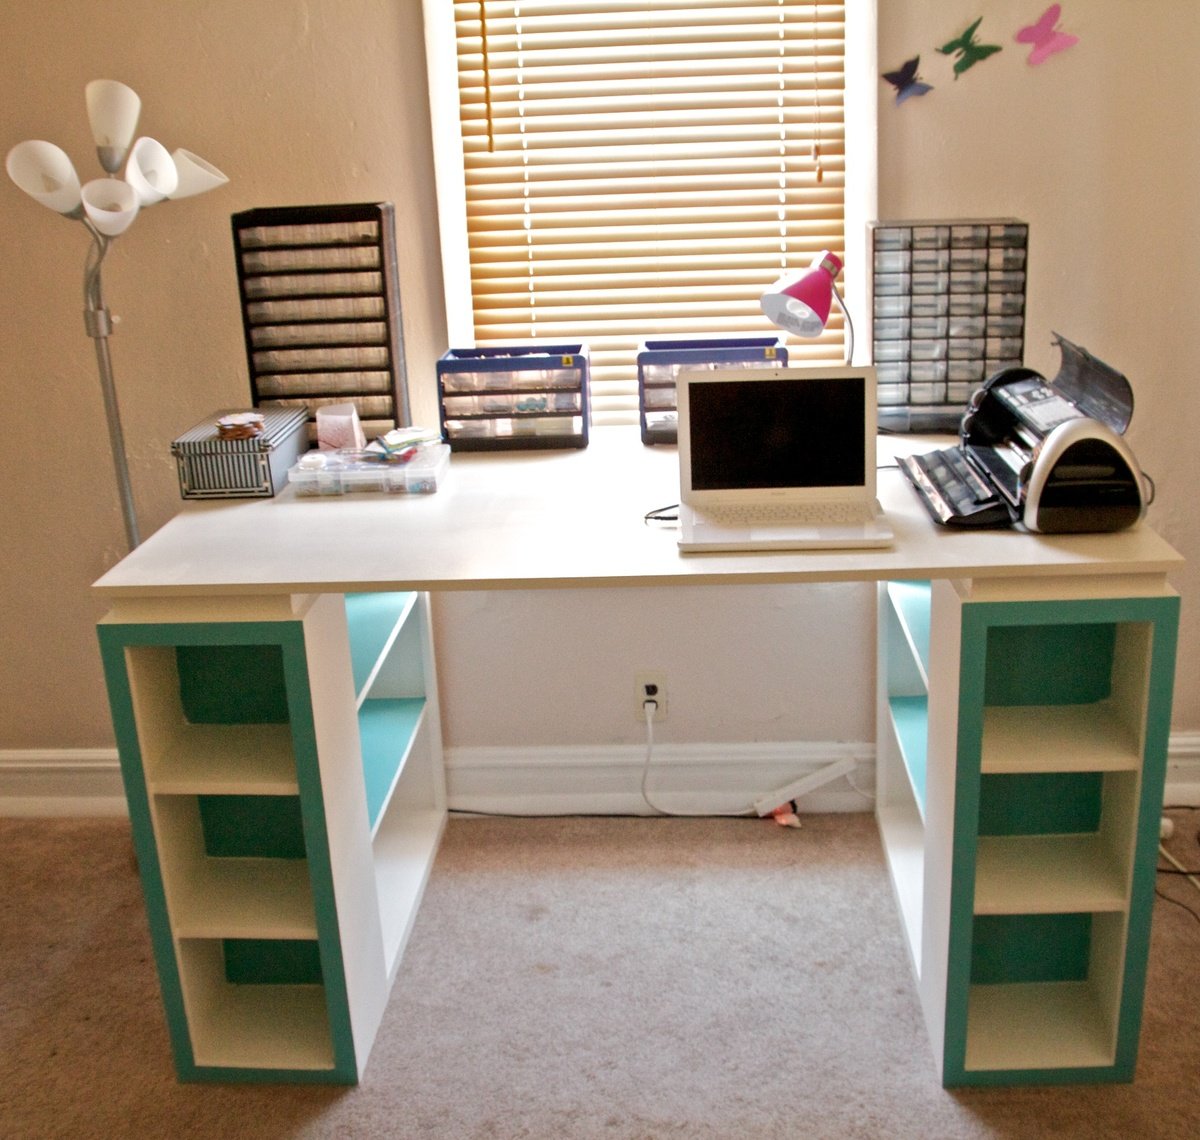
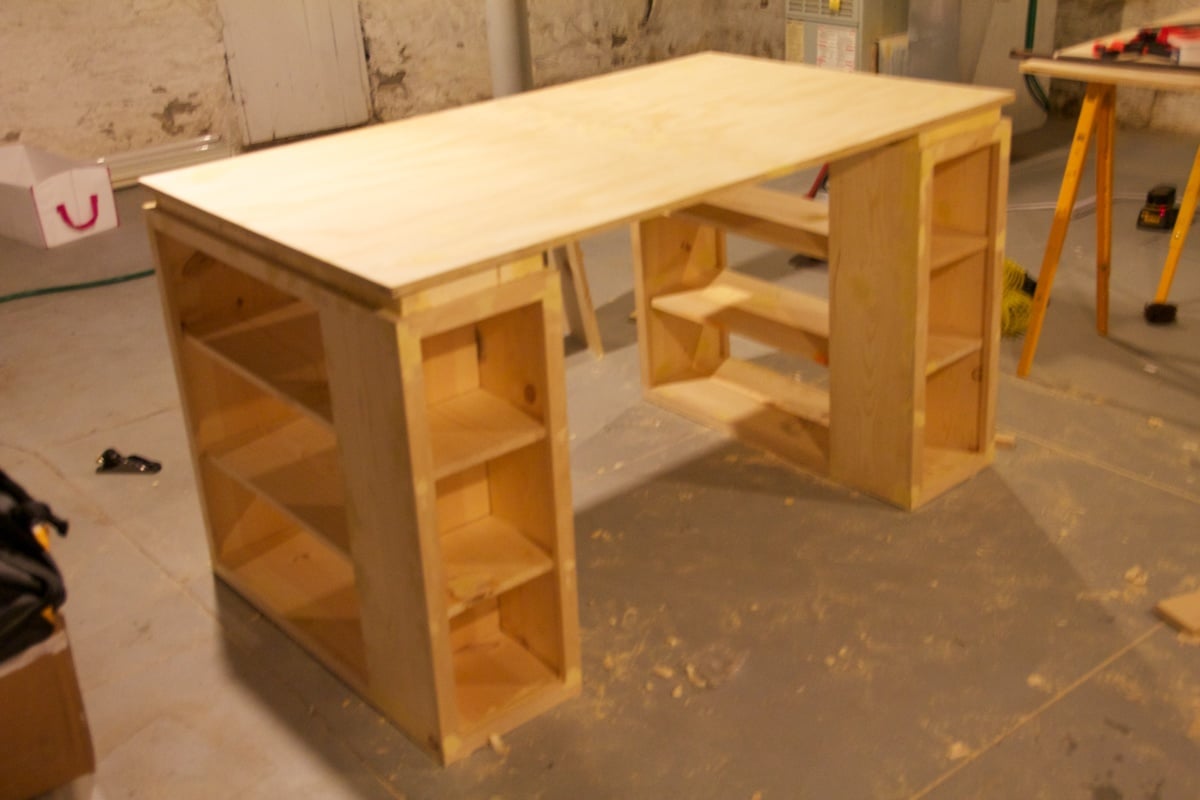
My wife's new Craft table
This is actually my third project from your site Ana.
I acctually decided to make this table ten inch wider since my wife has a loooooooot of crafts :)
This project took a little longer then I thought.
It was my own fault!!! I thought I would safe some time and get some of the wood cut buy the clerk at Home Depot. That turned out to be a really bad idea. Most of my cuts were uneven and even after I gave the clerk the exact measurements, a few of the boards were up to 2 inches too long. At the end I had to buy two more boards because I had to cut peaces away to have straight edges.
Lesson learned!!!
I love building wood furniture. And I already got my next plan from your site that I'm going to build.
Built from Plan(s)
Estimated Cost
$160
Estimated Time Investment
Weekend Project (10-20 Hours)
Finish Used
Valspar-Dove tail white(Eggshell)
Behr- Surfer(eggshell)
2 coats of clear Polyurethane Semi-Gloss
Behr- Surfer(eggshell)
2 coats of clear Polyurethane Semi-Gloss
Recommended Skill Level
Beginner
Comments

Wed, 09/07/2011 - 04:18
this is what i need.
awesome job! im in the middle of making one of these at the moment. but just to be a tad different i have put a small cutout hole on the top, theres a little bin that sits on the shelf under it, so all i have to do when ive finished with all my paper cuts is swipe it down the hole! hehe how nifty. oh and where did your wife get the black cricut machine?? lol
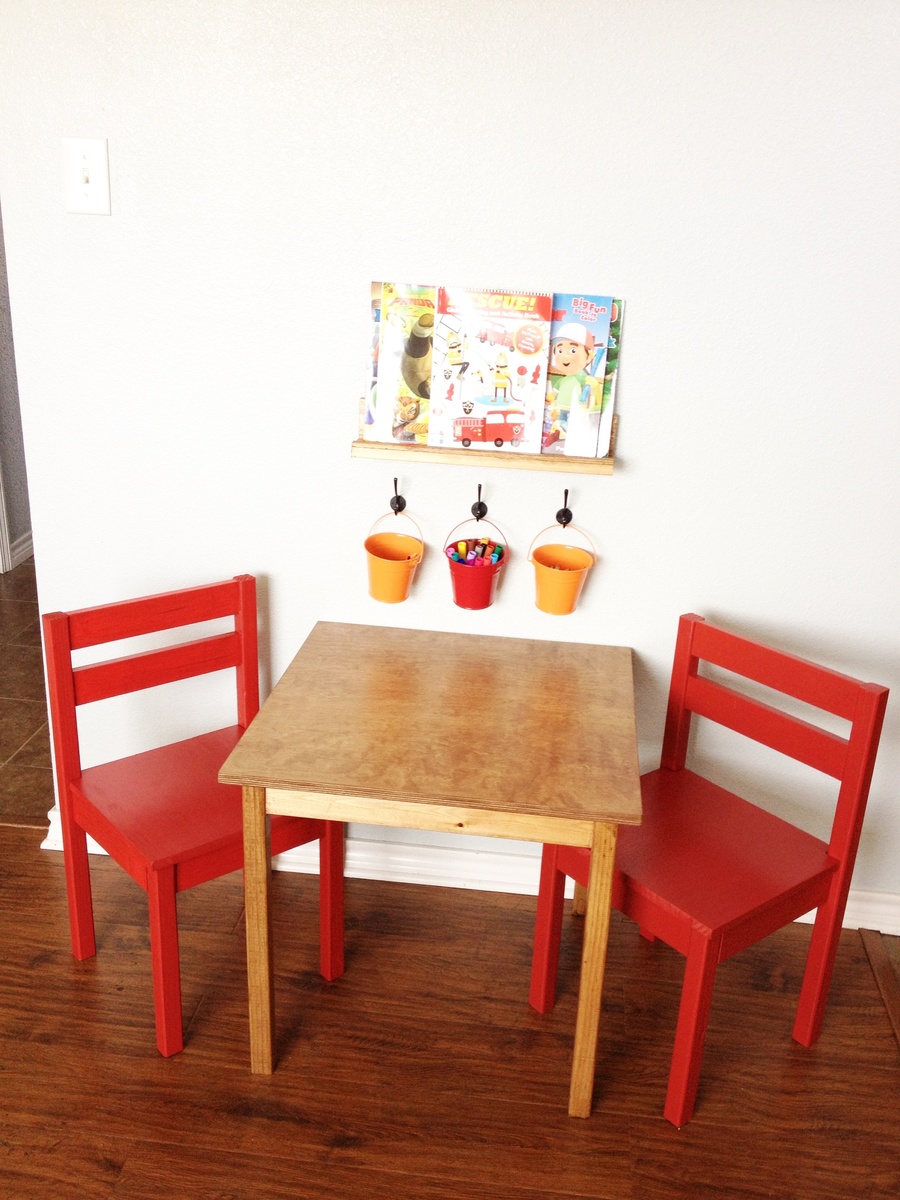
Kids table and chairs
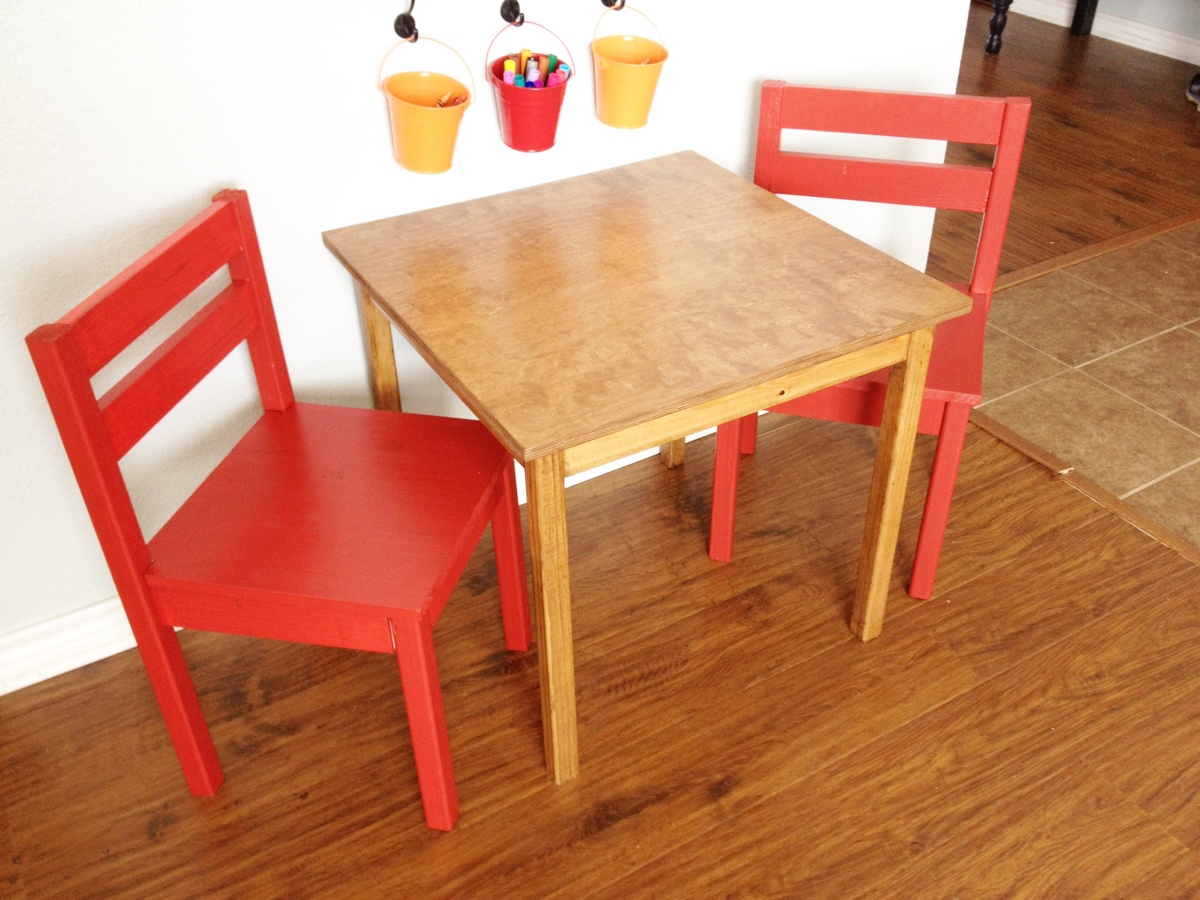
This is a table and chair set I made for my 3 year old son and he loves it! I changed a couple of things. One of the things was with the table top, instead of making it rectangular I did mine square. The second thing was instead of doing the three pieces of wood I used a single 3/4" 2'x2' piece of birch plywood I found at Lowes. With the chairs I also did solid piece seats instead of the slats and I decided to do the legs with 2"x2" wood instead of 1"x2" and I found those modified plans here http://thatsmyletter.blogspot.com/2011/12/t-is-for-table.html?m=1
Built from Plan(s)
Estimated Cost
$50
Estimated Time Investment
Afternoon Project (3-6 Hours)
Finish Used
For the table I used Minwax stain in Early American then sealed it with Minwax Polycrylic in a semi gloss finish. Then for the chairs I just used red paint.
Recommended Skill Level
Beginner
Comments

Tue, 09/03/2013 - 08:44
I really like the
I really like the modifications you made. These look like the chairs I remember from my kindergarten days. I have the table and chairs in my "to do" list. Now I know what to do to make them look more like the kid-sized chairs I like the most.
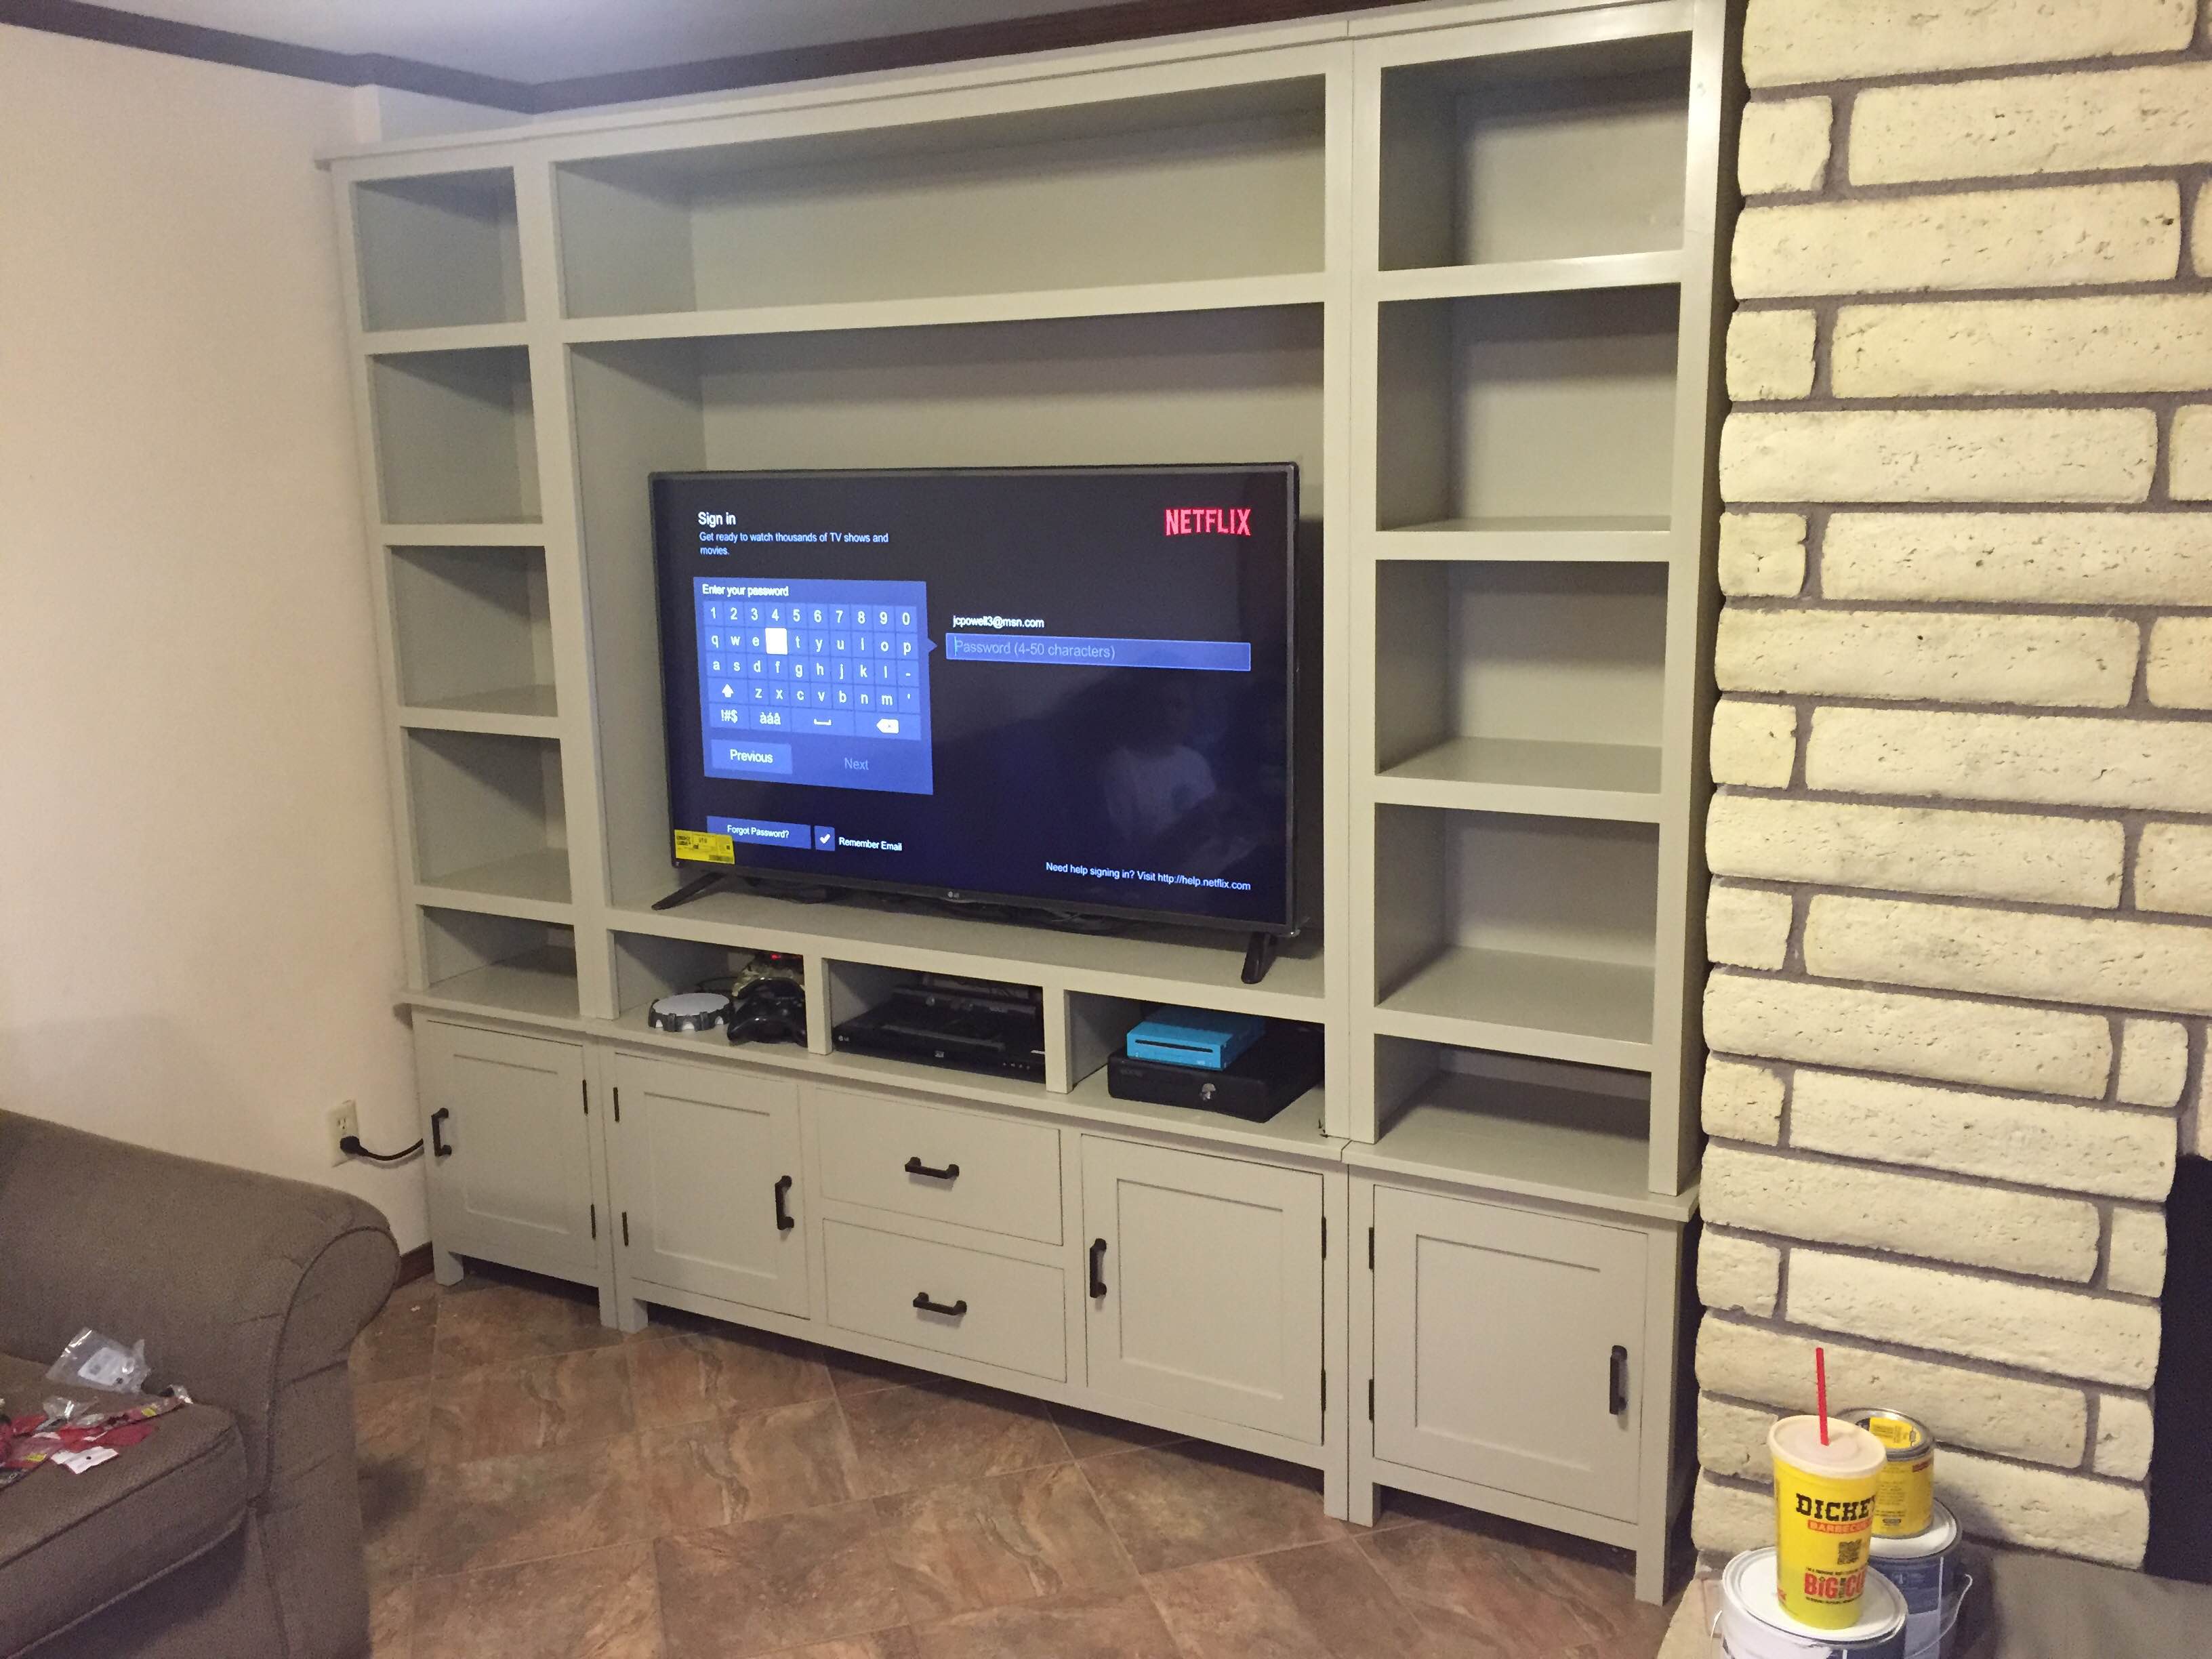
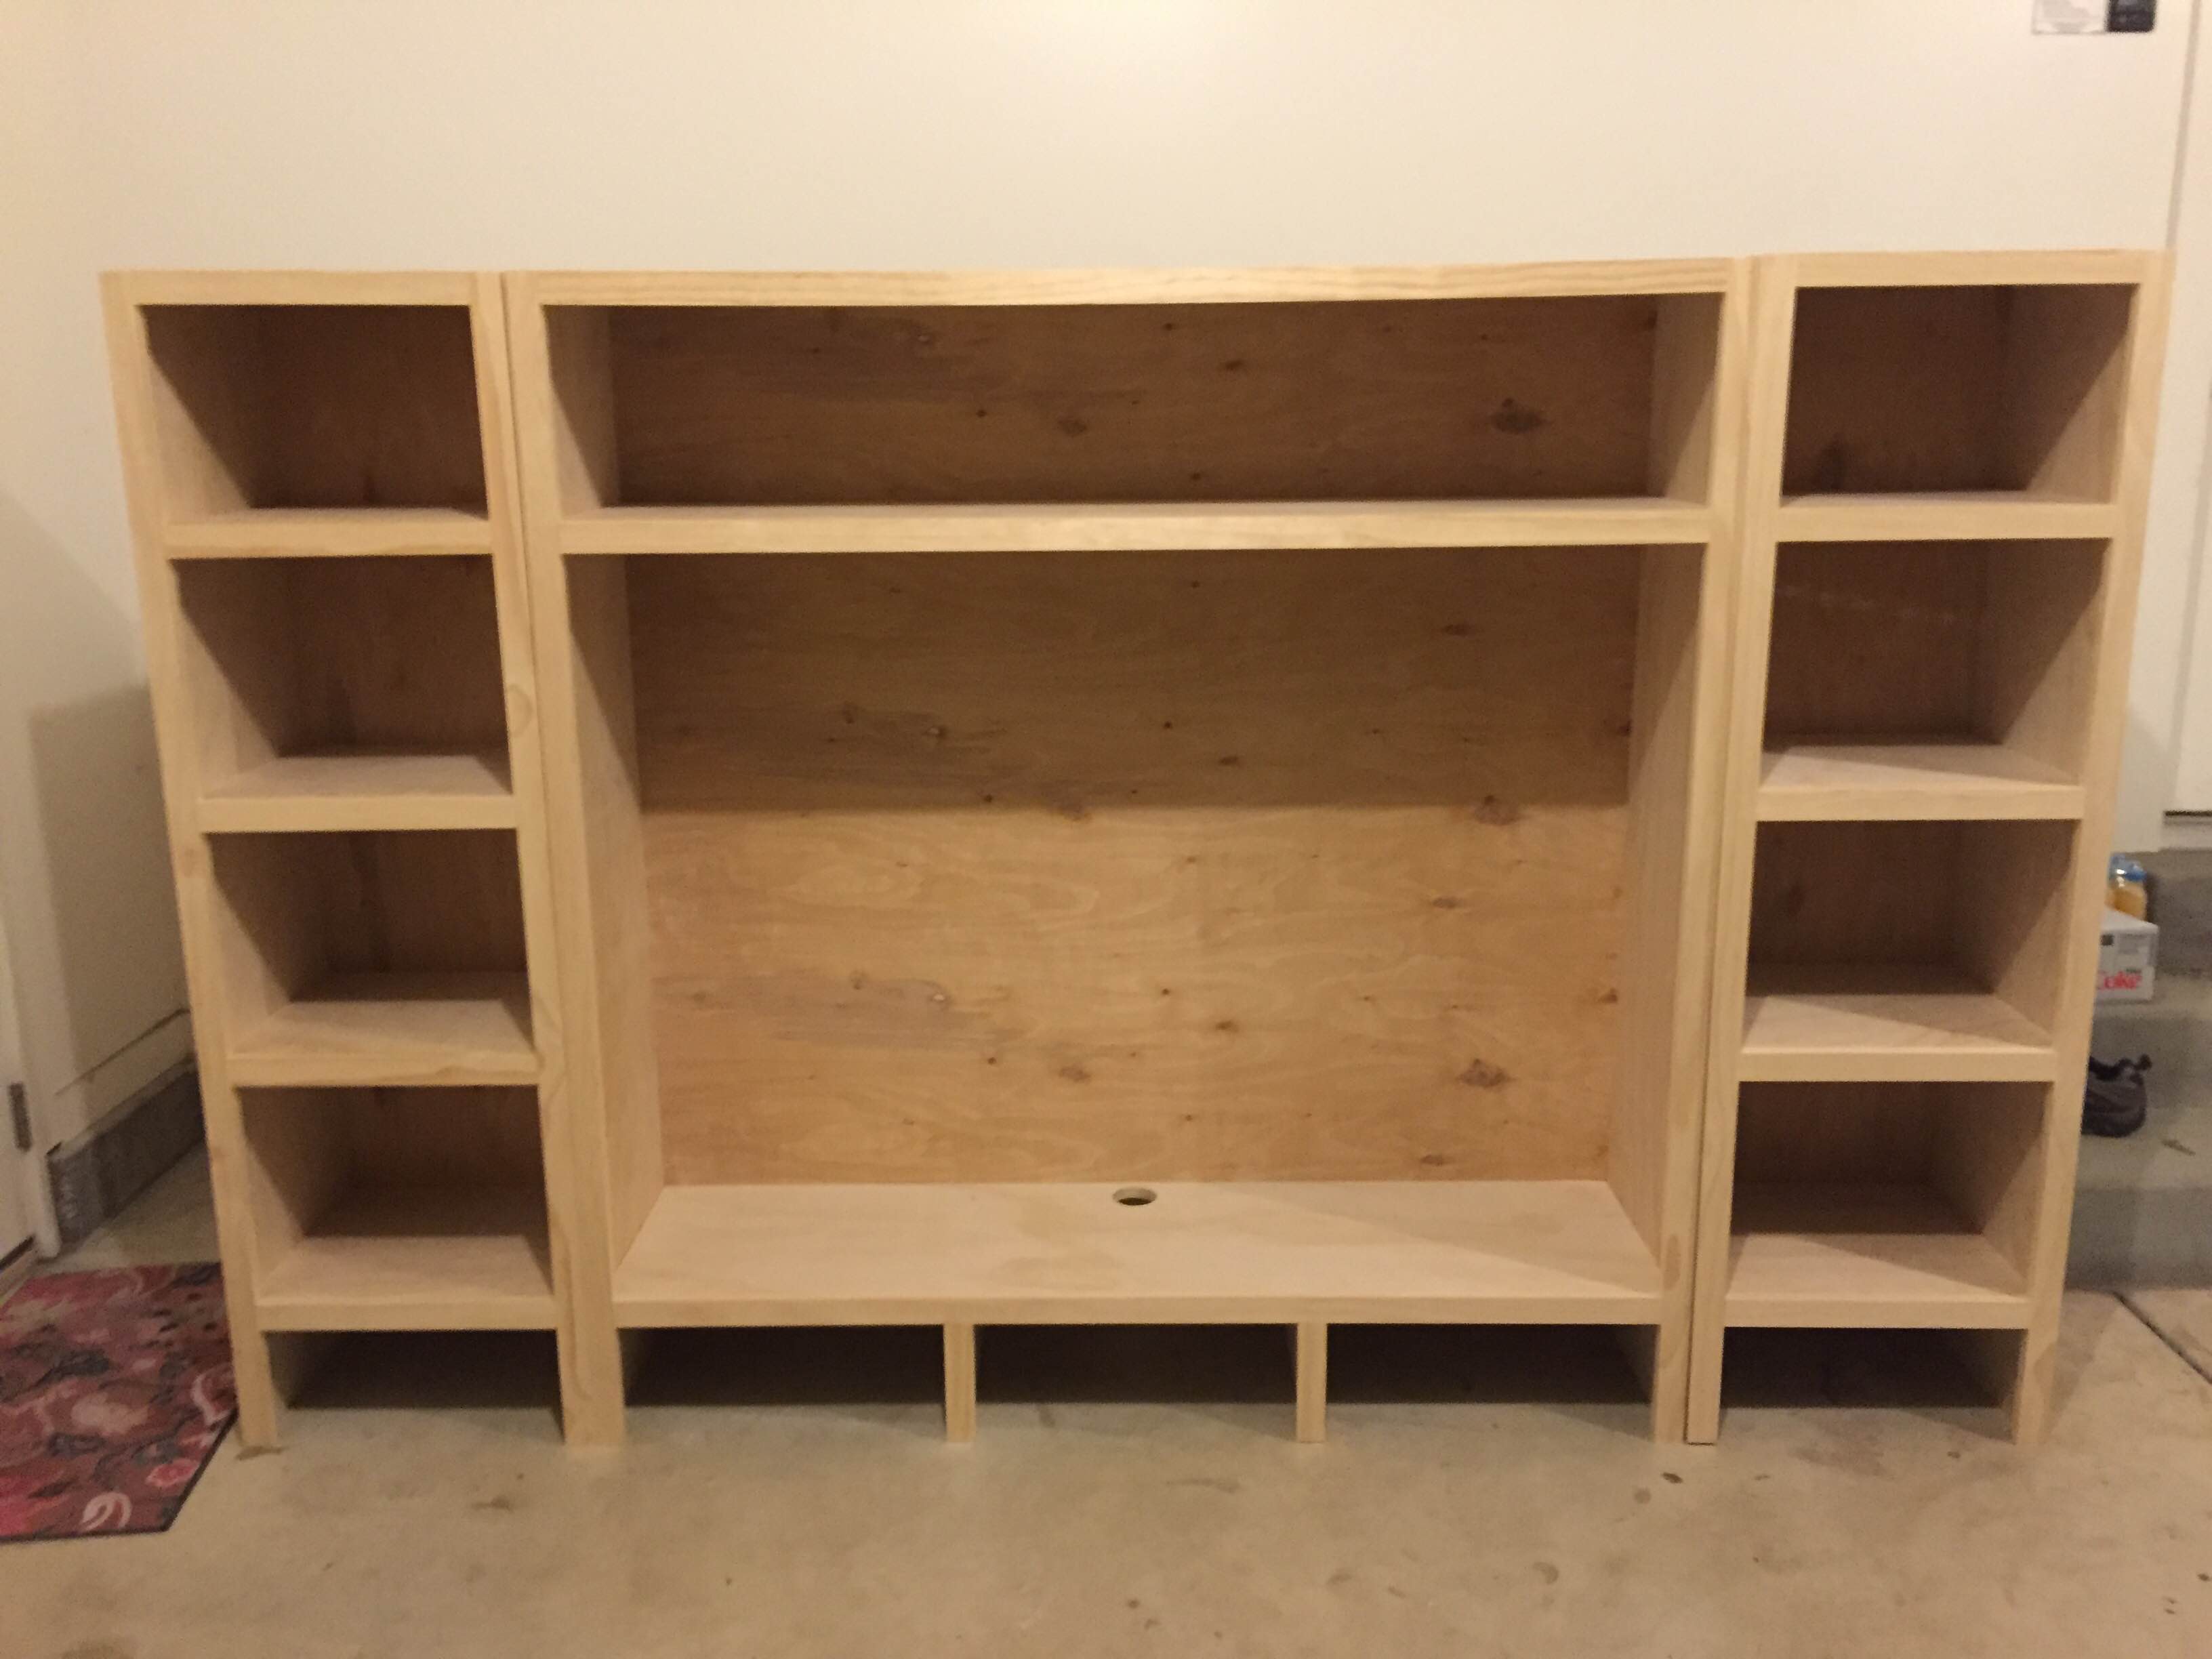
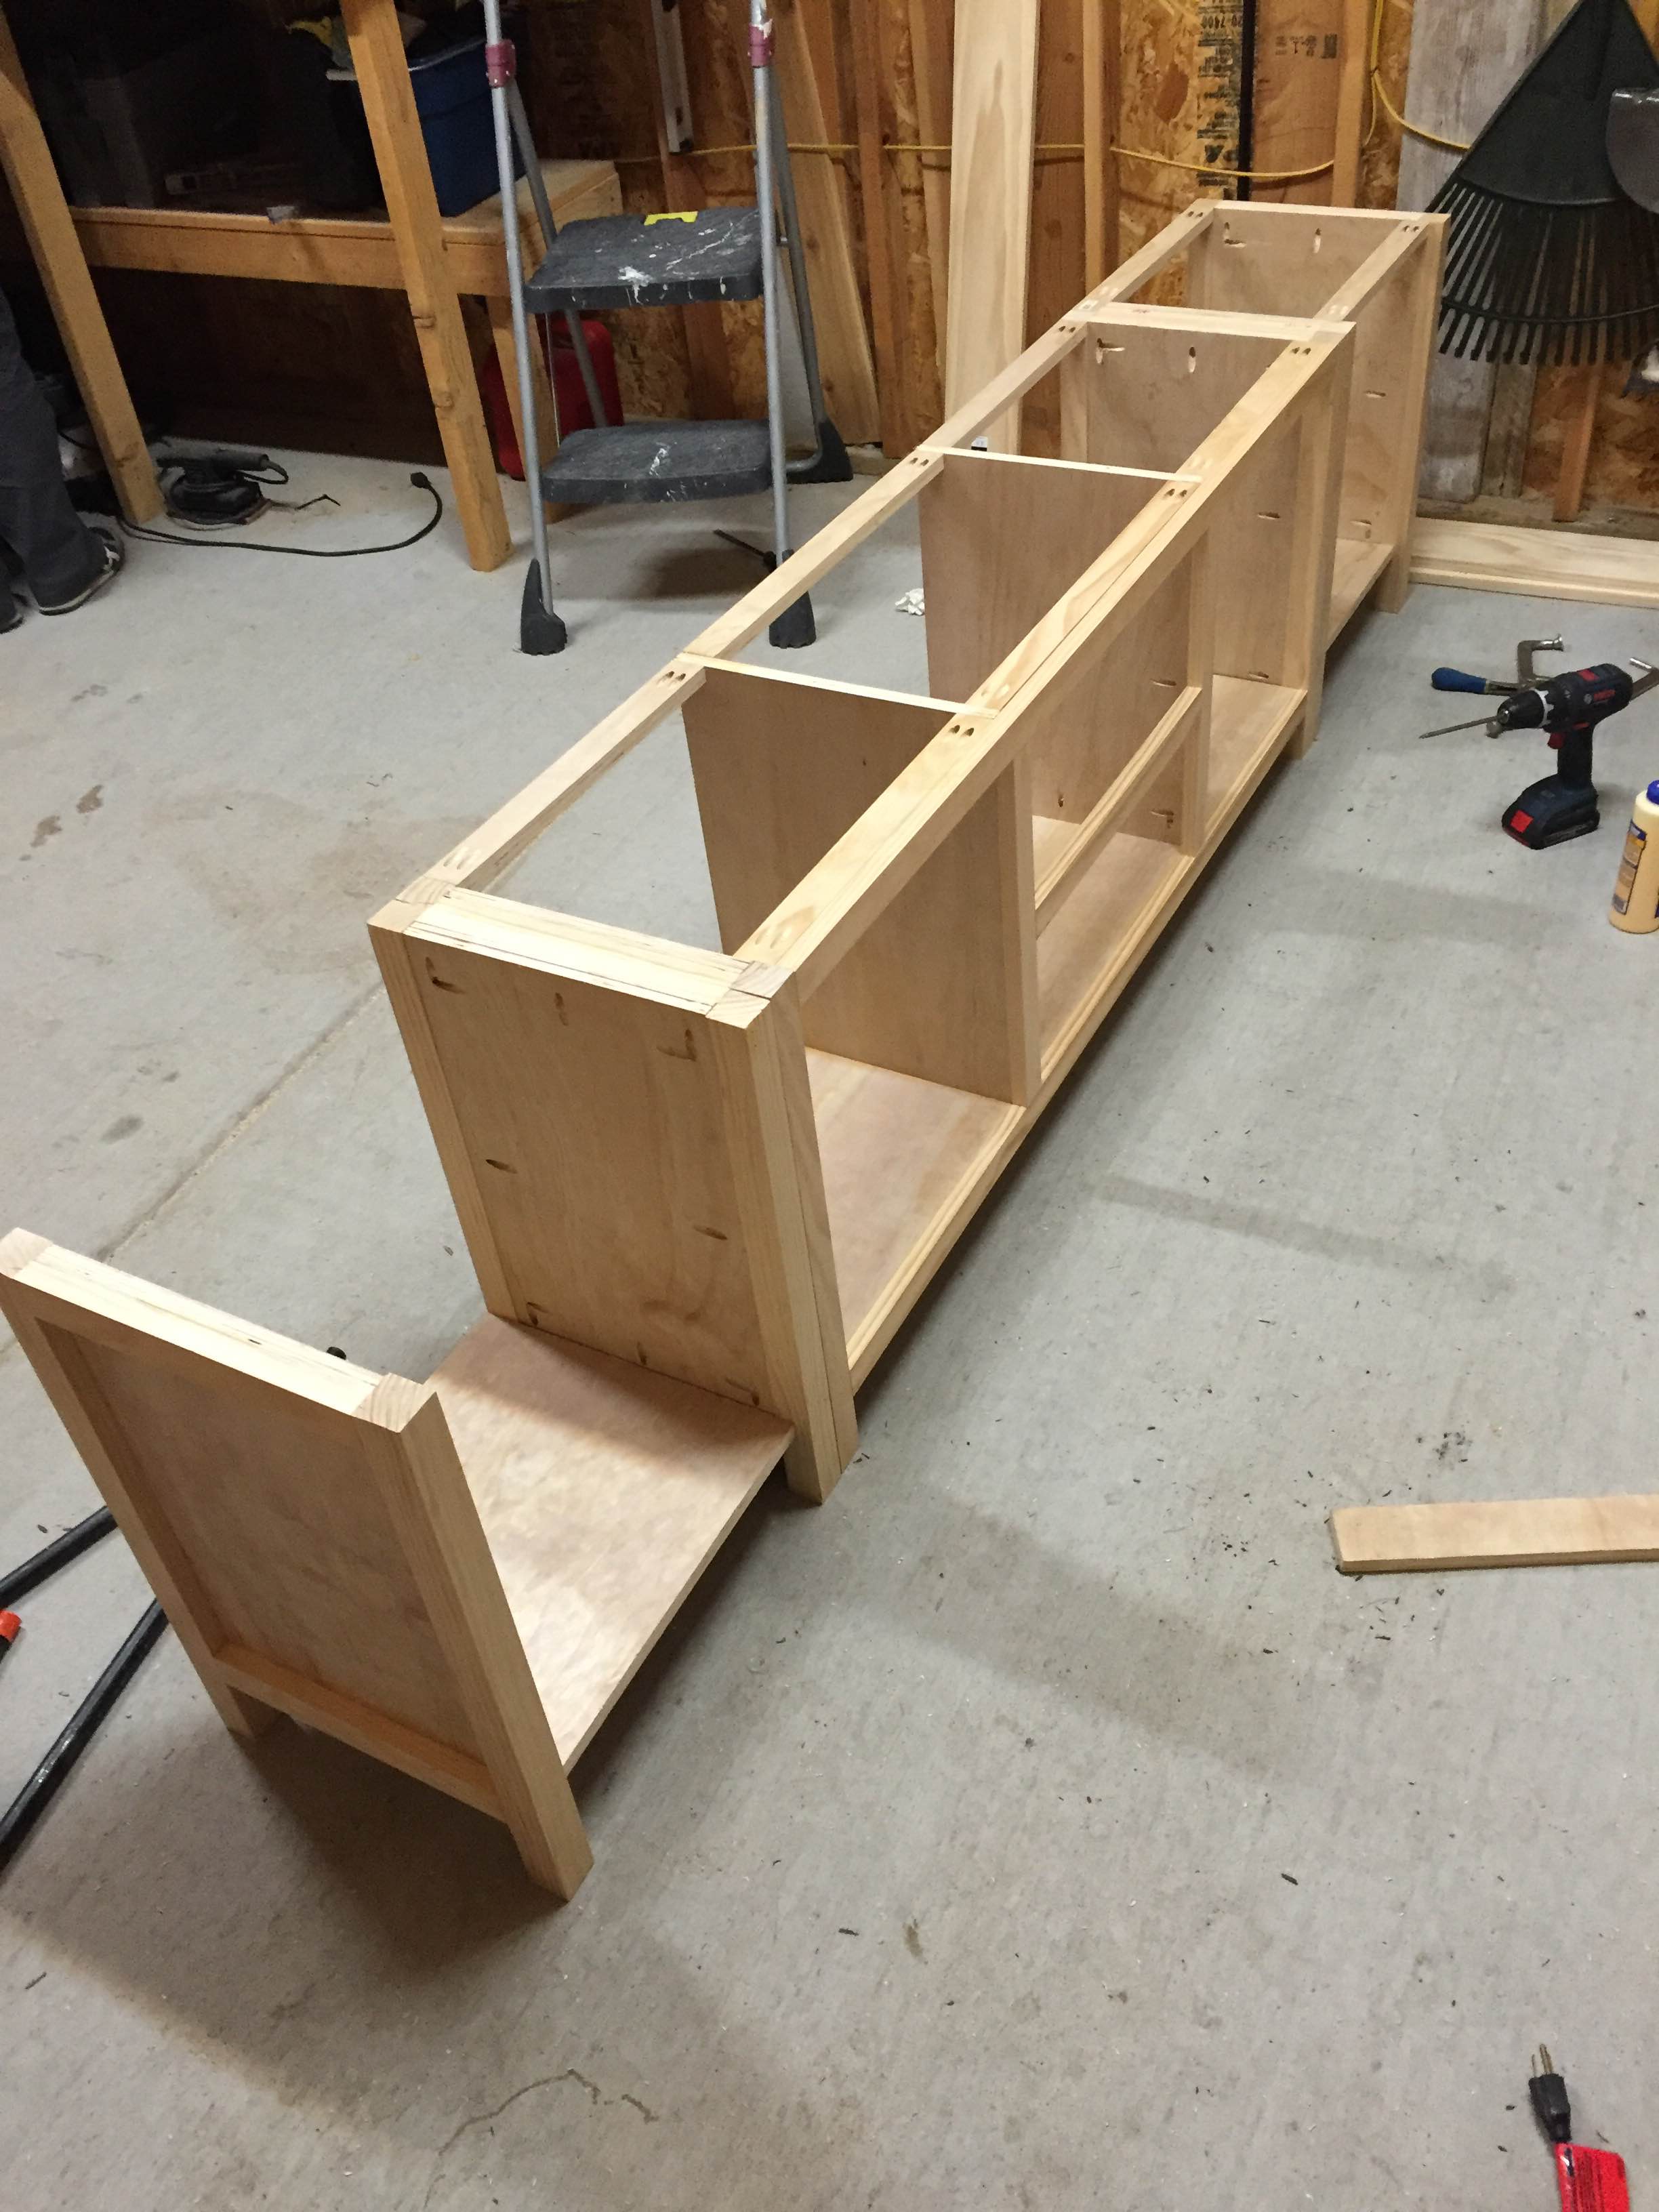
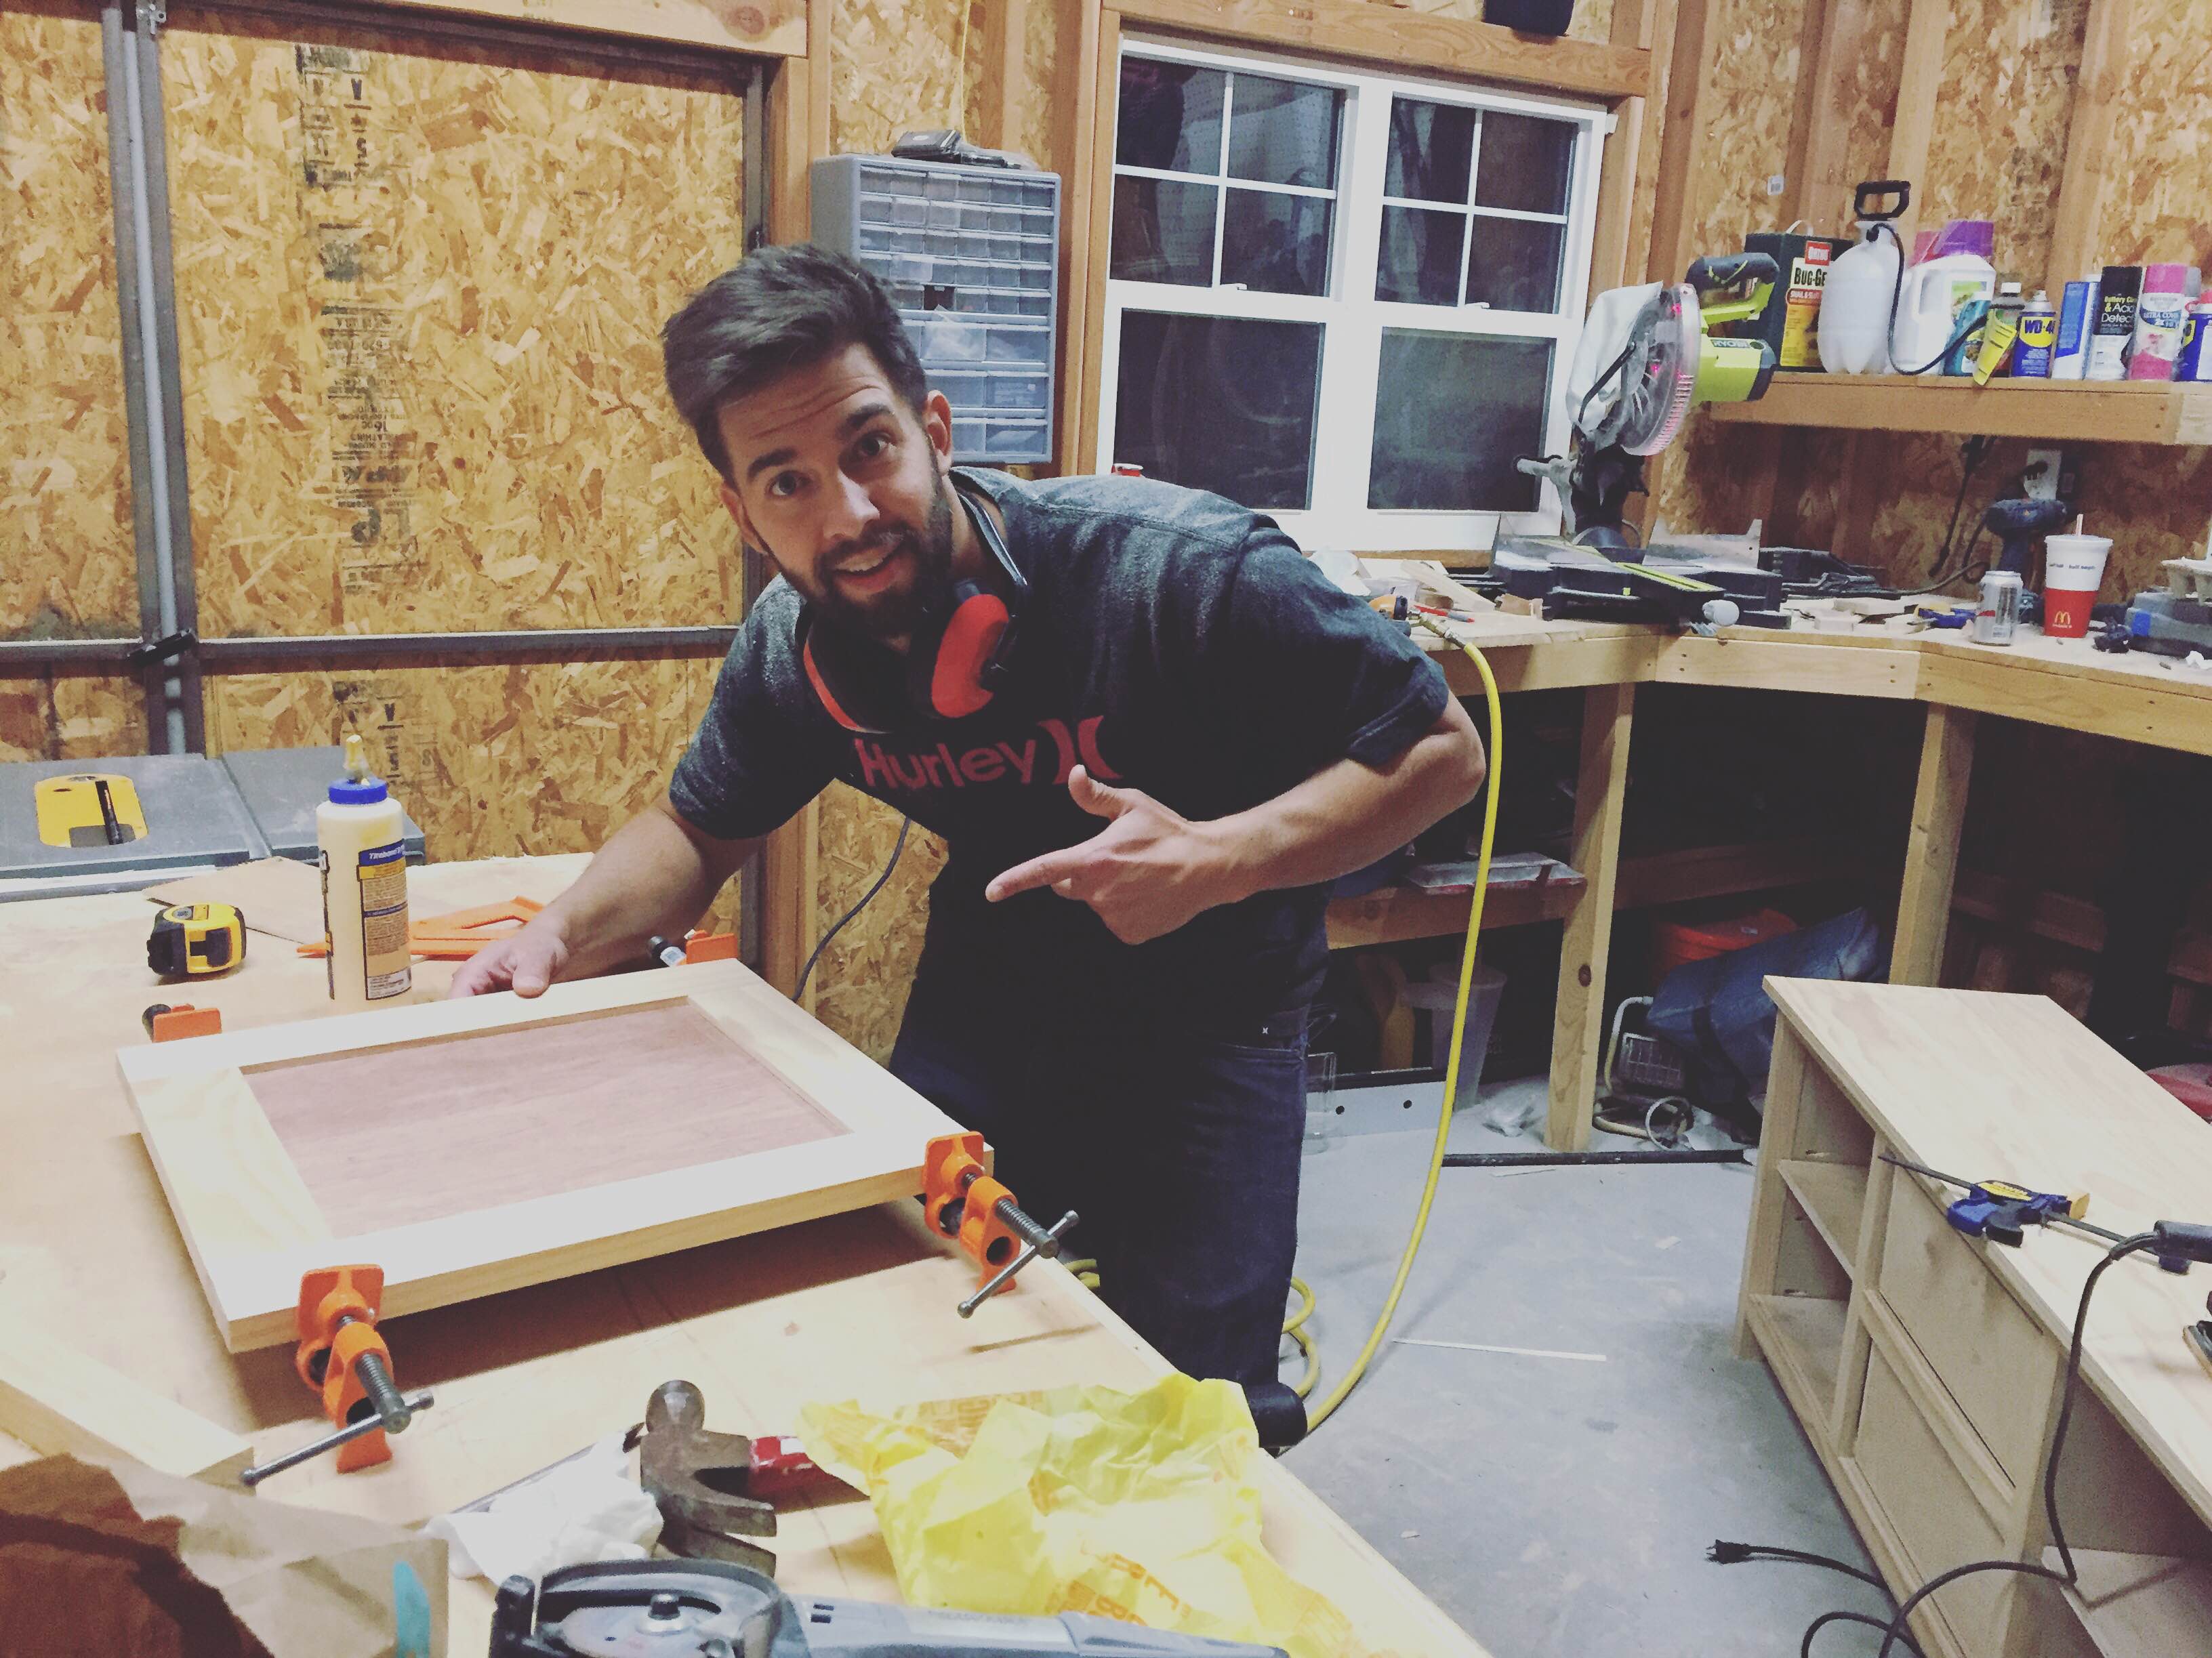
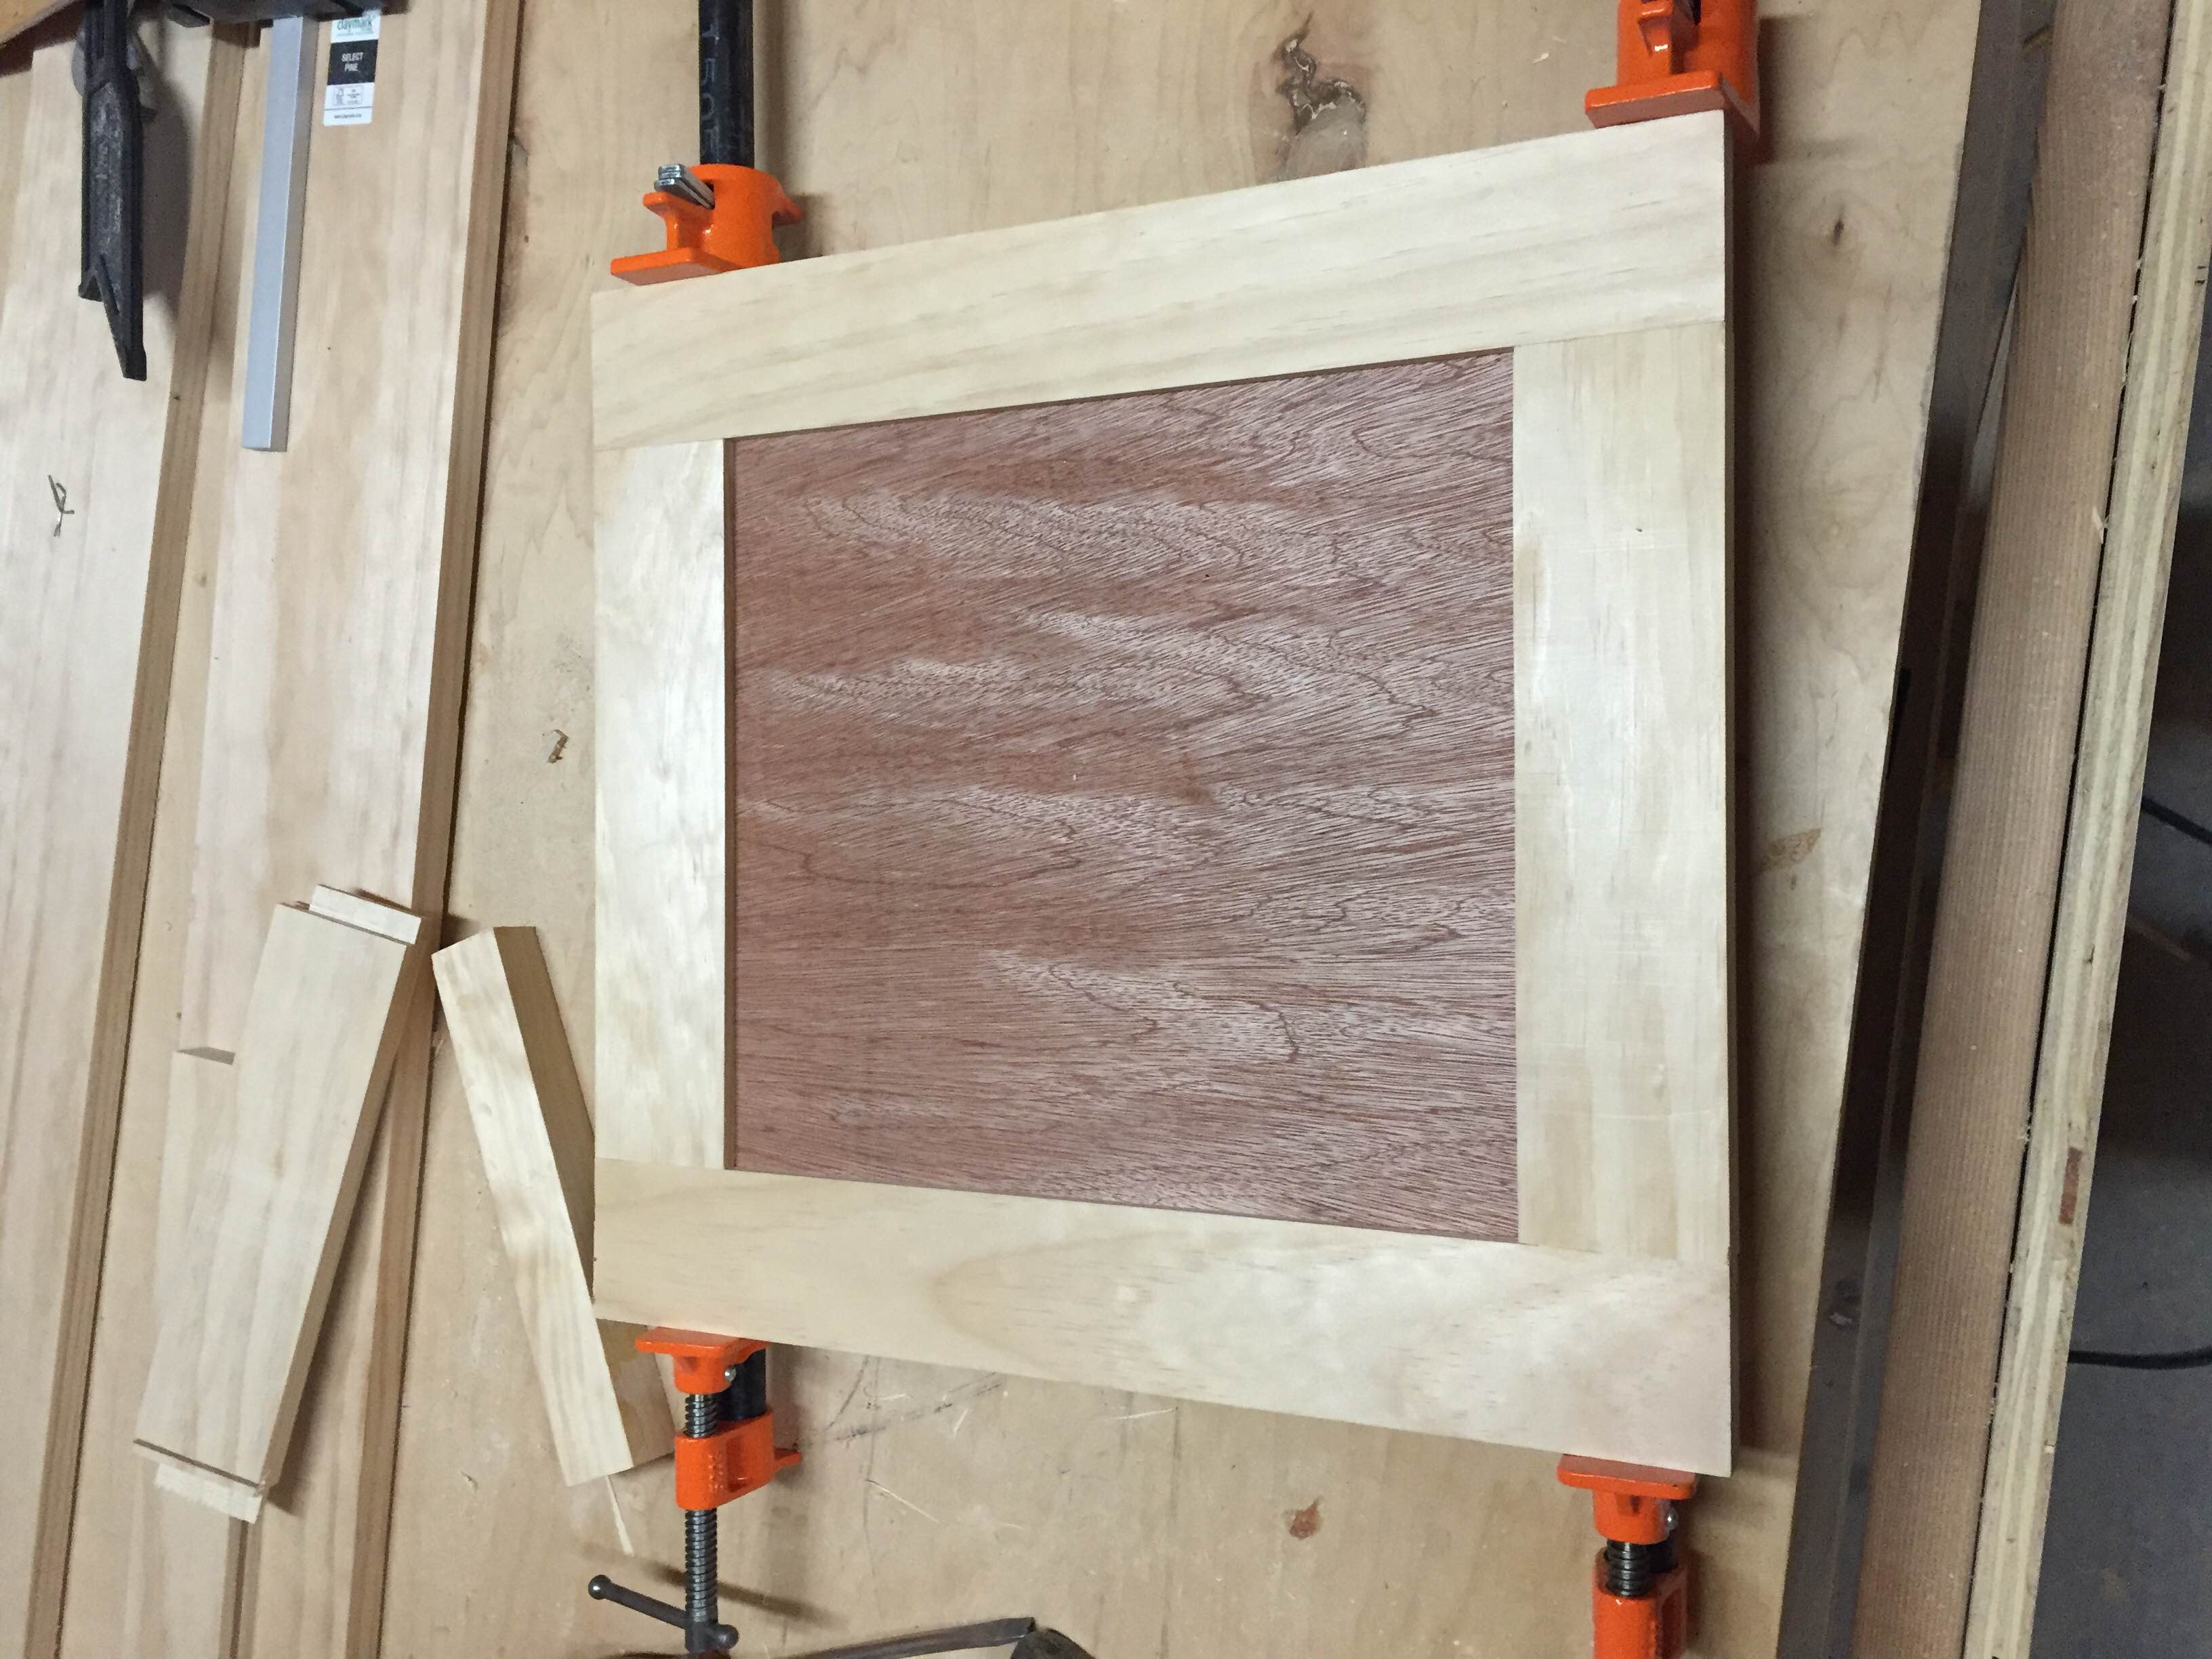
The Media Hutch Entertainment Center
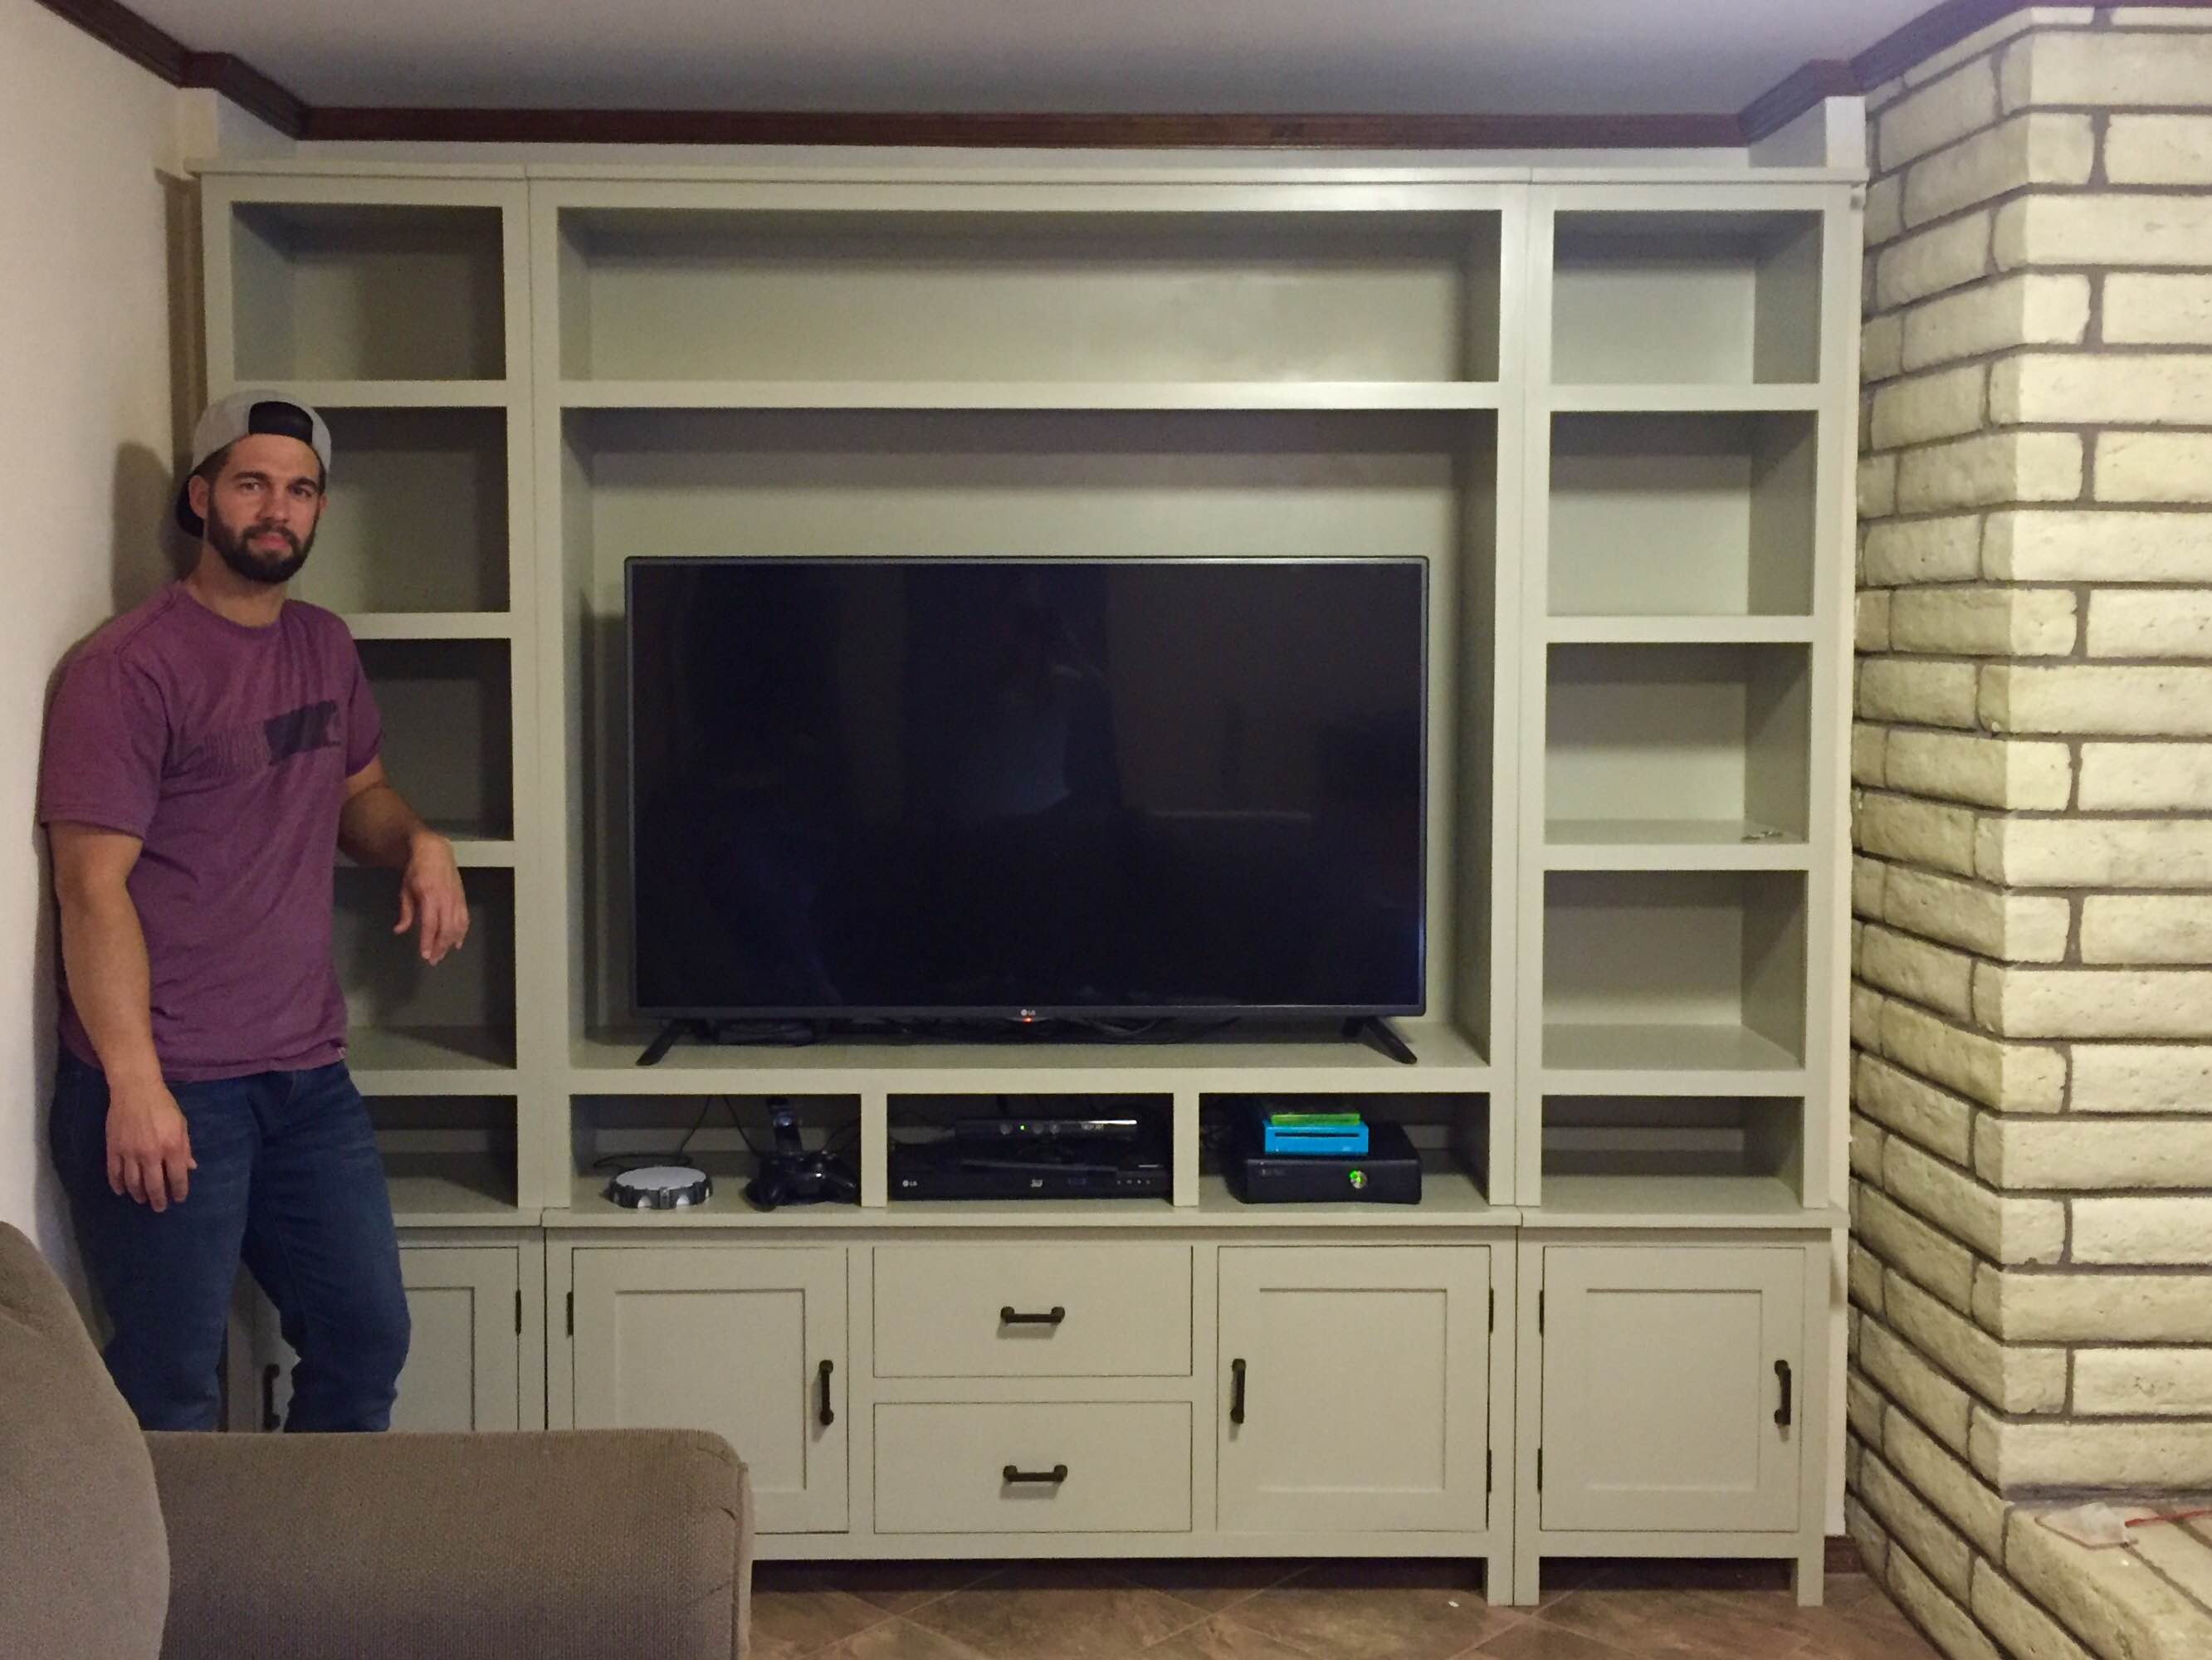
I built this for my oldest brother. I only used 2x2's for the legs. I built the carcuses out of plywood and used 1x2 select pine for the face frames. I built the top shelfs to be 5 feet tall. So the whole thing is 7 feet high by 8 feet wide.
Built from Plan(s)
Estimated Cost
$600-$700
Estimated Time Investment
Week Long Project (20 Hours or More)
Finish Used
Primed with Killz, and painted with Sherwin Williams Analytical Grey. After it was painted I used a finishing wax for a topcoat
Recommended Skill Level
Advanced
Comments
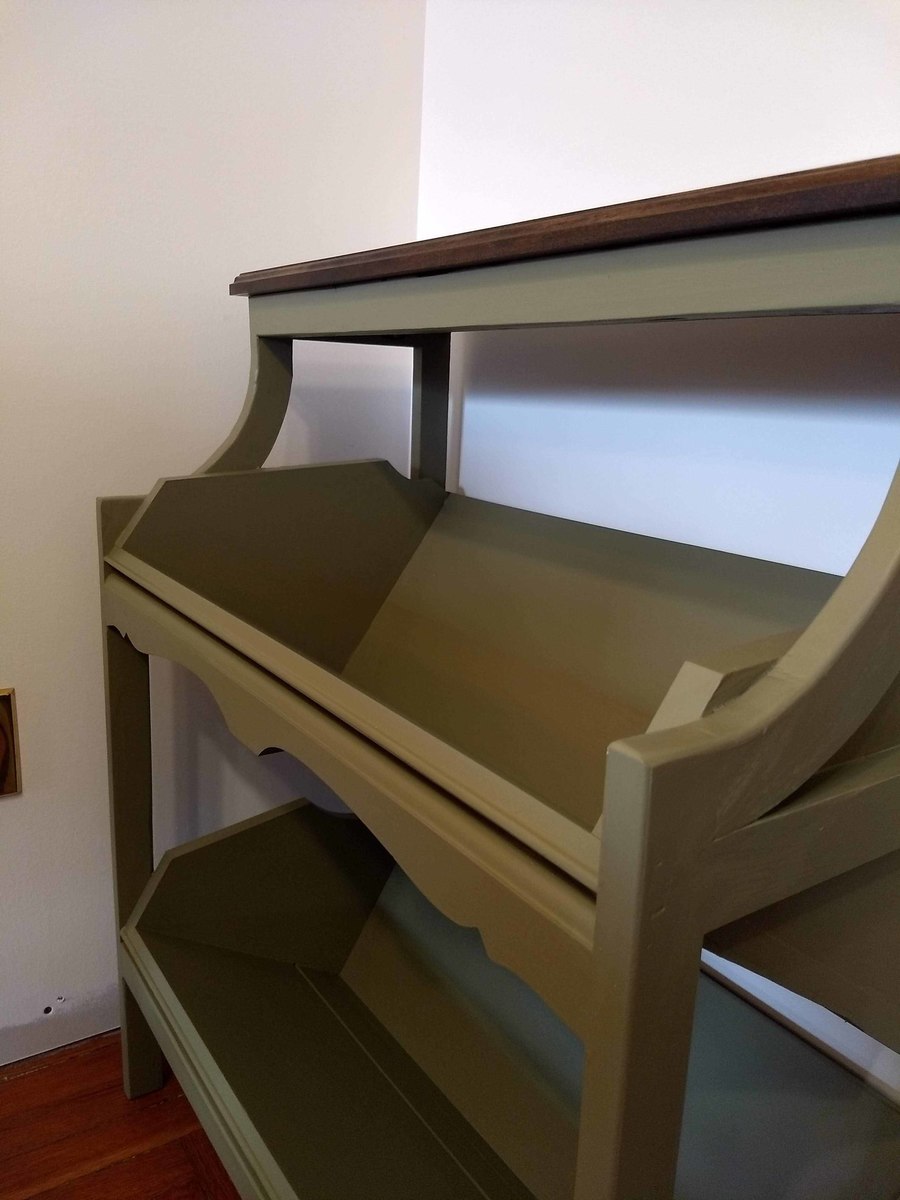
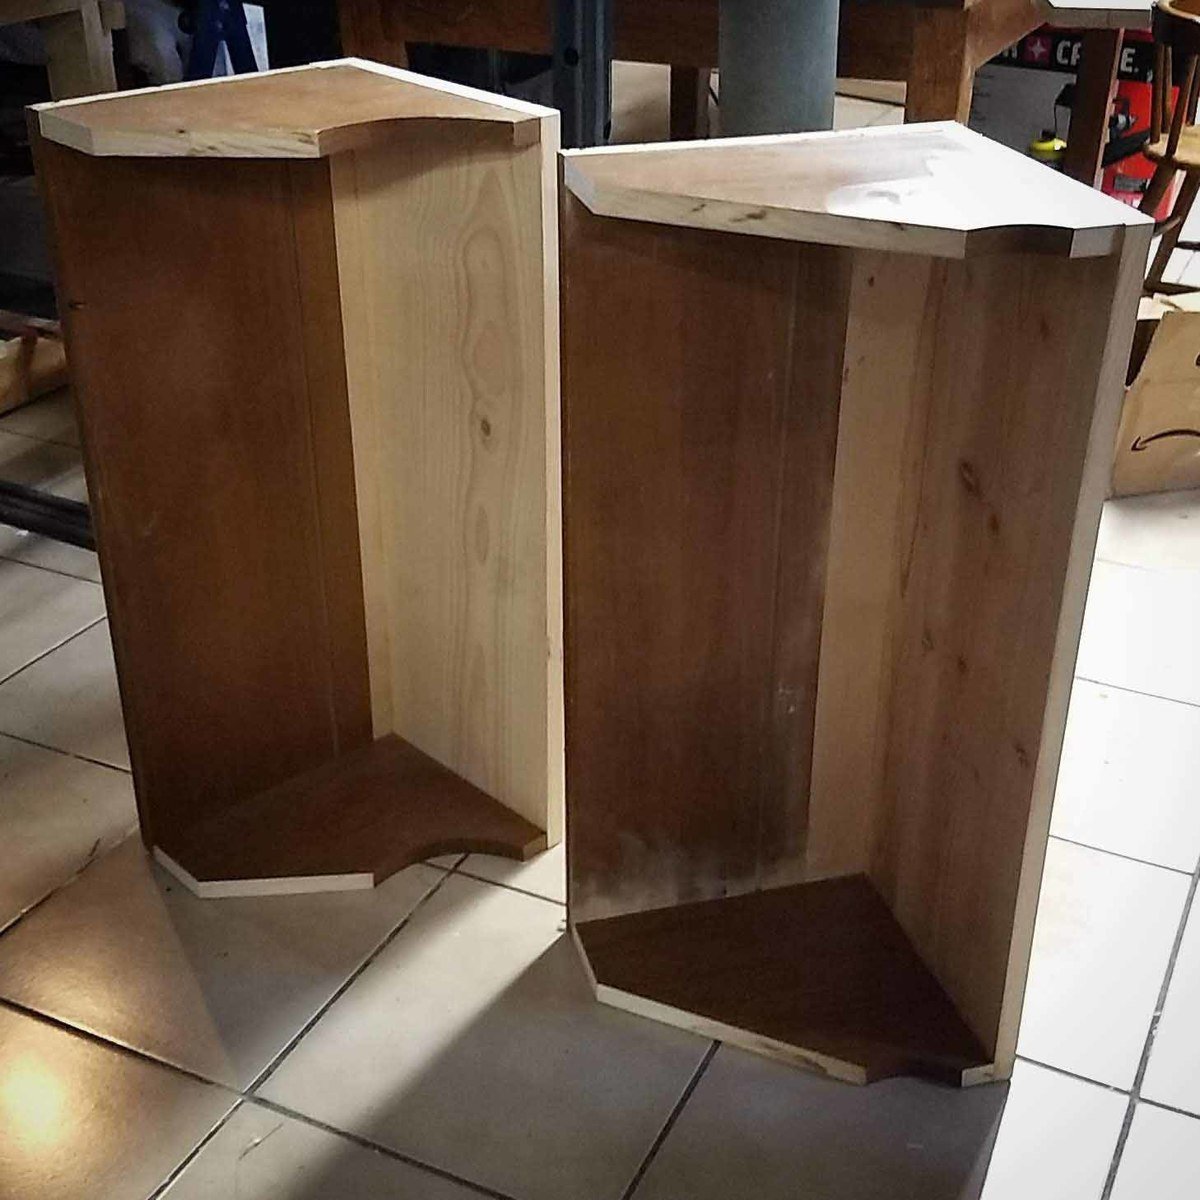
Kid-friendly Green Library Console
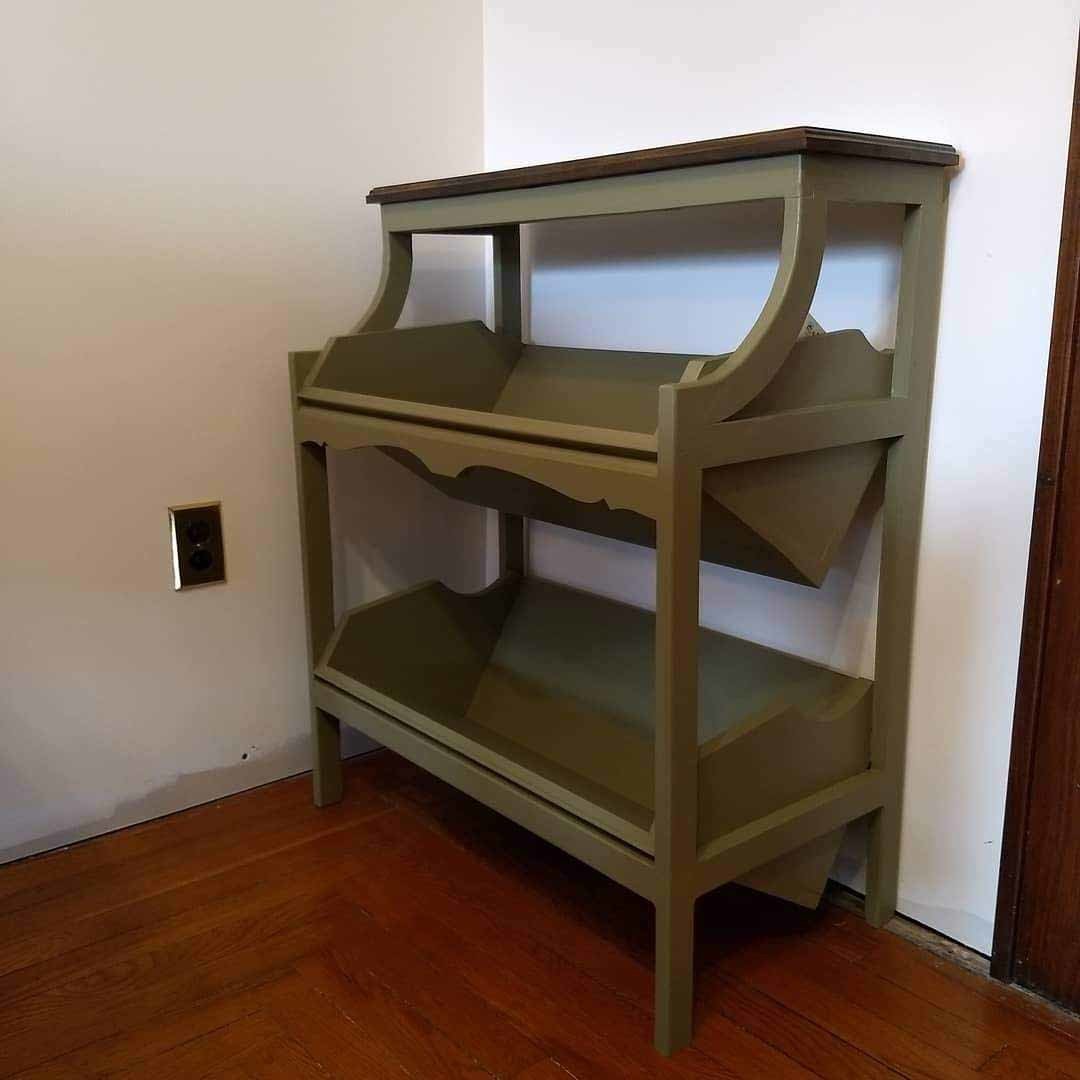
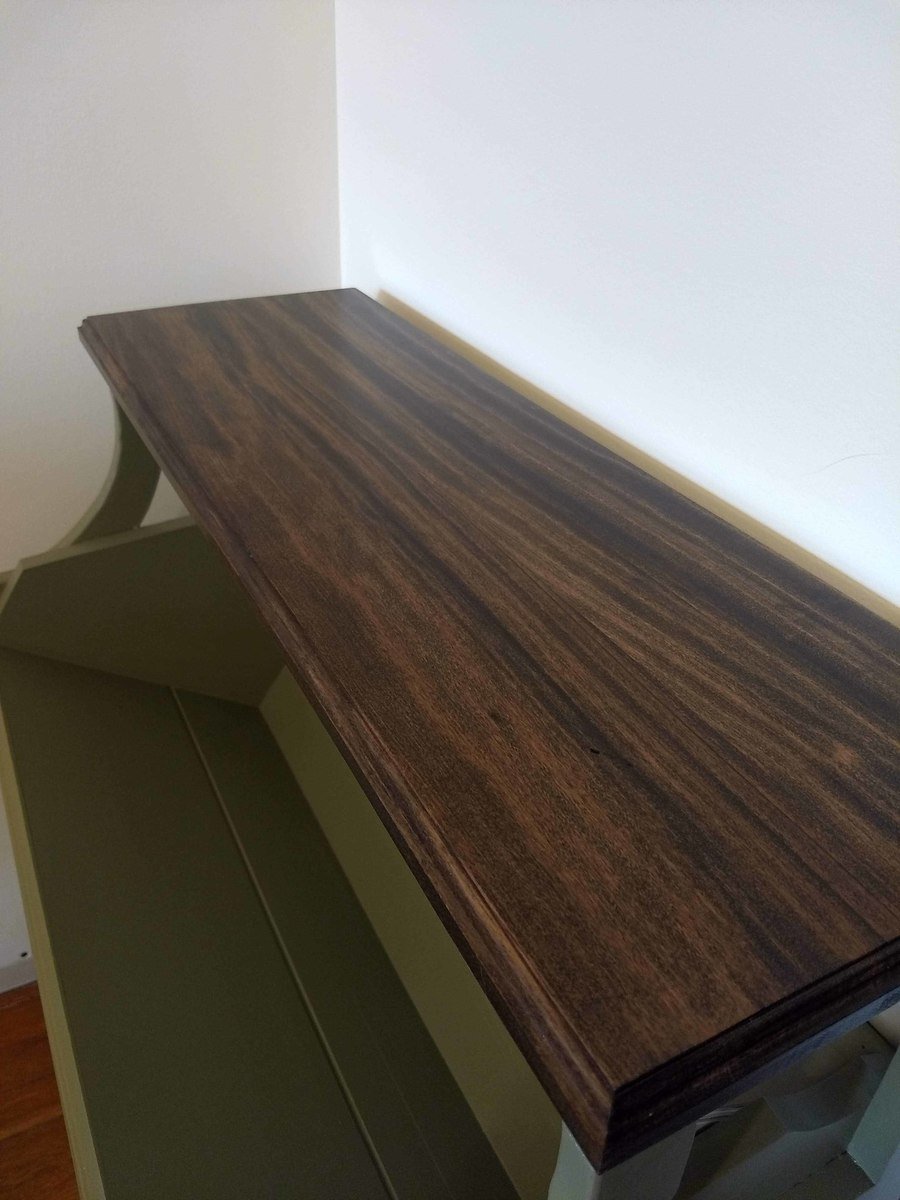
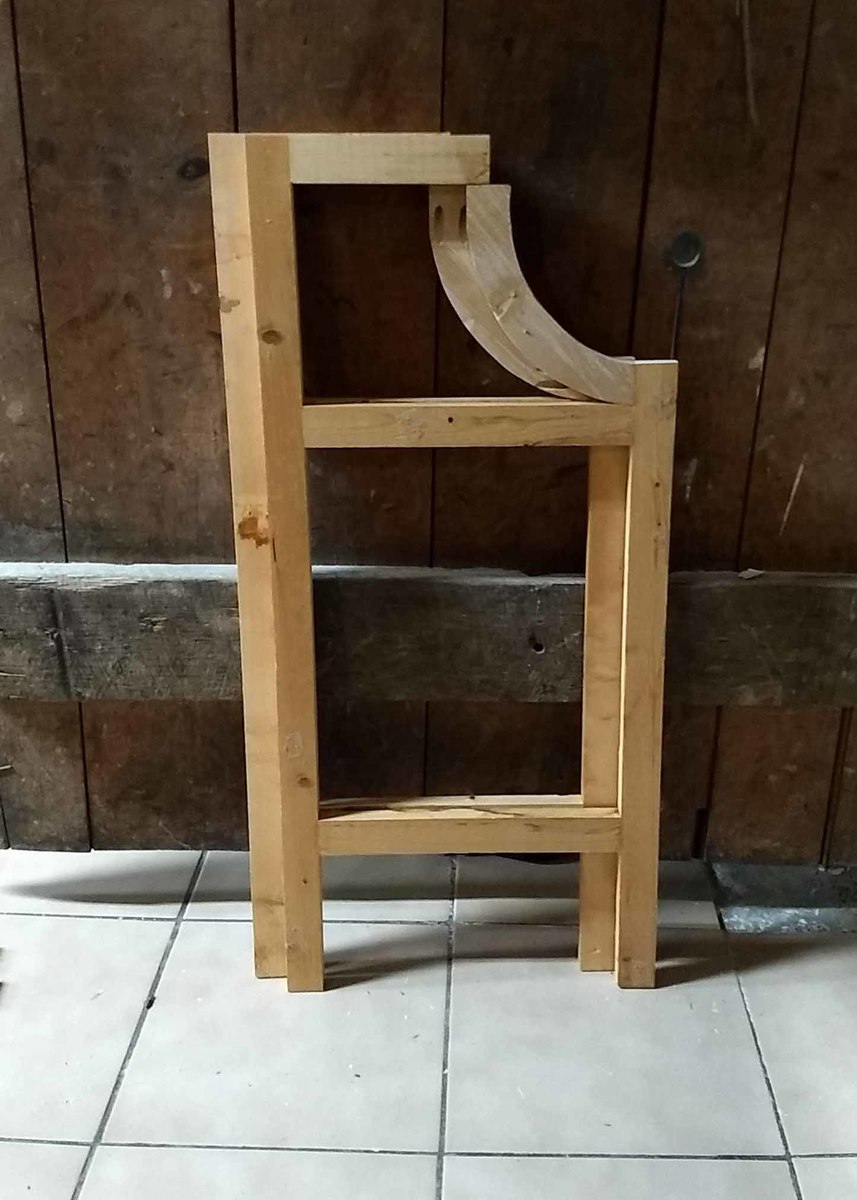
I did very little modification to the original plan on this one besides reducing the overall length to 28". I had an old plate/cup display hutch that wasn't very practical or pretty, so I took it apart and used the pieces to make the shelves (and the curvy bit under the first shelf). <!--break-->They weren't quite the right size, so I added other wood scraps (including a bit of plywood) to get the dimensions needed. The 1x2s are crappy used furring strips I ripped out of the attic when we redid the roof, so they were all water stained and covered in nail holes. The top was a vintage table leaf I acquired at some point and appears to be 3" pieces of poplar glued together (it took the stain beautifully). Oh! I did do one other thing that wasn't in the plans...I connected the shelves to the base using 5/8" dowels through the horizontal pieces on the sides. It took a little extra time, but I do feel more secure with the weight of the books+shelves (+possibly a climbing child) resting on those dowels instead of just screws.
The main thing is that this case holds my toddler's whole library. She can even put the books away by herself without them falling off when she doesn't place them just right. I love that it looks like it belongs in a grown-up's living room, but it's 100% classy kid-friendly furniture design!

Built from Plan(s)
Estimated Cost
Maybe $6 for screws, glue, and finish - built from scraps and a crummy wood hutch I was otherwise going to toss
Estimated Time Investment
Day Project (6-9 Hours)
Finish Used
100 grit sanding, then Zinsser Shellac-based primer and Behr Marquee oops paint for the base. The top is Minwax Dark Walnut stain followed by General Finishes water-based poly in satin (applied with a foam brush which turns out almost looking like I sprayed it: perfect with no brush strokes. I prefer the Wooster foam brushes from Lowes).
Recommended Skill Level
Beginner
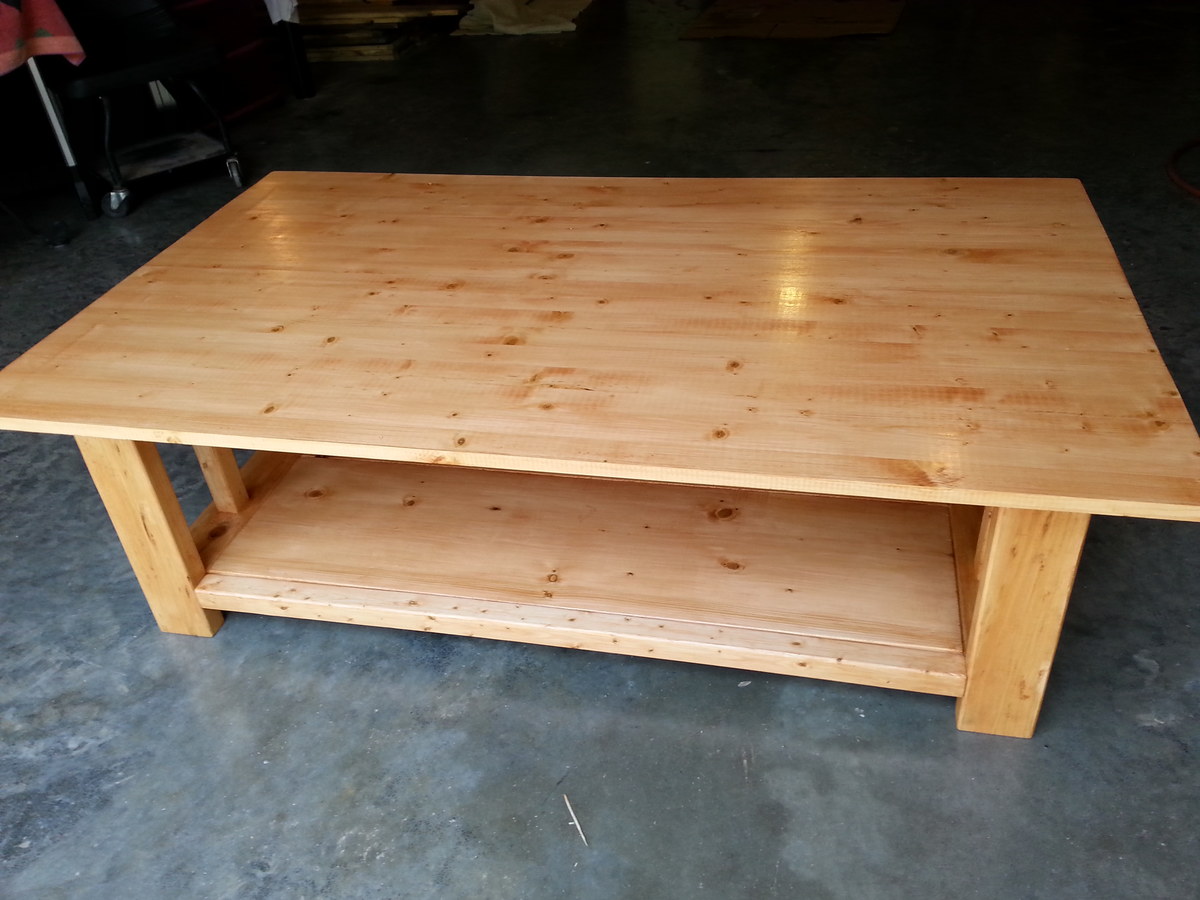
Coffee Table
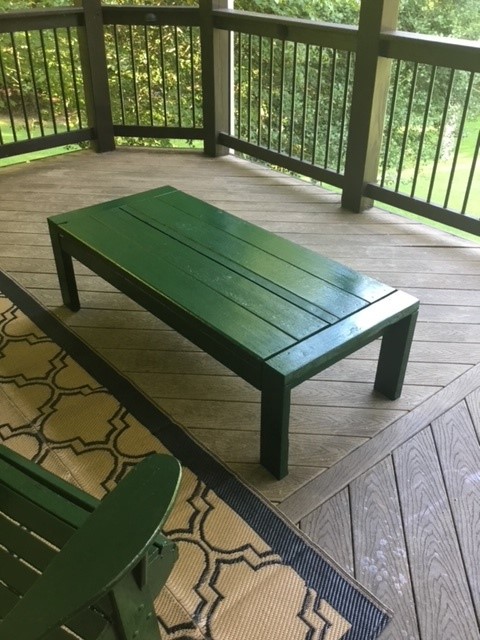
Here is a coffee table I built using the plans from Ana and wood from an old picnic table. The plans were perfect and the coffee table turned out well. I used the 2X4 coffee table plans - http://www.ana-white.com/woodworking-projects/2x4-outdoor-coffee-table - I had to make a few cutting adjustments in order to only use the reclaimed wood from the picnic table but it still turned out great.
Comments
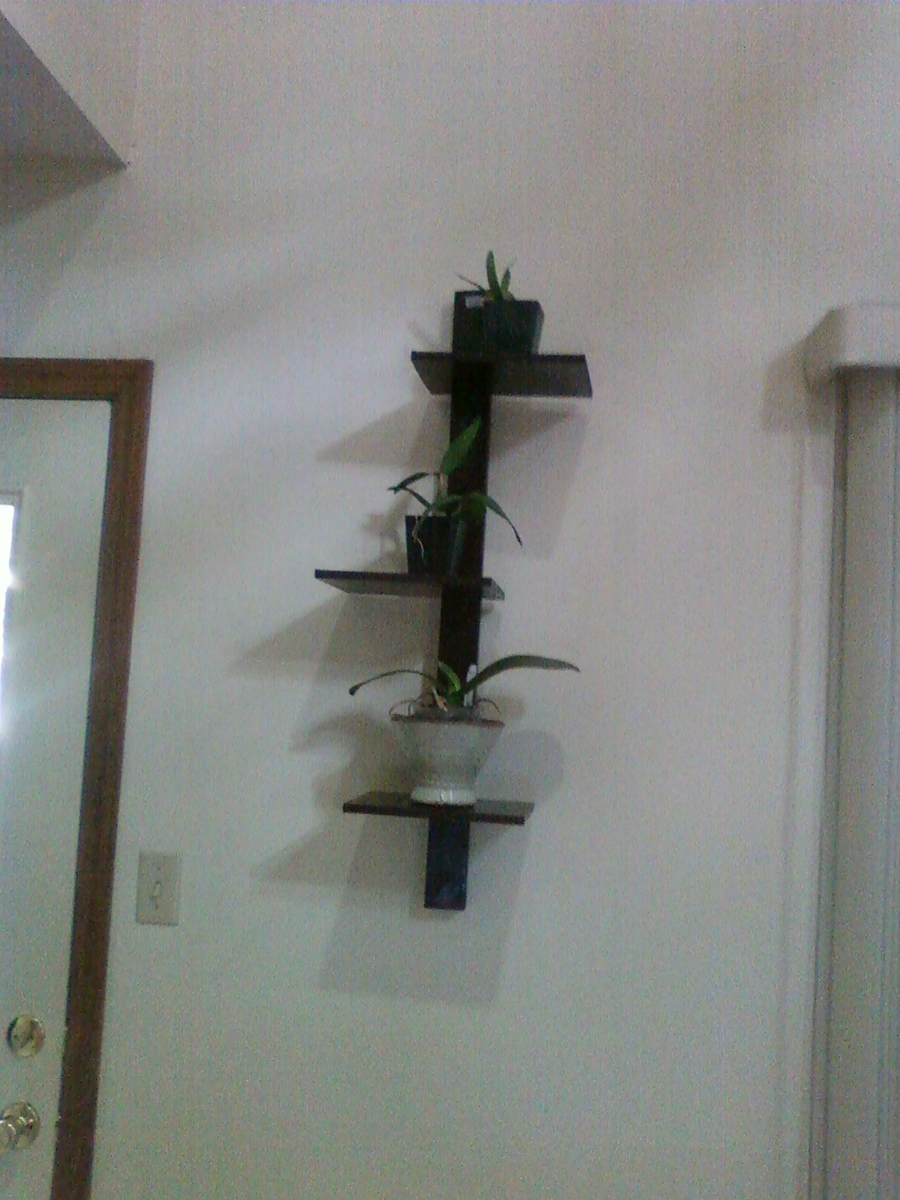
A Home for Some Orchids
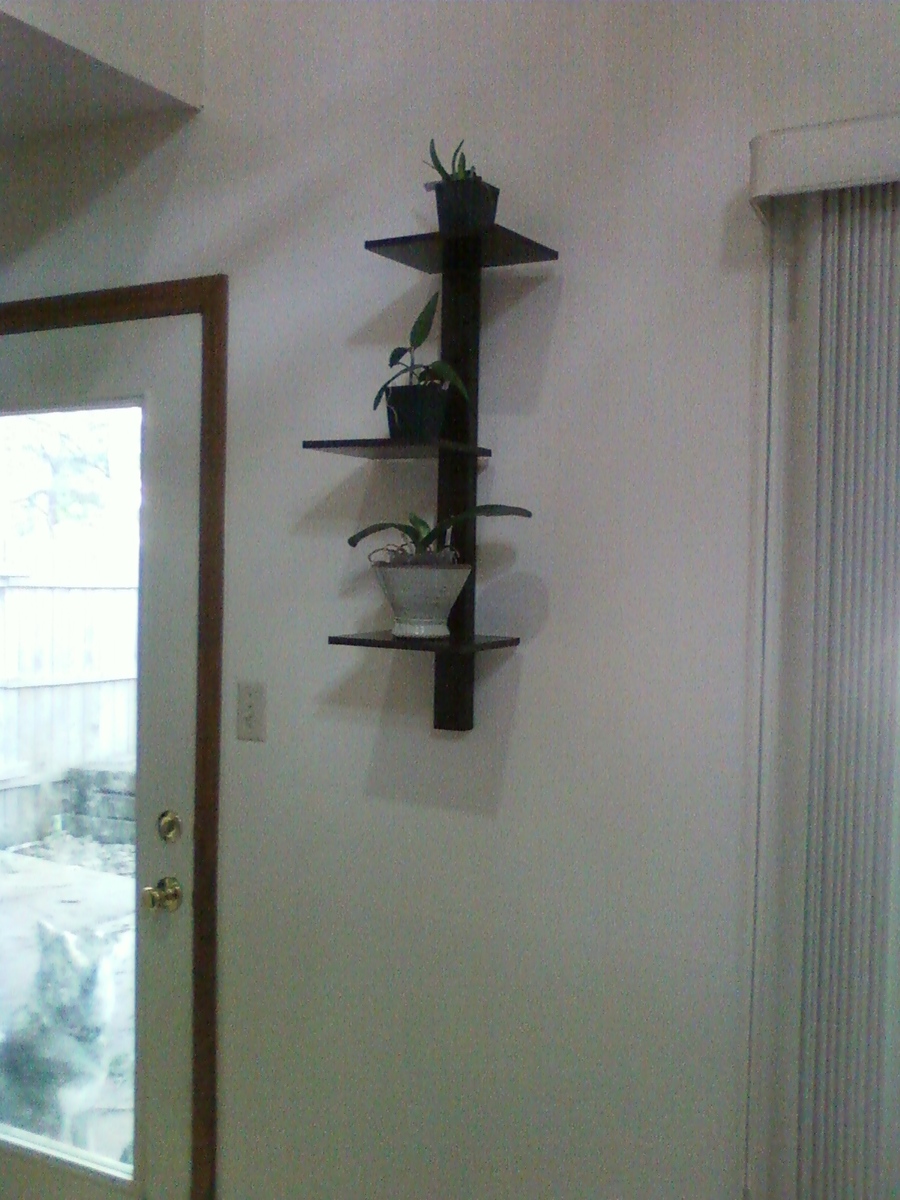
I built this with some scrap mdf, and 1x3's. I offset the shelves, and voila! A modern shelf to go with our eclectic, yet very modern decor. It also gives me a nice display for some of my orchids. I love this shelf!
Built from Plan(s)
Estimated Time Investment
Afternoon Project (3-6 Hours)
Finish Used
Kona Brown
Recommended Skill Level
Starter Project
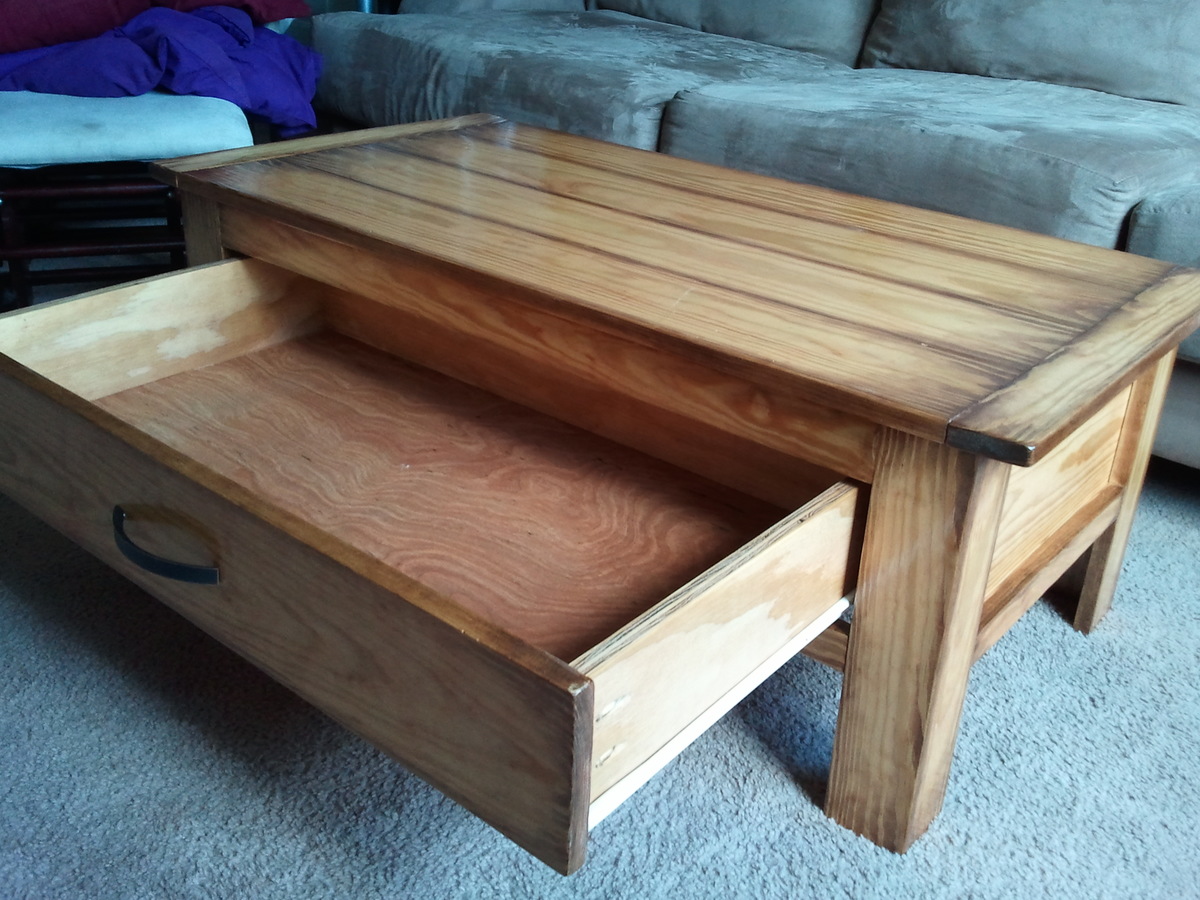
Coffee table with a massive drawer!!
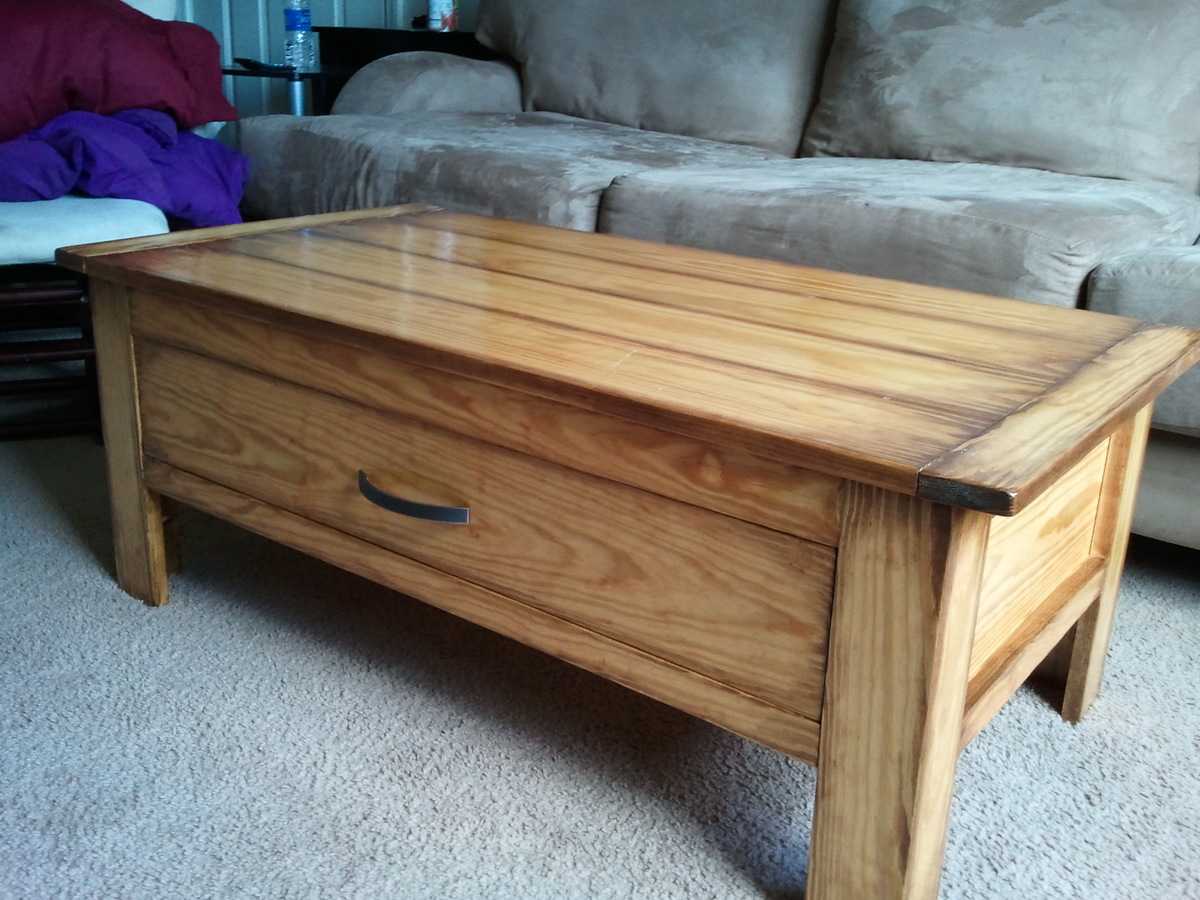
This was my second coffee table. Anticipating that the hardest part would of course be the drawer, I actually started with the drawer and built the rest of the table around that! Made a big difference too. It was much easier.
I took my time with this project with things that I had rushed through before, sanding parts before assembly, dry fitting with lots of clamps at each step, and I took extra care on cutting pieces square.
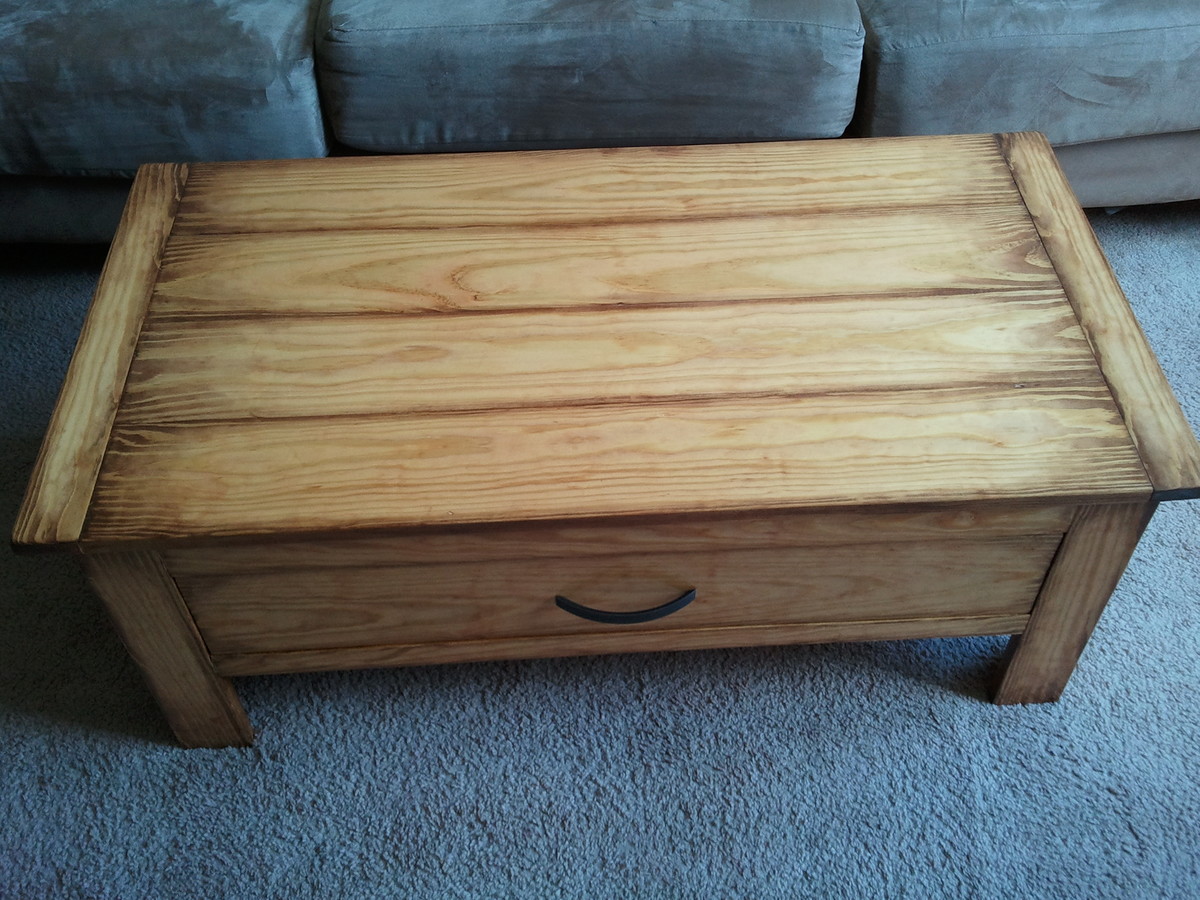
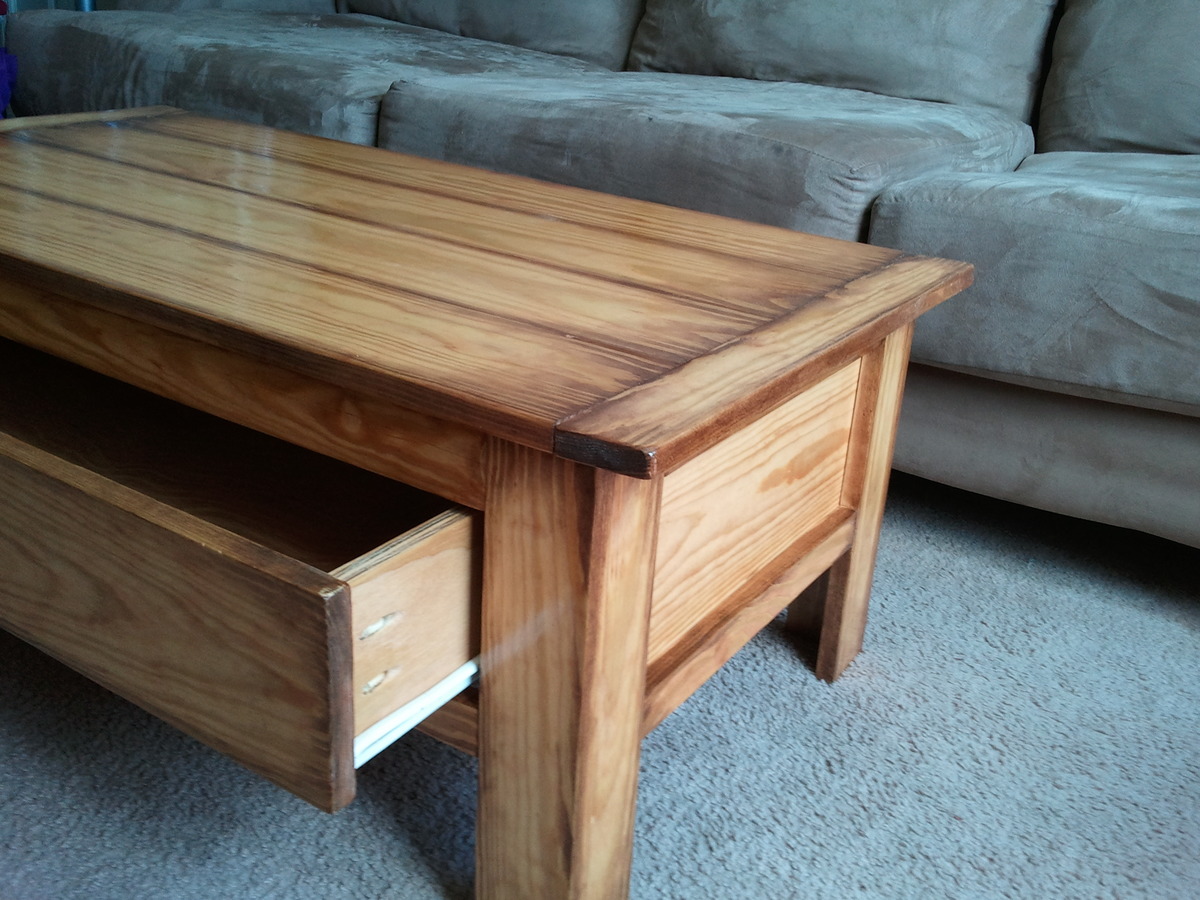
Since I was able to get the drawer done so much easier this time, the hardest part was the top. I hate how the ends turn up slightly... does anyone know how to stop that from happening?
I spent about a week and a half on this table, working on it for a few hours a day while my son was in school.
I am SO SO SO happy with how it turned out. The drawer was really tight in the shop (no air conditioning) but when I got it home, it has loosened up a bit, and its still just a little sticky, but not bad at all. I just love this finish. It's by far my favorite finish of any that I have tried.
I am trying to sell this coffee table, and my next project is going to be a console that coordinates, but will have the base part painted and the panel top stained. I really need a good job in the near future so I don't have to keep selling these things that I build and fall in love with!!
** On a side note, this coffee table got me a marriage proposal from a near stranger. Who would have thought that making sawdust would be so attractive to guys? LOL.
Built from Plan(s)
Estimated Cost
$125
Estimated Time Investment
Week Long Project (20 Hours or More)
Finish Used
First stain with Minwax Golden Pecan, then rub edges and massage into a gradient with Minwax Red Oak. Two coats of semi-gloss poly. Last coat on top is applied VERY HEAVY. Sanding with 600 grit by hand in between coats.
Recommended Skill Level
Intermediate
Comments

Wed, 09/04/2013 - 20:47
Sticking
You can get silicone in a spray can and it will keep the drawer sliding slick and not catch. I had to use it on my apothecary console table. I believe beeswax or candle wax can also help if you'd like a more natural solution. Great table!
Thu, 09/05/2013 - 20:44
thanks
actually since I have it home and it's so much cooler, it doesn't stick at all anymore. It is completely perfect. It took a couple days for the wood to adjust, but I'm so happy because there are NO "obviously handmade" flaws. You know what I mean?
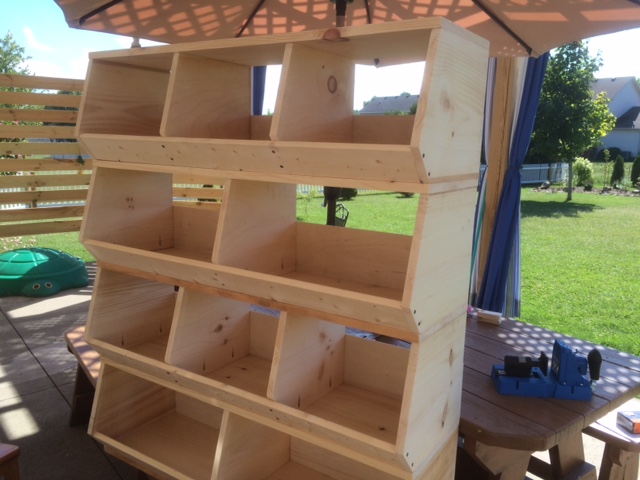
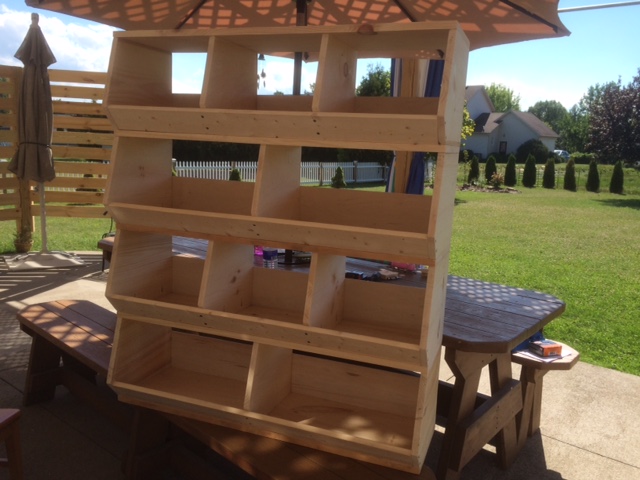
Toy storage bin

This was my first Ana White project and the first time using my new Kreg jig that my wife bought for me as a birthday gift. I modified the plans to build this as one complete unit and not as separate bins to be stacked. I used my Kreg jig on the dividers and ends to attach each section to the next. This saved on material and made it a bit lighter since I was building it 4 units high. I added small 2x3 feet to the bottom to clear an outlet behind the toy bin. Two L brackets were used to anchor the unit to the wall.
Built from Plan(s)
Estimated Cost
Cost was about $80 for materials. The stain was a mix from what I already had.
Estimated Time Investment
Afternoon Project (3-6 Hours)
Finish Used
Minwax polyshades. This was a mix of a couple stains I had left over.
Recommended Skill Level
Beginner
Heart Pine tabletop
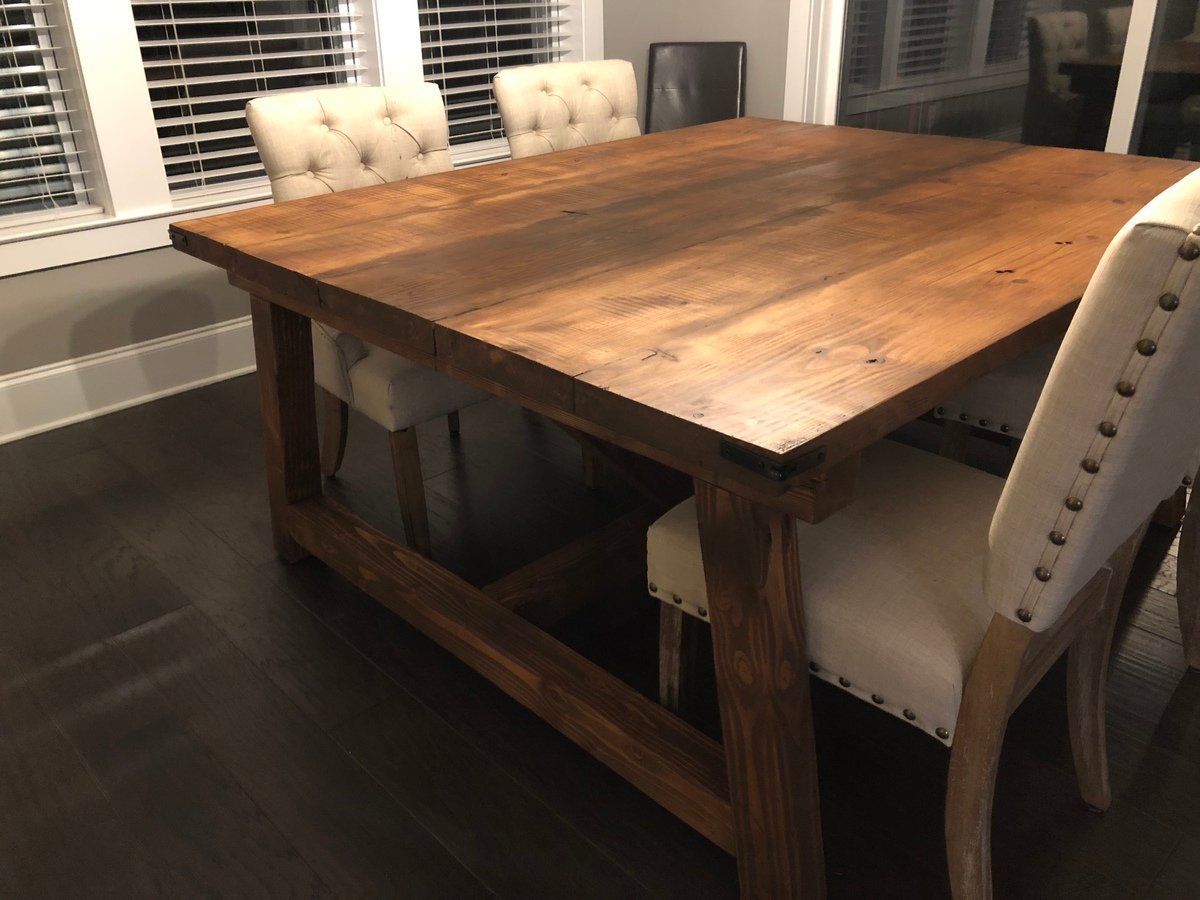
Found five 2x12 heart pine planks and used this base as the template. Table is about 18" wider than the plans. It turned out great!

Estimated Time Investment
Week Long Project (20 Hours or More)
Finish Used
Classic american
Recommended Skill Level
Beginner
Comments

Thu, 12/27/2018 - 10:05
That tabletop is gorgeous!
That tabletop is gorgeous! Thanks so much for bragging, much appreciated! Ana
Floating bed
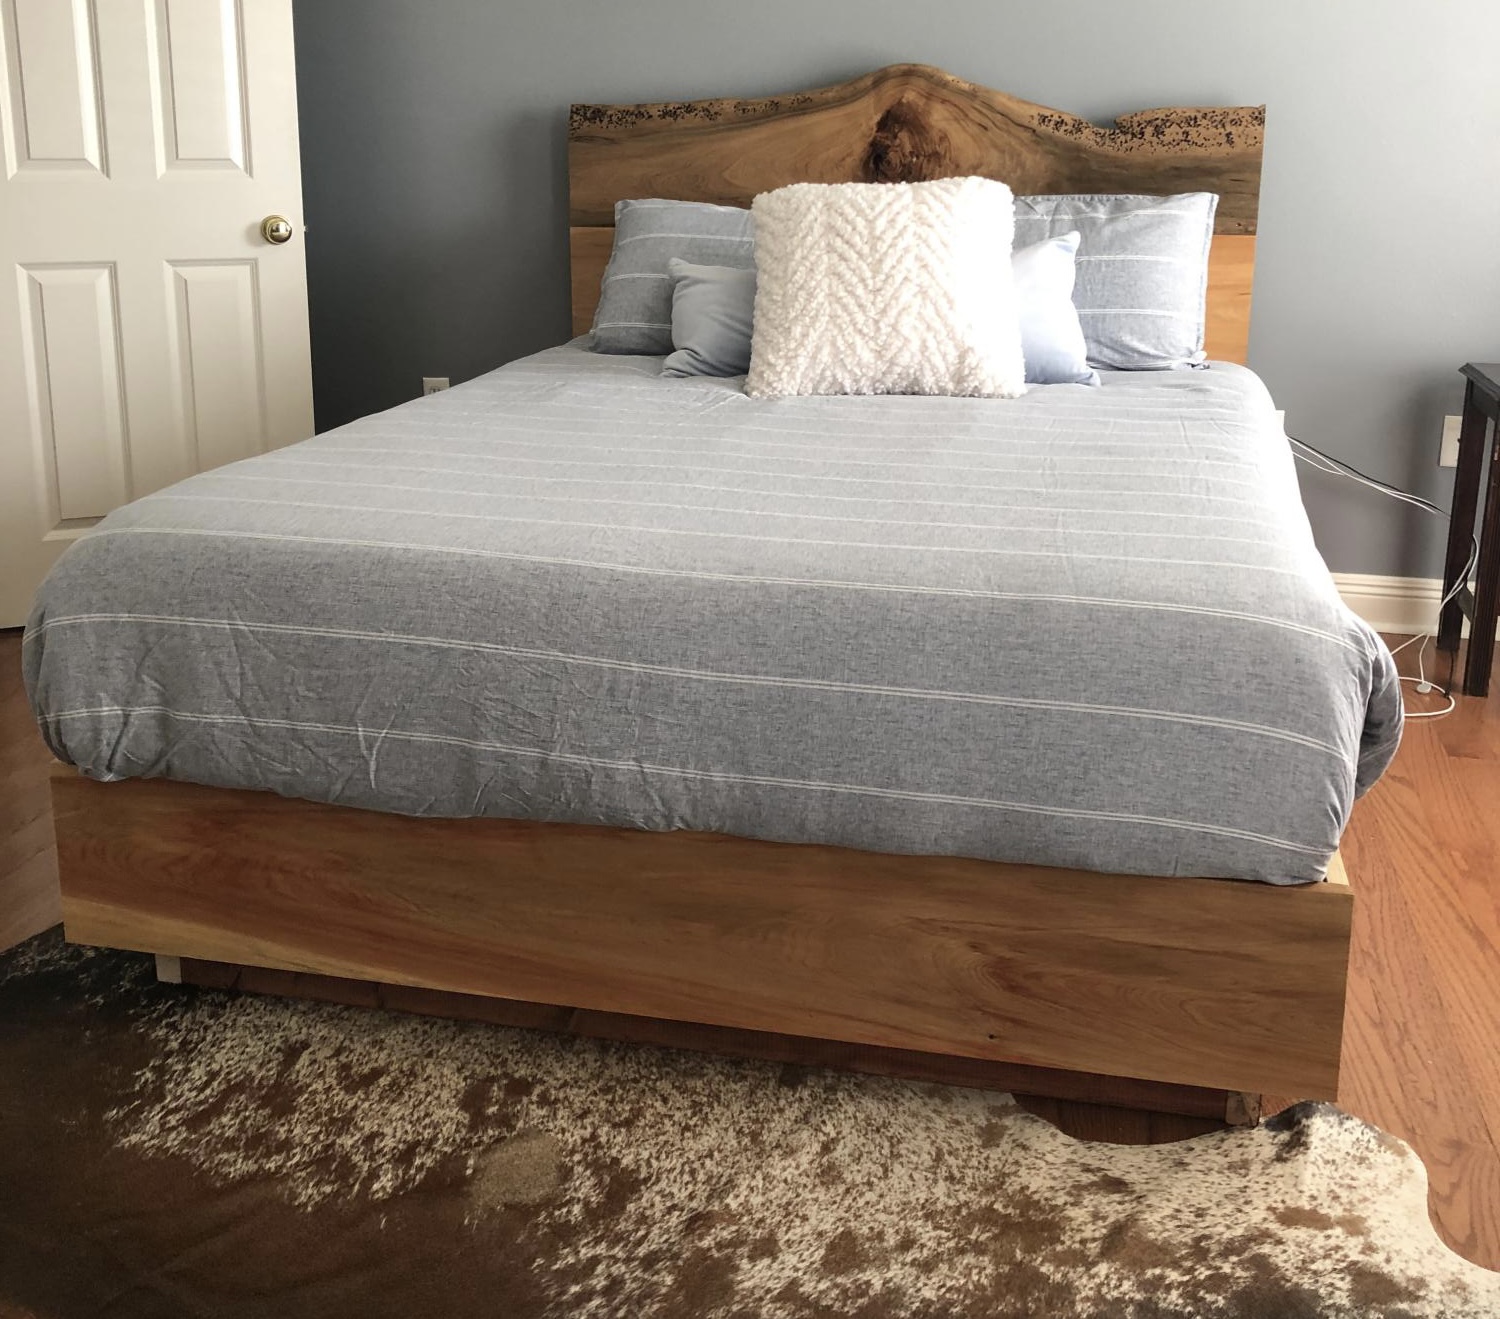
My son needed a new bed and he was interested in a live edge Cypress headboard. We were able to make this one!
Built from Plan(s)
Comments
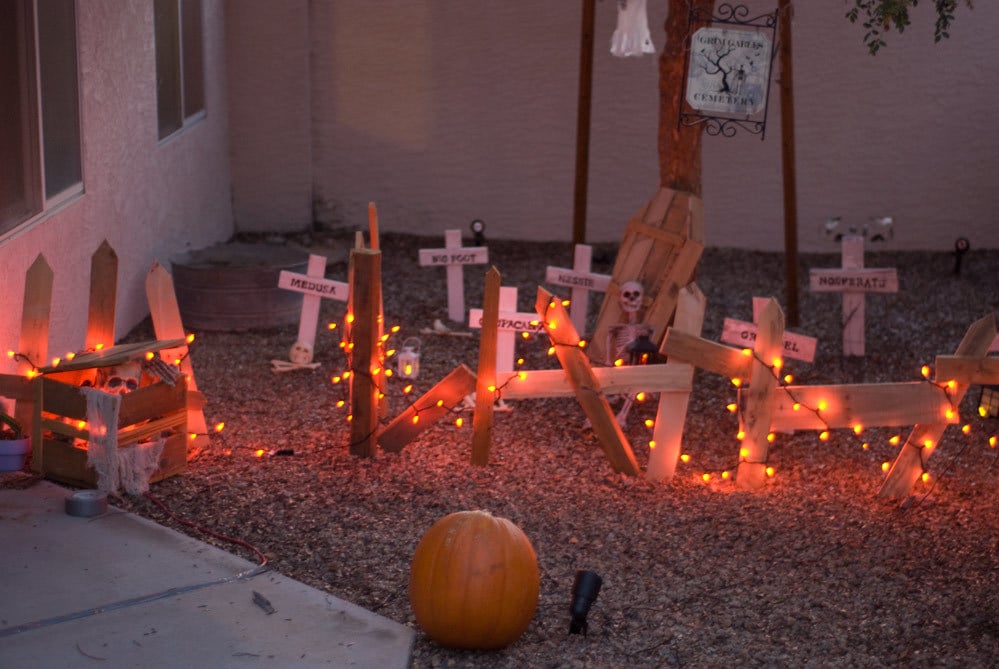
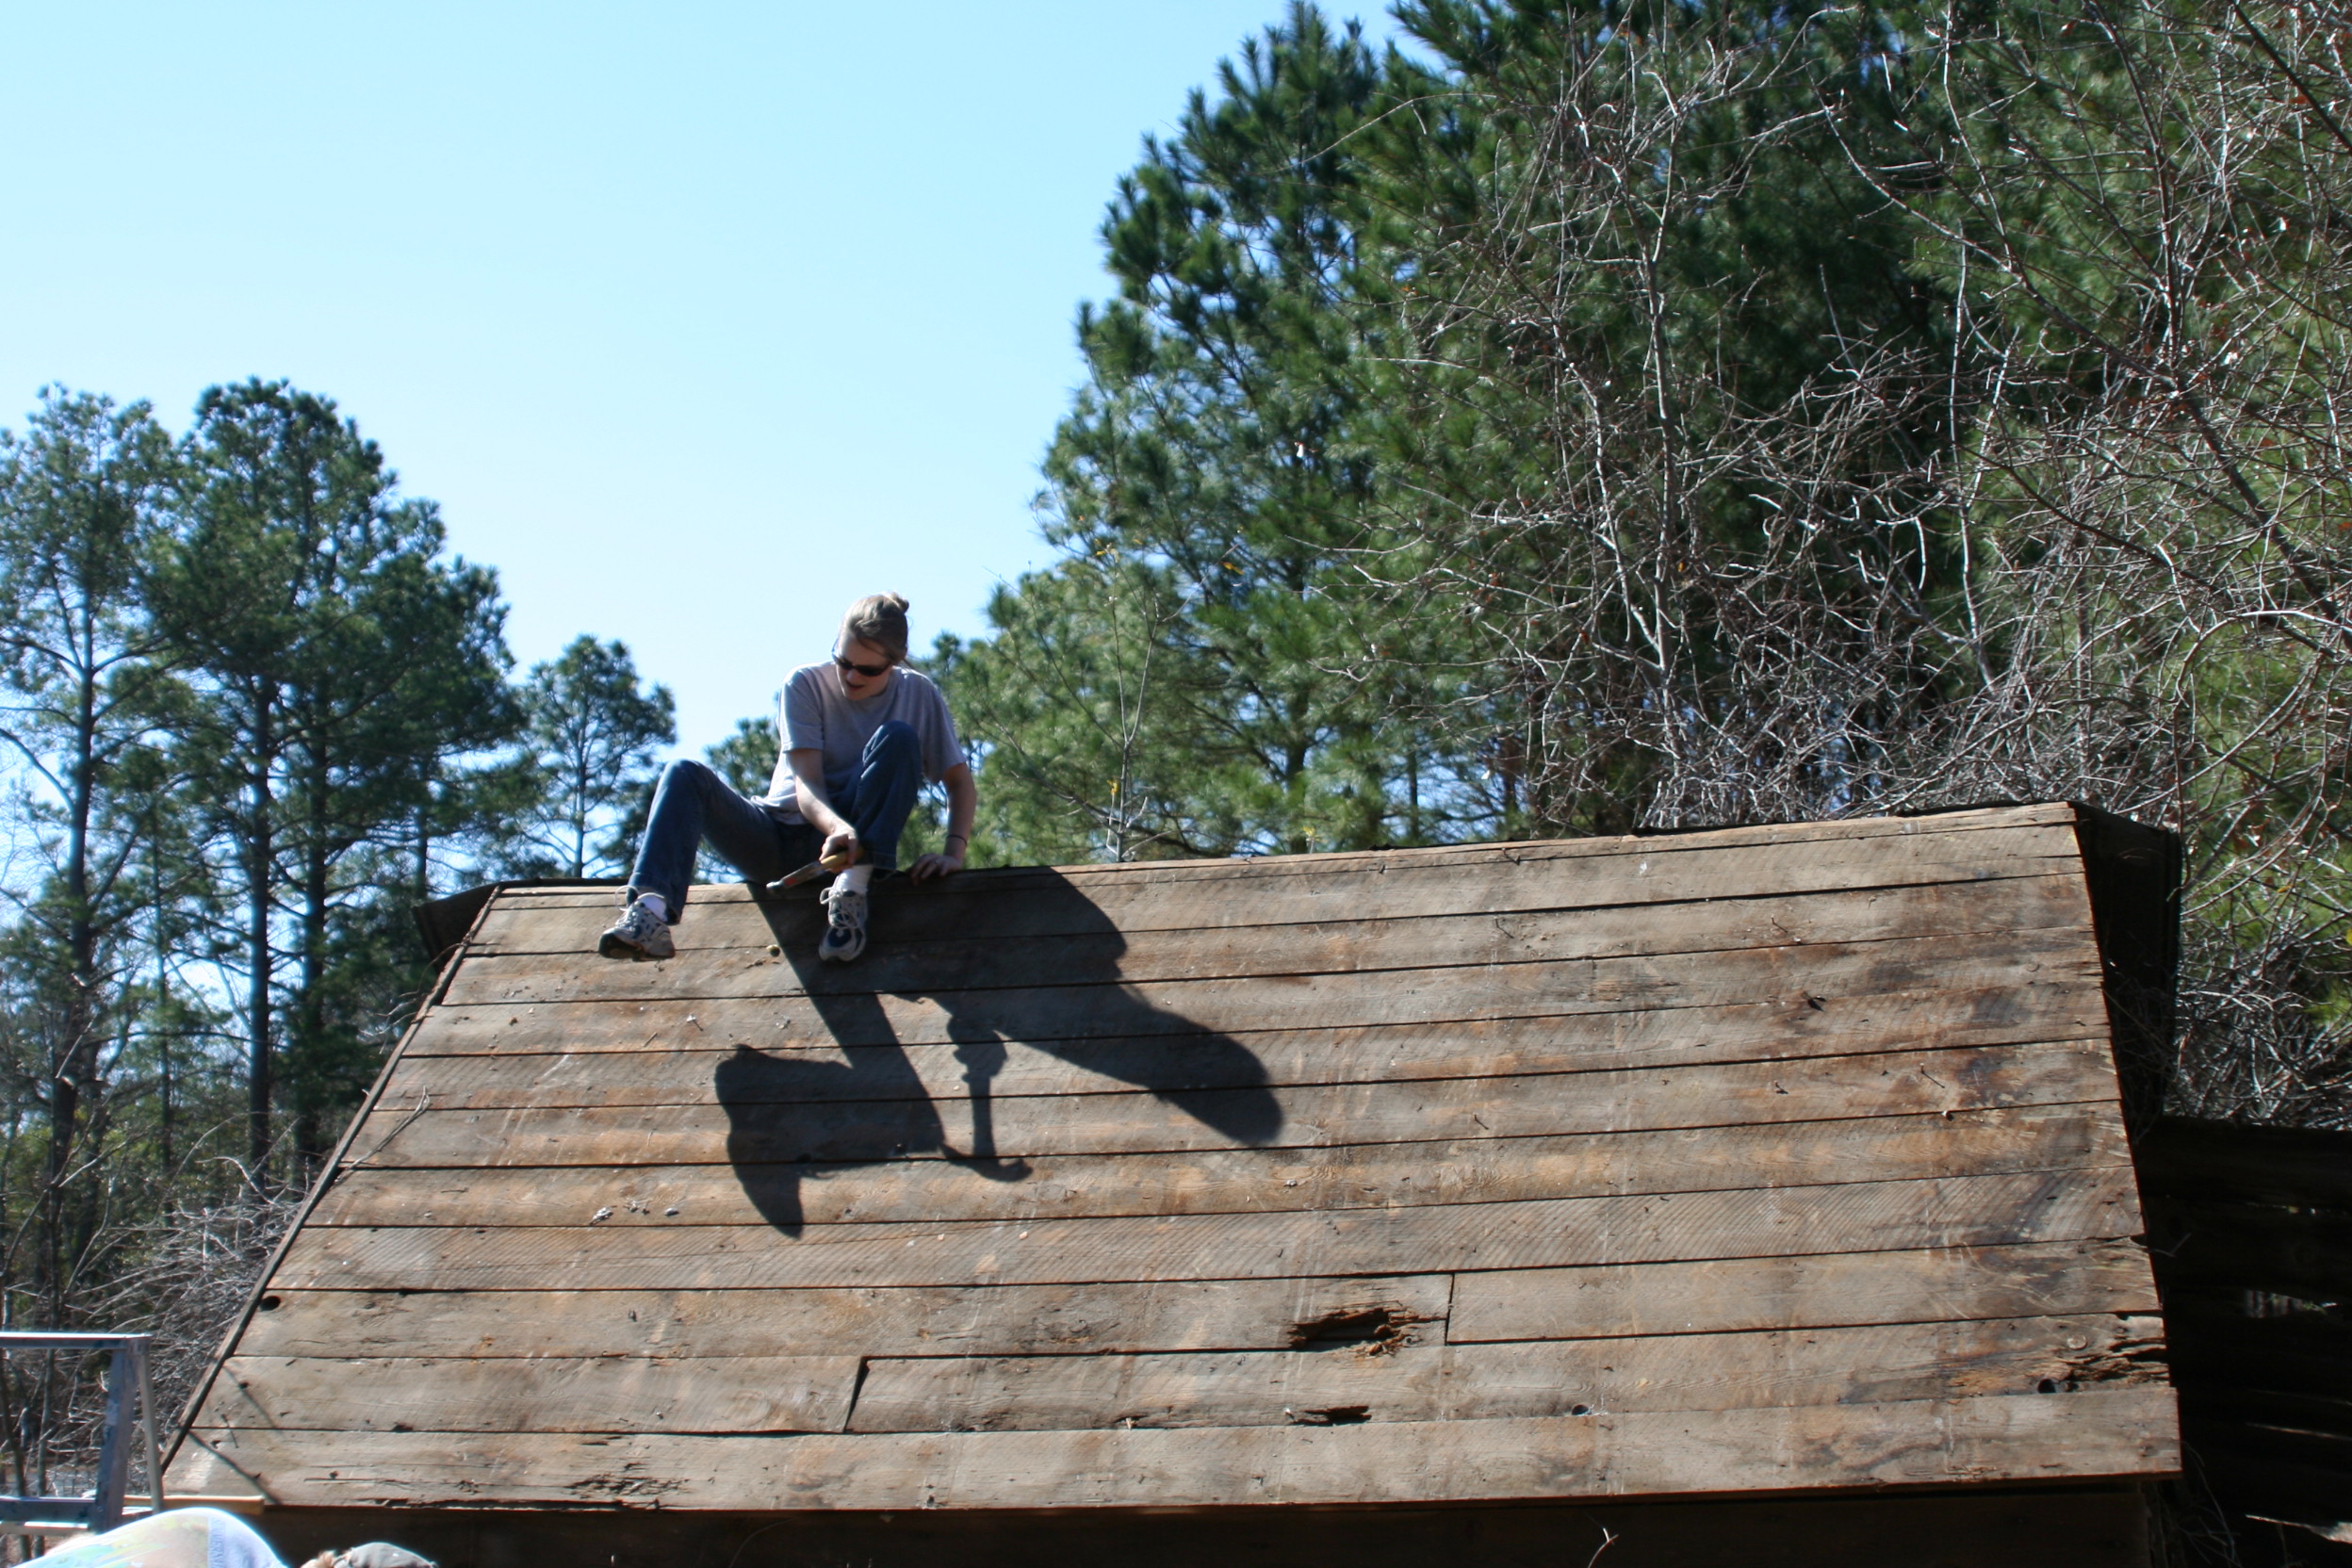
Pallet Crates as Halloween Decor
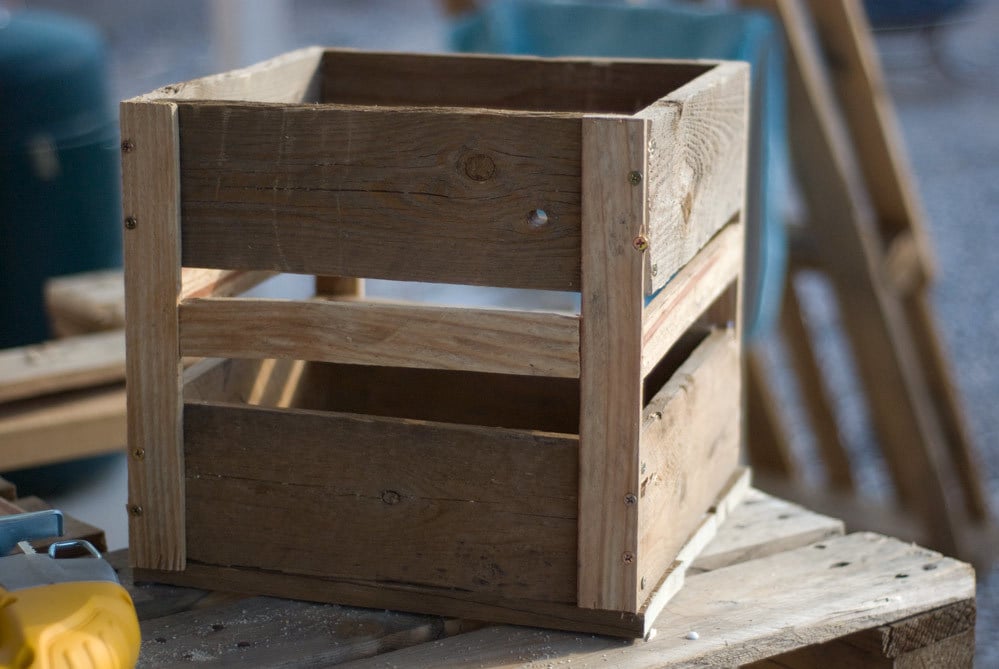
I started to build these crates as storage for my oldest daughter's room, but I never got around to finishing a second. Halloween was coming on fast and I had about 8 pallets in my backyard. I debated tearing them apart and building another crate, or using them to create a graveyard.....
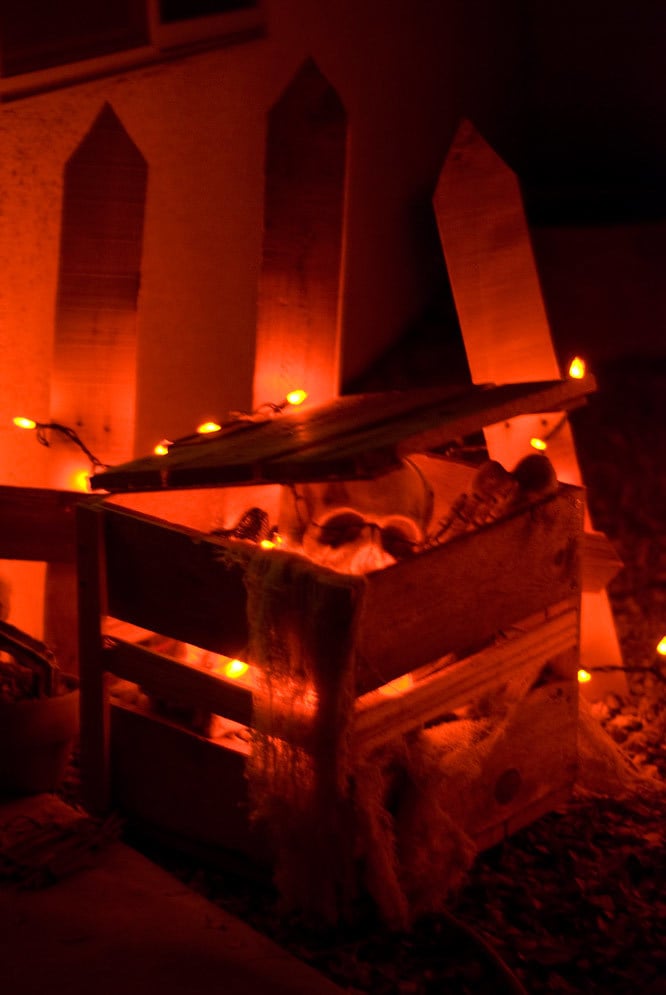
The graveyard won, and I ended up doing a picket fence, a casket and headstones with the pallet pieces. The crate fit right in to the decor, so it has now become a halloween decoration instead of a storage solution for my daughter's room. It even got a lid!

Built from Plan(s)
Estimated Cost
free
Estimated Time Investment
An Hour or Two (0-2 Hours)
Finish Used
absolutely... NONE!
Recommended Skill Level
Starter Project
Comments
Thu, 05/02/2013 - 20:47
Today starting from the left,
Today starting from the left, there is the gated entrance to flats, a new building (shop, garage & mini cab office) the flat roof building is still there but remodelled (chemist & ladies garments) the other buildings have been demolished and replaced by flats. The houses on the far corner of North Street are still there, with Prince Regent pub next door behind what was the island urinal in the middle of the road and tree. Water Damage Restoration Oceanside CA
Wed, 05/15/2013 - 21:06
I dont think Blue will be a
I dont think Blue will be a good option as it will make the room look dull. You anyways have a brown toned sofa and a brown floor. So do not go for blue. I suggest if you want to add color to your room add a rug, change your sofa upholstery and that should work. You may not need to paint the wall. Infact add some posters and paintings. All this will add color to your room. carpet cleaning Downers Grove IL
made with love by my Grandchildren and I
My grandchildren needed a table that they could use for blocks, coloring, trains and just all around fun so with the help from my 4 year old and 3 year old Grandson's we created the perfect table from the rustic x coffee table plans.

Built from Plan(s)
Estimated Cost
$65.00
Estimated Time Investment
Day Project (6-9 Hours)
Finish Used
Minwax polyshade. Stain and polyurethane in 1 step. Pecan satin color
Recommended Skill Level
Beginner
Modified Michaela's kitchen island
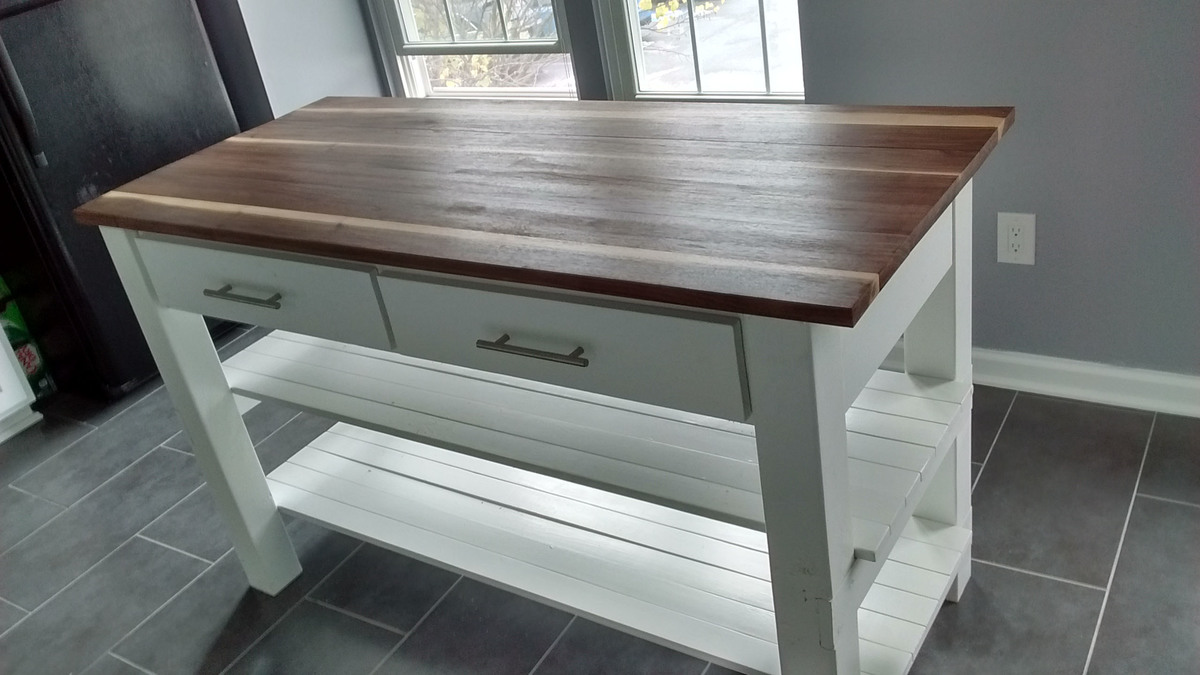
I used the plans from Michaela's kitchen island, but modified the top. Instead of 2x4s pine studs, I used black walnut boards a friend of mine had lying around. They were ~1x8" boards so I ripped them to ~4" width and ~60" length. They were a little warped so I glued and screwed them togther using a Kreg jig (best tool ever). This made a huge difference and there was only minimal gaps (1/16") between the boards. I ended up borrowing a belt sander from another friend to take out the 1/16"-1/8" lips in the boards. First time using a belt sander and it took a few minutes with 80 grit across the grain to get a level surface. Used 120 grit paper with the grain to smooth out the scratch marks from the 80 grit. Attached the top to the base with screws, finish sanded with 220 and 320 grit, cleaned up the dust with a tack cloth and then applied a few coats of polyurethane. For the drawers, I couldn't find 21" slides so I ended up modifying the drawers for 20" slides. Another fun and satisfying project!
used the plans for Michaela's Kitchen Island, more or less, but scrapped the top. Instead of wood, I went with a piece of Corian that I got very, very cheap at a local recycled building materials store. It was not that much more expensive than using wood, believe it or not. It's also easier to work with than wood, at least for this project. We even had enough left over for 2 large cutting boards. - See more at: http://ana-white.com/2012/02/kitchen-island-w-corian#sthash.yUJ3fA16.dp…
used the plans for Michaela's Kitchen Island, more or less, but scrapped the top. Instead of wood, I went with a piece of Corian that I got very, very cheap at a local recycled building materials store. It was not that much more expensive than using wood, believe it or not. It's also easier to work with than wood, at least for this project. We even had enough left over for 2 large cutting boards. - See more at: http://ana-white.com/2012/02/kitchen-island-w-corian#sthash.yUJ3fA16.dp…
Built from Plan(s)
Estimated Cost
$200, includes cost of wood and hardware. The black walnut was free, but otherwise would be over $100.
Estimated Time Investment
Week Long Project (20 Hours or More)
Finish Used
Behr "Frost" semi-gloss paint for the base, Minwax Fast-Drying Polyurethane for the top. After cutting all pieces, but before assembly, I applied a coat of white primer to all base pieces. I then applied 2 coats of Frost semi-gloss. For the top, I applied coats of polyurethane with light sanding using "0000" steel wool between coats. Synthetic 2.5" bristle brushes were used for paint and polyurethane.
Recommended Skill Level
Intermediate
Comments
Thu, 11/05/2015 - 15:31
Gorgeous!!
I don't seem to have friends with stashes of black walnut lying around : D
Keurig K Cup Holder Drawer
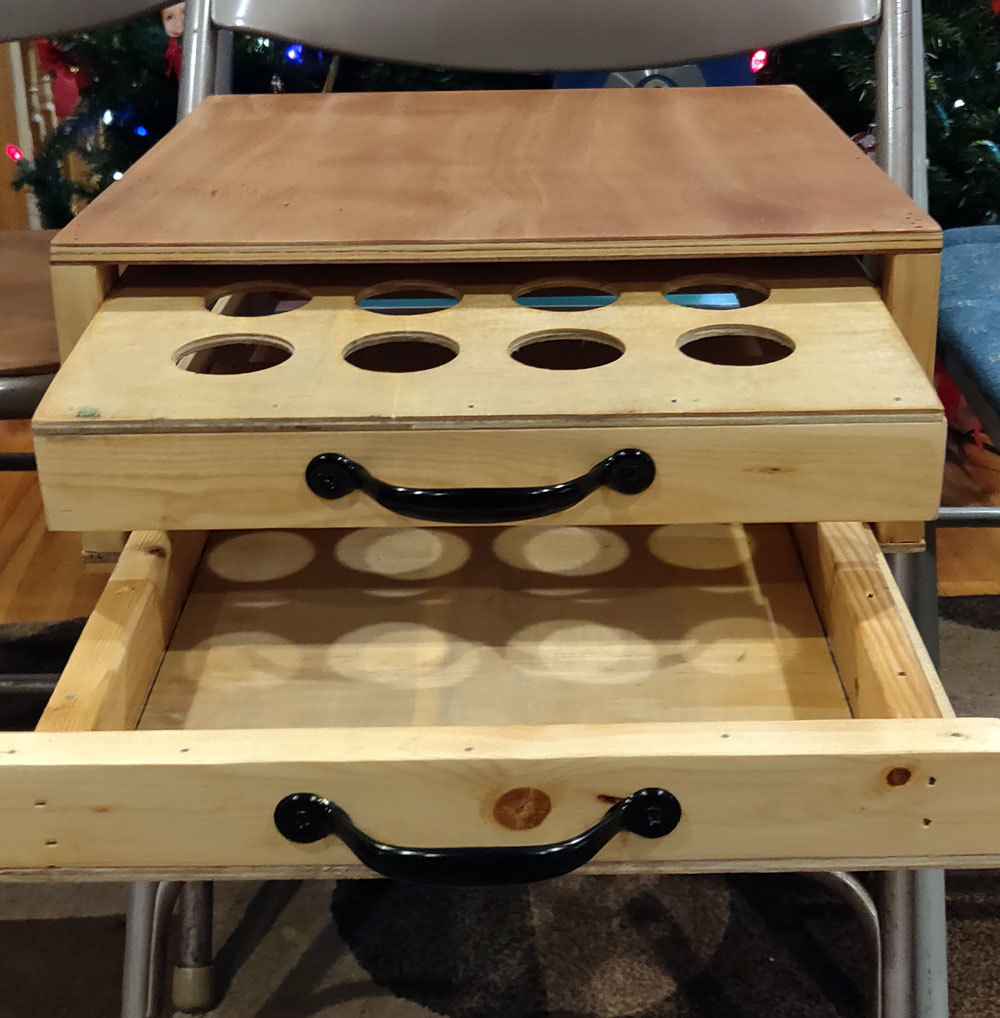
Was easy to make
Built from Plan(s)
Estimated Time Investment
Afternoon Project (3-6 Hours)
Recommended Skill Level
Beginner
Comments

Thu, 01/02/2020 - 13:02
Adjustments made?
Looks great! We were hoping to add a drawer as well but I’m not really sure where to start. What adjustments did you make to create the open drawer? Can you post a photo of the side of the drawer? Thank you!
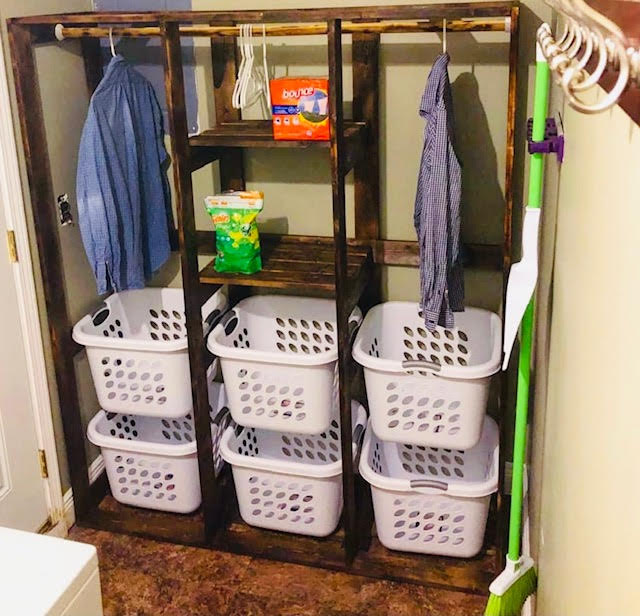
Laundry Basket Closet
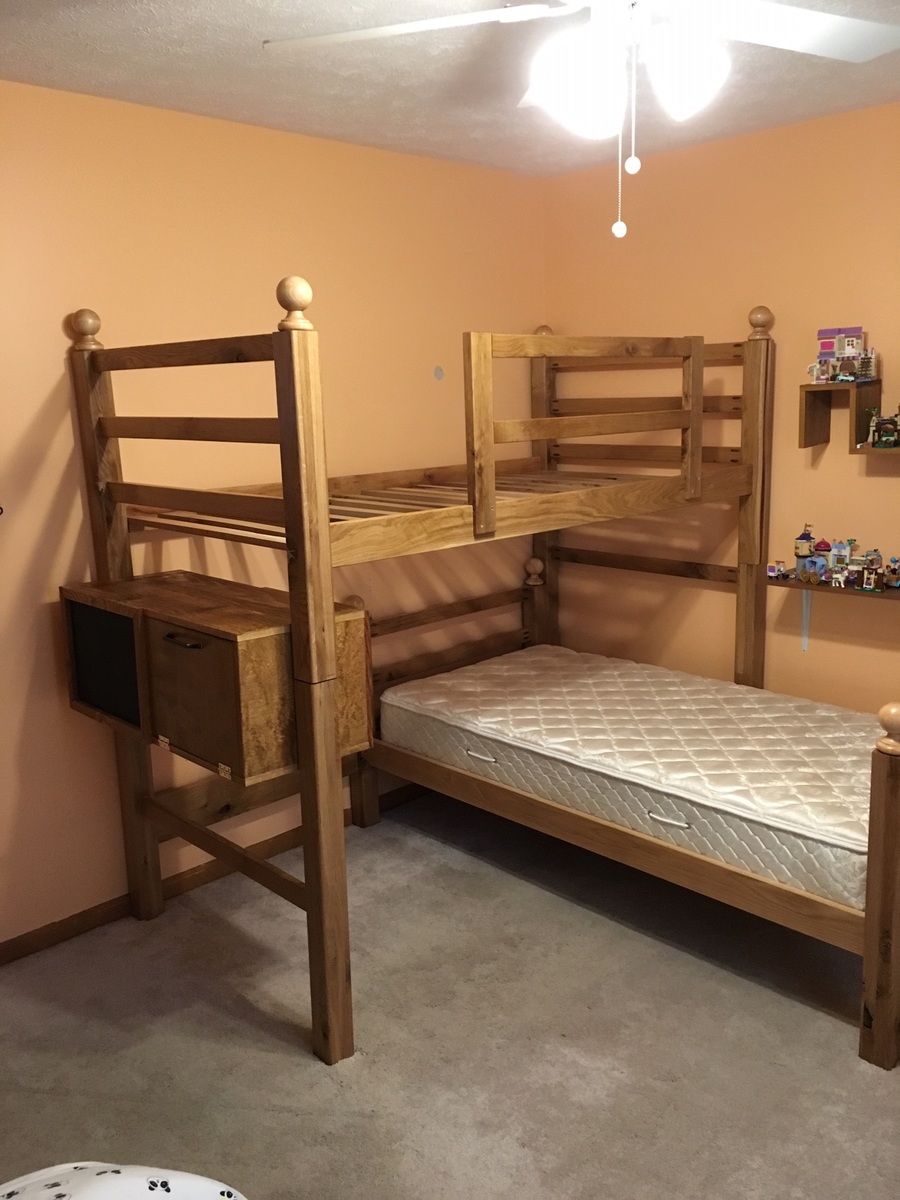
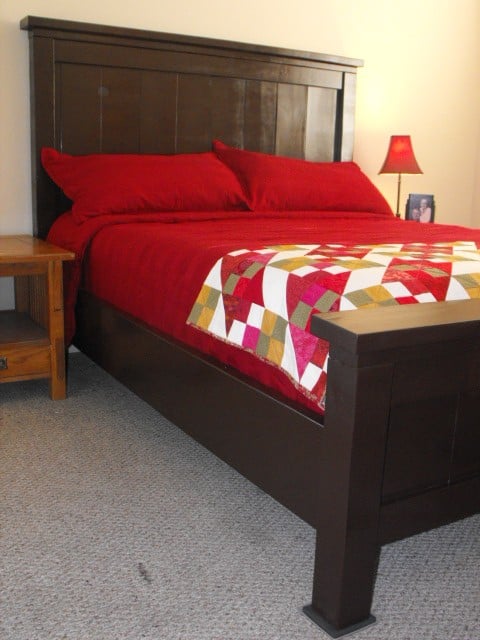
Queen Farmhouse Bed
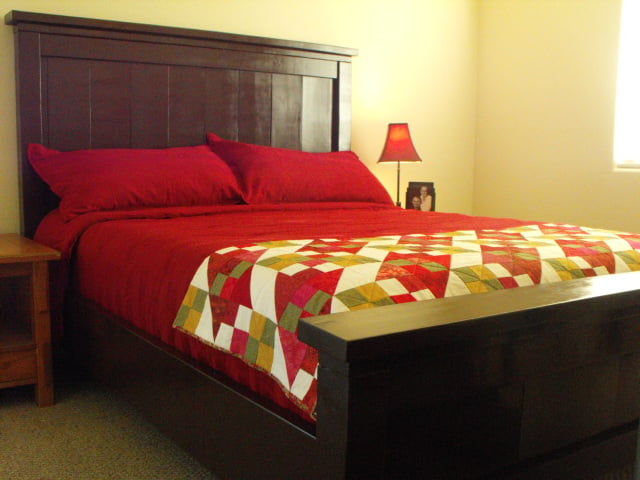
I never thought I would have been able to do this. Thanks Anna! This was my first time building anything. It was a great learning experience. My husband was a big help. He got me comfortable with operating the power tools and assisted me with attaching the posts. This project took a lot longer to put together because I have an extremely active two year old. :-) So I had to do this when pee wee was napping or preoccupied. Originally I wanted to stain the wood Espresso but for some reason I couldn't find Espresso stain sold anywhere in Vegas. I took a swatch down to the local paint shop to have it matched but when the second coat of stain was on the footboard I realized it was not at all the color I had in mind. I had to resand all of it down and the second time around I went with a primer and espresso spray paint. I had a boxspring so instead of making the makeshift boxsprings I found the design in another plan for adding the strip to the sideboards so that slats could be laid down for the boxspring. It turned out amazing! My next project is the farmhouse nightstands. I can't wait!
Built from Plan(s)
Estimated Cost
$300
Estimated Time Investment
Weekend Project (10-20 Hours)
Finish Used
We used a white primer and Rustoleum Universal Gloss Espresso Brown spray paint.
Recommended Skill Level
Beginner
Comments
Building Built In Bookshelves
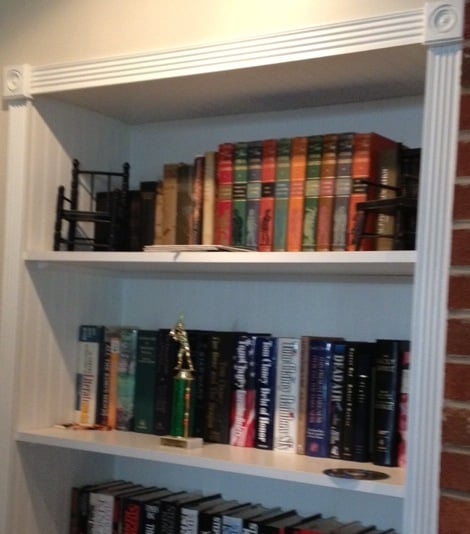
I decided to build bookshelves on either side of the fireplace, where it was just drywall. I wanted them to be flush with the wall, and the garage is behind the wall. So, I built them into the garage.
I put headers above where the bookshelves would be, and framed the back side in the garage with just 2x4's. I used full sheets of bead board to cover the backs and sides, and tops. Then I bought pre made shelves and put them up using quarter round to support the shelves on all three sides.
I then bought a door frame kit that I liked, that came with fluted pieces for the sides and top with decorative squares to put at the corners. I caulked and painted it all once it was built. I used a circular saw, framing nail gun, compressor, trim nail gun, chop saw and a hammer total. It was a pretty simple project but has made the space much more useable and pretty. My next project is to build a mantle and surround that matches the bookshelves.

Estimated Cost
$200
Estimated Time Investment
Weekend Project (10-20 Hours)
Finish Used
glossy white paint, Behr Polar Bear white.
Recommended Skill Level
Intermediate
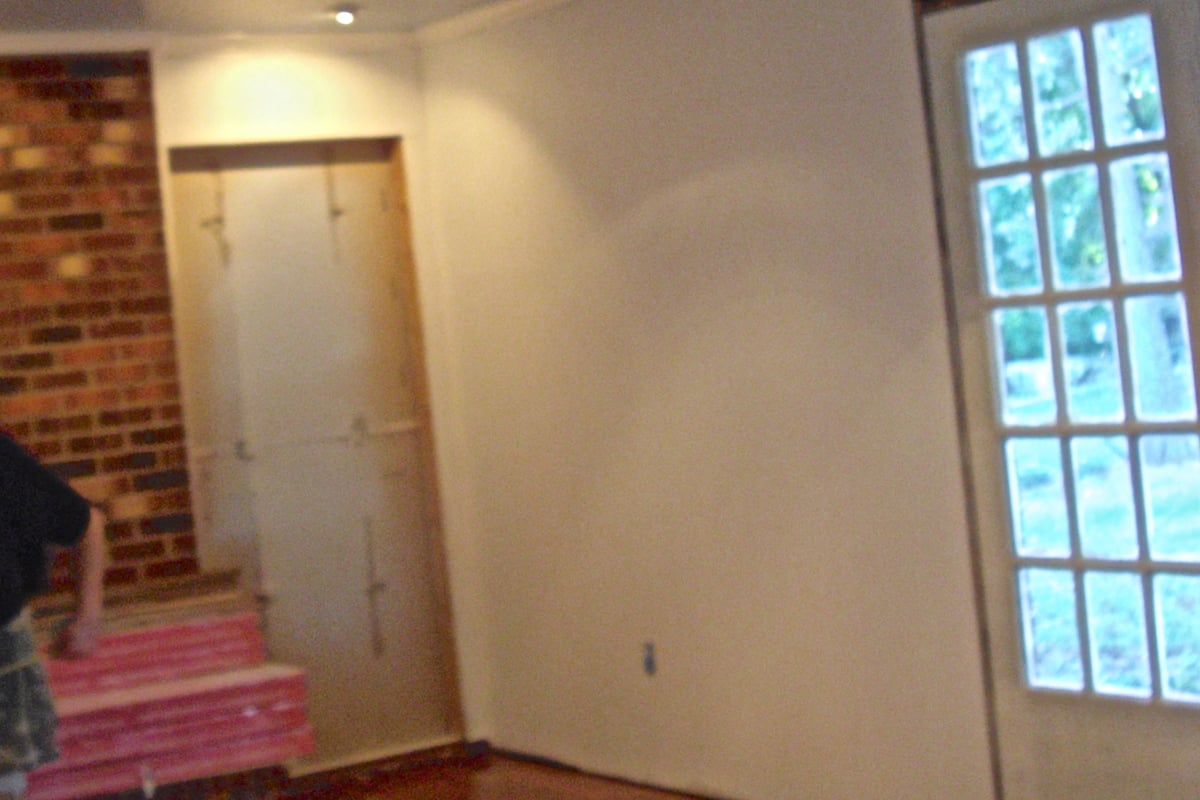
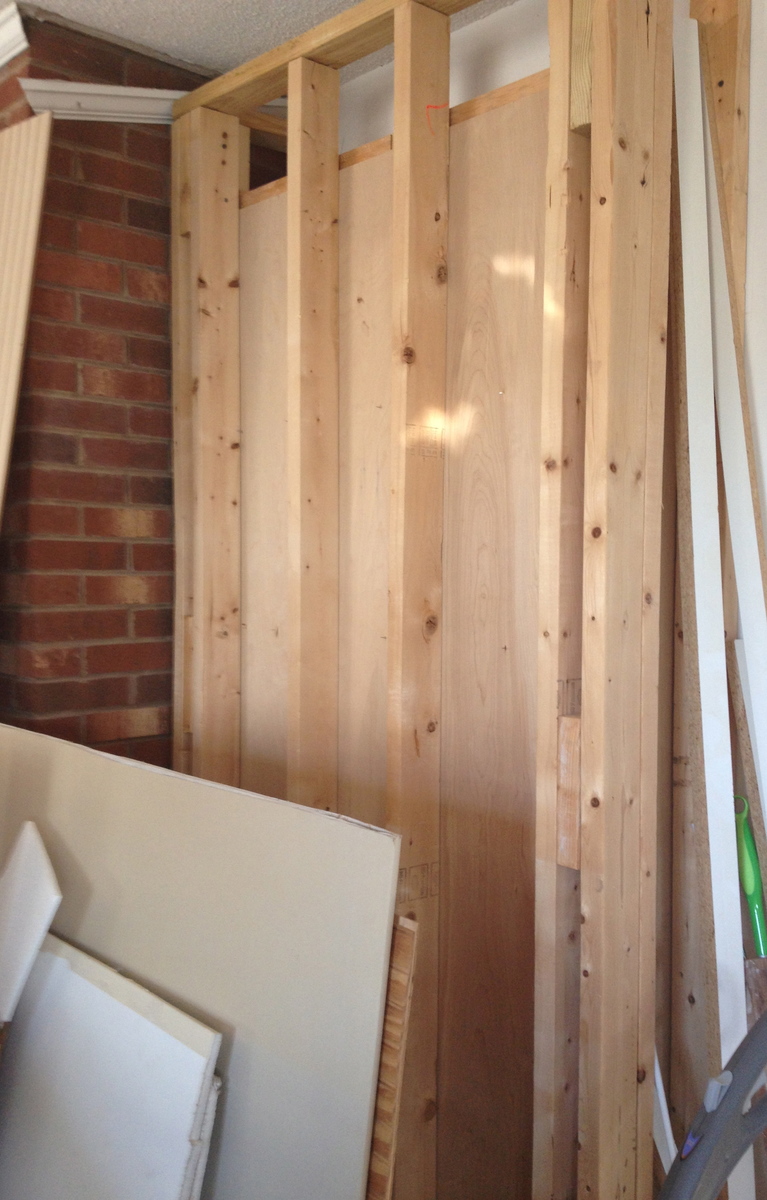
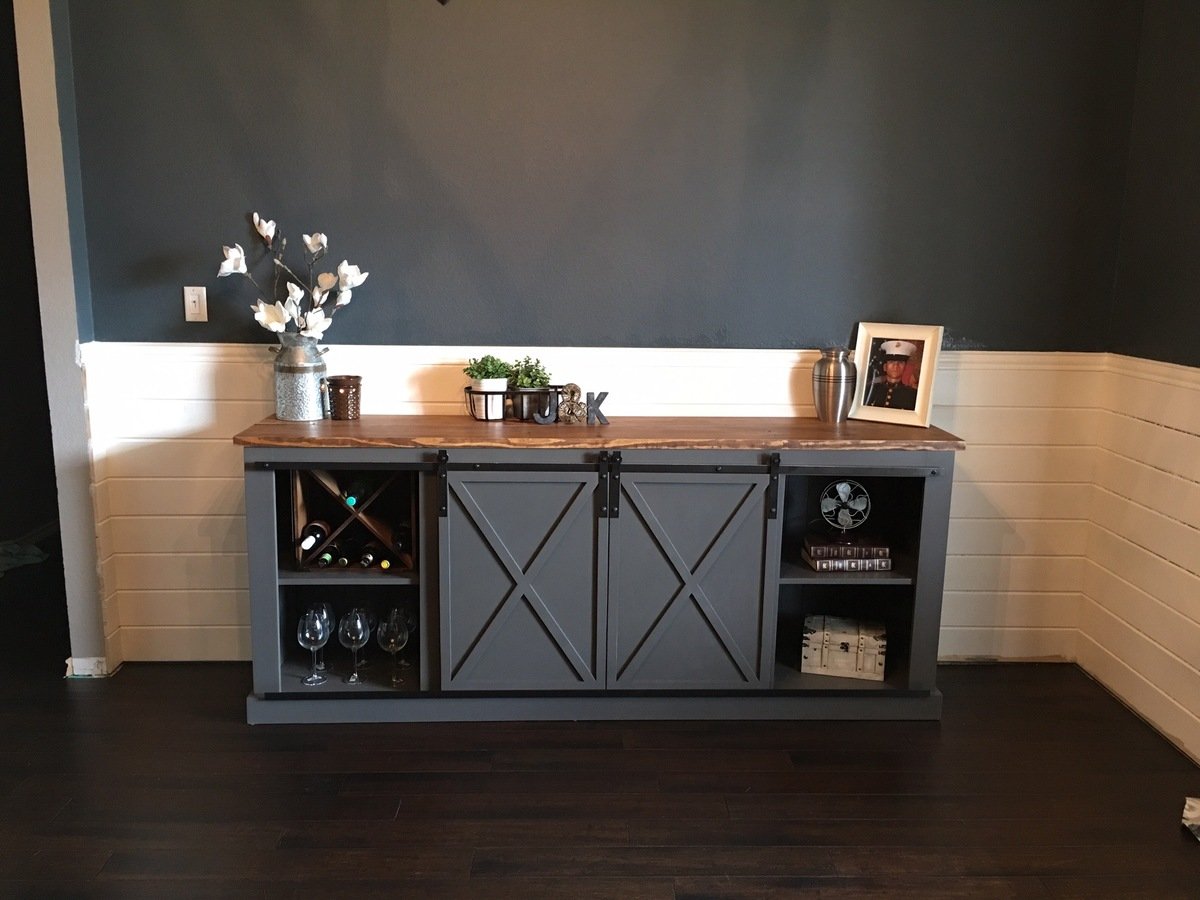
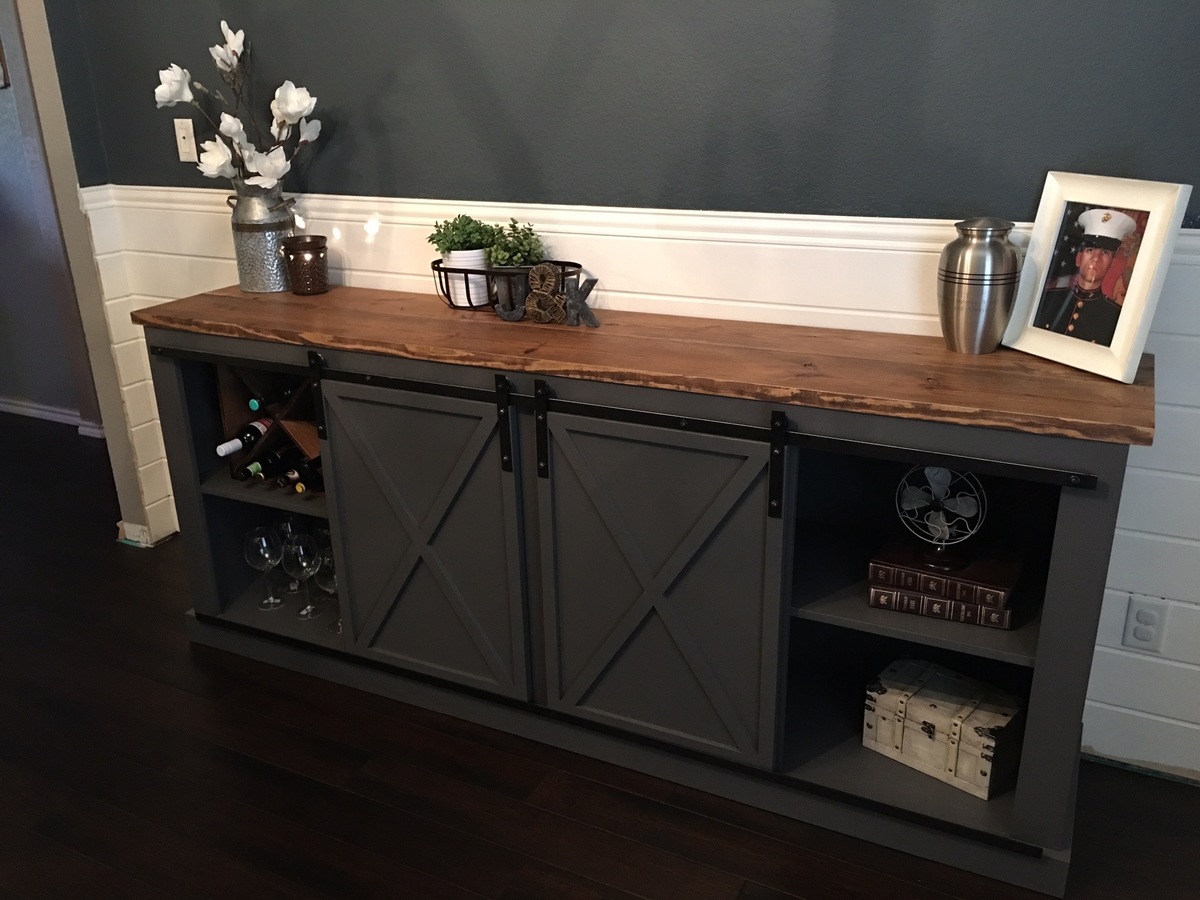
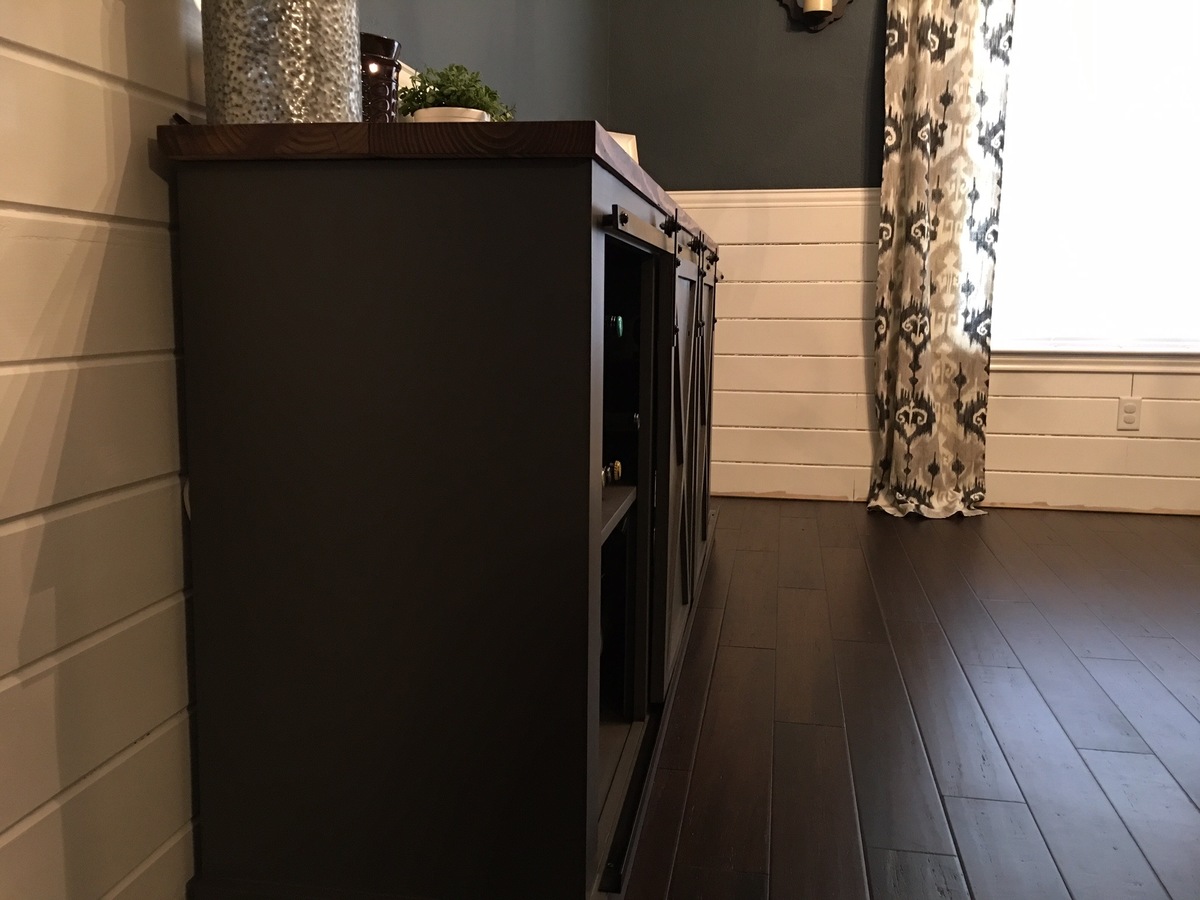
Sliding Door Console
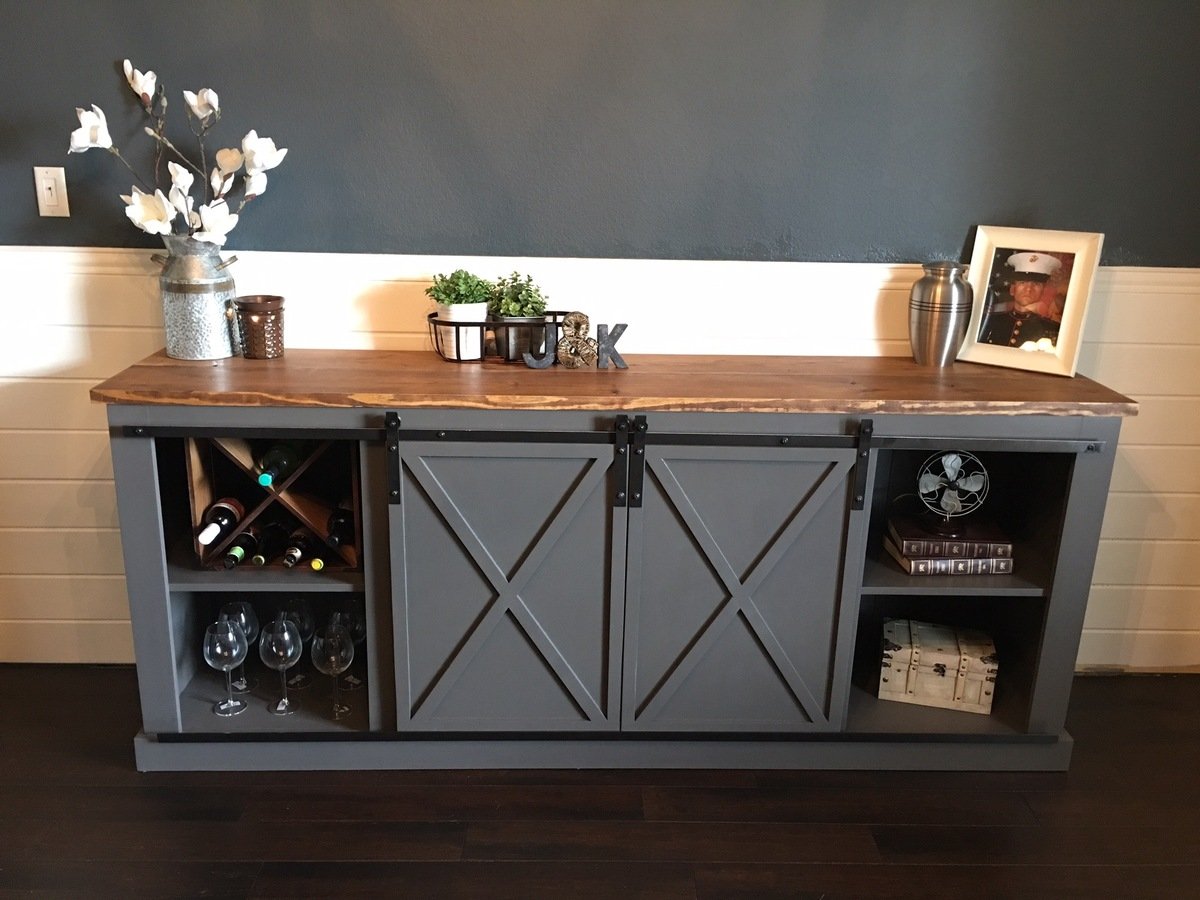
This is my build of the sliding door console. I built this for my wife after she insisted we needed this for our dining room. The build overall was pretty easy, after my wife decided to change the paint color 3 times (yes, after we had bought the gallons, and I had it completely painted every time). I will say though that if you plan on painting this then you should use plywood for the front facing boards of the frame. I built mine over the course of about a month and after I had painted it I noticed significant wood shrinkage on the areas where boards came together. Plywood shrinks minimally if any at all so it should take care of that issue.
P.S. Don’t mind the unfinished construction in the background, we are in the process of installing bigger baseboards, and the planked walls are still unfinished.
Built from Plan(s)
Estimated Cost
$180-240
Estimated Time Investment
Week Long Project (20 Hours or More)
Finish Used
Special Walnut
Recommended Skill Level
Intermediate
Comments
Fri, 12/11/2015 - 19:53
Hardware - Help!
Looks awesome! We have ours built (except the doors and hardware). Any tips? Thanks!
Wed, 12/23/2015 - 15:00
tips
Hey, Im so sorry for the late reply. I hope you were able to get that doors/hardware done without problems! The doors werent bad at all, I added right angle bar below the door into my plan to keep them gliding smoothly and in line. Also we have a 1 and a half year old that would most definitely figure out a way to get the doors off without it. As far as the rest of the hardware, I used the link that Ana posted on her original post for building it, it wasnt too bad at all. I had to improvise on a few things, other than that I just followed the instructions. Let me know how yours turned out!
Sat, 03/26/2016 - 08:44
Barn Door Hardware
Looks fantastic! Where did you purchase the barn door hardware from? Finding it difficult to find some that won't break the bank!
Fri, 07/22/2016 - 23:56
Hardware
I recently completed this project with a few changes. I used 1/4th inch aluminum flat bar for the track and the hinges . For the wheels I used metal screen door replacement wheels. I originally had the pully wheels, but when they are on flat bar it's very difficult to move and has a rough time sliding across the flat bar. The screen door wheels were about $6 and gives you a nice smooth glide for your door, because the wheels have ball bearings.
Sat, 01/09/2016 - 17:53
Hello. I have one built,
Hello. I have one built, about 90% done just need some staining and paint. My wife and I went to home depot today to look at paint and looked are your intellectual because we really like how yours turned out. Intellectual looks to be a dark gray? In your pictures it looks like there is a possible tint of a blue? What finish did you get? We bought a sample and painted a piece of the wood to see how it would turn out in our room. Doesn't seem to match your color.
I made some dimension alterations to our, will post picture when its complete.
Tue, 02/16/2016 - 20:14
The color is intellectual,
The color is intellectual, but the light coming in might make it look a little blueish. Also the color we have our walls painted behind it is "steel blue," so it may be making the buffet look more blue than gray. The finish we used was satin. Sorry this is a late reply but I hope you got yours all finished and love it!
Fri, 01/08/2016 - 20:24
CanT find 2x3s anywhere?!
Can anyone recommend where to find 2x3 pieces of lumber like she calls for in this plan? We can find 1x3 and 2x4 but no 2x3s anywhere!

Fri, 01/15/2016 - 14:43
Is that a 1x10 or 2x10 on the
Is that a 1x10 or 2x10 on the top. All 2x10 I find are rounded on the edges and yours look squared. Ran threw the table saw but now I am short and to big of a gap.
Tue, 02/16/2016 - 20:18
I used 2 2x10s for the top
I used 2 2x10s for the top but I jointed them first so that may be why it looks squared. I ended up rounding it over a little bit anyway to soften the edges. I ended up cutting off more than I wanted also and while I didnt have a gap on mine - the edge doesn't hang over on the front as much as I would like.
Fri, 01/15/2016 - 18:31
Did you use a 2x10 on the top
Did you use a 2x10 on the top? I can't tell. If so where did you find one with squared edges??
Fri, 02/05/2016 - 10:29
paint/stain
what color stain did you use? and when you painted it, did you spray it or roll it on? I'm struggling with the quality of paint job I can do once I finish a project
Tue, 02/16/2016 - 20:22
The stain I used was Miniwax
The stain I used was Miniwax "Special Walnut." I actually used our paint sprayer that we got for a christmas present for the first time! It took a lot of practice and I ended up having to sand off a bunch before I got the technique down, but in the end it was worth it. The sprayer makes it look much more professional and finished. Just be sure if you use a polyeurathane for a sealer, that you get a water based and not an oil based.
Thu, 10/27/2016 - 11:08
Door Hardware Setup
Do your doors stop when sliding open or can they slide off? Great Work!
Sun, 01/15/2017 - 07:07
Sorry for late reply, I never
Sorry for late reply, I never get notified when there has been a comment. At the moment they slide all the way off, but there is a simple pin system you can use that stops them from sliding off. Thank you!
Mon, 12/12/2016 - 08:53
Help with Project board sides
So in the materials it lists
2 - project panel pieces 17-1/4" x 36" (may be advertised as 18" wide project panel - measure in store)
What is the thickness of these supposed to be? I cannot find this at any hardware store and was going to ise 1x4 strips instead. My question is, if this is going to have heavy use, do I need to use thicker boards to ensure it can hold the full weight of the top?
This is for my art studio and will hold tools, printer, laptop ect.
thanks!
B
Mon, 12/12/2016 - 12:03
HELP WITH PROJECT BOARD SIDES
HELP WITH PROJECT BOARD SIDES
So in the materials it lists
2 - project panel pieces 17-1/4" x 36" (may be advertised as 18" wide project panel - measure in store)
What is the thickness of these supposed to be? I cannot find this at any hardware store and was going to ise 1x4 strips instead. My question is, if this is going to have heavy use, do I need to use thicker boards to ensure it can hold the full weight of the top?
This is for my art studio and will hold tools, printer, laptop ect.
thanks!
B
Sun, 01/15/2017 - 07:11
Thickness
I believe the thicknesses are the same of 1x material that you find at a big box store. If you are going to lowes or home depot it would be in the back of the section where the nice 1x boards are (pine ranging from 1x2-1x12). They will be wrapped completely in plastic shrink wrap. Hope this helps, sorry for late reply!
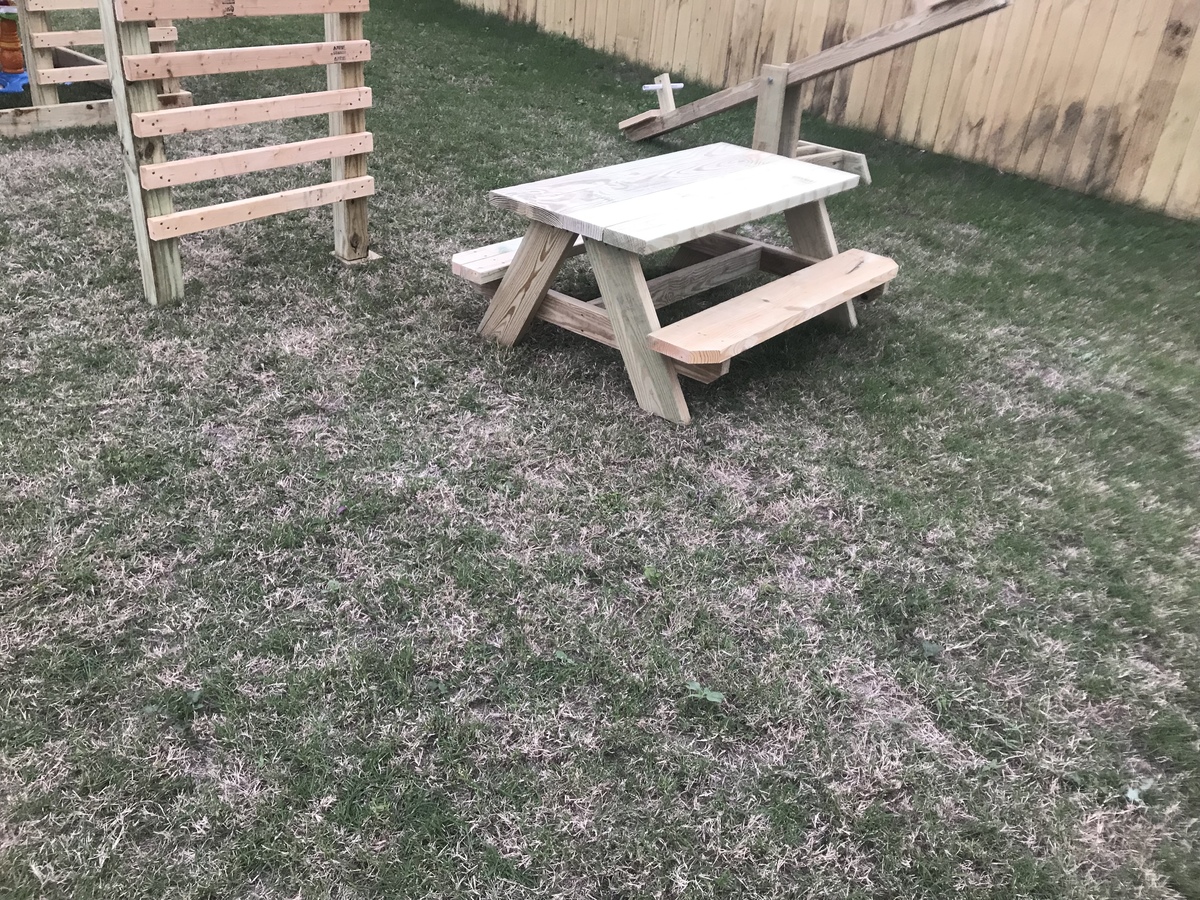
Dylan and gerald picnic table
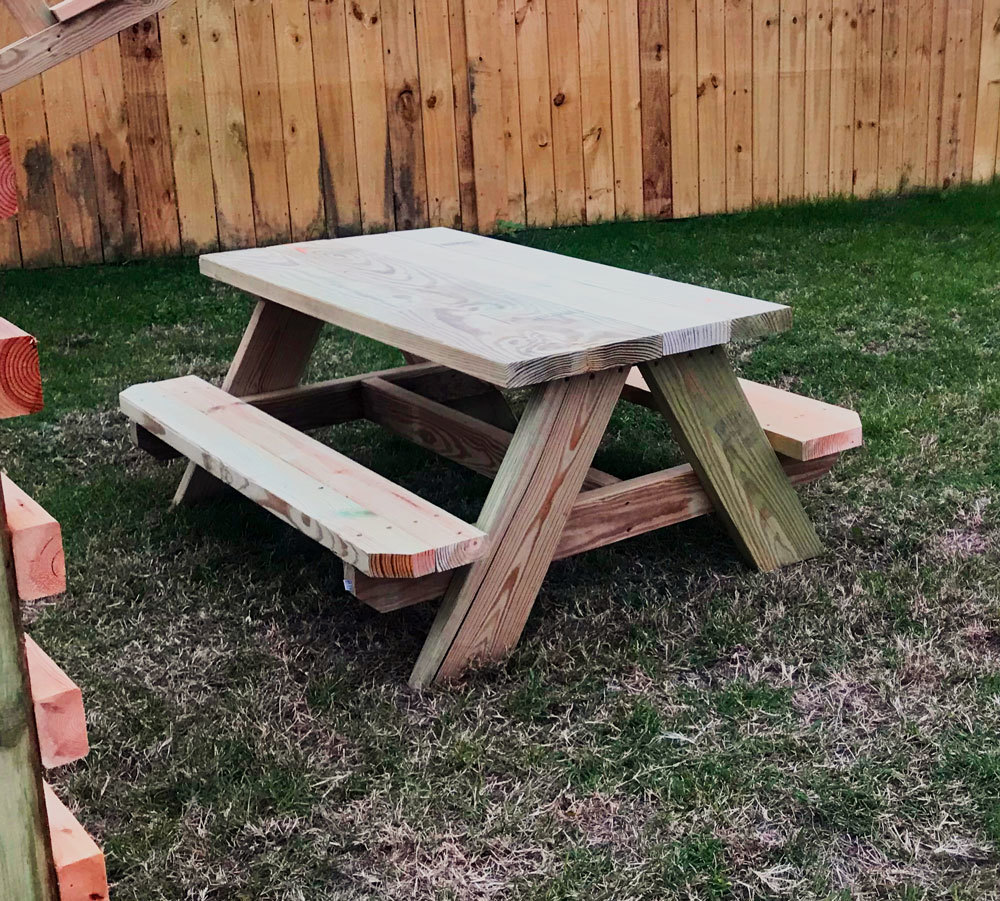
Picnic table
Built from Plan(s)
Estimated Cost
$40
Estimated Time Investment
An Hour or Two (0-2 Hours)
Recommended Skill Level
Beginner