Keurig K Cup Holder Drawer
Was easy to make
Built from Plan(s)
Estimated Time Investment
Afternoon Project (3-6 Hours)
Recommended Skill Level
Beginner
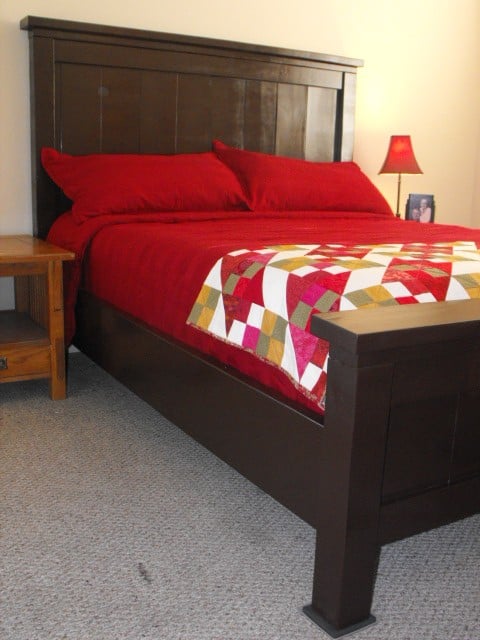
Was easy to make
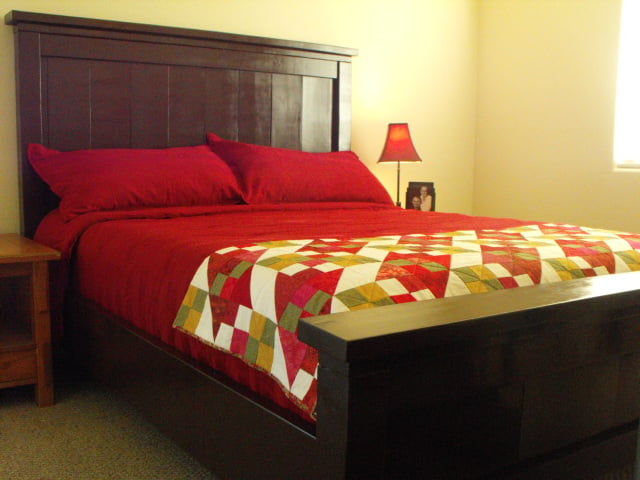
I never thought I would have been able to do this. Thanks Anna! This was my first time building anything. It was a great learning experience. My husband was a big help. He got me comfortable with operating the power tools and assisted me with attaching the posts. This project took a lot longer to put together because I have an extremely active two year old. :-) So I had to do this when pee wee was napping or preoccupied. Originally I wanted to stain the wood Espresso but for some reason I couldn't find Espresso stain sold anywhere in Vegas. I took a swatch down to the local paint shop to have it matched but when the second coat of stain was on the footboard I realized it was not at all the color I had in mind. I had to resand all of it down and the second time around I went with a primer and espresso spray paint. I had a boxspring so instead of making the makeshift boxsprings I found the design in another plan for adding the strip to the sideboards so that slats could be laid down for the boxspring. It turned out amazing! My next project is the farmhouse nightstands. I can't wait!
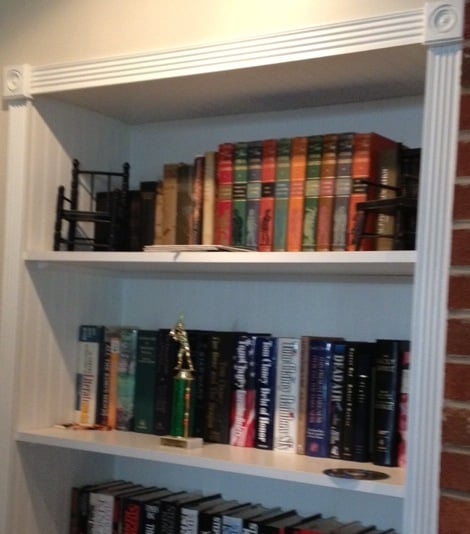
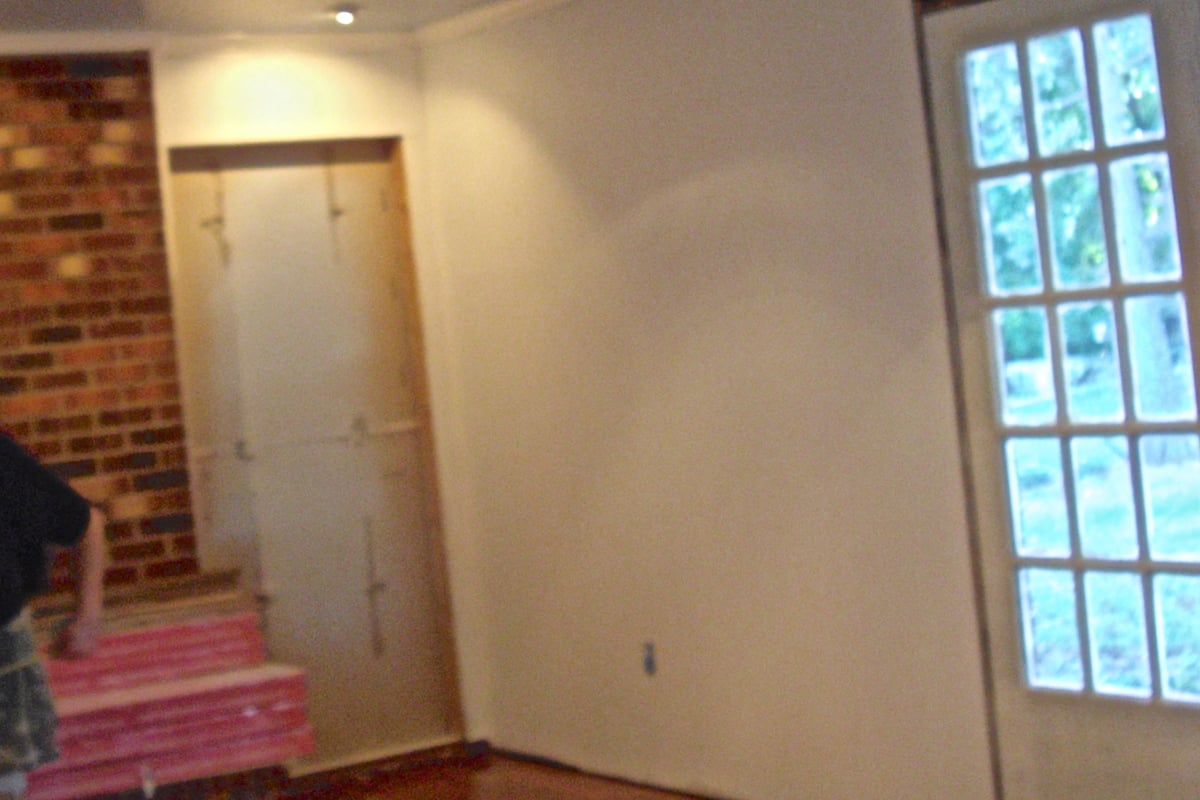
I decided to build bookshelves on either side of the fireplace, where it was just drywall. I wanted them to be flush with the wall, and the garage is behind the wall. So, I built them into the garage.
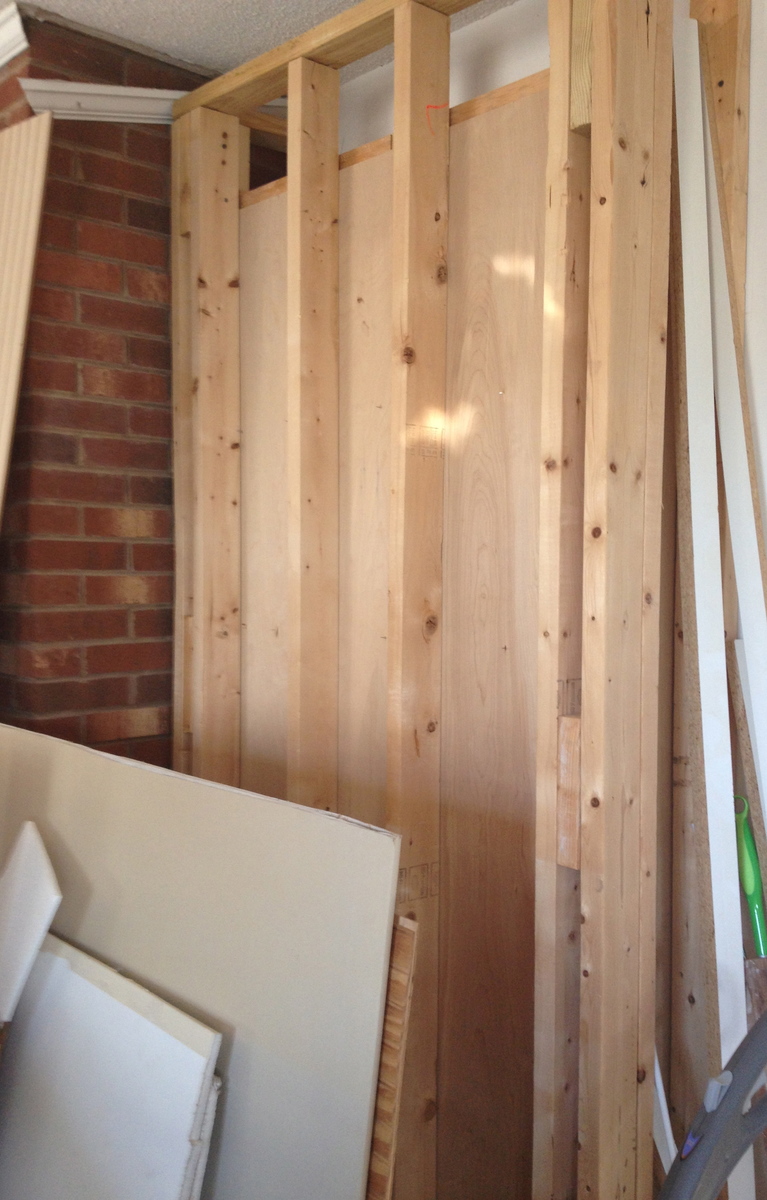
I put headers above where the bookshelves would be, and framed the back side in the garage with just 2x4's. I used full sheets of bead board to cover the backs and sides, and tops. Then I bought pre made shelves and put them up using quarter round to support the shelves on all three sides.
I then bought a door frame kit that I liked, that came with fluted pieces for the sides and top with decorative squares to put at the corners. I caulked and painted it all once it was built. I used a circular saw, framing nail gun, compressor, trim nail gun, chop saw and a hammer total. It was a pretty simple project but has made the space much more useable and pretty. My next project is to build a mantle and surround that matches the bookshelves.

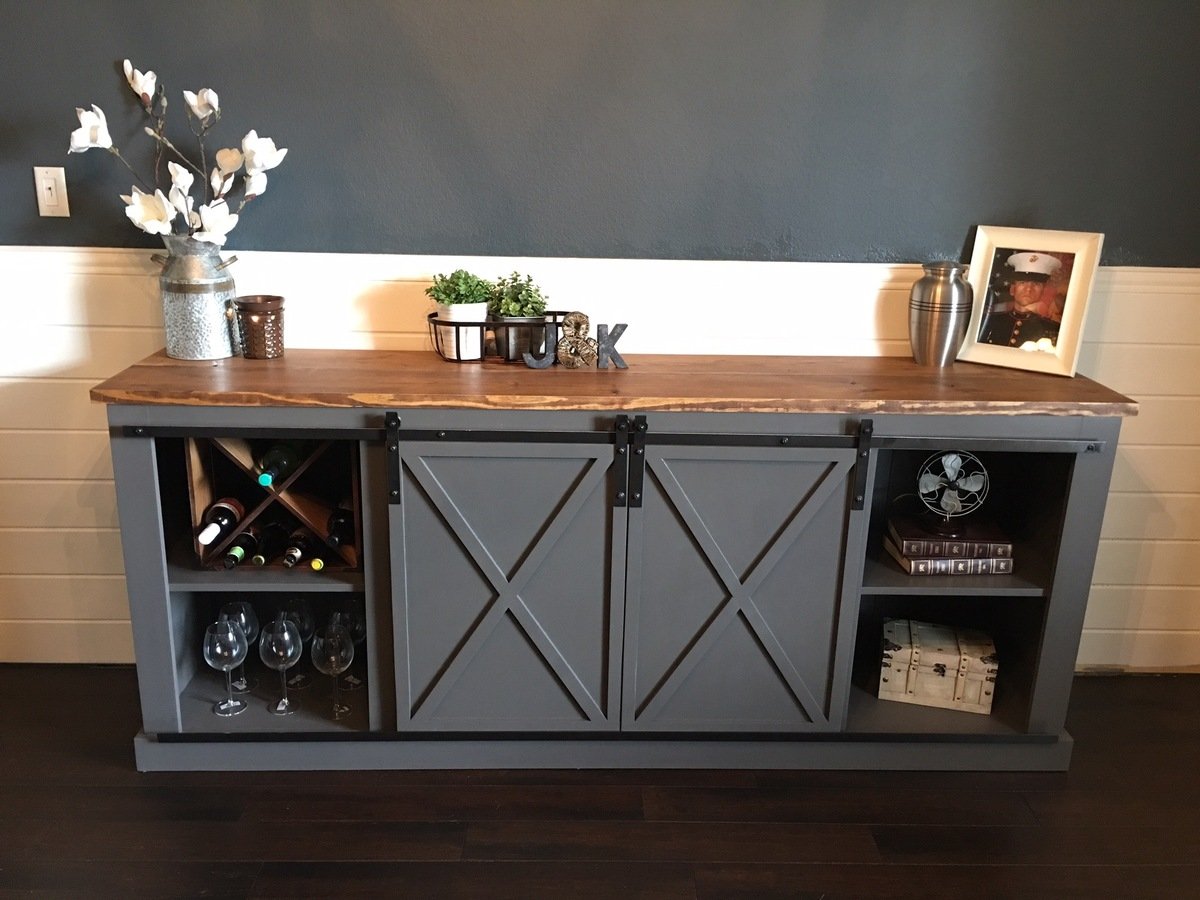
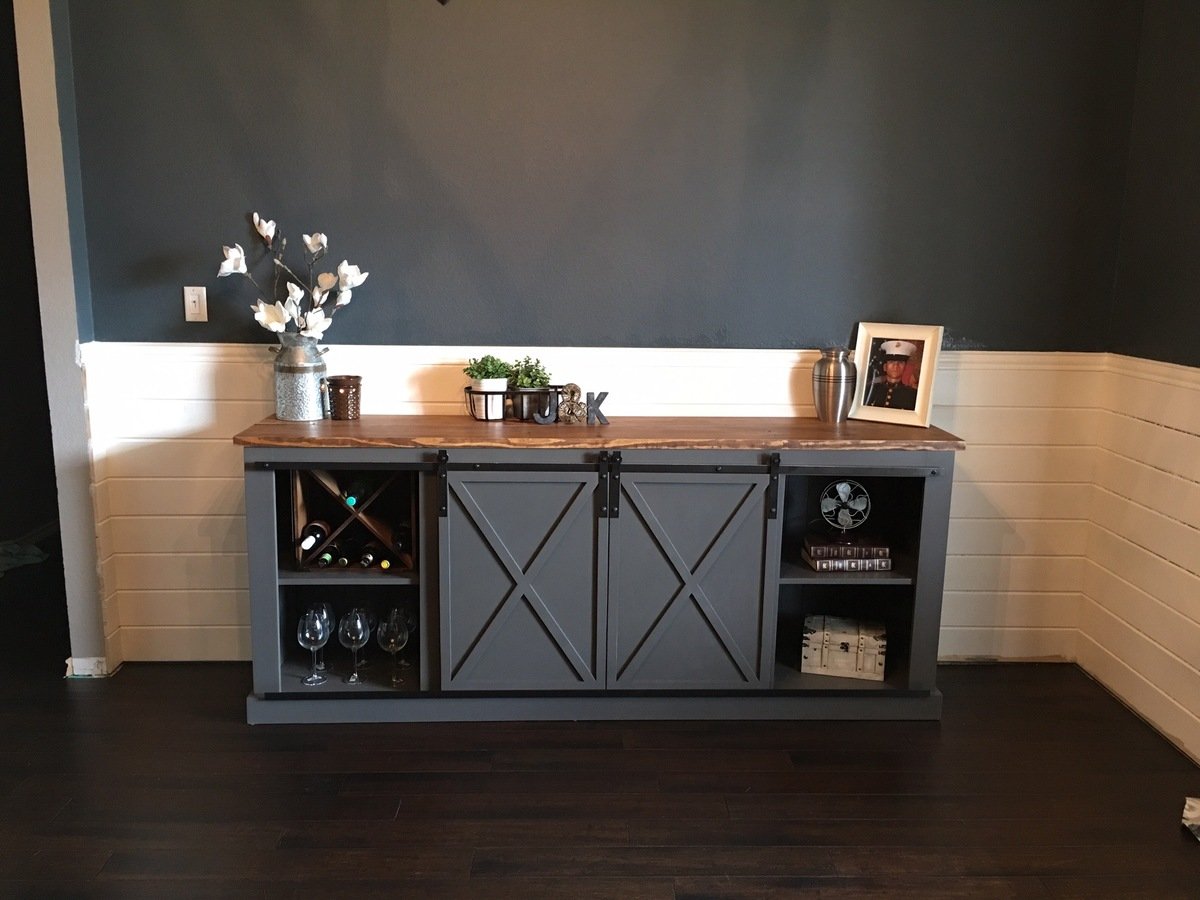
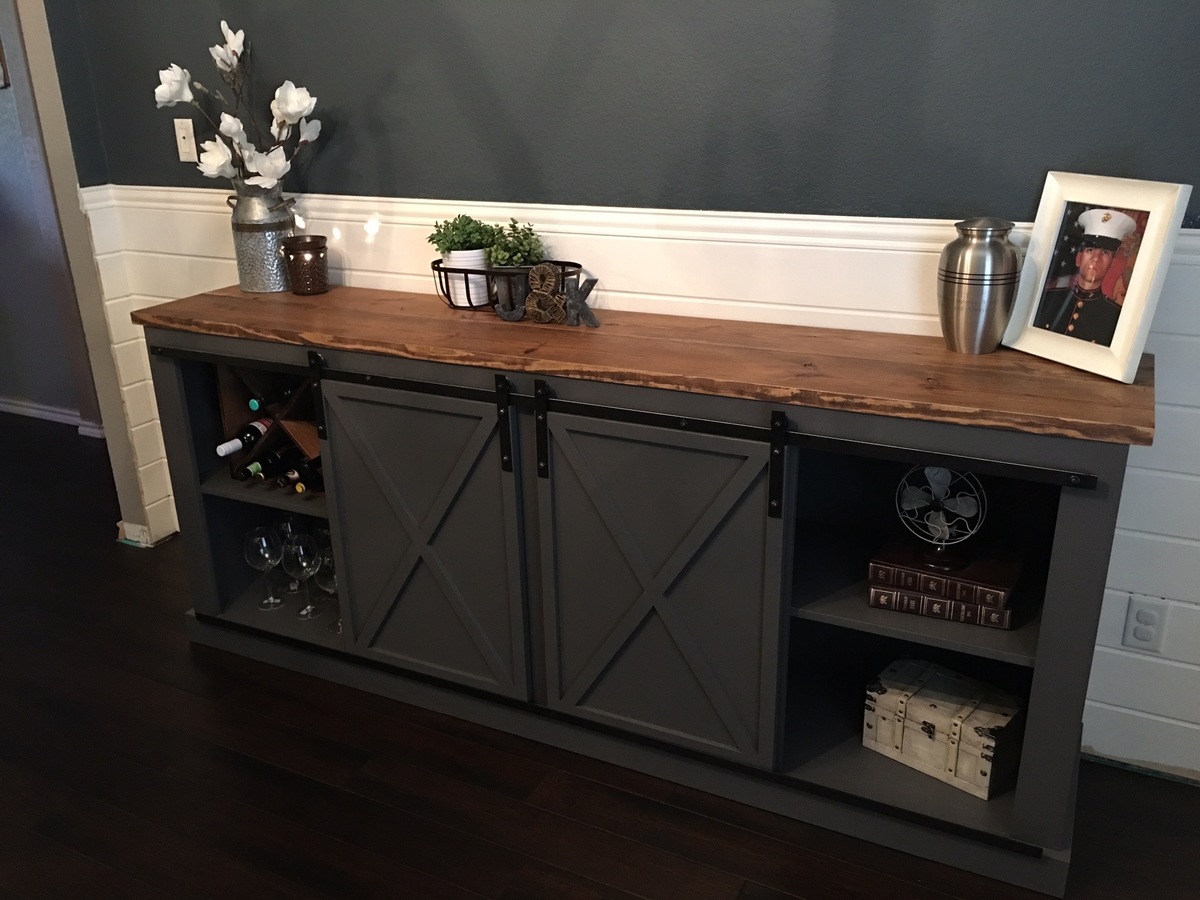
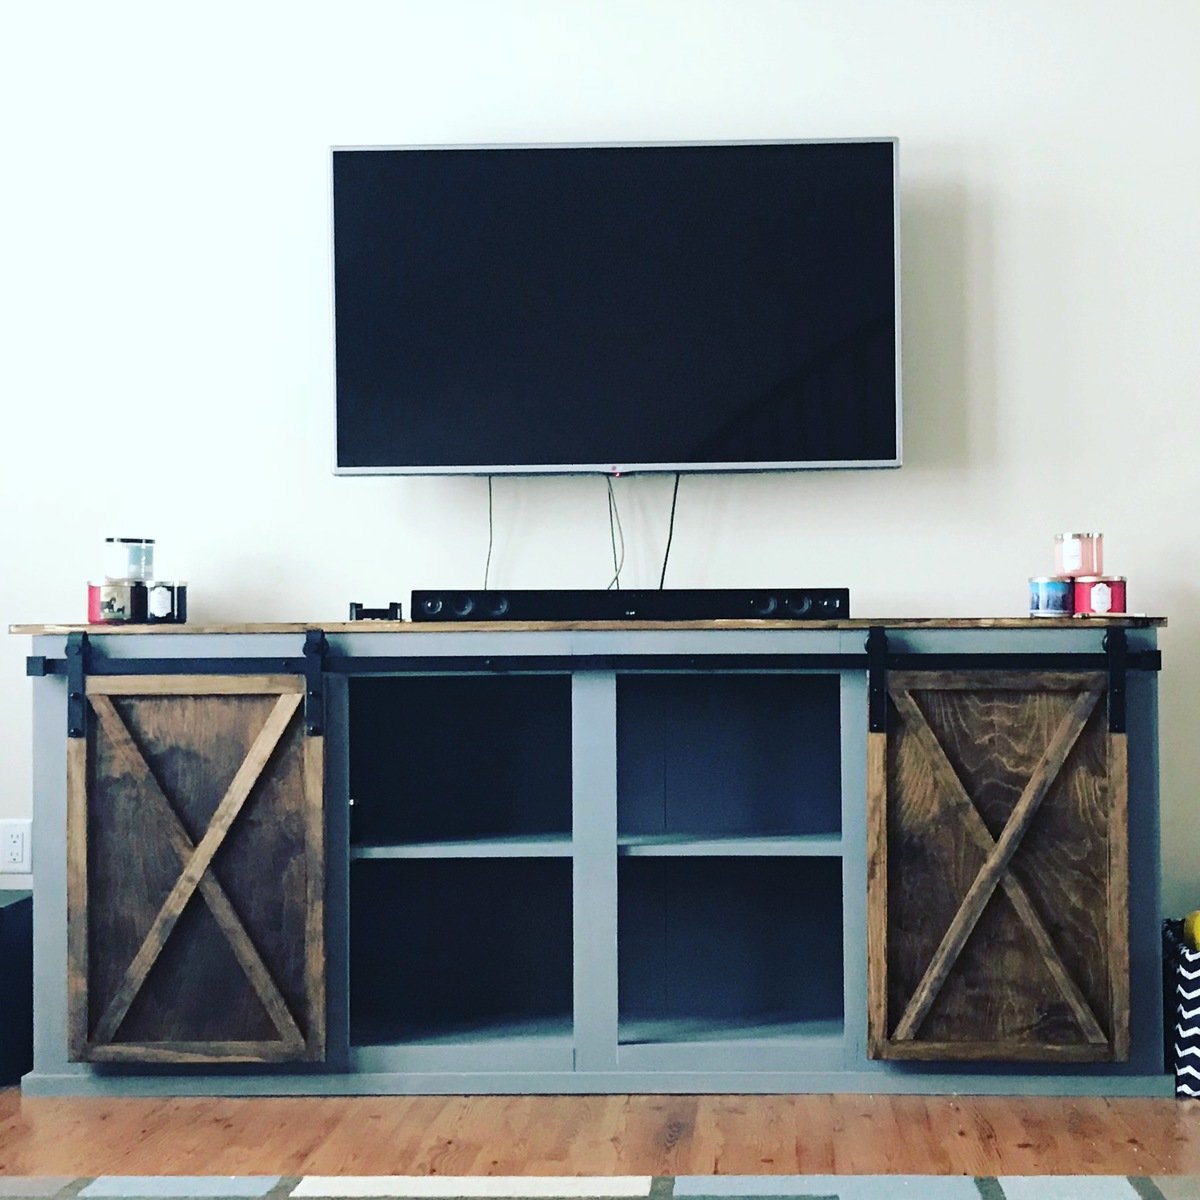
This is my build of the sliding door console. I built this for my wife after she insisted we needed this for our dining room. The build overall was pretty easy, after my wife decided to change the paint color 3 times (yes, after we had bought the gallons, and I had it completely painted every time). I will say though that if you plan on painting this then you should use plywood for the front facing boards of the frame. I built mine over the course of about a month and after I had painted it I noticed significant wood shrinkage on the areas where boards came together. Plywood shrinks minimally if any at all so it should take care of that issue.
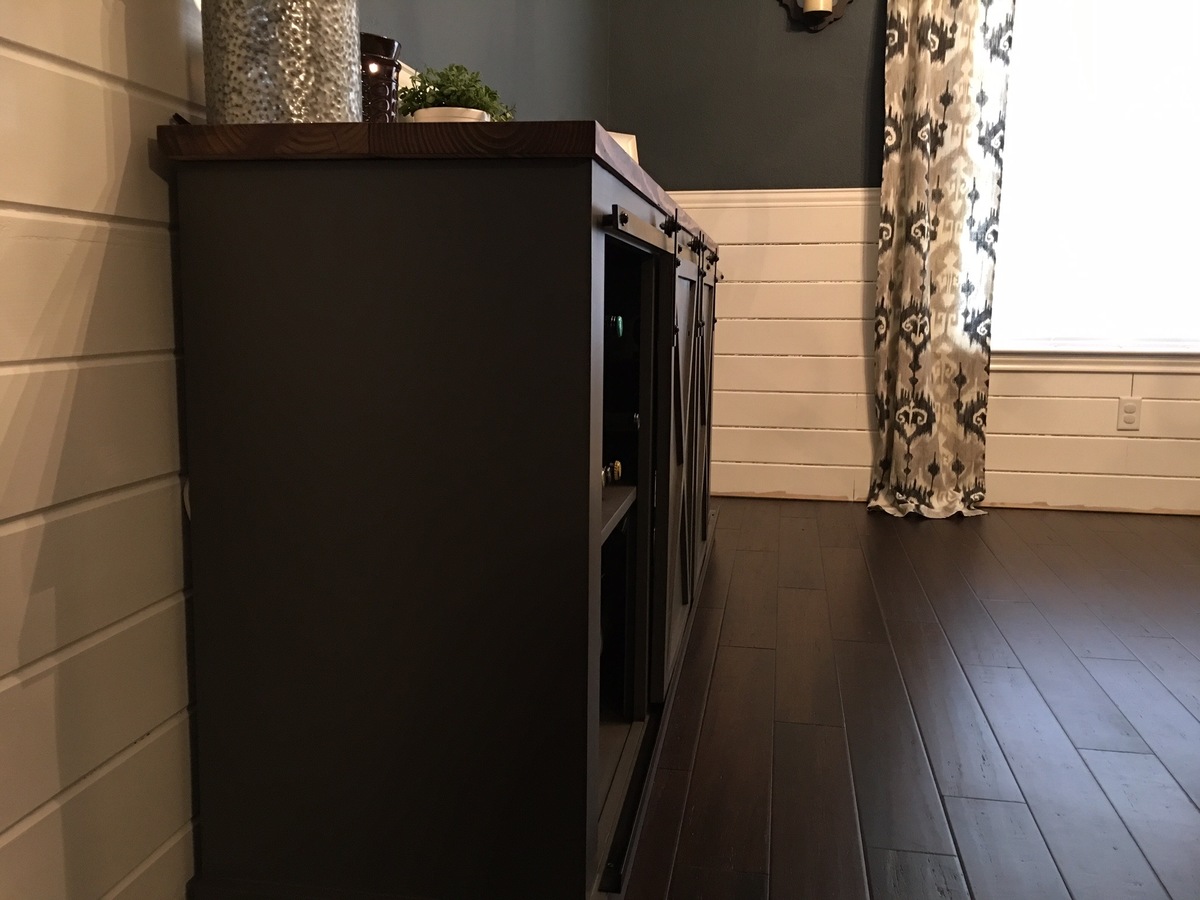
P.S. Don’t mind the unfinished construction in the background, we are in the process of installing bigger baseboards, and the planked walls are still unfinished.
Fri, 12/11/2015 - 19:53
Looks awesome! We have ours built (except the doors and hardware). Any tips? Thanks!
Wed, 12/23/2015 - 15:00
Hey, Im so sorry for the late reply. I hope you were able to get that doors/hardware done without problems! The doors werent bad at all, I added right angle bar below the door into my plan to keep them gliding smoothly and in line. Also we have a 1 and a half year old that would most definitely figure out a way to get the doors off without it. As far as the rest of the hardware, I used the link that Ana posted on her original post for building it, it wasnt too bad at all. I had to improvise on a few things, other than that I just followed the instructions. Let me know how yours turned out!
Sat, 03/26/2016 - 08:44
Looks fantastic! Where did you purchase the barn door hardware from? Finding it difficult to find some that won't break the bank!
Fri, 07/22/2016 - 23:56
I recently completed this project with a few changes. I used 1/4th inch aluminum flat bar for the track and the hinges . For the wheels I used metal screen door replacement wheels. I originally had the pully wheels, but when they are on flat bar it's very difficult to move and has a rough time sliding across the flat bar. The screen door wheels were about $6 and gives you a nice smooth glide for your door, because the wheels have ball bearings.
Sat, 01/09/2016 - 17:53
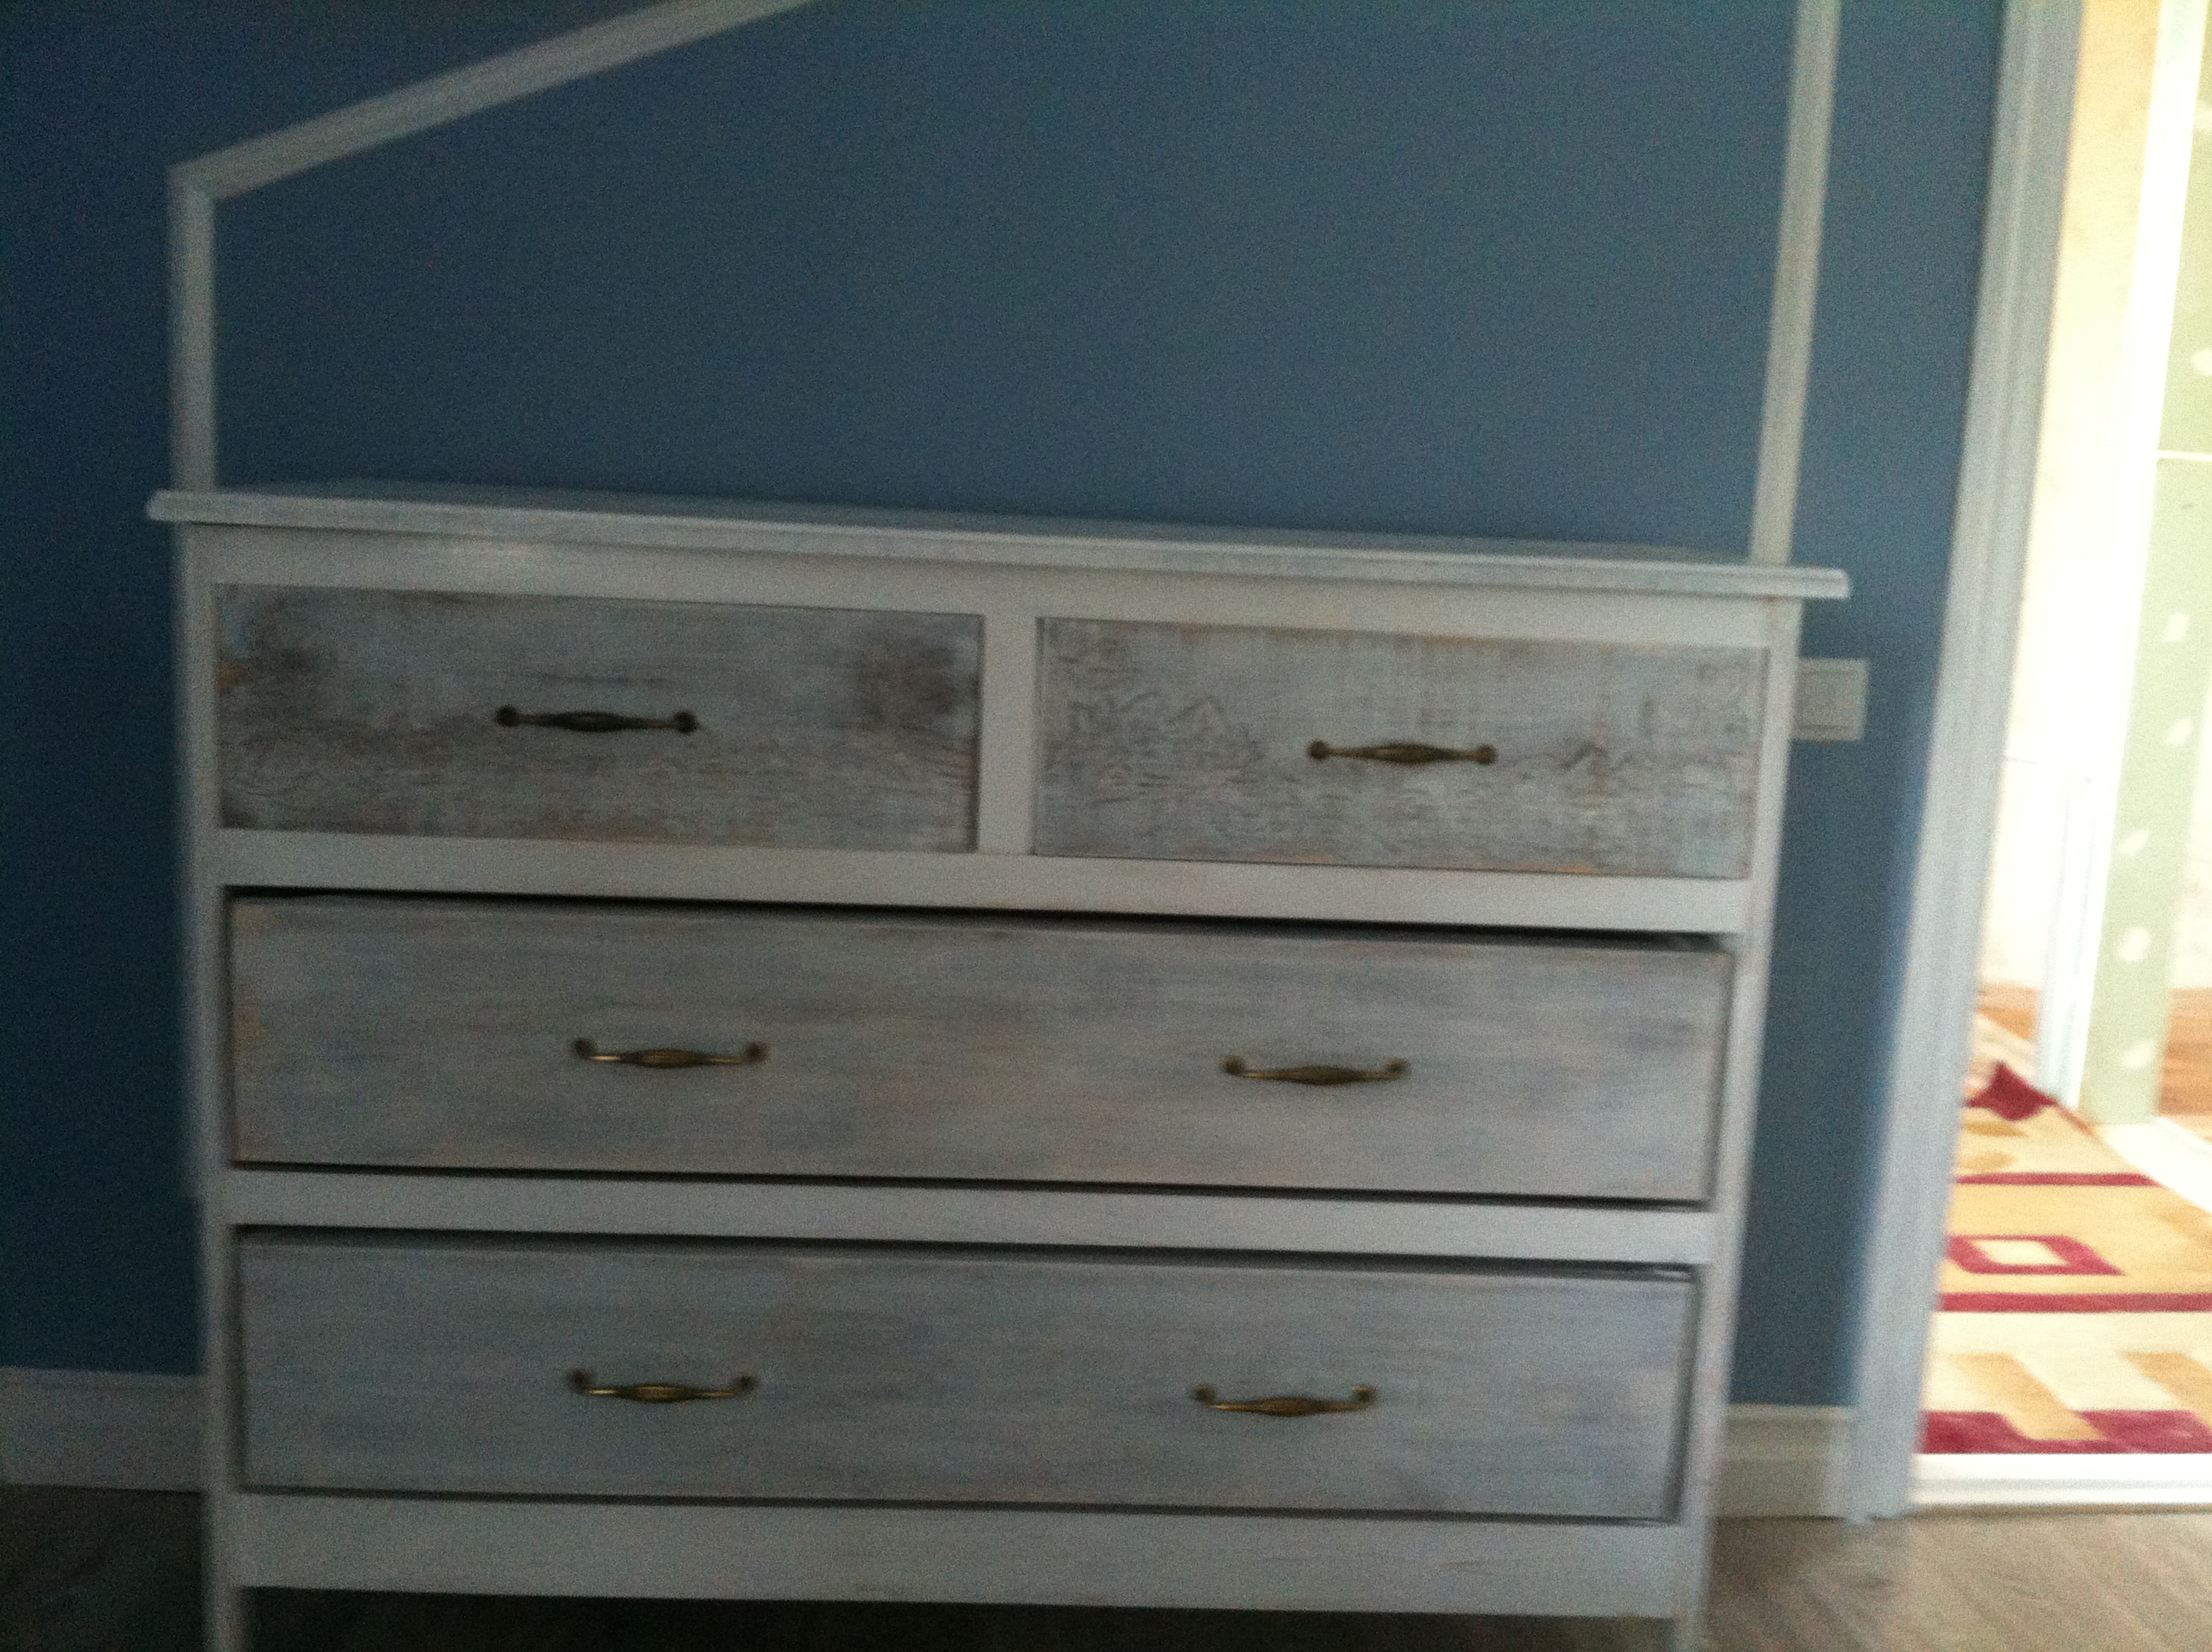
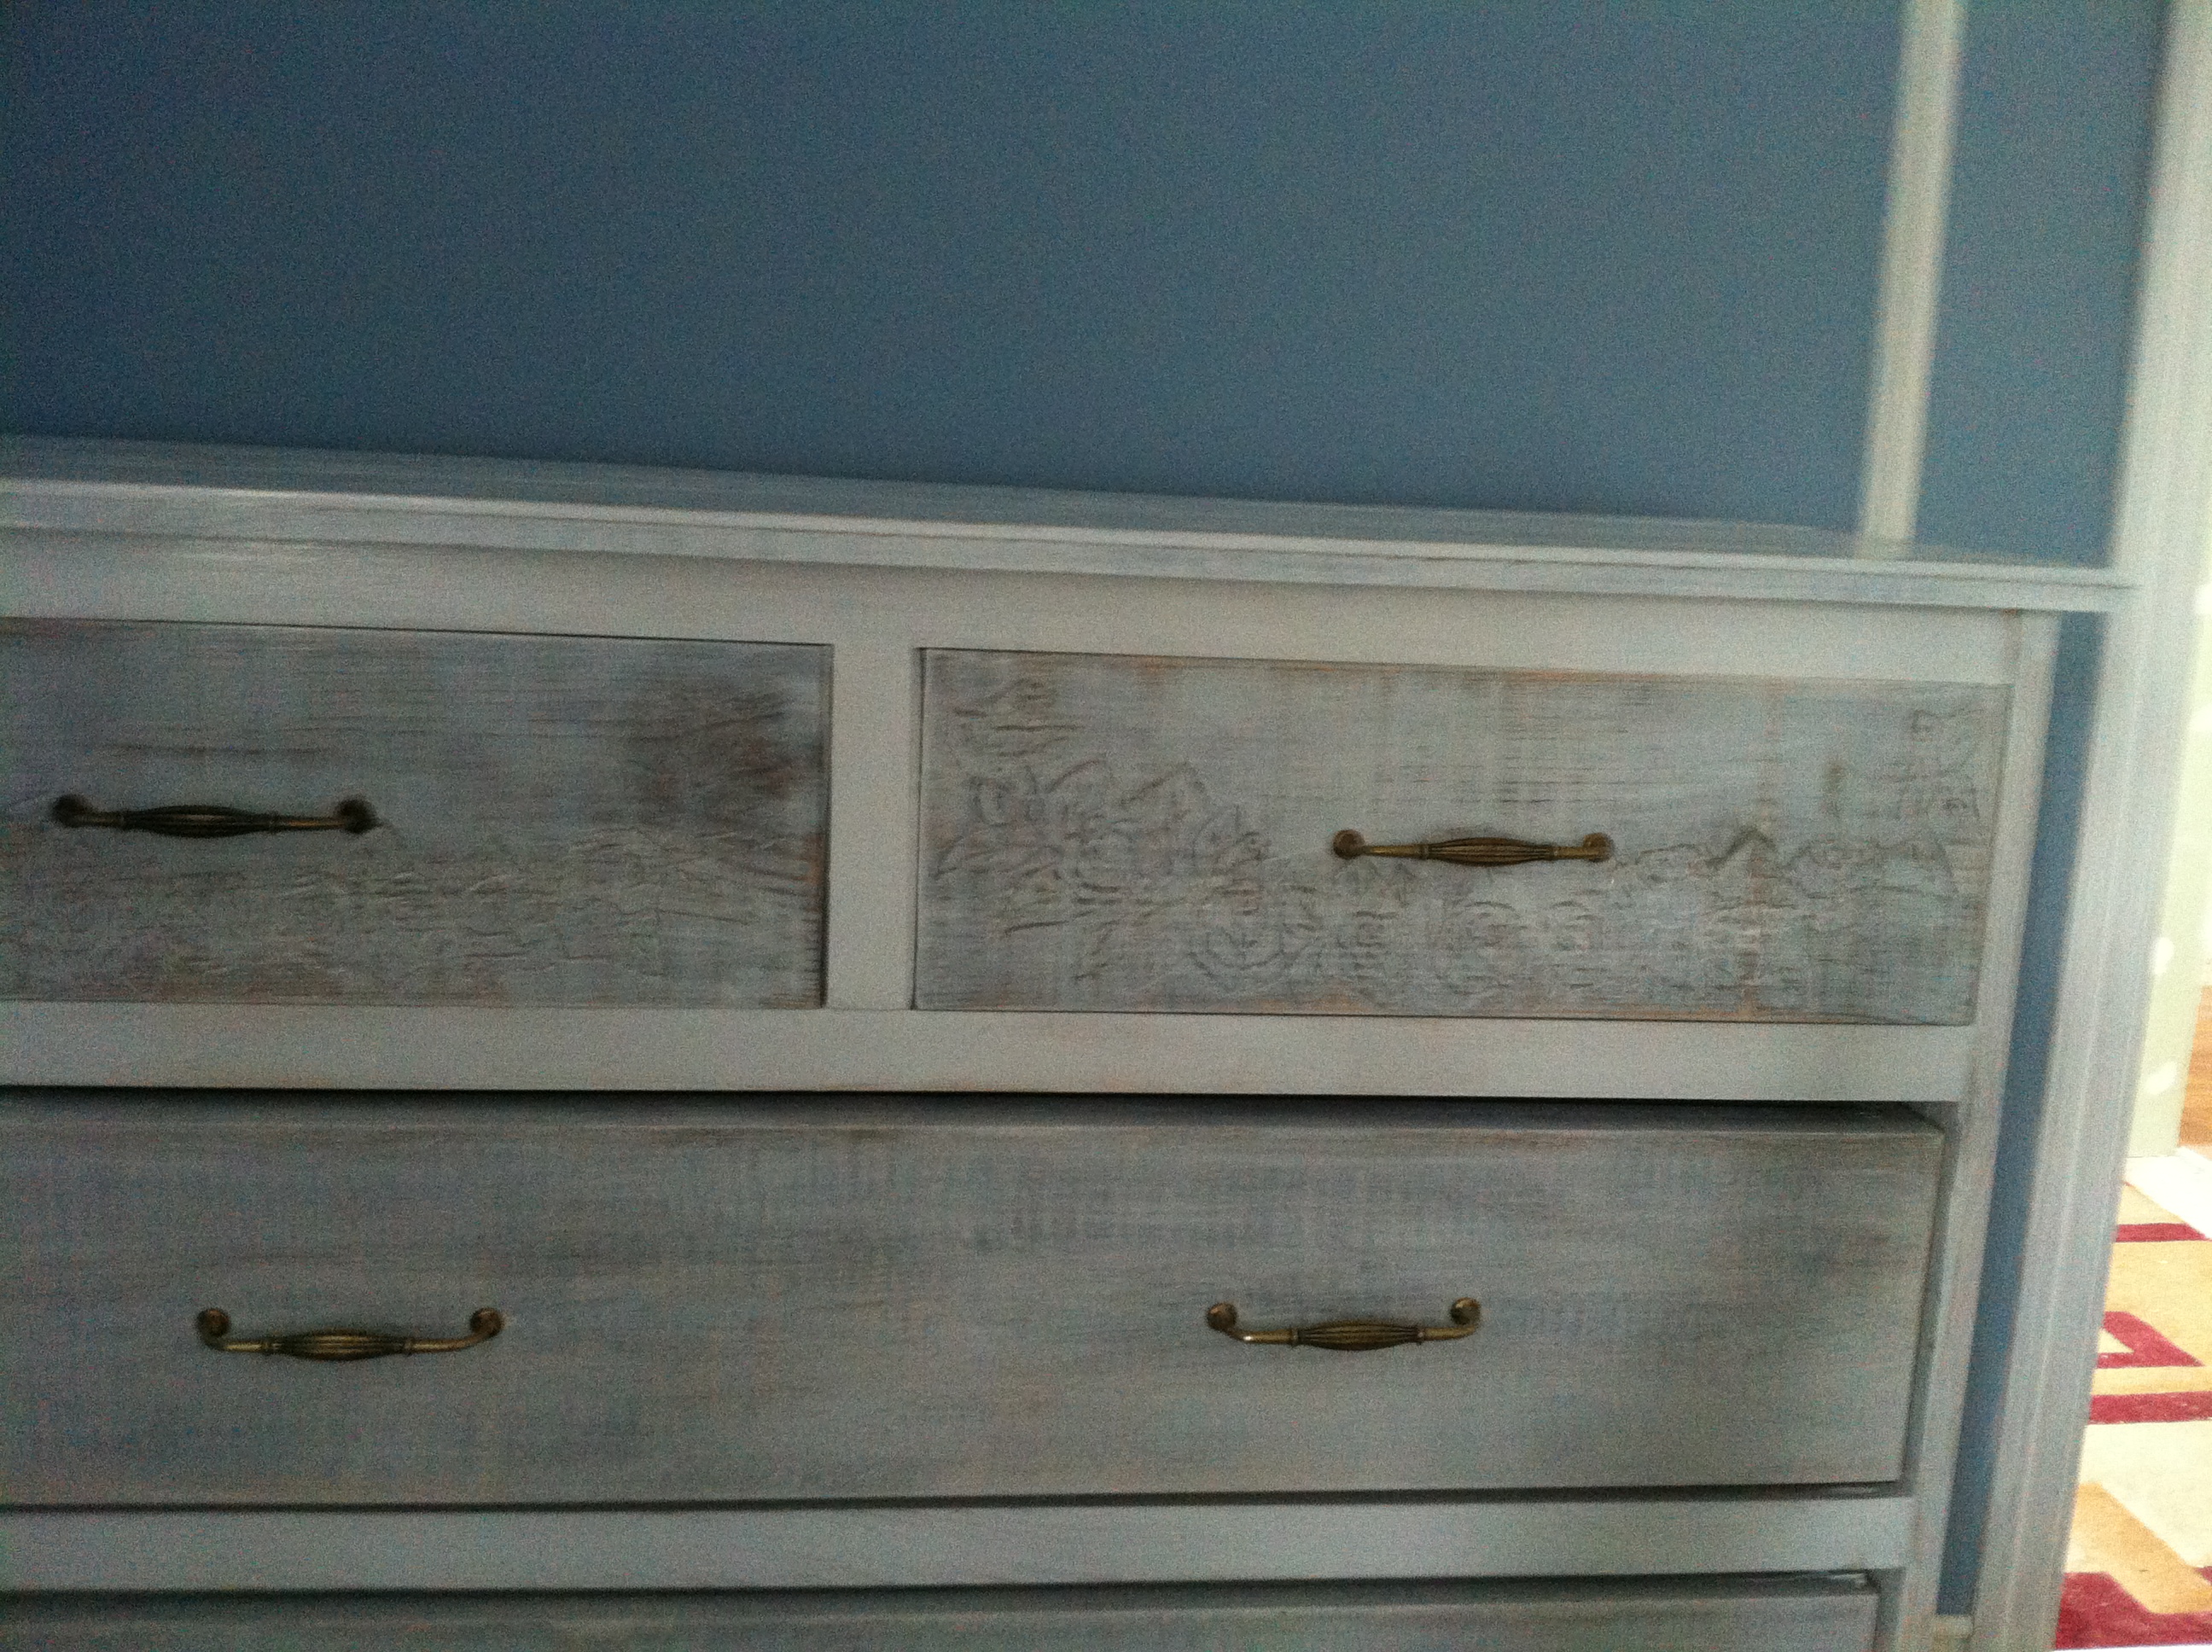
Hello. I have one built, about 90% done just need some staining and paint. My wife and I went to home depot today to look at paint and looked are your intellectual because we really like how yours turned out. Intellectual looks to be a dark gray? In your pictures it looks like there is a possible tint of a blue? What finish did you get? We bought a sample and painted a piece of the wood to see how it would turn out in our room. Doesn't seem to match your color.
I made some dimension alterations to our, will post picture when its complete.
Tue, 02/16/2016 - 20:14
The color is intellectual, but the light coming in might make it look a little blueish. Also the color we have our walls painted behind it is "steel blue," so it may be making the buffet look more blue than gray. The finish we used was satin. Sorry this is a late reply but I hope you got yours all finished and love it!
Fri, 01/08/2016 - 20:24
Can anyone recommend where to find 2x3 pieces of lumber like she calls for in this plan? We can find 1x3 and 2x4 but no 2x3s anywhere!
Fri, 01/15/2016 - 14:43
Is that a 1x10 or 2x10 on the top. All 2x10 I find are rounded on the edges and yours look squared. Ran threw the table saw but now I am short and to big of a gap.
Tue, 02/16/2016 - 20:18
I used 2 2x10s for the top but I jointed them first so that may be why it looks squared. I ended up rounding it over a little bit anyway to soften the edges. I ended up cutting off more than I wanted also and while I didnt have a gap on mine - the edge doesn't hang over on the front as much as I would like.
Fri, 01/15/2016 - 18:31
Did you use a 2x10 on the top? I can't tell. If so where did you find one with squared edges??
Fri, 02/05/2016 - 10:29
what color stain did you use? and when you painted it, did you spray it or roll it on? I'm struggling with the quality of paint job I can do once I finish a project
Tue, 02/16/2016 - 20:22
The stain I used was Miniwax "Special Walnut." I actually used our paint sprayer that we got for a christmas present for the first time! It took a lot of practice and I ended up having to sand off a bunch before I got the technique down, but in the end it was worth it. The sprayer makes it look much more professional and finished. Just be sure if you use a polyeurathane for a sealer, that you get a water based and not an oil based.
Thu, 10/27/2016 - 11:08
Do your doors stop when sliding open or can they slide off? Great Work!
Sun, 01/15/2017 - 07:07
Sorry for late reply, I never get notified when there has been a comment. At the moment they slide all the way off, but there is a simple pin system you can use that stops them from sliding off. Thank you!
Mon, 12/12/2016 - 08:53
So in the materials it lists
2 - project panel pieces 17-1/4" x 36" (may be advertised as 18" wide project panel - measure in store)
What is the thickness of these supposed to be? I cannot find this at any hardware store and was going to ise 1x4 strips instead. My question is, if this is going to have heavy use, do I need to use thicker boards to ensure it can hold the full weight of the top?
This is for my art studio and will hold tools, printer, laptop ect.
thanks!
B
Mon, 12/12/2016 - 12:03
So in the materials it lists
2 - project panel pieces 17-1/4" x 36" (may be advertised as 18" wide project panel - measure in store)
What is the thickness of these supposed to be? I cannot find this at any hardware store and was going to ise 1x4 strips instead. My question is, if this is going to have heavy use, do I need to use thicker boards to ensure it can hold the full weight of the top?
This is for my art studio and will hold tools, printer, laptop ect.
thanks!
B
Sun, 01/15/2017 - 07:11
I believe the thicknesses are the same of 1x material that you find at a big box store. If you are going to lowes or home depot it would be in the back of the section where the nice 1x boards are (pine ranging from 1x2-1x12). They will be wrapped completely in plastic shrink wrap. Hope this helps, sorry for late reply!
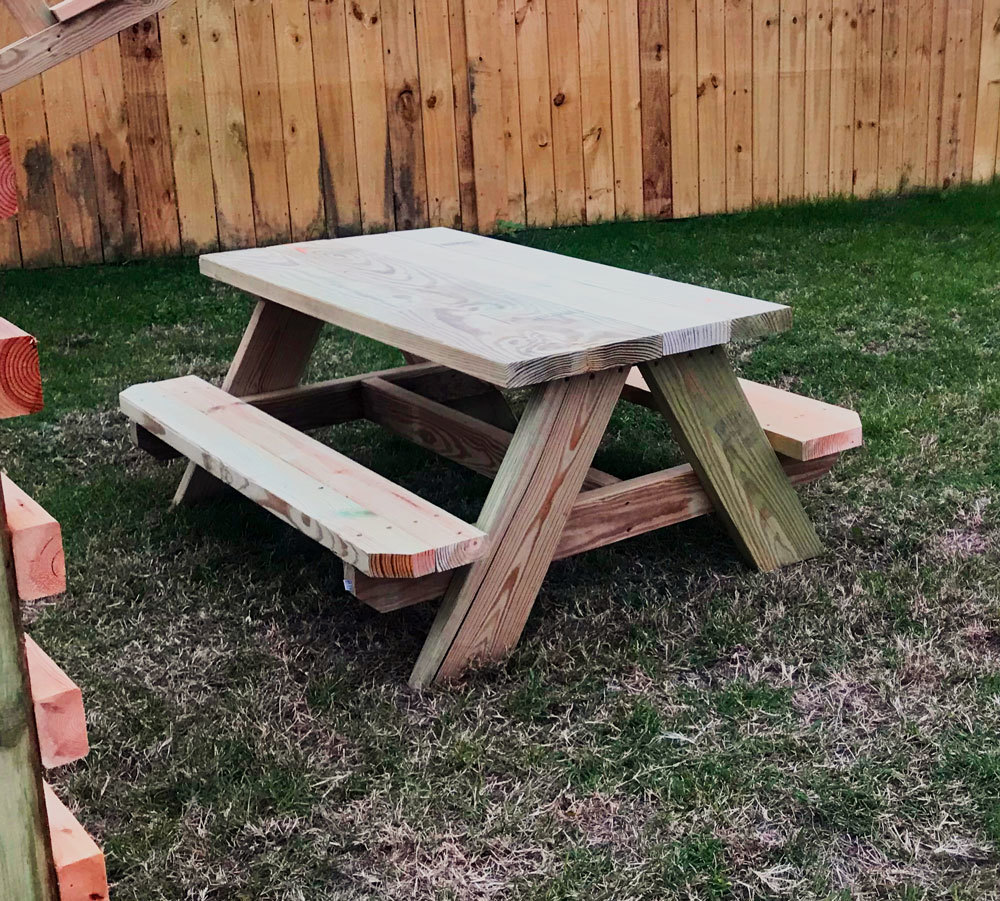
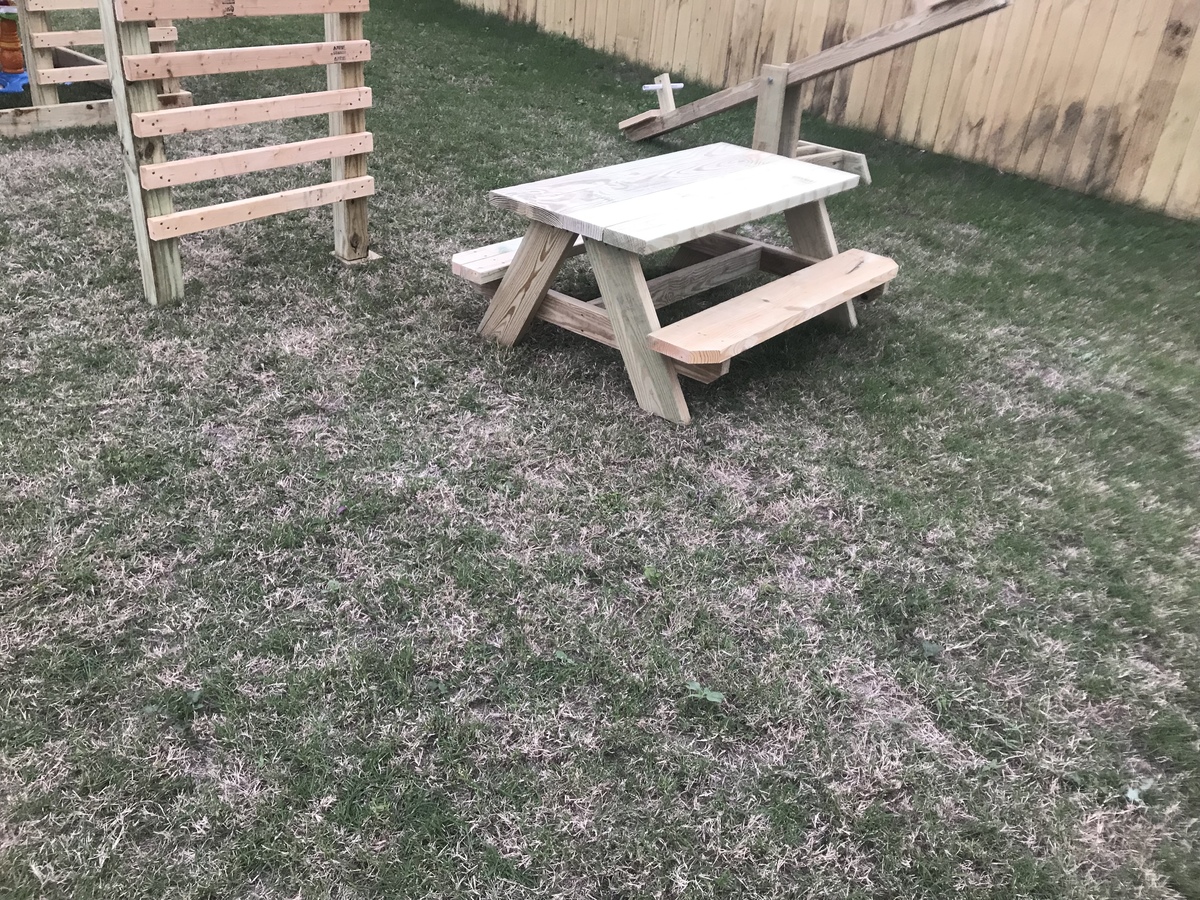
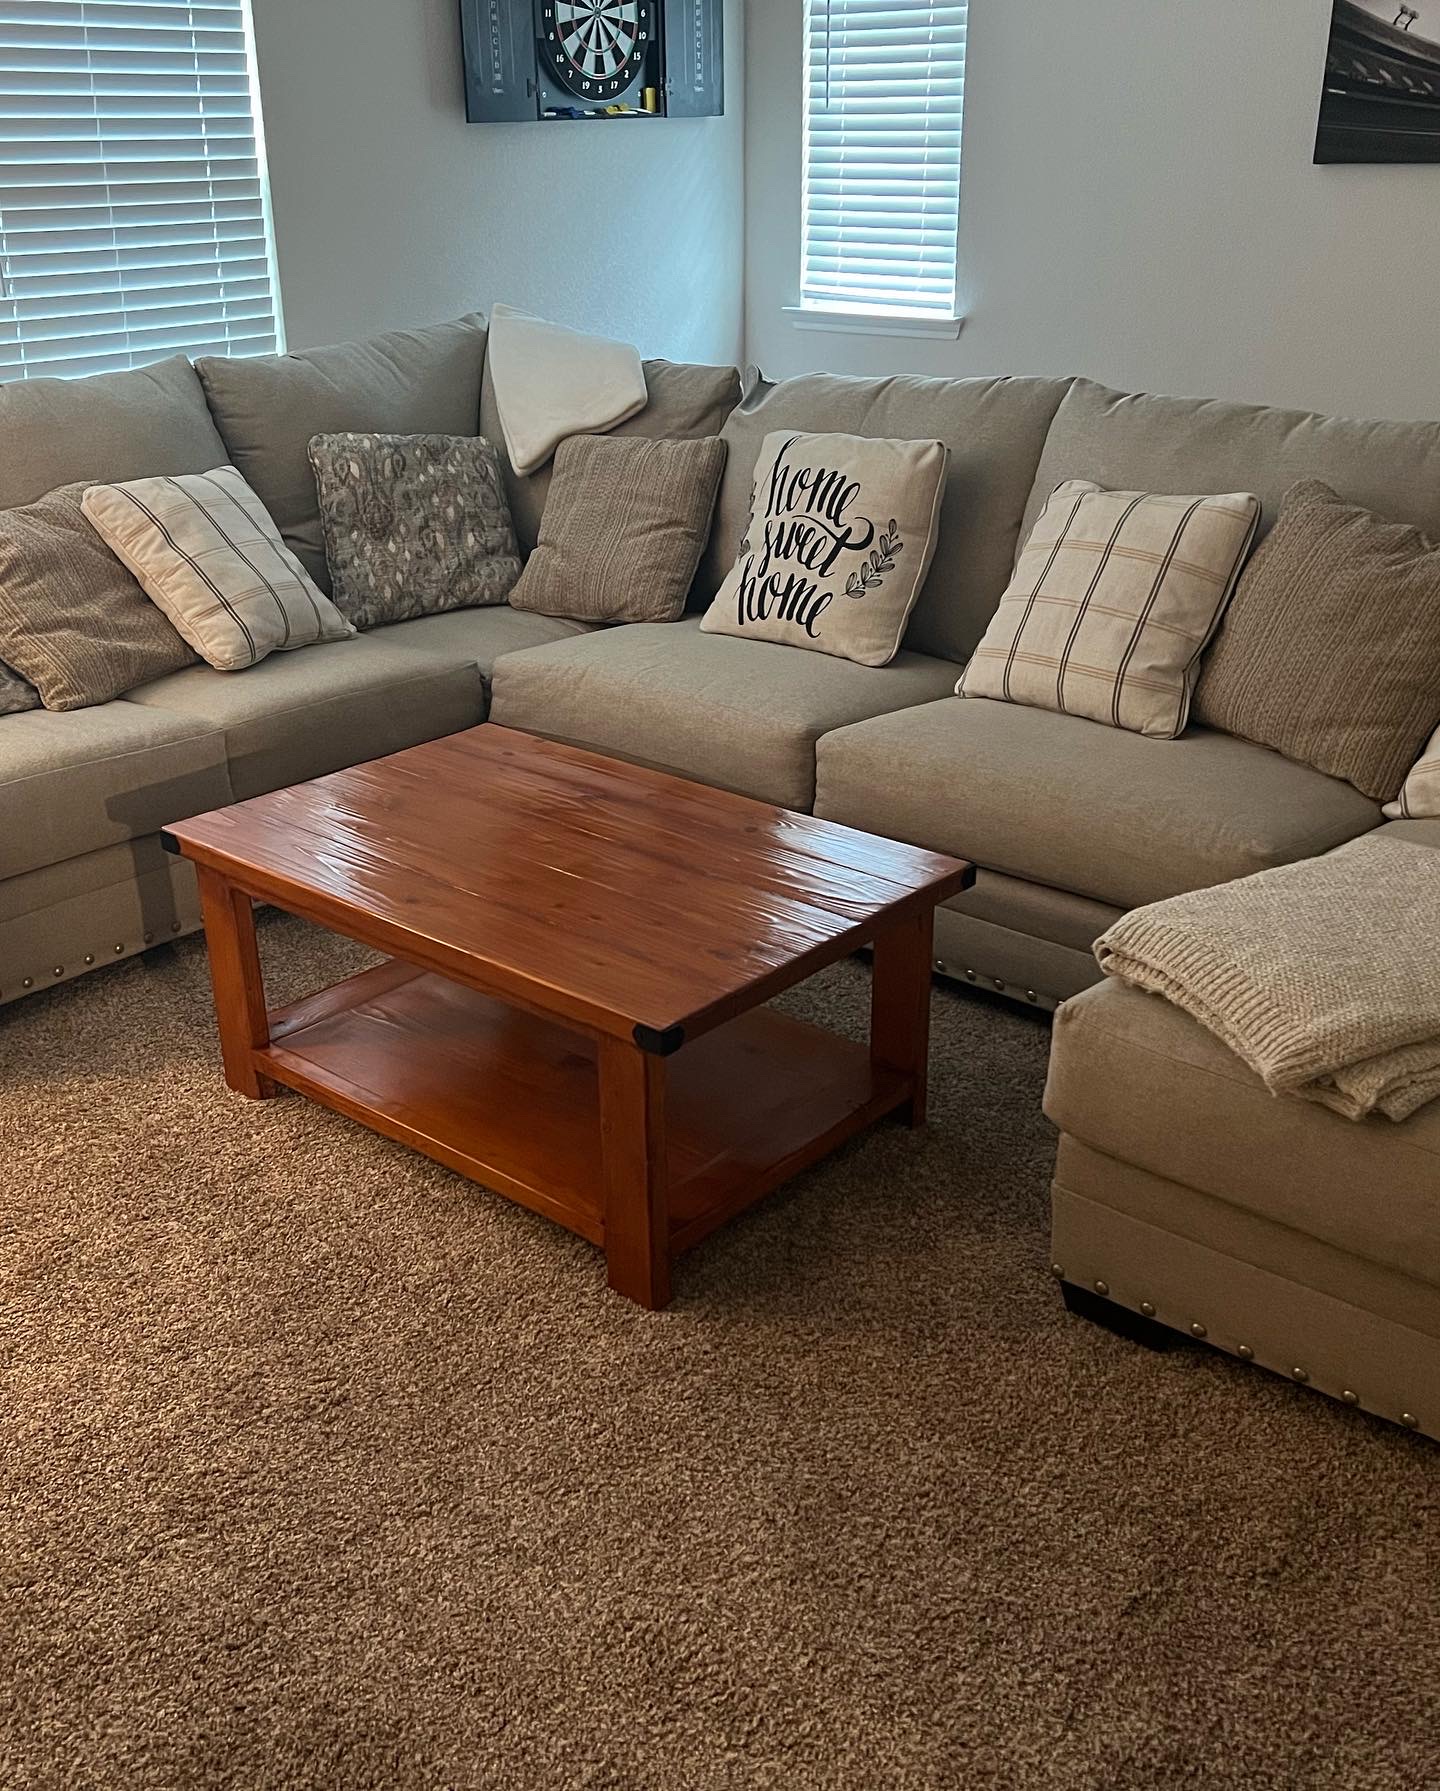
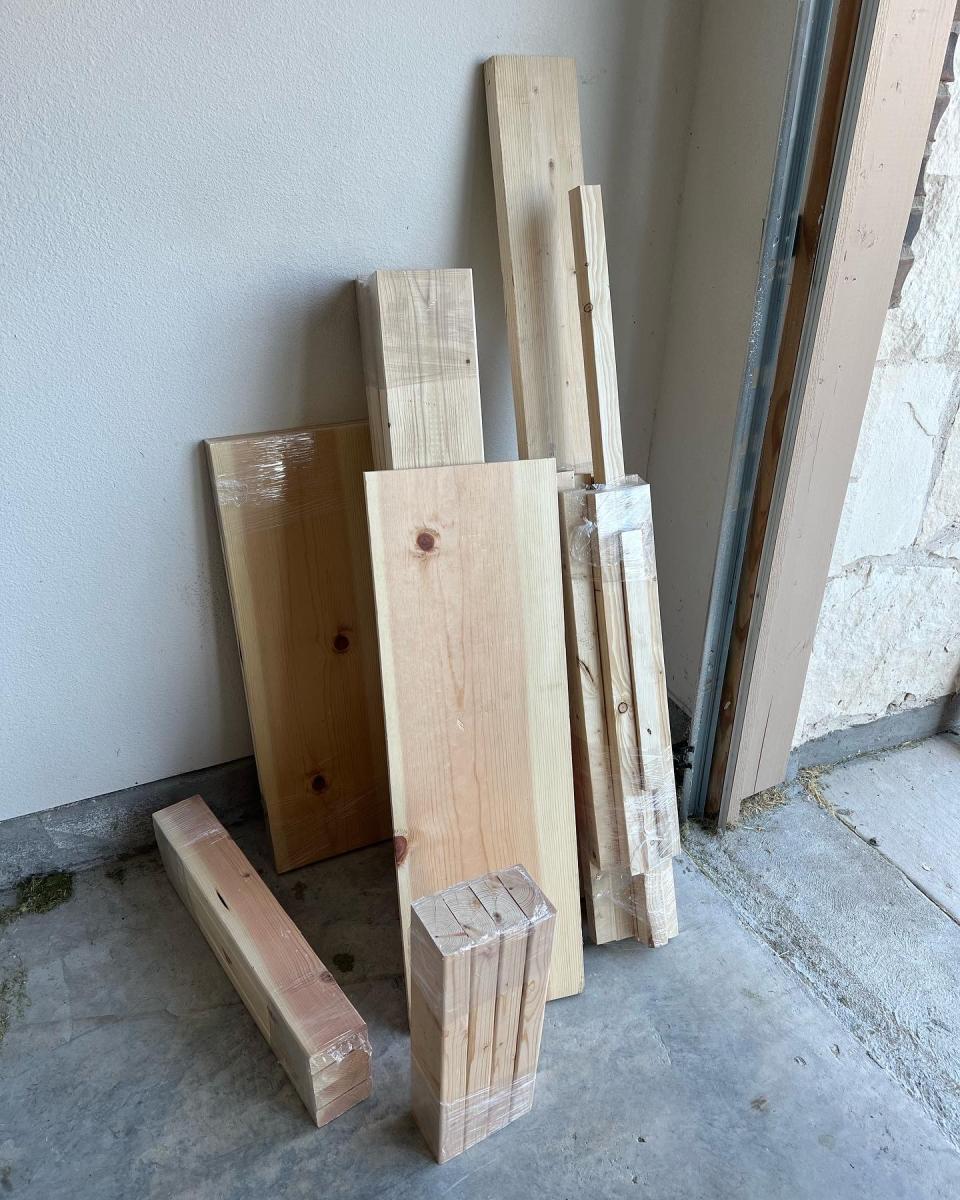
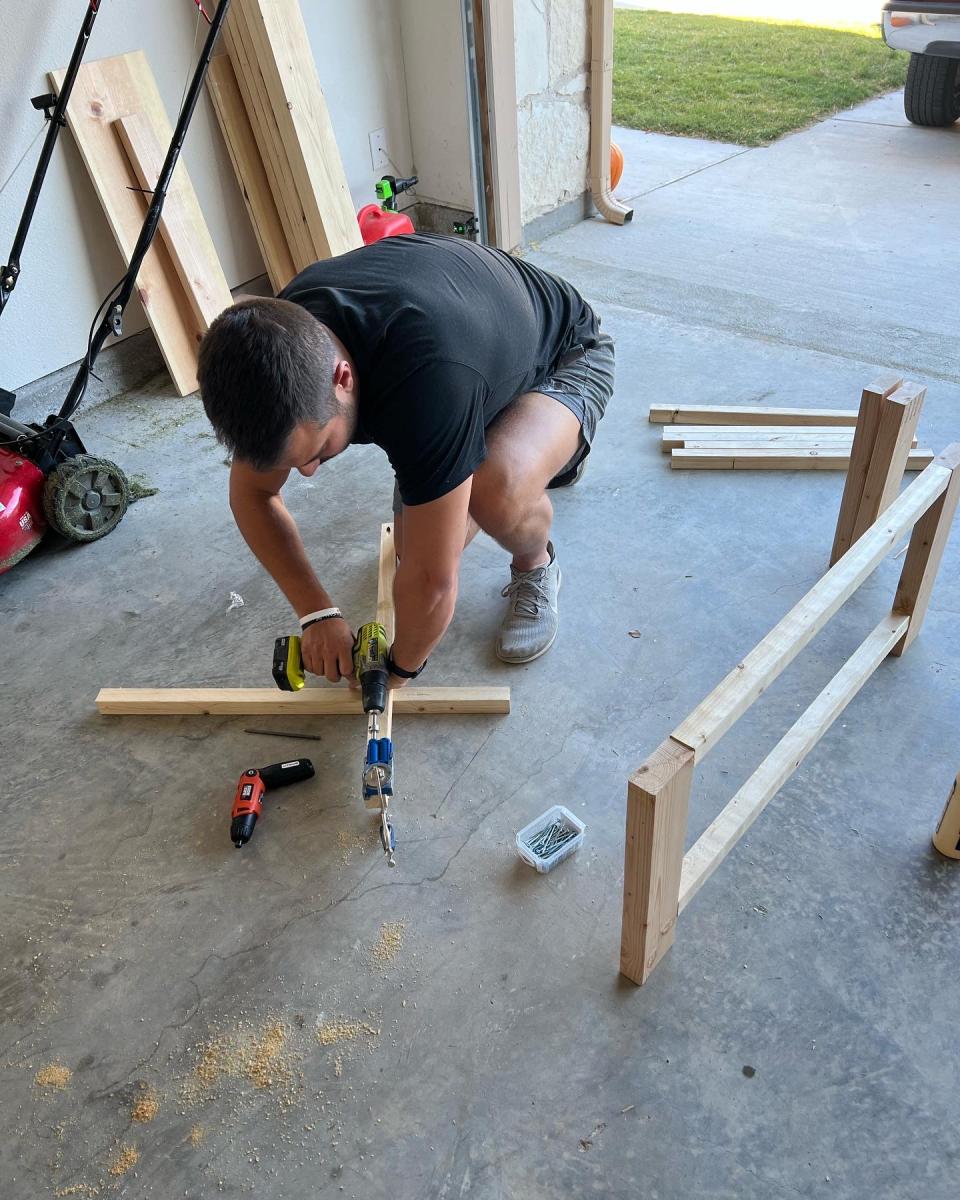
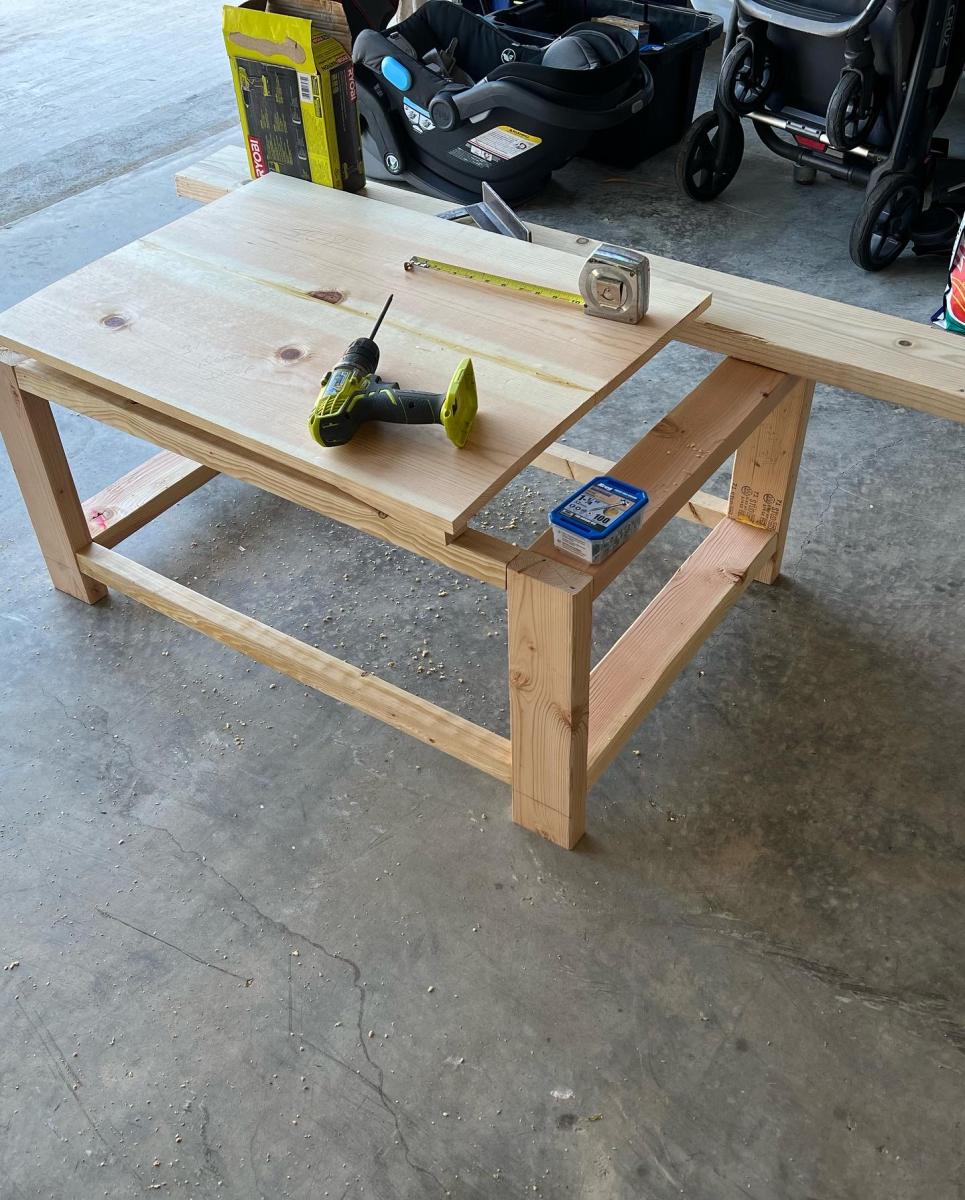
Picnic table

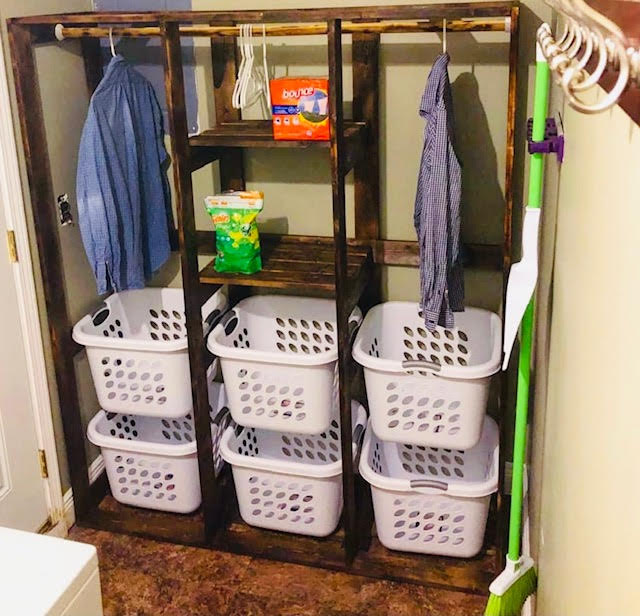
Love it so much! It holds every single piece of my husbands gear, and he finally keeps it all in the garage instead of dispersed on the ground around his office (gag). I’m currently making a vinyl sticker with his name and number to put on the front bottom piece! Thank you, Ana!
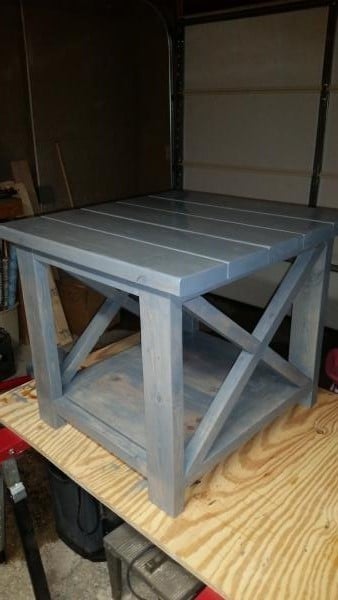
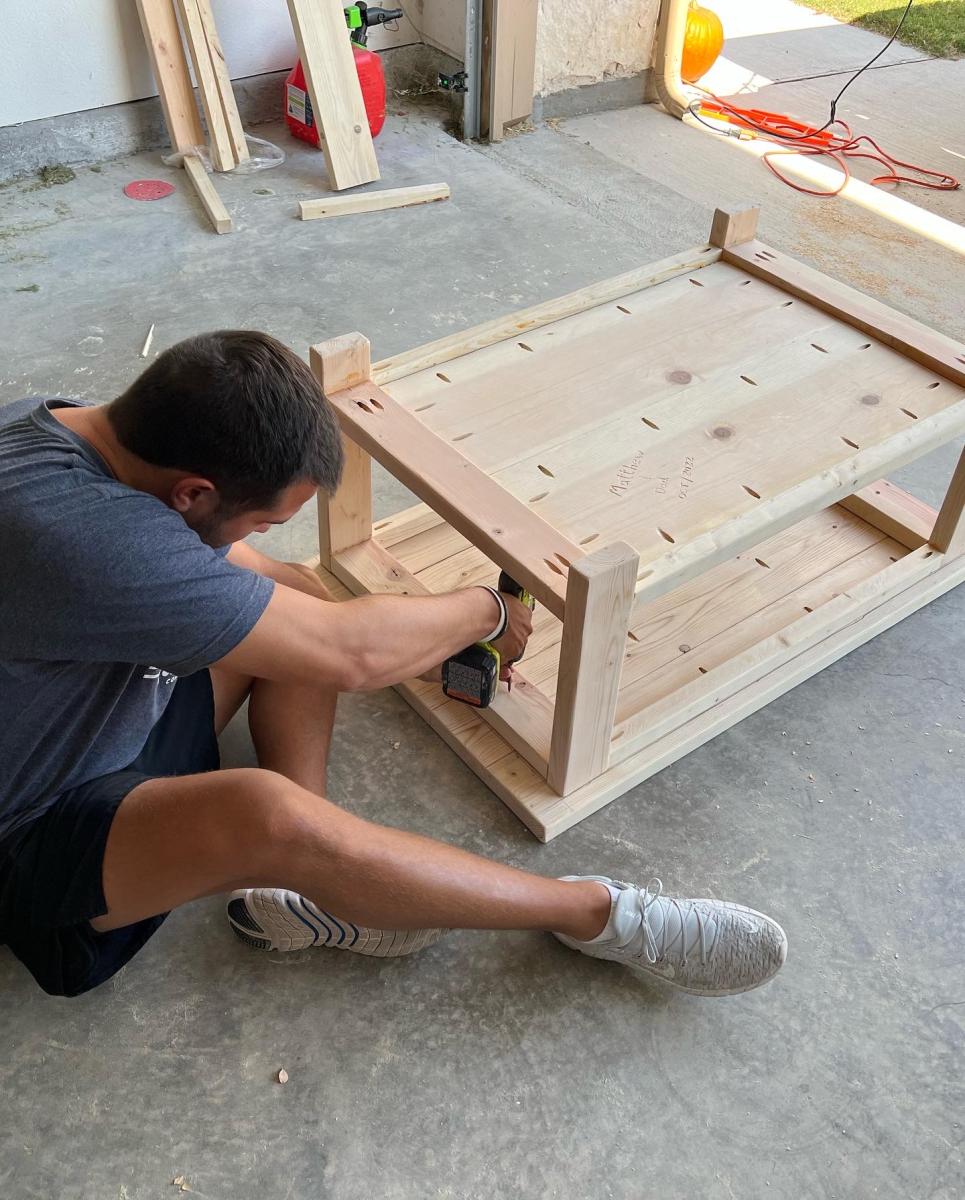
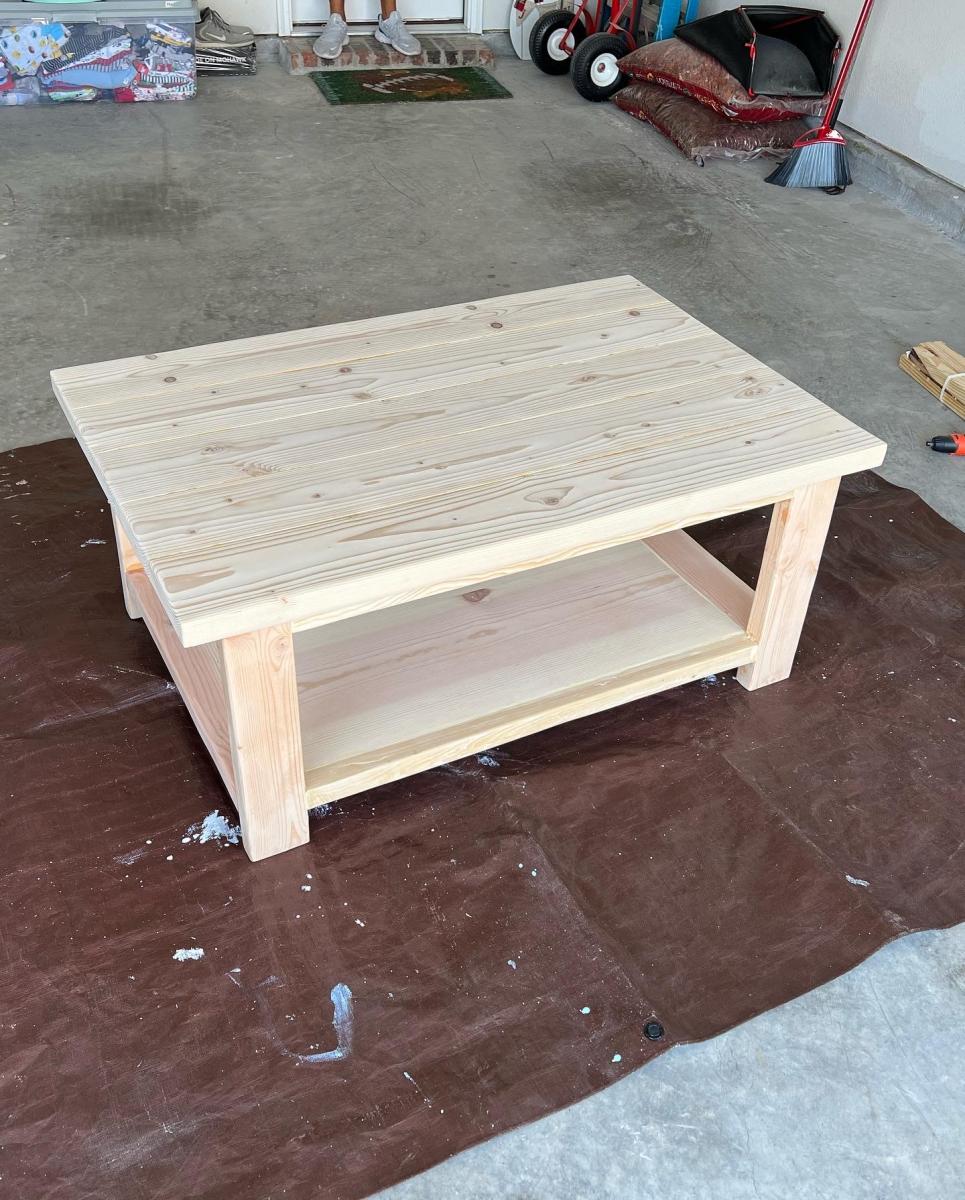
I took this project on not sure how it would come out and I am very happy with the results!!
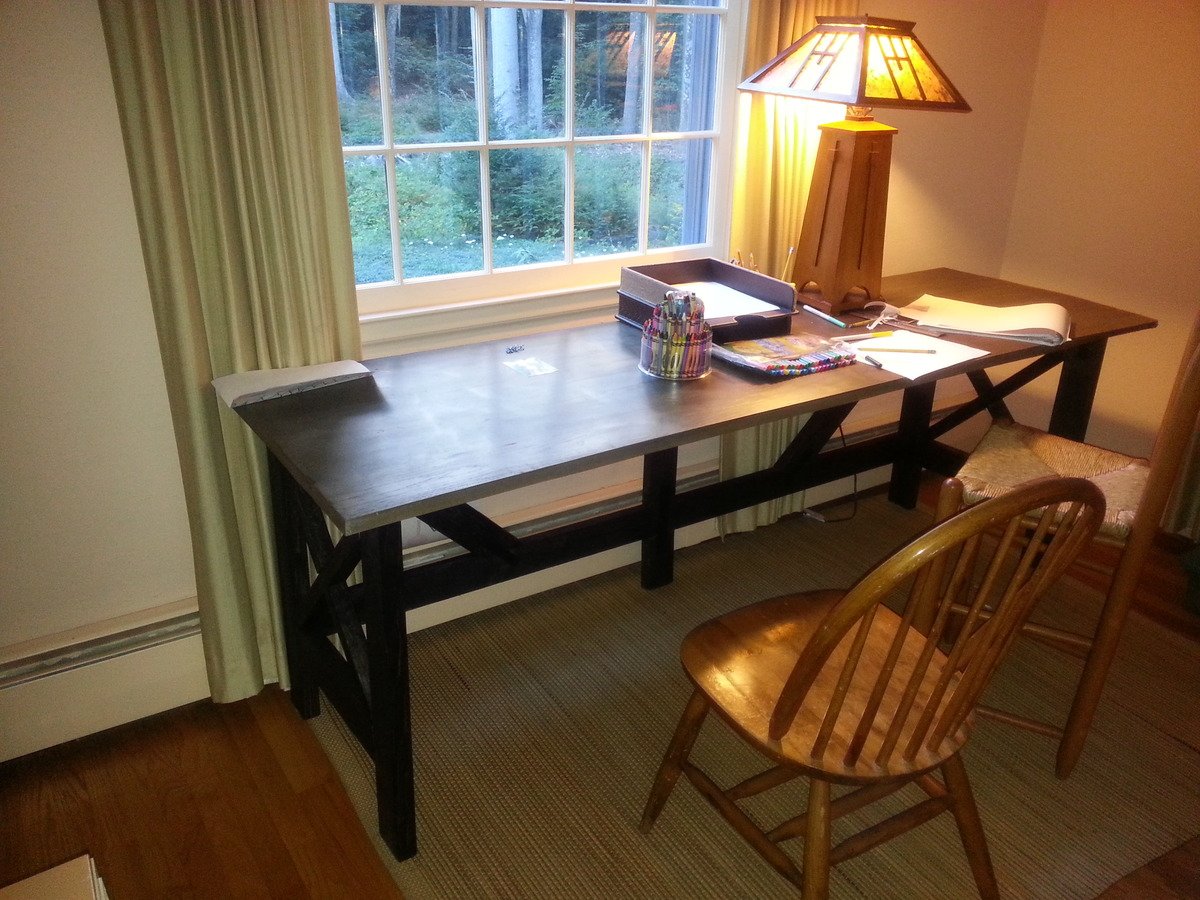
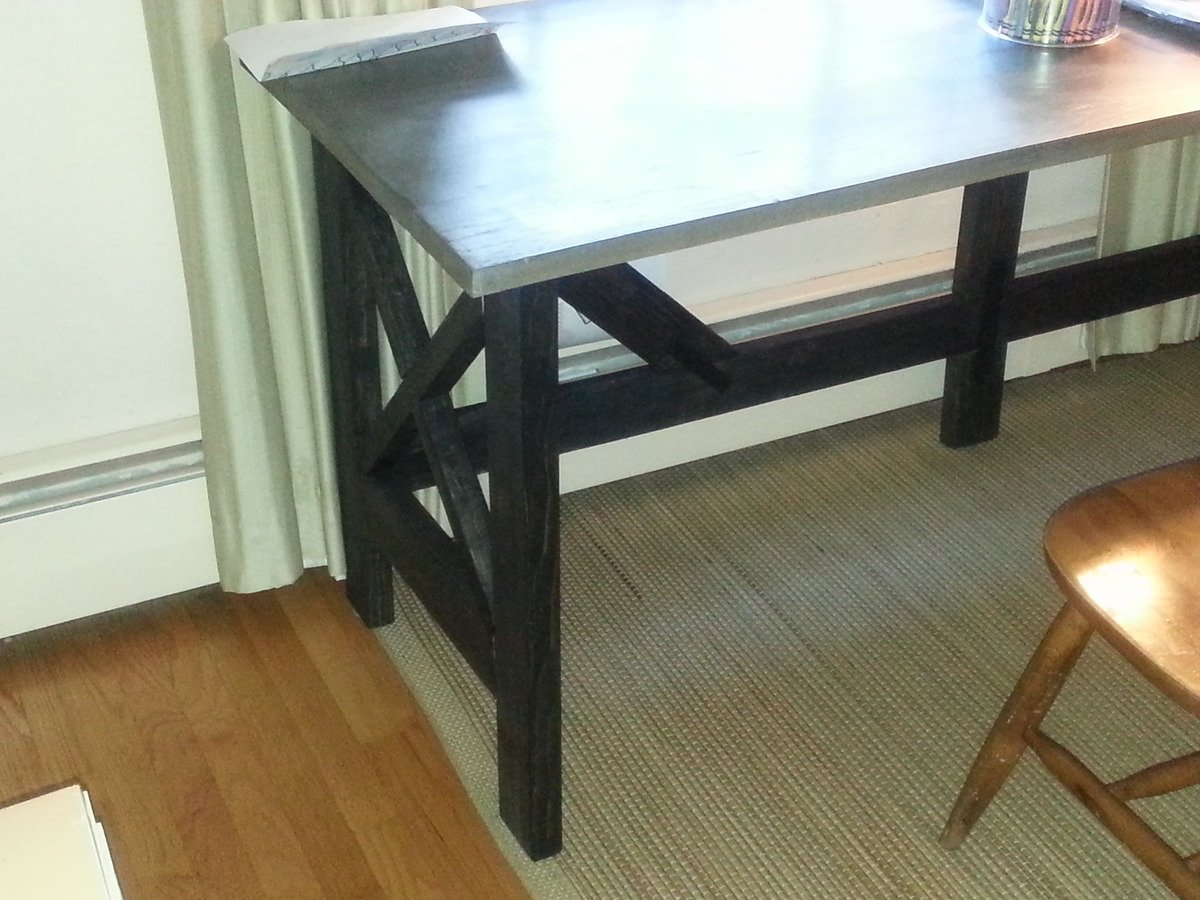
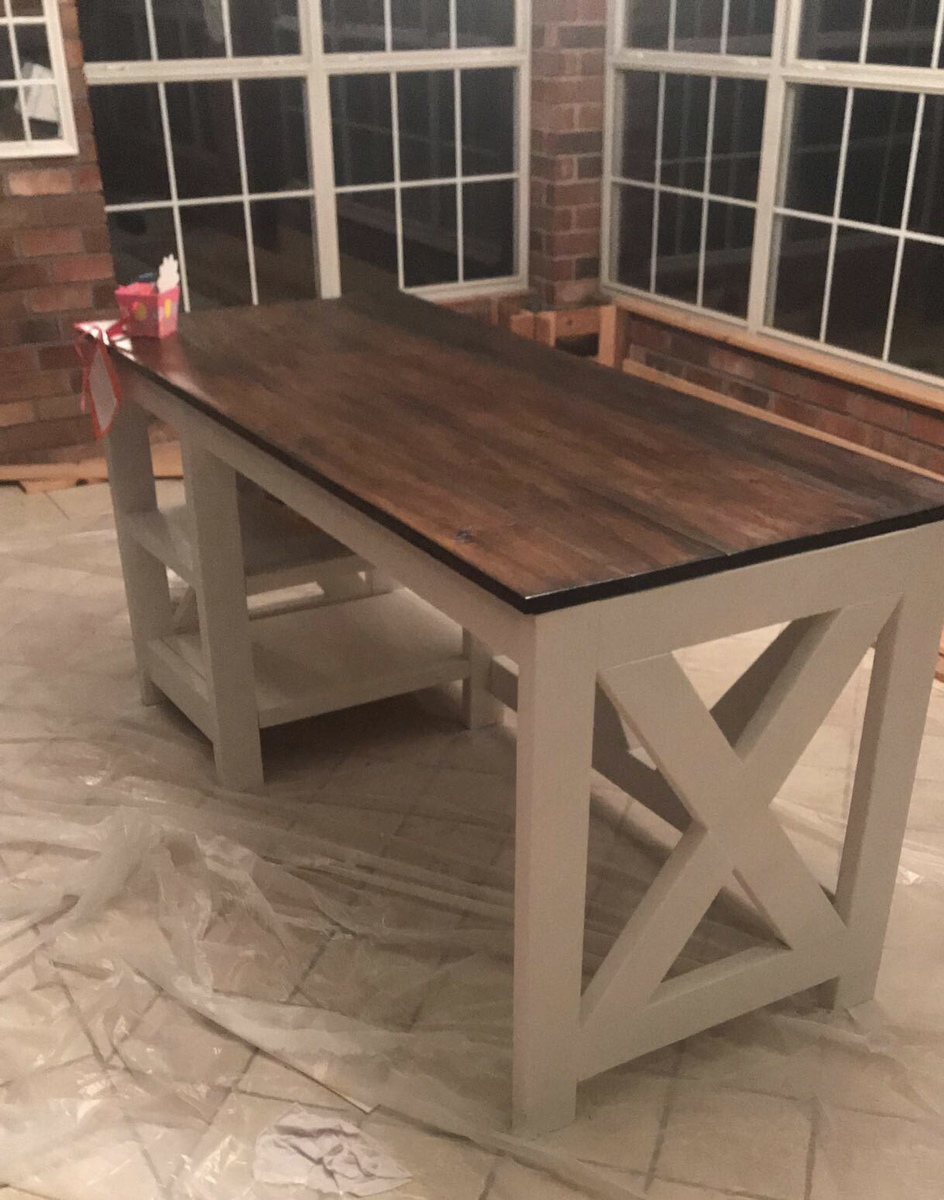
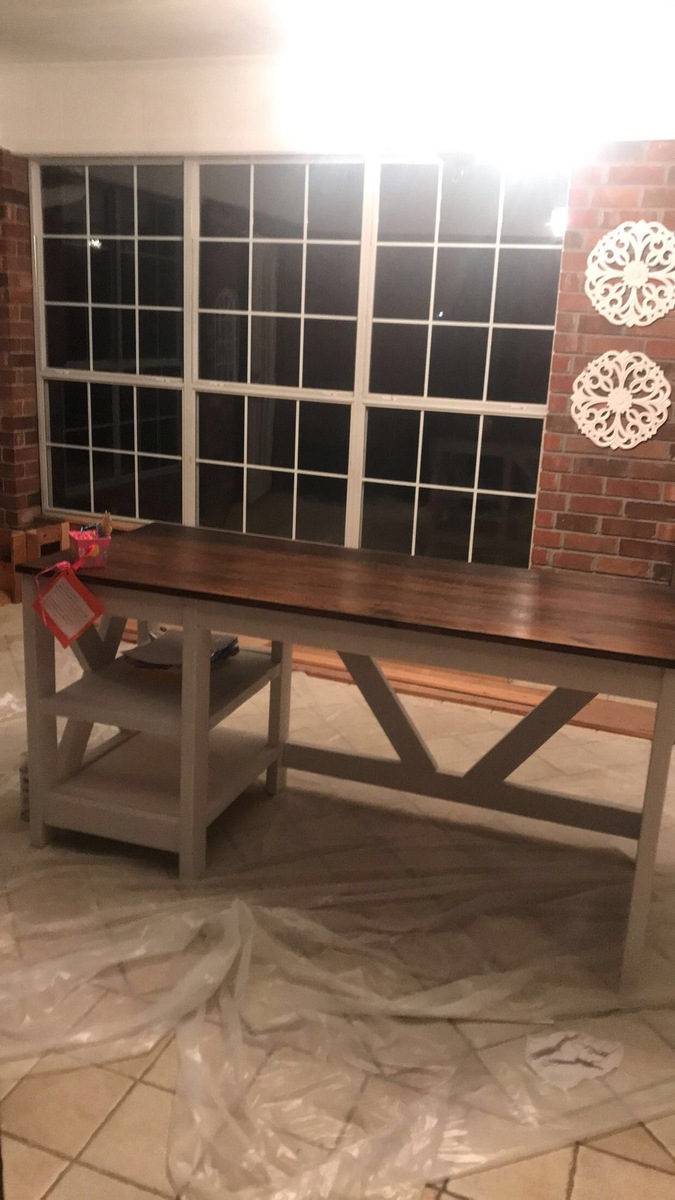
I wanted to create a library table (big desk) for my two youngest boys so they would have a craft/homework space. I liked the plan for rustic x console so I adapted it to make this 7 ft desk. Kids love it so much I couldn't even get a picture of it before they started using it.

Fri, 09/13/2013 - 07:02
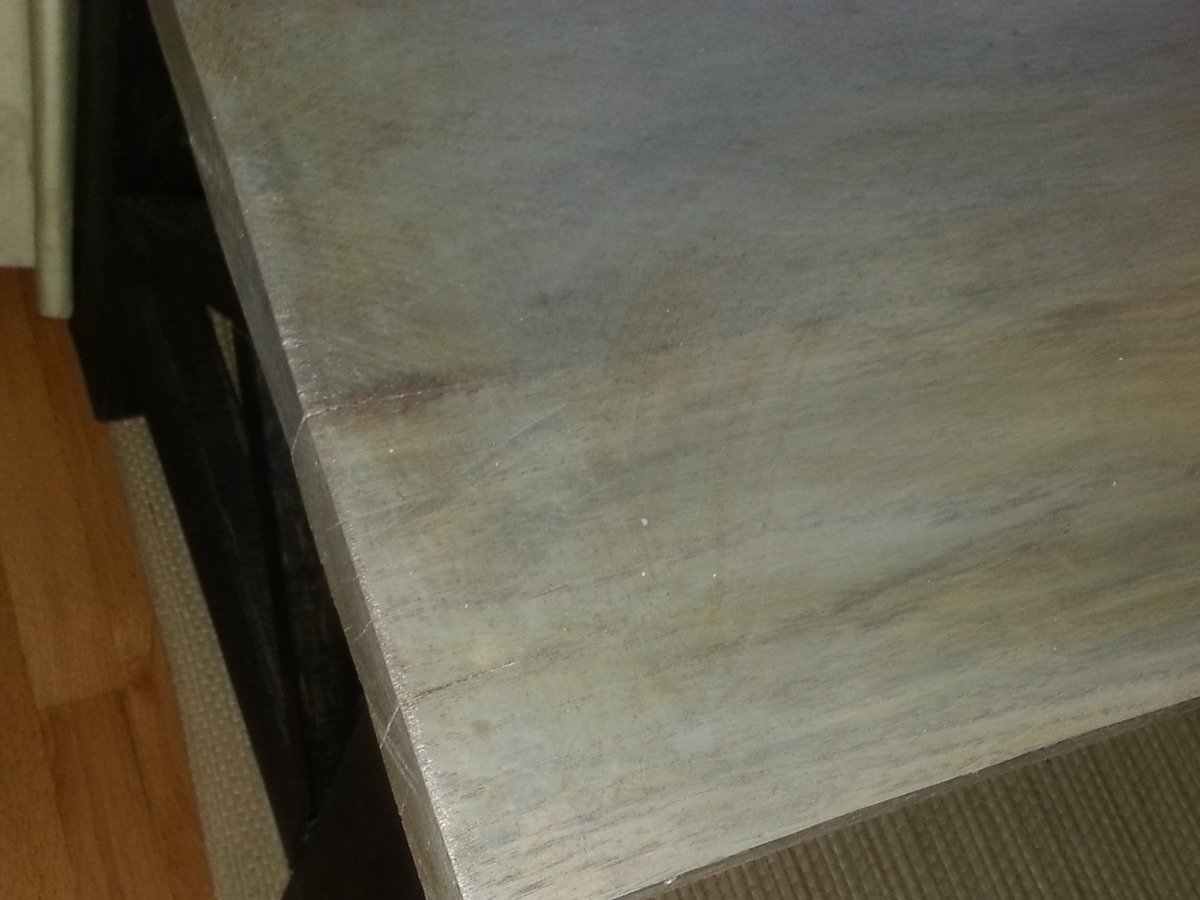
I love what you did with the finish on the top. It makes it look like metal. It looks so good with the black base. Very unique!!
Fri, 09/13/2013 - 11:07
The vinegar will turn oak dark purple (not a chemist so I can't tell you why). The first coat of stain (gray) protects the wood (but not entirely) from that reaction. So when you rub the rusty steel wool and vinegar over the surface and let it sit, it creates depth. But it is easy.
Fri, 05/09/2014 - 07:55
This desk is great! I love the X plans, and I need a better desk than what I have. Would you be willing to do a plan post to share how you modified the console to a desk. While I've been lurking Ana-White for a few months, I've yet to actually build things, so I'm not sure I want to attempt going too far off plan on one of my first eventual projects.
Enjoyed this project. Already have a request to build a whole set.
I absolutely love how this turned out! Great plans! I used a lot of old wood my grandfather had so this project was extra special.

Sat, 01/05/2019 - 14:24
This is beautiful! Love that you are using your grandfather's tools too.

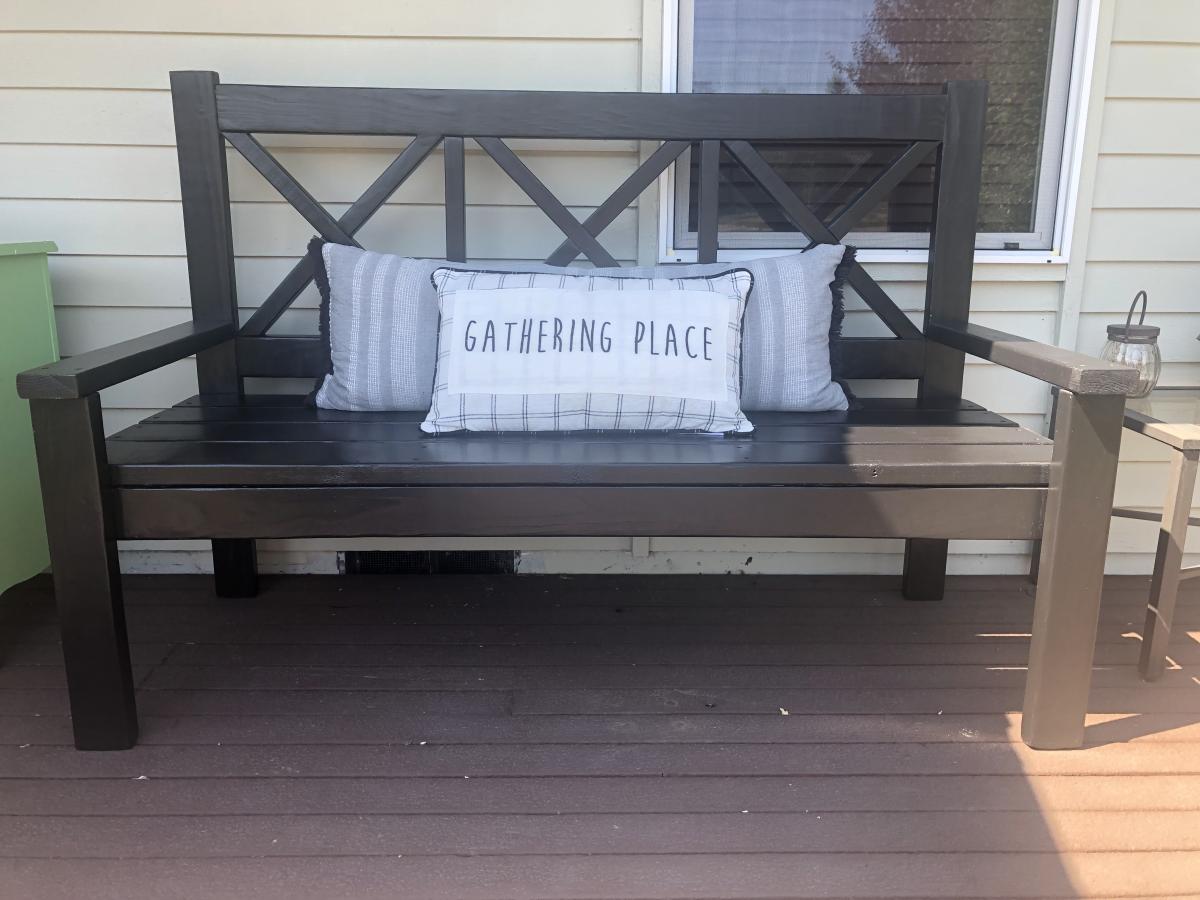
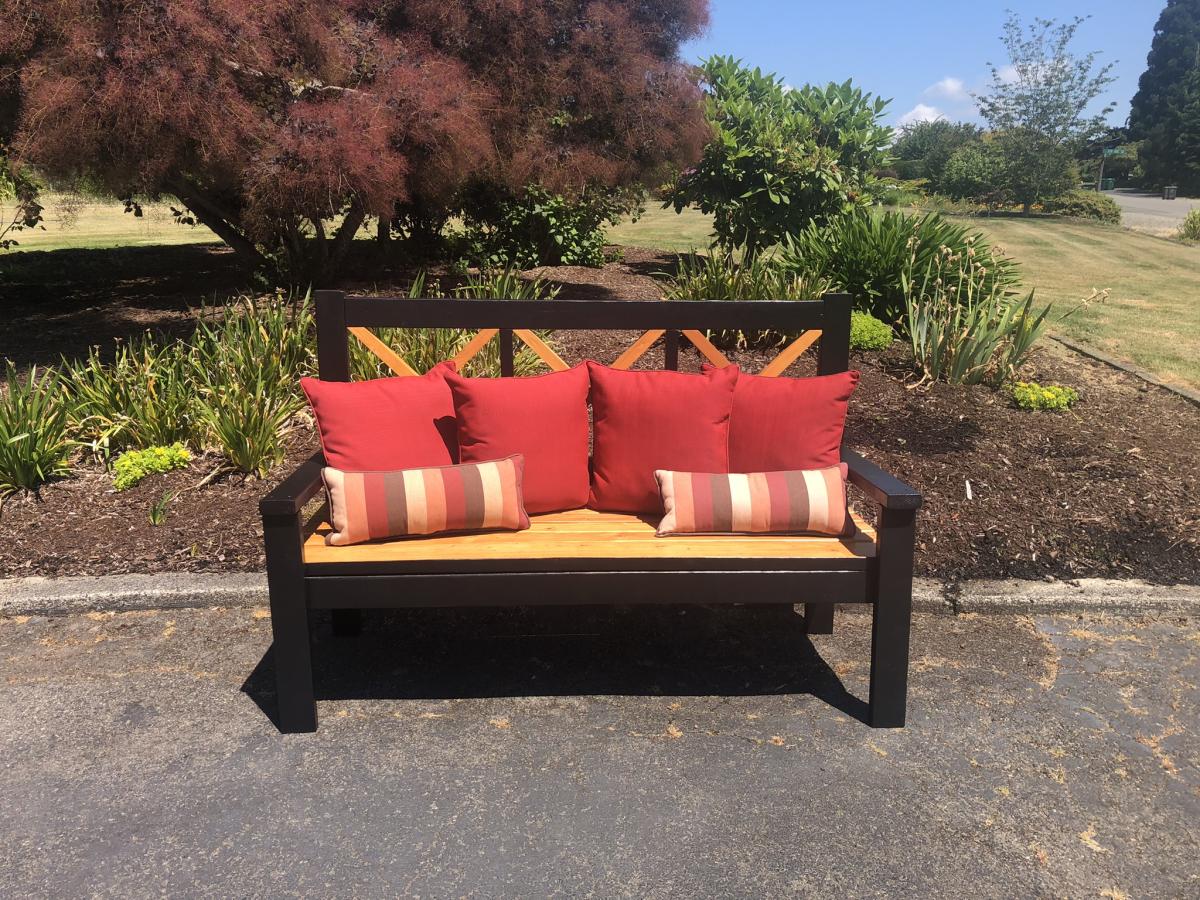
I have built 2 of the large porch bench with X backs - one was all black and the other stained & painted. The only thing I had trouble with was the X backs - but that was with me, not the plans. Lots of compliments on both of them!
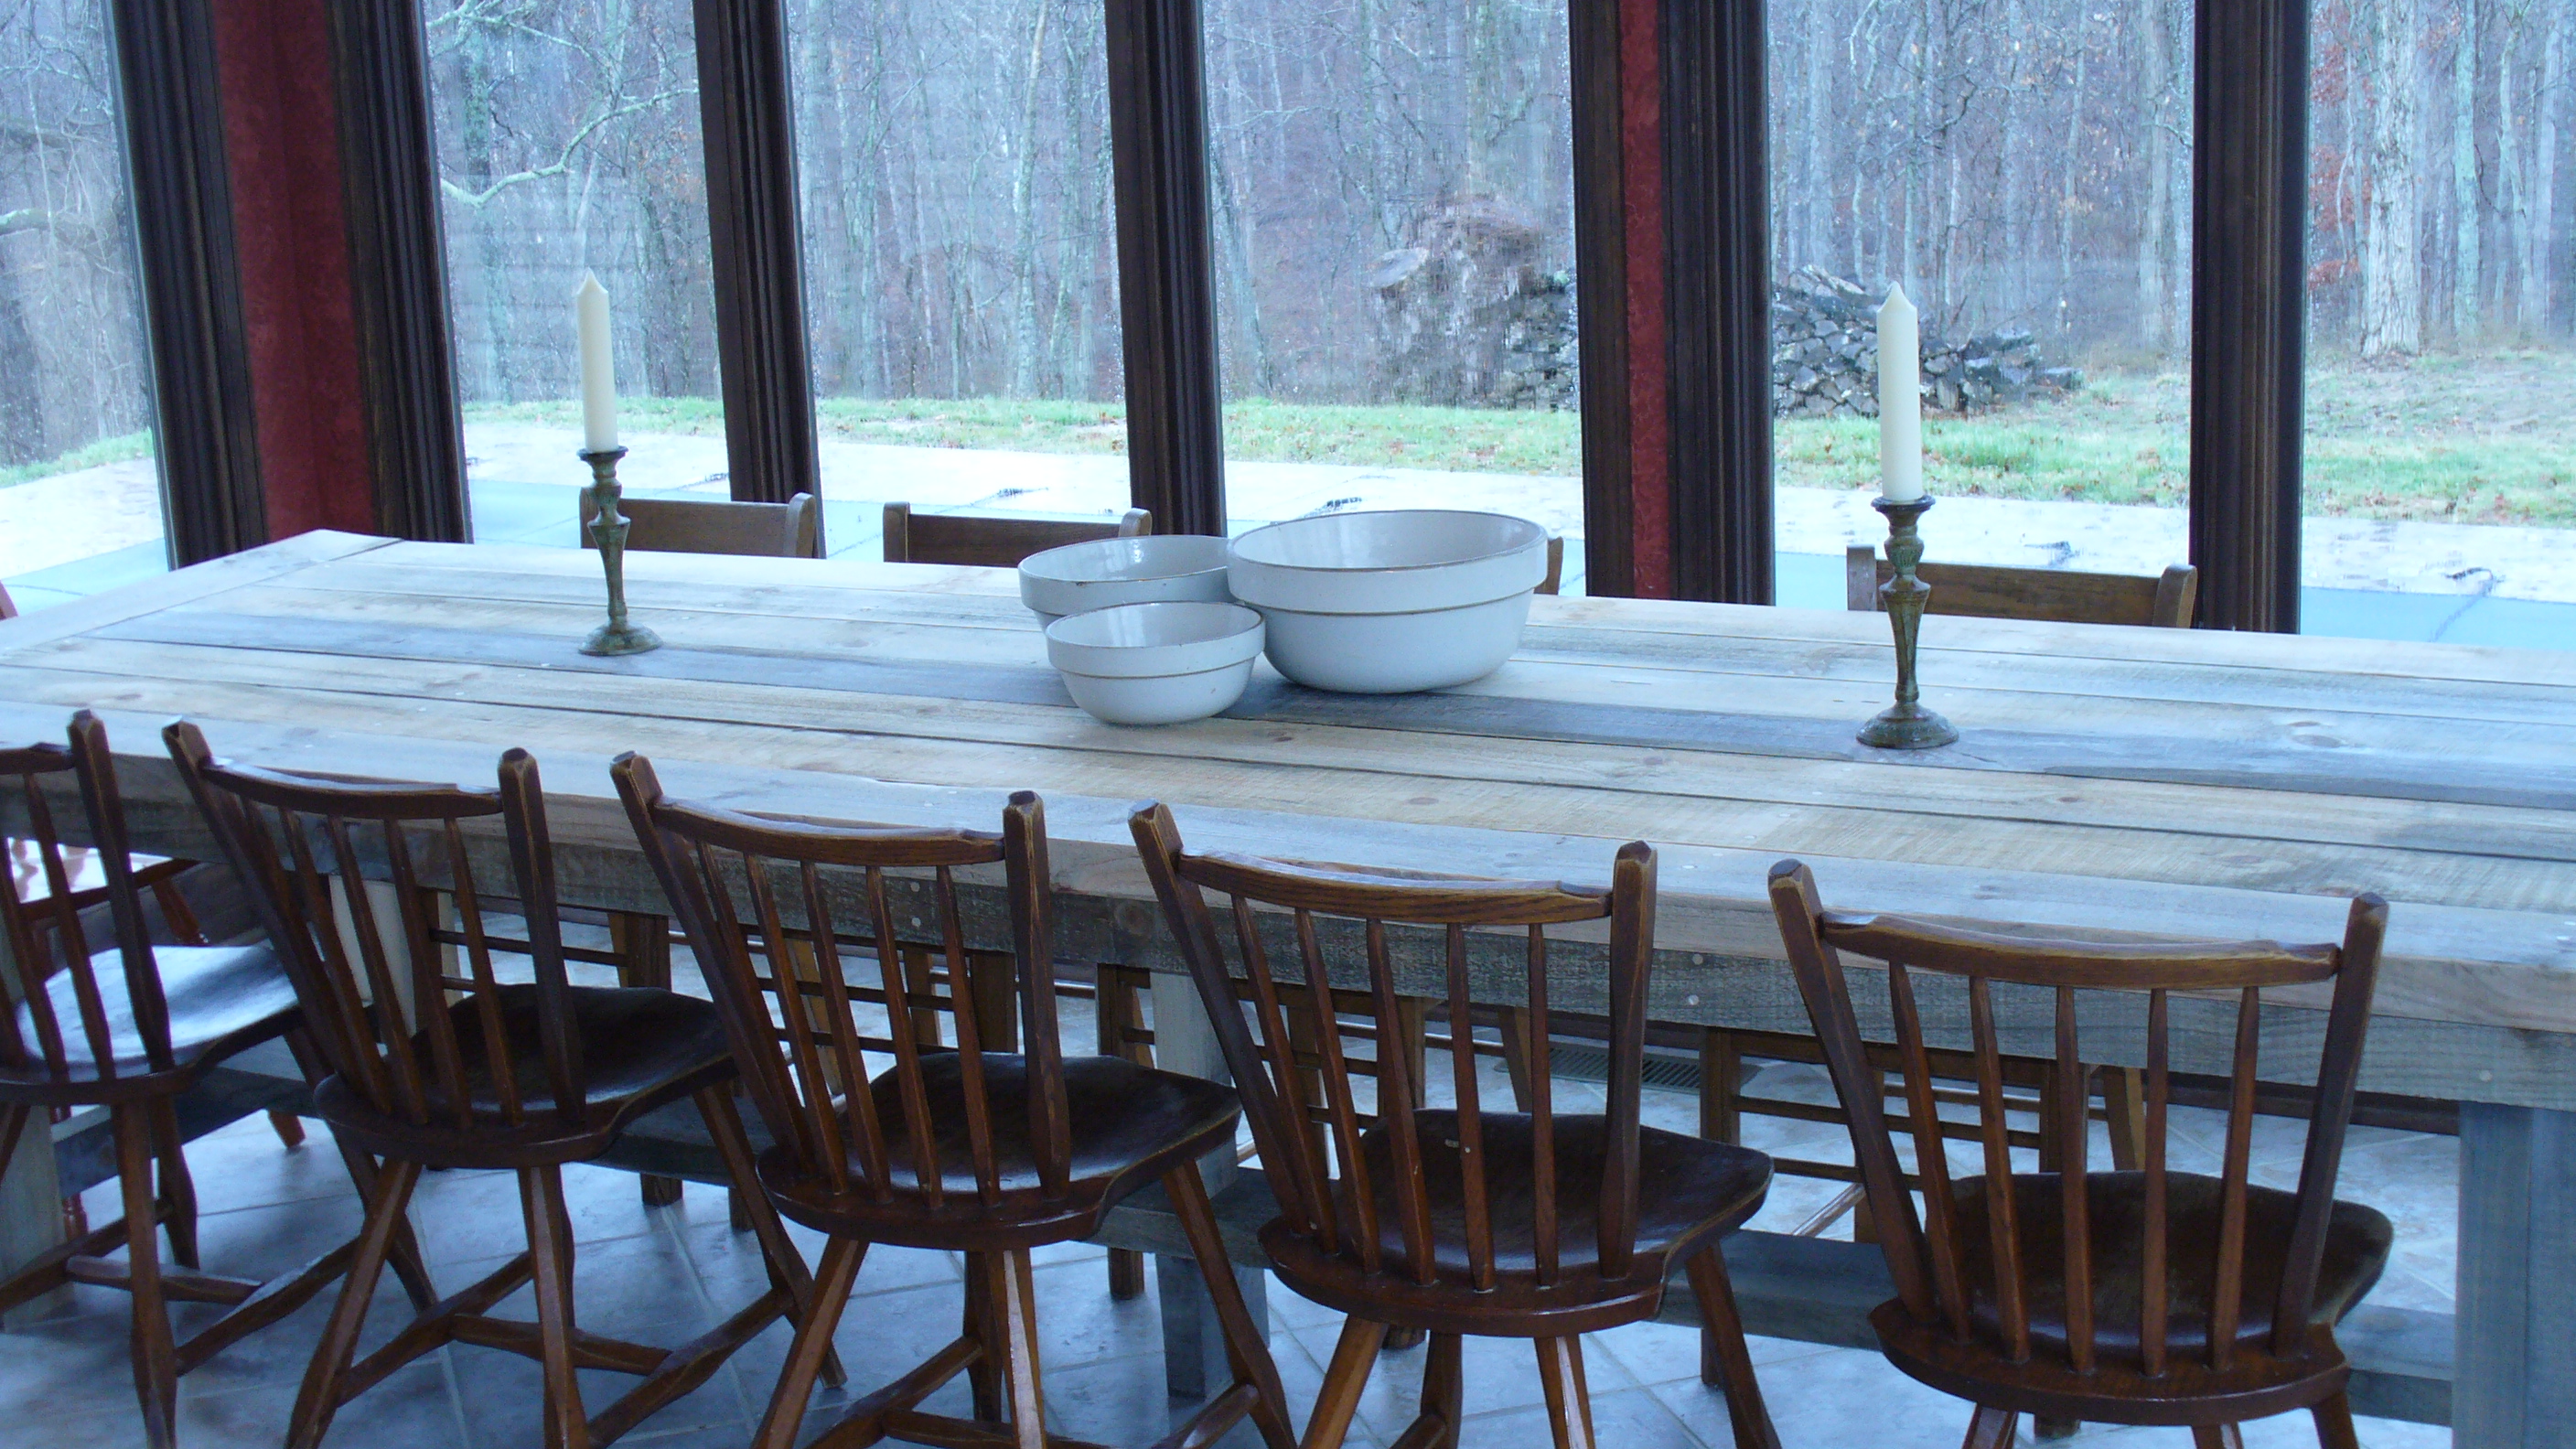
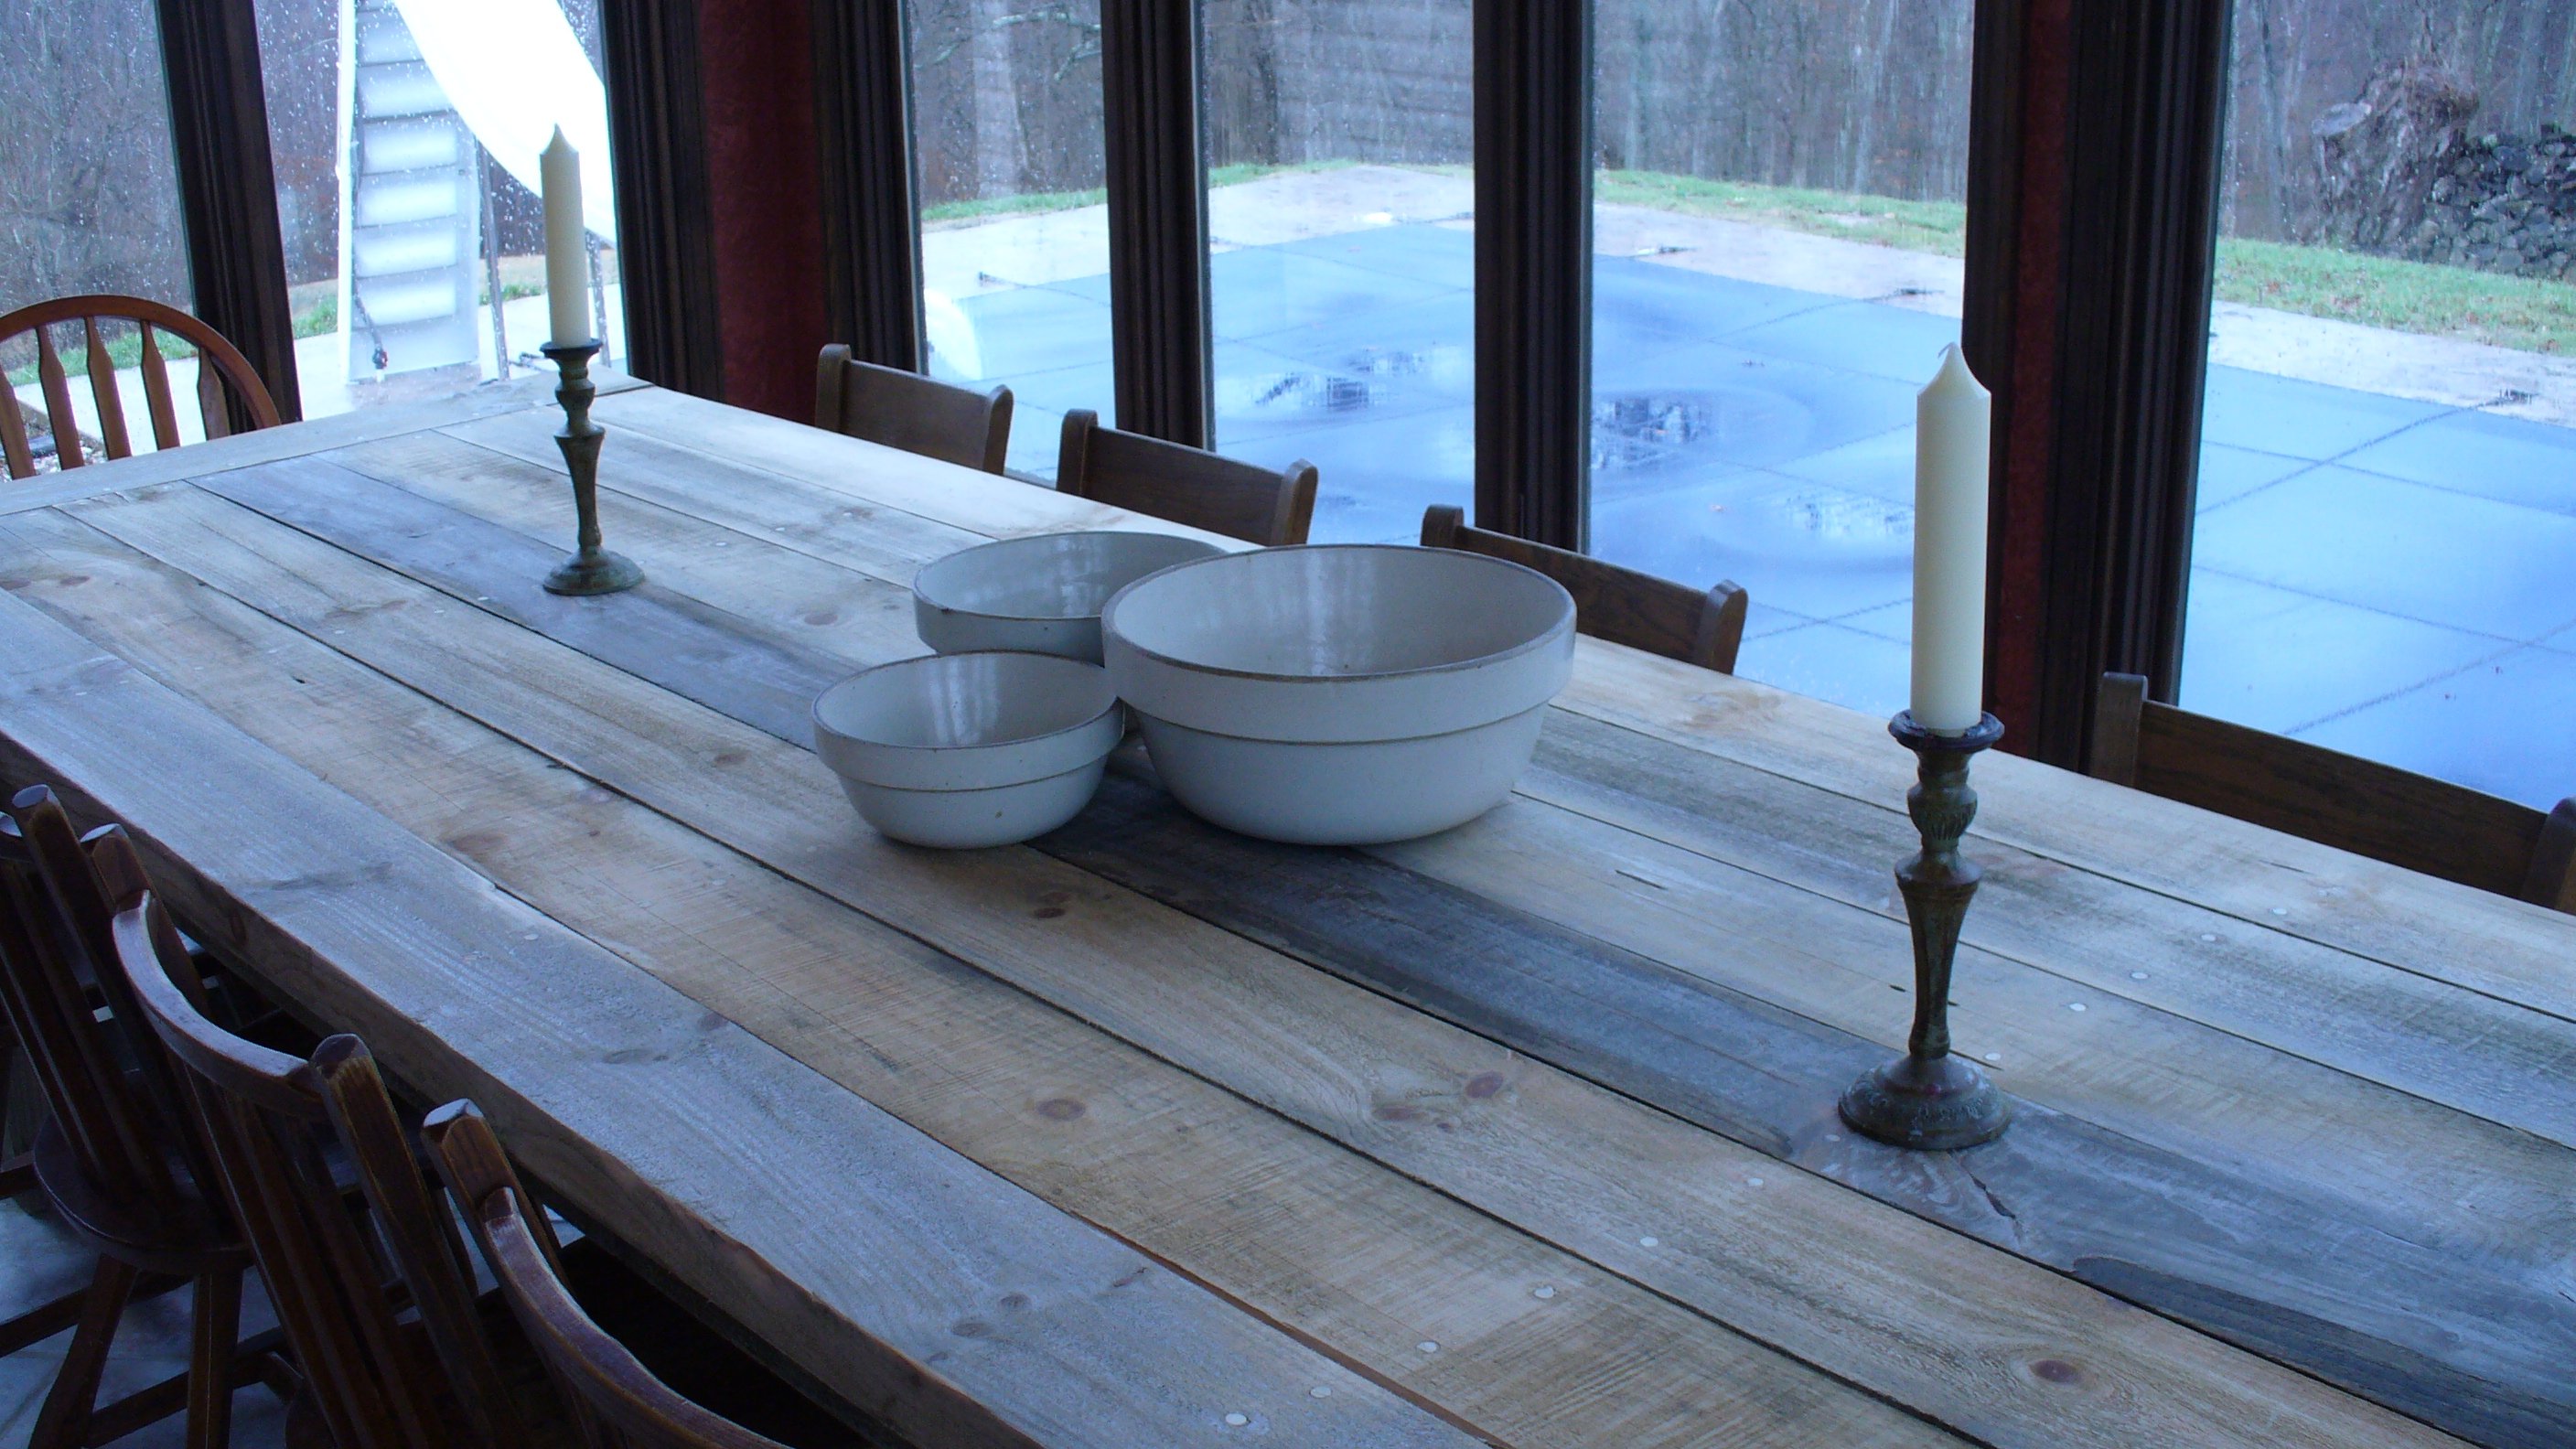
11' Rustic Farm Table made out of 2" rough cut pine. Used a couple different plans from here and just kinda made it work to fit the space. Used a power sander to add some character and to smooth it out and wear it down in spots. Some of the wood wasn't as bluish gray, so I soaked steel wool in white vinegar and brushed it on, seemed to help a bit, especially on the fresh cuts.
Tue, 08/23/2011 - 05:21
Brings me back to my Grandparents house where our family filled the entire table! Great Job!
Mon, 10/31/2011 - 17:11
Absolutley stunning I am looking to make a farm house table to stay out side was going to use pressure treated lumber and pour a concrete top do u think this design will hold a 500 lb top?
Mon, 04/02/2012 - 06:26
we are in process of building our table and we want to keep the natural wood distressed look and we don't want the shiny lacquer look... how did you seal this table to protect from spills?
Wed, 06/13/2012 - 09:56
What did you use to secure the table-top boards to the base? I have some masonry nails that I have considered using but I'm worried that nails will not work as well in the long run since I plan on using my table outdoors. Do you remember what you used? How are they holding up?
Sat, 07/14/2012 - 06:05
I LOVE how you used the 2" rough cut pine! We need a 9 foot table for our huge banquet and this is perfect...the use of steel wool and vinegar is a great idea. You've inspired me, thanks!
Sun, 04/05/2015 - 19:45
Love this table!! Would love to have this big table for when all our family gets together.
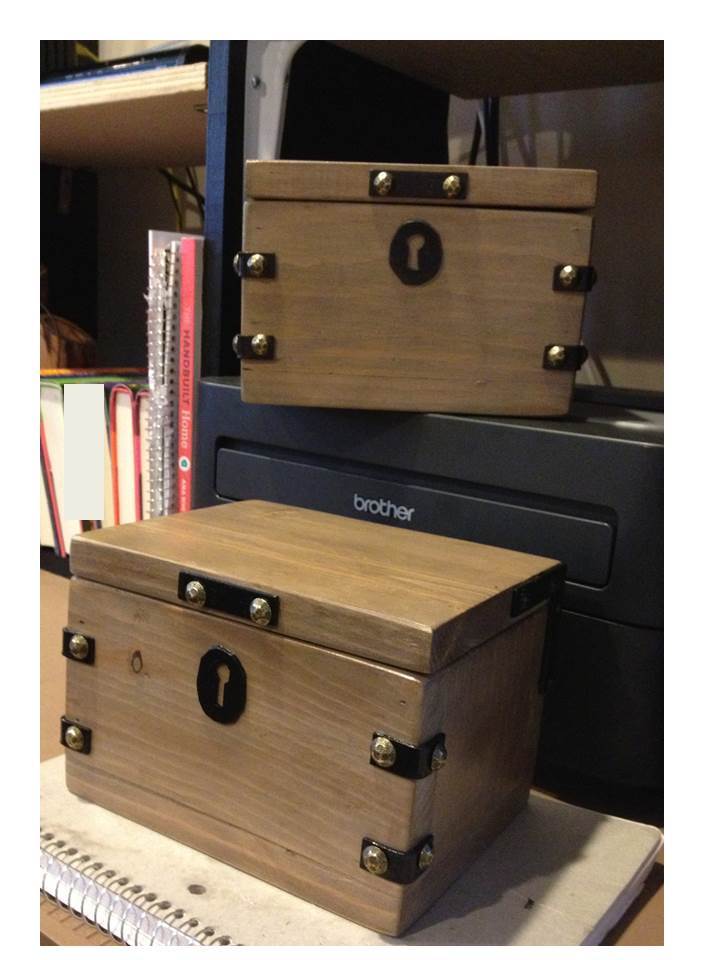
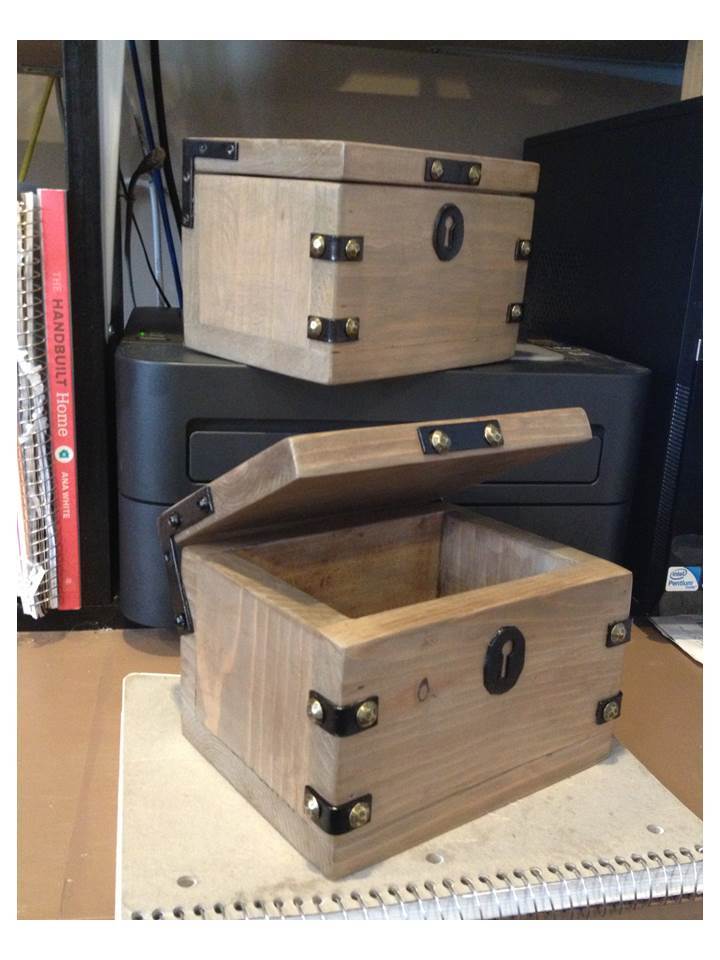
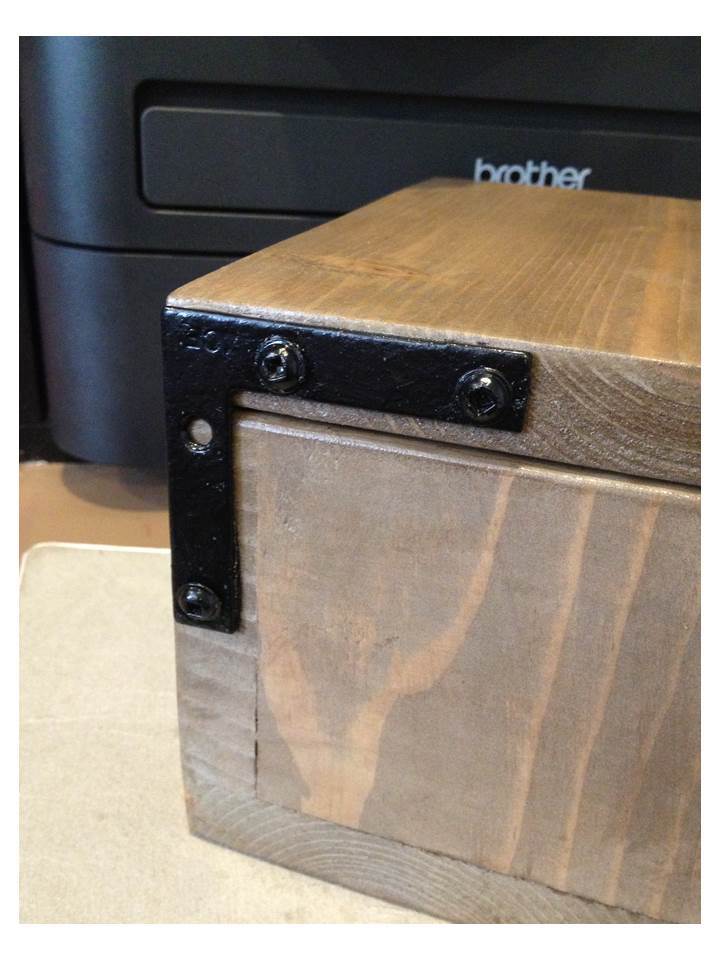
I had so much fun doing the prototype of the pirate’s treasure trunk, I built another one today! It was a super-fast build, and I did some things differently today which really speeded up the finishing process.
The first difference on this one is the use of the ½” x 2 ½” angle. It’s the next size larger than the one from yesterday. Instead of using the screws that came with it, I used some 1 ¼” Kreg screws. The hardware and screws are painted with some gloss black paint. I think it made for a sturdier hinge, so I’ll be doing them that way from now on. I also made a little “gasket” out of felt to go behind the bracket at the bottom where the pivot screw is attached. I’m hoping this will protect from friction over time.
For the finish, I started it with the gray wash just like the original. For the walnut glaze, instead of mixing the Minwax Express Color with mixing glaze, I just diluted it with some water. This dried much faster, but it gave the same look. I added 2 coats of Minwax oil modified water based poly before attaching the hardware. I still used the super glue before attaching with the furniture nails, but skipped the mod podge step, and just went over the hardware and keyhole with an artist’s brush and some poly.
All the wood was scrap and the finishing materials were left over from other projects. I bought the corner brackets and the larger angle brackets this morning at Ace for $7.50. These pieces cost a little more than Lowe’s, but Ace was closer so it saved me a trip.
There's another one of these in work (a lady’s trunk) which I will post later.
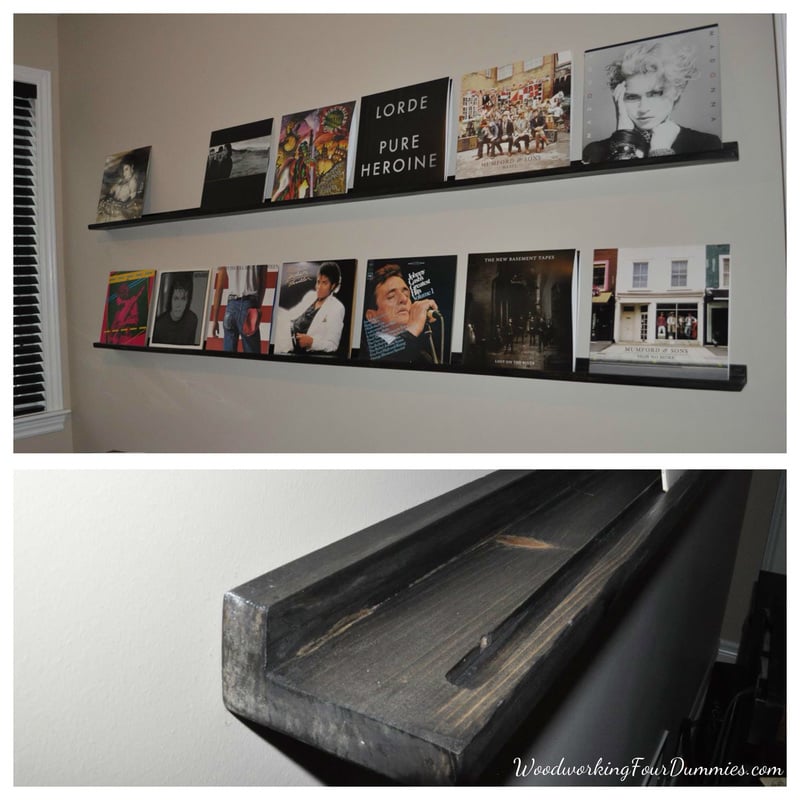
I recently started collecting vinyl records and wanted to show some of them off but also have them readily available to play. I saw some options online but decided to make some shelves myself. No judging my music! :)
More details and instructions on my blog:
http://www.woodworkingfourdummies.com/blog/diy-record-display-shelf
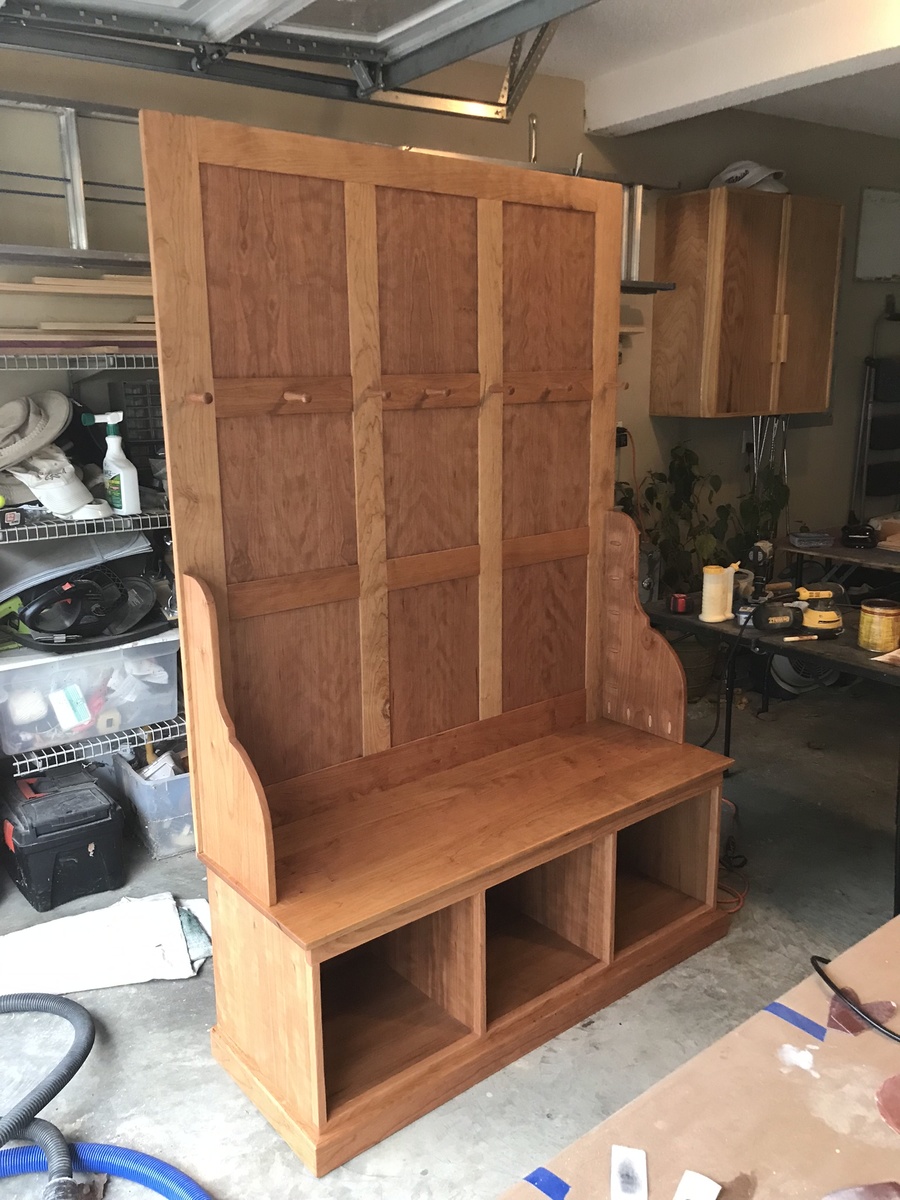
I built this Fancy Hall Tree with cherry hardwood and cherry plywood. The lower bench is done with rabbet joints and dados instead of pocket hold screws but the upper portion is all pocket hole screwed together but instead of laminating a large piece of plywood tot he back I cut individual panels and dropped them into rabbets like a picture in a frame. The supporting wings are connected to the base and the back panel with pocket screws as is the panel to the base.
Fun weekend project with @kendrickcobb with our next #diyproject from #anawhitediy @anawhitediy . Precut the wood to do the project at sons home but sadly side X piece wasn’t right length and we also took 10 inches off the length to make 42 inches in order to fit perfectly. We added some decorative corner hardware from Lowe’s and two coats of antique walnut stain.
Tue, 10/18/2022 - 09:33
Thanks for sharing, those x pieces can be tricky. We recommend scribing and cutting to fit for your next project. :)
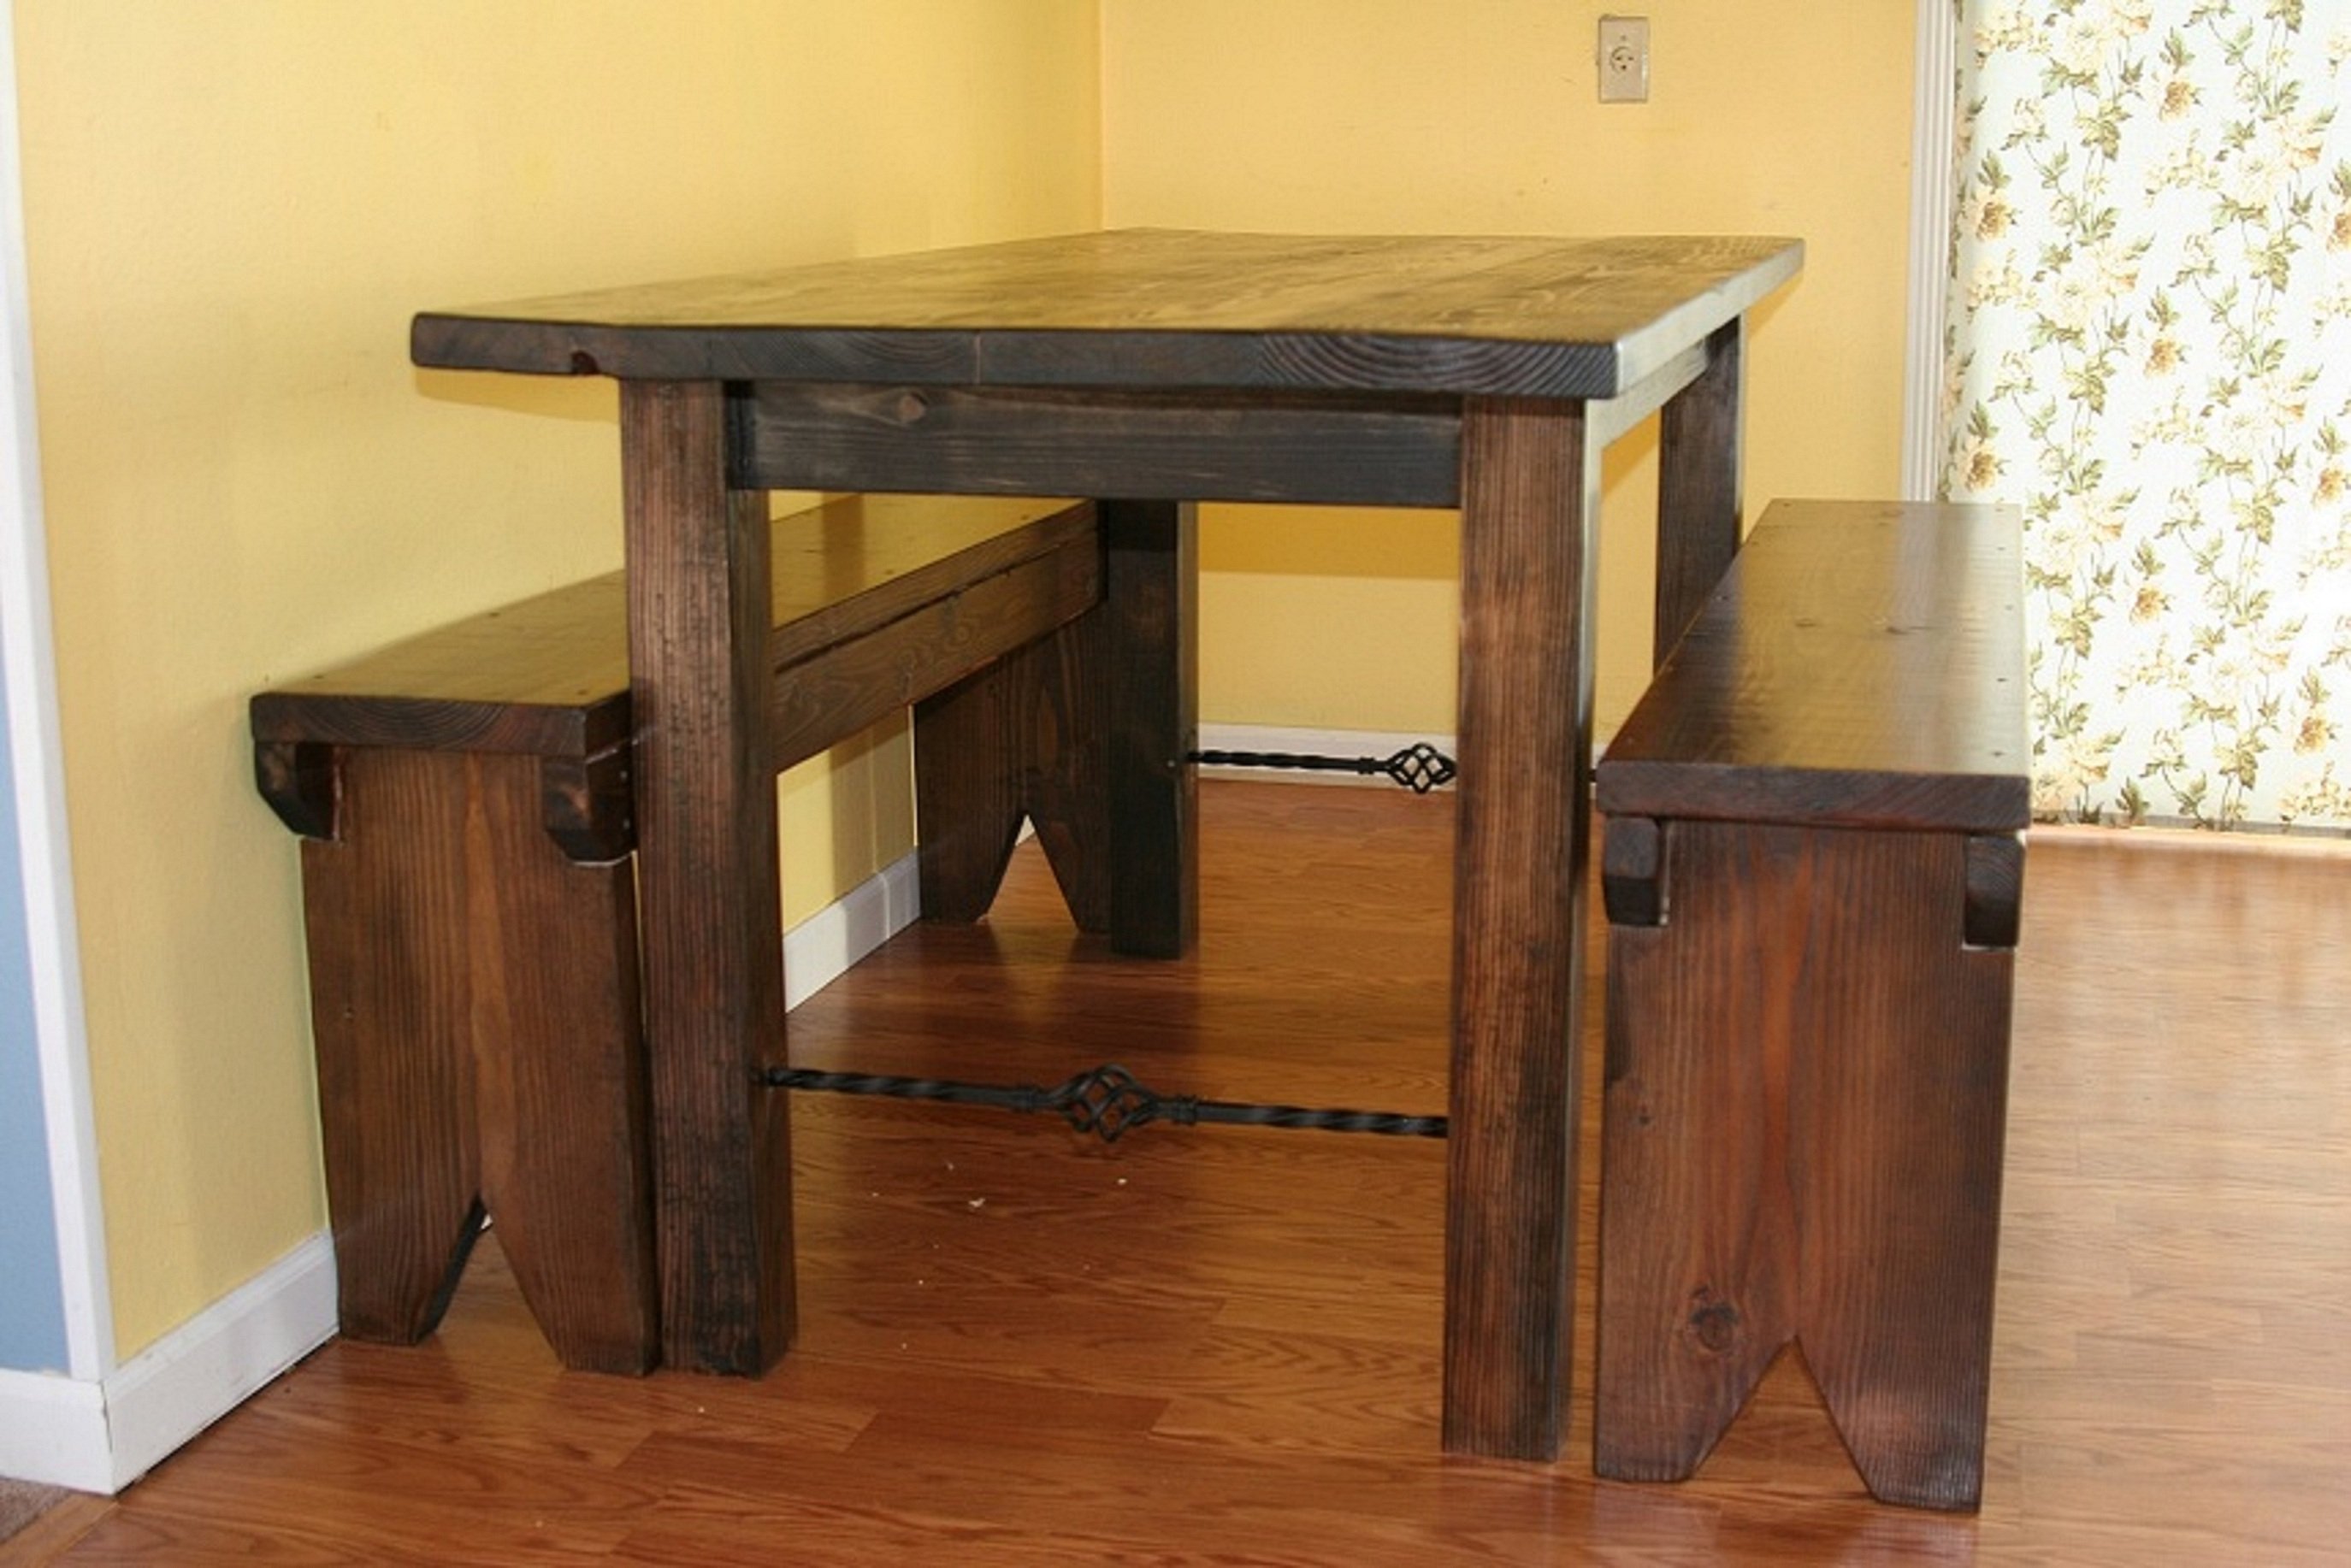
For years I have wanted a dining room table with benches and after searching the net for plans for my husband to make it happen, I found Ana's site and knew that it was a possibility to build it and that it didn't have to be a project only for my husband. My husband built the table and my first build was the benches. My husband found a couple of wrought iron balusters that he used at supports on the table legs. We used 2 x instead of 1x which gave it a much bulkier look.
Tue, 09/20/2011 - 13:14
Nice job on the table. The stretchers are a great idea. The benches really get off the set.

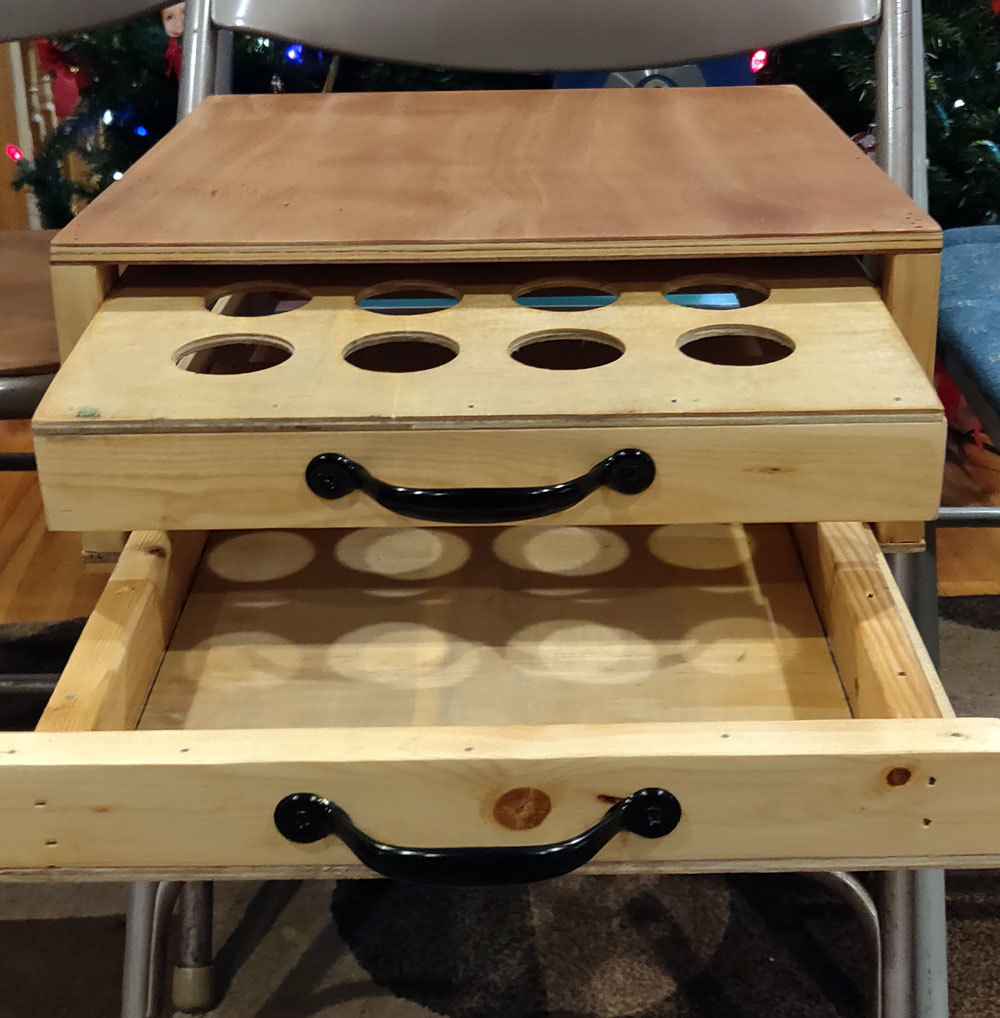
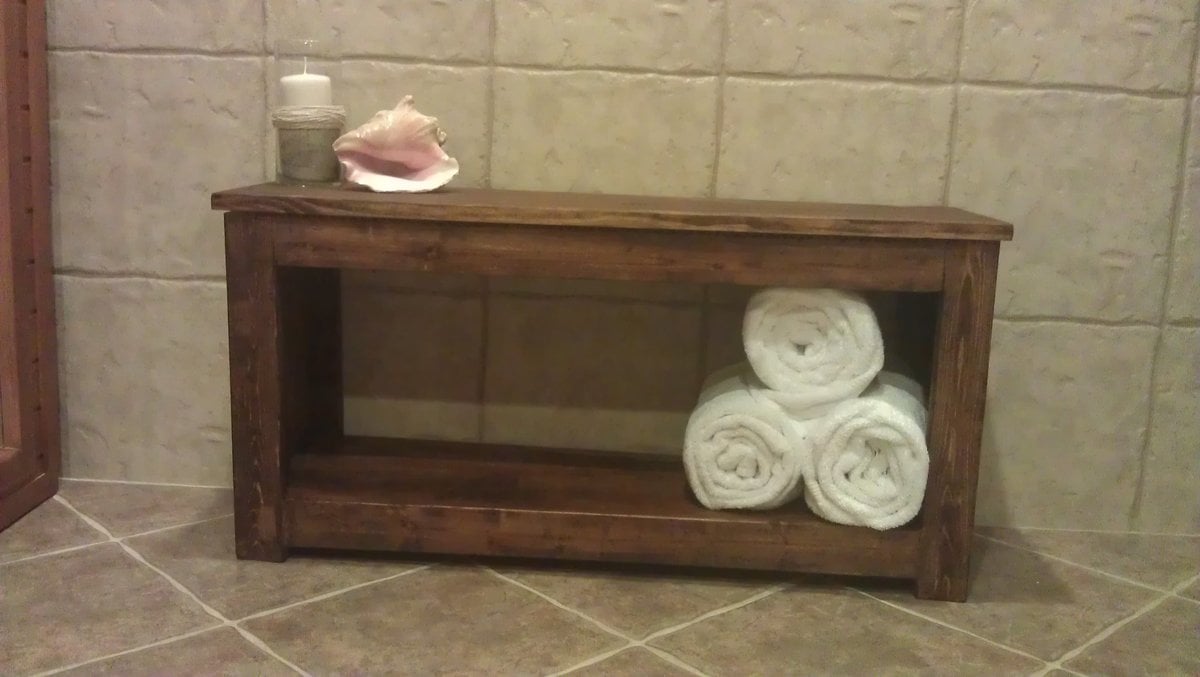
I had an old bookshelf in the garage.....wobbly and just not having any justice. I took it apart and turned it into a play kitchen. Used the plans and modified to what wood I had available from the shelves.


This project was fun. The hardest part was trying to find barn door hardware. I did end up finding one on amazon but it was still too long and had to cut it down. Very doable in a weekend.


Comments
builtbyjessie
Mon, 12/31/2018 - 04:07
Nice job.
Looks good. I added a drawer too.
JD_2030
Thu, 01/02/2020 - 13:02
Adjustments made?
Looks great! We were hoping to add a drawer as well but I’m not really sure where to start. What adjustments did you make to create the open drawer? Can you post a photo of the side of the drawer? Thank you!