New Green House
My wife and I built your green house! It is turning out awesome! I just want to take the time to say thank you for the plans. You are a great designer and generous with your sharing.
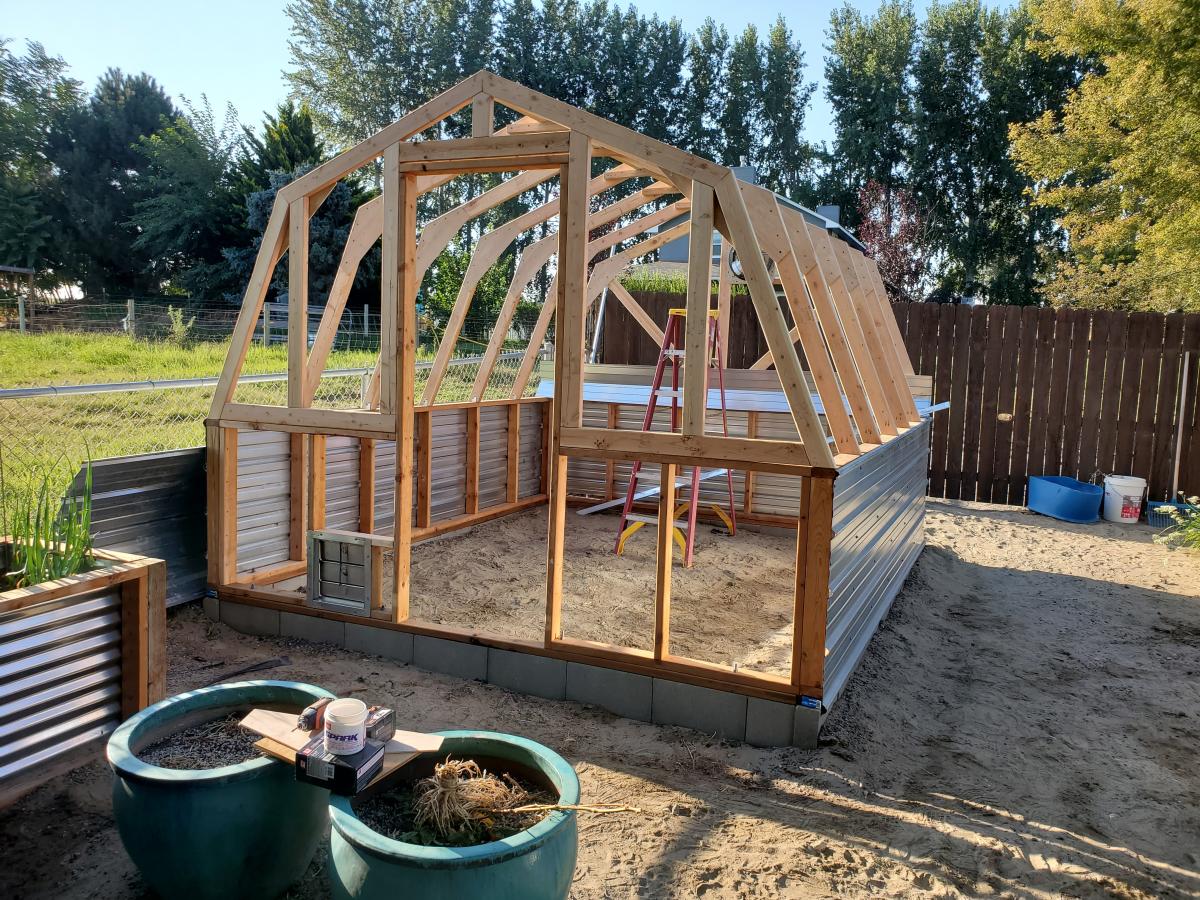
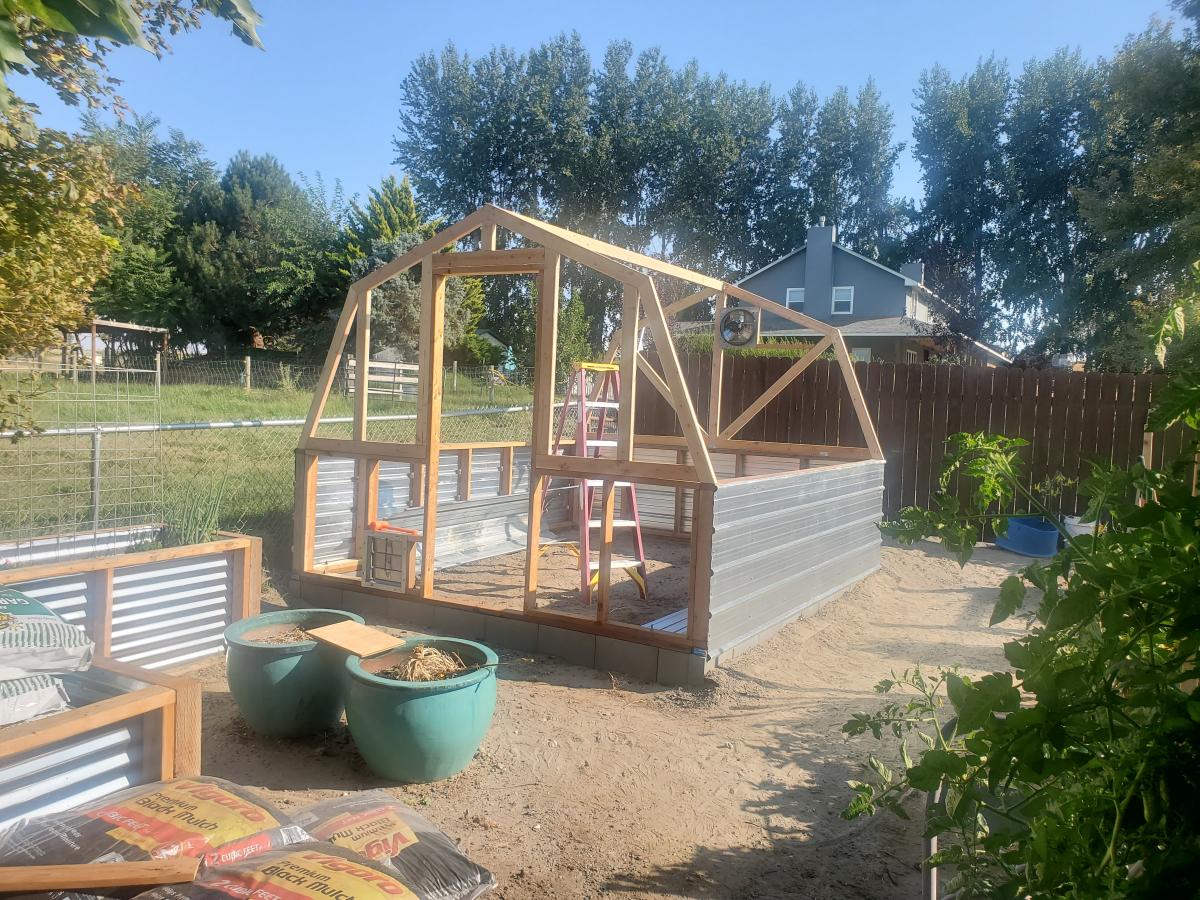
Built from Plan(s)
My wife and I built your green house! It is turning out awesome! I just want to take the time to say thank you for the plans. You are a great designer and generous with your sharing.

I love making thing for our son. i document most of it at http://madeatthisplace.blogspot.com.au/
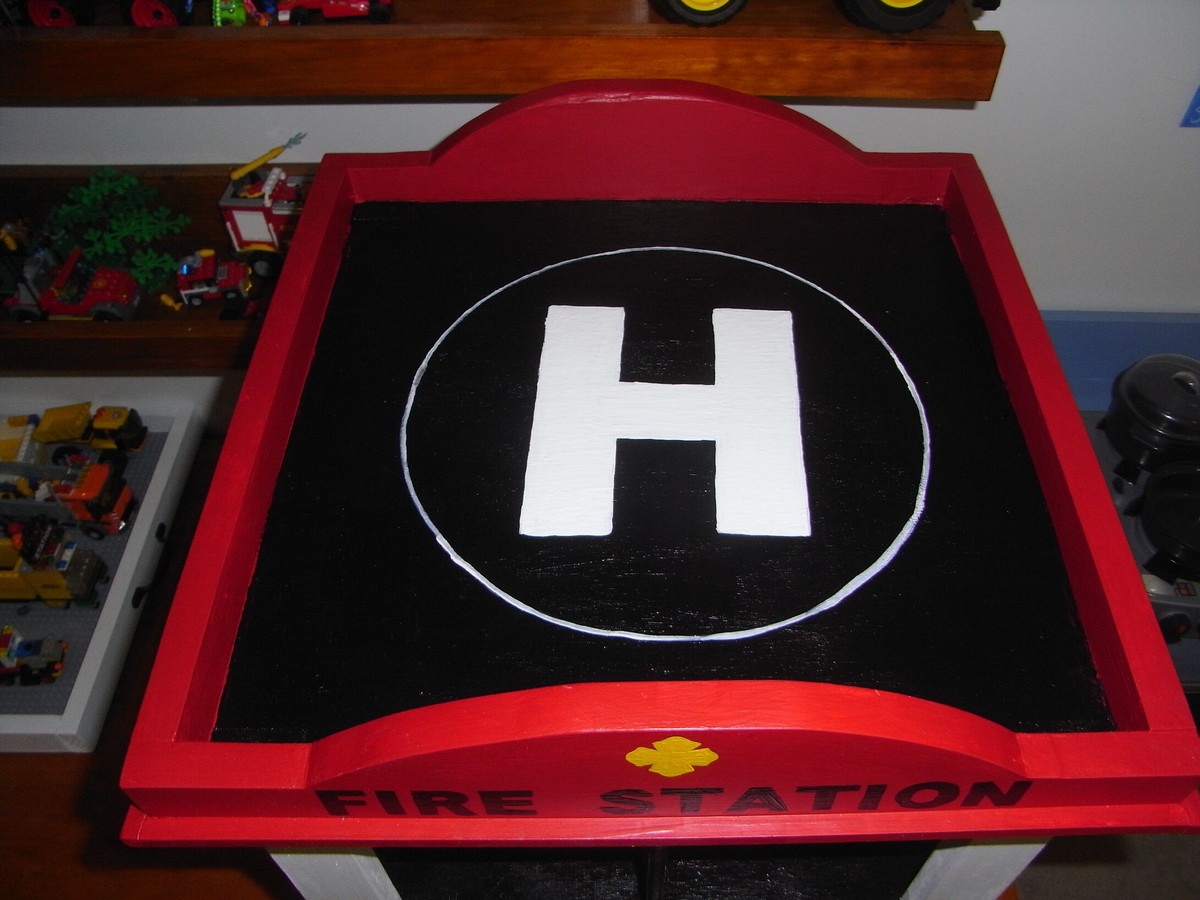
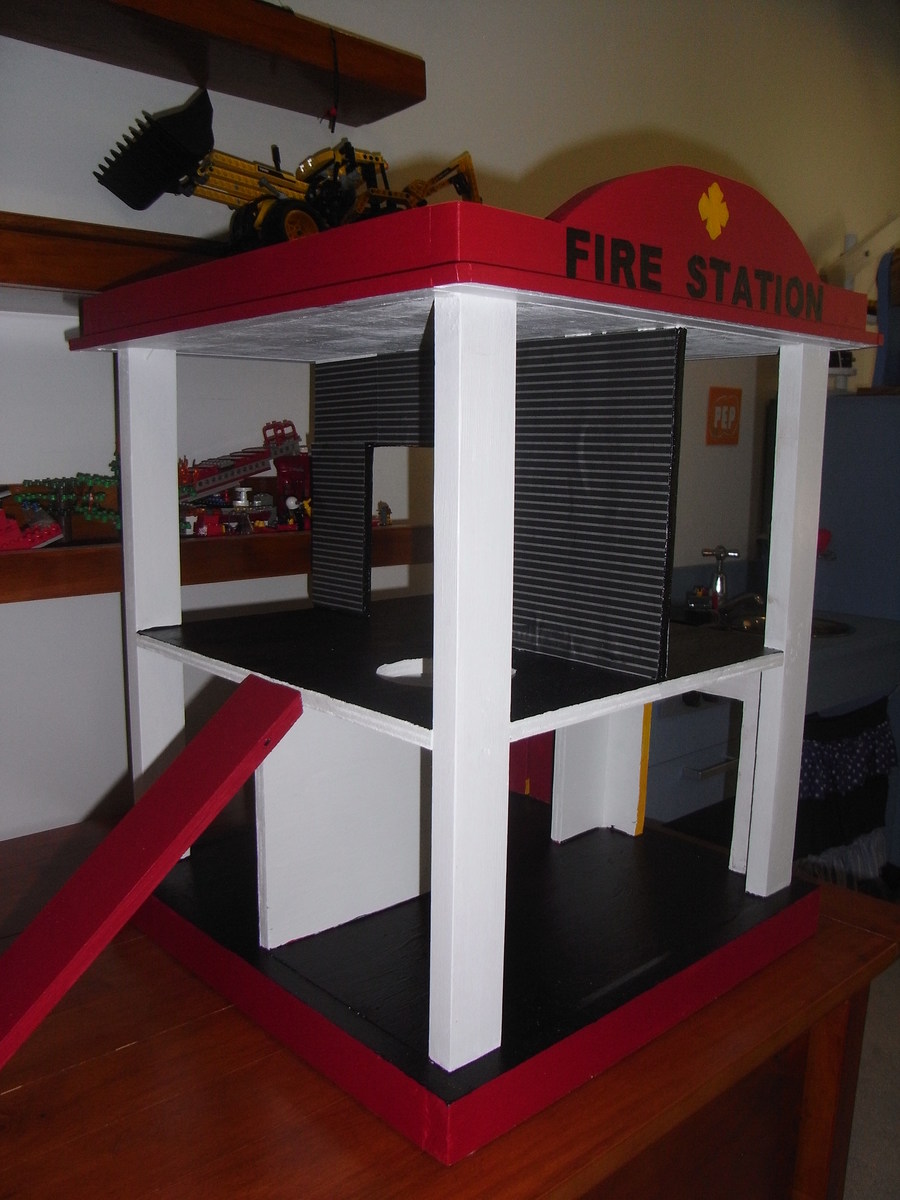
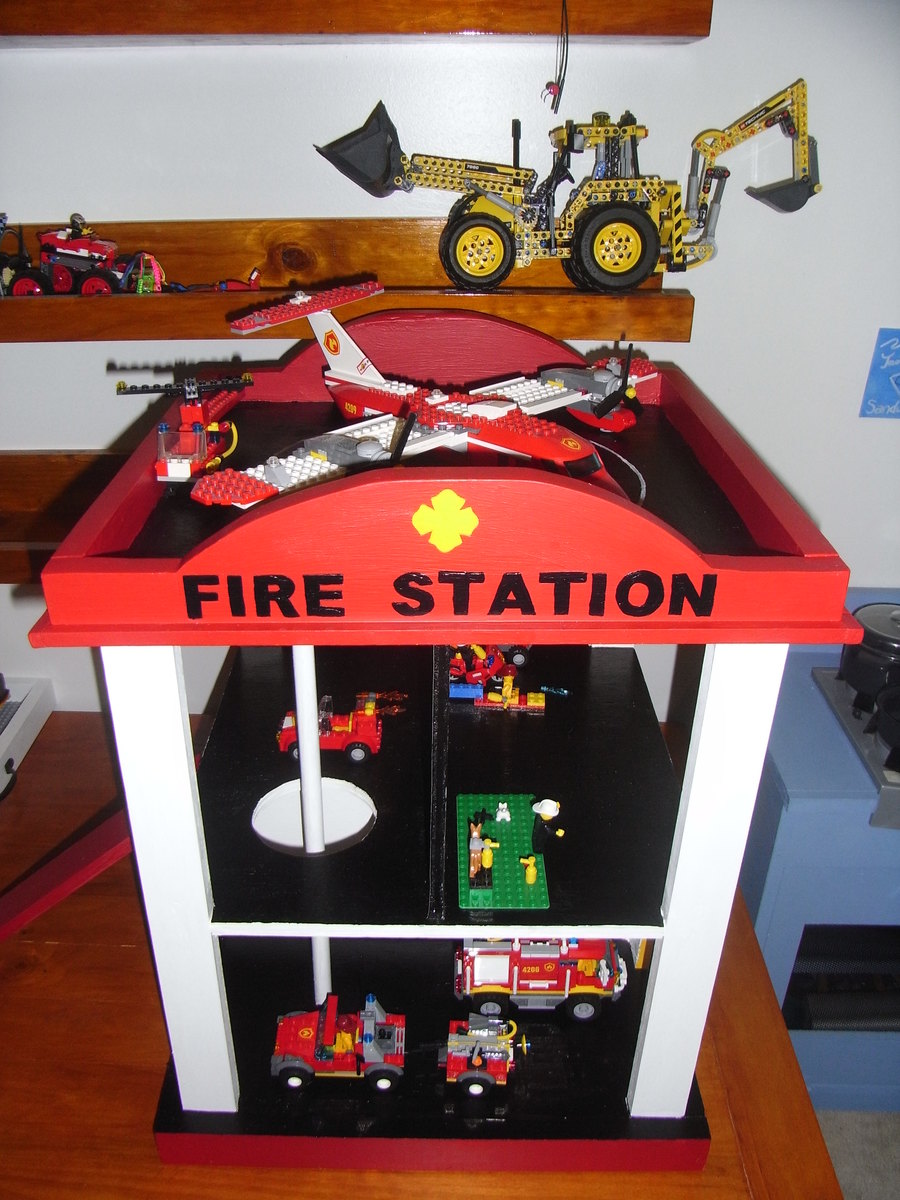
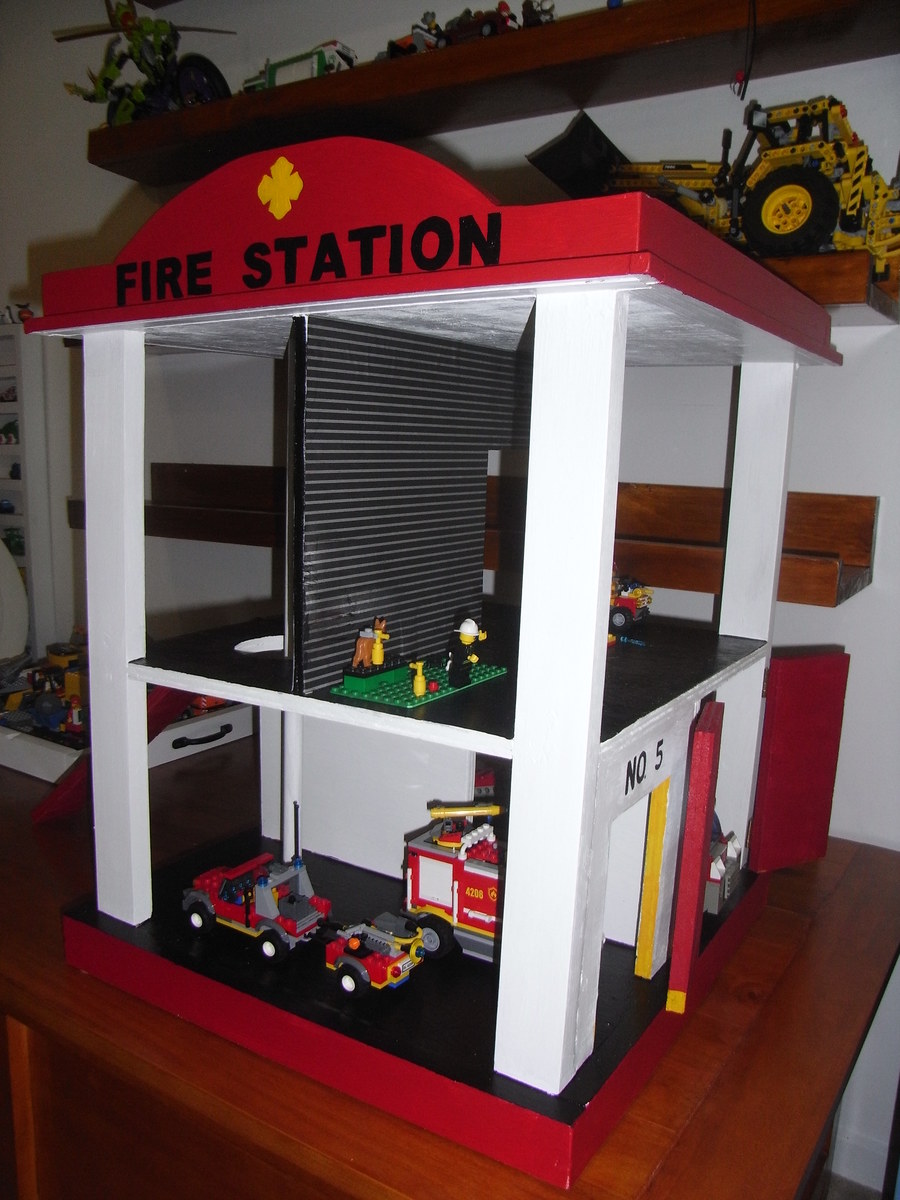
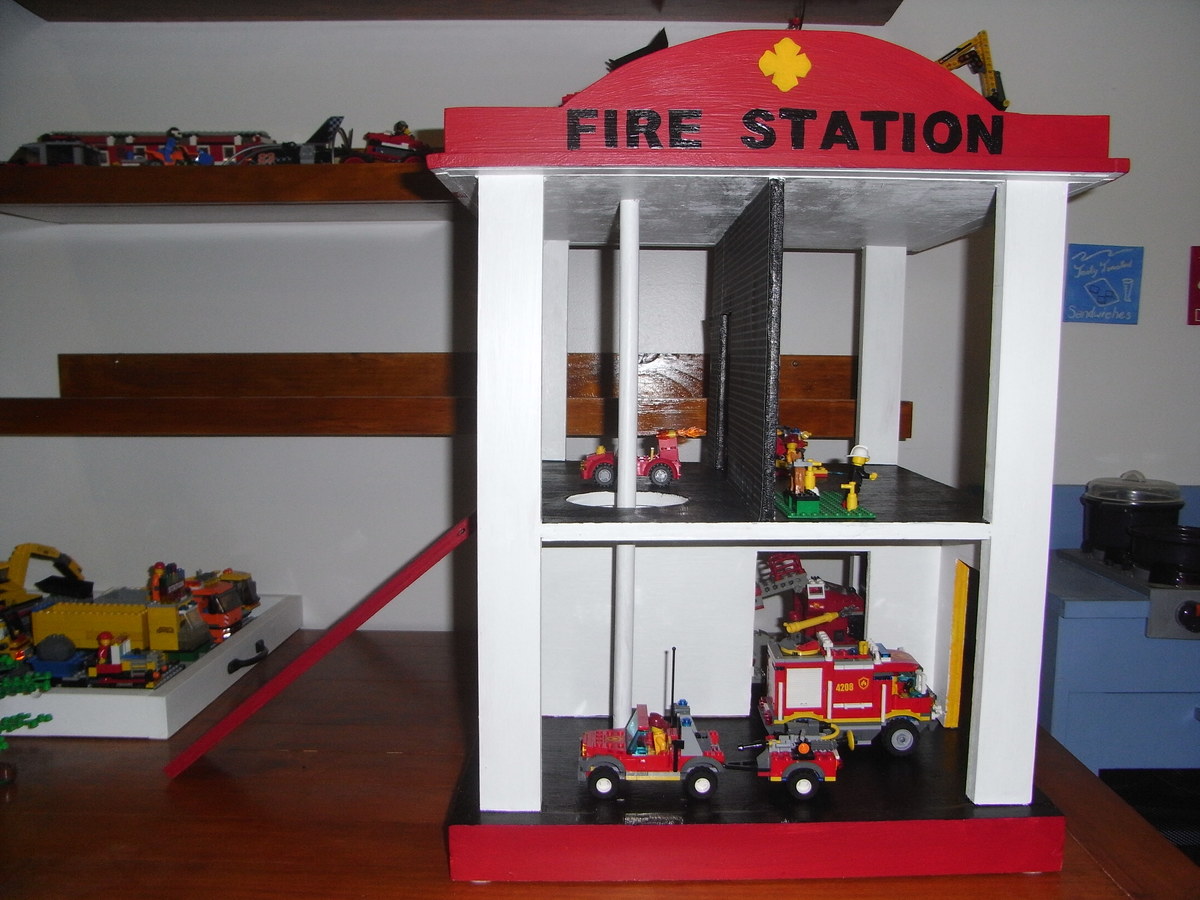
Our son has a lot of Lego, especially fire engine Lego.
It was spread out everywhere and we needed to contain it.
This fire station playhouse was perfect.
I added a ramp so the cars and trucks could get up to the top level and garage doors on one side as our house is more like a garage then a fire station.
I used scrapbooking paper on the upper level walls and painted a H on the roof for the helicopter. (or in our case a plane).
Mon, 05/06/2013 - 04:31
Awesome job!!! I don't see much built for boys and this is just an awesome playset, I will defiantly be doing something like this for my grandson. I especial like that it's up off of the floor.
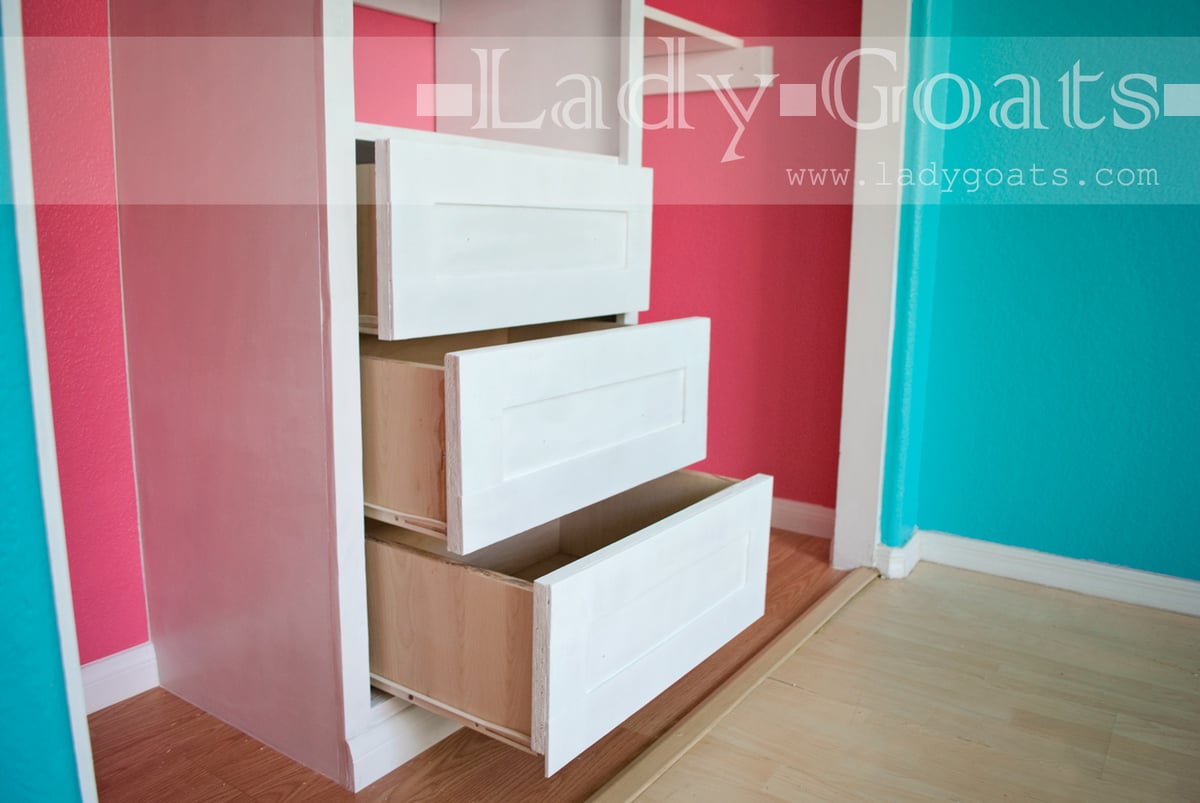
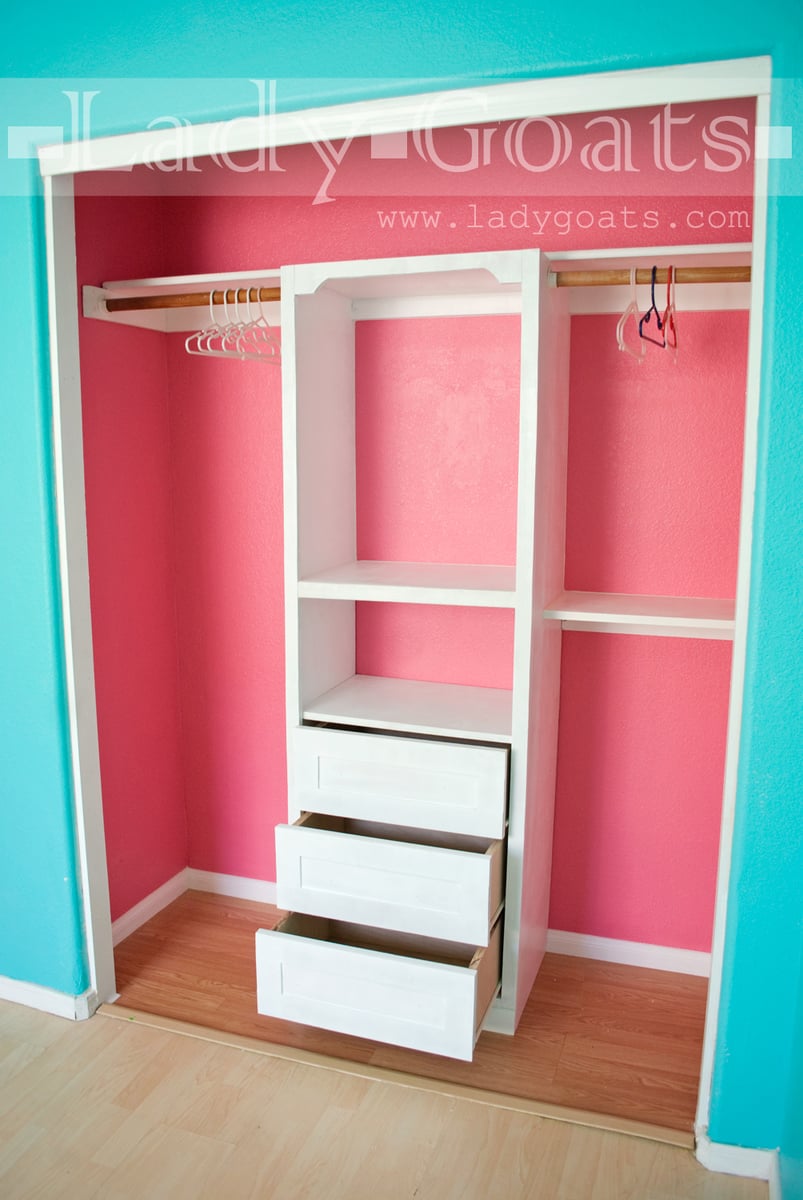
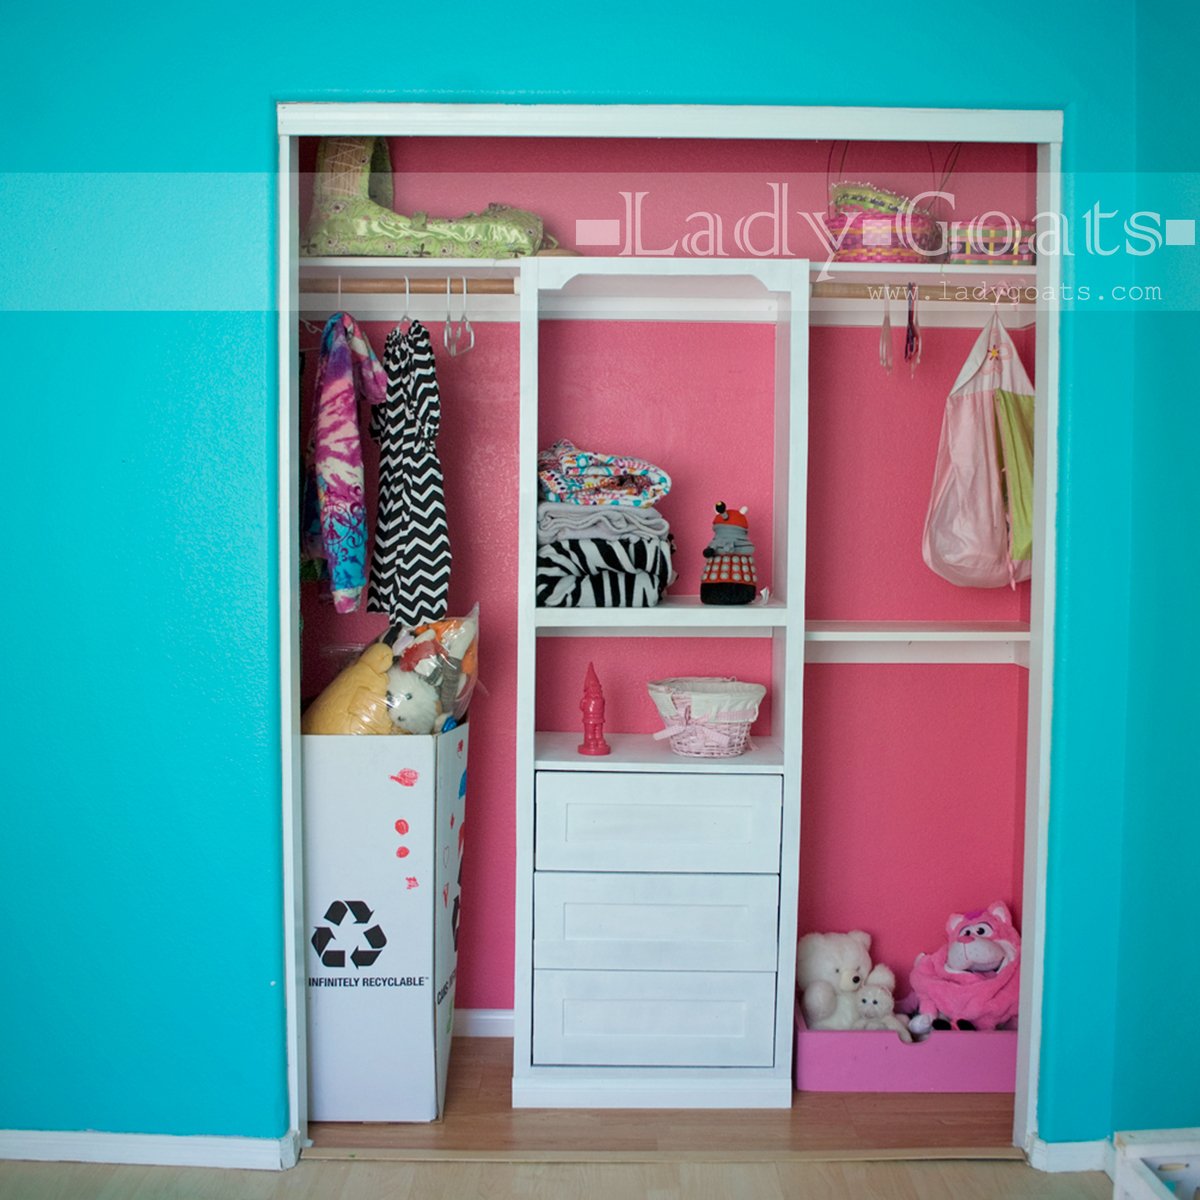
When I realized I was going to build the closet tower, i made sure there were plans for the drawers before beginning. Thankfully there were, so that made this a brainless build. Thanks, Ana! Read about the build, here.
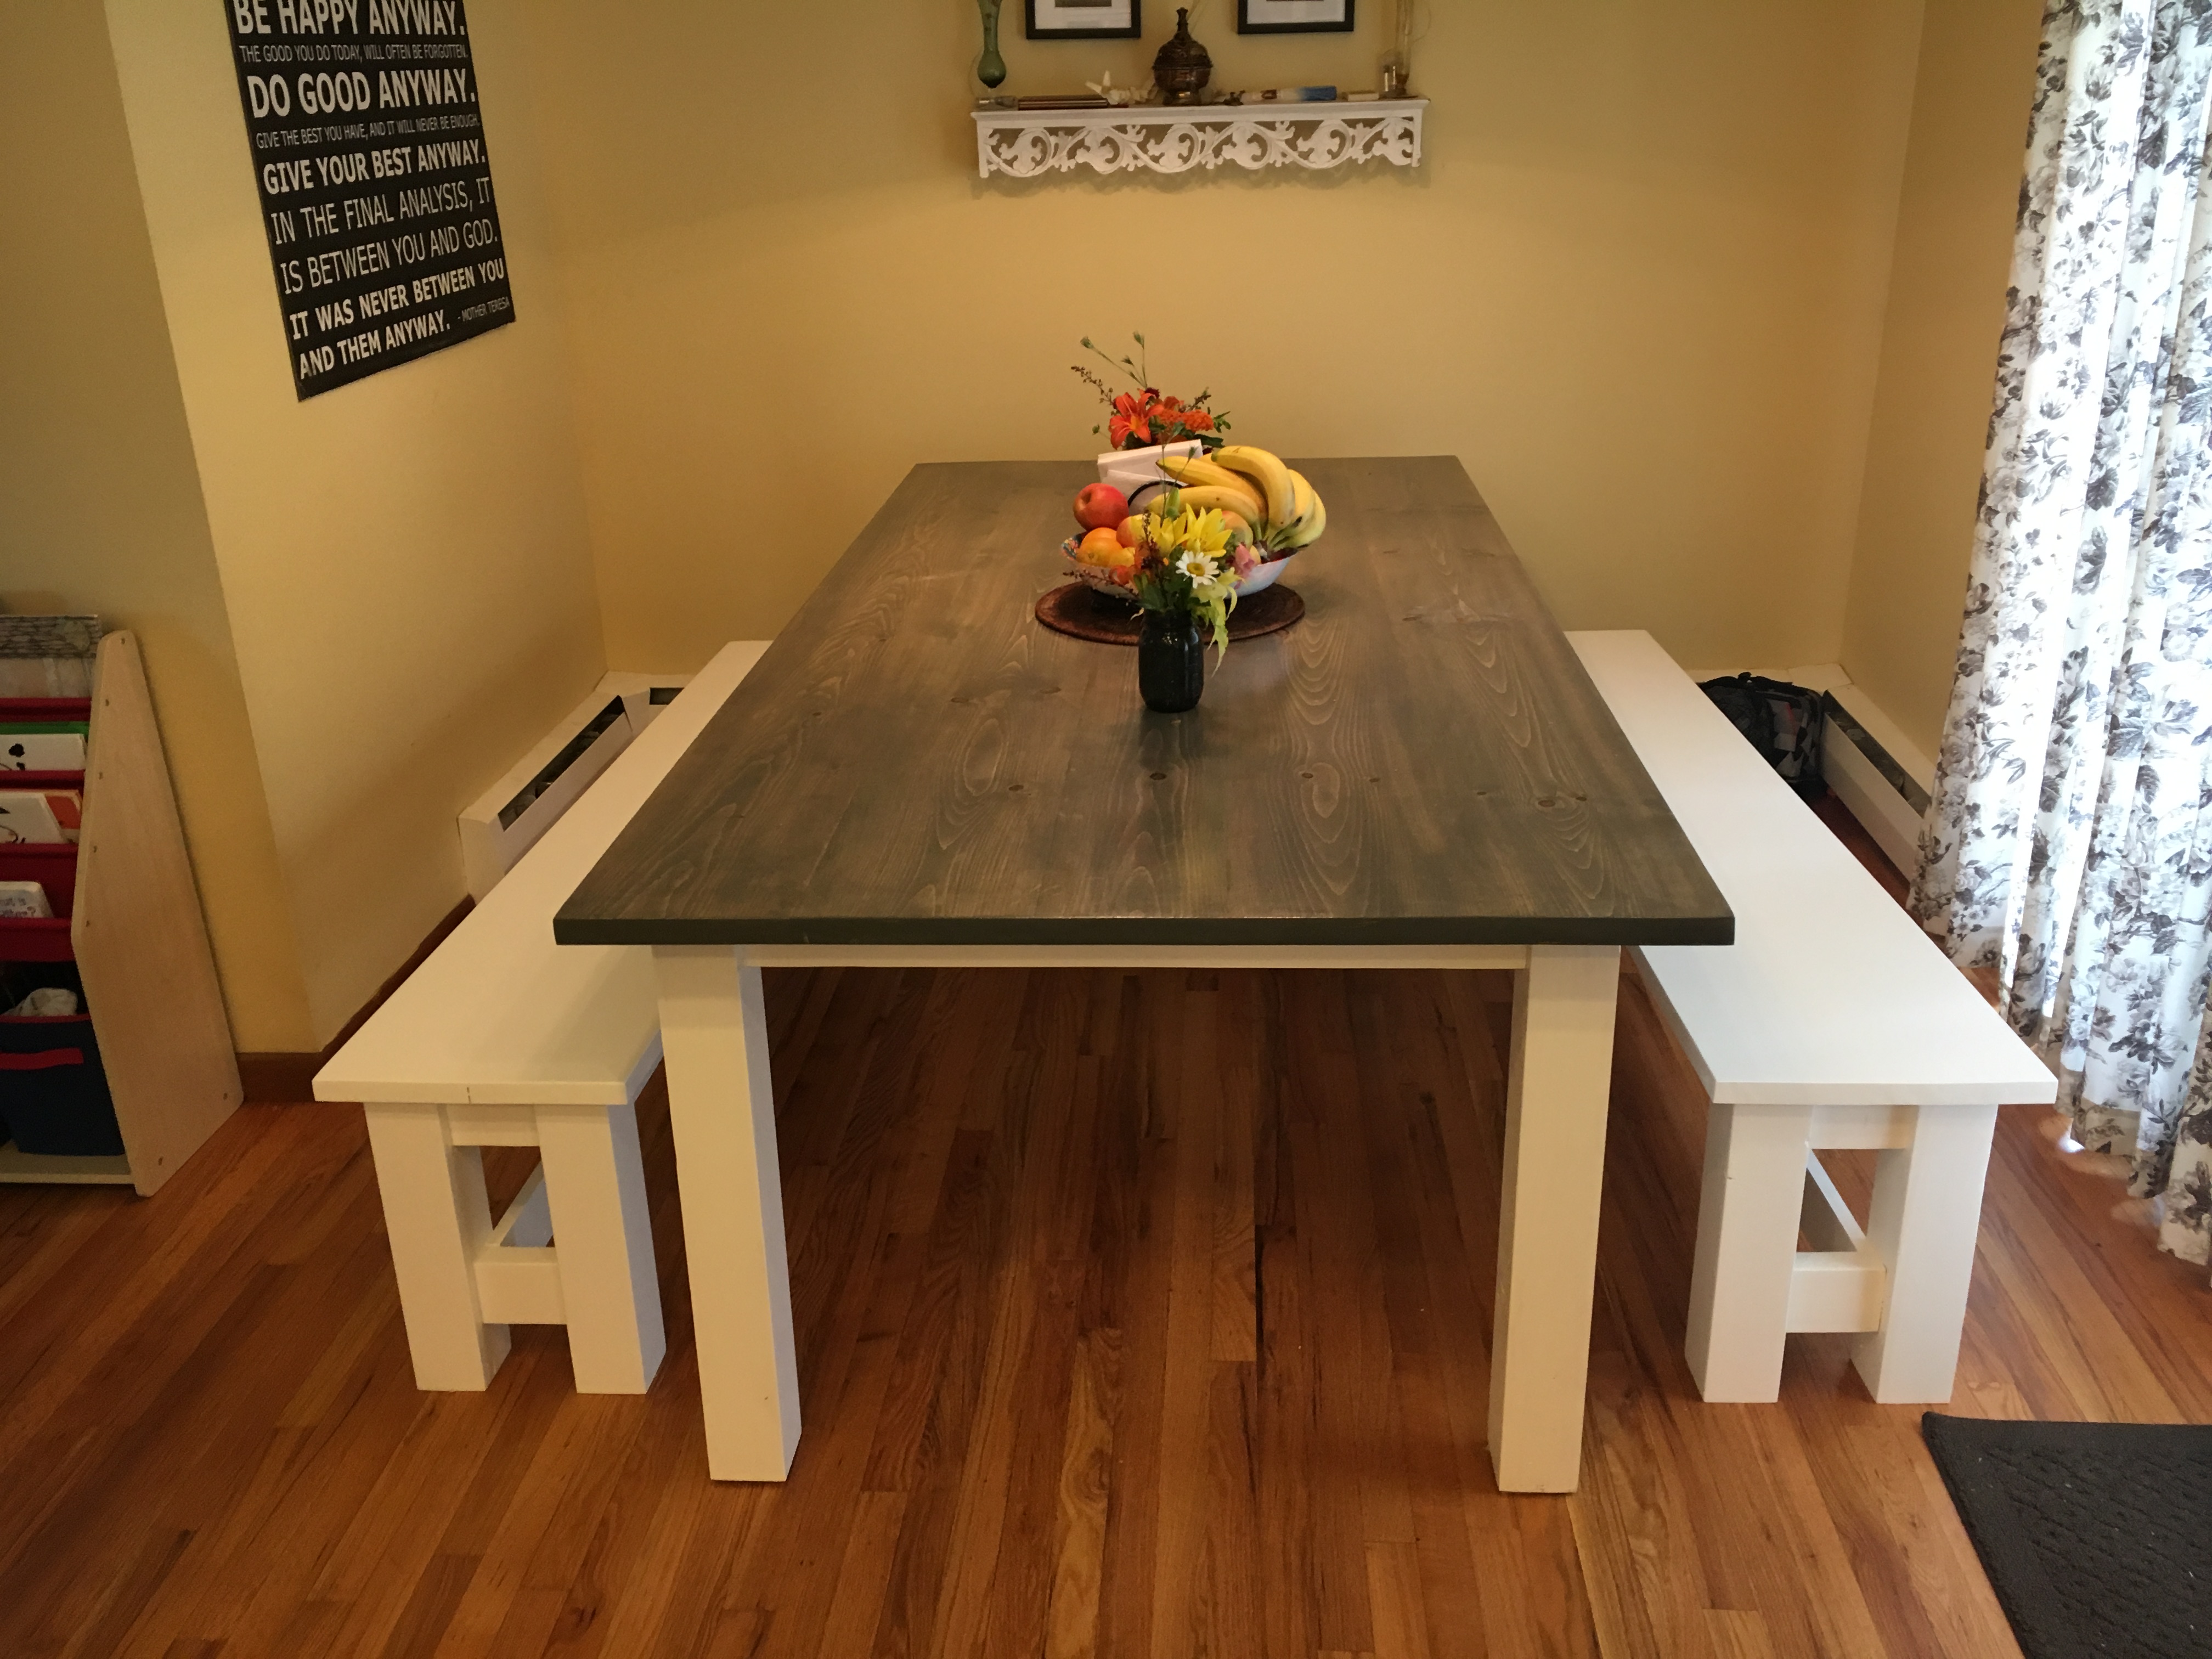
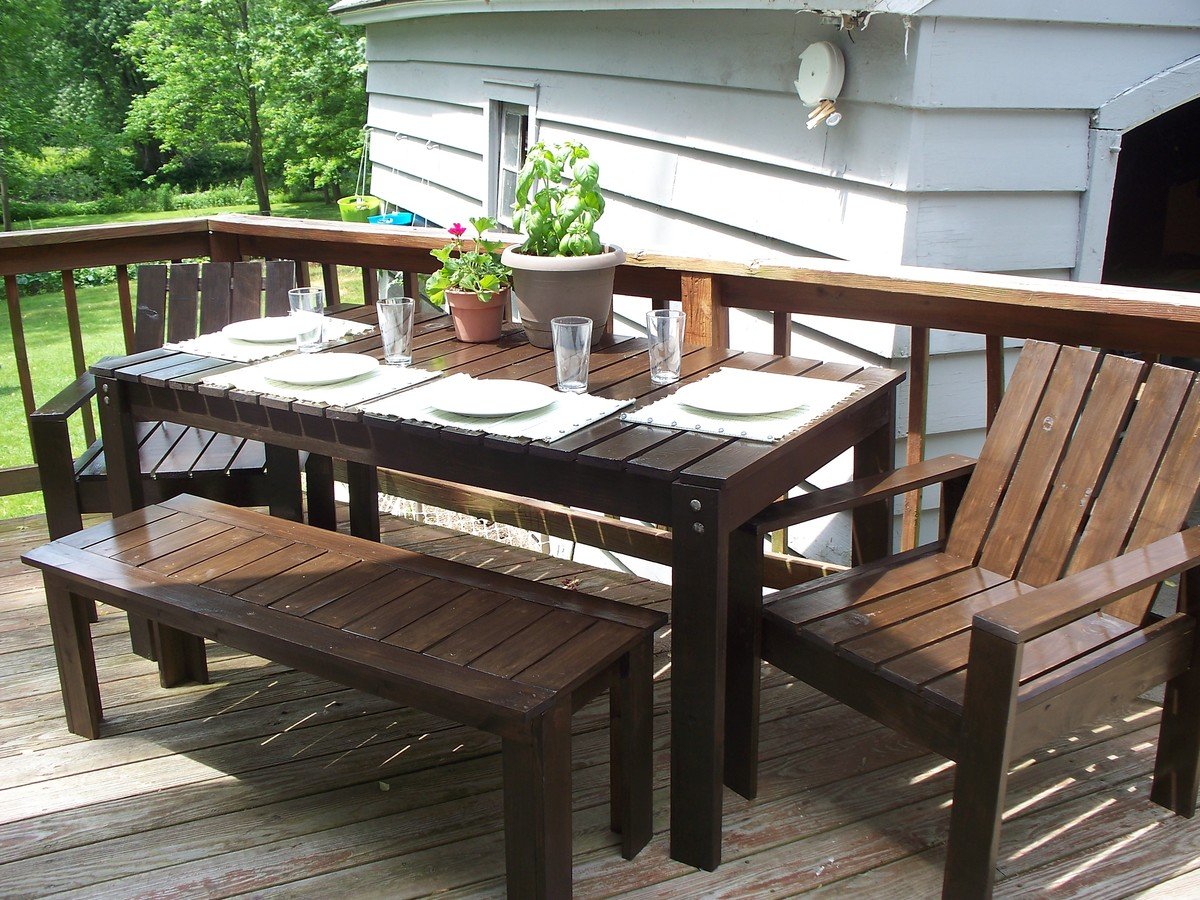
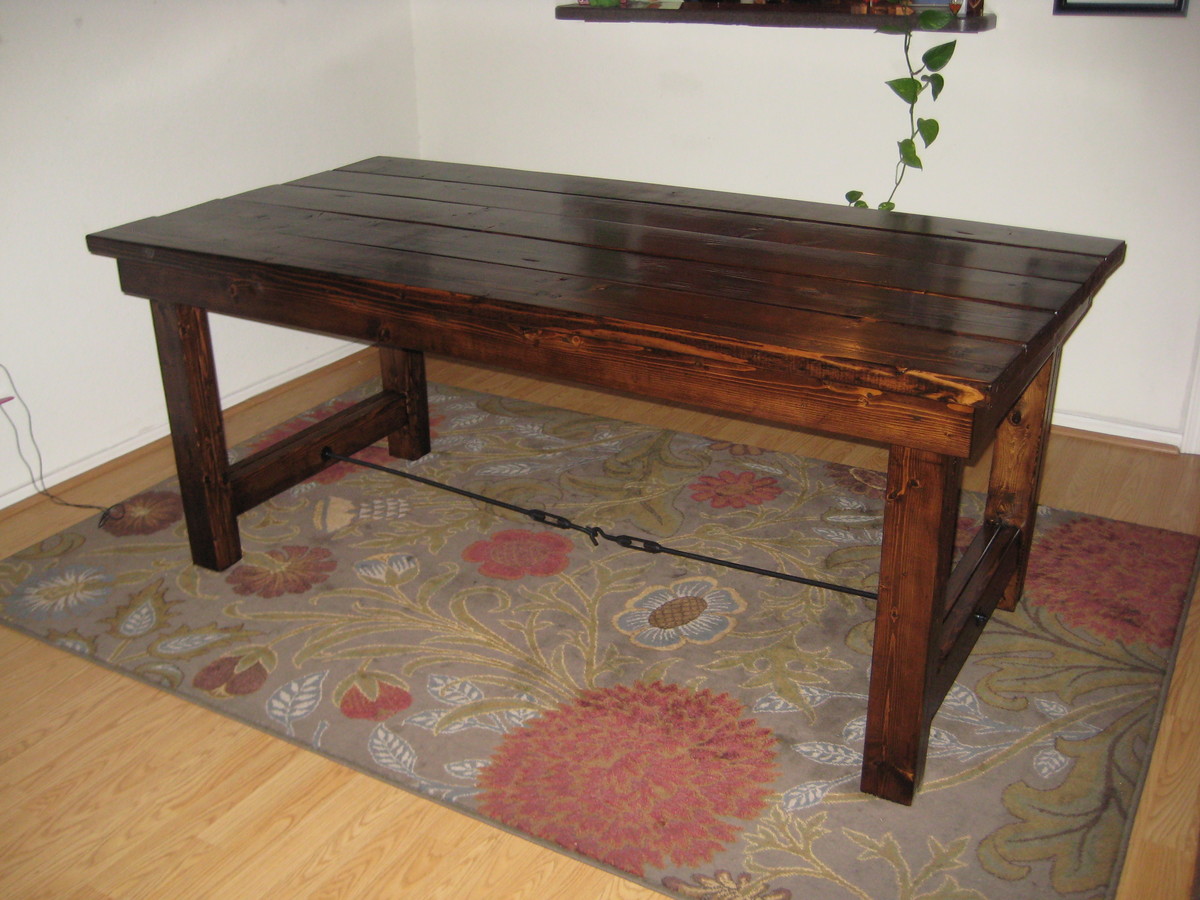
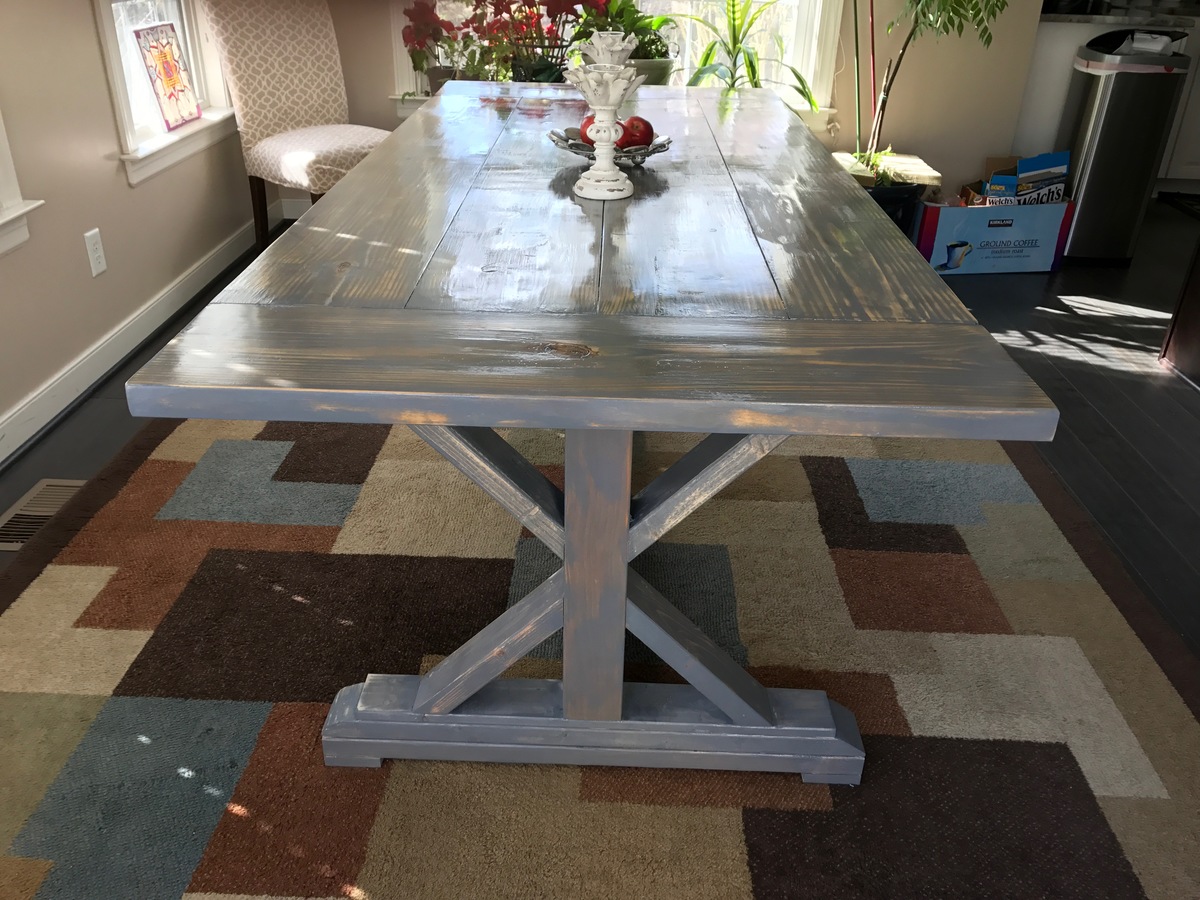
7 1/2 foot table using basic Ana White plans. I removed the stretcher to allow for more seating... but reinforced the underside to help make it structurally stronger. I also didn't add breadboards as the boss didn't like them. Painted the benches and legs of the table white.... stained the top with miniwax classic grey with a few coats of poly.
I was 58 when I built these. Super easy. I also built these in my kitchen to store all my gadgets..
Thanks Ana. You have so many things I want to try.
April E
This is my second build and I'm so pleased with how it turned out! I bought a Kreg Jig especially for this project, and I honestly don't know how I ever lived without it!
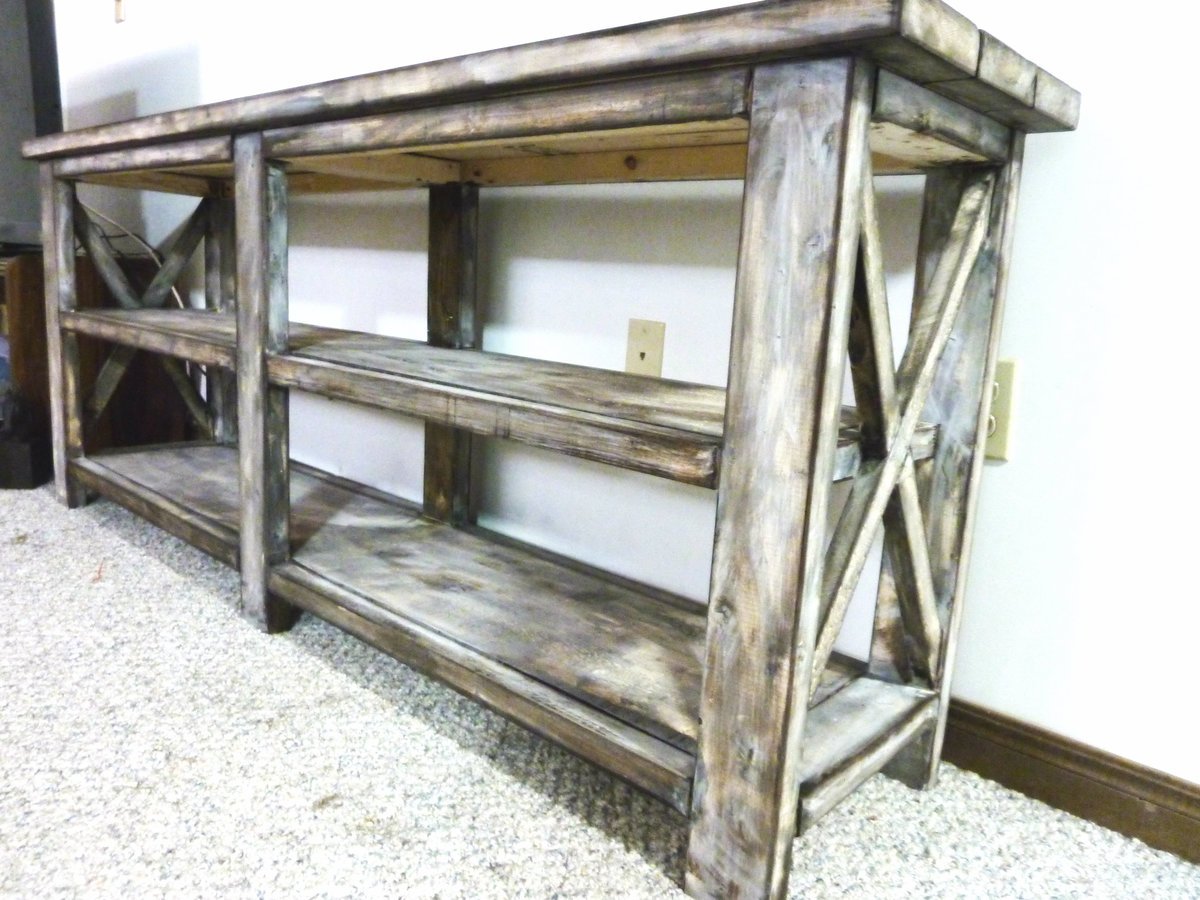
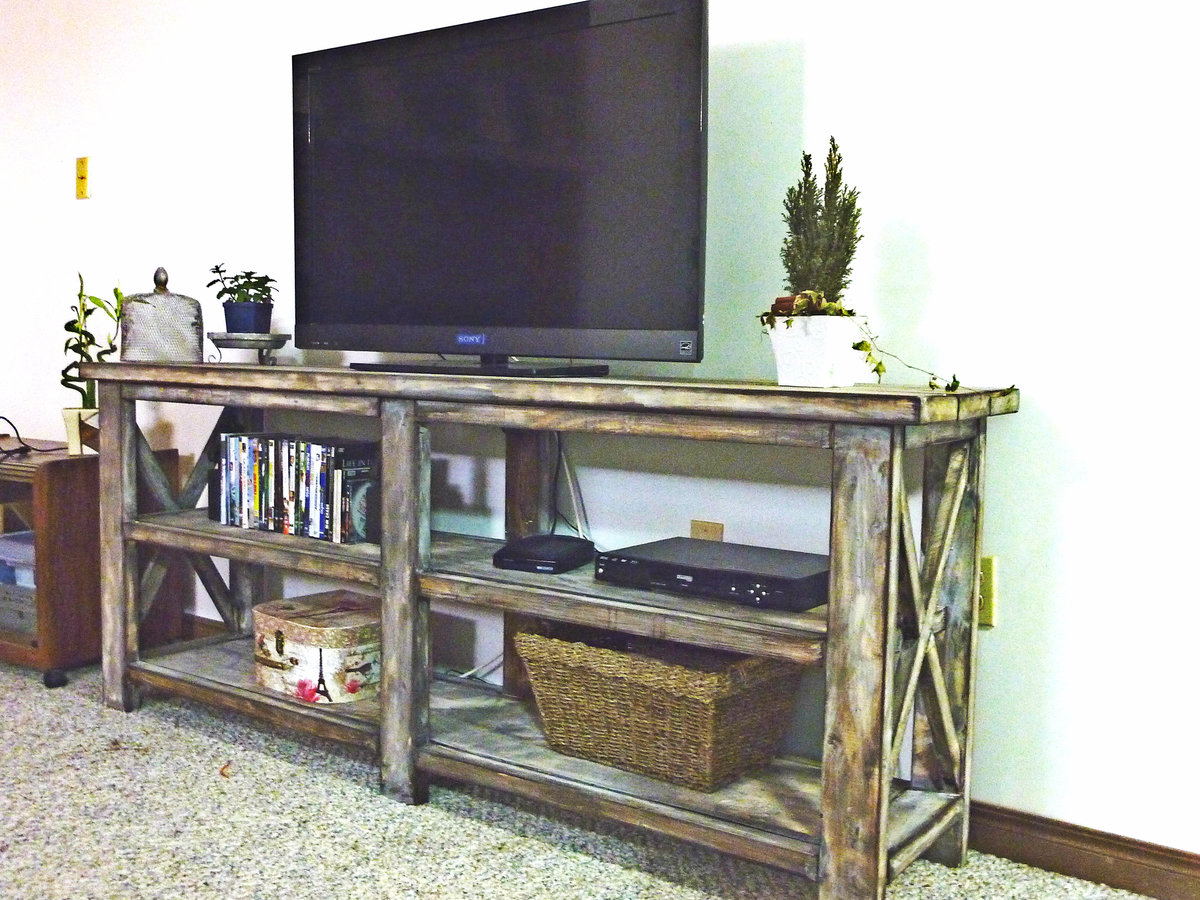
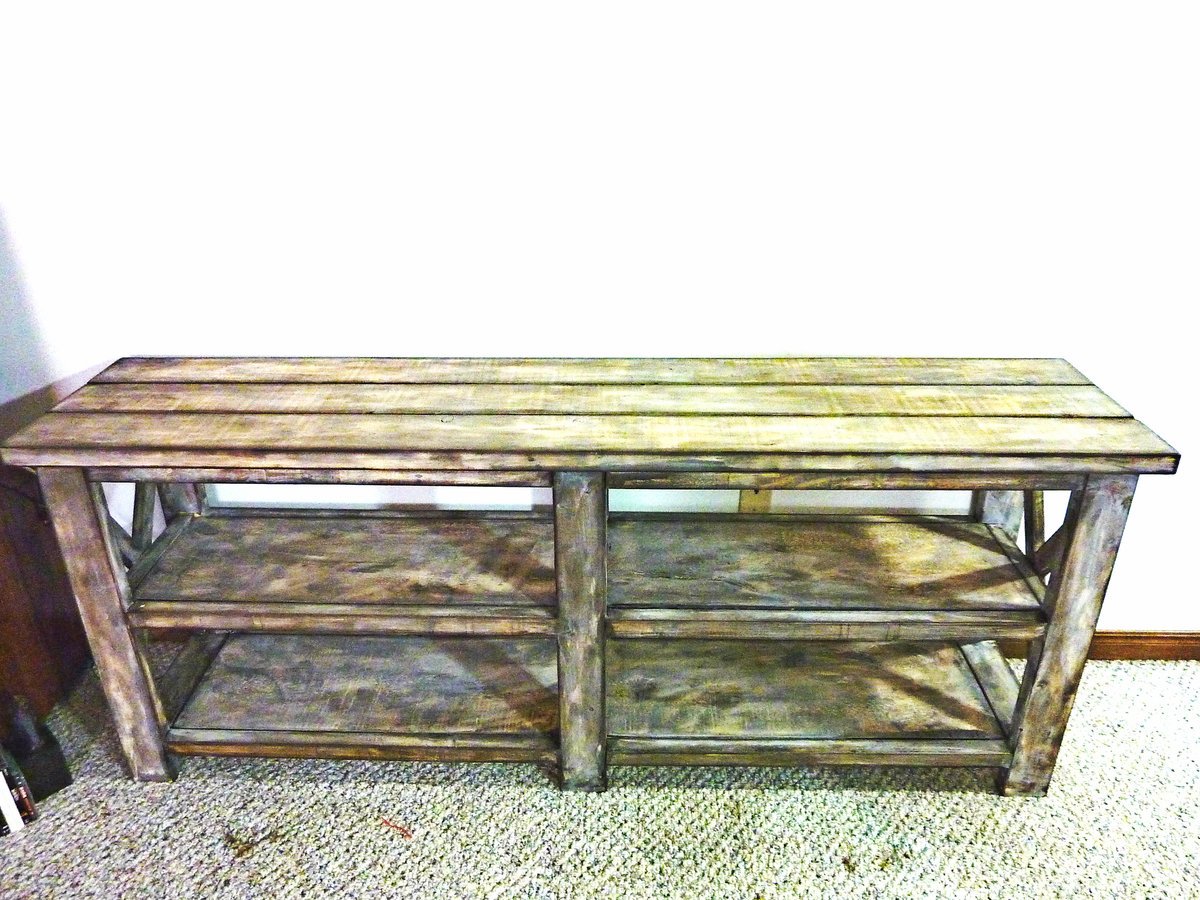
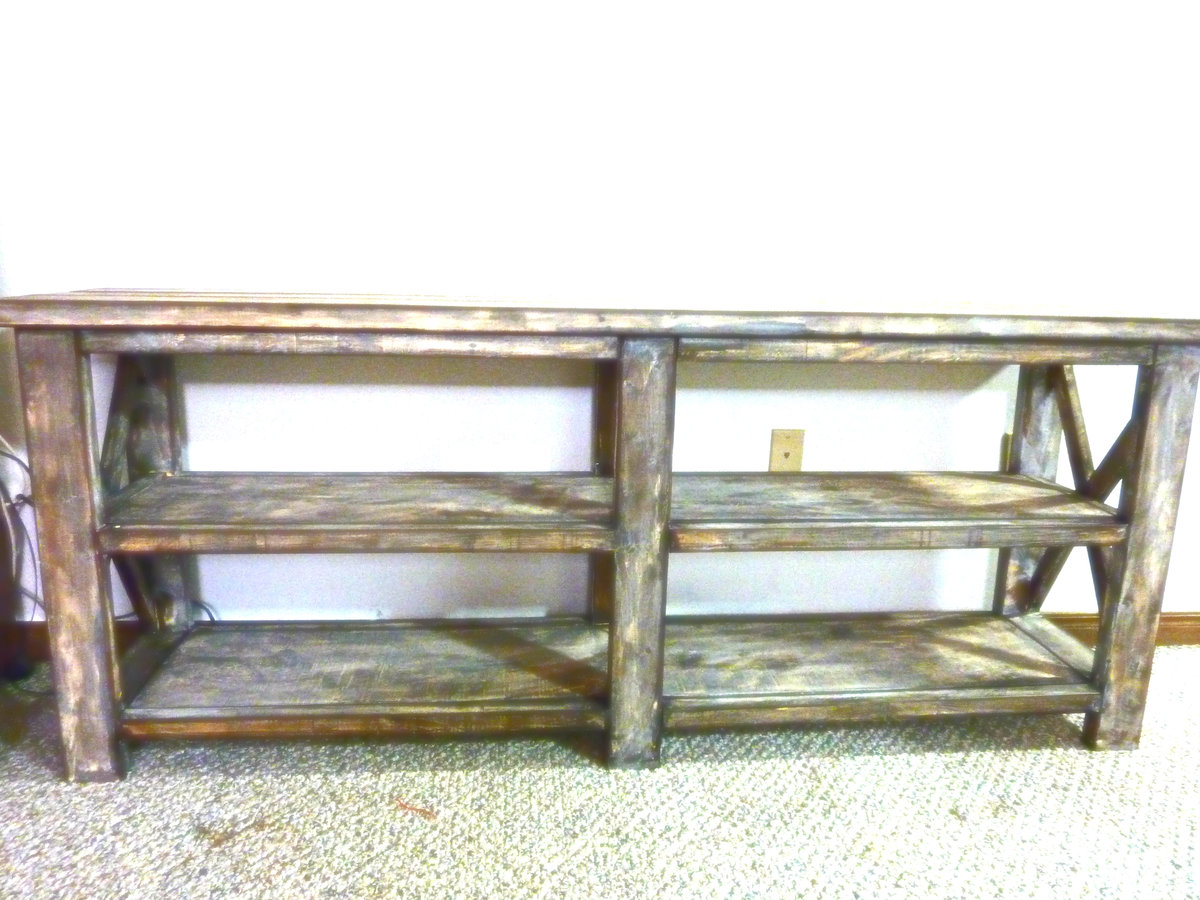
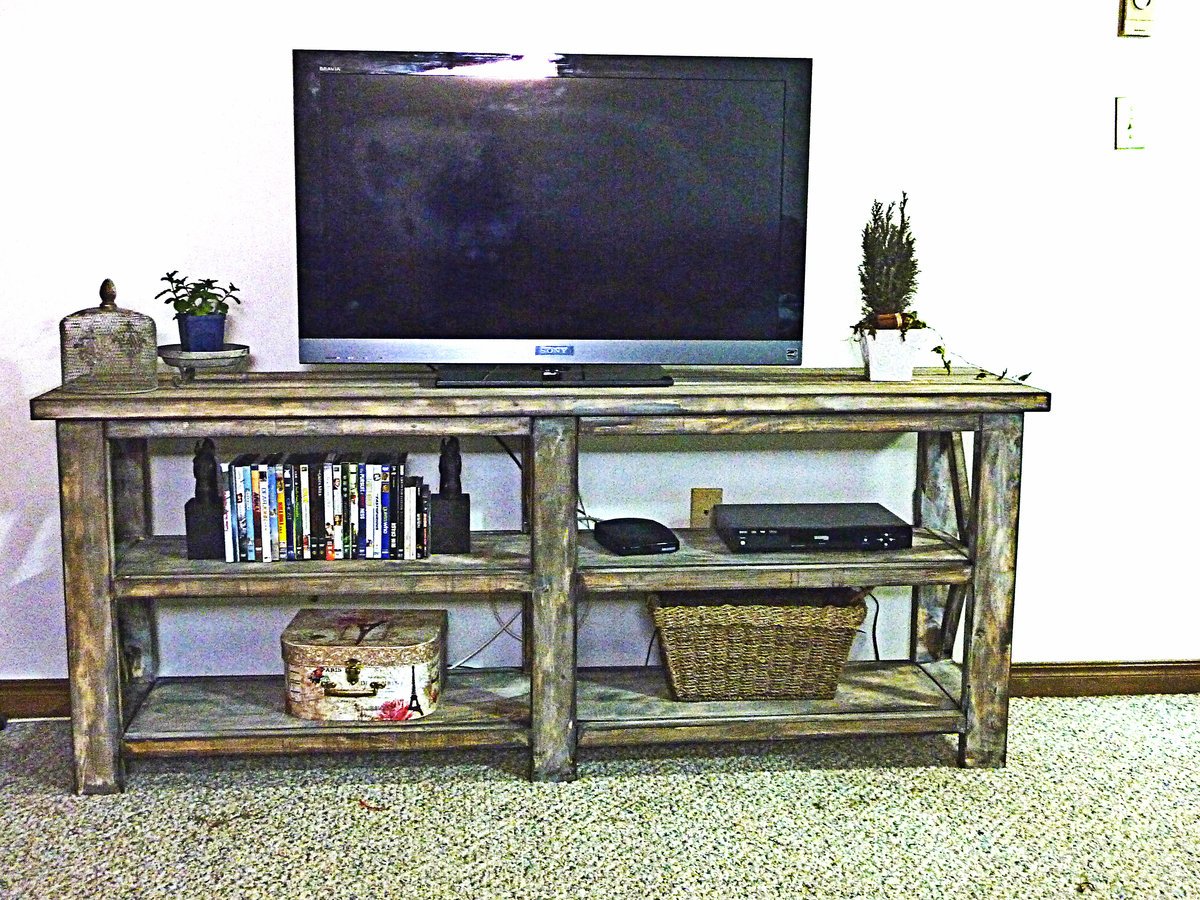
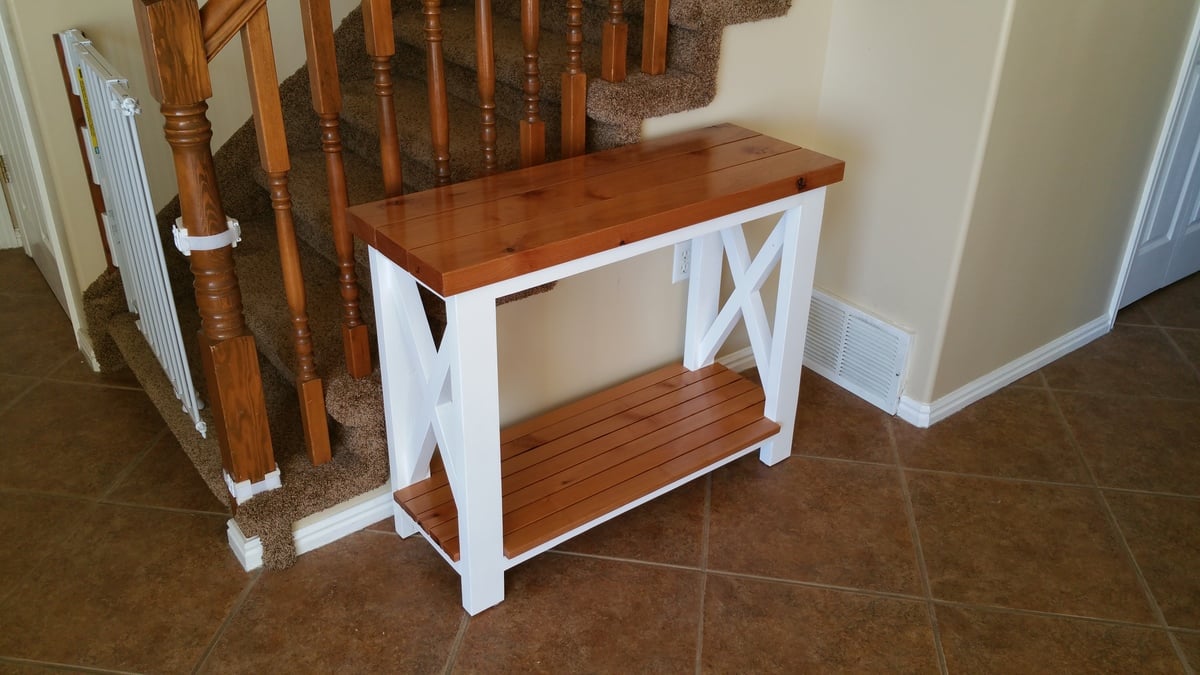
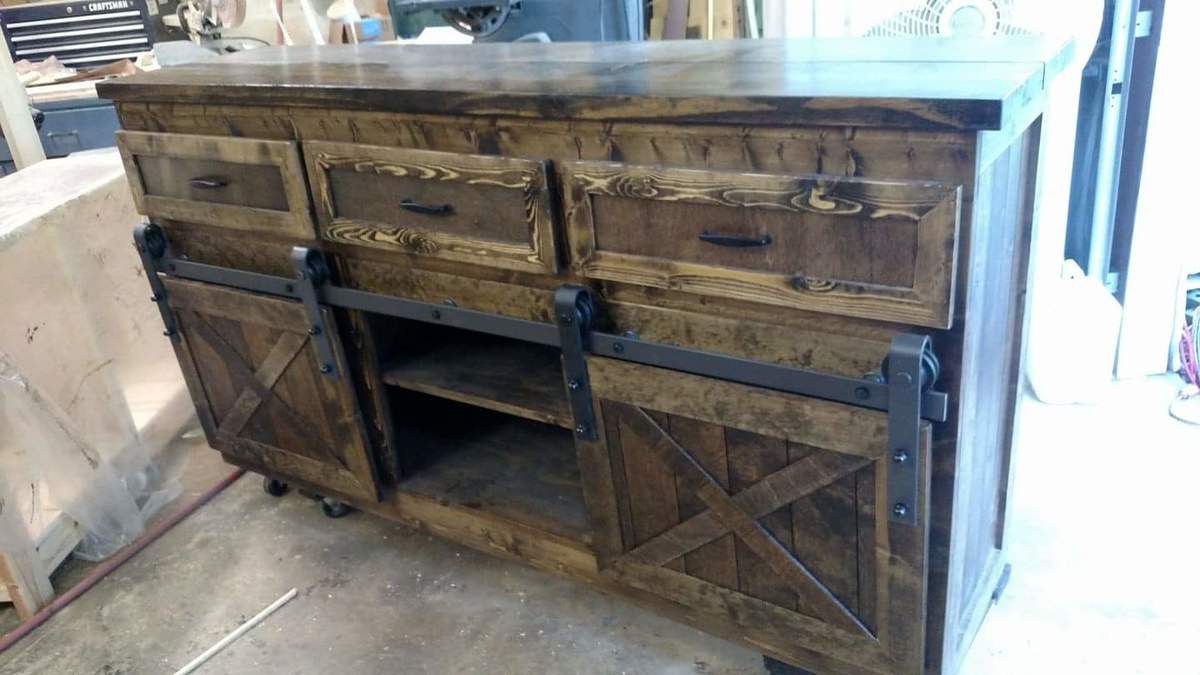
I'd been wanting a new console for our TV and this seemed perfect.


Fri, 08/02/2013 - 06:54
This looks awesome, I wasn't planning on building the console table to match my coffee table, but after seeing how yours turned out I might have to work on this next! I love the cool finish that you did!
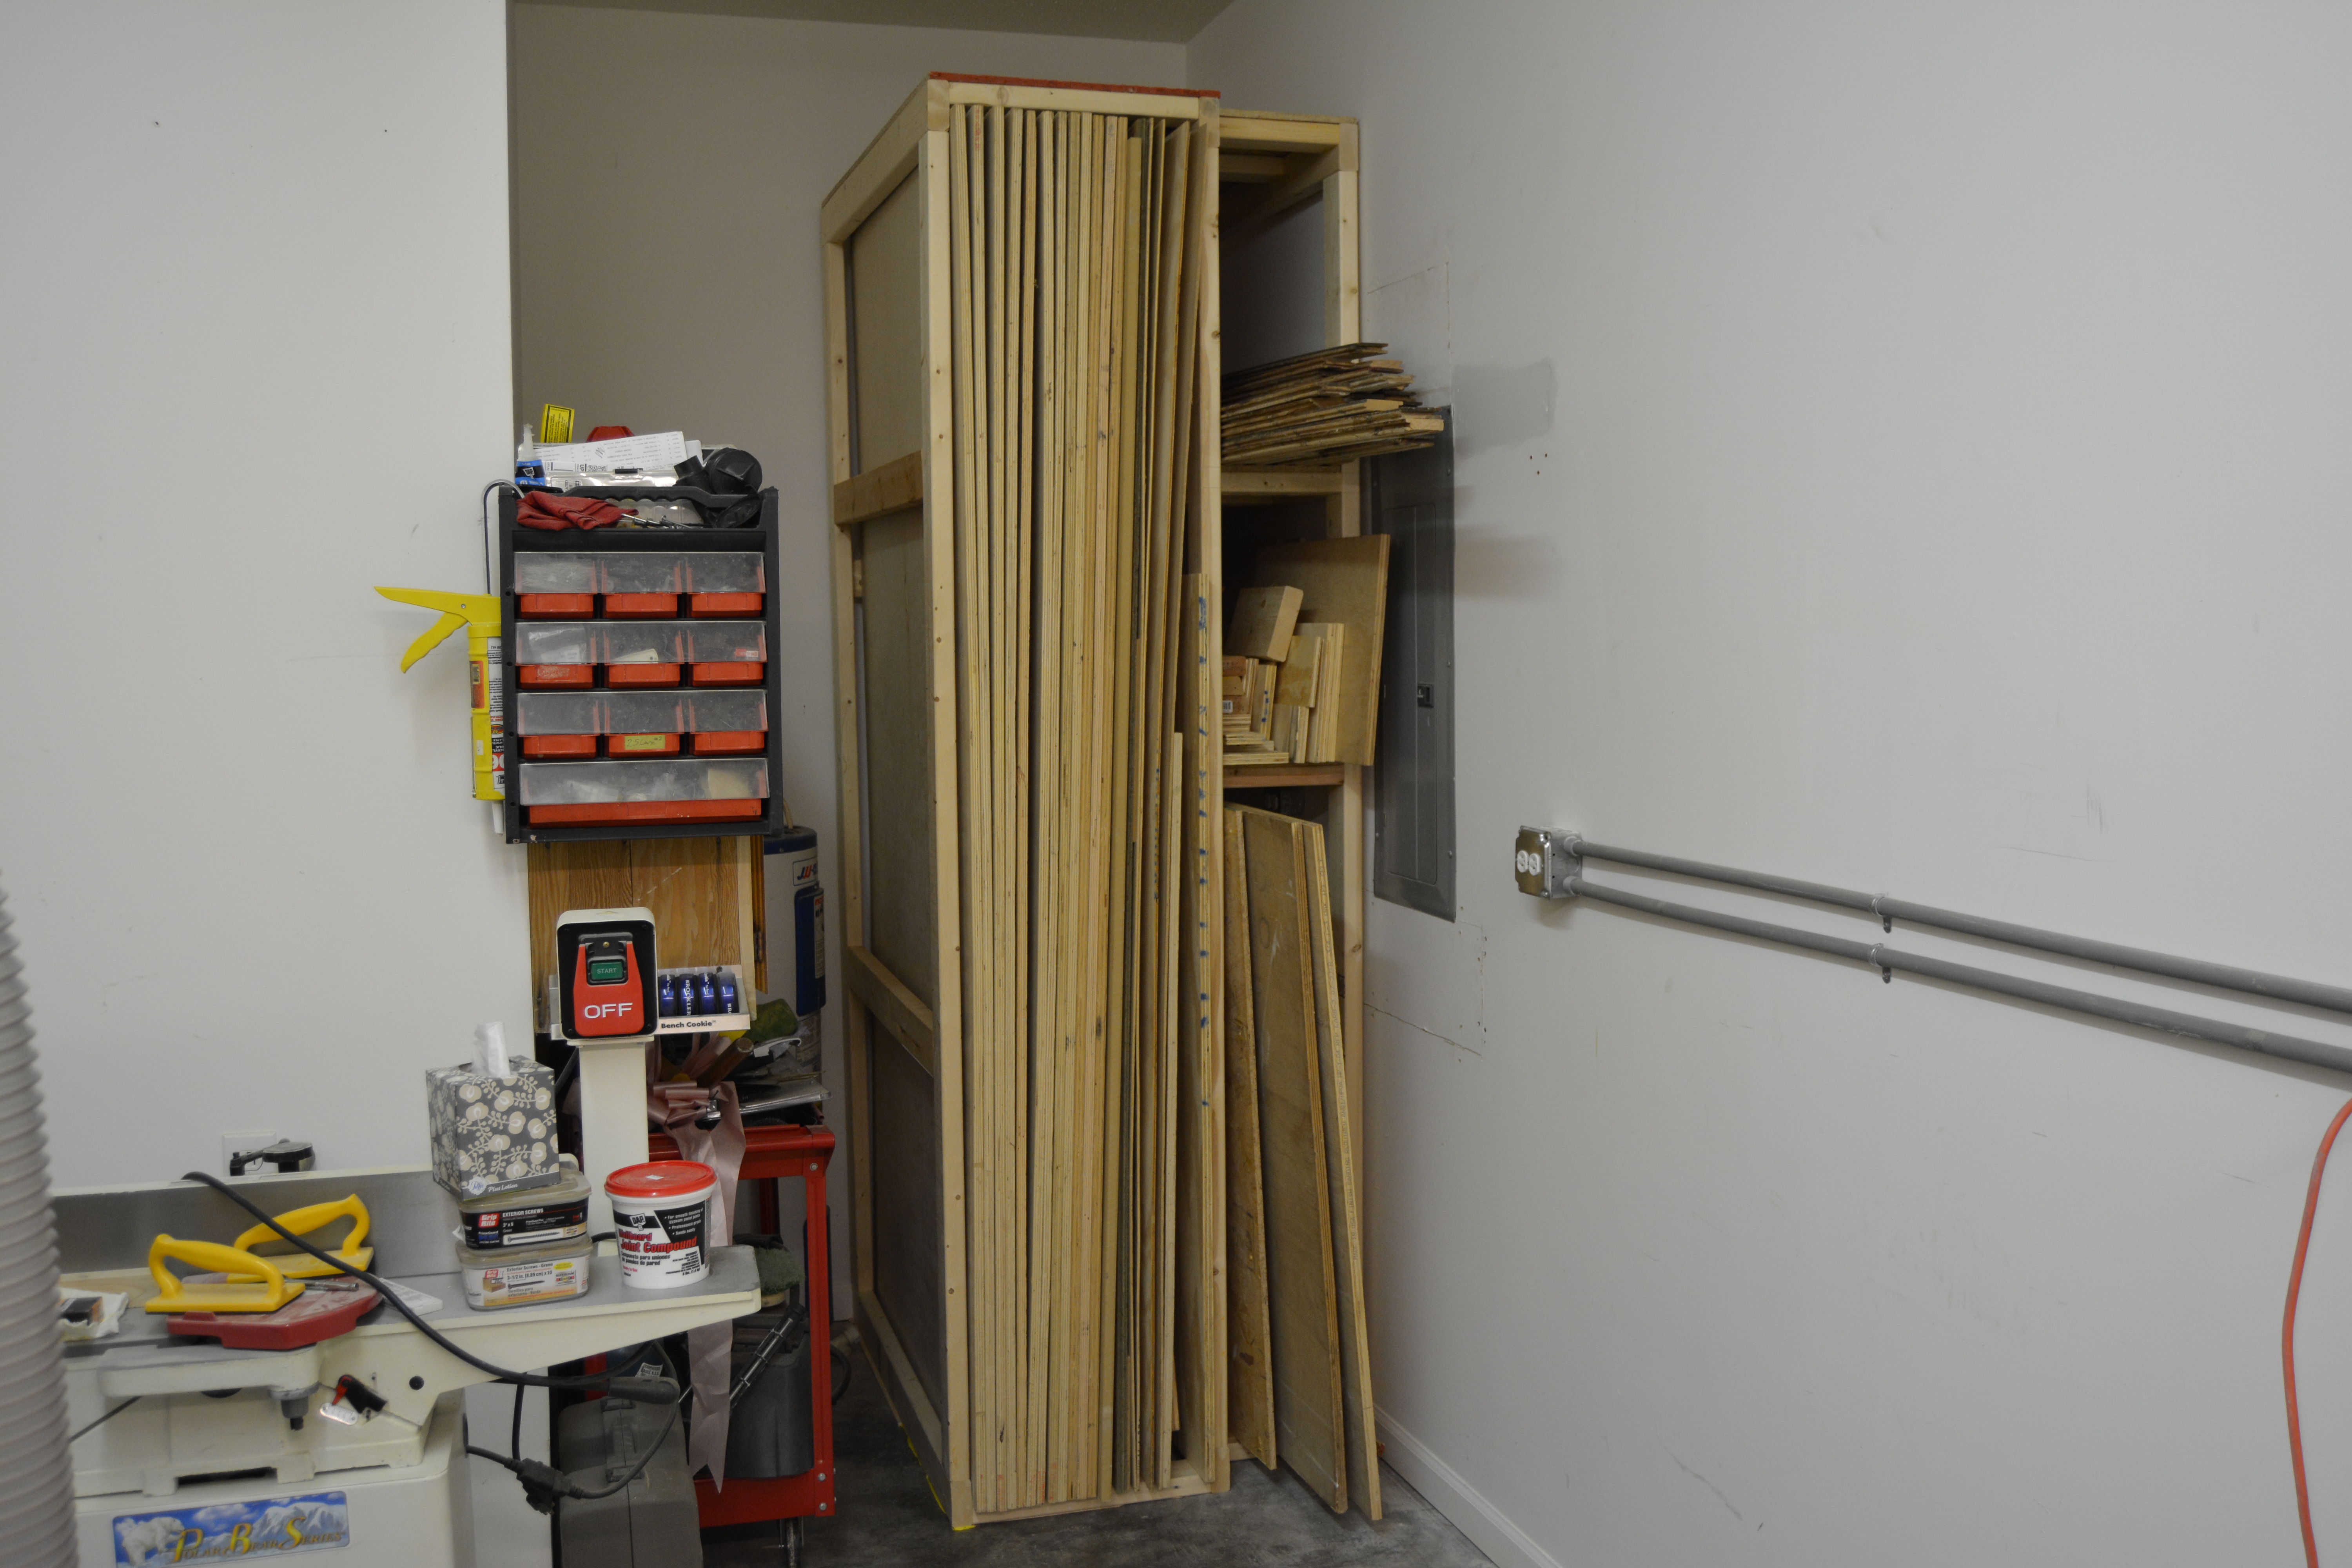
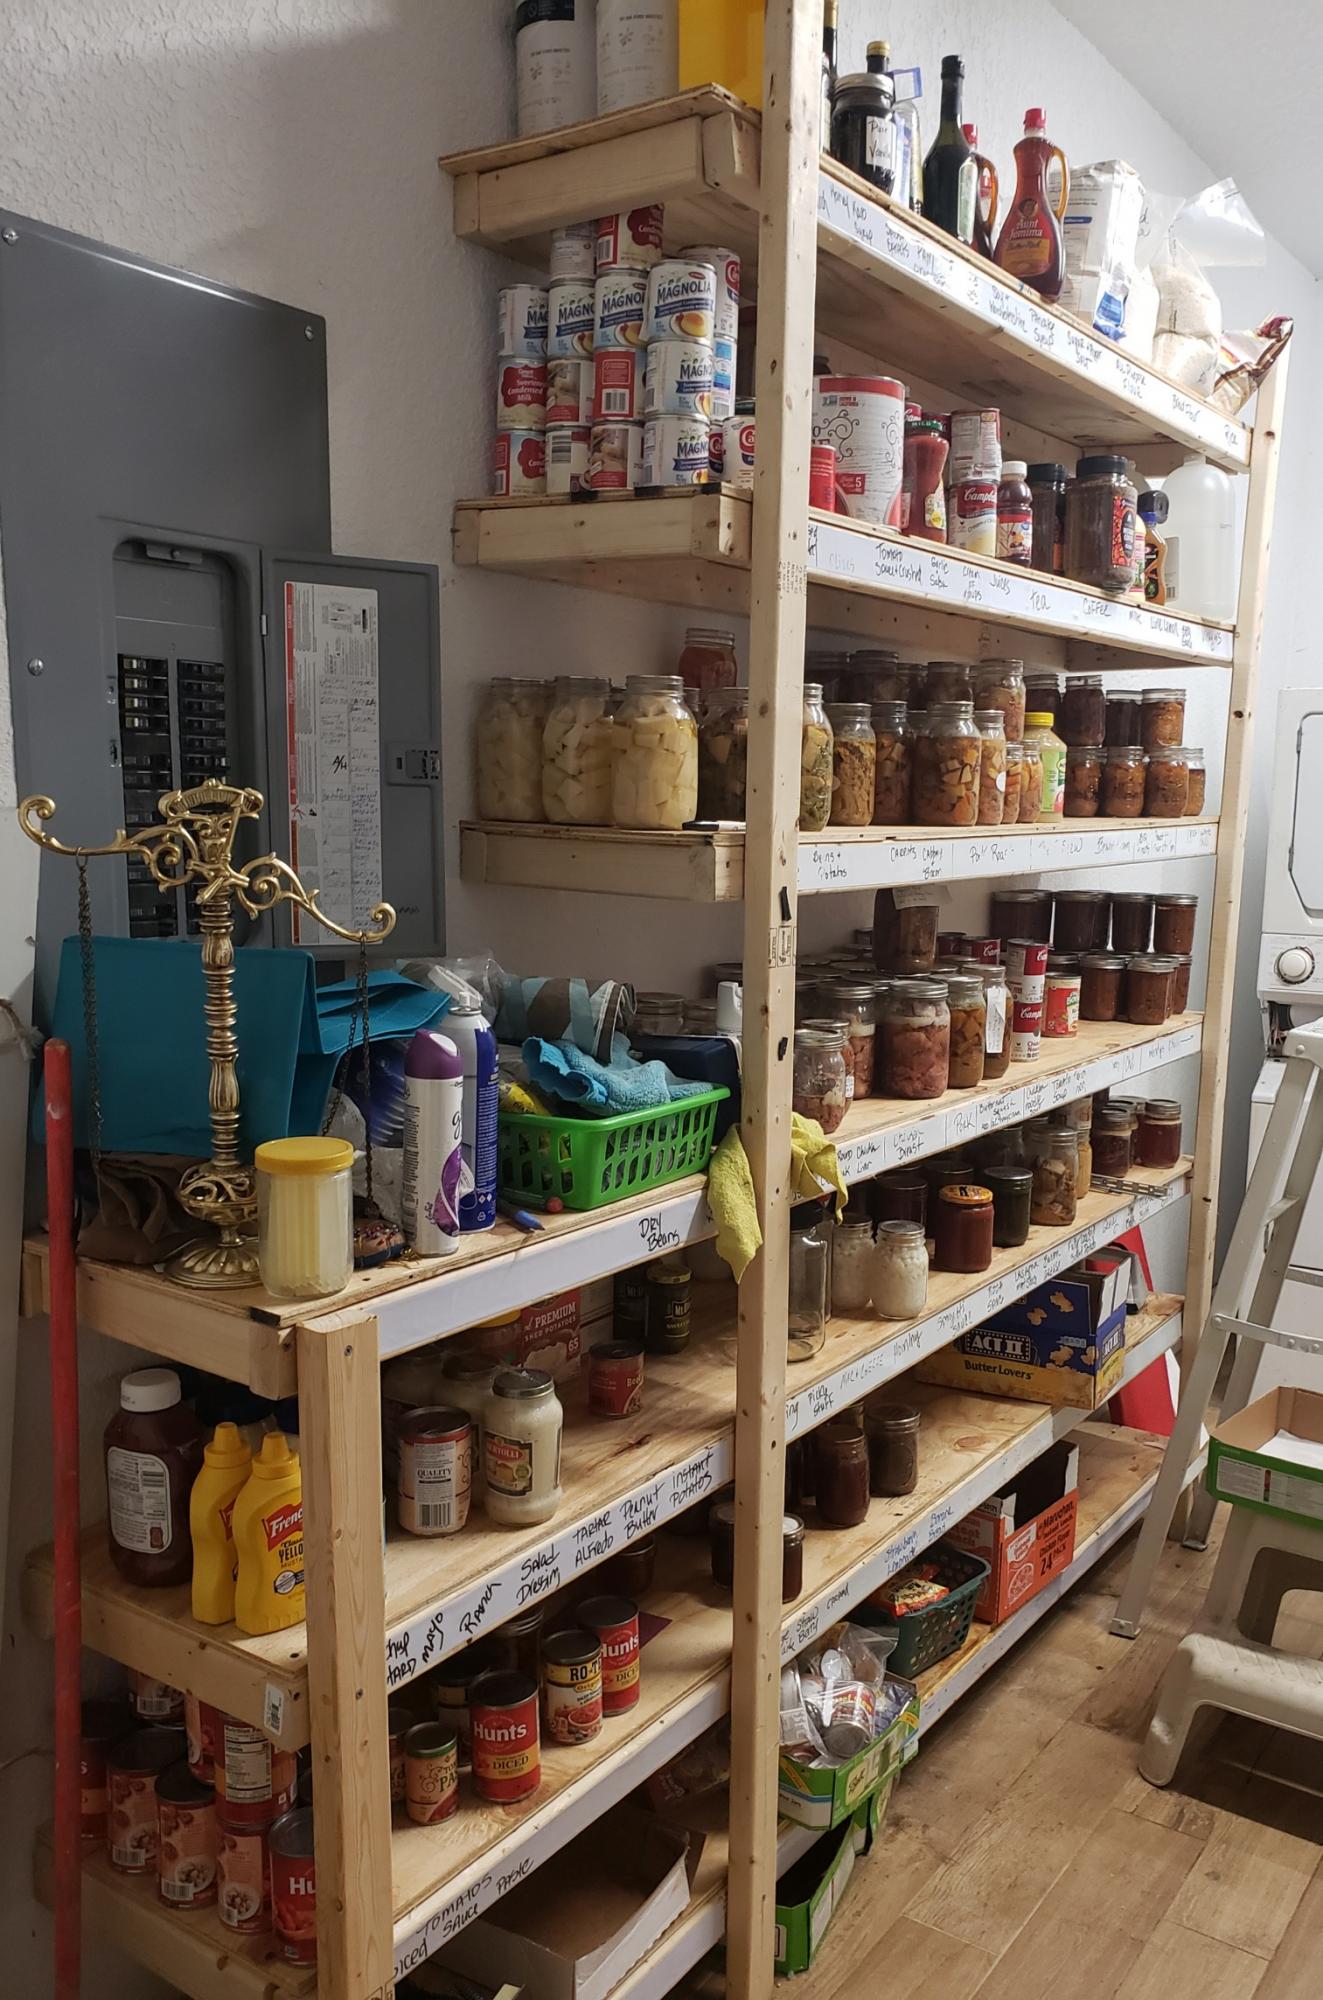
I built this plywood rack for my shop a couple of weeks back. Here is a link to my site with a free set of plans: http://www.lanebroswoodshop.com/2015/02/sheet-goods-rack.html
And my YouTube video: https://www.youtube.com/watch?v=aJWOj63wqYk


These were exactly what we were looking for to dress up the front of our house. They are a great size and went together pretty easily. Getting the angle cuts right took a few tries, but once you get past that it's all pretty simple! Also these are very forgiving for small errors and they look fantastic! We made three for across the front of our house and painted them to match our front door. For more details on our planters, please follow the link to our blog!

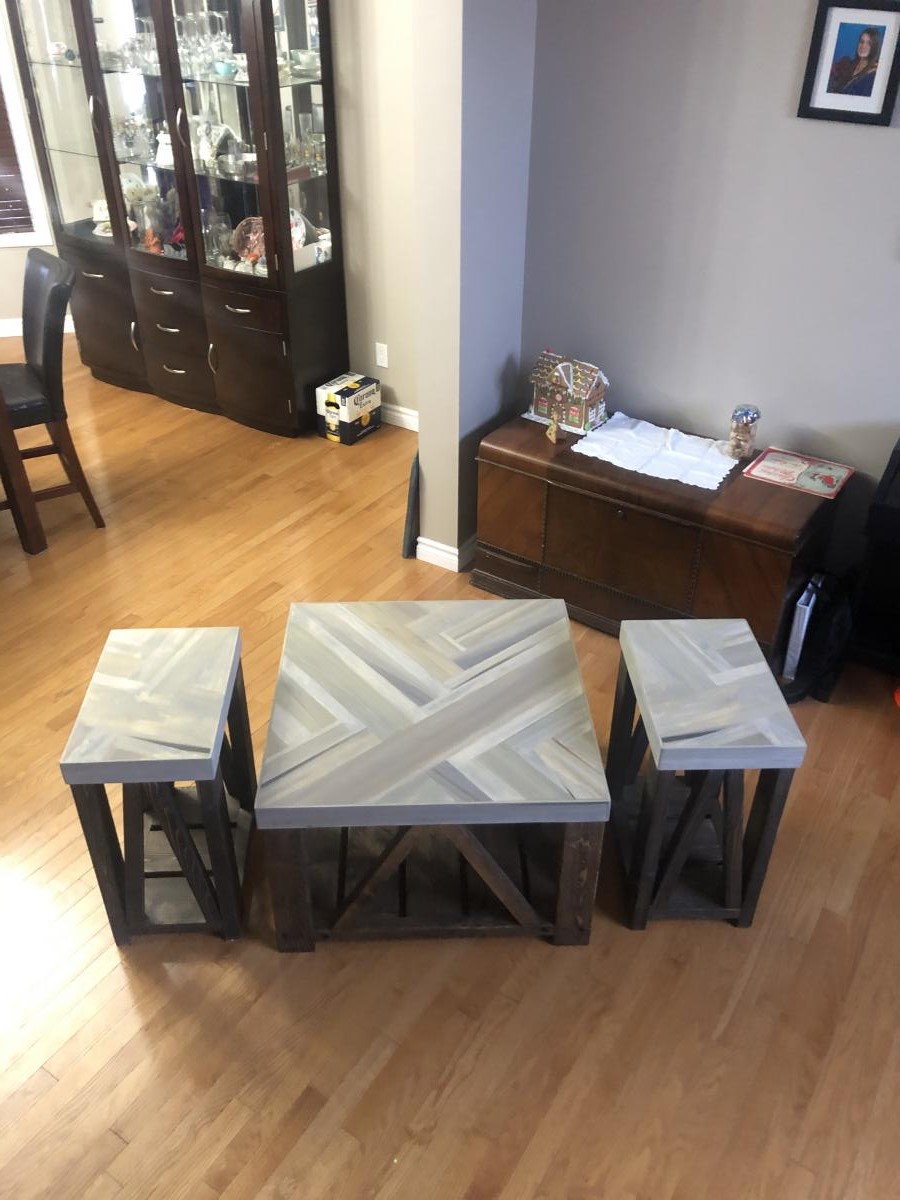
Wife asked me for a coffee table for the living room. Was the first piece of furniture ive ever made, it turned out so well she asked for matching end tables. So i made some mirror image end tables. Fairly simple construction 2x4 and 2x6 and the top surface are poplar slats from home depot. 1”-4” Very happy with the way it turned out. Thanks Ana for all your great building tips and plans🤘🏼😎


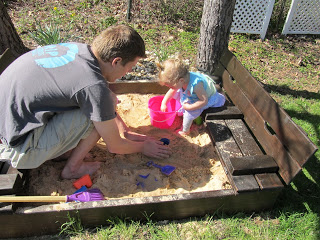
I gave this one to my Dad to do. Of course he made some changes. But she loves her sand box and we love it too! Thought I would share some pictures of the construction after he brought the parts to our house. 400 pounds of sand later.
Built from reclaimed knotty alder

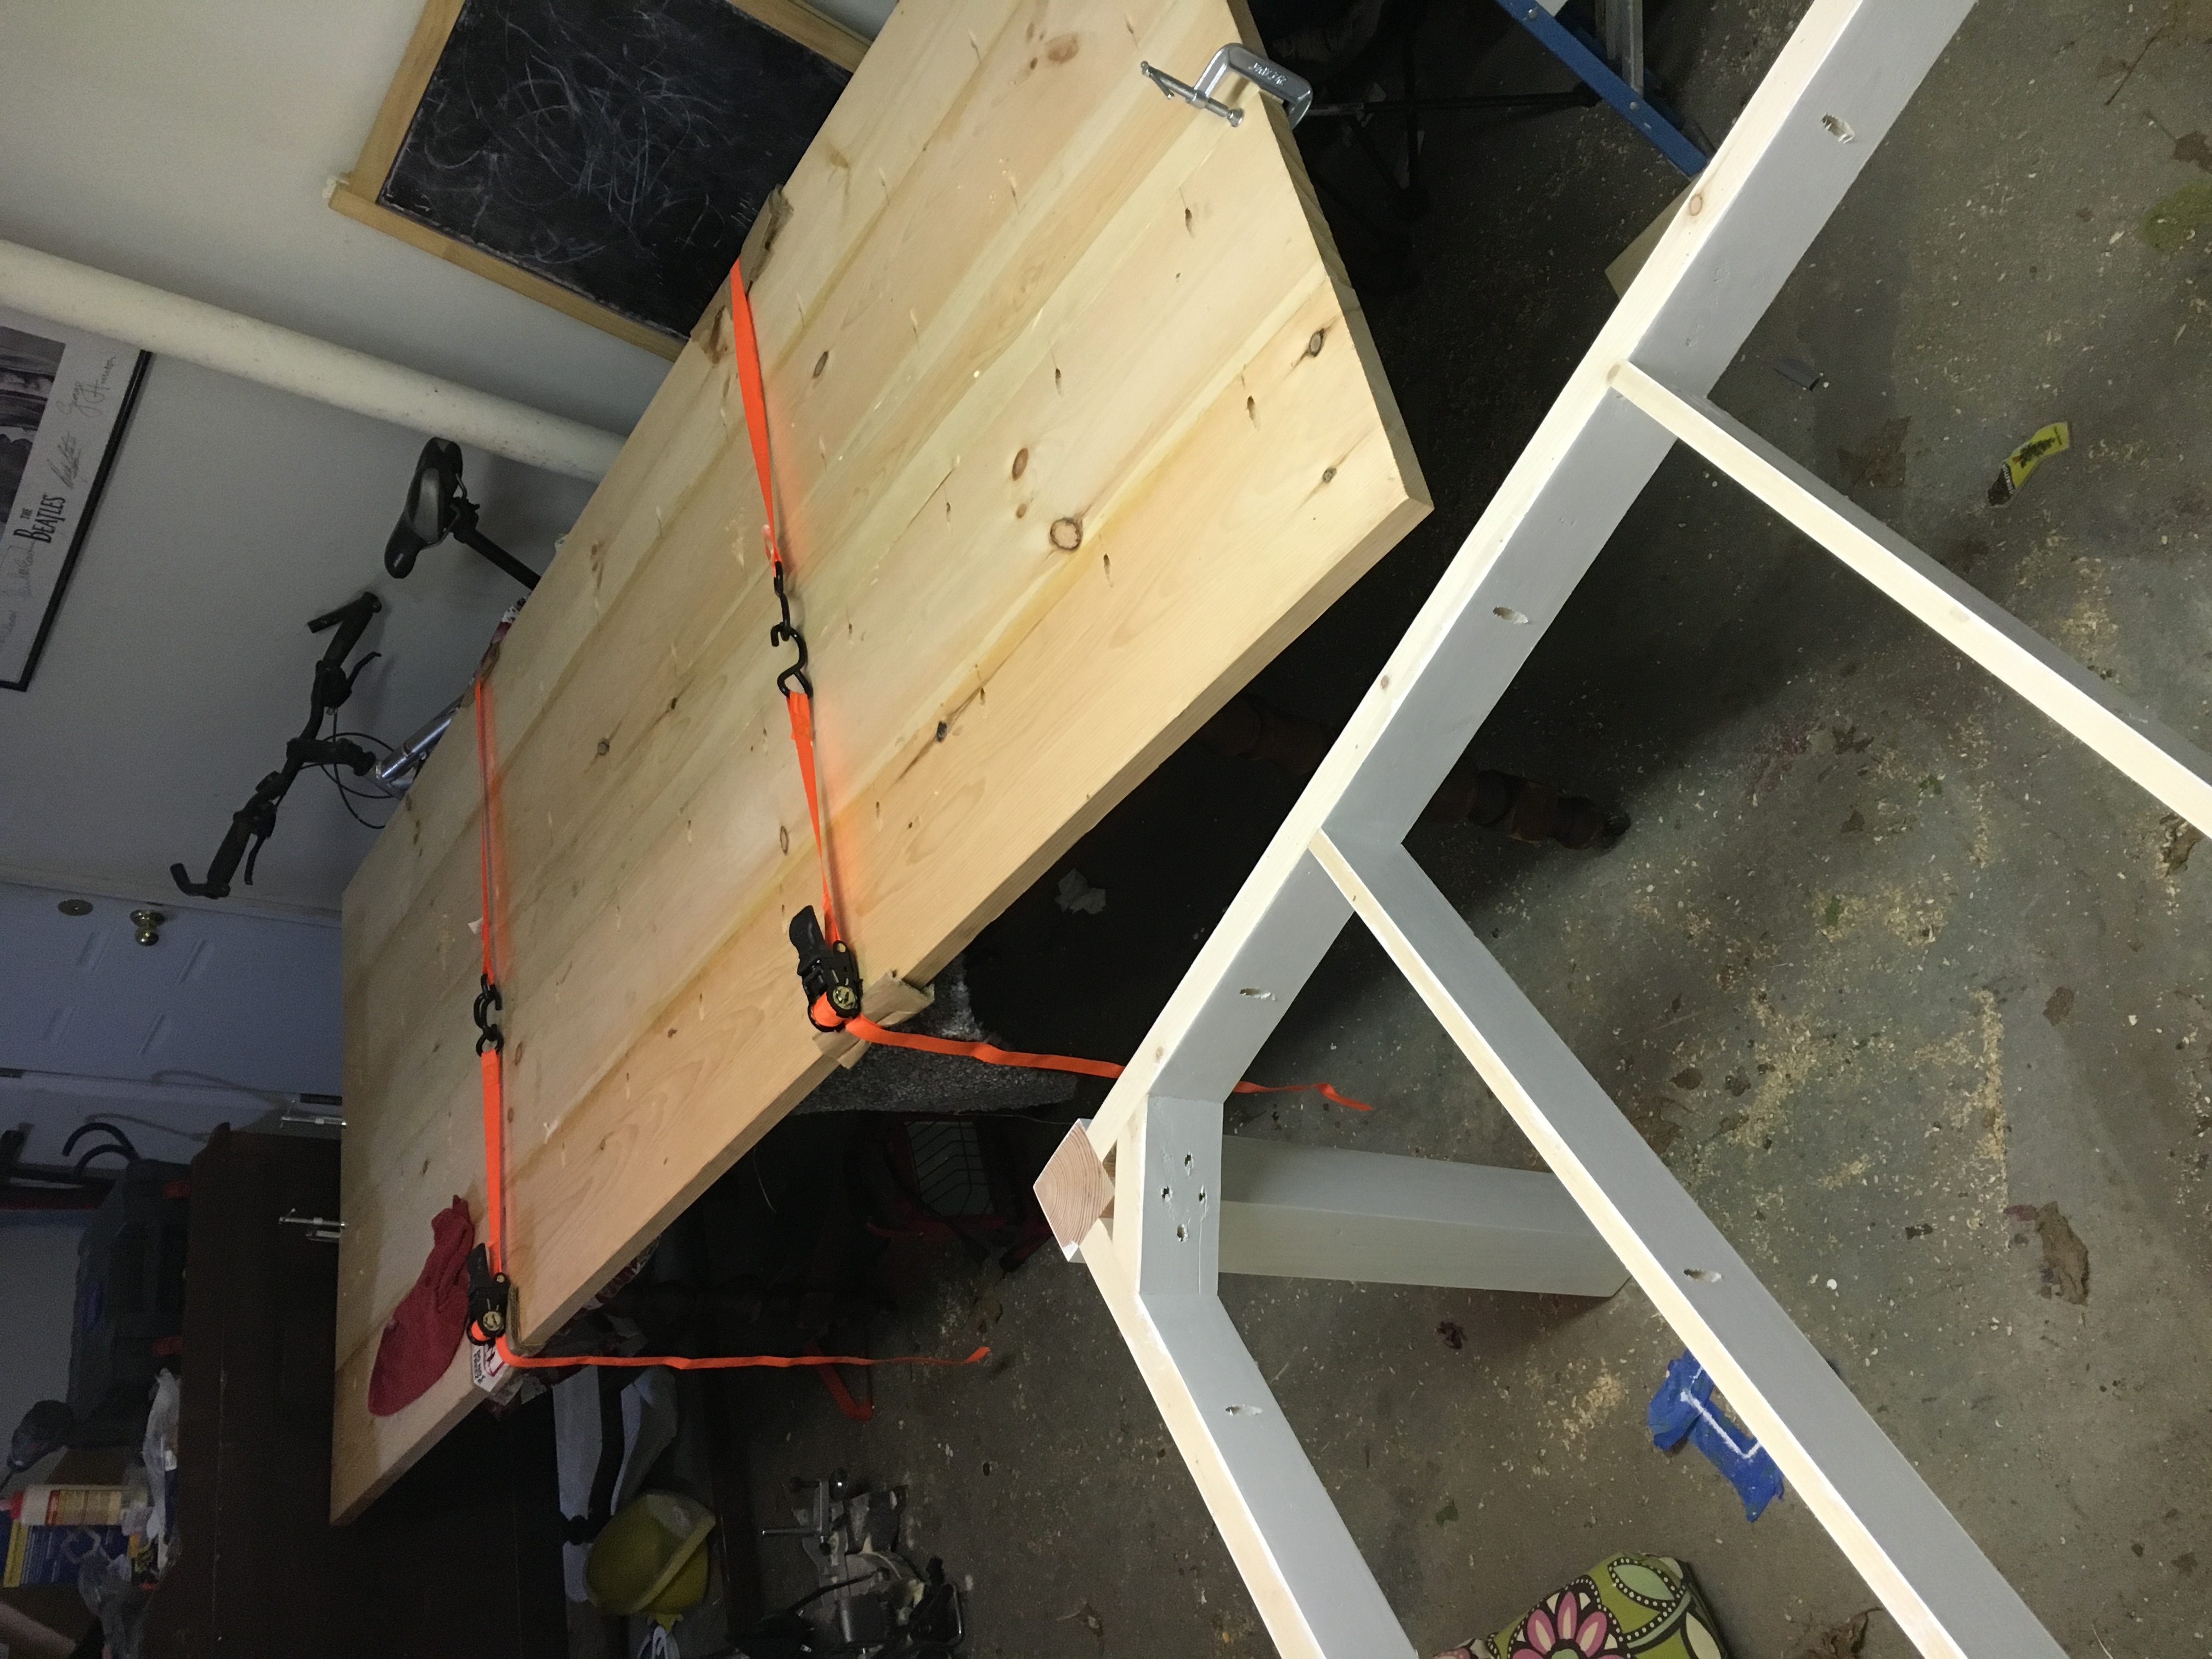
This was my Covid winter project. My name is Michael Gardner, I live in Florence, Oregon and I'll be 70 years old this month.
Tue, 10/05/2021 - 11:15
Way to go, that is something to be proud of, thank you for sharing!
The outdoor bench was my first Ana project. It was so easy and rewarding that I immediately set out to build the rest of the set!
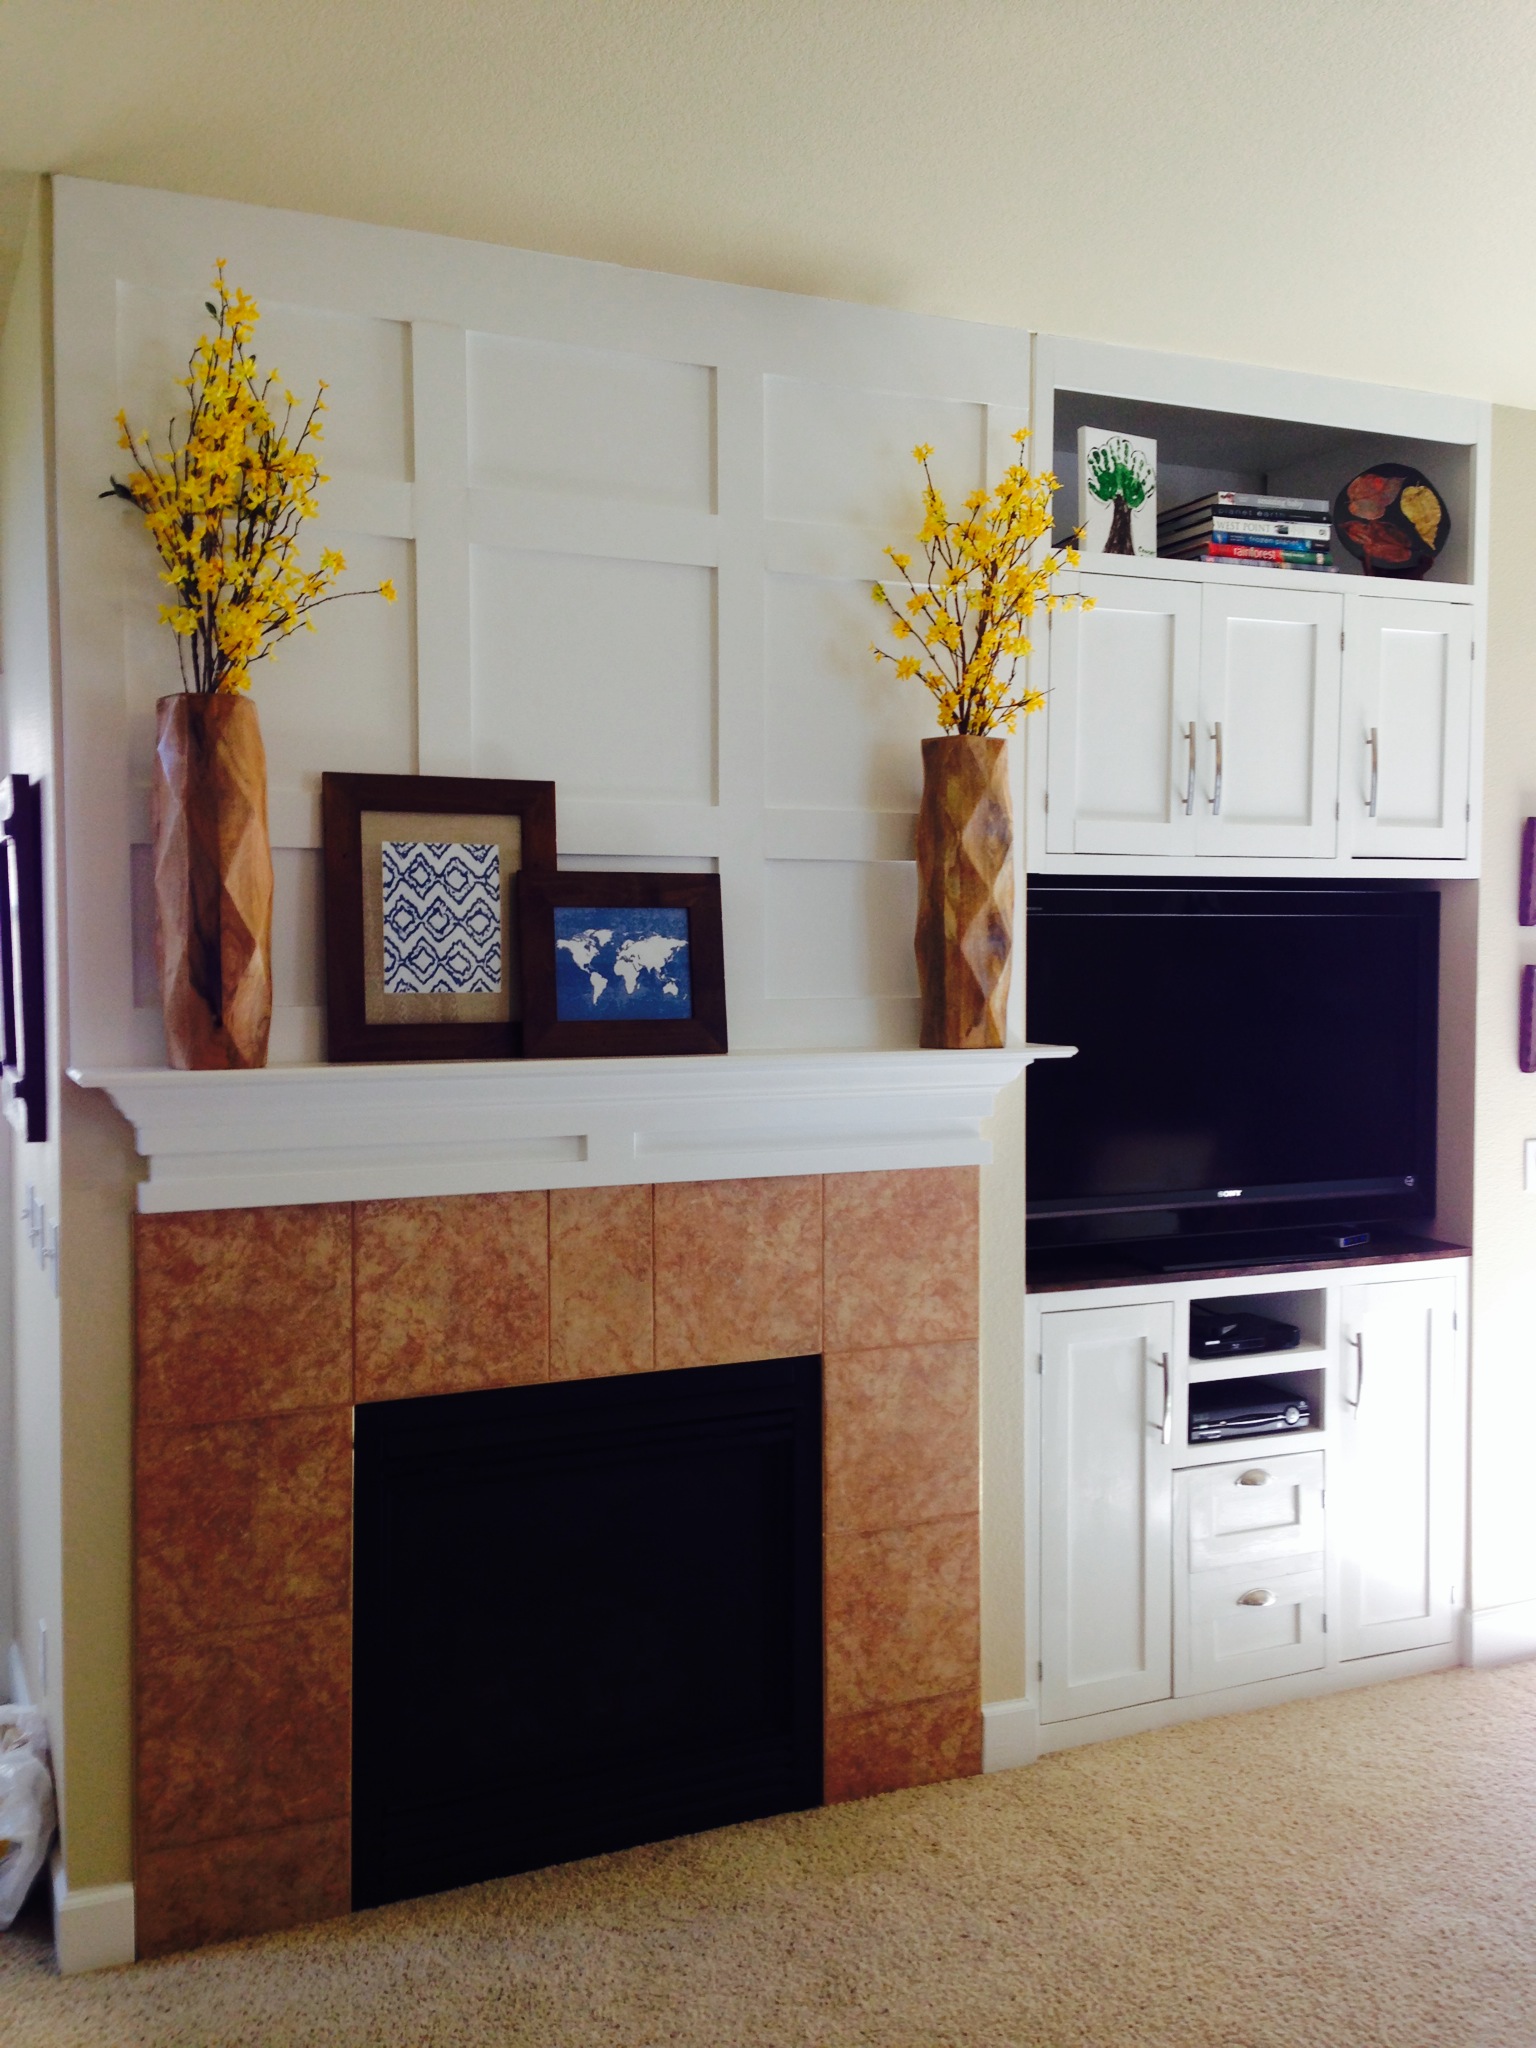
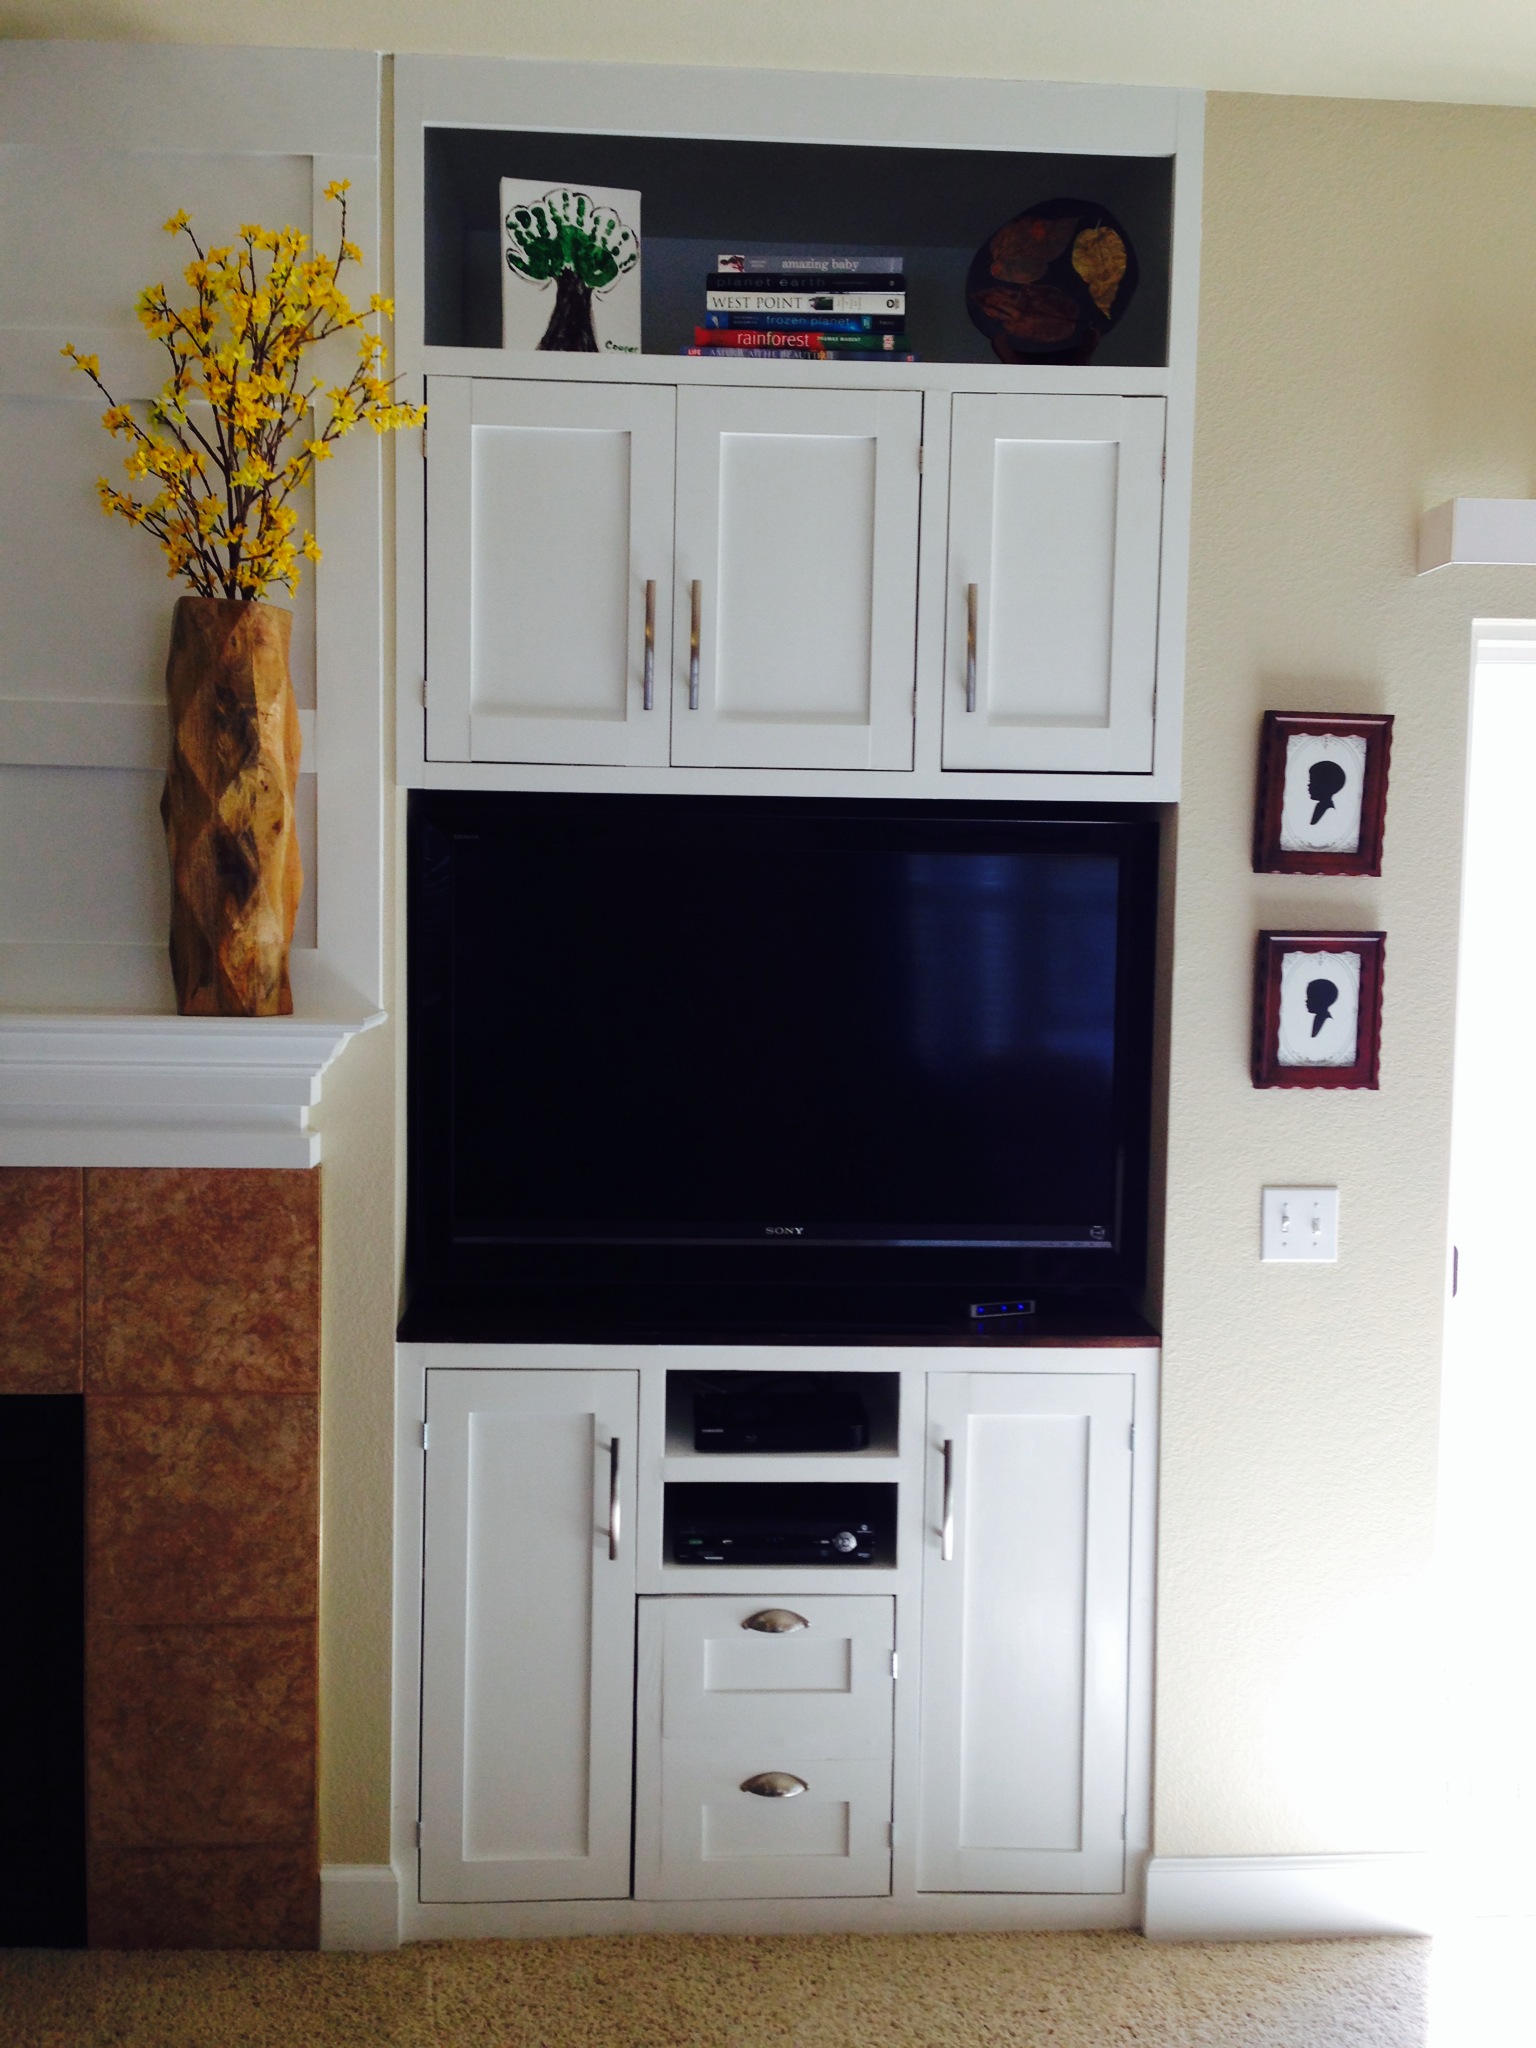
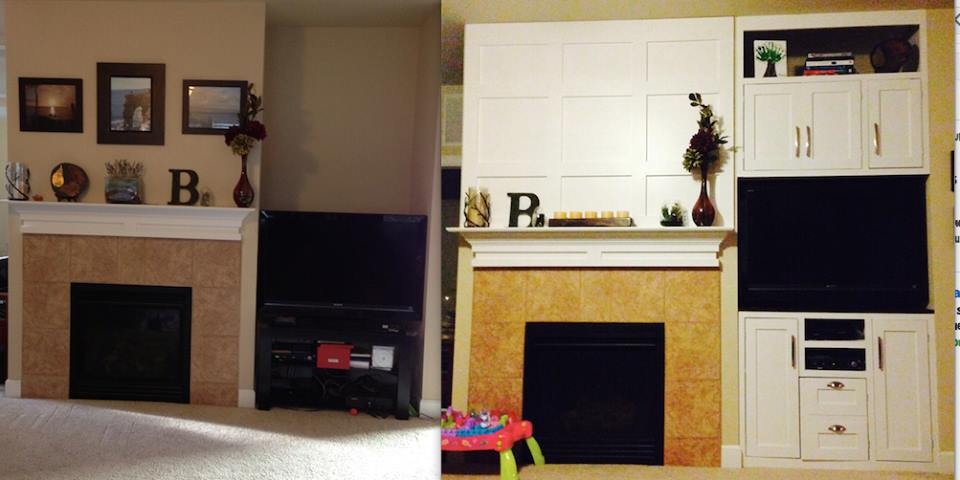
See the before/after pic for the difference. My daughter was pulling everything off our open TV stand so it had to go! I designed this to give us the toy storage we need as well. The niche was over two feet deep so I wanted something to utilize all the space. I also wanted the fireplace to stand out so added the board and batten treatment.

In reply to Great job by TwoCuteKids
Wed, 04/01/2015 - 06:53
Thanks! We just sold our house in under 48 hours and I think they helped. Thanks for all the great plans Ana!

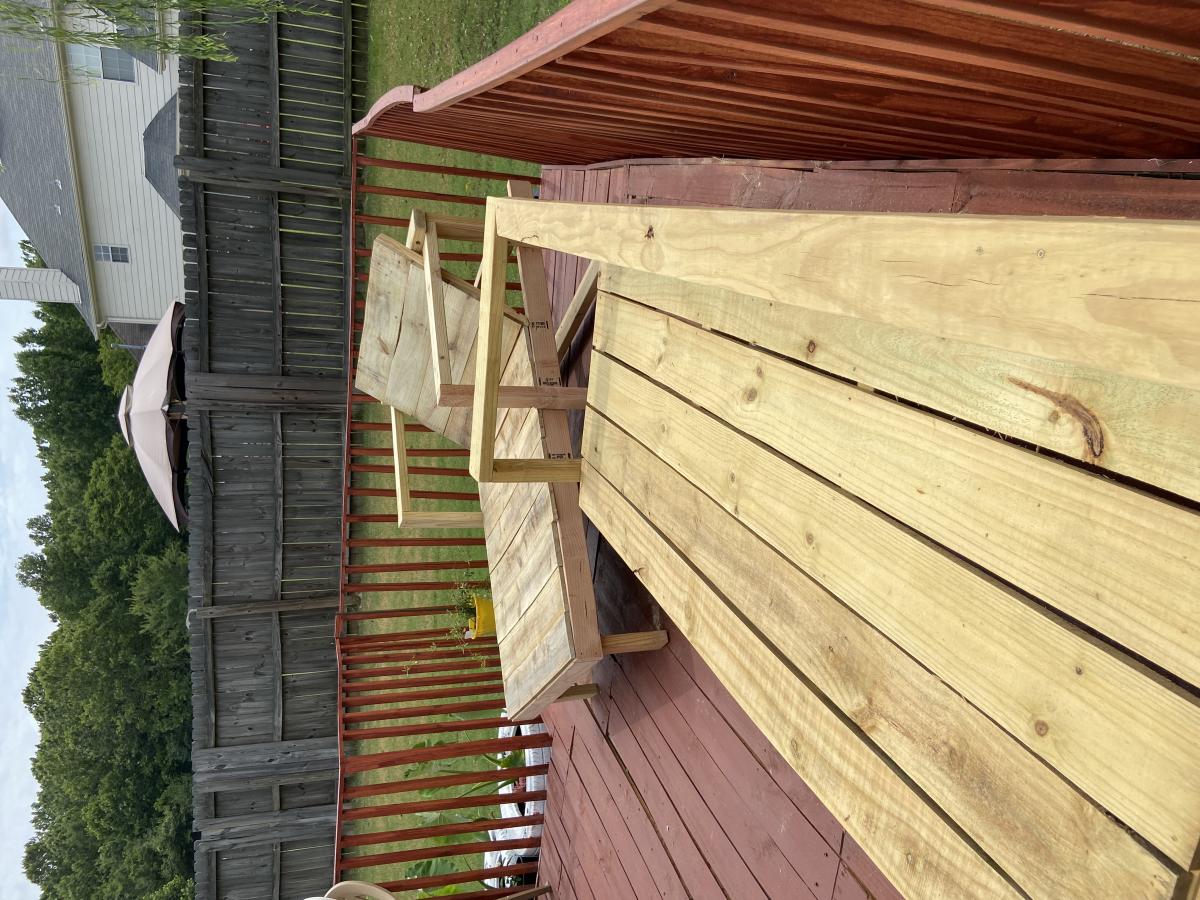
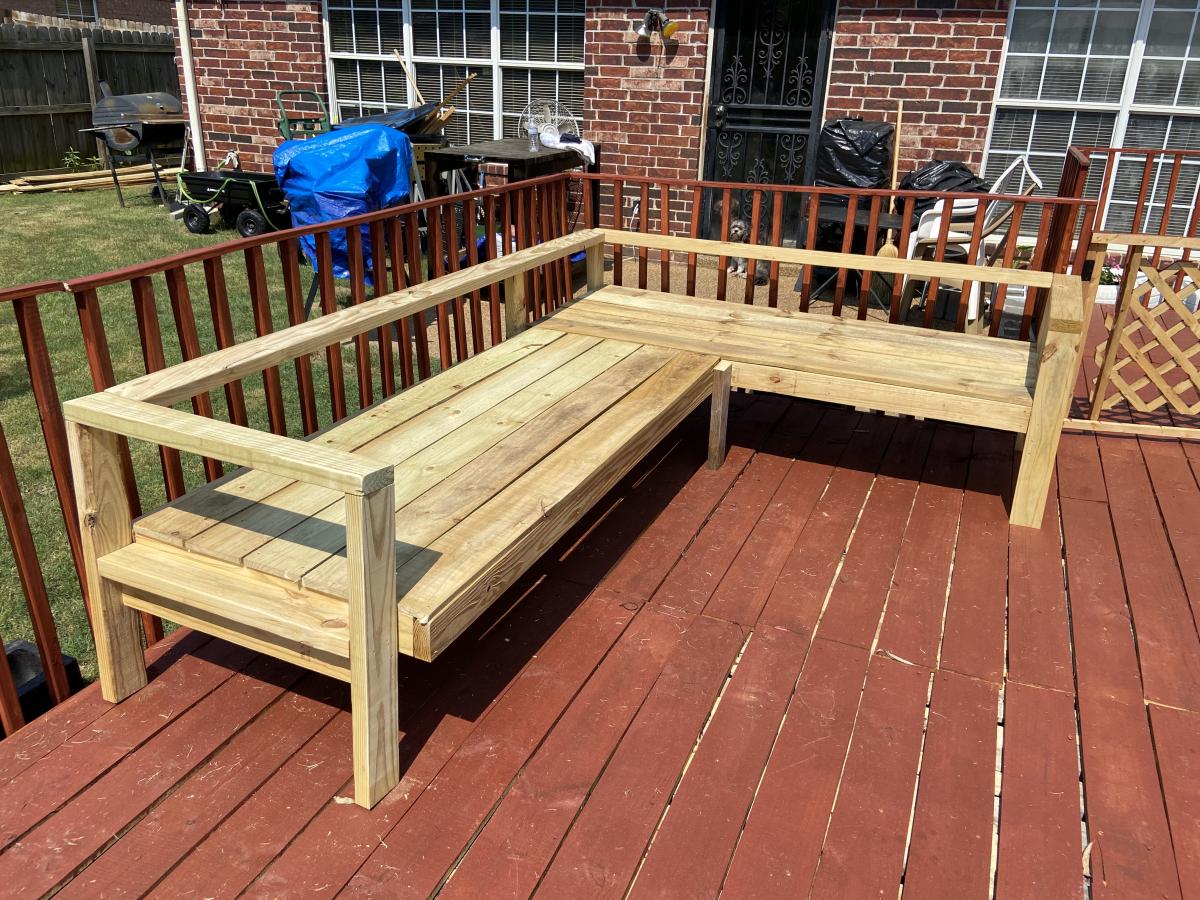
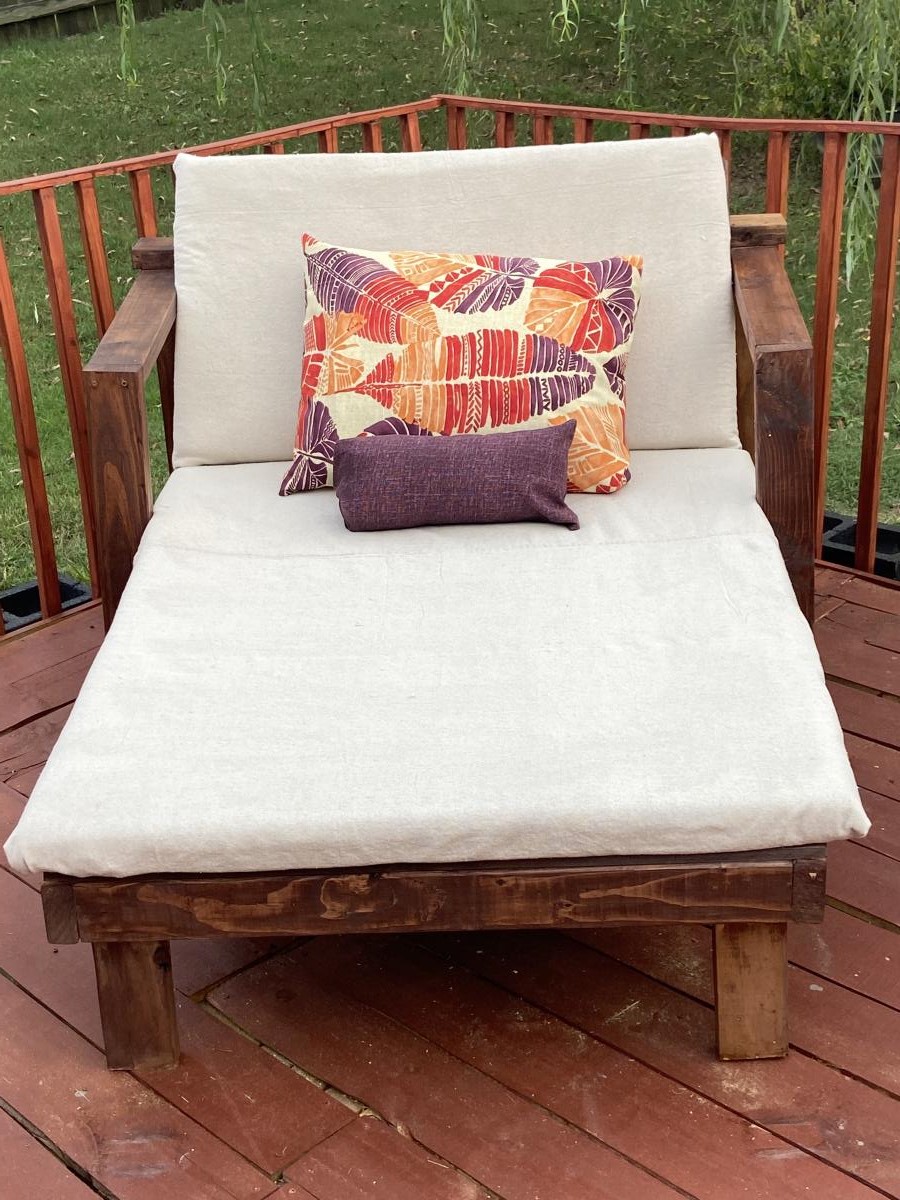
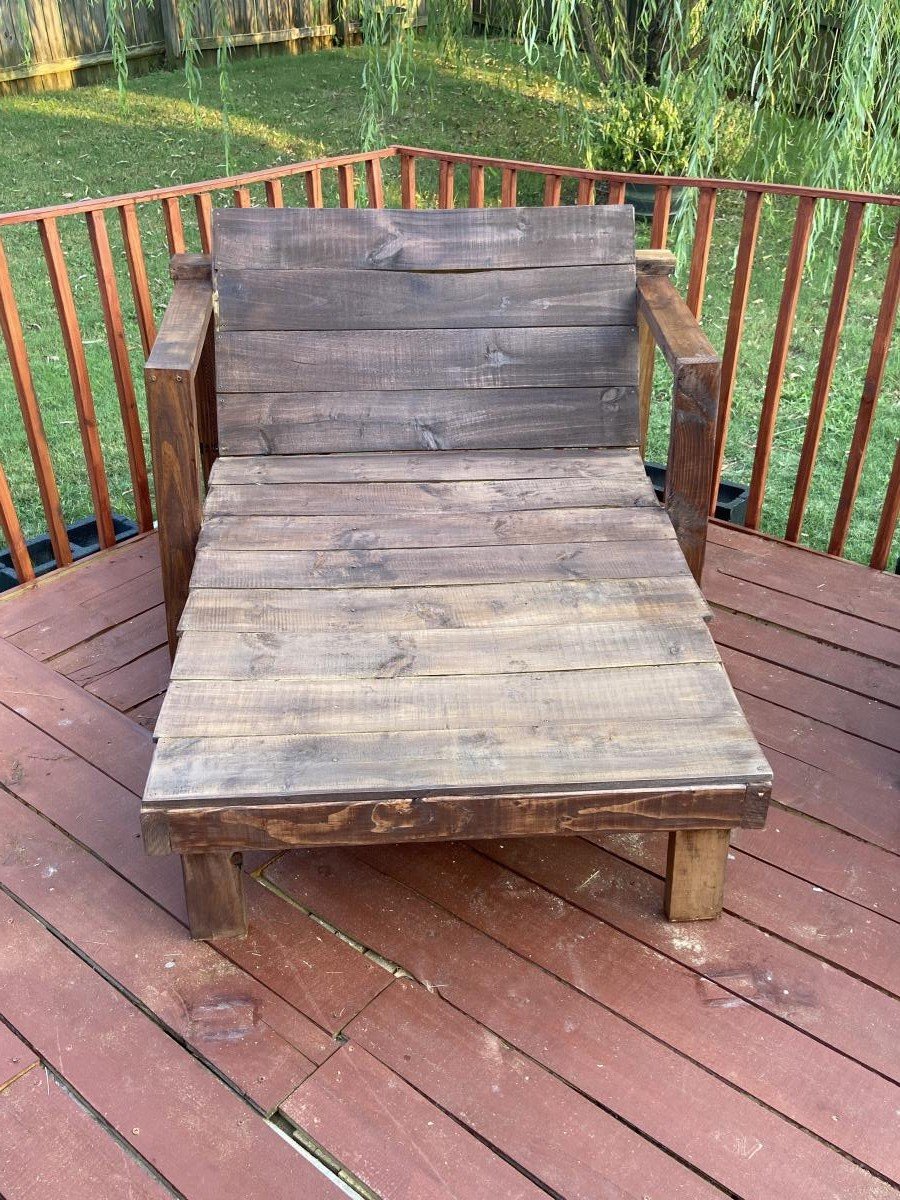
The sectional is based from Anna’s design. The lounger was a combination of different design. I love Anna White designs. As a beginner in woodworking, I find her to be easy to follow.
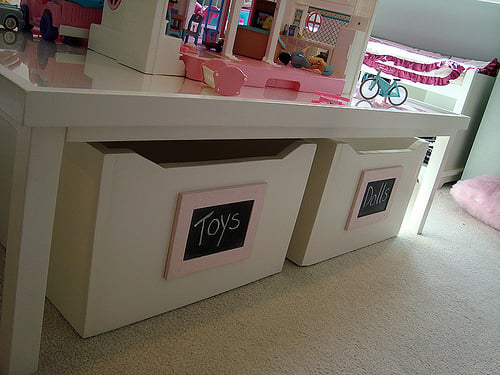
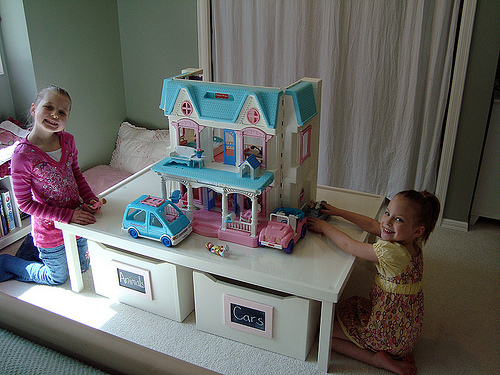
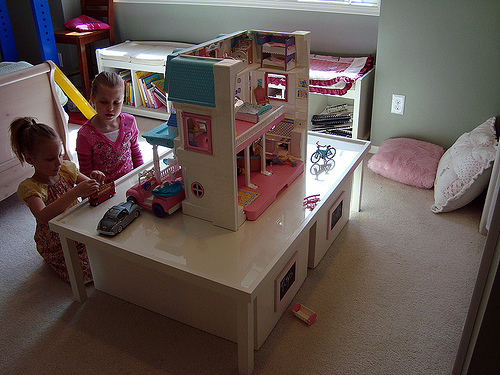
Anna's (the one on the right) new activity table with rolling carts! Rolling drawers are made of 3/4" MDF with 2" casters underneath. The chalkboard frames (found here) were painted with satin finish pink paint, then two coats of glitter Mod Podge. I love how they turned out!!! We added a piece of 1/8" plexiglass to the top to protect it better. The flat top is made of MDF, sides and frame are made of pine and the legs are poplar. Two coats of primer, three coats of semi-gloss paint and three coats of poly. She is sooooo excited!!! Ana's estimate of $50-$100 on her website is fairly accurate depending on where you live, minus the plexiglass. So adding it all up... 3 - 2" x 2" x 8' stud/strips are $1.29 each at HD (total $3.87) 4 - 1" x 2" x 8' Radiata Pine boards are $4.82 at HD (total $19.28) 1 - 49" x 97" sheet 3/4" MDF was about $40 at HD (they rip cut it for me for free) 8 - 2" casters were about $2.50 each at HD (total $20) That's $83.15 plus tax and doesn't include all of the smaller extras like screws, glue, sandpaper, primer, paint and poly. I had most of those already... but it's items like that would easily push the total over $100. The little extras that I did were pricier poplar legs since I didn't like the look of 2x2 stud/strips and the custom sheet of plexiglass $35 at local plastics company. 2x2 studs/strips are fine, but after using them on my sawhorses and painting them, I wanted something more perfectly square (prettier?) for this table.
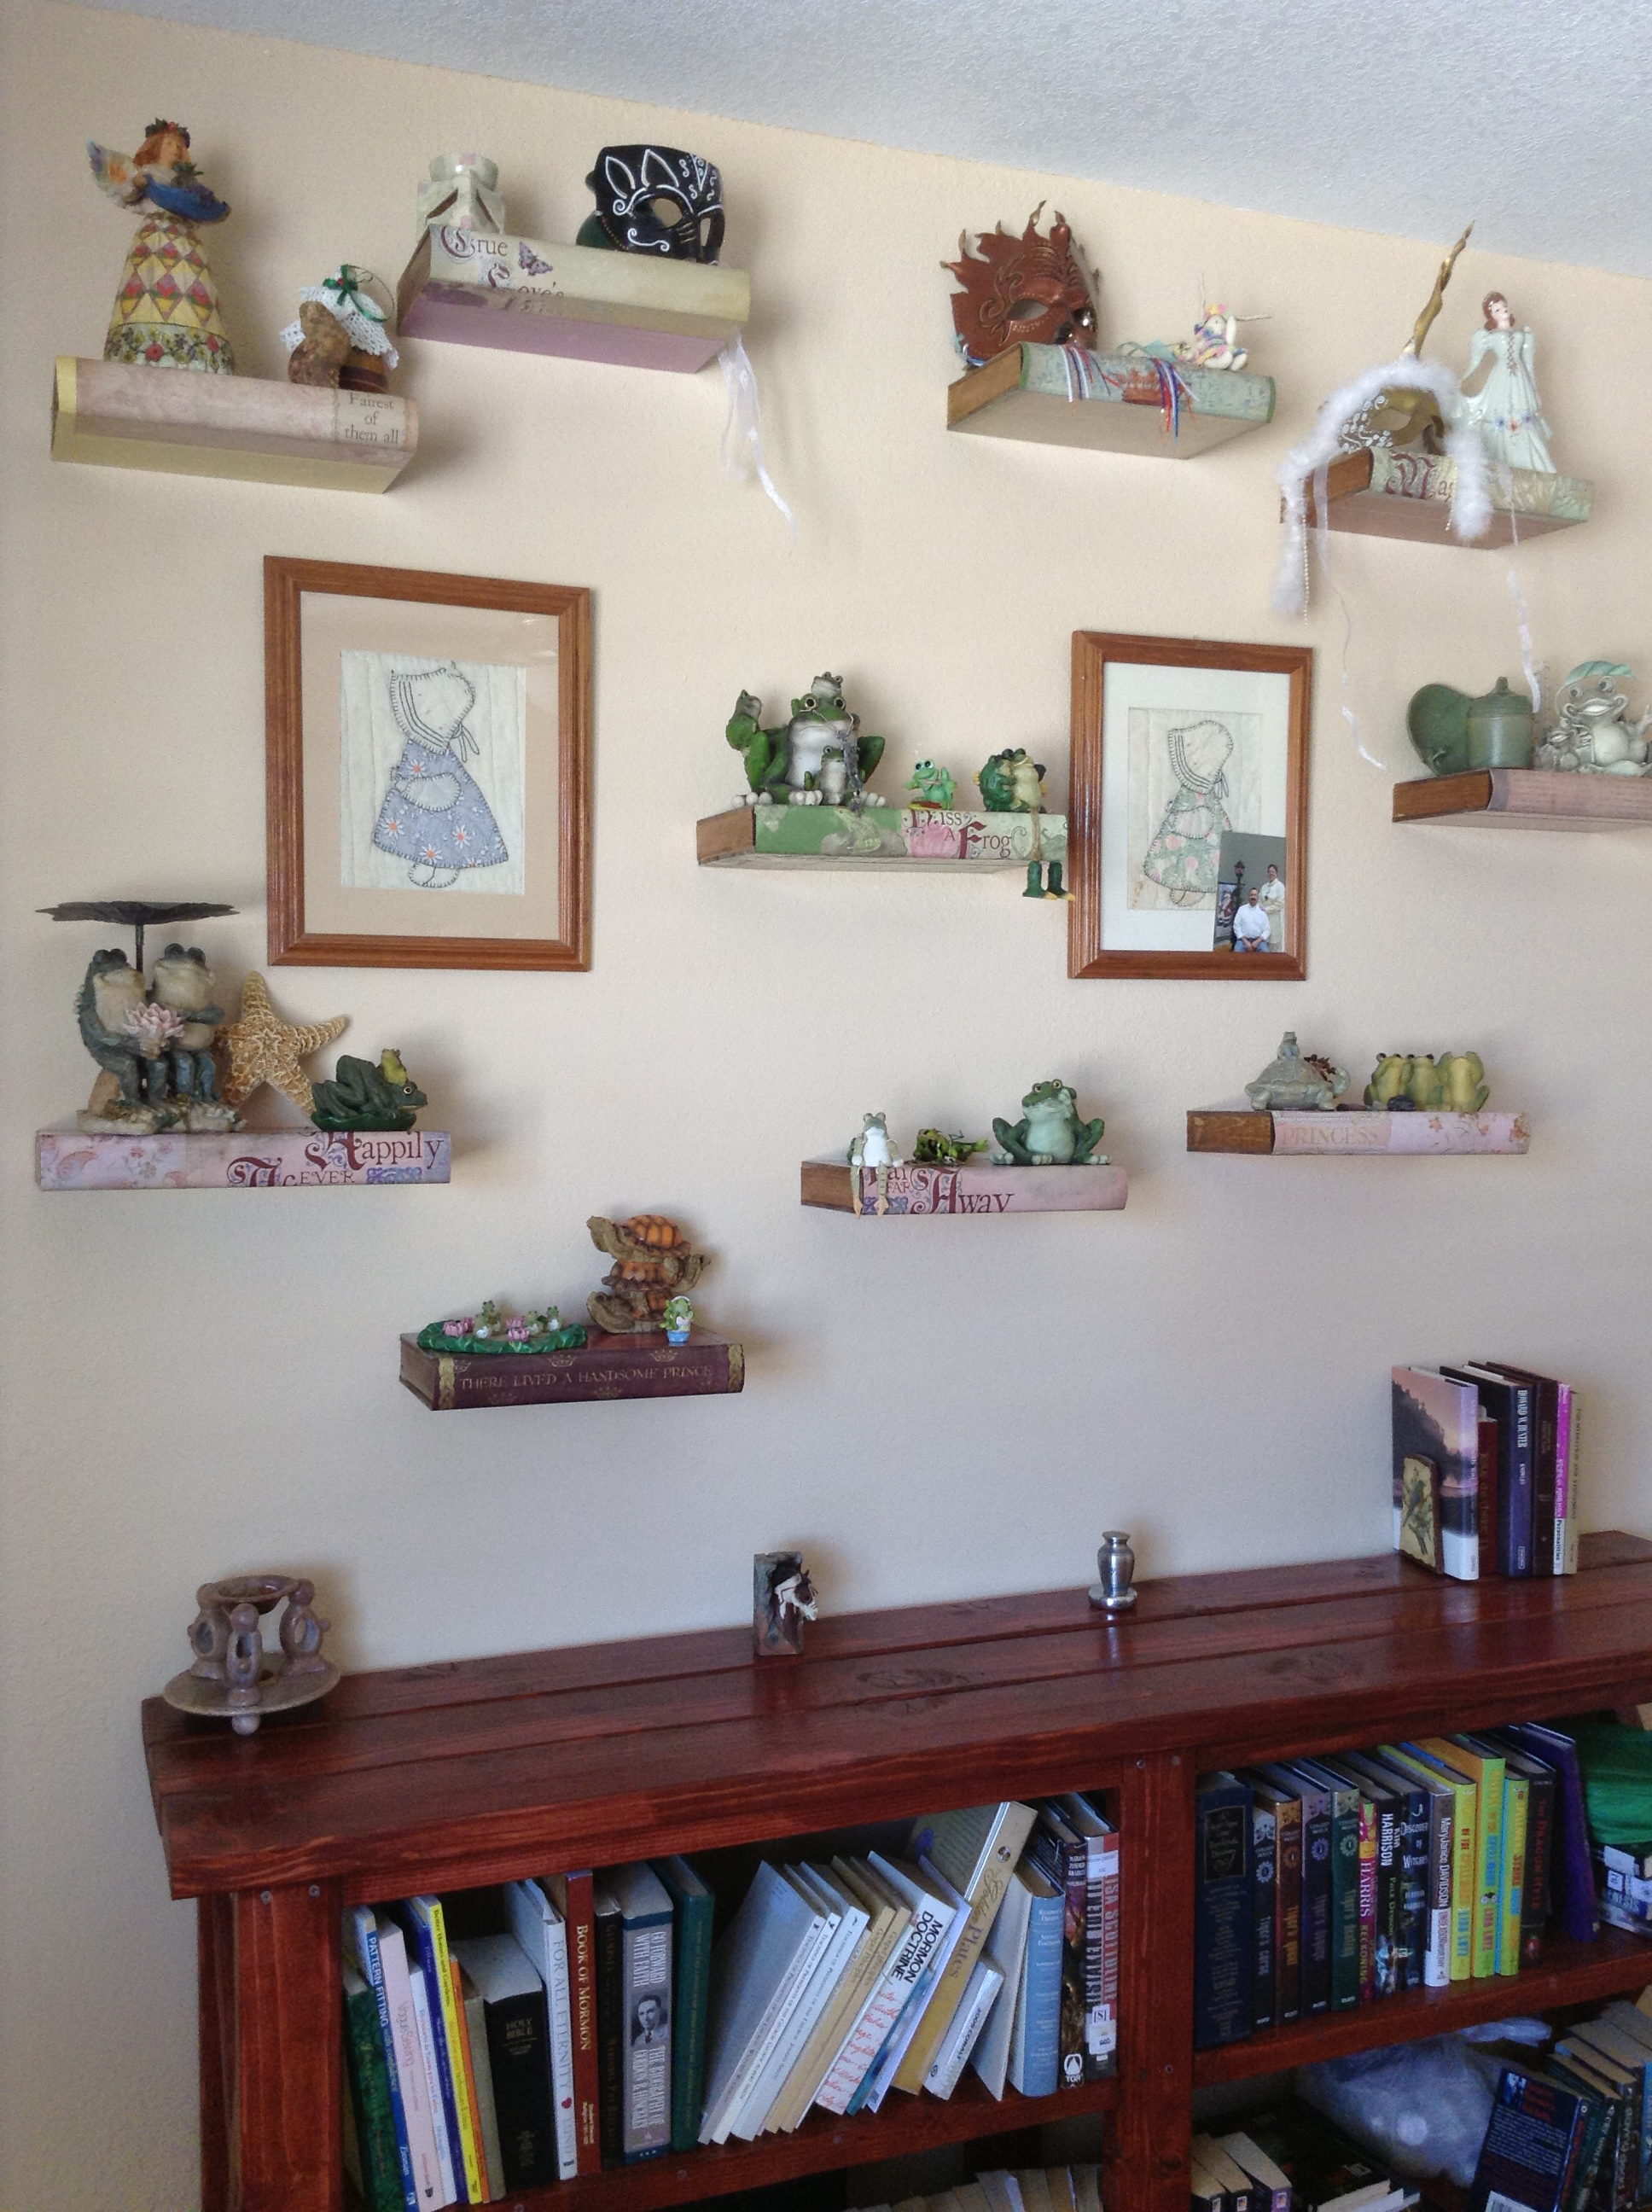
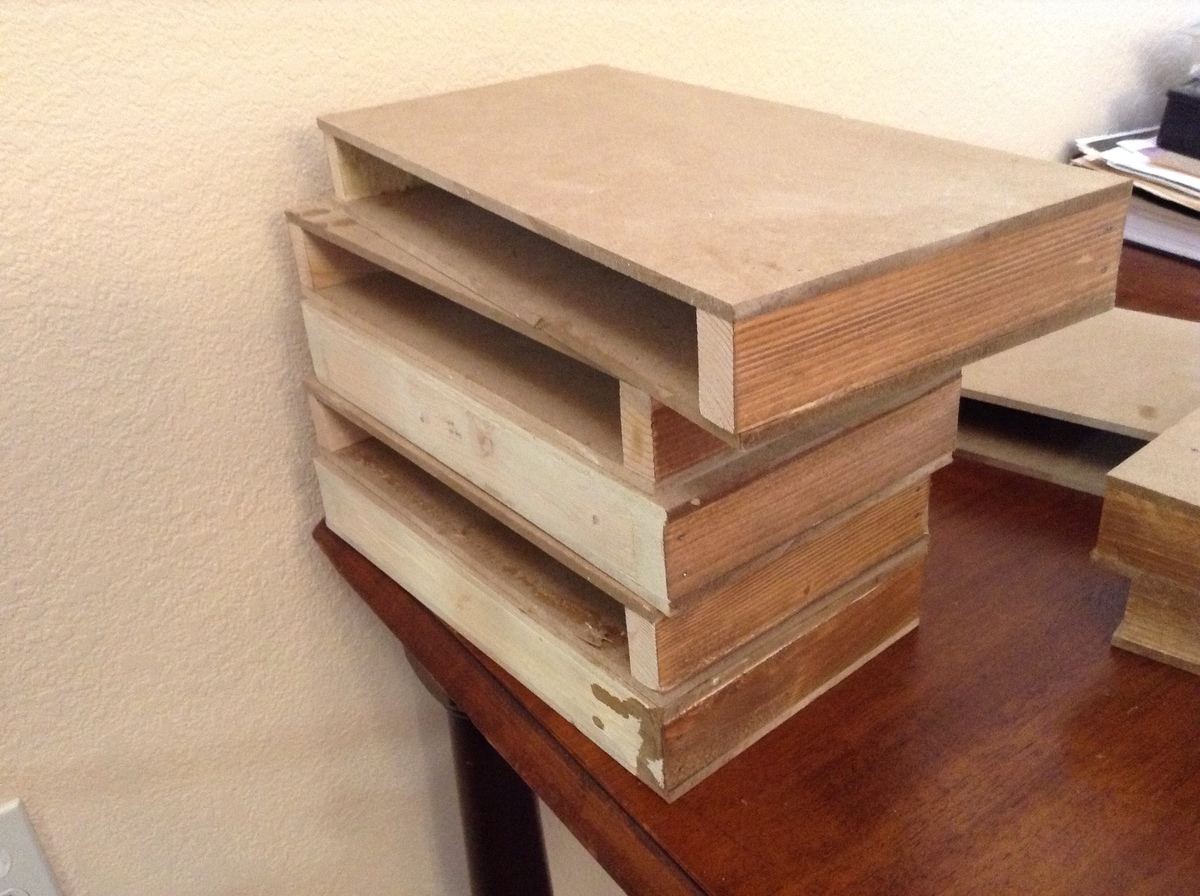
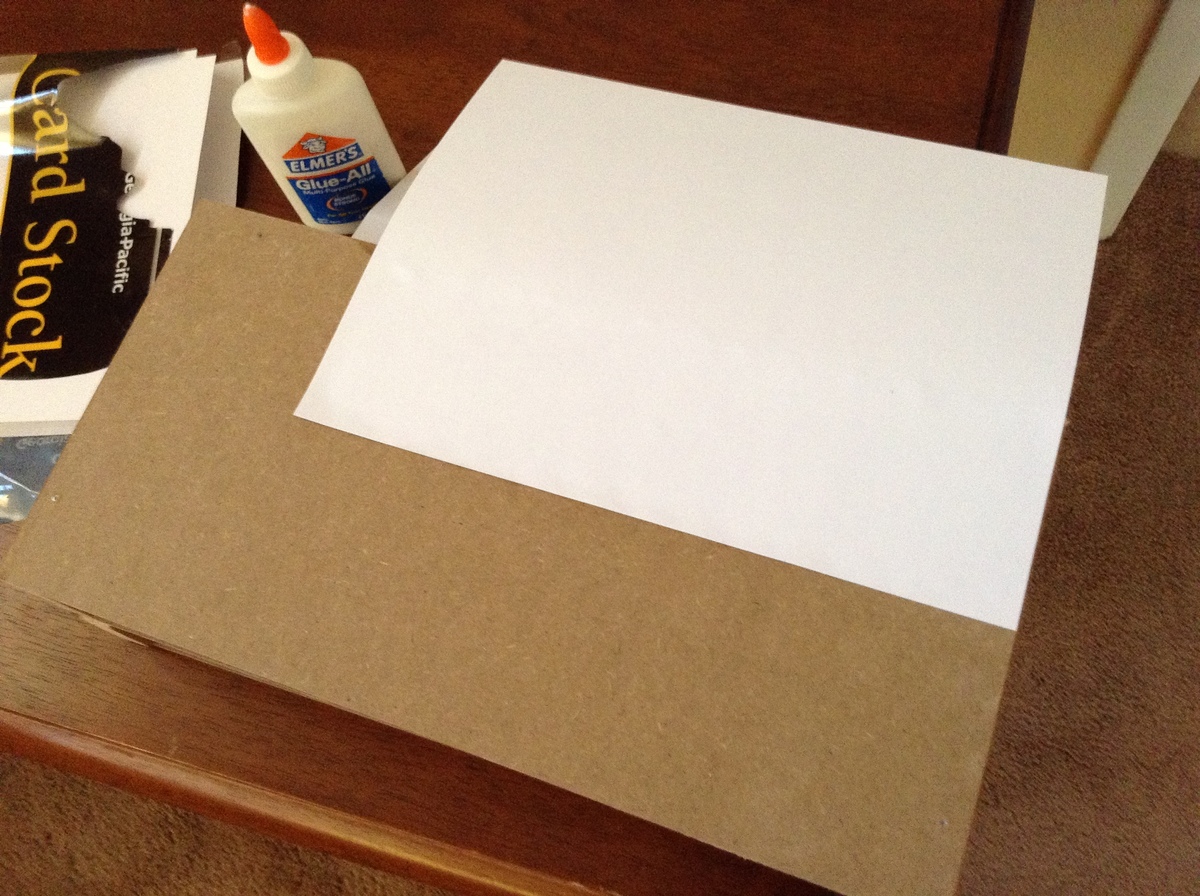
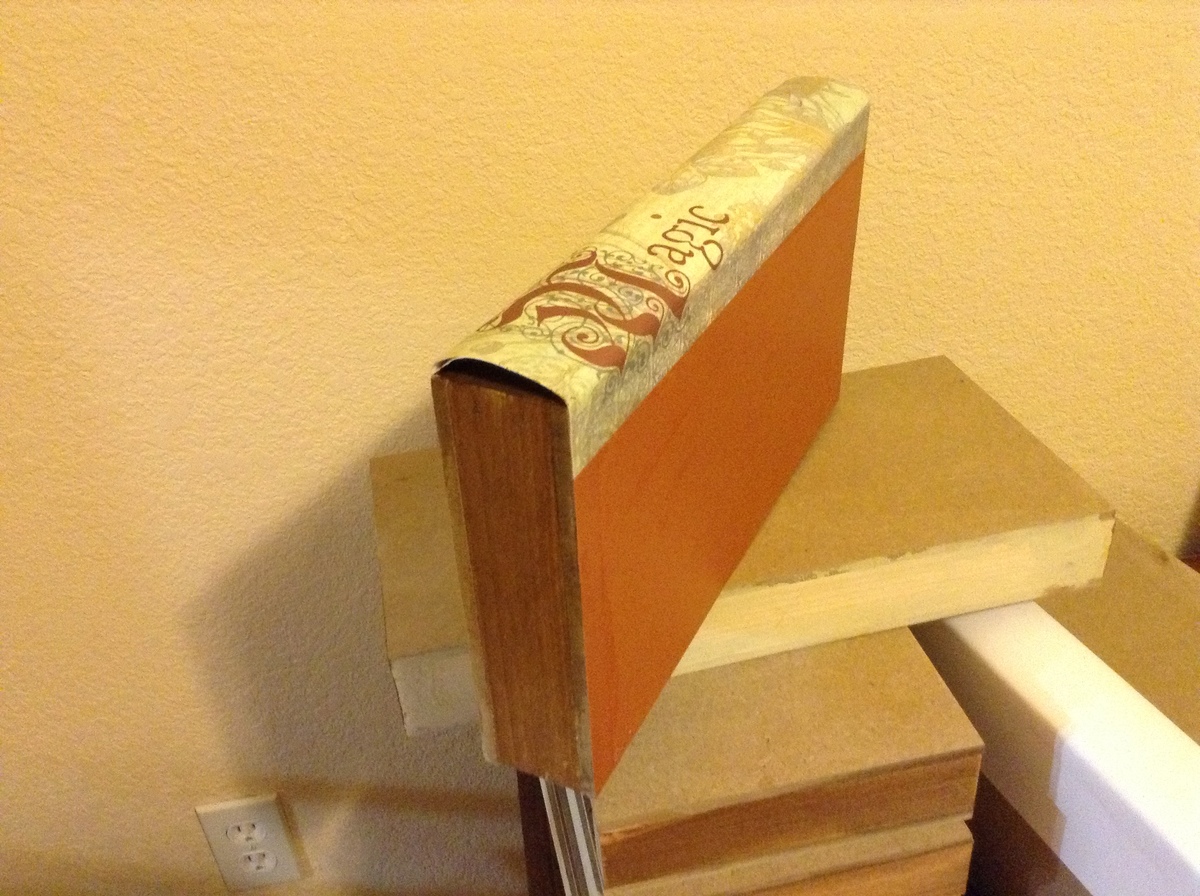
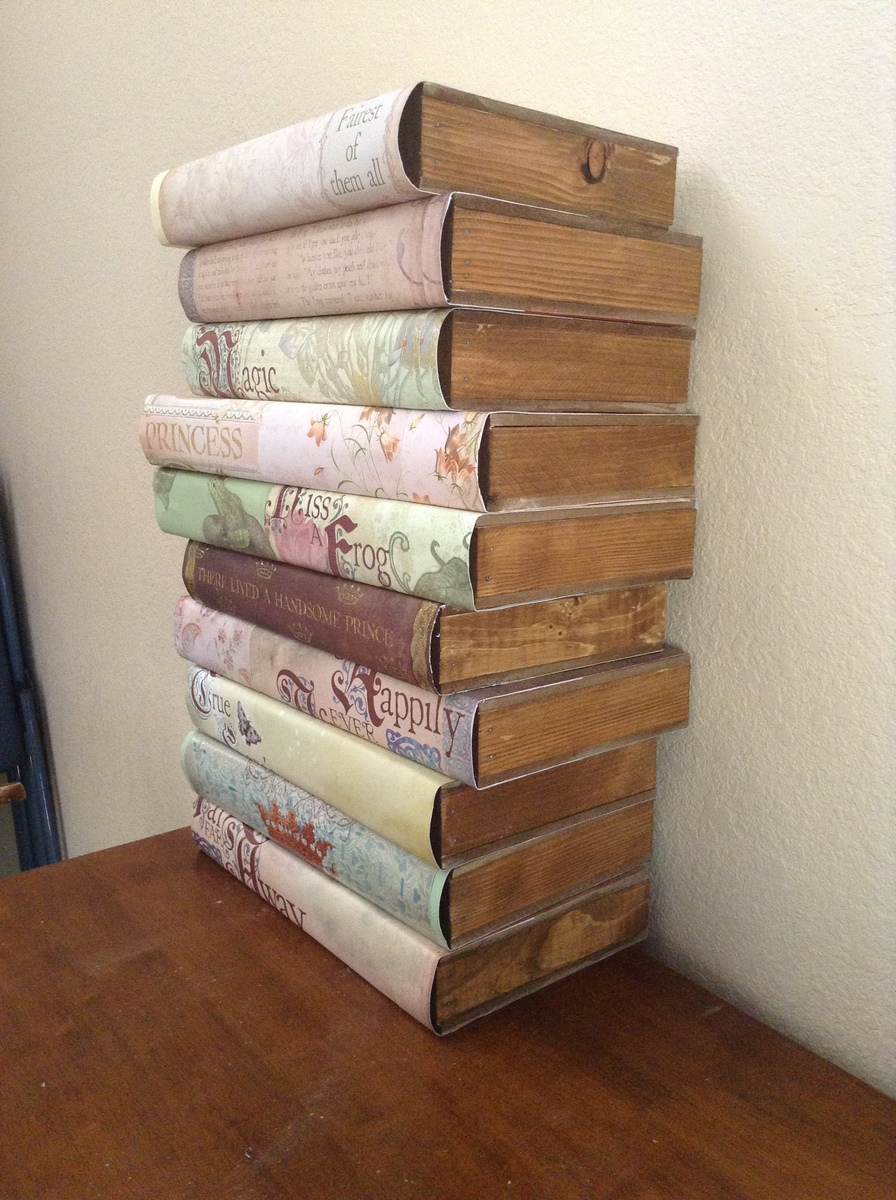
I wanted to make floating shelves. As I was making them, I got the idea to decorate them like books.

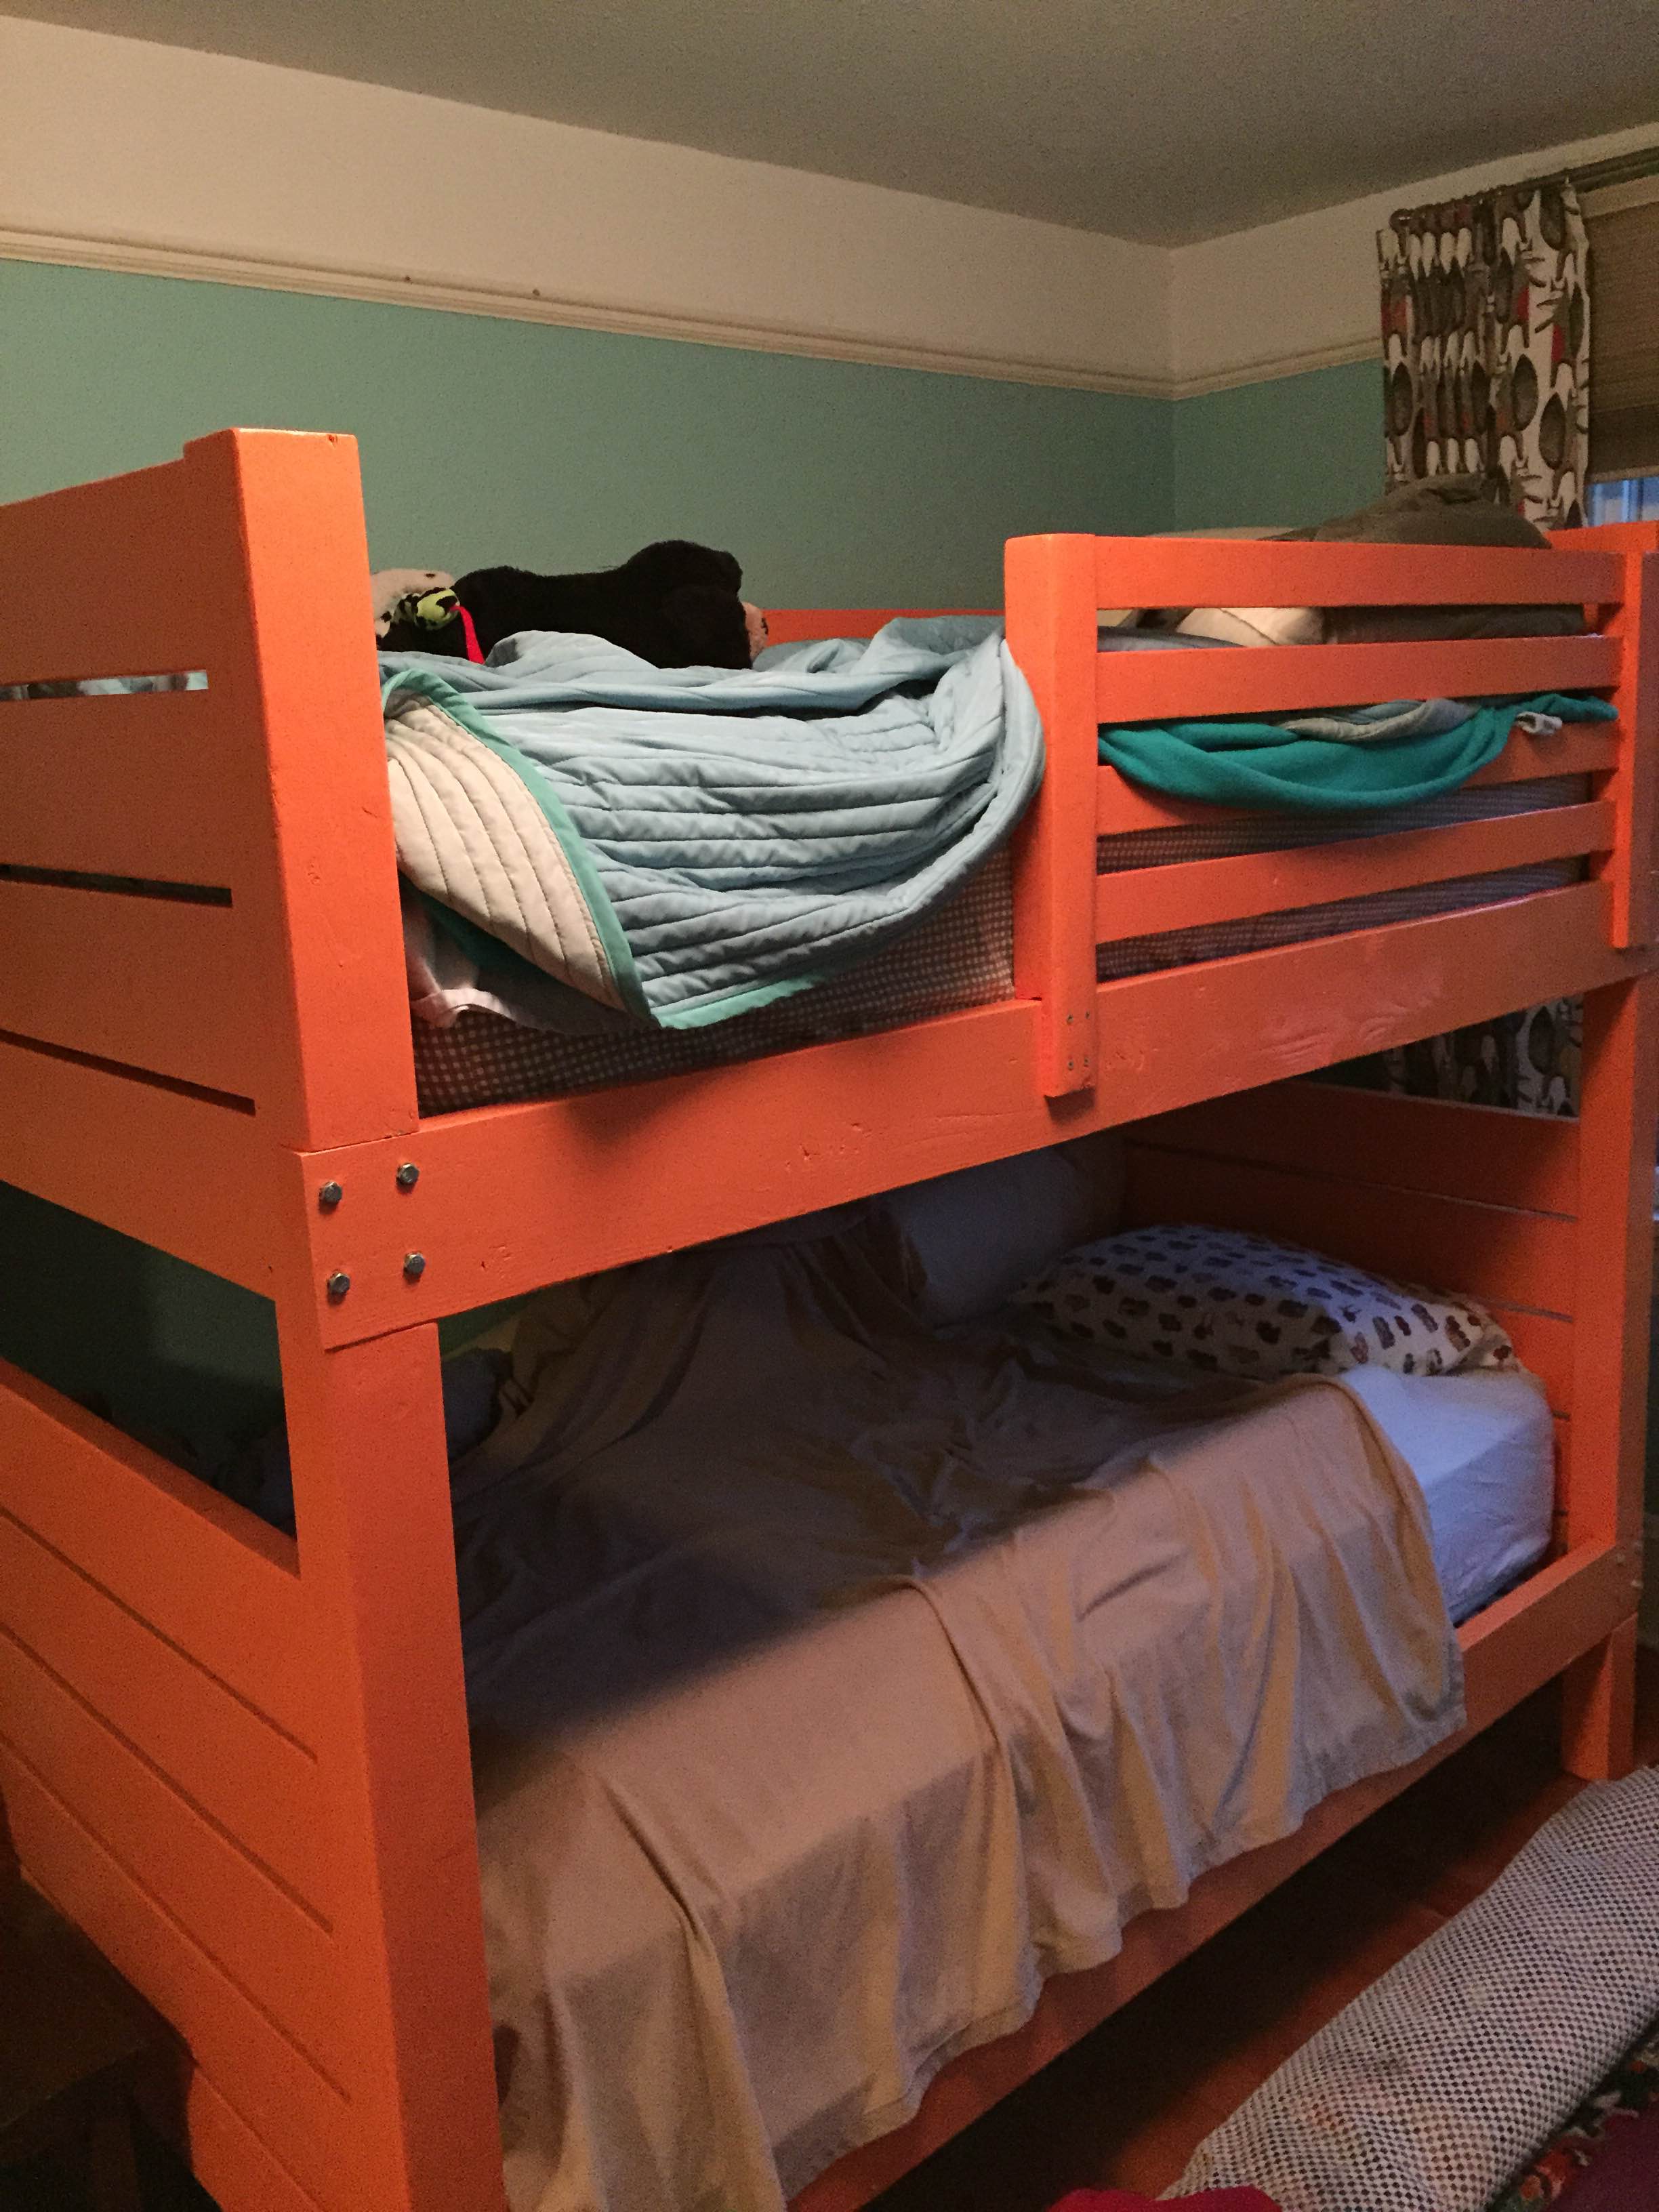
This is my first large project and I'm very happy with the result. Since I knew we were using regular (thick) mattresses instead of thin bunk-style mattresses, I built the guard rails taller than in the plans. The bunk beds are painted Benjamin Moore Citrus Orange http://www.benjaminmoore.com/en-ca/paint-color/citrusorange. The walls are Benjamin Moore Waterfall http://www.benjaminmoore.com/en-ca/paint-color/waterfall.
Helpful Hint: IKEA's LONSET slatted bed base fits perfectly instead of needing to cut your own bed slats. http://www.ikea.com/us/en/catalog/products/80278715/#/30278732


Comments
Ana White Admin
Sat, 10/02/2021 - 07:19
Love it!
Thank you for sharing, it looks amazing!