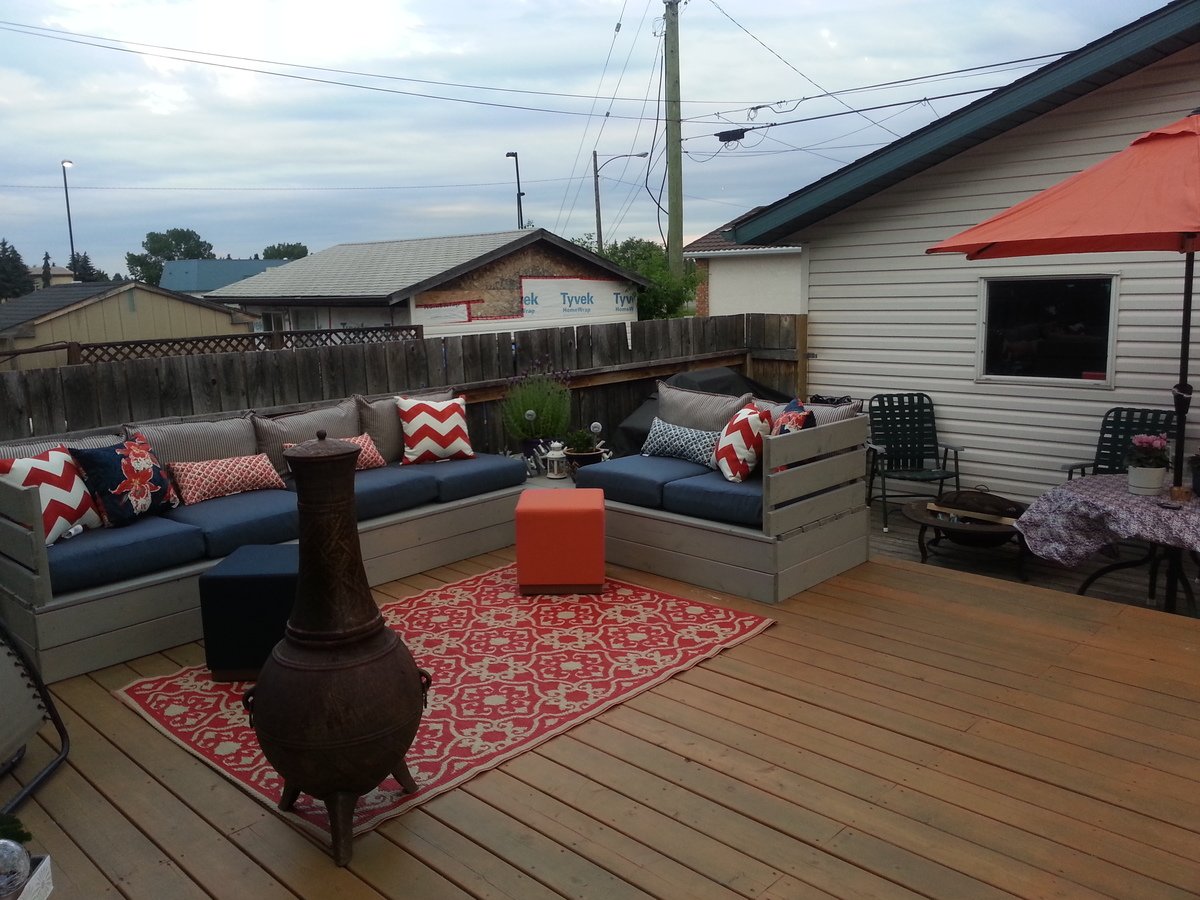
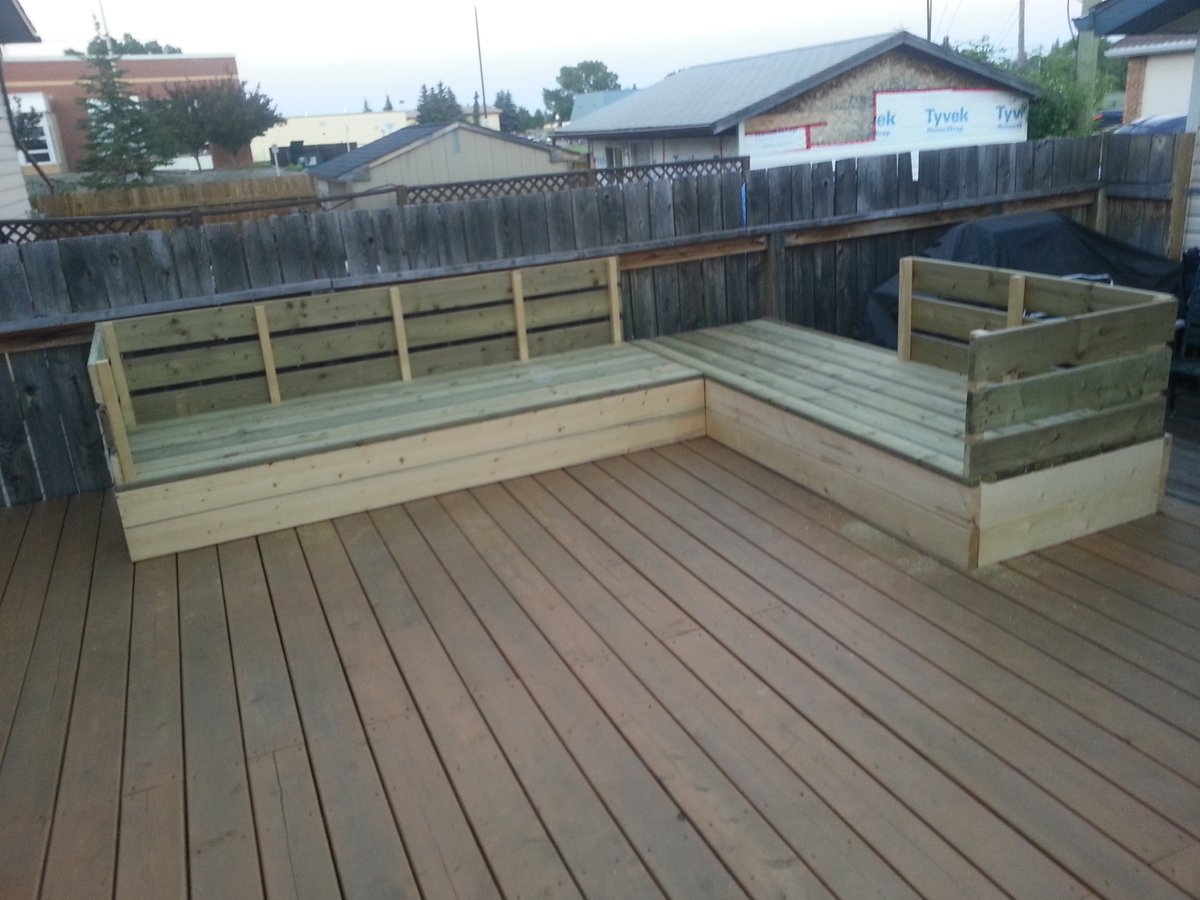
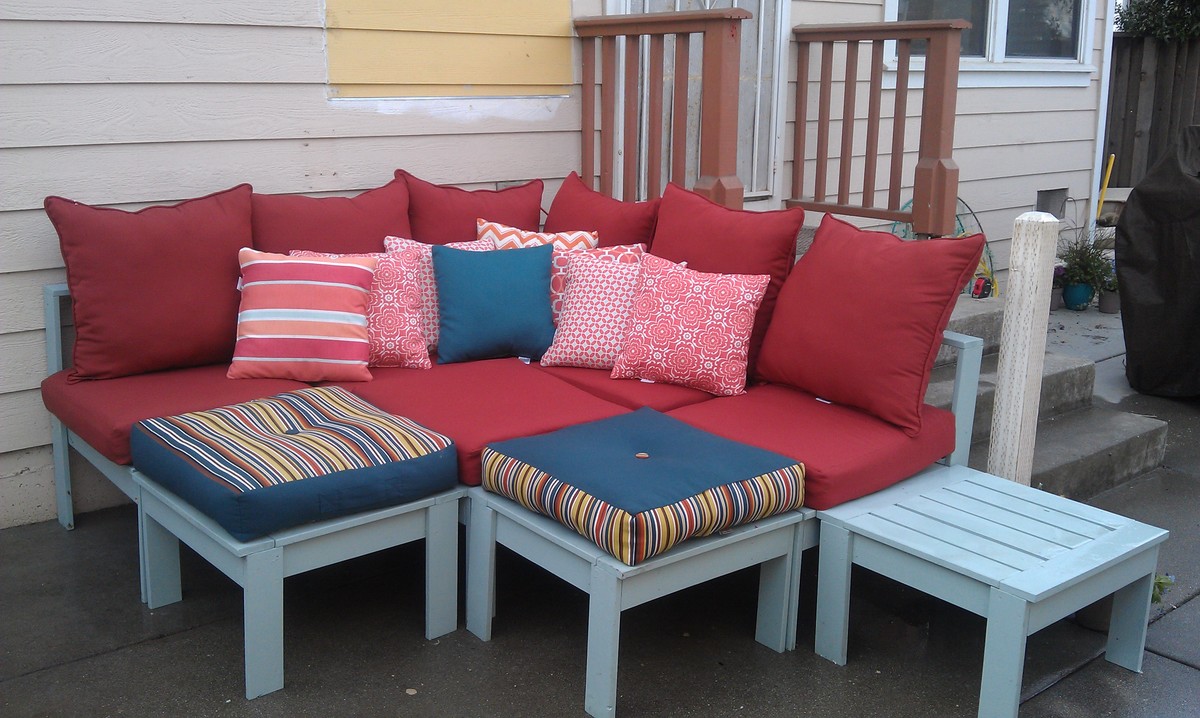
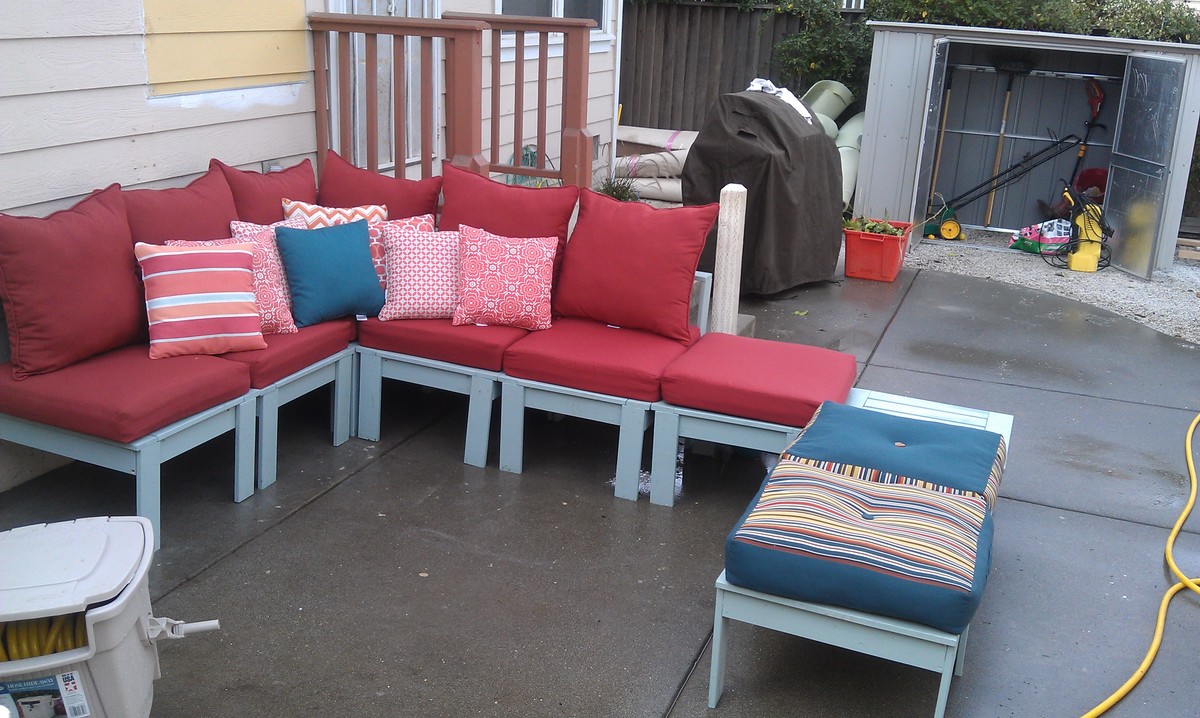
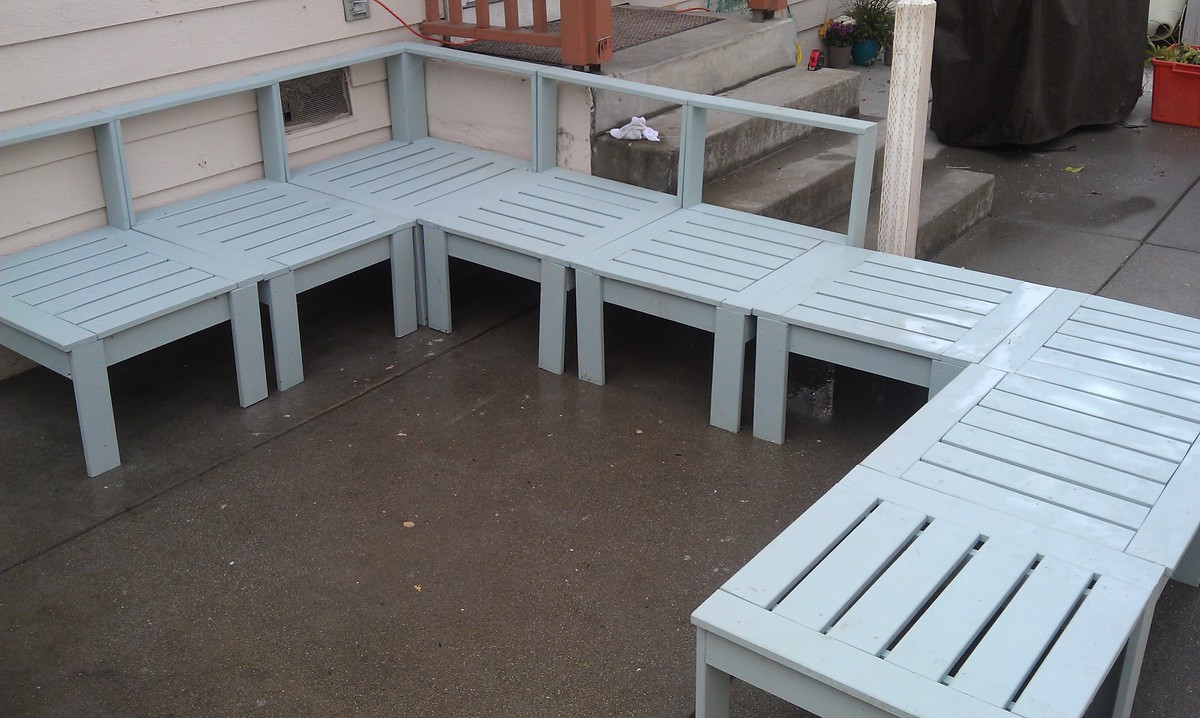
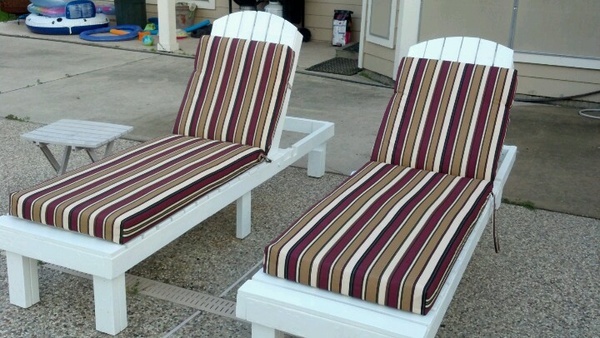
Outdoor Platform Sectional

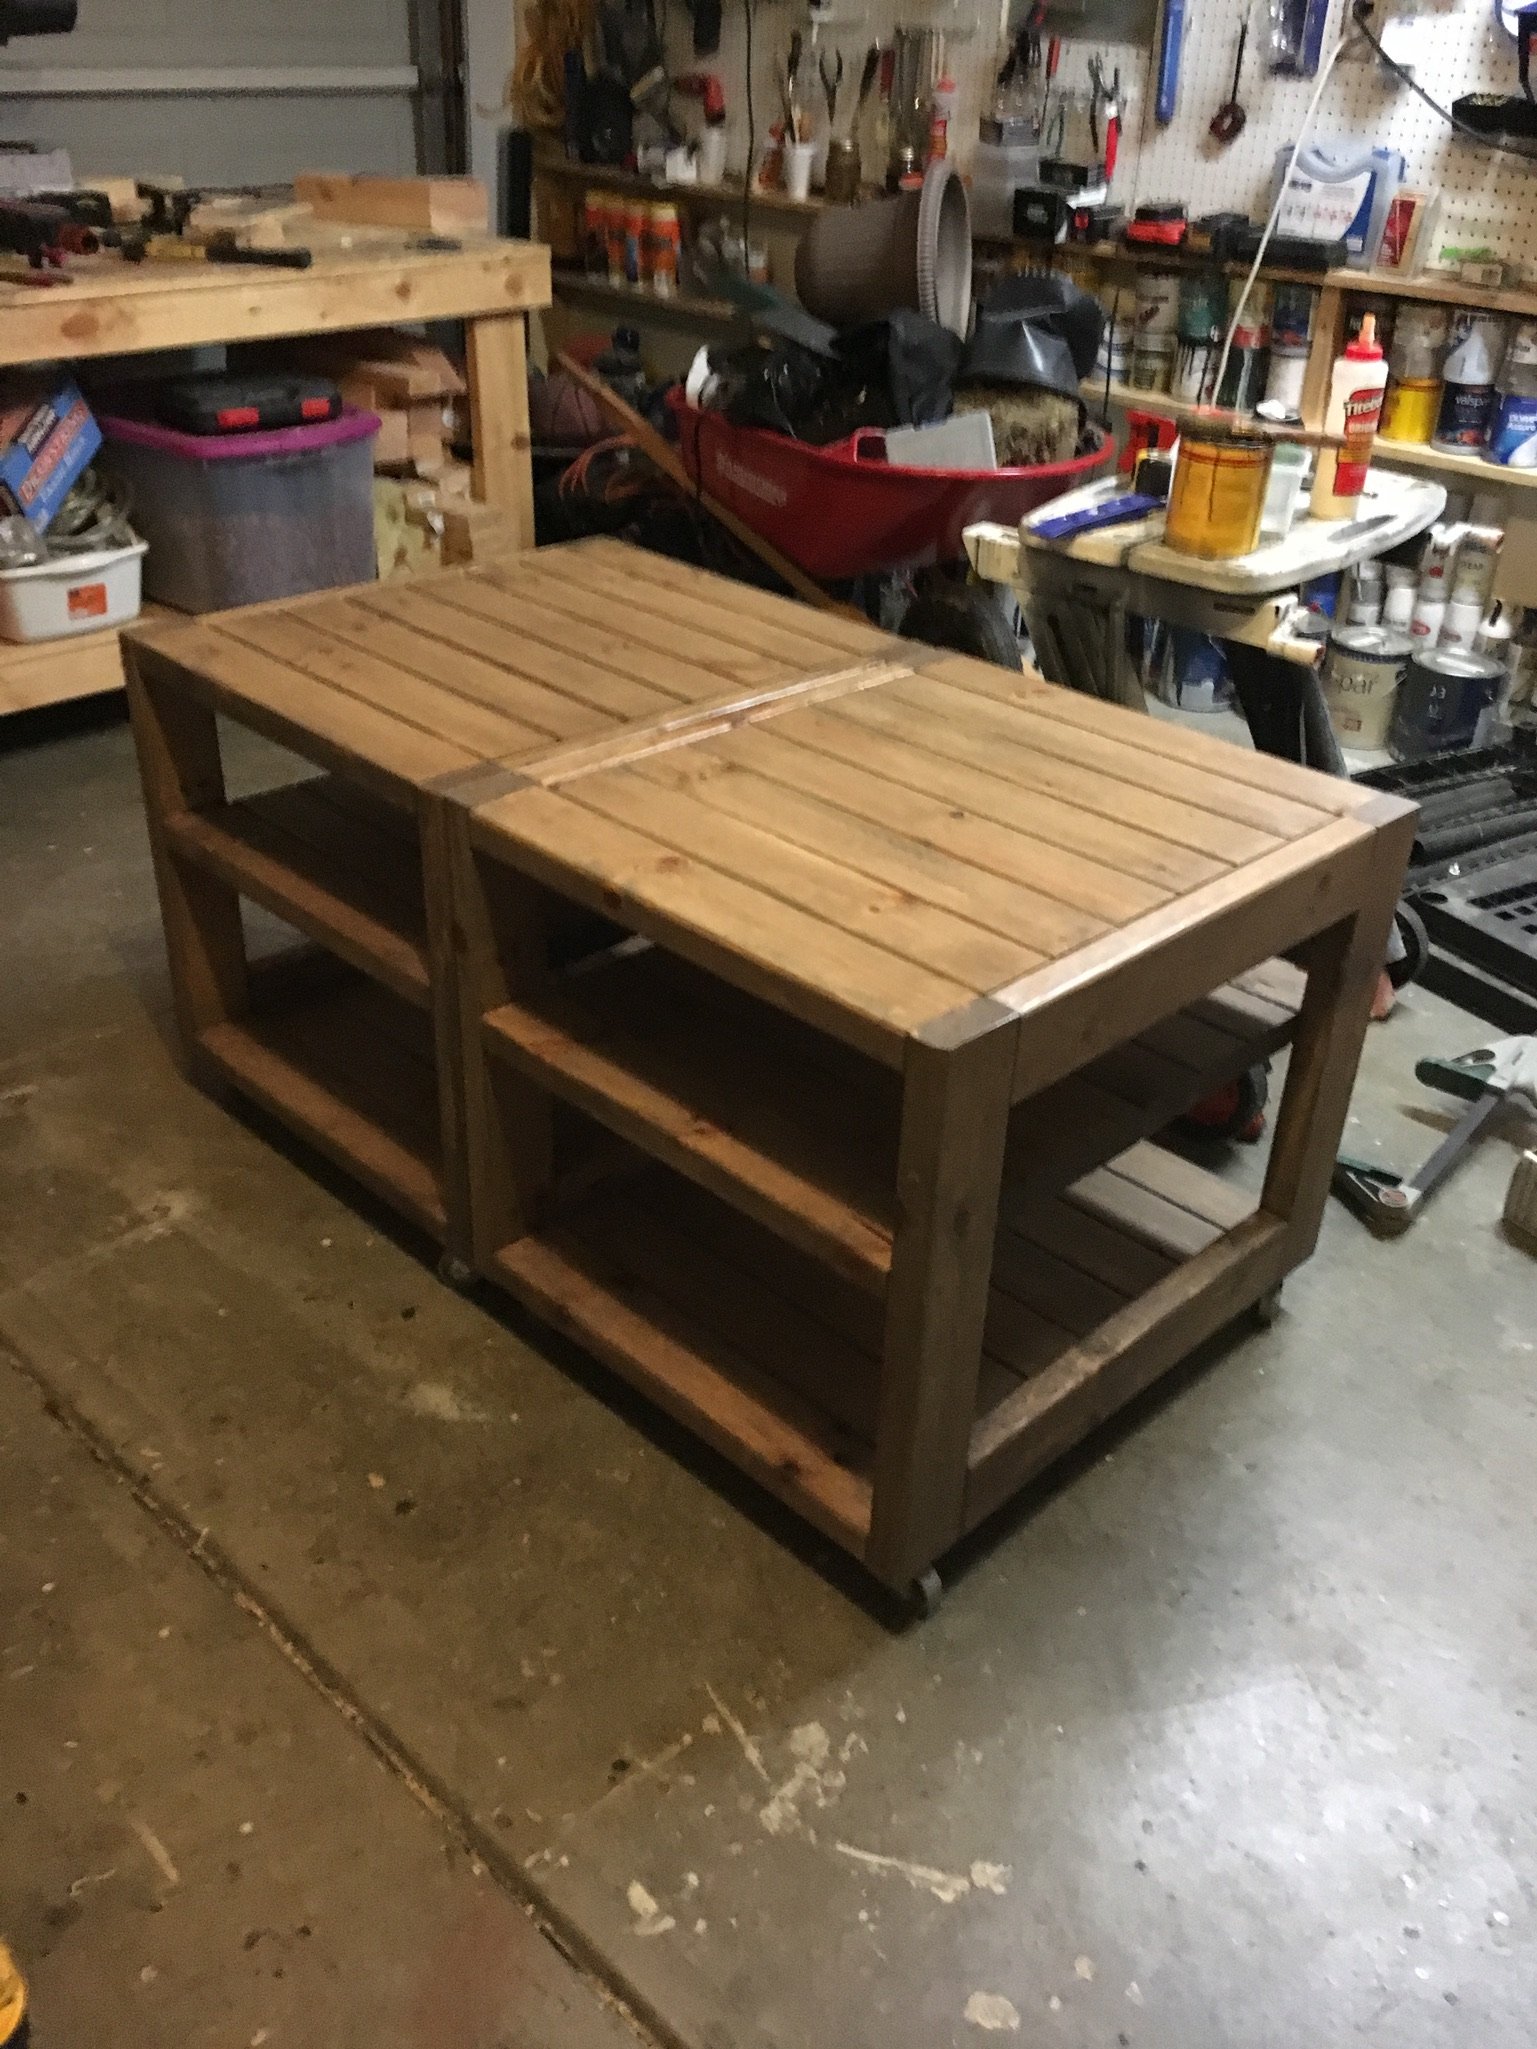
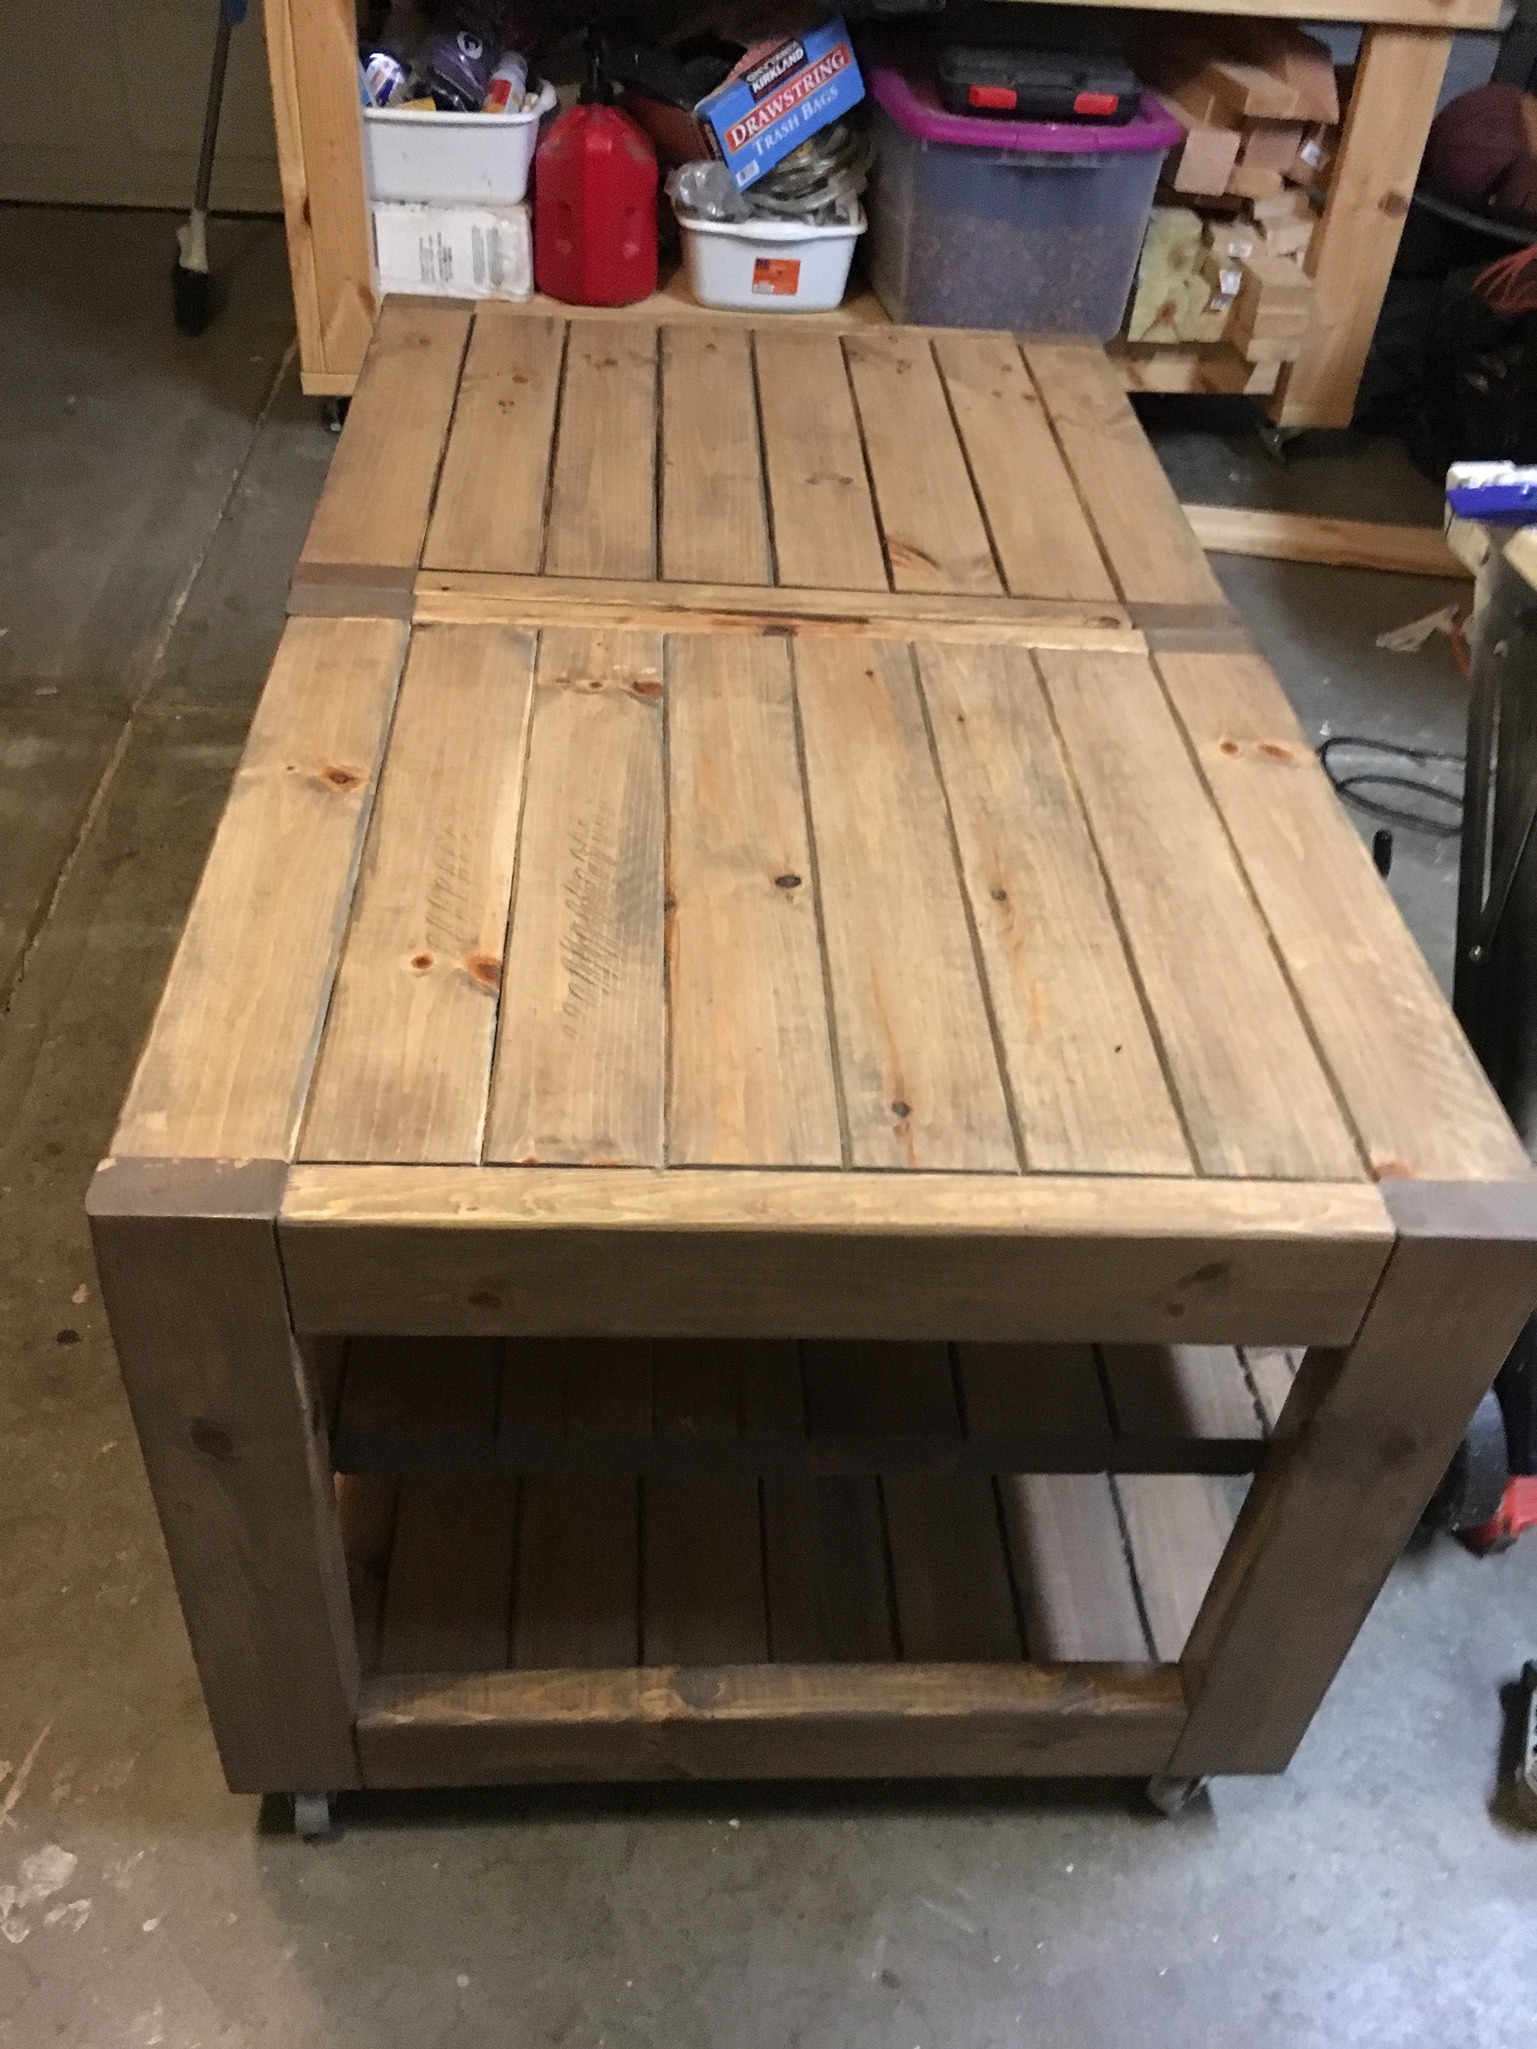
The only real change I made to Ana's plan was switching out the 2x6 board for 1x6. I still used 2x6 boards for my base, but went with the 1x6 for my decking boards, and top backing boards. My reasoning for this was to reduce weight. Other than that I increased the size of the base by adding another 2x6 on top (basically doubling up the base height). This made the sectional the perfect height, in my opinion. The plan Ana offered was pretty straight forward, and I love the size of the sectional itself. Very happy with how it turned out.
Cost Breakdown:
Lumber : $200
Screws: $20 (I used anti rust deck screws)
Stain: $35 (I used a semi-solid stain in a drift wood grey)
Cushions: approx $500 (when I started this project I had no idea cushions were so expensive)


Comments
Pursuit of Handyness
Sun, 07/13/2014 - 09:35
Looks Great
Looks Great. Don't you love how Ana's plans are so customizable. I'd like to build something similar but I'm aware that cushions are pricey. Where did you find yours? What do you think of the quality?