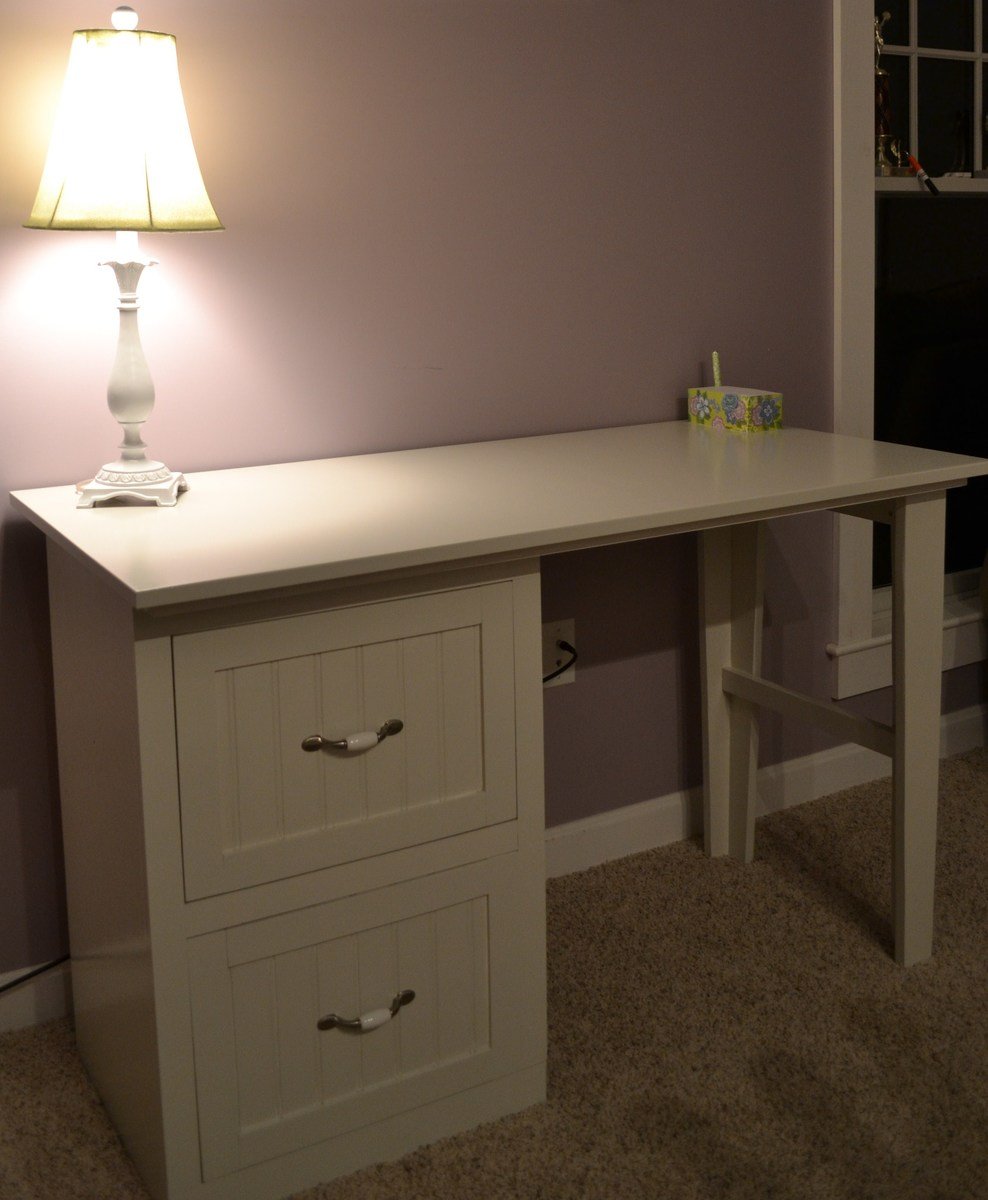
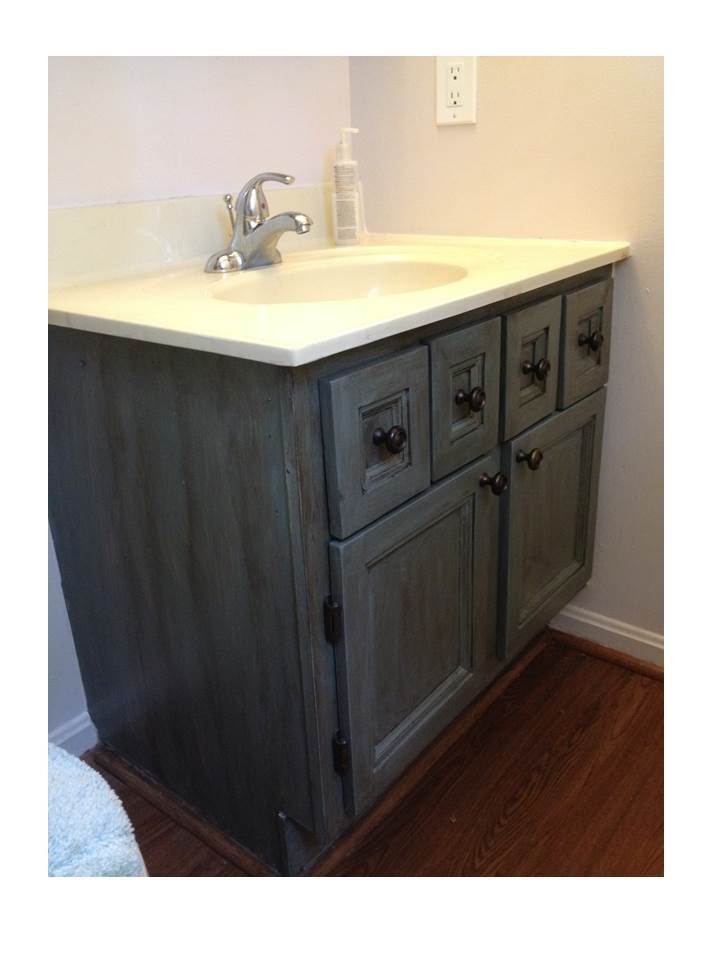
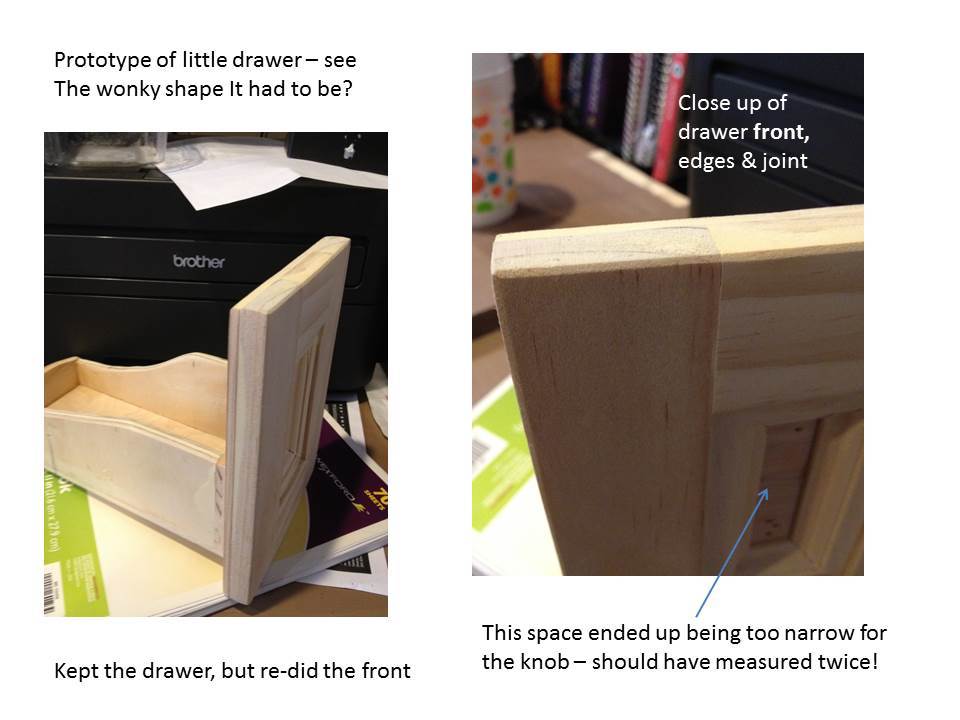
Converted an ordinary bathroom vanity into a Napoleon sink console/vanity. This is the second one I’ve completed, the first was in the hall bathroom which Hubby calls “his” bathroom. Since this one for the master bath is more feminine, I’m calling her Josephine! This was approximately a day and a half project, but spread out over several weekends. I had originally planned to put a faux drawer in front of the sink, and had the drawer front made, but then decided I’d like to try to make some custom drawers in front of the sink to utilize that space. I ended up doing the center drawer fronts twice – on the first try the space in the center was a little too narrow for the knob once the trim was in place. Since the vanity is in a corner, the sink doesn’t fall exactly in the center of the vanity cabinet, leaving it left of center by about an inch. This required different middle drawer sizes with interesting shapes.
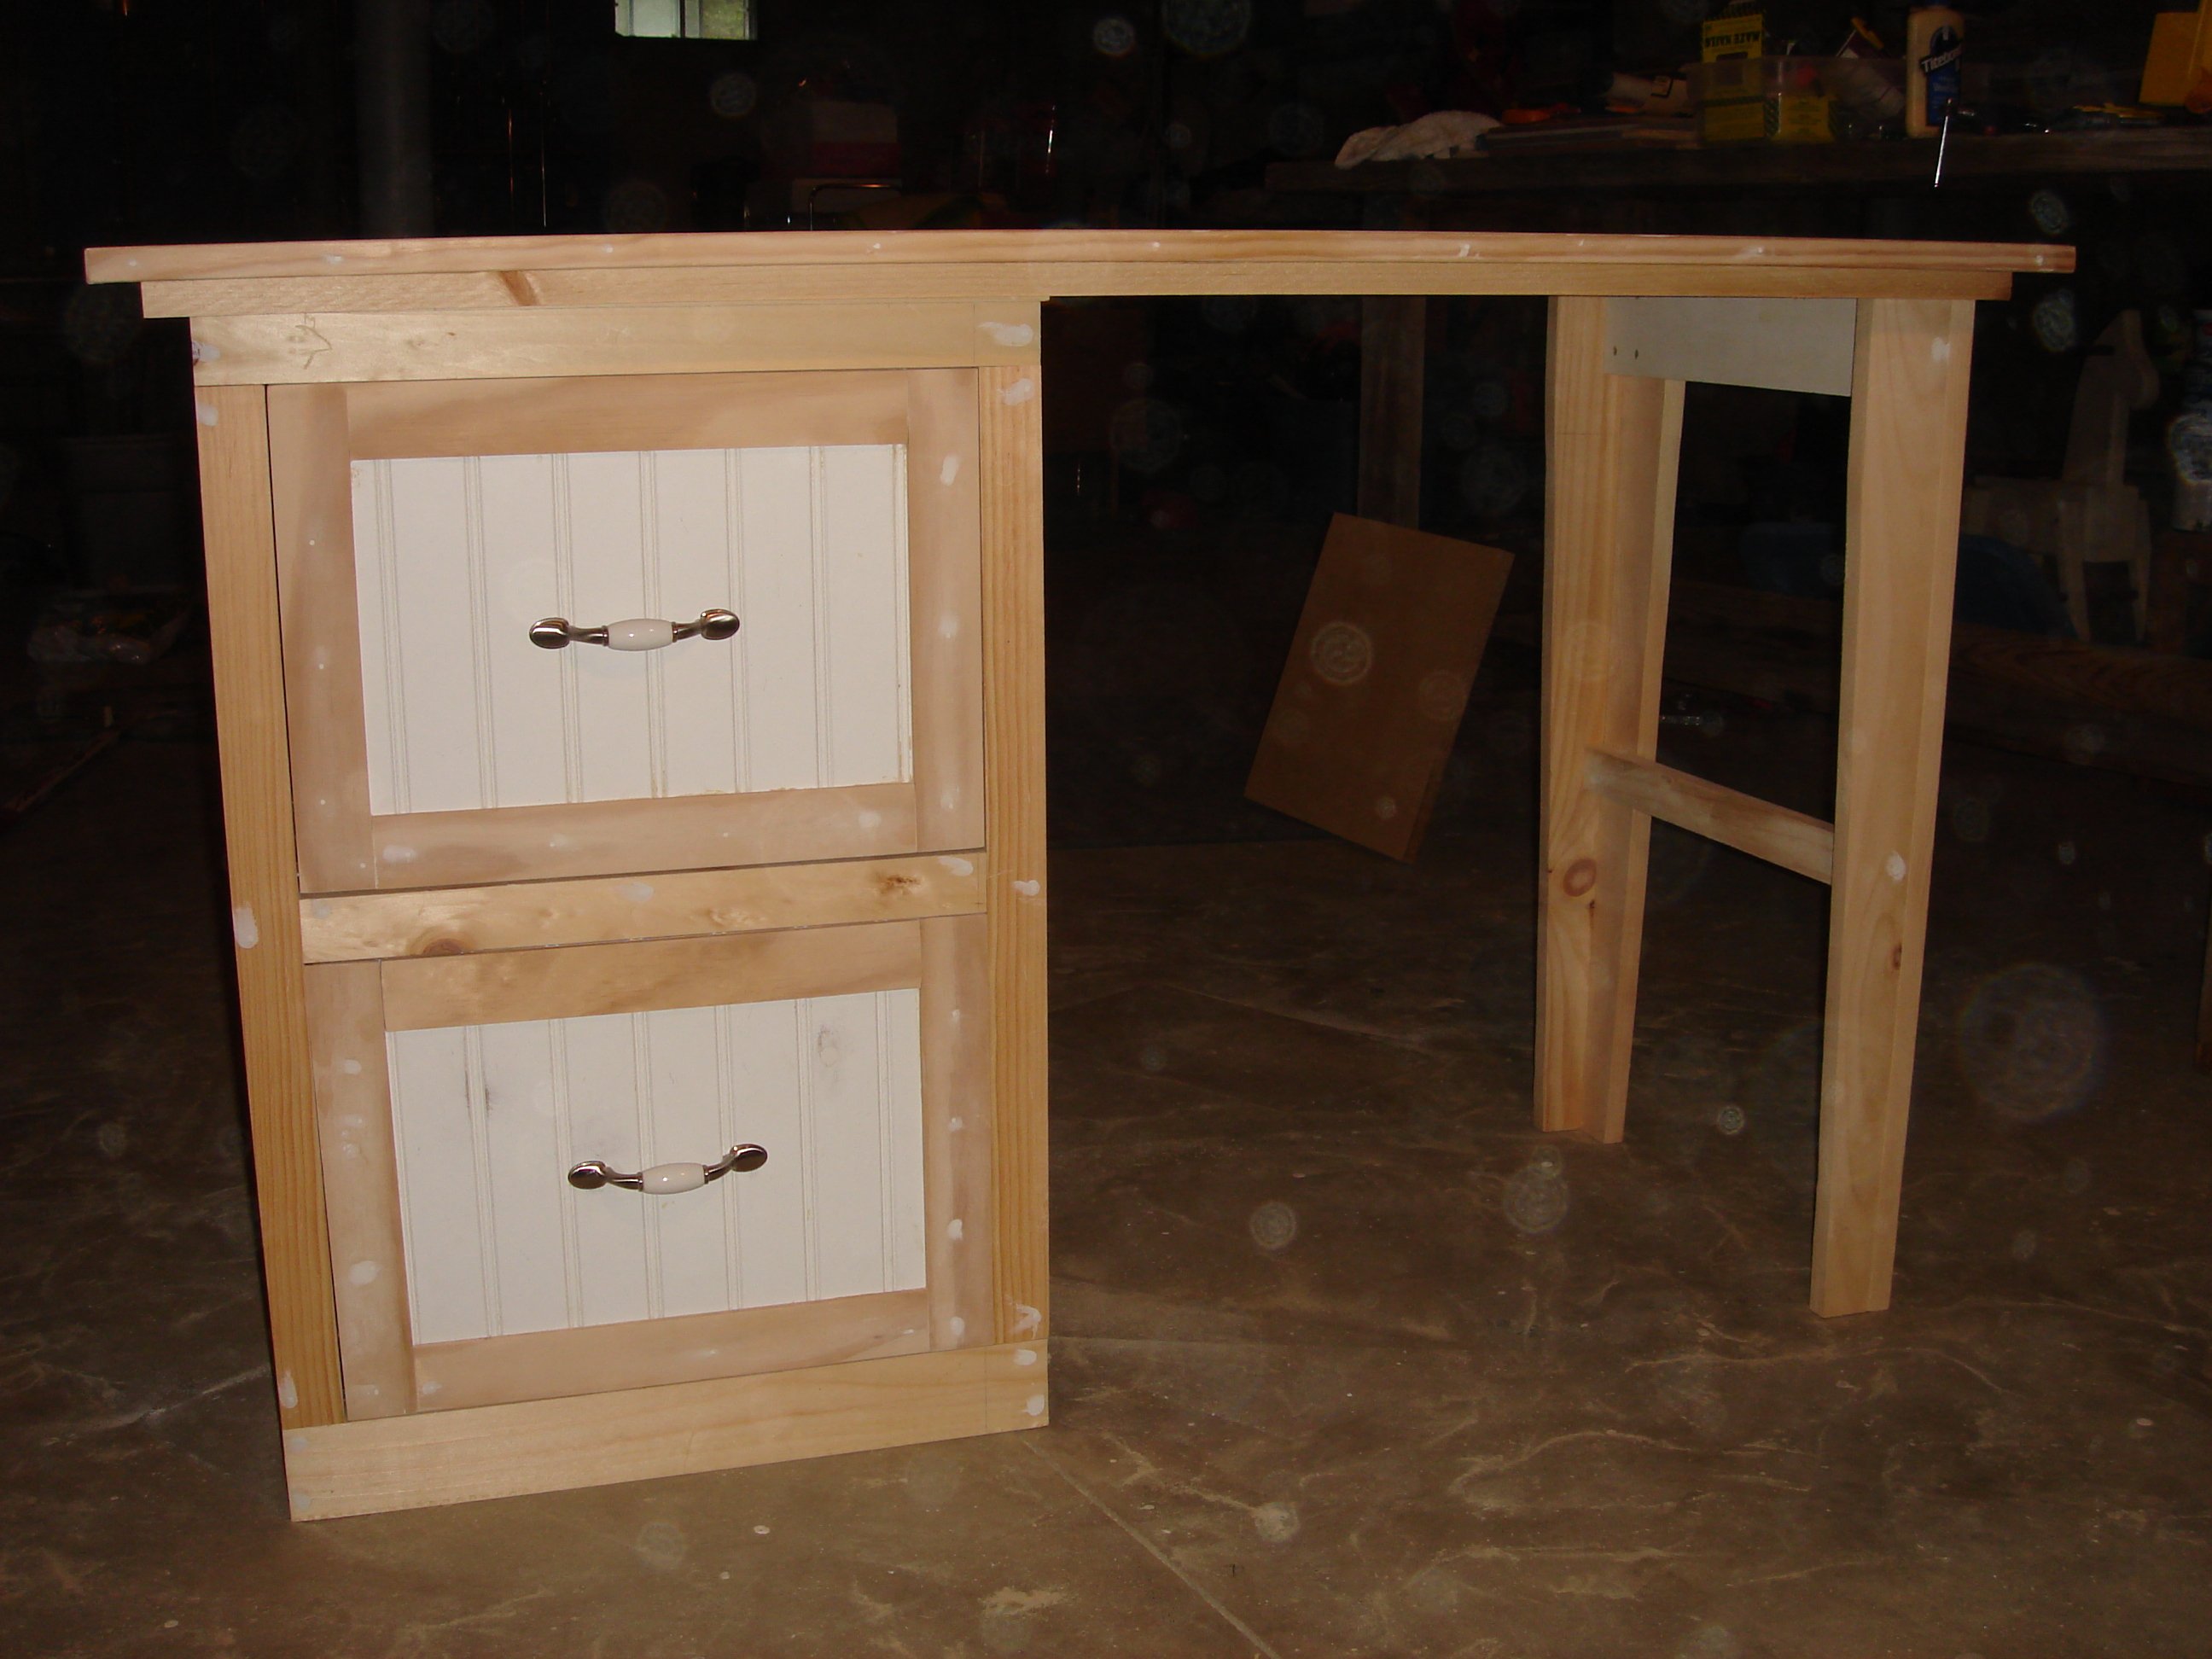
The drawers are made from a combination of 3/8” craft boards and 3/8” plywood, ½” craft board, and some ¼” plywood for the bottoms (all of them except the one right of center – that has ¾” plywood for the bottom). The 2 outer drawers also have ¾” S4S as guides.
The doors and drawer fronts are ¼” birch plywood cut to size, with ½” x 1 ½” craft boards glued to the fronts for rails and stiles (I added a few pin nails from the back side also). Inside these, mitered pieces of mini-stop moulding were glued in place. The whole thing received some putty on the edges and joints, and thorough sanding with 80-grit, then 220-grit.
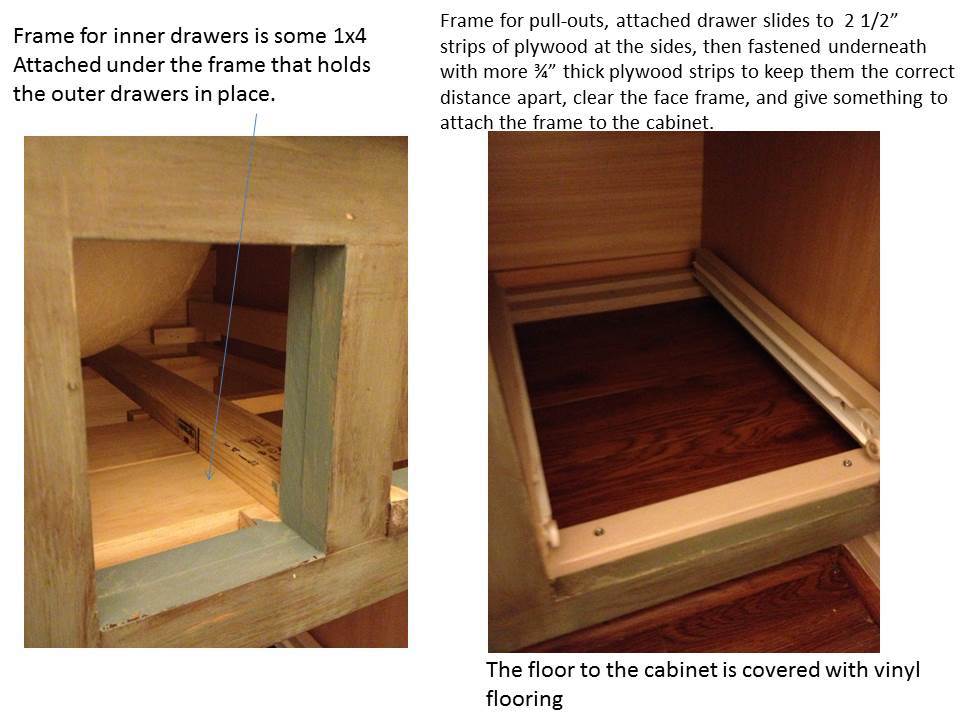
The inside frames are made from S4S, 1x2, and some scraps of 1x4 cut to size. If I were doing this in a newly constructed vanity without the sink already in place, the setup for the drawers would have been much simpler. But, we weren’t ready to buy new yet, so necessity was the mother of invention and we have this. I re-used the hinges and 2 of the knobs from the original, and I bought 4 more and the hardware for the drawers.
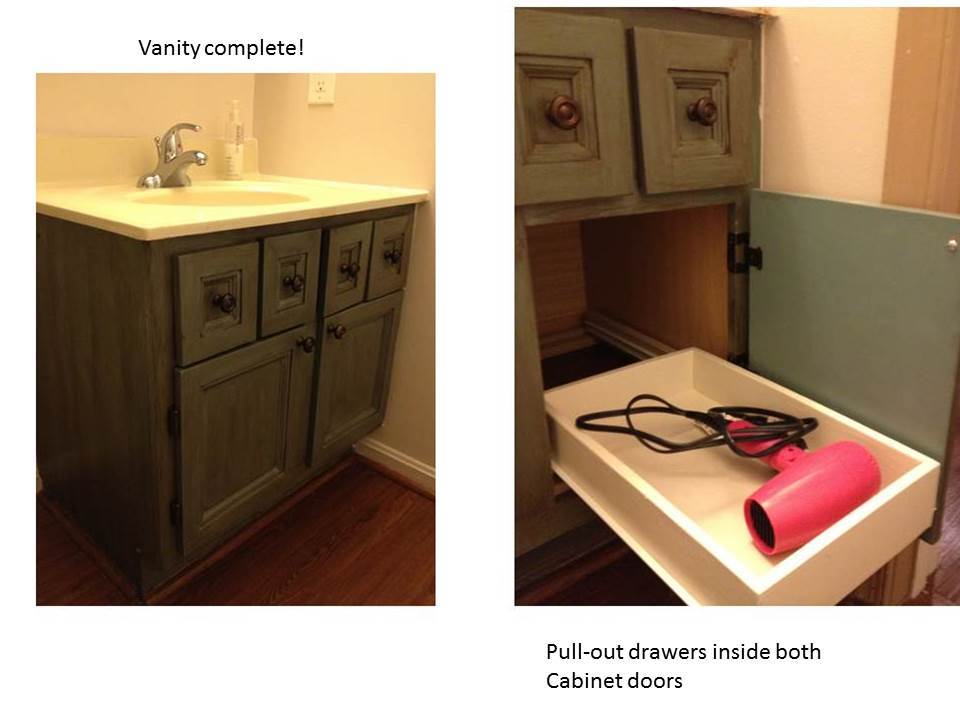
The pull-outs in the bottom are made from plywood scraps, thoroughly sanded and painted. These are based on Ana’s wood pull out cabinet drawer organizer, with added supports across the bottom to make the drawer clear the lip of the face frame, keeping them the correct distance apart, and giving something to attach to the cabinet floor.
For the inside floor of the cabinet, I got this Idea from Yvonne at Sunnyside Up-Stairs in this post:
http://sunnysideup-stairs.blogspot.com/2013/06/progress-installed-dishw…
Left over flooring was placed on the cabinet floor to give it a fresh new look and protect the cabinet bottom. Our house is 21 years old, so you can imagine the floor of the vanity cabinet had seen some wear and tear. Now it looks new!


Comments
avillela710
Mon, 05/10/2021 - 06:46
Love it
Love it