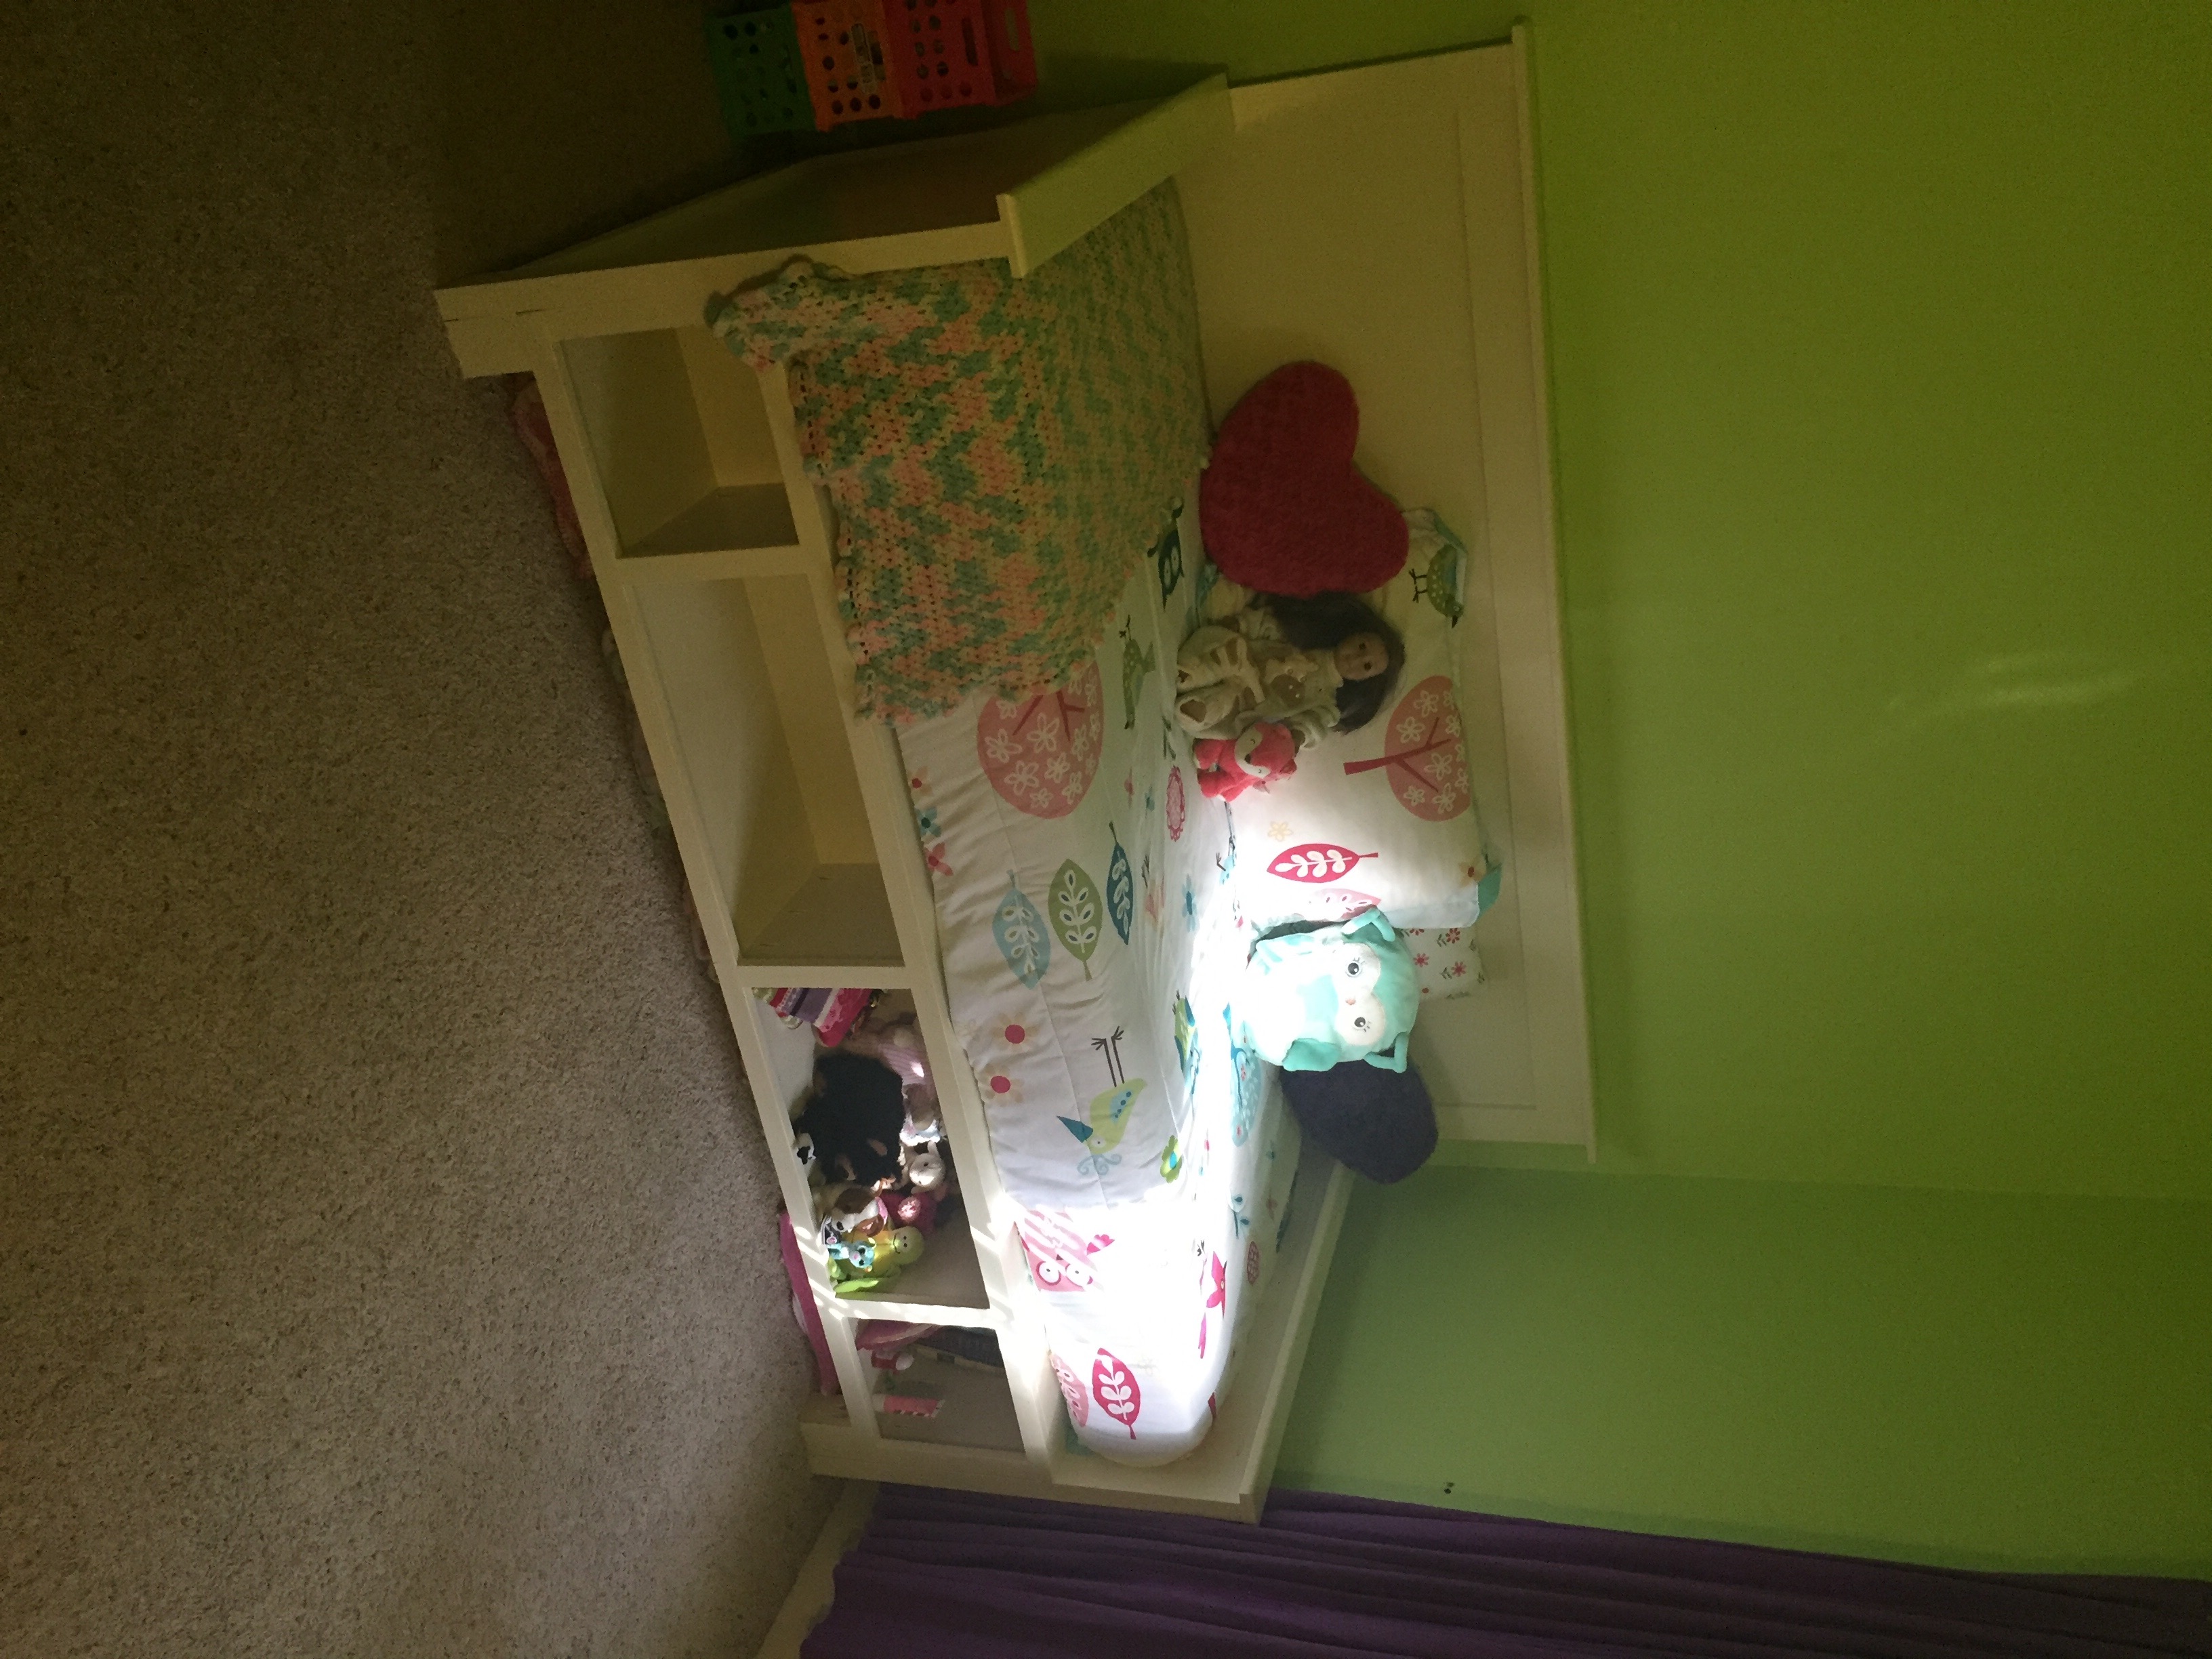
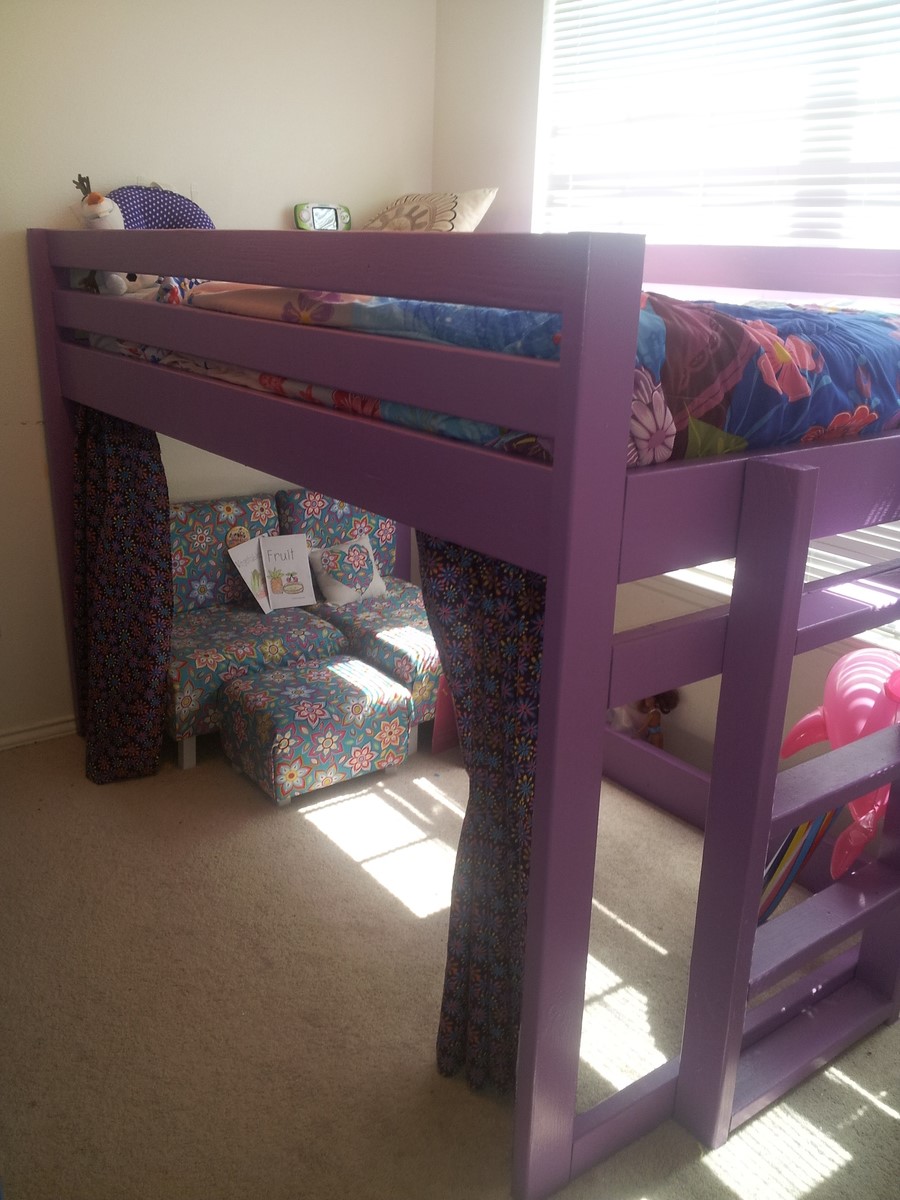
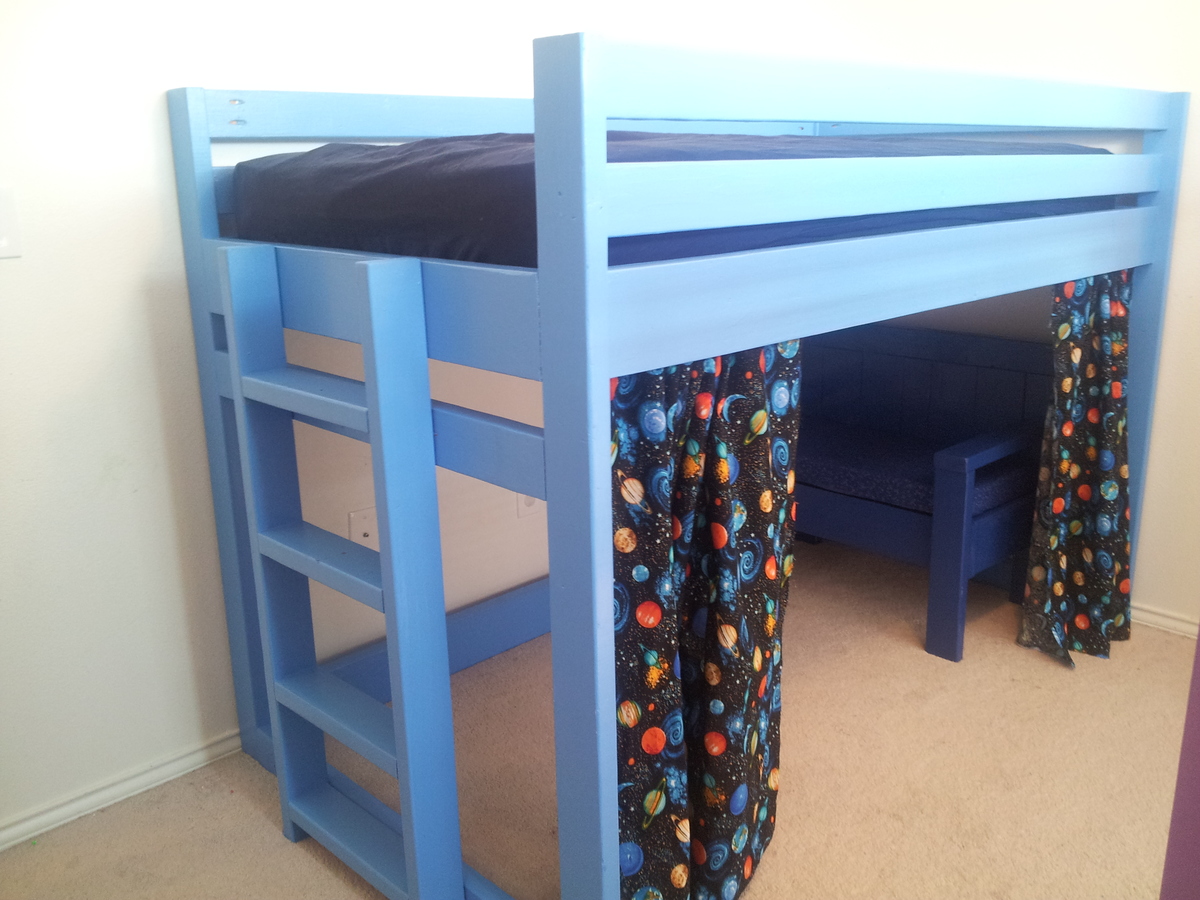
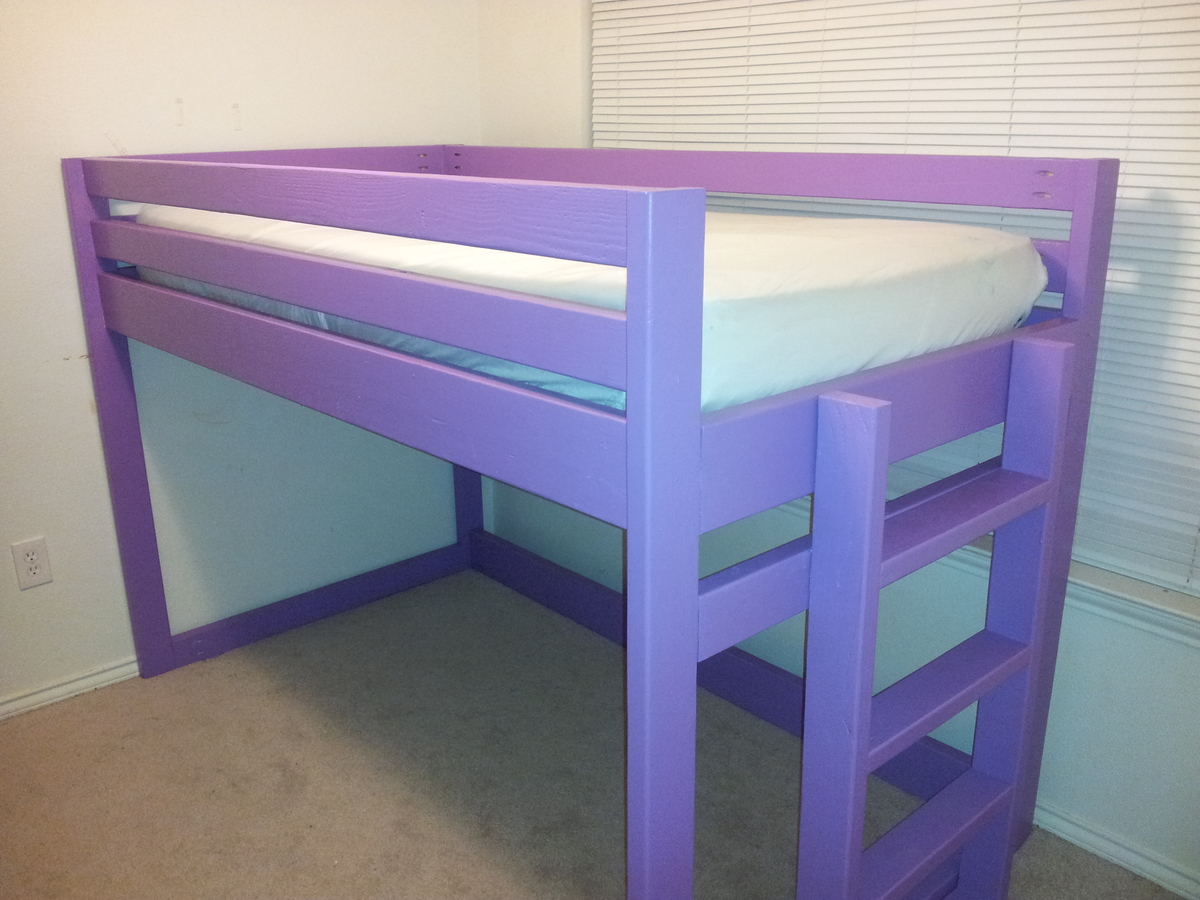
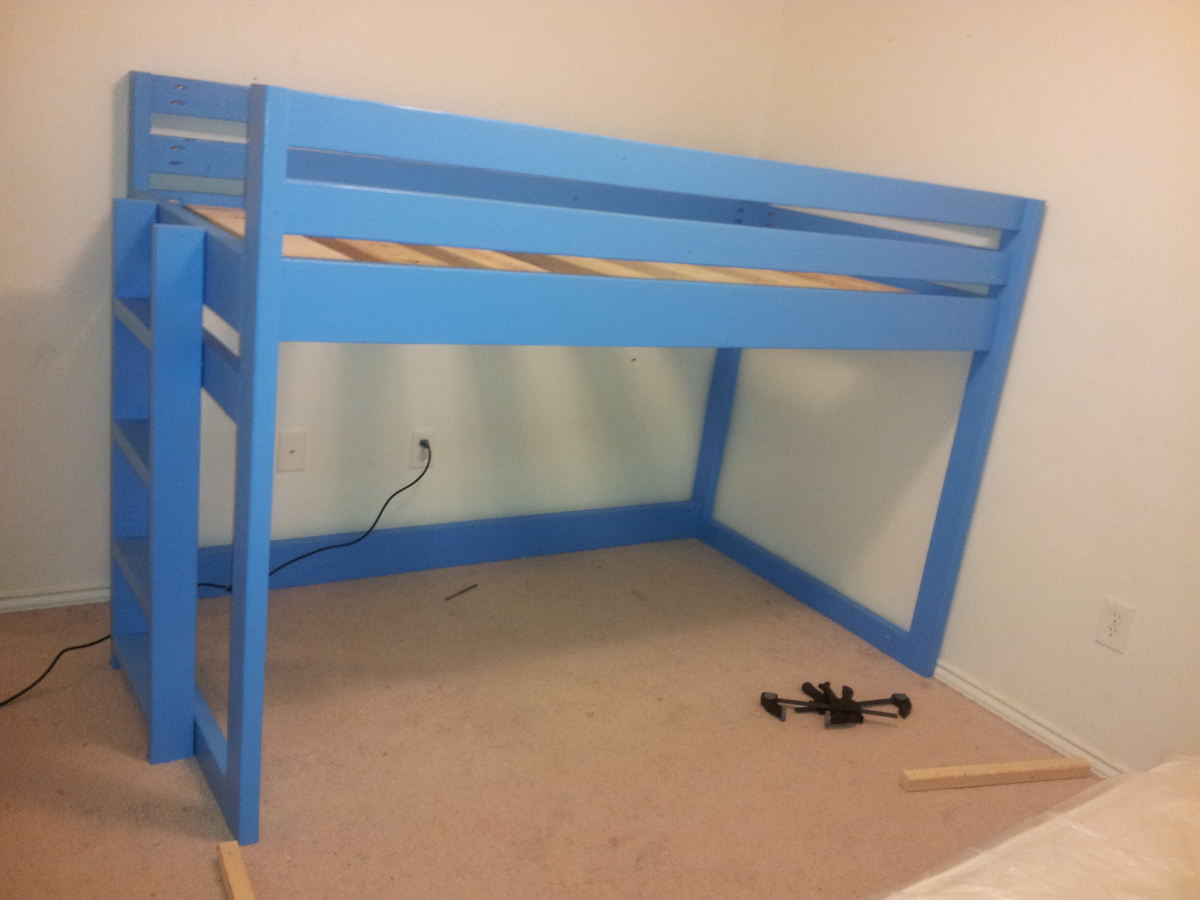
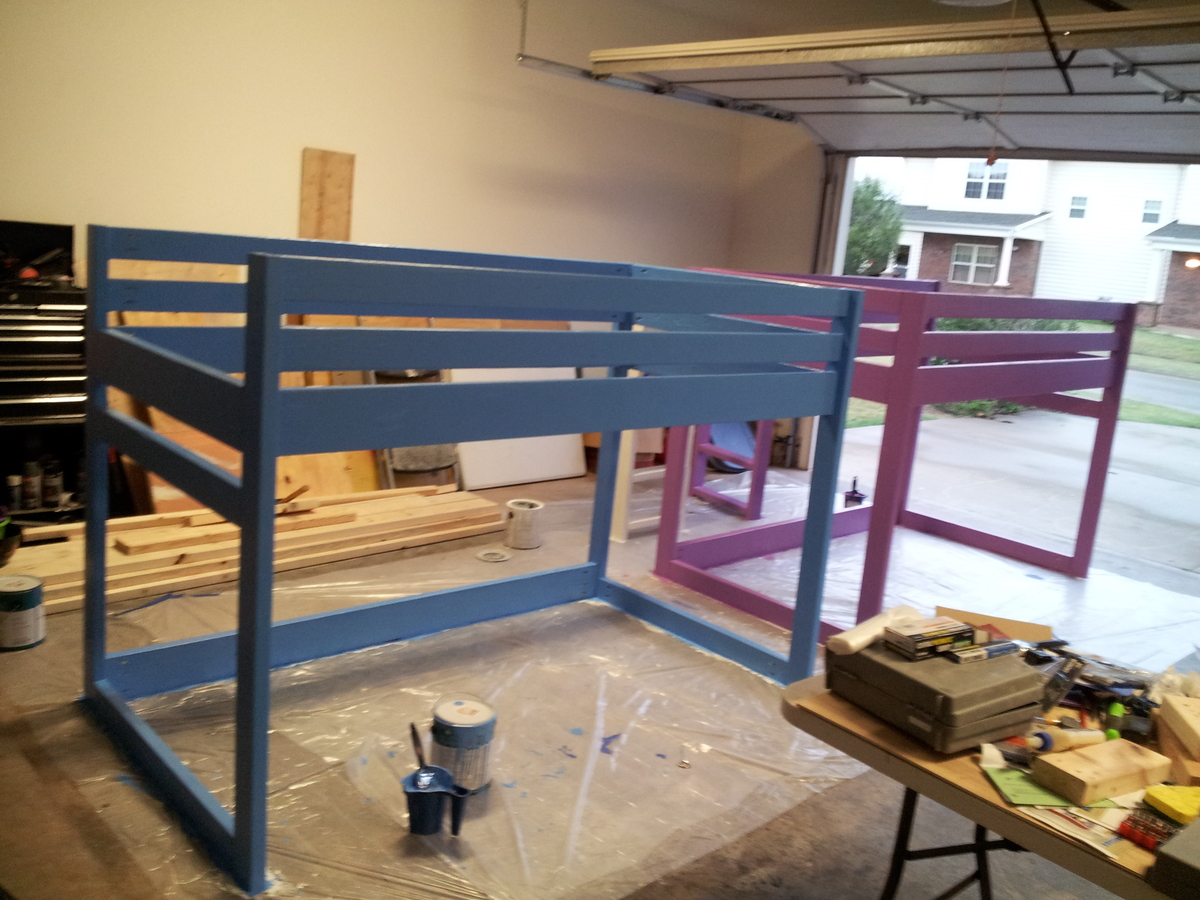
Community Brag Posts

Farm Style Side Table

Submitted by Anonymous (not verified) on Tue, 02/13/2024 - 12:26

This was a new project idea my wife wanted me to do. It was relatively simple to follow. I felt it turned out pretty good. I've always felt that Ana's plans were well thought out and simple to follow. Even for a beginner like me.


Robert Gilliam

Built from Plan(s)

Queen Storage Bed

Submitted by HR Dad on Thu, 07/19/2012 - 14:43

My boy was sleeping on a queen box spring / mattress sitting on the floor; figured he needed a bed and the storage bed seemed just the ticket.

Found some beadboard on clearance for $16 a 4x8 sheet so picked up about 5 sheets. It was on clearance since it was prefinished. Not a big deal since I knew I'd be painting the bed (had to prime the stained wood first). I think the beadboard adds a nice touch on the ends.

Haven't built drawers yet, but the wife kind of likes the looks of the cubby bins so drawers can wait.

The headboard wasn't from any plan; just followed the same basic concept as the bed; sides are 3/4 plywood, but I rabbitted out the trim in order to insert the 1/4 beadboard. Used some scrap hardboard pegboard as a template for the shelf pin holes on the inside of the headboard to enable an adjustable shelf.

The bed sits up a little high for our liking, but eventually we will remove the boxspring and just set the mattress on the bed frame; just have to figure out where to store the boxspring . .

I miss the family when they're out of town, but at least I get a lot of projects done . . .

Built from Plan(s)
Estimated Time Investment
Weekend Project (10-20 Hours)
Finish Used
Behr Interior Paint
Recommended Skill Level
Beginner

Comments

YankeeBelle

Thu, 08/30/2012 - 17:19

This is beautiful. Love your colors and use of beadboard! Great job! I love the bins too....really terrific!

My Very Own Rustic Table

I wanted a farmhouse table look, but no too county. I think that this table accomplished that.

I debated a while with staining the entire table or staining the top and painting the legs. I'm really glad that I decided to paint the legs. I think it turn out great.

This was my first DIY wood project. I'm pretty much addicted now. Every time my wife wants to get a new piece of furniture, I always tell her that I can probably build it.

Built from Plan(s)
Estimated Cost
$150
Estimated Time Investment
Weekend Project (10-20 Hours)
Finish Used
Rust-Oleum Ultimate American Walnut Oil Wood Stain on Top

White paint on legs & aprons
Recommended Skill Level
Intermediate

Ladder Tote Storage

Submitted by Anonymous (not verified) on Thu, 02/15/2024 - 10:21

storage for totes - can be made to accommodate any size totes - just adjust the measurements basically it is "ladders " 2x4s for legs 2x2s for "runs" 2x4s across the bottom & top this is in a basement with short ceilings so if you have a taller space you can go taller or you can go shorter.

Kiddie Chairs

These chairs were easy to build, although I modified Ana's plans a little bit. I opted for solid wood 2x2s for the legs (I wanted it to be sturdier), and a solid seat instead of a slatted one. I notched out the back of the seat so it would fit flush against the back legs. Because of my modifications, my chair was just a couple bucks more.

Also, I was so excited to find solid wood balusters for the chair legs - they're not only better quality, but cheaper than furring strips!

Check out my blog link for a complete play-by-play!

Estimated Cost
$7.00
Estimated Time Investment
Afternoon Project (3-6 Hours)
Finish Used
Primed with Zinsser 3-in-1 Primer, then painted with Red Valspar Paint found in the "Oops" section of Lowes. Three coats of Rustoleum Satin Polyurethane.
Recommended Skill Level
Beginner

Comments

Amy's "My Chair"

Submitted by rosiejane on Tue, 05/13/2014 - 22:09

My daughter needed a chair that wasn't as bulky as our high chair but higher than a normal dining chair. This plan was perfect. I changed the dimensions to suit what I needed. The actual building took only a couple of hours but the finishing seemed to take forever. I probably spent about a week just on the finishing. I distressed it to help disguise the inevitable bumps and grubby handprints.

Built from Plan(s)
Estimated Cost
AUD$20
Estimated Time Investment
Afternoon Project (3-6 Hours)
Finish Used
Cabots stain - burnt gum, dulux vivid white, clear water-based varnish.
Recommended Skill Level
Beginner

Comments

cthomas

Mon, 05/01/2017 - 16:30

Is this adaptable for adult size with no back. Looking for something like this to slide under a new kitchen desk.

Kentwood bed 2016

Submitted by Anonymous (not verified) on Mon, 08/15/2016 - 21:12

I wanted to build my 10 year old son a new bed after getting rid of bunk beds. We both liked this one and worked on it together.

Built from Plan(s)
Estimated Cost
$130 for bed and a nightstand (not pictured)
Estimated Time Investment
Week Long Project (20 Hours or More)
Finish Used
Dark walnut stain, poly, steel wool, and beeswax finishing wax.
Recommended Skill Level
Beginner

Hen House

Submitted by Anonymous (not verified) on Tue, 02/20/2024 - 08:43

A new home for 8 ex battery hens. :)

ManicMick

Seesaw

Submitted by embleier on Tue, 07/24/2012 - 11:12

I made this Seesaw for my 4 year old's birthday present! It was SUPER easy...and she LOVES it!

Estimated Cost
$25
Estimated Time Investment
An Hour or Two (0-2 Hours)
Recommended Skill Level
Intermediate

Full Bed with upholstered headboard

Submitted by skyzen on Sun, 05/18/2014 - 20:04

First of all, thanks Ana for the wonderful plans. I made this in full size mainly from the farmhouse bed plan with some modifications. The headboard is made of 1x4s with an upholstered pegboard. Instead of using 4x4 post for legs, i glued 2x4s studs together and later wrapped them with fabric instead of painting them.

This looks great in our second bedroom.

Built from Plan(s)
Estimated Cost
$70
Estimated Time Investment
Weekend Project (10-20 Hours)
Finish Used
Valspar Glossy White
Recommended Skill Level
Intermediate

Folding Workbench with Storage

Submitted by lookitsash on Fri, 08/19/2016 - 13:15

Digging through my scrap wood collection, I came across some pieces of pegboard from our previous home that I had forgotten about. I had just relocated a lot of garden tools to the shed, and there was an empty wall in the garage that would now be perfect for the pegboard. After mounting the pegboard and hanging up some tools, the wall still looked a little empty. I had a vision of mounting a heavy duty folding workbench to the wall. This was the perfect location, and if the workbench folded, we could still fit the car in the garage.  You can read all the details about my folding workbench on my blog at:


http://www.justmeasuringup.com/blog/building-a-folding-workbench-with-french-cleats


The workbench is a perfect addition to my garage, and its used every day.  Best of all, I just fold it down when I need to park the car!

Estimated Cost
Around $150
Estimated Time Investment
Weekend Project (10-20 Hours)
Finish Used
No paint or stain, but I did route the edges of the table with a roundover bit to give it a professional finish
Recommended Skill Level
Intermediate

King Sized Fancy Farmhouse Bed

Created our own King sized Fancy Farmhouse bed (headboard only) using Ana White’s plan! Overall, a well laid out plan, very easy to complete! We went with a two tone color scheme to match an antique dresser I refinished last year. Note: we used nickel gap “ship lap” for the panel of the headboard and used the pocket hole jig to secure the pieces together, traditional tongue and groove probably would have been easier, but I love how the nickel gap looks finished!

Estimated Cost
$200
Estimated Time Investment
Day Project (6-9 Hours)
Finish Used
Cream colored paint is Valspar Gloss Almond enamel paint

Dark stain is Cabot Ebony with 2 coats of satin poly
Recommended Skill Level
Intermediate

Bathroom shelf with hooks

This was inspired by your Flat Wall Bookshelf and made using a piece of 1x6, a piece of 1x4, and a smidge of recycled paint. We added towel hooks to the ends (the same ones that kept pulling out of the wall), and mounted the whole thing to studs in the bathroom. Thanks for the plans!

Estimated Cost
$0.10 out of pocket
Estimated Time Investment
Day Project (6-9 Hours)
Finish Used
Unknown pale green Martha Stewart paint from a recycling center. Cost: $0.50 for the quart.
Recommended Skill Level
Beginner

LOVE MY SHED!!!

Submitted by Storm on Wed, 05/21/2014 - 20:41

I saw this storage shed plan and loved it. I did make a few changes because I needed a 4' x 8'. I also built a shed floor to secure it too so I built the shed frame using 2x4's.
I also put the lower ends of the side walls in the rear to assist with water runoff.
Because I wanted the option to add shelves on the left side I decided to put one larger door on the right front only and added some contrast by vertically placing the pickets on the opposite side. I'm presently waiting for my shingles to arrive. After that I'll stain it. I really enjoyed putting this together, learned a lot.

My next project will be the outdoor sectional. I'll be making 5 pieces, 1 corner and 5 armless pieces. Can't wait to start.
Happy building,
Keep Safe

Built from Plan(s)
Recommended Skill Level
Beginner

Comments

jakeaharper

Wed, 08/03/2016 - 06:03

I absolutely love this shed and the way you altered the design with one door. Can you please send me the measurements you used for this project? I would love to build this for my yard!

Sideboard/Game Console

Submitted by jakegarner on Wed, 06/03/2020 - 14:19

Used the plan for a double-entry console to make a triple cabinet to go behind the couch and serve as a board game console and sideboard for the dining room.

Lowered the total height to 34 in to fit behind the couch. The total length is 8 feet.
For the plywood top I edged them then pine boards to make the top look more like a solid piece of wood and stained it.

Estimated Cost
$300-400
Recommended Skill Level
Intermediate

Comments

Stone Fireplace Entertainment Center

Submitted by Anonymous (not verified) on Sat, 03/02/2024 - 11:14

We took out the tv entertainment cabinet and built a frame for a 60” electric fireplace. We found the ledger rock to match the wall I completed two years ago and then I tiled the rock over the backer board and installed the fireplace. The wood on top of the fireplace came from an oak tree that was growing through our deck. I milled the wood and joined three boards to give me the depth I needed, sanded, stained and put a poly finish on it. Love the final result and we gained 6” of space in the room.

Wes Silvey

Back