Community Brag Posts
Birdfeeder

Decided to use some scrap pieces of wood to make this for our backyard. Only difference I did was use 1x6 instead of 1x8 since that is what I had around. Thanks for the plans.
Estimated Cost
$0; had the wood lying aroung
Estimated Time Investment
An Hour or Two (0-2 Hours)
Finish Used
Paint
Recommended Skill Level
Starter Project
laundry organizer

found these plans online and threw them together slightly modified for my wife since she is the main laundry person in our house right now since I'm working two jobs. she was thrilled and posted this picture online now i'm signed up to build three more for single moms we know!
Estimated Cost
30$ maybe
Estimated Time Investment
An Hour or Two (0-2 Hours)
Finish Used
no time to finish, wife demanded i install and secure to stud right away.
Recommended Skill Level
Beginner
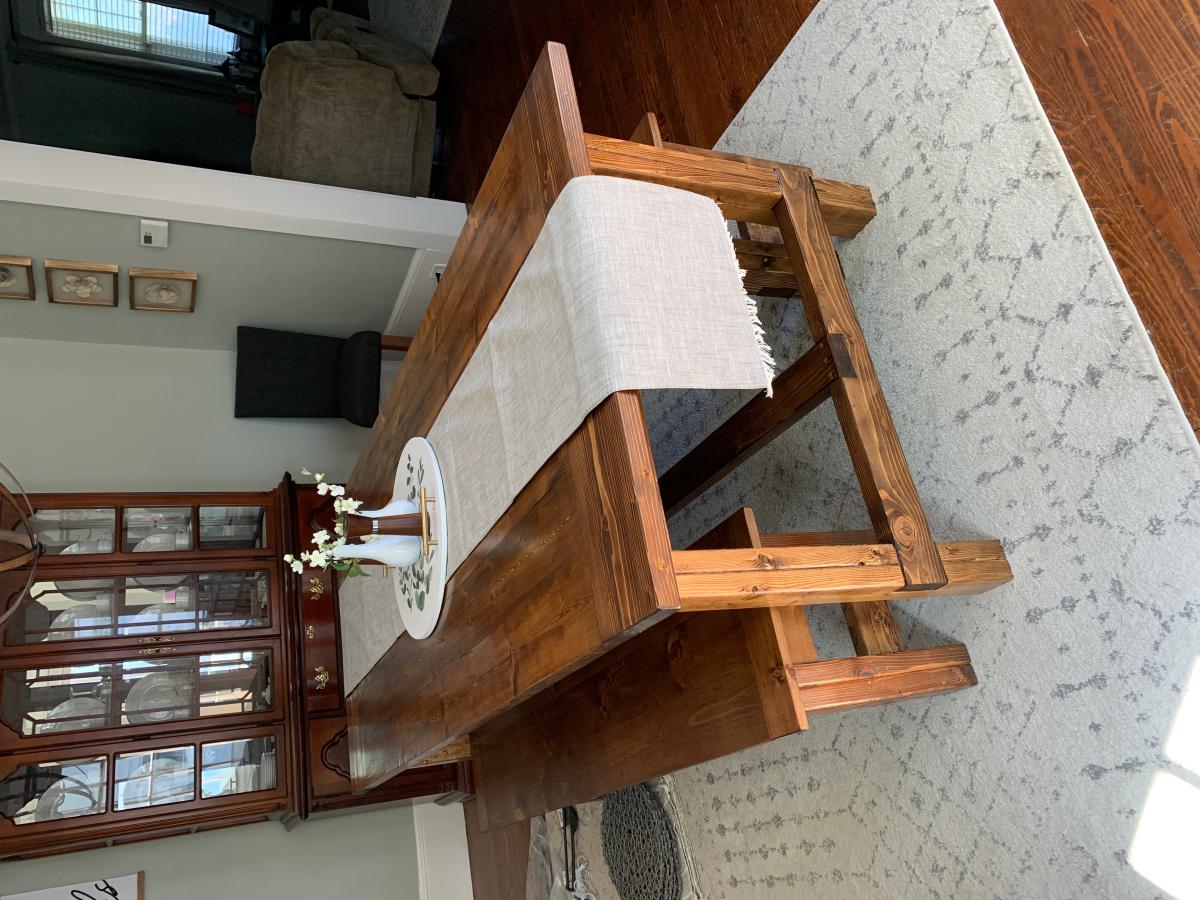
Fancy X Farmhouse Table
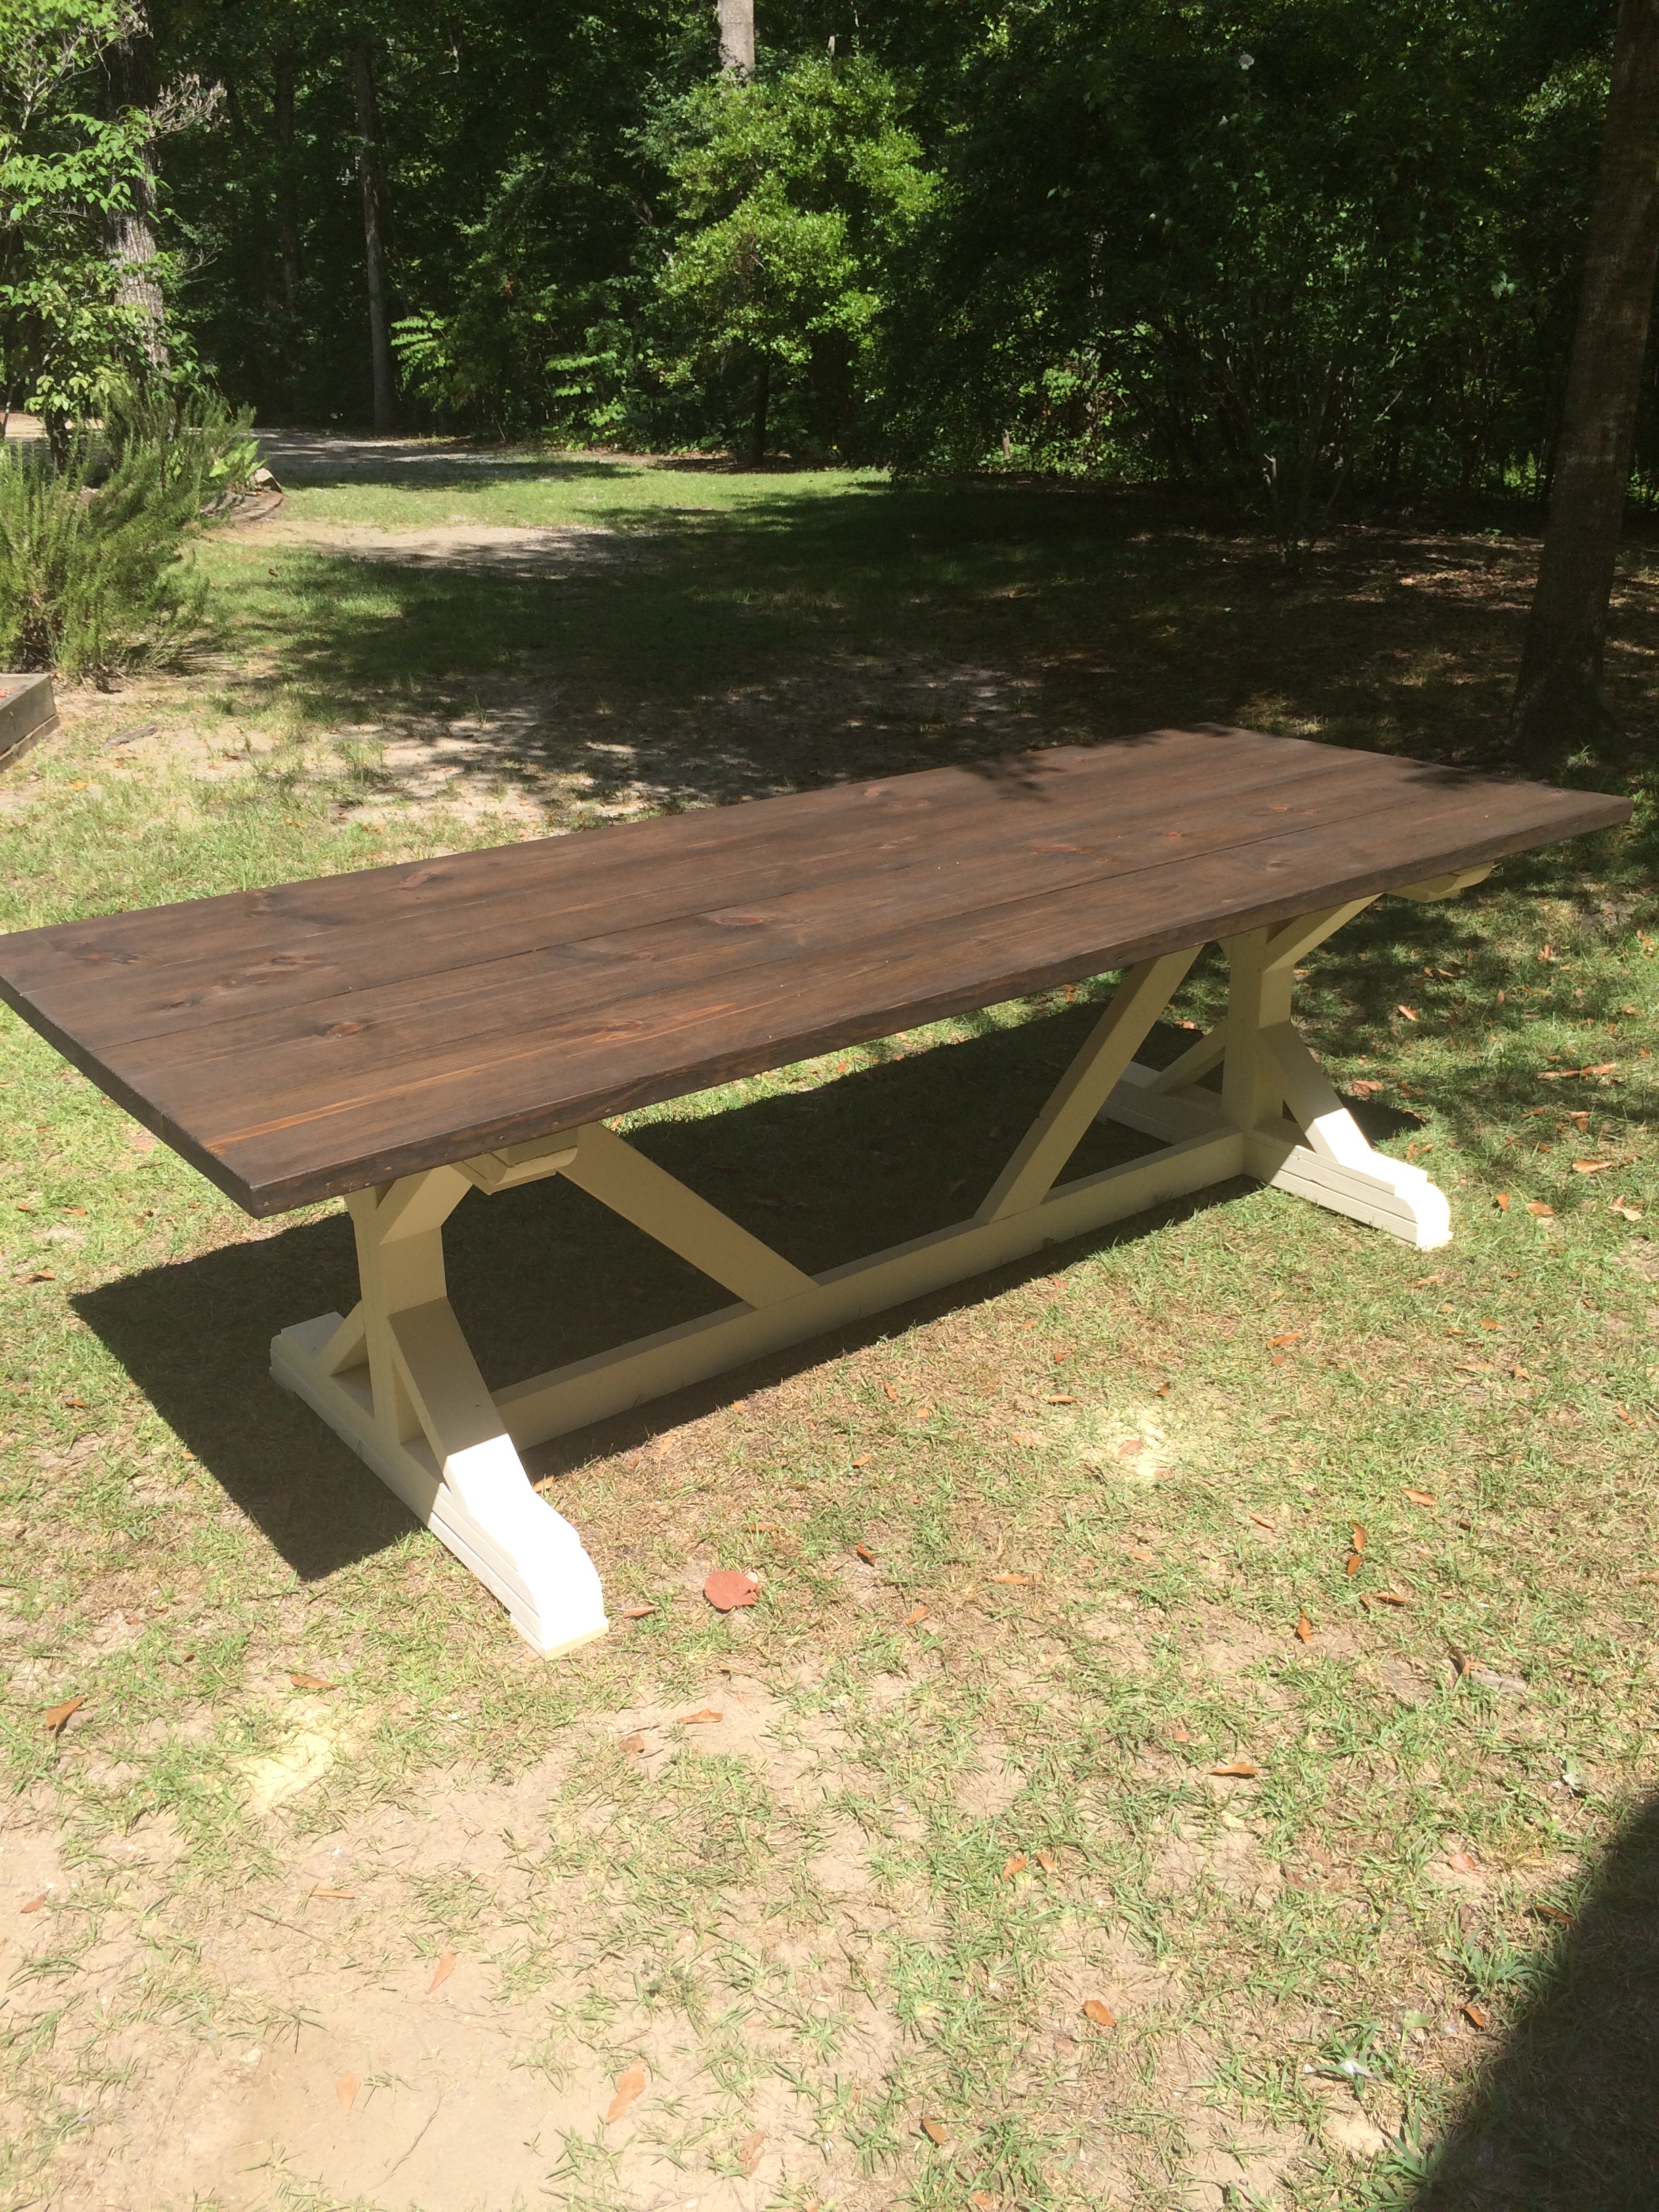
This was a fun one to build. I love how it turned out. Most importantly this wife loved it! I used the miter saw to create a curved love on the feet, this was really easy to do just took a couple practice boards then I had it. I dont remember how much I had in the money I had in the wood but I was a lot cheaper to build rather than buy.
Table top stain is Espresso
BAse paint is some cream color I dont remember sorry.
Built from Plan(s)
Estimated Cost
$100
Estimated Time Investment
Weekend Project (10-20 Hours)
Finish Used
Minwax Espresso Stain
Cream paint
Cream paint
Recommended Skill Level
Intermediate
Farmhouse Table & Benches
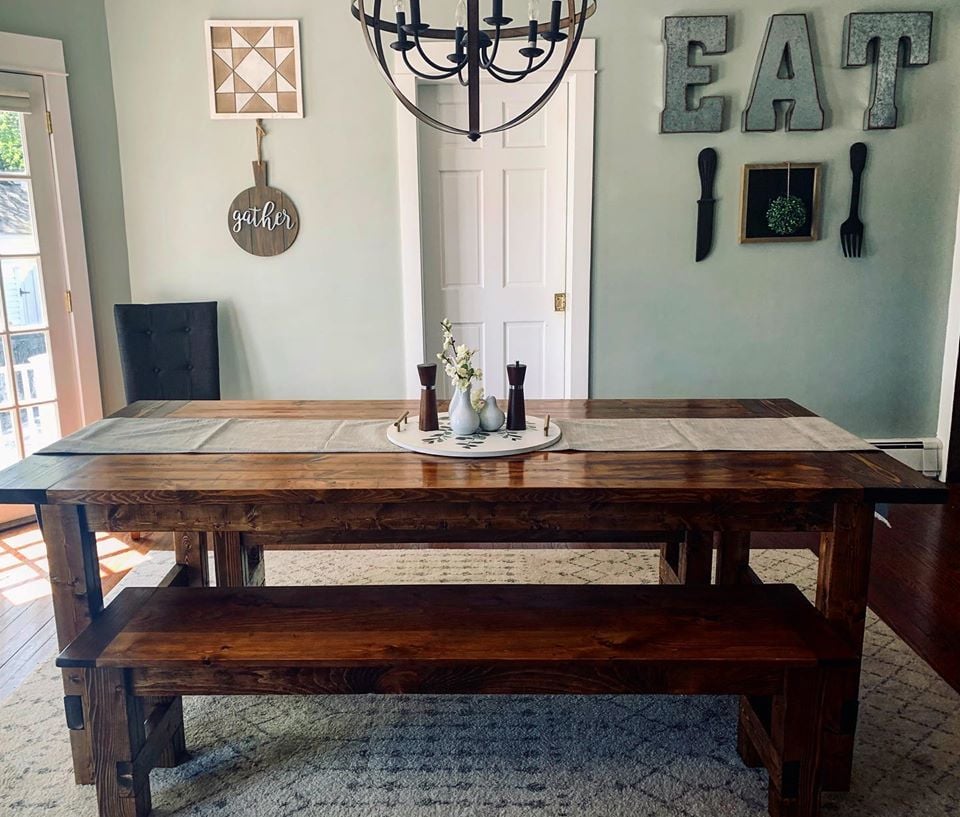
This was my first time building a piece of furniture on my own, so it was a lot of learning and trial and error on my part. The plans were fantastic for the most part (I thought the bench plans could have used a little more specification and couldn't seem to find a pocket hole version). We completed the project over the course of a couple months, simply because we revisited it when time allowed. It could easily be done in a much shorter period. One thing I will say is this -- add a step to the plans and utilize a planer and jointer on all of the boards. I had the table put together at one point and whew, I wasn't sure what I did wrong, and I went back and had followed all the steps. While this might sound obvious now, remember it was my first time doing something like this, so I followed each step to a T. I also used a belt sander on the table and bench tops to level things out even more, and went across the grain to make a smooth surface with an 80 grit belt, then hand sanded with a sanding block with 120, 220, and 320 grit. I also modified the bench plans to cut about 5 inches off so that they would fit under the table.
We used Minwax pre-stain conditioner, then one 10 minute application of Mixwax Honey stain, followed by Mixwax Satin Poly. It turned out great and we are already moving on to other projects!

Built from Plan(s)
Estimated Cost
About $400 inclusive of lumber, stain, poly, and sanding.
Estimated Time Investment
Week Long Project (20 Hours or More)
Finish Used
Minwax Pre-Stain Conditioner
Mixwax Honey (10 minutes then wipe off)
Mixway Satin Poly (3 coats, sand with 600 grit after coat 1, 800 grit after coat 2).
Mixwax Honey (10 minutes then wipe off)
Mixway Satin Poly (3 coats, sand with 600 grit after coat 1, 800 grit after coat 2).
Recommended Skill Level
Beginner
Barn Wood Rustic Island

My daughter bought a condo this past summer in St. Louis, MO. It's in an old factory that was rehabbed into condos. It's very industrial looking. Her condo has a lot of open space in the kitchen. She asked me to build her an island. I've previously used several of your plans to build various pieces of very functional pieces of furniture for my daughter, my son, and my wife and me. But this one is one I am especially proud of. I based it off your plan, "Michaela's Kitchen Island" modifying it to meet my daughter's unique needs. The majority of it is oak barnwood reclaimed from my wife's grandparents barns that were torn down to make way for an interstate highway. It is very attractive and user friendly. My daugher couldn't be more pleased. Thanks for all your great building ideas and plans. You've made this dad and daughter very happy.
Greg Winemiller, Mount Carmel, IL
Built from Plan(s)
Comments
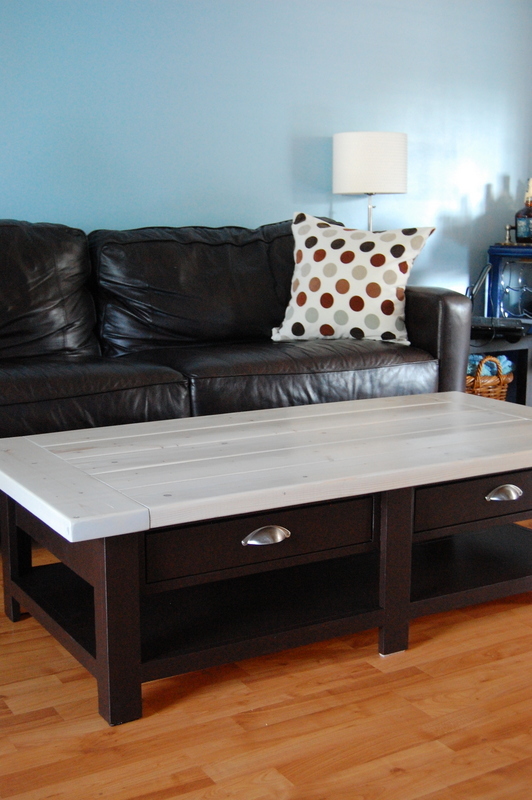
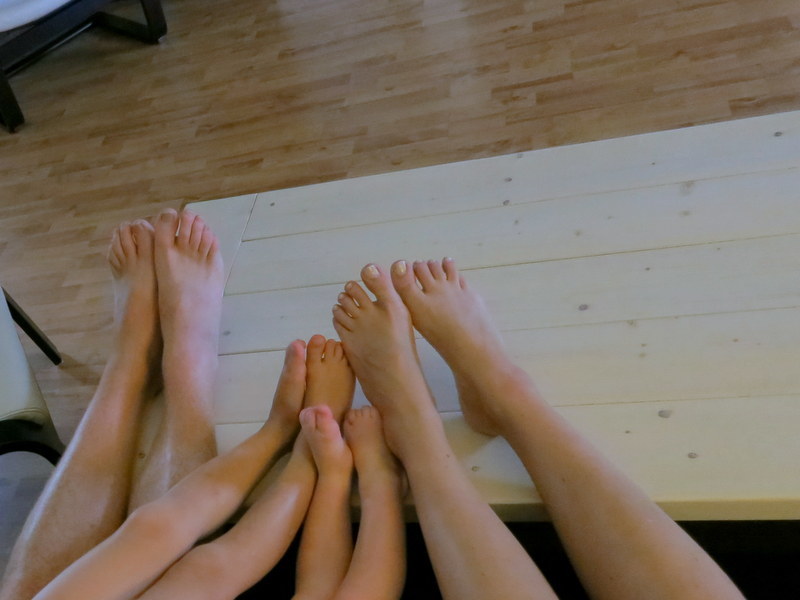
New coffee table & a place to rest our feet!
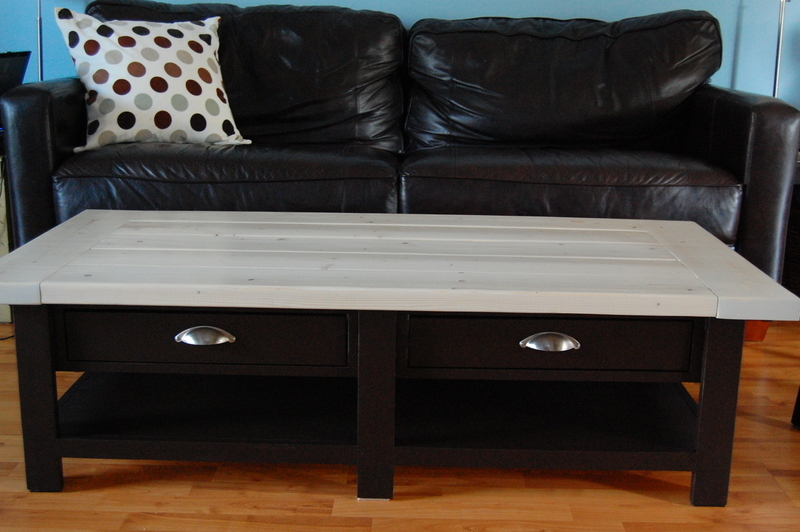
We needed a coffee table that we could rest our feet on comfortably while watching television (how gauche!). I altered the plans so the table is 15.5" high--just perfect for legs!
Like any project, this one had its ups and downs. I had to remake the table top twice (using the same wood), as the pieces just didn't line up right at first. And then I had had the brilliant idea to stain the bottom part gold for a pop of color in the room. Not cute. I had to paint over the stain with oil-based primer (followed by latex paint); it was worth it to get the final result!
Built from Plan(s)
Estimated Cost
$110 for wood and hardware
Estimated Time Investment
Weekend Project (10-20 Hours)
Finish Used
SW Antique White oil-based stain on the top; SW Black Bean paint on the bottom
Recommended Skill Level
Intermediate
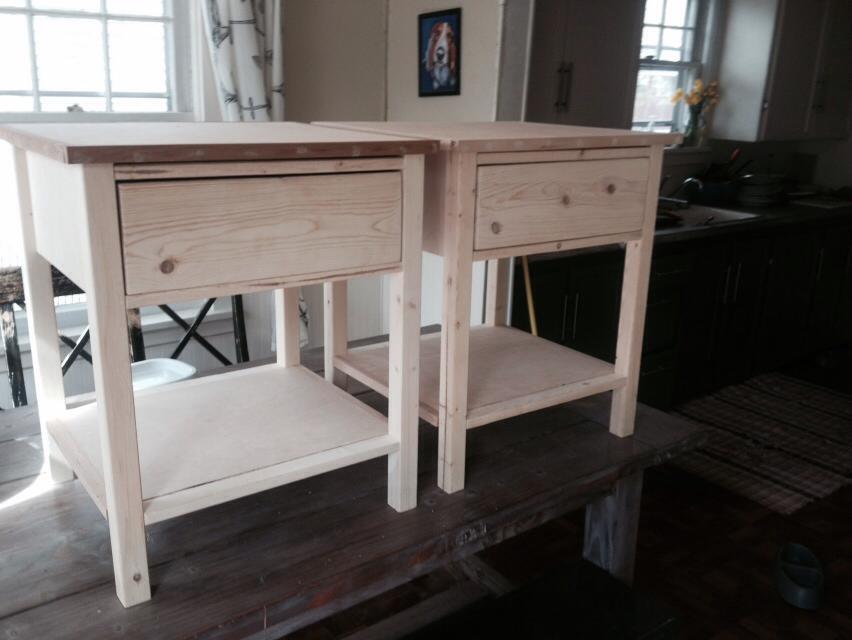
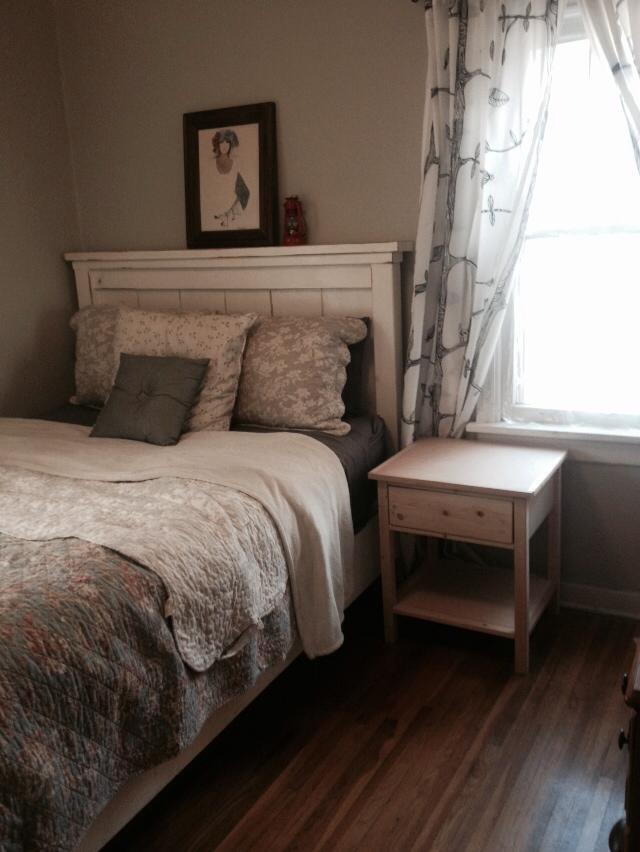
Farmhouse End Tables from Ana's Book!
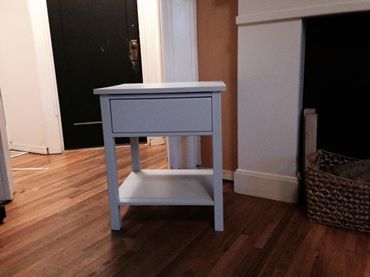
I made two of these farmhouse end tables for a friend/client. She wanted them to be very light gray when painted. I went to the blue store to get some paint mixed and waited... and waited.. and waited... and couldn't find anyone for the paint section. So I eventually just mixed it myself. It does have a bit of a bluish hint to it but I think they are very pretty.
These were a fun build and probably the best drawers we have ever made but we did have to use wooden guides on the inside to be sure it will close perfectly.
I hope she loves them!
Built from Plan(s)
Estimated Cost
100 for two
Estimated Time Investment
Weekend Project (10-20 Hours)
Finish Used
light gray paint
Recommended Skill Level
Intermediate
Chaise Lounge Chair
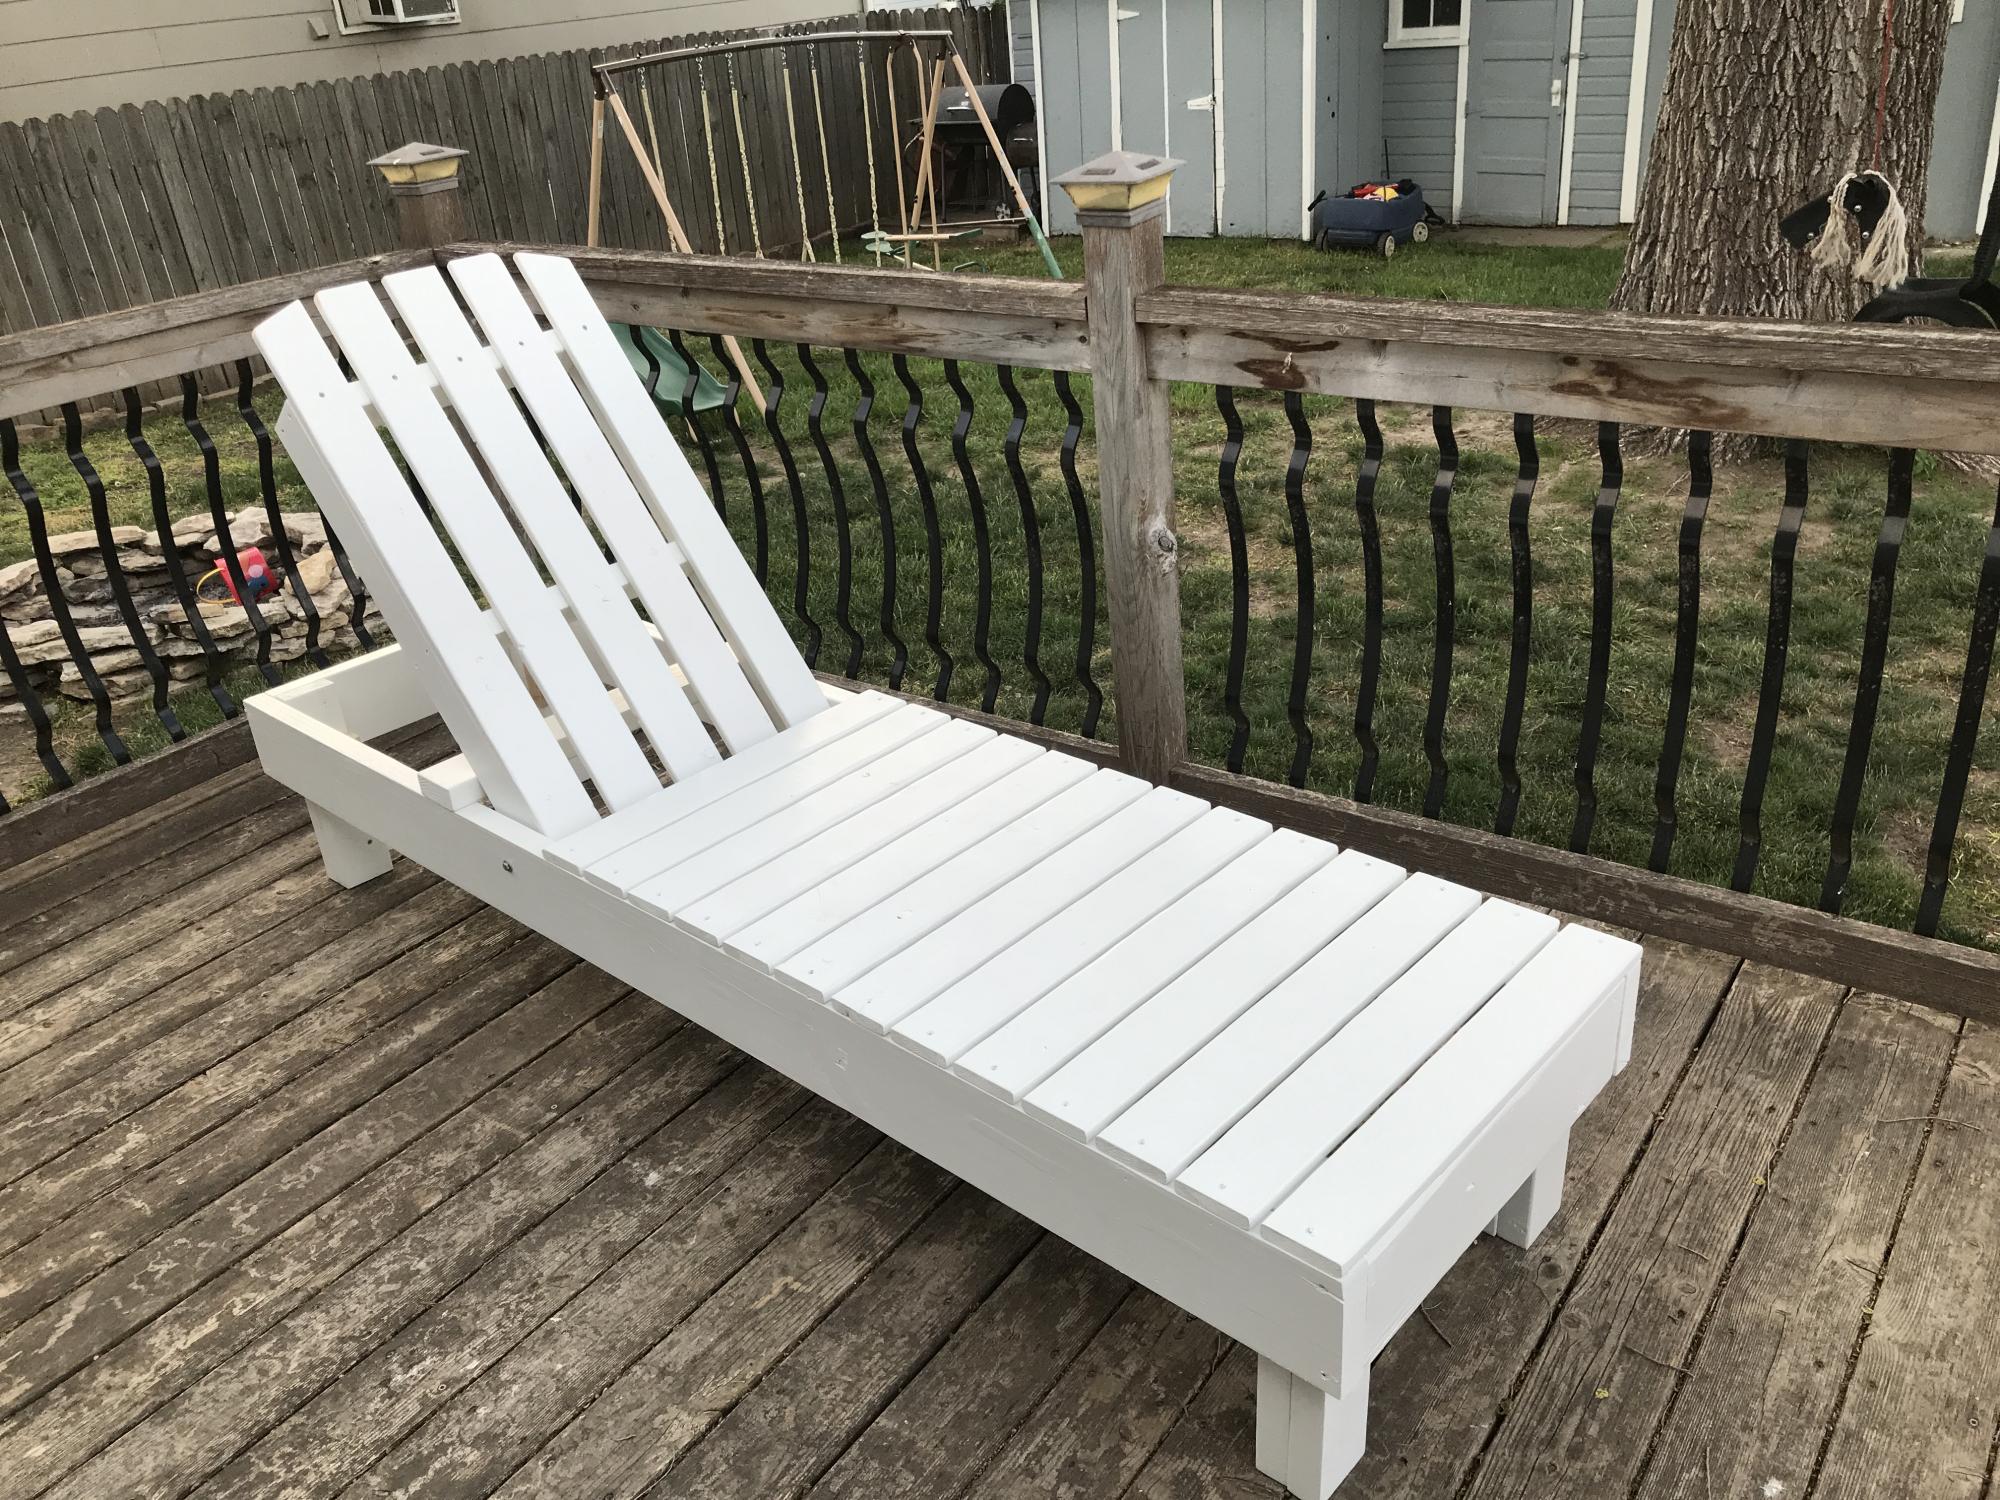
This took way longer than anticipated. I didn’t account for how much time would go into sanding, priming and painting the wood. Also, the plans were changed to use 2x6’s but didn’t take that into account for the stop block. Still trying to figure that part out when fully reclined. Other than that, it turned out really good.
Built from Plan(s)
Estimated Cost
$65
Estimated Time Investment
Weekend Project (10-20 Hours)
Recommended Skill Level
Intermediate
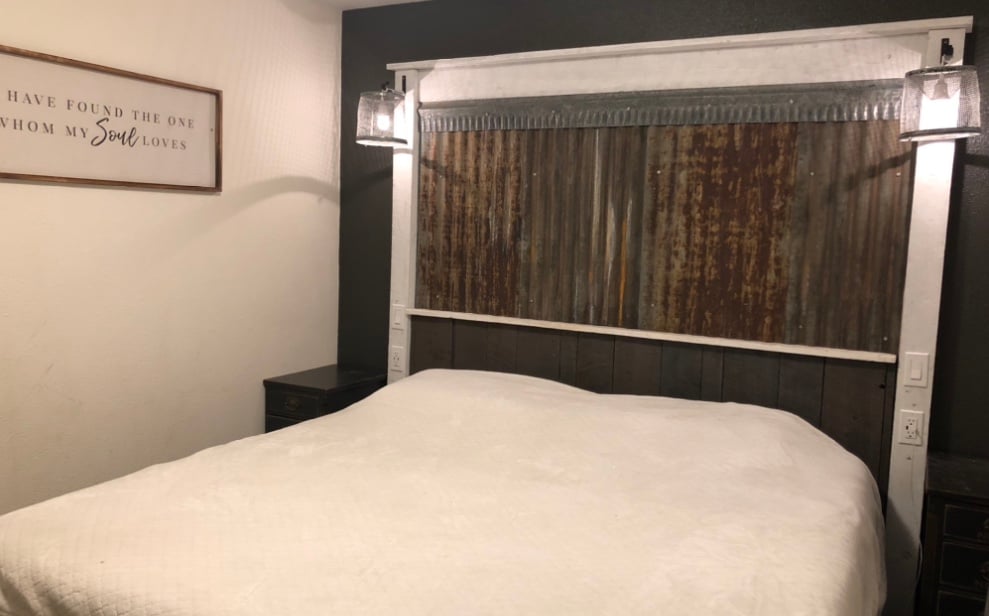
Headboard with Insdustrial Lights
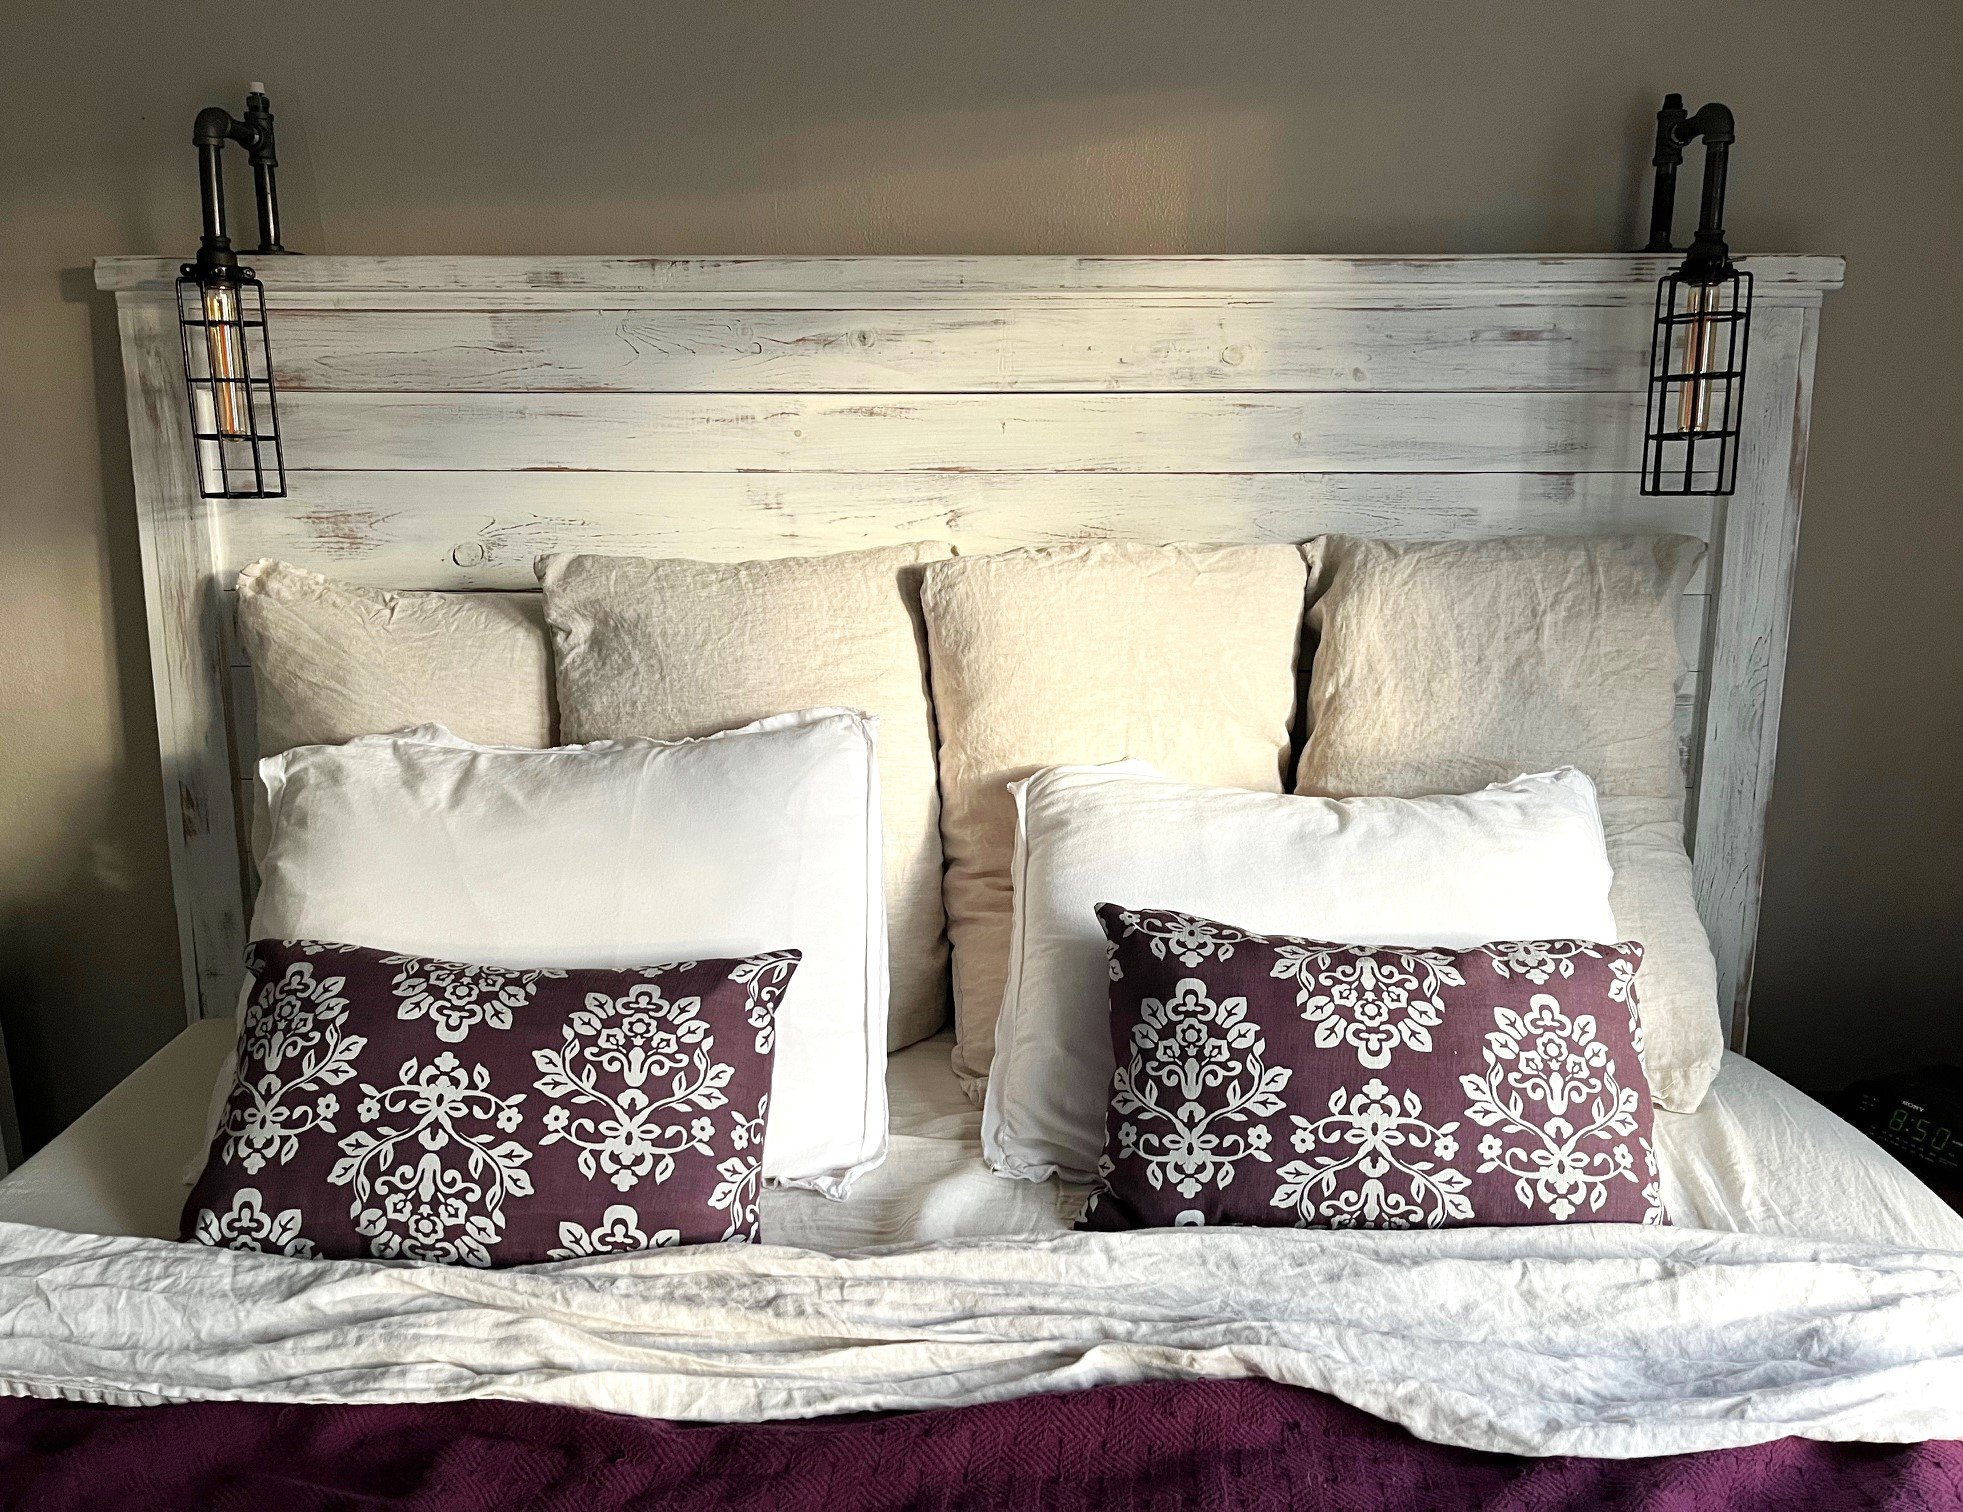
White Rustic headboard (California King) with sidelights.
Jackie M
Built from Plan(s)
Entryway Bench and Storage Shelf with Hooks
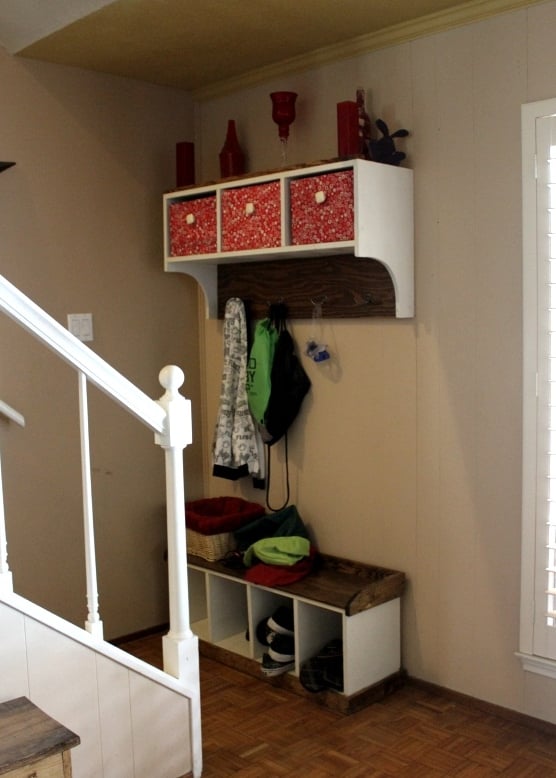
I modified the size on this a bit and as in a few of my other builds, I needed room for all five boys to put their stuff ;)
It is at the bottom of the stairs and I'm not sure what our house would look like without it!!!! EVERYTHING ends up here!!!
Built from Plan(s)
Estimated Time Investment
Afternoon Project (3-6 Hours)
Recommended Skill Level
Beginner
kids Adirondack
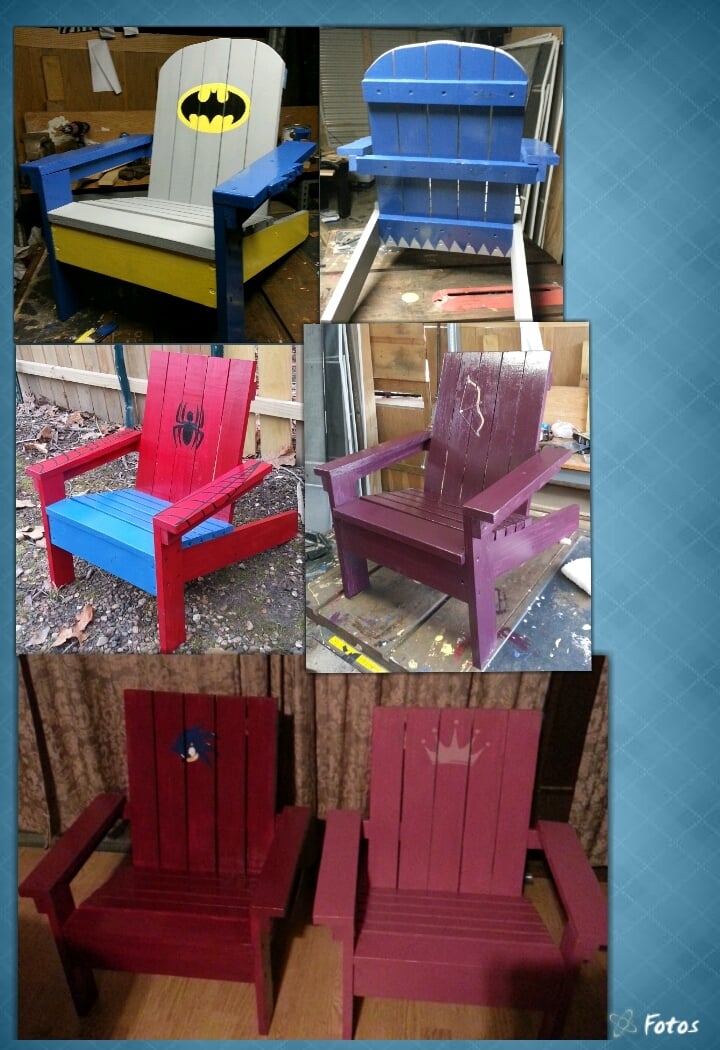
I started msking tgese for my kids and couldnt stop. first was the sonic and princess then spiderman then batman and last the brave chair.


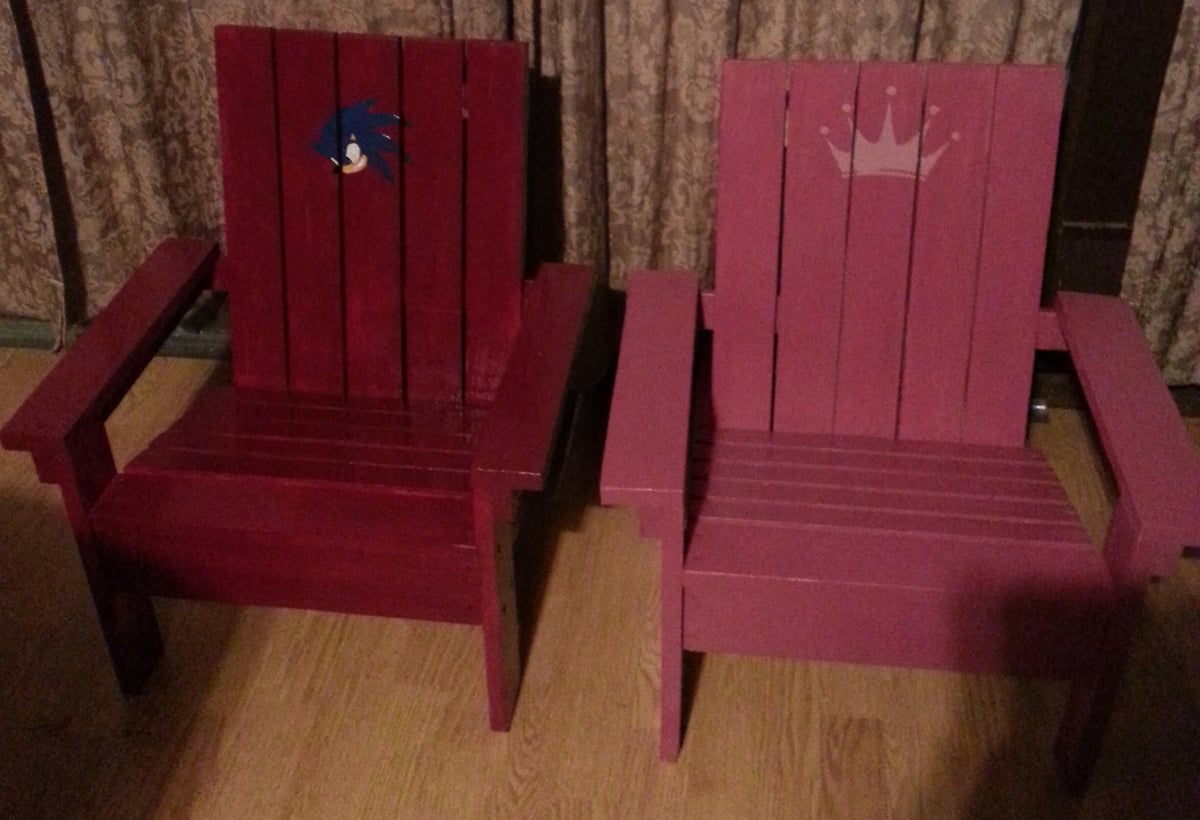
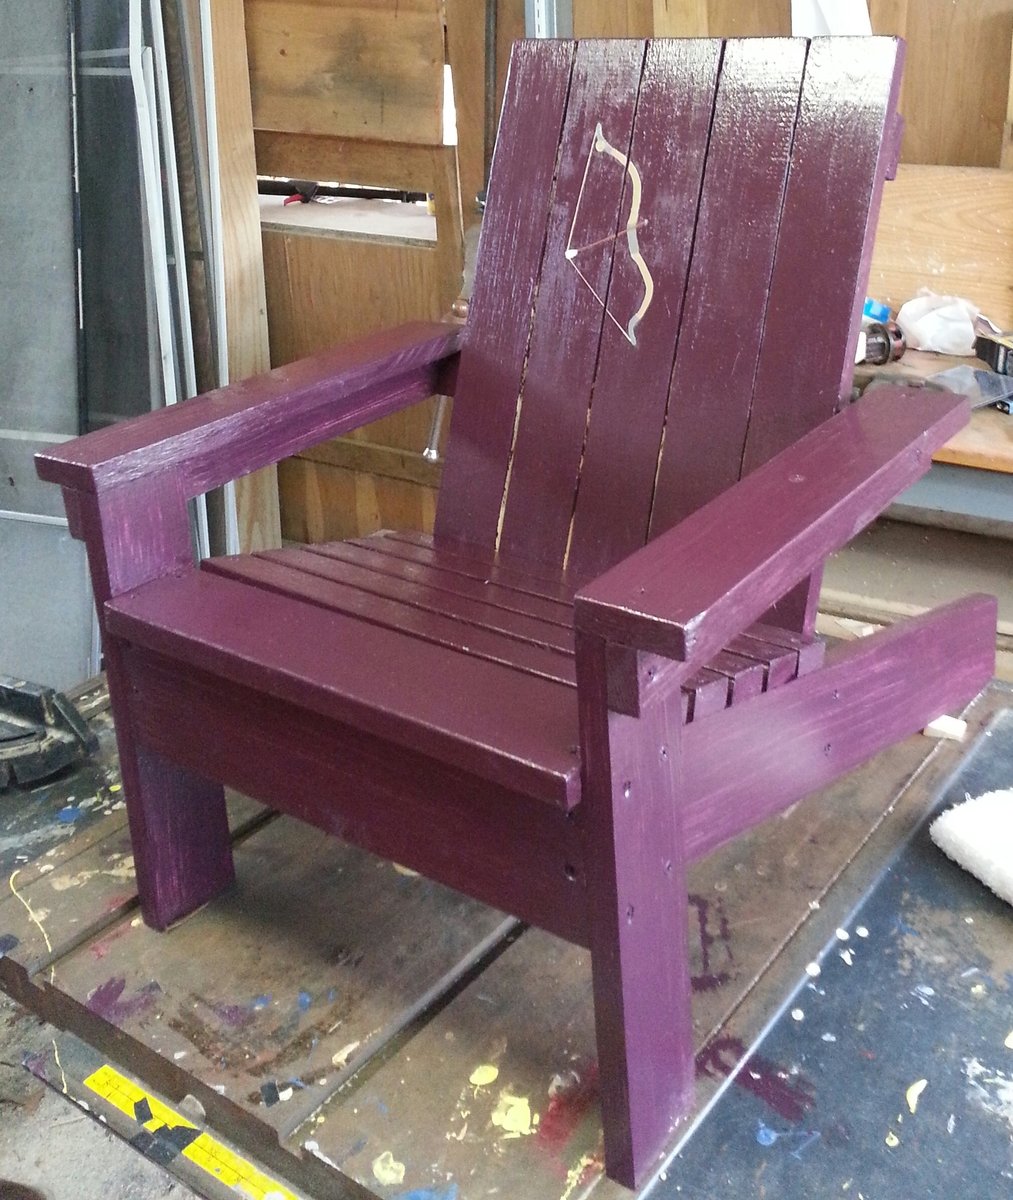
Built from Plan(s)
Estimated Time Investment
Afternoon Project (3-6 Hours)
Finish Used
Paint lots of fun painting
Recommended Skill Level
Beginner
Comments

Sun, 06/09/2019 - 13:02
These are so fun! Love all…
These are so fun! Love all the different designs!
Super Easy Bench To Make!
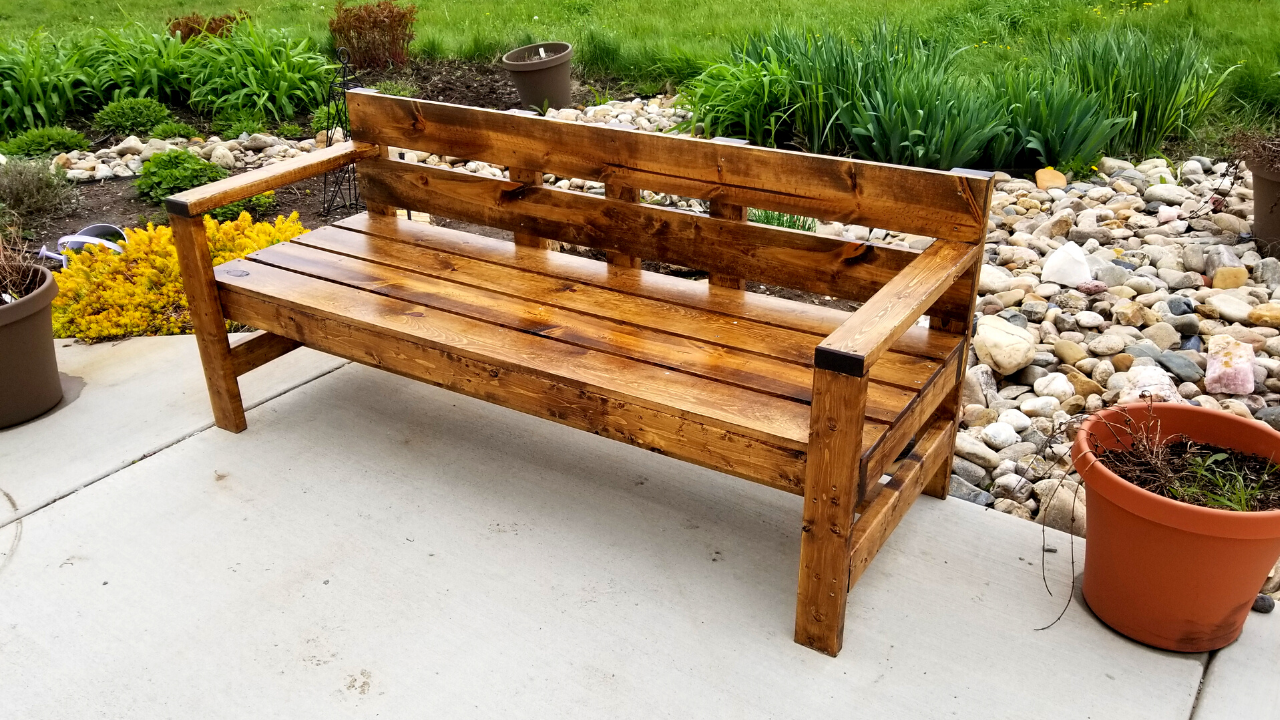
We built this bench for the church that lets us use their facilitys for our home school group.
Built from Plan(s)
Estimated Cost
$50
Estimated Time Investment
Afternoon Project (3-6 Hours)
Finish Used
minwax provincial 211 and poly
Recommended Skill Level
Beginner
Mudroom with Boot Storage and Hooks
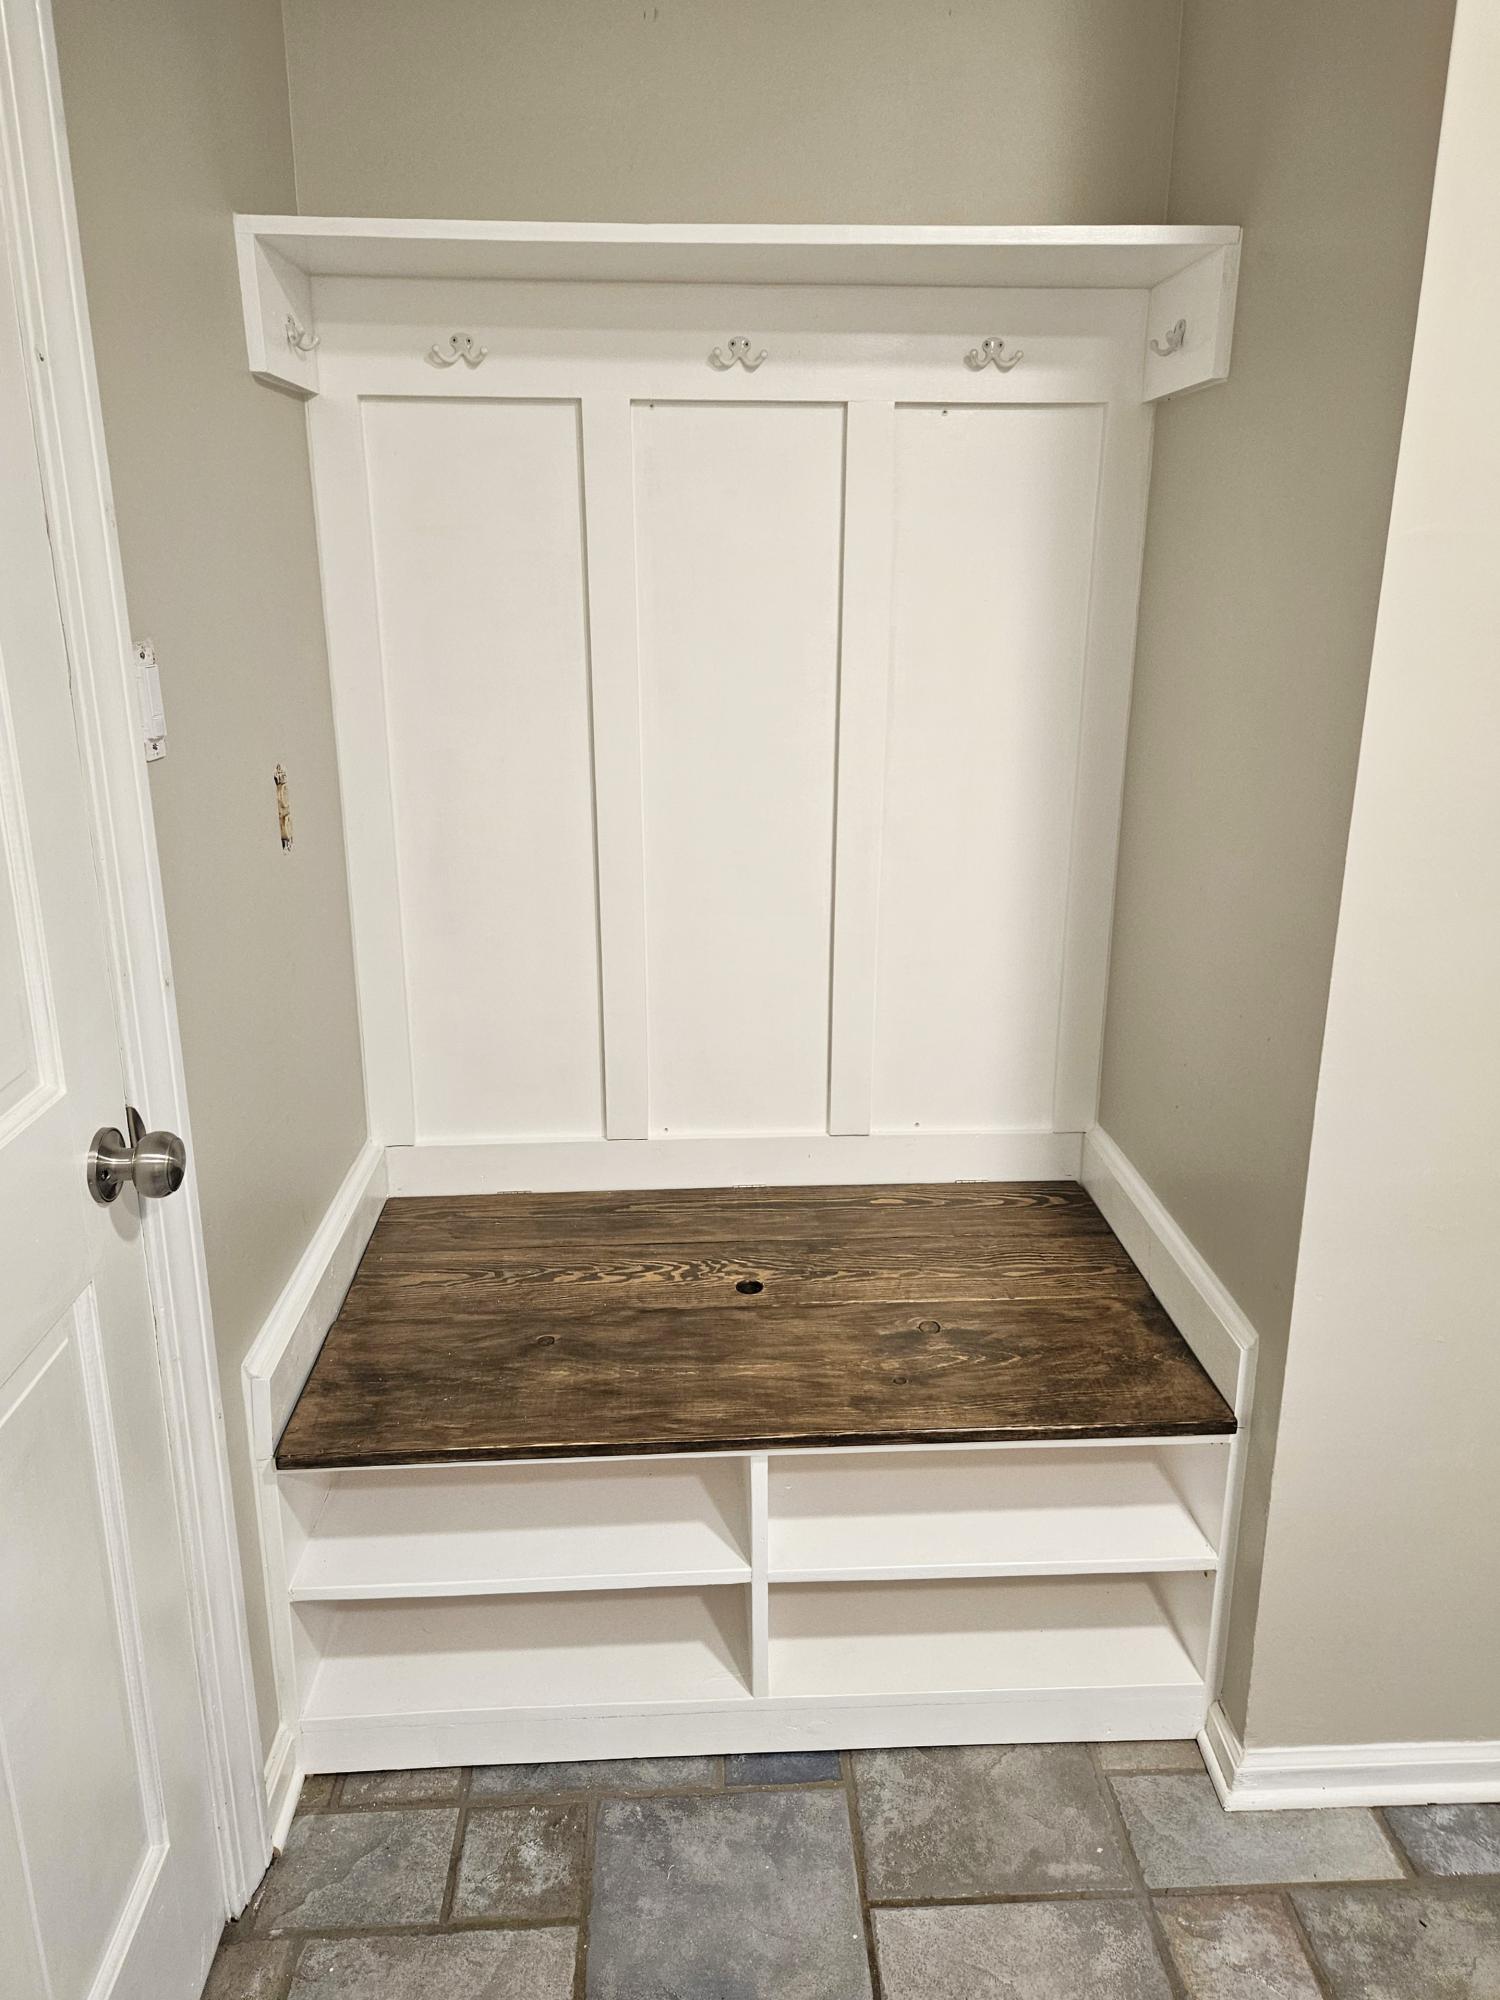
Built the drop zone bench with hidden storage in the laundry room. Modified to fit in 45 inch space where a built-in desk was. A fun and easy build. Thanks Ana for the great ideas and plans.
Don Toy
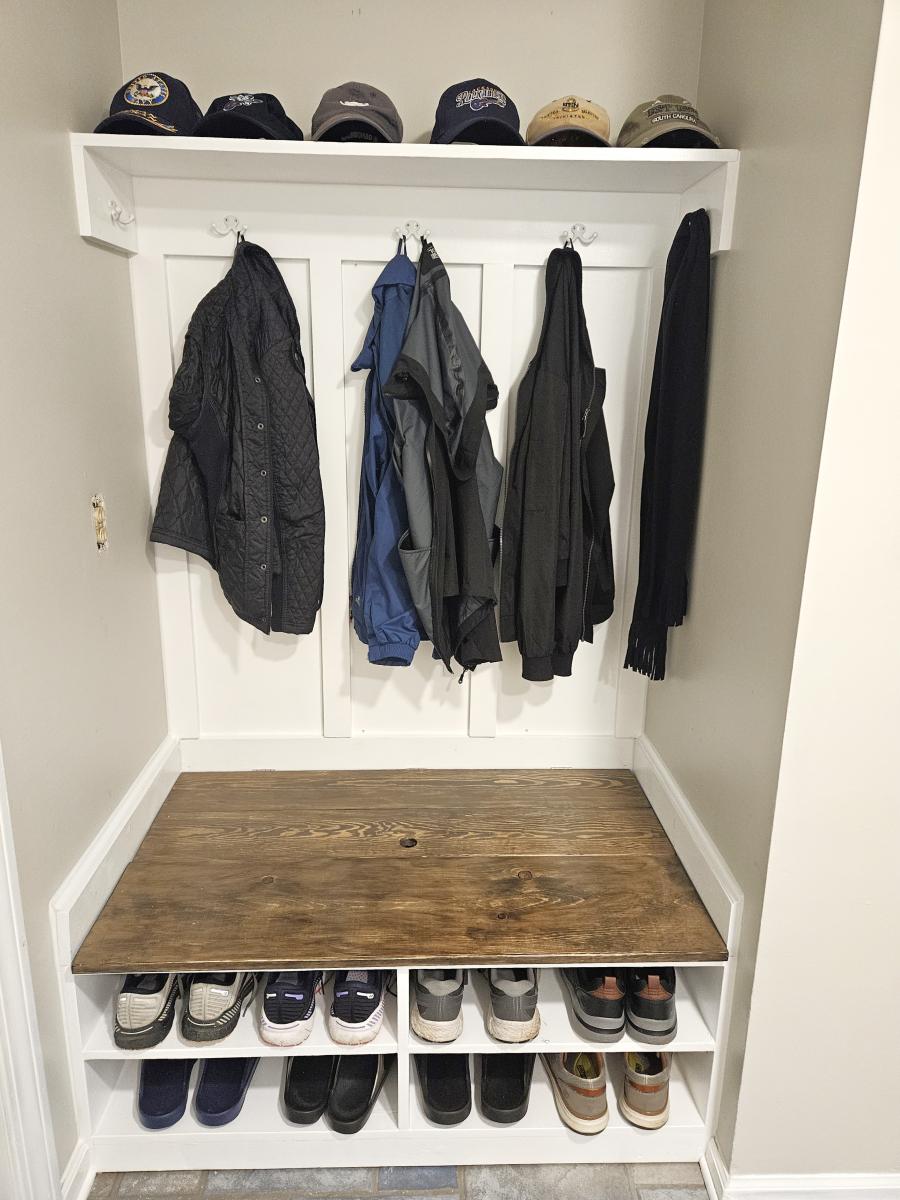
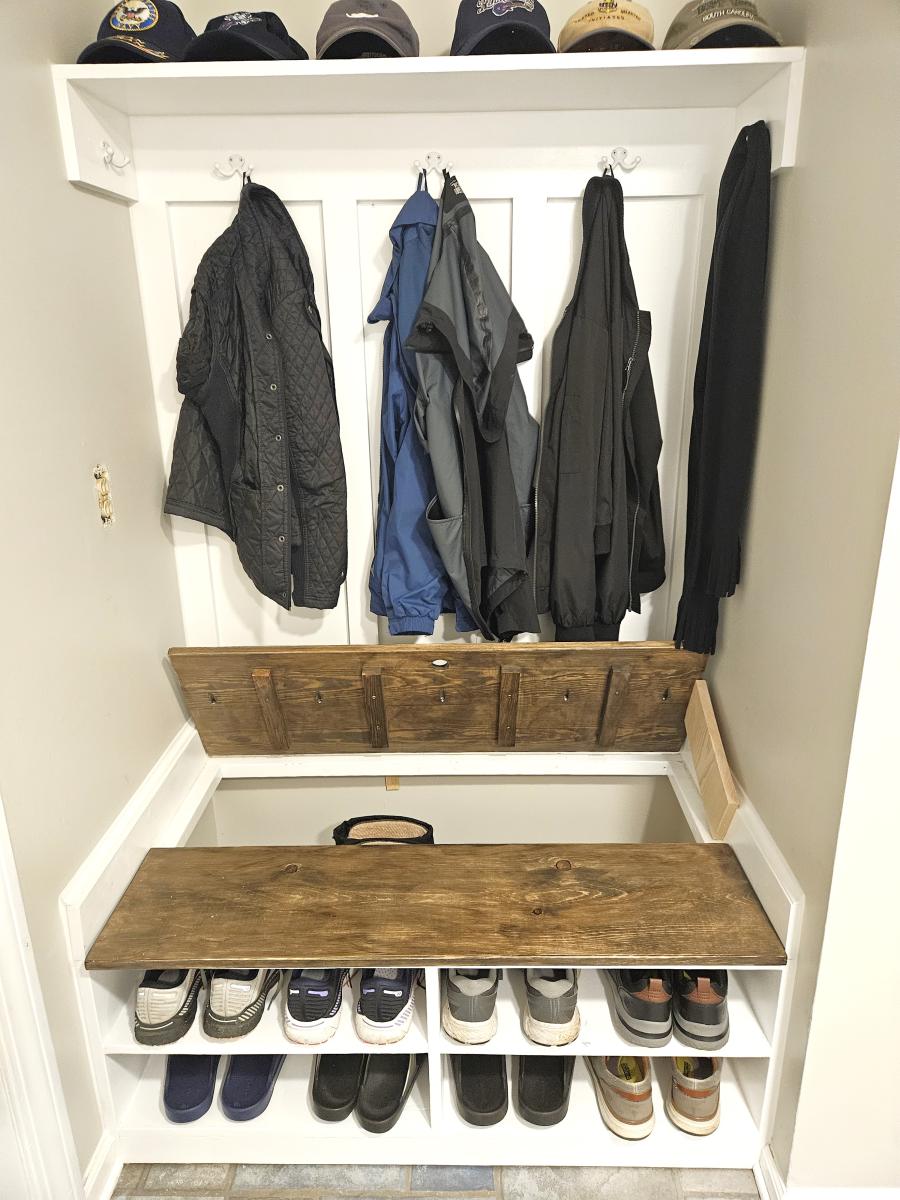
Built from Plan(s)
Sewing Desk
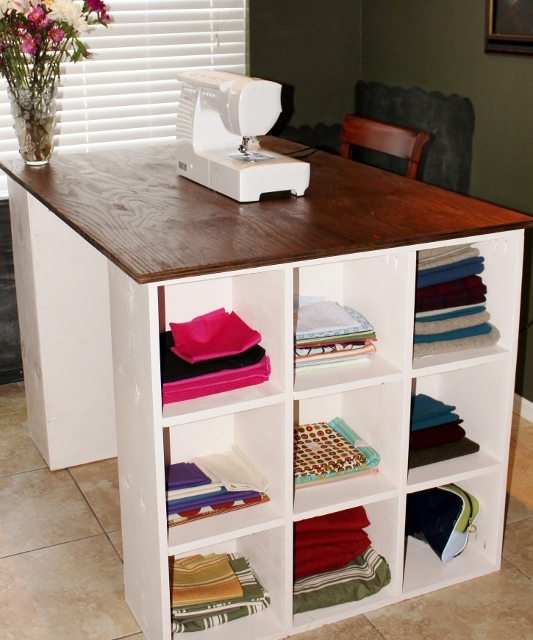
Our first woodworking project! A sewing desk that was featured on this site.
Built from Plan(s)
Estimated Cost
$60
Estimated Time Investment
Weekend Project (10-20 Hours)
Finish Used
make sure you sand the pieces multiple times. I used semigloss paint and also a stain and finished it off with a clear poly protector for the table top.
Recommended Skill Level
Beginner
Mitre Saw Rip Guide
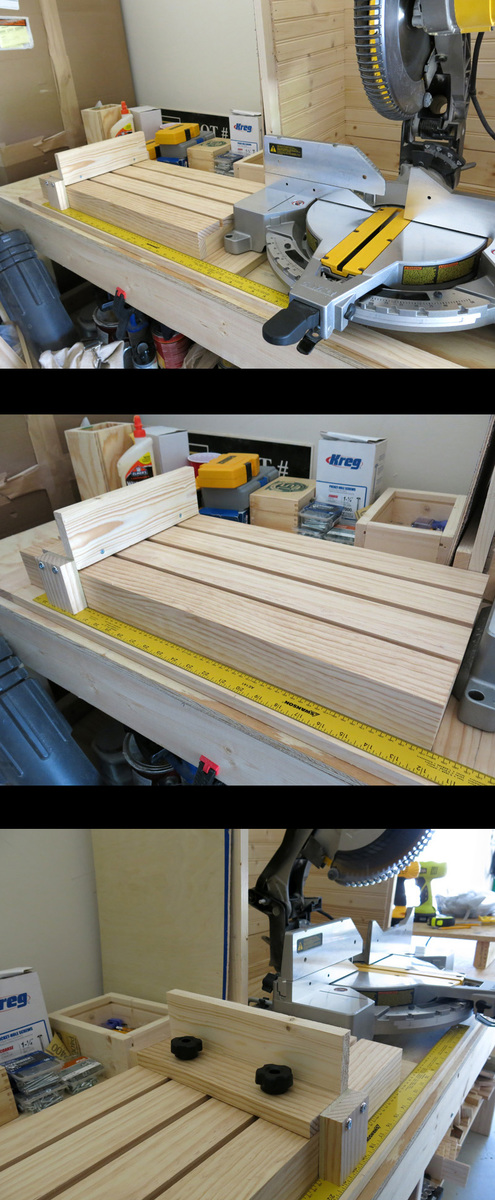
I wanted a jig/guide that would allow me to cut multiple pieces of wood exactly the same length using my Mitre saw. Designed this Jig and apart from the 4 screws you see everything is pocket holes. Now when I build from Ana's plans and my own designs I can guarantee all the pieces that need to be the same length will be!!
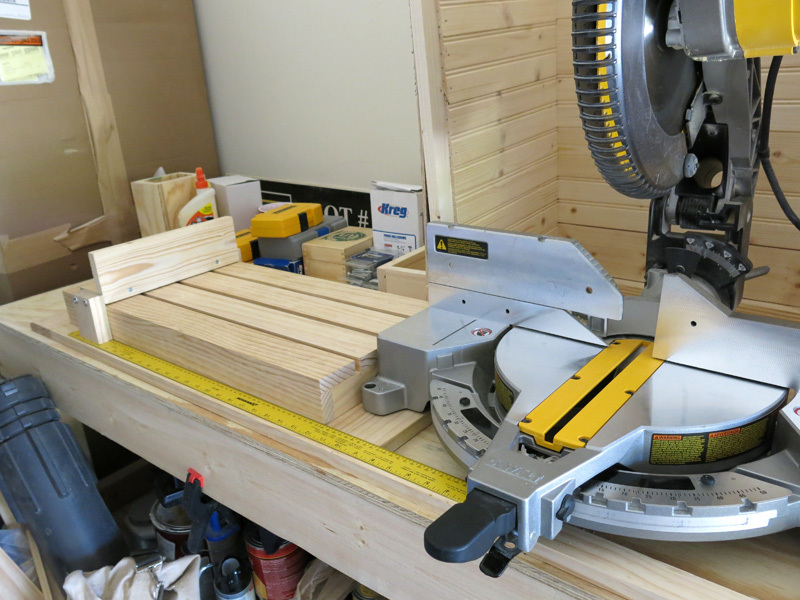
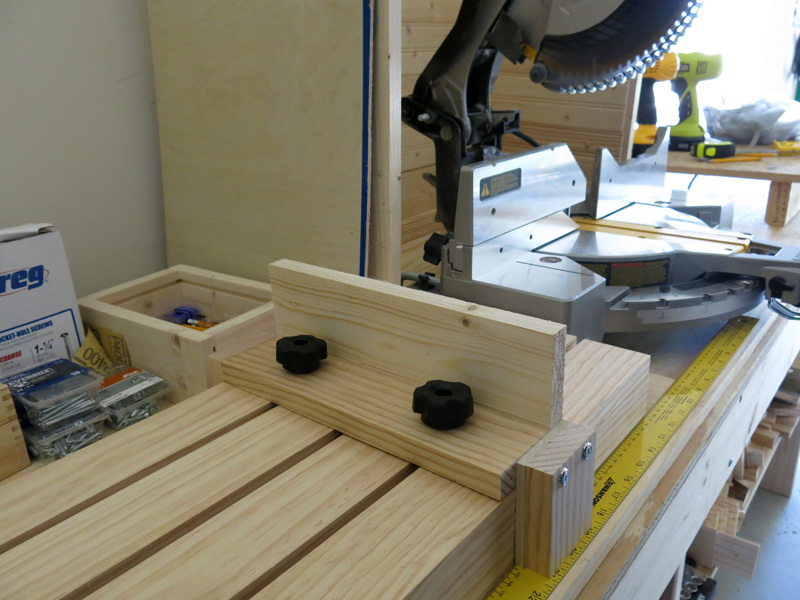
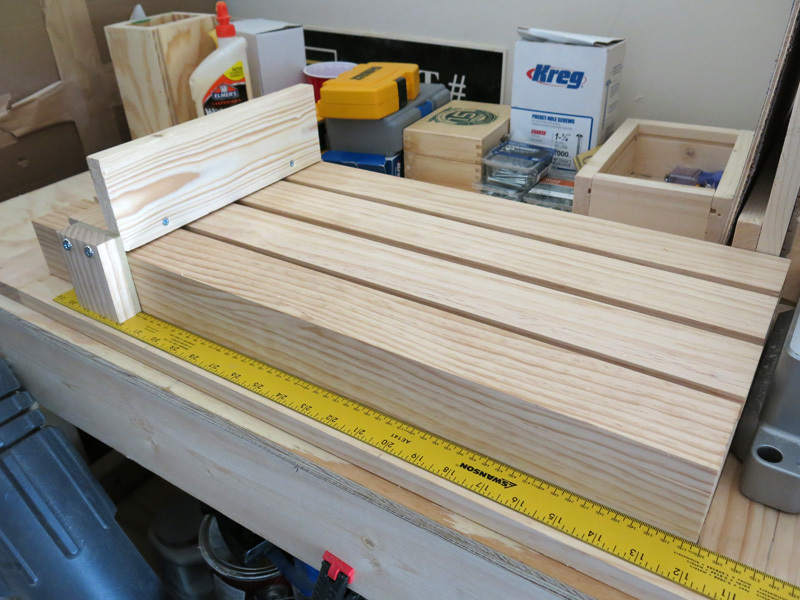
Estimated Time Investment
Afternoon Project (3-6 Hours)
Finish Used
Not finished yet but will put a clear protection on it.
Recommended Skill Level
Beginner
Comments


Fire Table Sectional and corner conversation set!!! Perfect!!!!

This was the first time I had ever worked with some of the tools and really done any serious building. We built a new deck onto the back of my home and I could not stand the cost of the furniture to make it complete. Thank you Anna I have become fearless with tools!! Our deck has become even more special!!
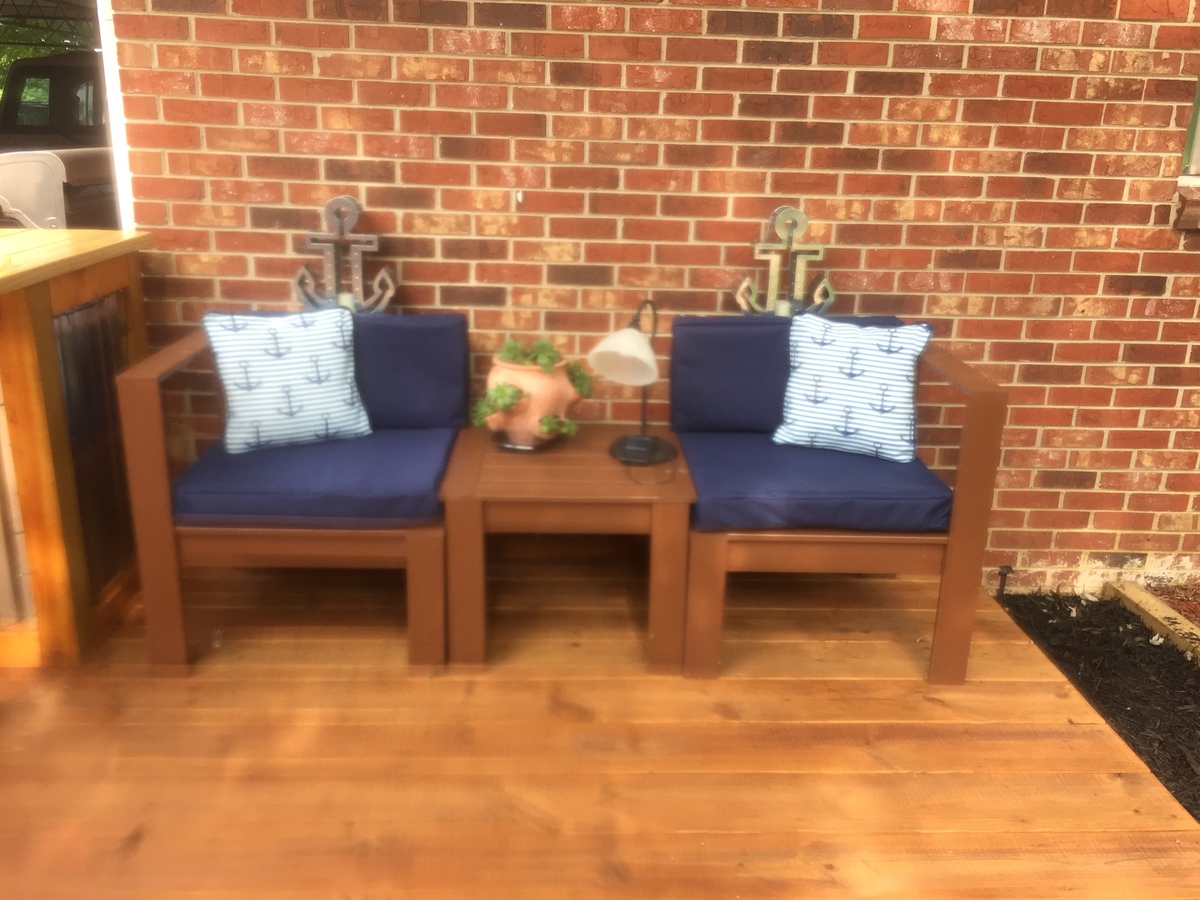
Built from Plan(s)
Estimated Cost
Furniture ~ $280
Cushions ~ $250
Cushions ~ $250
Estimated Time Investment
Week Long Project (20 Hours or More)
Recommended Skill Level
Beginner
Farmhouse storage platform bed
Fellow Alaskan here!
Wood and screw Materials costed $320
The metal storage buckets are outdoor drink buckets from Home Depot $200 for 8 of them!
There are 4 storage buckets on each side! We took this from your farmhouse plan and altered it for king size. And in after thought he made a baby co-sleeper to match, 30$ to make!
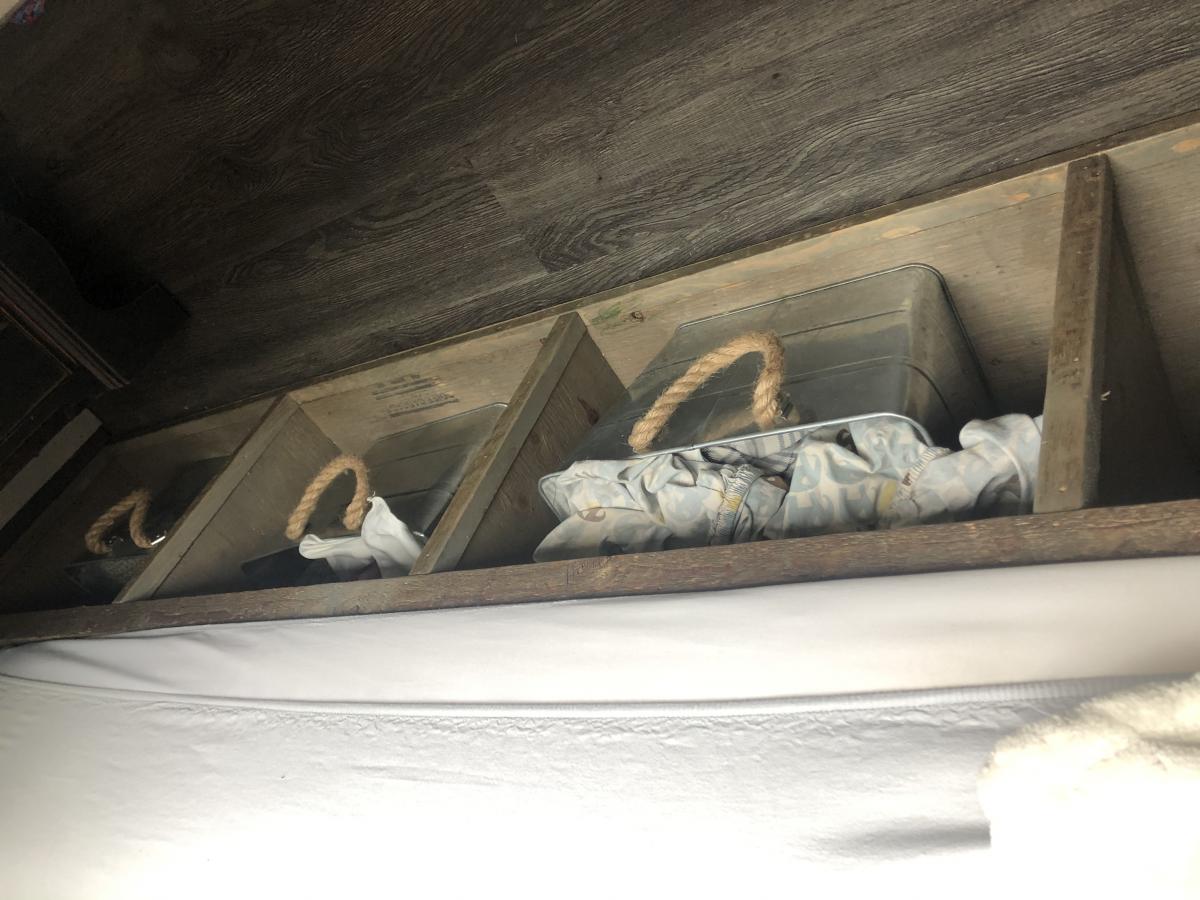
Built from Plan(s)
Estimated Cost
$550
Estimated Time Investment
Weekend Project (10-20 Hours)
Finish Used
Weather gray stain
Watered down white paint
Poly on top!
Corrugated rusted metal is restored from a local barn that was getting torn down.
Watered down white paint
Poly on top!
Corrugated rusted metal is restored from a local barn that was getting torn down.
Recommended Skill Level
Intermediate
Comments
Outdoor Sectional Sofa
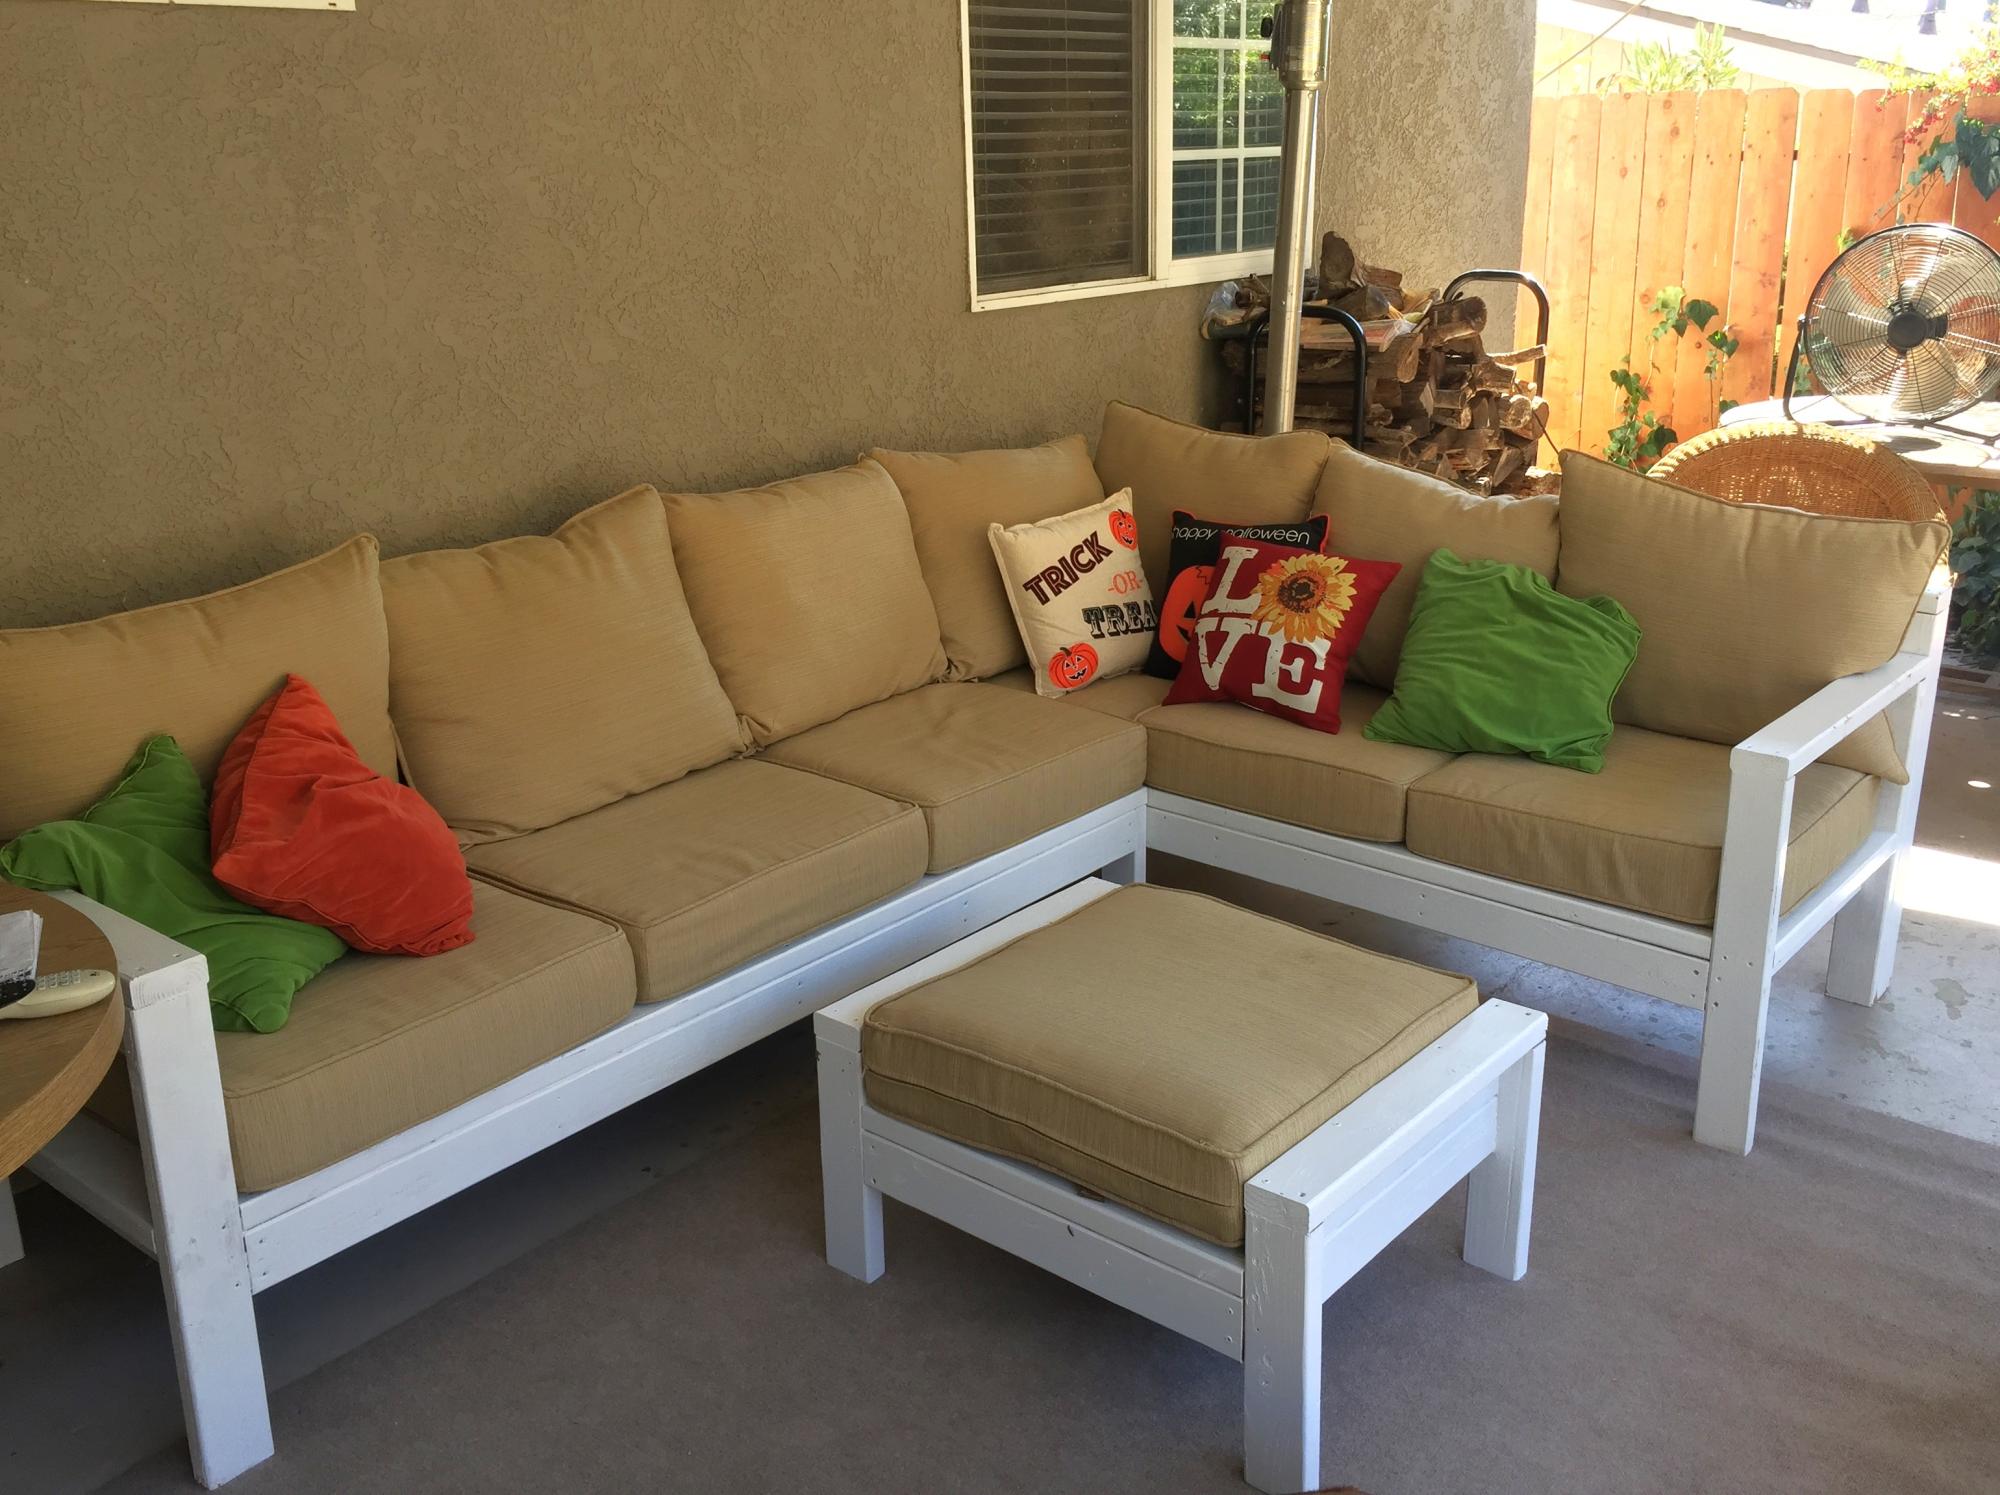
I made this a few years back for my brother, such a fun build.
Natasha M
Built from Plan(s)
PB Sawyer Trestle Look Alike
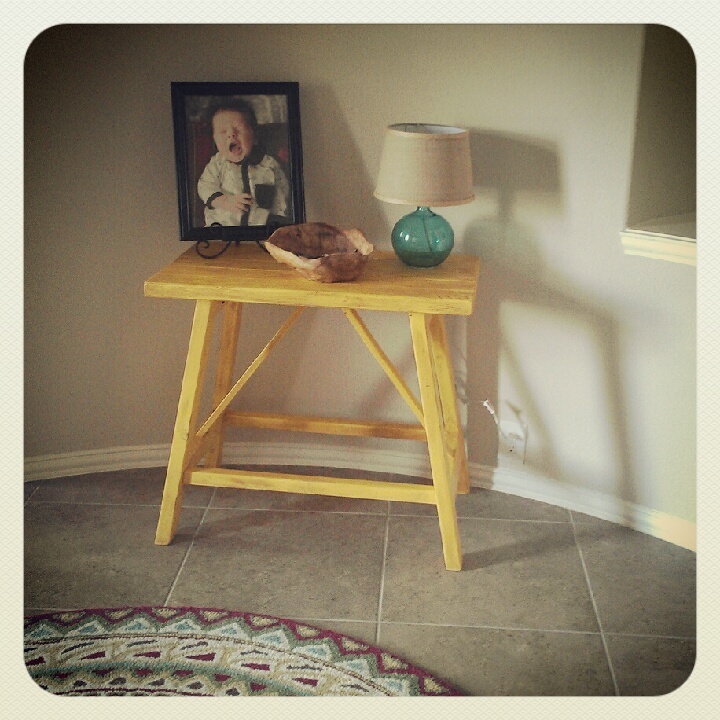
So my husband and I have this thing...I find the projects, he builds the projects and I get to finish it. I'm more of the artsy one and he is more hands on. So this is the first table we did from Ana!
Estimated Cost
$35
Estimated Time Investment
Afternoon Project (3-6 Hours)
Finish Used
Yellow Paint w/ Glaze...will update with specifics later!
Recommended Skill Level
Beginner