Cooperoni
Thank for the plans!
Built from Plan(s)
Thank for the plans!
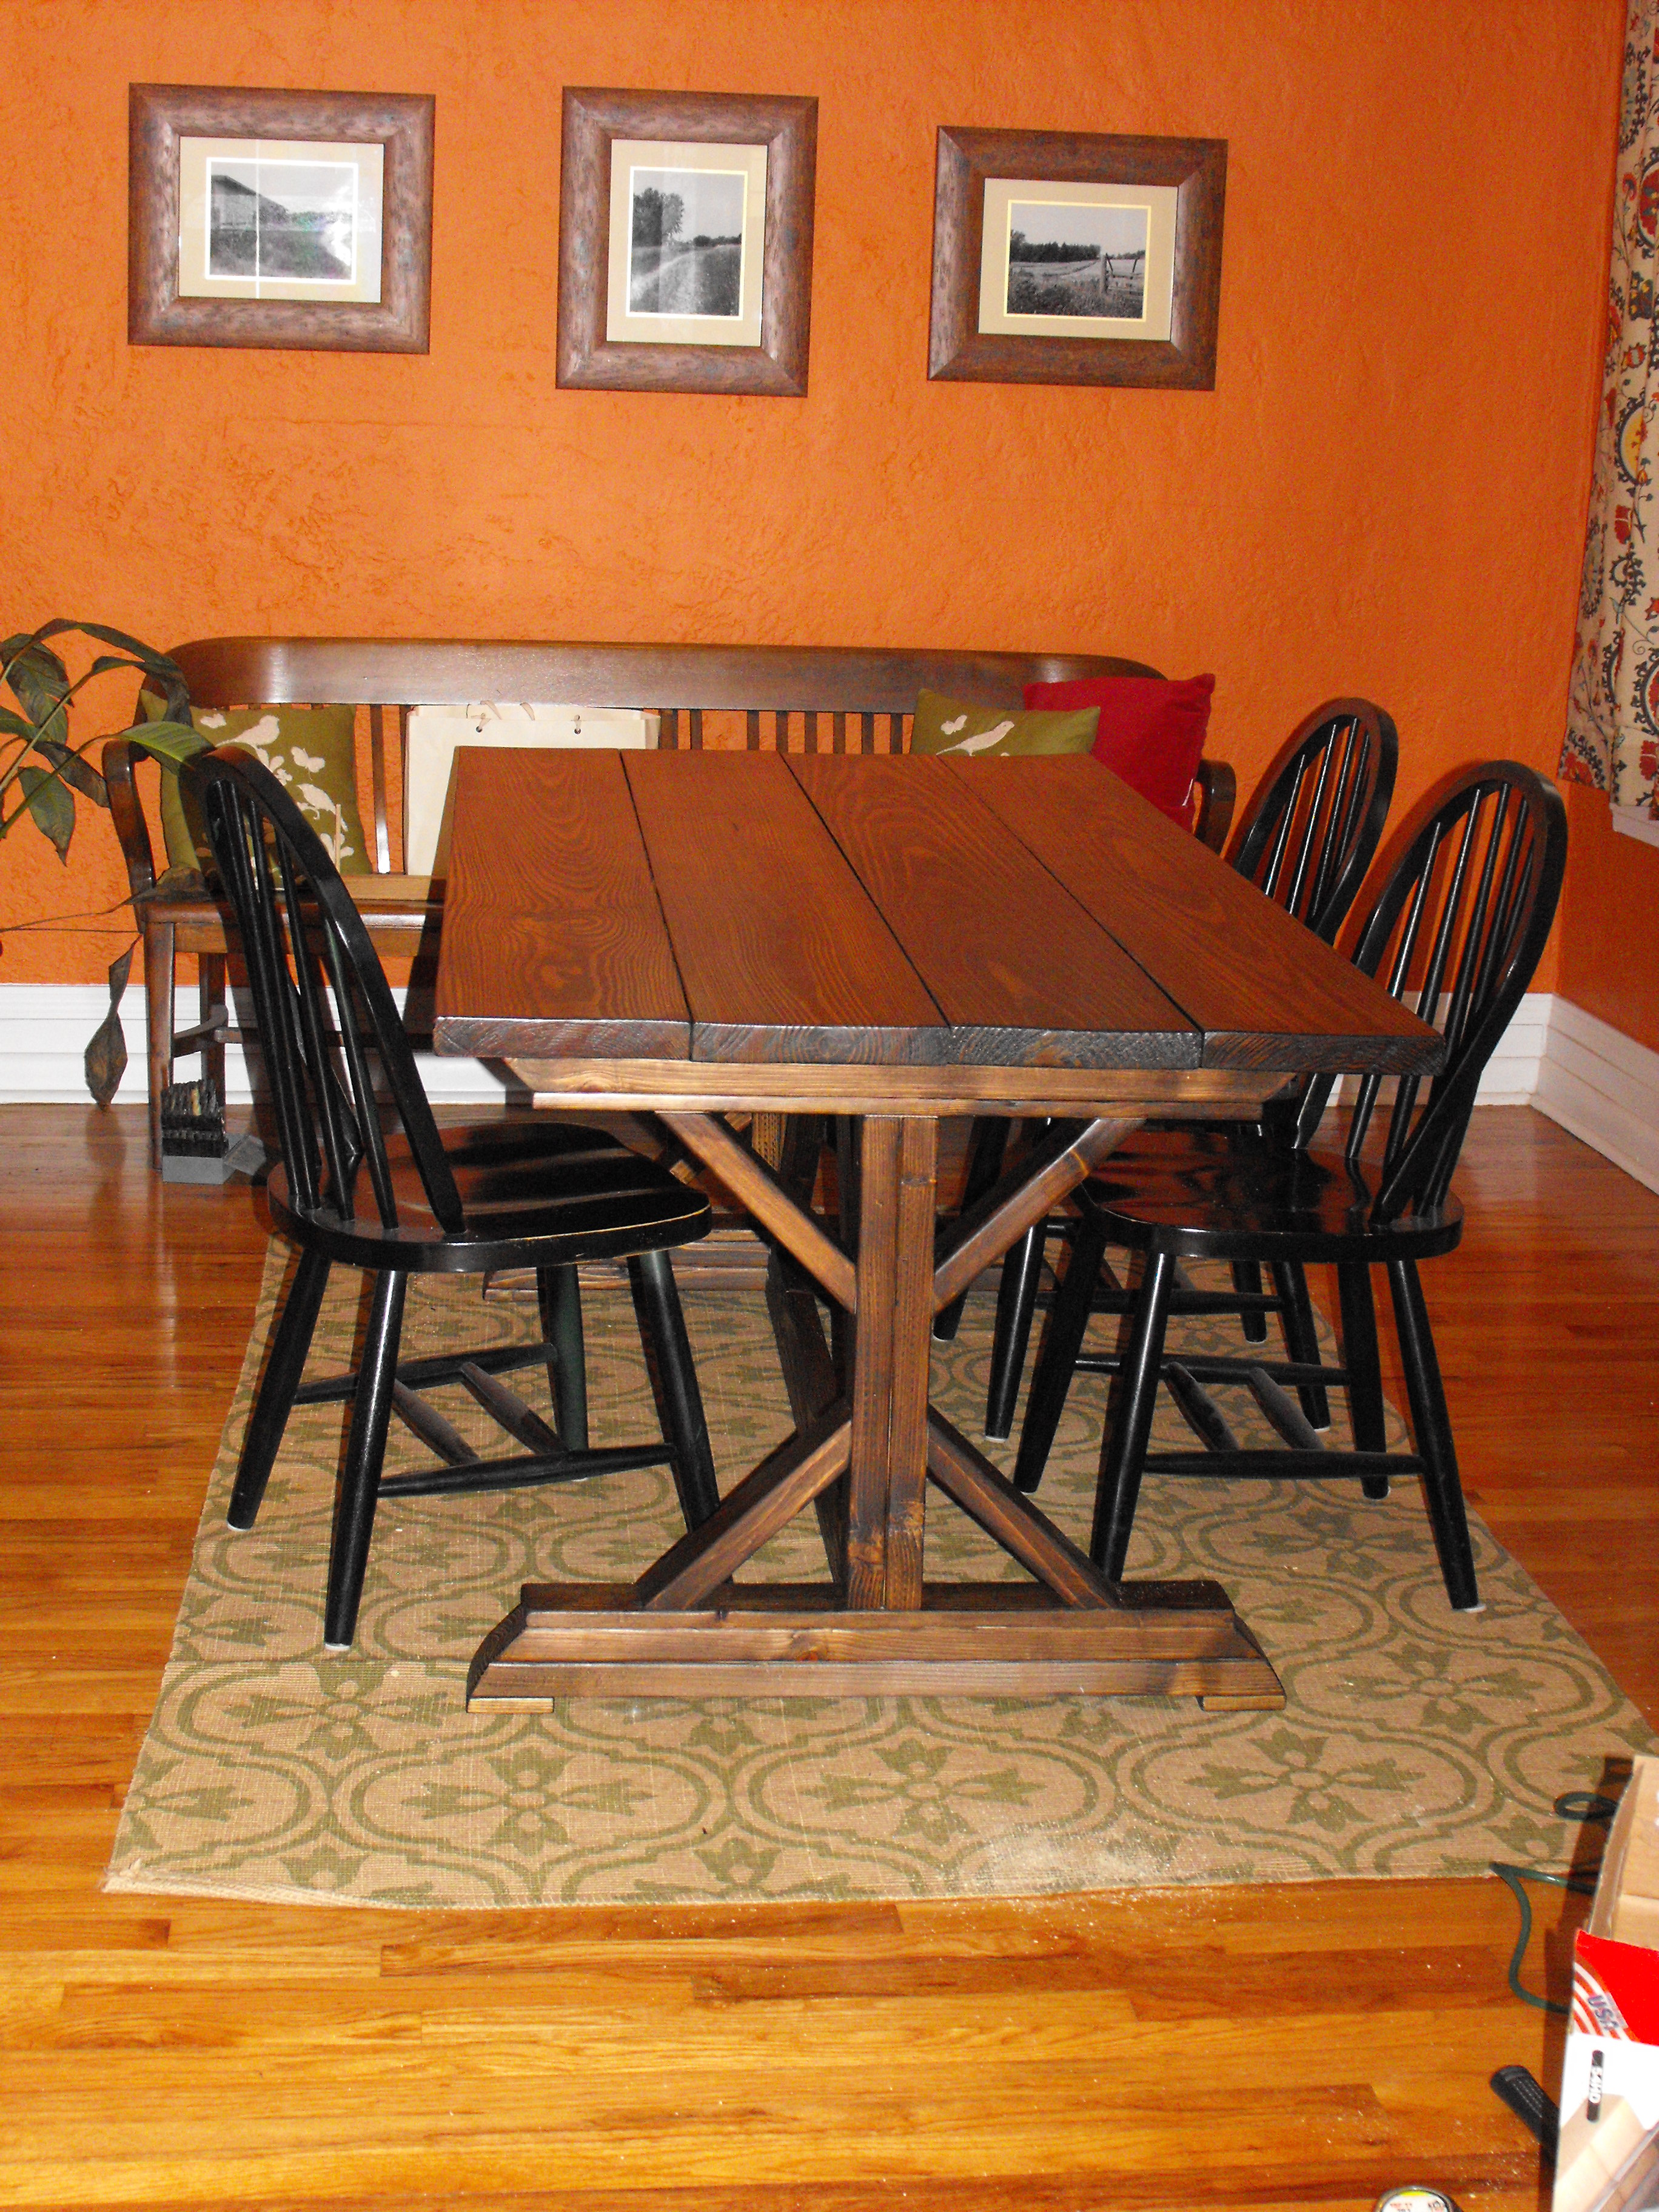
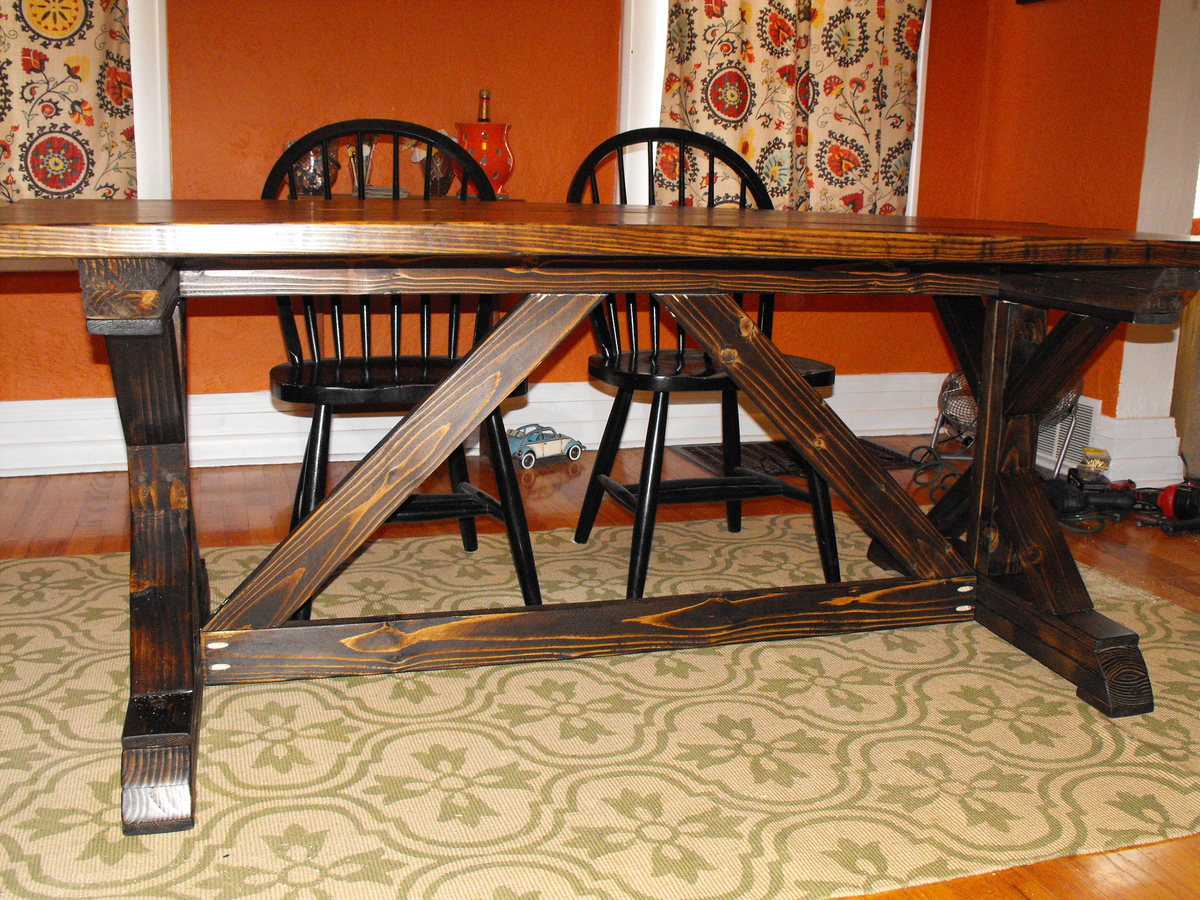
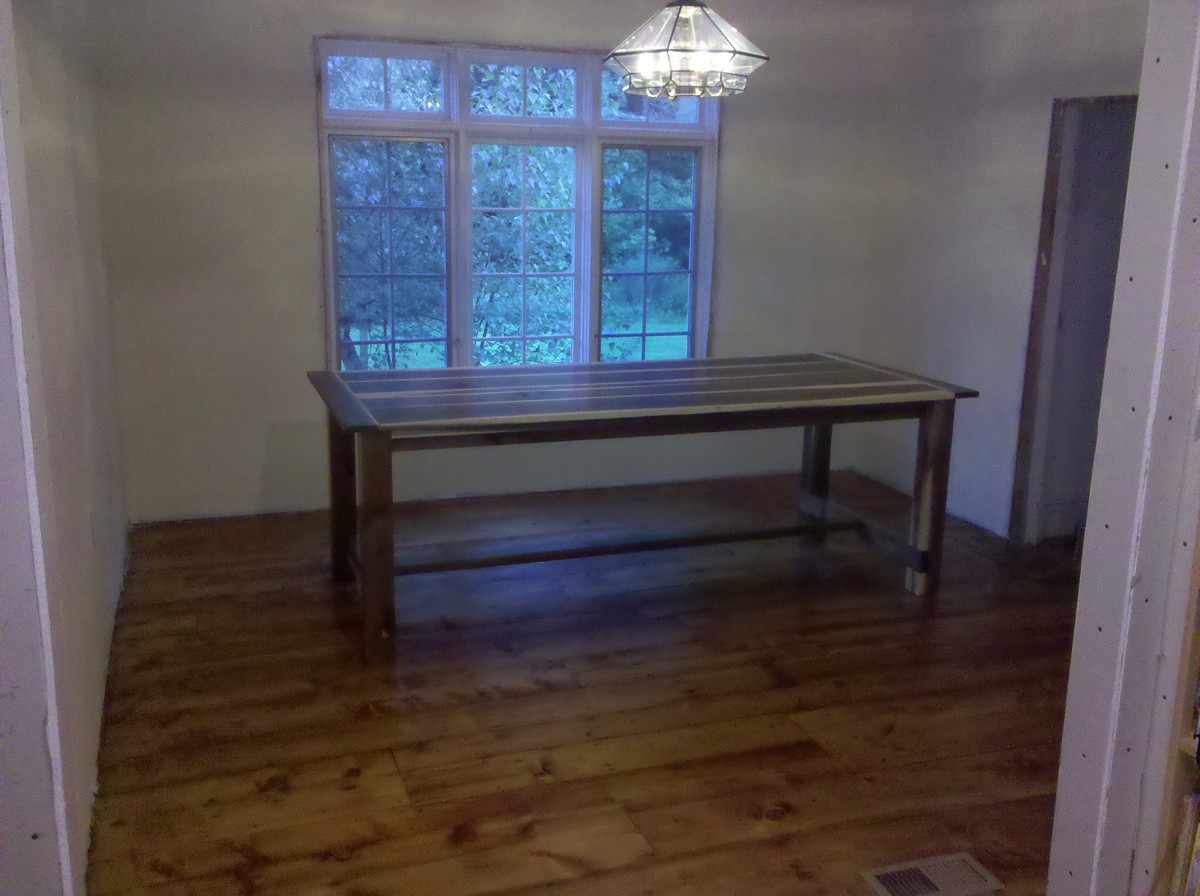
I started looking for a farmhouse table months ago at antique stores and on Craig's list but never could find exactly what I was looking for at a reasonable price. A friend had pinned an Ana White plan on pinterest. I sent my boyfriend a link to the plans for the fancy farmhouse table and he decided to build it for my birthday!!! It took him a few afternoons and turned out exactly how I wanted it. It was fun to build and not too hard. We shorten the length to 6.5feet to fit in the dining room. I used Minwax dark walnut 2716 as the finish. I topped it with two coats of poly. It fits perfect and looks amazing!

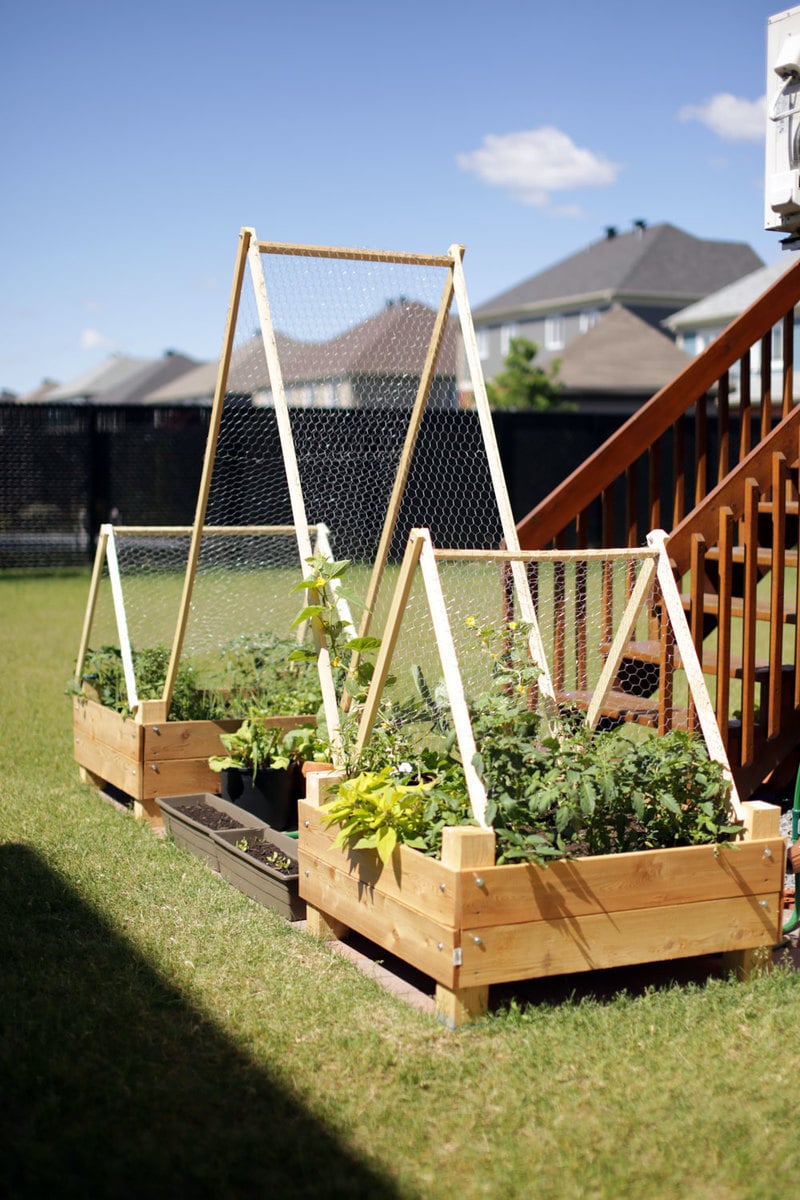
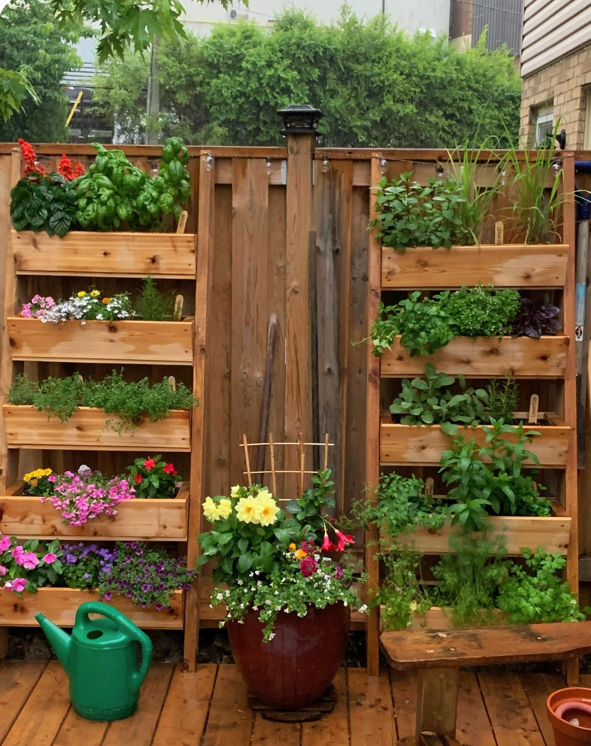
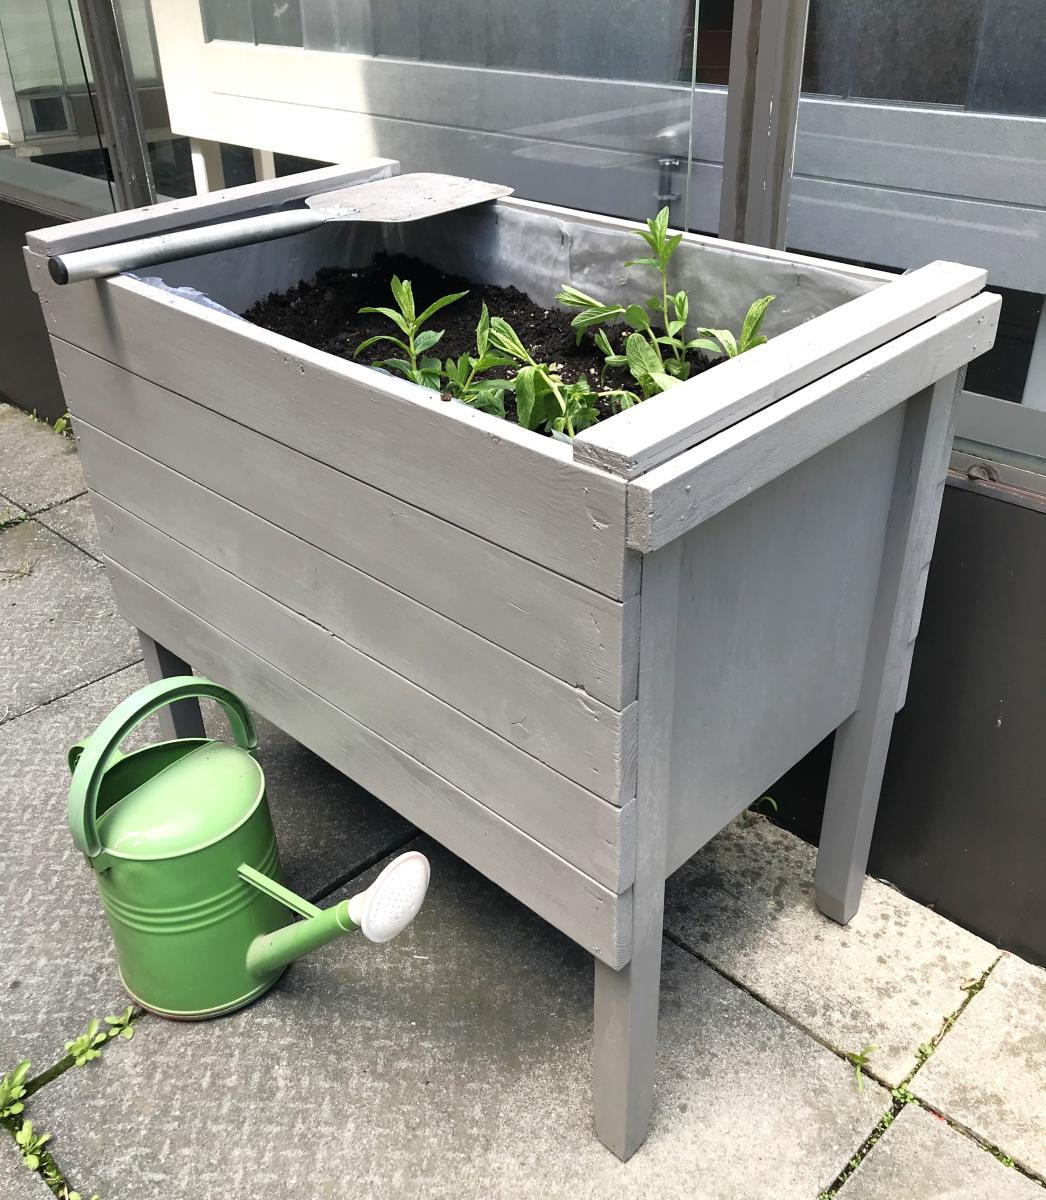
We wanted a small garden to fit on the back patio stones and this plan fit well. We reduced the height because we have 3 small children to "help" water the plants. The trellis was hoping that we could extend the amount of produce we could grow. They're very heavy, sturdy and straightforward to build. Thanks very much!!
Super simple plans that were easy to follow for first time builders. We really love how it turned out and are working on an end table of the same style now.
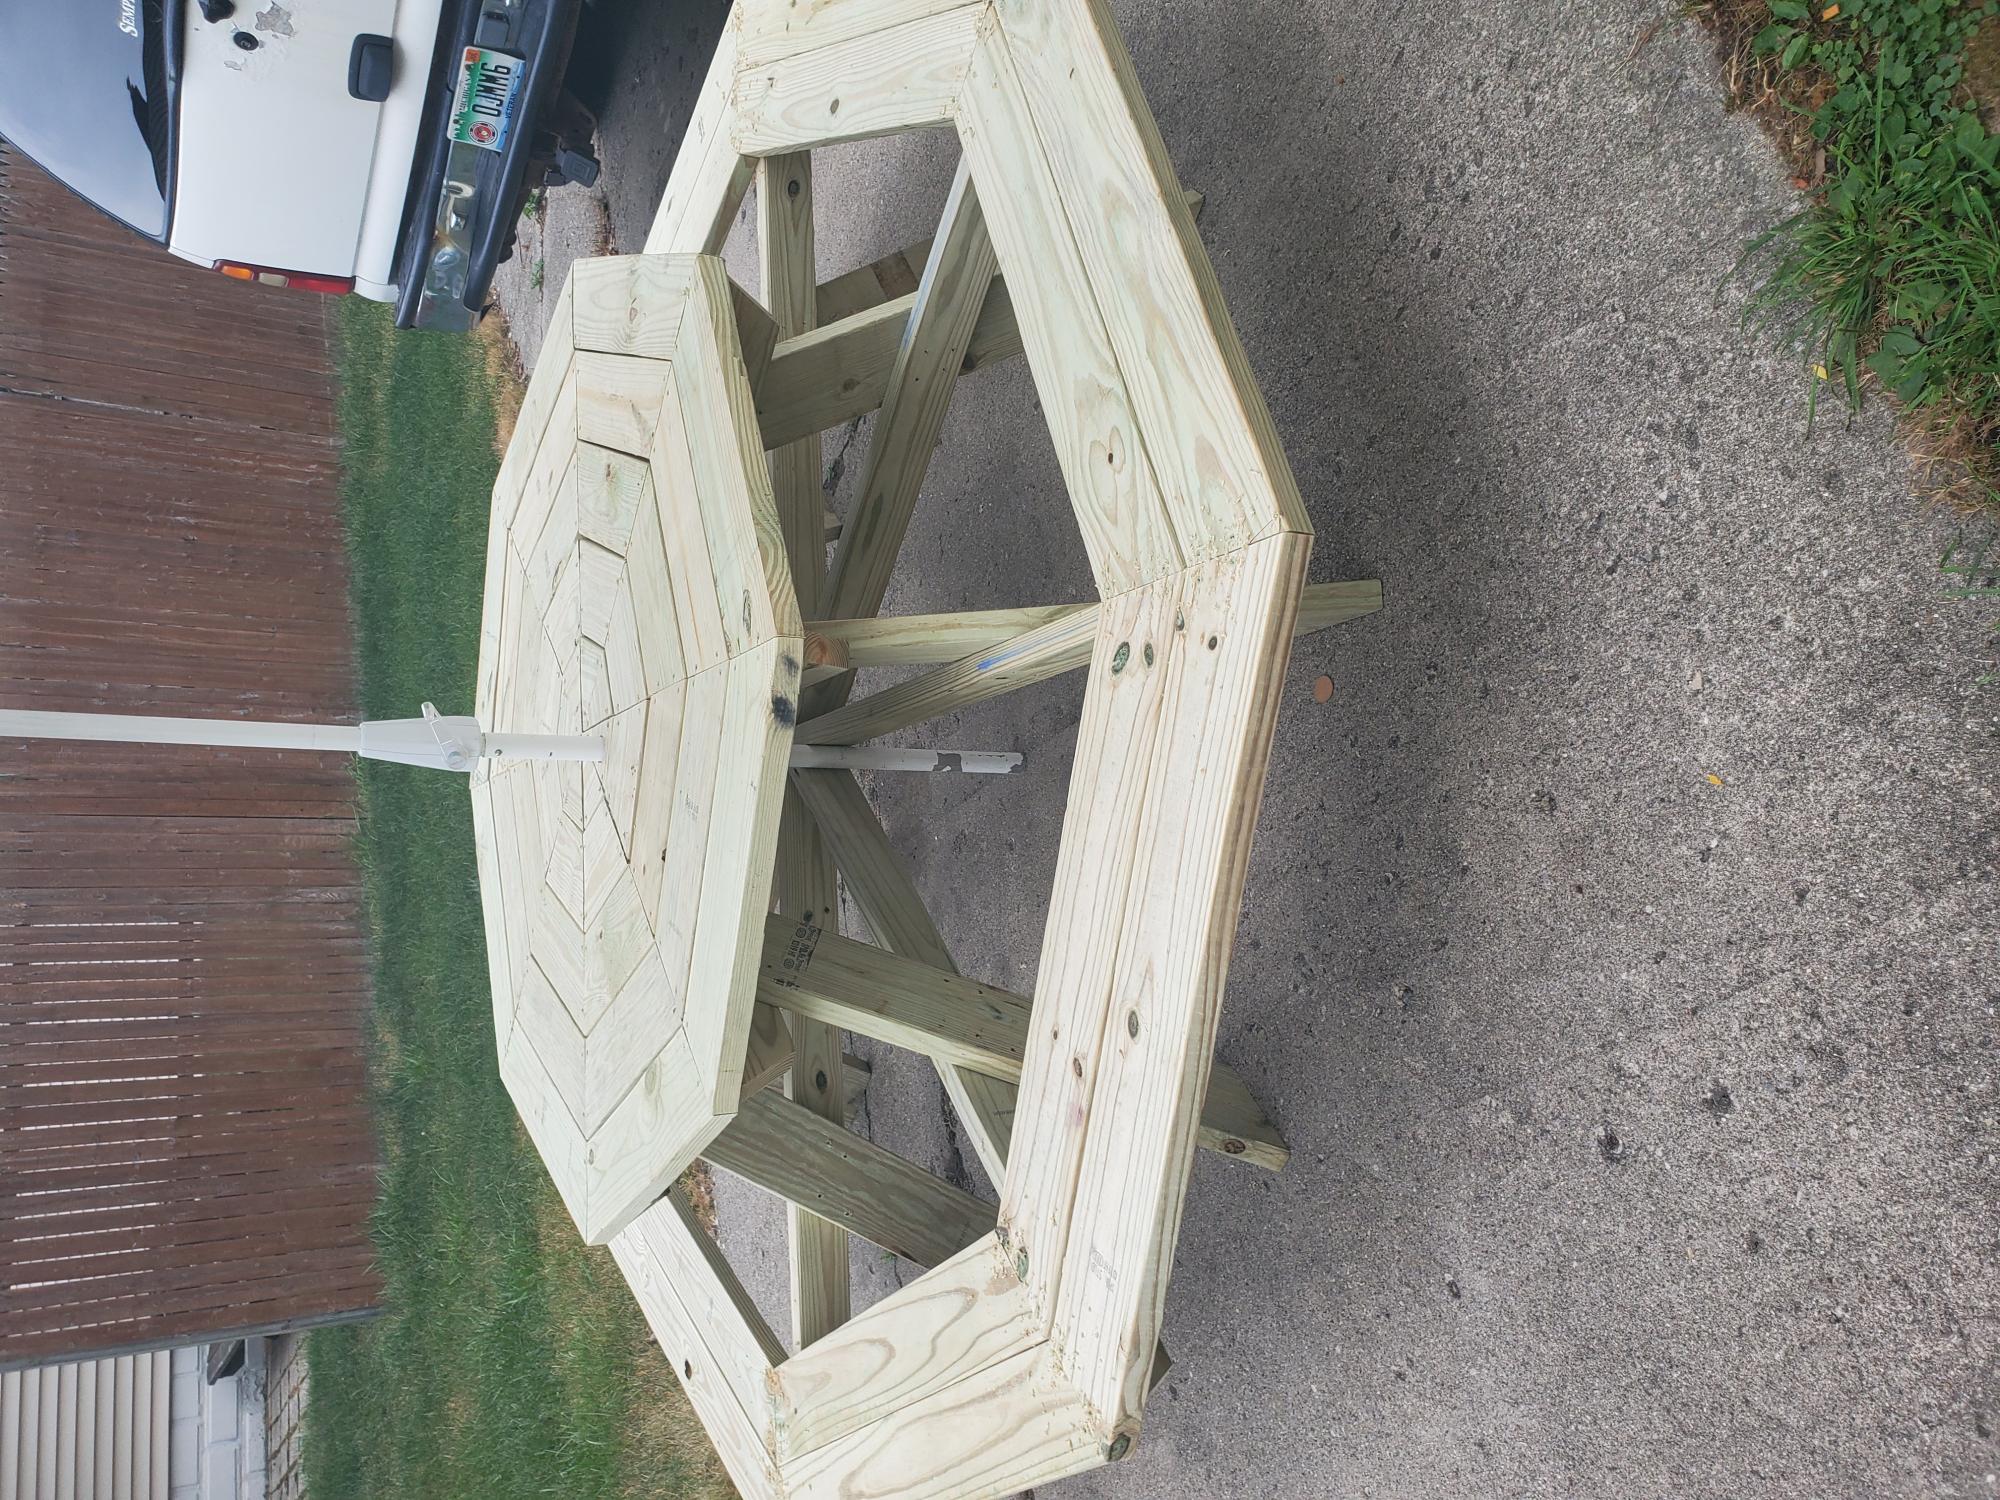
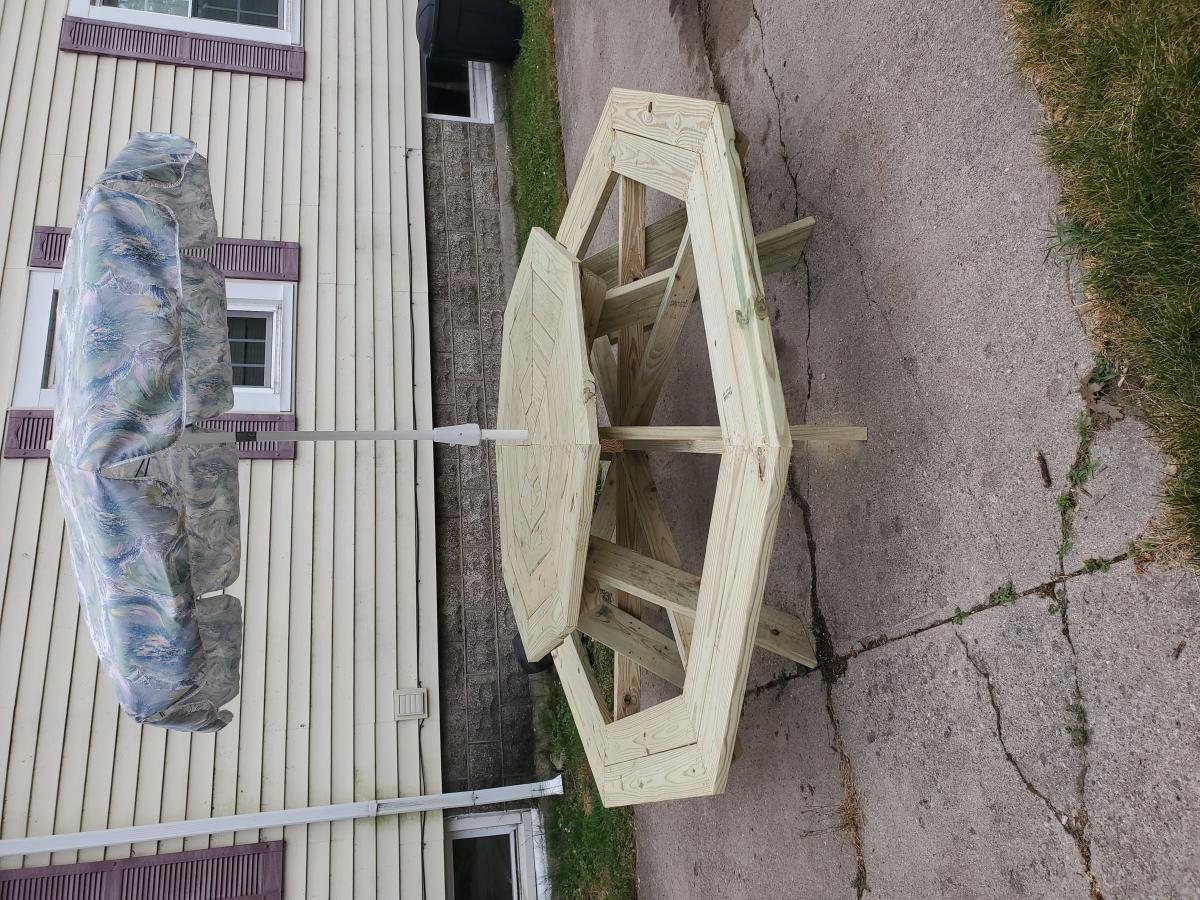
I ended up going with the suggested 4 inch extension for more leg room. The outer boards measured out around 41 11/16". Two more 2x6x8's were used to do this along with a 2x4x10.

Hello everyone,
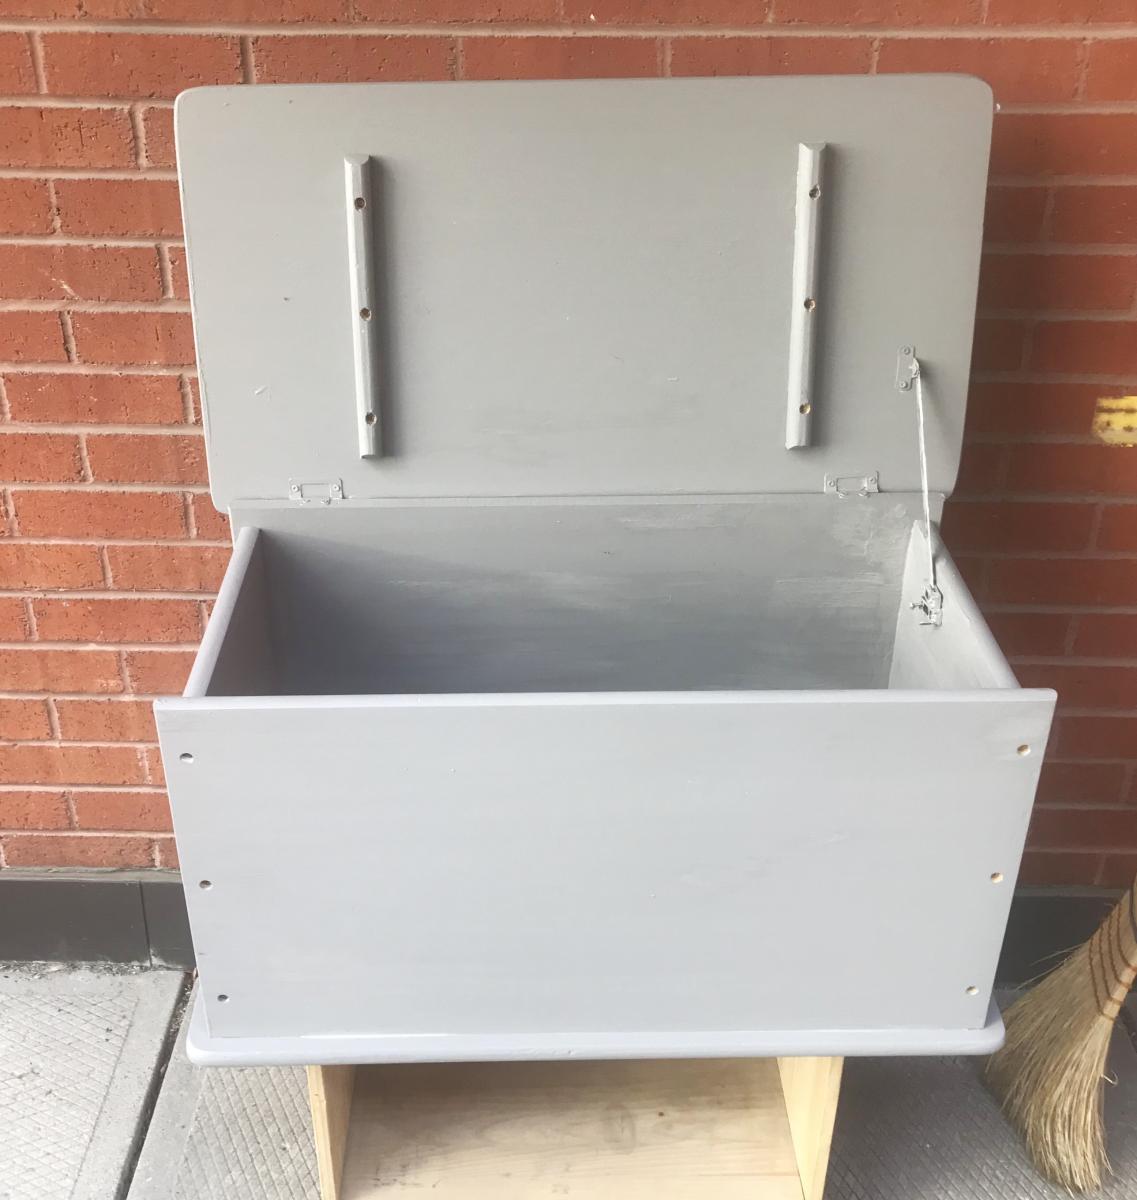
I collected unwanted wood and I put them in a good use. Transform them into planters . Many people throw excellent wood . Either, they aren’t aware or they purchased new furniture.
Thank you Mrs. Anna . She has inspired me with her excellent ideas. God bless you
Jean Abinajem
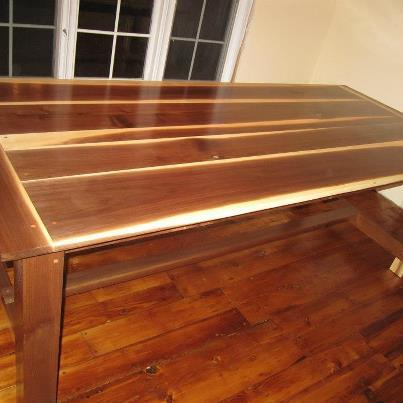
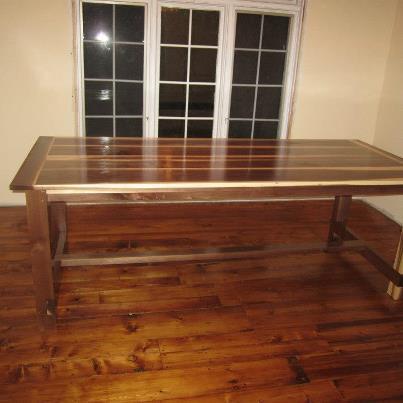
I Got my inspiration from ana's website here. I have a 200+ year old house and I just redid the dining room so I figured now would be the time to make a table for it. I did not use standard pine lumber, this was done all in Vermont walnut that was cut about 4 miles from my house and milled on site. I like to keep a stock pile of local lumber (mostly red oak and walnut when it pops up). My only advice if you are working with rough cut lumber is to invest in a good planer and joiner (I know easier said than done). If anyone would like the exact plans I used I would be happy to send them to you.
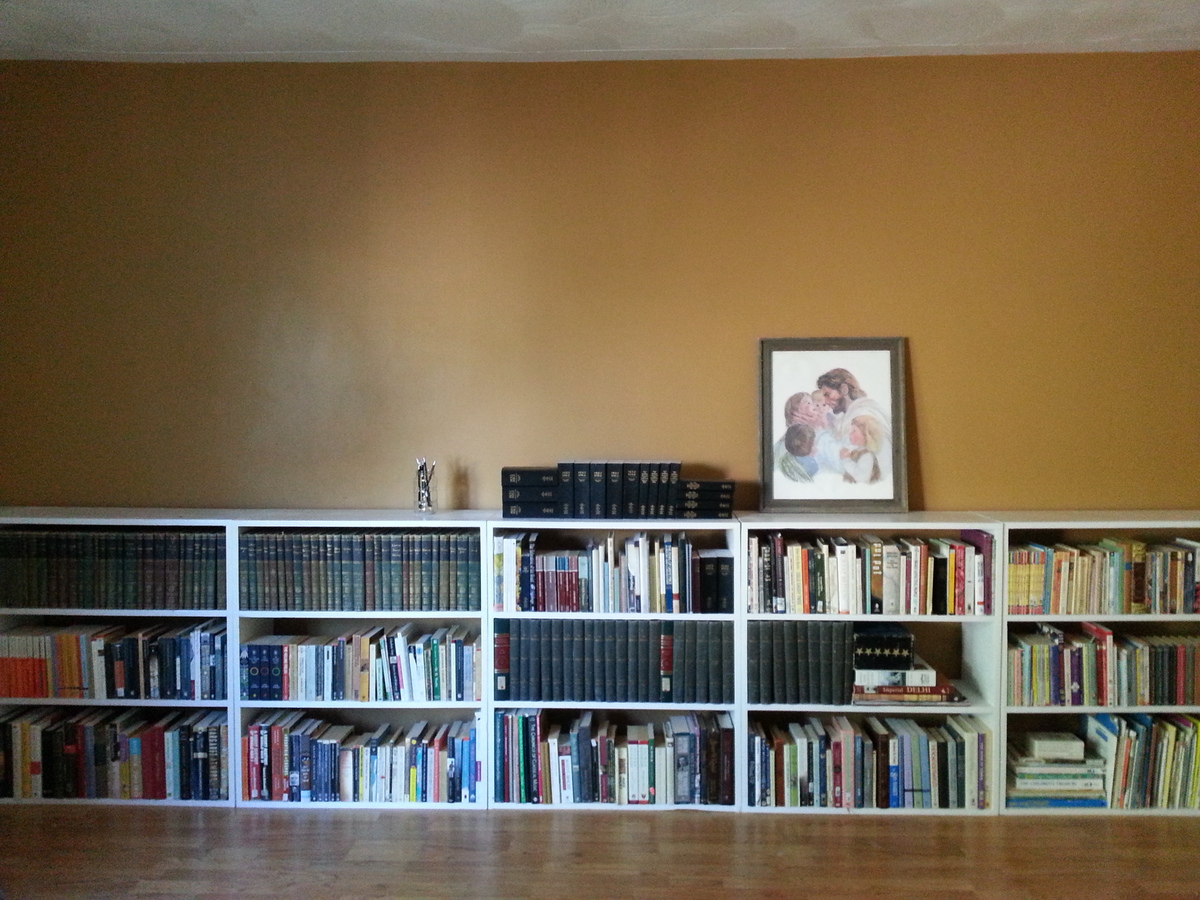
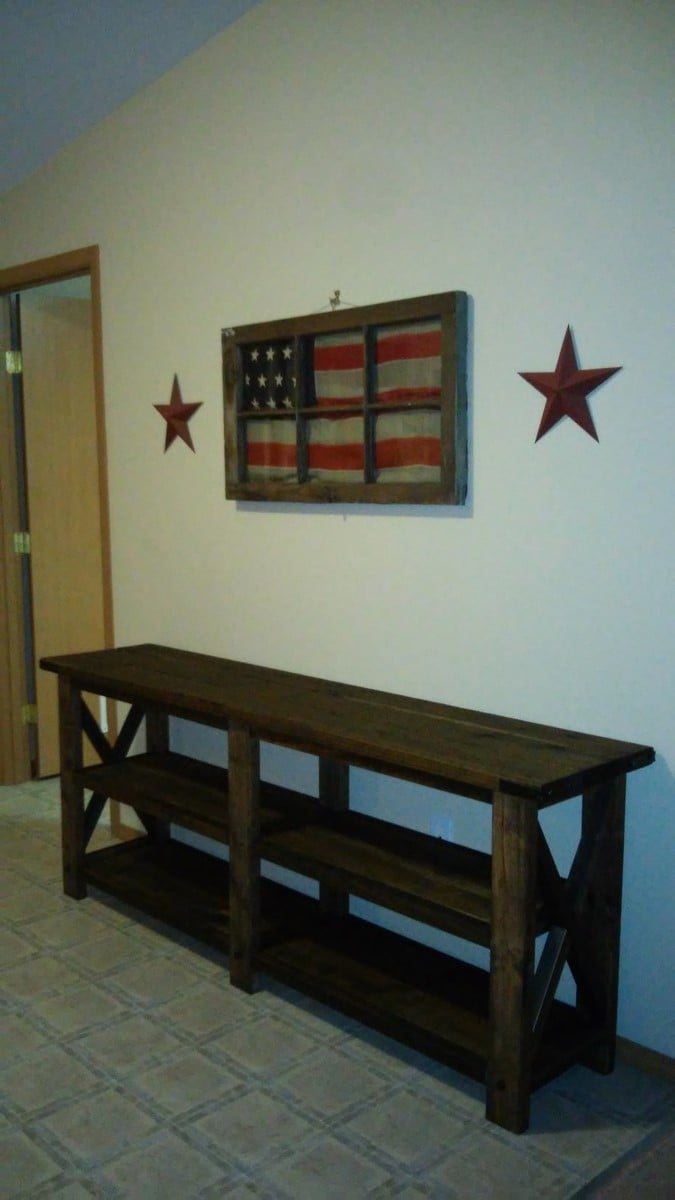
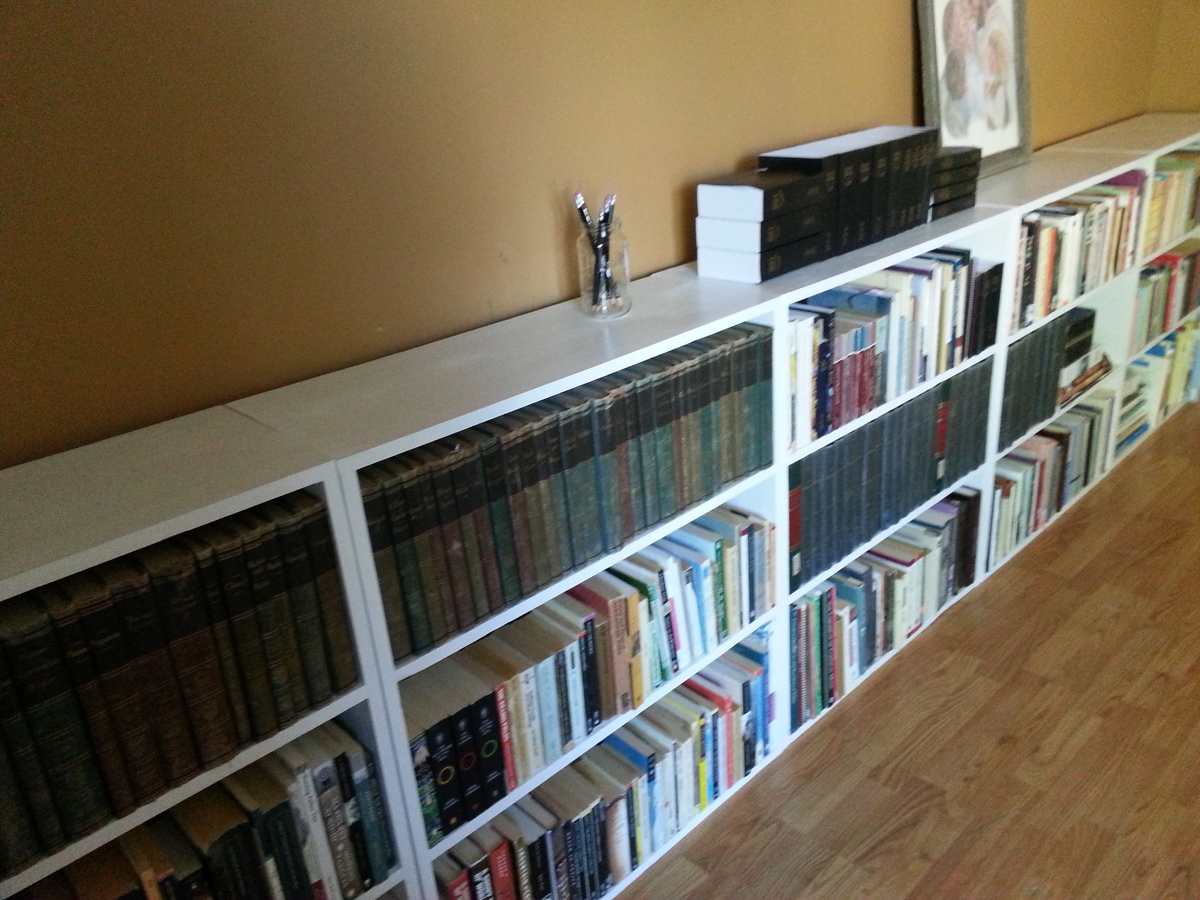
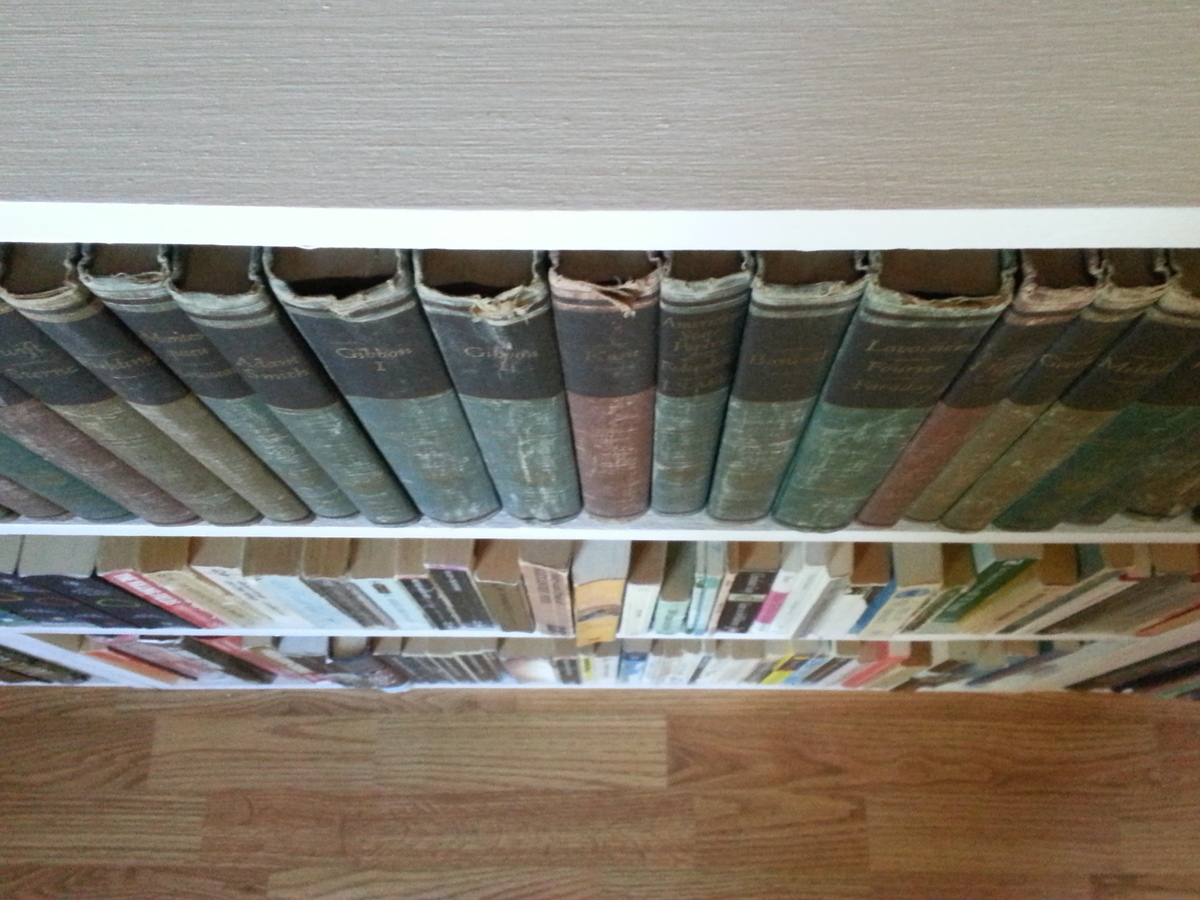
I built five of these bookshelves for my living room. I wanted them to fill the one wall, so I just divided the length of the wall by five to determine how wide to make each shelf. Also, because I was building several to be pushed together, I didn't want the bulk of 2 by SPF, so I used laminated pine shelving. Two eight foot boards were needed for each shelf, and that left very little waste. I love how they turned out. I blogged more about them (including dimensions) here http://skonkers.blogspot.ca/2014/07/home-is-where-shelves-are.html

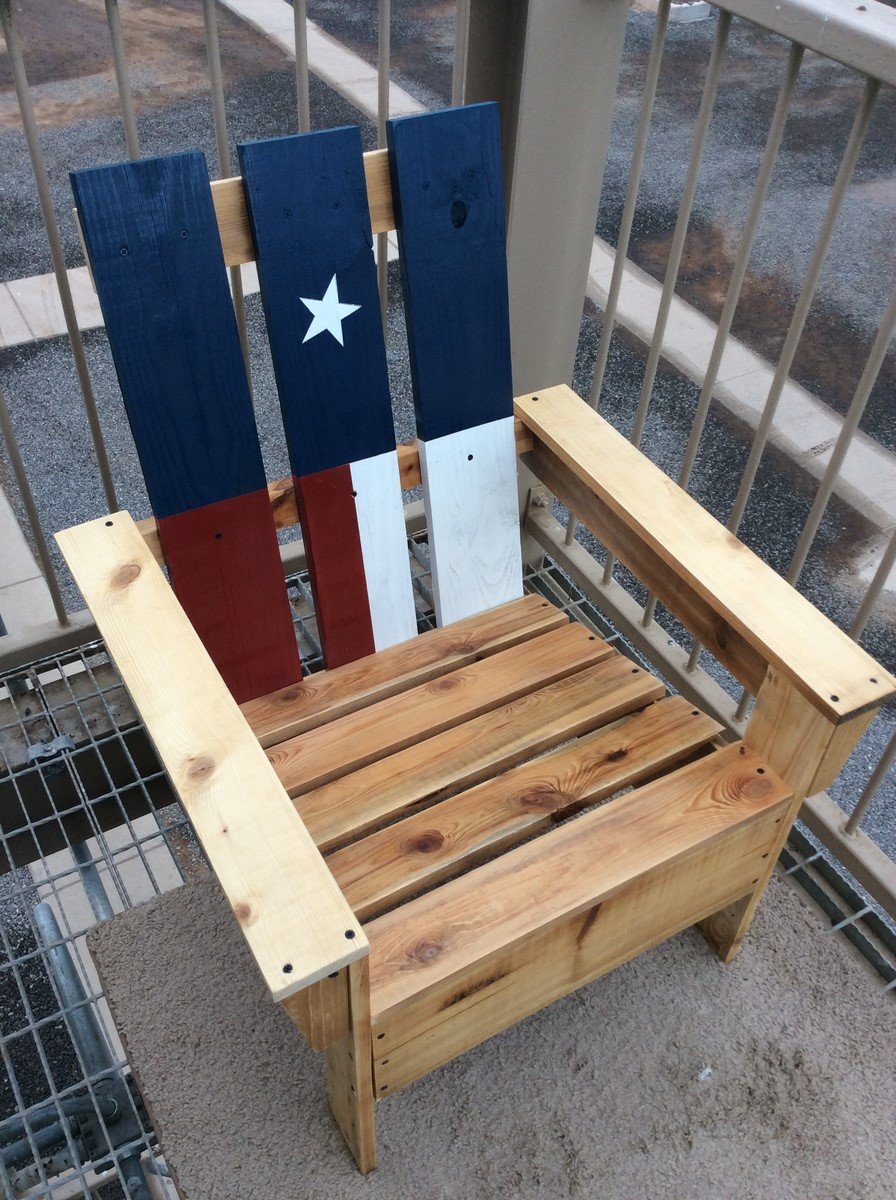
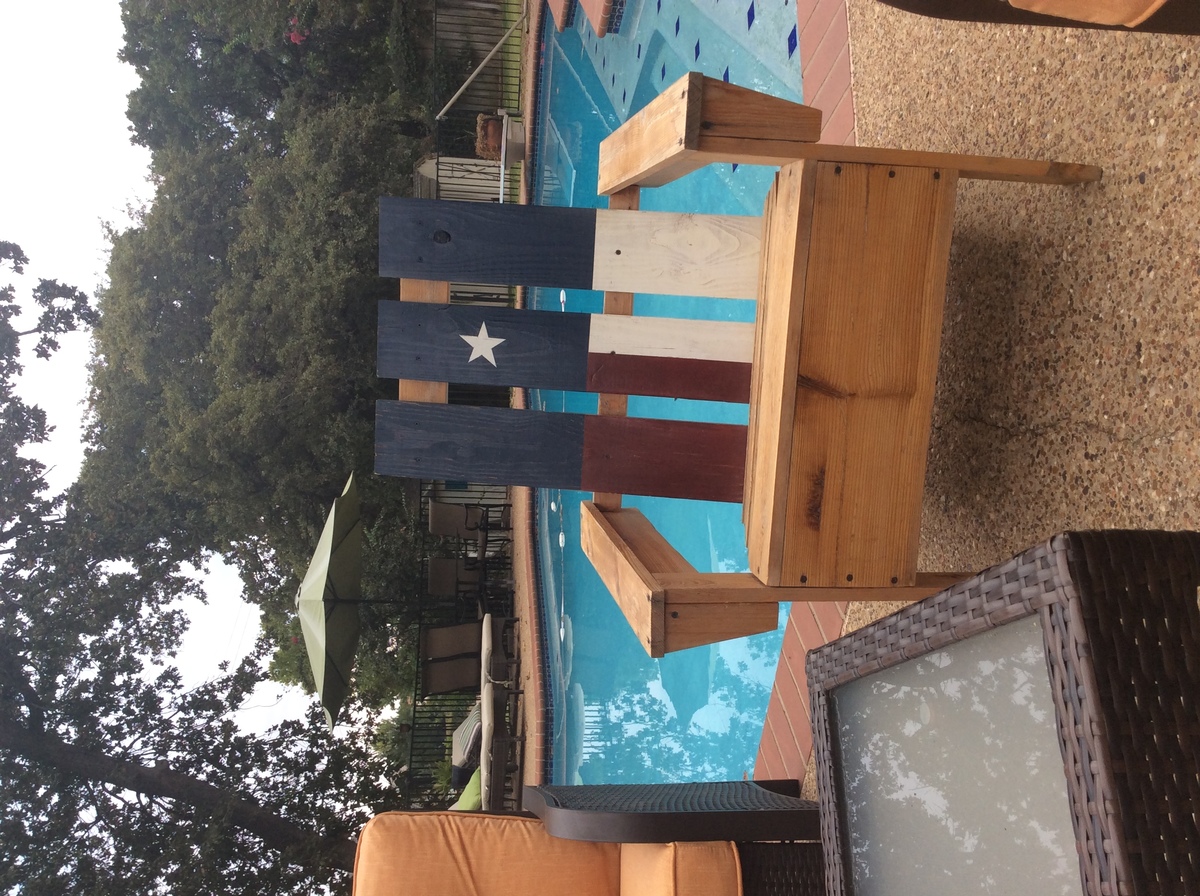
Built from scrap lumber during my deployment with the US Navy to Camp Lemonnier, Djibouti, Africa, and brought home to Texas on my return Sept 2016.
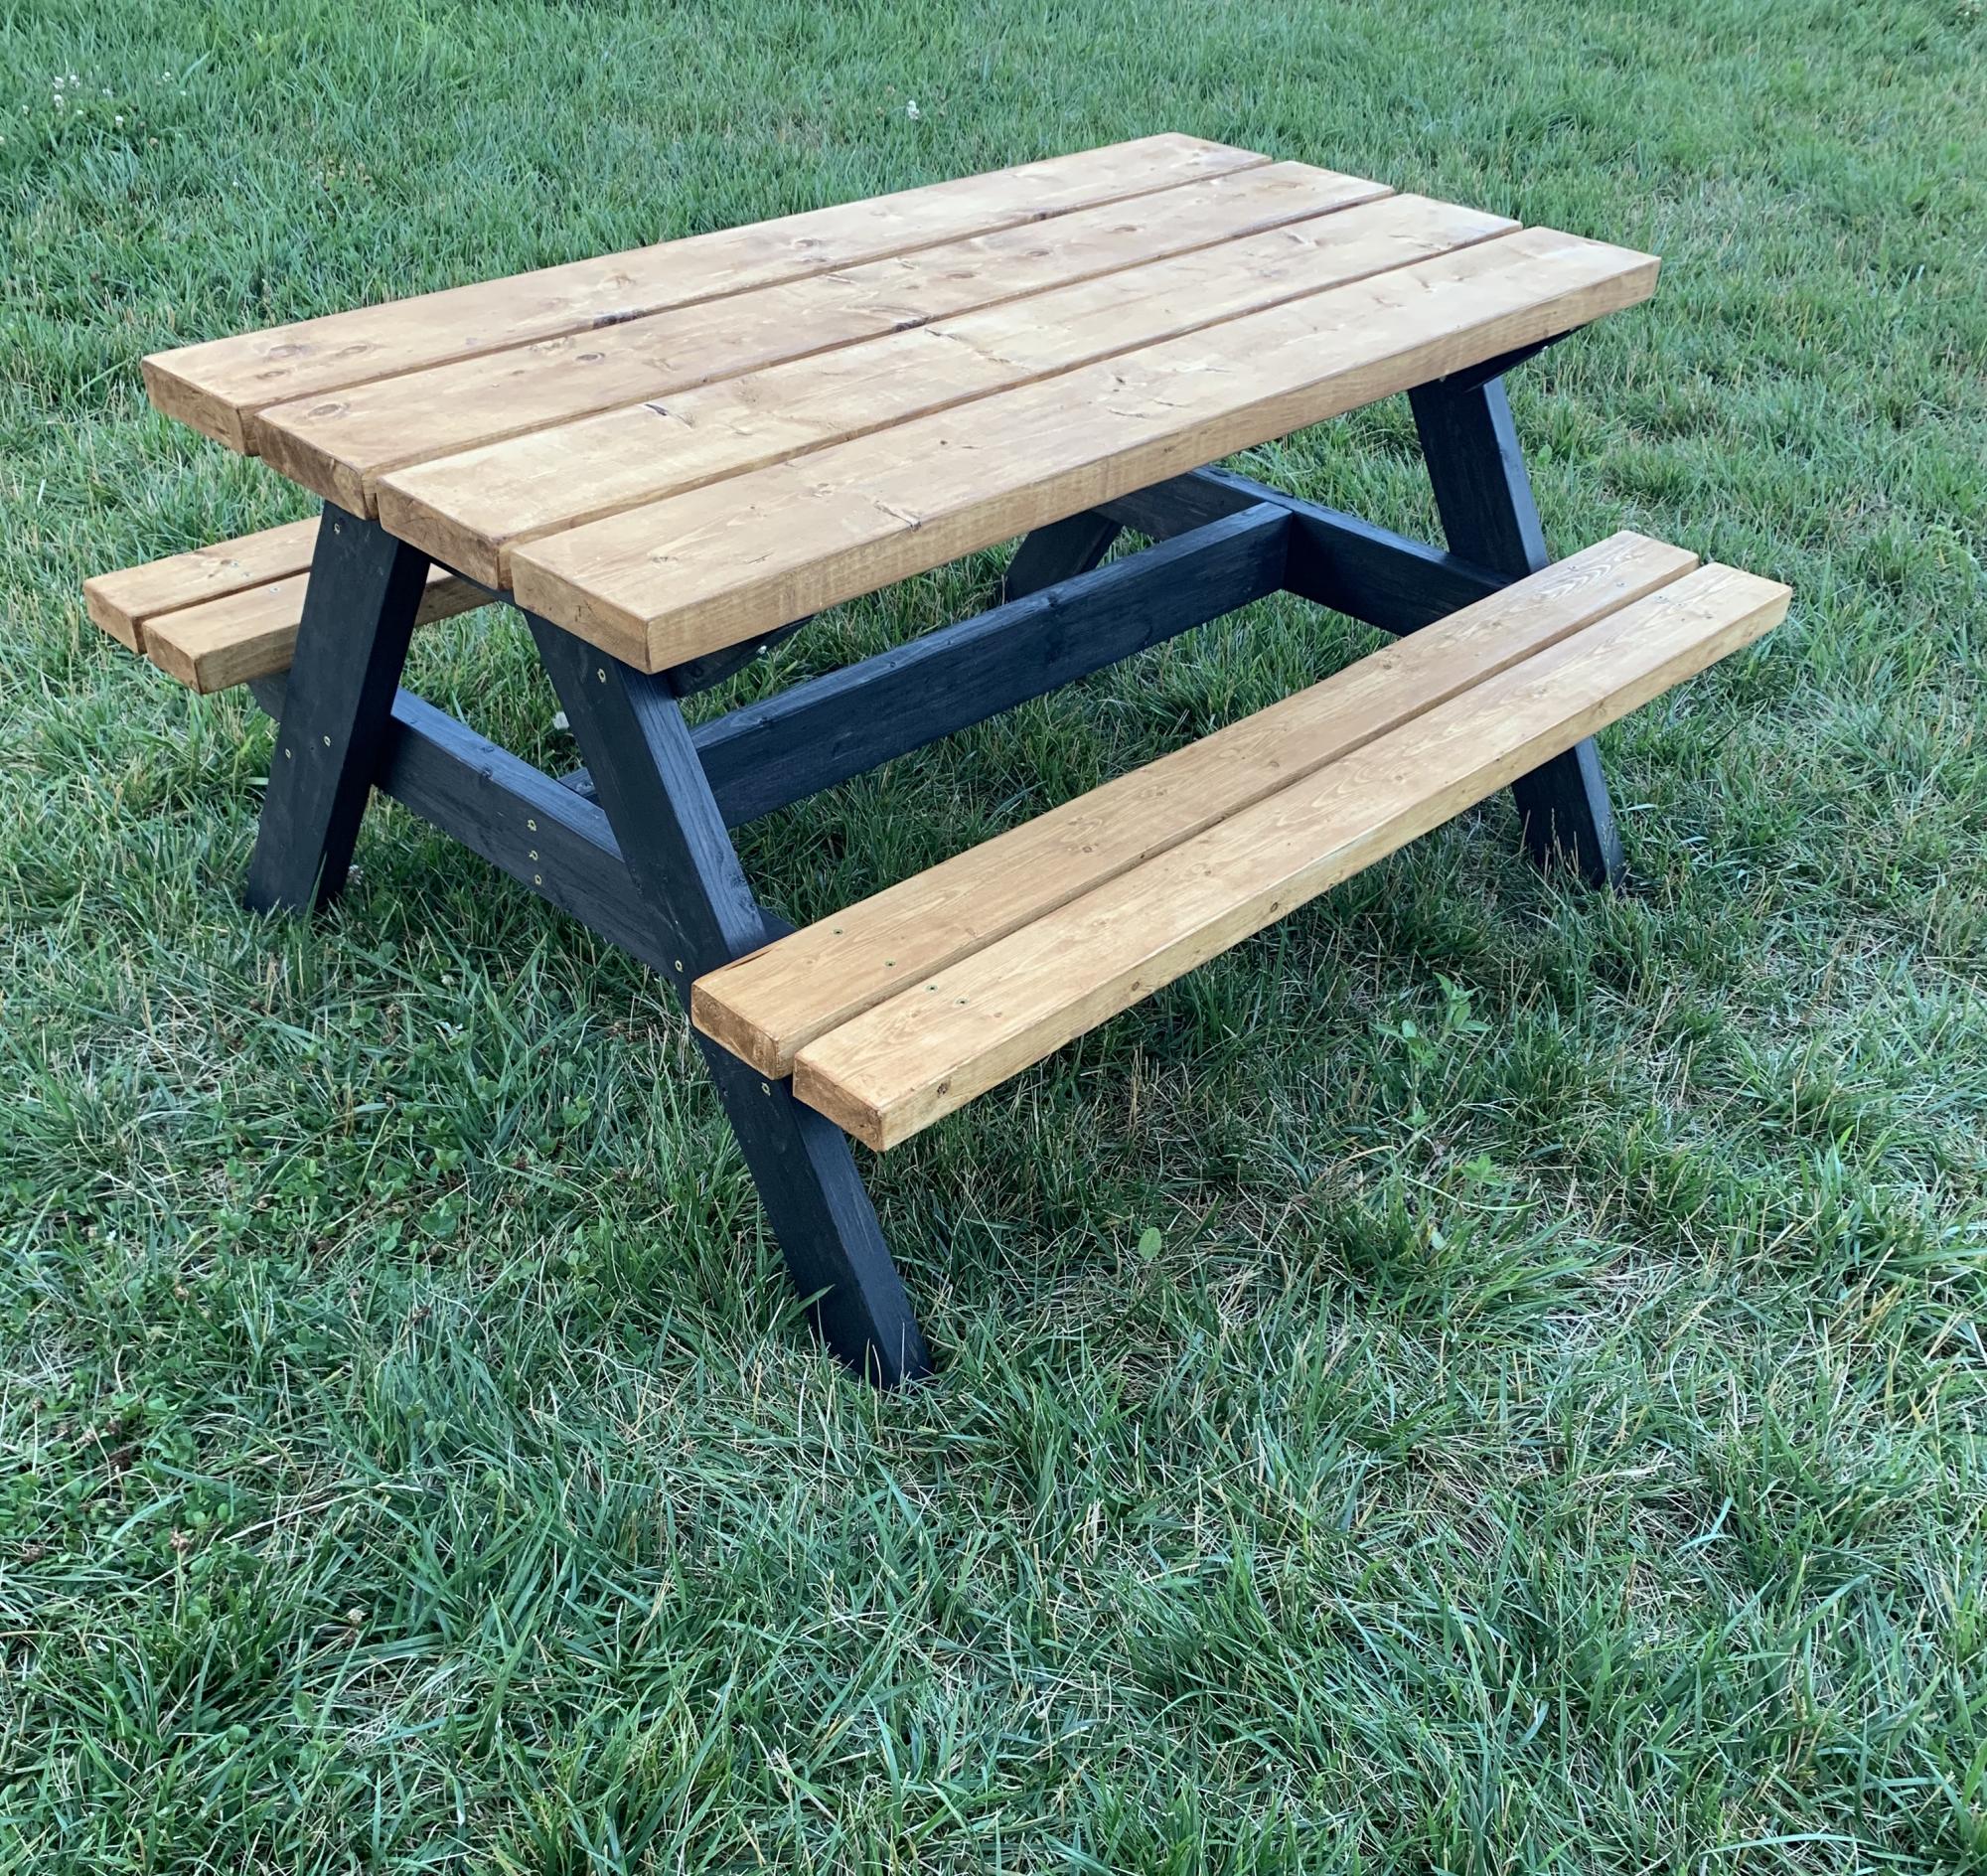
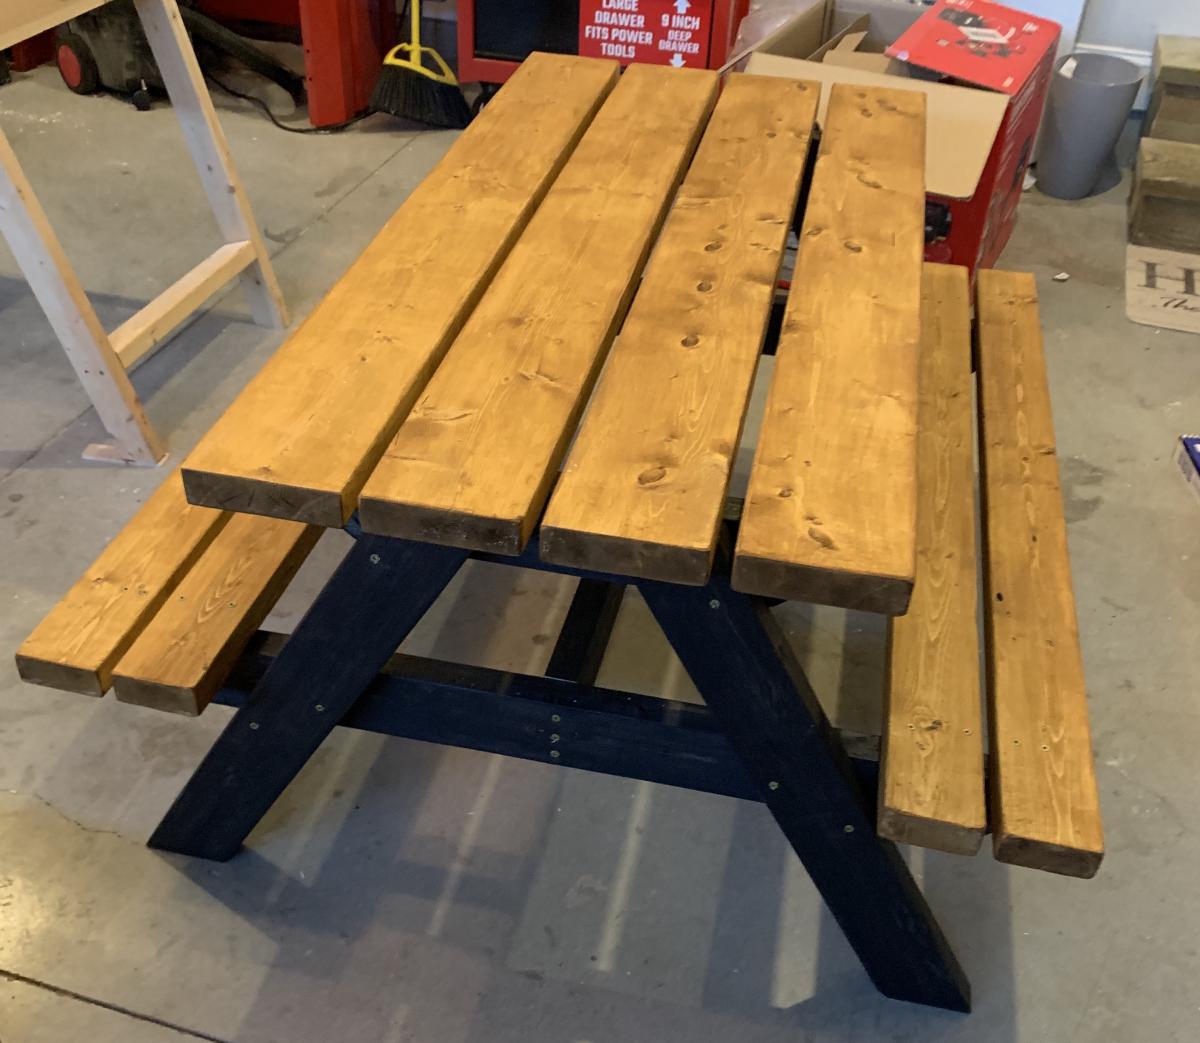
This was a easy build and is super strong . ITs built for a kid sized picnic table but I tested It with my weight to see how it holds up and (200 lbs) didn’t hurt it or even make the seat budge.
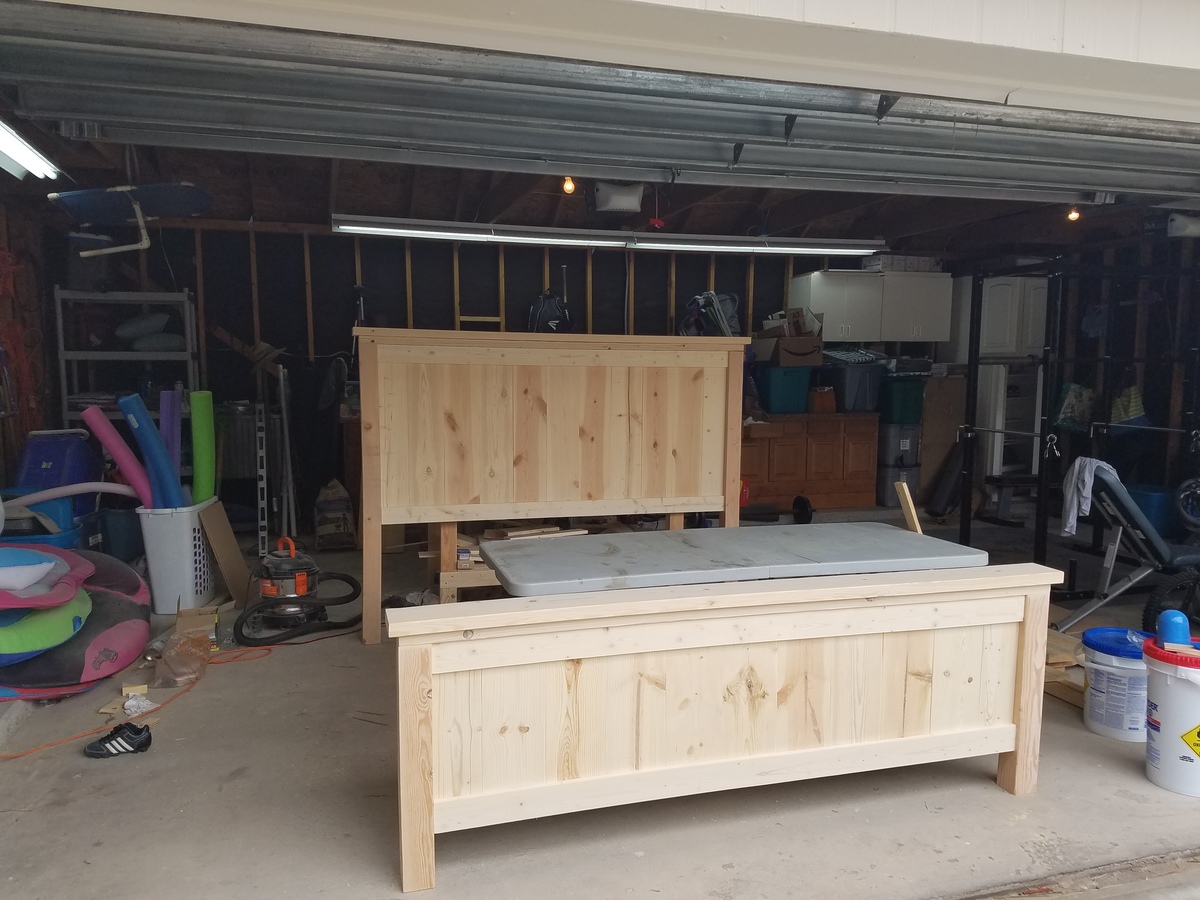
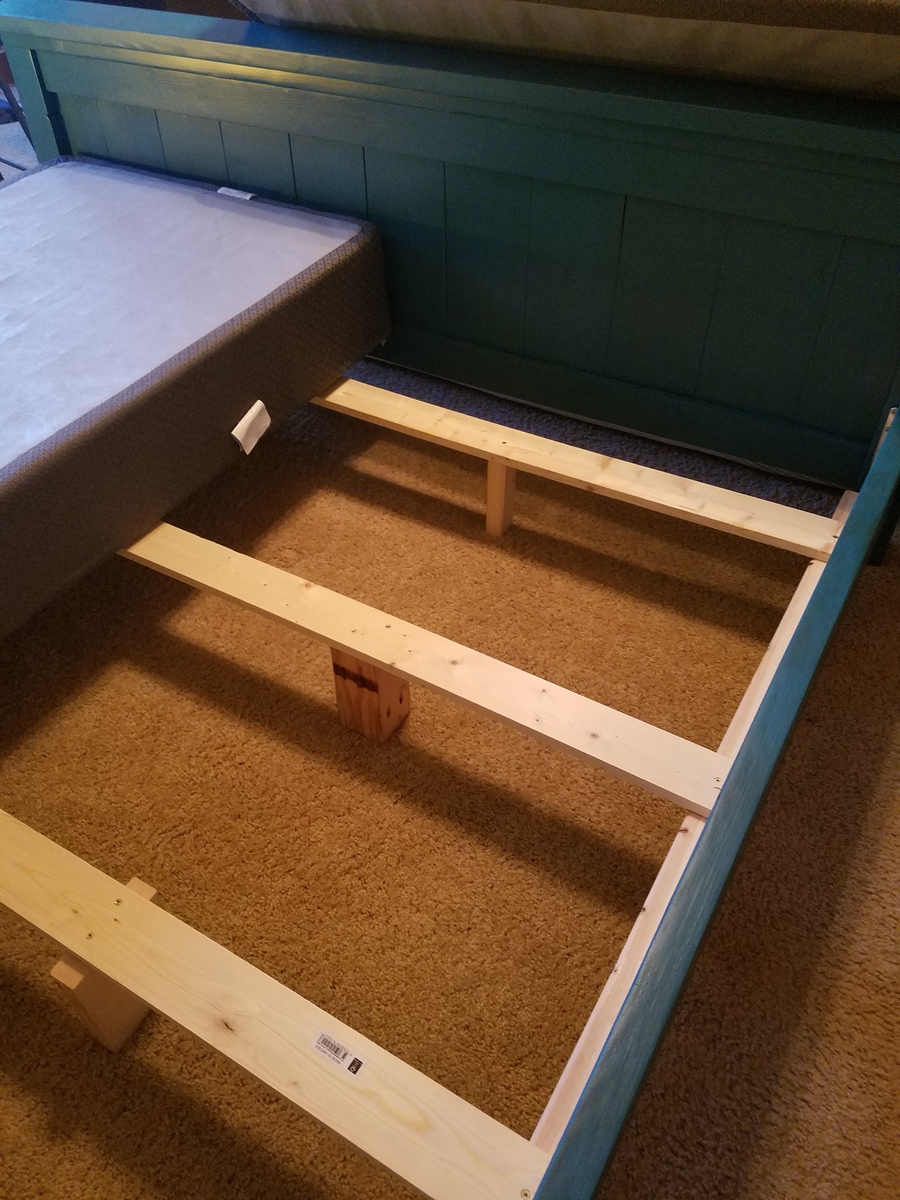
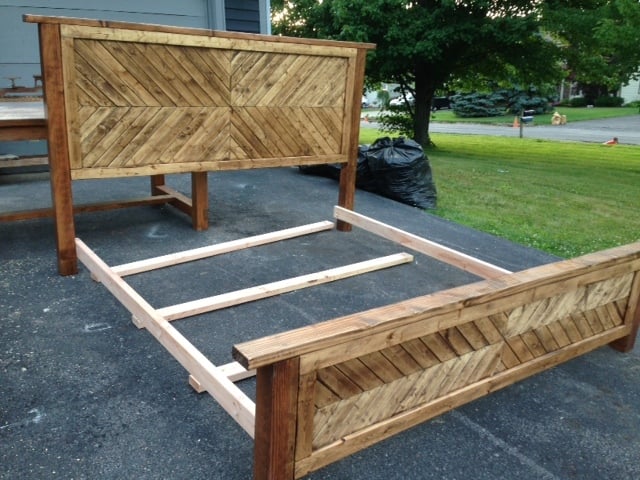
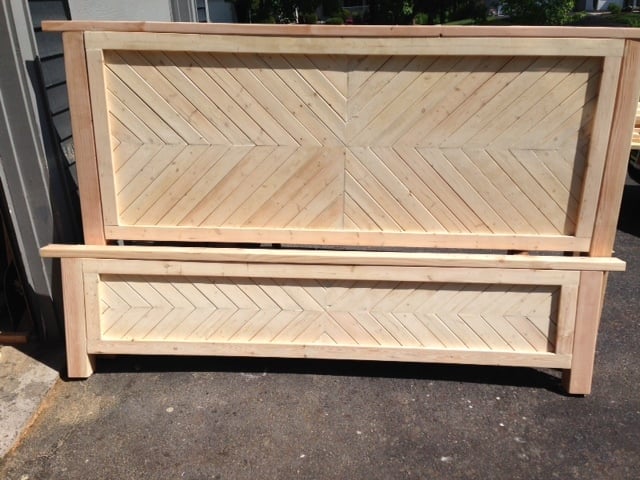
I added six inches to all vertical measurements for the headboard and footboard to make this bed a little taller.
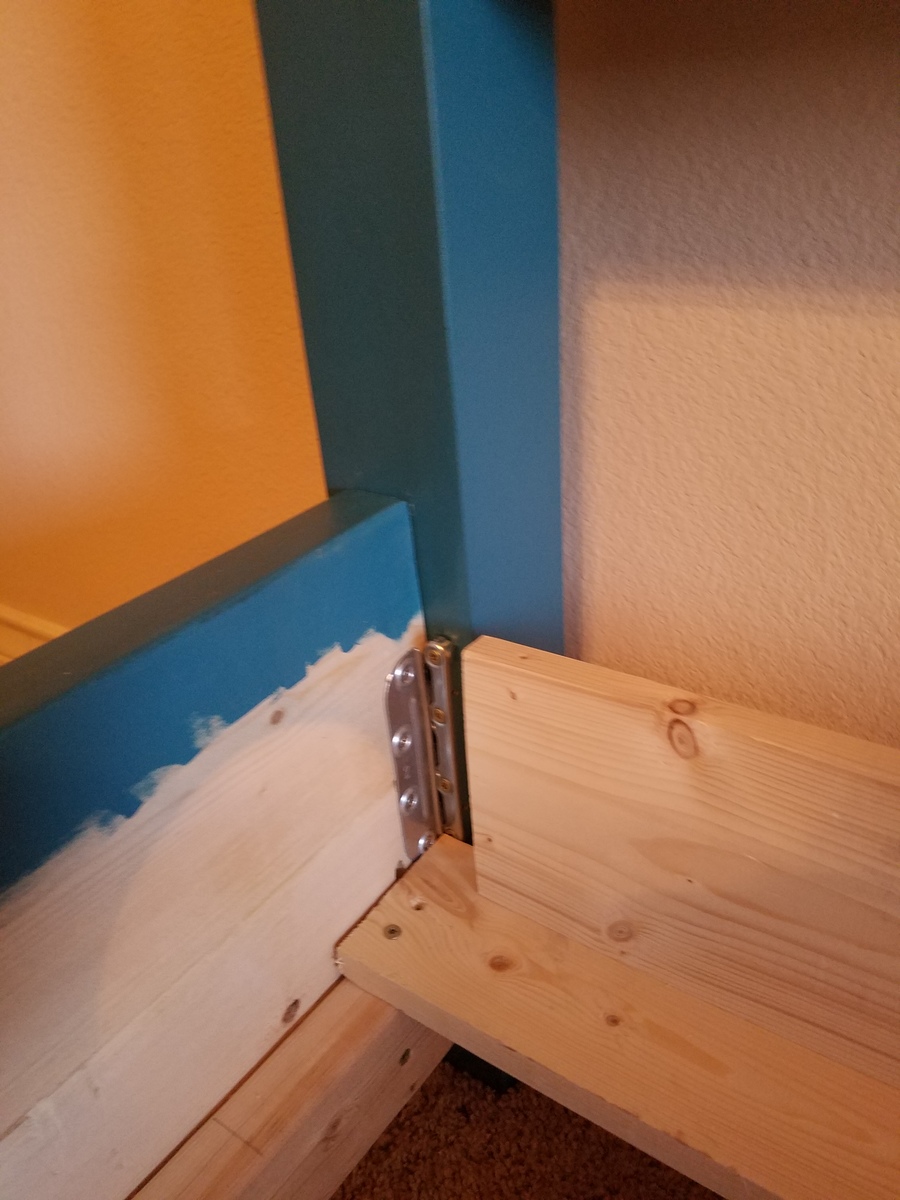
This bed was easy to build – this was my 5th woodworking project ever. It is however a BIG project in terms of size…I can carry the footboard by myself, but the headboard is a different story! I used Jamison’s (from rogueengenieer.com) technique for attaching side rails. My bed came out a little bit wide even though I sized down the width measurements to fit a king sized mattress used in the traditional orientation ( 76 inches wide by 80 inches long.) Had I attached the rails on the insides of the 4/4 posts it would have been perfect, but I wanted to be able to break the bed down easily in case we move. (We have a history of being semi-nomadic!) I purchased the rail hardware off of amazon. I also ended up using pocket holes to attach a 1x6 to the end of my top support board to keep the box springs from sliding up.
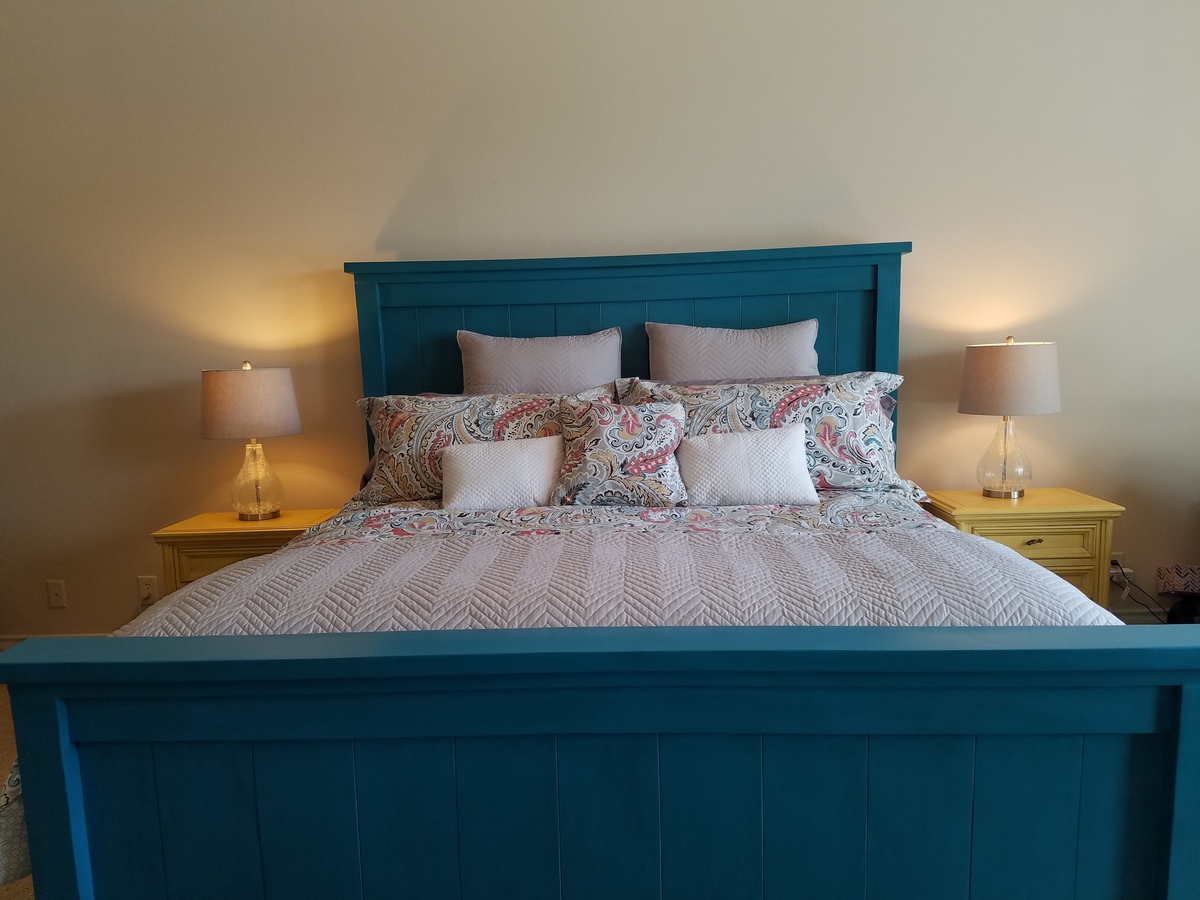
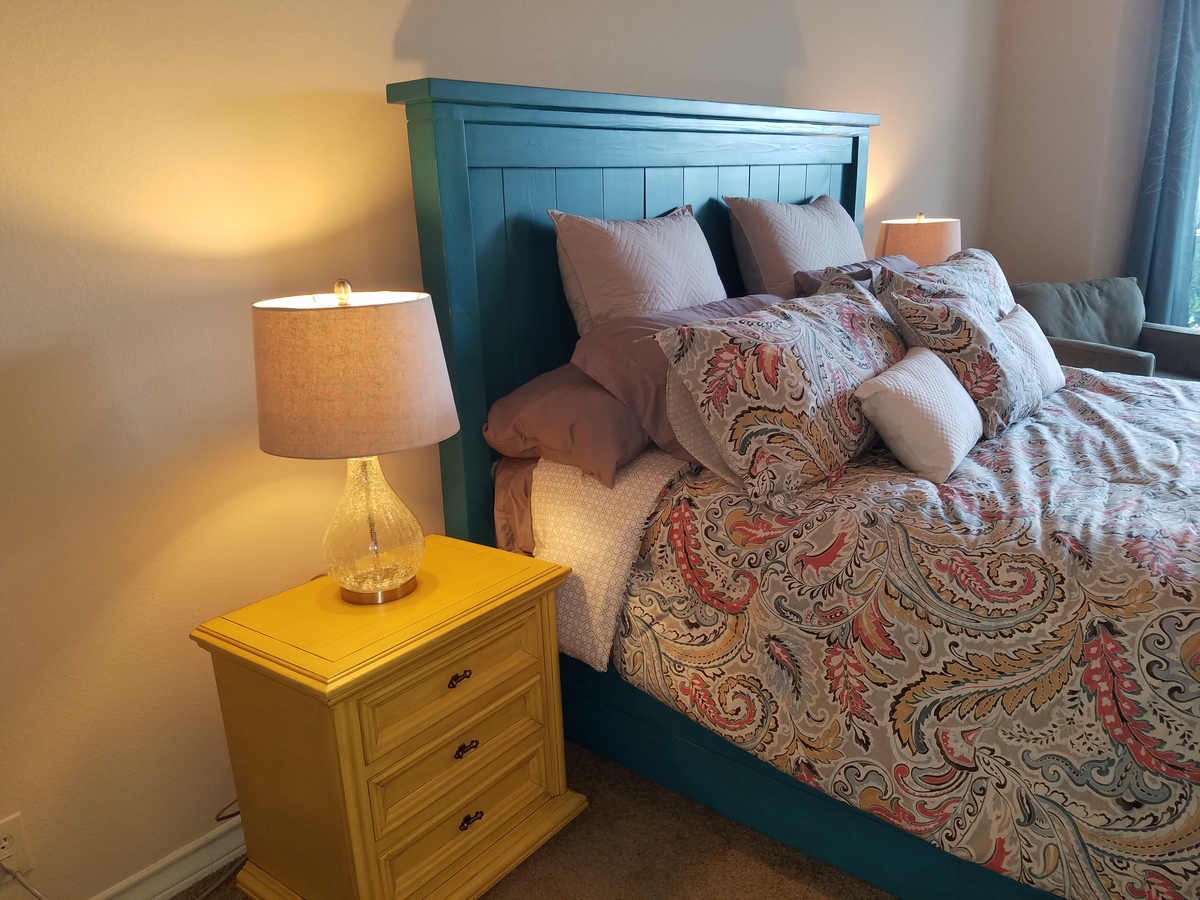
I LOVED the color of the feature bed on the California King Farm House plans, so I tried my best to match that. I used a home right max sprayer for the primer, paint and polycrylic. I hand applied the brown glaze with a sponge brush and wiped most of it away with old t-shirt rags. I absolutely love the bed – it is super heavy and very sturdy! Thanks Ana!

Didn't use plans for this, so I eyeballed basically everything. Certainly made for a more frustrating build, but I have to say I'm happy with the end result!
My long weekend project! Thank you for the pattern, your video was so helpful and they turned out so good! I’m so happy with them.


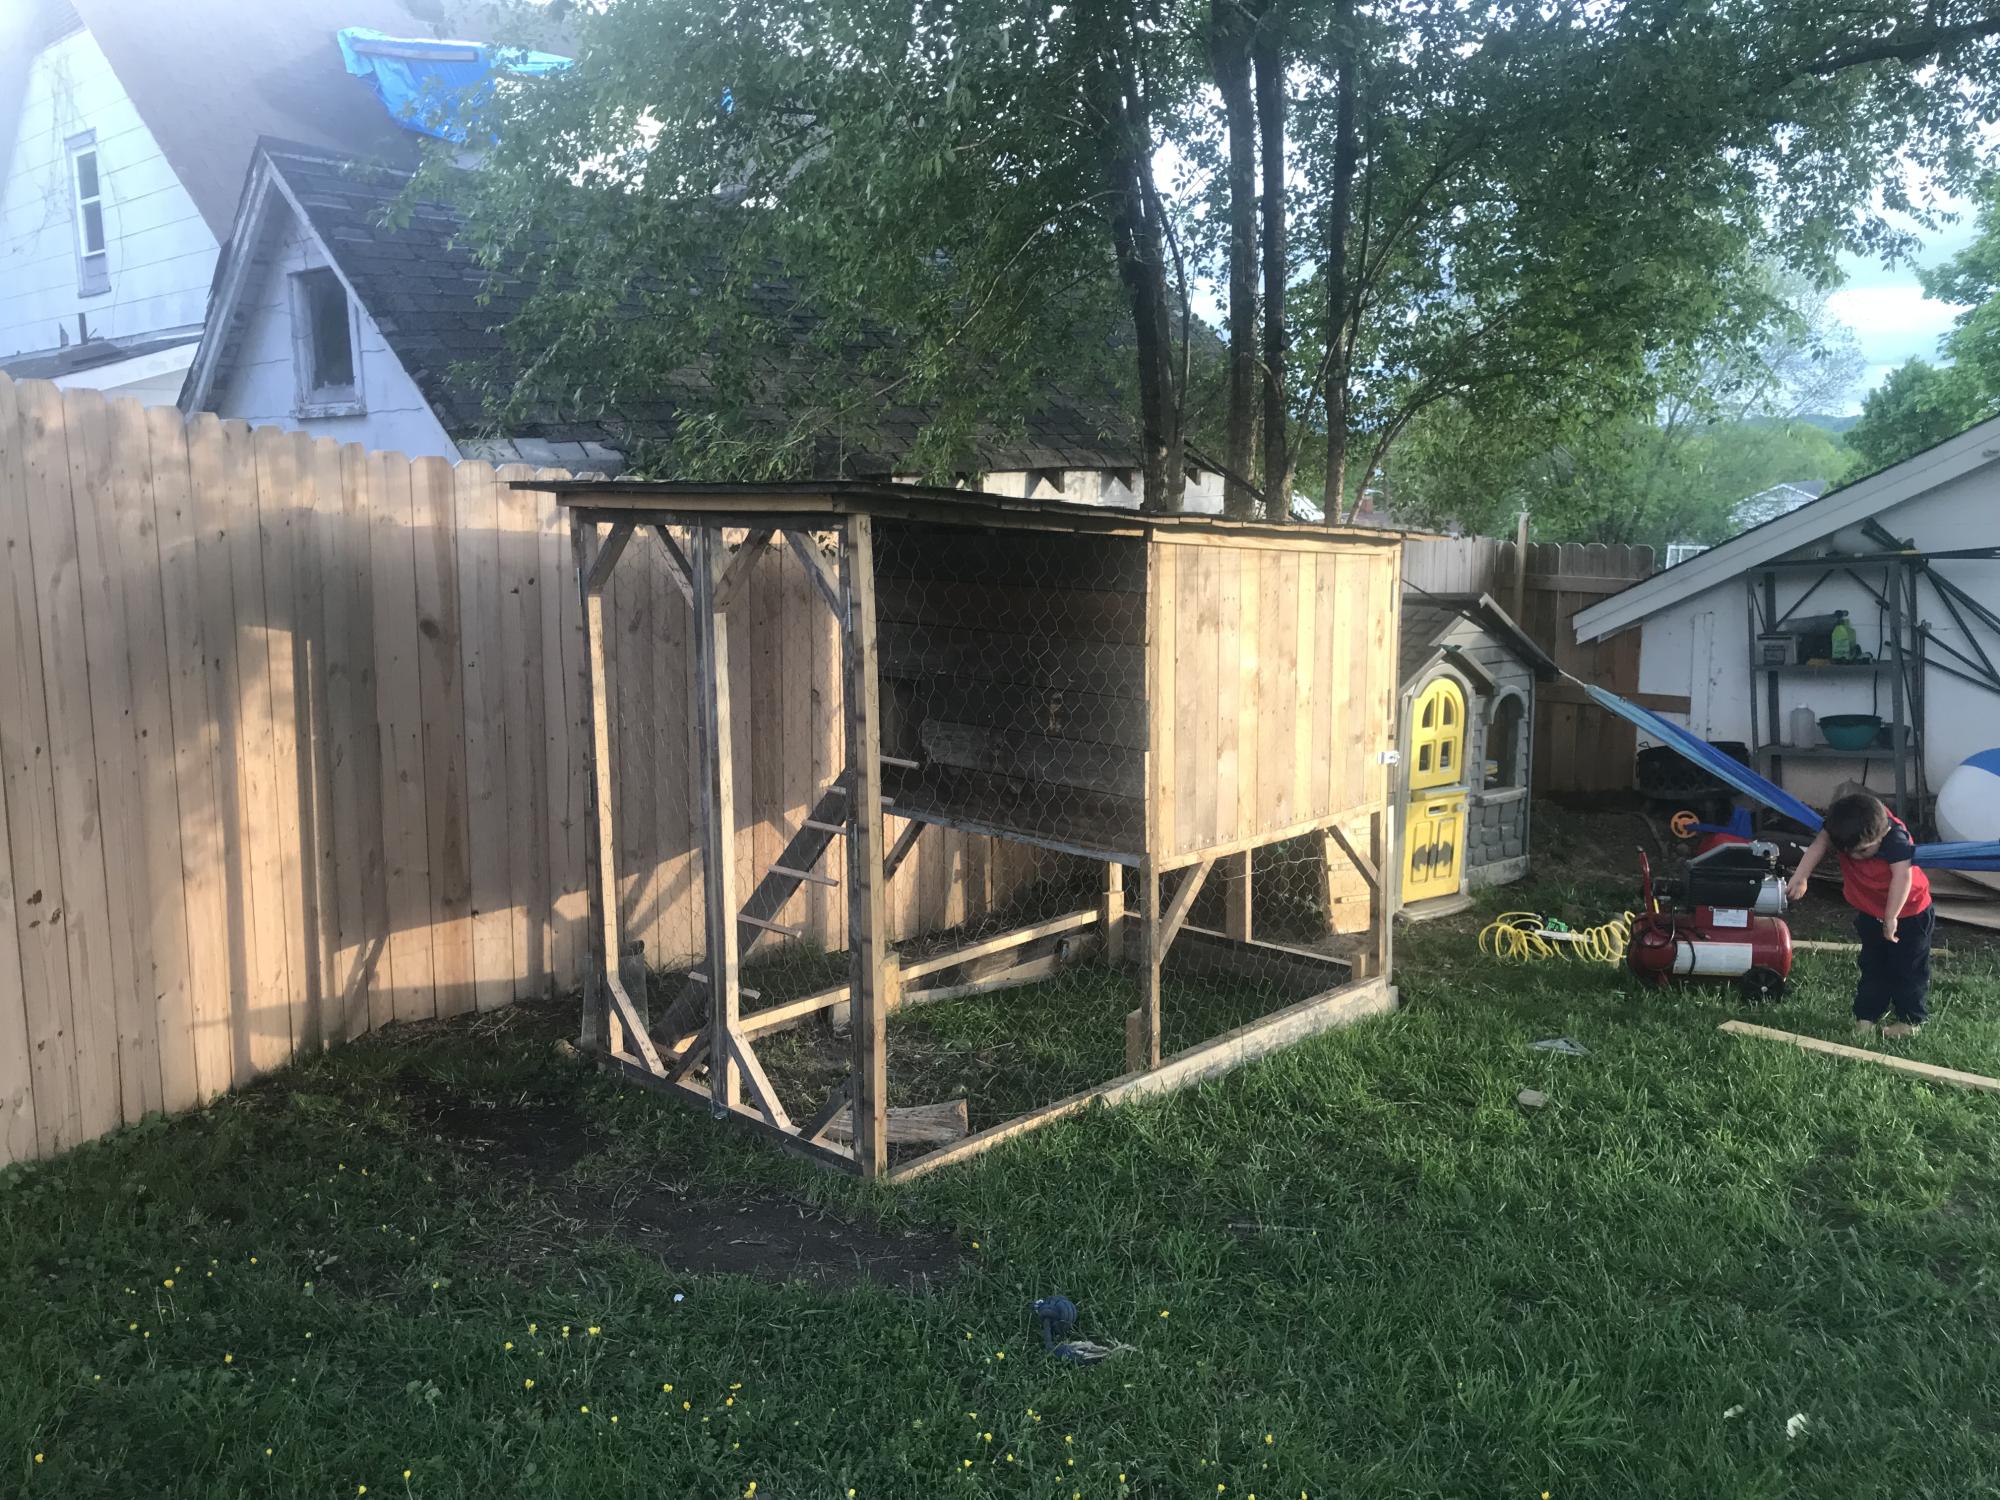
My daughter has a farmhouse themed room. This bed fits righting into the decor, with the sideboard forming part of a chicken coop that is painted over it.
modified all 3 plans to sizes I needed

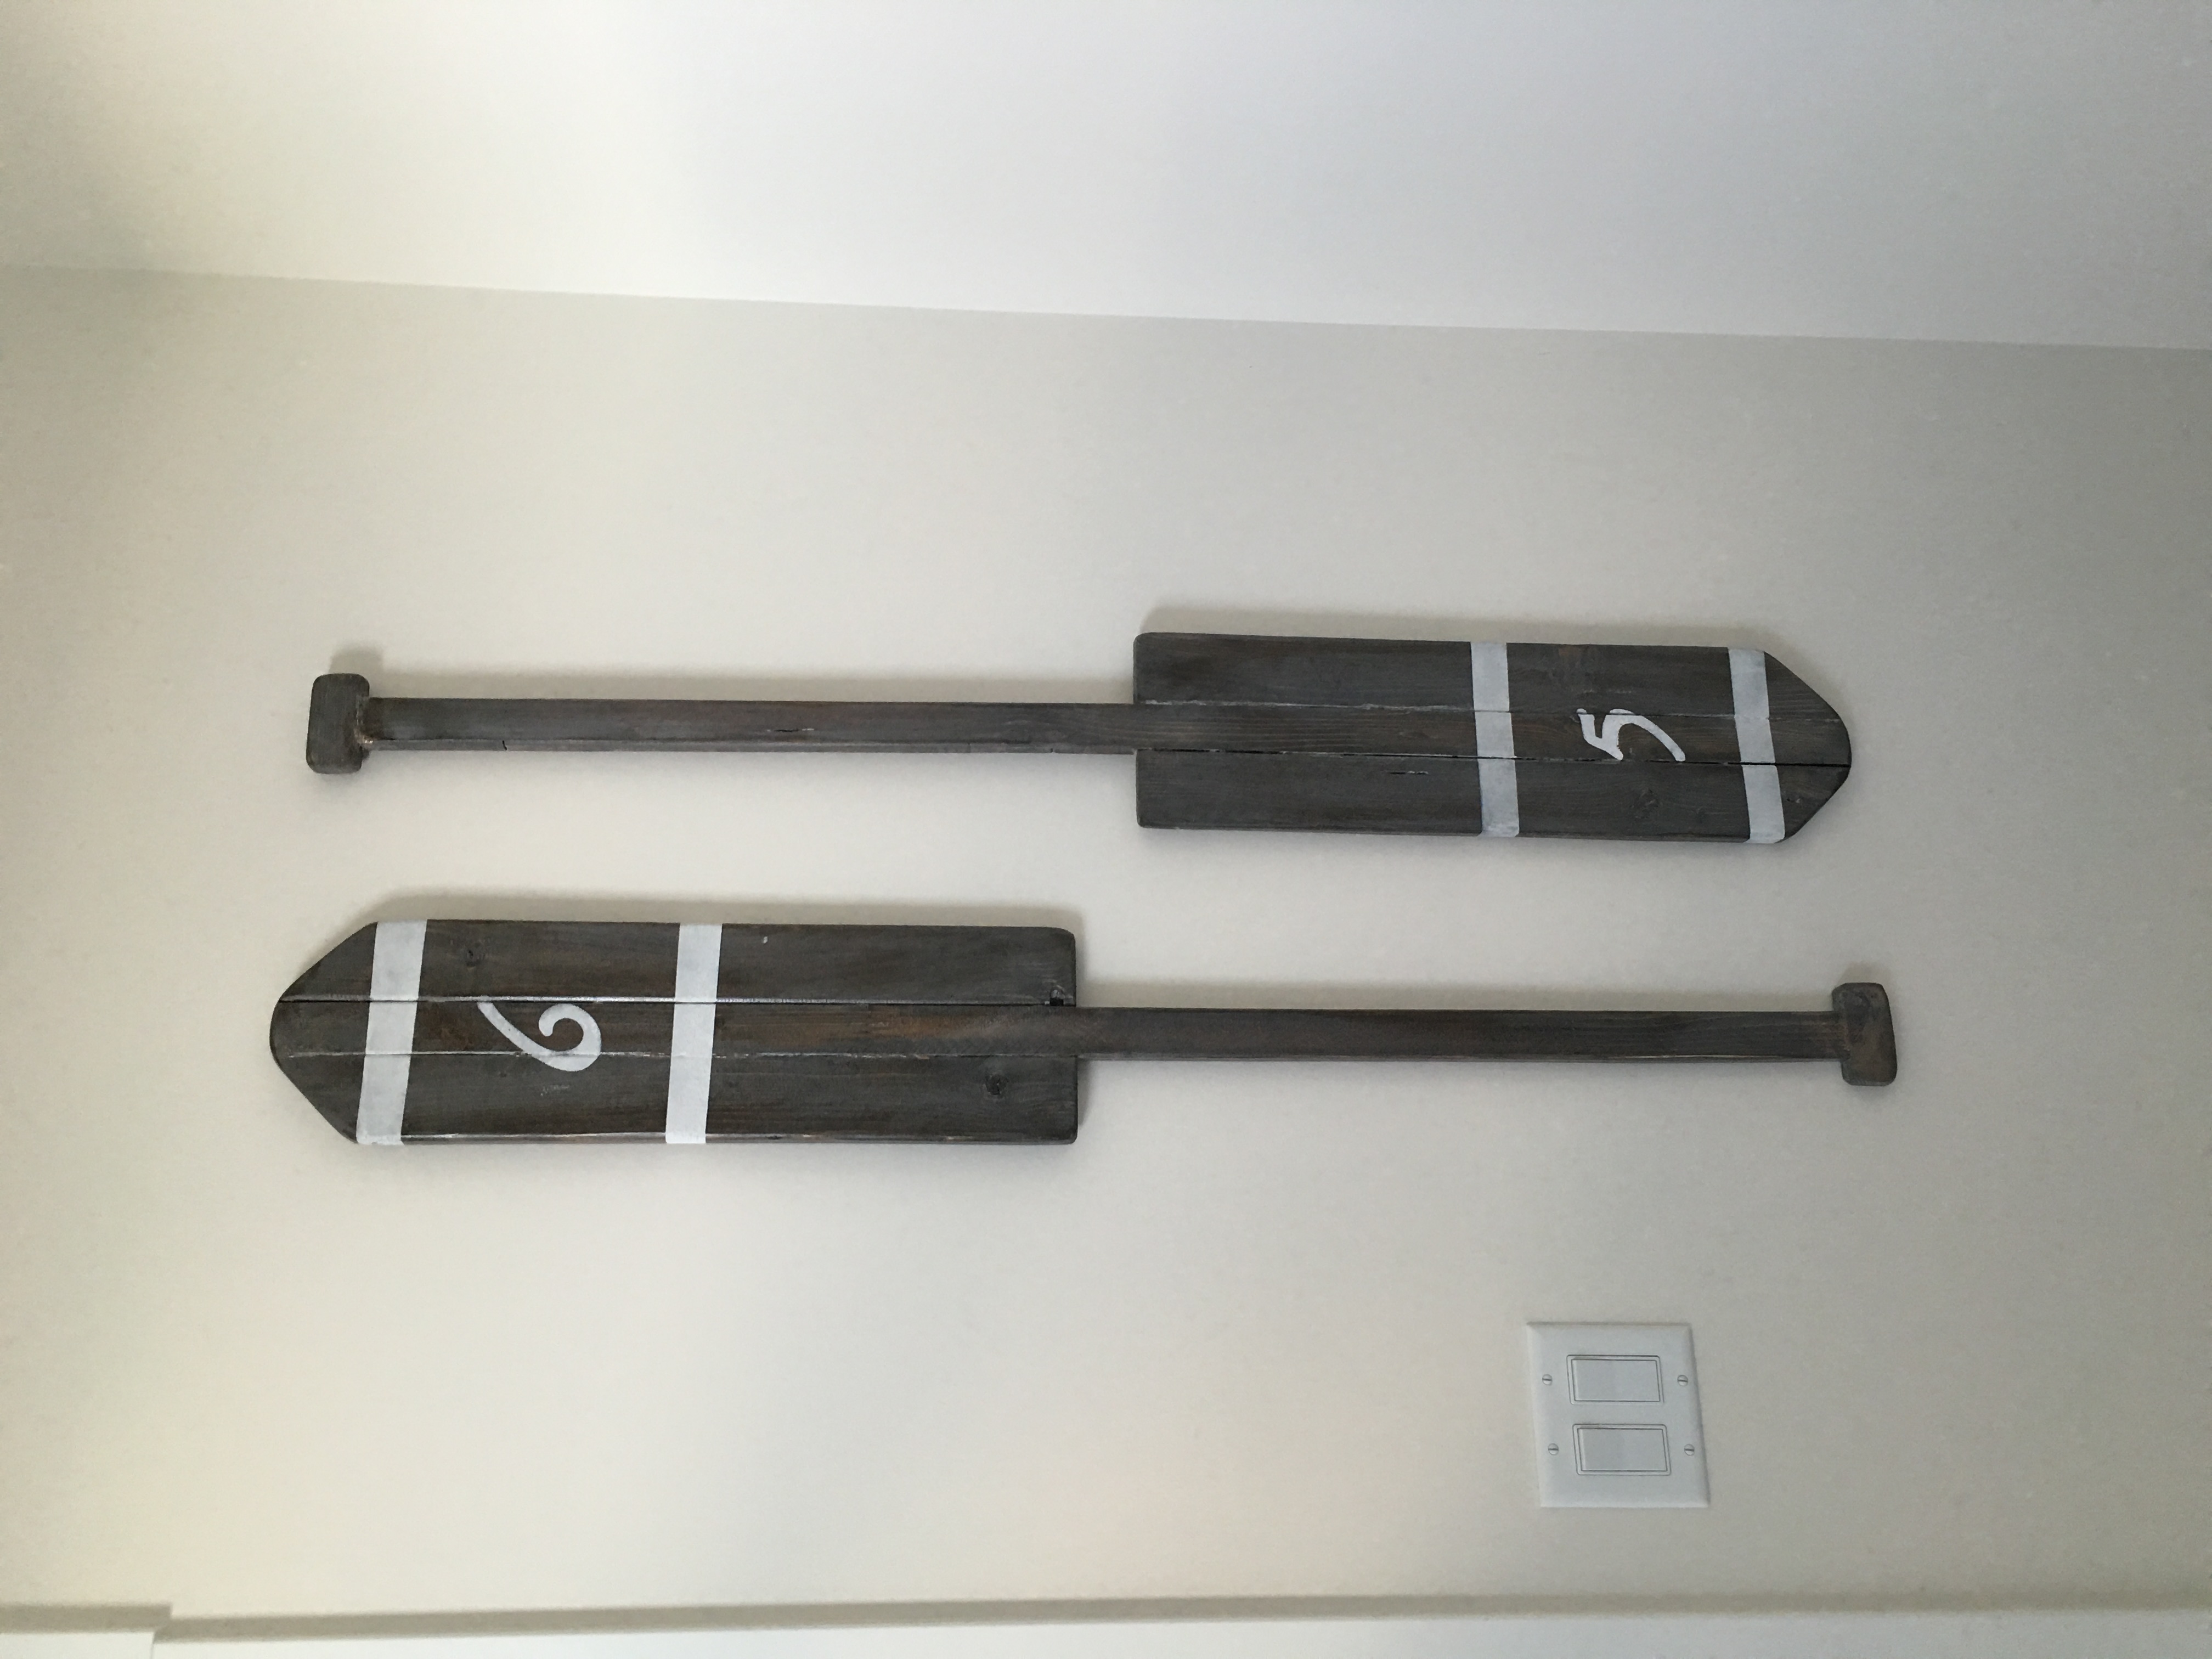
I actually made 2 sets of these oars as wall decor for our cottage. This is the second set - I love them! The kids chose the numbers which are completely random :)
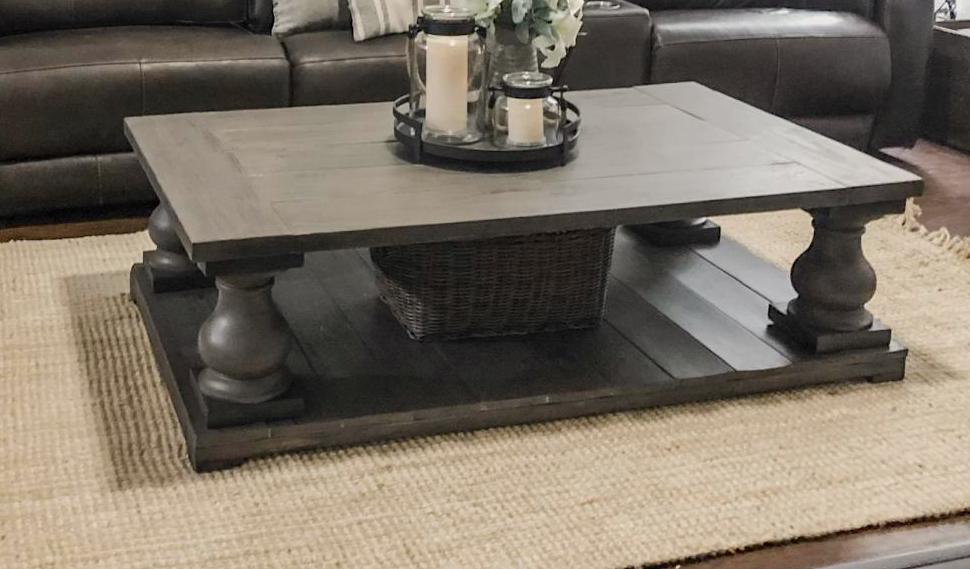
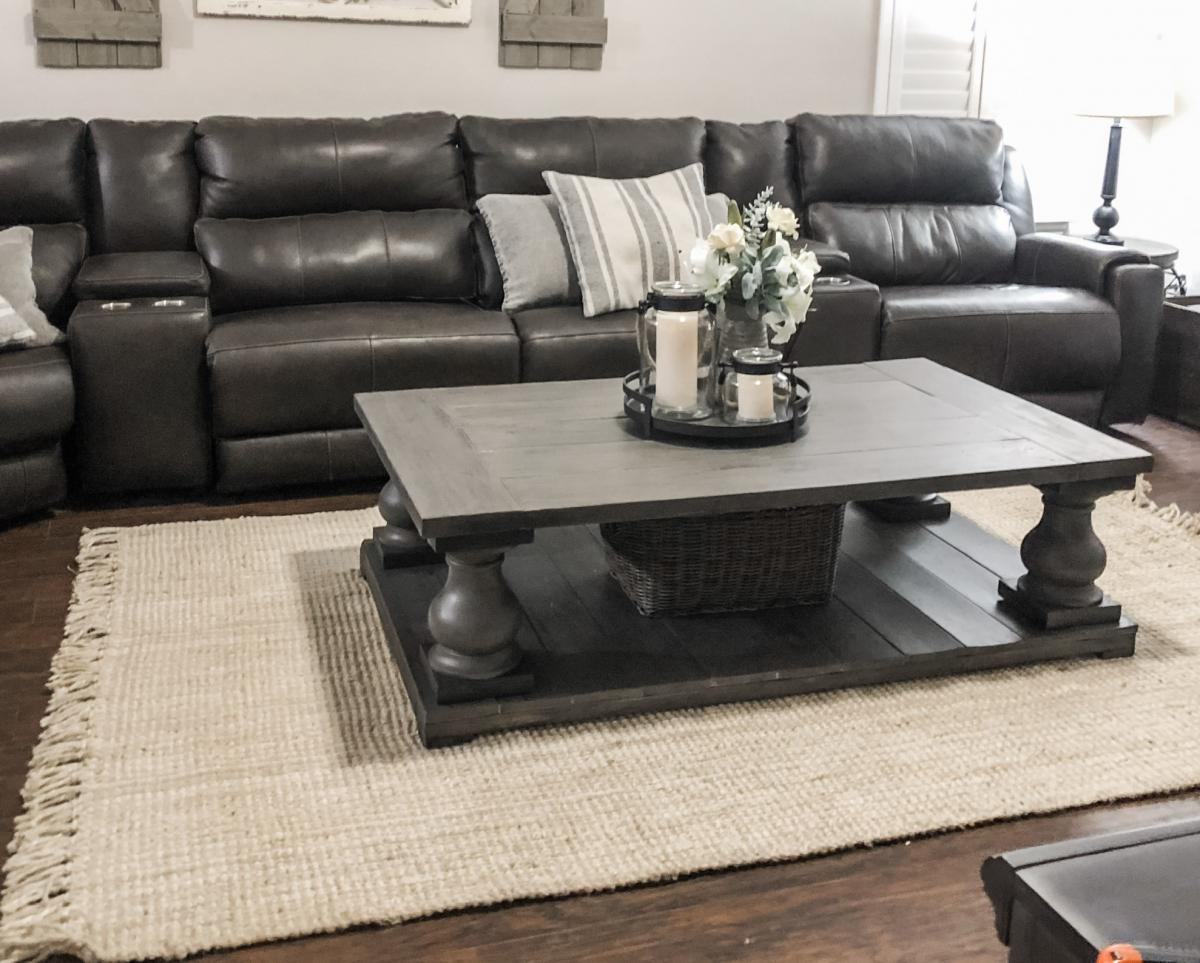
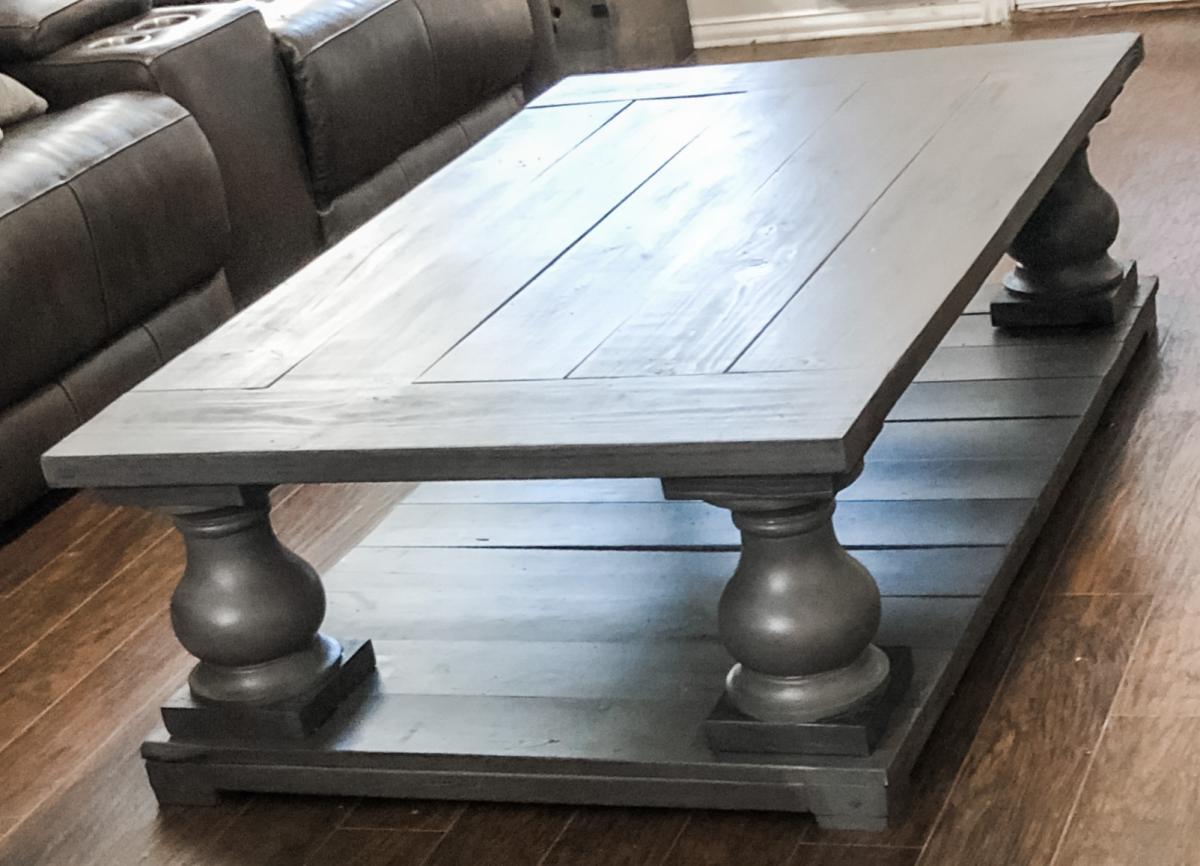
Love this table! Created from Ana Whites Balustrade Coffee Table plans. Looks just like the table from RH.
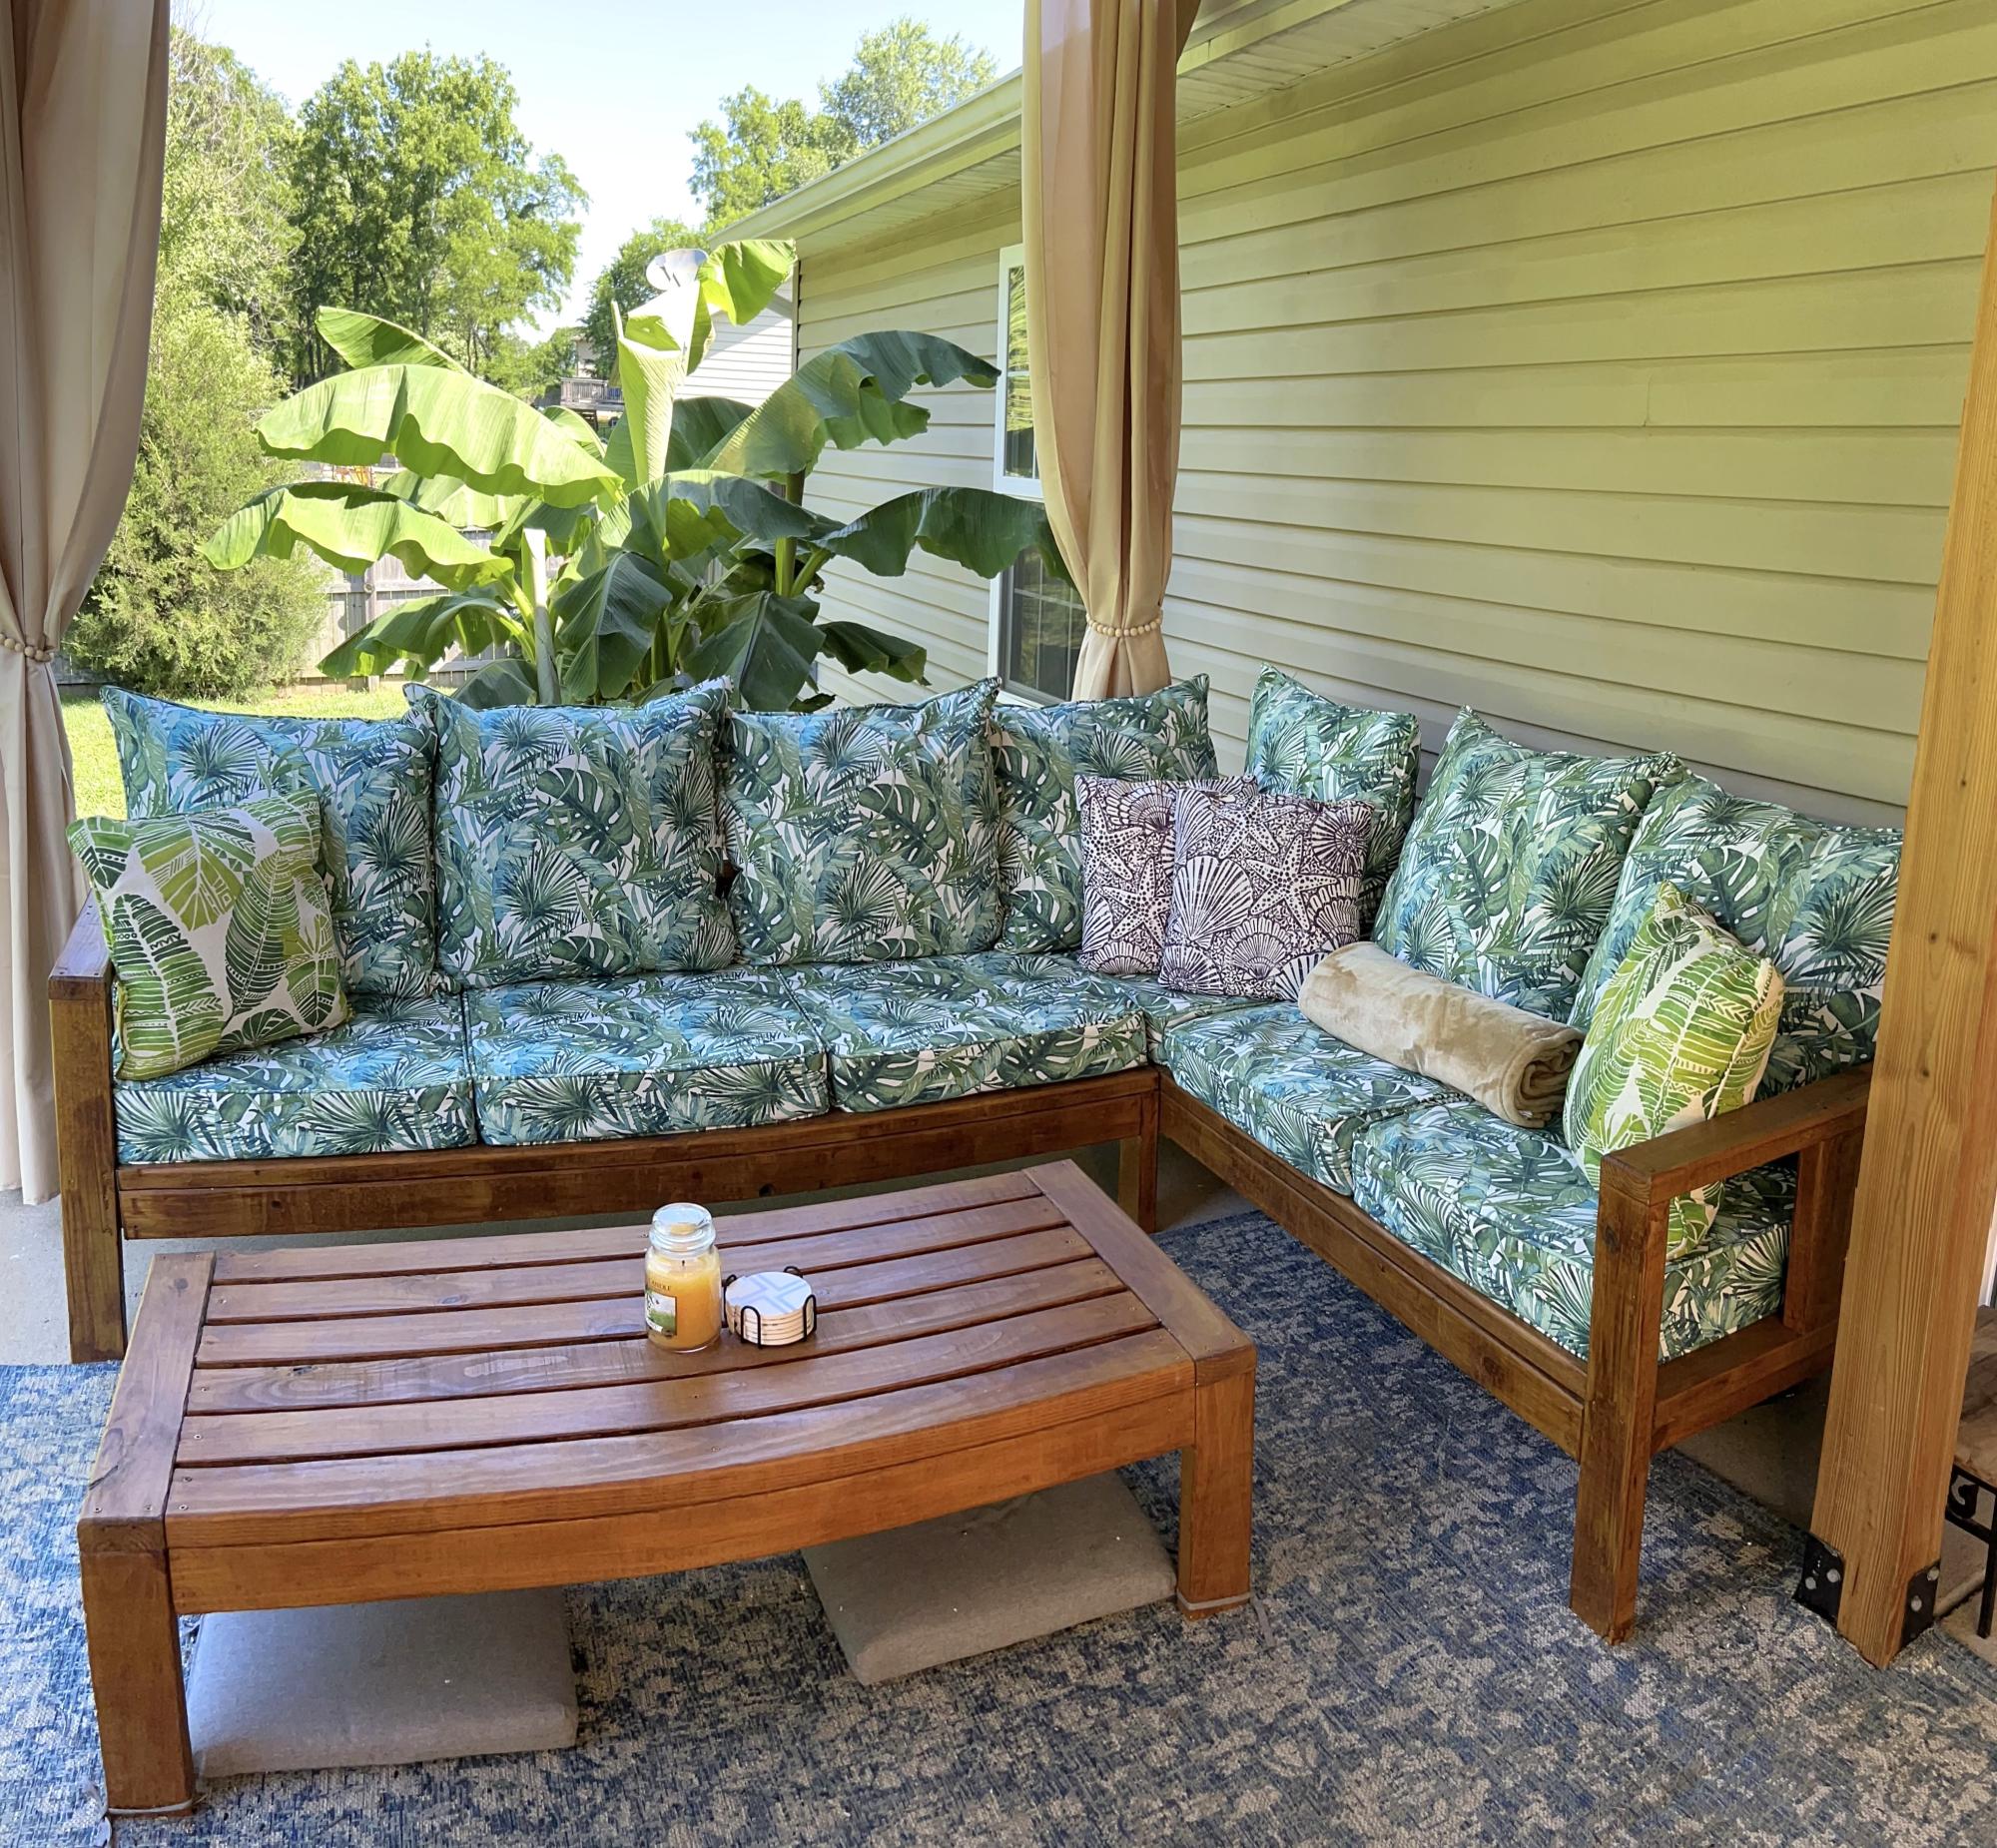
Outdoor sectional and coffee table.
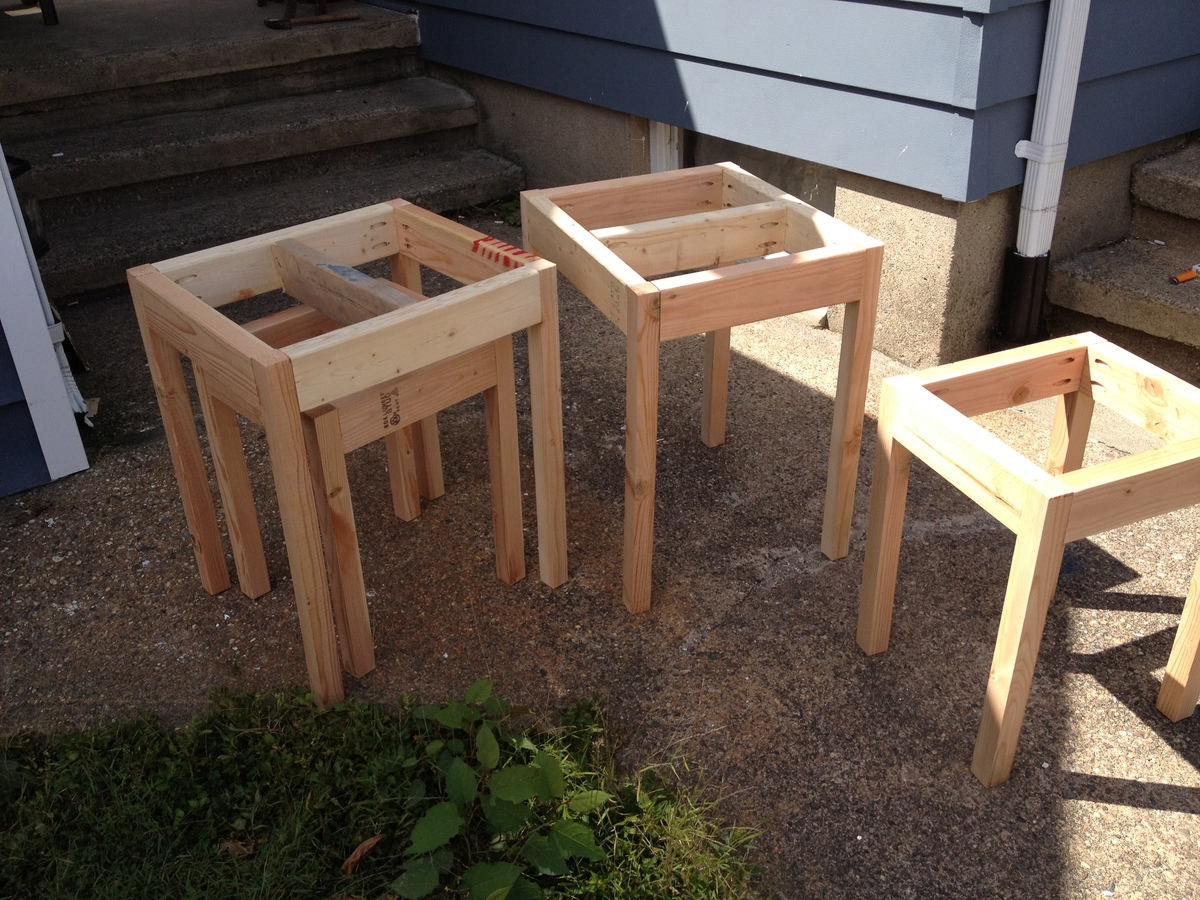
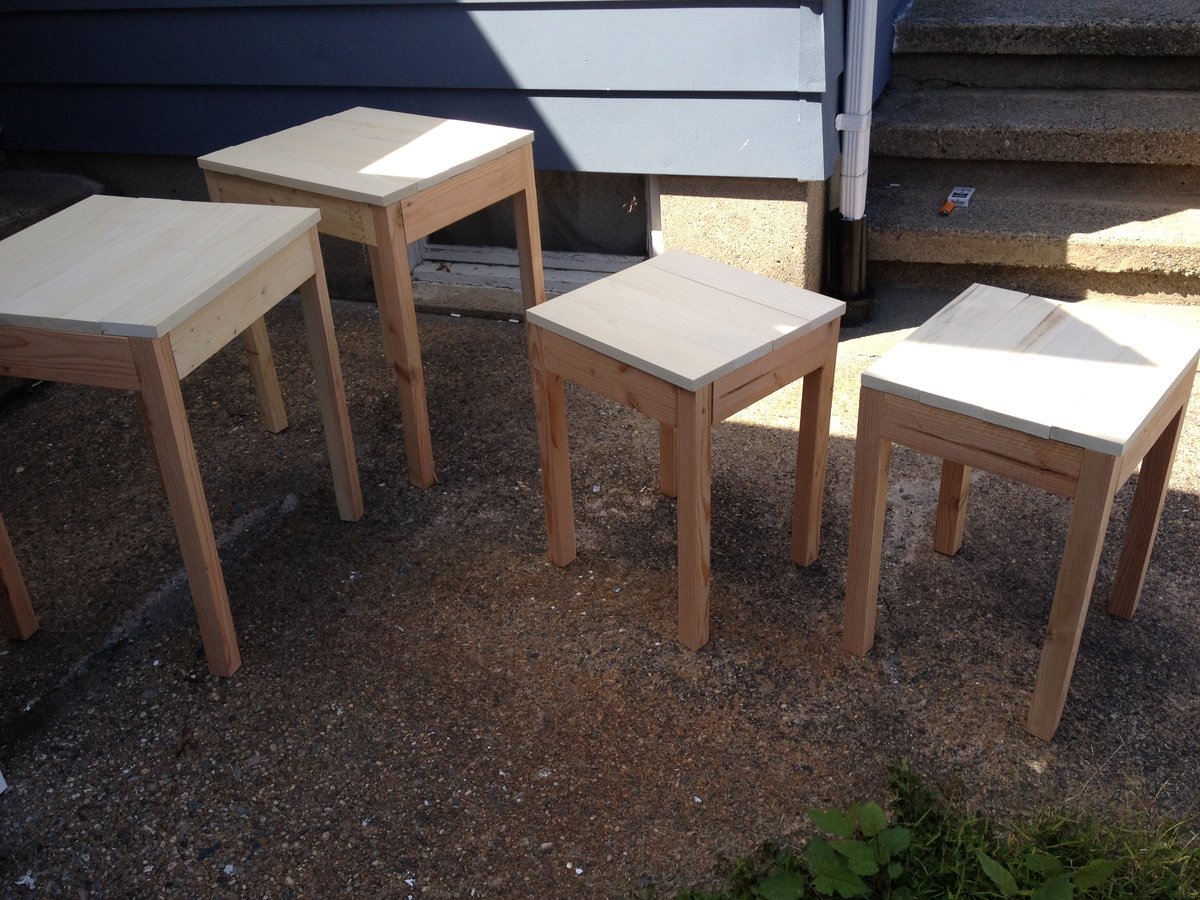
Austin Spencer
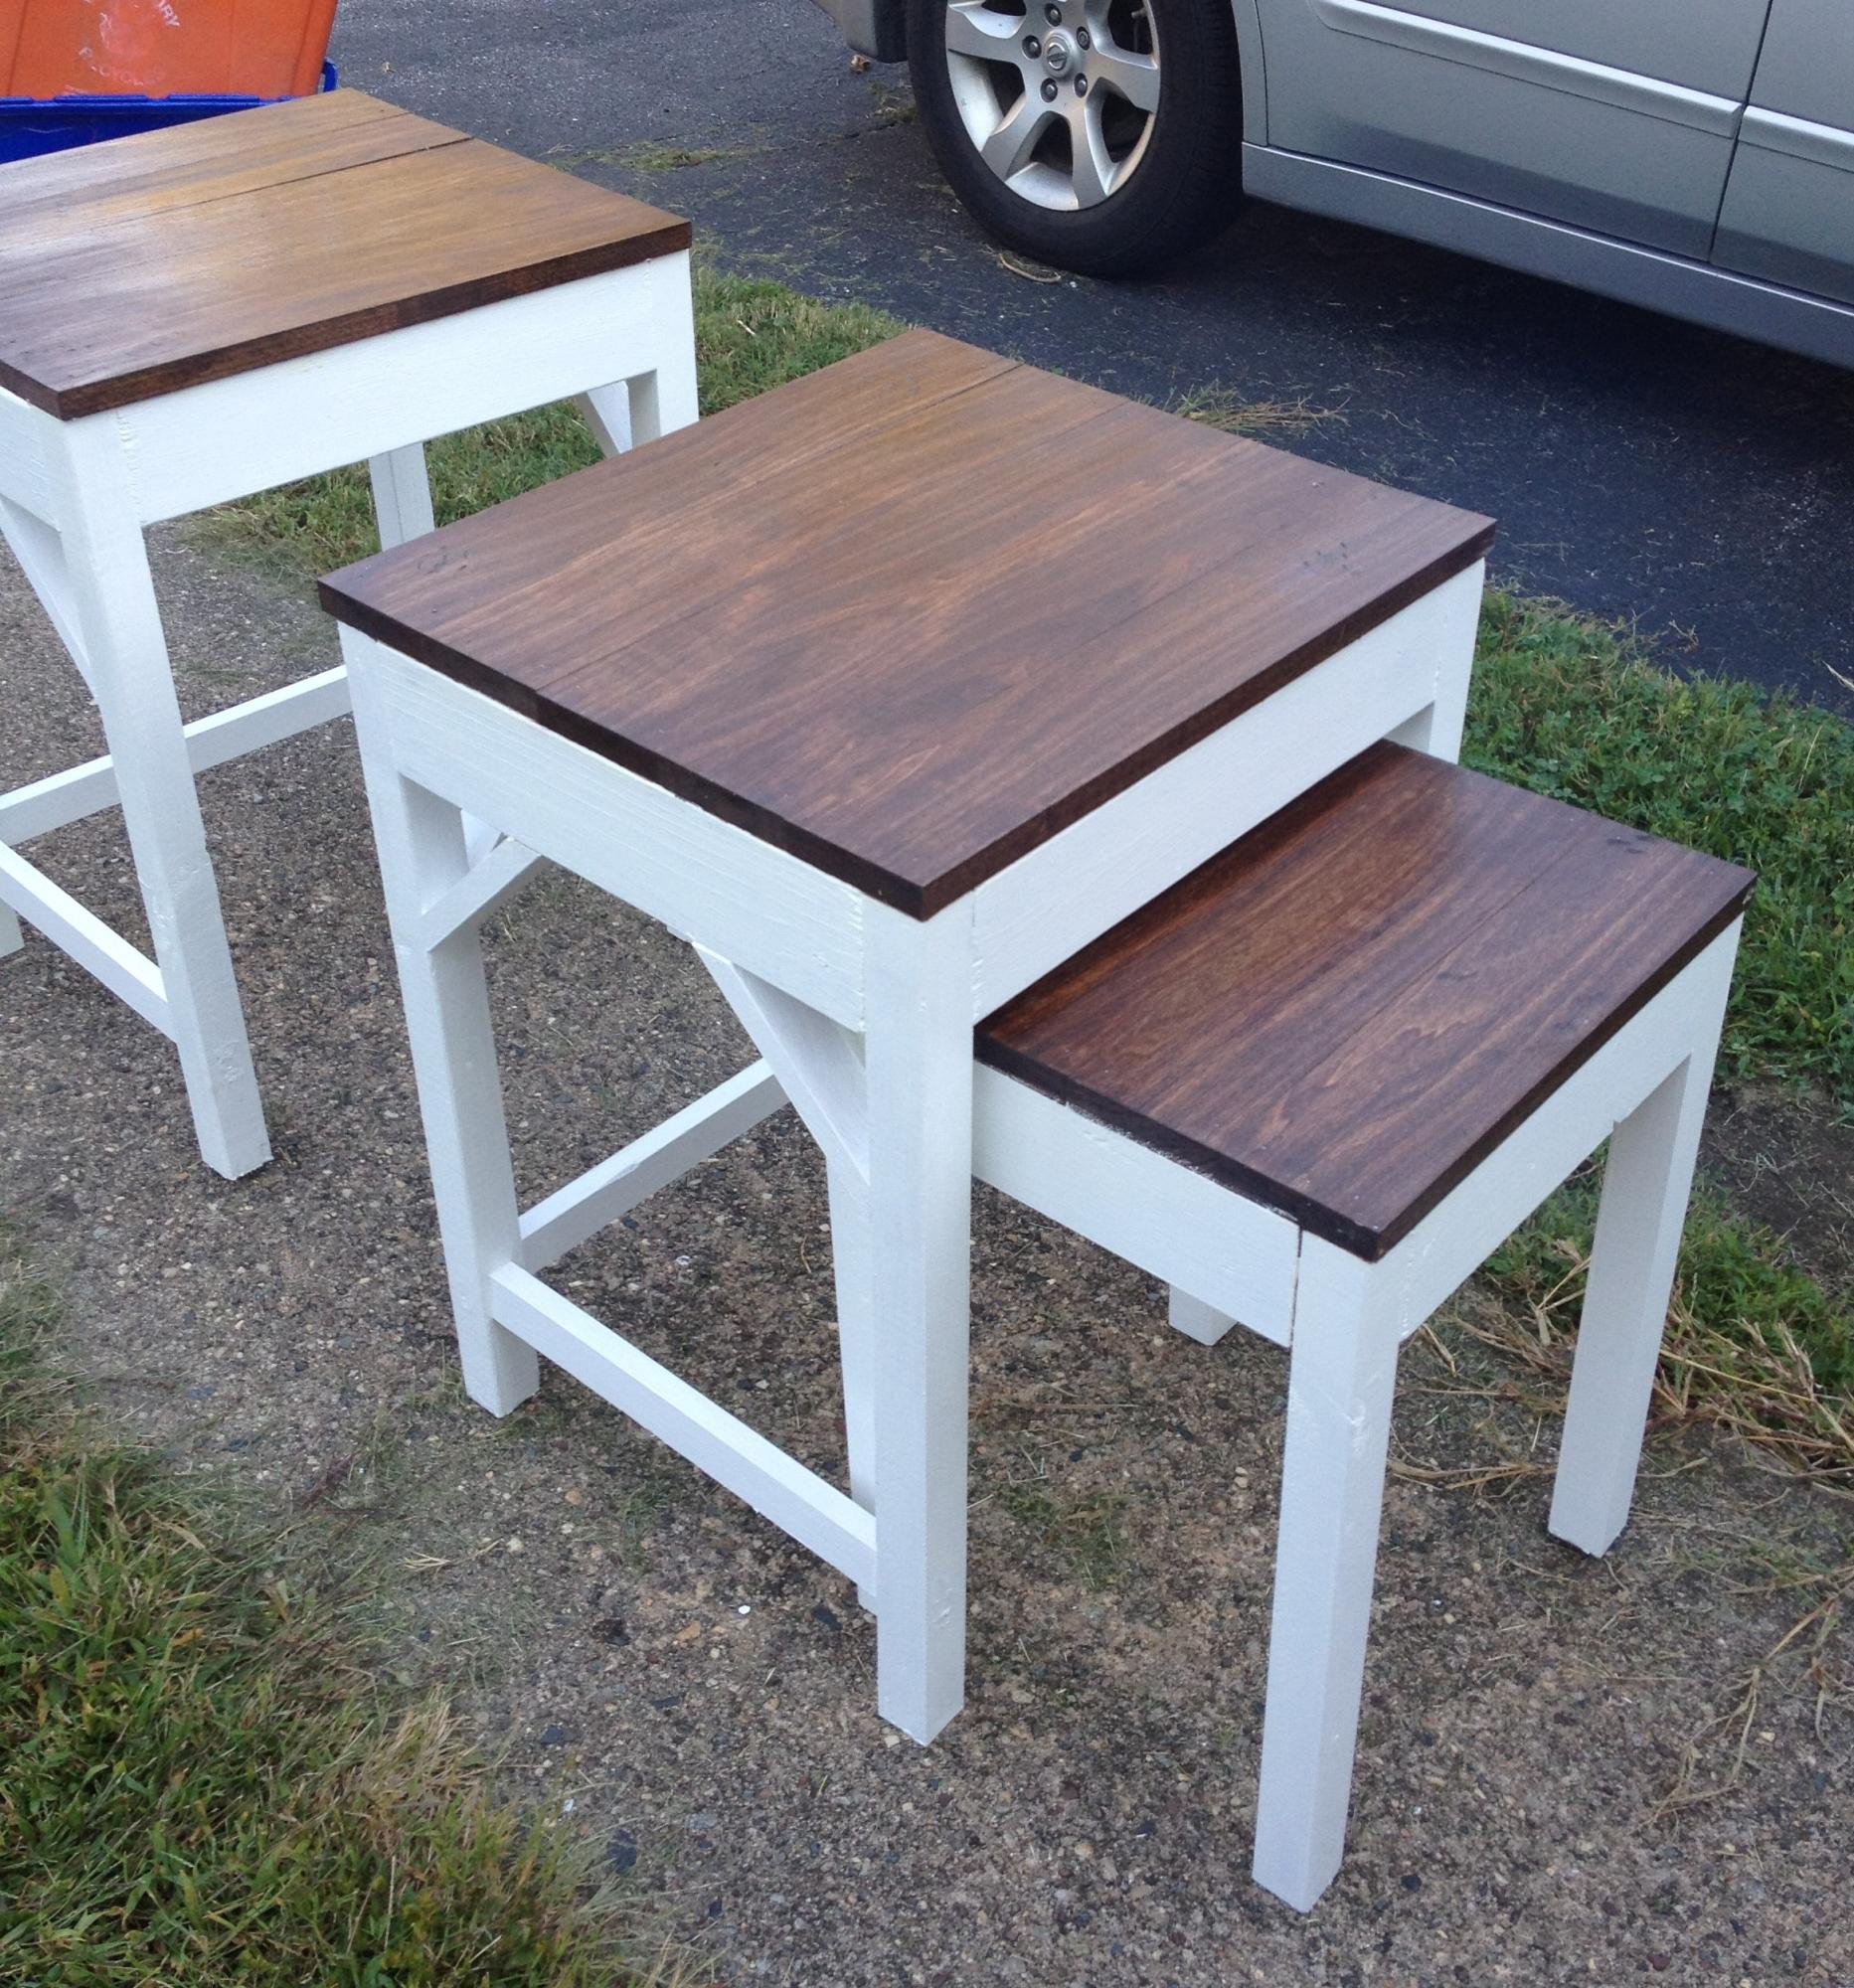
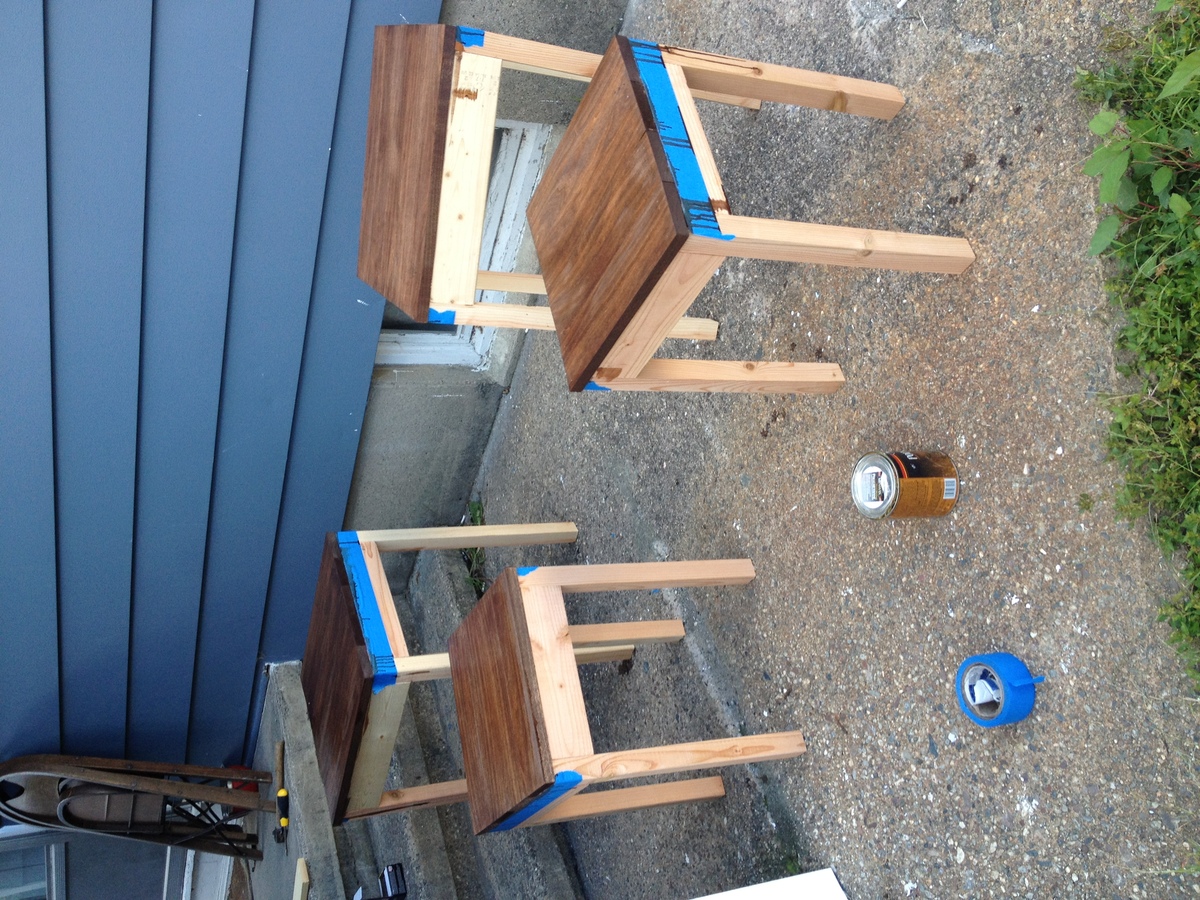
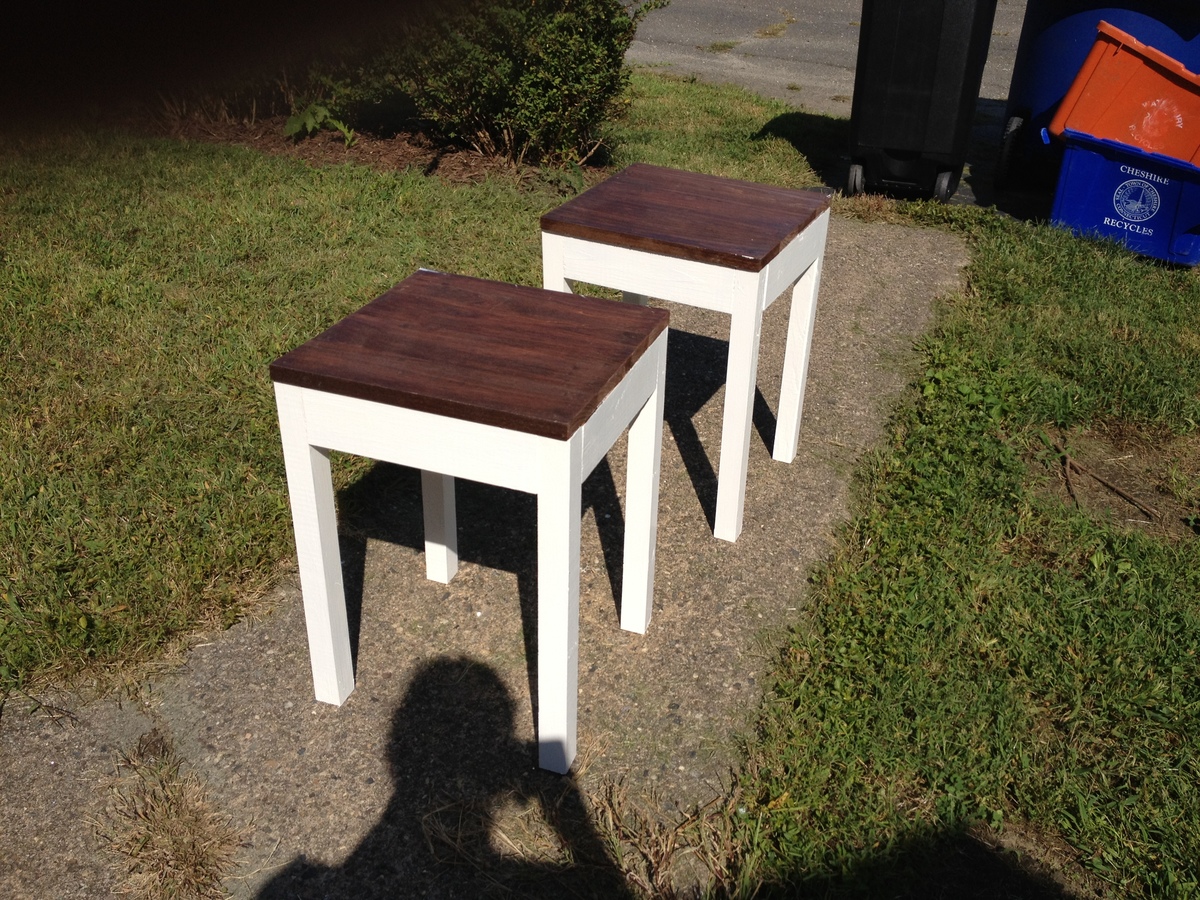
After building my new coffee table, I needed new end tables to match! I love that I can store the little tables underneath, or use them around the room during a party. After the coffee table, these were a lot simpler to build, though took longer due to the fact that there are four of them!

Sun, 09/16/2012 - 21:20
Hi, stain on your tabletops is beautiful - I was wondering what brand of chestnut stain you used? Thank you!

My wife wanted a bench to put in the mudroom as a place to sit when you take off your boots in the winter. I came across this project on your website and decided to try to tackle it.
it turned out pretty good, in my opinion. Only a few small things learned. One, is that if you're changing the space of the gap from 1/4" to 1/8", the boards should be resized to accommodate the change. And/Or at the very least, put the boards on the outsides first and work your way in. Then, at the very least the sliver needed to fill in the gap would be in the middle. ☺