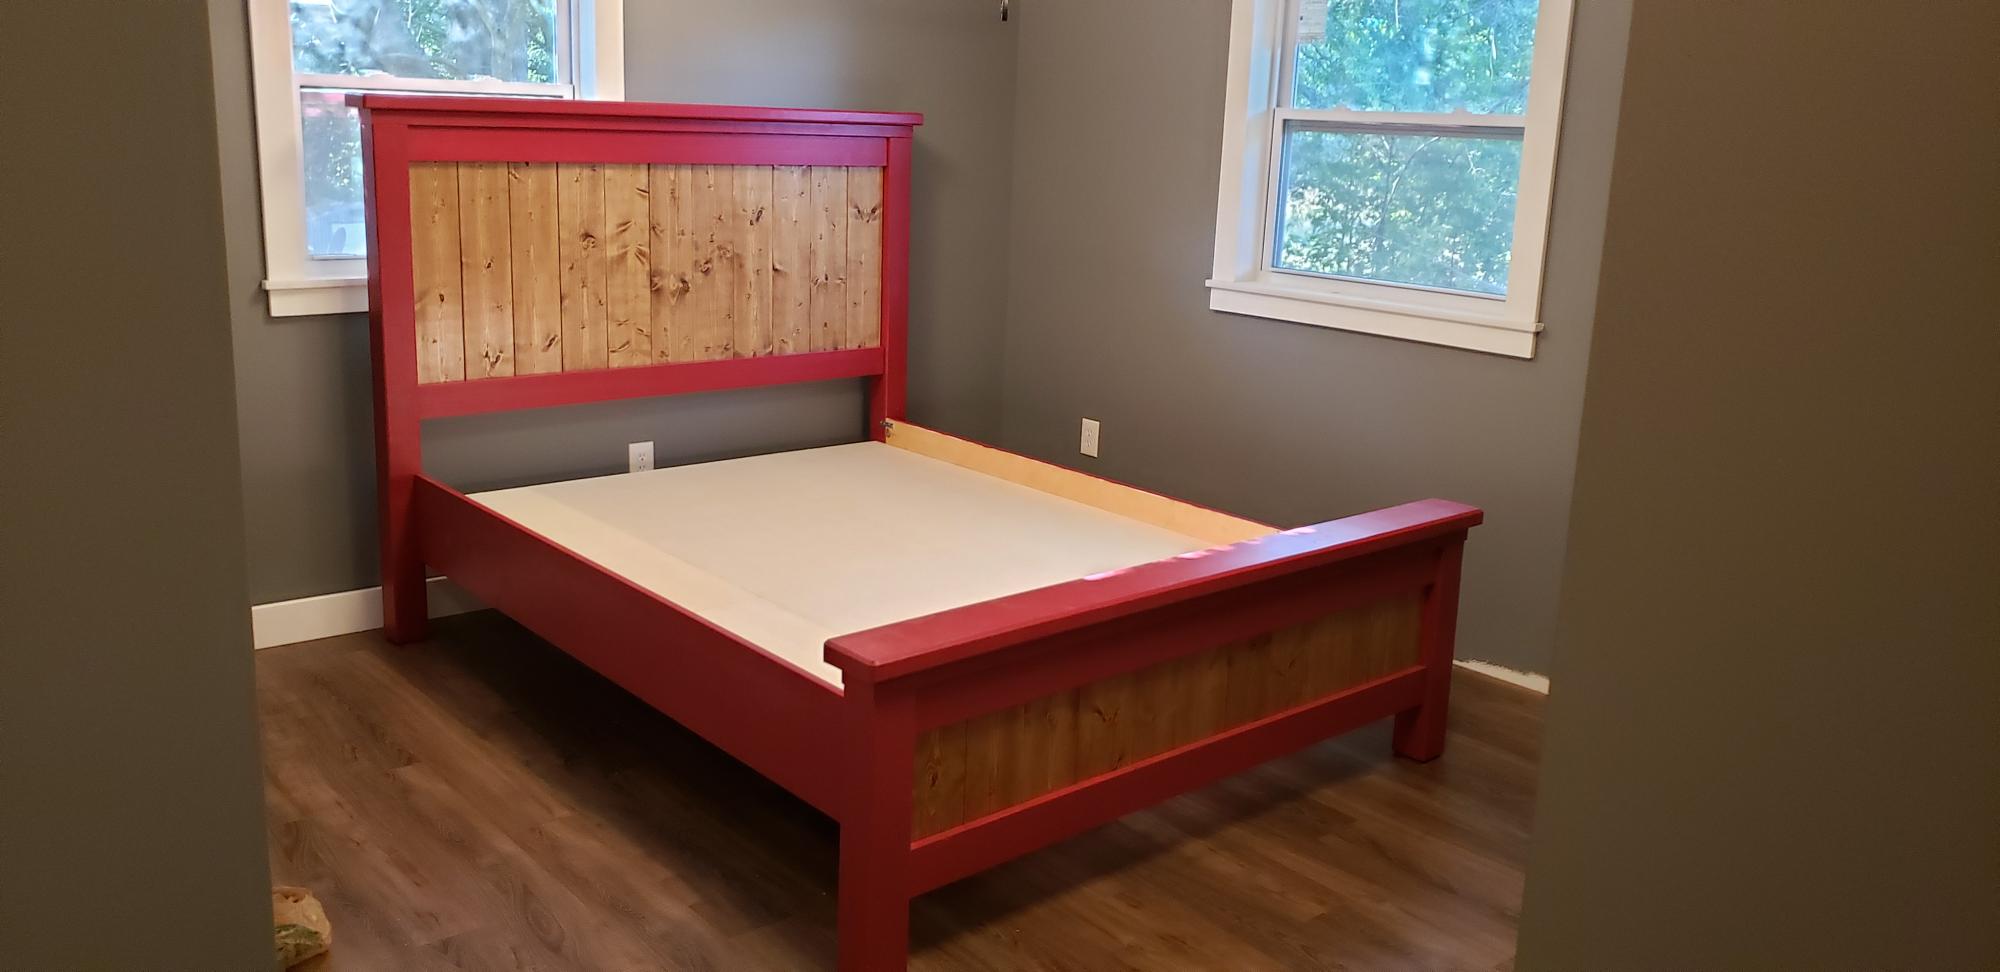
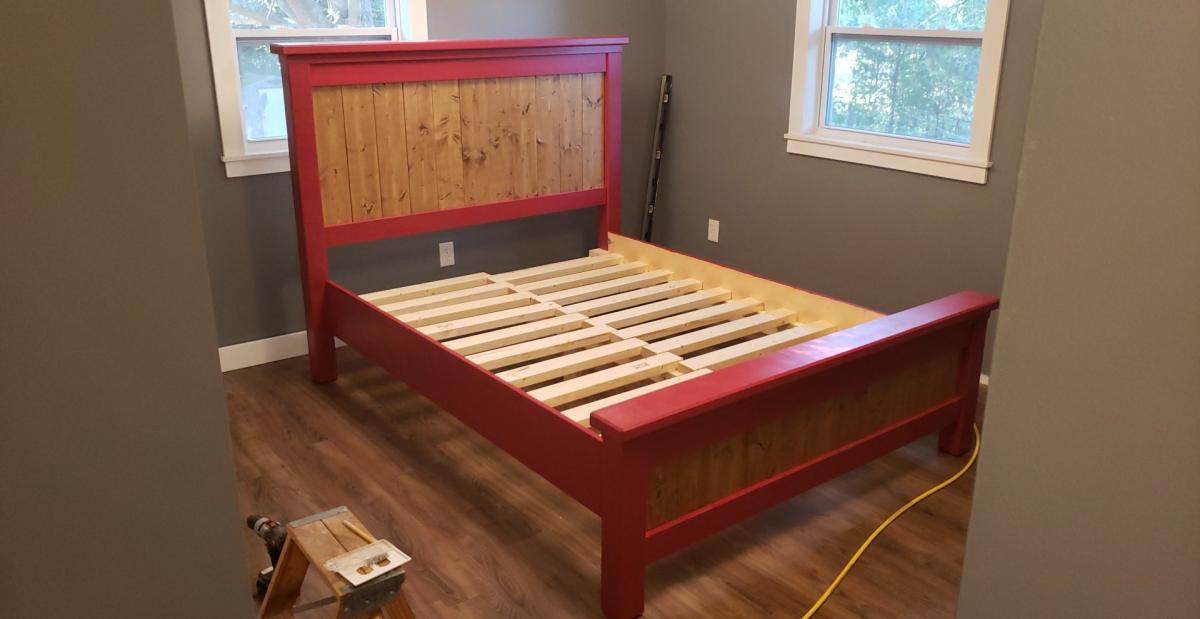
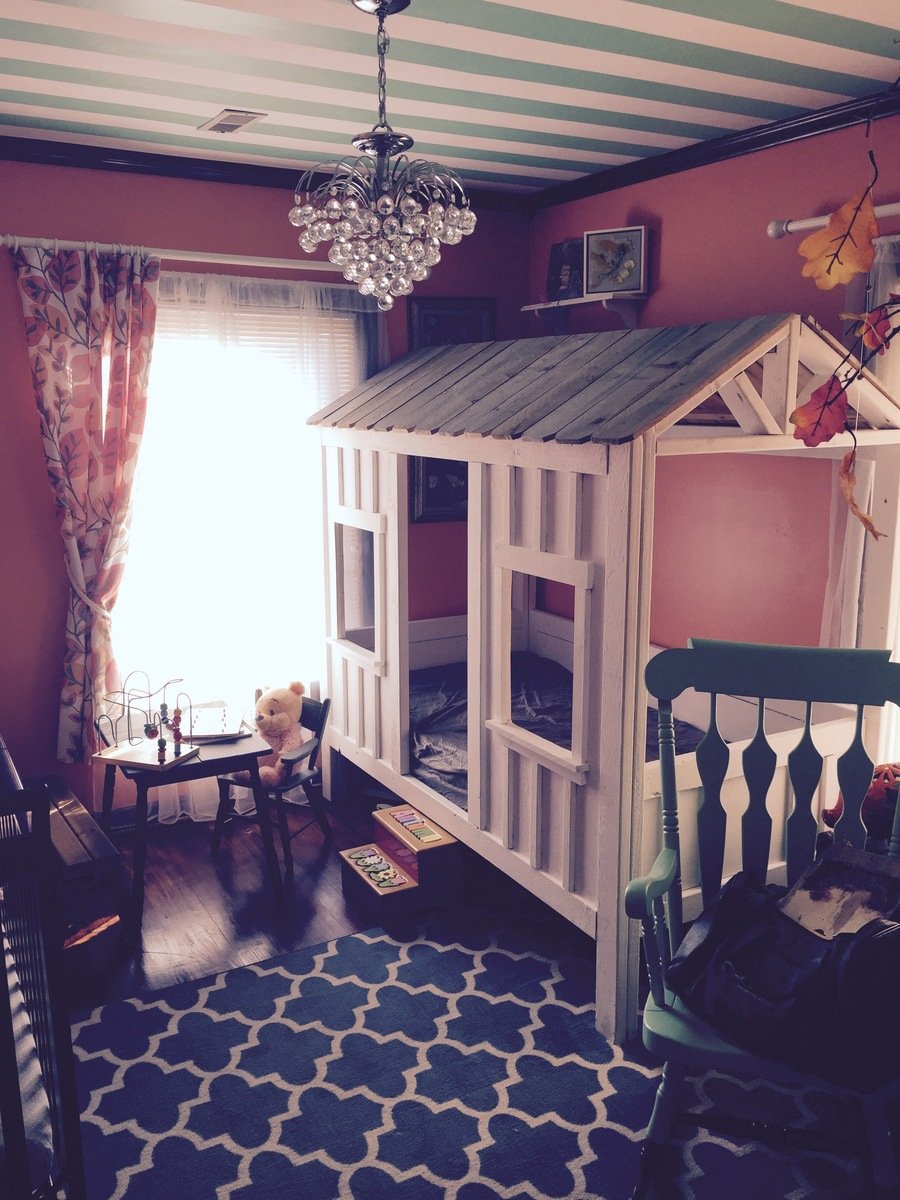
Community Brag Posts

Loft Bed

Submitted by Anonymous (not verified) on Thu, 02/11/2016 - 19:16

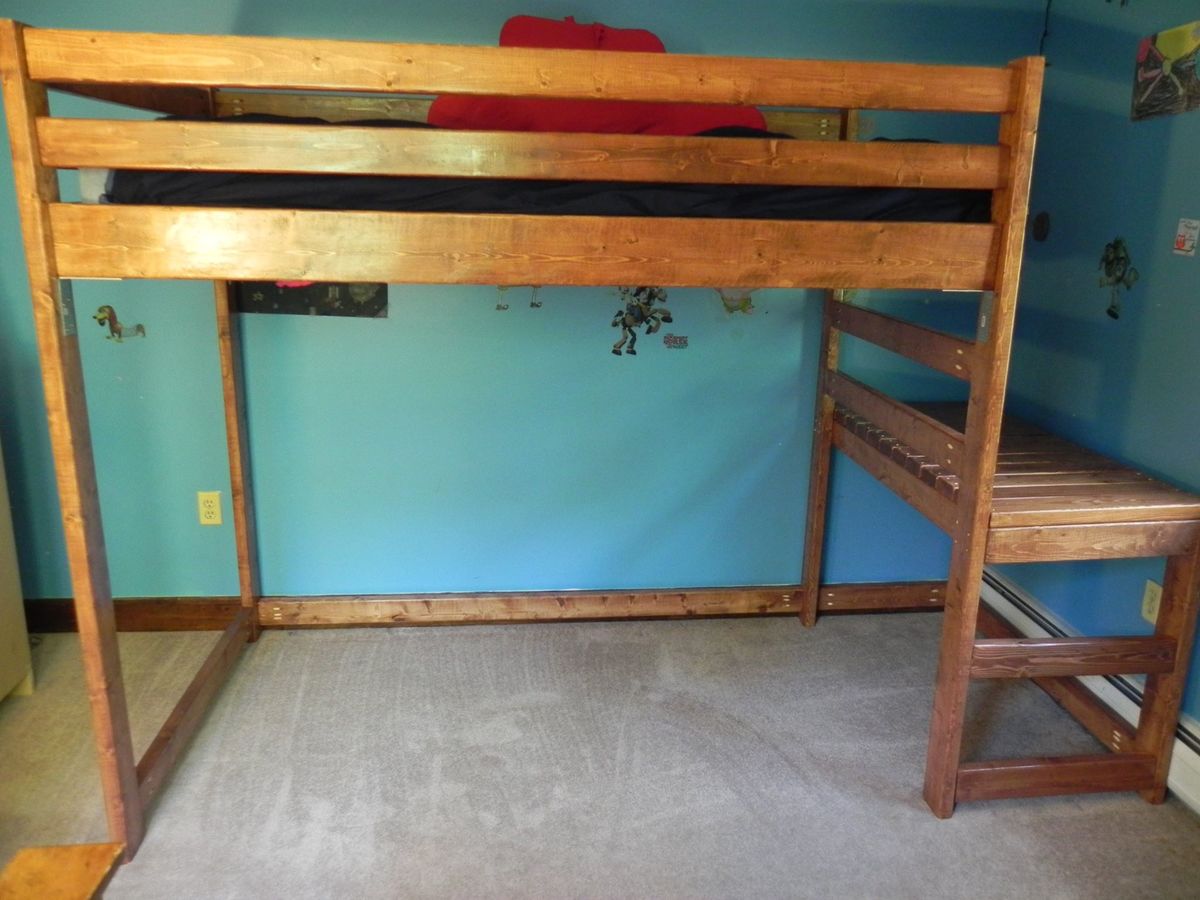
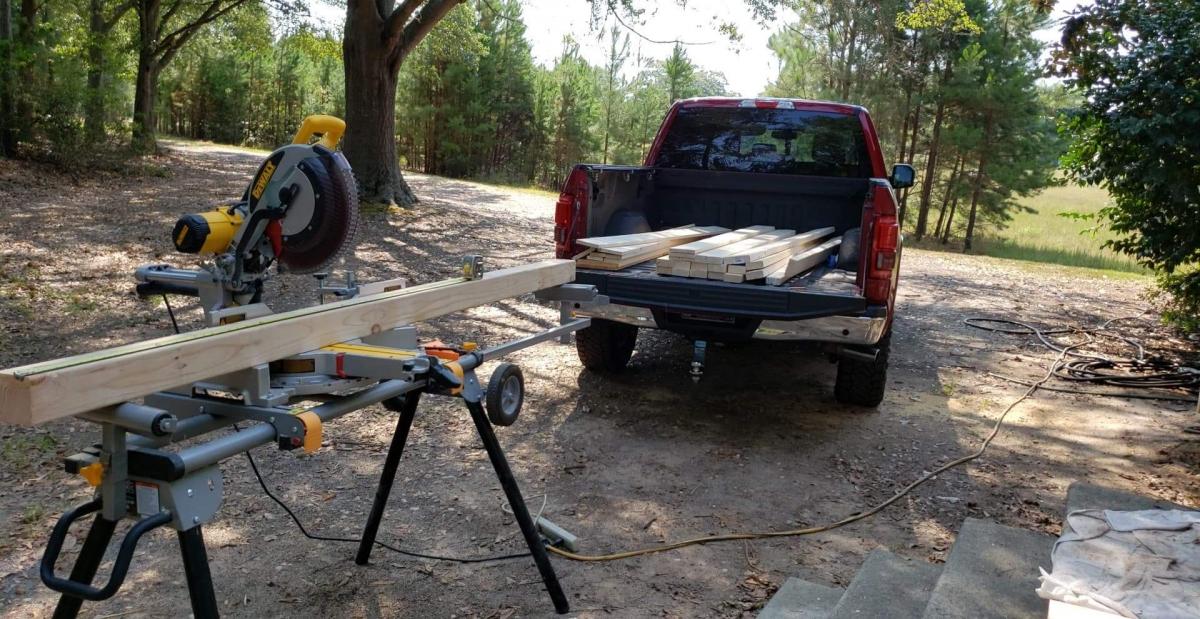
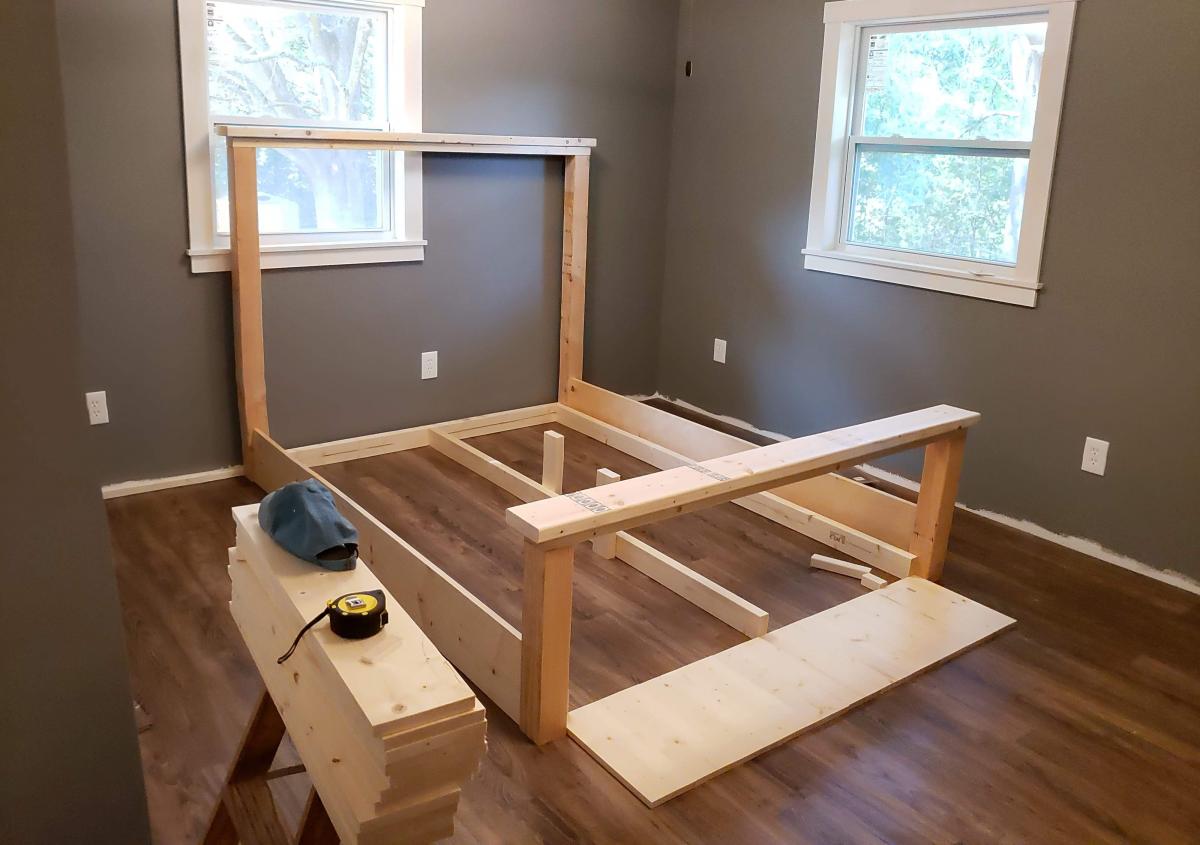
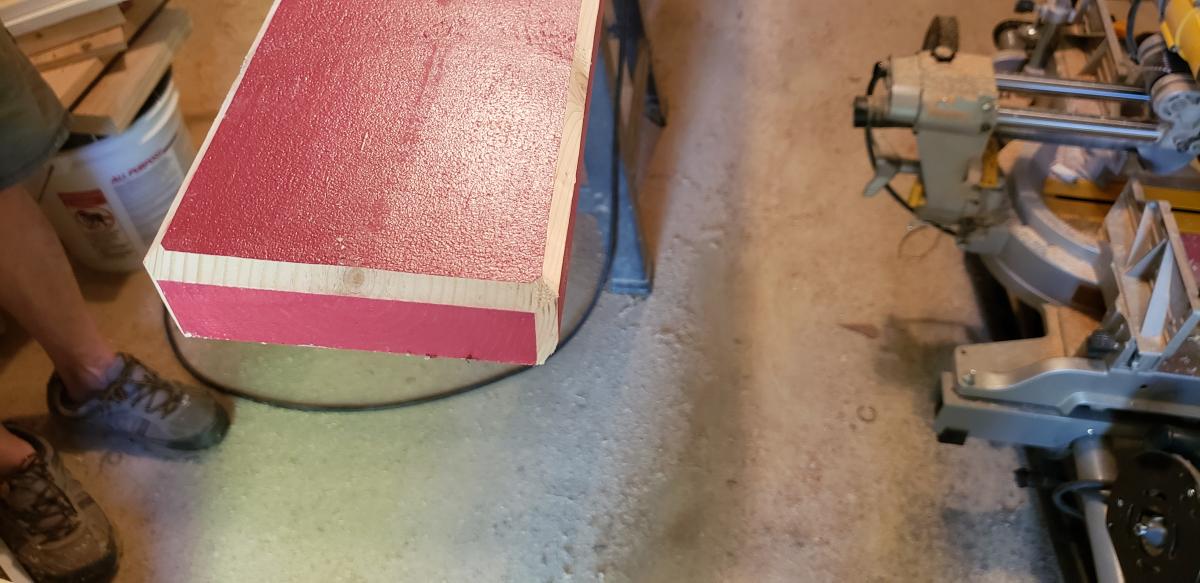
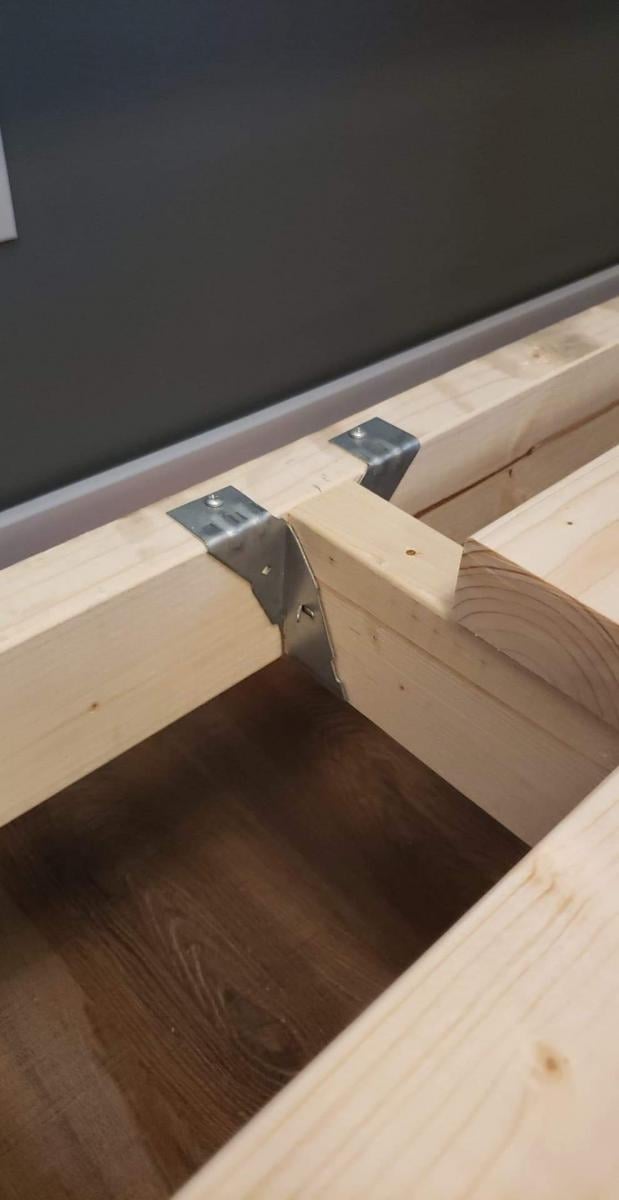
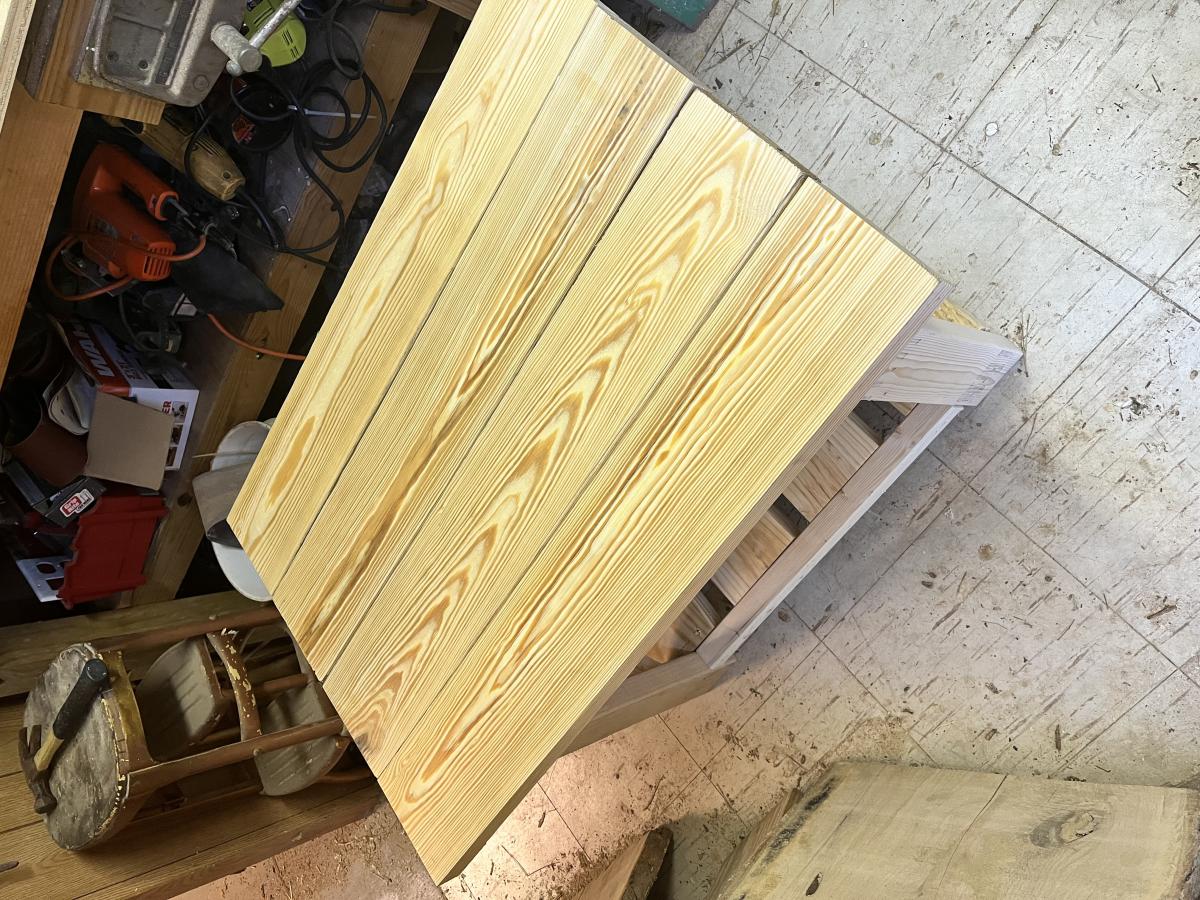
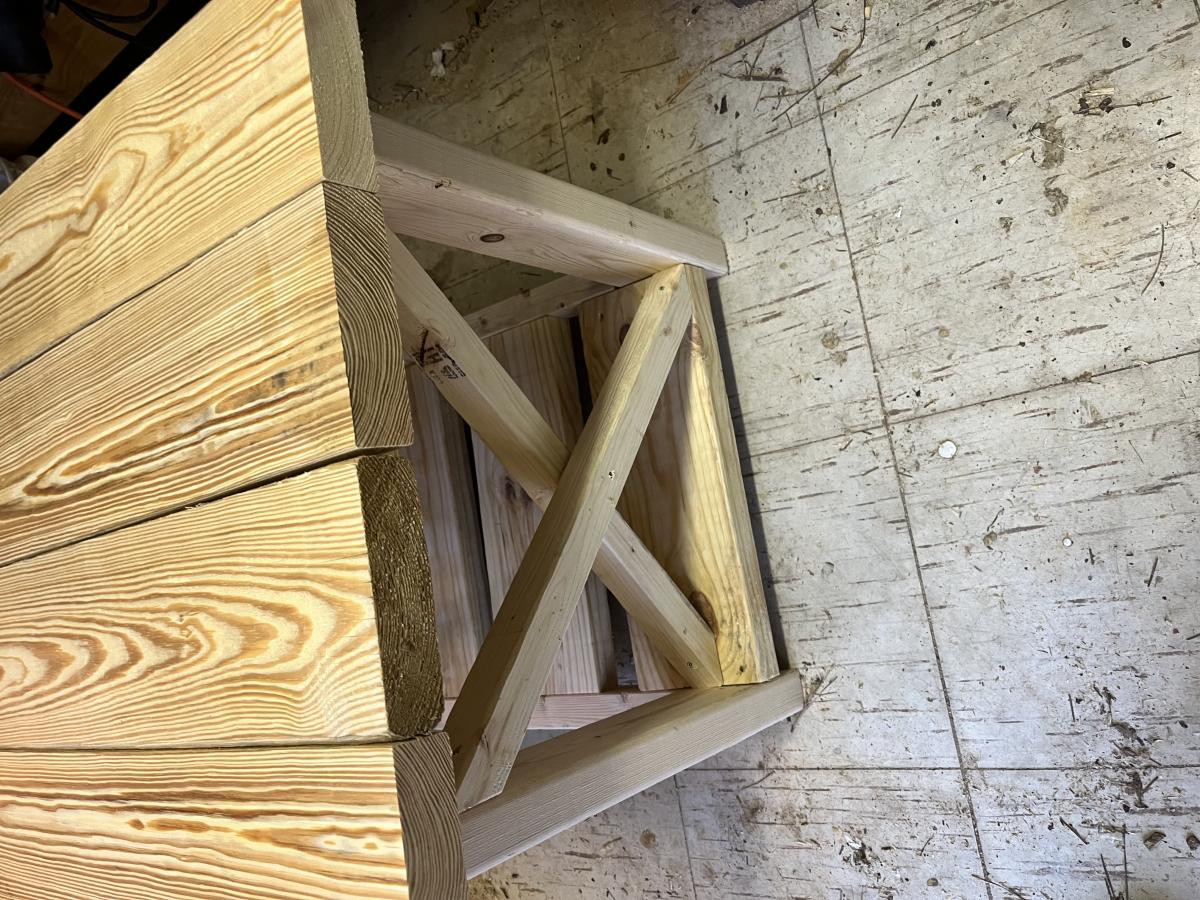
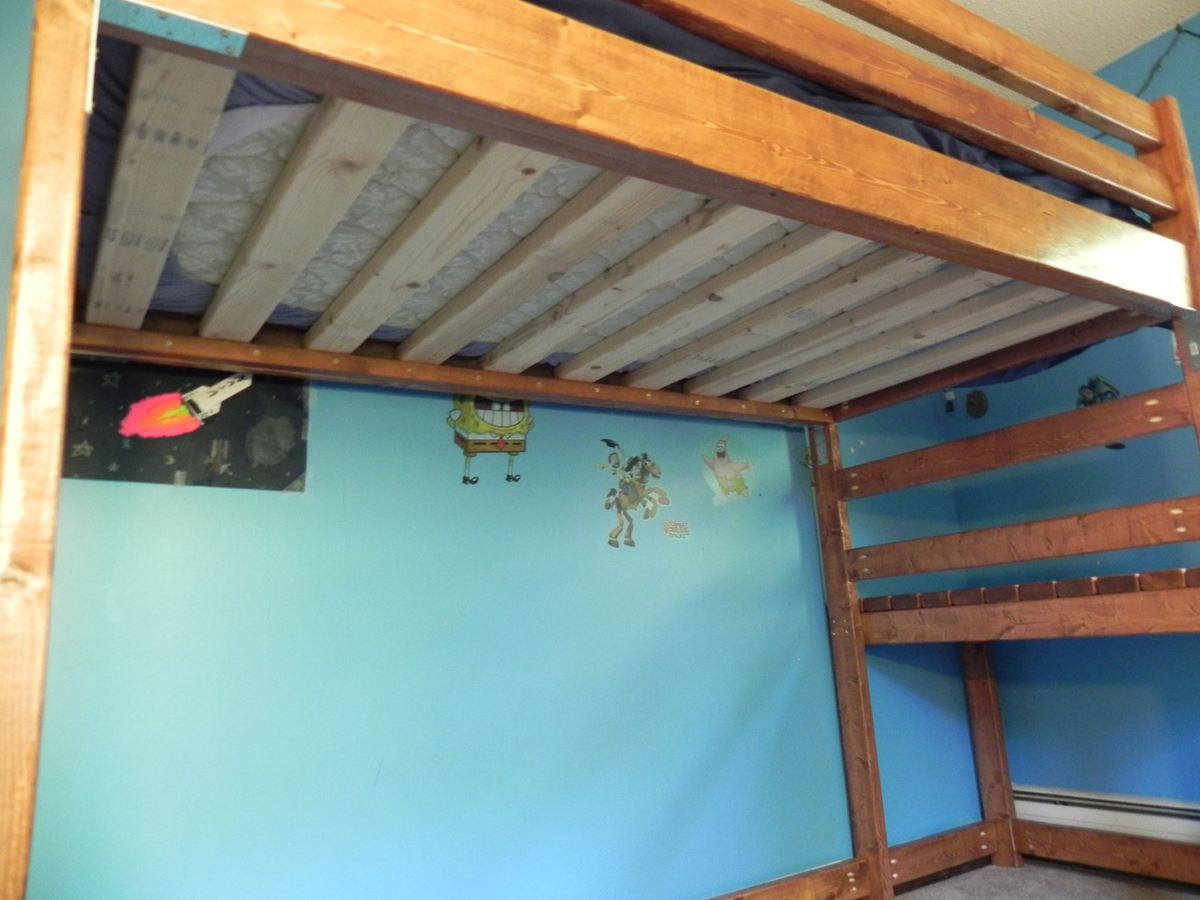
I built this bed for my 10 year old son. I only made a few changes from the original plan. I increased the height so my son could easily fit underneath the bed. I did make the stairs, but we decided not to use them to save on floor space. I also added metal L brackets under the side 2x6's for support. It was a fun project and fairly straight forward. I finished each piece individually and then assembled it in his room. The sanding, staining, and varnishing was very time consuming, but worth it in the end. He absolutely loves it and so do his siblings and friends!

Estimated Cost
$150
Estimated Time Investment
Week Long Project (20 Hours or More)
Finish Used
Minwax stain and polyurethane This is very high in voc's. I recommend a respirator mask even with ventilation. I have since started using finishes lower in voc's, which can be found online.
Recommended Skill Level
Beginner

Queen Farmhouse Bed

Built this bed for my wife and I in our starter home. It has been a pretty easy project with good instructions. Id change up my order of operations to prevent the wood from cupping as bad as it did in places as well as be more strict with my wood selection but im very happy with it over all. I braced it up a little more than instructions called for since this was my first bed build.

Built from Plan(s)
Estimated Cost
300 built and finished
Estimated Time Investment
Weekend Project (10-20 Hours)
Finish Used
Dark crimson M140-7 paint with special walnut stain. Multiple coats with sanding for surface prep.
Recommended Skill Level
Beginner

Front porch table

Submitted by Anonymous (not verified) on Mon, 05/22/2023 - 07:30

My father in law was a very good woodworker. He had a great shop with all the power tools anyone could want. He passed away 2 years ago and one day I went in his shop and remember thinking this woodworking could be sort of fun.
I searched the internet and came across the Ana White instructional site. Your site and instructional videos have helped me so much. The photos attached are my first attempt at furniture making. I used and modified one of your plans for this piece of furniture. It was SO helpful. Thank you for making these videos and plans available for those that are leaning this craft.

Built from Plan(s)

Zebra shelf

Submitted by Lady Goats on Tue, 01/10/2012 - 11:11

When I saw Ana post this shelf to Facebook, I stopped what I was doing and got to building it. I think it was about 3 hours after she'd posted it that I had this thing built and ready for the first coat of paint (and I cooked dinner during that time). It's perfect for the big kid's jackets/backpack/shoes when she comes home from school (I hung it at kid's console table height so she can hang her stuff and access the top). So far it's worked perfectly, and she just LOVES it.

Built from Plan(s)
Estimated Cost
$3.20 for the hooks
Estimated Time Investment
An Hour or Two (0-2 Hours)
Finish Used
Lowe's super cheap-o spray paint (like $0.98 per bottle) left over from another project, and zebra pattern painted on with acrylic paints/sealed with poly.
Recommended Skill Level
Beginner

Mod Bar Made Small

I liked the look of the Mod Bar, but the original design was too big for my dining room. I did a little redesign, made it smaller and included the stemware in the piece. I also wanted a "lighter" look, so I decided not to use trim around the bottom. Now it's perfect for my dining room!

Built from Plan(s)
Estimated Cost
I only spent $40 because I was able to use some scraps from other projects
Estimated Time Investment
Weekend Project (10-20 Hours)
Finish Used
I first used General Finishes Dark Brown Dye Stain and followed that with Minwax Ebony stain. It's topped with several applications of a solution (1/3 boiled linseed oil, 1/3 thinner and 1/3 varnish) to give it a hand rubbed look.
Recommended Skill Level
Beginner

Modified Henry desk

Submitted by Anonymous (not verified) on Sun, 02/14/2016 - 13:02

My husband had been using a sawed off dresser as a computer desk for almost year and was in desperate need of something nicer. I wanted to surprise him so while he was at drill one weekend I decided to build him this desk. I took the height up to 34 and decreased the length to 51 so it would fit in our space and his desk chair could fit under it. He was very surprised and LOVED it! 

Built from Plan(s)
Estimated Cost
$56
Estimated Time Investment
Weekend Project (10-20 Hours)
Recommended Skill Level
Beginner

Dining room table

Submitted by Anonymous (not verified) on Tue, 10/01/2019 - 18:32

Husband and I always wanted a 12 foot table when we moved into our new home. Together, with my father-in-law, we came up with the plan, went to a lumber yard, and put together our beautiful table for all our kiddos and extended family to eat around for years and years

Estimated Cost
1000
Estimated Time Investment
Week Long Project (20 Hours or More)
Finish Used
Provincial by varathane
Recommended Skill Level
Beginner

Comments

Outdoor Sectional

Submitted by Anonymous (not verified) on Sat, 05/27/2023 - 09:15

Sectional painted with Glidden semigloss exterior paint in Phantom Mist. Cushions from Overstock and pillows from Homegoods.

Comments

Narrow Cottage End Tables

Submitted by MissyMoo on Sun, 01/15/2012 - 16:49

My husband and I built two of these endtables over the last two weekends. This was our first real furniture project, and we had a lot of fun working together. Thankyou so much for you plans Ana, it couldn't have been easier!

Built from Plan(s)
Estimated Cost
$35 per table
Estimated Time Investment
Afternoon Project (3-6 Hours)
Recommended Skill Level
Beginner

12' x 4.5' Custom Ash Table based off X table plans

Submitted by jeeptj12 on Mon, 12/02/2013 - 08:24

I used Ash wood from my local woodworking shop. The wood varied in width but is a true 2" thick. The table is 12' long and 4.5' wide. I didn't see the need in having the X on the leg ends as the ash was plenty strong enough to hold the top planks. Plus, I really like the look without it. I did add a cantilever beam in the center to stop sag. I didn't feel like I needed diagonal bracing in the center to support the cantilever beam (Note: Original design has center diagonal supports in wrong direction which do nothing for structural integrity of table). The table top planks were strong enough to span an 8' distance. The table top over hangs each end by 2' on center. I left the wood as rough cut as possible. I did rough it up a little more. I sanded with a #36 grit only to sand off writing, dirt, and burrs. I stained with MinWax Early American and sealed with Satin Poly by MinWax. Feel free to ask any questions. This is my 2nd wood project and I am hooked.

Built from Plan(s)
Estimated Cost
$1000 (wood has skyrocketed but this table would cost $7k-$9k if bought)
Estimated Time Investment
Weekend Project (10-20 Hours)
Finish Used
MinWax Early American
MinWax Satin Poly
Recommended Skill Level
Beginner

Comments

Wolvesey

Wed, 02/19/2014 - 14:37

Can I ask how you attached the top supporting plank under the table top and also how you attached the bottom cantilever into the upright supports?

jeeptj12

Fri, 04/04/2014 - 08:39

I screwed the top cantilever planks on each end into the post. I notched and screwed the center cantilever support. I actually didn't need the center cantilever support because the wood could span the distance but I did it just to be safe.

Autumn's Cabin Bed

Submitted by Anonymous (not verified) on Tue, 02/16/2016 - 12:33

I saw this on Pinterest and immediately had to make it for my 2 year old daughter Autumn. It took only 1 weekend to do from start to finish. The instructions were very easy to follow. I did substitute 1 item though. I swapped out the 1x6 boards for the roof paneling and used cedar privacy fence pickets instead. The pickets were sitting outside at my local Home Depot and already had the great grey age to them. I simply cut them into 3 equal lengths and dog eared the ends to match.

Built from Plan(s)
Estimated Cost
$130
Estimated Time Investment
Weekend Project (10-20 Hours)
Finish Used
white paint
Recommended Skill Level
Intermediate

Comments

Extra large shoe bench

Submitted by Anonymous (not verified) on Wed, 10/02/2019 - 04:39

The plans for this bench fit out mudroom perfectly! All ready for winter now with the boot storage in back ☺️

Estimated Cost
Not sure 🤔 had the wood on hand already
Estimated Time Investment
Weekend Project (10-20 Hours)
Finish Used
We stained the top with Golden Oak and the bottom is extra white from the Lowe’s sherwin Williams colors
Recommended Skill Level
Beginner

Comments

Mermaid potting bench

Submitted by Anonymous (not verified) on Fri, 06/02/2023 - 12:26

Made with an ikea pallet and some other stuff.

Comments

Little Helper Tower for my naked chef

After reading the comments, we decided to do the hinged learning tower, but took one dad's suggestion and used vertical legs on the non-ladder sides, too. We felt like it would be sturdier and would put less stress on the hinges. My son is much safer than he was on our step stool. He calls this tower his castle.

Built from Plan(s)
Estimated Time Investment
Week Long Project (20 Hours or More)
Finish Used
Paint, which took the majority of the 20+ hours. We're also sanding fanatics. Actual construction took very little time.
Recommended Skill Level
Beginner

Comments

SewThready (not verified)

Fri, 01/20/2012 - 17:53

Okay, I have to ask... Why the hat? If you're gonna be naked, why bother with the hat? lol

Outdoor Storage Shed

Submitted by Keon on Wed, 12/04/2013 - 21:24

This is a small storage shed project I did to replace an old dilapidated plastic one that was falling apart and leaking. It was a fun on and off week long project.

Total cost of wood and material was around $200.00. All cuts can be done using a circular saw however I used a table and miter saw for simplicity and speed. The basic joinery for the frame is glued hardwood dowels (1/4" and 3/8") however you can use pocket screws or simply glue joints (screws for the 1x2 trim as they will move). All of the trim was hand cut using my pull saw because, well, it's just so much easier cutting 1X2's by hand than running back and forth to the miter saw each time.

A good rule of thumb, be prepared to use a weatherproof sealant on all cracks and openings that might let water in prior to finishing. For a finish I am just using two coats of outdoor primer and 2 coats of outdoor paint. I may end up brushing on a coat of water sealant (Thompson's) along the bottom half to prevent the skirt from soaking up any water.

Overall dimensions are approx. 7' tall X 3' wide X 22" deep with a total of four shelves and a small attic you can use for whatever you like.

The whole build is documented by pictures and text upon request, just send me an email if interested. Enjoy :)

Estimated Time Investment
Week Long Project (20 Hours or More)
Finish Used
2 coats outdoor primer, 2 coats outdoor paint
Recommended Skill Level
Beginner

Wood Workers Fighting Cancer - KIDS TABLE AND CHAIRS

Submitted by jbayer80 on Fri, 02/19/2016 - 13:22

This was a really fun project. I wasn't able to build it int time for the WWFC donation but suggest everyone do it this year (2016) around November. 

Estimated Cost
$50 for 1 sheet of plywood
$15 for 1 can of Polycrylic
$12 for 4 sample size paint (would be cheaper to buy the qt.)
The original plan called for certain hardware
Estimated Time Investment
Weekend Project (10-20 Hours)
Finish Used
BEHR Ultra - Adirondack Blue and Timeless Ruby
5 coats of Polycrylic
Recommended Skill Level
Beginner

Coffee Bar barn door console

Submitted by Anonymous (not verified) on Wed, 10/02/2019 - 12:15

Modified Grady barndoor console into a coffee bar with chalkboard upper piece

Built from Plan(s)
Estimated Cost
200
Estimated Time Investment
Weekend Project (10-20 Hours)
Finish Used
Sherwin Williams Gauntlet Grey paint
Minwax dark oak stain
Chalkboard paint valspar
Recommended Skill Level
Intermediate

Comments

ruggedcrosscus…

Wed, 11/18/2020 - 19:01

This piece was built by my hisband Mo Coomer. Our little shop is called Rugged Cross Custom Designs. It states submitted by anonymous.

Dream Dollhouse

This is my 3rd build from Ana’s site. I built the dream Dollhouse with my daughter. She loves it! I would recommend taping off a section the size of the finished doll house to get a feel for the size. I knew it would be big, but wow it is huge. Fist thing she did was climb inside.
My 3 year old daughter helped when she could. She applied wood glue with a foam brush, painted the bottom and checked all the board walls and floors with a level.
I did not do the stairs, I did not think my daughter would play with them; I also wanted to keep the floor space. I still need to finish putting the wall paper up & add the casters. My dad got me 1 ½ trim for crown molding from the habitat for humanity store. He is also looking for caters there as well. Next time he come to visit are we are going to install it. With the crazy snow in Washington it might be a while.
I used a cheap primer that really mad the paint worse, but like my mom said I can always remodel it later.

I the supplies were close to $75, the new saw blade, Kreg Jig Jr., and other misc. to stock my shop a lot more.

Thank you Ana for such a great plan!
Becca

Estimated Cost
$75
Estimated Time Investment
Weekend Project (10-20 Hours)
Finish Used
High Gloss Latex, Tink Pink from the Berh Diseny line
Recommended Skill Level
Beginner

Gas Pump Curio Cabinet

Theses cabinets were built for a customer from plans they had found online. The hardware was ordered with the plans for an extra expense and the glass was made to order. Hope you enjoy them thanks for looking.

Estimated Cost
$450 for two
Estimated Time Investment
Week Long Project (20 Hours or More)
Finish Used
Latex paint
Recommended Skill Level
Advanced

Rustic X Coffee Table

Submitted by Anonymous (not verified) on Mon, 02/22/2016 - 06:18

I had a blast building this rustic x coffee table. Fun project

Estimated Cost
$200 plus labor
Estimated Time Investment
Weekend Project (10-20 Hours)
Finish Used
MinWax Mission Oak Stain with MinWax polyurethane Satin finish
Recommended Skill Level
Intermediate

Corner cabinet

Submitted by Anonymous (not verified) on Thu, 10/03/2019 - 06:13

Wanted a corner cabinet for awhile and found Ana’s plans!! So easy and love my cabinet❤️

Built from Plan(s)