Community Brag Posts

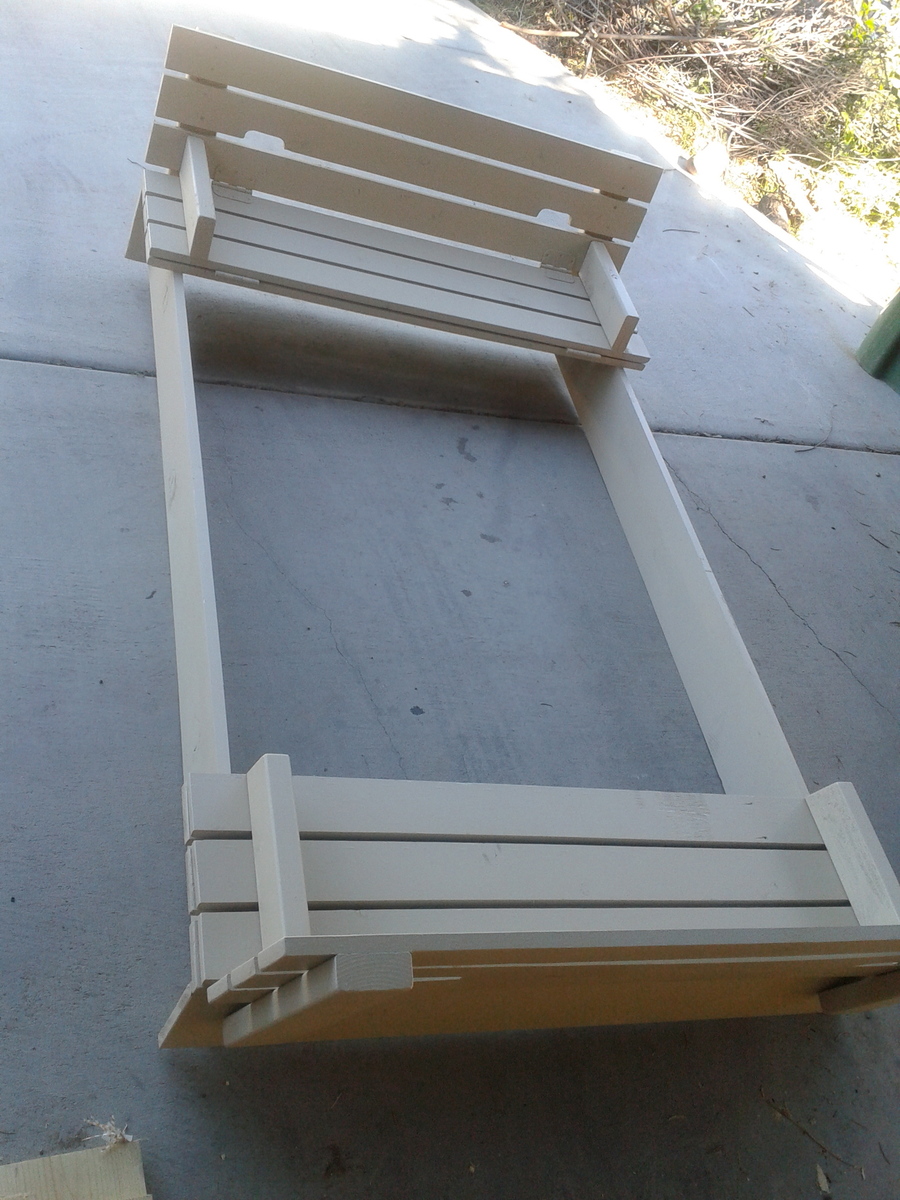
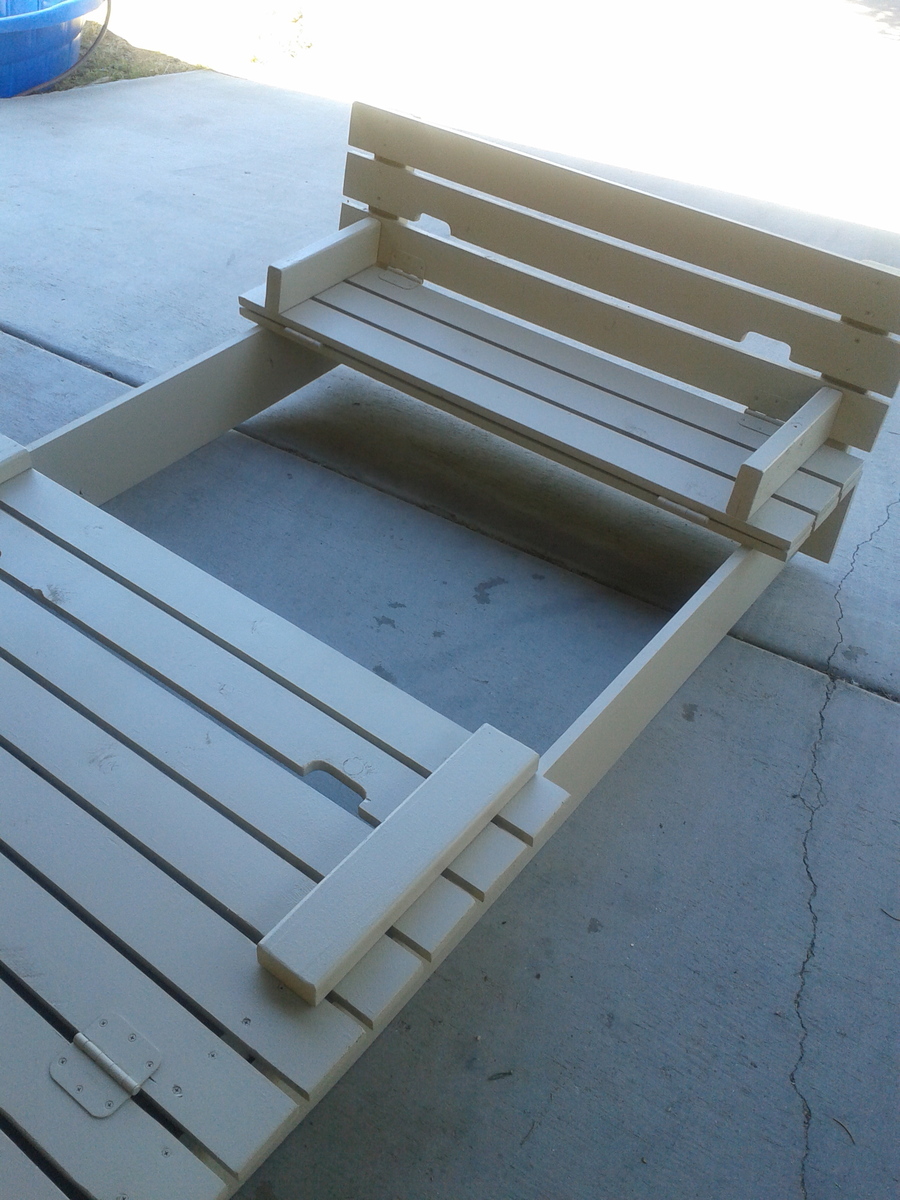
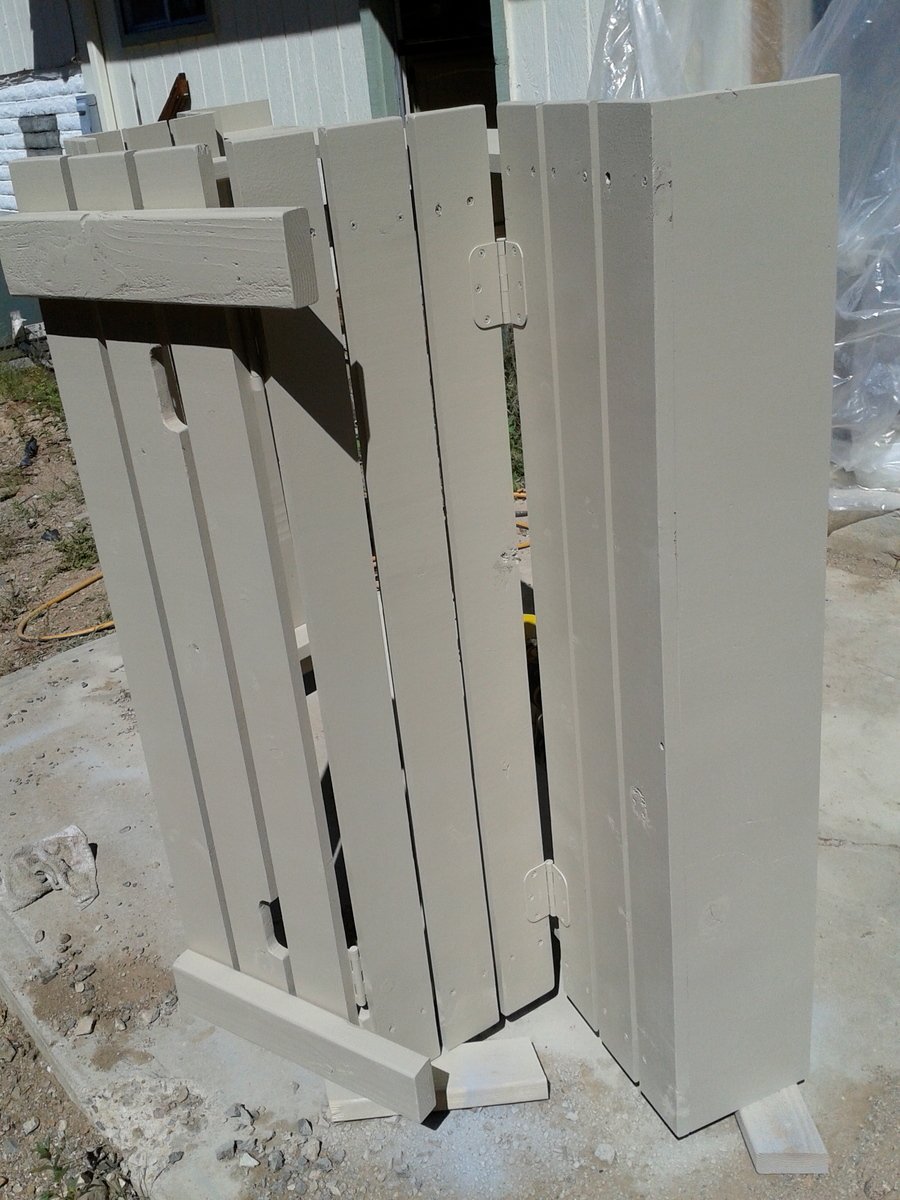
Custom Sandbox with built-in seats

Submitted by Ljmommy on Sat, 09/28/2013 - 10:13

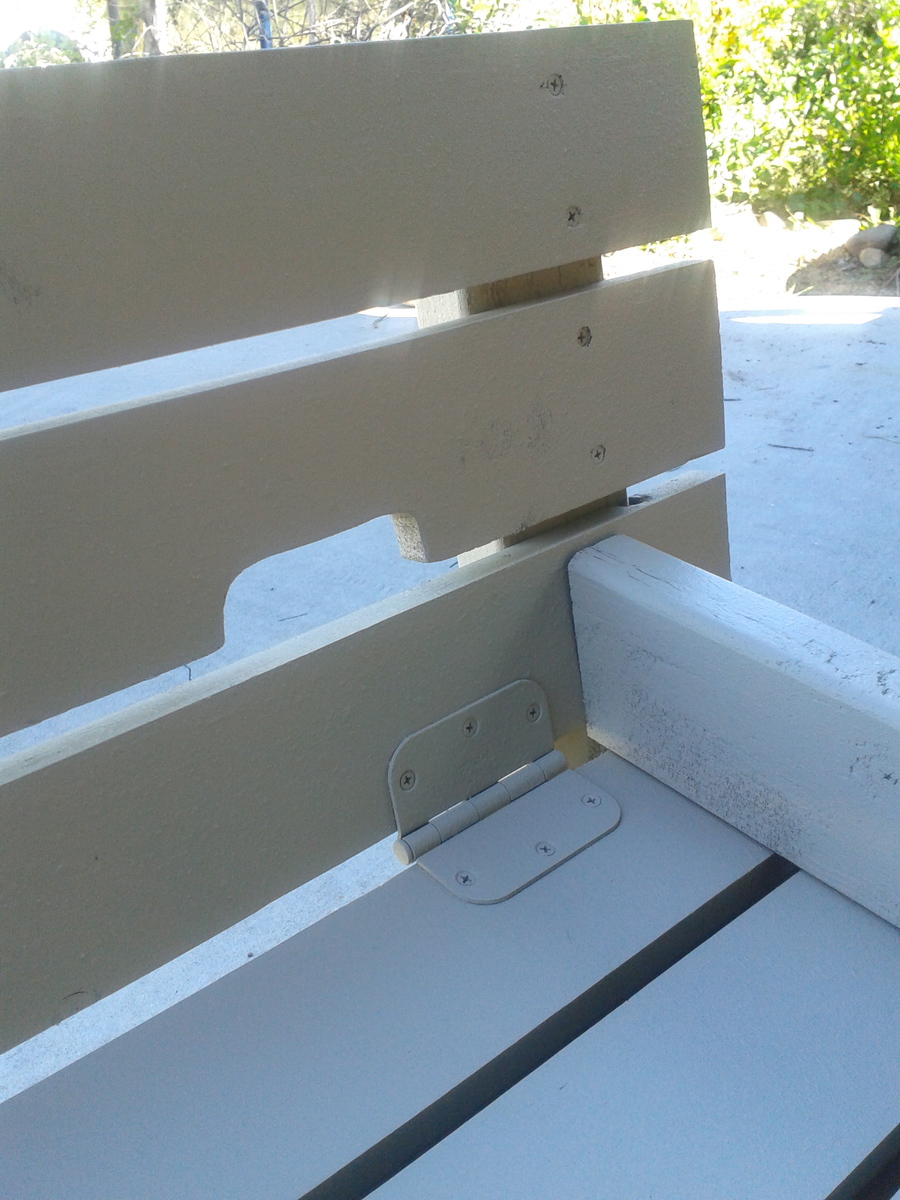
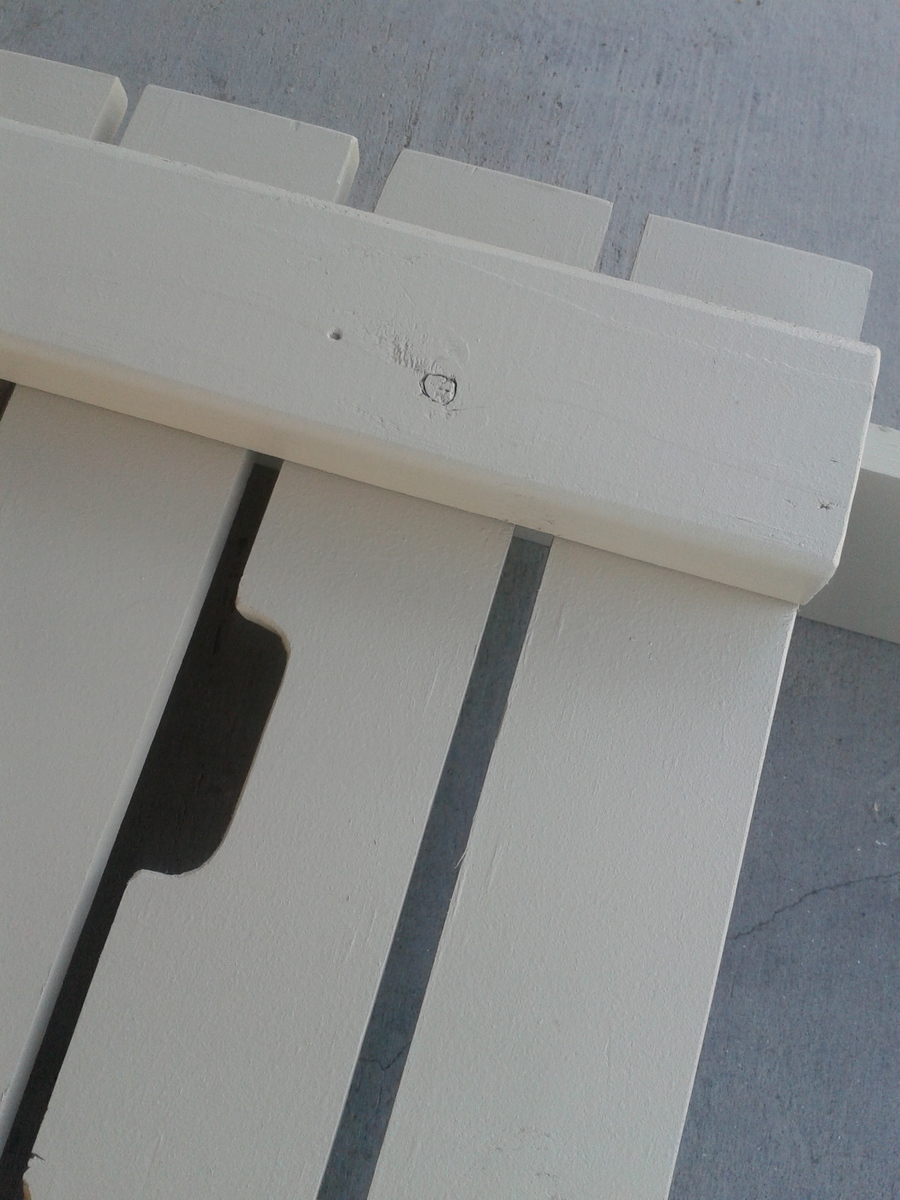
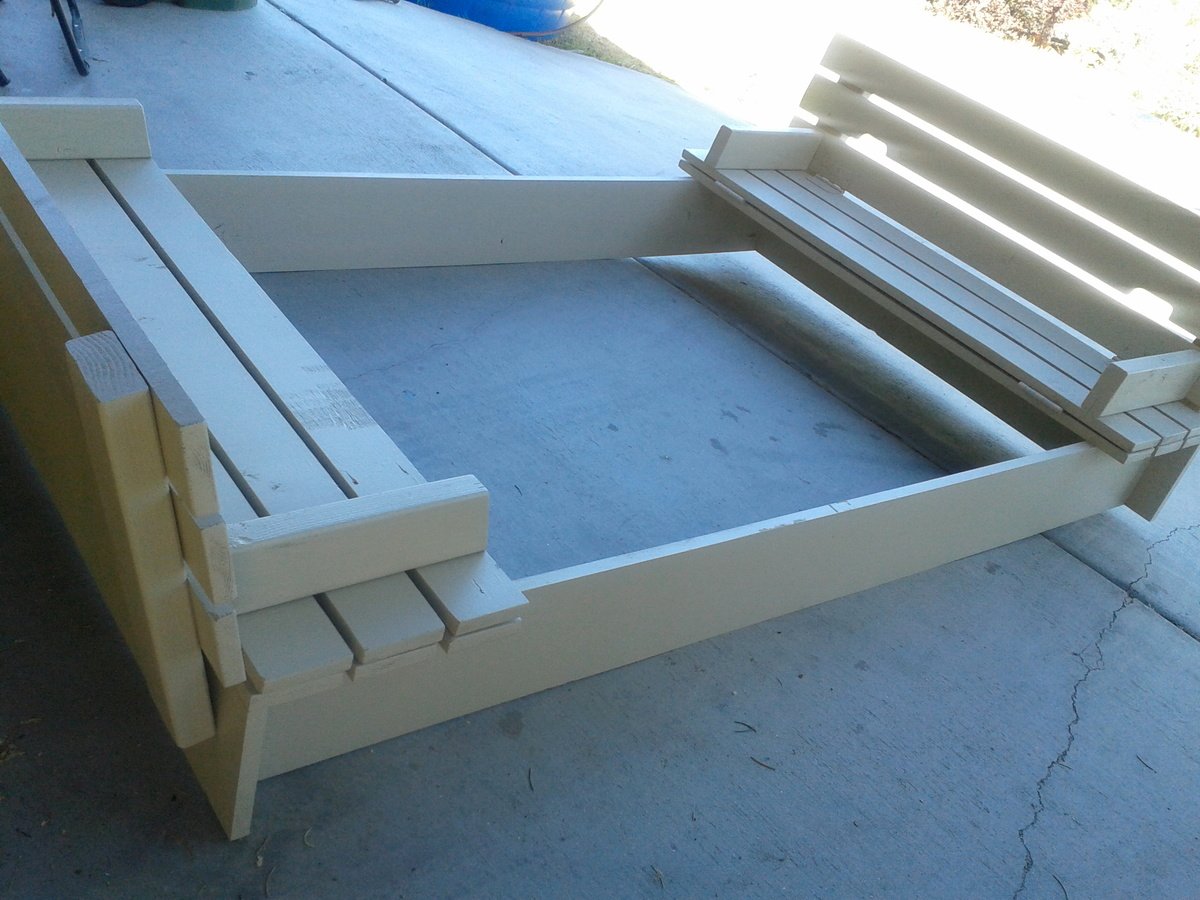
On this project we modified a few things like the arm rests which we cut at an angle to keep kids from pinching fingers in there if someone decided to move the bench back on them. We also modified the size which we made 6'x4' to maximize play sand space and kid space. Therefore this made our benches bigger so that big kids (my husband) could sit on the benches and play in the sandbox. Yes there was talk about putting cup holders but I won the conversation by mentioning sand in his drink and we would have to do a sippy cup. We notched out the handles instead of installing handles which made it look sleek. We used the template from the hinge so it matched the shape....clever huh? We decided to primer and paint this one sandstone in the brick and mortar sample book by Behr and had them put it in an exterior paint color for us. We used a wagner paint sprayer which made the project fast at the end. Overall still an easy project for anyone. I do suggest pre drilling all holes first before screwing in screws so the wood doesn't split when doing the slats on the top.

Built from Plan(s)
Estimated Cost
$50-$75
Estimated Time Investment
Afternoon Project (3-6 Hours)
Finish Used
Primer/Paint
Recommended Skill Level
Intermediate

Comments

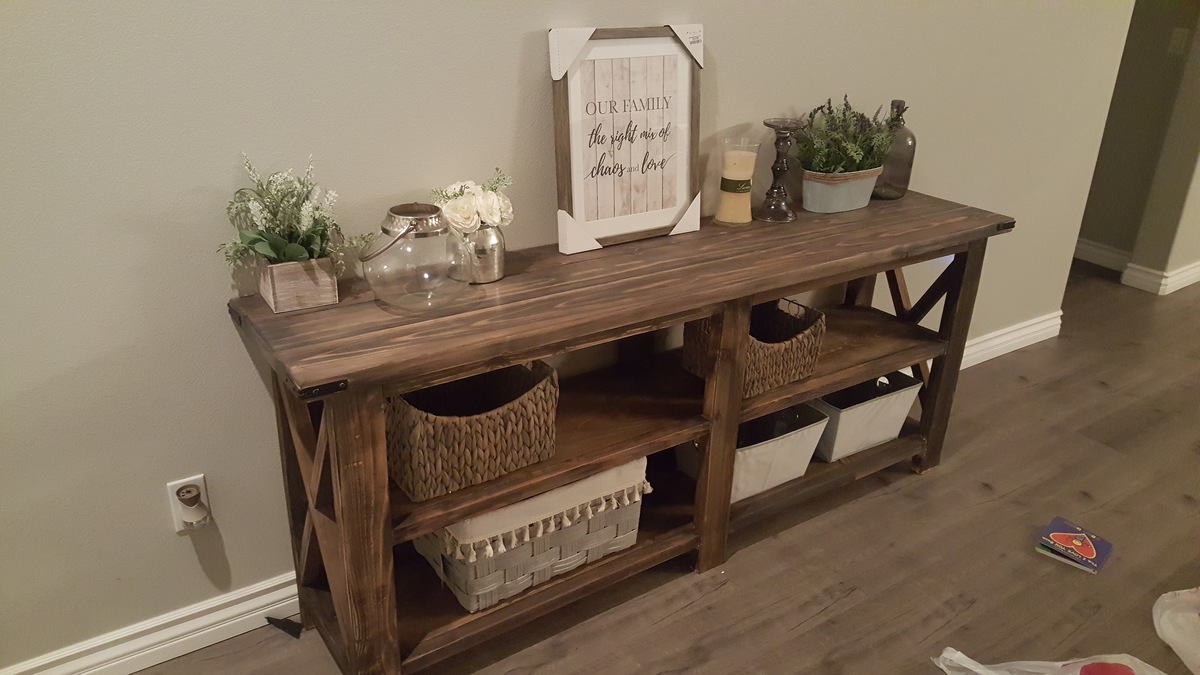
Rustic x console

Submitted by Anonymous (not verified) on Mon, 03/11/2019 - 23:02

This is my first ana white project and my first woodworking project. I think i like this new hobby i just picked up. 

Built from Plan(s)
Estimated Time Investment
Weekend Project (10-20 Hours)
Finish Used
Black tea, vinegar/ steel wool stain, wax finish
Recommended Skill Level
Beginner

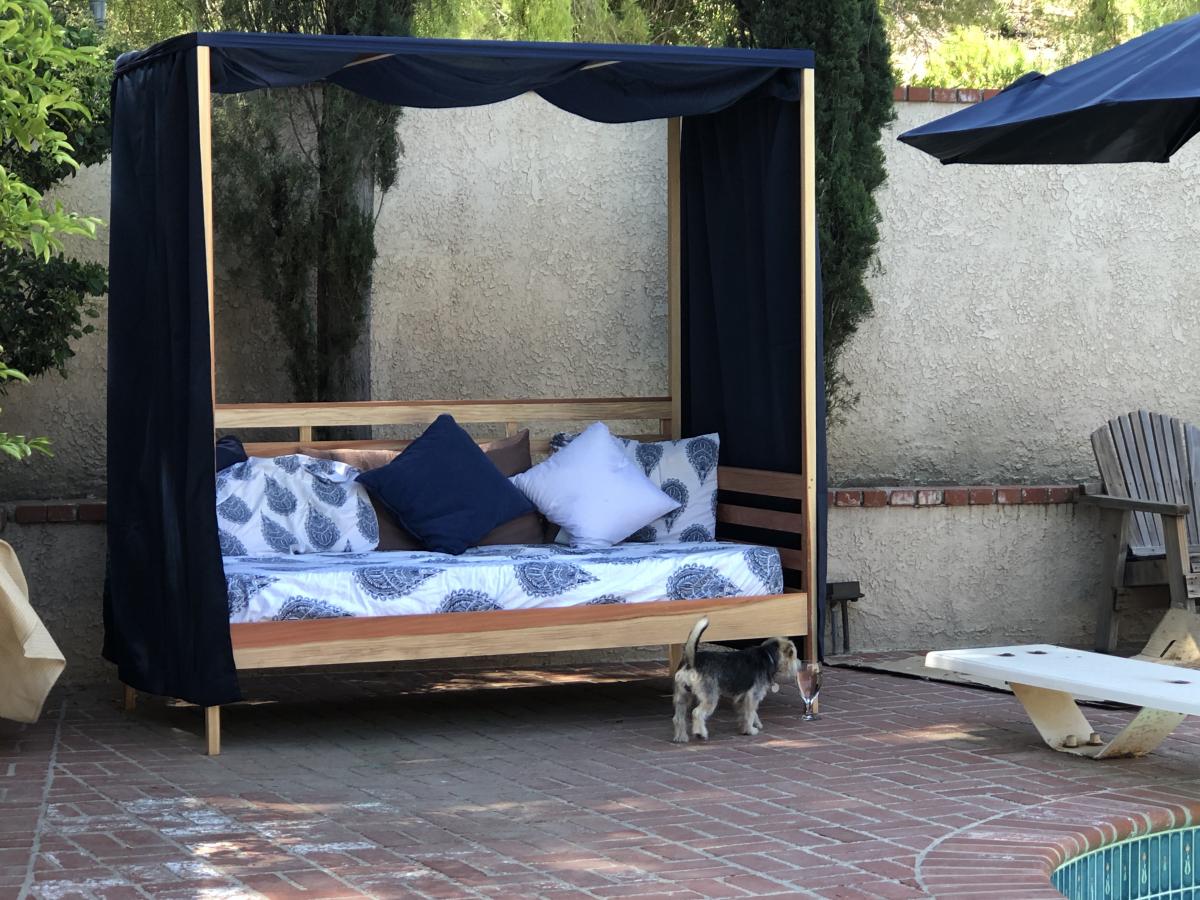
Outdoor day bed

Submitted by TamTamW on Wed, 07/03/2019 - 09:28

Loved making this. Used old sun curtains and a sheet for extra splendor. 

Built from Plan(s)
Estimated Time Investment
Weekend Project (10-20 Hours)
Finish Used
None.
Recommended Skill Level
Beginner

Comments

Love the console

Submitted by Sissy0820 on Wed, 07/17/2019 - 17:56

I love how this console turned out I made a few changes > Made it taller at top to fit the larger hardware and changed the top.

Built from Plan(s)
Estimated Cost
$400
Estimated Time Investment
Week Long Project (20 Hours or More)
Finish Used
painted base white , burned top then clear coated it.
Recommended Skill Level
Intermediate

Washer Dryer Pedestals Bases

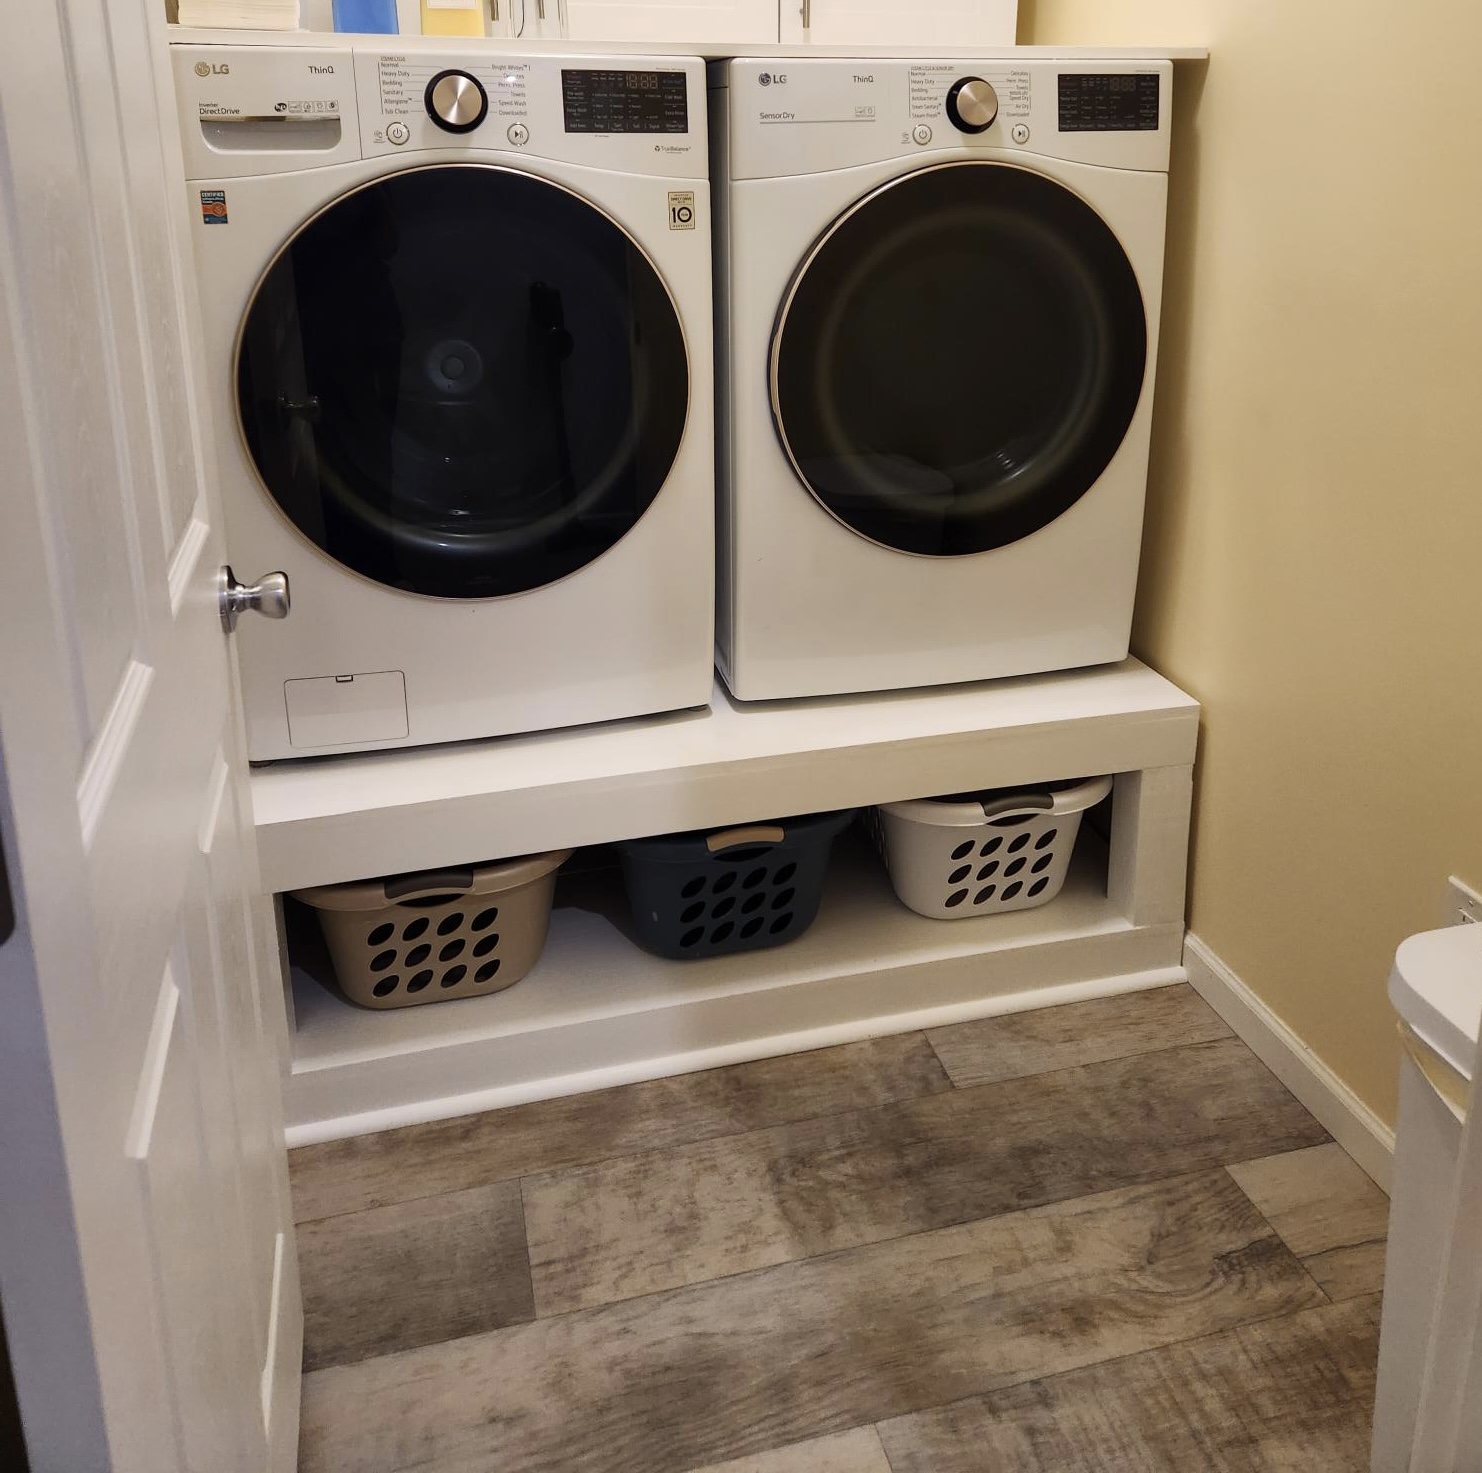
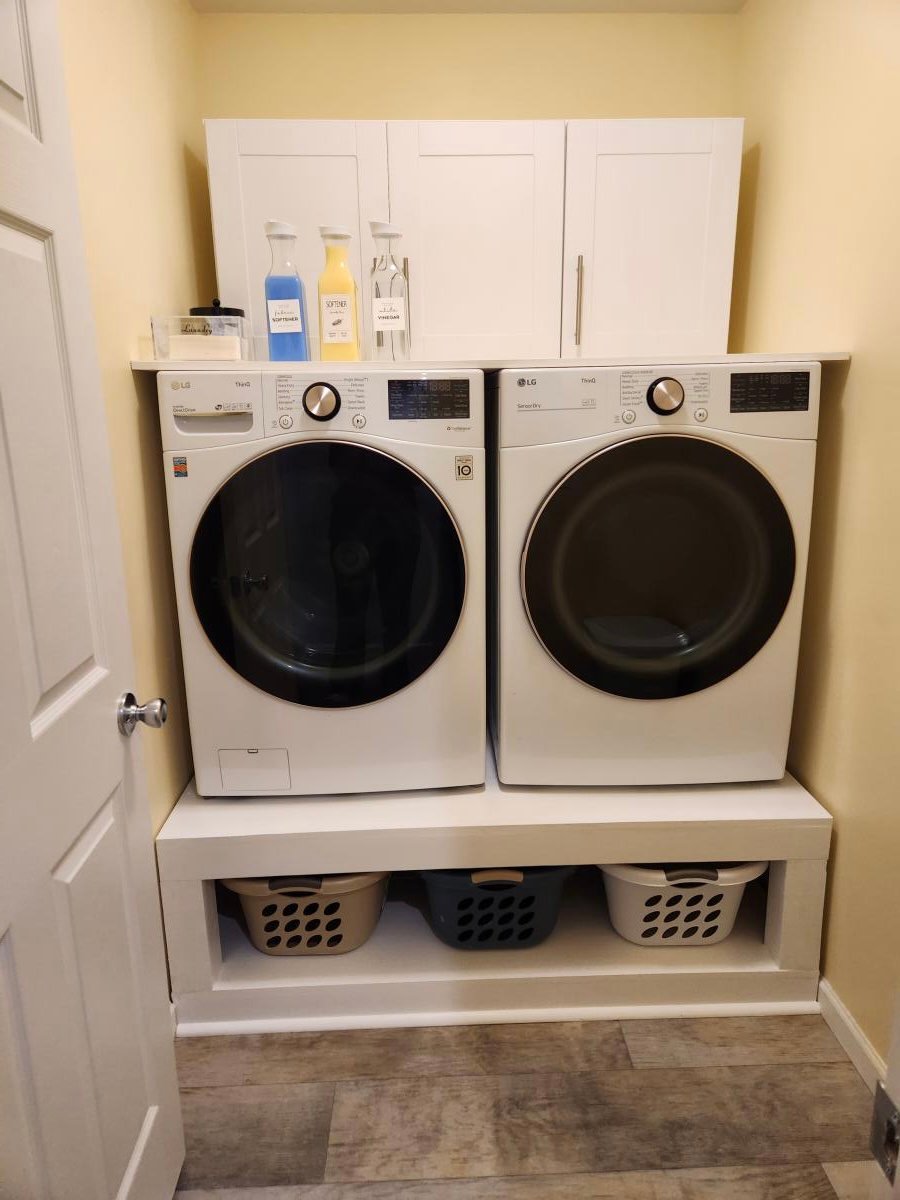
This pedestal base for the washer and dryer really created the perfect opportunity to organize and declutter our tiny laundry room. Had to resize it a bit to fit the space but it turned out perfect! I added a super easy top for an even counter space and bought some stock laundry room cabinets to sit in the back for extra storage. Such an upgrade!

King Bed Frame for adjustable base

Submitted by Anonymous (not verified) on Tue, 10/08/2019 - 05:50

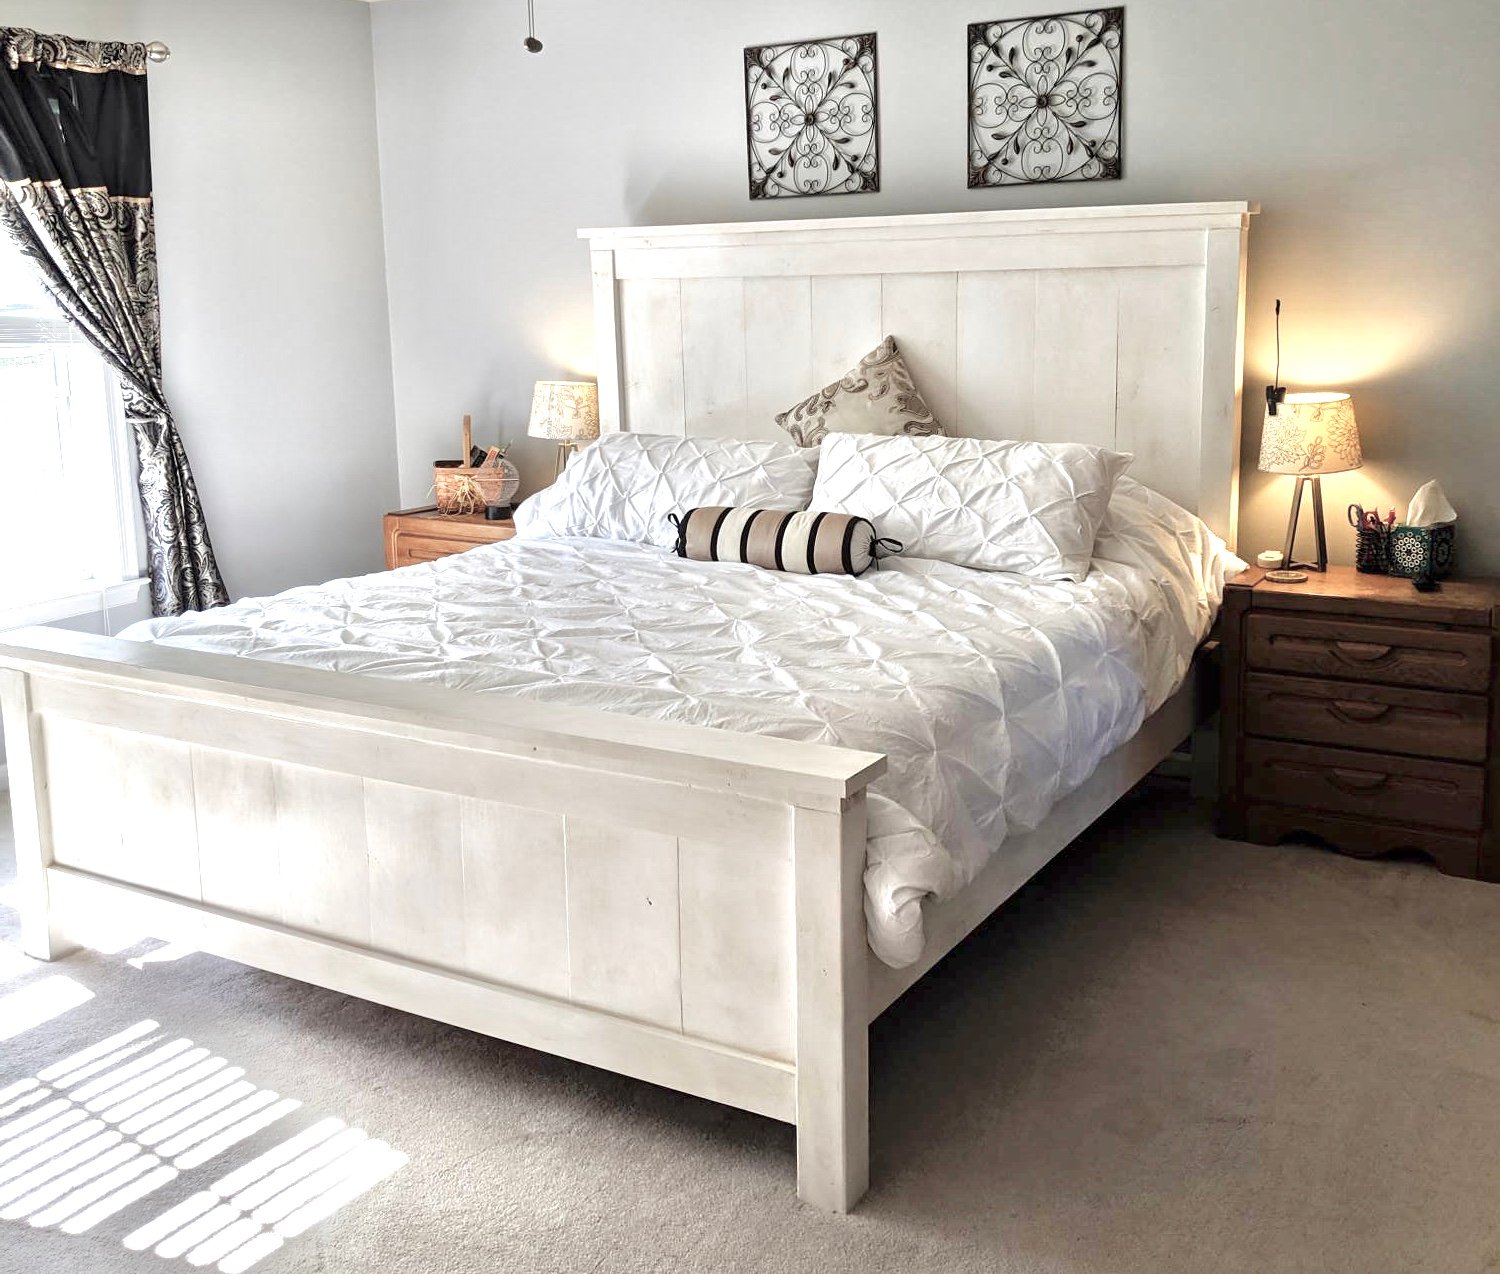
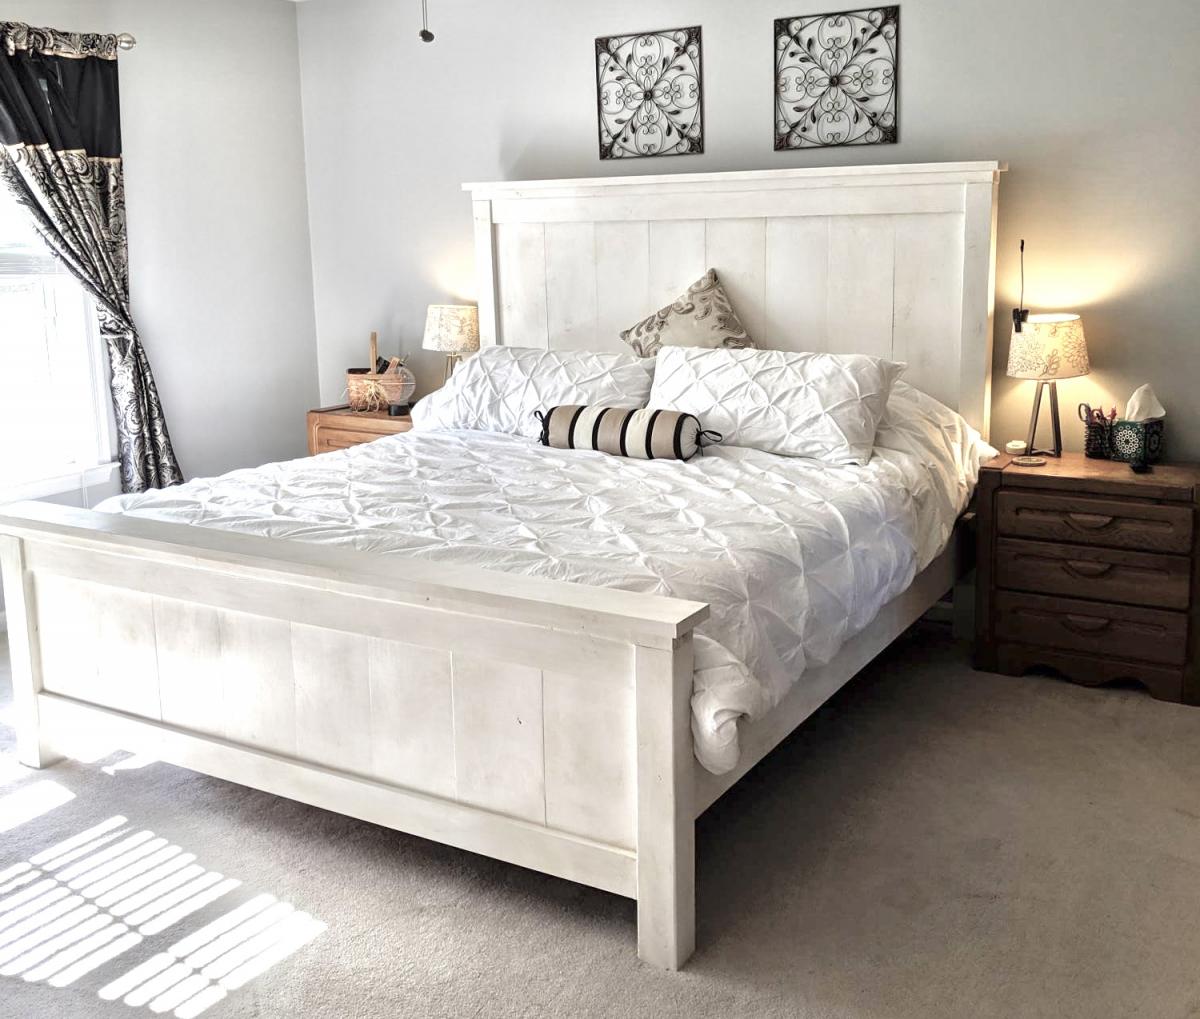
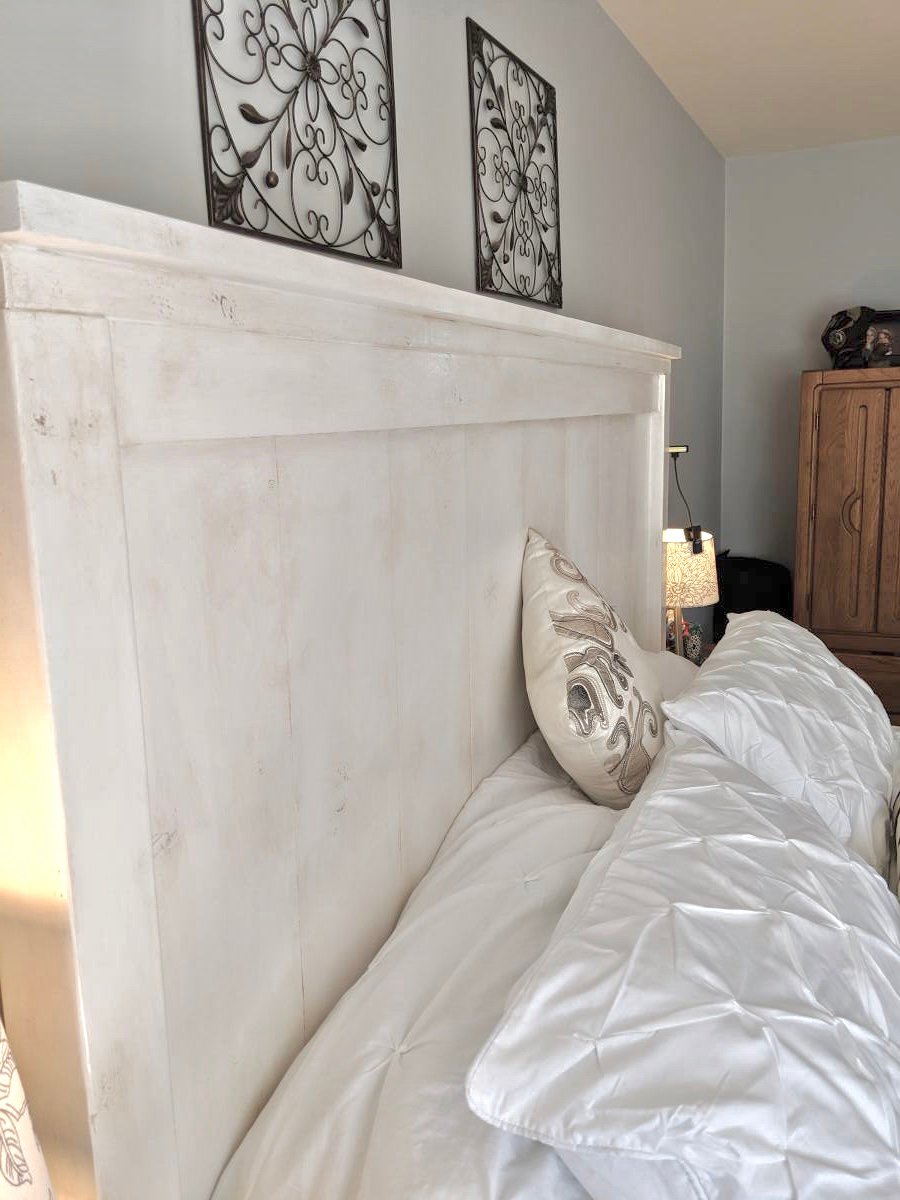
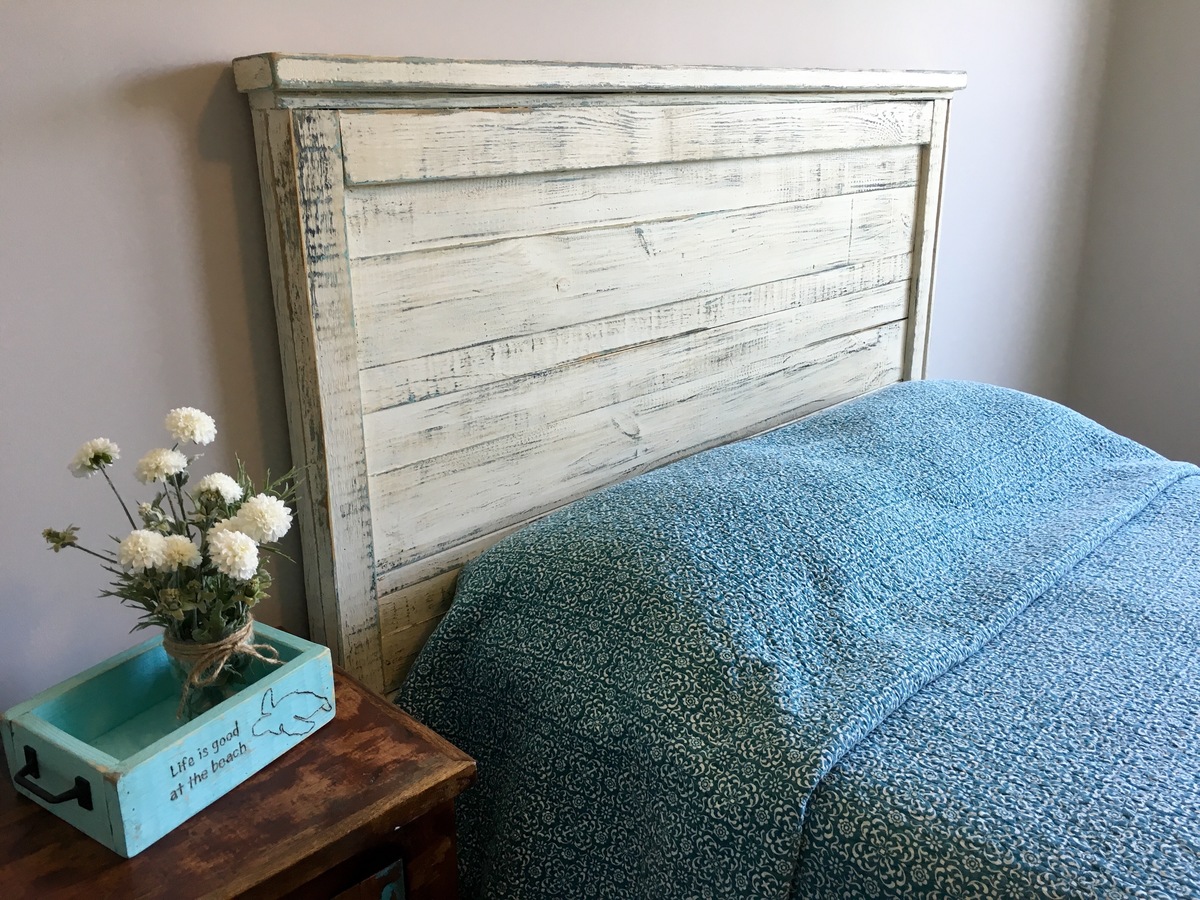
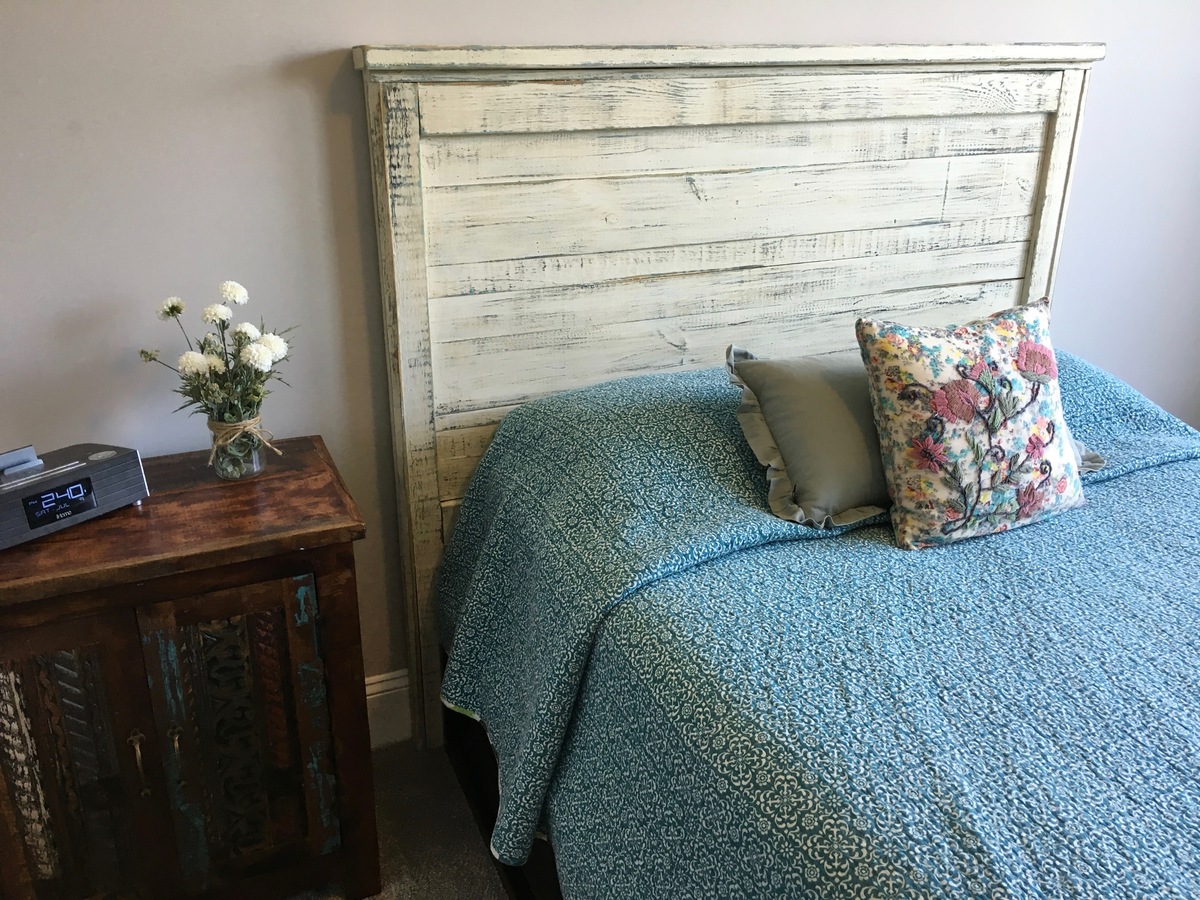
I could not find a frame which would accommodate my new adjustable king base. Modified Anna's plans by increasing the height of the headboard and footboard. Finished with chalk paint and antique finish for a rustic look. Side rails attached with mortises to allow for moving bed in 4 pieces if needed. Love my new bed

Estimated Cost
$300
Estimated Time Investment
Weekend Project (10-20 Hours)
Finish Used
Chalk paint (purchased from Habitat for Humanity re-store) using recycled paint. Finished with three coats of Annie Sloan wax
Recommended Skill Level
Intermediate

Comments

khowe791

Sat, 11/30/2019 - 03:31

Hi! We are making this headboard this weekend. We want to increase the headboard height and footboard as well. Do you happen to know the cut measurements or how you adjusted the height of the 1x6 (or 1x8 as others used) to make it work? Yours looks perfect! Thank you in advance for any feedback! 

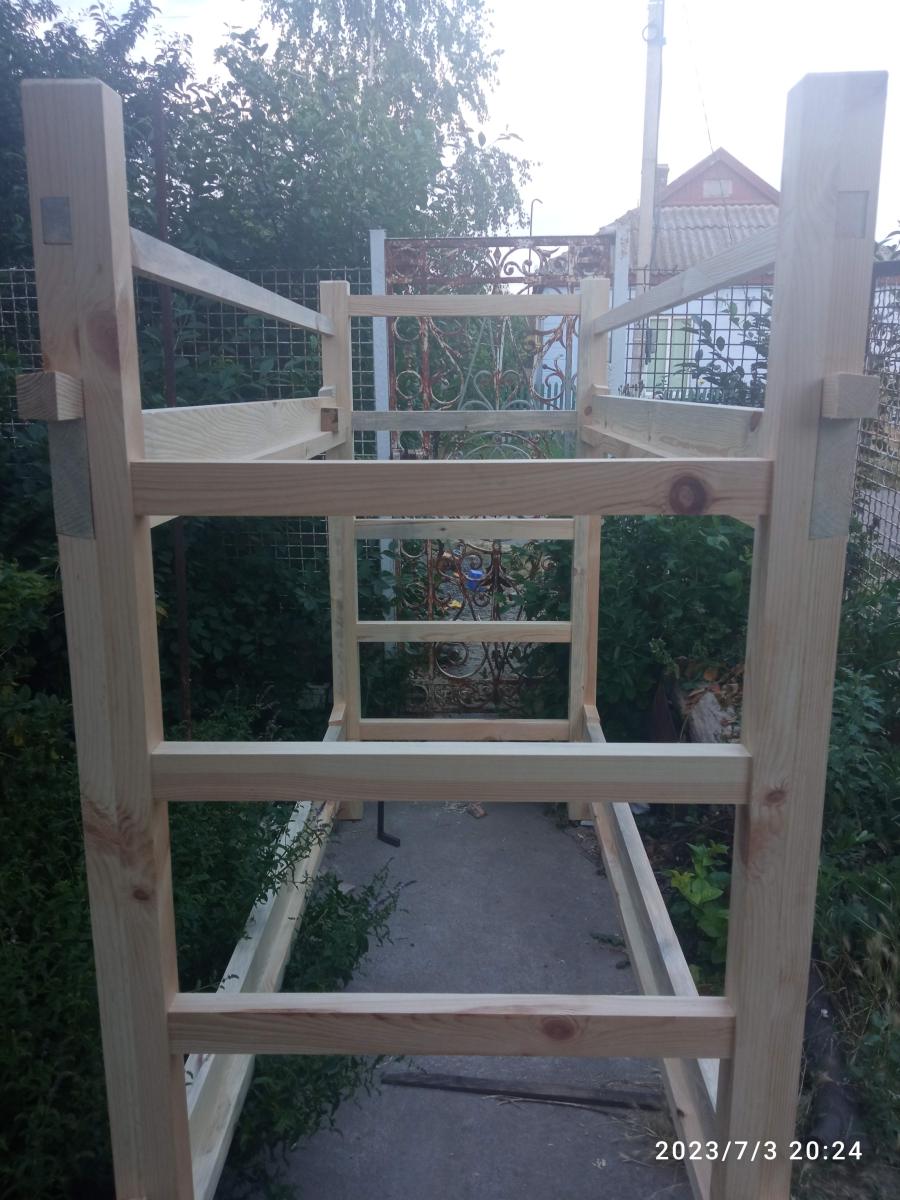
Double Bunk with Dovetail Joinery

Submitted by Anonymous (not verified) on Wed, 07/05/2023 - 08:34

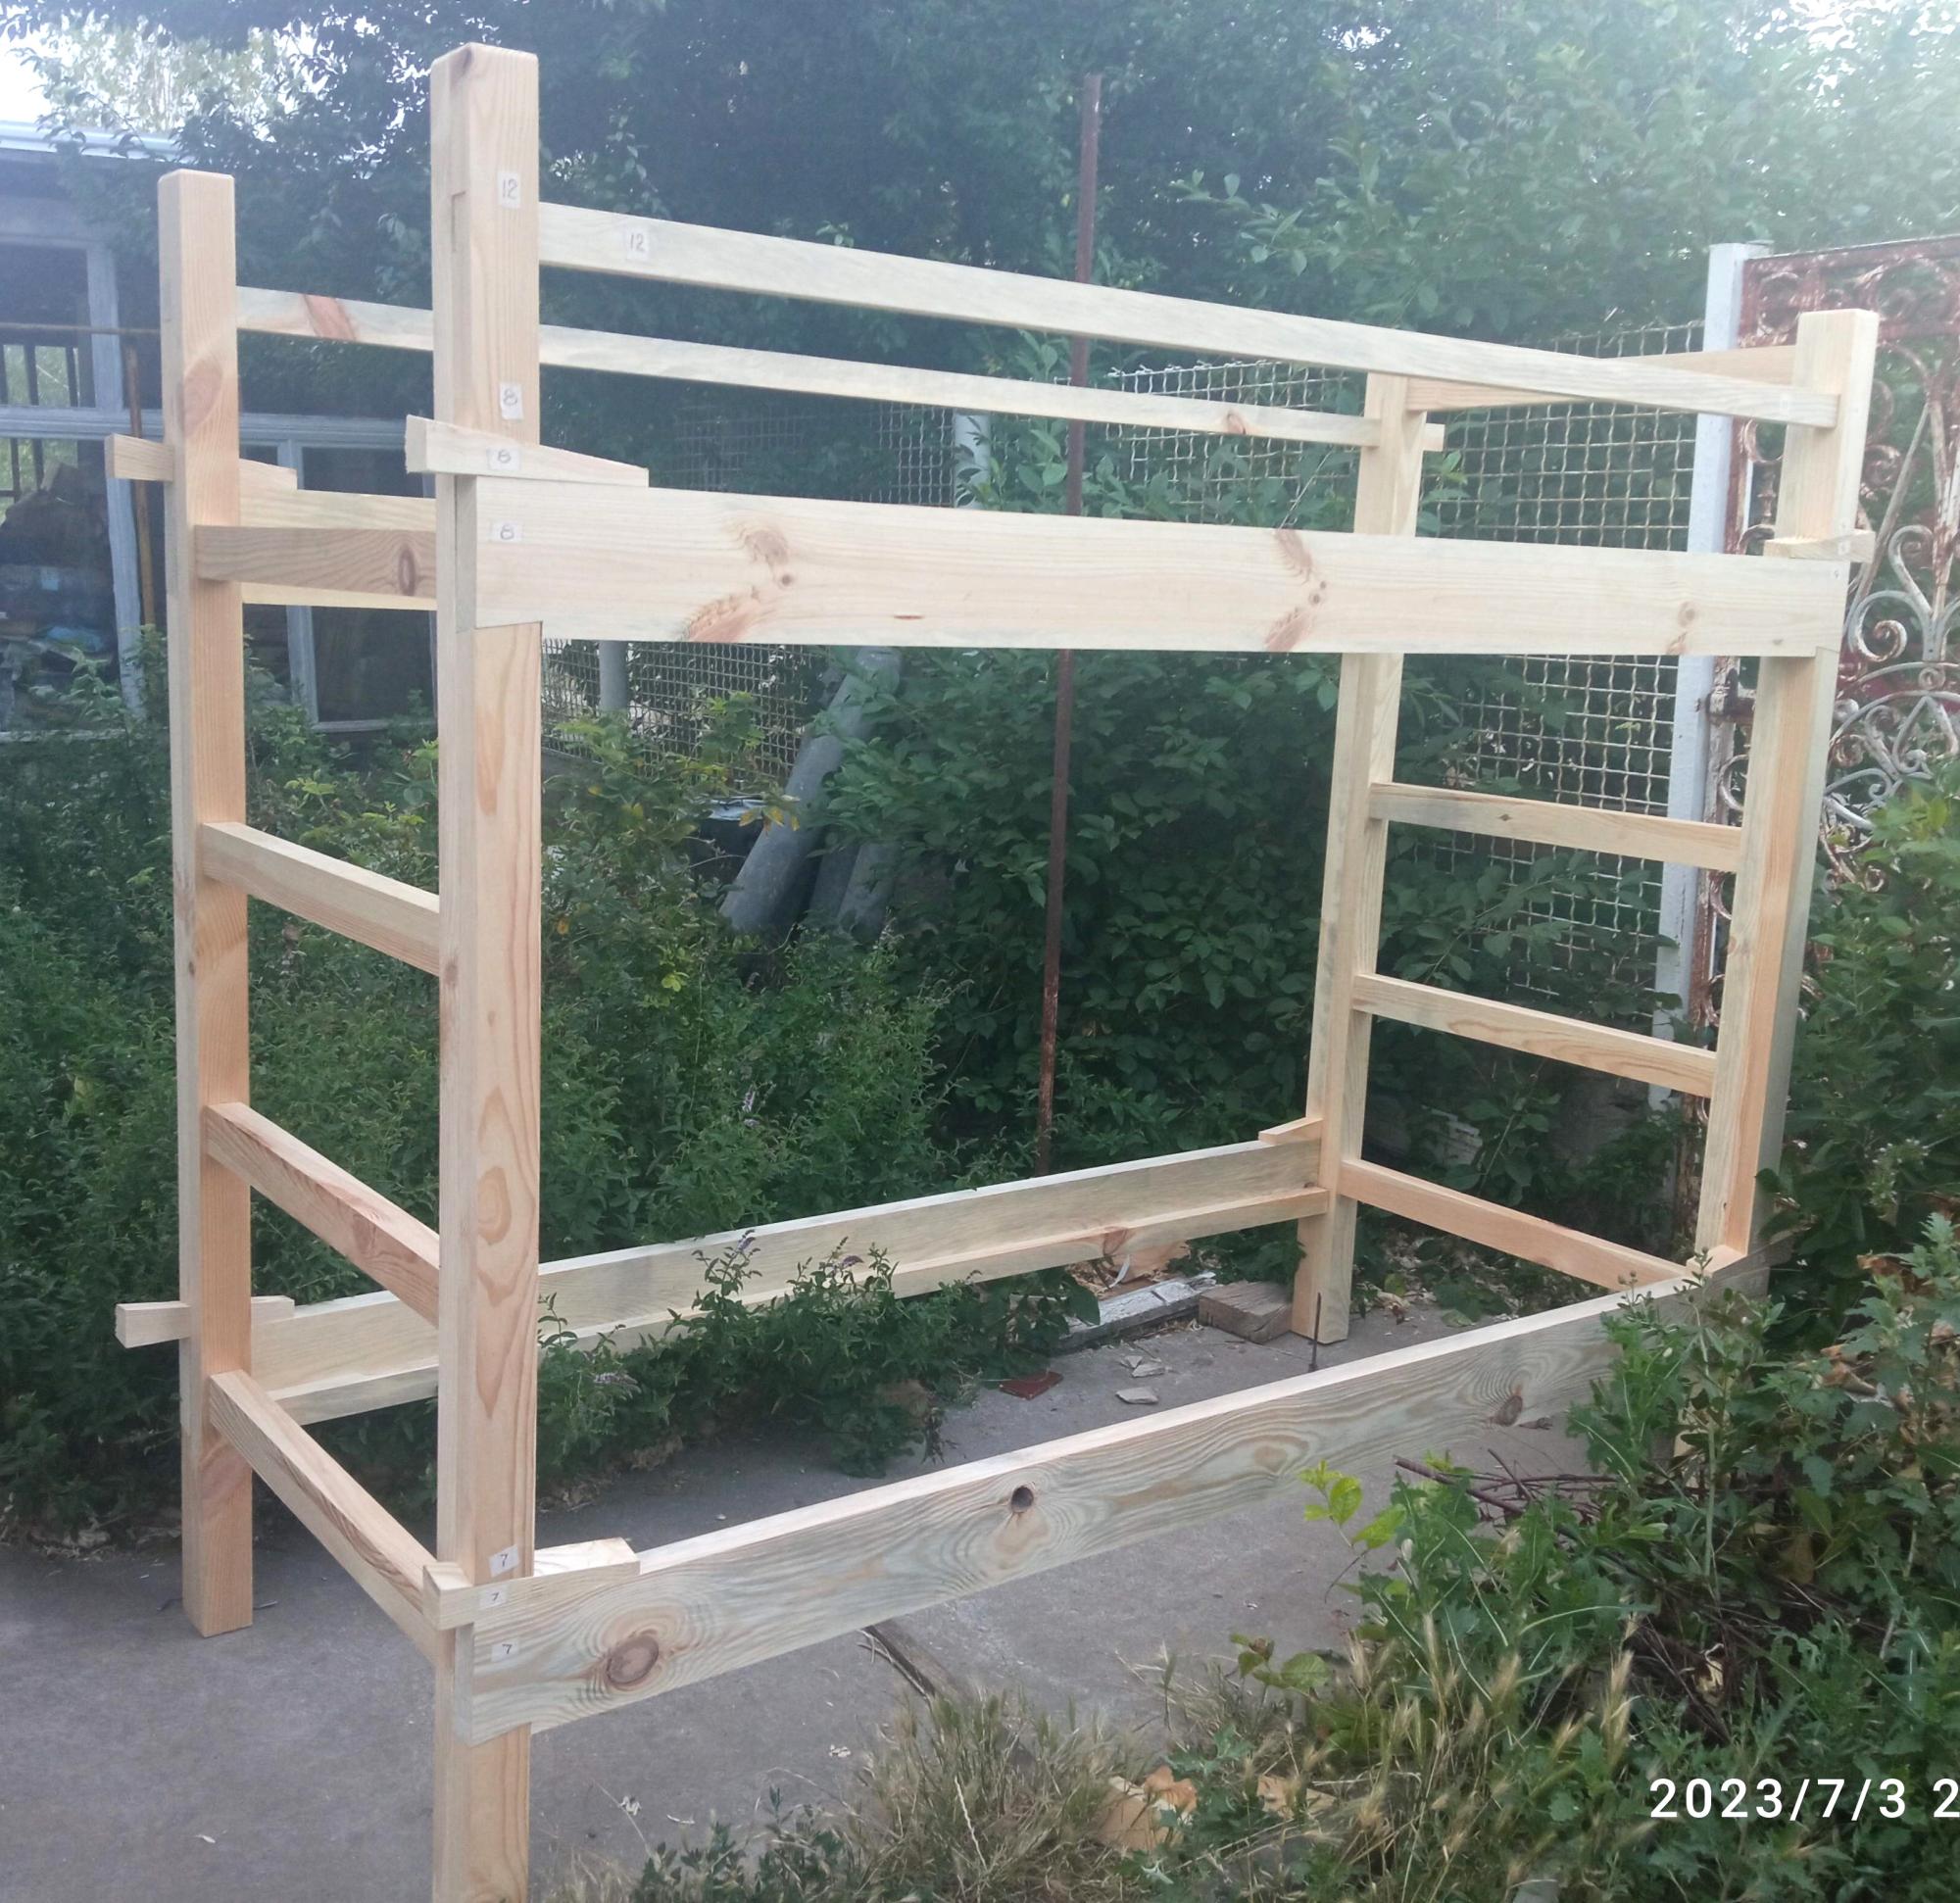
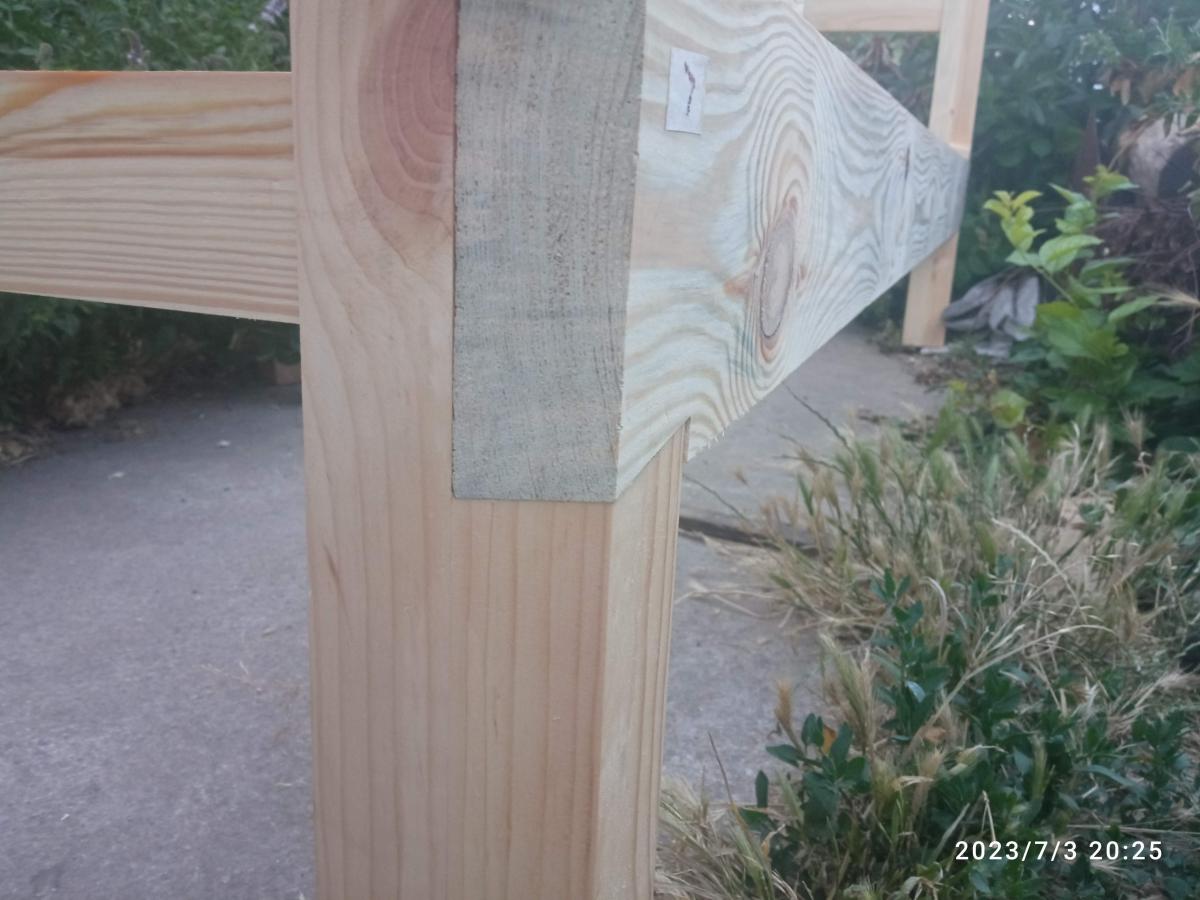
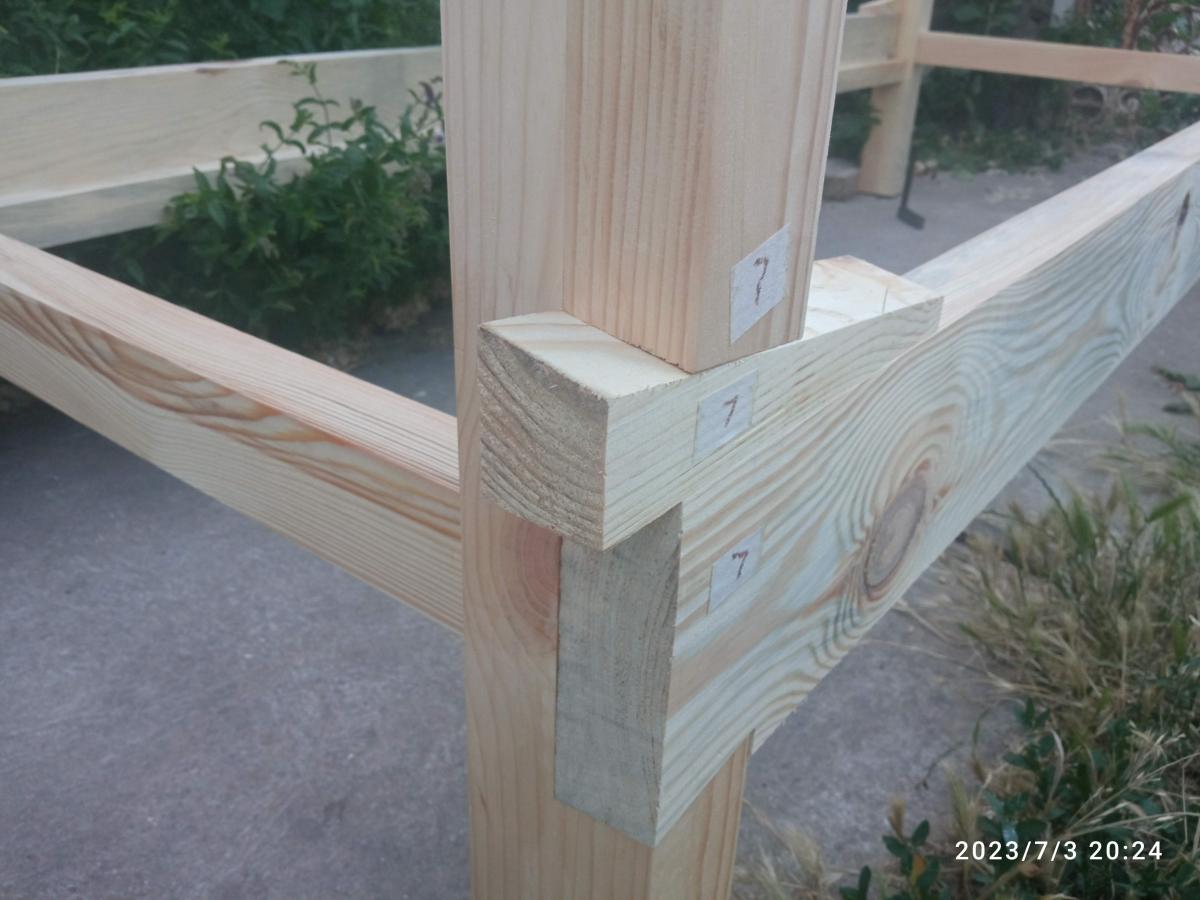
This double bunk bed has been inspired by Your plans for modern bunk bed - Side Street. To facilitate quick assembling - disassembling of beds for relocation dovetails joints with double inclined tails and wedges have been made. Because the beds has been made for orphanage/"kids in difficult life situations" I changed spacing between headboard and footboard rails to let footboard serve as ladder and in this manner reduce costs and time of construction, save place for installation, avoid tripping hasard. Thank You very much for detailed and simple plans.

Andriy Pronin, Ukraine

Built from Plan(s)

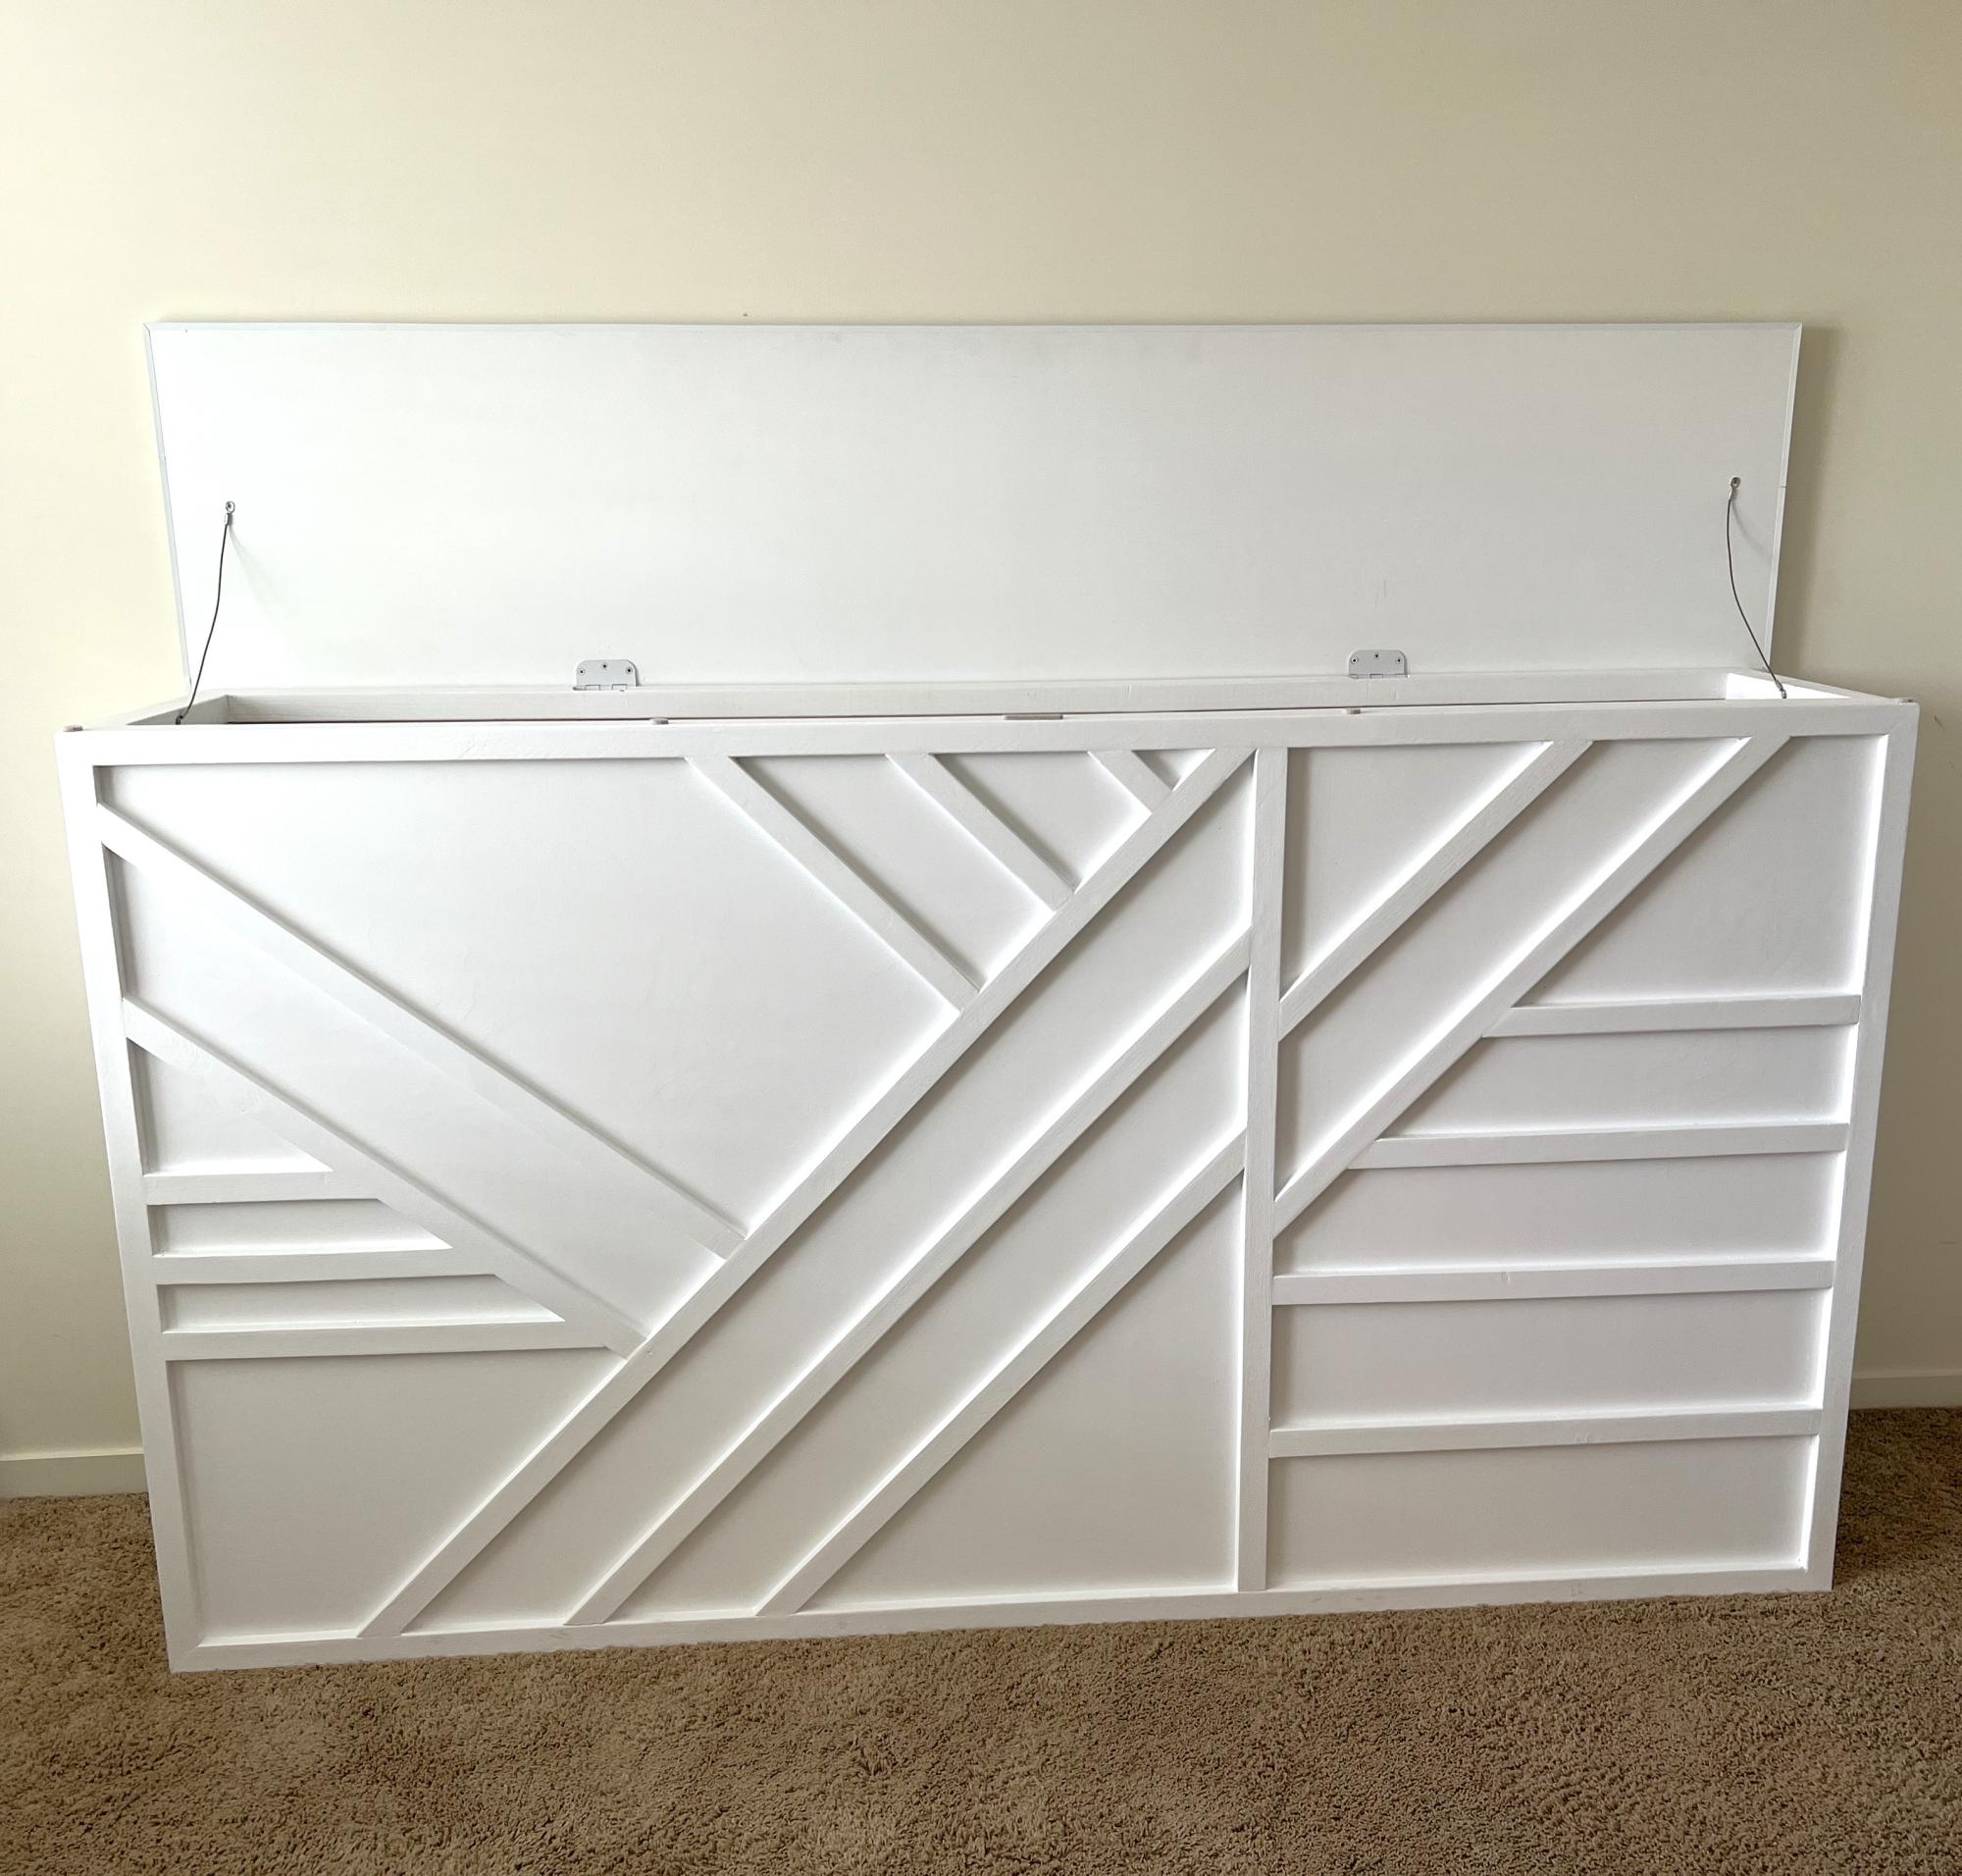
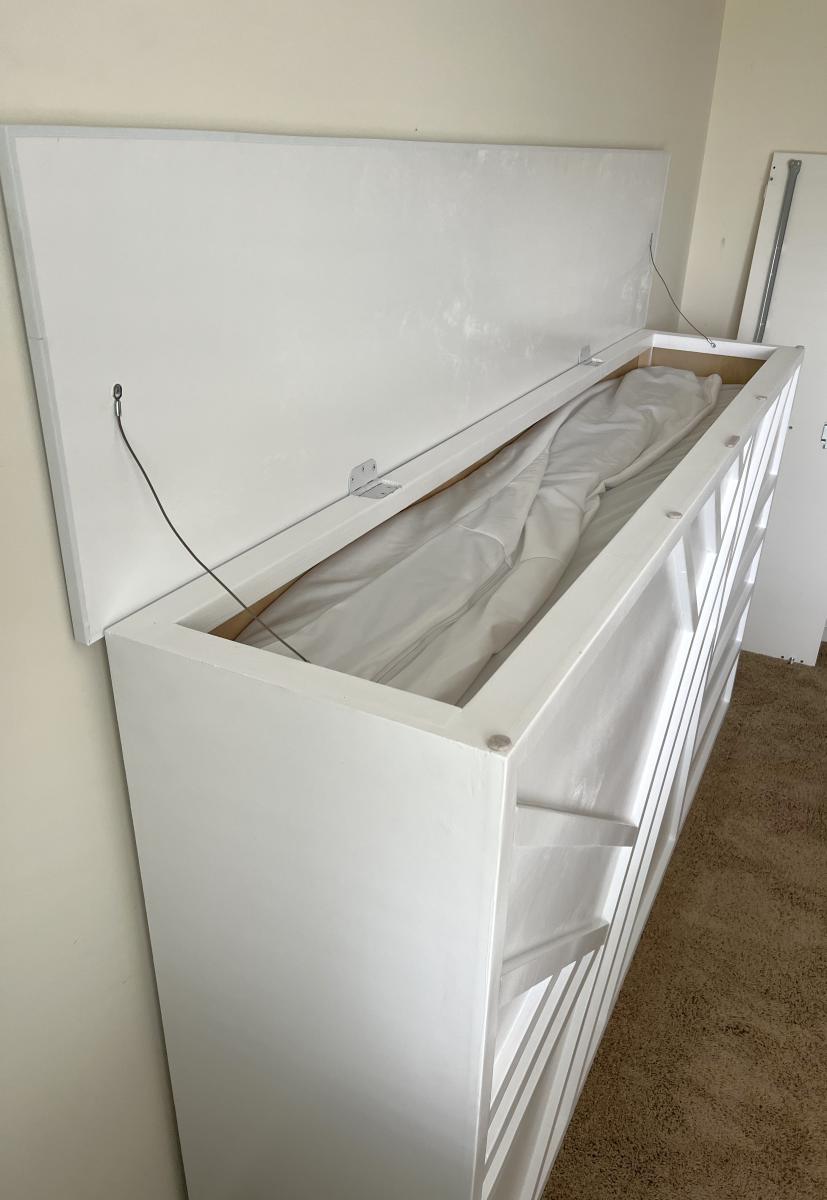
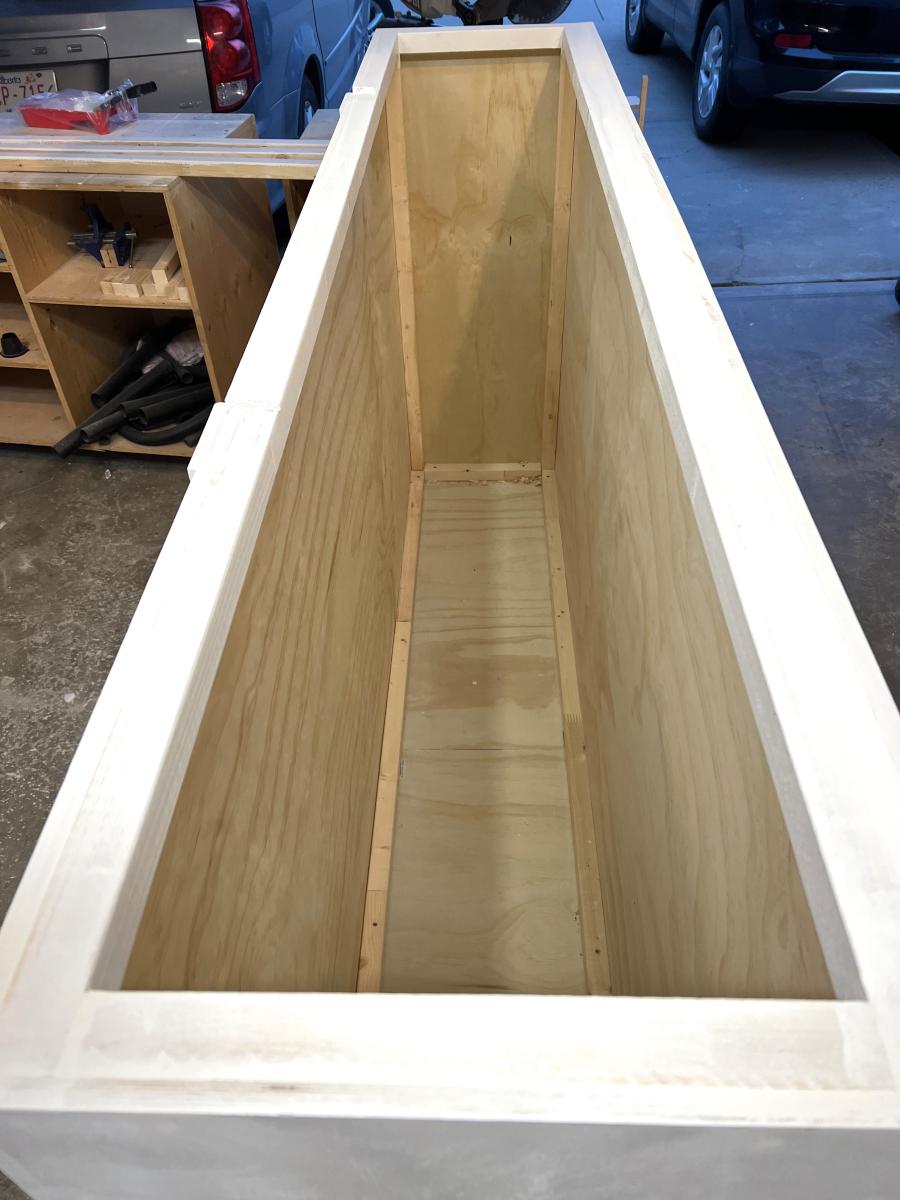
Storage Headboard

Submitted by Anonymous (not verified) on Thu, 07/20/2023 - 15:16

This project changed 3 times from the day i started.
It was supposed to be a simple vertical box to hide 2 twin mattresses
Then she decided to do a horizontal box (chest).
Then she decided to put it behind her be.
By the end it became a headboard storage and the design is Modern Geo Headboard

by Ana White

Built from Plan(s)

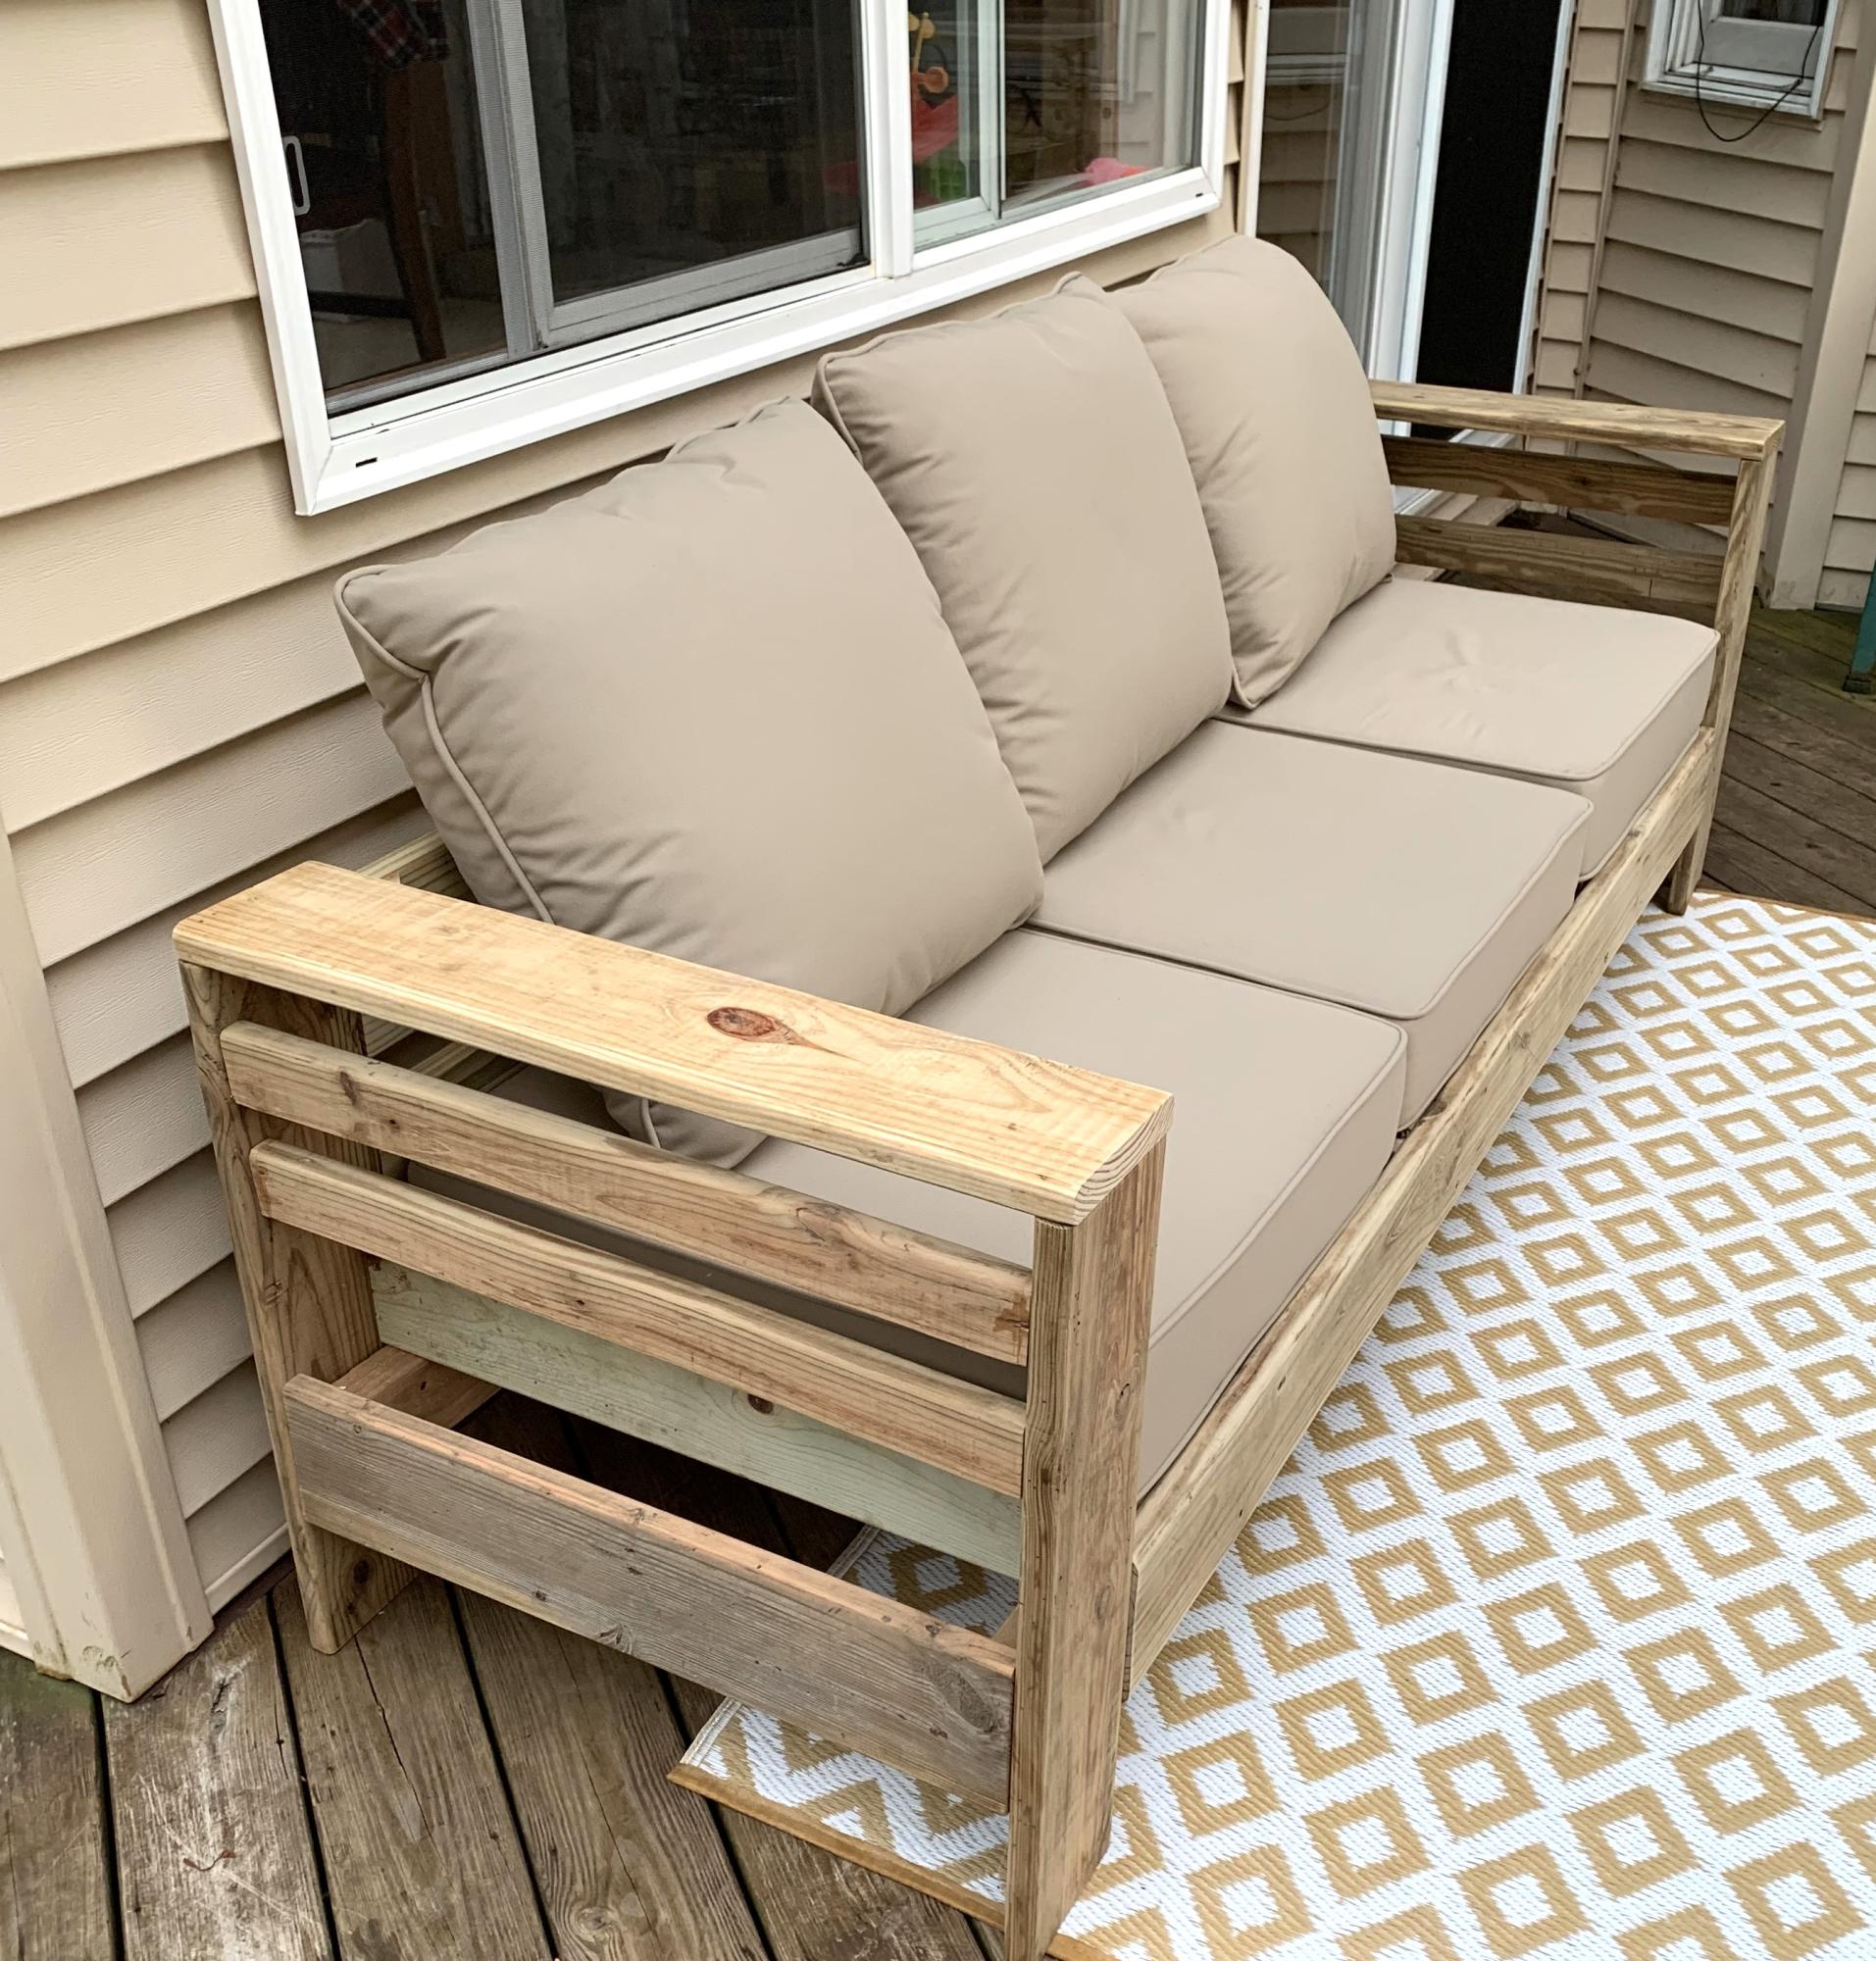
Reclaimed Wood Outdoor Sofa

Submitted by Anonymous (not verified) on Sun, 07/30/2023 - 14:43

We had a small deck with many rotted boards. The contractor who demoed it, knowing my interest in diy projects, sorted out any usable boards. I loved the idea of an outdoor sofa, so altered your beautiful pattern to accommodate decking boards - I literally only had to purchase 2 boards for the entire project! I’m so thrilled with how it turned out! Thank you!!

Camey Brown

Built from Plan(s)

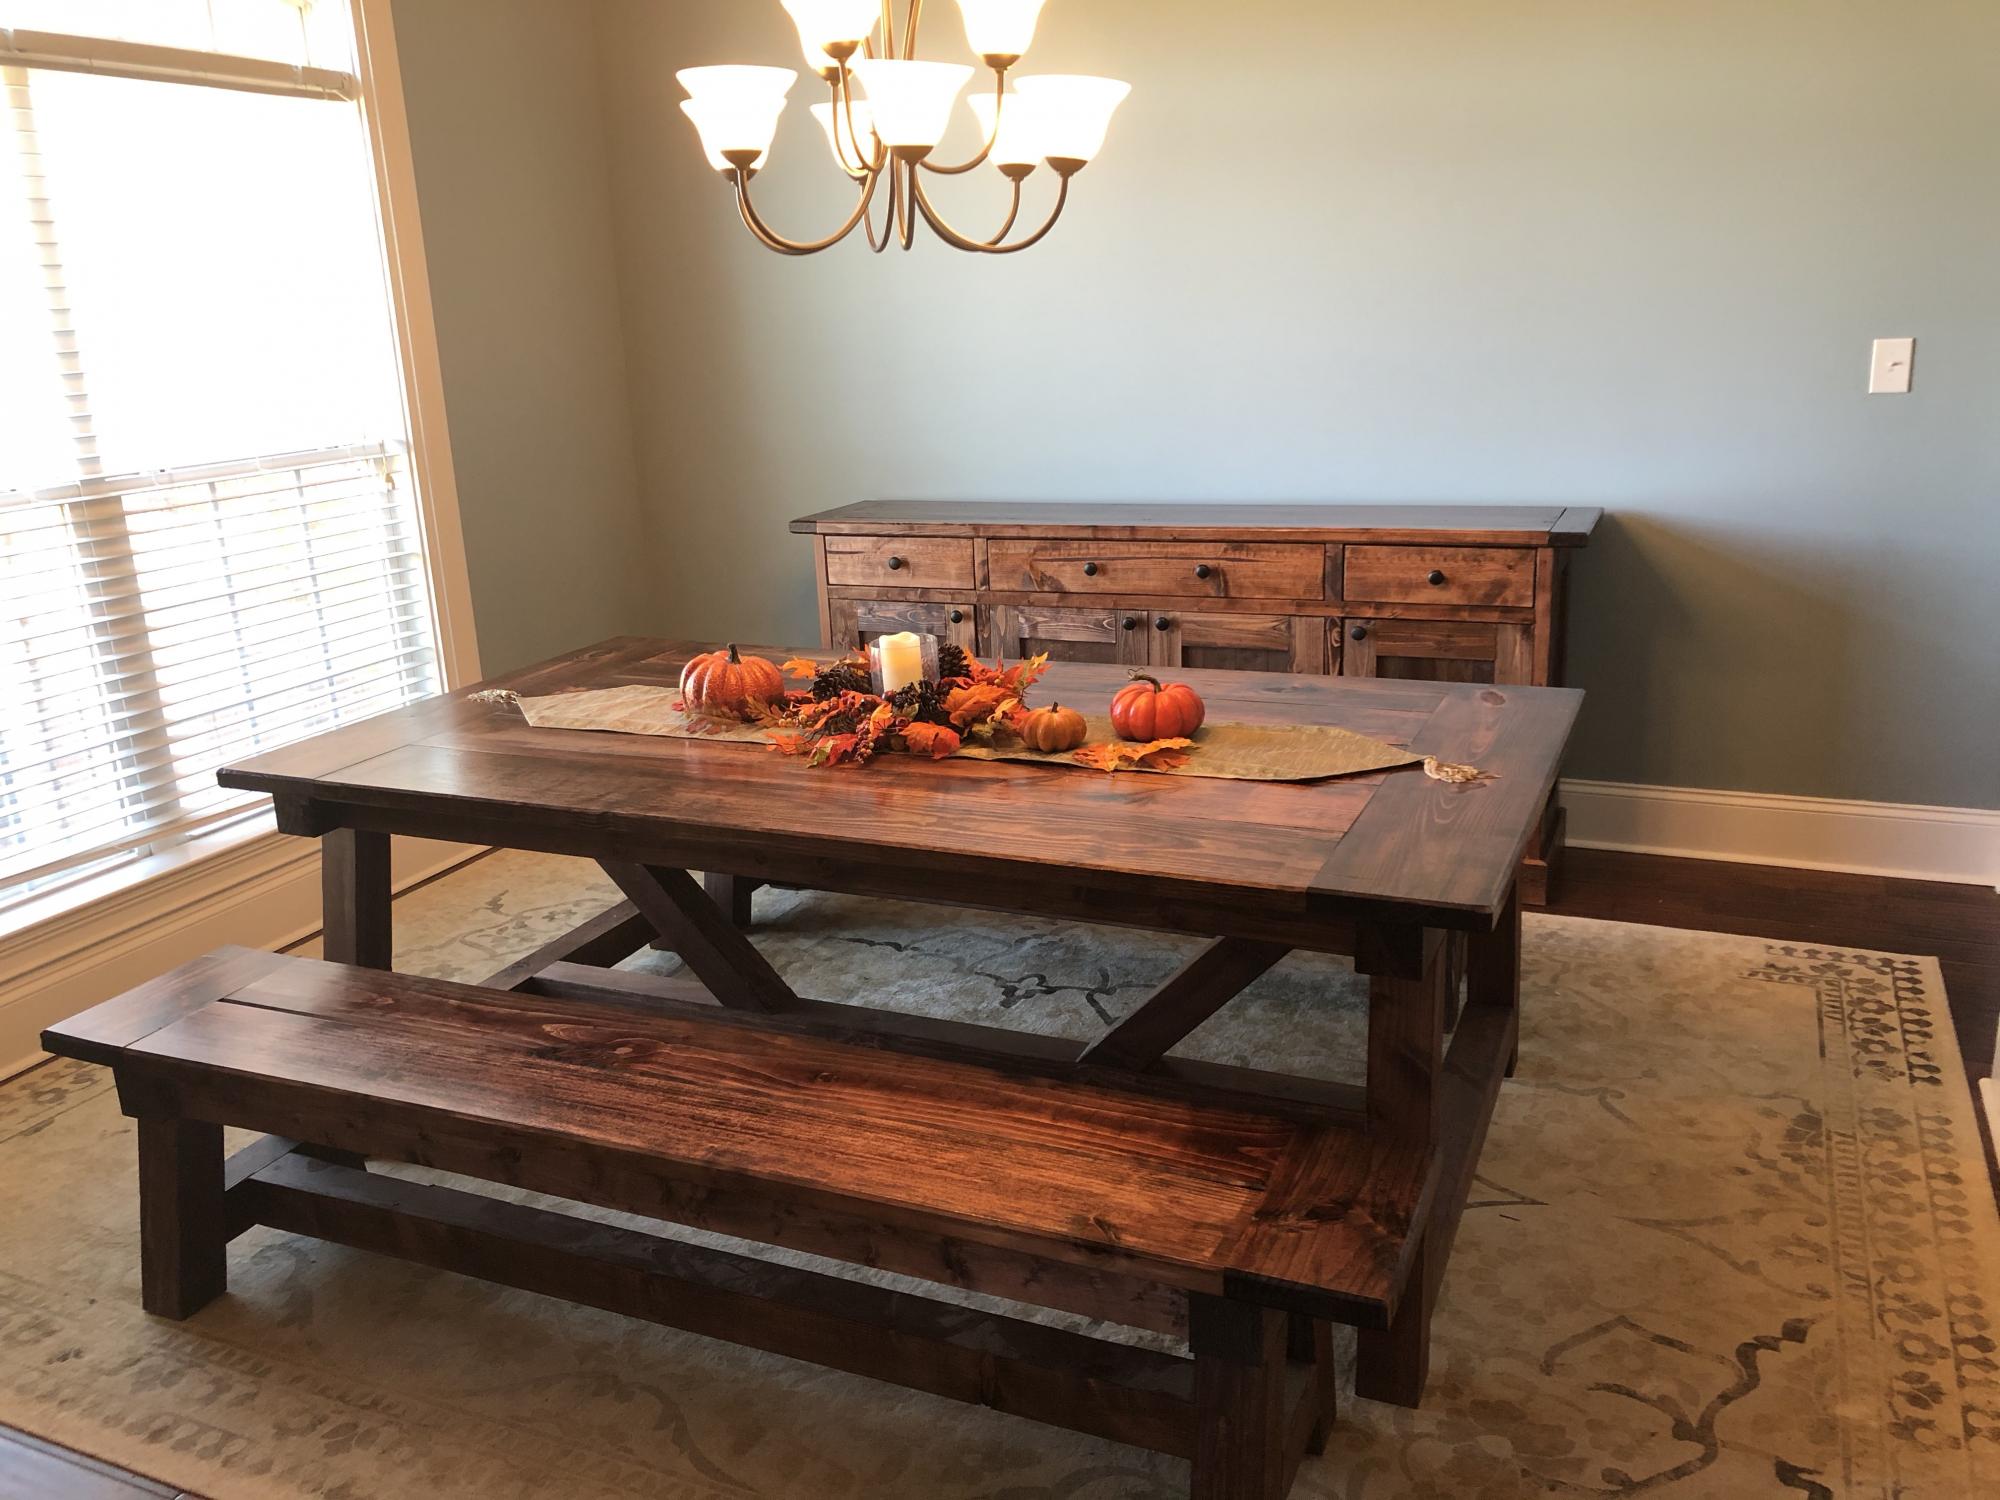
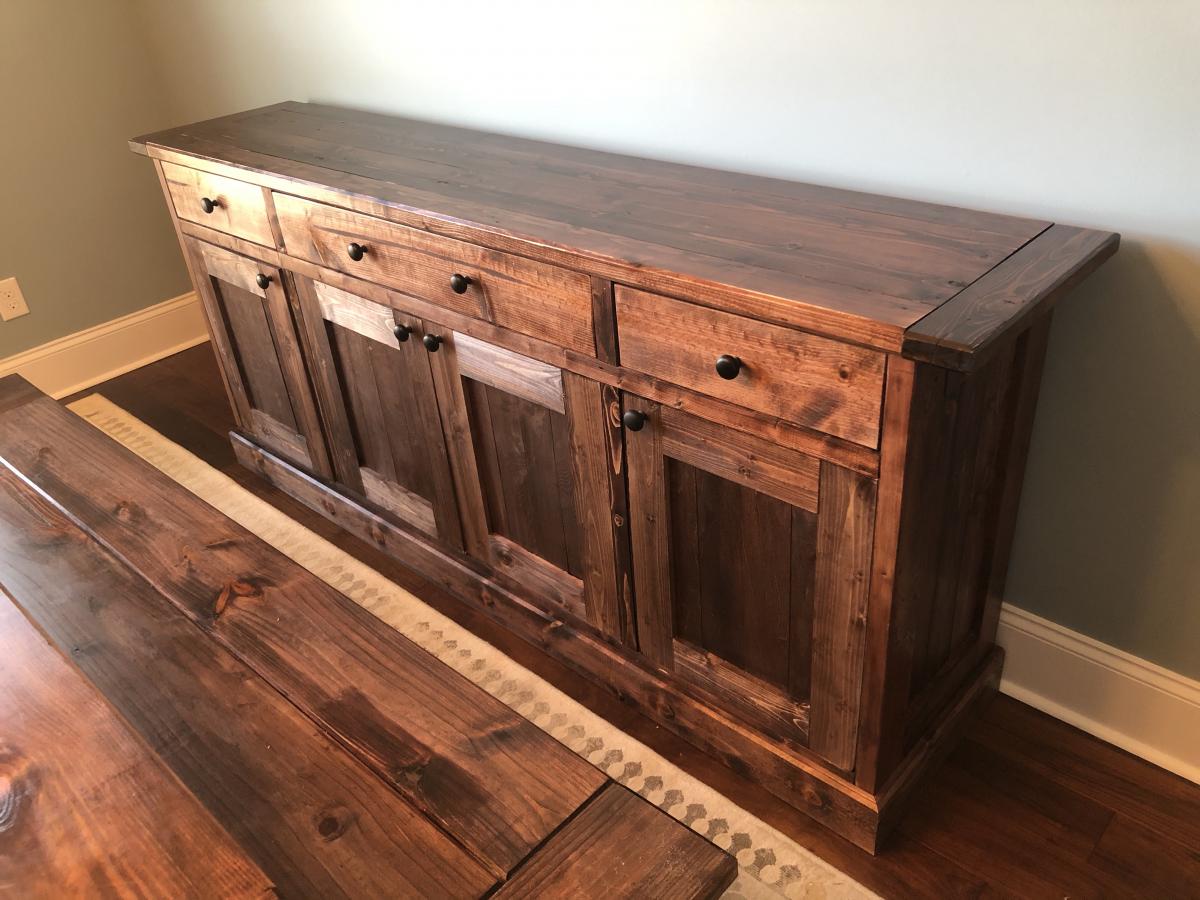
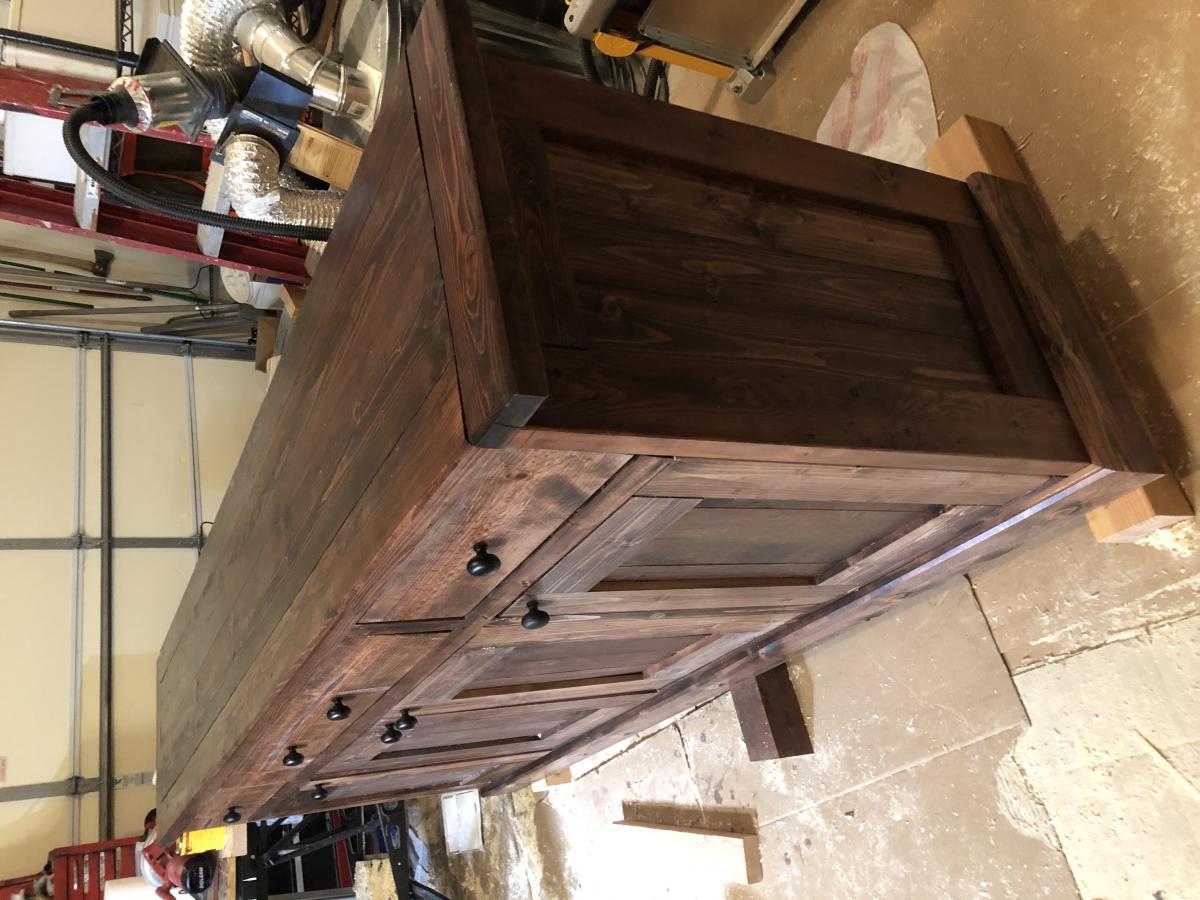
Sideboard Companion to 4x4 Truss Table

Submitted by Rasalhague on Fri, 11/29/2019 - 06:17

After the enlarged 4x4 Truss Table, we needed someplace to store the dishes.  The Planked Wood Sideboard was the thing.  Not an easy piece.  This was my first attempt at "Doors & Drawers" and was a steep learning curve, but we are so pleased with the big, sturdy results that match the table.

Estimated Cost
$550 with Kreg hinge and cabinet knob jigs (Will be reused)
Estimated Time Investment
Week Long Project (20 Hours or More)
Finish Used
Minwax Red Mahogany Stain
Recommended Skill Level
Advanced

Headboard with Fold Down Tray Tables

Submitted by t856463 on Sat, 01/25/2020 - 21:05

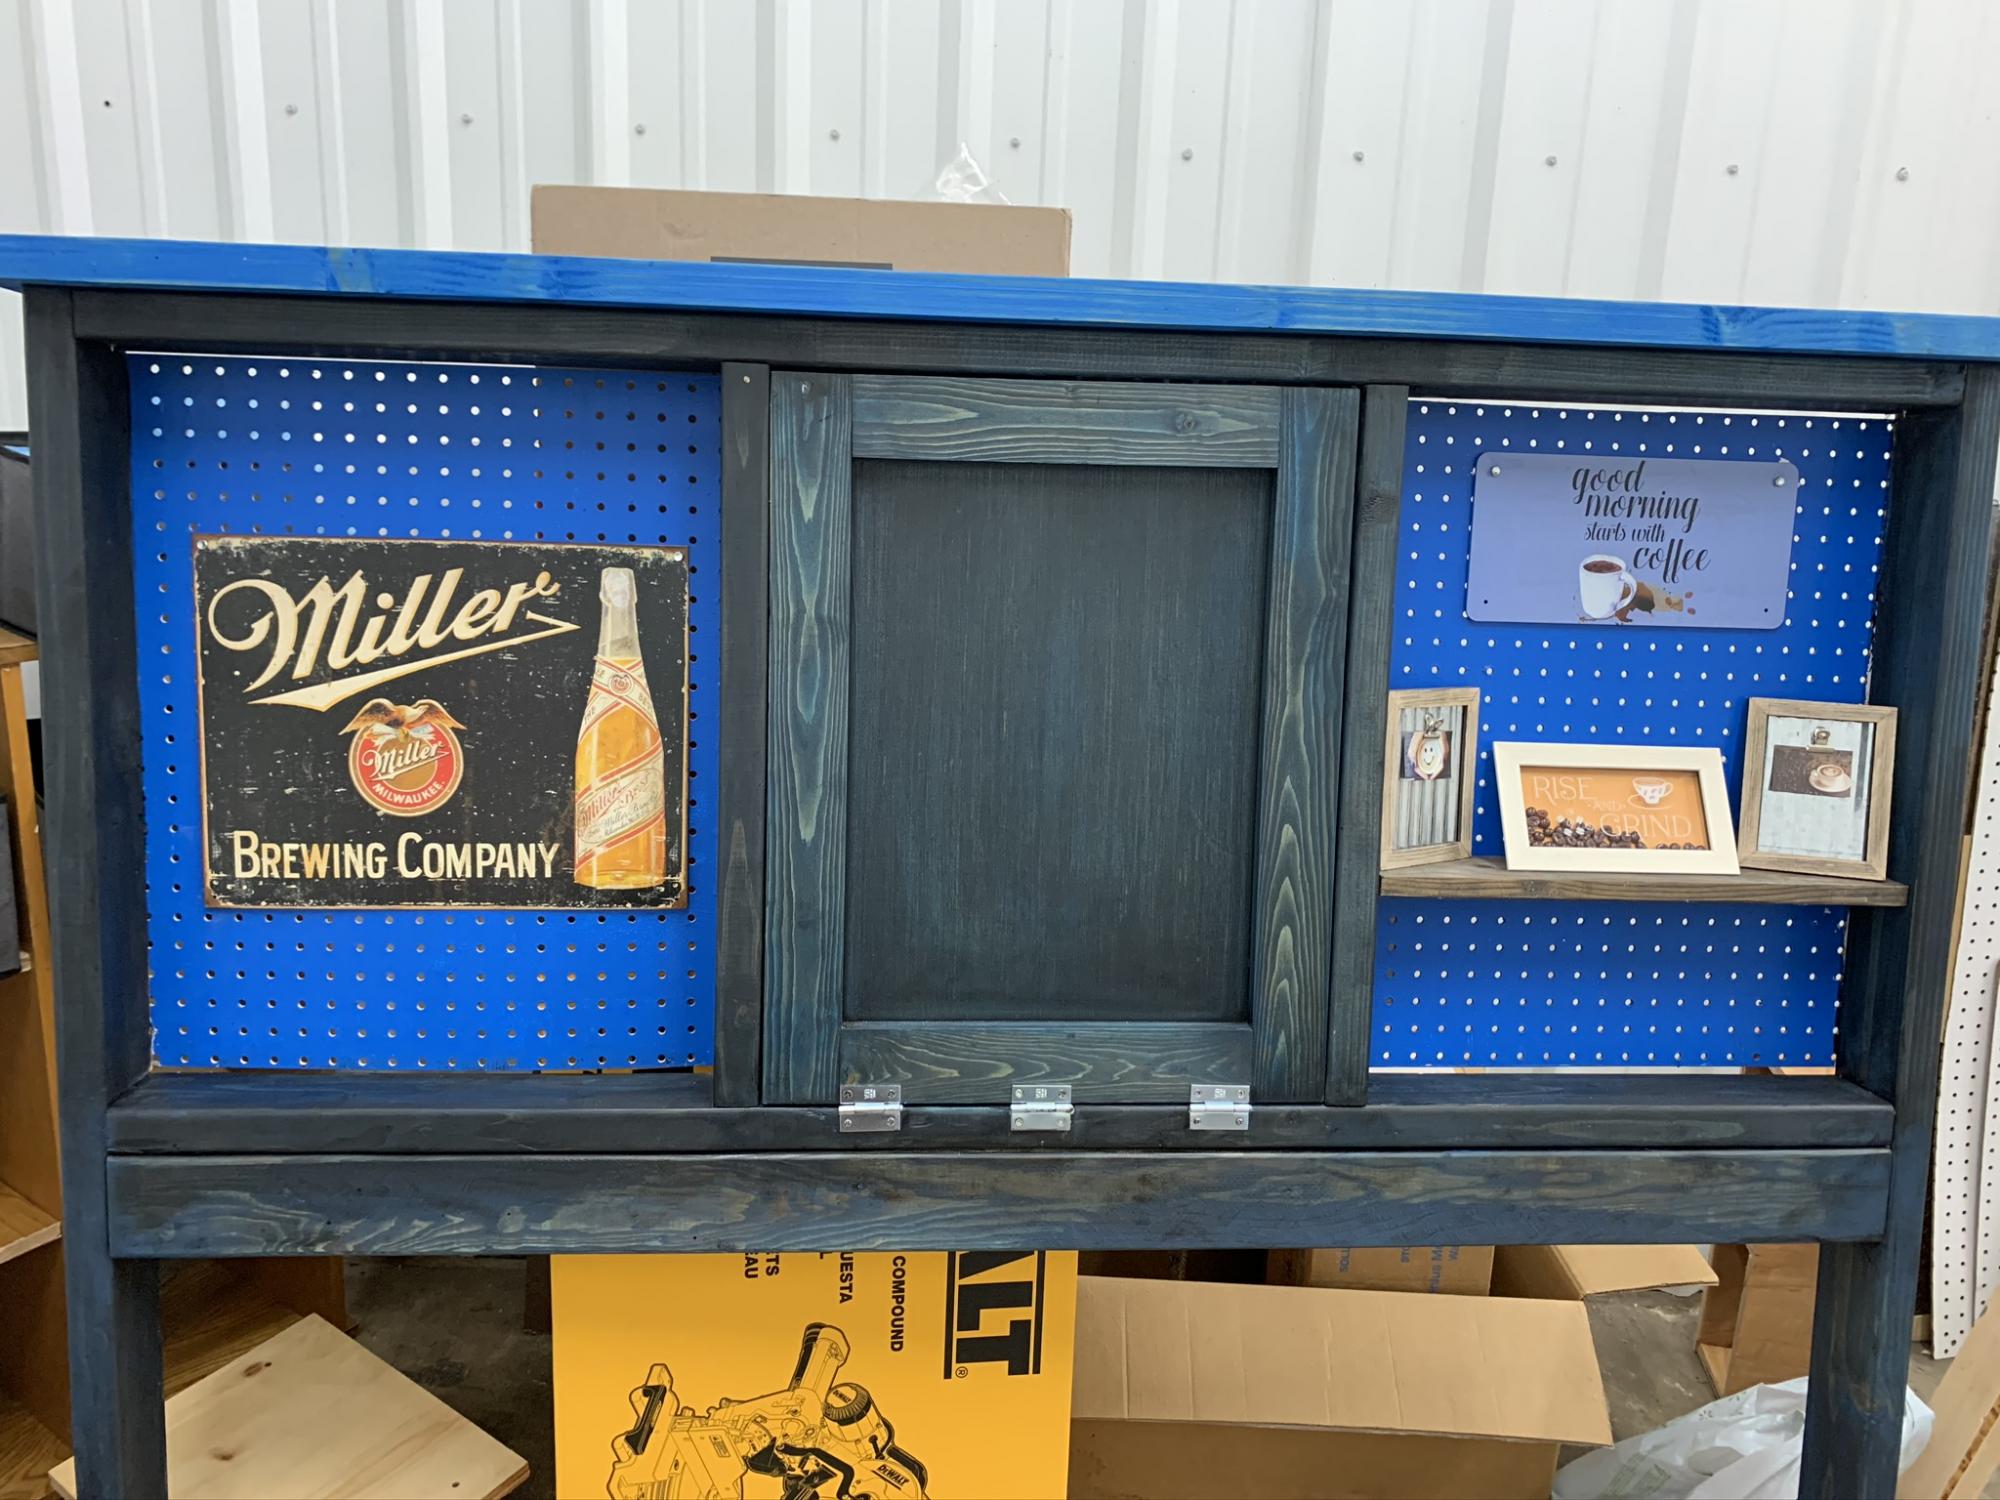
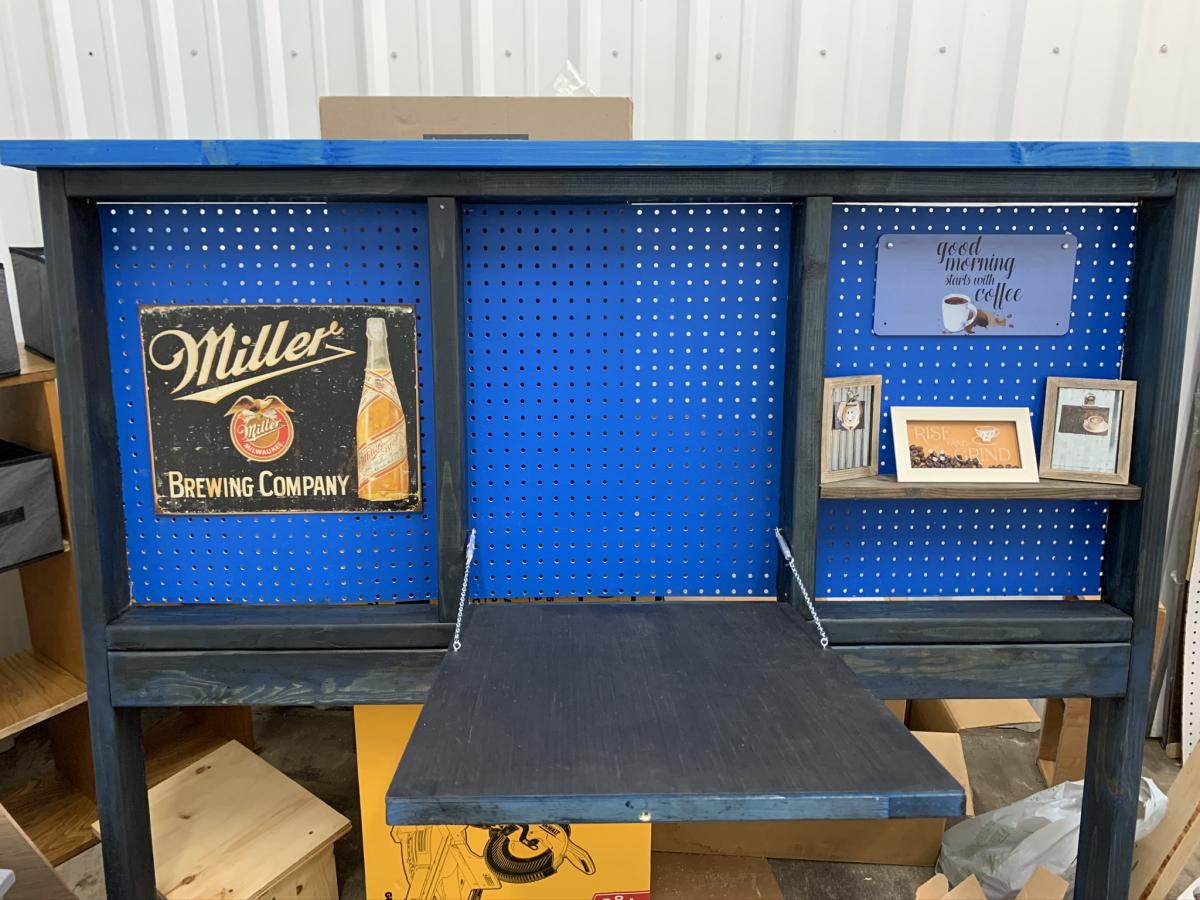
Wow, my 2nd piece of furniture I attempted.  A lot of wood filler was involved.  My shelves seemed too big, so I just did one, then my back board accidentally got used in “open shop” so I used some left over pegboard.  I had fun but spent a lot of time fixing “oops, that doesn’t seem right”. Peg

Estimated Cost
$40
Estimated Time Investment
Week Long Project (20 Hours or More)
Finish Used
Paint and stain

Rustic X Desk

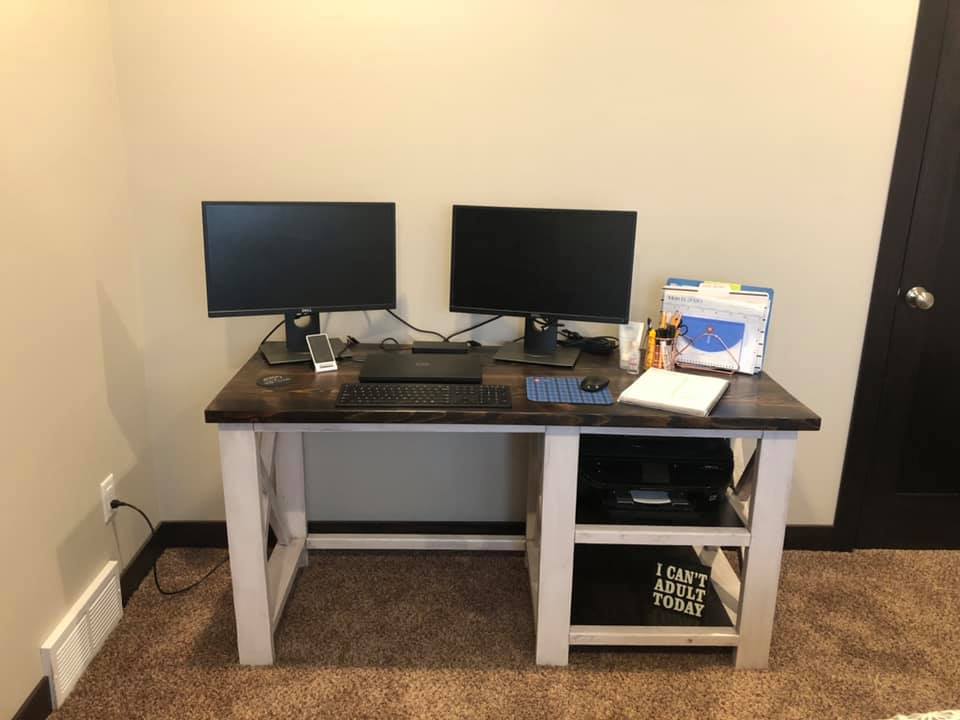
This was my first attempt at this desk and all things considered it turned out pretty well. I glued the top and shelves together instead of using pocket screws. I then stained the top and shelves expresso and used the expresso stain over the white paint on the base and then wiped it off to give it an aged look.

Built from Plan(s)
Estimated Cost
50

Sawhorse Table

Submitted by RHgaijin2 on Sat, 04/25/2020 - 20:48

I made this table for my two boys to do their homework on so I modified it a little to make it shorter.
I used reclaimed 2x4's for the base and MDF for the table top.

Built from Plan(s)
Estimated Cost
$40
Estimated Time Investment
Day Project (6-9 Hours)
Finish Used
black stain, white paint, polycrylic
Recommended Skill Level
Beginner

Poolside Hightop Deck Chair

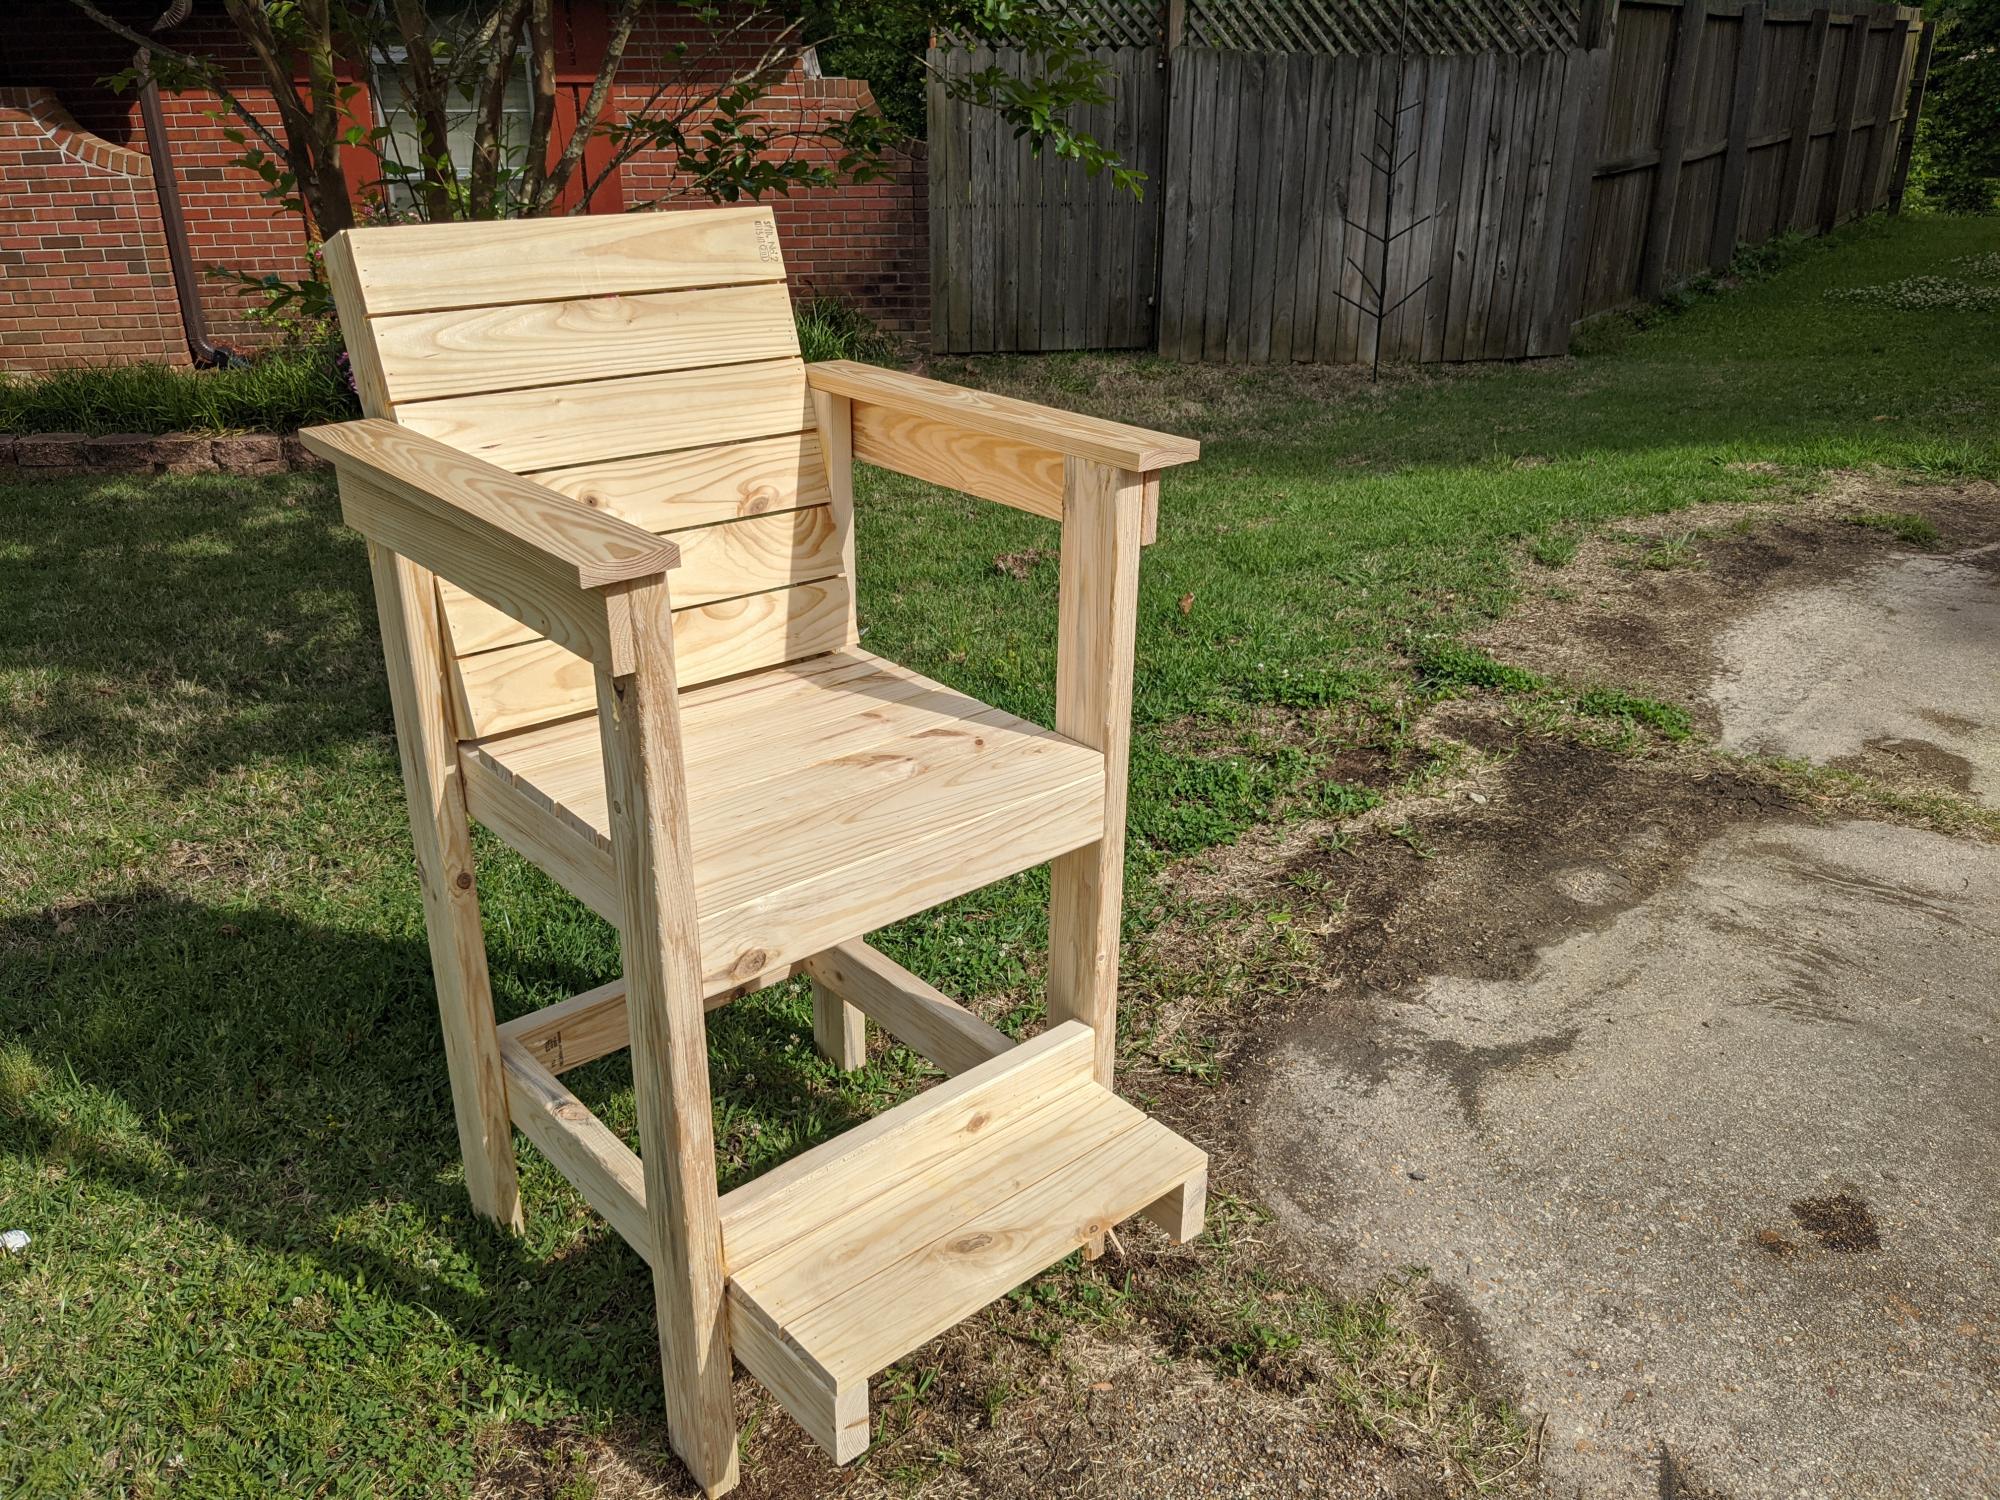
I have used so many of Ana's plans, I decided to design my own chair! I wanted a high top patio style chair that the back was angled and had a footrest. This is perfect for my outdoor patio. I think I need to update the plan already to include a cup holder! Appreciate any feedback or comments.

Estimated Cost
$50
Estimated Time Investment
Afternoon Project (3-6 Hours)
Finish Used
None
Recommended Skill Level
Beginner

A-Frame Chicken Coop (with modifications)

Submitted by anniejw17 on Mon, 07/02/2012 - 18:39

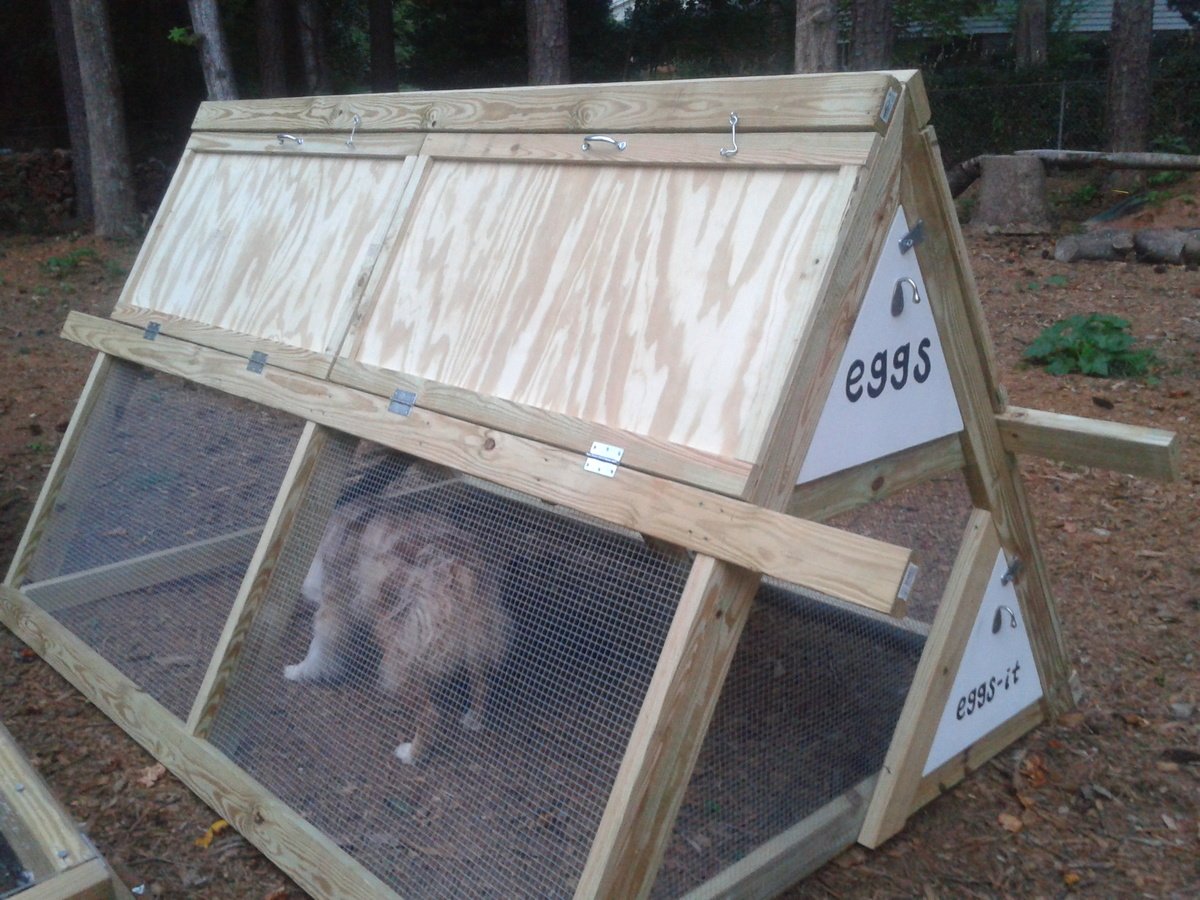
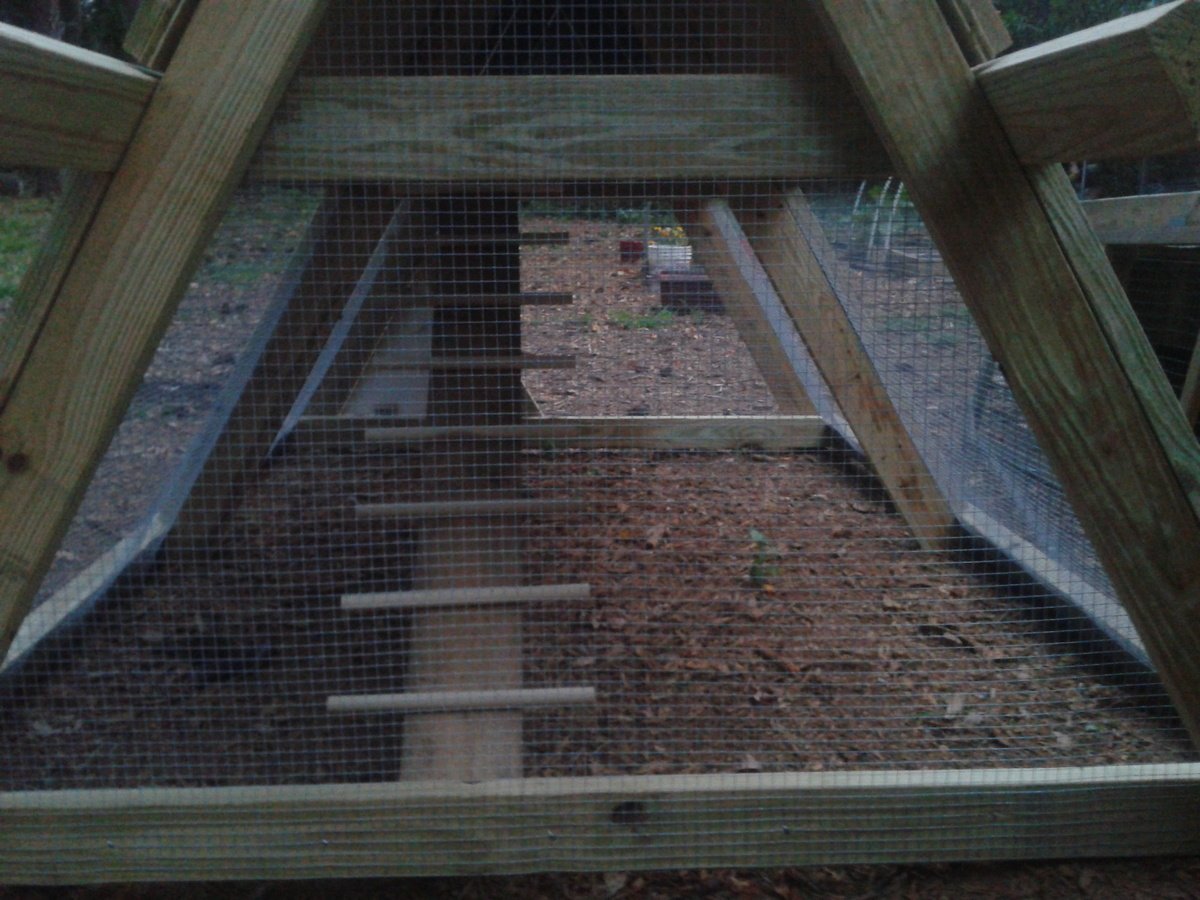
We followed the plans for the A-frame chicken coop very closely, and then modified it a bit at the end.

1. Trim was added to two doors on each side, as suggested. They are secured with latches at the top, more to keep them from falling open than to keep critters from getting in. We used 2x4x10's instead of 2x4x8's on the middle horizontal rail, giving us foot-long handles on each side. My husband and I are able to move the coop about 15 feet at a time, which is pretty good considering it is STURDY!

2. We used 1/2" galvanized hardware cloth instead of chicken wire, as suggested by one commenter (and lots of others in blogland).

3. I cut 1/4" plywood to fit the loft space and coated it with vinyl stick-on tile. This should make it easier to clean. We didn't screw down the plywood, so if we have to, we can remove it to hose it off/scrub it.

4. I cut a triangle of plywood to make an egg door at the end of the roost. It hinges at the bottom (with a 2x4 ripped into a 1x4 to cover the hardware cloth and provide a mounting spot for hinges) and latches at the top. I plan to use cotter pins or something to secure the latch. There is also a piece of untreated 1x4 held in place with tabs at the egg door to prevent bedding from falling out once it's converted to the nesting box (I'm planning to get pullets, not ready to lay yet, so they won't even have a tempting nest box)

5. There was no bottom door in the plans (to allow free-ranging), so I cut a piece of 2x4 to make a triangle against the bottom (same size as the egg door). It folds out (just like the egg door) and will allow the chickens easy access to the yard. We do have hawks in our neighborhood so free time will always be supervised. We also have a dog (who I coaxed into the coop for the main picture, haha!) who will need supervising. She's been around chickens before but you never know what will make her turn on them!

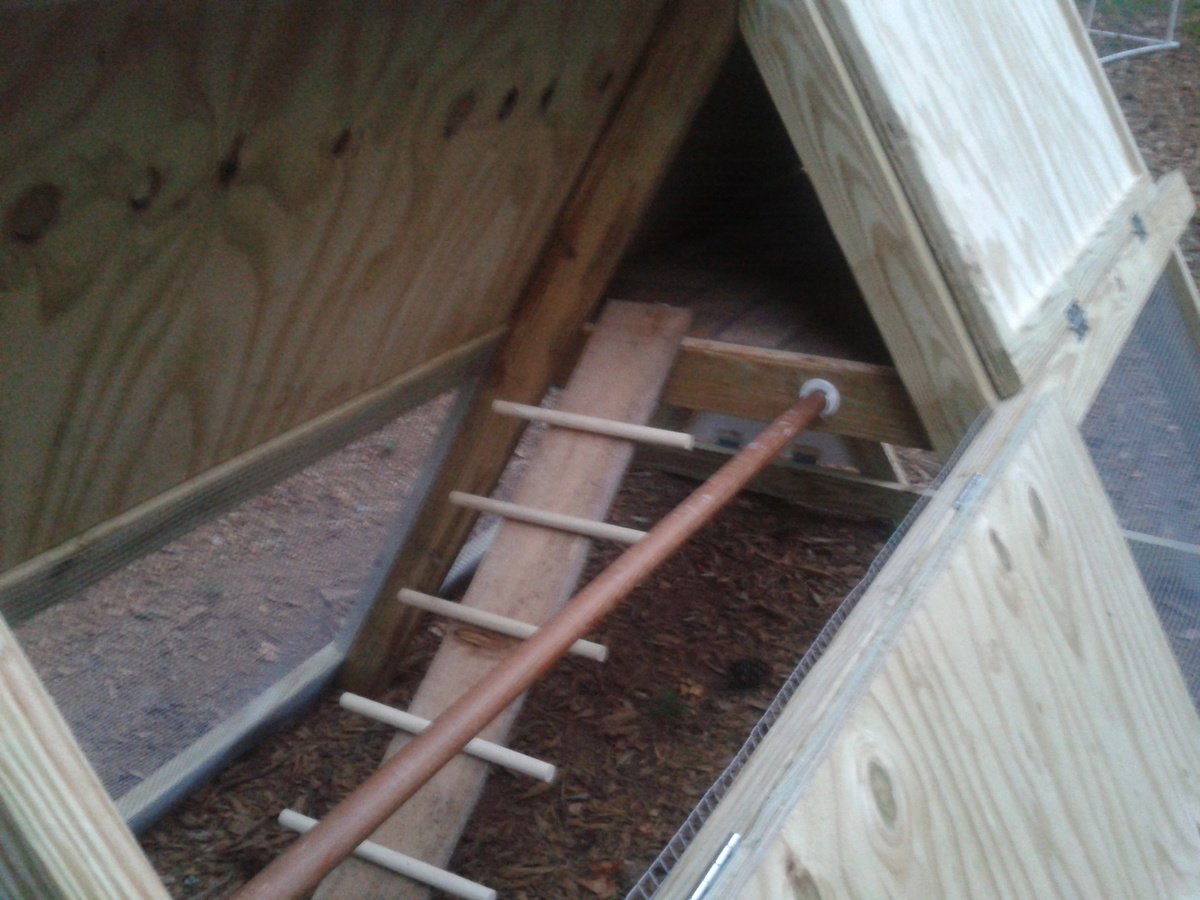
6. There was also no roost in the plans (although if you look at Ana's coop, there is a 2x4 across the middle of the side walls). I had a leftover closet rod, so I mounted that in the covered section parallel to the ladder. The ladder was shifted to the side. For the ladder, I just used a piece of cedar fencing and cut 2 48" dowels into 4 pieces each, and secured those with screws from the underside. I hope my chickens will be able to get up the ladder!

7. I also made a tube feeder from PVC and a dog bowl, and am working on a nipple waterer. Will update post when those are finished!

Now I just have to get some hens! I've been searching craigslist and can't wait!
Built from Plan(s)
Estimated Cost
200
Estimated Time Investment
Day Project (6-9 Hours)
Finish Used
Unfinished except for plywood floor (vinyl stick-on tile) and plywood doors (white exterior acrylic paint)
Recommended Skill Level
Intermediate

Comments

woodworking bench

Submitted by jcengel on Thu, 07/05/2012 - 21:17

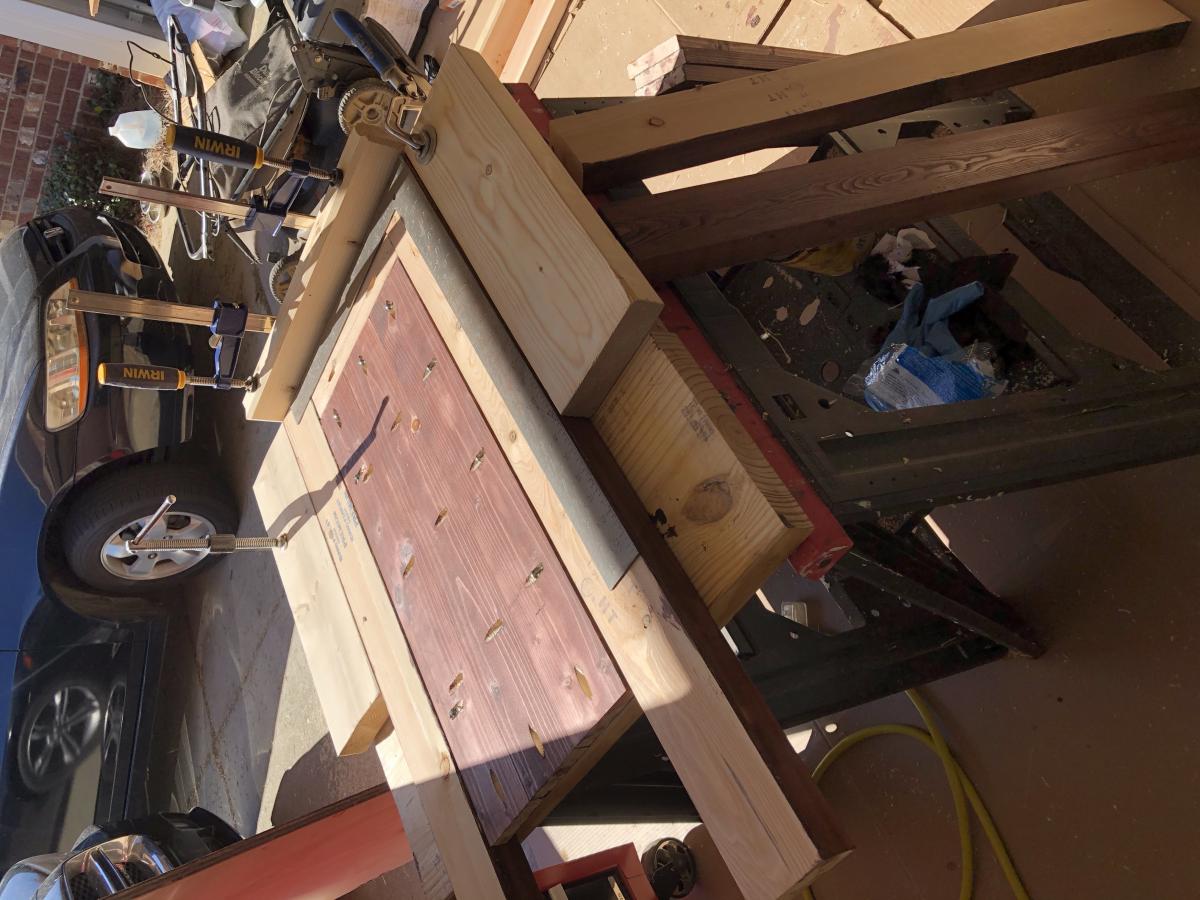
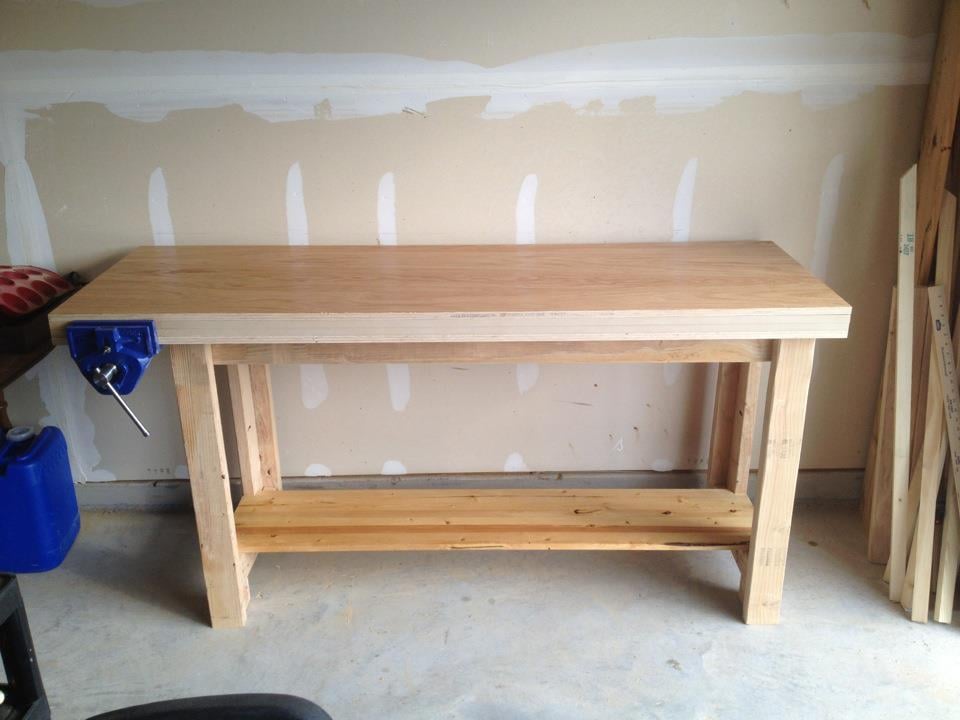
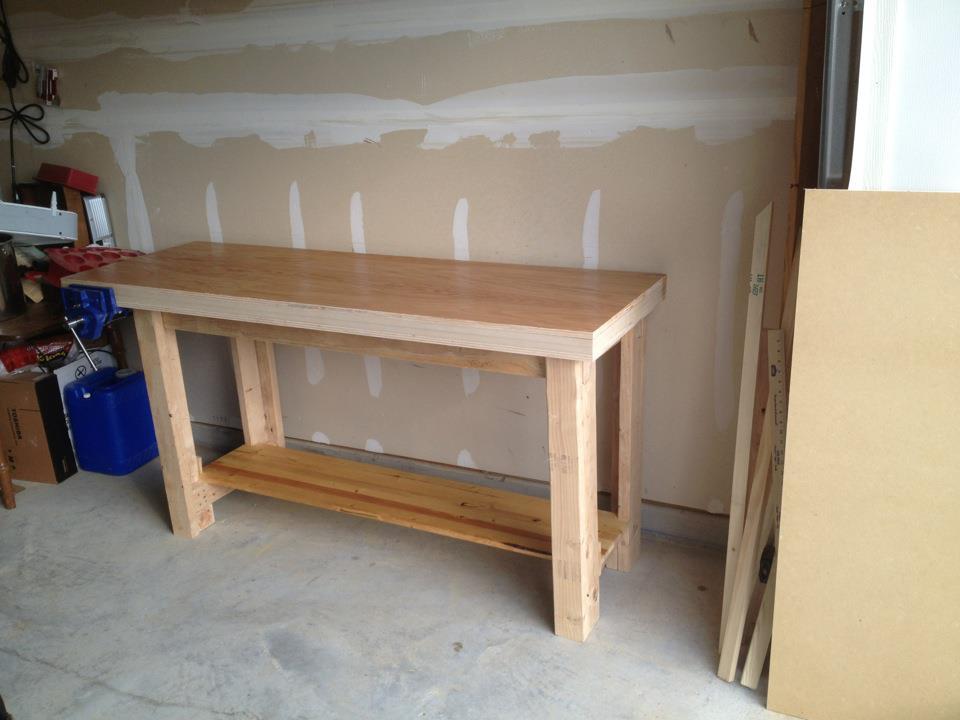
Used the sturdy work bench plans for the base. The base is 60" x 20". The top is 6'x2'. I wanted 2" overhang all around to accomodate clamping. I used 3/4" oak plywood for the benchtop. It's stacked as follows, oak plywood, 3/4" mdf x 2, oak plywood for a massive 3" thick top. I used pocket holes to join the legs and on a few of the other joints including to attach the top. The benchtop layers are screwed together with 2.5" wood screws with countersinks for the heads. I would have put a full shelf in but that's the piece of wood I had so I used it. I bought the 7" undermount woodworkers vise online for around $70. It's mounted with 2.5" lag screws and washers. I did not use exact 2x4's for the base, I used the standard 2x4's (which are actually 1.5" by 3.5"). The bench is pretty sturdy as is but with the massive top/vise and not using standard 2x4's it is not as solid as I would like. It's fine for now but eventually I going to install some threaded rods through the legs length and width to pull it together rock solid. I put some tung oil on the top and later i'll put some wax paste over that. I'm going to seal the edges with shellac or maybe just leave as is. Eventually put some bench dog holes in the top for my vise. I did this all with a cordless drill/bits, kreg jig, circular saw with homemade fence, rulers, squares, random orbit sander etc. Took about two weeks time, working mostly on weekends. The bench alone is around $130, all bought from a "big box" store. Be ready to spend more $$ on tools if you don't have them. This is my 2nd project.

Built from Plan(s)
Estimated Time Investment
Week Long Project (20 Hours or More)
Finish Used
tung oil
Recommended Skill Level
Starter Project

Modern Adirondack

Submitted by Anonymous (not verified) on Wed, 06/10/2020 - 10:10

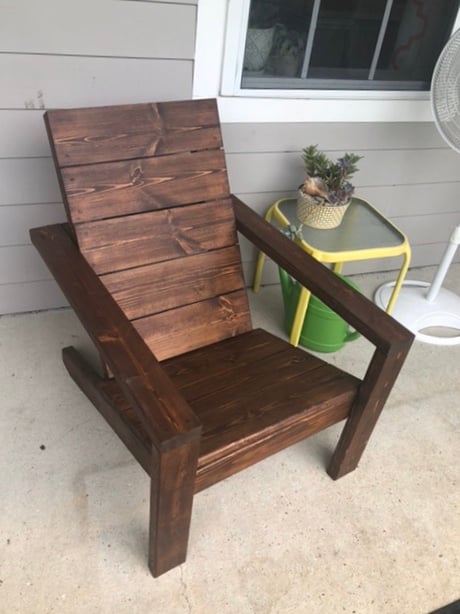
My wife and I were tired of the cheap plastic chairs but not wanting to spend a fortune. I came across Ana’s site and these great plans so I gave it a shot. Everything was pretty straightforward. I decided to use 1x6’s for the seat and back slats instead of 1x10’s. I also used dowel rods instead of wood filler to close all of the screw holes and I Roy fed the edge of the front seat slat one the router. I’m currently working on a partner for this chair with some adjustments (Making it 2” wider and using pocket hole and other techniques to hide the screws).

Estimated Cost
$40
Estimated Time Investment
Afternoon Project (3-6 Hours)
Finish Used
Minwax English Chestnut stain.
Valspar clear deck/outdoor furniture sealant.
Recommended Skill Level
Beginner

Comments

Cute corner desk

Submitted by Anonymous (not verified) on Sun, 09/11/2016 - 07:55

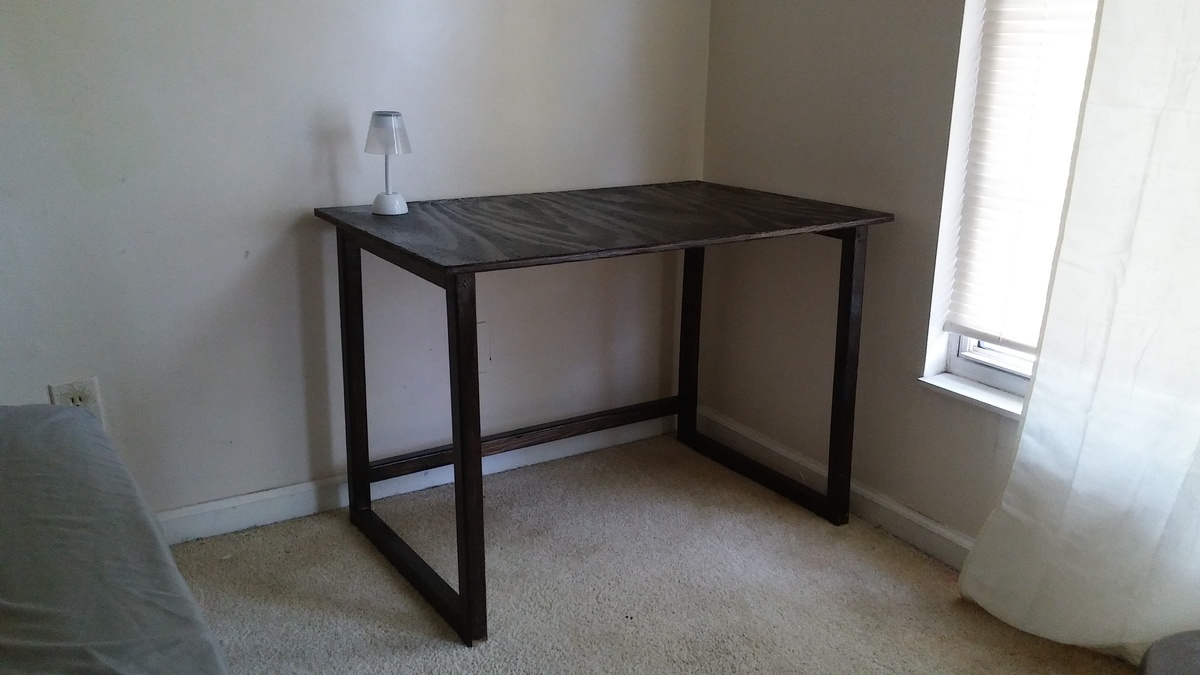
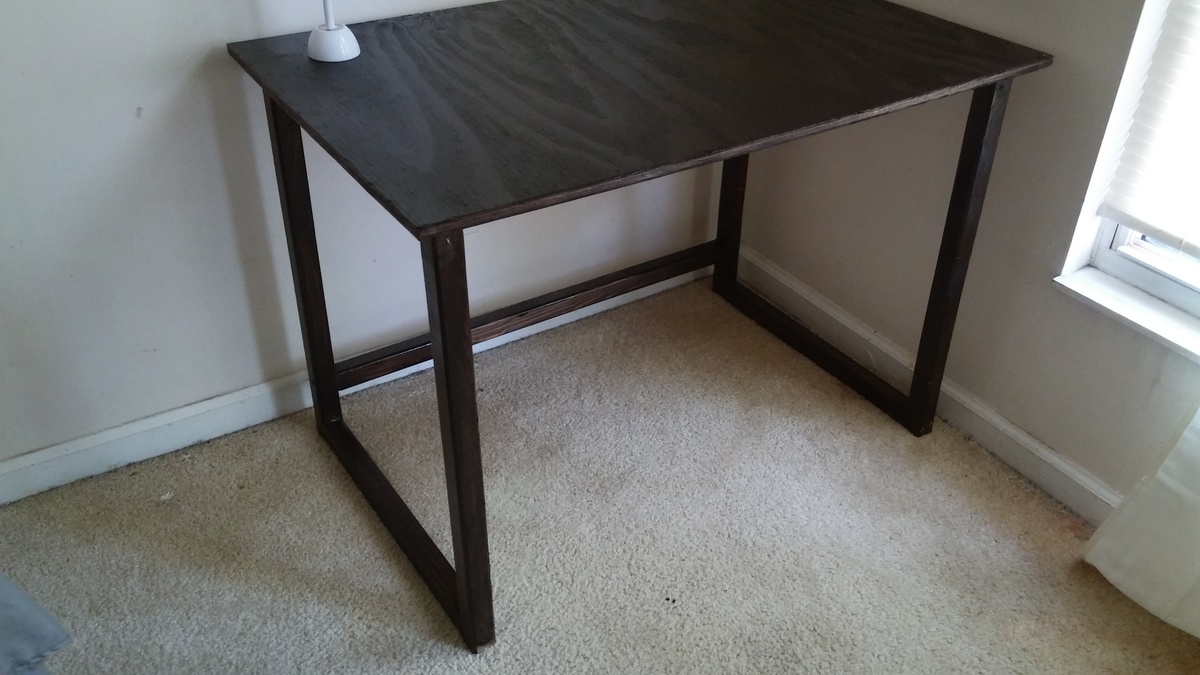
This 2x2 desk base was the perfect size for our 6' exchange student. He needed plenty of room width and length wise. We went with stain in Kona. More time was spent staining then building.

Estimated Cost
$20
Estimated Time Investment
An Hour or Two (0-2 Hours)
Finish Used
It is the base for a corner desk
Recommended Skill Level
Starter Project
Back