Landon's Mischief Step Stool
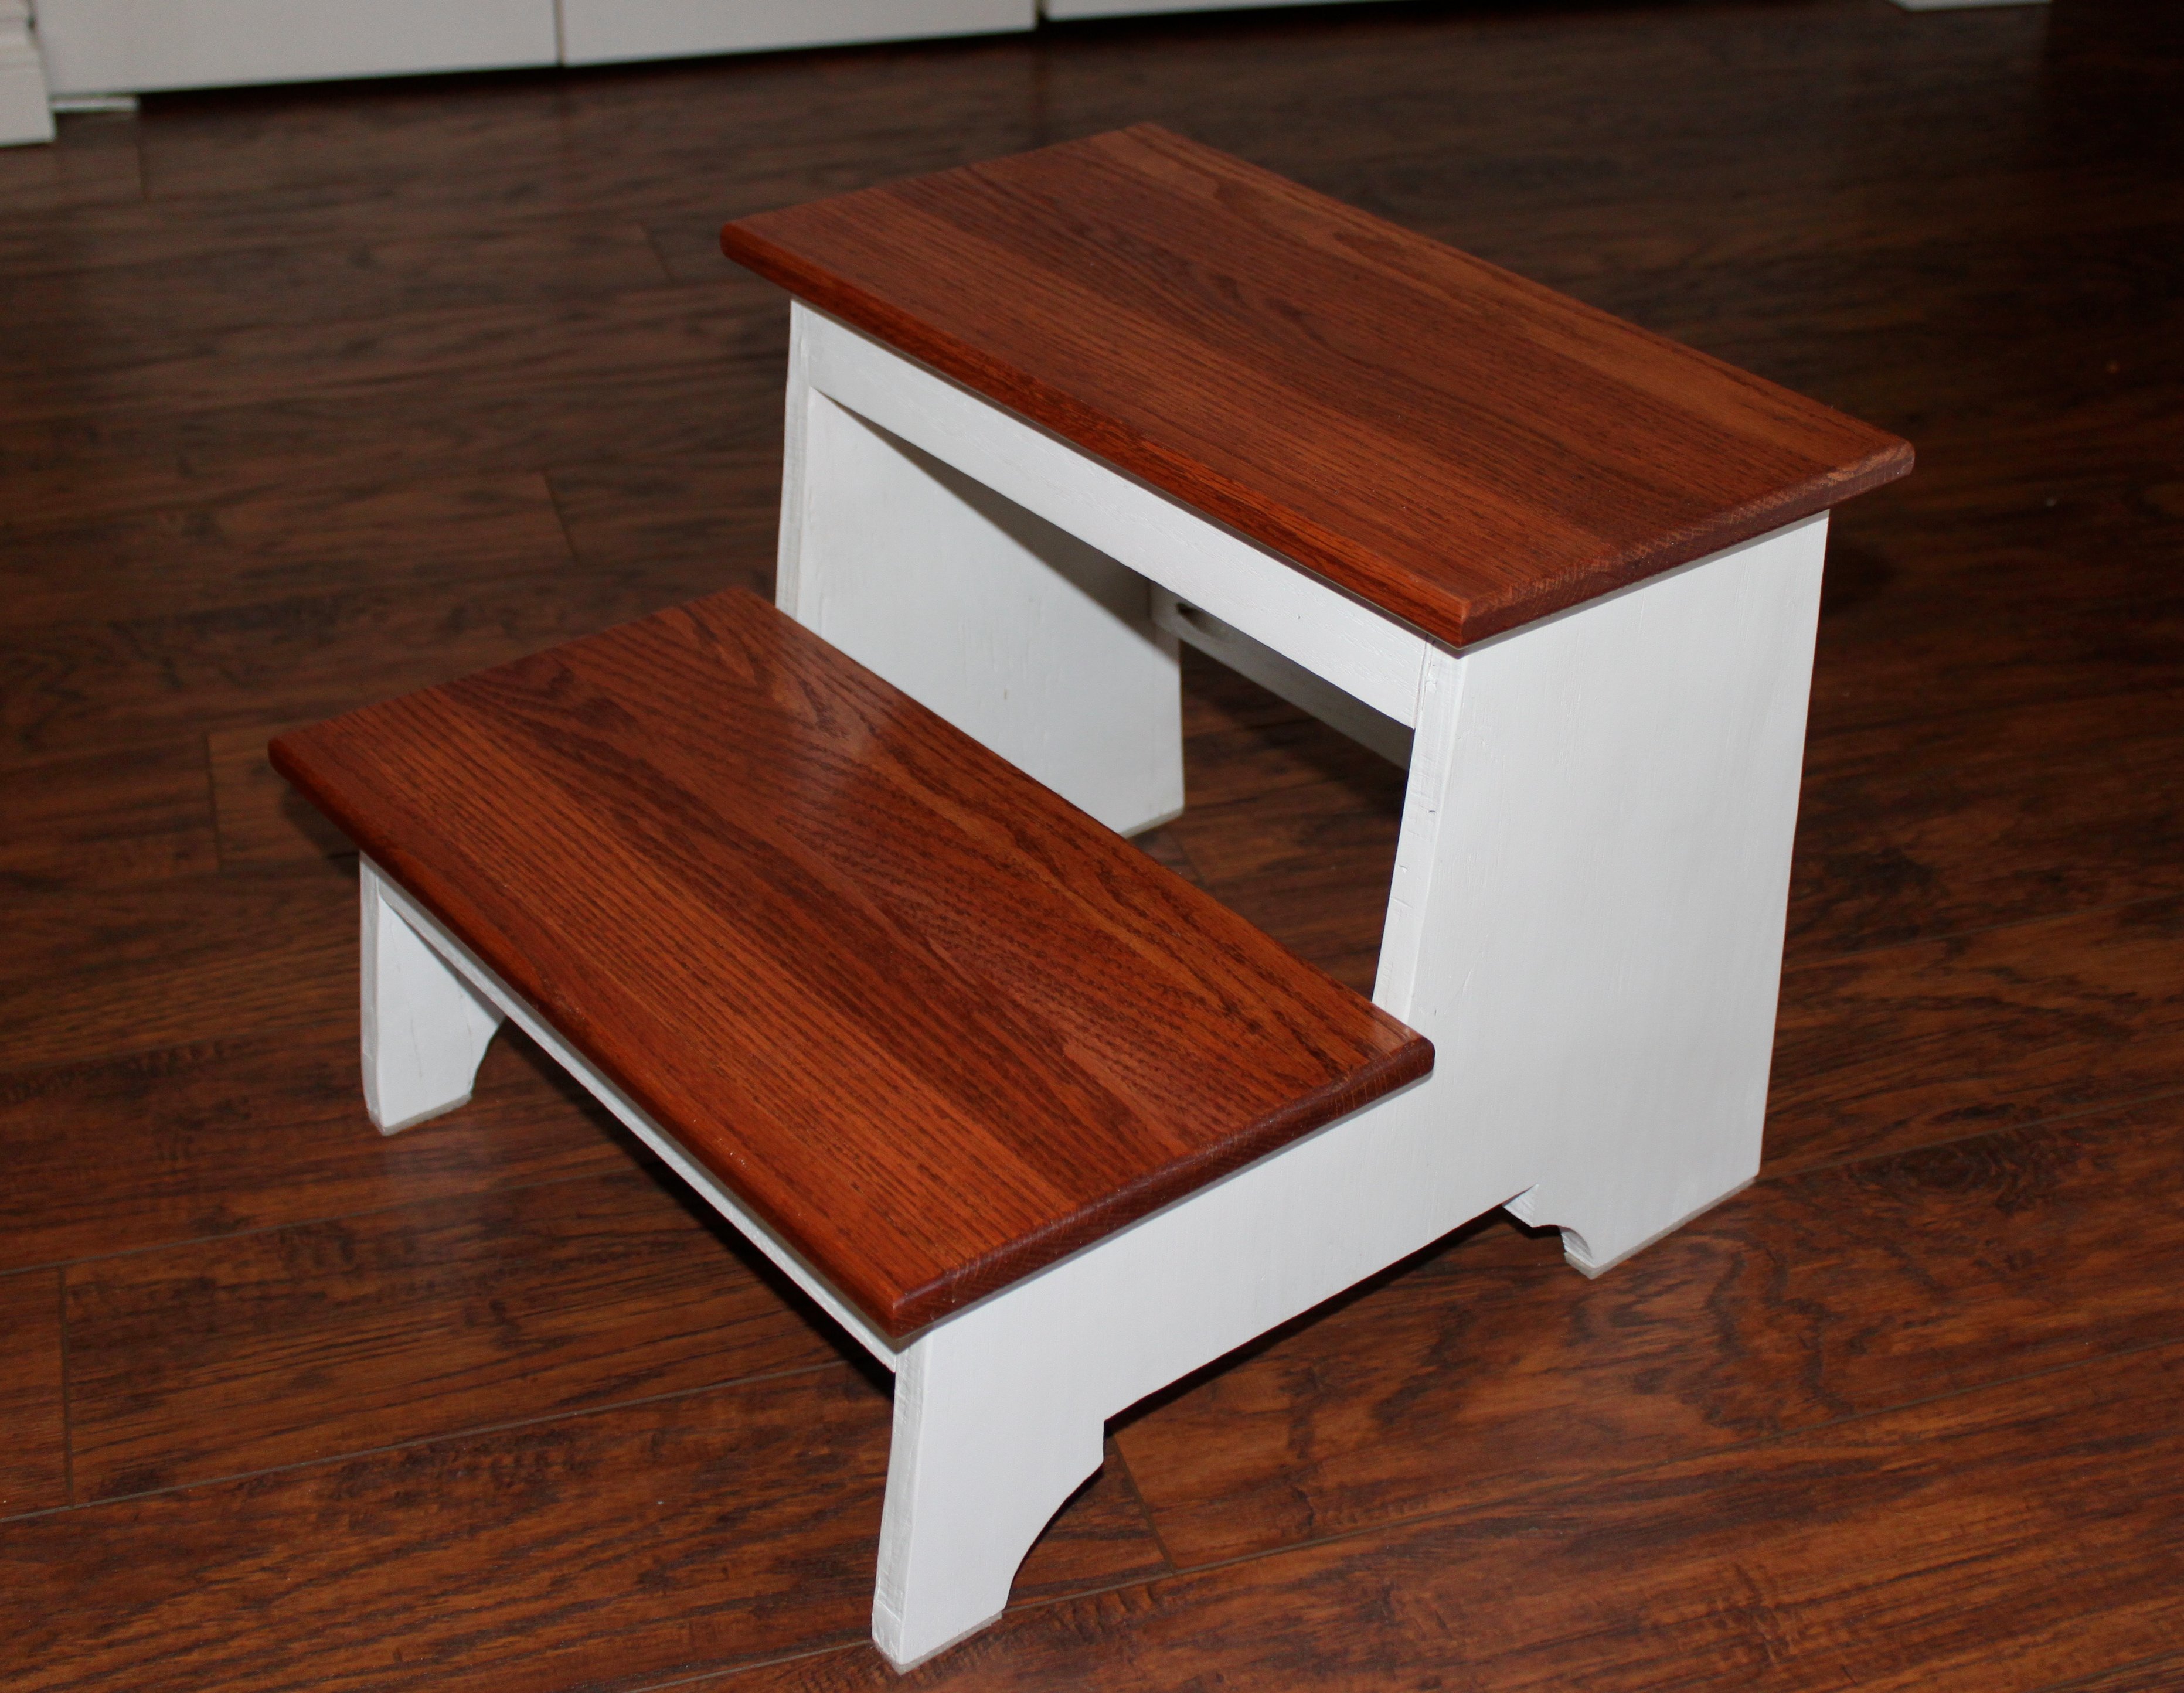
Very sturdy and stylish step stool built for my son in a style to match the kitchen and bathroom in our house.
This entire project was built using scrap plywood from a previous project and reclaimed oak boards that we demoed from our house while remodeling.
The sides were simply cut using a table saw to the rough dimension and then I added the details using a bandsaw. The stairs and rails were rough cut on the tablesaw and then milled using a jointer and planer to the specifications in the plan. Once cut I used a pocket screw jig to drill all the necessary holes before finishing assembly on the base. Each section was finished separately and then I used pocket screws to attach the steps last.
Very easy project that I made slightly more complicated by using reclaimed wood and a 2 tone design. Would recommend pocket screws to ensure strength and durability...I can stand on this and it doesn’t even budge!
Thanks for the plans!!
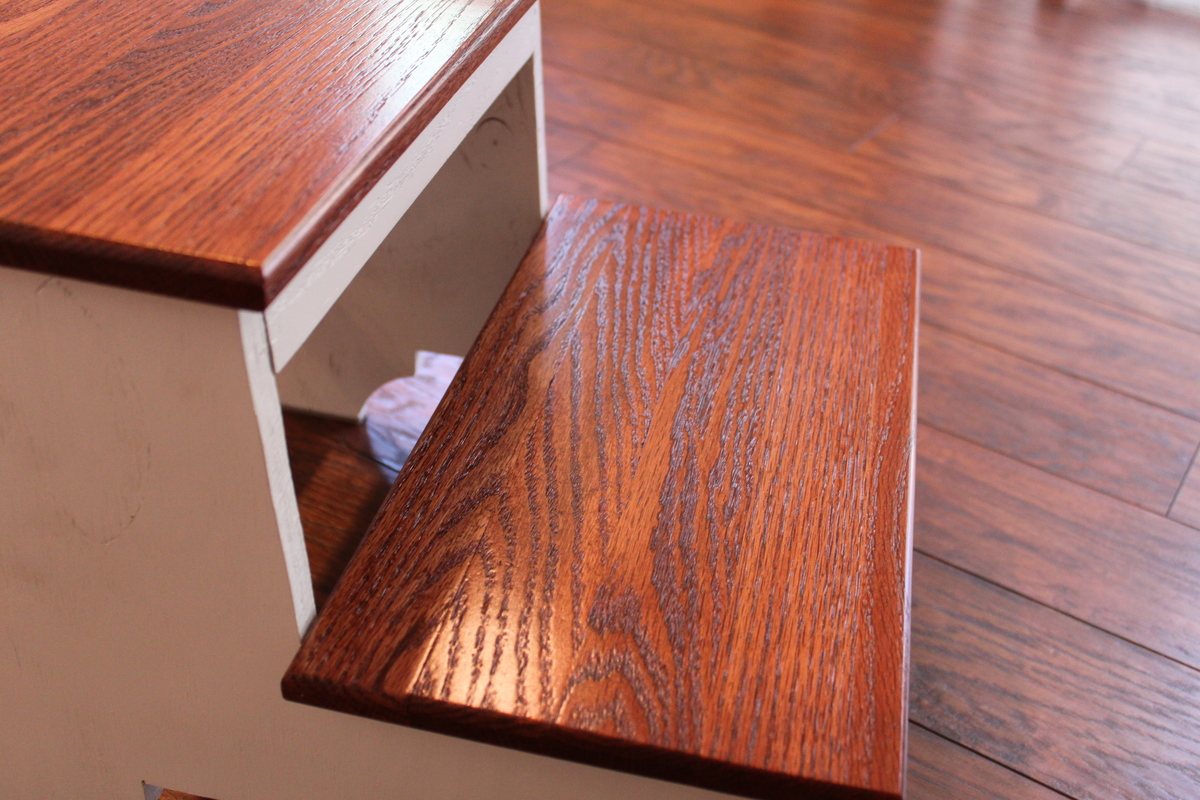
Steps were stained using Minwax Red Chestnut oil based stain.
The whole thing was finished using 2 coats of a clear Poly applied with a HVLP Sprayer.