Community Brag Posts

Pottery Barn Inspired Dresser

I drew up the plan and built it with my sister. The drawers are fake, all of them are swing doors. Even though it's not perfect, I think it turned out great given that we built it in my sister's small city apartment.
Estimated Cost
$200
Estimated Time Investment
Week Long Project (20 Hours or More)
Finish Used
Two coats of paint and polyurethane.
Recommended Skill Level
Starter Project
Comments

Sun, 06/26/2011 - 18:39
Thank you!!
Thank you!! I used 1X3's for the beadboard, so the whole thing is very heavy! :)
In reply to Nice Job by Ryver (not verified)
Mon, 07/04/2011 - 19:57
Thank you! And sorry, I
Thank you! And sorry, I doodled the plan on a piece of paper and didn't get to do it properly in google sketch :p I aso wanted to do the drawers, but the last time I made drawers it was a lot of work, and between the budget and lack of space/tools, a faux drawer face was an easier option. I would love to build this again with proper tools, and when I do, I will make sure to upload the plan! Thanks again!
Step Stool for a Friend
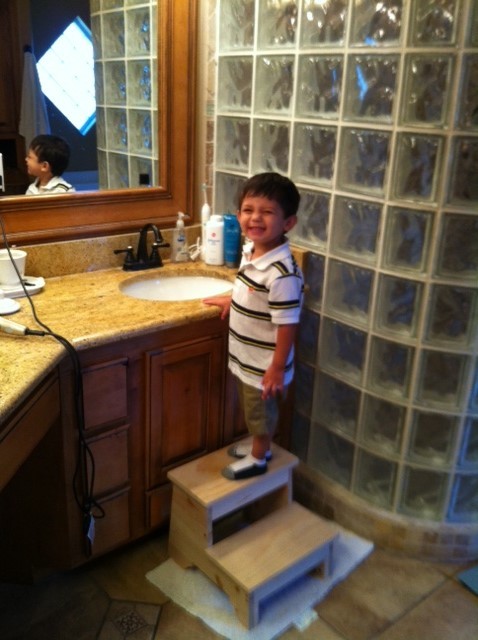
At dinner a couple of nights ago with a good friend and his wife she commented that she really needed a stool of some sort for her older kid to stand on at the bathroom sink. Well that need became the next quest for me. I really savor trying to fill a need quickly and successfully. It took a few hours from the scrap pile to put the stool together and it appears from the picture that it was a success.
I deviated from the plan just a little by adding stiffeners on the four legs just because I did not like the direction of the wood grain and felt they might break off with enough lateral force.
If I build another stool of this type I think I would hinge the top step to give access to a small storage compartment. Should be easy to do and could add some versatility to the stool's function.
Built from Plan(s)
Estimated Cost
Probably about $5
Estimated Time Investment
Afternoon Project (3-6 Hours)
Finish Used
None, just a lot of sanding.
Recommended Skill Level
Beginner
Adirondack ski chair

Had some old skis I've been wanting to make into a chair. The Home Depot plans worked perfectly for the base. Cut the back brace a bit longer to fit the skis
Built from Plan(s)
Estimated Cost
$50
Estimated Time Investment
Afternoon Project (3-6 Hours)
Recommended Skill Level
Beginner
Modern Farmhouse Bed
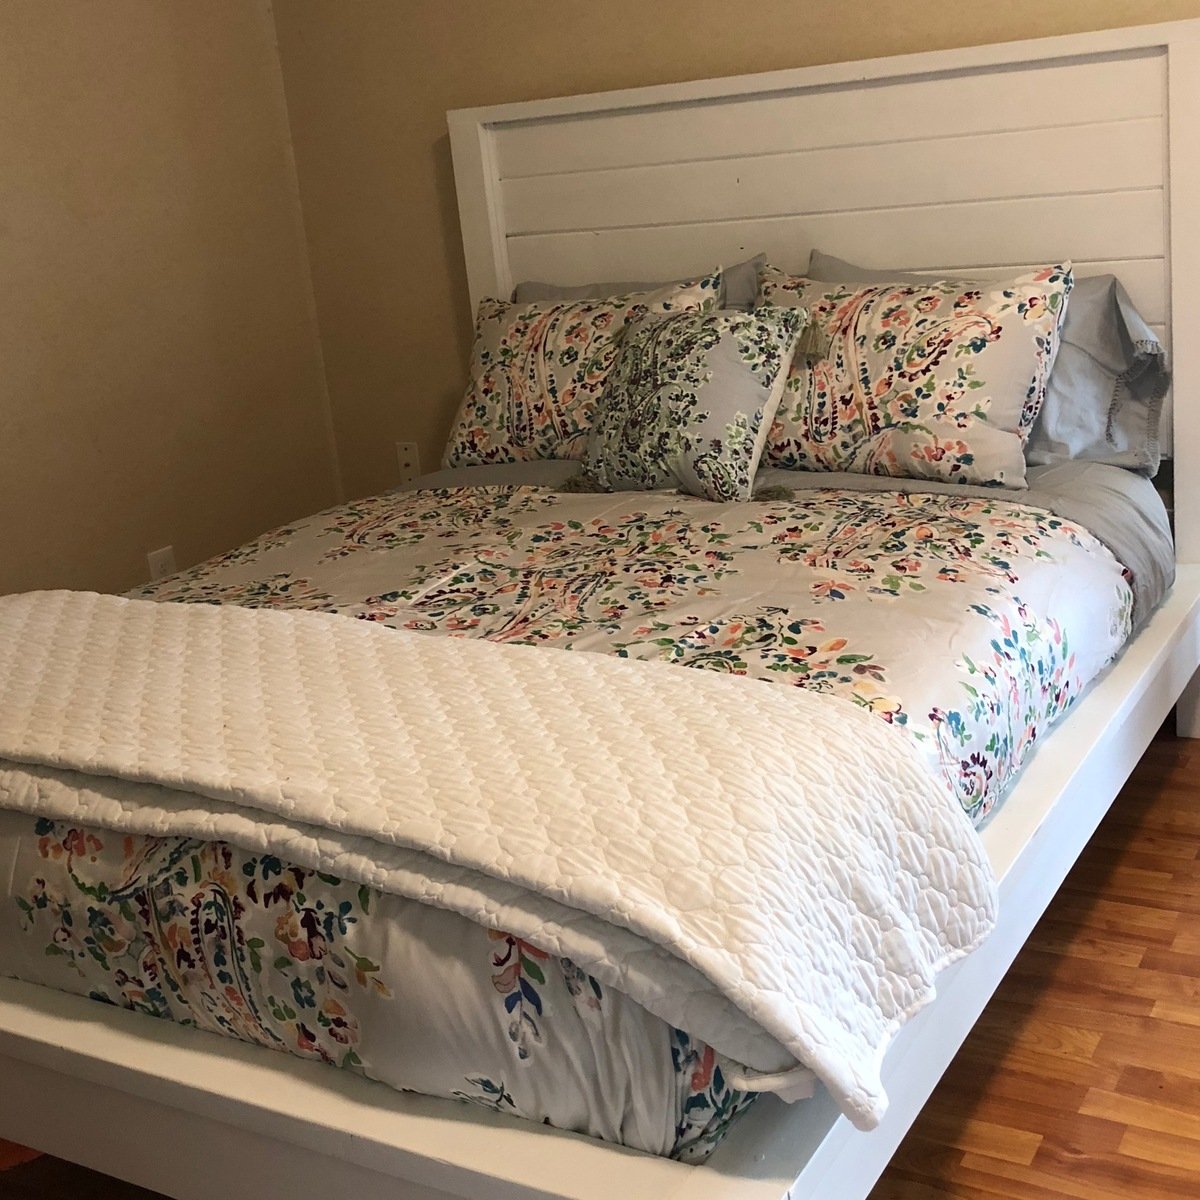
I wish I could get a better picture, but the bed is in an odd-shaped space and I can't back up enough to get a full picture. We used Fusion Mineral Paint to finish it. I love that paint, no need to prime OR add a protective finish! After it fully cured, this paint is so durable, and marks easily wash off.
This was our first build ever, and the plans were very easy to follow. We had it built in one day, and painted in the next. Definitely gave us confidence to continue on to other projects!
Built from Plan(s)
Estimated Cost
$100 in wood, $40 in paint
Estimated Time Investment
Weekend Project (10-20 Hours)
Finish Used
Fusion Mineral Paint in "Picket Fence"
Recommended Skill Level
Beginner
Outdoor Sofa
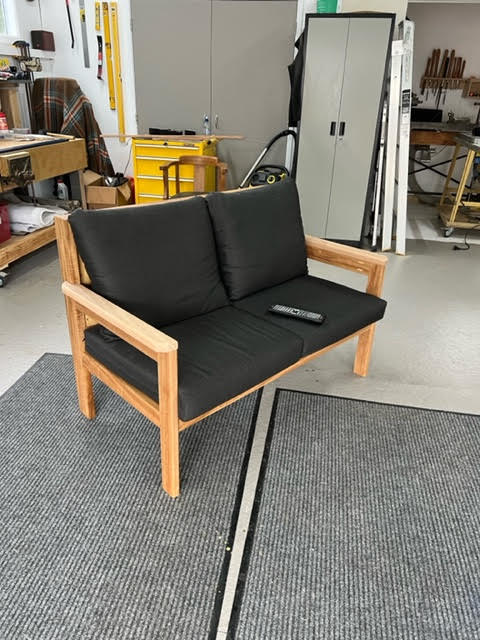
Two seater couch inspired by your web site . I have altered the design a little and added an ottoman . Built from Australian Eucalypt . Nicknamed Blackbutt Gum . It’s a hardwood but finishes very nice , sanded with 240 grit , varnished with marine grade diluted 10% with turps . Look forward to your weekly plans they inspire me to build projects and give me lots of ideas .
by Richard
Northland
New Zealand
Built from Plan(s)
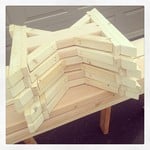
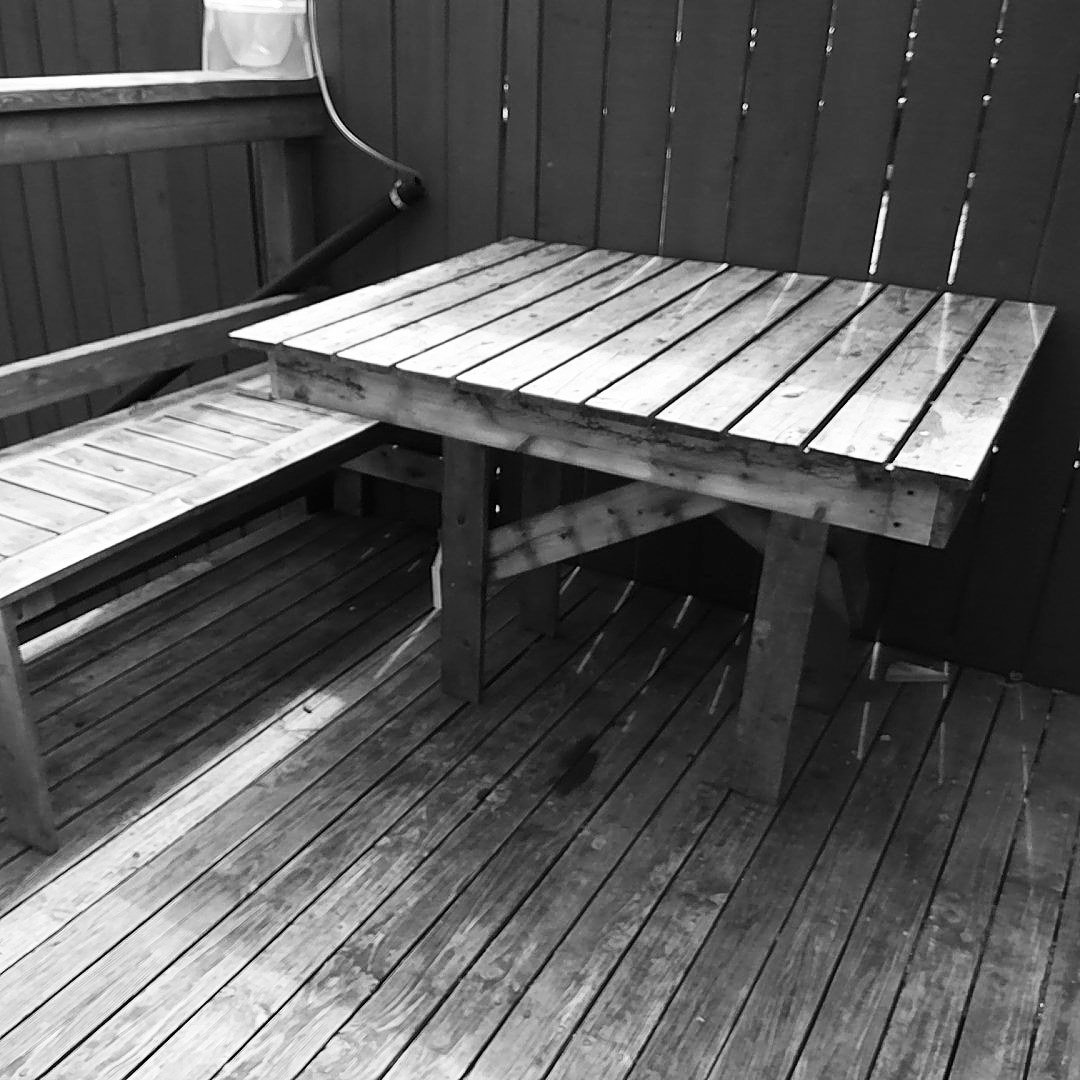
x table and benches

Good plans and easy to follow directions.
Built from Plan(s)
Estimated Cost
$110
Estimated Time Investment
Afternoon Project (3-6 Hours)
Finish Used
None yet.
Recommended Skill Level
Beginner
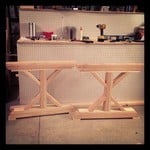
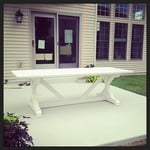
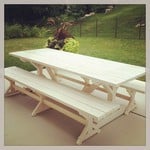
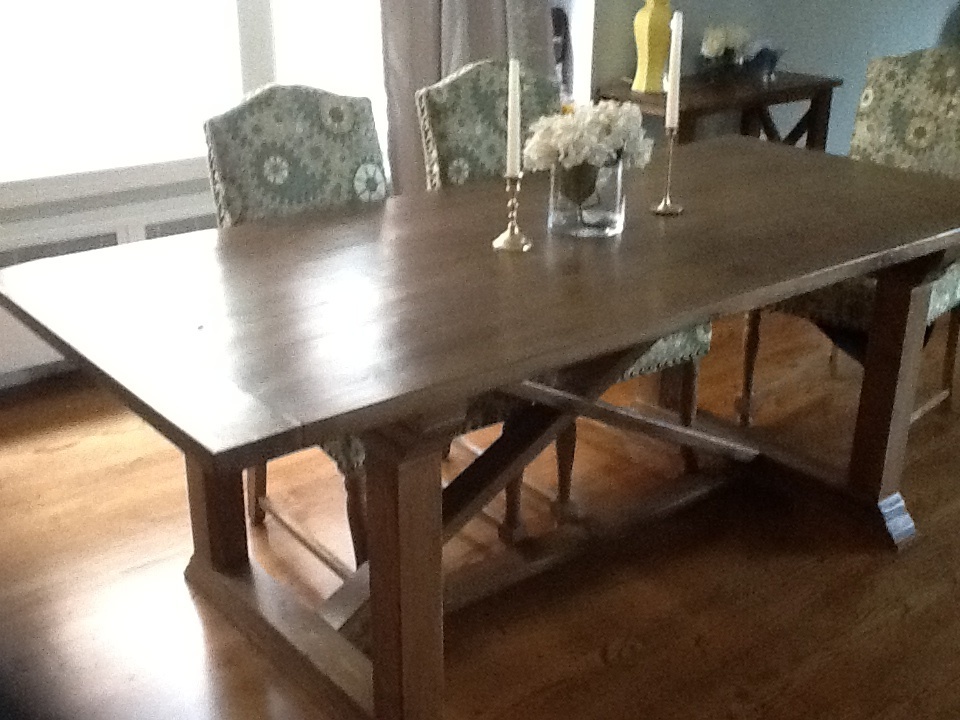
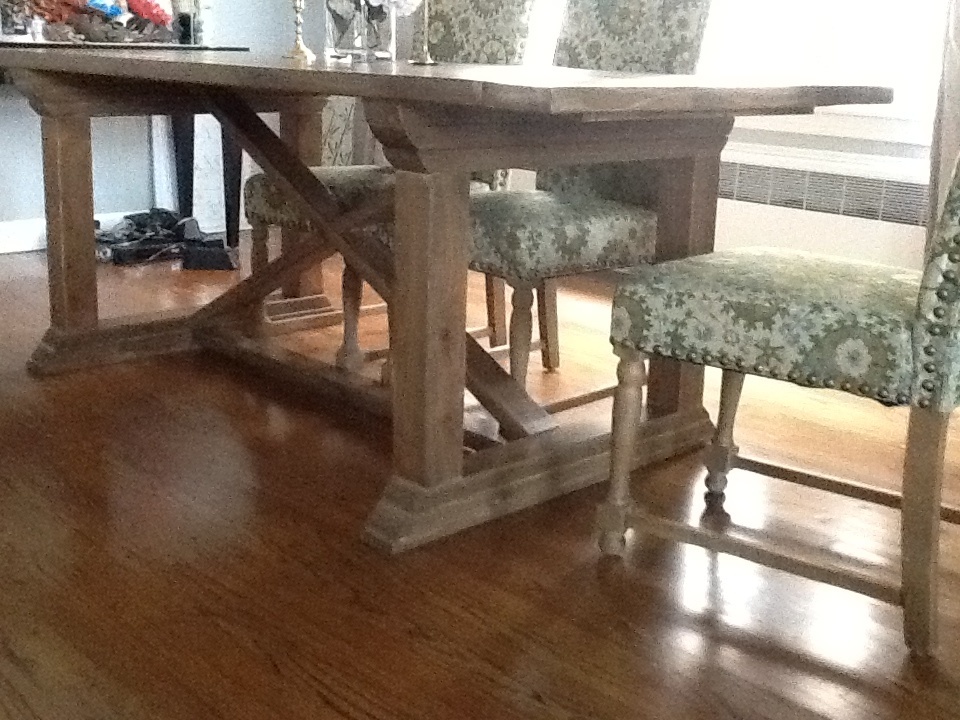
Fancy X Farmhouse Table and Benches
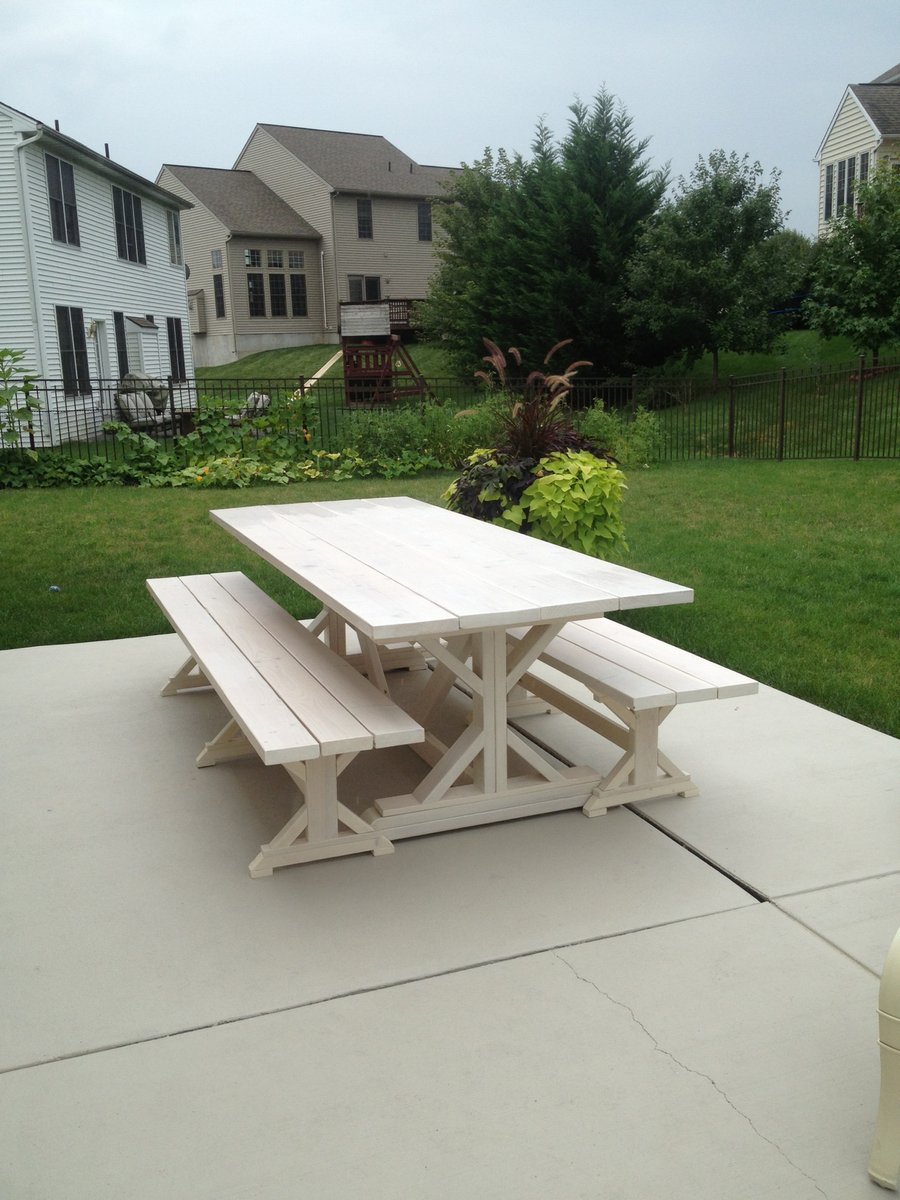
I LOVE my new patio table and benches. They came out great, and I hope they hold up for several years with the waterproofing stain I used.
Built from Plan(s)
Estimated Time Investment
Week Long Project (20 Hours or More)
Finish Used
Behr Waterproofing Stain in semitransparent Navajo White
Recommended Skill Level
Intermediate
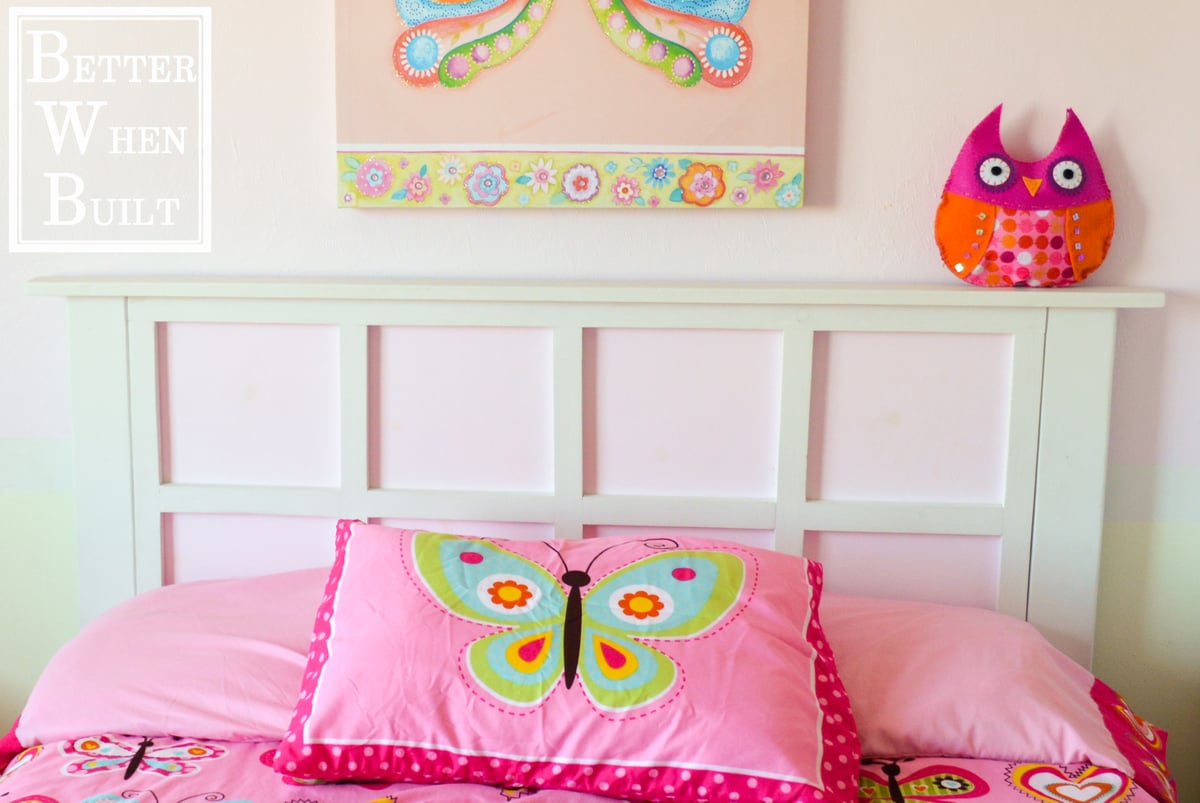
Storage Bed
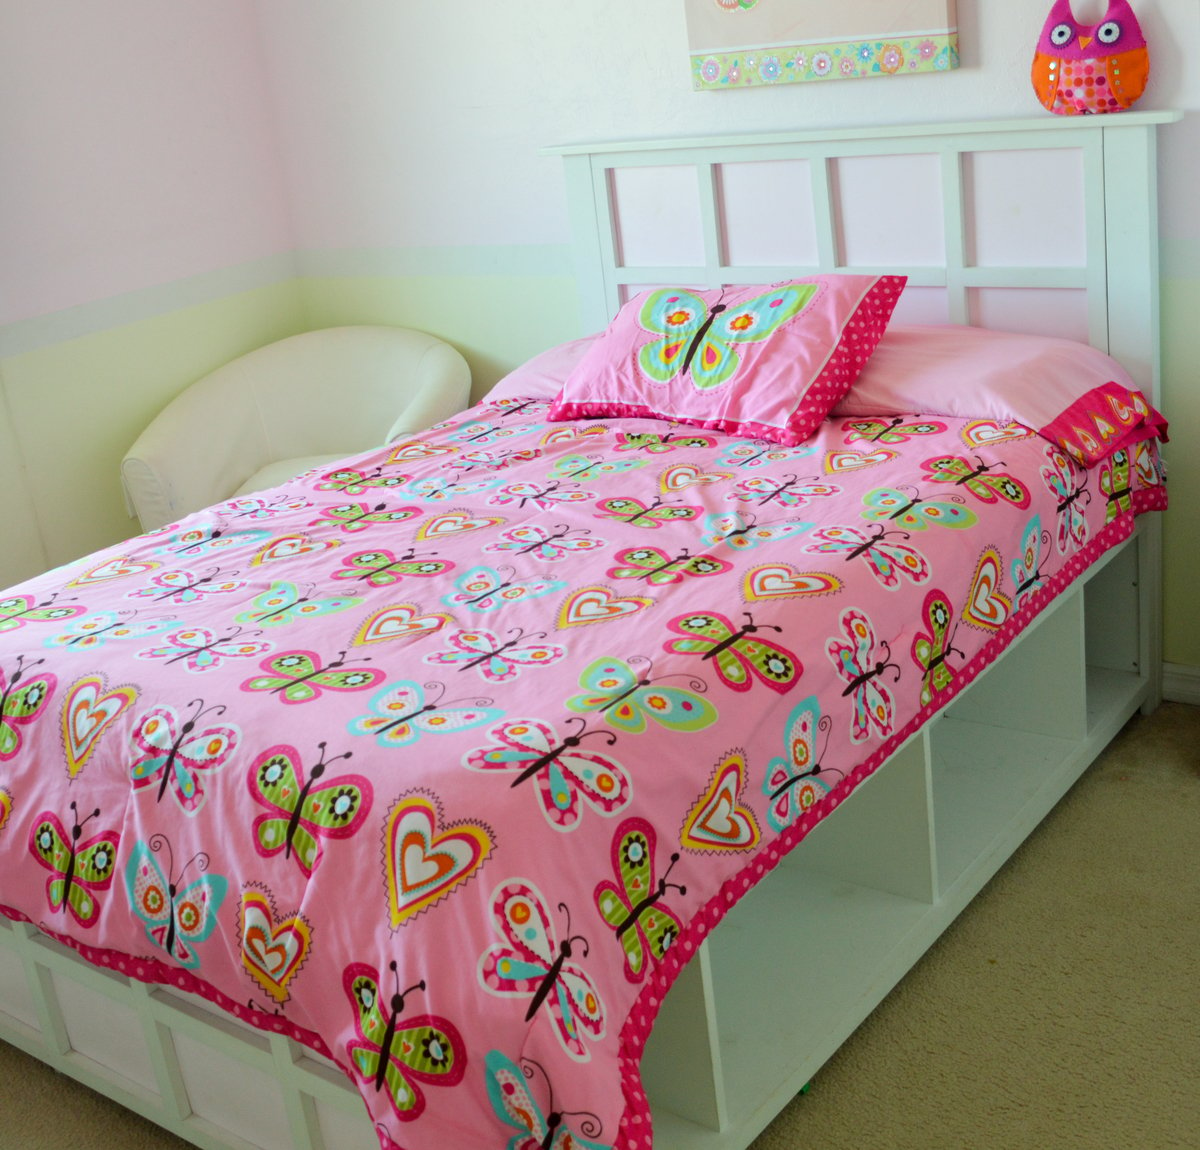
My daughter needed a new bed and I really liked Ana's Hailey Storage Bed plans. I adjusted Ana's plans to fit a full size bed and I also made a different headboard and footboard. To see how I made the headboard and footboard follow the links below:
Built from Plan(s)
Estimated Time Investment
Weekend Project (10-20 Hours)
Recommended Skill Level
Beginner
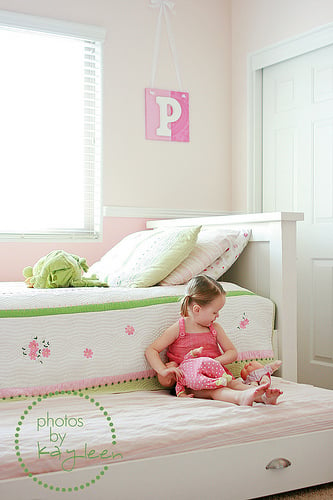
Bunkable Doll Beds
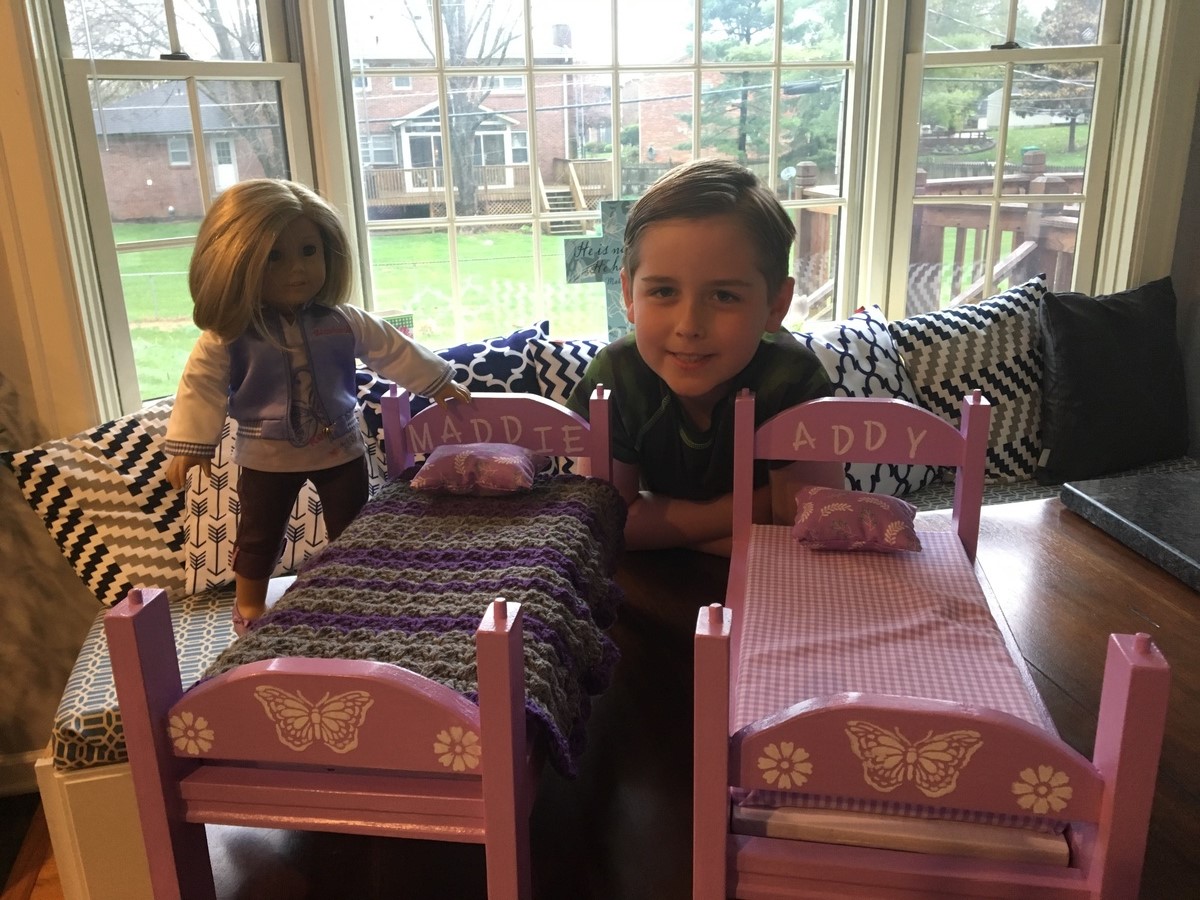
My son and I made these beds for a couple of his friends. We made them so that if they were ever together, they could bunk them up for their dolls. I had a great time working with him and incorporating his ideas into the project. He is very excited to give them the doll beds. http://www.ana-white.com/2012/12/plans/kid039s-kit-doll-bed
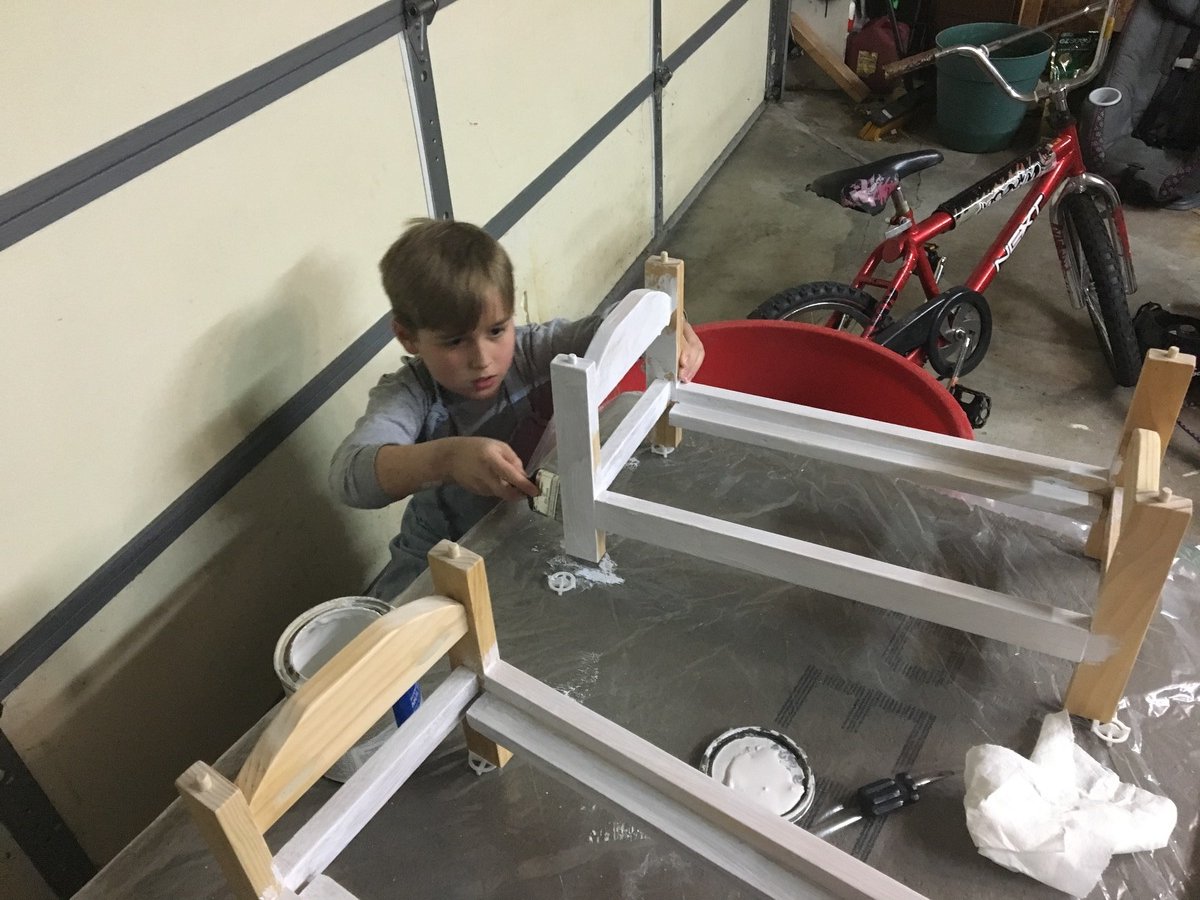
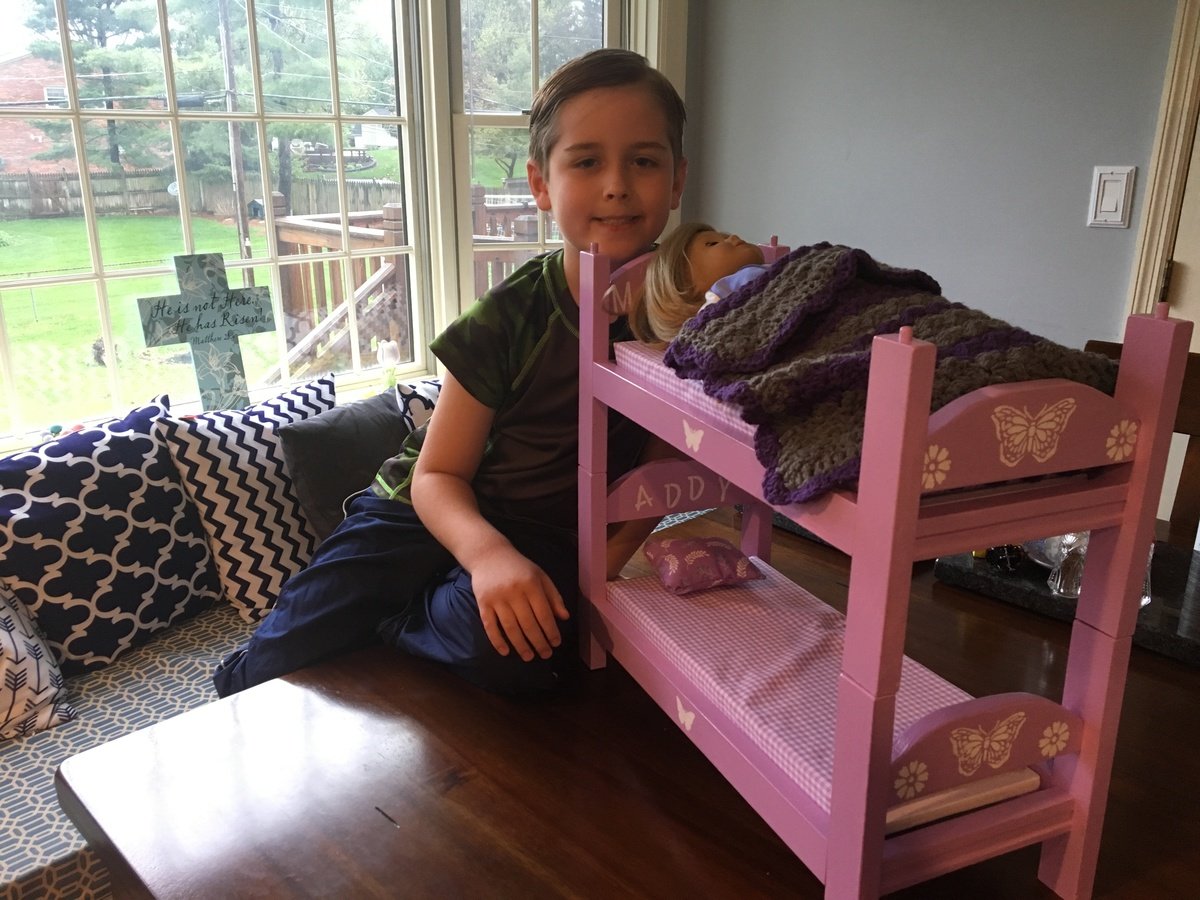
Built from Plan(s)
Estimated Cost
$10 each
Estimated Time Investment
Day Project (6-9 Hours)
Finish Used
Paint and Poly
Recommended Skill Level
Starter Project
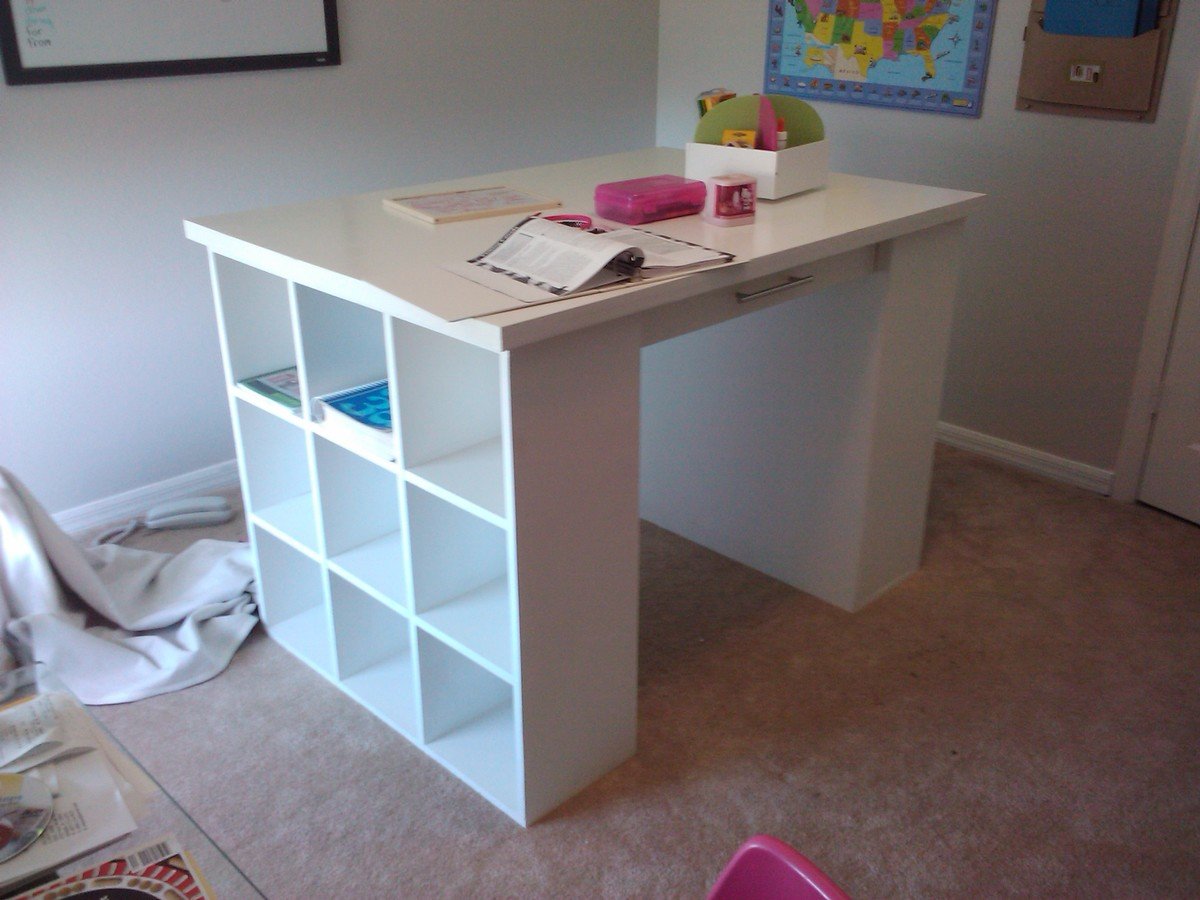
Craft Table
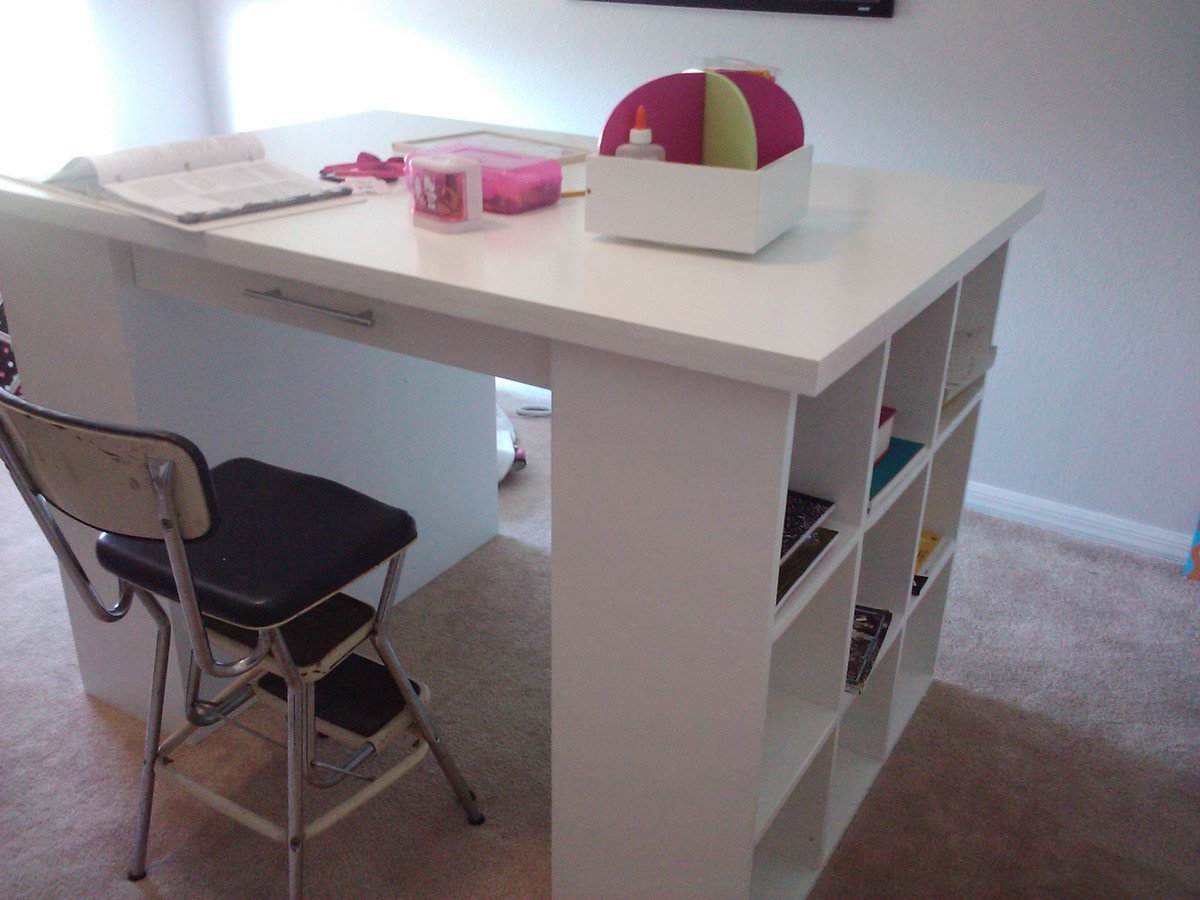
This is the first project that i completed. I made a few minor changes. I used a Kreg jig to fix the shelves into the book cases. I also wanted the top of the desk to be thicker so i glued and screwed two pieces of 3/4 hardwood ply together and finished the edges. I then added heavy drawer slides to handle the drawers as i had made them larger.
Built from Plan(s)
Estimated Cost
$150
Estimated Time Investment
Weekend Project (10-20 Hours)
Finish Used
I used a White enamel to finish the table, then a few coats of poly-acrylic on the top to make it easy to wash off marker and craft paint. I added two long drawer pulls to make the drawers easier to open.
Recommended Skill Level
Beginner
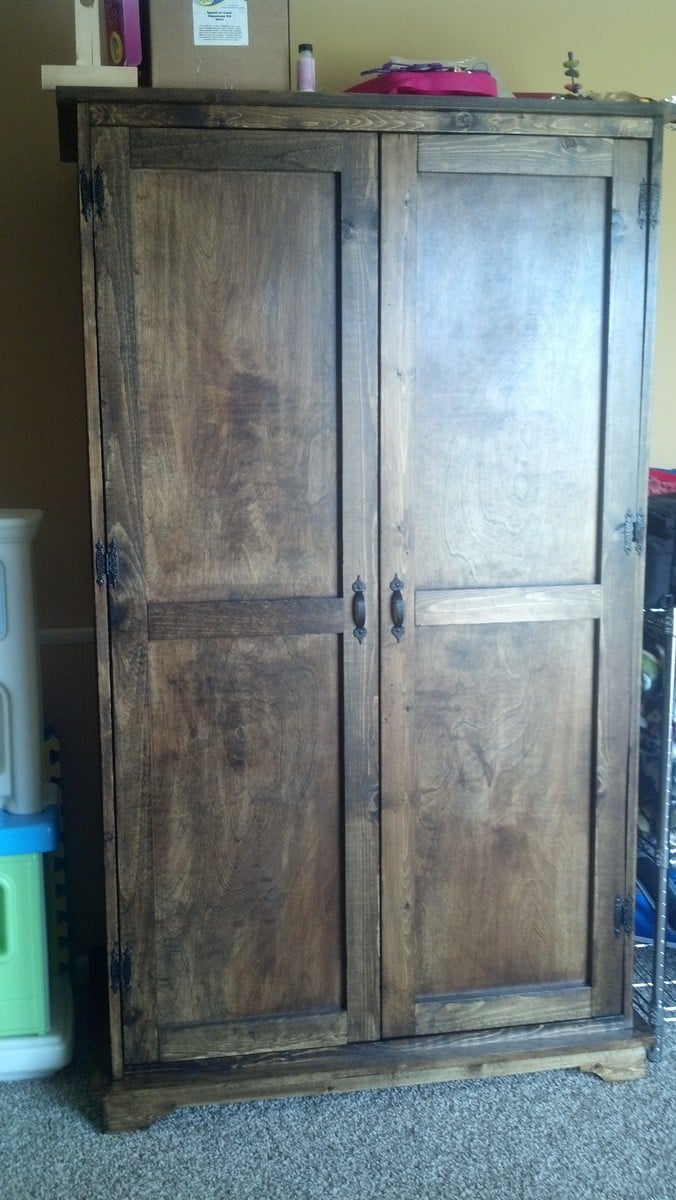
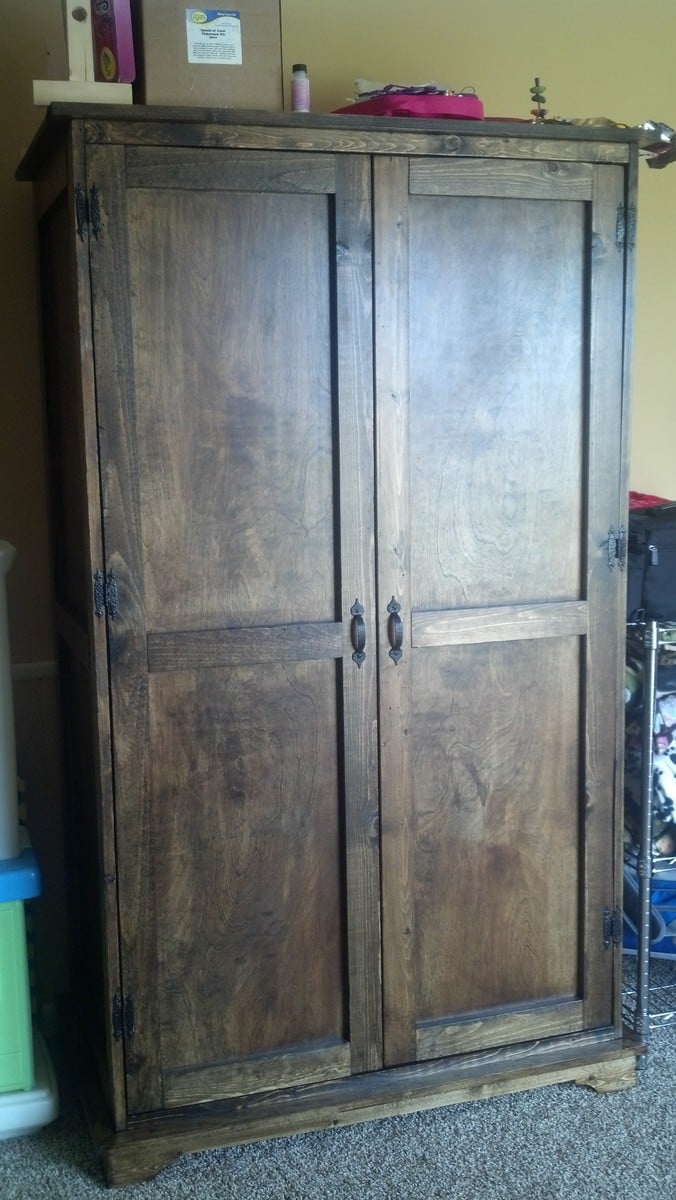
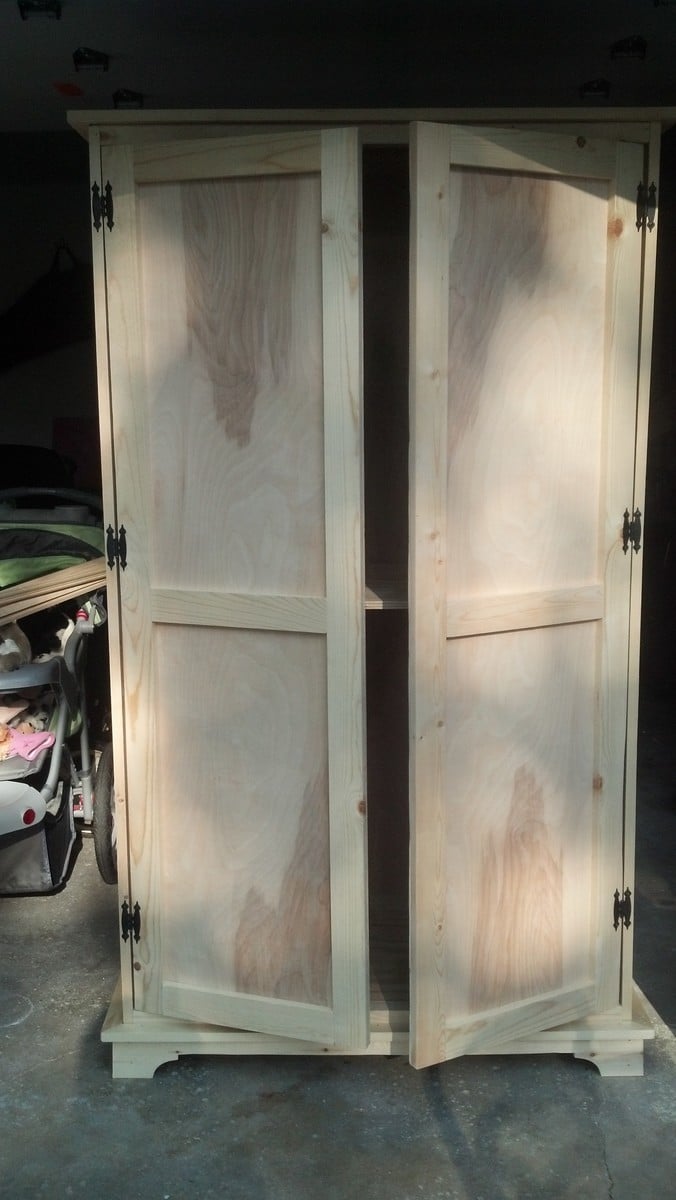
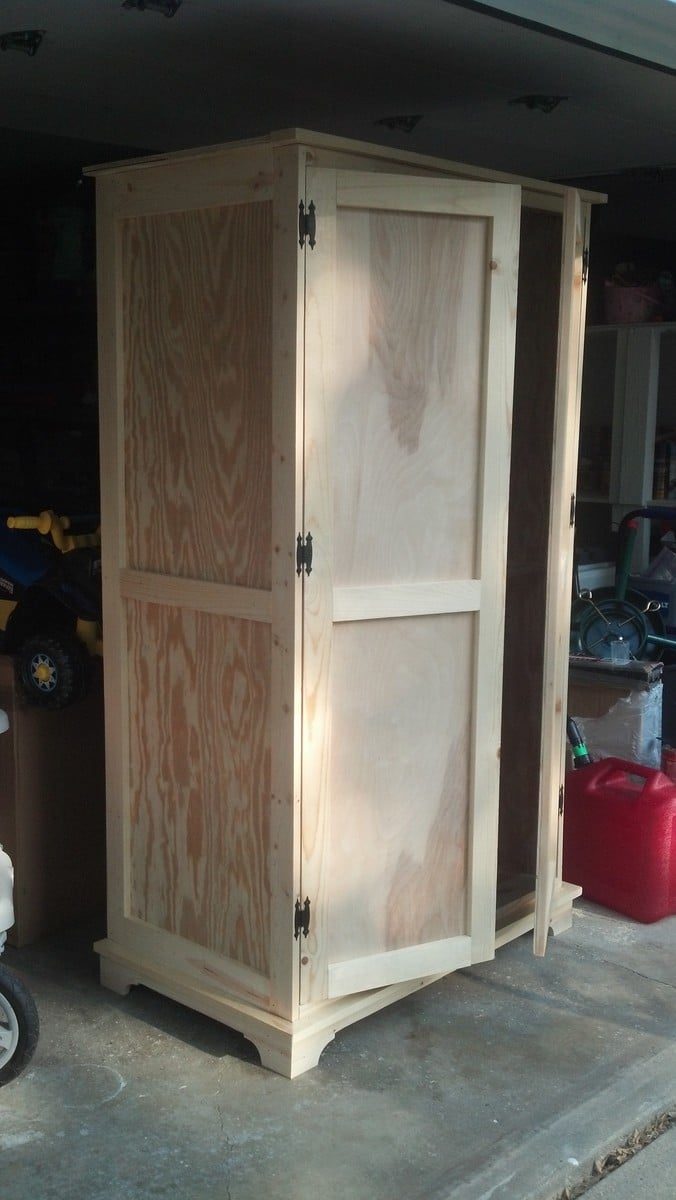
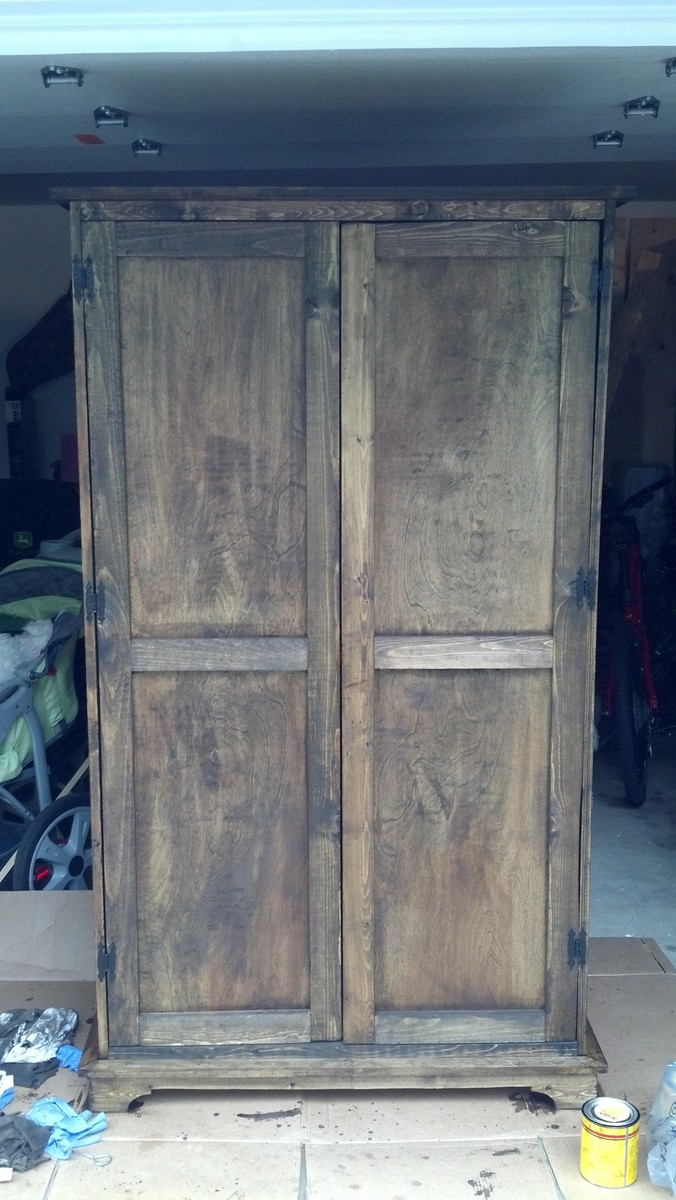
Toy Armoire
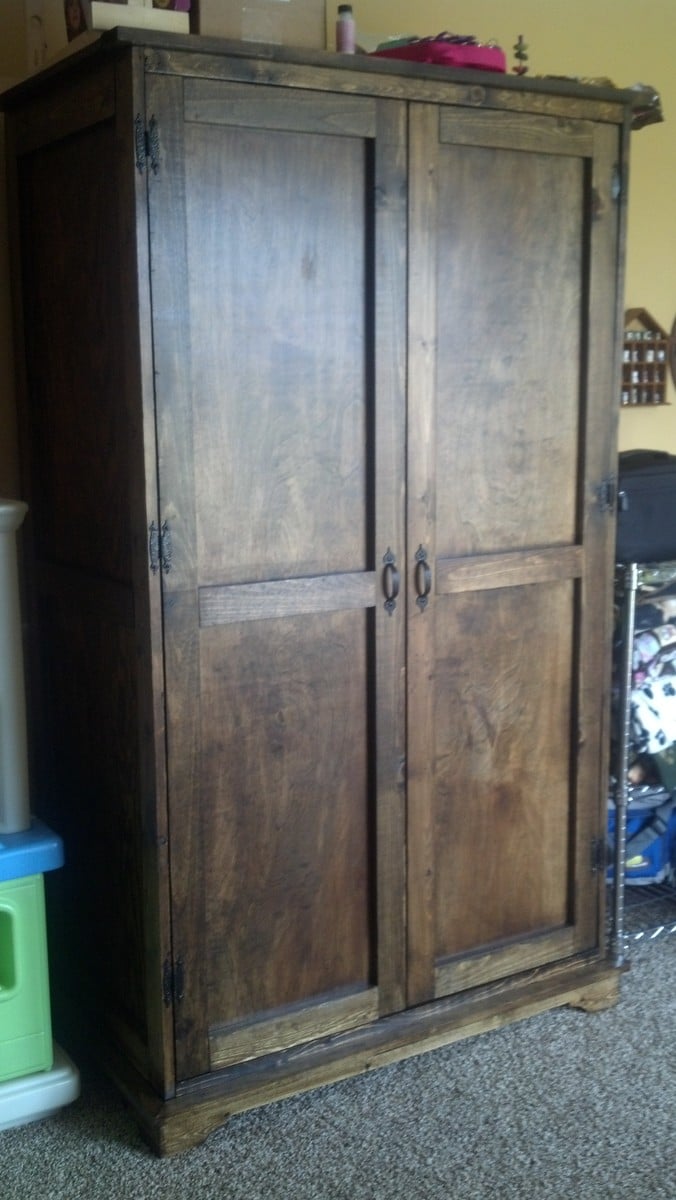
I adjusted the height of the armoire to 72 inches. It was a little tricky getting the doors to hang straight. I blame the new driveway; we just moved into a new house with a sloped driveway (our old one was super flat). I got the hardware at Lowe's. I also added a block of wood at the top, on the inside, to mount the door catches. I mounted them on the top and bottom on both doors, so four catches total. That really helped with the way the doors looked when closed.
Built from Plan(s)
Estimated Cost
$100
Estimated Time Investment
Weekend Project (10-20 Hours)
Finish Used
I used Minwax Dark Walnut with Minwax Satin Polyurethane. Two coats of each.
Recommended Skill Level
Intermediate
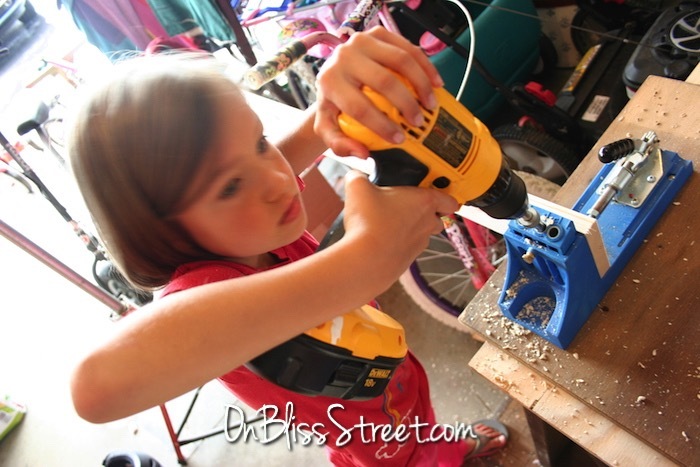
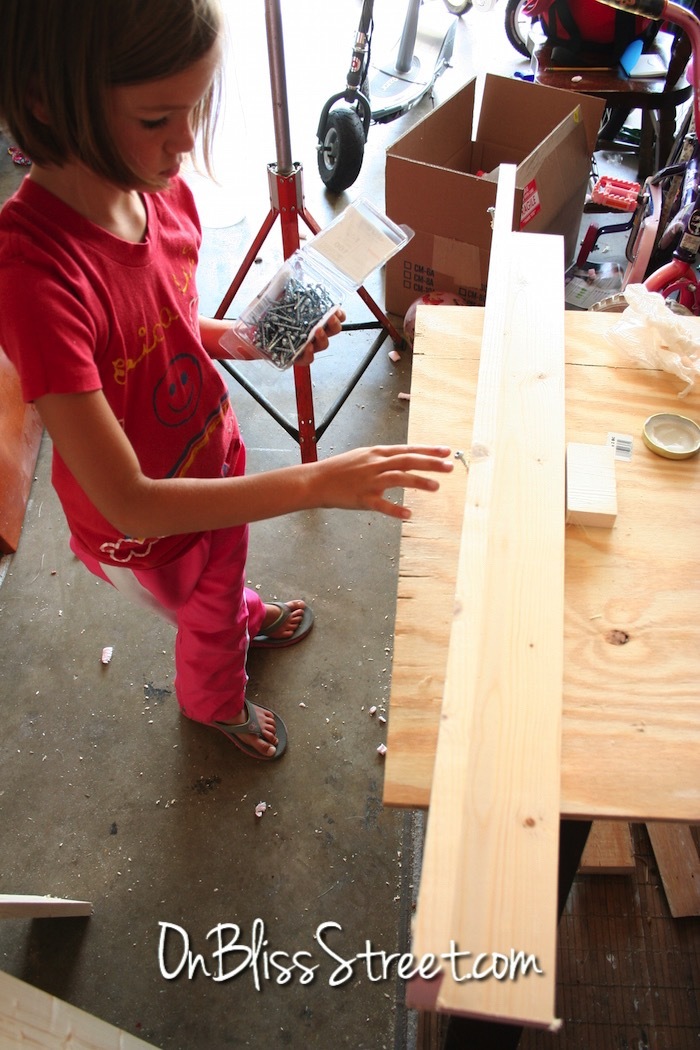
Book Ledges
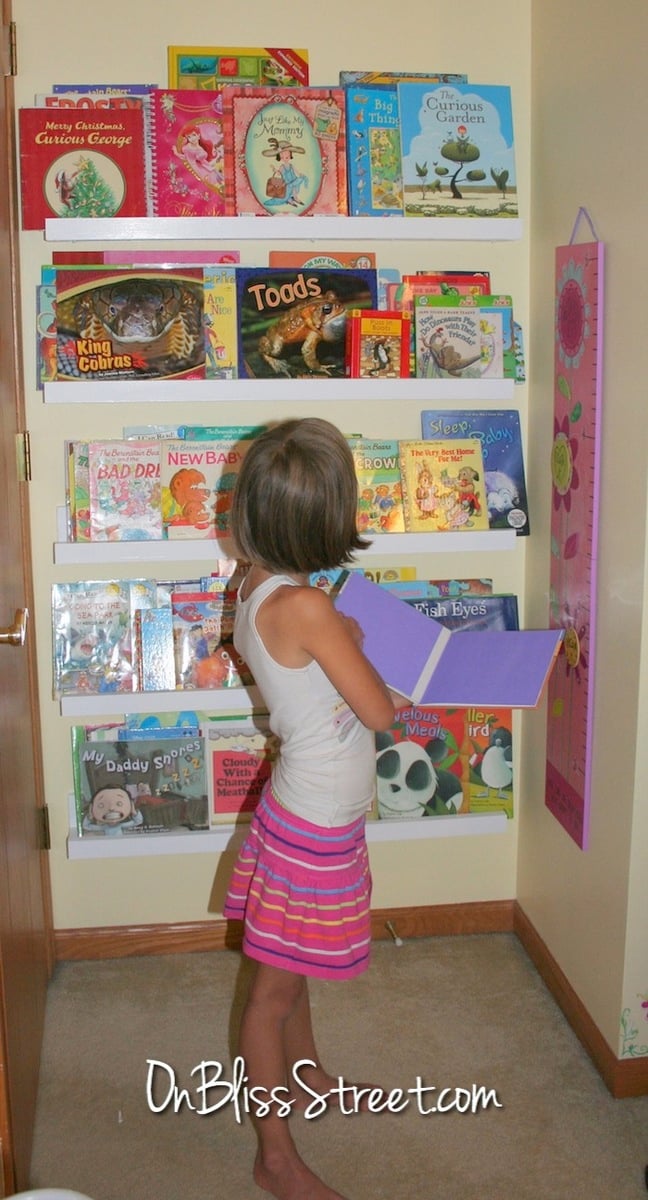
These ledges are incredibly versatile and will easily grow with any child. Books for the younger ones and then a gallery wall for when they grow. They are so easy to build that literally, a child can do it, as you can see. This was her first build that she completed by herself. After the boards were cut of course. Thanks Ana, this is a great plan and it was an AWESOME day for the girls!
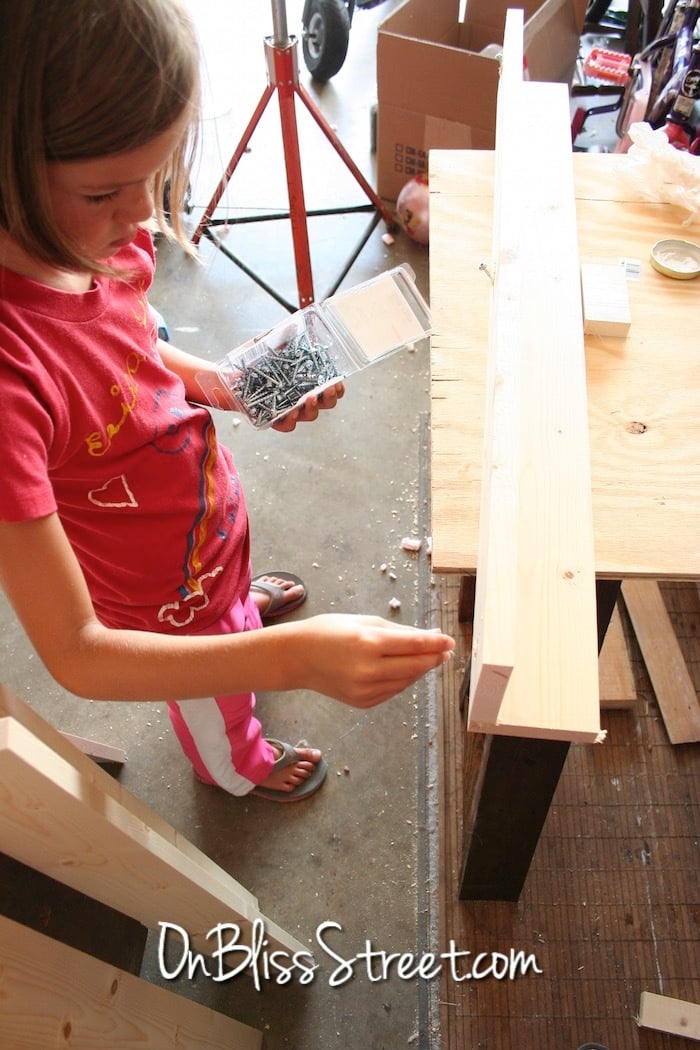
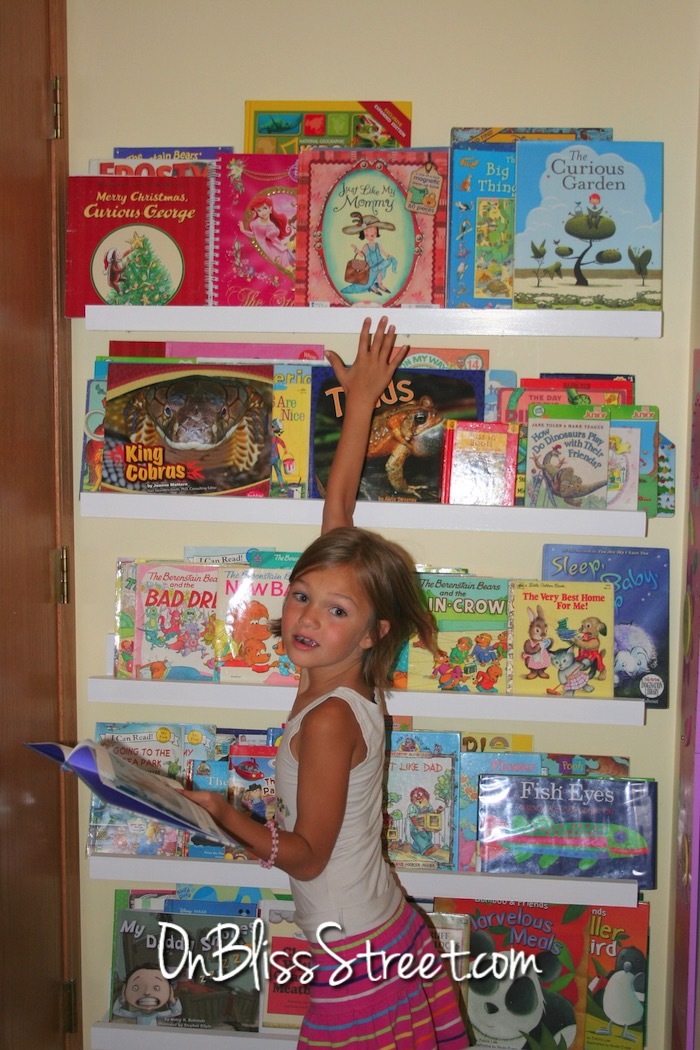
Built from Plan(s)
Estimated Cost
$25
Estimated Time Investment
An Hour or Two (0-2 Hours)
Finish Used
sanded and painted white.
Recommended Skill Level
Starter Project
Small table
I found the table to be pretty wobbly so I reinforced it with some triangulation and I moved all the legs into the centre so the triangulation wouldn't get in the way of people sitting on all sides.

Built from Plan(s)
Recommended Skill Level
Beginner
Banquette Style Bench
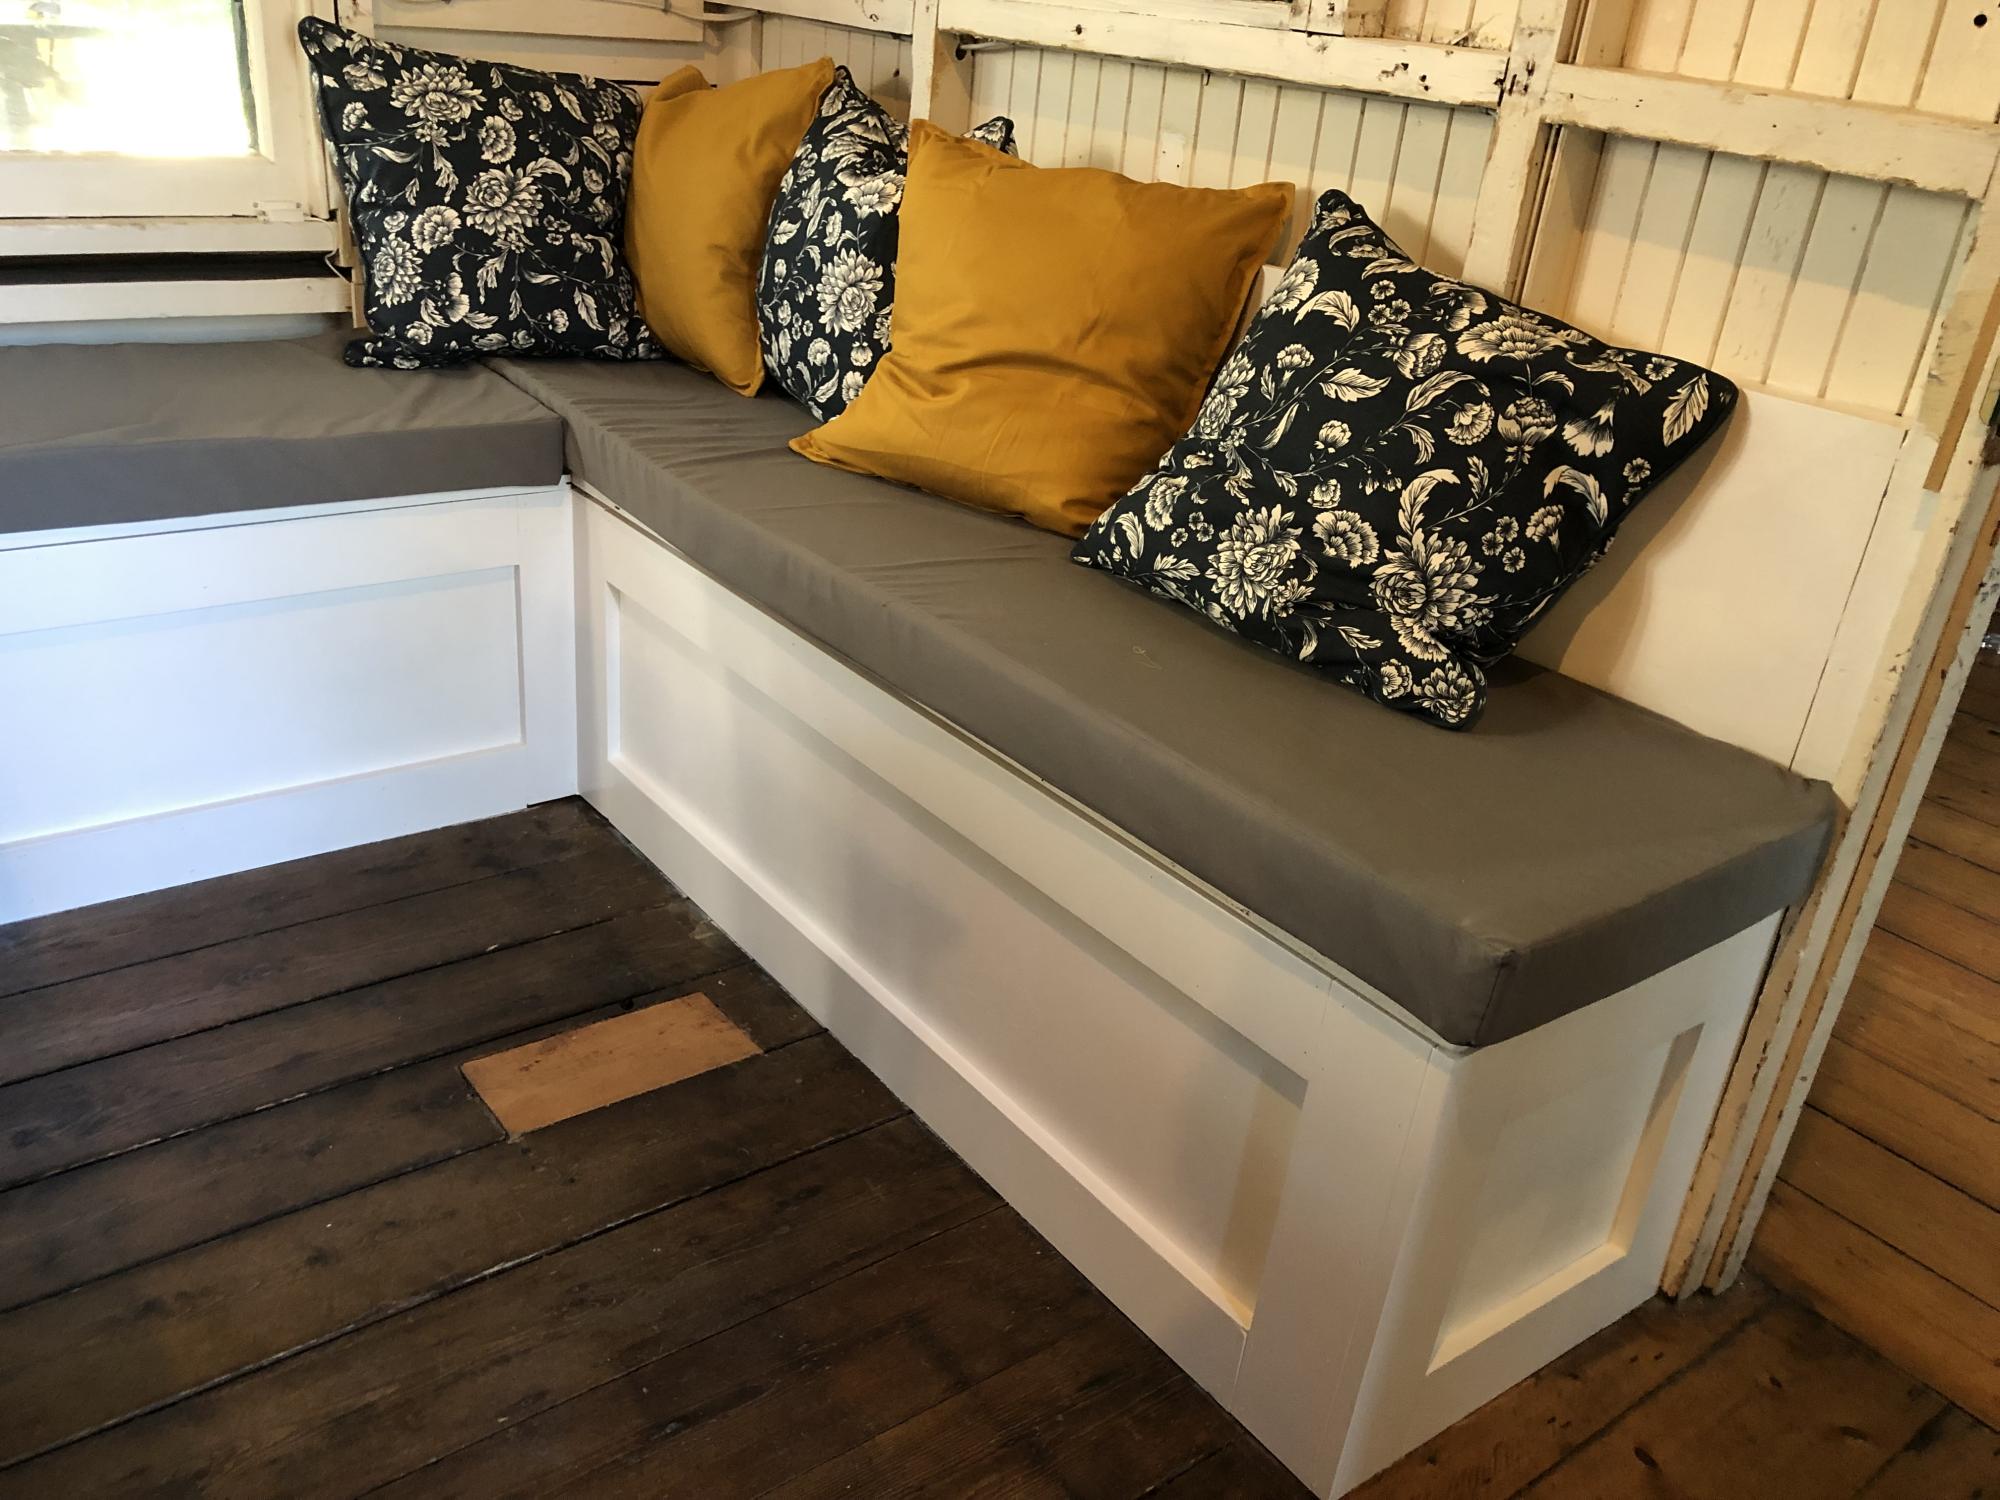
This is the first thing I built from your site. I used rainwear for the cushion so my grandkids can spill stuff and it won’t stain.
This is in my 134 year old cottage. Really spruced the place up.
Thanks for having your site - love the projects on it.
Built from Plan(s)
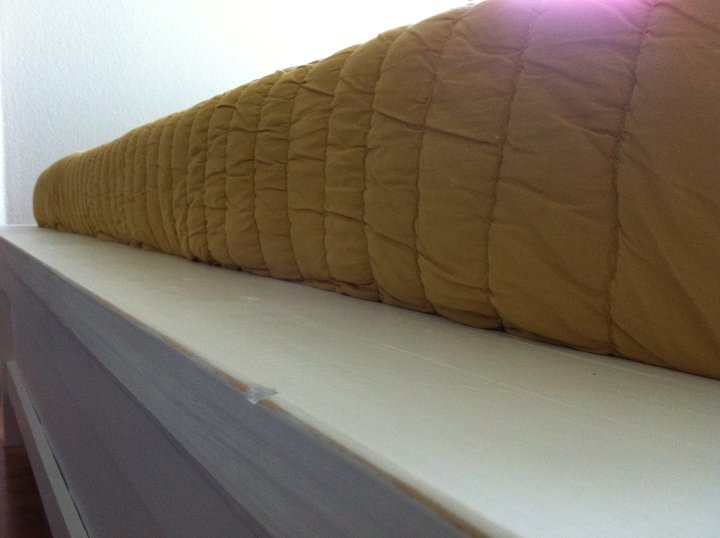
King Size Farmhouse Bed
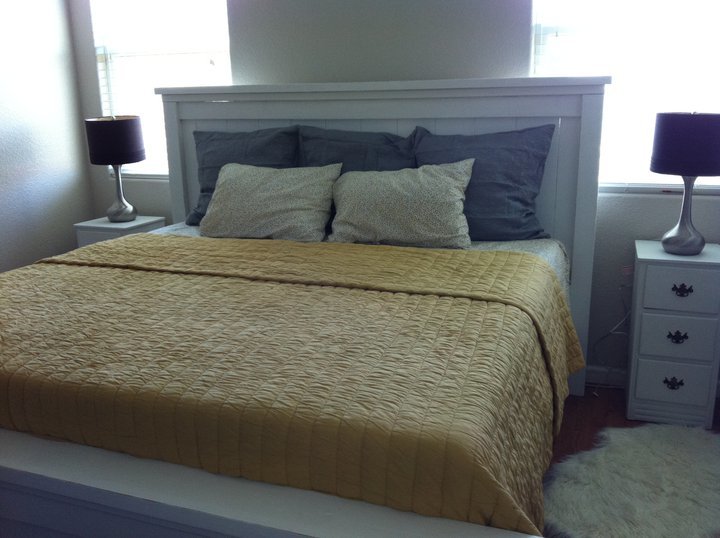
I fell in love with the Farmhouse bed after seeing Ana's bed on this site and just knew I had to make it. I'll preface this by noting that neither my husband or myself are builders or even owned any tools with the exception of an 18 volt drill. After building this bed, we went out and bought everything we need to build more pieces from Ana's collection of plans :) This project was very fun, forgiving, and the finished bed is absolutely beautiful.
I do have a few notes that would hopefully help people build this in the future. Hopefully you are reading this.
1) As Ana suggested, read ALL of the Farmhouse plans thoroughly, including the comments! Each of the plans are slightly different and might have a modification that would better suit you (I wish I had built the frame using the Fancy Farmhouse Bed. The way you assemble it makes it 7 inches narrower which would have been nice in our small room). There are also very valuable tips in the reader comments, so read those!
2) Read as many brag posts as you can. I saw that one lady used joist hangers for her support beams and side rail brackets so that the bed could be disassembled some day. That's what I did and I'm so, so glad that I did. You can find her post by googling "joist hanger + Ana White."
3) 4.5" screws are hard to find. I wont say impossible since some people did find them. If you use the new method for the posts of using 2x4s, you wont need the 4.5" screws. If you are using 4x4s, like I did, use lag bolts. I think the lag bolts will be more sturdy in the end anyway.
4) I should have made this item #1. In regards to the King size headboard plans, Ana has her mattress turned sideways and posted plans for a bed 80" wide. Since I did not thoroughly read Ana's notes, I missed that bit of important information and made my headboard 80" wide. Oops. Well, like I said earlier, this is a VERY forgiving plan. We just put the side rails on the inside of the 4x4 posts and added a .5 plywood scab to the inside of the side rails before we installed the joist hangers and that solved the problem. 80"-1.5"-1.5"-.5"-.5"= 76"! Since our bed is a platform bed, it worked out perfectly... just a little wider than it needed to be, but no one can tell the difference.
5) You actually need (5) 1x8 boards. I believe someone also posted that in the comments under the king farmhouse headboard plans. You also need (24) 4.5" screws or lag bolts, the plans only call for 20. (Ana calls for 6 per leg @ 4 legs = 24.
6) Really be sure of how high you want your bed before putting it together. Ours came out a little high, and if we wanted to, we could have cut the posts on the headboard a little shorter and mounted the side rails lower, but we just wanted to get the bed done. There is a lot of room to customize things in this plan so be sure to think everything out.
I think that’s it for now. If you have any questions, please let me know. I’d be happy to offer up any information I have learned while making this bed.


Built from Plan(s)
Estimated Cost
$100
Estimated Time Investment
Week Long Project (20 Hours or More)
Finish Used
After cutting the wood I took a wood chisil to all the 1x boards so there would be more definition between the panels on the head and foot boards. After the bed was assembled I chisiled all the exposed edges.
Kilz white oil based primer - 1 Coat.
Sanded between coats with 120 grit paper.
Valspar Satin Ultra White - 1 Coat.
Roughed up edges with 120 grit paper for a worn effect.
Kilz white oil based primer - 1 Coat.
Sanded between coats with 120 grit paper.
Valspar Satin Ultra White - 1 Coat.
Roughed up edges with 120 grit paper for a worn effect.
Recommended Skill Level
Beginner
Comments
Sat, 01/26/2013 - 17:49
Great information!
I really appreciate reading what you learned and would have done differently. Thanks for posting this!
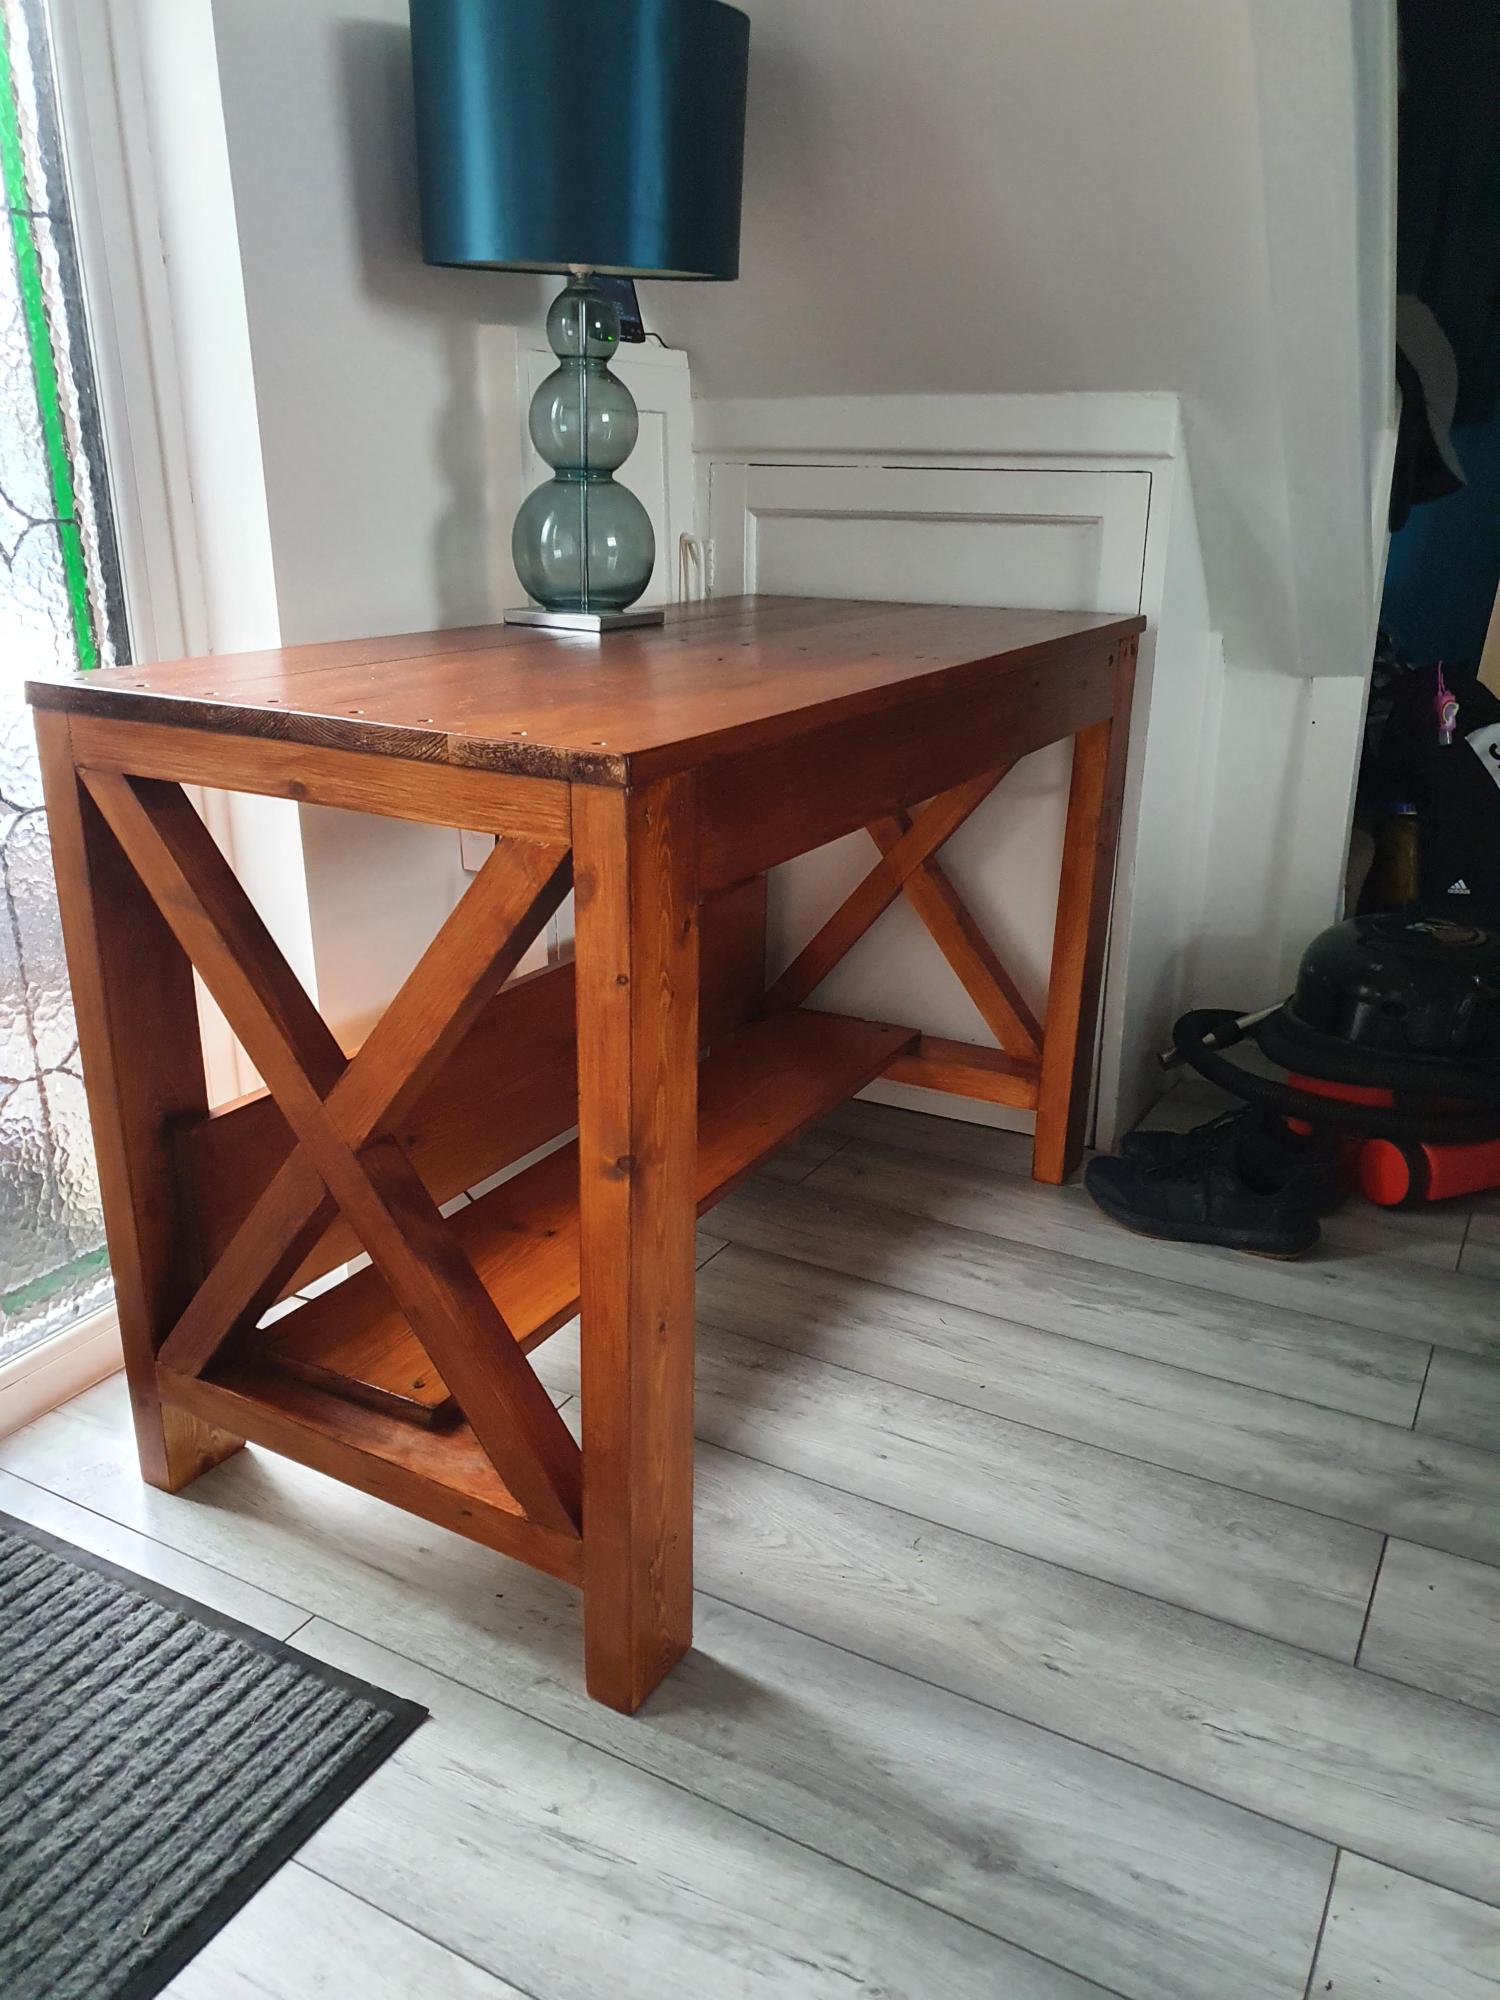
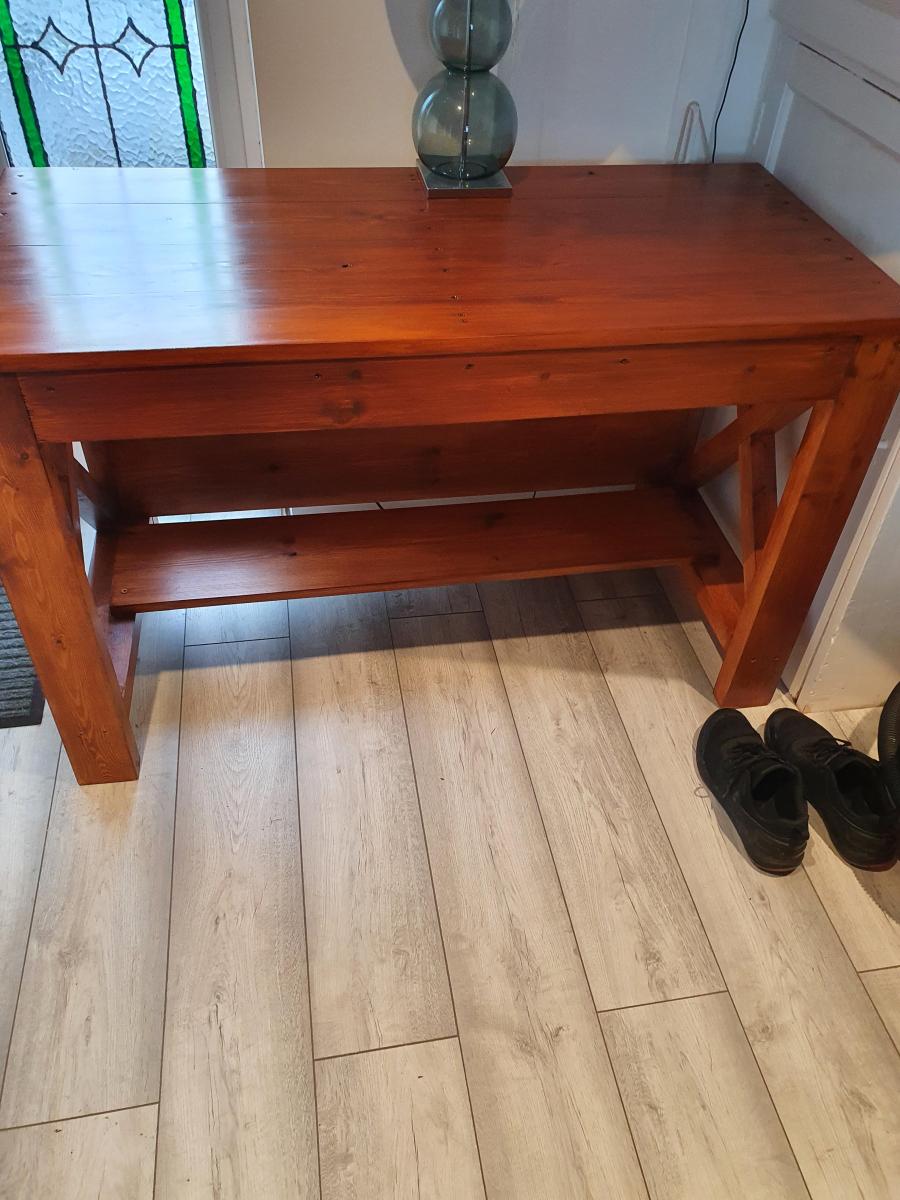
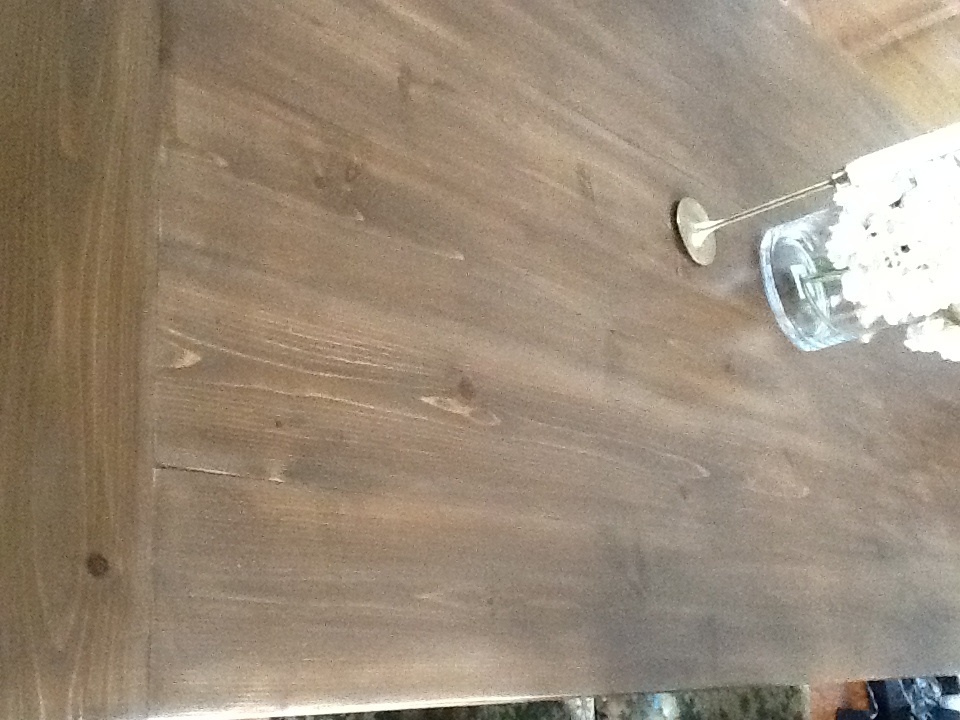
Rekourt table
I modified the size for my table a bit to make it smaller
Built from Plan(s)
Estimated Cost
150
Estimated Time Investment
Weekend Project (10-20 Hours)
Finish Used
Walnut
Recommended Skill Level
Beginner
Comments
Tue, 09/24/2013 - 15:35
Beautiful Top!!!
Fancynancy, that tabletop is fantastic! That's something so nice that if I had the money, I would buy it! I was hoping you would share the process you used to get it so smooth. I've done a planked top before and it wasn't nearly as pretty as yours. Thanks for sharing your gorgeous table.
Thu, 09/24/2015 - 20:23
length and width
hi fancynancy. i want to know what your modified measurements were on the rekourt table? i can only go to 6' long. width. i am not sure. thx
Sun, 01/22/2017 - 08:38
Rekourt dining modified
Hello, I am also curious about the modified rekourt plans. Would love your help/input. Thanks.
Twin Changing Table
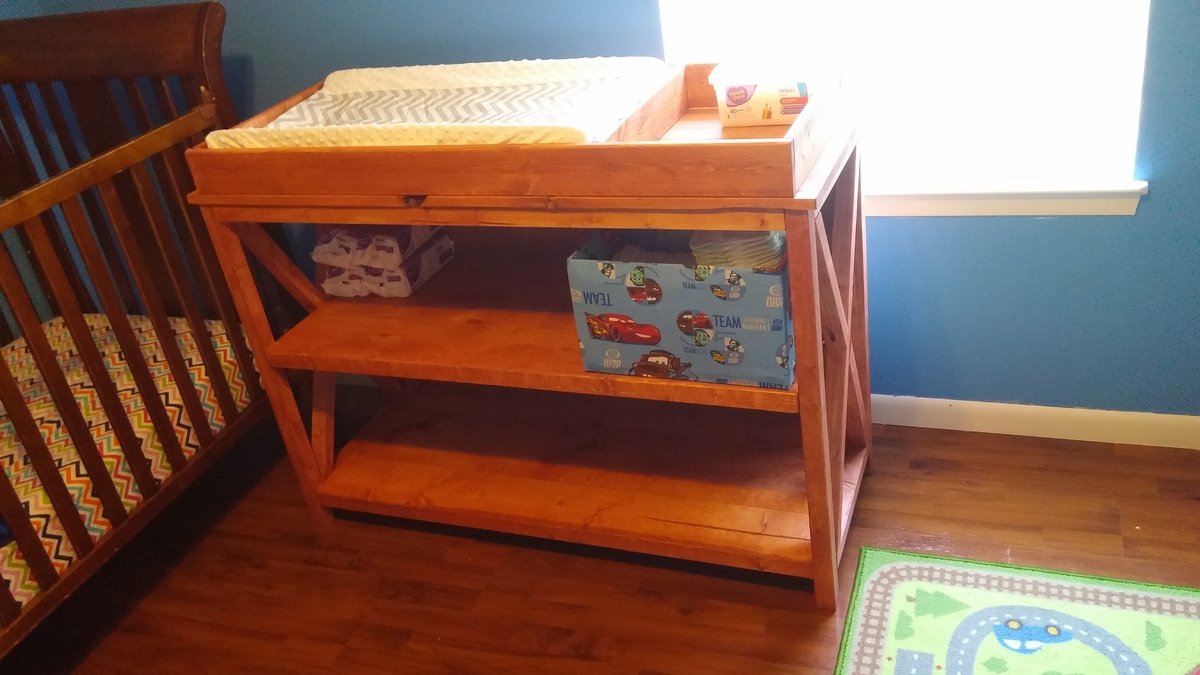
My beautiful wife and mother of my two 3-day old sons asked for a changing table. I deviated from the plans quite a bit for her tastes and added strength; it still turned out really well. The top is removable when we're ready to turn it into a book shelf or toy station. Stain is Sedona Red.
My wife says it makes her feel wealthy to have her own changing table. I know I'm wealthy because I have a beautiful family (and a great changing table)!
Built from Plan(s)
Estimated Cost
$55 (mattress pad and cover added cost $45)
Estimated Time Investment
Day Project (6-9 Hours)
Finish Used
Minwax Sedona Red
Recommended Skill Level
Intermediate
Comments
Tue, 09/08/2015 - 11:18
Very nice!
Beautiful build and congratulations on the birth of your twin sons.
RyobiNation workshop carts

The plans were easy enough to follow. I made the miter and table saw carts not as long because of the space I had to work with. These were perfect to provide a stand for my saws while at the same time giving me the additional storage I need. This was the last part of the garage that needed to be organized so I'm extremely pleased.
Built from Plan(s)
Estimated Time Investment
Weekend Project (10-20 Hours)
Recommended Skill Level
Beginner
Comments

Sun, 07/08/2018 - 20:56
Glad the plans worked for you
Glad the plans worked for you! So much extra storage now!
Potting bench
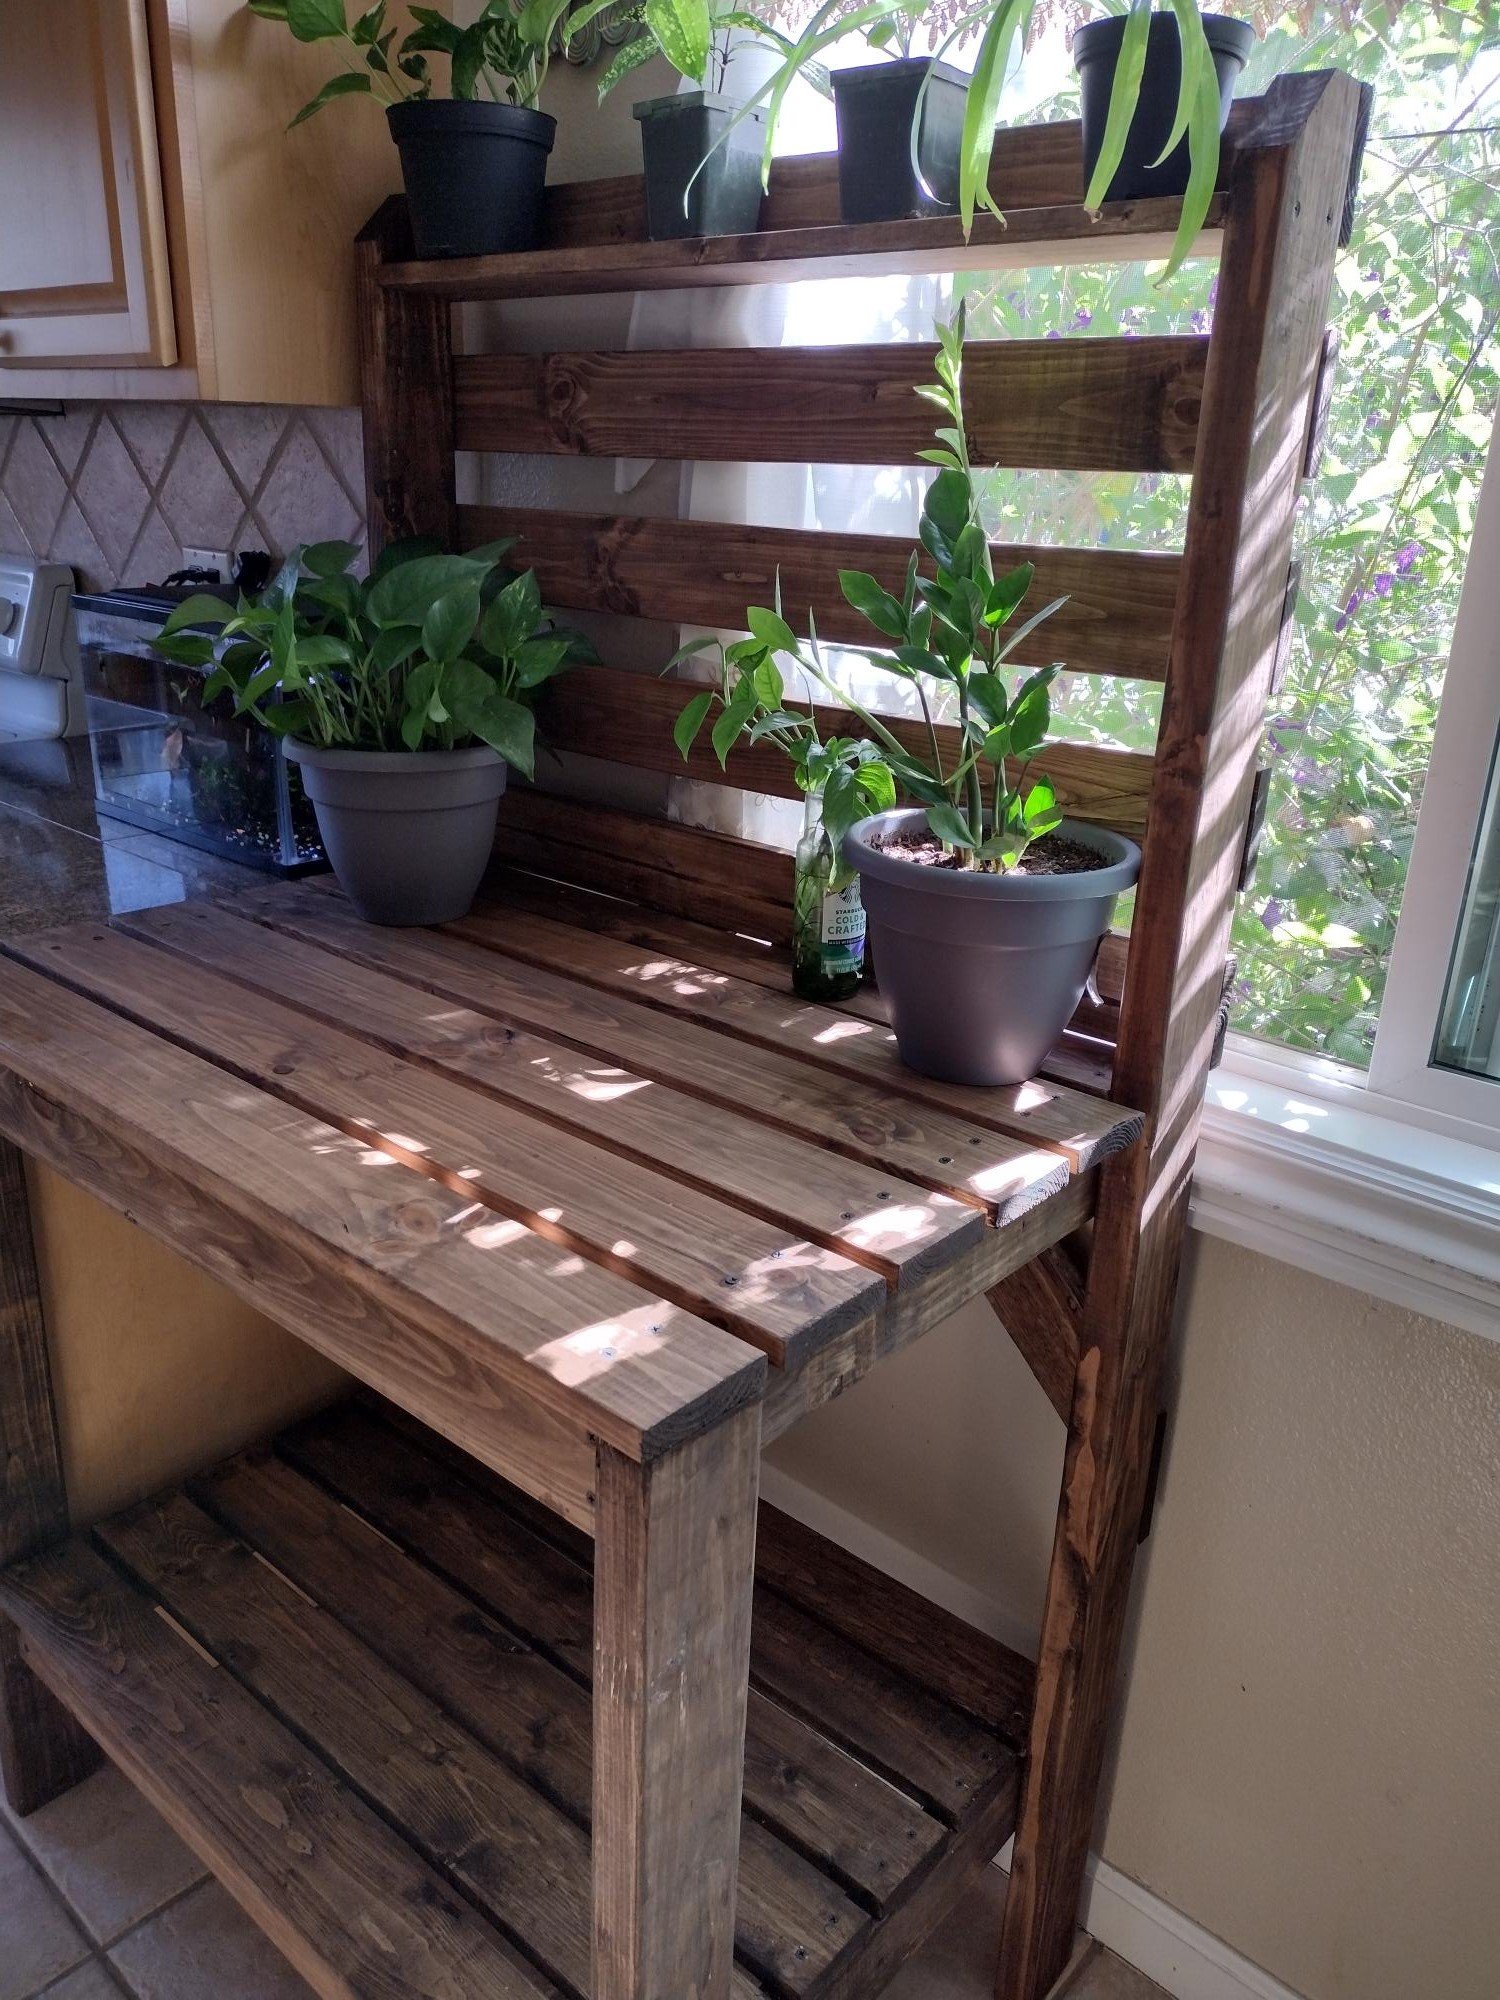
Simple potting bench in dark walnut
Built from Plan(s)