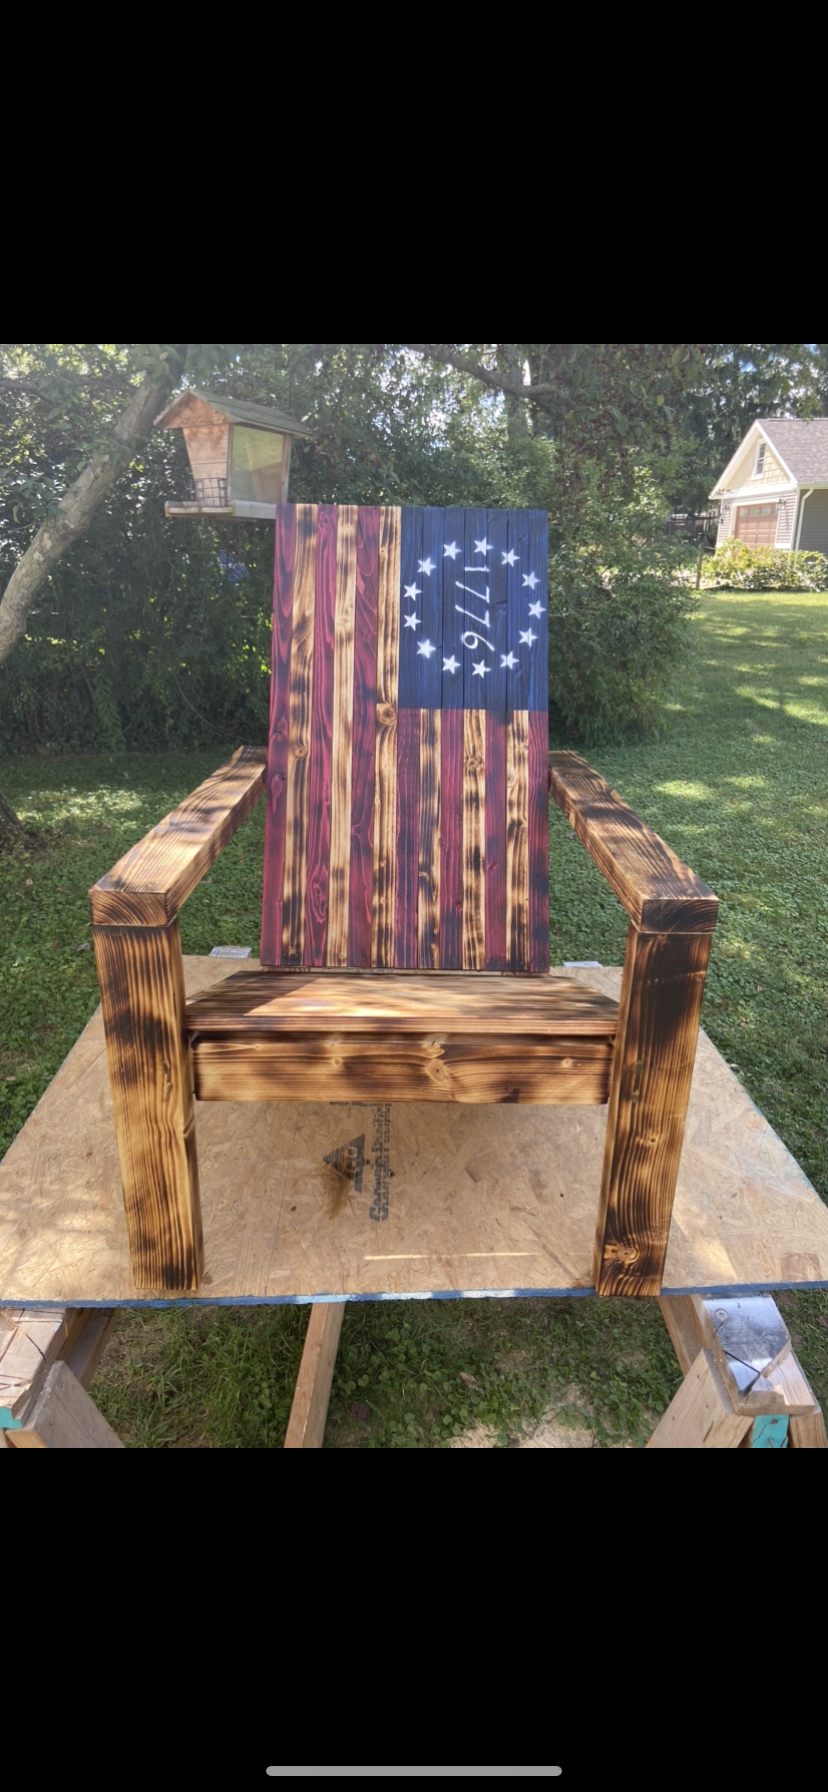
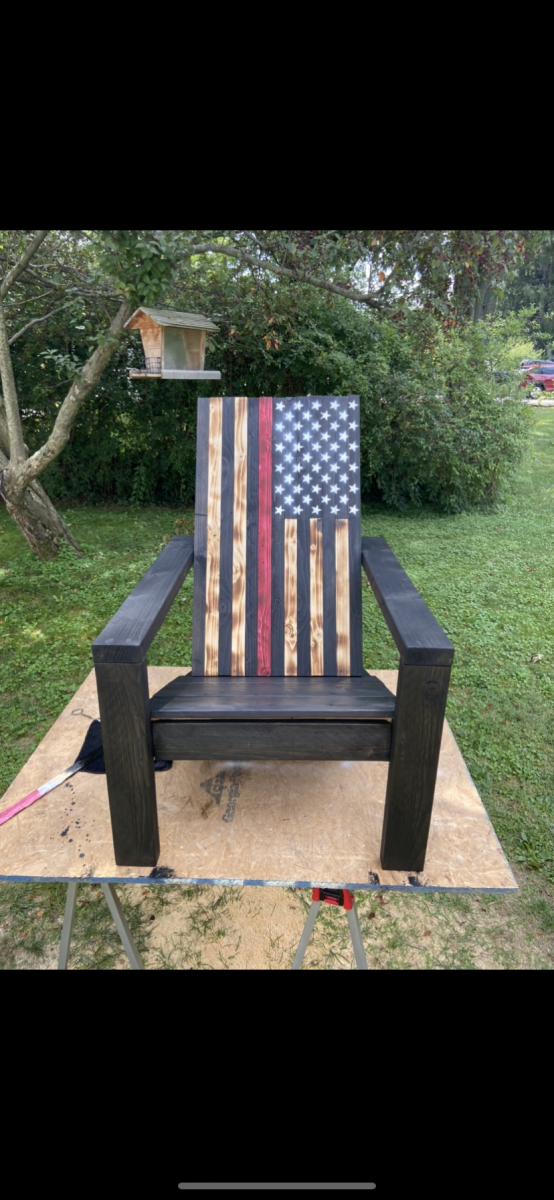
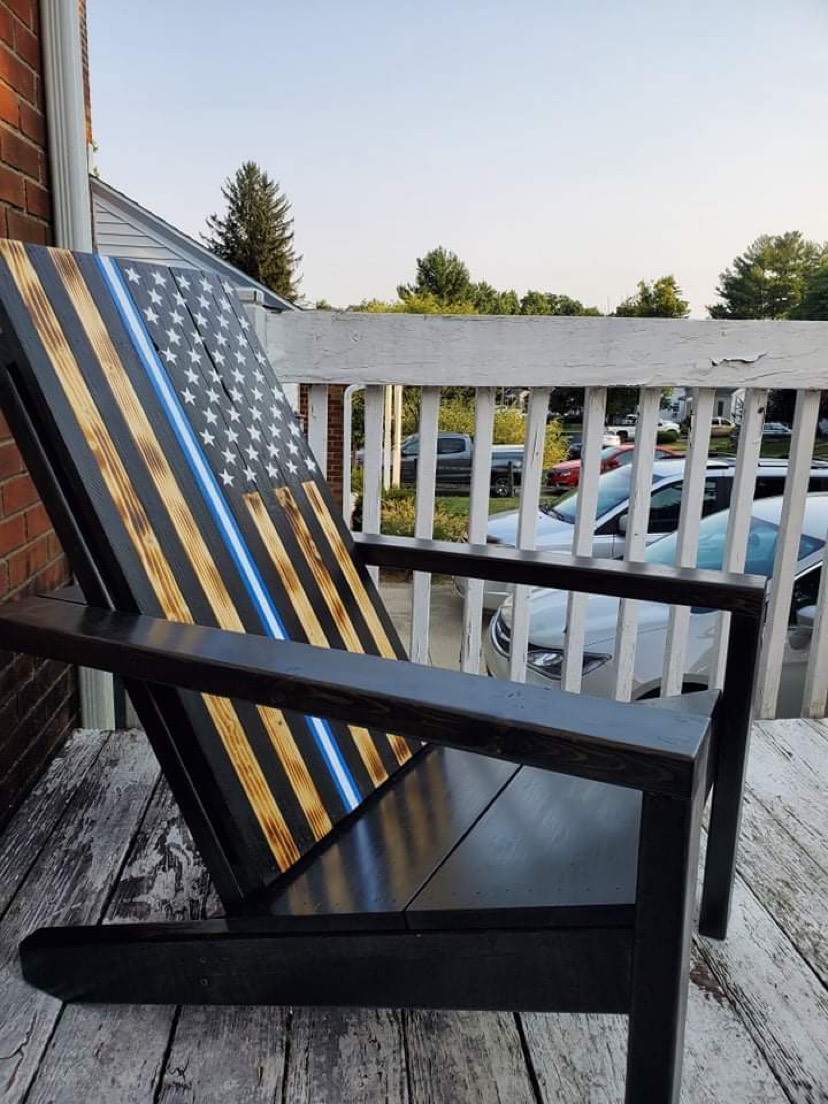
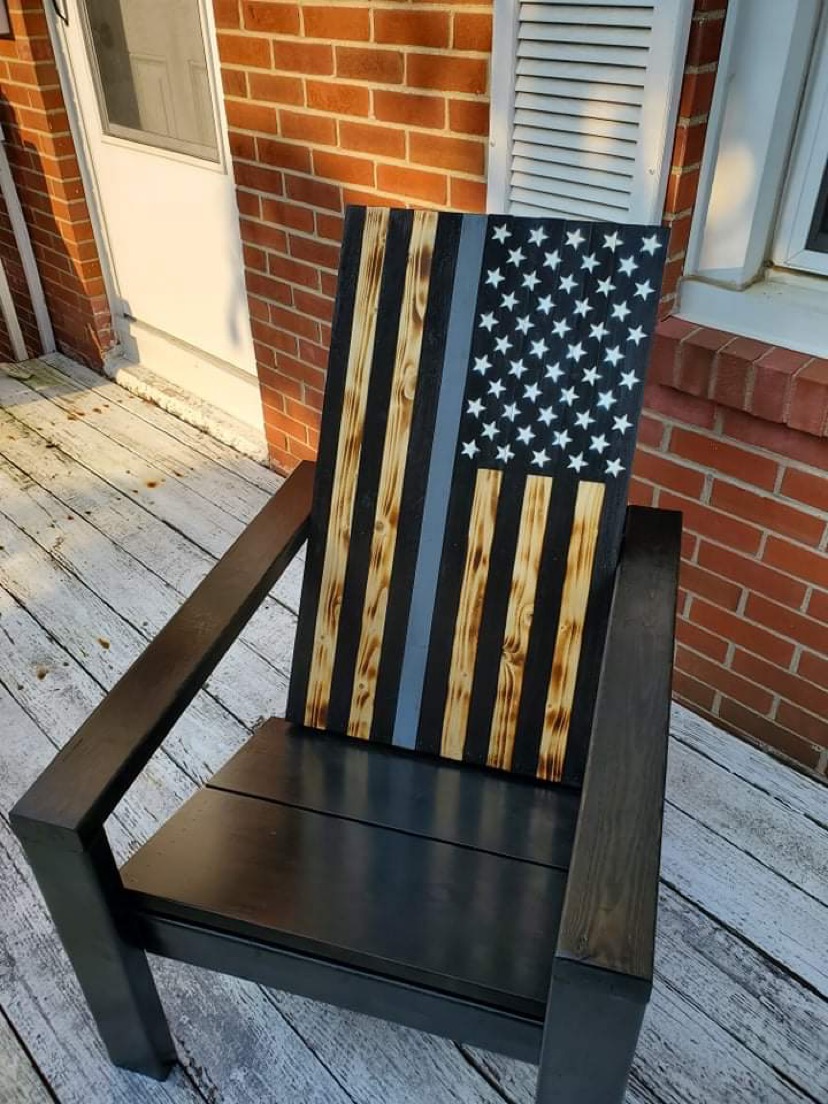
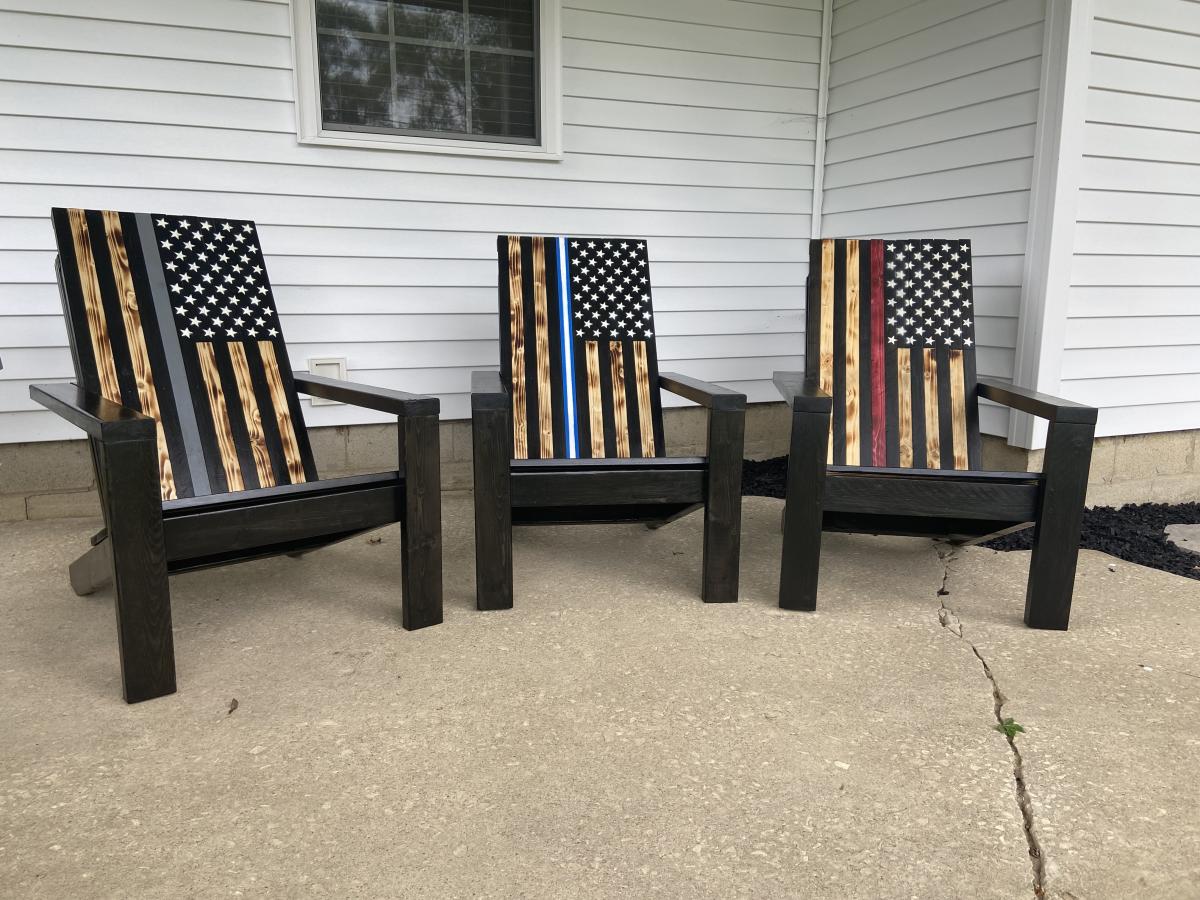
Modern Adirondack Chairs
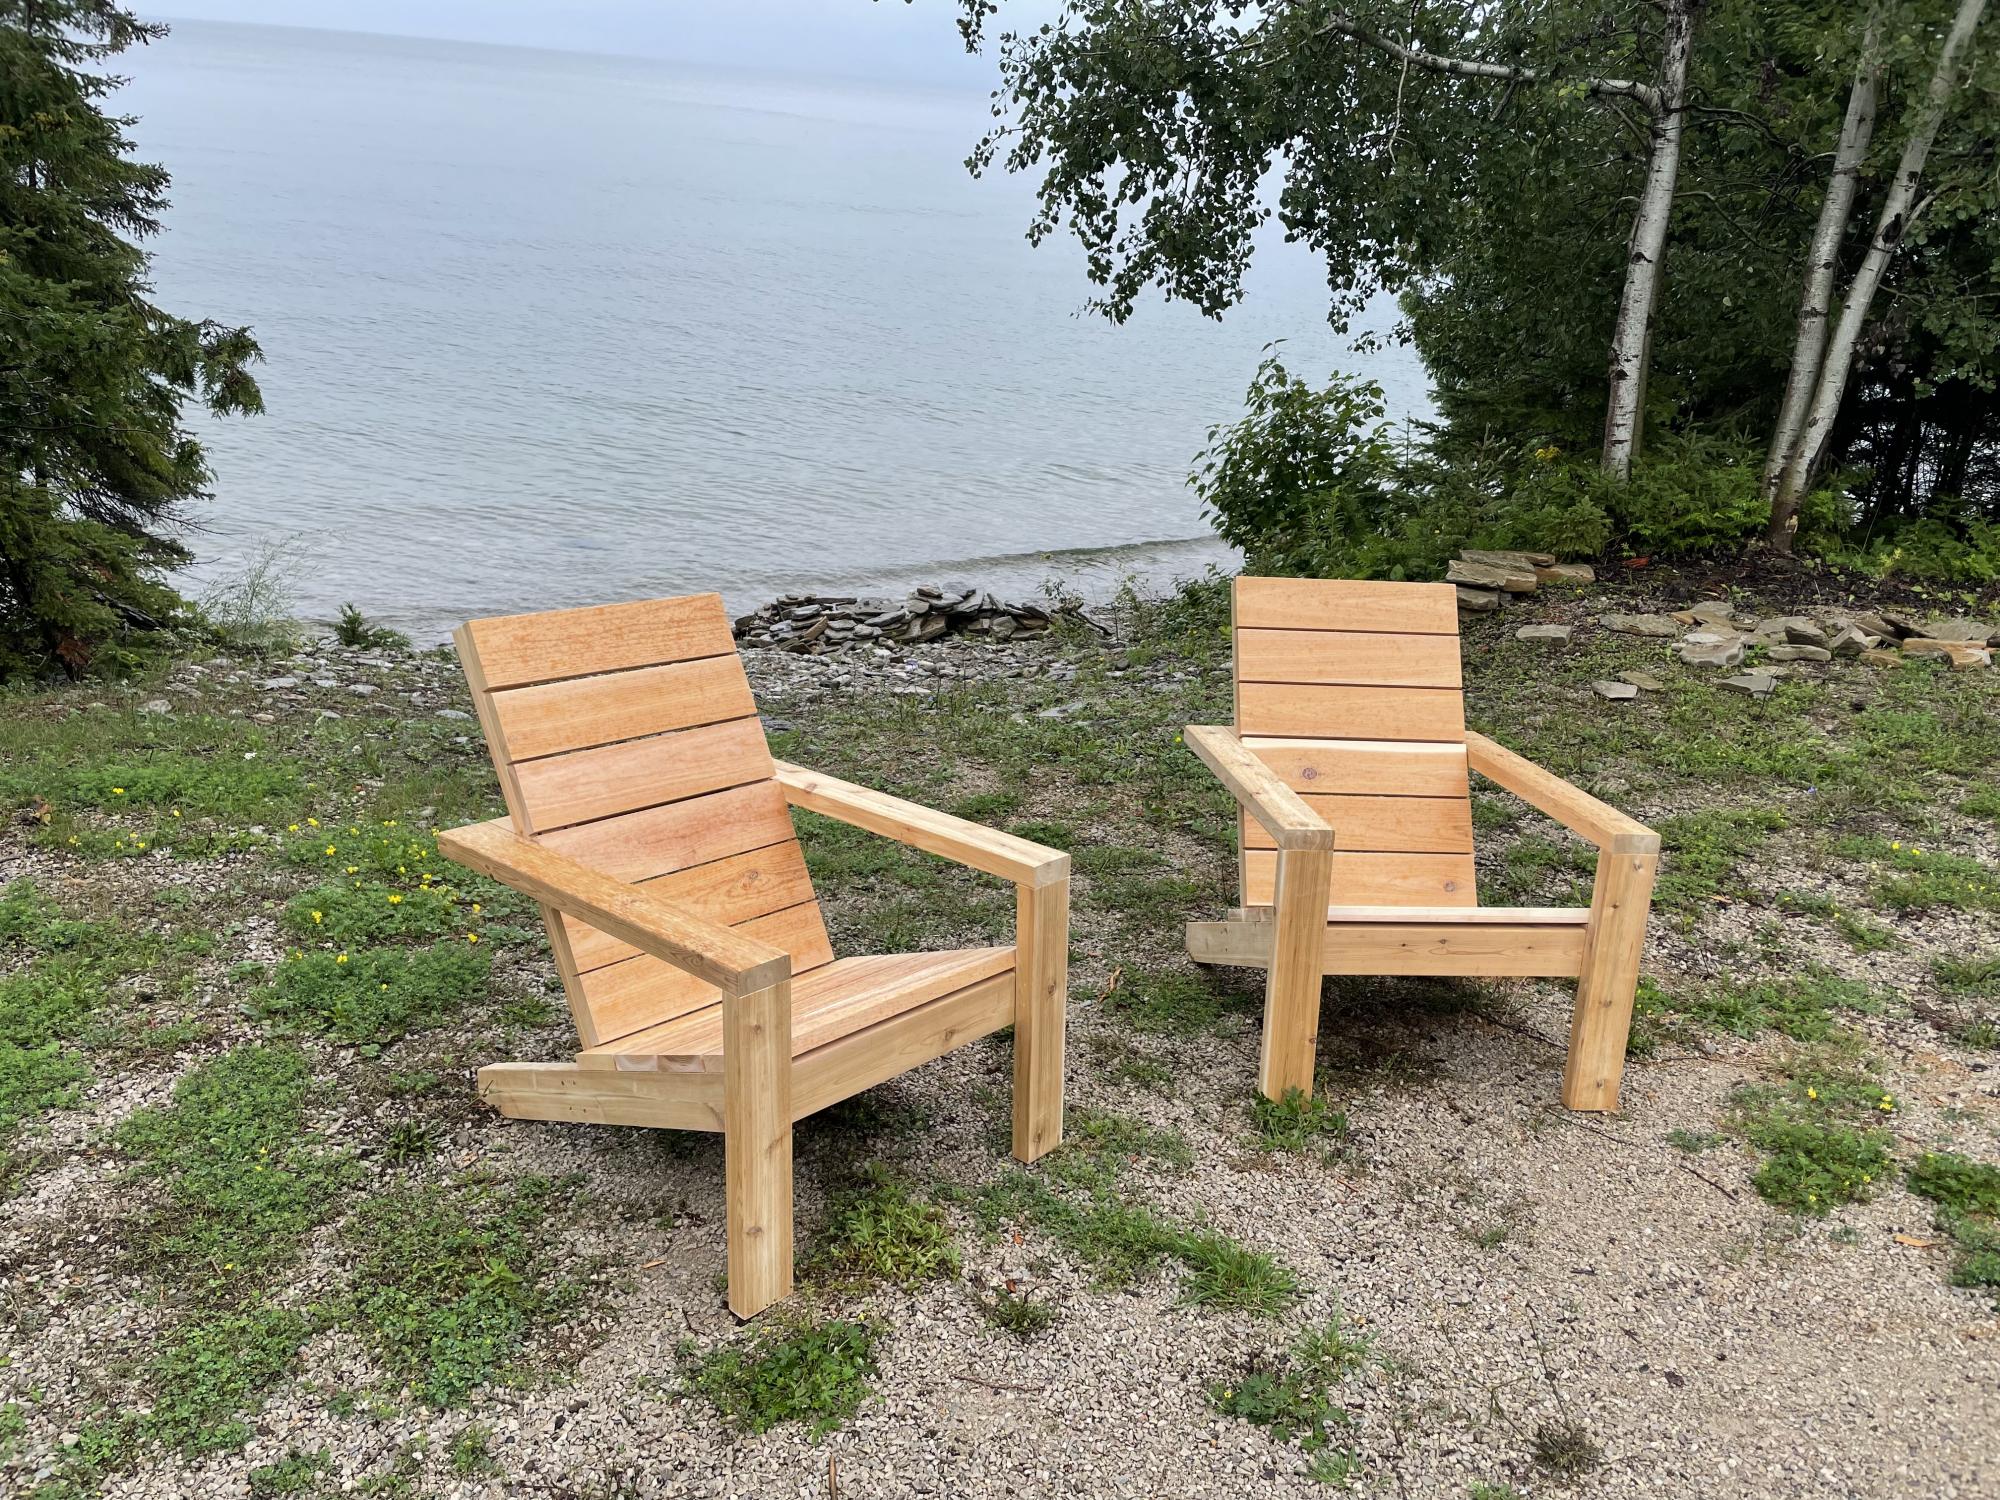
Have been wanting to build these chairs since the video came out for them. Finally found an occasion to build them for a friend of mine. I couldn’t find 1x10’s in cedar, so I used 5/4”x6” cedar deck boards ripped down to 4 1/2”. I also pocket-holed the seat boards in from the inside of the stringers and drilled the back boards in from behind for a clean look on the seat. Overall, it was a really enjoyable build and I’m really happy with how they turned out.
Built from Plan(s)
Estimated Cost
$100/chair
Estimated Time Investment
Day Project (6-9 Hours)
Recommended Skill Level
Beginner


Comments
Ana White Admin
Tue, 08/10/2021 - 10:20
Sharp!
They look great, thanks for sharing!